



Short sides change the whole mood of a haircut. That’s why undercut hairstyles keep hanging on: the contrast does most of the work for you, and it does it loudly. A simple top suddenly looks sharper. A curly top looks fuller. Even a bun gets more attitude when the sides are clipped tight.
The part people miss is this: the undercut is not one haircut. It’s a setup. The sides create the frame, and the top decides whether the look feels polished, messy, romantic, or slightly dangerous. Leave the top flat and the whole thing can look unfinished. Give it lift, movement, or texture, and the cut comes alive fast.
That flexibility is the reason so many people come back to it. You can wear the same undercut with pomade on Monday, curl cream on Friday, and a knot on the weekend without starting from scratch. The outline stays bold. The mood changes.
The best versions all have one thing in common. They look intentional from six feet away and interesting up close. That’s where the fun starts.
1. Classic Disconnected Undercut
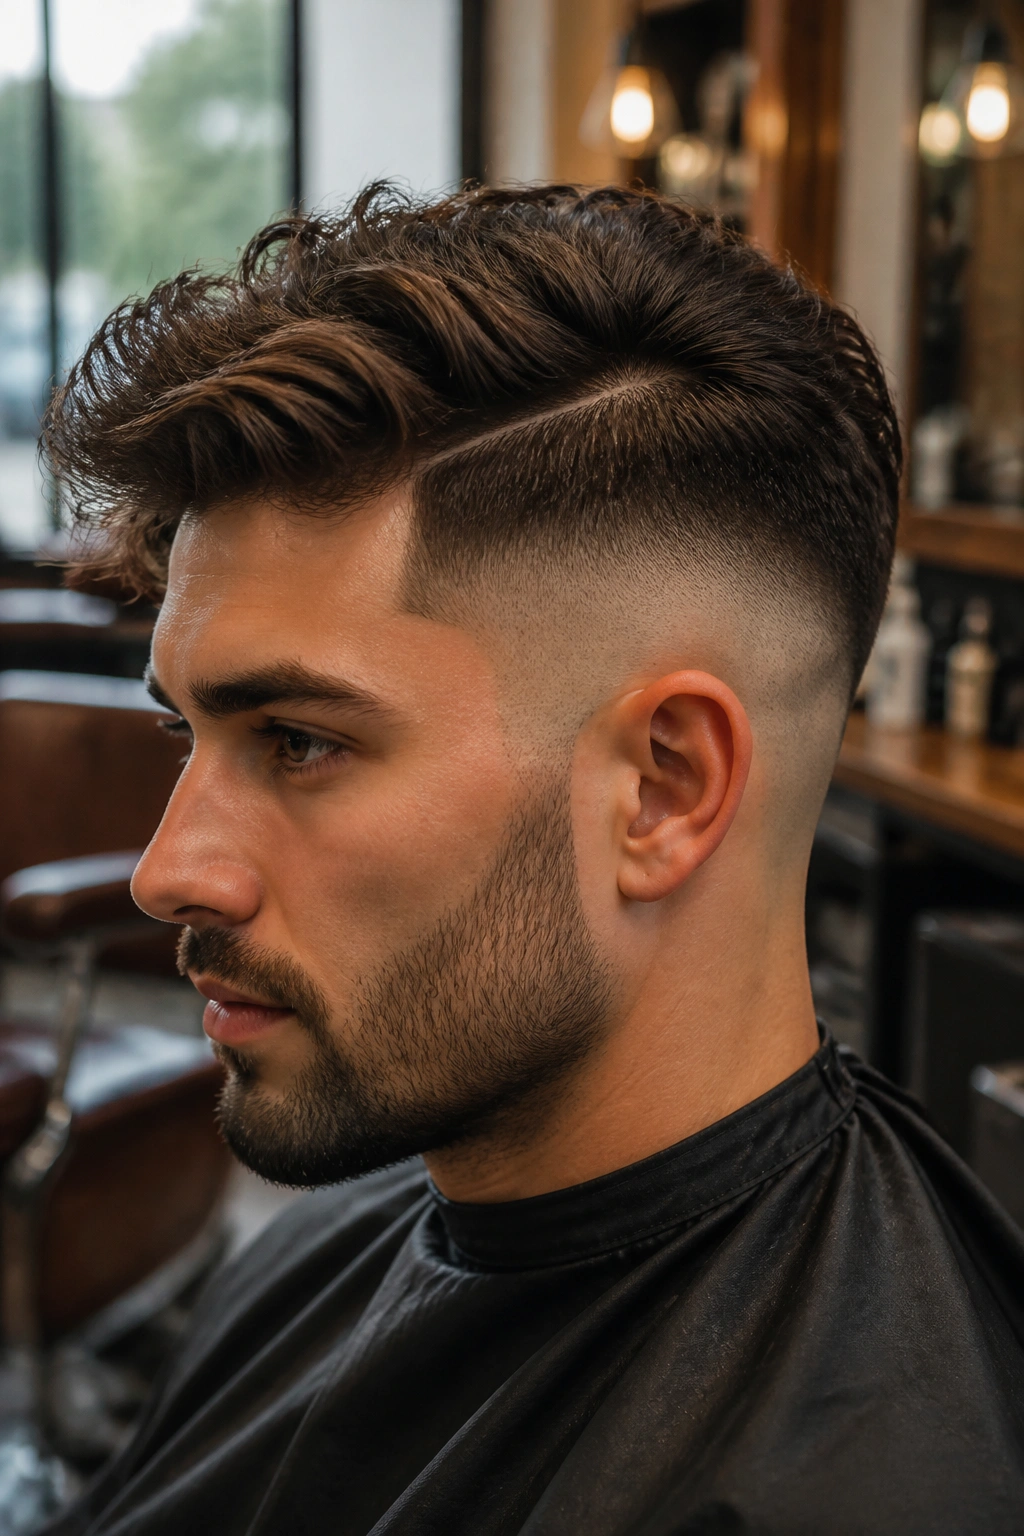
A classic disconnected undercut is the cut people picture when they hear the phrase and think, yes, that’s the point. The sides drop away fast, the top stays visibly separate, and the contrast does the heavy lifting. It looks clean, but not timid.
Why It Reads So Strong
The disconnect is what gives it that hard edge. There’s no soft blending to blur the shape, so the eye goes straight to the line between the short sides and the longer top. Ask for the sides to sit at a #1, #2, or skin level, depending on how sharp you want the finish.
- Top length: 3 to 6 inches works well.
- Best styling product: matte paste or light pomade.
- Maintenance: every 2 to 4 weeks if you want the shape to stay crisp.
- Works best with: straight, wavy, or thick hair.
Pro tip: keep the top slightly textured, not helmet-smooth. That tiny bit of movement keeps the cut from looking stiff.
2. Slicked-Back Undercut
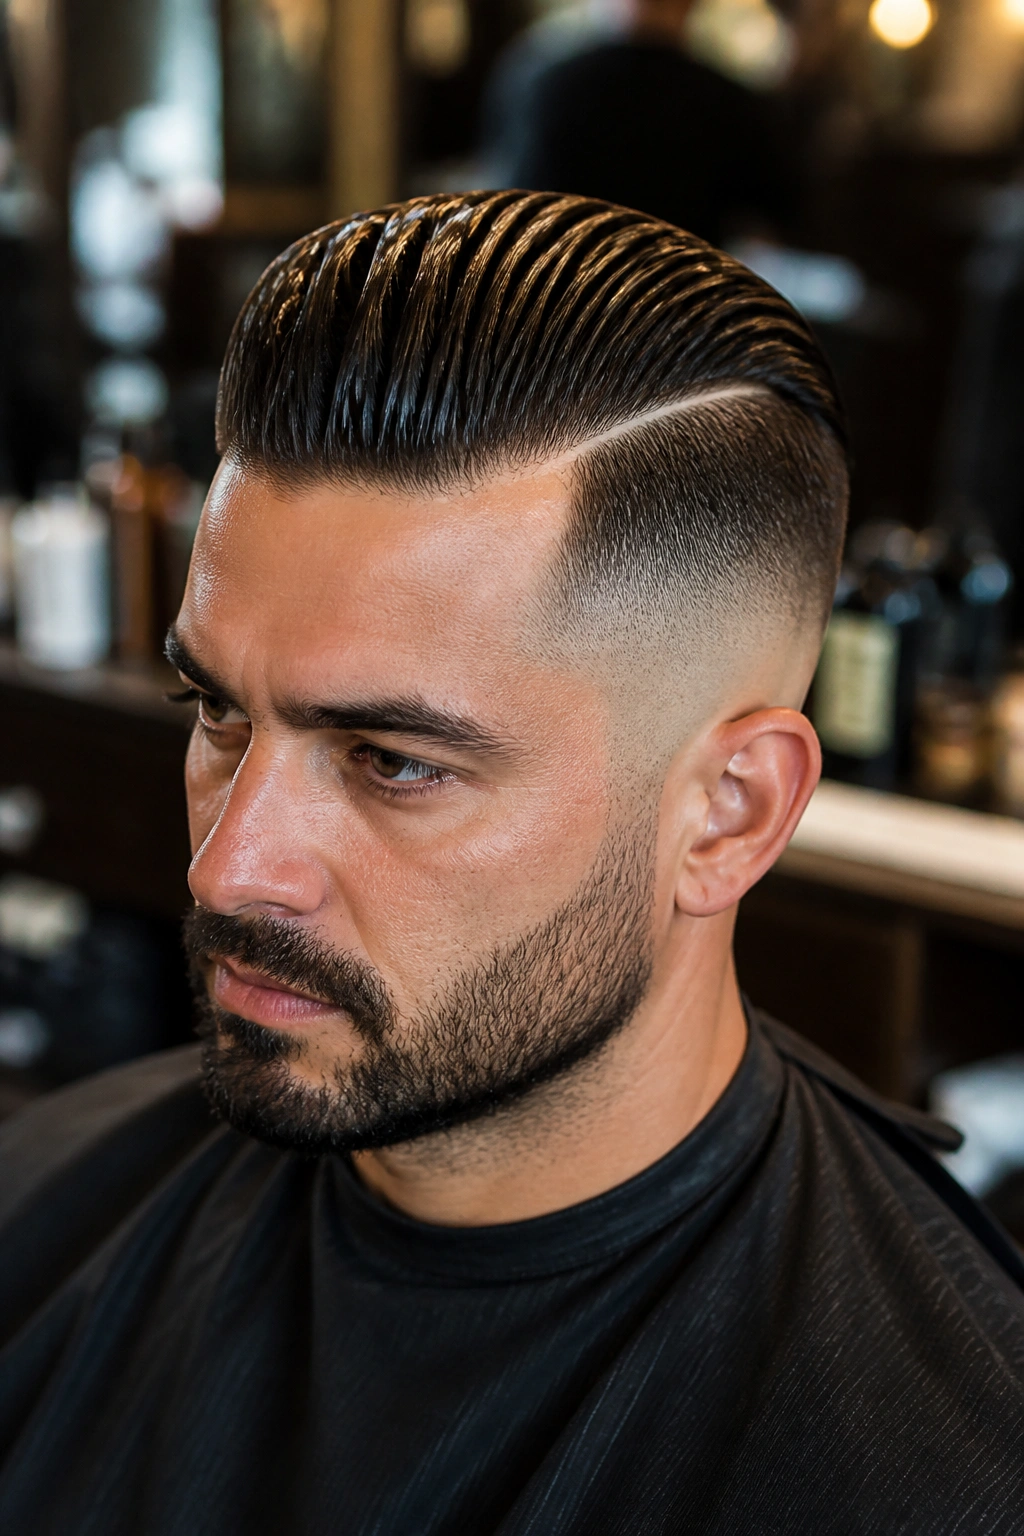
A slicked-back undercut can look expensive fast—if you leave enough length on top to actually sweep back. Too short, and it turns into a stiff patch of hair. Long enough, though, and it has that sharp, controlled feel people notice immediately.
The key is shine control. A wet gel finish gives you old-school gloss. A medium pomade gives you shine without the greasy look, which I prefer. Work the product through damp hair, comb it straight back, then let the front sit a little looser than the rest. That small break in the shape keeps it from looking like a costume.
3. High-Volume Pompadour Undercut
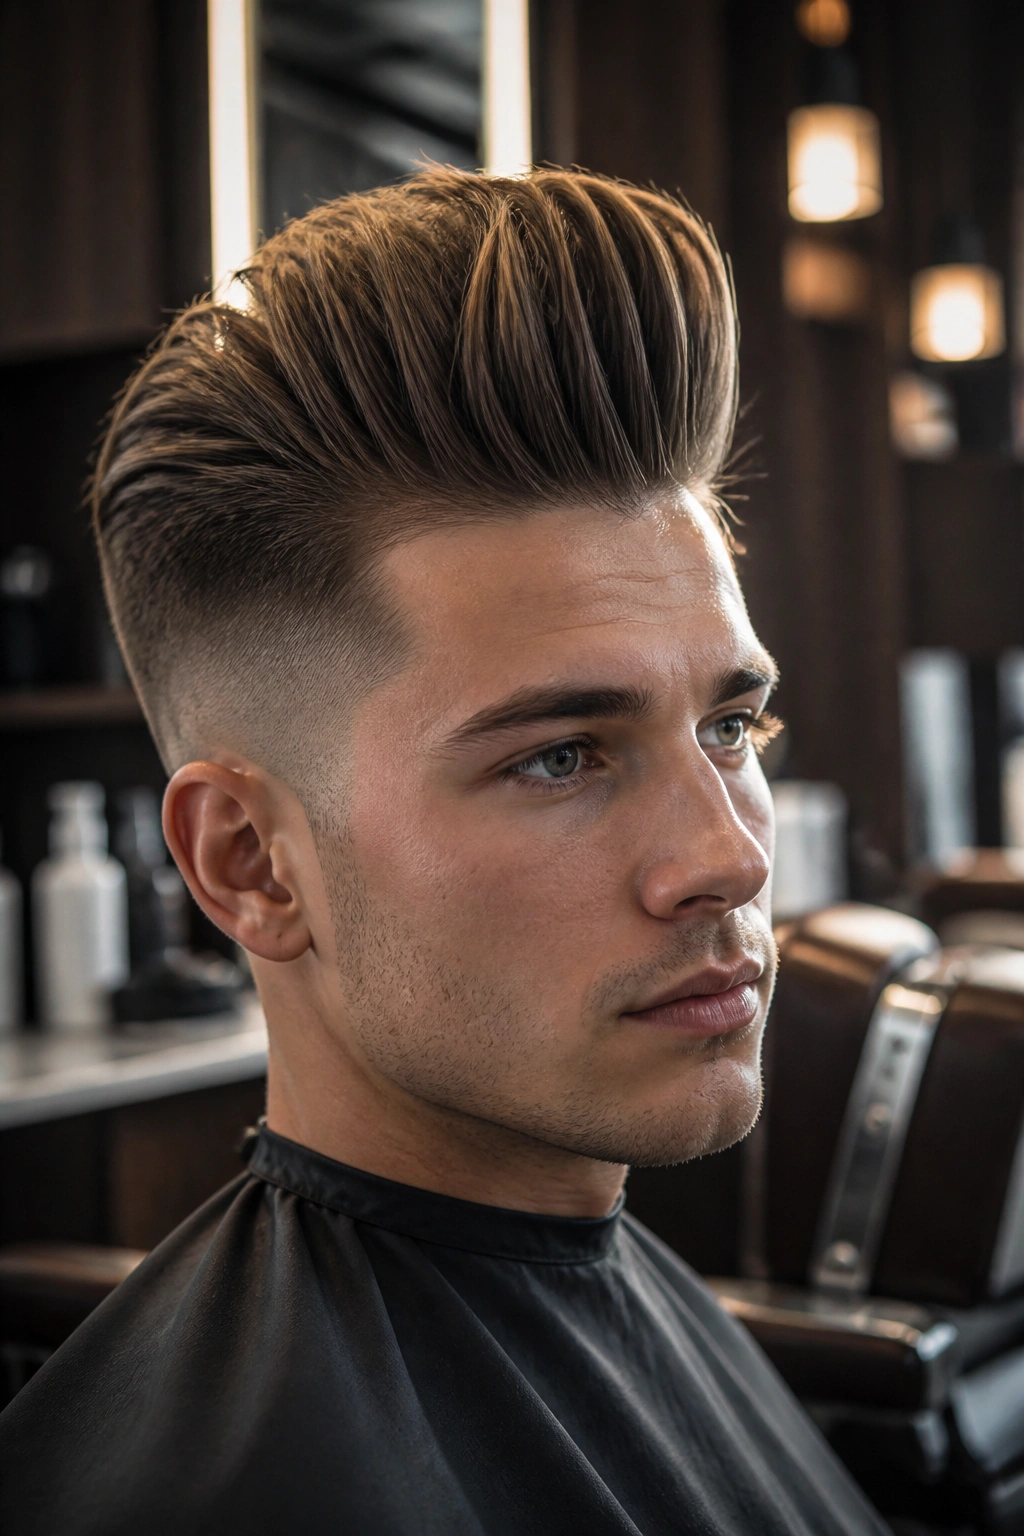
Ever want a haircut that walks into the room before you do? The pompadour undercut does that job. It’s all about lift at the front and a tight frame on the sides, which makes the top look even bigger than it really is.
How to Get the Height
Blow-dry the front section upward with a round brush or your fingers, then lock it in with a medium-hold pomade or volume cream. The sides should stay short enough to make the top feel dramatic, but not so bare that the whole thing looks harsh. Three to five inches on top is the sweet spot for most people.
A pompadour like this works best when the front has some real density. Thin hair can still wear it, but you need a dryer and a lighter product. Heavy wax will pull it down. That’s the one mistake I see again and again.
4. Textured Quiff Undercut
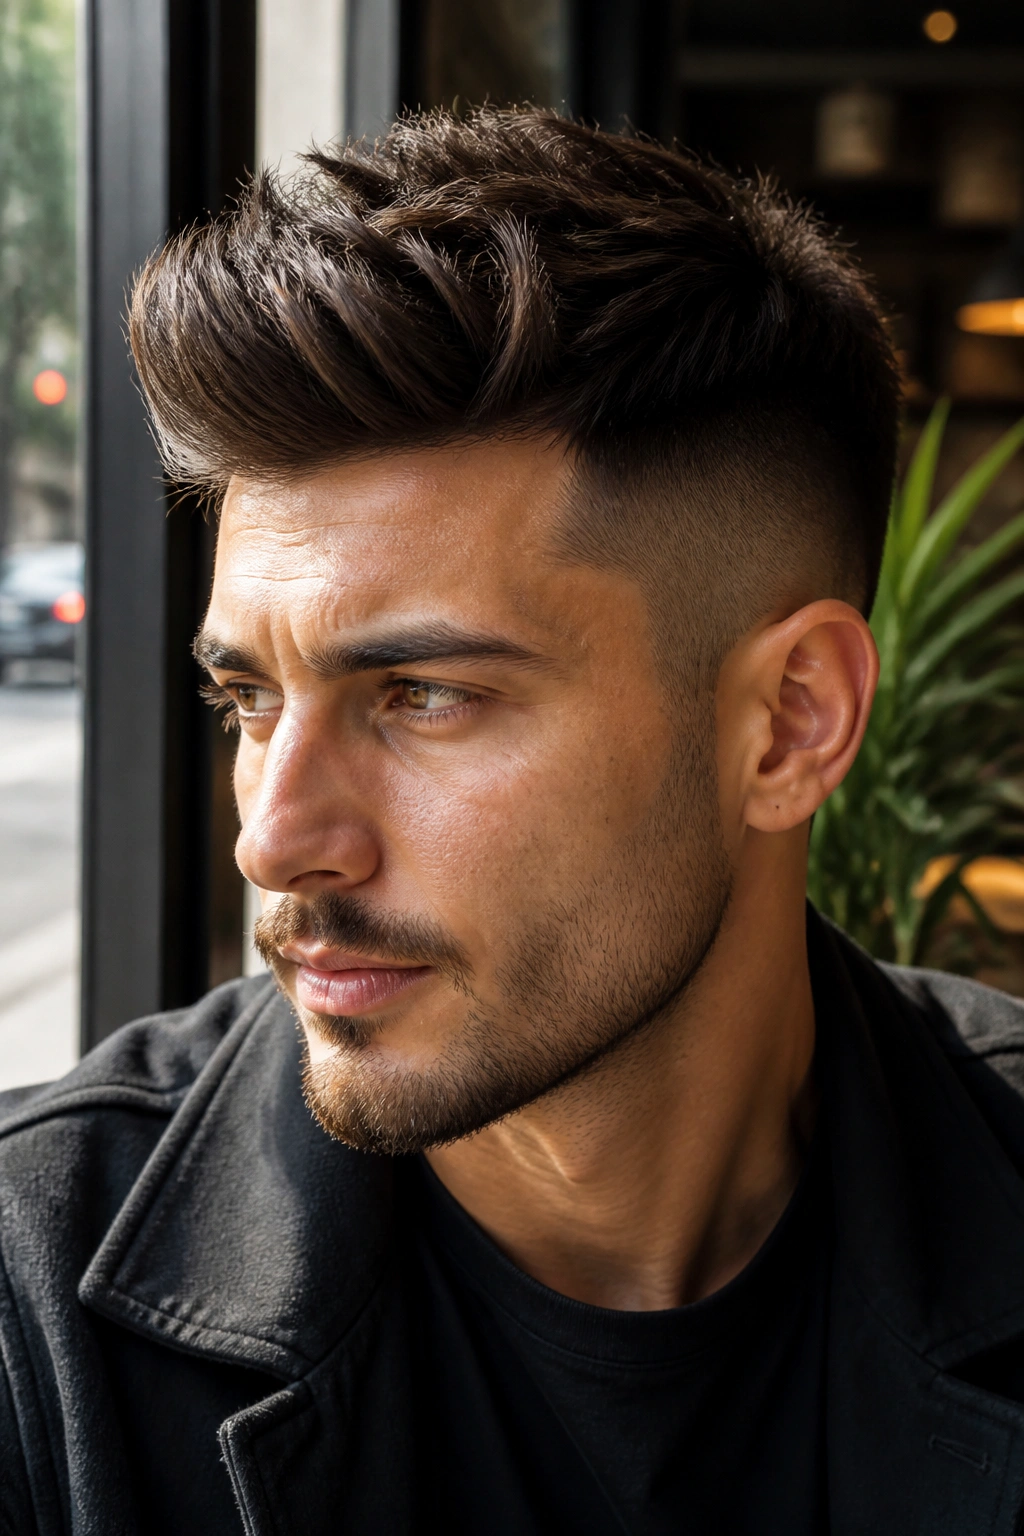
Picture a quiff that’s been lived in a little. That’s the textured version, and it’s a better daily choice than the shiny, carved-up version most people associate with the style. The shape still lifts at the front, but the top breaks into pieces instead of sitting as one perfect wave.
That rougher finish makes the haircut feel modern without trying too hard. A matte clay, a quick blow-dry, and a little finger-raking are enough. If your hair tends to fall forward, push the front up and back while it’s still warm from the dryer. The result is loose, not sloppy. There’s a difference.
5. Curly Top Undercut
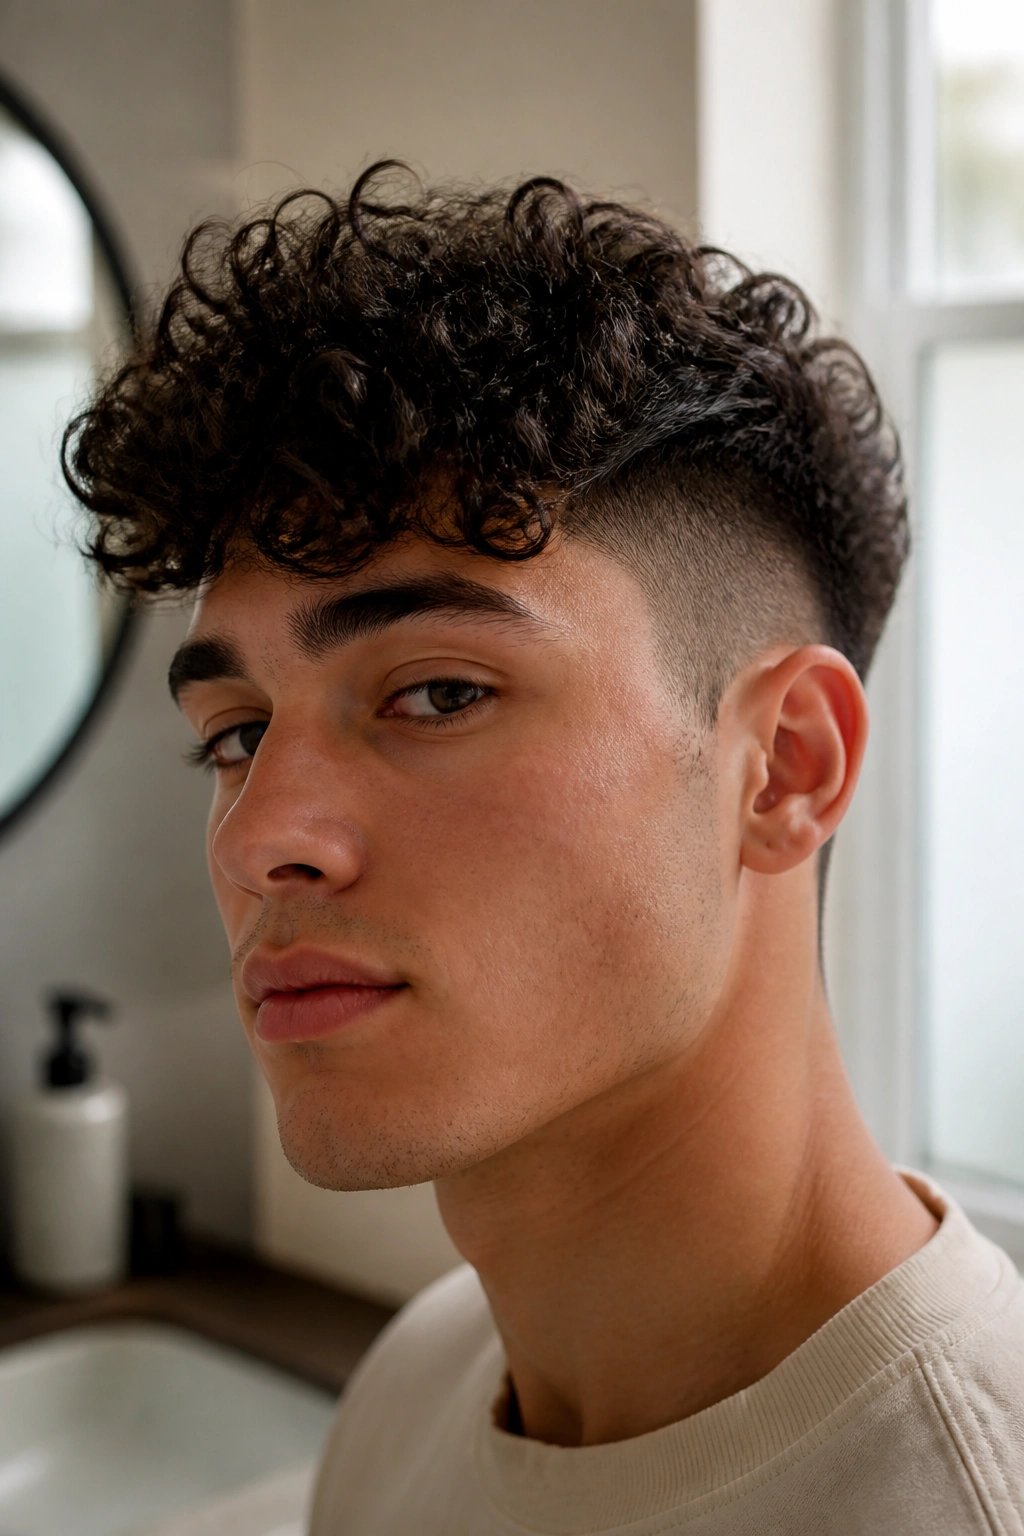
Curly hair and an undercut are a strong match because the short sides stop the shape from spreading out too far. The curls get room to do their thing, but the outline stays sharp. That balance is the whole point.
The best version keeps the top long enough for the curls to spring, usually around 3 to 6 inches, depending on curl tightness. Work in curl cream or a light gel on soaking-wet hair, then scrunch and air-dry or diffuse. Don’t fight the shrinkage. Let it happen. Curls that are forced into a flat shape lose the charm.
A clean undercut under curls also makes morning styling easier. You deal with the top, not the whole head. Small mercy. Big payoff.
6. Side-Part Undercut

A side-part undercut is the quieter cousin in this group, but it still looks bold because the structure is so clear. One side carries the volume, the other side stays tight, and the part line gives the haircut a neat spine.
Unlike a comb-over, which can get too smooth, the side-part version feels cleaner and less fussy. It’s a smart choice if you want something sharp enough for work but not so polished that it looks stiff after lunch. A little cream or light pomade is enough. Comb the top over while damp, then break it up with your fingers once it dries.
7. Hard-Part Comb Over Undercut

A hard part changes the whole mood. The shaved line makes the split between top and side obvious, which gives the haircut a harder, more graphic read. It is not subtle. That’s the appeal.
What Makes It Different
The comb over itself is easy to wear, but the hard part turns it into something sharper. Ask your barber for a narrow shaved line placed where your natural part falls or just beside it. Keep the top at 2 to 4 inches so it can move without collapsing.
- Best for: straight or slightly wavy hair.
- Product: light pomade or cream with hold.
- Styling move: comb from the part outward while hair is damp.
- Trim cycle: about every 3 weeks to keep the line crisp.
Best tip: if your hair whirls around the crown, do not force the part too far off-center. It will fight you every morning.
8. Fringe-Heavy Undercut

A fringe-heavy undercut brings the drama to the front. Instead of pushing hair away from the face, it lets the fringe fall forward and makes that line the focus. It can read edgy, moody, or a little punk, depending on how heavy the fringe is cut.
The trick is keeping the sides short enough that the front doesn’t feel buried. With thick hair, point cutting helps the fringe sit with a broken edge instead of a blunt curtain. Use a dry texture spray or a little paste, then pinch the ends into place. If the fringe lands too neatly, it loses the bite.
9. Curtain Undercut
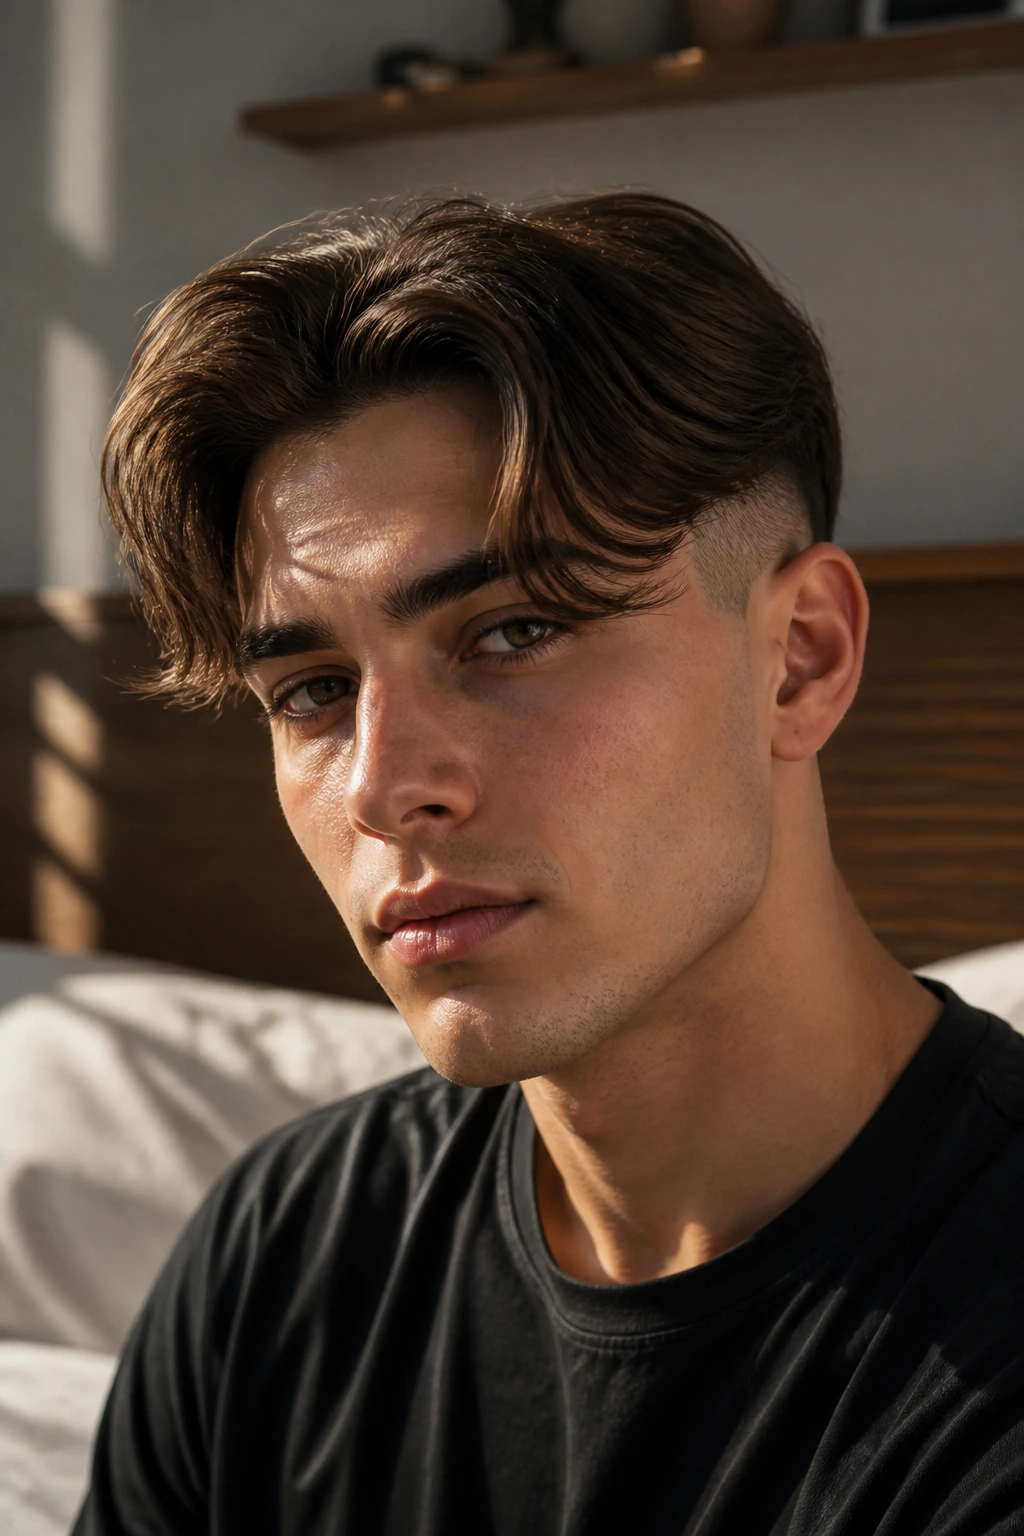
What happens when a middle part meets a tight undercut? You get a style that feels softer than a shaved side, but still has a strong outline. The curtains fall away from the face, and the short sides keep the shape from getting too heavy.
This is one of the better choices if you want movement around the eyes and cheekbones. It works especially well with straight or wavy hair that naturally parts in the middle. Dry it with a brush or your fingers, then use a light cream so the flow stays loose. Too much product will make the curtains sit like cardboard.
How to Wear It
Let the front pieces fall naturally, then push the rest back just enough to show the parting. The result is casual, but not lazy.
10. Messy Spiky Undercut
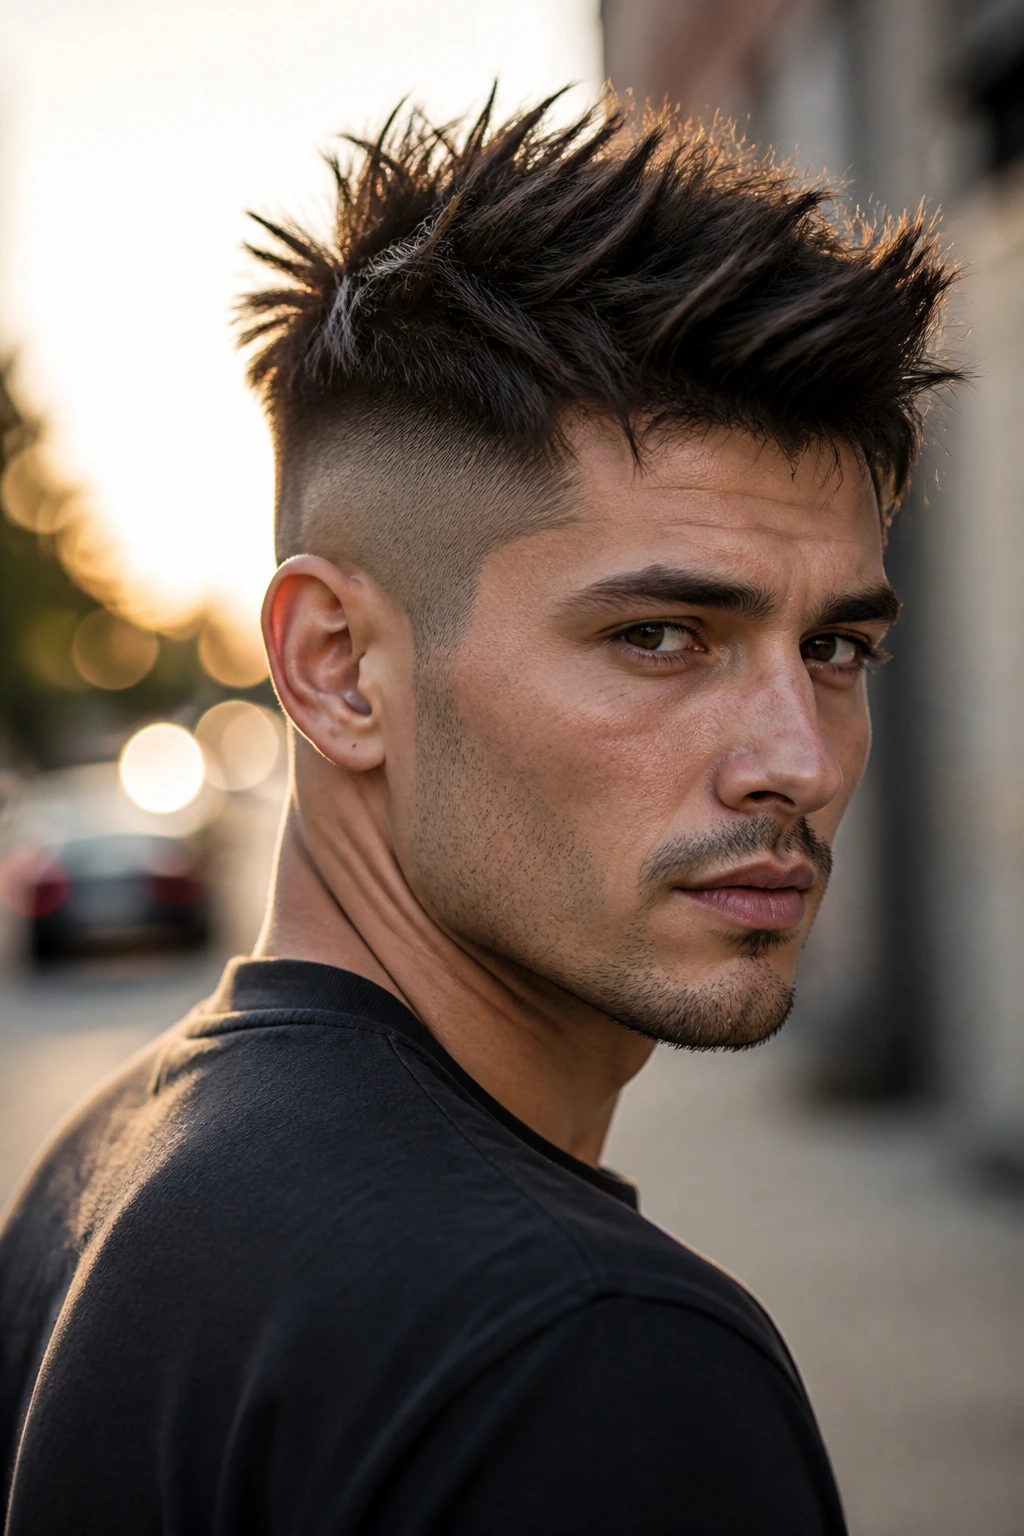
There’s a difference between messy and careless. A spiky undercut lives in that narrow gap, and when it’s done well, it looks energetic instead of overworked. The short sides keep the whole thing under control while the top gets a jolt of height and separation.
Use a small amount of matte paste, rub it between your palms, then push sections upward with your fingertips. Don’t build one giant spike. Break the top into smaller bits. That rougher shape gives the cut a lived-in feel that works better than the stiff, gel-heavy versions from old photos.
A little unevenness helps here. Too perfect looks fake.
11. Faux Hawk Undercut
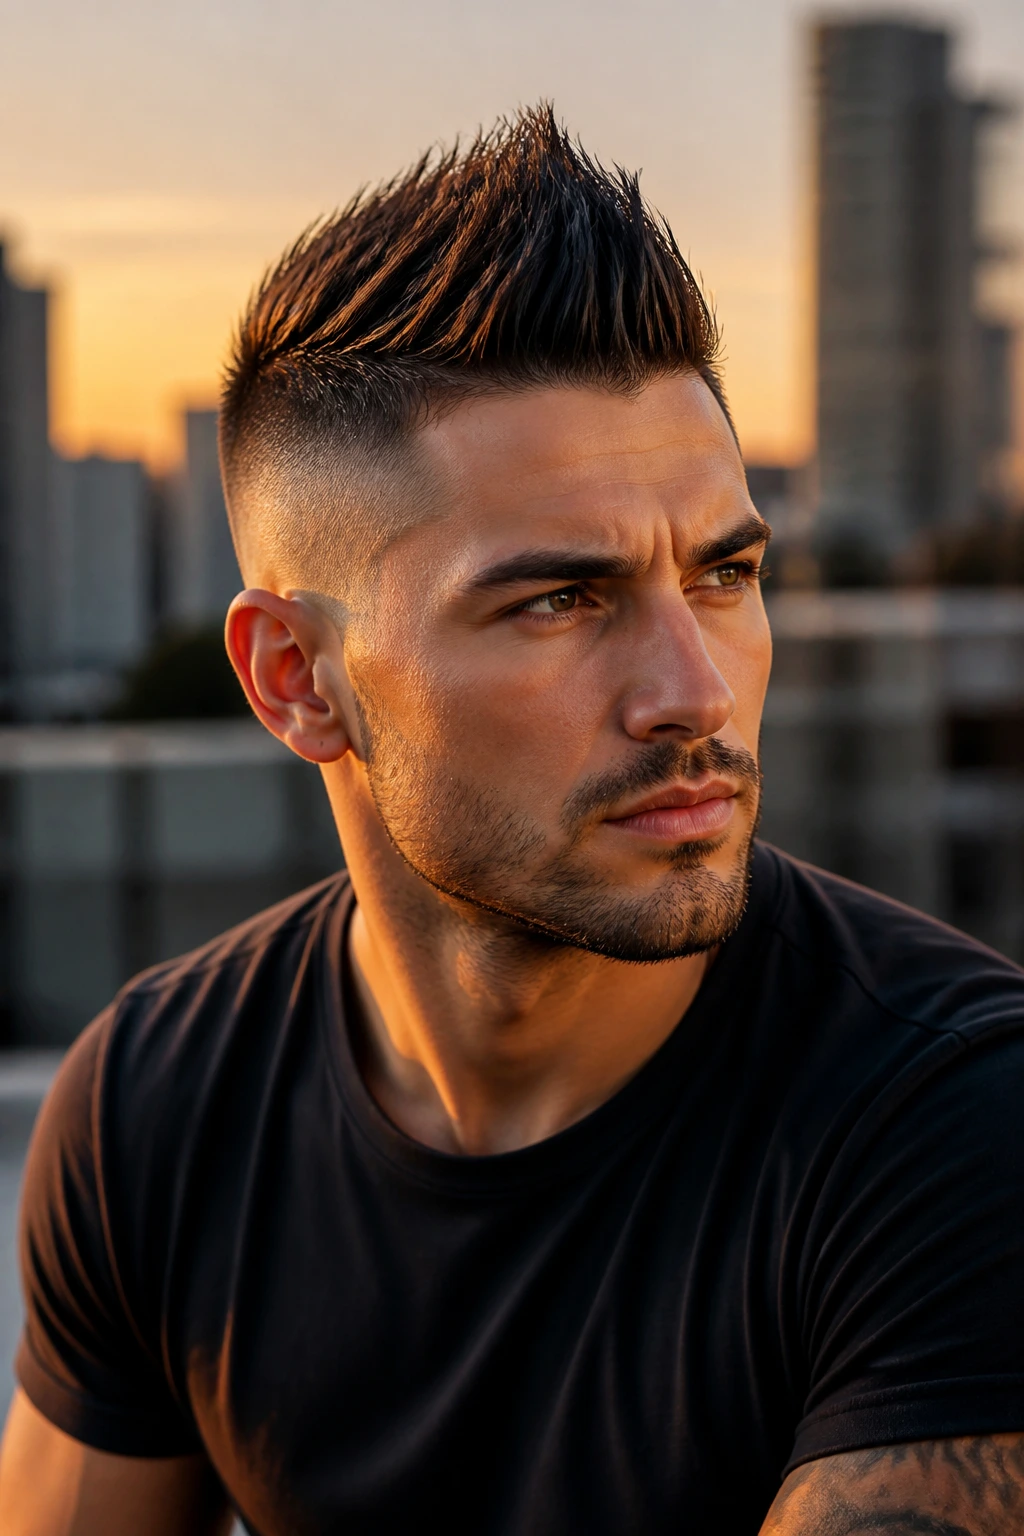
A faux hawk undercut is bold without crossing into full mohawk territory. The sides tighten down, the center strip stays fuller, and the whole cut starts to point upward through the middle of the head. That center line is what gives it attitude.
I like this version because it’s easier to wear than a true hawk. You can make it cleaner with a matte product or rougher with a stronger paste, and neither version feels out of place. Blow-dry the top toward the center before adding product. That step matters. Skip it and the shape falls apart fast.
If your hair is thick, this cut is a gift. If it’s fine, keep the strip shorter and use a lighter hand.
12. Full Mohawk
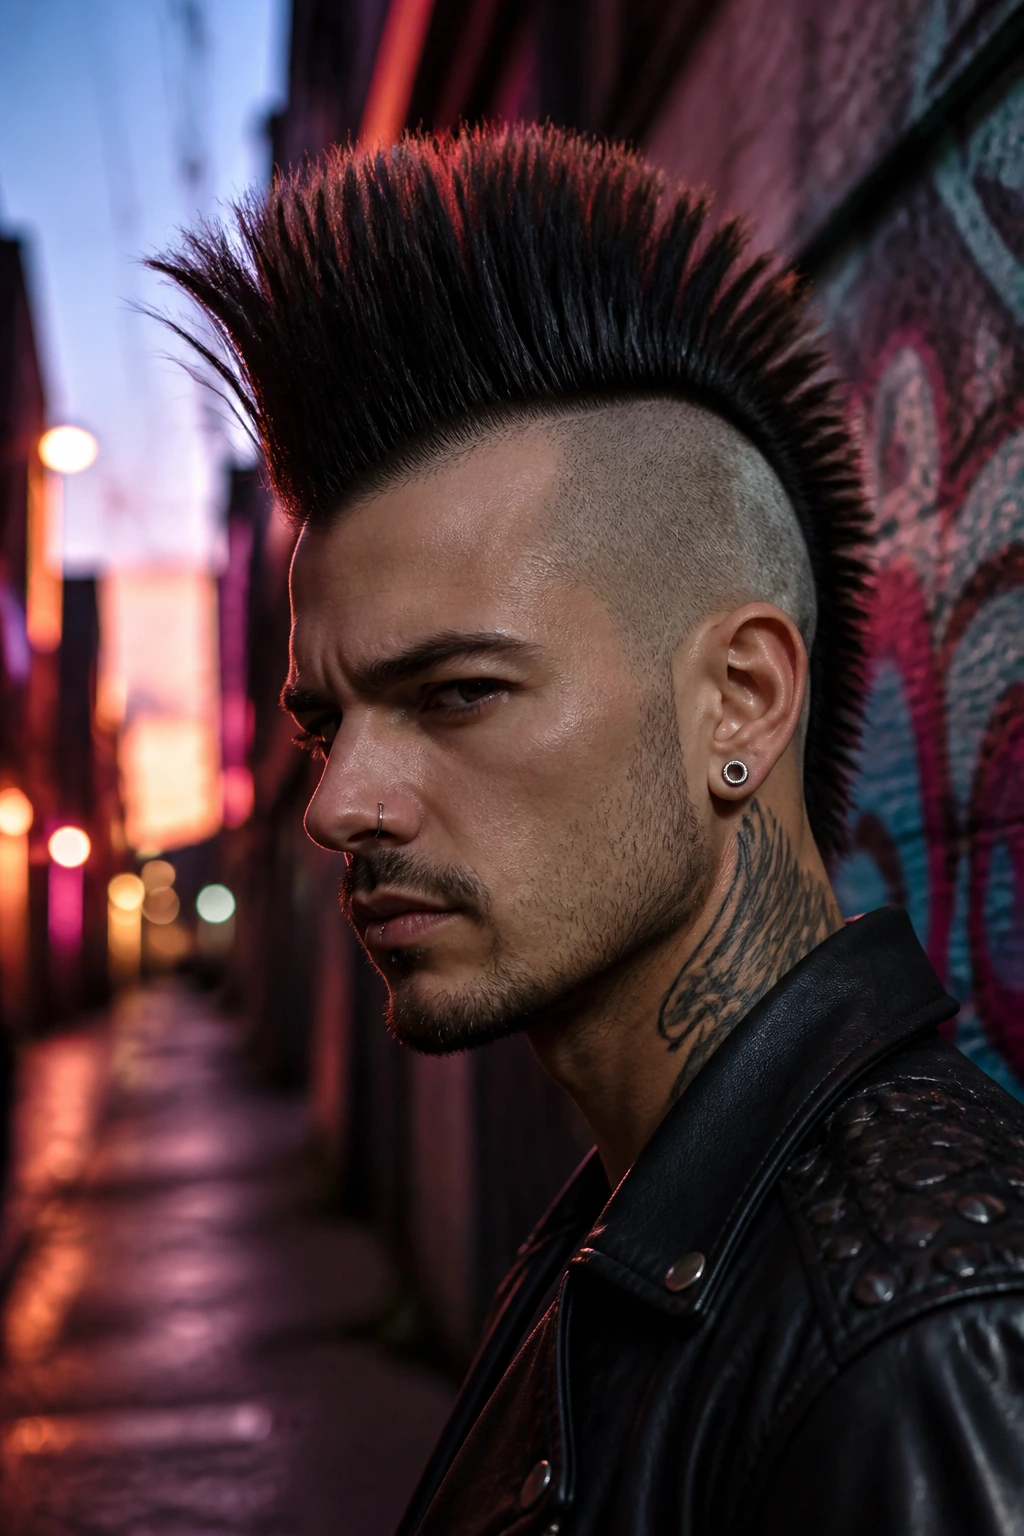
A full mohawk is the loudest option on this list, and honestly, that’s the point. The strip down the center gets the attention while the sides are clipped down hard, sometimes nearly to skin. There’s no pretending this is a safe haircut.
That said, it can look clean rather than chaotic when the top is shaped with care. The sides need enough contrast to make the center stand up on its own, and the top needs structure, not just volume. Strong-hold product is useful here, but don’t pile it on. Too much weight kills the point of the style.
If you want a cut that reads bold from across the street, this is the one.
13. Man Bun Undercut

A man bun undercut works because it solves a real problem: long hair can get heavy, and shaved sides keep it from feeling bulky. The top stays long enough to pull back, but the sides disappear, which makes the bun look tighter and more deliberate.
Why It Still Works
This version is less about the bun and more about the shape underneath it. A good undercut lets the hair sit higher on the head and keeps the neckline cleaner. Ask for the sides to stay short all the way around the ear and temple area, then leave enough length on top for a secure tie.
- Best top length: 6 inches or more.
- Styling aid: smoothing cream or a tiny bit of oil on the ends.
- Maintenance: clean the undercut every 2 to 3 weeks.
- Good move: leave a few loose pieces around the face if you want a softer finish.
Small warning: if the bun sits too low, the undercut loses some of its punch.
14. Top Knot Undercut

A top knot undercut feels tighter and more controlled than a bun because the knot sits higher and pulls the eye upward. That height gives the haircut a strong profile, especially when the sides are clipped down close.
The style works well when the top hair is long enough to twist into a small knot without frizzing out at the ends. Don’t overthink the finish. A little texture around the hairline can keep it from looking severe. If the knot is slick and the sides are clean, the haircut reads almost architectural. If the knot is loose and a little rough, it looks more casual.
Either way, the shape is doing real work.
15. Long Hair Tucked-Back Undercut
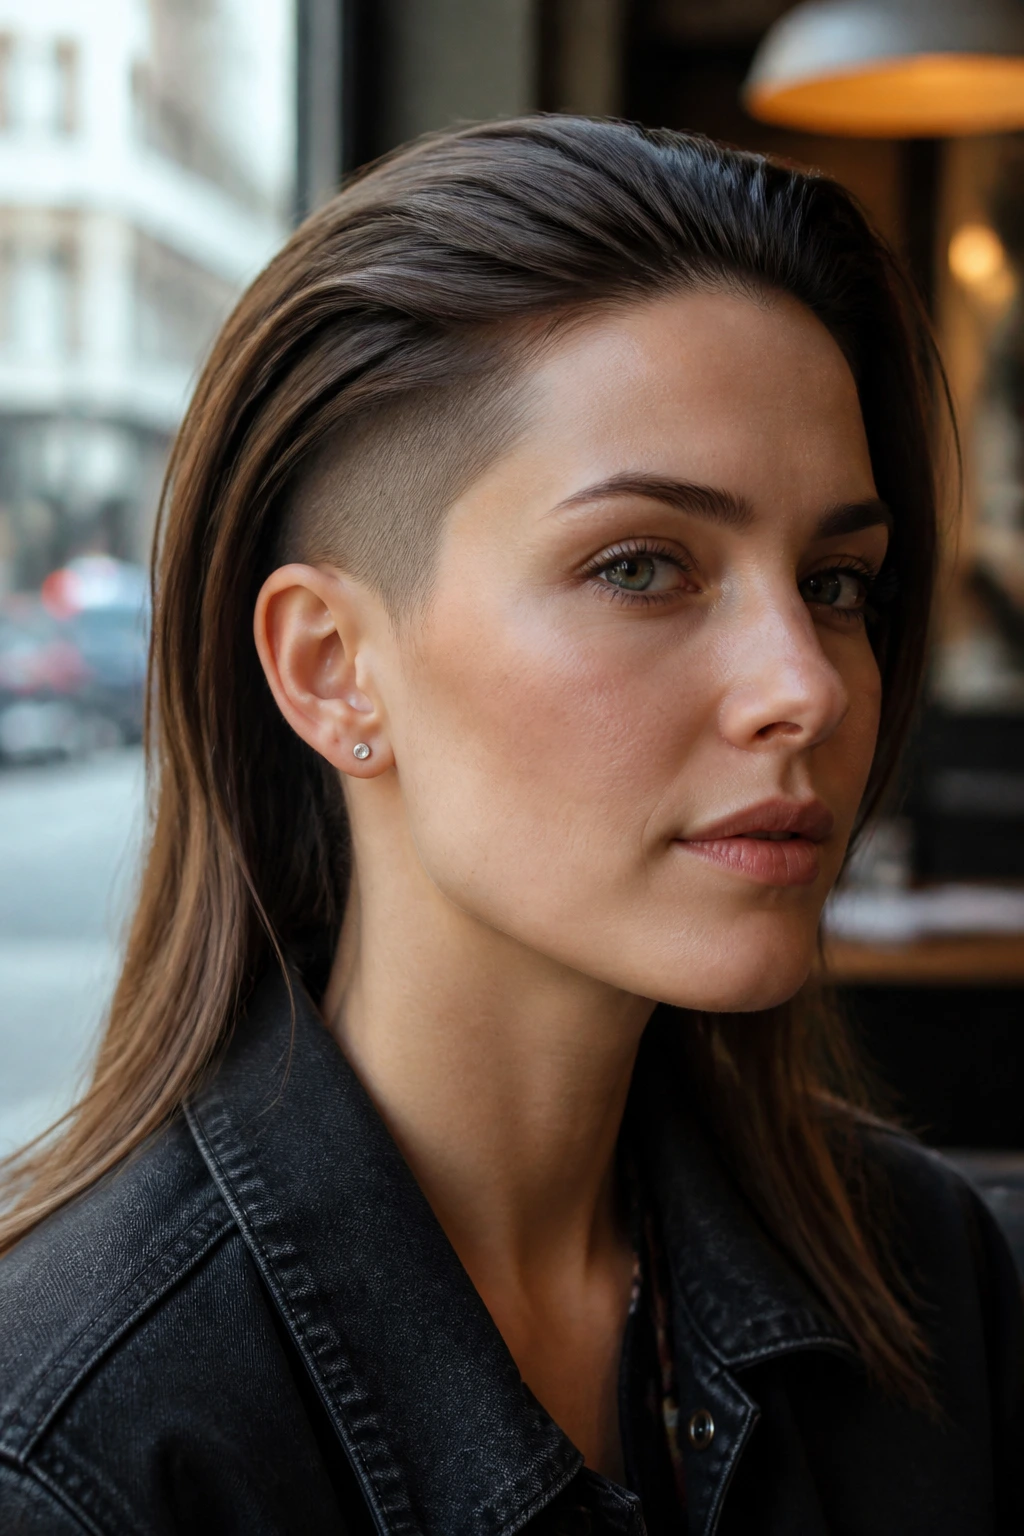
Ever notice how long hair can feel heavier the minute the sides are removed? That’s the trick here. A tucked-back undercut leaves the length on top and at the crown, then lets the sides fall away so the hair can be pushed behind the ears or swept back from the face.
The undercut helps the long top sit flatter when needed, but it also creates a stronger edge when you wear it loose. I like this look on hair that has some natural wave. Straight hair can do it too, though it may need a little cream to stop the ends from looking too sharp. The mood here is relaxed, but not soft. There’s still a clear line underneath all that length.
How to Use It
Tuck the front pieces behind one ear, leave the other side looser, and let the cut lean asymmetrical for a day. That tiny shift changes everything.
16. Shoulder-Length Shag With Undercut
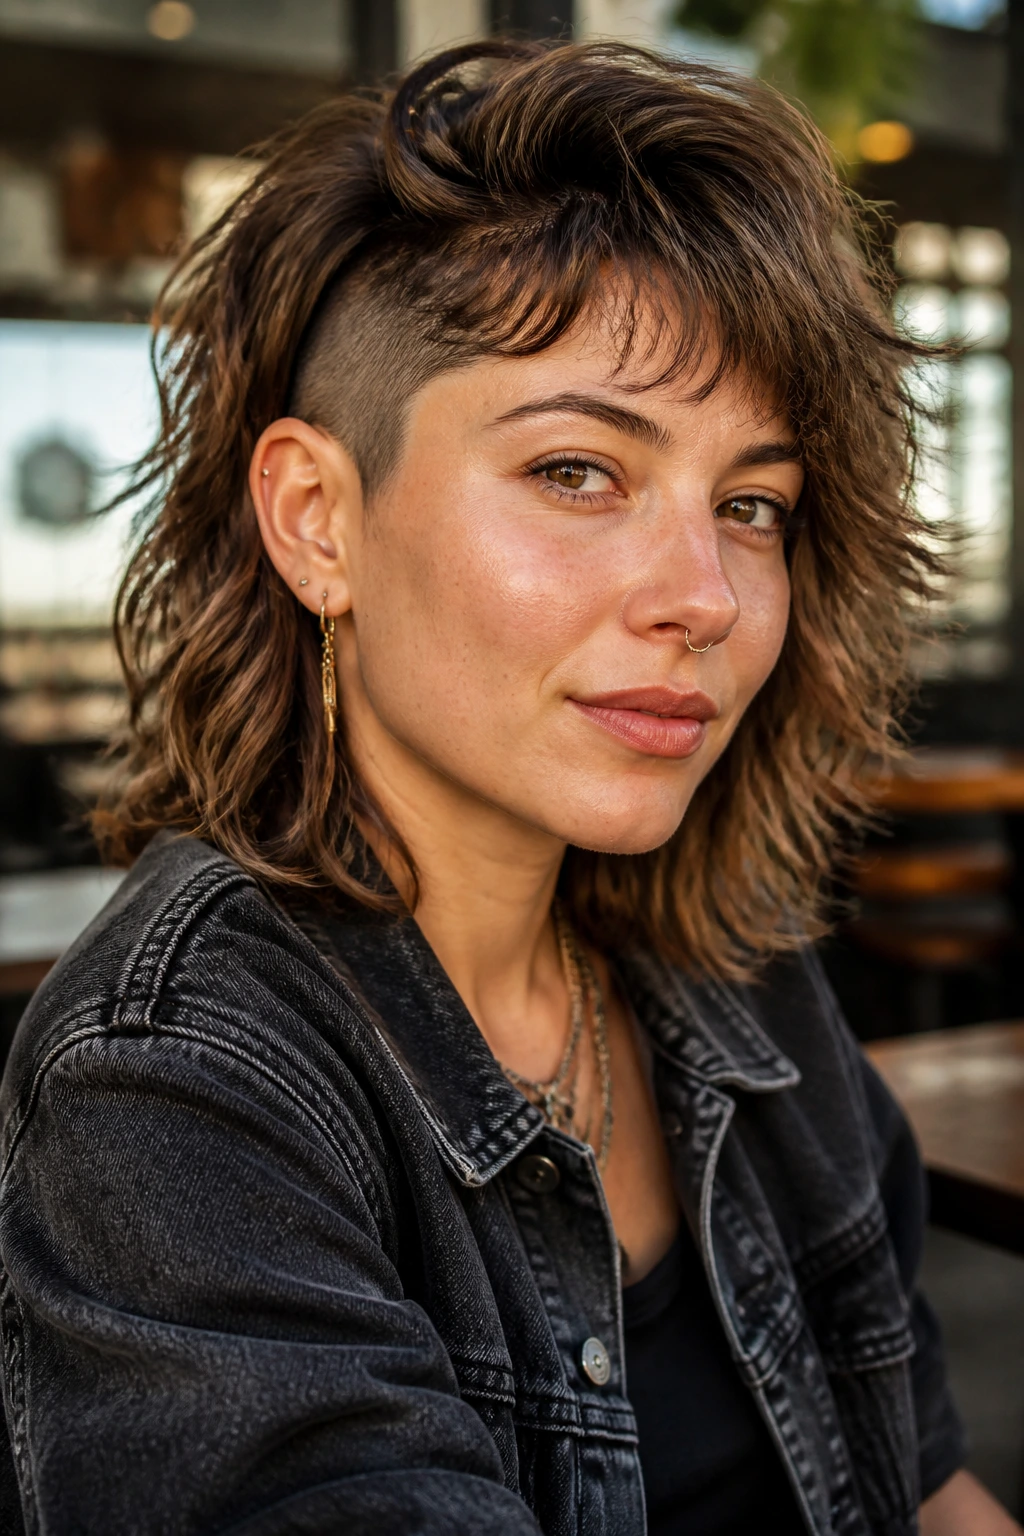
A shag with an undercut is a smart move when you want movement without bulk. The layers on top create that messy, broken shape, while the shaved sides keep the silhouette from puffing out too wide. It has a little rock energy, which is probably why it keeps showing up in salons.
The style needs texture more than precision. Dry it with a diffuser if the hair is wavy or curly, or rough it up with a sea-salt spray if it’s straighter. The undercut underneath is the part people don’t see right away, but it changes how the hair falls all day. Less triangle. More swing.
That’s the whole reason it looks bold without trying to scream.
17. Pixie Undercut
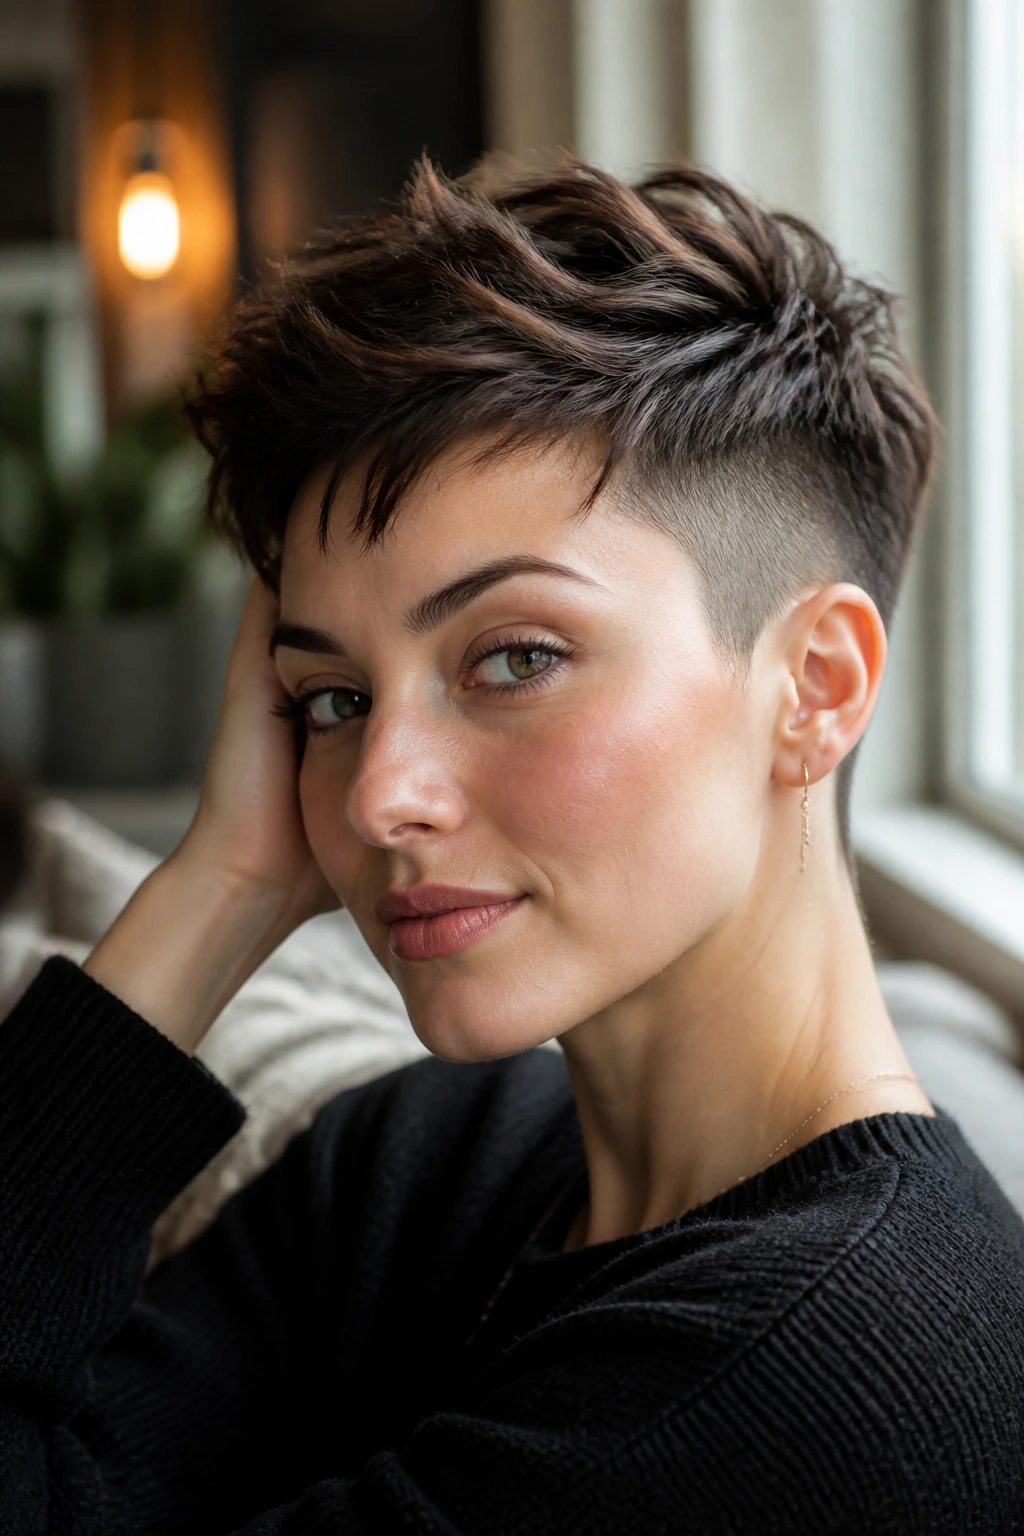
A pixie undercut can be soft, sharp, or somewhere in the middle, which is exactly why it works so well. The short top keeps the face open, while the shaved or closely clipped sides add a line that plain pixies often miss. It makes the cut feel intentional.
This version is a nice option if you want something easy to style but not boring. A dab of styling cream, a quick finger sweep, and you’re done. If you want a tougher edge, push the top upward and let the texture stay piecey. If you want it softer, brush it forward with a little shine cream. The undercut does the frame either way.
It’s one of those cuts that looks calm until you notice the sides.
18. Asymmetrical Bob With Undercut

A bob with one side longer than the other already has attitude. Add an undercut, and the shape gets even more striking because the lower section removes weight where the hair would normally sit flat. The result is cleaner around the jaw and neck.
What Makes It Stand Out
The asymmetry does the visual work, while the undercut keeps the cut from feeling bulky. That makes this a smart choice for thick hair, especially if the ends tend to flip outward. Keep one side grazing the chin and the other sitting a little higher or lower, depending on how dramatic you want the difference.
- Good product: smoothing cream or a light serum.
- Best finish: sleek or slightly tucked behind one ear.
- Maintenance: shape every 4 to 6 weeks.
- Extra detail: a hidden undercut behind the ear can make the bob sit much lighter.
My view: this cut looks strongest when it stays clean, not overly curled.
19. Sleek Bob Undercut
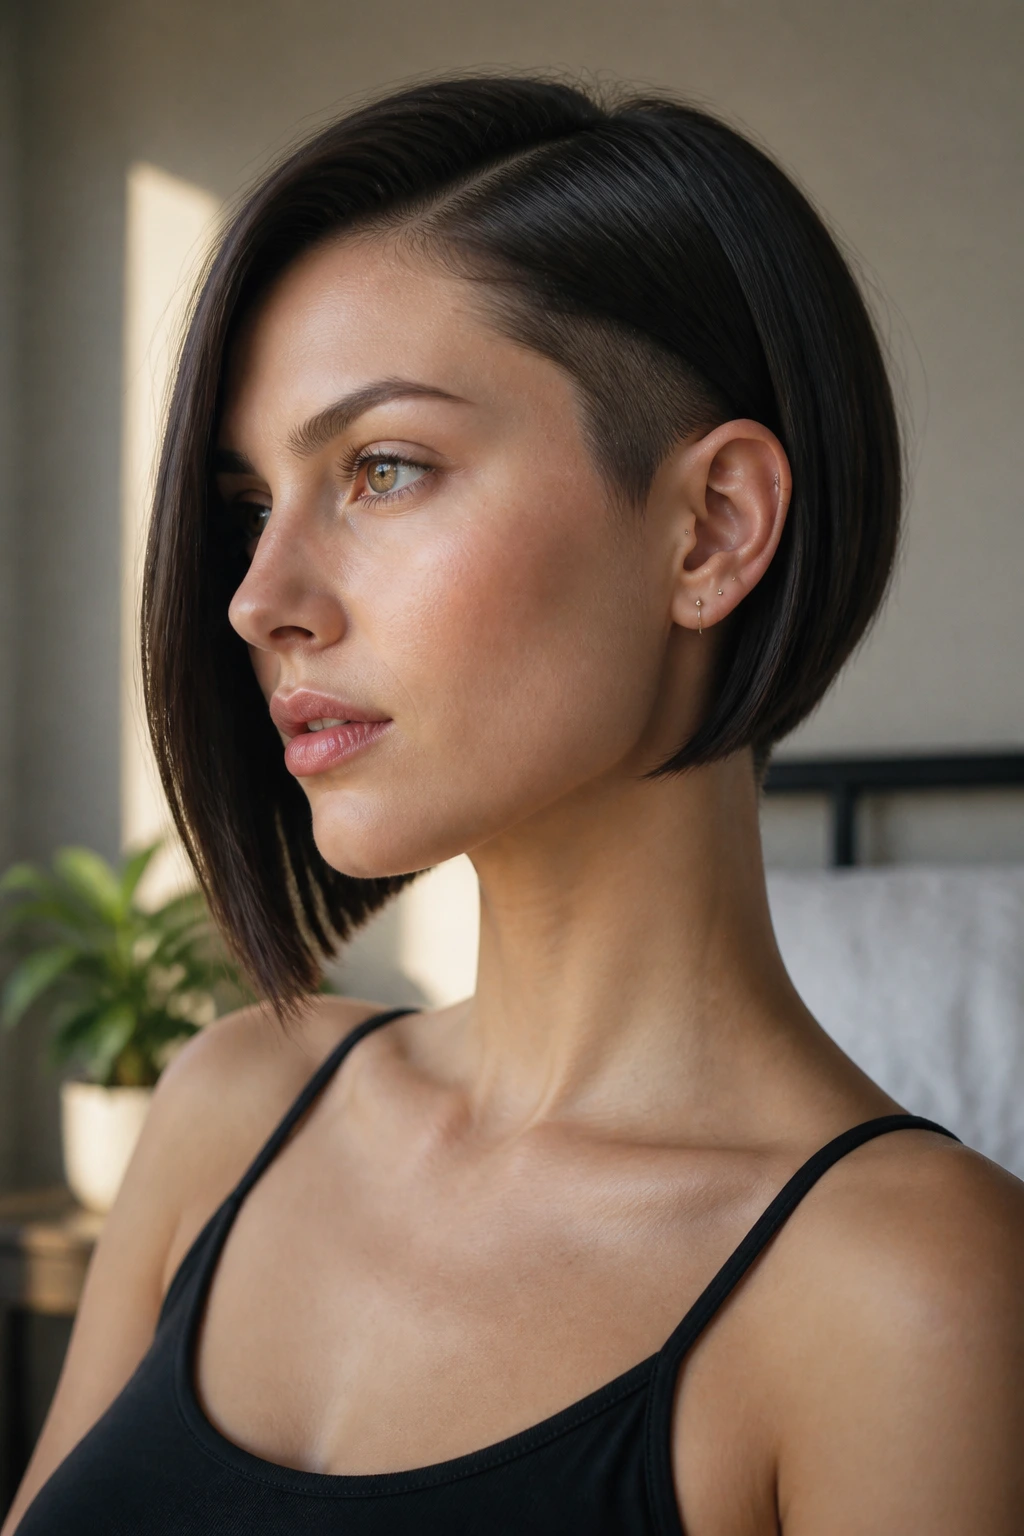
A sleek bob with an undercut is for someone who wants the polish of a blunt cut but hates the weight that comes with it. The top and outer layer stay smooth, straight, and sharp at the edges, while the undercut takes bulk out from underneath.
Why the Shape Feels So Crisp
The cut sits closer to the head because the hidden short section removes the puffy part that can make a bob flare outward. That makes the line at the jaw look neater and the whole haircut feel lighter when you turn your head. A flat iron or a round brush can help, but the real work is in the cut itself.
Use a smoothing cream before drying, then finish with a drop of serum on the ends. The key is restraint. Too much shine turns sleek into greasy. Too little and the line starts to fray.
20. Mullet Undercut
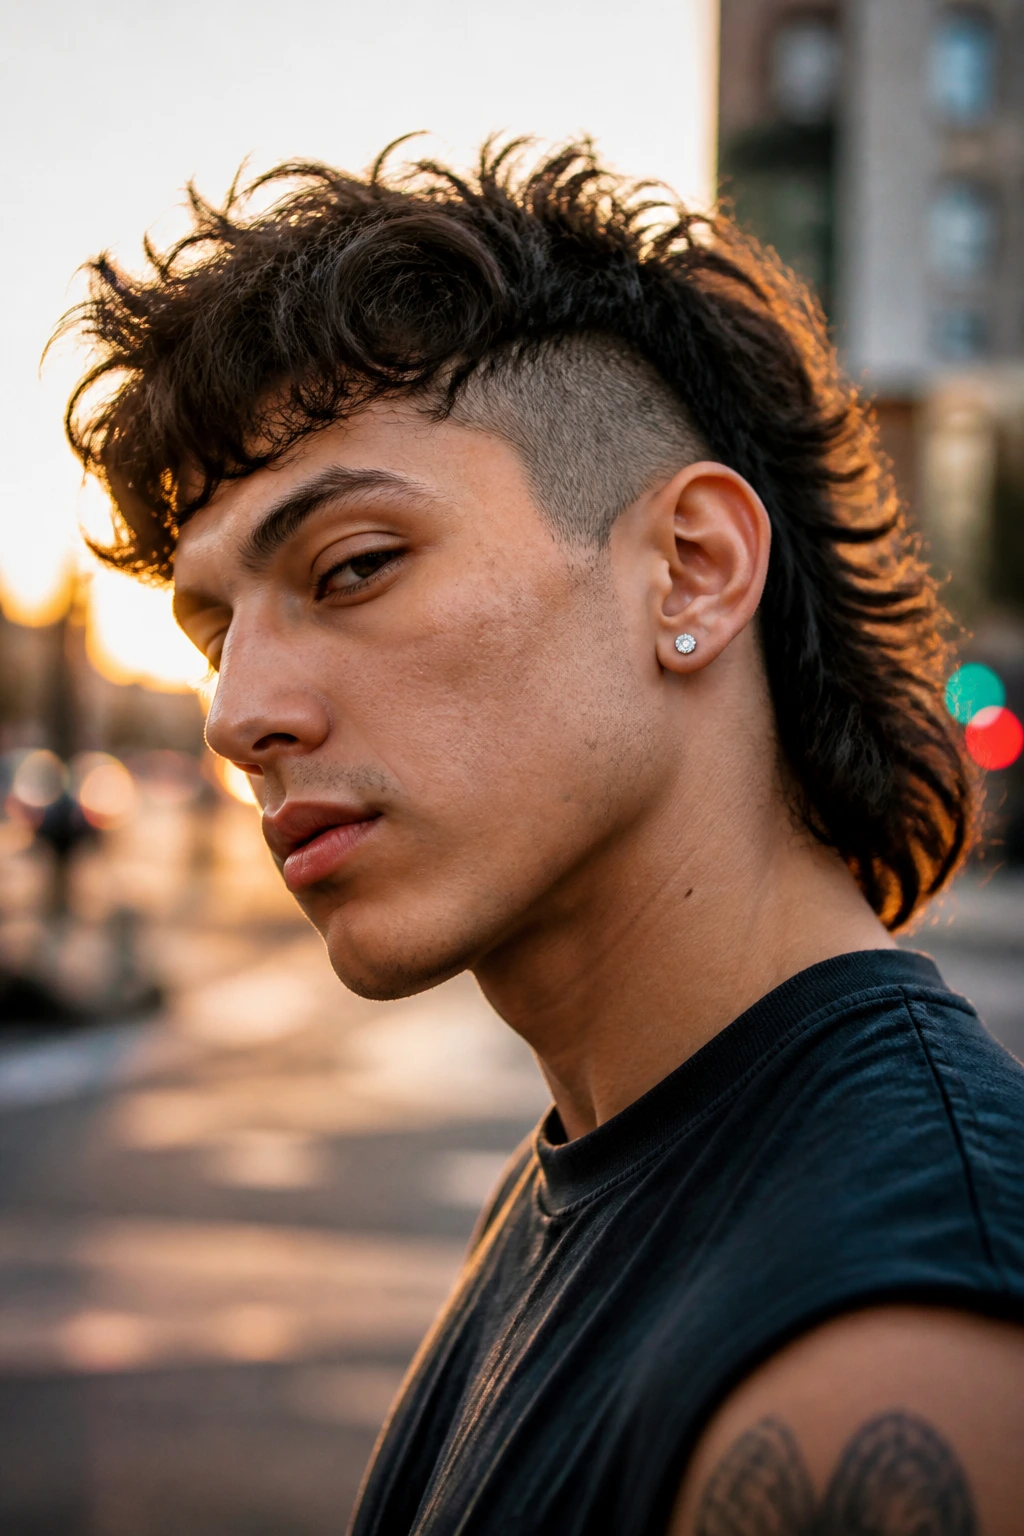
A mullet undercut is not shy, and that is exactly why people keep choosing it. Shorter sides and a cropped top set off the longer back, so the contrast feels even stronger than it does in a regular mullet. It’s part sharp cut, part joke, part statement.
What makes it work is balance. The front and sides need to stay tight enough that the back length feels intentional, not accidental. The best versions use texture through the top so the haircut doesn’t look like two different styles glued together. If you like hair with some grit, this one delivers. If you want neat and tidy, skip it. No apology needed.
It has edge by design.
21. Wolf Cut With Undercut
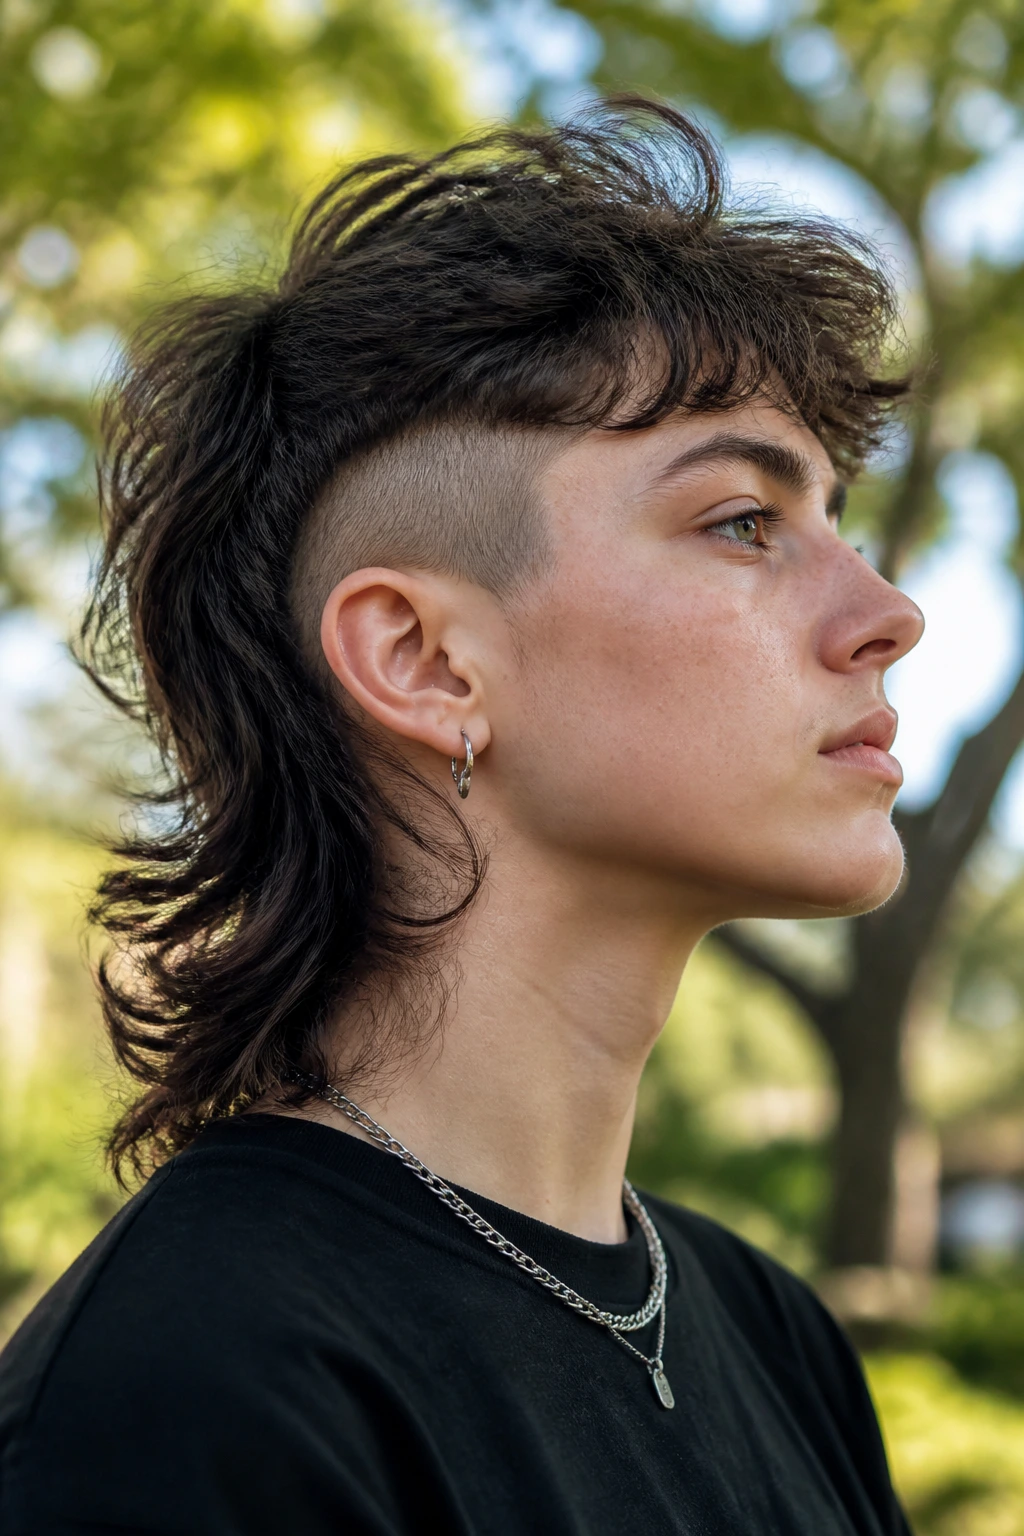
A wolf cut with an undercut brings together two cuts that already like movement. The layers on top create that shaggy, broken outline, and the undercut removes the bulk below so the hair can fall with a little more shape. It’s messy on purpose.
How It Changes the Look
Without the undercut, a wolf cut can get wide at the sides, especially on thick hair. With the undercut underneath, the top layers sit closer to the head and the ends have more room to kick out. That gives the cut its rough, almost wild finish.
- Best hair type: wavy or thick straight hair.
- Styling product: sea-salt spray or lightweight mousse.
- Drying method: air-dry or diffuse for movement.
- Shape note: keep the crown layered so the top doesn’t collapse.
Tiny note: this cut hates overbrushing. Pulling it too smooth ruins the point.
22. Braided Undercut
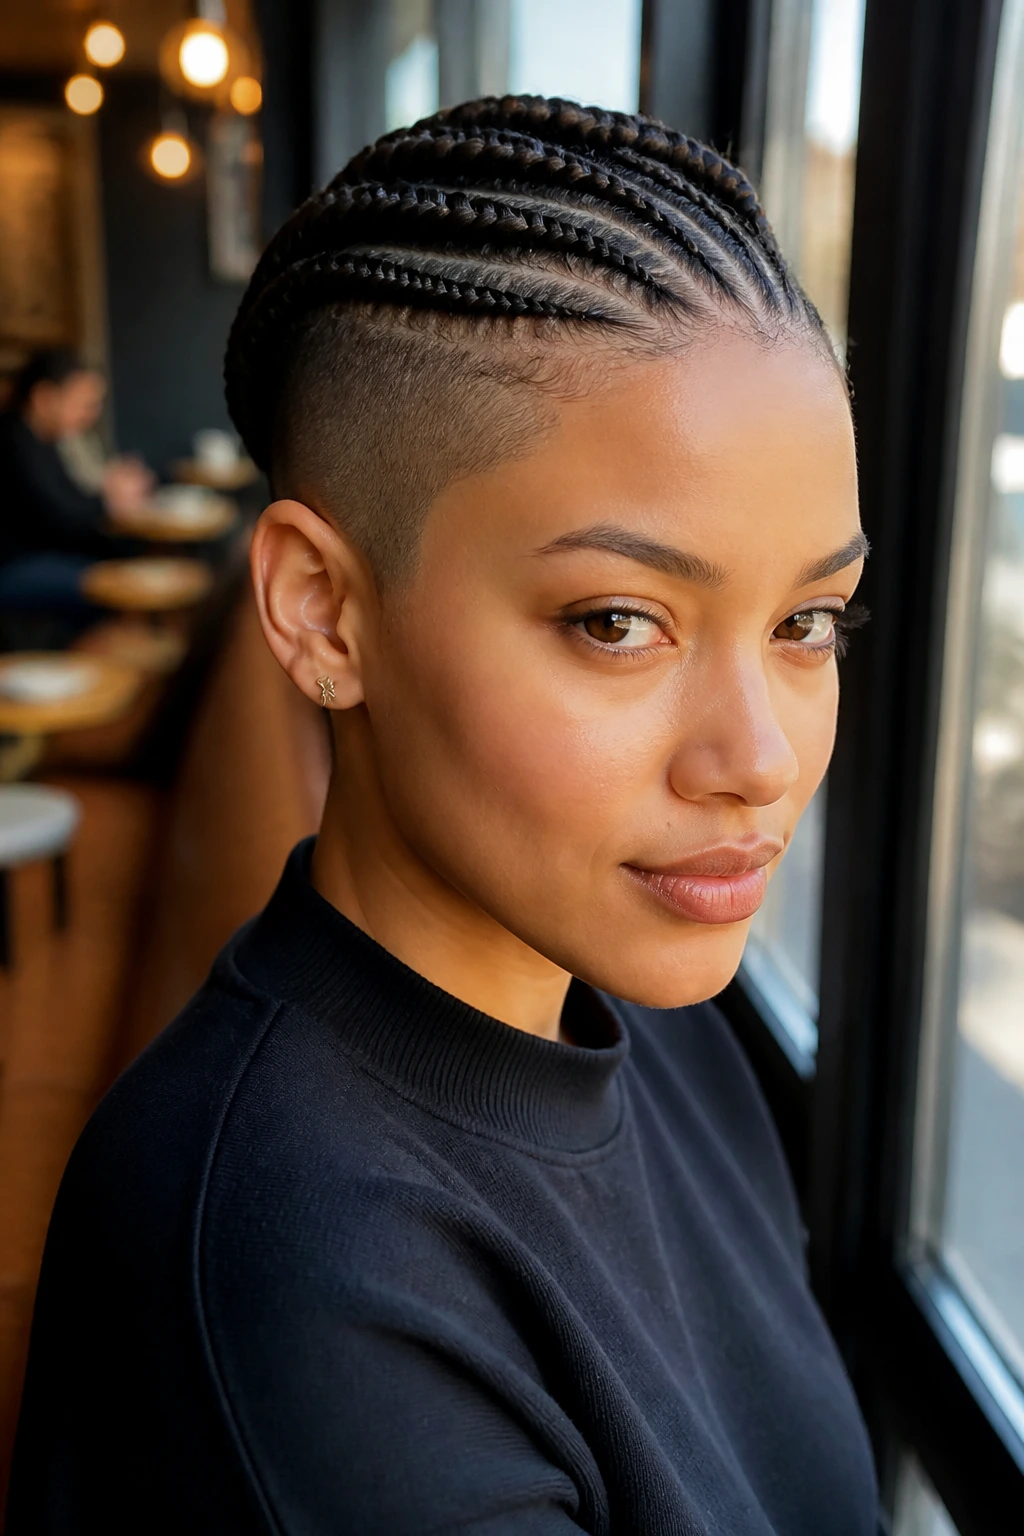
Braids and an undercut make a strong pair because the braids give you pattern and the shaved sides give you breathing room. Cornrows, box braids, or small directional braids all look cleaner when the lower sides are stripped down.
I like this style because it keeps the focus where you want it. The braid pattern shows up better, the neck area feels lighter, and the whole cut sits more neatly around the ears. If the braids run back from the hairline, the undercut sharpens the shape even more. Keep the scalp moisturized and the parted sections clean so the style stays neat longer.
The contrast is the whole show here. Without it, the braids have less punch.
23. Locs With Side Undercut

Locs can carry a lot of visual weight, and a side undercut changes that instantly. One side stays cropped or shaved, while the locs hang over the other side or up top. The asymmetry makes the style feel modern without stripping away the character of the locs themselves.
The best thing about this setup is movement. You can sweep the locs across the head, pin them back, or let them fall to one side, and the undercut keeps the profile lighter. Ask for a clean edge around the temple and ear so the shorter section doesn’t look fuzzy against the locs. A little oil on the scalp helps the style look cared for, not dry.
It’s bold in a quiet, serious way.
24. Afro Undercut

An afro with an undercut keeps the volume where it belongs: up top. The sides sit close, which makes the shape read taller and cleaner, not wider. That shift matters a lot when you want the afro to look crisp instead of rounded all the way down.
What Changes First
The eye goes straight to the crown because the short sides clear space around it. That means your shape is doing the work, not extra bulk. Keep the top shaped with regular trims so the outline stays even, and use a pick or fingers to lift at the roots if you want more height.
- Good for: coily hair with strong natural density.
- Product: moisturizing cream or light oil, depending on dryness.
- Maintenance: shape-up every 2 to 4 weeks.
- Extra detail: a clean temple line makes the whole cut look sharper.
Strong opinion: this is one of the cleanest ways to wear natural volume without losing edge.
25. Tapered Afro With Undercut

A tapered afro with an undercut softens the transition a little more than a full shaved side, and that can be a better look if you want the shape to feel balanced. The taper keeps some softness around the edges while the undercut still removes the bulk beneath.
This version is easier to grow into than people expect. Because the sides aren’t erased all at once, the haircut can shift between crisp and fuller as it grows. Ask for the top to keep its round shape and the sides to narrow toward the ear and neckline. It’s a clean silhouette, but it still has warmth. That combination is why it looks good on so many people.
26. Buzzed Sides With Beard Blend

A beard blend changes the undercut game because the haircut stops at the hairline and starts talking to the facial hair. When the sides are buzzed short and the beard is shaped to connect, the whole face gets a stronger frame. It can look rough, neat, or somewhere in between.
The important part is the transition. You do not want a hard gap between the sideburn and the beard unless you’re going for a very graphic look. A good barber can fade the sideburn area into the beard so the jawline reads clean. This style works especially well if your beard has solid density and your haircut needs a little more balance around the face.
The blend matters more than the length.
27. Skin-Fade Undercut With Design Line

A skin-fade undercut with a design line is the cut people choose when they want the sides to feel almost drawn on. The fade disappears into the scalp, then a shaved line cuts through the side or back and turns the whole haircut into a graphic shape.
Why It Hits Hard
The design line acts like a border. It separates the fade from the top and gives the haircut a custom feel without needing a wild shape on top. You can keep the upper section textured, slicked, or curly; the line still gives it a sharper finish.
- Best placement: temple, side panel, or above the ear.
- Top length: 2 to 5 inches, depending on the style.
- Product: matte clay for texture, gel for a cleaner line.
- Maintenance: the line usually needs refreshing more often than the fade.
A little caution: designs look best when they’re simple. Too many lines can start to feel busy fast.
28. Drop Fade Undercut With Texture
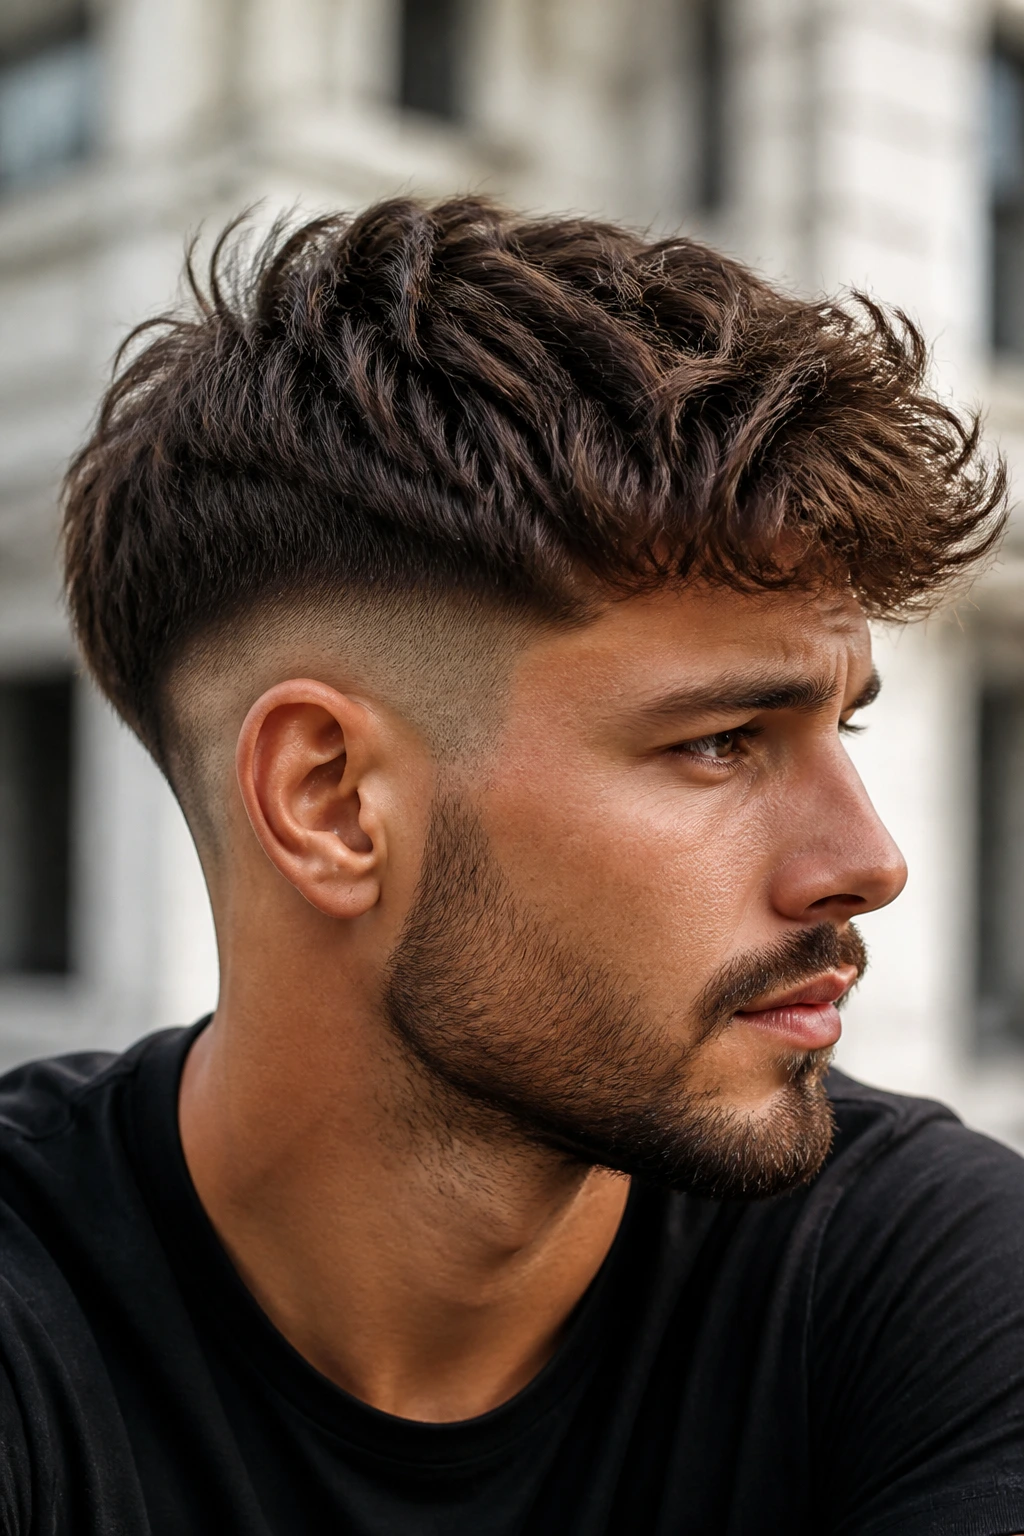
A drop fade undercut curves lower behind the ear, which gives the haircut a smoother contour than a straight fade. Pair that with a textured top, and the whole style gets more shape around the head instead of just height on top.
The curve matters. It follows the head nicely and makes thick hair easier to manage, because the fade drops where the hair would otherwise puff out. Use a matte product or even a dry spray if the top has natural movement. The result feels less rigid than a blunt disconnect and less soft than a taper. That middle ground is why this cut works for people who want edge without a hard block.
29. Low-Fade Undercut for Thick Hair

Thick hair can turn into a helmet fast if the sides are left too full. A low-fade undercut fixes that by clearing weight near the bottom while keeping enough hair above to hold shape. It’s a practical cut, which sounds boring until you see the difference in the mirror.
The top can stay textured, combed, or brushed forward. What changes is the silhouette. The low fade keeps the haircut from mushrooming out around the ears and neck, and that makes styling easier every morning. If your hair grows fast, this is one of the most forgiving options, because the fade can soften a little before the whole cut looks messy.
Thick hair likes a clean outline. This gives it one.
30. Brushed-Forward Crop With Undercut

A brushed-forward crop with an undercut is the opposite of the slick-back crowd, and that’s why it stands out. The hair moves toward the forehead instead of away from it, which gives the face a heavier, more grounded frame. The short sides keep the front from feeling too bulky.
What Makes It Work
The crop benefits from bluntness, but not too much. Point-cut the front a little so it falls with texture rather than sitting like one solid block. A matte paste is usually enough. Push the hair forward with your palms, then break up the ends with your fingertips.
This cut is especially good if your hair has a stubborn cowlick or doesn’t want to stay lifted. Instead of fighting it, you use the forward direction as the style. That’s smarter than wrestling your hair every morning.
31. Wet-Look Undercut

A wet-look undercut has a glossy finish that can feel very polished or very sharp, depending on how much product you use. The short sides make the shine on top look even more dramatic because there’s less hair competing for attention.
Use gel or a wet-finish cream on damp hair, then comb it into place with a fine-tooth comb. If you want it sleeker, go tight and neat. If you want it more fashion-forward, leave a few strands separated at the front. The trick is keeping the top controlled while the sides stay visibly short.
Why It Still Feels Modern
The shine gives the style energy, but the undercut keeps it from looking heavy. That contrast is what saves it from feeling costume-like.
32. Swept-Over Undercut for Fine Hair
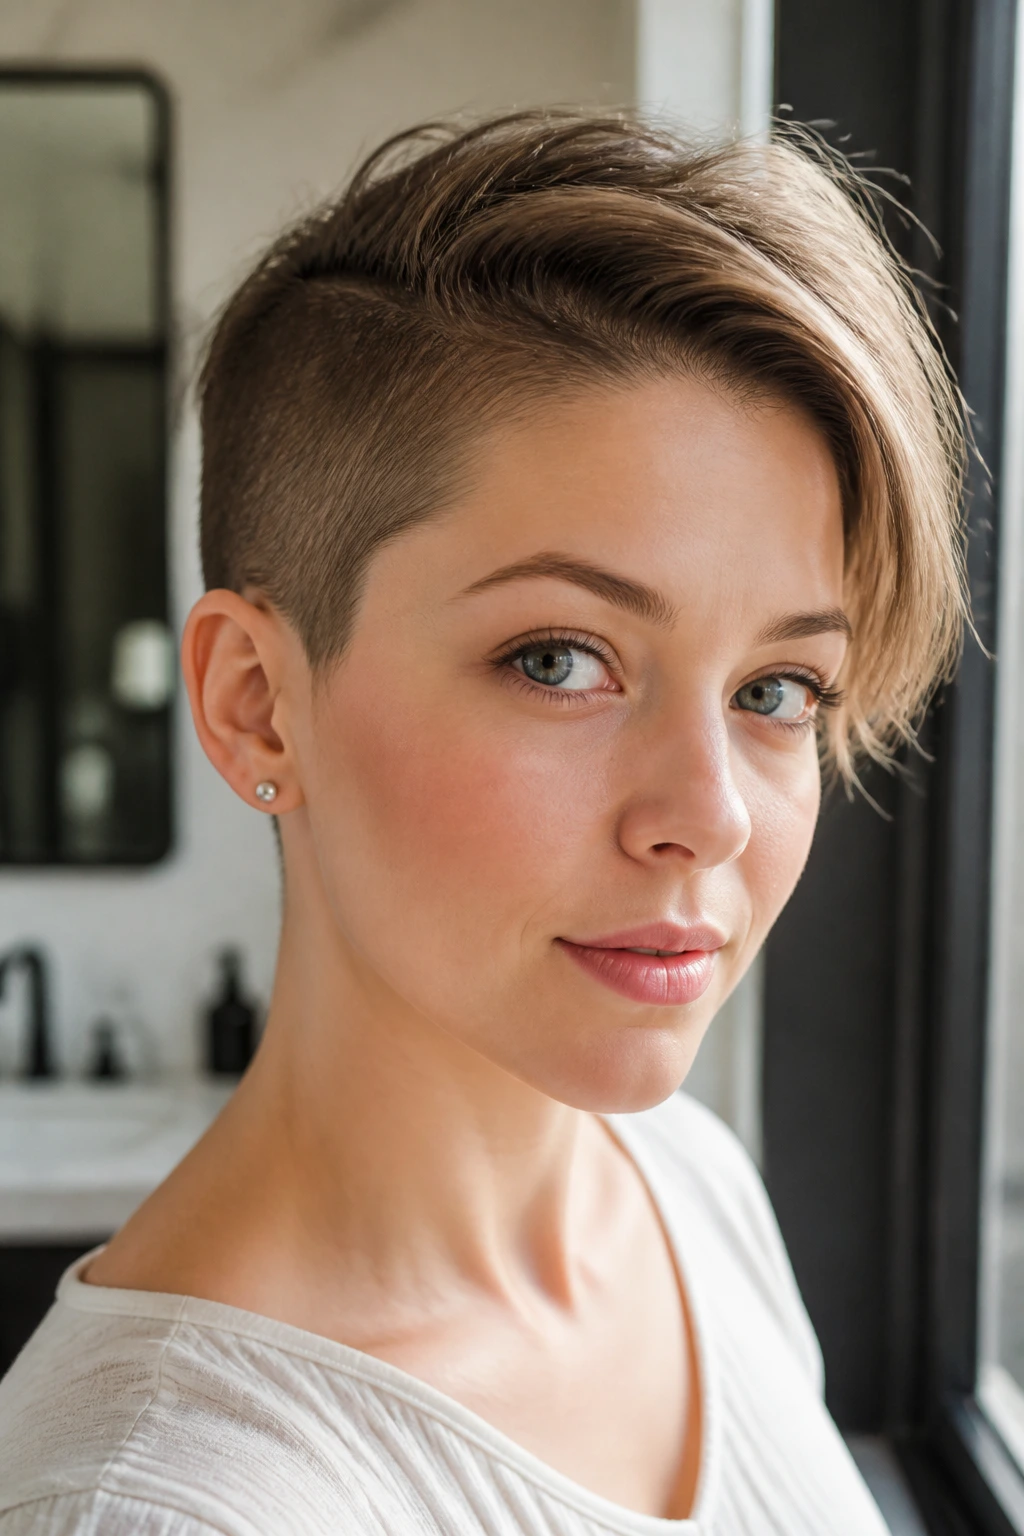
Fine hair can actually look fuller in an undercut when the top is swept to one side instead of forced upward. The short sides reduce the visual width, and the longer top gets the chance to read thicker than it is.
You do need the right product. Heavy wax drags fine hair down, so a light mousse or spray-style volume product makes more sense. Blow-dry the front in the direction you want it to fall, then finish with your fingers instead of a comb. That leaves a little lift at the roots. Small thing. Big difference.
A swept-over shape works because it builds illusion without making the cut look puffy.
33. Dyed-Top Undercut

What happens when the top is the color and the sides are the reset button? You get a dyed-top undercut, and the contrast can be fierce. The undercut gives the color room to show, whether you’re using platinum, copper, black cherry, silver, or something louder.
What To Know Before You Commit
The clean sides make the color pop faster, but they also put more pressure on the top section to stay healthy. Bleached hair needs moisture, and colored hair needs less heat. That means a heat protectant if you blow-dry, plus a mask or conditioner that keeps the ends from going dry and brittle.
- Best for: people who want the color to lead.
- Good finish: matte texture for bold shades, sleek finish for pale tones.
- Maintenance: trims and color touch-ups both matter here.
- Visual bonus: even a small color change looks stronger against shaved sides.
My take: if you’re going to color the top, the undercut is the frame that makes it worth it.
34. Clean, Grown-Out Undercut

A grown-out undercut can look better than a freshly clipped one when the shape is handled well. The sides soften, the top gets a little movement, and the harsh line turns into something more relaxed. It still reads bold, just less severe.
That softer stage is useful if you don’t want to live in the barber chair. Keep the neckline neat, trim the bulk around the ears, and let the top carry the shape. A little texture spray helps the grown-out length move instead of drooping. You can also tuck it behind one ear or push it back from the face to make the contrast show again.
Funny thing. Some cuts only get easier as they grow.
35. Long-Top Undercut With Natural Texture
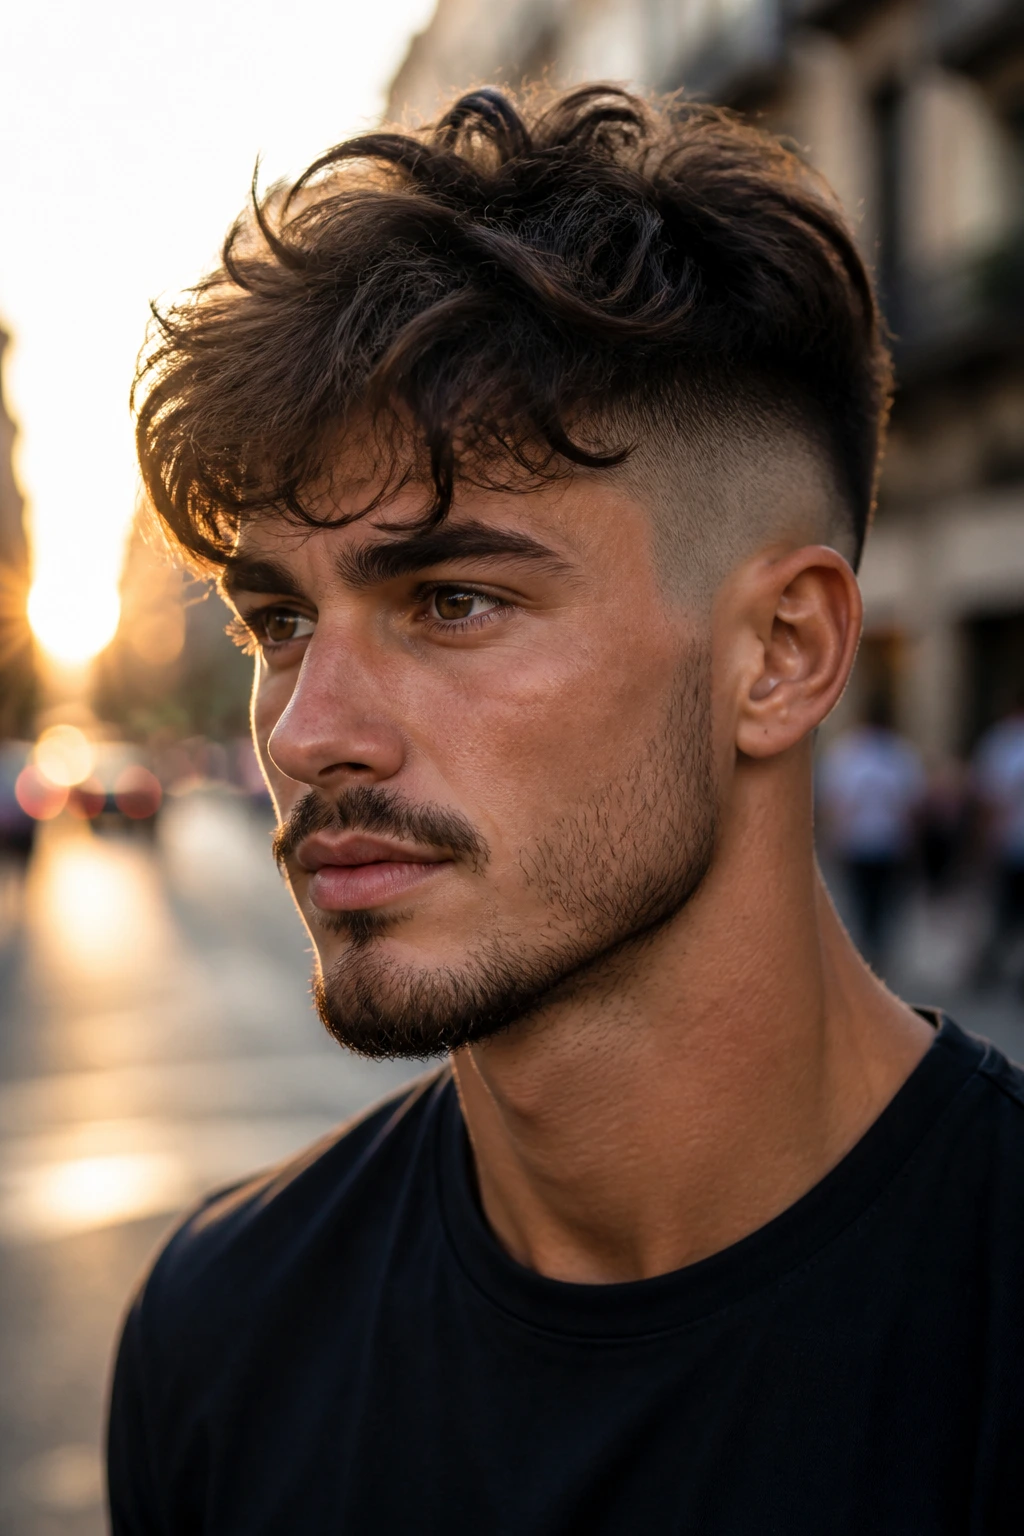
The most striking undercut hairstyles are not always the loudest ones. Sometimes it’s the long top with natural texture that wins, because it lets the cut breathe. The sides stay short, the top keeps its own movement, and the whole shape looks confident without needing extra tricks.
This version works especially well if your hair has wave, bend, or a little frizz in a good way. Fight that texture, and the haircut gets flat. Let it move, and it starts to look expensive in a very low-key way. A light cream or leave-in conditioner is usually enough. Heavy product can weigh the top down and blur the clean edge underneath.
Keep the outline tidy and the texture loose. That’s the cleanest version of bold.
