



Thin hair has a way of exposing every bad haircut. One wrong layer placement, one heavy product, one ponytail pulled too tight, and the whole style can collapse before lunch.
The good news is that thin hair is not hopeless at all. It usually wants shape more than bulk, and that’s a useful distinction. A blunt line can make ends look denser. A side part can create lift where the crown is flat. A small twist or braid can look richer than a style that is technically bigger but visually wispy.
I’ve always thought the biggest mistake people make with thin hair is trying to force it into a shape that belongs on thick hair. Heavy layering, giant curls, and overworked texture tend to steal the little density you have. The smarter move is cleaner edges, smart parting, and styles that make the eye see more hair than is actually there.
1. Blunt Chin-Length Bob
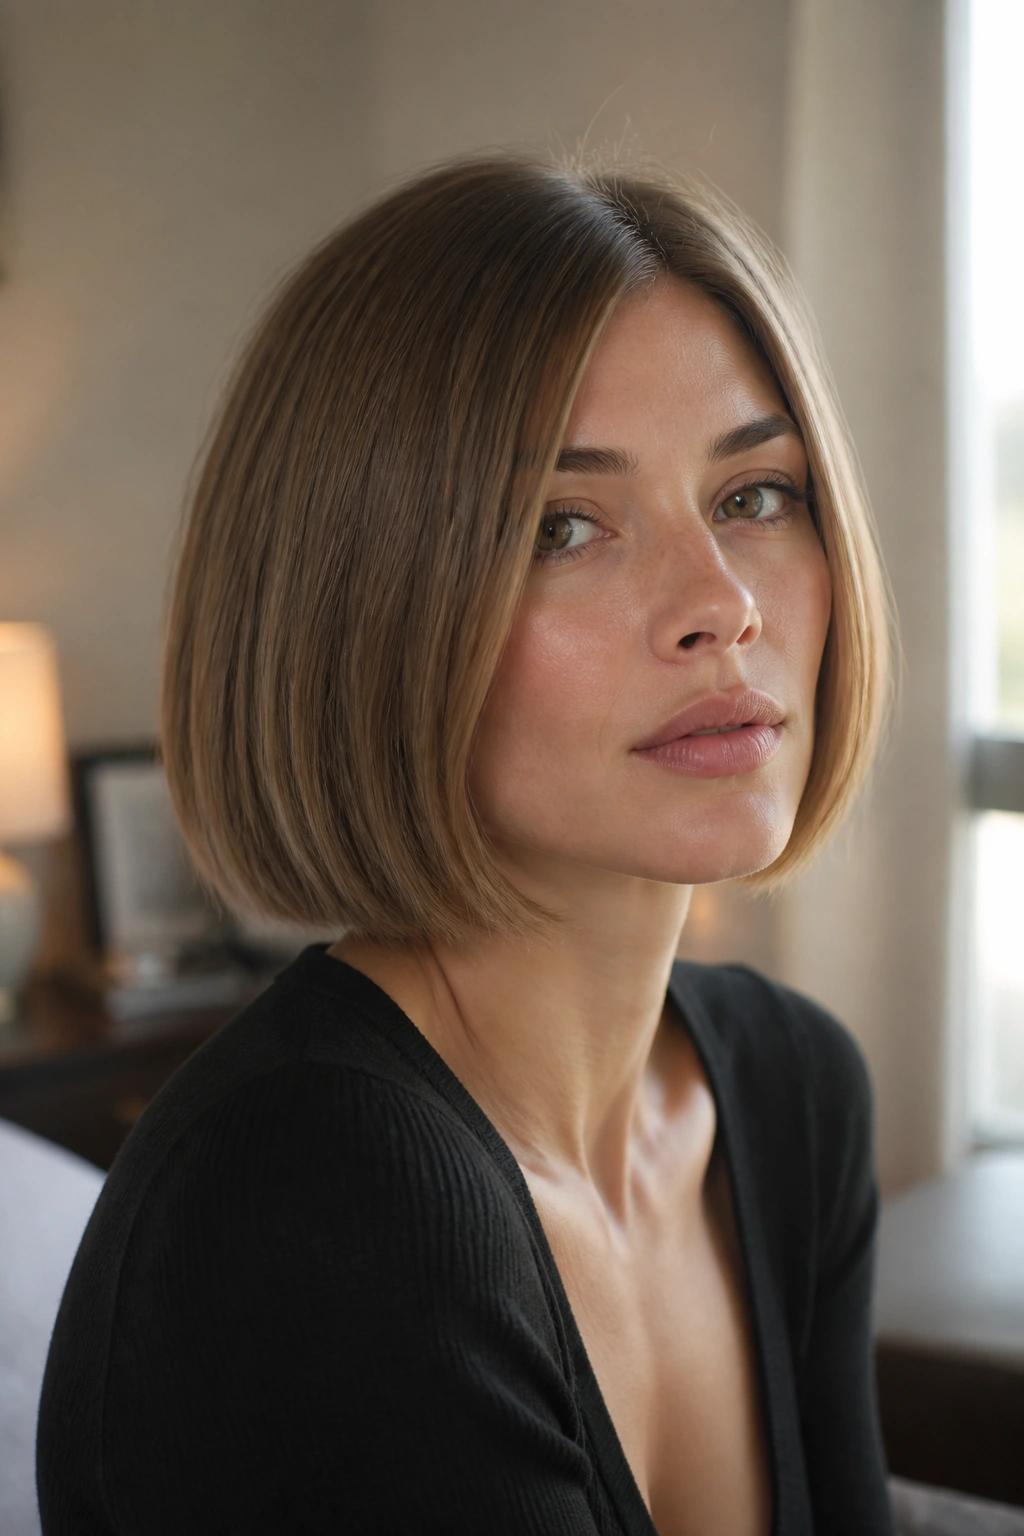
A blunt chin-length bob can make thin hair look fuller almost on sight. The reason is simple: the eye lands on a solid line instead of a soft, see-through edge. That hard perimeter gives the ends weight, and weight reads as thickness.
Why It Helps Thin Hair
Ask for the cut to sit right at the chin or a touch below it, with the ends kept blunt and even. Skip razor-heavy texturizing if your strands are already fine, because it can leave the outline wispy and dry-looking. A tiny bit of internal movement is fine. The outer line should stay strong.
Styling takes less work than people think. Blow-dry with a round brush, turn the ends under by half an inch, and finish with a pea-sized amount of lightweight cream. If your hair puffs at the sides, a flat iron pass on the last 1 to 2 inches of the ends gives a cleaner shape.
- Best for straight or slightly wavy hair
- Great if your hairline gets sparse near the temples
- Easier to keep looking neat than a layered crop
- Avoid if you want lots of swing and softness
My favorite detail: keep the part slightly off-center. Dead-center bobs can look severe on thin hair, while a small offset gives the cut a little lift.
2. Collarbone Lob With a Soft Bend
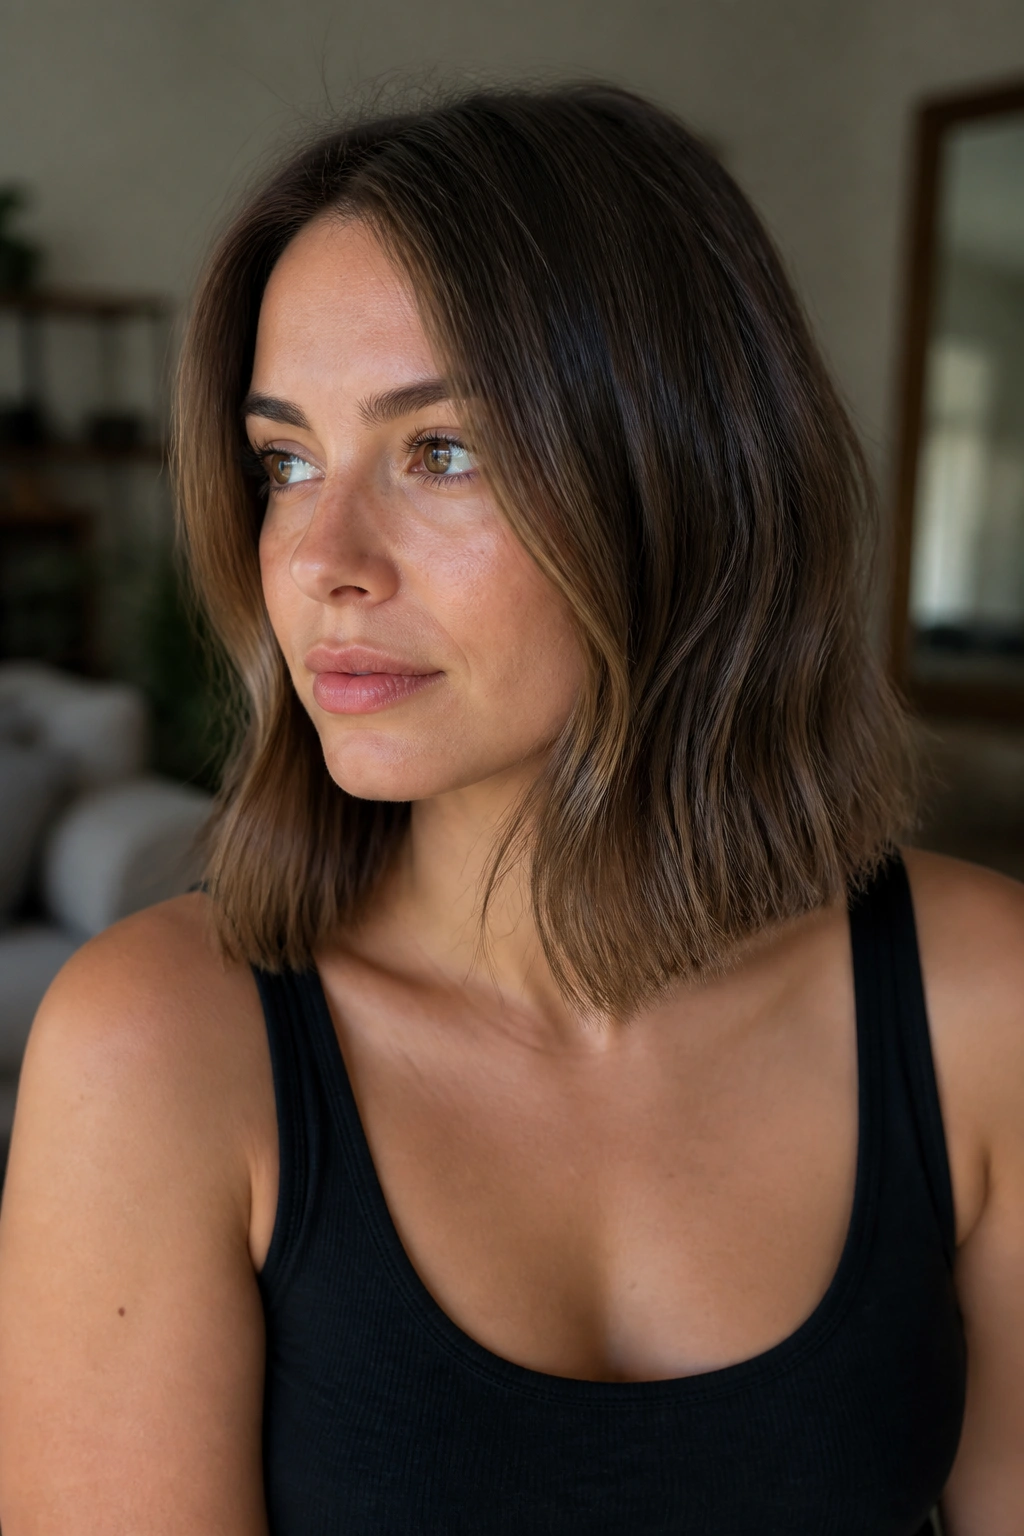
Why does a collarbone lob work so well on thin hair? Because it sits in that sweet spot between short and long, where the hair has enough length to move but not so much that it hangs limp. The collarbone gives the ends something to land on, and that landing point matters.
A soft bend is better than a tight curl here. A 1.25-inch curling iron or a straightener bend through the mid-lengths creates a little body without making the hair look overdone. Leave the last inch straighter so the outline still looks clean. That small trick keeps the style from turning puffy.
I like this cut for people who wear their hair down most days but still want it to look intentional when they tuck one side behind the ear. It has range. It can look neat at work and easy on weekends without needing a fresh blowout every morning.
What to Ask For
- Length that touches the collarbone
- Ends that are blunt or only lightly textured
- No choppy layers near the bottom
- A little face framing if you want movement around the cheekbones
3. Textured Pixie With a Longer Top

A pixie can be a gift for thin hair, but only if the top keeps enough length to move. Short sides and a longer crown create the illusion of lift, which is exactly what flat hair needs. If the top is cut too short, the style can end up looking sparse instead of sharp.
The best version has soft texture on top, not feathered wisps all over the place. A matte paste or light styling wax works better than creamy products because it gives grip. Start with a tiny amount, rub it between your palms, and press it into the roots at the crown before sweeping the top forward or to the side.
This cut also grows out well. That matters more than people admit. A bad grow-out on thin hair can look scraggly fast, while a pixie with longer top pieces can stay decent for weeks between trims.
Good if you want: less styling time, more lift, and a cut that does most of the work for you.
4. Long Pixie With a Swept Fringe
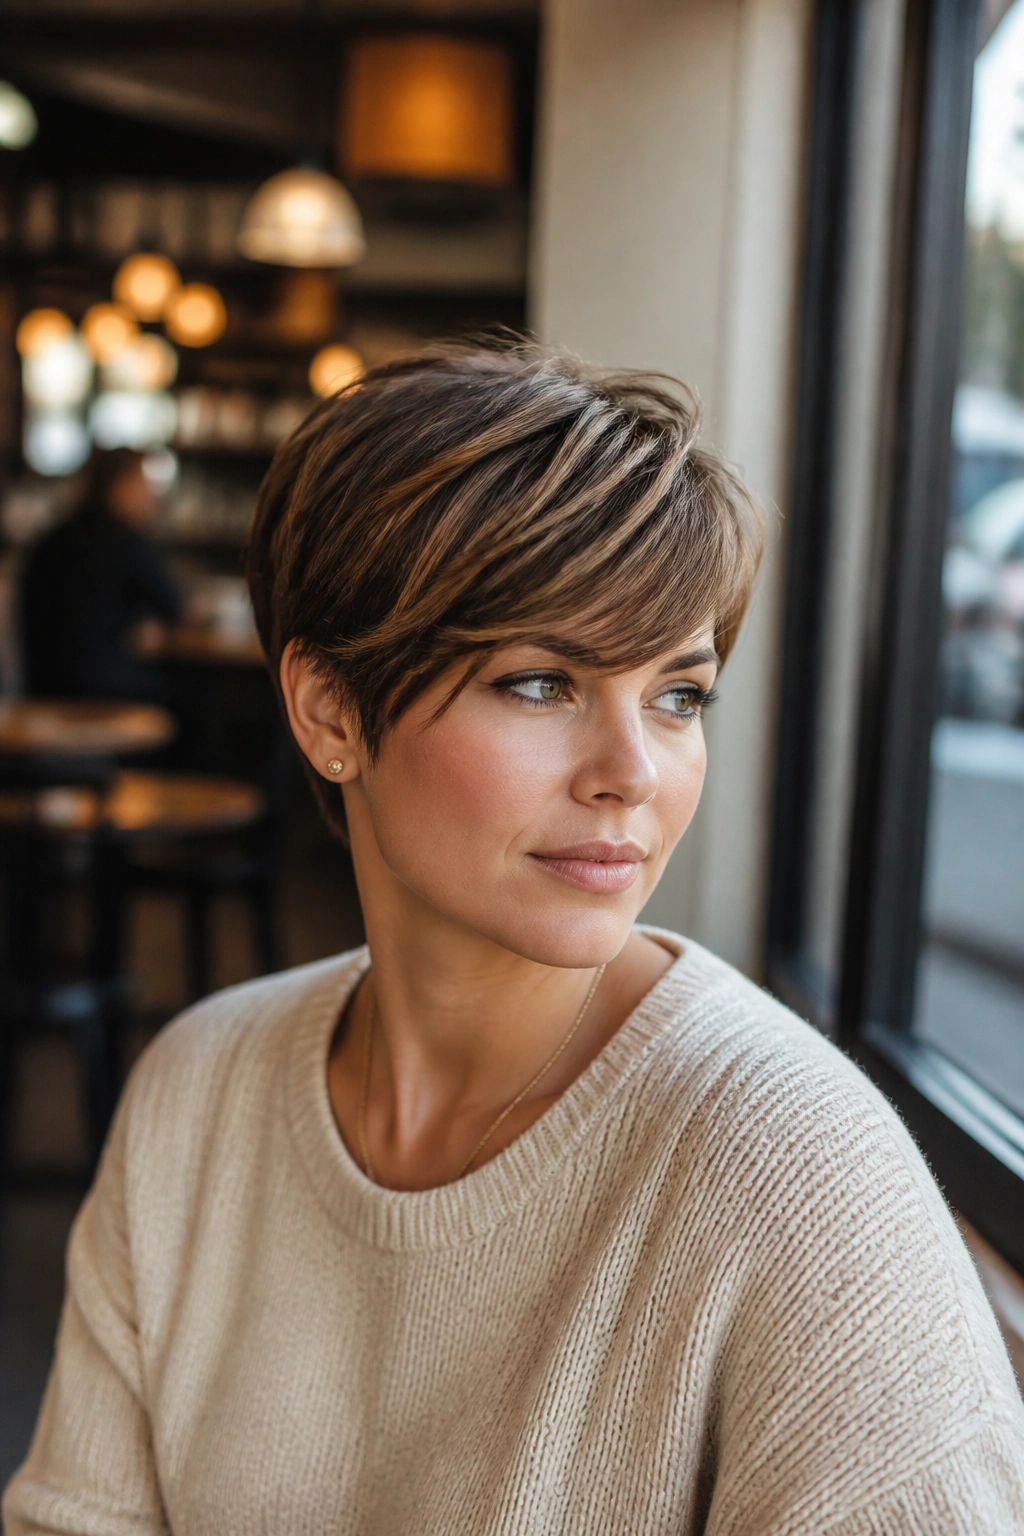
A long pixie gives you a little more softness than a short one, and that fringe can do a lot for thin hair around the front. The trick is to keep the front pieces long enough to sweep sideways instead of sticking up like little spikes.
If your forehead feels wide or your hairline is light, a swept fringe can pull attention forward in a better way. It frames the face without taking up much density. That makes it useful for fine hair that needs help where people actually look first.
I’d ask for the fringe to skim the eyebrow and the top to keep some length through the crown. Too much thinning at the sides is a mistake here. You want shape, not air.
A quick blast of root spray at the crown, then a side sweep with your fingers, usually does the job. No round brush marathon required.
5. Curtain-Bang Lob for Thin Hair
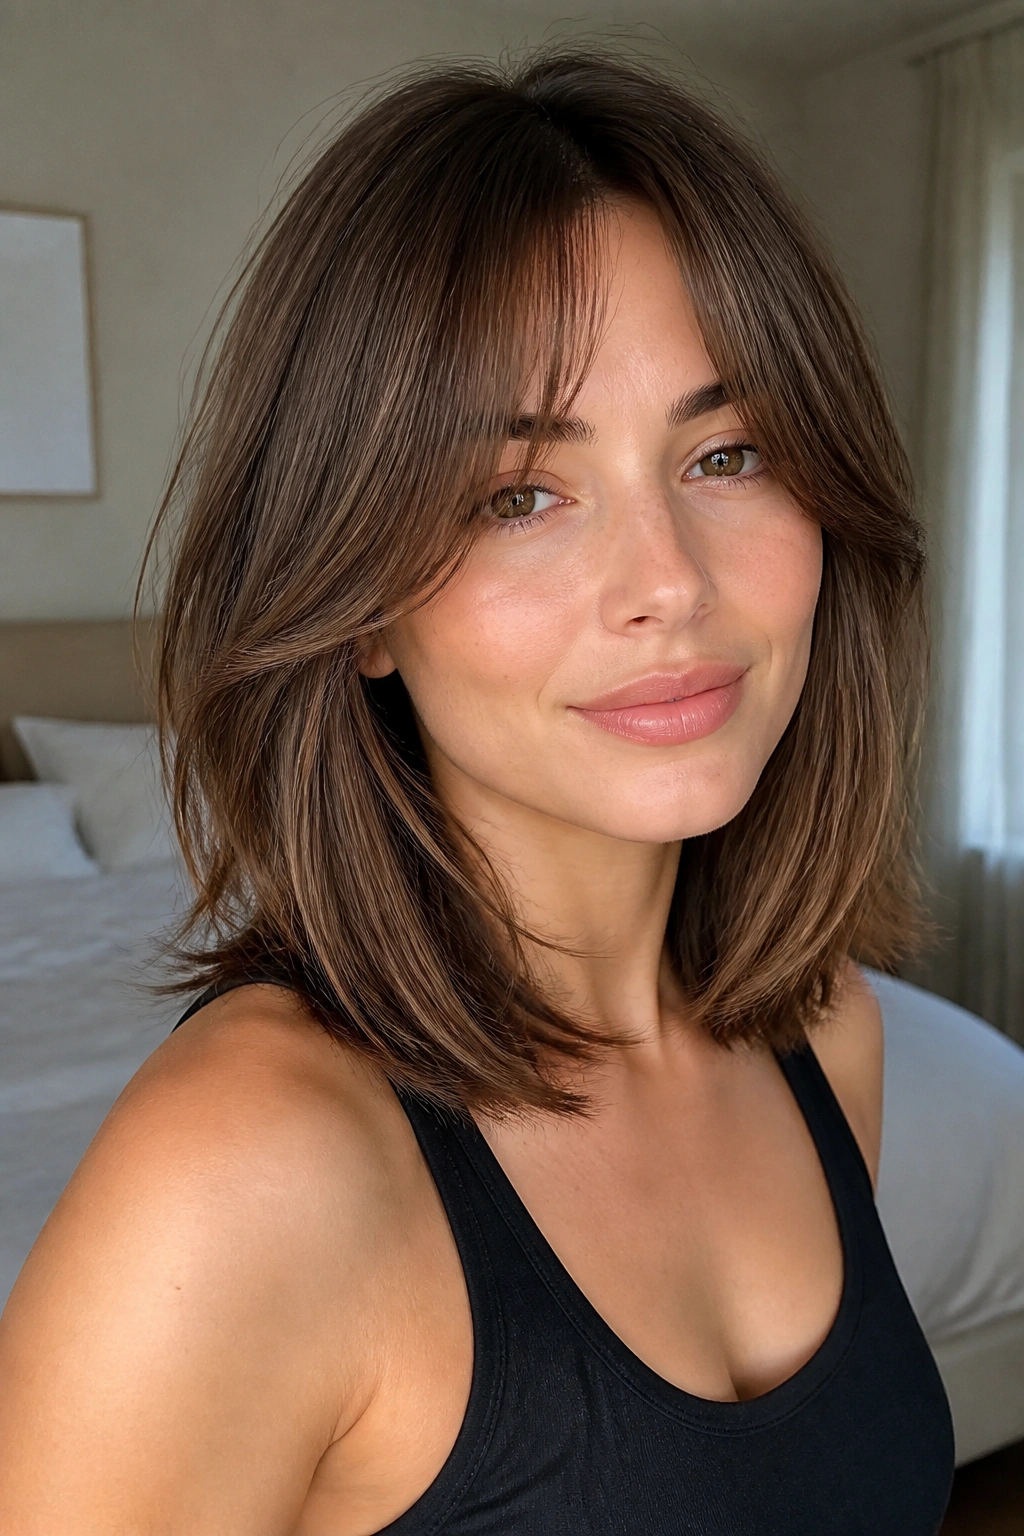
Curtain bangs can be a sneaky fix for thin hair because they split the eye line right down the middle and make the front of the style feel fuller. They also give a lob a little personality without forcing the whole cut into heavy layers.
The part matters. Let the bangs open naturally from the center or slightly off-center, then blow-dry them away from the face with a medium round brush. If they sit flat, pin them out of the way while they cool for a few minutes. That cooling step sounds fussy, but it helps the shape stick.
A shoulder-length cut with curtain bangs works best when the rest of the hair stays fairly clean through the ends. If the whole head is heavily layered, the bangs lose their job. The point is to create movement near the eyes and cheekbones, not to make the entire head look shredded.
Ask your stylist for:
- Bangs that start around the cheekbone
- A lob that keeps weight at the bottom
- Soft, face-framing pieces rather than choppy face layers
6. Deep Side Part With Loose Waves
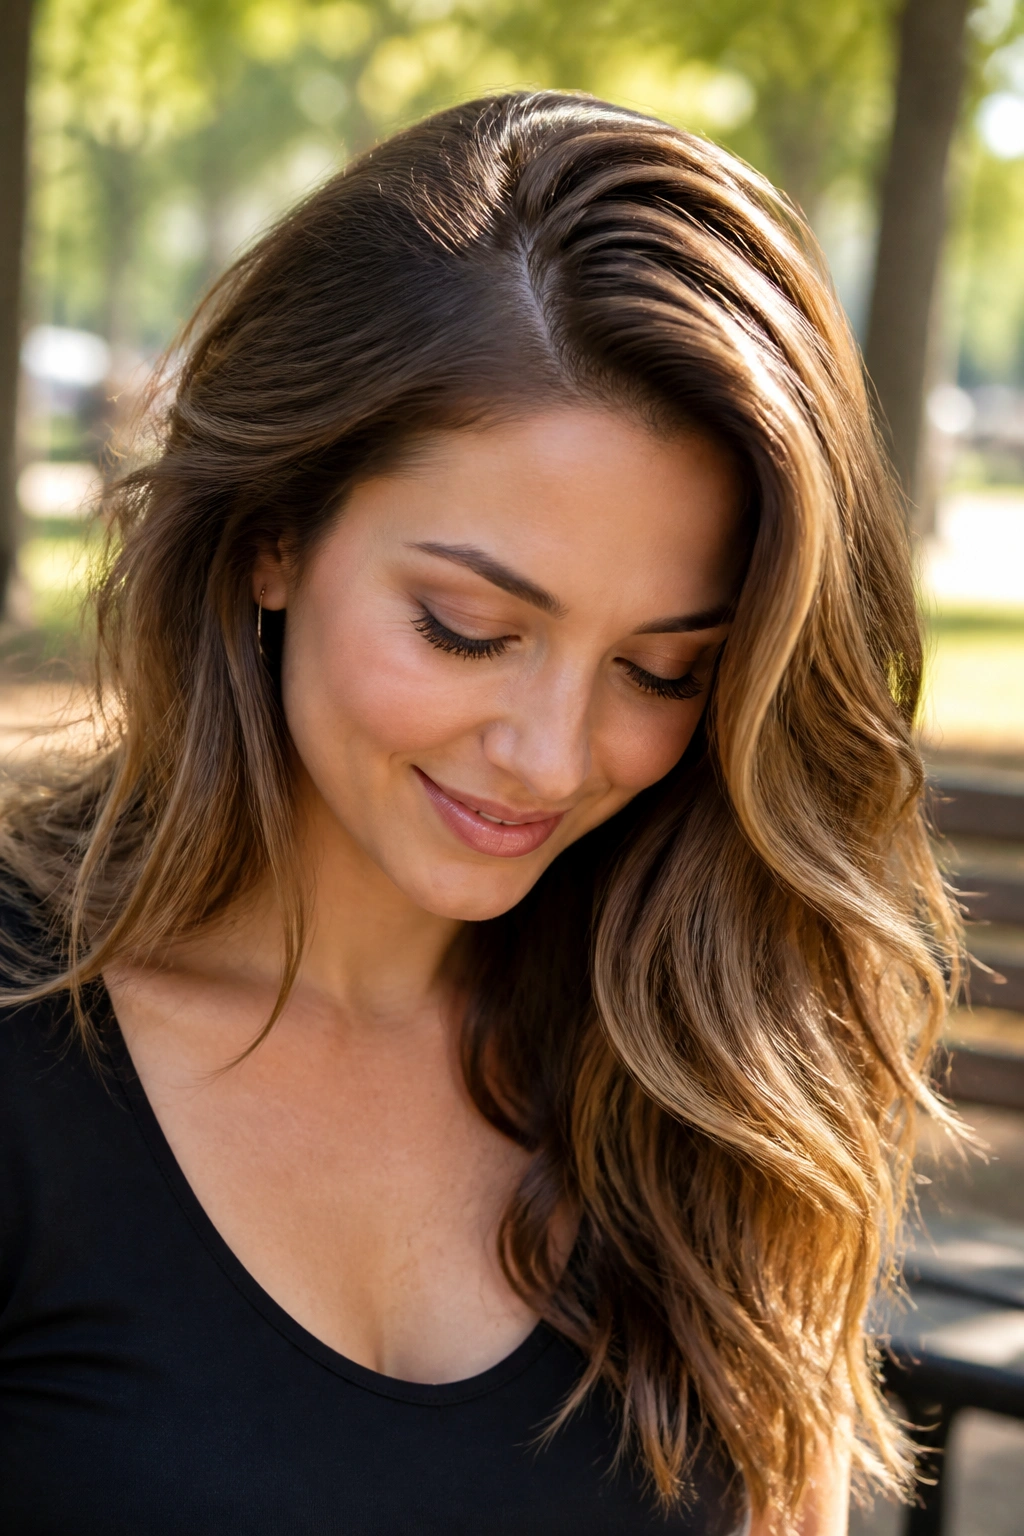
A deep side part is one of the fastest ways to cheat a little volume into thin hair. Push the hair to the heavier side, and the roots on the opposite side lift automatically. It sounds almost too simple, which is probably why people ignore it.
Loose waves work better than tight curls because they create width without making the hair look cramped. Wrap sections around a 1-inch iron, leave the ends out for a straighter finish, then brush everything out lightly. You want movement, not ringlets.
This style has a nice side effect: it makes the scalp line less obvious at the crown. That can matter a lot with fine hair, especially if your hair separates easily. A deep side part doesn’t fix everything, but it changes the silhouette fast.
And no, you do not need to make the part dramatic enough to feel theatrical. Even a 2-inch shift can change the whole look.
7. Soft Shag With Controlled Layers
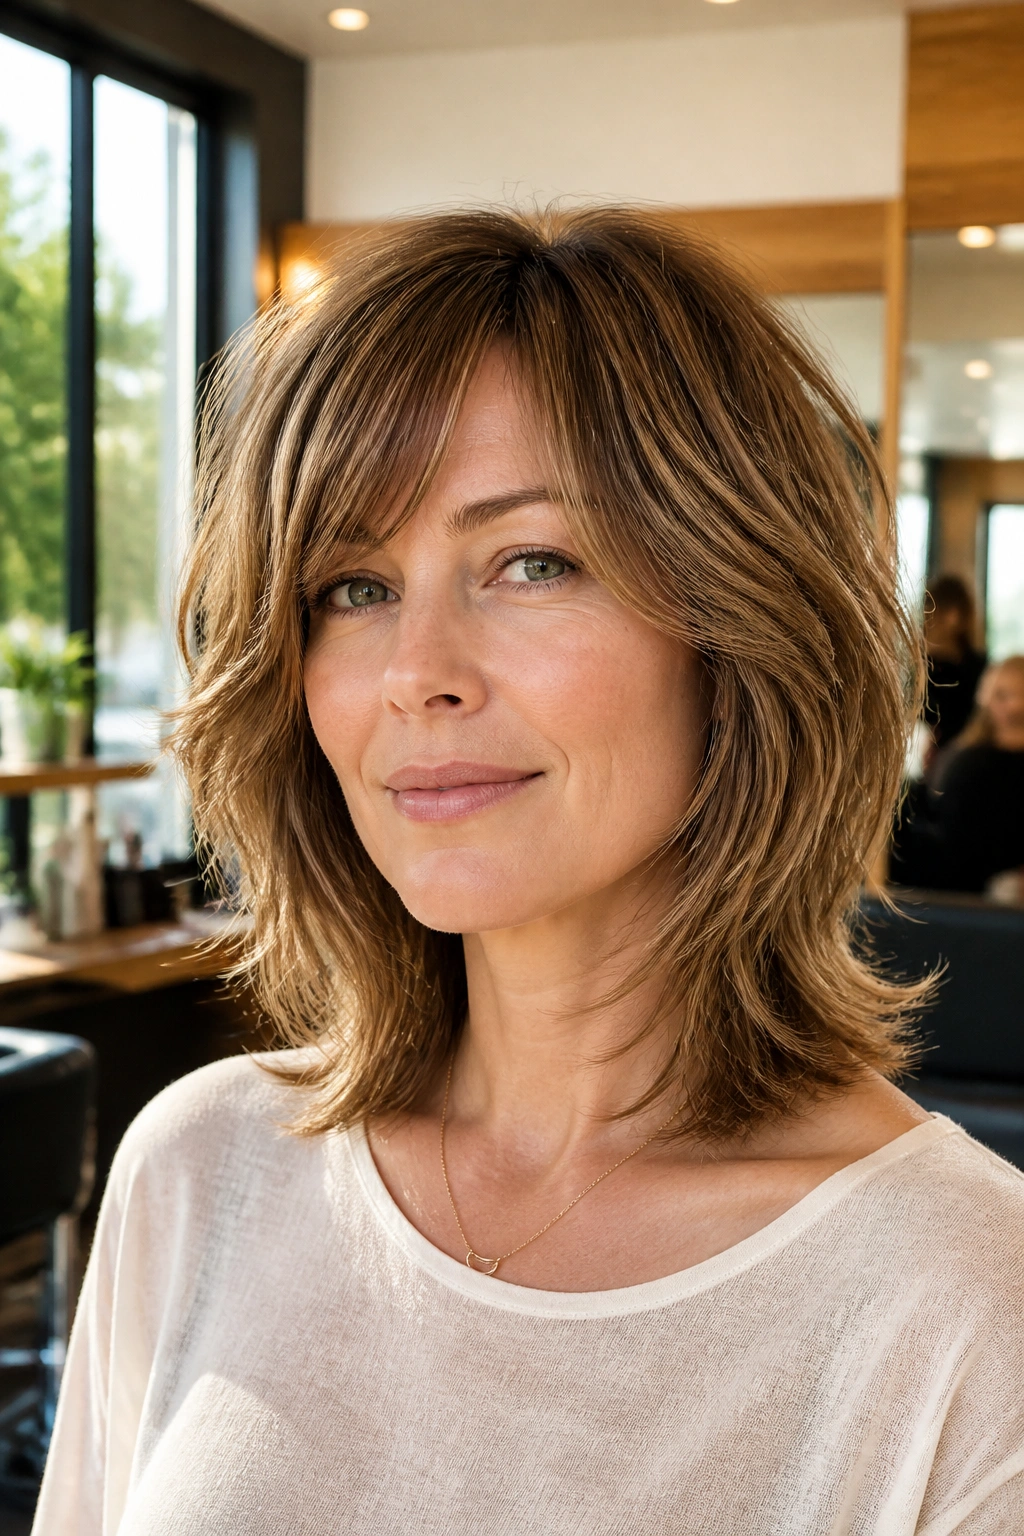
Not all layers are bad. They just need discipline.
A soft shag for thin hair works when the layers are kept controlled and the perimeter still holds some weight. The old mistake is over-chopping the whole head until there’s no solid shape left. That gives you movement, sure, but movement without density can look stringy in daylight.
What to Ask For
Keep the shortest face-framing pieces near the cheekbones, not up by the temples. Ask for gentle, blended layers through the crown and sides, then leave the bottom edge thick enough to support the cut. A shag that ends at the collarbone or slightly above it often behaves better than a long one on thin hair.
Styling is best with a little grit. A salt spray or texture mist on damp hair helps, then a rough-dry with your fingers. If the ends flip oddly, a quick pass with a 1-inch iron settles them without killing the texture.
8. Face-Framing Layers on Long Hair
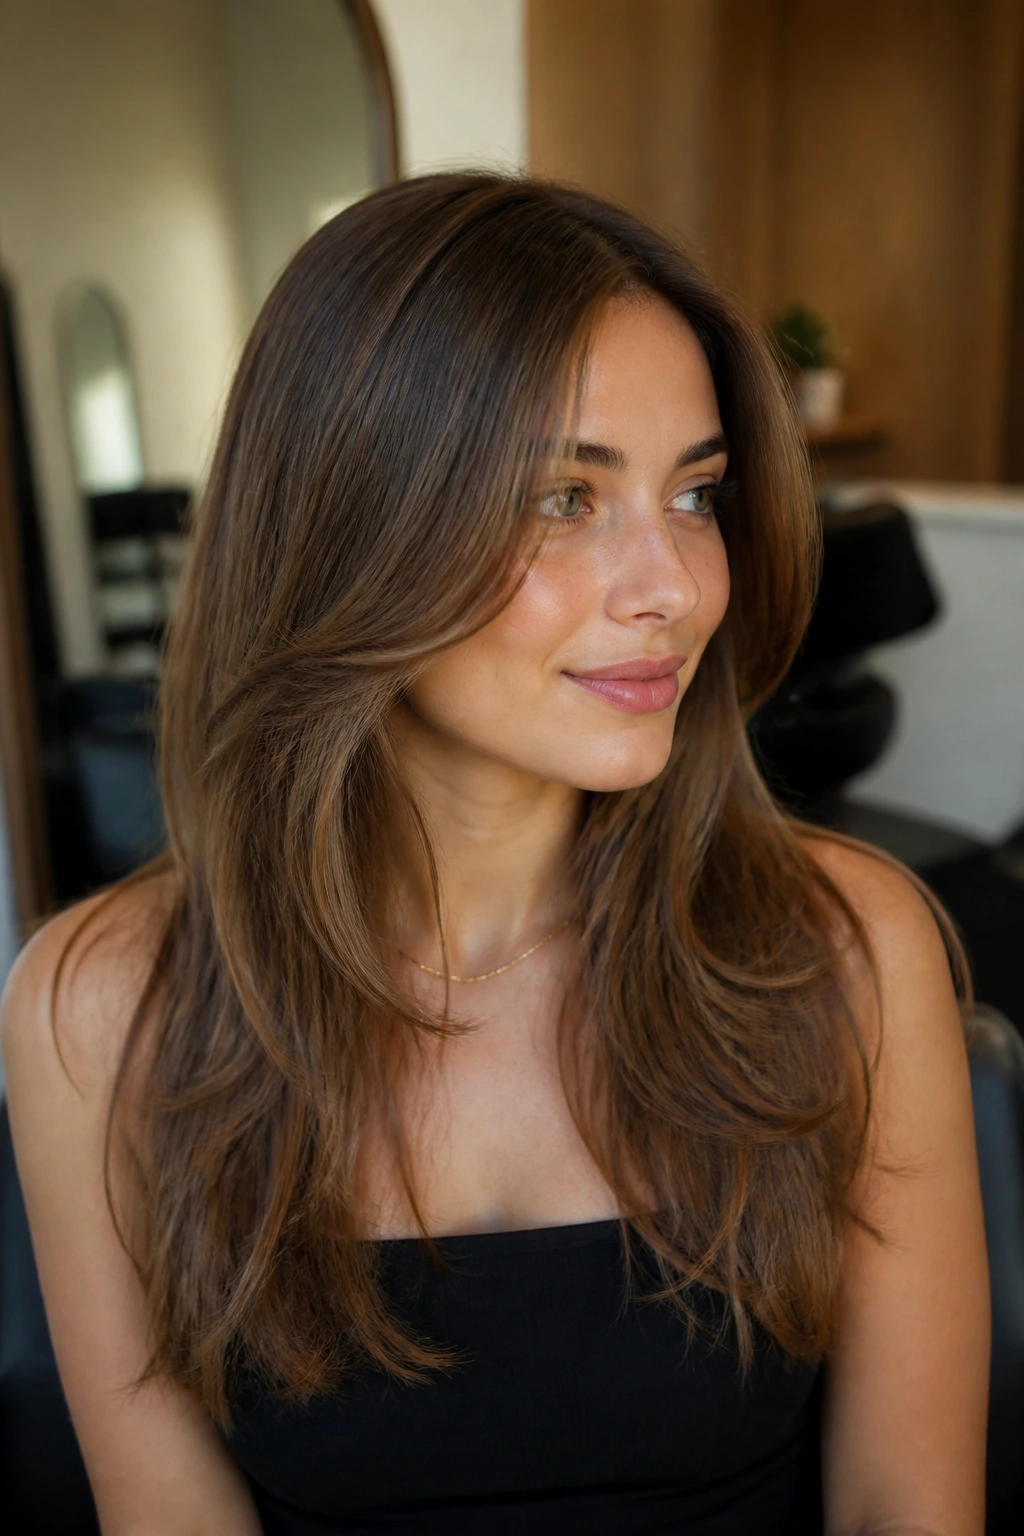
If you refuse to give up length, this is the move I’d start with. Long hair on a thin head can look beautiful, but only if the back stays solid and the layers live mostly around the face. Heavy layers through the whole head can make the ends look stringy by the time the hair reaches your shoulders.
Face-framing layers give the front some life without sacrificing the body at the bottom. They also make it easier to wear hair in a half-up style, because the front pieces fall on purpose instead of hanging there like leftovers. That sounds blunt, but it’s the honest version.
Keep the shortest pieces near the chin or collarbone. Longer than that, and you lose the shaping effect. Shorter than that, and the style can start to feel disconnected if your hair is very fine.
A center part can work here, though I usually prefer a soft off-center part if the crown needs a lift.
9. Sleek Low Bun With Crown Lift
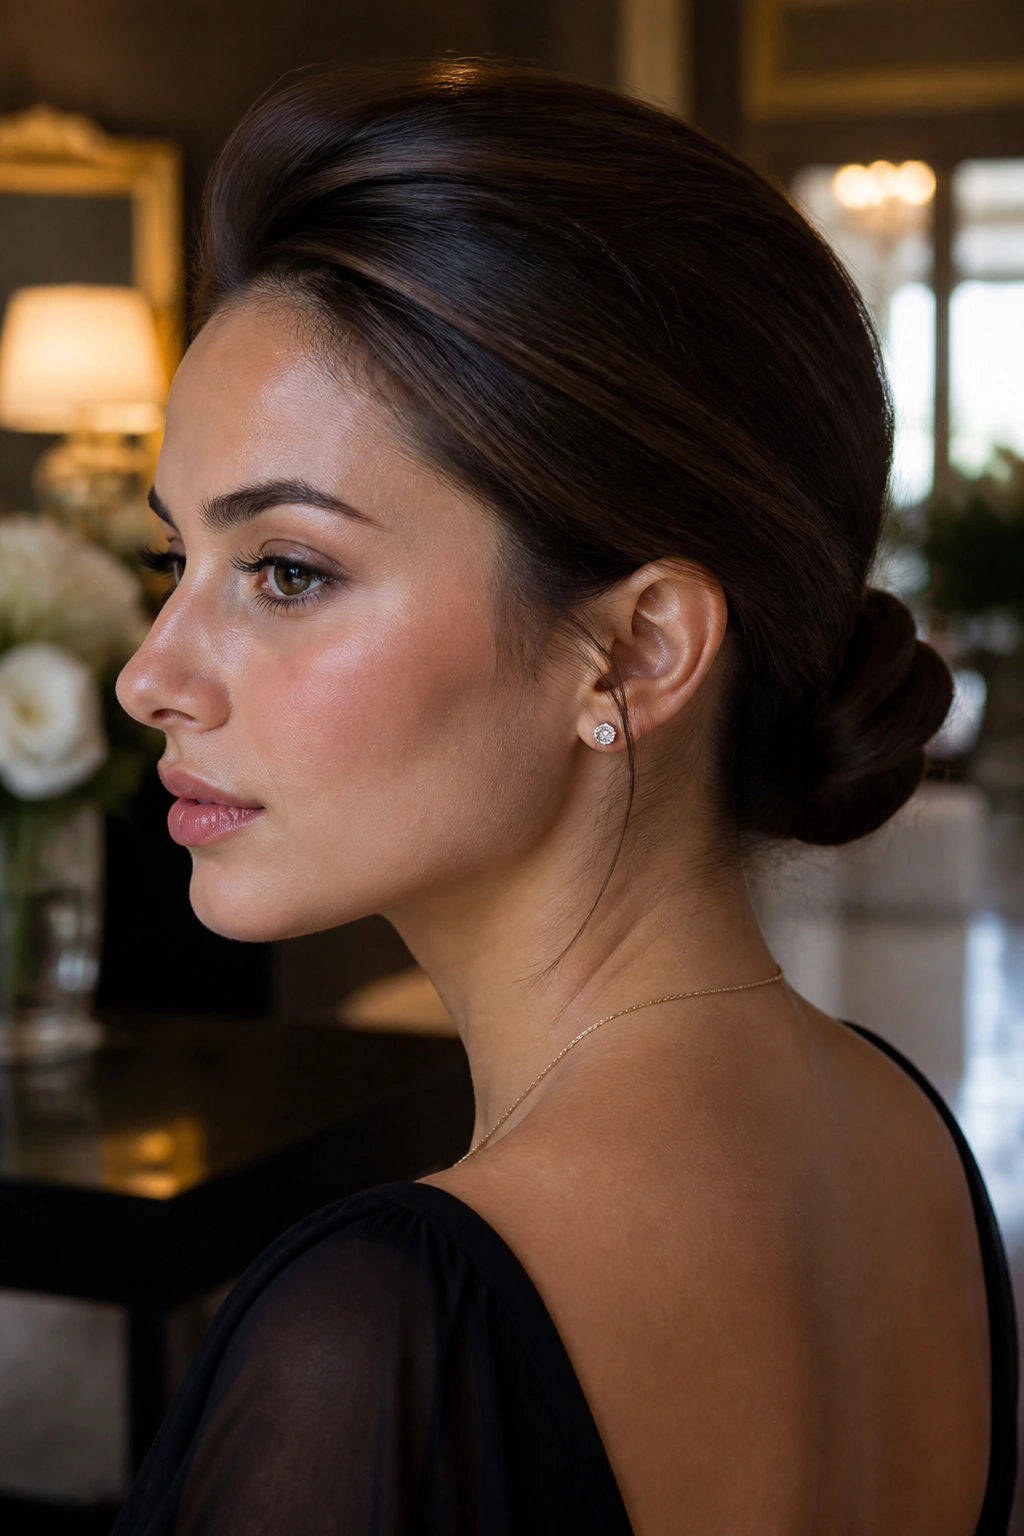
A low bun is one of the smartest styles for thin hair because it turns a possible weakness into a clean shape. If the bun is neat, the eye reads polish instead of sparseness.
The trick is to create a little height at the crown before you twist the hair back. A fine-tooth comb, a light mist of hairspray, and a soft tease at the roots can give enough lift to keep the style from looking flat against the scalp. Then gather the hair low at the nape and twist it into a compact bun.
I like this style for dinners, office days, and any time the hair needs to look tidier than it feels. It also works on second-day hair, which is a blessing. Thin hair often gets easier to handle when it’s not freshly washed.
Finish with a few pinned flyaways around the ears if you want softness. Clean does not have to mean harsh.
10. Messy Top Knot With Loose Pieces

A messy top knot can be flattering on thin hair, but only if you stop treating it like a giant cloud. The knot should sit small and intentional, not stretched into a sad little puff that exposes every short layer underneath.
Think lift at the crown, loose pieces around the face, and a knot that uses the texture you already have. Dry shampoo helps because it adds grip at the roots. If the hair is too silky, the knot slides and the whole thing collapses.
A Better Way To Build It
Pull the hair up with your head tipped forward, but leave out two thin front sections before you tie it. Twist the ponytail into a small coil, wrap it once, and pin where the bun feels secure rather than where it looks biggest. That little difference matters.
A top knot works best when the bun itself stays compact and the shape comes from the height, not the bulk. It’s a subtle distinction. A useful one.
11. Bubble Ponytail
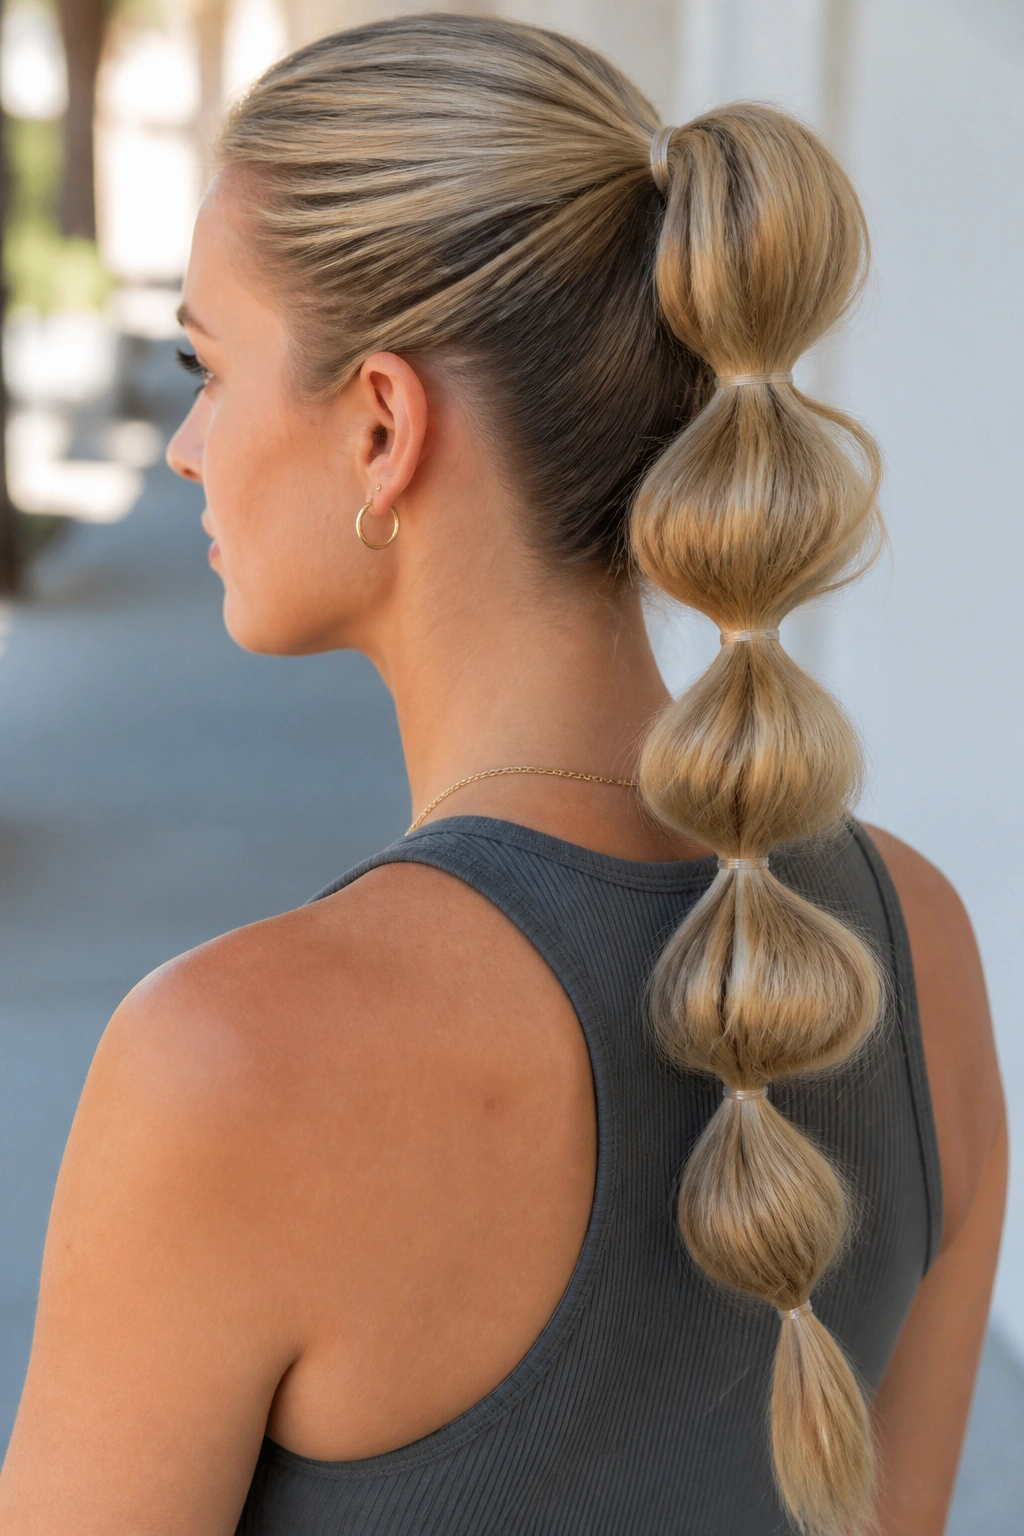
A bubble ponytail is one of those styles that makes thin hair look more styled without asking for a ton of actual hair. Each elastic breaks the length into sections, and those little breaks create the illusion of more body.
The spacing matters. Put the first elastic at the base of the ponytail, then add more every 2 to 3 inches depending on your length. Gently pull the hair between the elastics outward until each section puffs into a round shape. Don’t yank. A little lift is enough.
This is a strong choice for medium to long hair that tends to look flat in a plain ponytail. It also works when the ends are not perfect, which is a nice relief. Thin hair often looks better in styles that disguise the tail end a bit, and the bubble pony does exactly that.
How To Keep It From Slipping
- Use clear elastics or small snag-free ties
- Mist the ponytail with texturizing spray first
- Tug each bubble evenly on both sides
- Hide the base with a tiny wrapped section if you want a cleaner finish
12. High Ponytail With a Wrapped Base
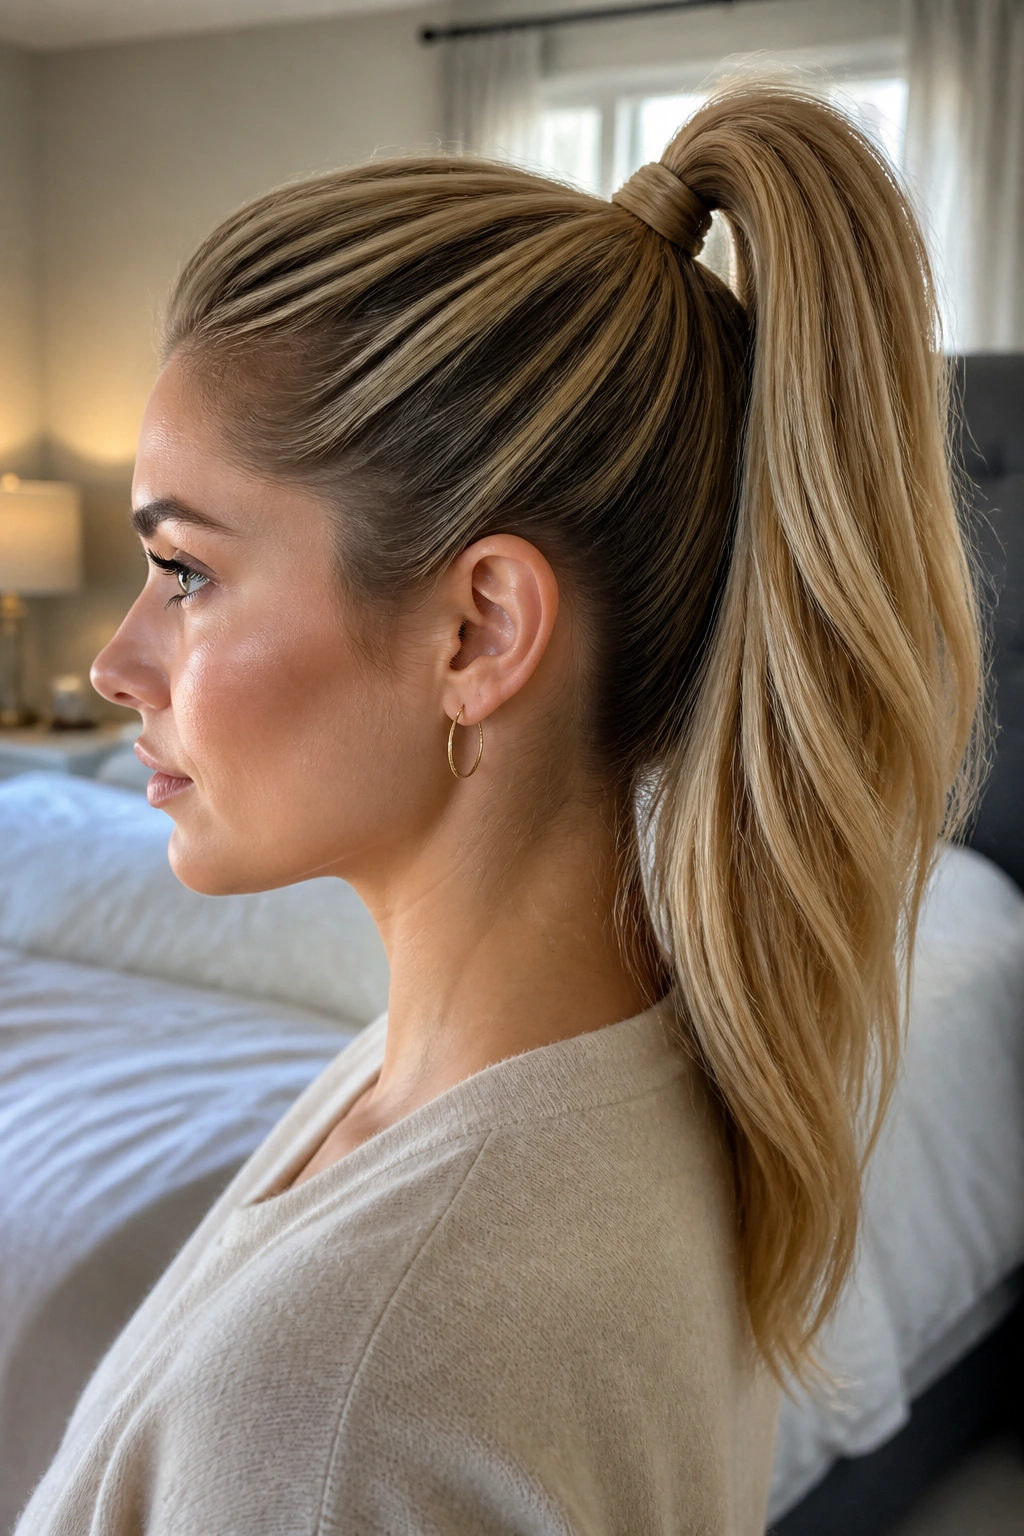
A high ponytail can be a good look for thin hair, but only when the crown has been lifted first. If you tie it straight back with no prep, the scalp shows too much and the style can look severe. That’s the part people get wrong.
I prefer a high ponytail that starts with a bit of root spray and a light backcomb at the crown. Then gather the hair high, secure it tight, and wrap a small section around the elastic so the base looks finished. That wrap makes the whole thing feel more expensive, even if the rest of the style took five minutes.
The ponytail itself should stay sleek near the roots and a little airy through the tail. If your hair is very fine, curling the tail in one loose bend can help the end look thicker. Straight ends can look a little frail in photos and in mirrors.
This one is blunt, practical, and better than people give it credit for.
13. Low Side Ponytail
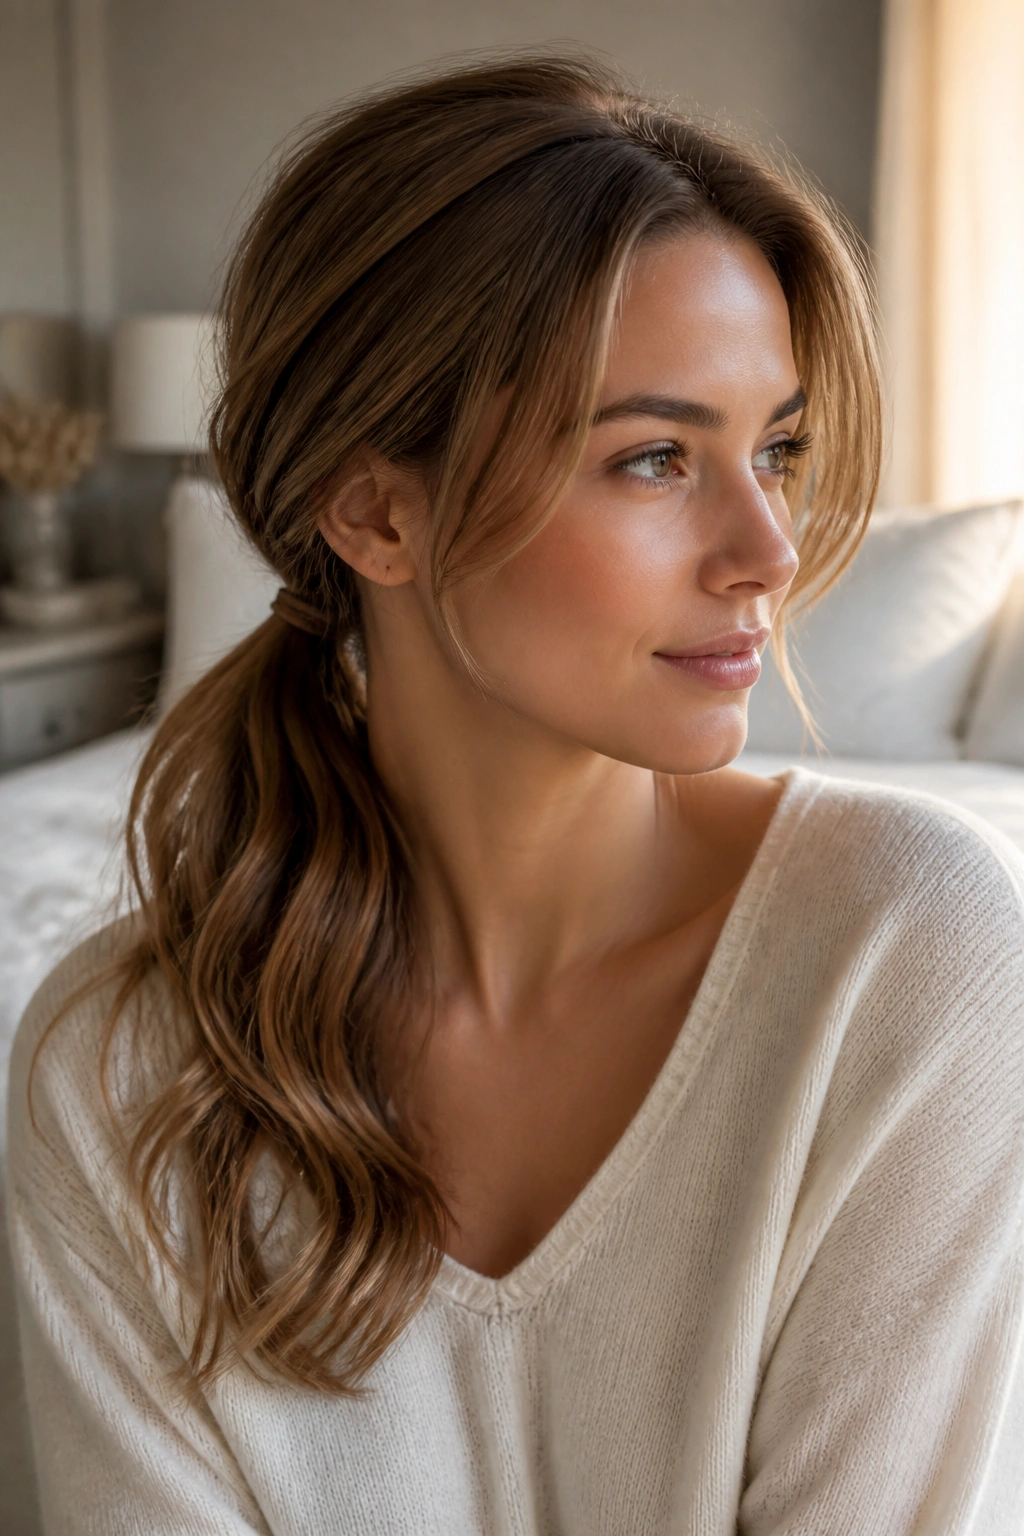
A low side ponytail softens thin hair in a way a centered pony never really can. The side placement gives the eye a new line to follow, and that changes how full the style feels. It also keeps the crown from needing too much height, which is helpful if your roots lie flat fast.
The best version sits just behind one ear and drapes over the shoulder. Leave the top slightly loose so the style doesn’t look squeezed down. You want a controlled bend, not a slick, tight pull that shows every bit of the scalp.
Straight hair benefits here because the side sweep adds movement. Wavy hair gets even more from it because the loose tail looks fuller when it falls across the chest. I also like this style with a ribbon or a wrapped elastic, but the base should stay clean first.
A low side pony is a quiet fix. Sometimes that’s exactly what thin hair needs.
14. Half-Up Twist With Extra Height

A half-up twist gives you one of the best things thin hair can ask for: lift at the crown without giving up the look of length. That balance is hard to beat.
Take the top section from temple to temple, twist it back loosely on each side, and pin it where the head starts to curve toward the back. Pinning too low flattens the style. Pinning slightly higher creates a little dome shape that reads as fullness. A couple of crossed bobby pins usually holds better than one fancy clip.
The rest of the hair should stay down and loose. If the bottom is waved or lightly curled, the contrast helps. If it’s straight, the style still works, but a tiny bend at the ends keeps it from looking too plain.
This is one of my favorite office-to-dinner styles because it looks deliberate without eating up time. Thin hair likes that kind of efficiency.
15. Claw Clip French Twist
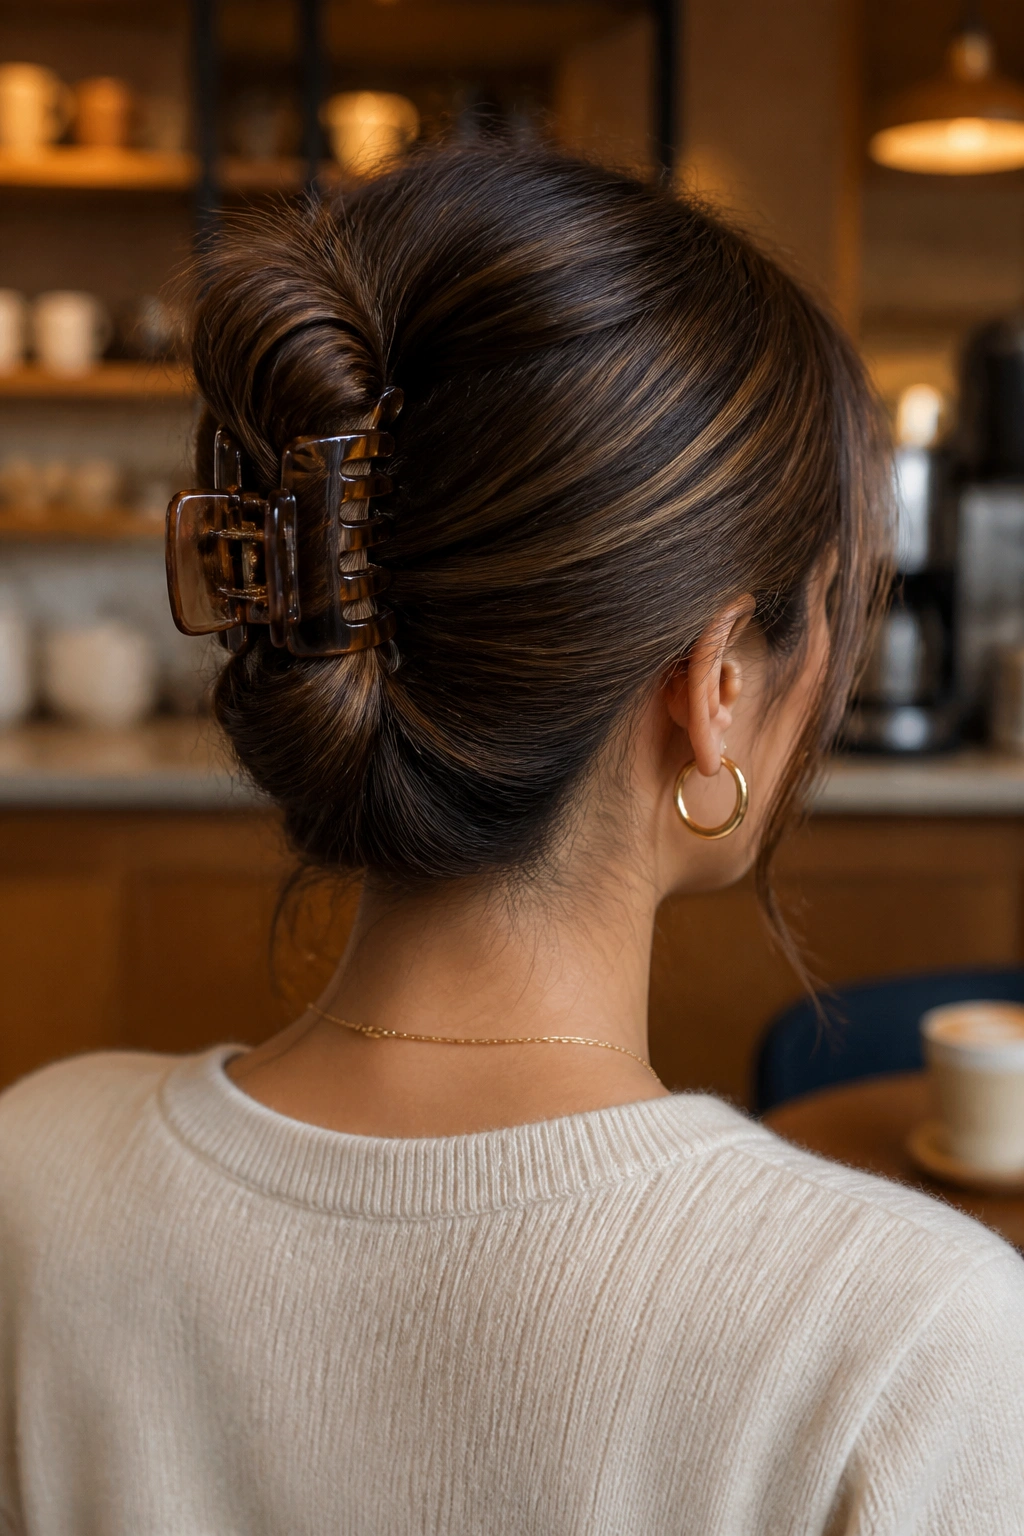
A claw clip French twist is practical, fast, and strangely flattering on thin hair. Since the clip itself creates shape at the back of the head, you don’t need a huge amount of hair to make it work.
The mistake is overloading the clip. Thin hair does better when the twist is compact and the ends are tucked neatly inside or left out in a controlled way if the hair is shorter. A medium-sized clip often works better than a giant one because it grips the twist instead of swallowing it.
Use a little dry shampoo or texture spray first. Clean, slippery hair slides out of clips with almost rude efficiency. The added grip helps the style stay in place through a commute, a desk day, or a long dinner.
I love this one for hair that refuses to cooperate. It turns that into part of the look.
16. Mini Front Braids

Mini braids at the hairline are a small move with a big payoff. They pull attention to the face, add texture at the front, and make thin hair feel styled even when the rest is simple and loose.
You can braid one small section on each side or do two tiny braids on one side and pin them back. The sections should be narrow enough to look delicate, not chunky. A tiny clear elastic or a hidden bobby pin keeps the ends in place.
This style is especially useful when roots are a bit flat or oily. Braids hold better on hair that isn’t freshly washed, which makes them a smart choice for day two or day three. They also work well under hats, which is handy if you want to keep the rest of the hair down.
A small braid reads like intention. Thin hair benefits from that more than people realize.
17. Loose Pancaked Braid
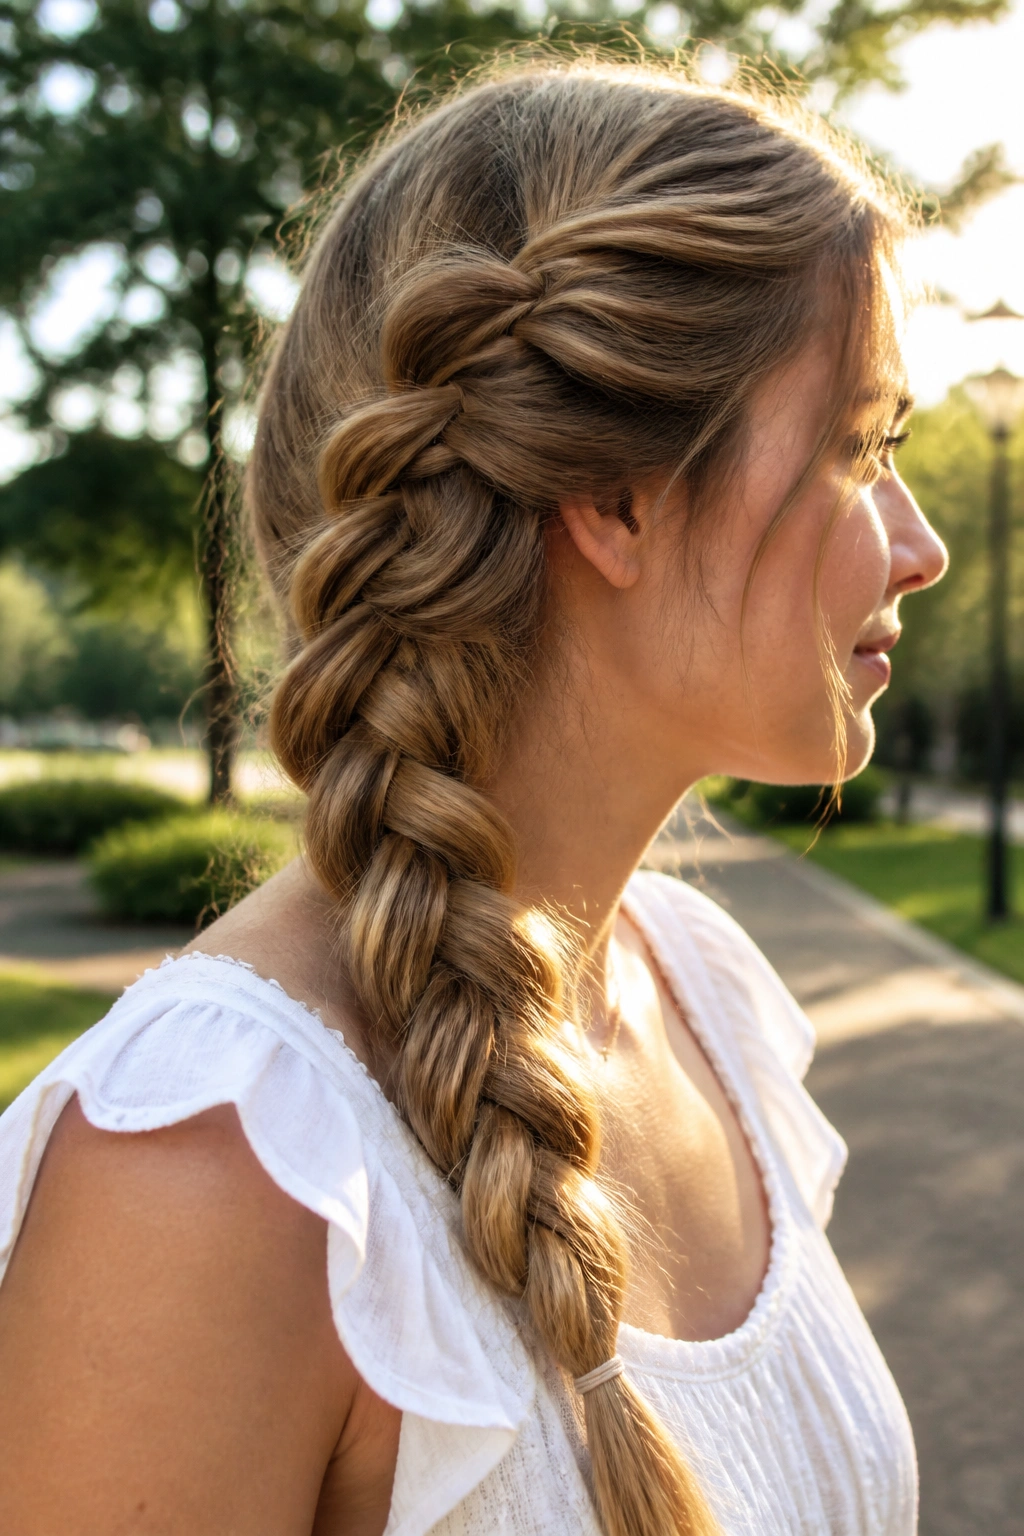
A loose braid can look far wider than a tight one if you pancake it properly. That means pulling the outer edges of each braid section outward after the braid is finished, which opens the weave and makes it look fuller.
Start with a low side braid or a simple back braid. Secure the end, then gently tug each loop from the outside only. Don’t yank the middle or the braid can fall apart. A little texture spray before braiding helps the strands grip each other, which makes the finished shape hold better.
This style suits thin hair because it adds visual width without needing actual volume. The braid itself becomes the volume. That’s the whole trick.
It’s also forgiving. Uneven pieces, shorter layers, and soft flyaways are less of a problem here than they are in a sleek ponytail. Sometimes a braid is the better bad-hair-day answer.
18. Dutch Braid Into a Ponytail
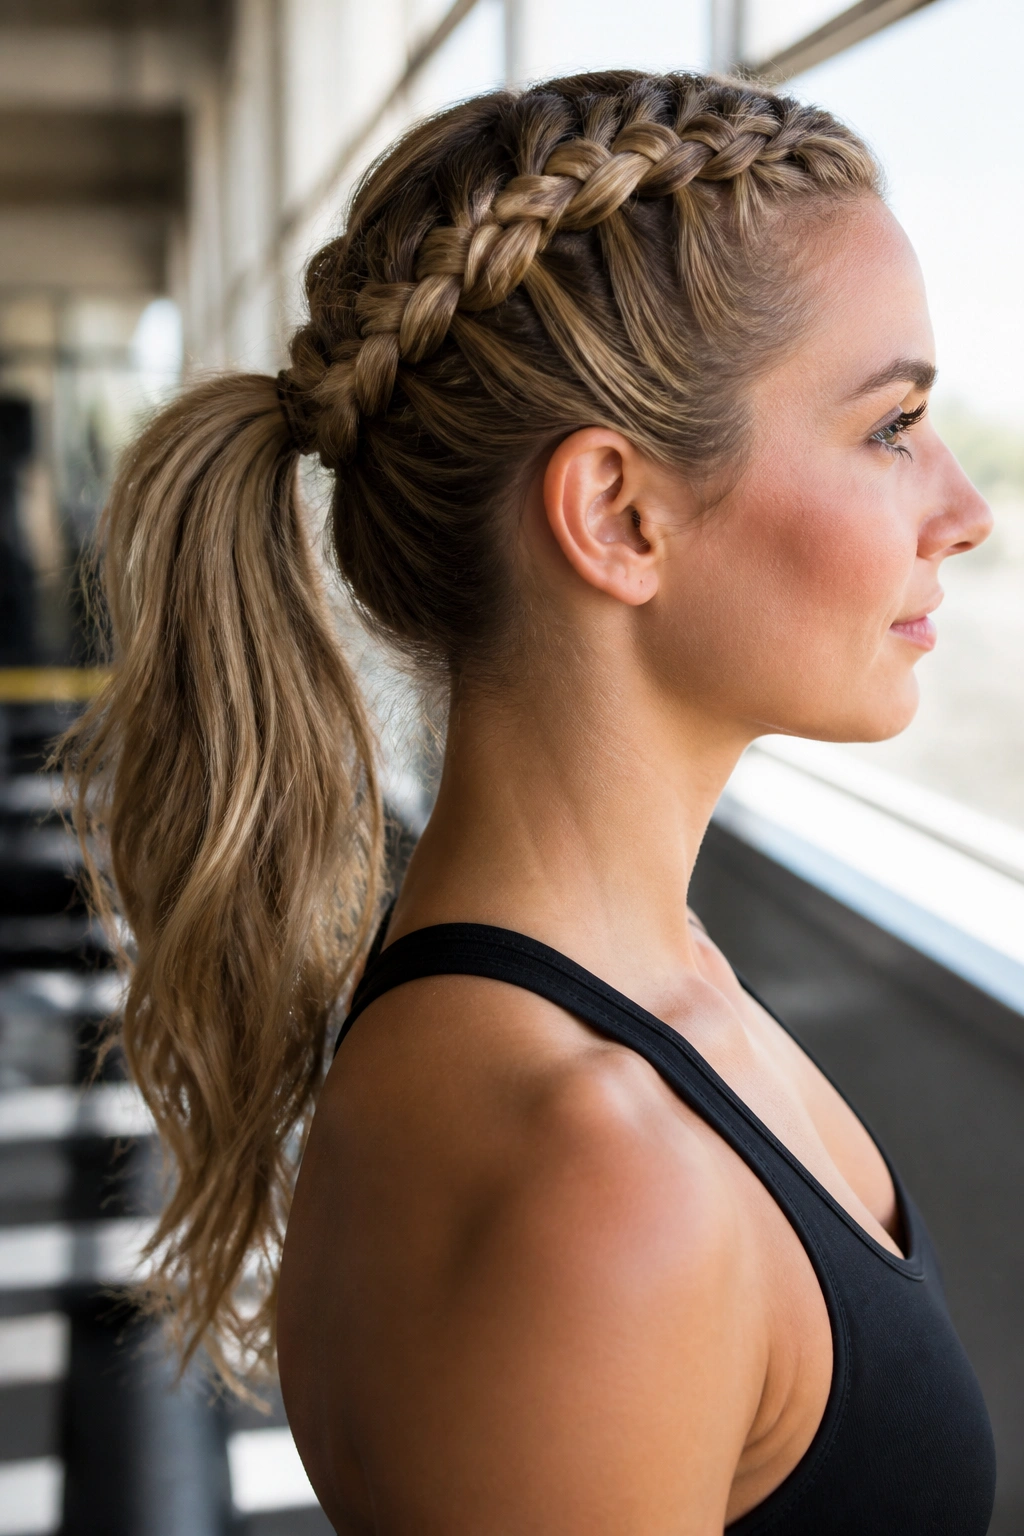
A Dutch braid into a ponytail gives the crown some structure before the tail takes over. Unlike a full braid that runs all the way down the back, this style puts the attention up top where thin hair often needs it most.
Start the braid at the hairline and work back through the top section only. The braid should sit on top of the hair instead of disappearing into it. Once you reach the back of the head, tie the rest into a ponytail and let the tail stay soft. That contrast keeps the style from looking too tight.
Where It Works Best
- Gym days
- Busy mornings
- Hair that needs grip at the roots
- Medium to long lengths
Thin hair likes this look because the braid creates a raised line along the scalp. That line suggests fullness, even when the ponytail itself is modest.
19. Waterfall Braid

A waterfall braid is lovely on thin hair when you want detail without making the whole head look crowded. The braid weaves across the crown and lets sections drop through, so you get texture at the top while still showing length underneath.
It works best on hair with a little bend or texture. Pin-straight, slippery hair can make the style unravel faster than you’d like. A light texturizing mist before braiding helps the strands hold their place. If the hair is very silky, a tiny bit of dry shampoo at the roots can be a lifesaver.
This style is more delicate than a regular braid, and that’s the appeal. It doesn’t demand a lot of hair to make an impression. Thin hair can wear it without looking crowded or overworked.
I’d keep the rest of the hair softly waved. The contrast between the braid and the loose lengths is where the style gets its charm.
20. Headband Tuck
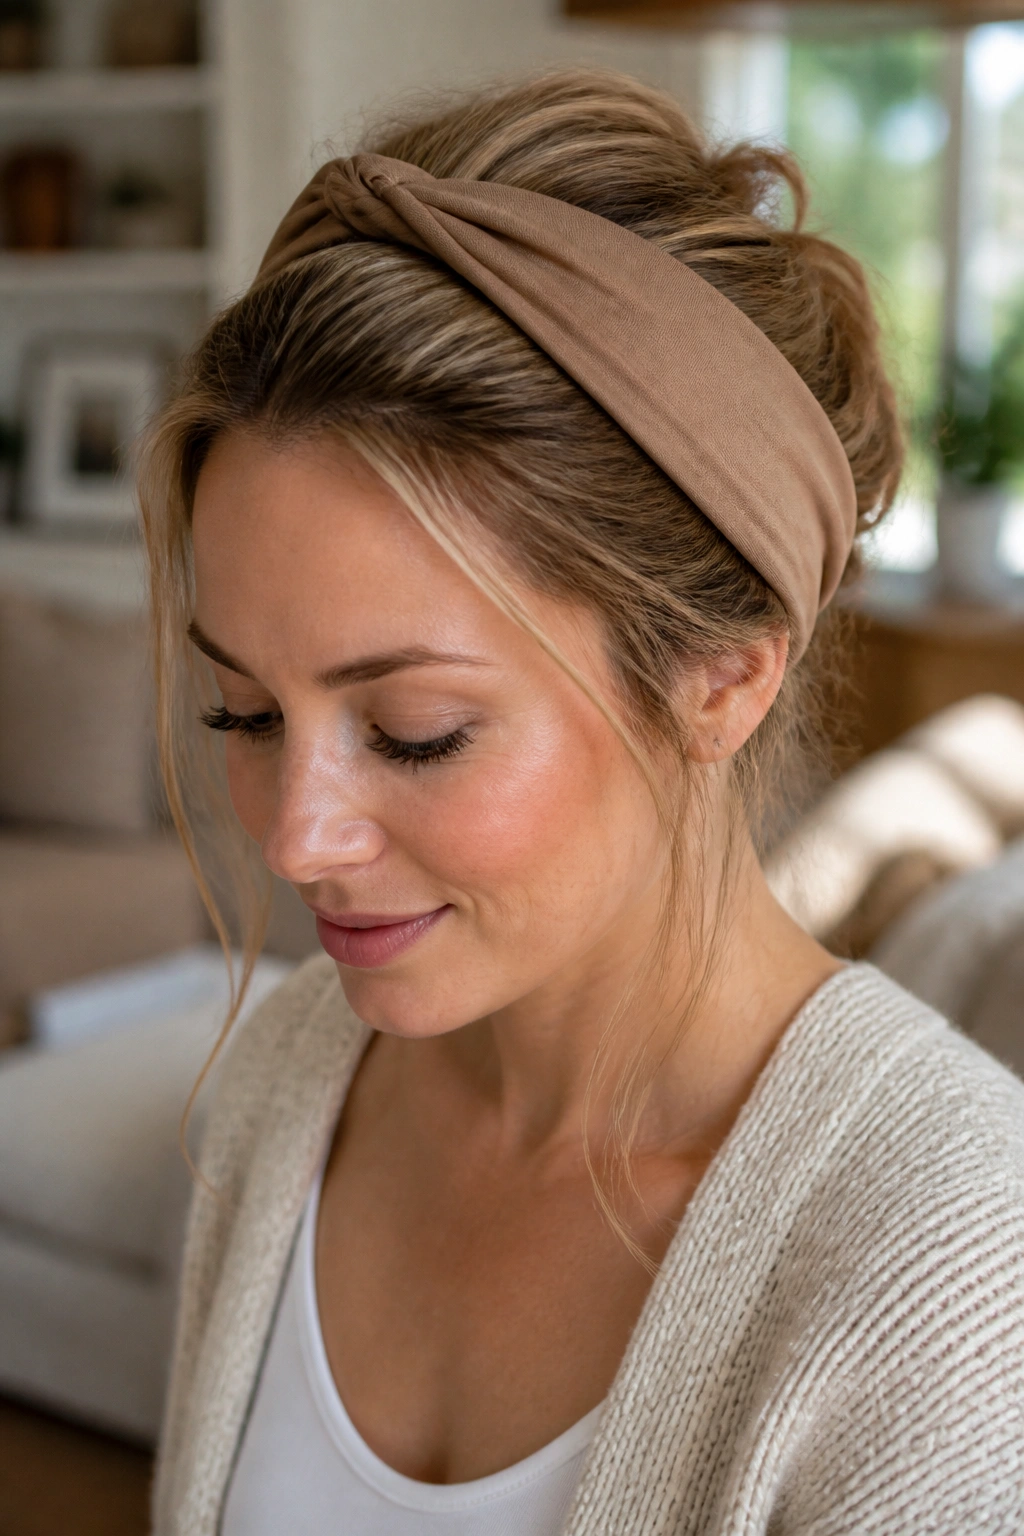
A headband tuck can rescue thin hair in about five minutes, and I’ll defend it to anyone who thinks it looks old-fashioned. A wide fabric band or a smooth padded headband gives the style a defined top line, which is great when roots lie flat.
Slide the band on, then tuck the back lengths up and under in loose rolls. A few face-framing pieces left out near the temples keep it from feeling too rigid. If the hair is very fine, a bit of texture spray before tucking helps the ends stay put.
Best Band Width
A band that’s about 1 to 2 inches wide usually works better than a tiny one. Narrow bands can disappear into thin hair. A wider band makes the whole style look more deliberate and hides the part line a little better.
This is the kind of style that solves two problems at once: it pulls the hair off the face and gives the top a cleaner shape.
21. Wet Look Side Part for Thin Hair
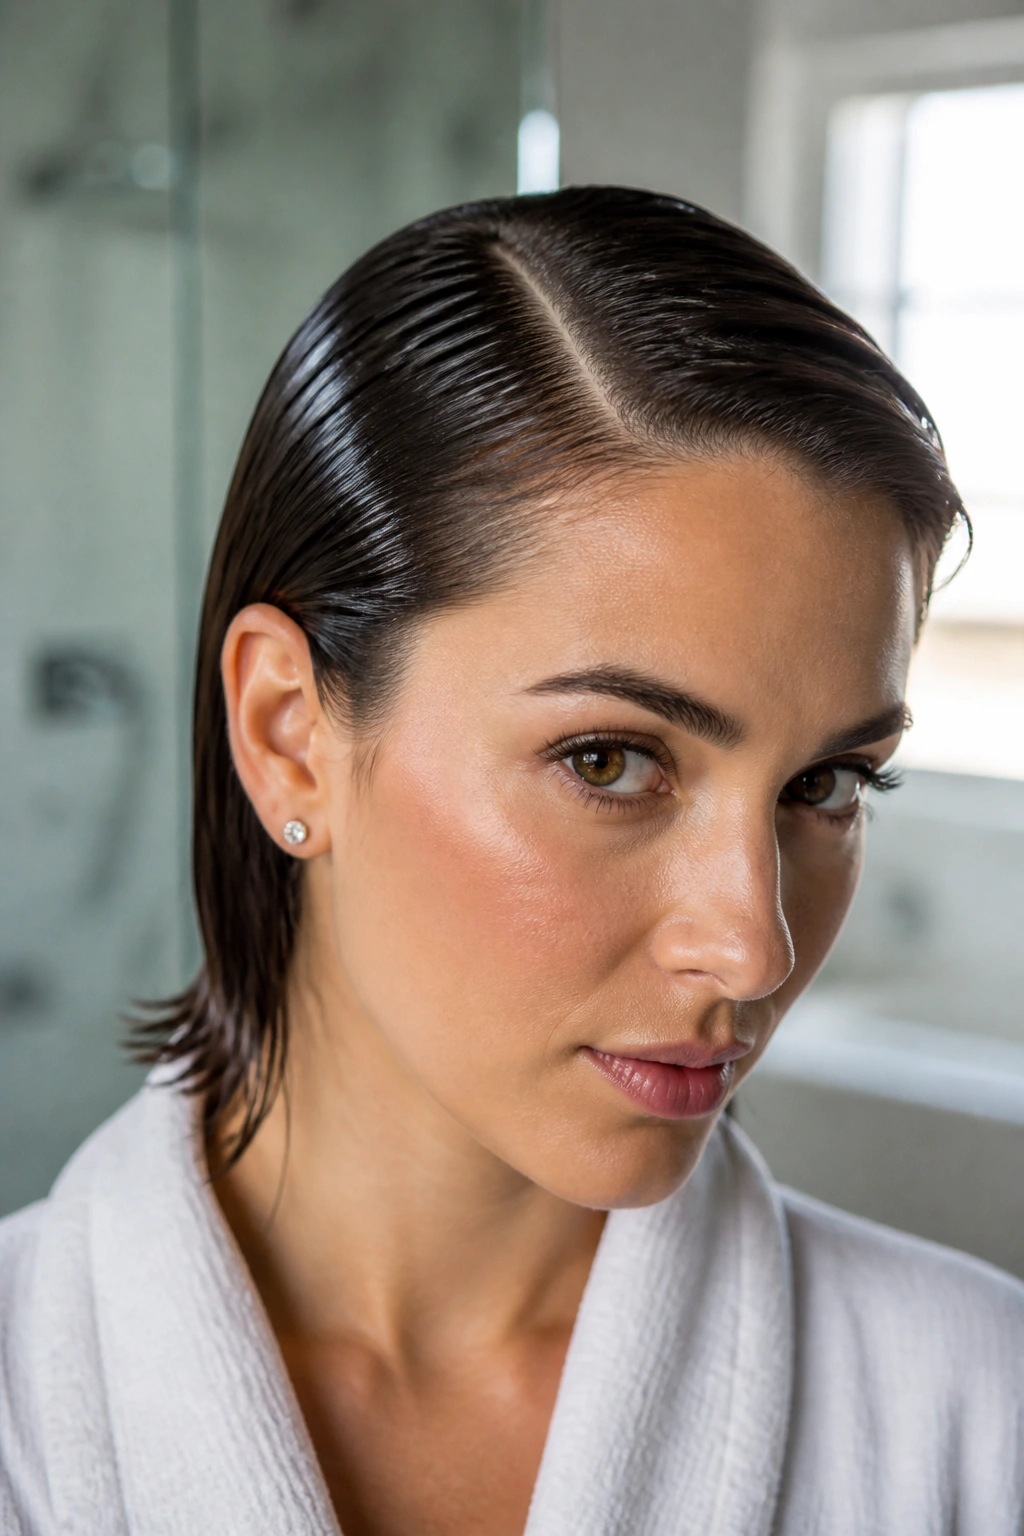
Thin hair is one of the few places a wet look can work in a smart way. The reason is that the shine and slickness make the style feel intentional, so a visible scalp line doesn’t read as a mistake. It reads as part of the look.
Start on damp hair with a strong-hold gel or styling cream, then comb in a deep side part. Smooth the hair back with a fine-tooth comb and keep the surface glossy, not greasy. A tiny amount of shine serum on the lengths is enough. Heavy oil is too much and can make the hair look stringy instead of sleek.
This style is sharp, a little dramatic, and better than people expect for fine strands. It works especially well with short bobs, pixies, and tucked-back lobs. Keep the rest of the makeup or outfit simple and the hair does all the talking.
No fluff. That’s the point.
22. Feathered Bob

A feathered bob gives thin hair movement around the edges without turning the whole cut into a see-through mess. The ends are softly shaped, but the outline still stays full enough to hold its weight.
The best version usually hits around the jaw or just under it. The feathering should happen near the surface and around the face, not all the way through the bottom perimeter. If the ends are thinned out too aggressively, the bob loses its body fast.
I like this style because it feels lighter than a blunt bob but doesn’t go limp the way overly layered cuts can. There’s a real difference between soft shaping and overtexturizing. One gives lift. The other steals density.
A round brush and a quick bend at the ends can bring the shape to life. If the hair is naturally straight, even better. The cut will show cleanly.
23. Italian Bob

The Italian bob sits a little fuller and a little rounder than a feathered bob, which is exactly why it flatters thin hair so well. The shape hugs the jawline and keeps the ends plush, not shredded.
I’d describe it as a bob with body and a small curve under the edge. It often looks best when the cut is kept around chin length with minimal layering. You want the hair to feel weighty in the hand. Not heavy. Just not wispy.
What Makes It Different
Unlike a sharply textured bob, the Italian version keeps more substance at the ends. That means the style can look polished even on days when the roots are flat. A round brush blowout, or a quick bend under with a flat iron, gives the outline a little finish.
It’s a strong choice if you want something chic without leaning hard into the messier, piecey look.
24. Flipped-Out Lob
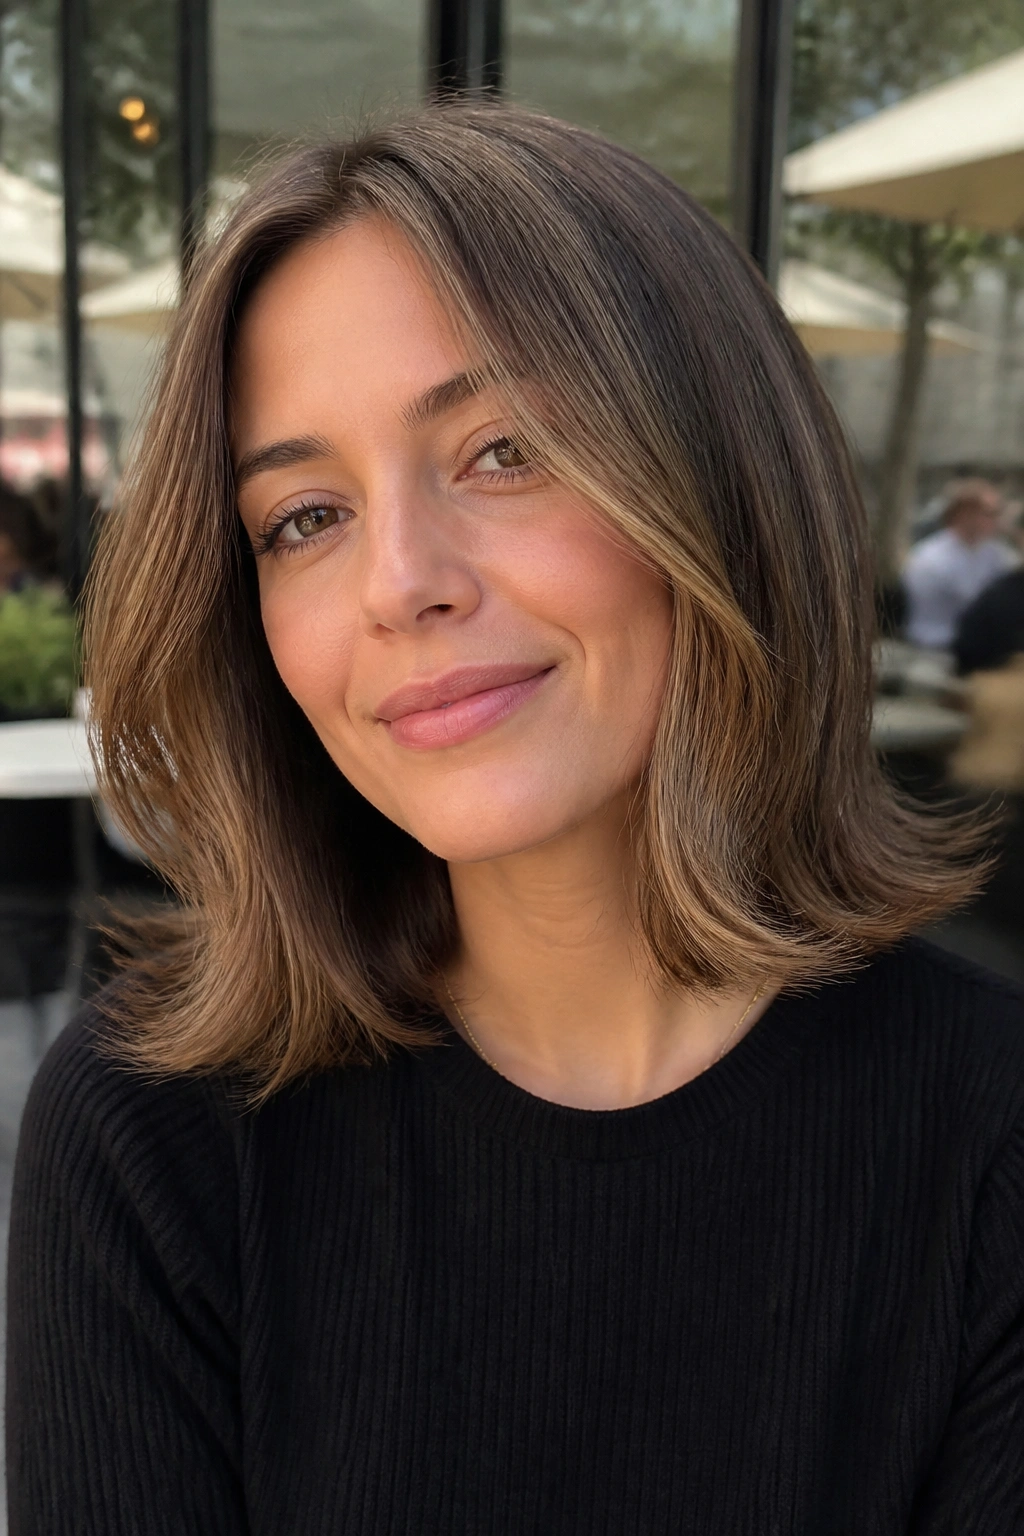
A flipped-out lob has a playful shape that makes thin hair look wider at the edges. Instead of curling the ends under, you flick them out so the silhouette opens up around the shoulders.
That outward turn matters. It creates movement near the bottom line, and the eye reads that width as extra fullness. If the rest of the hair is smooth, the flip stands out more. A flat iron or round brush can create the bend in a few seconds per section.
This style works well on hair that lands between the jaw and the shoulders. It can feel retro without looking costume-y, which is a relief. Too much curl would make the style feel dated. A soft flip keeps it light.
A little root lift at the crown helps, too. The ends are doing one job, and the roots should do theirs.
25. Wavy Lob With Invisible Layers
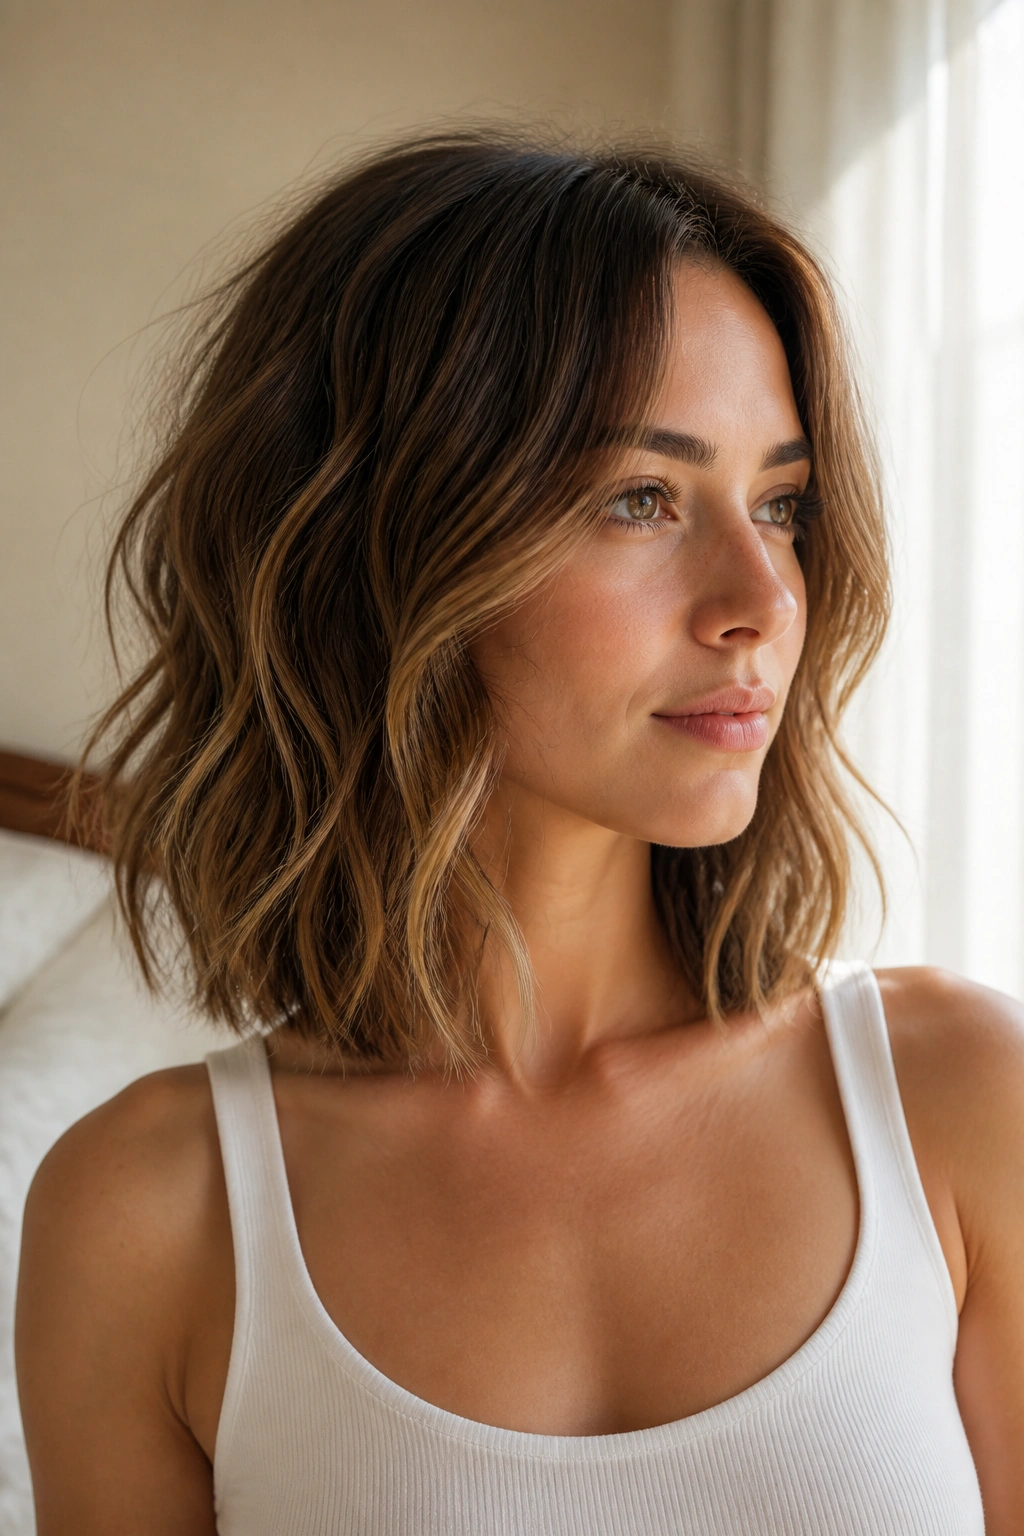
Invisible layers are a smart trick for thin hair because they give movement inside the cut without stripping the outside edge of its weight. That means the lob can wave and sway while still looking thick at the bottom.
The waves should be loose and irregular, not uniform curls. Think bending sections around a 1.25-inch iron, then brushing them out after they cool. The goal is a natural, airy finish that doesn’t expose too much scalp between sections.
This style is especially good if your hair looks flat when it’s too straight but frizzes when it’s overworked. The hidden layers help the shape sit better, and the lob length keeps it from looking stringy. That combo is hard to beat.
A mist of light-hold spray is enough. Heavy texture products can make the style go limp faster than you’d expect.
26. Rolled-Under Bob

A rolled-under bob has an old-school feel, but there’s a reason it keeps showing up. The turned-in ends create a thick, clean line that thin hair can actually hold. It looks tidy, full, and put together without needing a lot of volume at the roots.
Blow-dry with a round brush or use a flat iron to tuck the ends under slightly. The curl should be soft, not bouncy. If the roll is too tight, the style can shrink up and lose the nice dense shape. You want the outline to stay broad.
This is a very good style for straight hair that needs structure. It also works well for workdays because it looks neat from every angle. Thin hair sometimes benefits from looking controlled rather than airy.
A side part or soft fringe pairs well here. It breaks up the line enough to keep the bob from feeling severe.
27. Half-Up Crown Braid
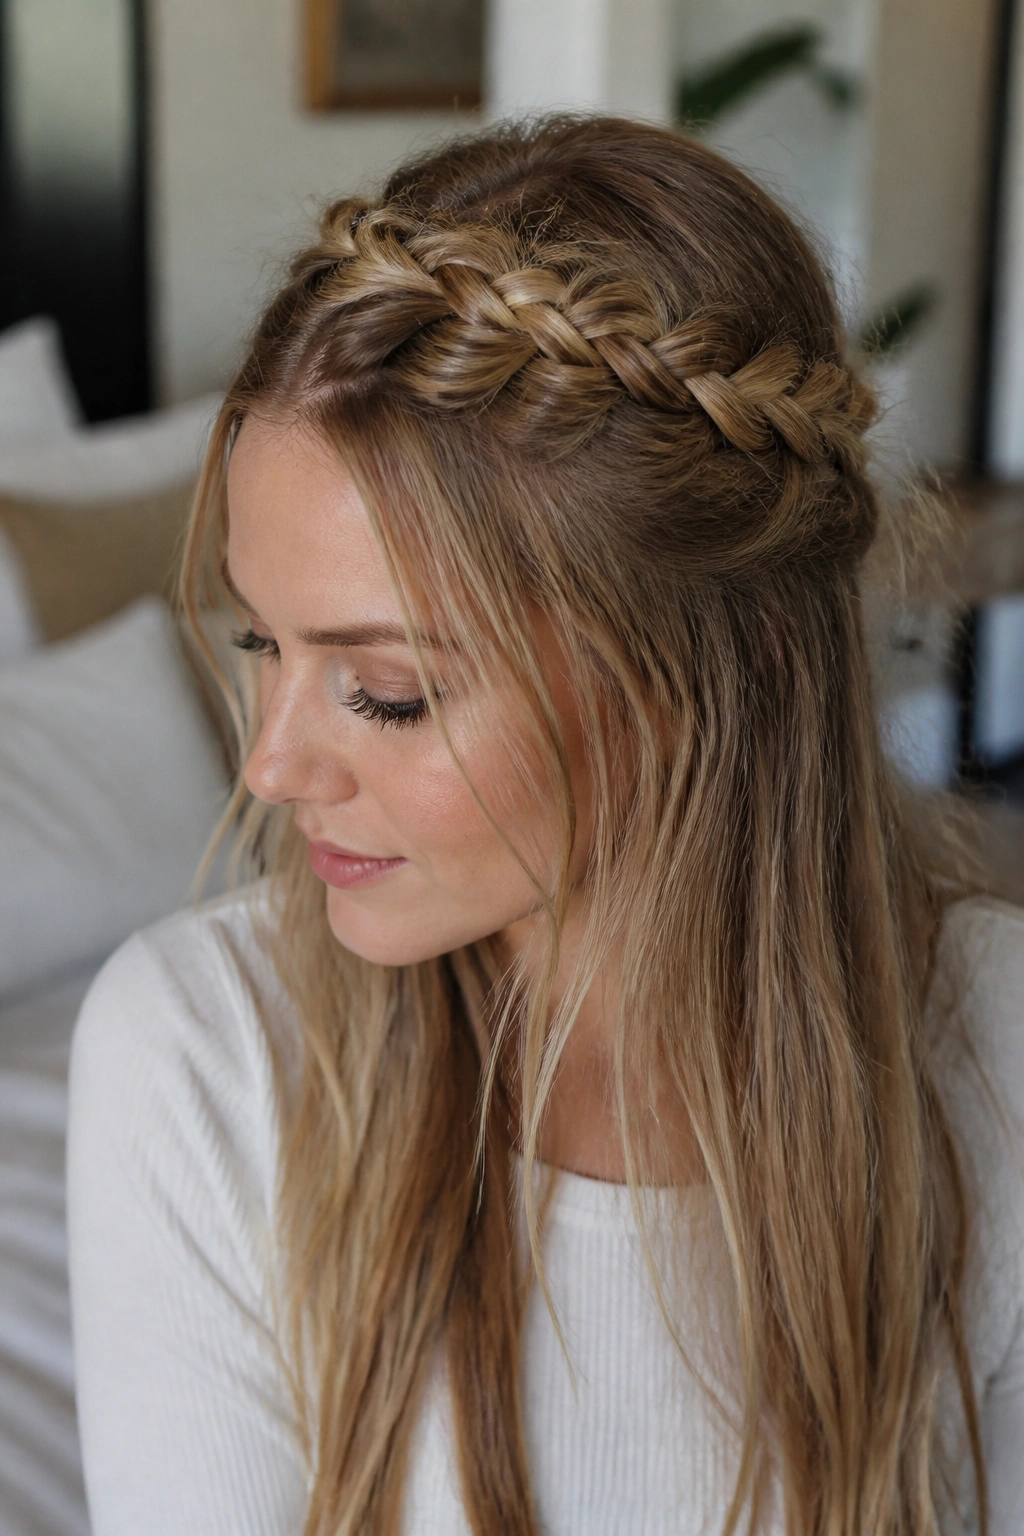
A half-up crown braid gives thin hair one of the nicest visual tricks there is: texture across the top without forcing the whole head into a braid. The braid sits where the hair usually looks flattest, which is exactly why it helps.
Take small sections from each side, braid or twist them back, and pin them behind the crown. Let the rest of the hair stay loose. If you want more fullness, gently widen the braid after it’s secured. A few loose pieces around the face keep the style from feeling too formal.
I like this one for weddings, brunches, and any day when you want the hair out of your eyes but still want length showing. It also hides a weak crown better than most half-up styles.
Keep the braid soft. Tight braids can pull thin hair too flat and make the scalp line more obvious.
28. Ribbon Ponytail
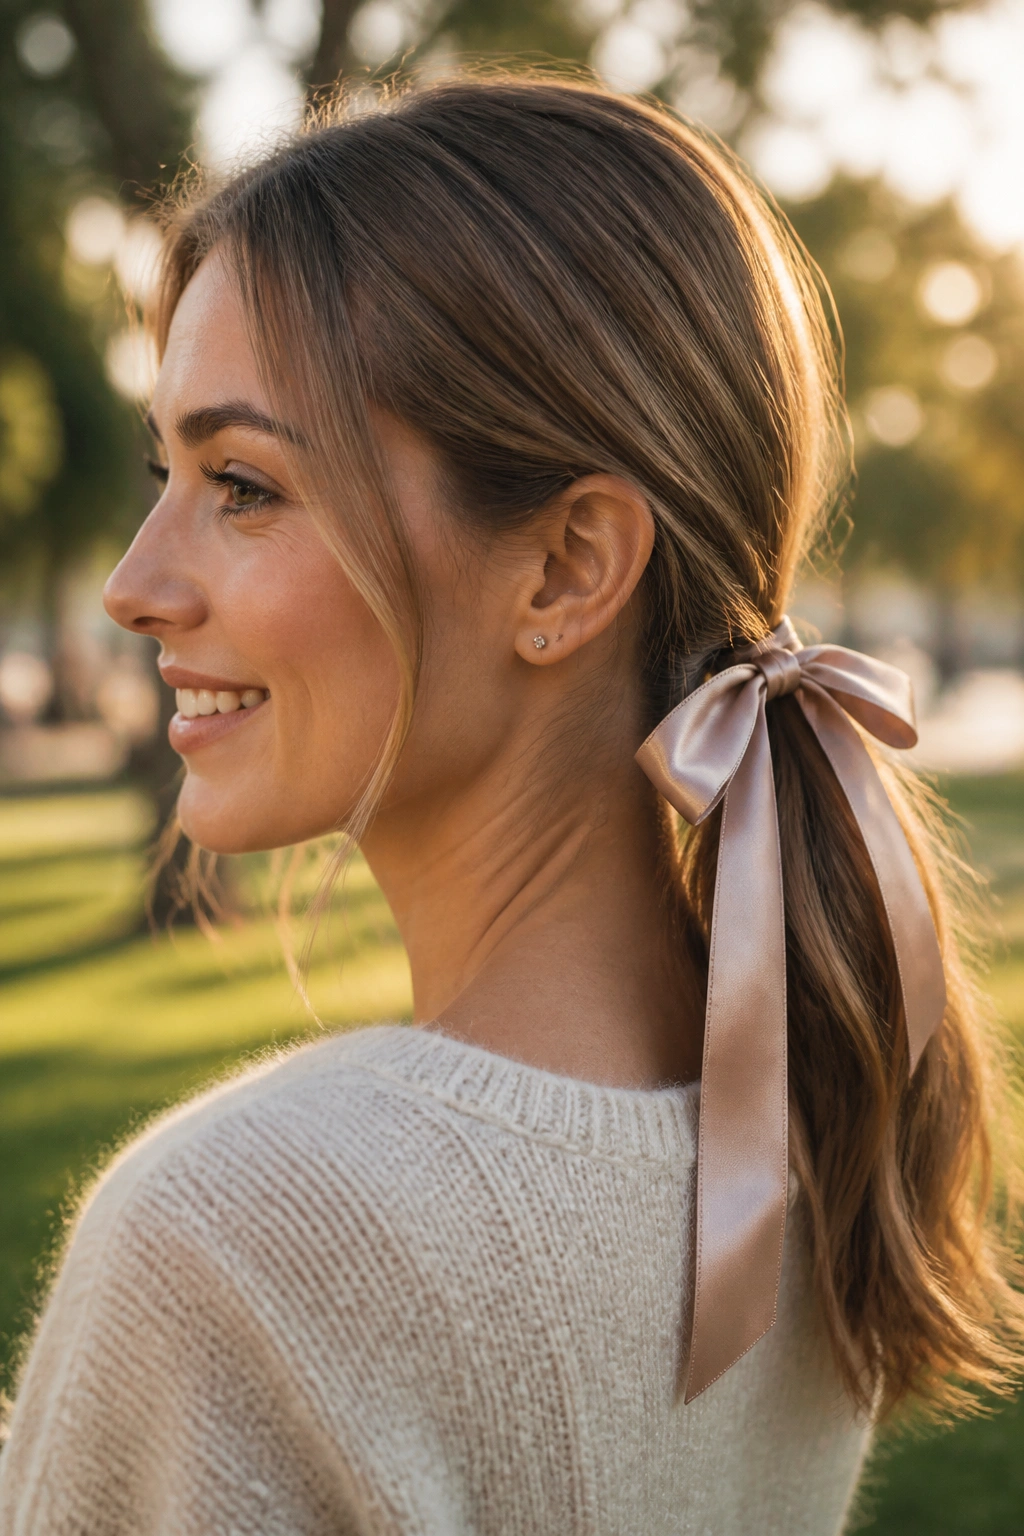
A ribbon ponytail is a small detail that makes a thin ponytail look finished instead of skimpy. The ribbon adds width at the base and draws the eye away from the fact that the tail itself may not be thick.
Choose a satin or grosgrain ribbon that matches your outfit or hair color, then tie it around a low or mid ponytail after you’ve secured the elastic. Let the tails of the ribbon fall alongside the hair or knot them into a small bow, depending on the mood. A low pony with a ribbon looks soft. A higher one feels more playful.
The best part is that this style works even when the ponytail isn’t huge. That’s the win. Thin hair often looks better when the eye is distracted by detail rather than volume for volume’s sake.
If you need one style from this whole list to start with, pick the one that fits your morning routine without a fight. The best haircut or style is the one you’ll actually wear, and thin hair usually looks best when you stop asking it to be something it’s not.
