



Ski helmets are non-negotiable on the mountain. They keep you safe, warm, and compliant with resort rules, but they are notorious for flattening volume, creating weird kinks, and causing serious “helmet hair” by the time you reach the lodge for lunch. The struggle to balance safety with a style that survives a full day of carving is real. You want a look that stays put under the harsh wind, fits comfortably against the helmet’s padding, and doesn’t leave you with matted knots when you finally take the gear off.
The trick lies in focusing on low-profile, secure styles that sit away from the helmet rim. If your hair is too bulky near the crown, the helmet won’t sit correctly, which compromises safety. Avoid top knots, high messy buns, or elaborate accessories that create pressure points against your skull. Instead, think about styles that distribute hair weight evenly at the nape of your neck or keep it tucked securely against the head.
1. The Classic Single Low Braid
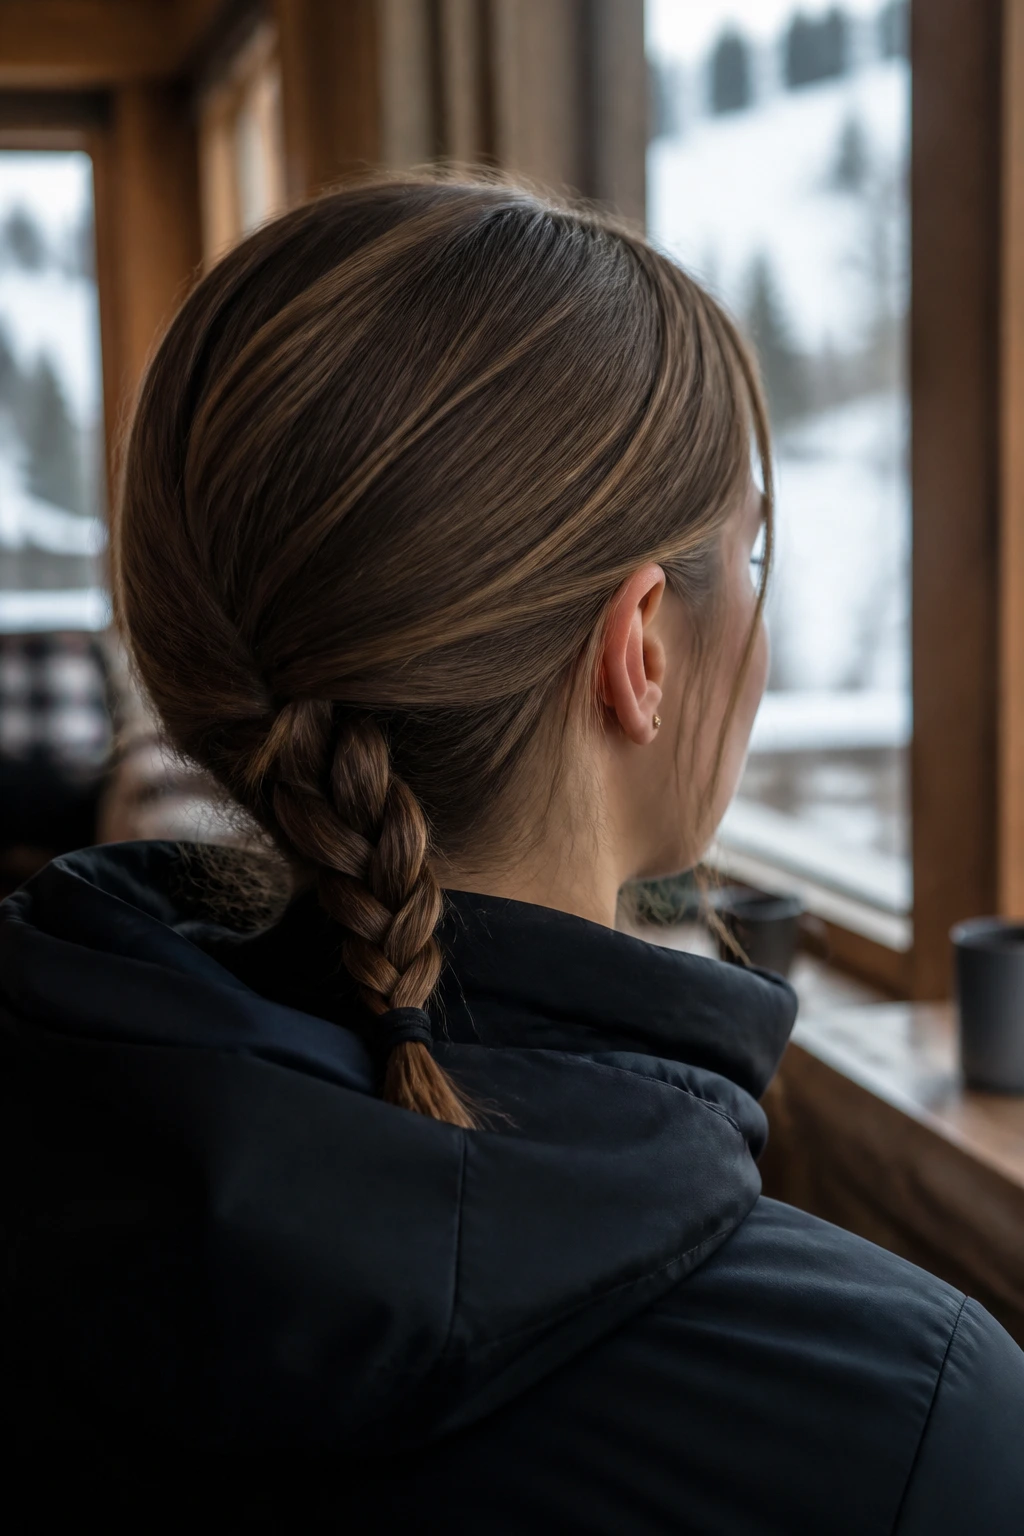
This is the gold standard for a reason. It keeps every strand contained, prevents tangles from the wind, and fits perfectly under any helmet model. The secret here isn’t the braid itself—it’s the placement. Most people start braiding too high. To ensure it sits comfortably under your helmet, begin your braid right at the nape of your neck.
Why It Works on the Slopes
When you secure the braid low, you avoid that annoying pressure point where the helmet strap meets the back of your head. It’s also the most durable style for all-day skiing. You can tuck the end of the braid into your jacket collar to prevent it from whipping around in your face while you’re on the lift.
Pro Tips for Security
- Use a snag-free hair tie at the end; fabric-covered elastics or silk scrunchies work best to prevent breakage.
- If your layers tend to fall out, spritz your hair with a light-hold texture spray before you start braiding to give the strands extra grip.
- Avoid heavy styling products, as they can become sticky or stiff in cold temperatures.
2. Double Dutch Braids

Dutch braids are essentially inverted French braids where you cross the strands under rather than over. This creates a raised, 3D effect that looks great, but more importantly, it locks the hair closer to the scalp. This style is incredibly secure and prevents that “sweaty hair” feeling because it holds the hair off your neck while still fitting under the shell.
Making Them Helmet-Friendly
The key is to keep the braids tight. If you pull them apart to make them look “pancaked” or loose for volume, they will likely loosen up and get messy under the helmet liner. Keep the tension firm. Start the Dutch braid right at the hairline for maximum security, pulling tight as you work your way down.
Why Skiers Love Them
They are completely symmetrical and balanced. If you like to ride with a beanie under your helmet, the low-profile nature of these braids means you can comfortably fit both without your head feeling like it’s being squeezed. They also survive a full day of skiing without needing a single touch-up.
3. The Sleek Low Ponytail

A high ponytail is a classic mistake for skiers. It gets pushed down by the helmet, causing it to poke out the back, which is uncomfortable and makes your helmet tilt forward. A low ponytail, however, is sophisticated, incredibly simple, and keeps your hair tucked neatly away from your neck.
How to Style It Properly
Gather your hair at the base of your neck. If your hair is long, consider a “looped” pony where you pull the hair halfway through the elastic to create a small, compact bun. This prevents the ends of your hair from whipping in the wind or getting caught in your jacket zipper.
Maintenance on the Mountain
- Use a clear silicone band or a small, durable fabric elastic.
- If your hair is prone to static in cold weather, rub a tiny drop of hair oil between your palms and smooth it over the ponytail before you put your helmet on. This keeps the hair sleek and prevents it from sticking to your face.
4. The Side-Swept Braid
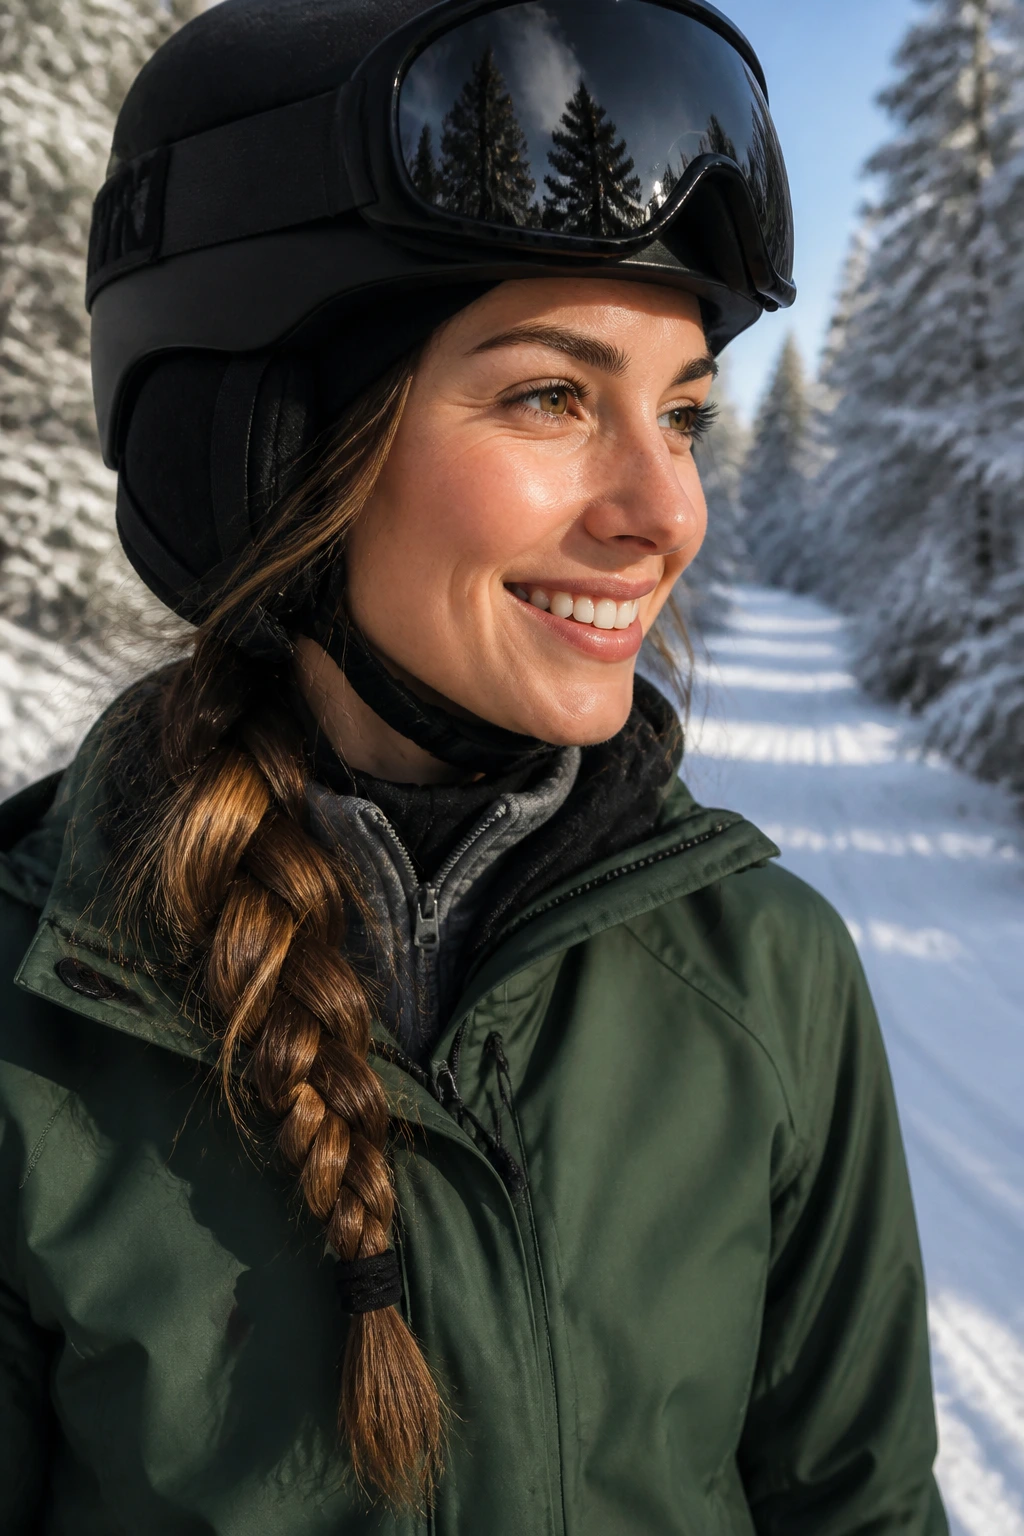
If you aren’t a fan of hair pulling against your neck, the side-swept braid is the perfect compromise. It shifts the weight of your hair to one side, which feels lighter and prevents the hair from getting bunched up under the back of your helmet.
Getting the Placement Right
Start the braid just behind one ear, sweeping the hair across the nape of your neck before bringing it over your shoulder. This ensures that the bulk of the hair is sitting to the side, completely clear of the helmet’s rear fit-adjustment dial.
Performance Benefits
- It offers a change of pace from the standard back-centered styles.
- It’s very easy to manage if you need to adjust your goggles or remove a face mask, as the hair is kept out of your way on one side.
- It looks great in photos, framing your face without interfering with your vision.
5. Bubble Braid
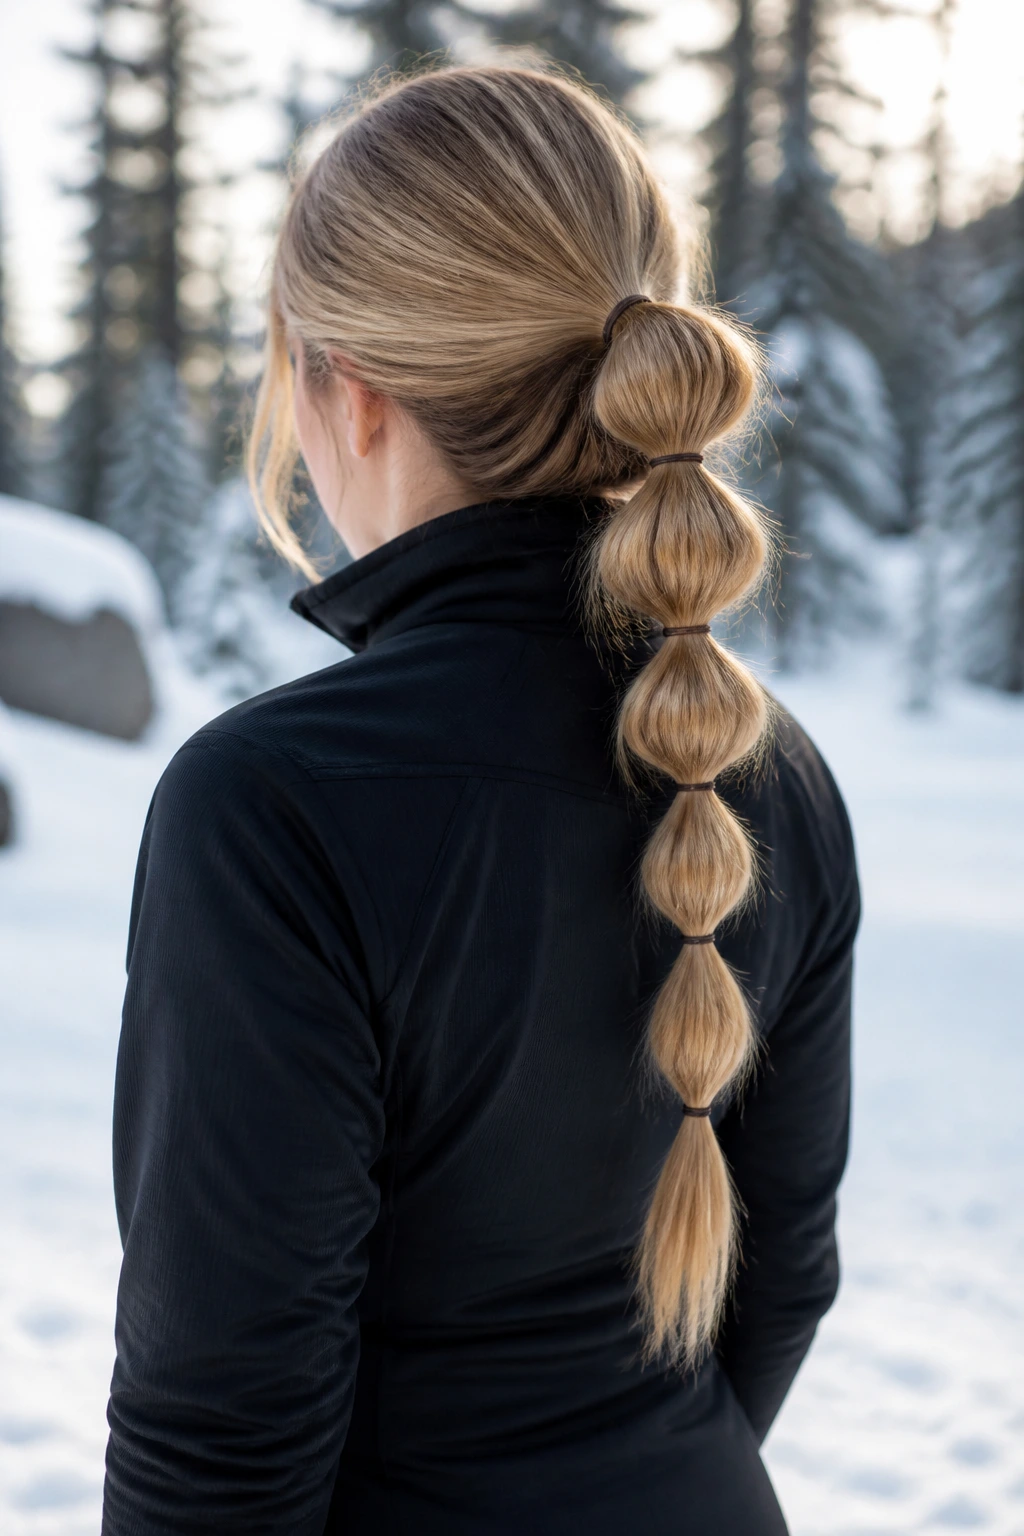
The bubble braid is a fantastic alternative if your braiding skills aren’t quite there or if you just want something that looks a bit more modern. It’s basically a ponytail with extra elastics spaced out along the length to create “bubbles.”
Construction Technique
- Start with a low ponytail at the nape of your neck.
- Place another elastic about two inches down, then gently pull the hair between the two bands outward to create the bubble shape.
- Repeat this process until you reach the ends of your hair.
Why It’s a Winter Win
The bubble braid is very lightweight and stays put. Because you are using multiple hair ties, it’s much more secure than a single ponytail. It stays tight against your head, making it the perfect low-profile style for those who want a bit of flair without compromising their safety equipment.
6. The Braided Headband
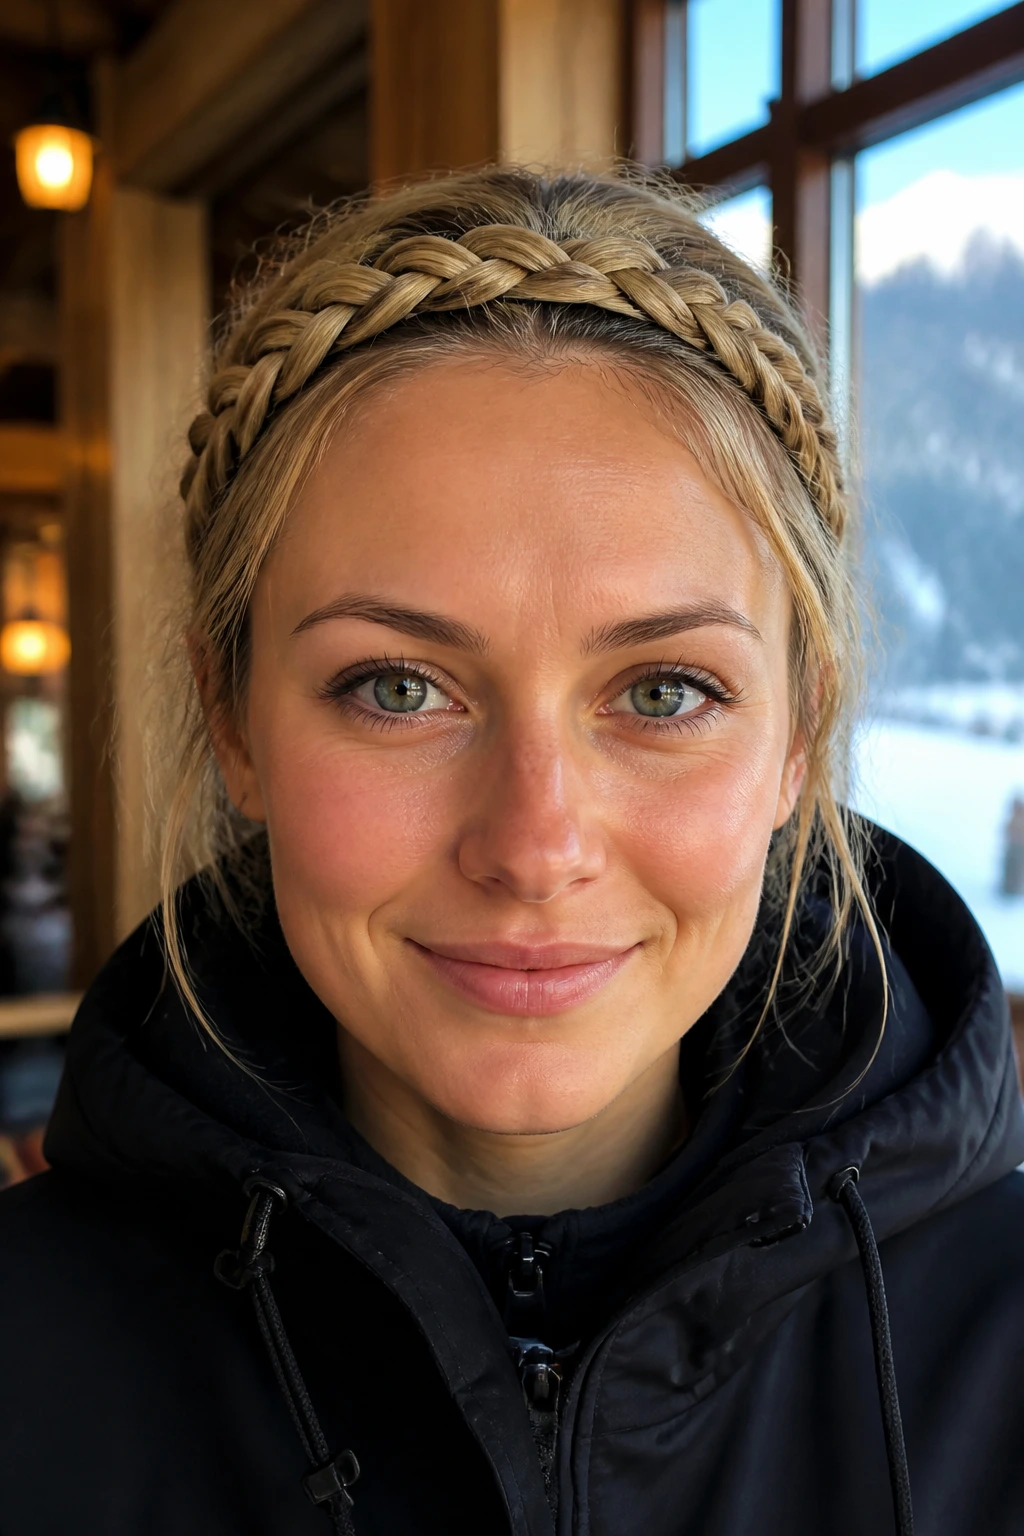
This style is a life-saver for keeping your bangs or face-framing layers out of your eyes while skiing. It doesn’t matter how short or long your hair is; you can incorporate your front sections into a Dutch or French braid that runs horizontally along your hairline.
The Mechanics of the Look
Start at one temple and braid across your forehead, incorporating new hair as you go. Once you reach the other side, secure the tail of the braid with a small clear elastic and pin it behind your ear, hiding it underneath the rest of your hair.
Matching with Helmets
Since the braid sits close to your hairline, it won’t interfere with the helmet at all. It actually acts as a barrier, keeping your hair off your face and preventing any stray flyaways from getting stuck to your goggles or skin.
7. The Tucked-In Bob
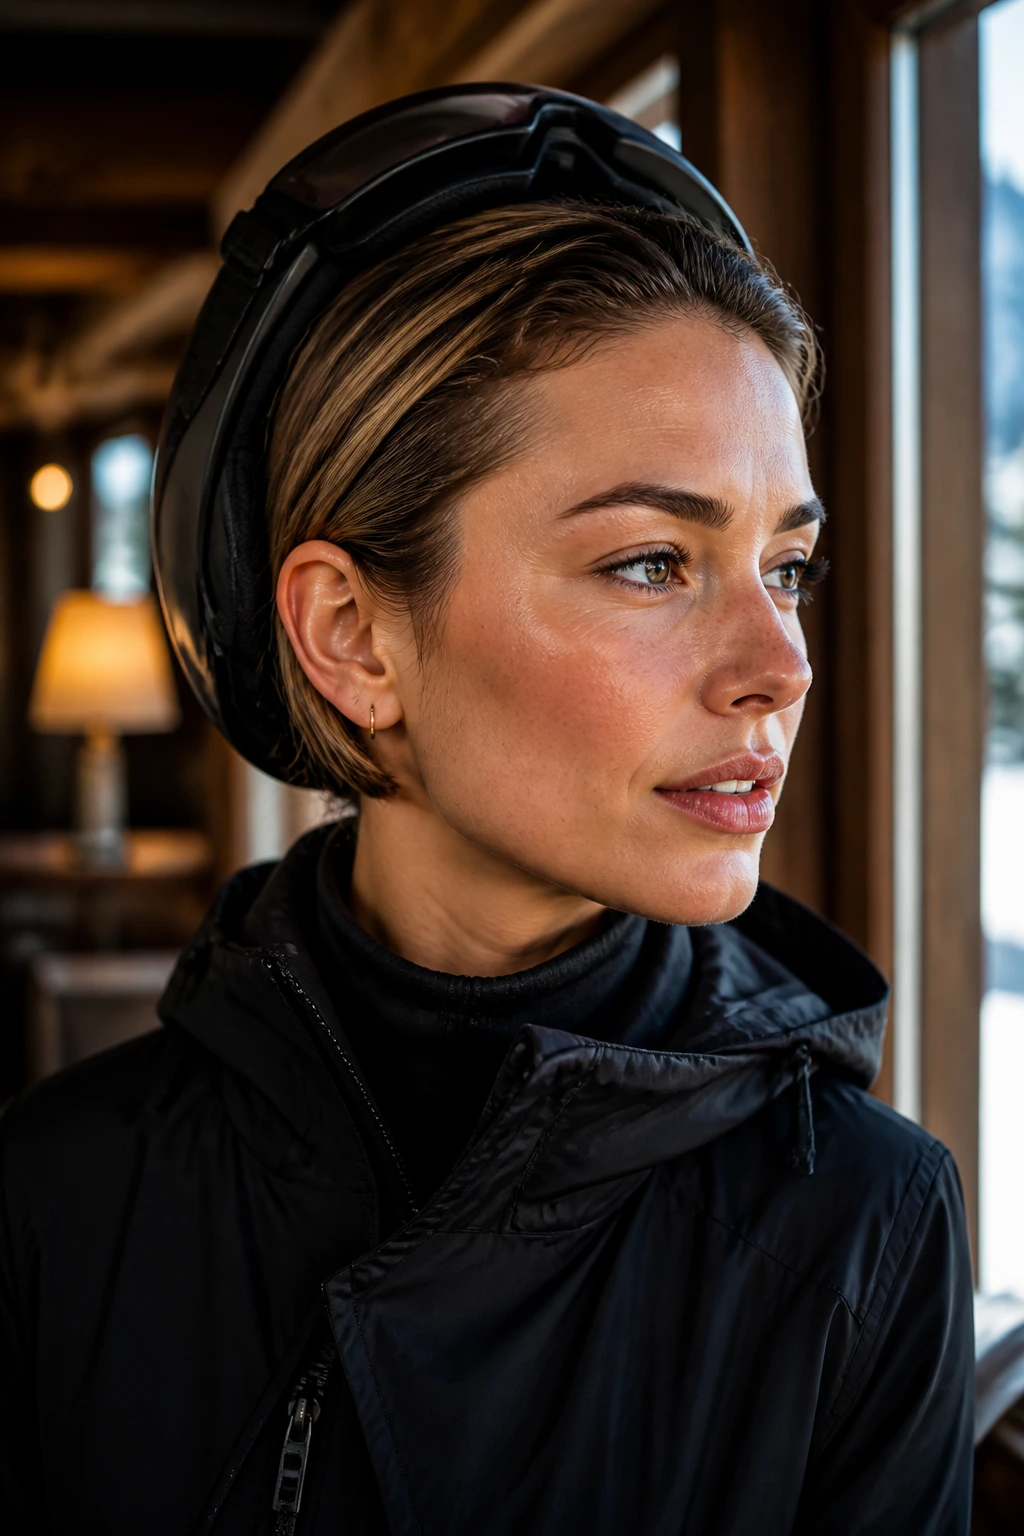
For those with short hair, like a bob or a lob, the struggle is preventing the ends from flipping out and getting tangled. The “tuck” method is the best solution. Instead of trying to force your hair into a ponytail, simply slick it back and tuck it behind your ears.
How to Make It Stick
Use a light-hold styling cream or a small amount of pomade to keep the hair smooth. Then, use a headband—ideally a thin, silicone-lined one that grips well—to push the hair back and keep it secure.
Dealing with Wind
When you put your helmet on, ensure the rim of the helmet covers the hair. The friction from the helmet liner will naturally keep the hair tucked back for the entire day. If you have any shorter layers that won’t stay, use a few discreet bobby pins near the nape of your neck to hold them in place.
8. Two Low Pigtails
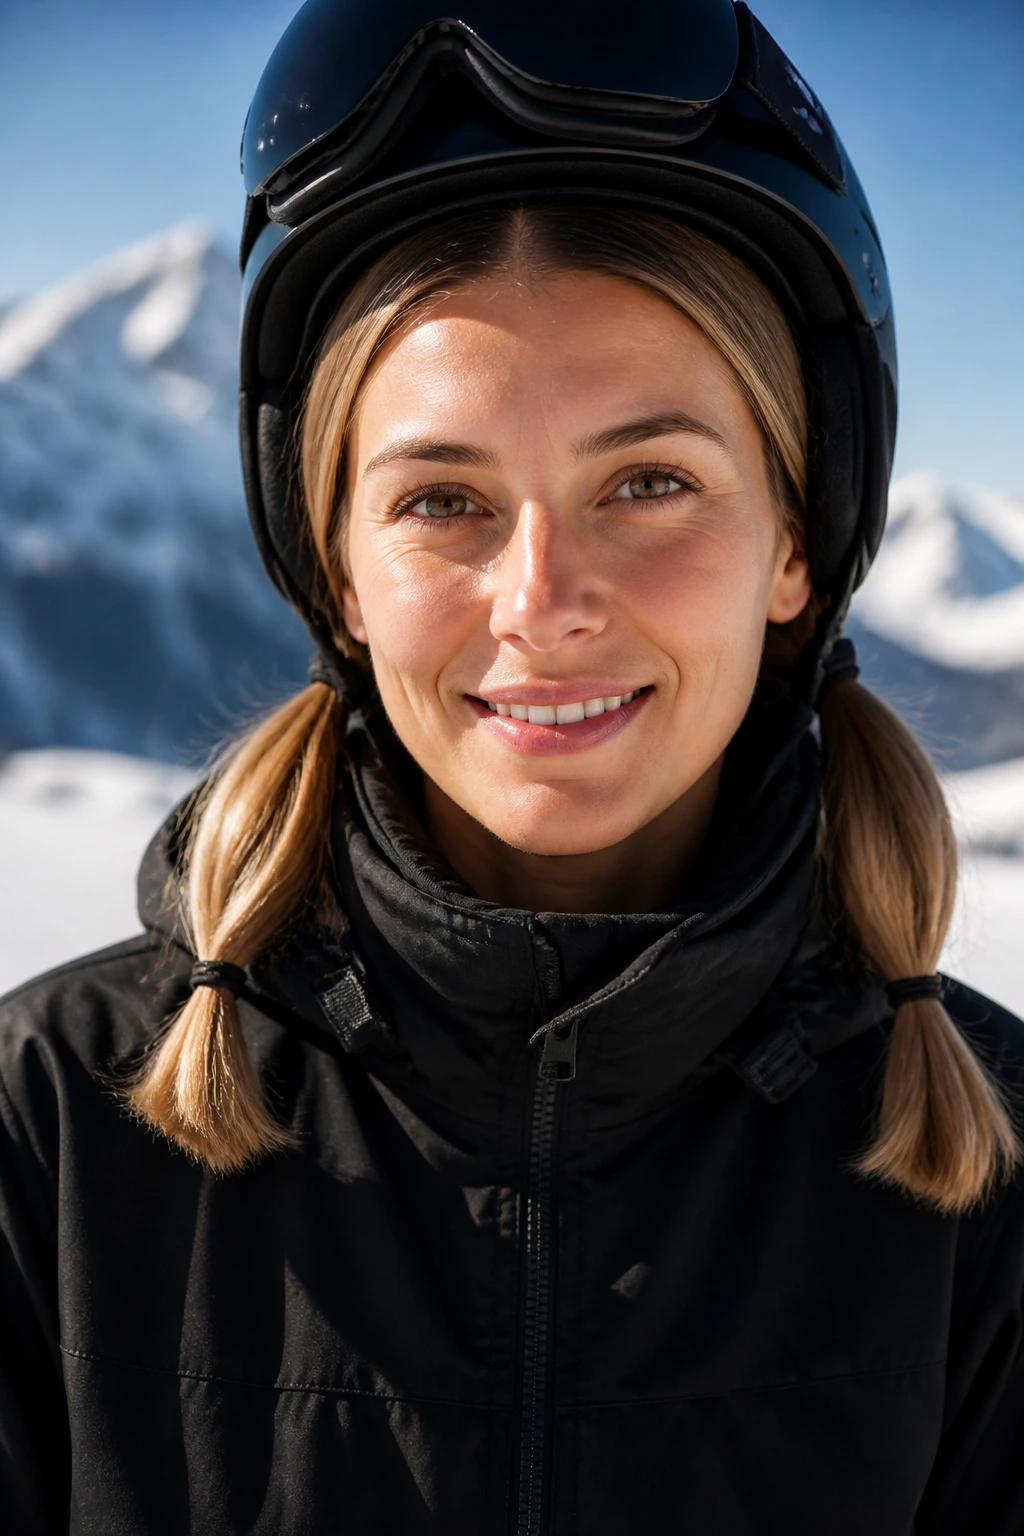
Pigtails are often dismissed as a childish hairstyle, but when done low and tight, they are one of the most functional ways to manage hair under a ski helmet. They keep your hair divided, which makes it much easier to fit under a beanie or neck gaiter.
The Style Adjustment
Avoid high pigtails. Secure these at the very base of your skull. You can leave them as simple ponytails, or braid them for extra security. By dividing the hair, you reduce the overall bulk in the center of your head, which helps the helmet sit more securely.
Benefits of the Divided Look
- It prevents hair from forming a single, uncomfortable lump against the helmet padding.
- It’s arguably the most comfortable style for wearing while lying back on a chairlift.
- If you have thick hair, this helps distribute the weight evenly, preventing headaches from a tight ponytail.
9. The French Twist (Low-Profile Version)
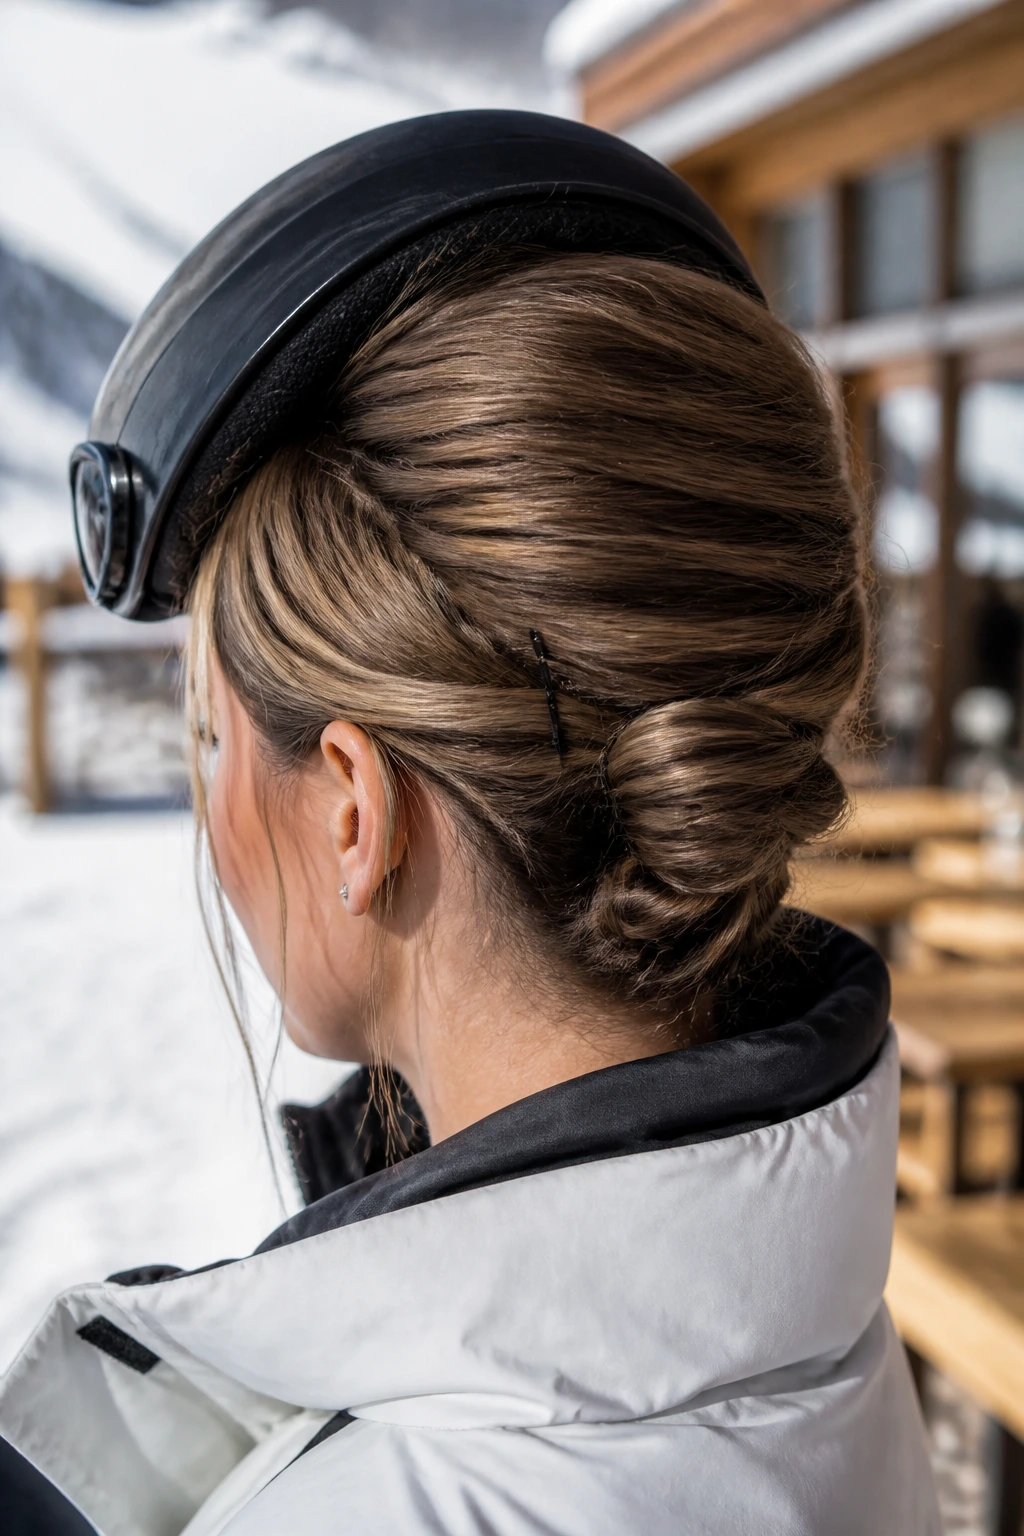
While a traditional French twist is usually an evening style, a modified, low-slung version works surprisingly well for skiing. The goal here is to get all your hair secured into a compact, flat shape at the back of your head.
The “Ski-Proof” Adaptation
Instead of using a fancy claw clip (which can be dangerous if you fall), use a series of flat, metal hair pins or “U-pins.” Gather your hair at the nape of your neck, twist it firmly, and fold it upward, tucking the ends underneath. Pin it securely against your head.
Why This Works
The resulting shape is flat and centered. Because it doesn’t extend far from your head, it won’t push against the helmet interior. It’s elegant, keeps your neck clear, and prevents hair from whipping into your eyes during high-speed runs.
10. The Pull-Through Braid
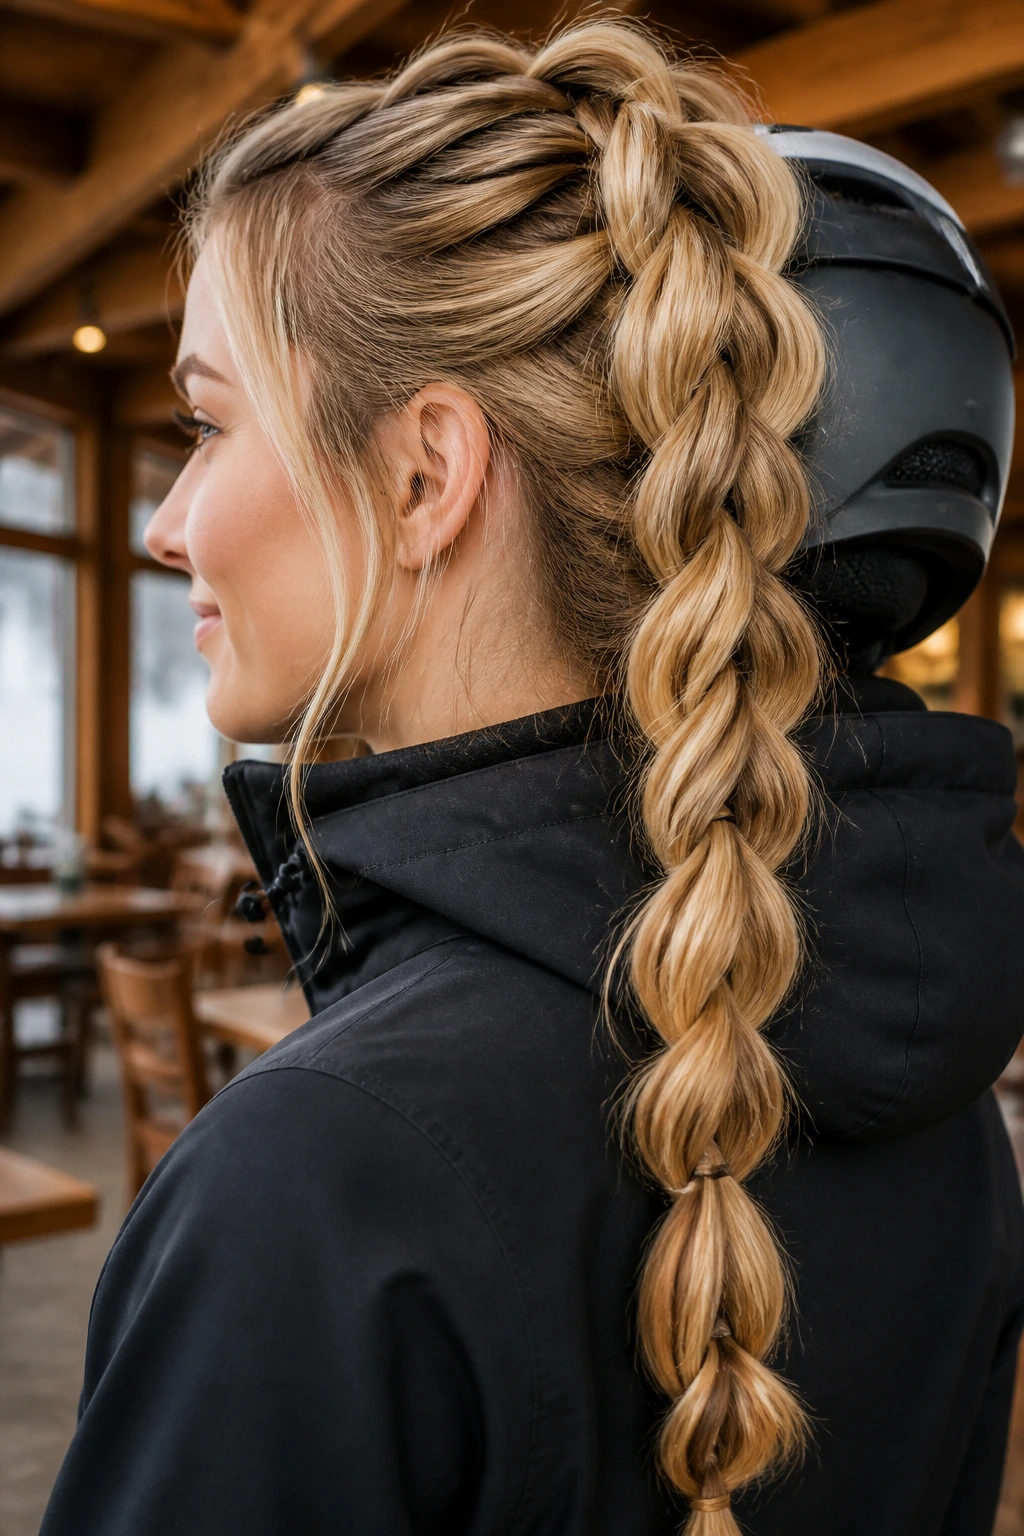
This is the “cheat code” of braids. It looks intricate, like a professional fishtail or French braid, but it’s actually made by connecting a series of ponytails. It’s incredibly sturdy and doesn’t unravel, no matter how much you move around.
Step-by-Step for Skiers
Start with a low ponytail. Place a second elastic about three inches down. Split the hair between the two elastics, pull the lower ponytail up through the split, and tighten. Continue this down the length of your hair.
The Durability Factor
Because it uses multiple elastics, it’s virtually indestructible. You could crash (hopefully not!) and your hair would still be in the exact same place. It creates a thick, visually interesting look that holds tight all day.
11. Hidden Mini Braids
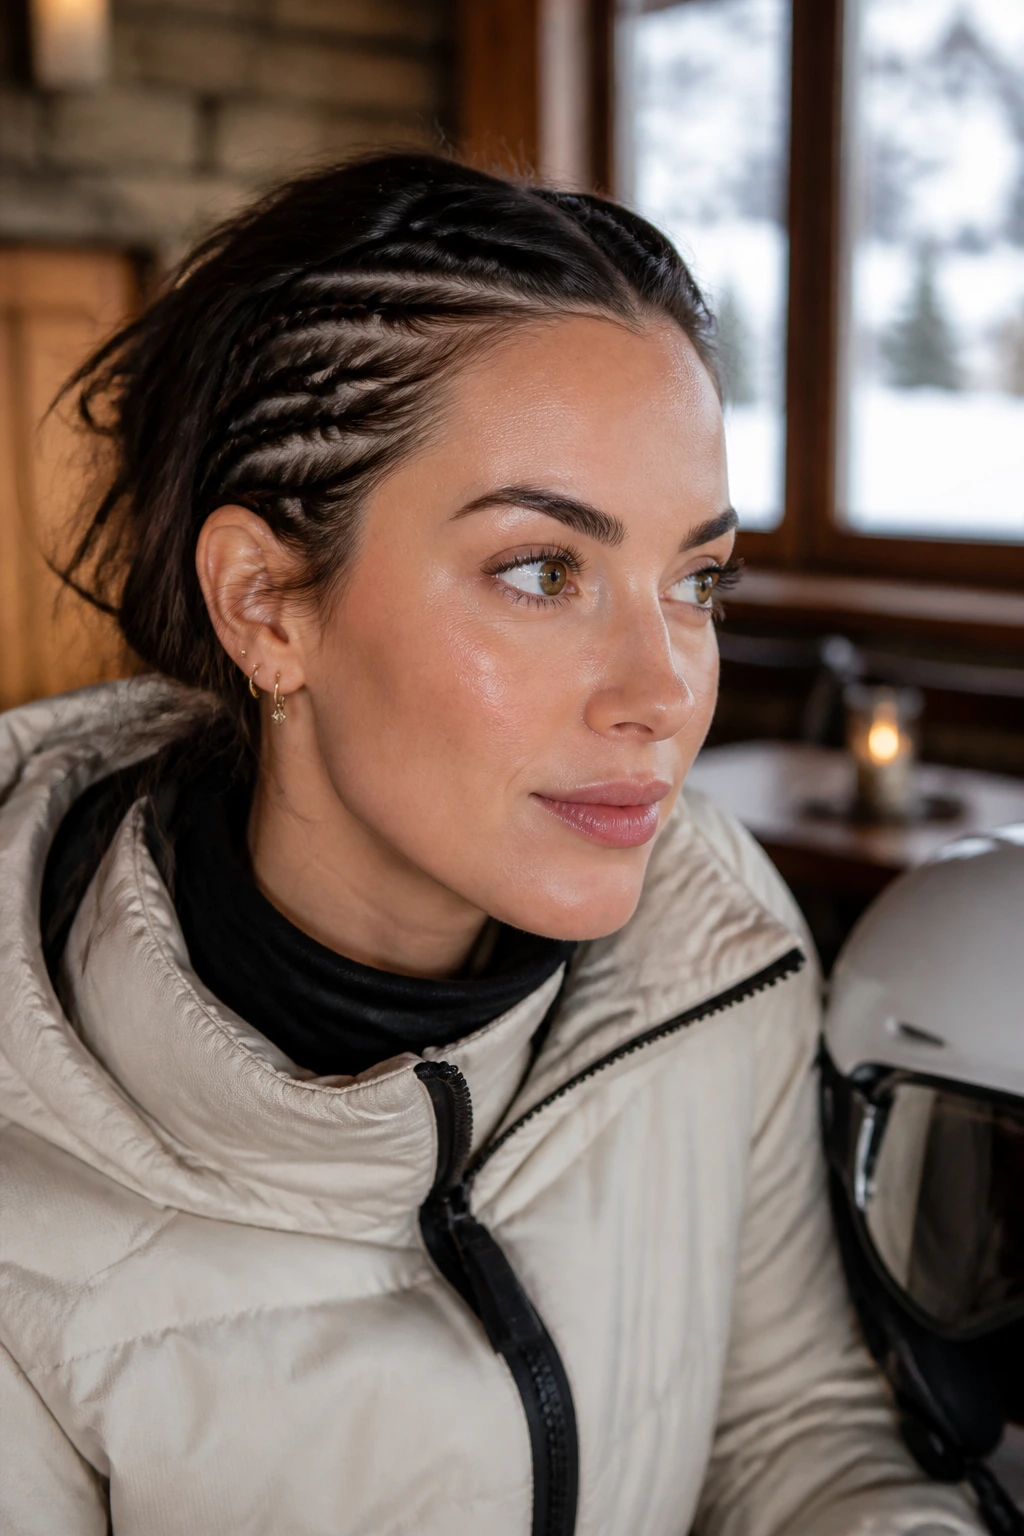
If you want to keep your hair down but need to keep it under control, adding a few discreet mini-braids is the solution. This is great for keeping layers out of your face without having to commit to a full updo.
How to Style
Create two or three small braids along your hairline or just above your ears. Secure them with tiny elastics and pull them back, tying them together at the nape of your neck with the rest of your hair.
The Aesthetic Benefit
It keeps your hair tucked and secure while still allowing you to enjoy the feeling of your hair being “down.” It prevents the hair from getting in your goggles and helps guide the hair strands toward the back so they don’t get messy.
12. The “No-Style” Headband Method

Sometimes, the best strategy is the simplest one. If you have medium-length hair, you don’t always need to tie it back. A high-quality, non-slip athletic headband is often enough to keep everything in place.
The Selection Process
Choose a headband made of moisture-wicking fabric. Avoid thick, bulky knits that will create a gap between your head and the helmet. A flat, synthetic headband acts as a base layer for your hair.
Execution
Sweep all your hair back, put on the headband, and then carefully pull your helmet on. The headband creates a “zone” that keeps the hair from creeping forward into your eyes. It’s the fastest option for those mornings when you’re rushing to catch the first chair.
13. The Half-Up Braided Crown
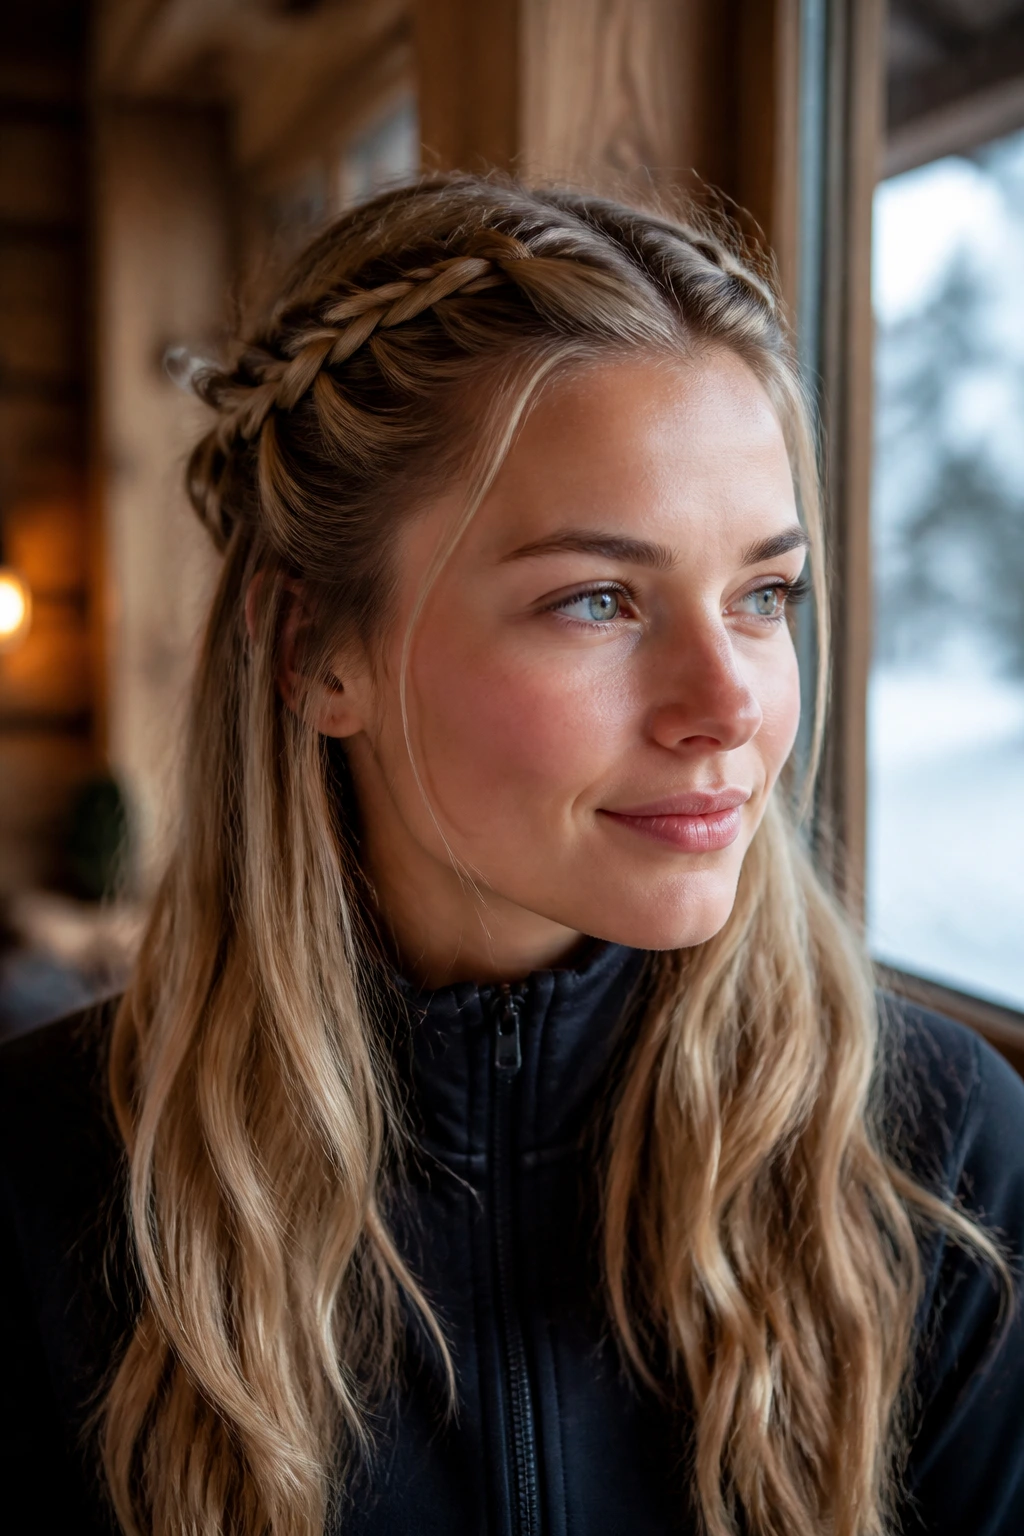
This is a great option for people who hate the feeling of all their hair being pulled back. It keeps the front sections—the ones that cause the most trouble with goggles—out of your face, while leaving the rest loose.
How to Execute
Create a small Dutch braid starting from one temple and wrapping around to the back. Do the same on the other side. Join the two braids at the back of your head with a hair tie.
The Functional Trade-off
This style leaves the bottom half of your hair free. While this is comfortable, be aware that the loose hair can get knotted by the wind. Keep this style for days when you plan to tuck your hair into your jacket or neck gaiter to protect the loose strands.
14. Fishtail Braid

The fishtail braid is elegant and incredibly tight. It uses smaller sections of hair than a standard three-strand braid, which makes it less prone to pulling and loosening throughout the day.
Why It’s Perfect for the Mountain
It’s a low-profile braid. Unlike a French braid, which can be bulky, a tight fishtail braid lies very flat against the head or neck. It is perfect for fitting under a helmet without creating those uncomfortable pressure points that ruin your day.
Getting the Look
It takes a little longer to master, but the result is a braid that feels almost like a solid rope of hair. Because it’s so compact, it doesn’t tend to get caught on your zipper or helmet straps as easily as a looser braid might.
15. The Low Claw Clip (With Caution)
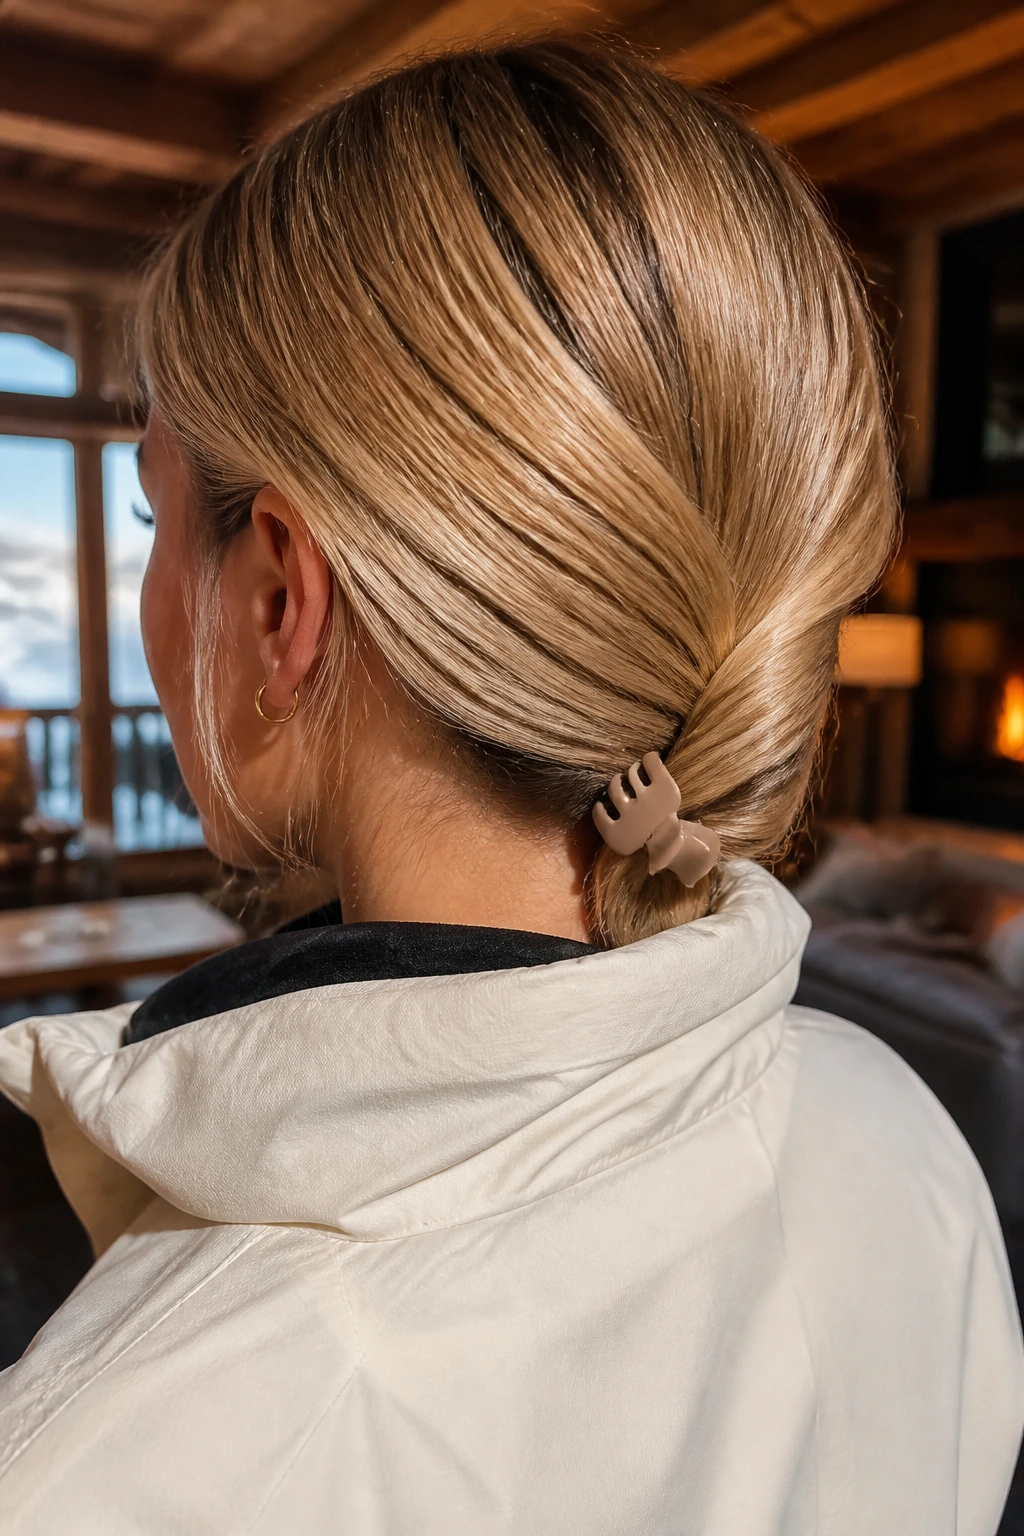
Usually, claw clips are a big “no” for skiing because they can dig into your scalp if you fall. However, if you use a very small, flat-profile claw clip positioned correctly at the very base of your neck, it can work.
Safety First
Ensure the clip is small enough that it doesn’t extend beyond the nape of your neck. If you have a long, thick braid or a bun, you can use the clip to secure it against your collar rather than against the helmet.
The “Clip and Tuck” Method
- Create a low ponytail.
- Twist the hair up toward the nape of the neck.
- Secure the twist with a small, flat clip so that it sits right at the hairline. This keeps the hair from falling forward.
16. The Scarf-Integration Style
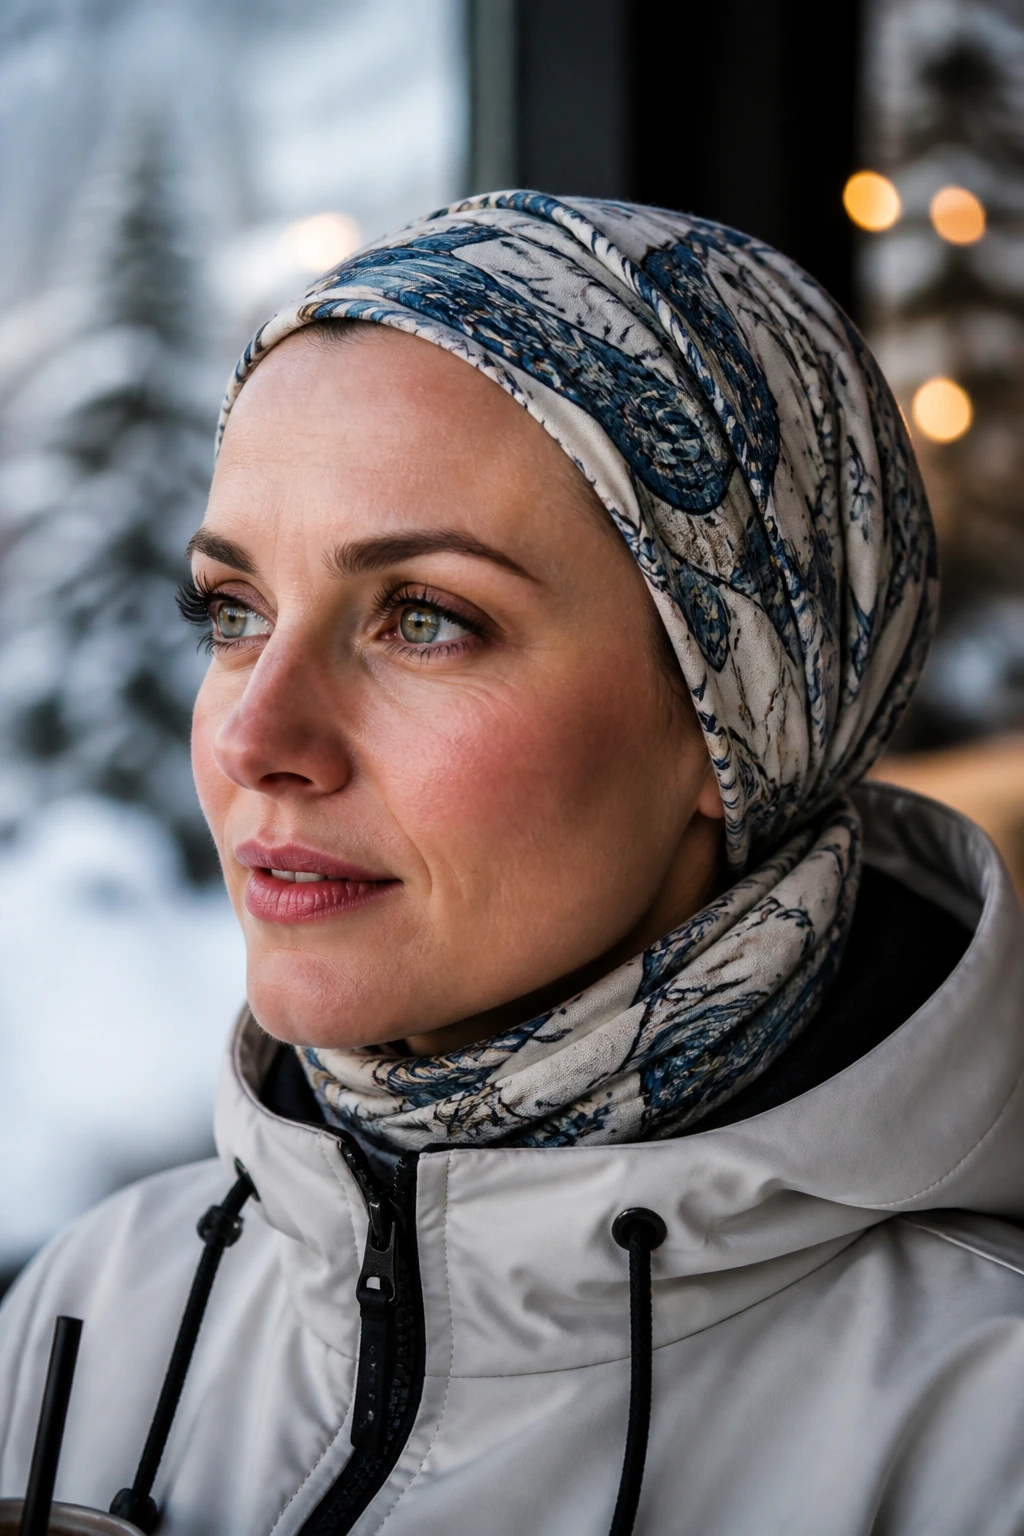
If your hair is extremely difficult to manage, use your accessories to help you. A thin, silk, or synthetic scarf or buff can be used to wrap your hair completely before you put your helmet on.
How to Do It
Gather your hair into a low, loose ponytail or bun. Take a thin, stretchy neck gaiter or a light scarf and wrap it over your hair, covering it entirely. Then, slide your helmet on over the top.
Why This is Genius
This method completely eliminates the risk of hair rubbing against the helmet liner, which causes static and breakage. It also keeps your hair perfectly smooth. When you take your helmet off at the lodge, your hair will be largely untouched and free of tangles.
17. The Sleek Tucked Look (Down)

Sometimes you just want your hair down. The key to doing this successfully without ending up with a wild, tangled mess is to guide the hair behind your ears and use a bit of product to “lock” it in place.
The Product Hack
Use a small amount of light-hold mousse or styling gel on damp hair before it dries. Once you’re ready to ski, push all the hair back. This provides enough “grip” to keep the hair from constantly falling into your face.
The Helmet Interaction
When you pull your helmet on, be slow. Reach up and smooth any stray pieces back behind your ears as the helmet slides down. The shell of the helmet will hold everything in that “slicked-back” position for the duration of your run.
18. Braided Pigtails (For Thick Hair)
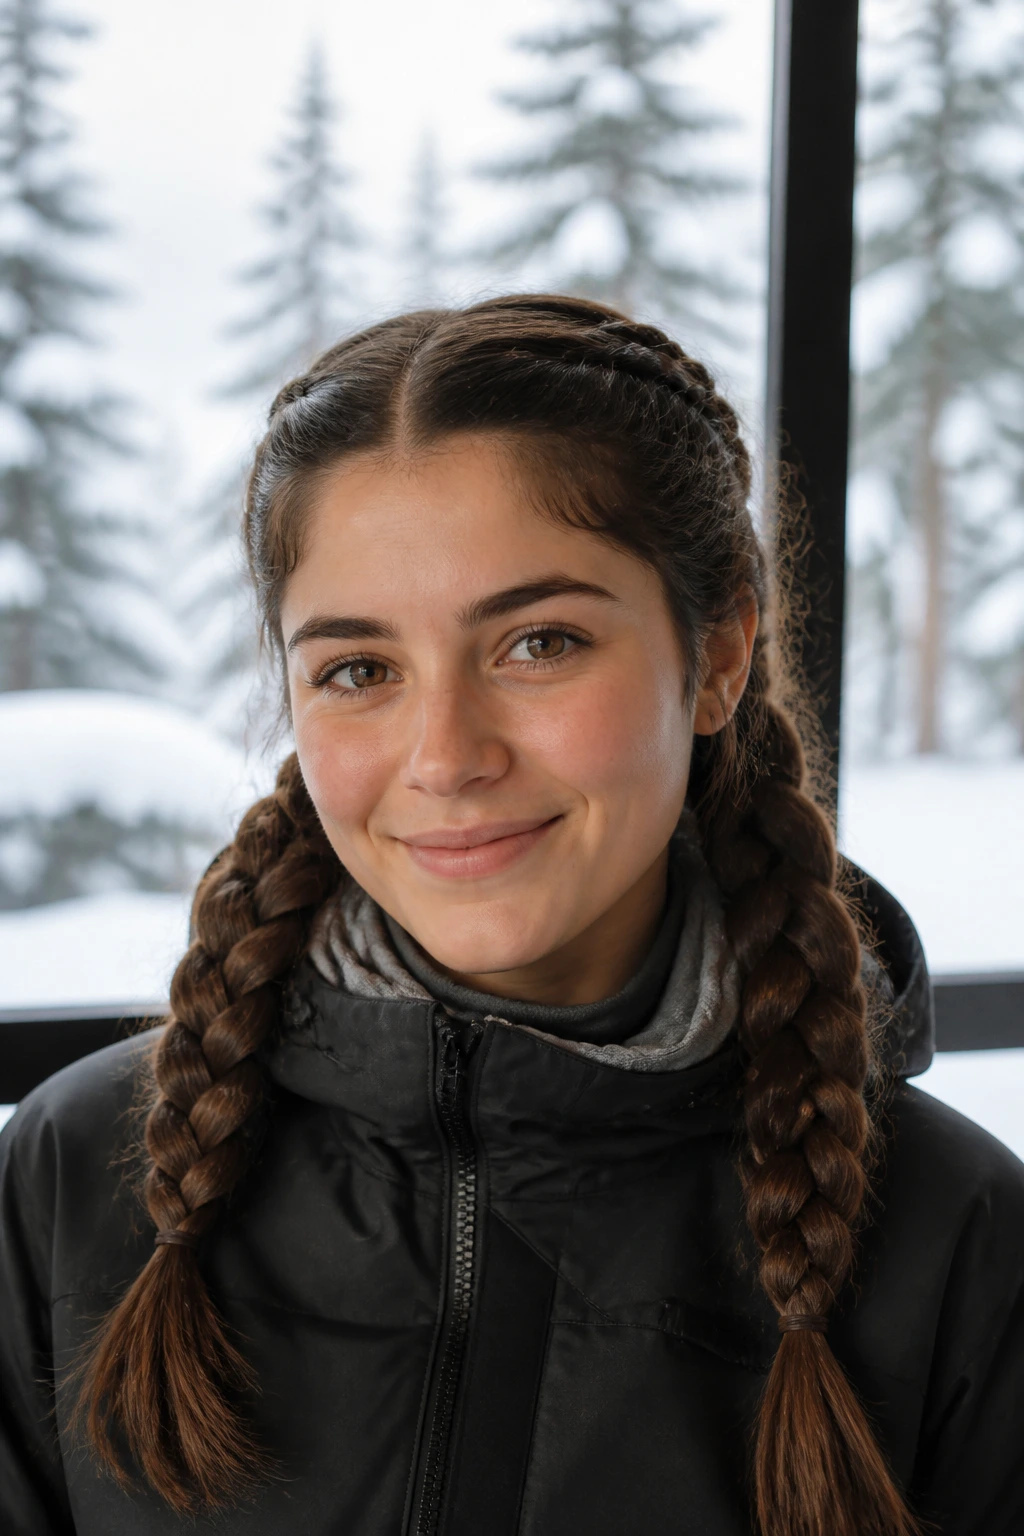
If you have thick, long hair, two braids are often better than one. One large braid can become a heavy, cumbersome mass that pulls on your scalp. Two braids distribute the weight and are easier to manage under the helmet.
Styling for Balance
Part your hair down the middle. Braid each side separately. You can choose to leave them down or, if they are long enough, cross them at the back of your head and pin them at the nape of your neck for a “halo” effect that stays incredibly secure.
The Benefit of Dividing
By splitting your hair into two distinct braids, you ensure that the center of your head is clear of bulk. This is arguably the most comfortable configuration for wearing a helmet for six or seven hours at a time.
19. The “Helmet-Friendly” Bun
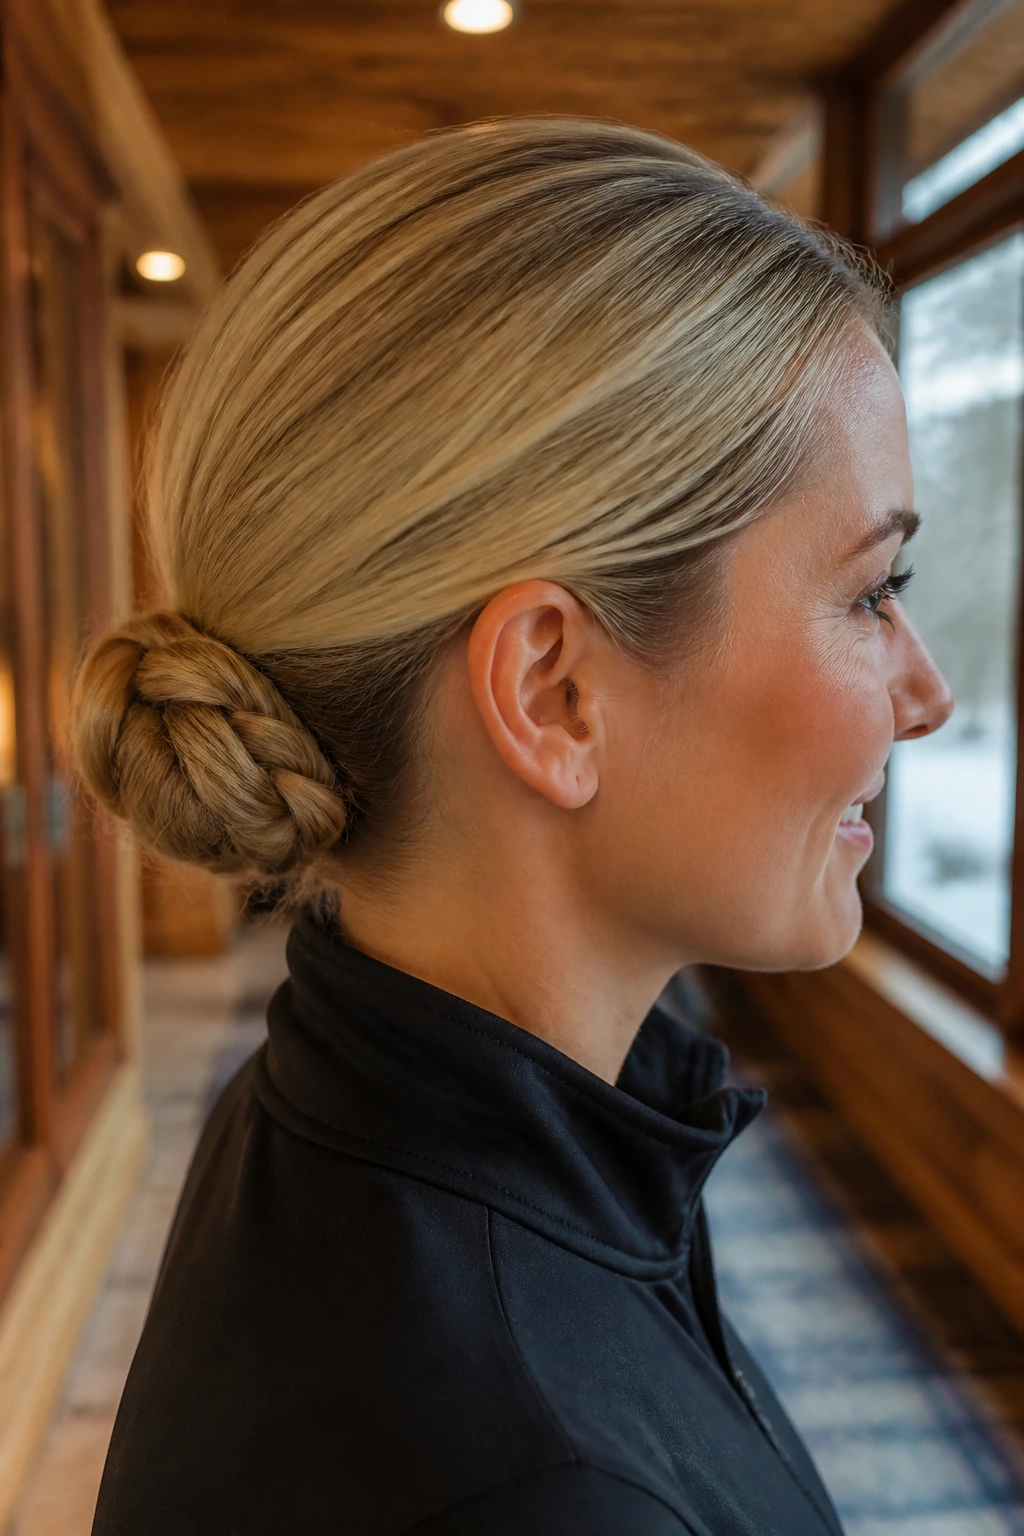
Wait, didn’t we say no buns? We said no high buns. A bun located at the very base of your neck, right where the helmet strap sits, is a different story—provided it’s a flat bun.
The Flat Bun Technique
- Gather hair into a low ponytail.
- Instead of twisting it into a ball, braid the ponytail first.
- Wrap the braid around the base of the elastic and pin it flat against the skin of your neck.
- This creates a very compact, flat surface that won’t interfere with the helmet’s fit or the strap.
Why This Works
It keeps the hair off your neck (no sweat) and keeps it out of the way of your zipper. It’s a very clean, professional look that survives heavy activity perfectly.
20. The Protective Serum Finish

Regardless of the hairstyle you choose, the environment on the mountain is harsh. The combination of cold, wind, and friction is the fastest way to dry out your hair and cause split ends.
The Pre-Helmet Ritual
Before you start any of the styles listed above, apply a tiny amount of a leave-in conditioner or a lightweight hair serum, focusing on the ends. This adds a layer of protection against the static electricity caused by the helmet’s synthetic lining.
The Results
When you finally remove your helmet at the end of the day, your hair won’t just look better; it will be healthier. This is a crucial step that many people skip. A little bit of oil or serum makes the hair more pliable, meaning it’s less likely to knot when you start taking out the braids or bands.
Final Thoughts
The key to keeping your hair intact on the slopes isn’t about finding one magical style, but rather mastering the art of low-profile, secure positioning. The mountain is an unforgiving environment—the wind, the cold, and the repeated putting-on and taking-off of gear will test the hold of any hairstyle. By keeping your hair secured at the nape of your neck and ensuring no bulky knots press against your skull, you prioritize your comfort and safety without sacrificing your look.
Ultimately, the best style is the one that you can do quickly in the car or the base lodge and forget about until the day is done. If you spend your time on the chairlift worrying about your hair falling out, you’re missing out on the ride. Experiment with a few of these styles to see which one works best with your specific hair texture and helmet shape. Once you find that go-to, you can focus on what really matters—the next run.
