



Long hair can make braiding feel easier and harder at the same time. Easier, because there’s enough length to grip, pinch, and shape. Harder, because the weight keeps tugging at your hands, and a style that looks neat on shorter hair can slide loose halfway down the back.
That’s why easy braids for beginners with long hair tend to be the ones with forgiving shapes and simple hand patterns. You want styles that still look good when one section is a little fatter than the other, or when your part isn’t laser-straight, or when you stop to regrip because your fingers got tired. Long hair gives you room to work, and that room is a gift.
A few basics help more than people expect. A rat-tail comb makes parts cleaner. A brush that actually removes tangles saves you from snapping ends. Tiny elastics matter. So does a light mist of water or a dab of leave-in if your hair slips around like satin. If your hair is layered, the little flyaway pieces will escape sooner than you want, and that is normal. You’re not doing anything wrong.
Start with the braid that teaches your hands the rhythm, then move into the ones that look a bit fancier without asking for expert-level fingers.
1. The Classic Three-Strand Braid
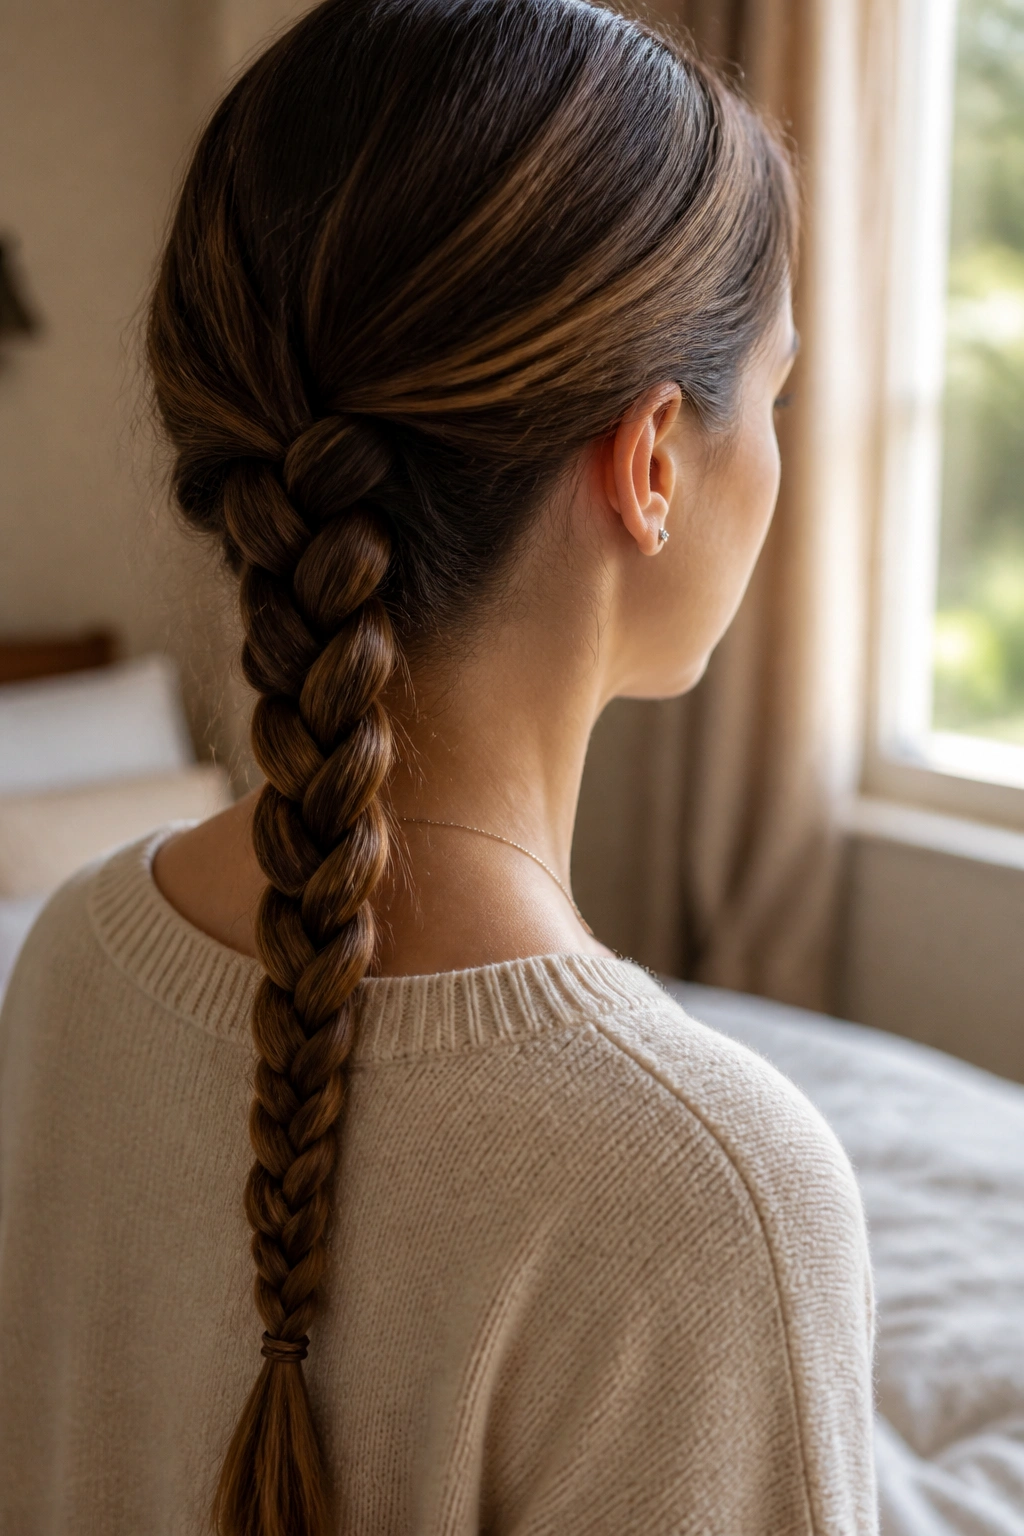
Start here. Really.
The plain three-strand braid is the style every beginner should get comfortable with first, because it teaches the one skill every other braid depends on: holding even tension while your hands switch places. On long hair, it also gives you a nice thick tail, which means you can see the shape even if your first attempt is a little lumpy.
Why It’s the Best First Braid
You only need three sections, and that means fewer chances to get lost. If one side looks a bit uneven, it still reads as a braid. That makes it perfect when you are learning how tight to pull and how often to regrip.
- Part the hair into three equal sections at the nape.
- Cross the right strand over the middle, then the left strand over the new middle.
- Keep your hands close to the braid instead of reaching too far down.
- Tie it with a small elastic about 2 inches from the ends so the tail stays neat.
Quick tip: if the braid starts to look flat, tug the outer edges slightly with your fingertips after you secure it. Not enough to wreck the shape. Just enough to make it look fuller.
2. The Low Side Braid
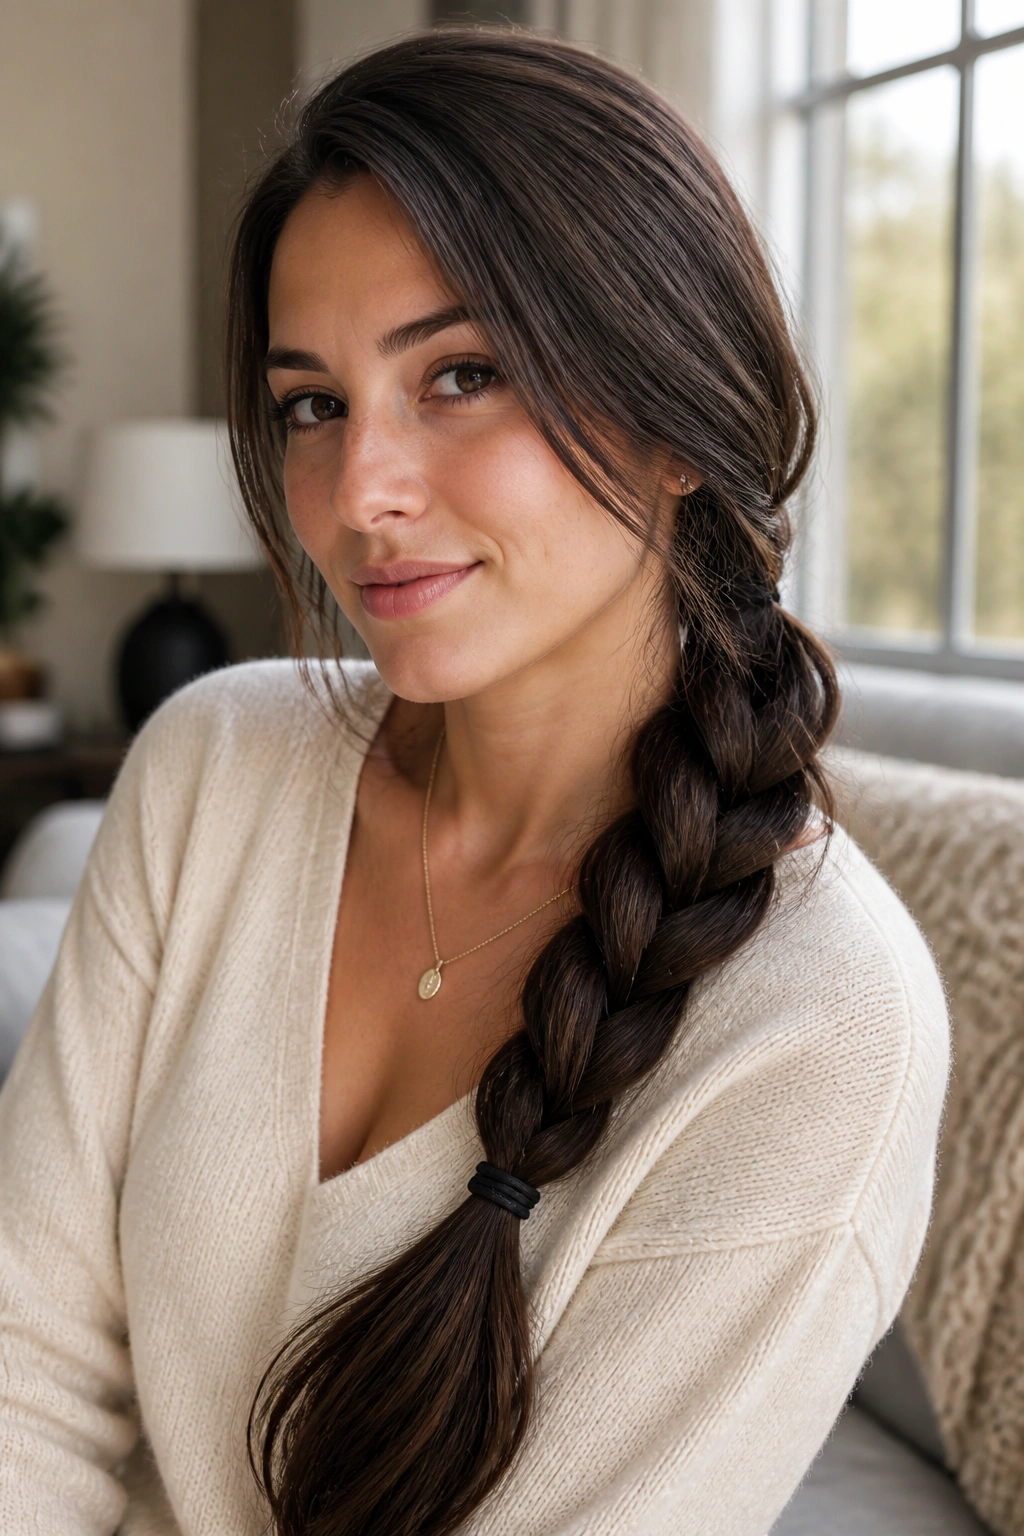
A side braid hides a messy part better than almost anything else.
That is the whole charm. You sweep all the hair over one shoulder, start braiding low near the ear or jawline, and suddenly the style looks intentional even if your part is crooked and one side has more layers than the other. Long hair makes this braid feel rich and full, which is part of why people keep coming back to it.
The nice thing about a low side braid is that it is forgiving in a way a center-back braid is not. You can braid loosely for a softer shape or keep it snug if you want it to stay put for hours. It works especially well on second-day hair, because a little texture helps the strands grip each other instead of slipping away.
If your hair is very slippery, mist the lengths with water or use a pea-size amount of styling cream before you start. That tiny bit of control matters. A braid that fights you at the front usually ends up looking loose at the bottom.
3. The French Braid
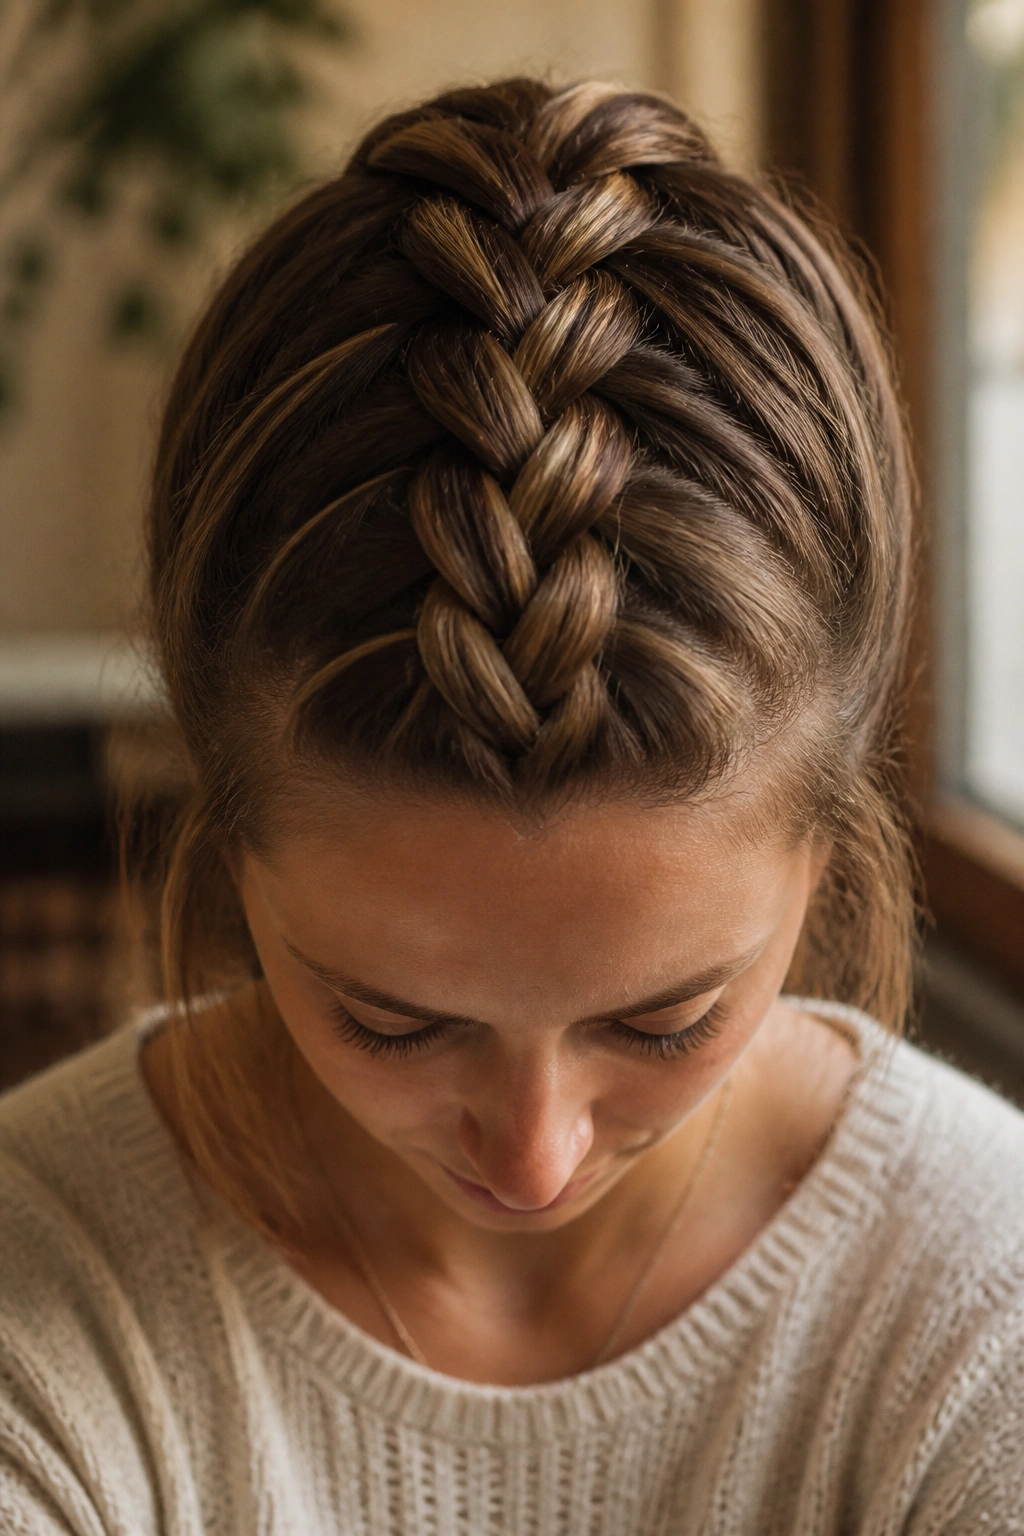
Why does the French braid make people nervous? Because it sounds formal. The actual pattern is not that wild.
You begin with three small sections at the crown, then add hair from each side as you braid downward. That steady feeding motion is the whole trick. Once your hands understand the rhythm, the style becomes more repetitive than difficult, and repetition is good when you are learning.
How to Keep the Braid From Drifting
The braid should sit in the middle of the head, not wander left and right like a crooked zipper. Keep your thumbs close to the scalp and take in the same amount of hair on each pass. Small sections are easier than large ones, especially on long hair where big chunks can make the braid bulky fast.
A French braid is one of the best beginner styles because it keeps the top neat and pulls all the hair back in a way that lasts. If you get tired halfway down, stop, secure it with a clip, and finish later. Nobody’s hair needs to be perfect on the first go.
4. The Dutch Braid
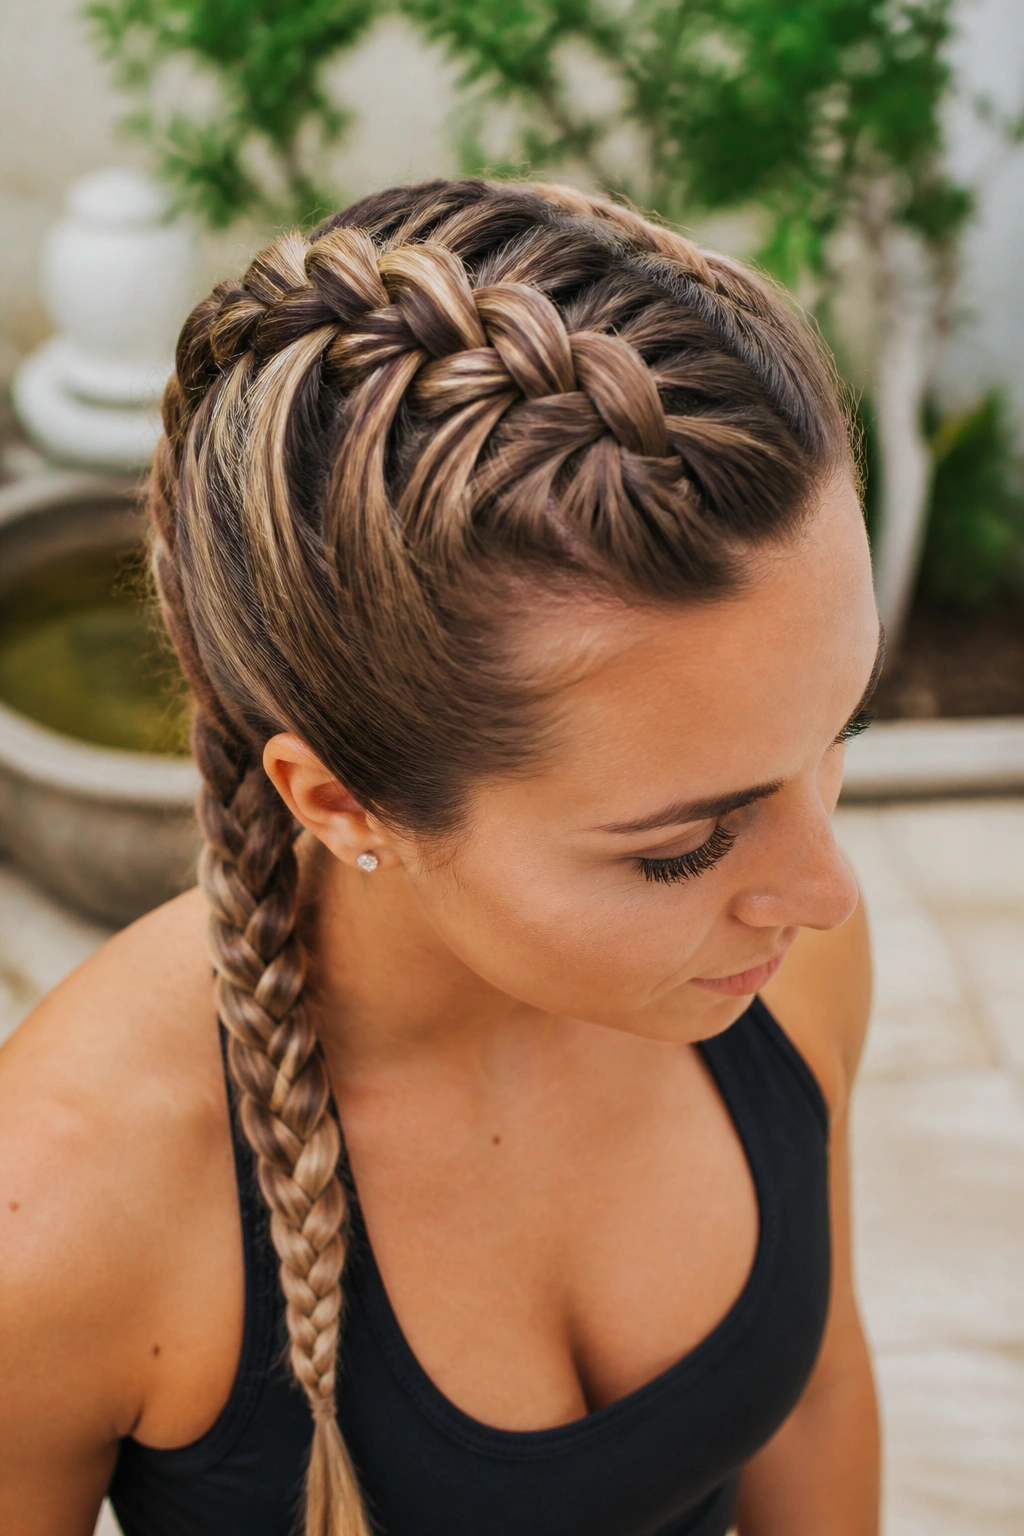
A Dutch braid looks more complicated than it is because it pops off the head instead of lying flat.
That raised shape comes from crossing the strands under the middle section instead of over it. Once you get that difference into your fingers, the braid starts to feel almost like a French braid in reverse. The visual payoff is big, which is why people love it for gym days, travel, or any moment when they want hair that stays put and still looks finished.
What Makes It Stand Out
The braid sits on top of the hair instead of blending into it, so the pattern is easier to see. On long hair, that bold ridge looks especially good because the plait has room to show off its shape all the way down.
- Start with three sections at the crown.
- Cross the side strands under the middle strand.
- Add hair as you move downward.
- Keep your grip firm near the scalp so the braid doesn’t sag.
Good habit: if your fingers get mixed up, pause for two seconds and reset. Rushing is what makes Dutch braids turn into a mess.
5. The Fishtail Braid
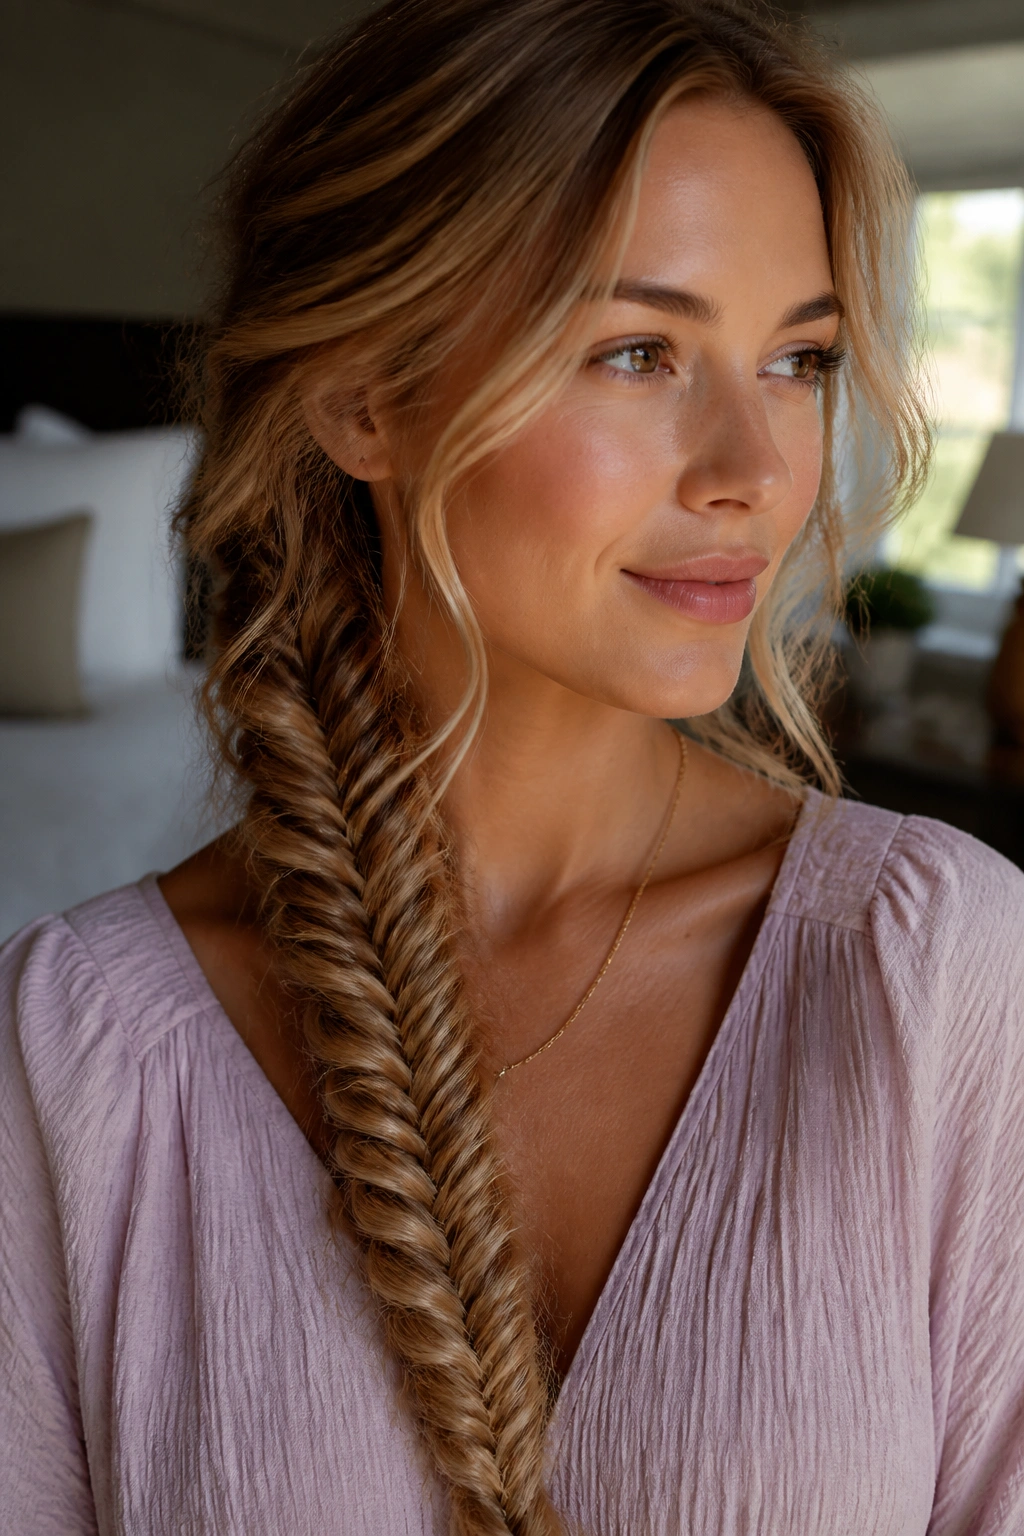
The fishtail braid looks fancy, but it behaves like a patient little puzzle.
Instead of three sections, you split the hair into two. Then you take a thin piece from the outside of one side and cross it over to the other, repeating until you reach the ends. The movement is small and steady, which is why this braid is often easier for beginners than people assume. It is slower, yes. Harder? Not really.
Long hair makes the fishtail especially satisfying because the woven pattern has room to show. On shorter hair, it can disappear. On long hair, it gets prettier the longer it is.
I like this braid best when the hair has a bit of texture. Freshly washed strands can be too smooth and slippery, and then the tiny sections keep escaping your fingers. If you want a cleaner look, lightly mist the hair first. If you want a softer look, pull the braid apart a little after tying it.
6. The Rope Braid
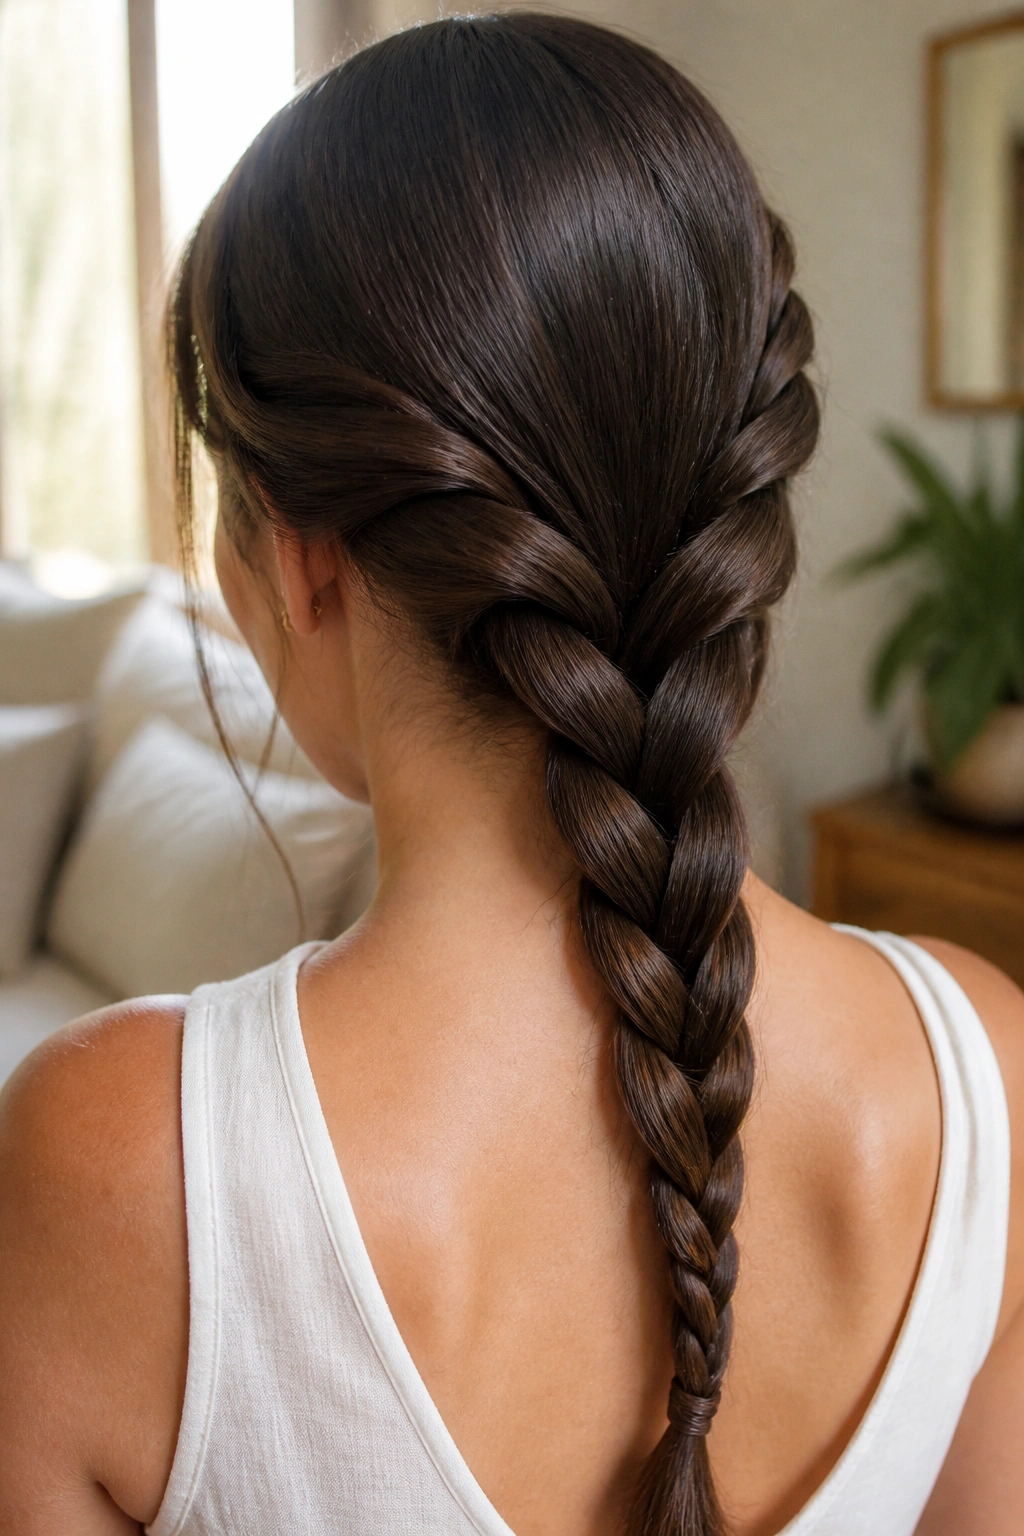
Unlike a three-strand braid, the rope braid uses only two sections. That alone makes it feel less fussy.
You twist each section in the same direction, then wrap them around each other in the opposite direction. It sounds fancier than it is. Once you get the twist-and-wrap pattern into your hands, it goes fast, and long hair shows off the spiral shape beautifully.
This is the braid I’d hand to someone who likes tidy hair but does not want to keep three strands balanced all morning. It works especially well on smoother hair, where the shine makes the twist pattern stand out. If your hair is thick, keep the sections tight. If your hair is fine, use a little texture spray so the ropes do not unravel.
The one thing people forget is tension. Twist each section firmly before crossing them together. Loose twisting gives you a wimpy rope. Tight twisting gives you a braid that actually holds.
7. The Pull-Through Braid
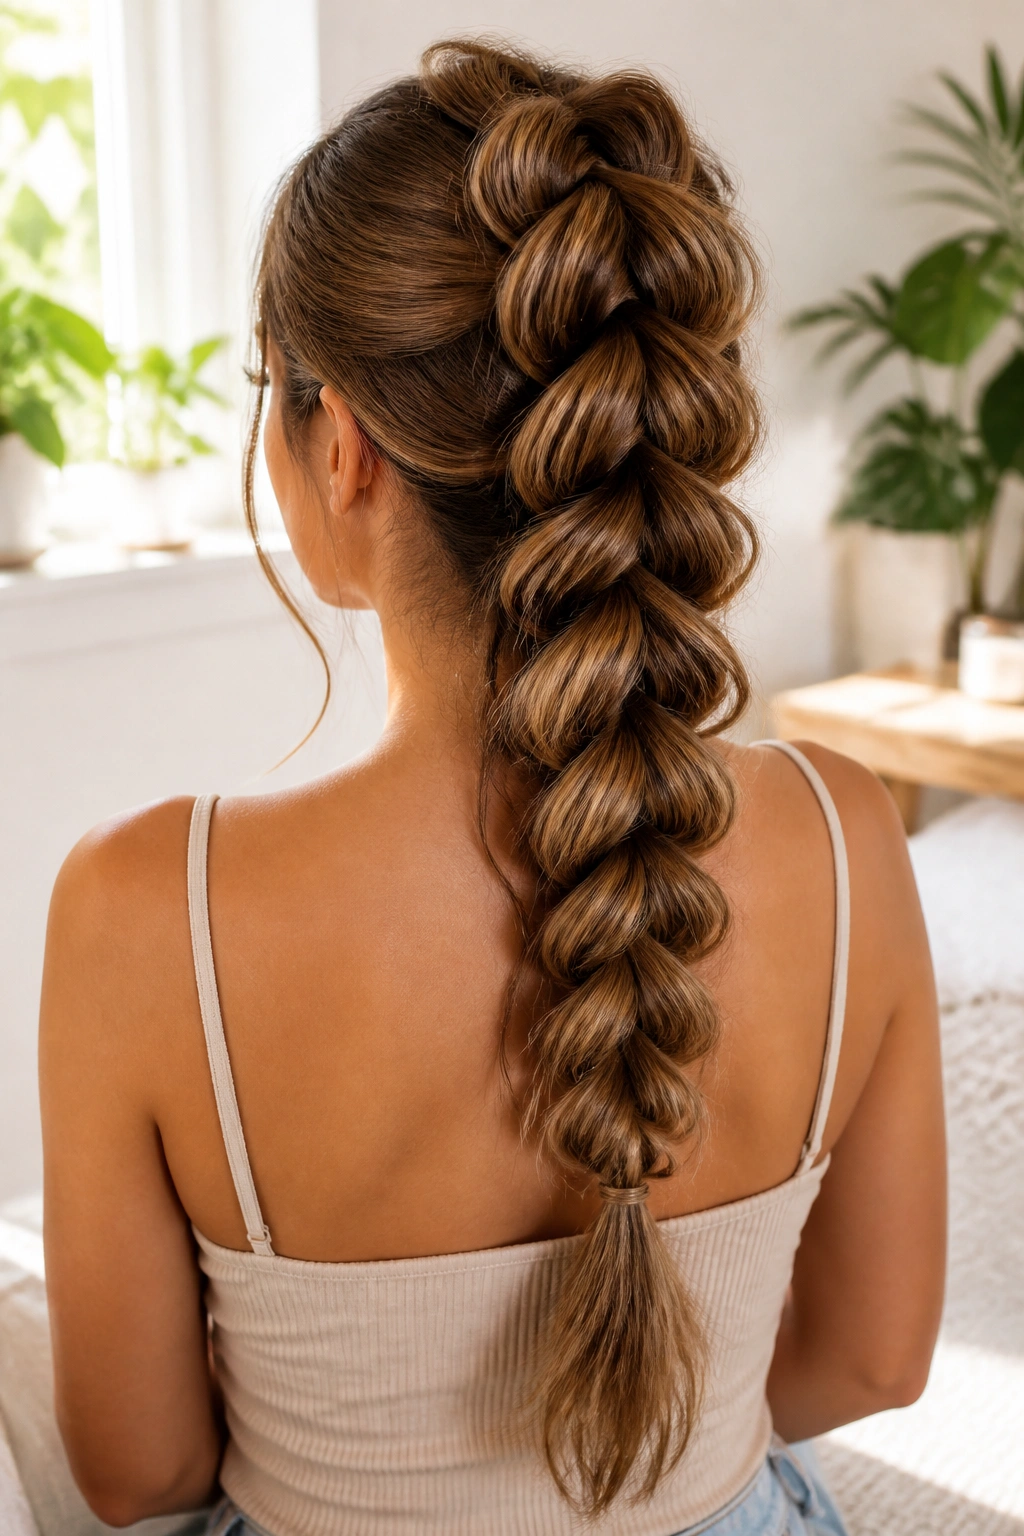
This is the braid for people who want volume without wrestling with tiny sections.
A pull-through braid uses a chain of ponytails, not traditional braiding. You split the hair into sections, secure one under another with elastics, then pull the top ponytail through the next section and keep going. The finished style looks full, thick, and a lot more complicated than the steps behind it.
Why It Works So Well on Long Hair
Long hair gives this style its body. Every ponytail adds weight, and every loop creates the kind of stacked shape that looks polished from across the room. It is also forgiving. If one section is a little uneven, the next one can hide it.
- Use 6 to 10 small elastics depending on hair length.
- Smooth each section before tying it off.
- Tug the sides of each loop gently to build width.
- Finish by hiding the last elastic with a small strand of hair if you want a cleaner look.
Best part: you do not need perfect braiding fingers. You need patience and a few elastics.
8. The Bubble Braid
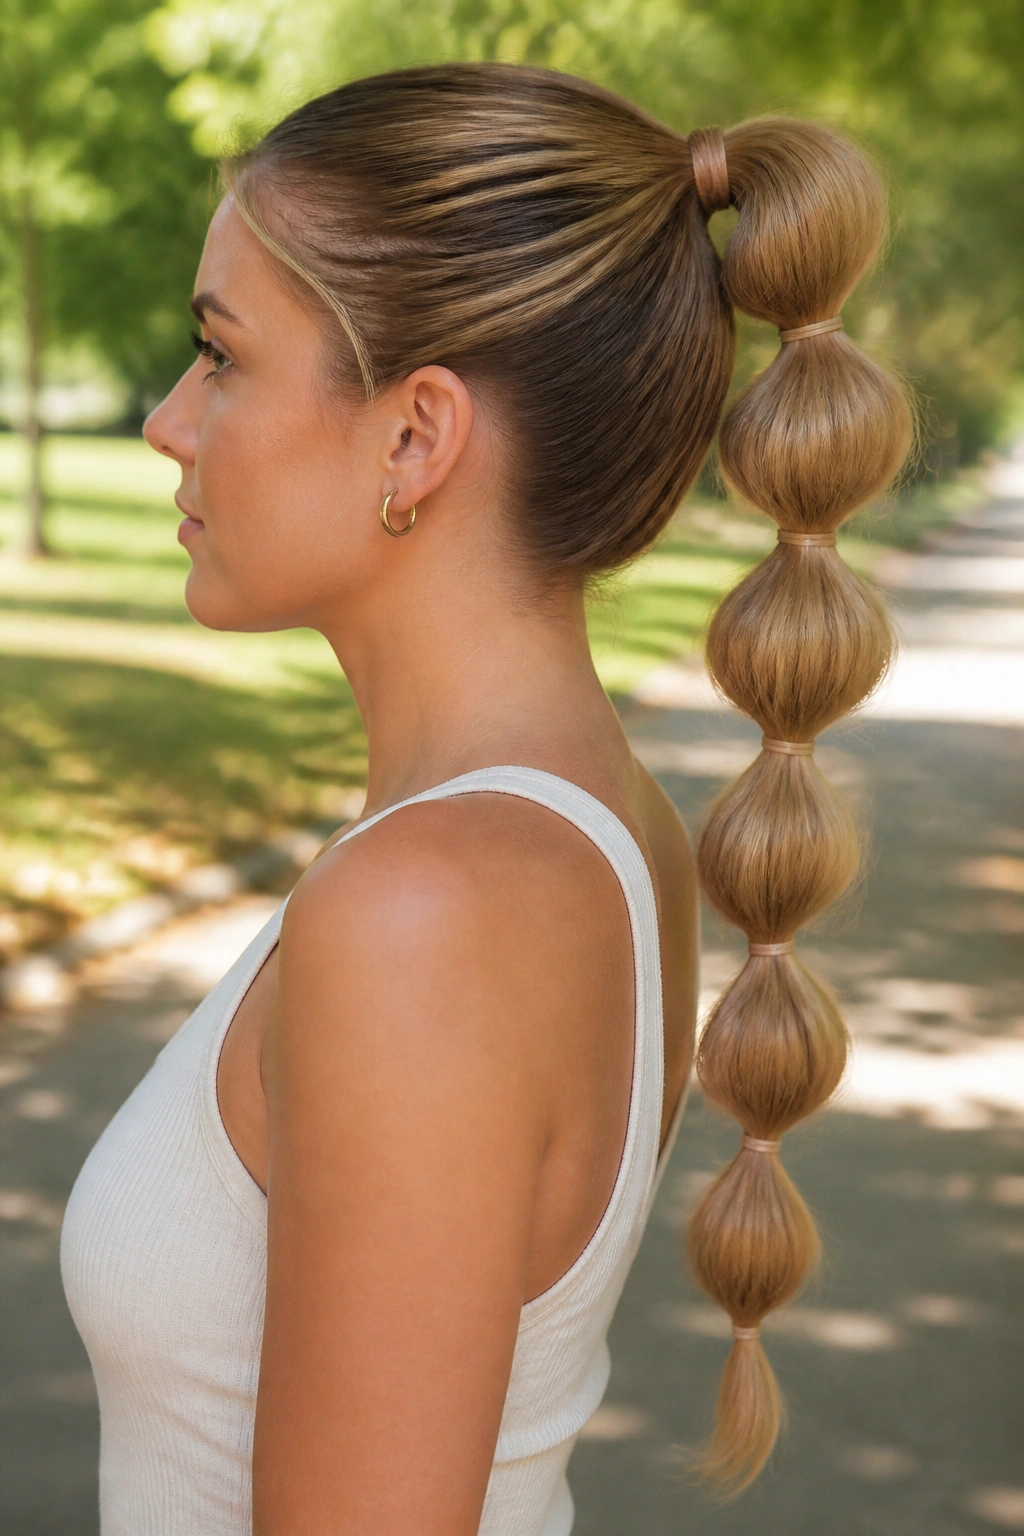
A bubble braid is the easiest style on this list for someone who freezes at the word “braid.”
Technically, it is more of a braid-inspired ponytail, but the look belongs here because it gives long hair shape without demanding a real plait. You make a ponytail, add elastics down the length, then pull each section outward to form rounded bubbles. That’s it. No strand crossing. No counting. No panic.
The style shines on thick hair, because fullness makes the bubbles look round and clean. If your hair is fine, a little teasing between the elastics can help. Keep the bubbles even, or don’t. Uneven bubbles can look playful instead of sloppy.
This is a good one for days when you want your hair off your neck but still want a bit of drama. It also takes almost no practice, which is rare. Use that.
9. The Half-Up Braid
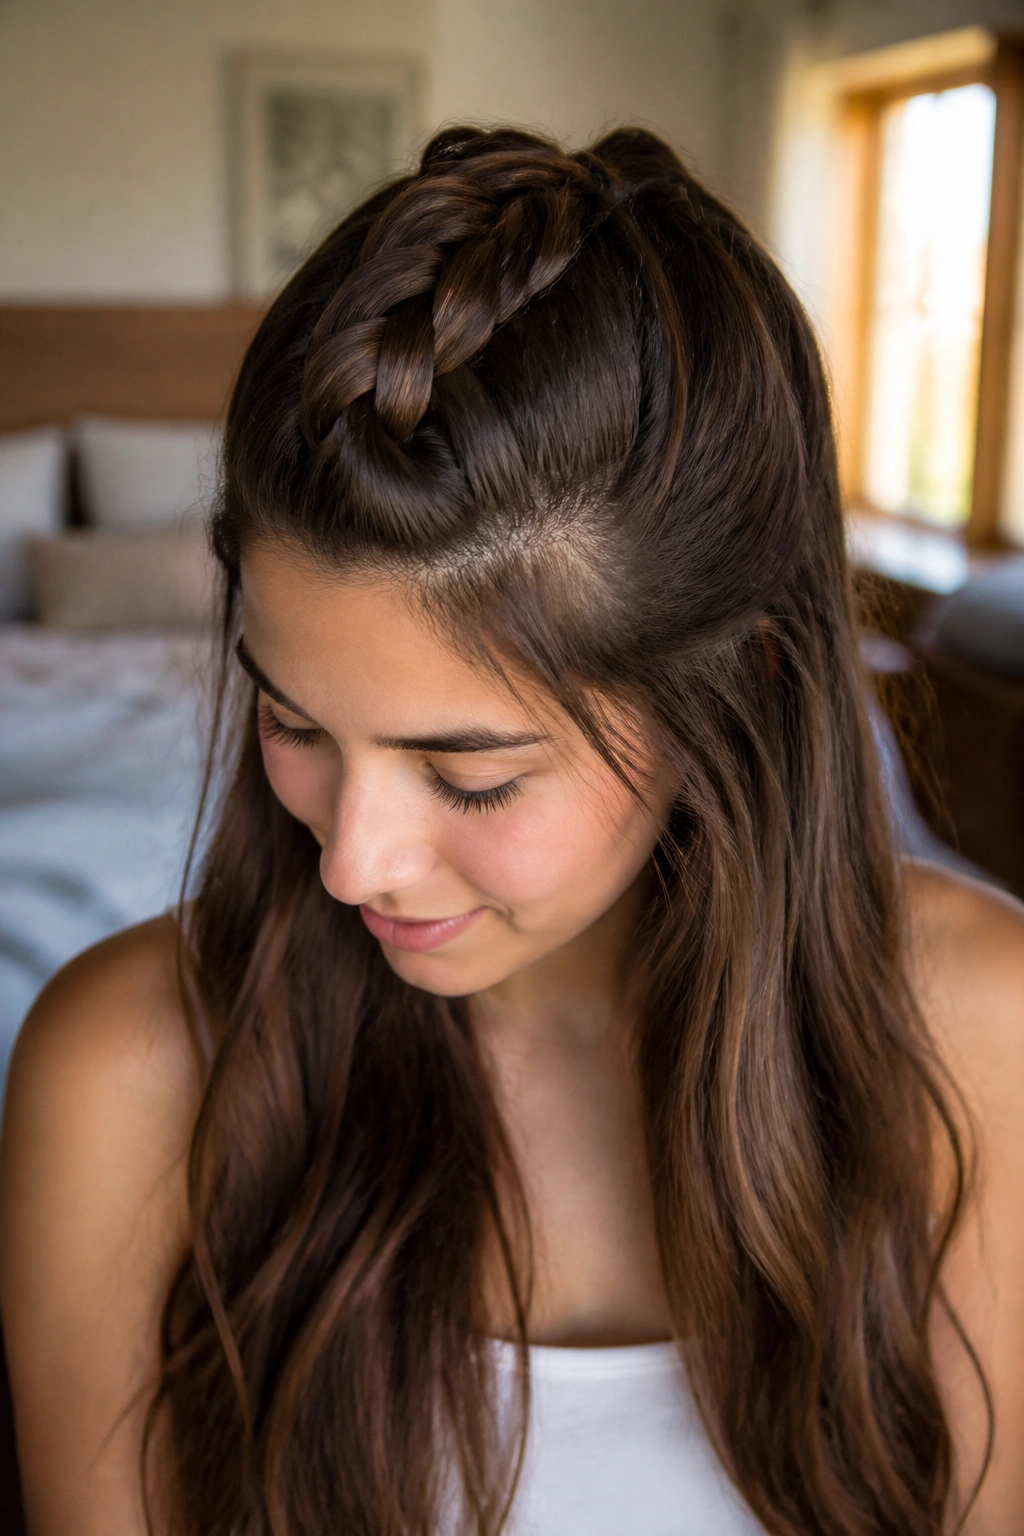
Want hair out of your face without giving up the length? This is the one.
A half-up braid keeps the front and top sections secure while leaving the rest of the hair down, which makes it one of the easiest protective styles for beginners with long hair. You can do it as a simple three-strand braid, a tiny French braid, or even a twisted braid if your hands are tired. The point is to control the top half and let the rest fall.
How to Keep the Top Section Neat
Section off the hair from temple to temple, or just grab the crown area if you want something looser. Braid that section back and tie it off with a small elastic. Then leave the remaining hair loose, wavy, or straight. On long hair, the contrast between the braided top and the flowing ends looks clean without needing much effort.
A half-up braid is one of those styles that works on almost anyone, and that is not a lazy compliment. It is practical. Practical styles stay in heavy rotation for a reason.
10. Double Dutch Braids
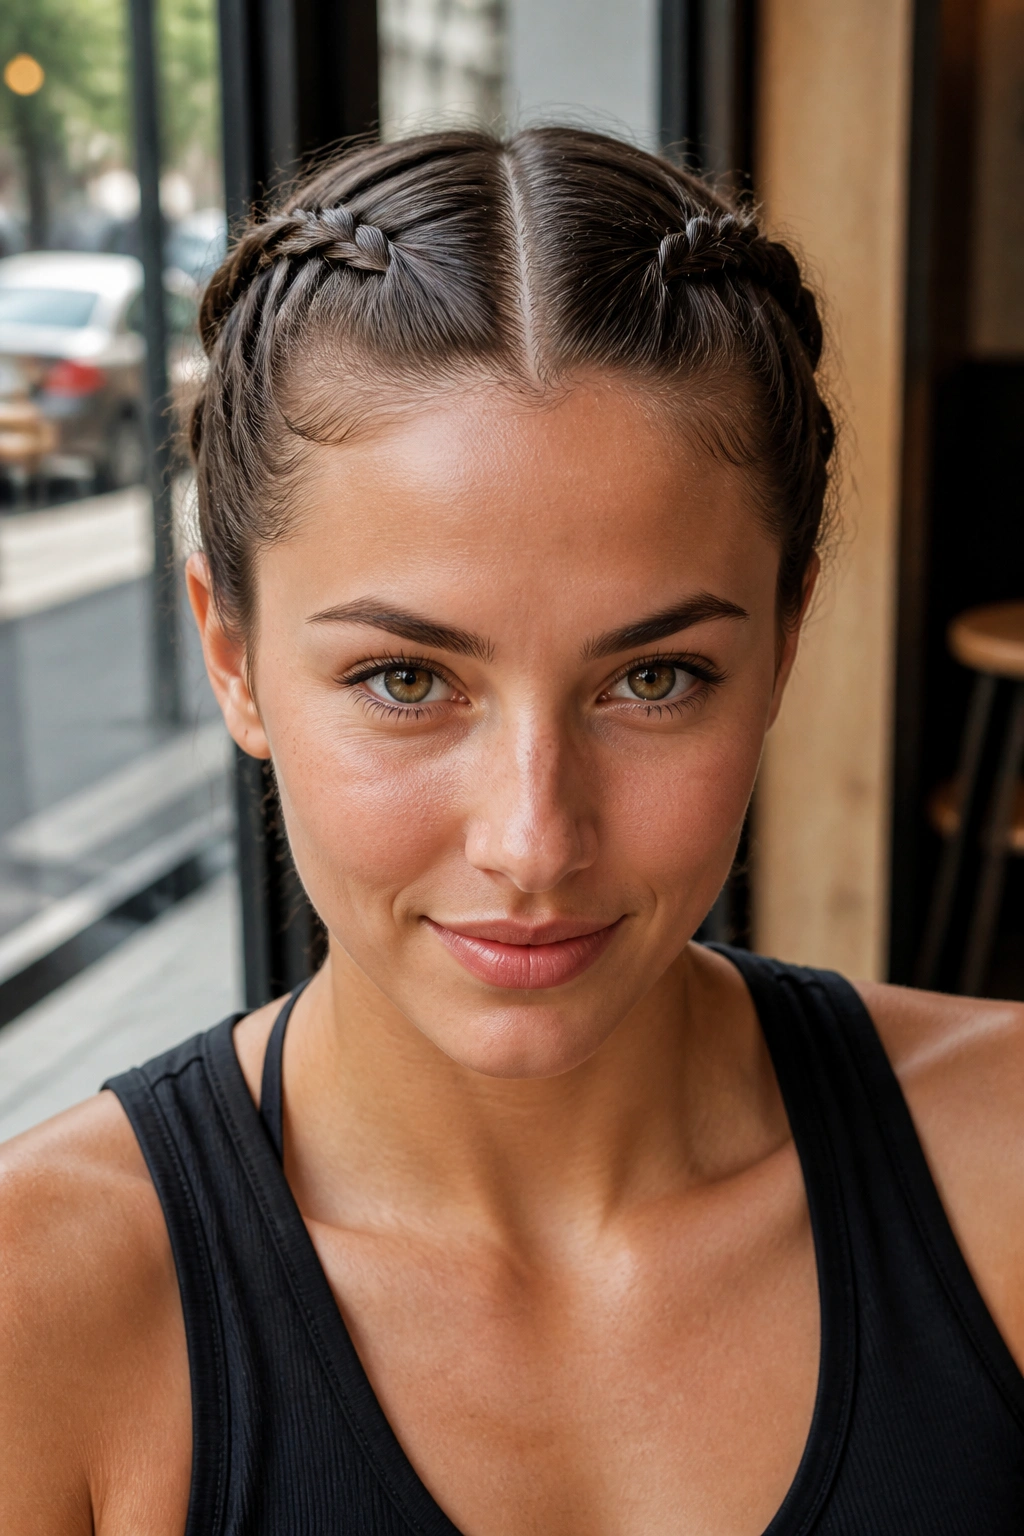
A center part and two Dutch braids can save a bad hair day fast.
The style is simple: split the hair down the middle, then Dutch braid each side from the front hairline toward the nape. The result is neat, close to the scalp, and very good at keeping long hair from blowing in your face or getting tangled under straps, collars, and jacket hoods.
What to Watch For
Each braid should mirror the other in size and placement, but they do not need to be perfect twins. If one side is slightly thicker, that is fine. Better to finish the style cleanly than to keep reopening the part and wreck the shape.
- Use a center part from forehead to nape.
- Keep both braids close to the head.
- Tie each braid off low, then secure the ends.
- Smooth the part with a comb if you want a sharper line.
This style is useful, plain and simple. It keeps long hair contained and feels more secure than a loose braid sitting on one shoulder.
11. The Lace Braid
A lace braid is a French braid with a small rule change, and that rule change makes it friendlier than it sounds.
Instead of adding hair on both sides, you only feed in from one side while the other side stays open. That creates a braid that slides along the head like a trim border. It is a lovely choice if you want one side pinned back but do not want to commit to a full braid across the whole head.
Because you are working with only one side of the section, the hand pattern feels simpler than a full French braid. That makes it a useful step for beginners who want to practice controlled feeding without dealing with both sides at once. Long hair gives the braid a nice drape, especially when it starts near the temple and follows the curve of the head.
Keep the added sections small. Big chunks make the braid lumpy. Tiny sections make the lace line smooth and easy to pin.
12. The Waterfall Braid
The waterfall braid looks delicate, but the logic behind it is plain enough.
You braid across the head and drop one strand each time, letting a new section from above replace it. That creates the little falling effect that gives the braid its name. It is one of the prettiest ways to frame long hair for a dinner, a photo, or any day when you want the front pieces to look deliberate.
Unlike a tight French braid, this style is about movement. The dropped strands should hang loose and clean, so it works best on smooth or softly waved hair. Heavy curls can make the pattern hard to see, though they can still look lovely if the braid itself is kept loose.
This one takes a little more patience than the first five styles. Still, it is not as hard as people make it sound. Once you learn the drop-and-replace rhythm, the braid becomes a straight line with a pretty trick.
13. The Crown Braid
A crown braid wraps around the head like a frame, and on long hair it can look much more finished than the effort it takes.
The easiest version starts with a braid near one temple, then follows the hairline and tucks across the top and back. It sounds elaborate. It is really a long path with a few pins. If your hair is dense, it helps the braid hold its shape. If your hair is slippery, a bit of dry shampoo at the roots gives it more grip.
Best Way to Keep It in Place
Use bobby pins that match your hair color, and slide them in facing against the braid’s direction so they catch the base properly. That tiny detail matters more than people think. A crown braid that is pinned badly starts to sag by lunchtime.
- Start with slightly textured hair.
- Braid loosely enough to wrap, but not so loose that it falls apart.
- Pin behind the braid, not through the top.
- Hide the ends under the braid or behind the ear.
This is the kind of braid that looks fancier than it is, which is always a nice trade.
14. The Braided Bun
If you want your hair off your neck and off your shoulders, a braided bun earns its keep.
First, make a braid — any simple one will do — then wrap it into a bun and pin it down. That is the whole idea. The braid gives the bun more texture than a plain twist, and long hair gives you enough length to make a bun that actually feels substantial instead of tiny and sad.
What I like here is the balance between control and softness. A neatly braided bun can look polished. A slightly messy one can look relaxed and still stay put. Either way, the braid keeps the ends tucked away, which helps if your hair tangles easily or frays at the tips.
If your bun feels too wide, twist the braid tighter before wrapping it. If it feels too small, pancake the braid first to create more surface area. Both fixes work.
15. The Braided Ponytail Wrap
Want a ponytail that looks cleaner in three extra minutes? This is the move.
Take a small section of hair from the ponytail base, braid it, and wrap it around the elastic to hide the tie. Then braid the rest of the ponytail in a simple three-strand style. It’s a neat little upgrade that makes a basic ponytail look intentional without turning the whole thing into a project.
Where the Braid Should Sit
The wrapped section should be tight enough to cover the elastic, but not so thick that it makes the base bulky. A skinny braid is usually enough. After you secure the wrap with a pin underneath, the rest of the ponytail can hang straight, waved, or curled.
This style is nice when you want a braid but do not want to braid every inch of hair. Long hair gives the tail enough length to show off the wrap at the top and the finished braid below. That contrast is the whole point.
16. The Four-Strand Braid
A four-strand braid looks like a skill test, but it is mostly a pattern test.
Instead of three sections, you work with four, crossing them in a set rhythm that creates a flatter, wider braid. It takes a little concentration at first, which is why I would not call it the first braid to learn. Still, if you already feel comfortable with the three-strand version, this is a natural step up.
How to Keep Track of the Strands
A simple trick helps: keep the same strand in the same relative spot in your mind every time you move it. Some people even hold one strand between the pinky and ring finger so it does not wander off. That sounds fussy until you try it. Then it makes sense.
- Use a bright hair tie on one end if you keep losing track.
- Work slowly for the first few passes.
- Keep the strands flat and separated.
- Stop and reset if the braid starts to twist in on itself.
Long hair makes the final shape look full and neat, which is worth the small learning curve.
17. The Accent Braid
An accent braid is the easiest way to start braiding if you are nervous about messing up a whole head of hair.
You braid just a small section — near the temple, along the part, or behind one ear — and leave the rest of the hair down. That tiny size makes it manageable, and if the braid is a little uneven, no one notices because it is not the whole style. Beginners often do better here than in full braids, simply because the pressure is lower.
I like accent braids for long hair because they add detail without stealing the rest of the look. One small braid can tuck into a ponytail, sit beside loose waves, or disappear into a half-up style. It also gives you a low-stakes place to practice tension, hand placement, and the feel of the strands sliding through your fingers.
Use a mini elastic and keep the section narrow. Bigger accent braids stop looking like accents.
18. The Milkmaid Braid
Milkmaid braids are a good answer when you want the look of a crown braid without doing the whole head in one piece.
You make two braids, one on each side, then bring them up and pin them across the top of the head. The result is charming, secure, and easier to manage than a single braid that has to wrap all the way around. Long hair helps here because the braids need enough length to cross over neatly without sticking out.
Why It’s Easier Than It Looks
Each side is just a regular braid. That’s it. You are not inventing a new hand pattern; you are only arranging the finished braids differently. That makes this style a friendly choice for beginners who can braid but do not yet trust themselves to pin a full crown evenly.
If your hair is thick, the style sits better when the braids are not pulled too tight. If your hair is fine, you may want to tease the roots lightly so the pinned braids have something to hold onto. The style works best when the braids feel snug but not stiff.
19. The Messy Side Braid
A messy side braid is one of the few styles where a little imperfection helps.
You sweep the hair to one side, braid it loosely, and leave a few face-framing strands out if you want softness. The braid does not need to be polished to work. In fact, a too-perfect side braid can look a little severe on long hair, while a softer one feels easier to wear.
What Gives It That Relaxed Look
The looseness comes from two places: the braid tension and the pulled-apart edges. Once the braid is tied off, tug the outer loops just a little to widen the shape. That creates texture and makes the braid look fuller without needing extra products.
- Start lower than you would for a regular side braid.
- Keep the braid slightly loose from the start.
- Pull a few strands around the face if you want movement.
- Use texturizing spray if the hair is too silky.
This style is one I reach for when the hair is clean but not cooperating. It does not fight back.
20. Braided Space Buns
Two small braids turned into buns can make long hair feel controlled without looking severe.
The usual move is to part the hair down the middle, braid each side, then coil each braid into a bun near the crown or behind the ears. It gives you symmetry, keeps the ends tucked away, and turns a basic braid into something with a little personality. The style is especially useful when you want your hair off your neck but still want a playful shape.
What makes this beginner-friendly is the repetition. You do the same braid twice, then pin each one into a circle. If one bun ends up a little bigger, it still works. Long hair gives the buns enough material to look full, which is half the appeal.
A few pins under each bun usually do the job. If the ends poke out, tuck them underneath instead of trying to fight them flat.
21. The Headband Braid
A headband braid sits right across the front of the hair, and that makes it a smart option for long hair that needs a quick fix.
You braid a section from one side of the head to the other, following the hairline like an actual band. It keeps the front pieces back without hiding the rest of your length. That’s the useful part. You get control at the front and freedom everywhere else.
Unlike a crown braid, this style only travels across one visible area. That means less pinning and less chance of the shape sliding apart in the back. It also works well with both straight and wavy hair, because the braid has a clear place to live and doesn’t need to wrap all the way around the head.
If your hair falls in layers, the braid may need a few extra pins at the far side. That is normal. Pin from underneath and let the loose hair cover the hardware.
22. The Ribbon-Woven Braid
A ribbon-woven braid is a good finishing touch when a simple braid feels too plain.
You thread a thin ribbon through one section of the braid or weave it alongside the strands as you braid down. The method is still straightforward — basic braid, extra detail — but the ribbon changes the whole mood. Long hair gives the ribbon enough runway to show up clearly, which is why this style works better on length than on short cuts.
Choose a ribbon that is narrow and not too slippery. Satin looks pretty, but it can slide if you tie it poorly. Cotton or grosgrain holds better. If the ribbon is too wide, it crowds the braid and turns the style stiff. Thin is safer.
This is also a useful rescue style for hair that needs a little extra polish without a full redo. One ribbon, one braid, and the whole thing looks like you planned it.
A good braid does not need to be hard. It needs to hold, stay comfortable, and look like you meant it. That is enough.
