



Long hair and fishtail braid hairstyles have a funny little problem built into them: the hair looks richer, heavier, and more dramatic, but it also slips apart if you rush the setup. On a smooth blowout, a fishtail braid can start out gorgeous and turn soft in exactly the wrong way by lunch. On day-two hair, it often behaves better. On very silky hair, you may need a touch of grip at the roots or a tiny bit of powder through the lengths.
That’s why the braid matters as much as the style. A fishtail on long hair can read polished, romantic, sporty, boho, or straight-up formal, and the difference usually comes down to two things: how tight you begin and how much you loosen at the end. I have a soft spot for braids that still look like hair, not rope. Too perfect feels stiff. Too loose falls apart.
The long length gives you room to play. You can pull the braid over one shoulder, wrap it into a bun, split it into pigtails, or weave in ribbon and still have enough hair left for shape. That’s the real gift here.
Start with the side version, because it shows the pattern clearly and makes every other fishtail braid hairstyle easier to understand.
1. Classic Side Fishtail Braid
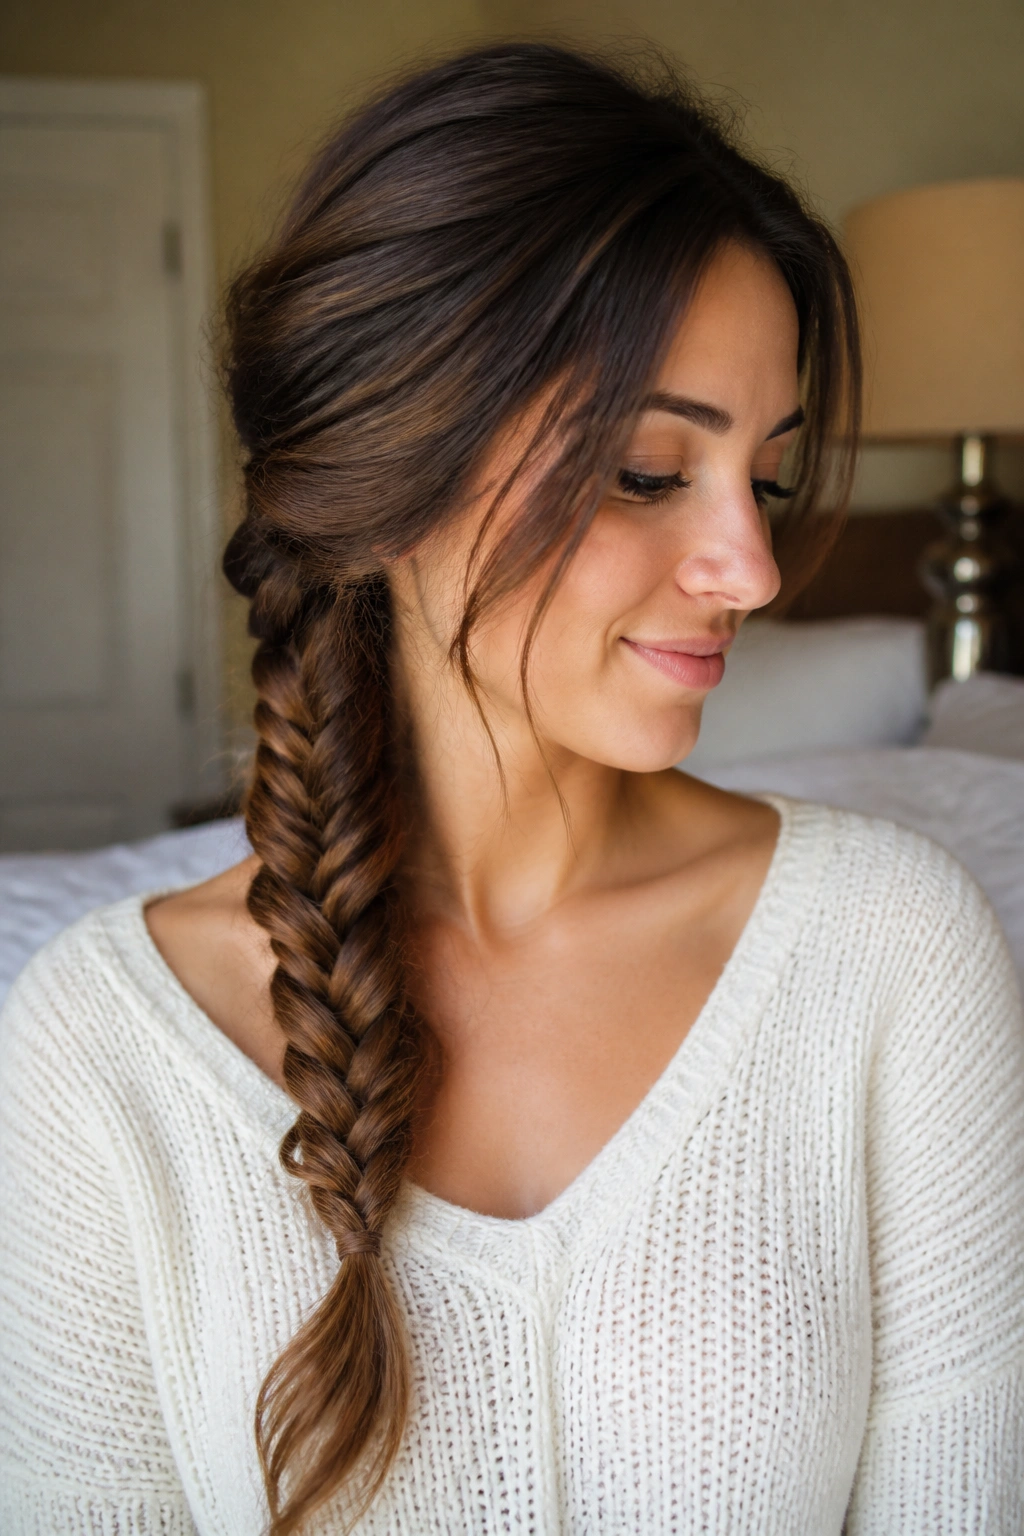
A side fishtail is the most forgiving place to start, and honestly, it still looks good even when it isn’t perfect. Sweep all the hair to one shoulder, divide it into two sections, then keep pulling tiny outer pieces from side to side until you reach the end. That’s the whole engine.
Why it works on long hair
Long hair gives the braid weight, so the pattern sits down instead of puffing out like a small halo. The extra length also lets you tug the braid wider at the end without losing the tail entirely.
- Start with hair that has a little texture, not glass-slick strands.
- Use 1/4-inch sections from the outside edges.
- Secure the end with a small clear elastic 2 to 3 inches from the last woven piece.
- Pull the braid apart with your fingertips, not a comb.
Best tip: braid slightly tighter than you think at the top. Long hair relaxes as it settles.
2. Sleek Center-Back Fishtail Ponytail

A slick center-back fishtail is the one I reach for when I want the braid to look sharp, not casual. It takes the simple ponytail shape and gives it more detail, which is exactly why it works so well with long hair. The length hangs cleanly, and the braid pattern stays visible from top to bottom.
Brush the hair straight back, gather it at mid-crown or just below it, and tie a firm ponytail first. Then fishtail-braid the tail all the way down. That extra ponytail base keeps layers from slipping loose while you braid, which is especially helpful if your hair is thick or freshly washed.
It’s a neat style for work, dinner, or any day when you want your hair off your face but not boring. If the top looks too severe, leave a thin side part and smooth only the front sections back. The braid still feels polished. Just less stiff.
3. Half-Up Fishtail Crown
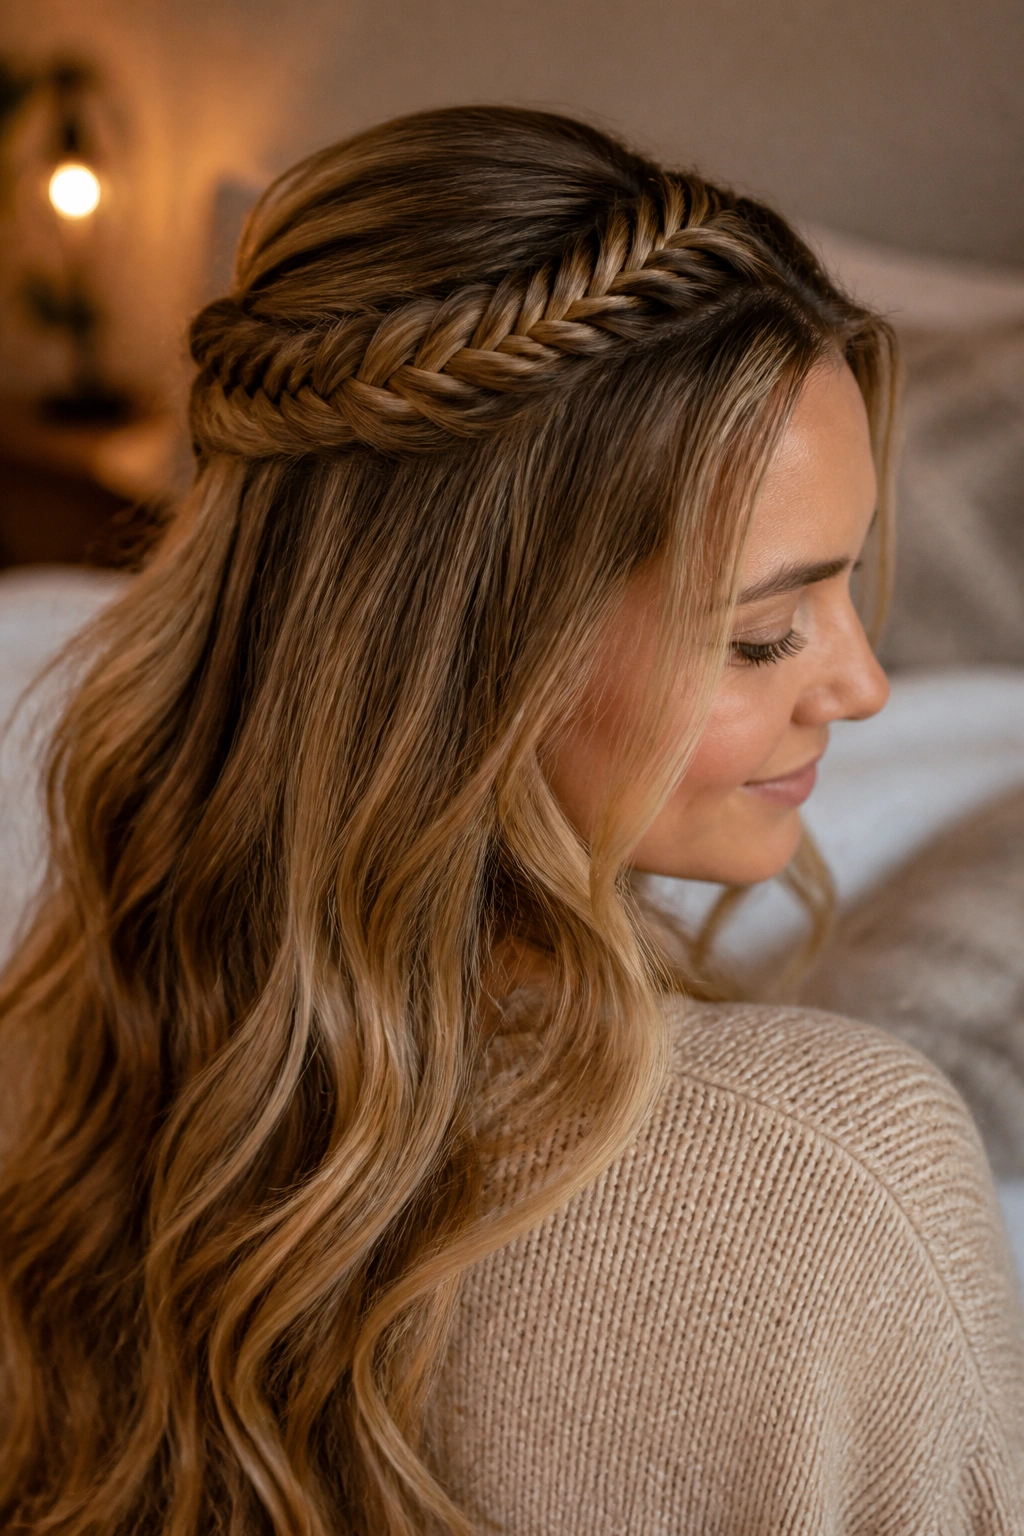
Why does a half-up fishtail look so flattering on long hair? Because it gives you the shape of a braid without stealing all the length. The top half gets lifted, the bottom half stays loose, and the result feels soft instead of heavy.
How to place it
Take a section from temple to temple, about 2 to 3 inches deep, and clip the rest away. Braid that top section into a small fishtail, starting near the crown so the pattern sits high enough to show. Secure it with a tiny elastic, then let the loose length fall beneath it.
The trick is to keep the braid narrow. If you start too wide, the top half can look bulky fast. If your hair is layered, mist the ends with a light spray before braiding so the shorter pieces stay put.
- Best for long layers
- Good for second-day hair
- Easy to dress up with a barrette
- Looks fuller when the braid is lightly pancaked
4. Double Fishtail Pigtails

Two fishtails give long hair a playful shape that a single braid can’t match. Split the hair straight down the middle, then braid each side from just behind the ears to the ends. Keep the tension even. Not tight. Even.
This style works because the braid weight is distributed on both sides, so the hair feels lighter on the neck. That matters when the hair is very long or thick. It also keeps the look from collapsing to one shoulder, which can happen with a single braid after a few hours.
What to watch for
- Make the part clean at the scalp, but don’t obsess over every line.
- Use matching elastics so one side doesn’t look louder than the other.
- Leave a few face-framing pieces out if you want it softer.
- Braid each side to the same point before securing the ends.
A little asymmetry is fine. Symmetry that’s too exact can look stiff.
5. Pancaked Mermaid Fishtail

A pancaked fishtail is what happens when you take the braid and spread it out until it looks wide, soft, and almost airy. On long hair, that extra width is the whole point. The braid becomes more of a statement, and the pattern shows up better than it does in a thin, tight plait.
Start with a normal fishtail braid. Then use both hands to gently pull at the outer edges of each woven section, beginning at the top and working down inch by inch. Don’t yank. Tug. The braid should widen without turning fuzzy.
If your hair is thick, this look can get huge in the best way. If your hair is fine, it still works, but you’ll want to keep the top tighter so the width comes from the braid itself rather than loose flyaways. I like this one for long lengths because the braid can keep going and still look balanced. It has room to breathe.
6. Fishtail Wrapped Ponytail

Unlike a plain ponytail, this version hides the elastic and gives the whole style a cleaner finish. That’s the big draw. You gather the hair into a low or mid ponytail, fishtail the tail, then wrap a small strand around the base so the hair tie disappears.
The wrapped base makes the style look more finished than a normal braid tie-off. It also gives a slightly longer neck line, which I love on long hair because it keeps the braid from feeling bottom-heavy.
Use a 1-inch strand from underneath the ponytail wrap, tuck the end under the base, and pin it flat with one bobby pin. If your hair is thick, use two pins crossed in an X. That sounds fussy. It isn’t. It just keeps the wrap from sliding.
This braid reads clean, not flashy. Which is the point.
7. Dutch Crown Into Fishtail Length
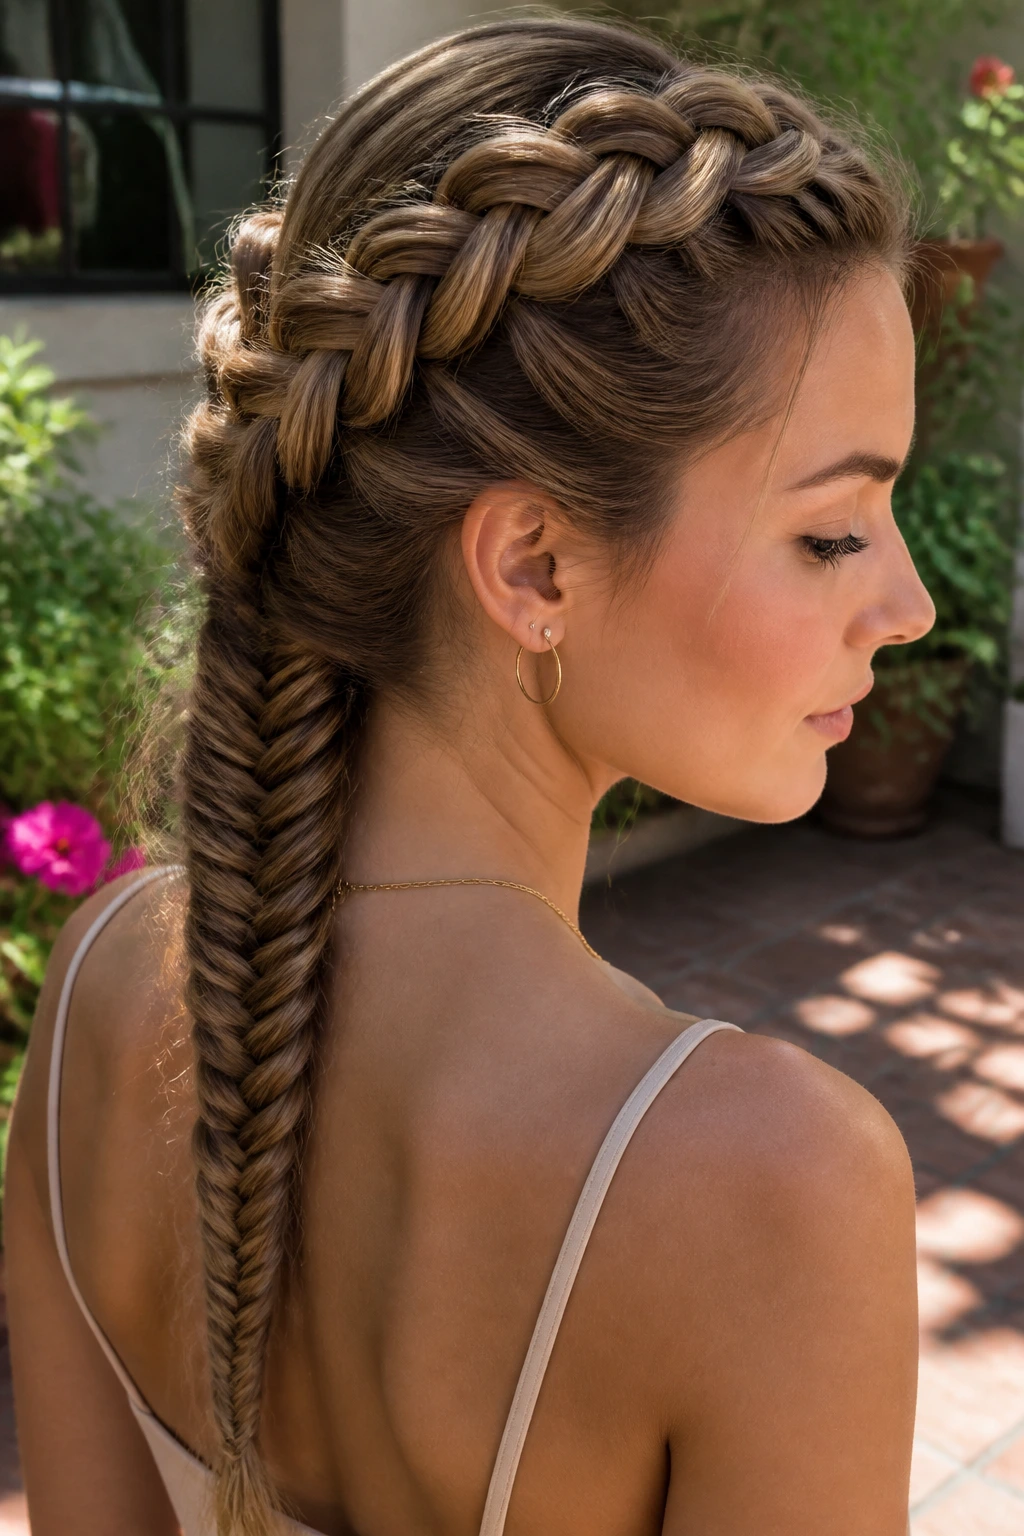
A crown that starts as a Dutch braid and finishes as a fishtail is one of those styles that looks more complicated than it is. The Dutch section hugs the scalp and creates the crown shape, then the braid can loosen into a fishtail when you reach the back or side of the head.
The switch from Dutch to fishtail
Begin at one temple and braid along the hairline, crossing the strands under instead of over so the braid lifts. Keep feeding in hair as you travel across the crown. When you reach the point where you want the braid to stop hugging the head, let the added sections fall away and continue the tail as a fishtail.
That transition is smoother if you keep the first part snug. Too loose, and the crown loses shape. Too tight, and the braid digs into the scalp. There’s a narrow middle ground, and that middle ground is where the style looks expensive without actually being precious.
Pin the end under the braid if you want a hidden finish.
8. Messy Boho Side Fishtail
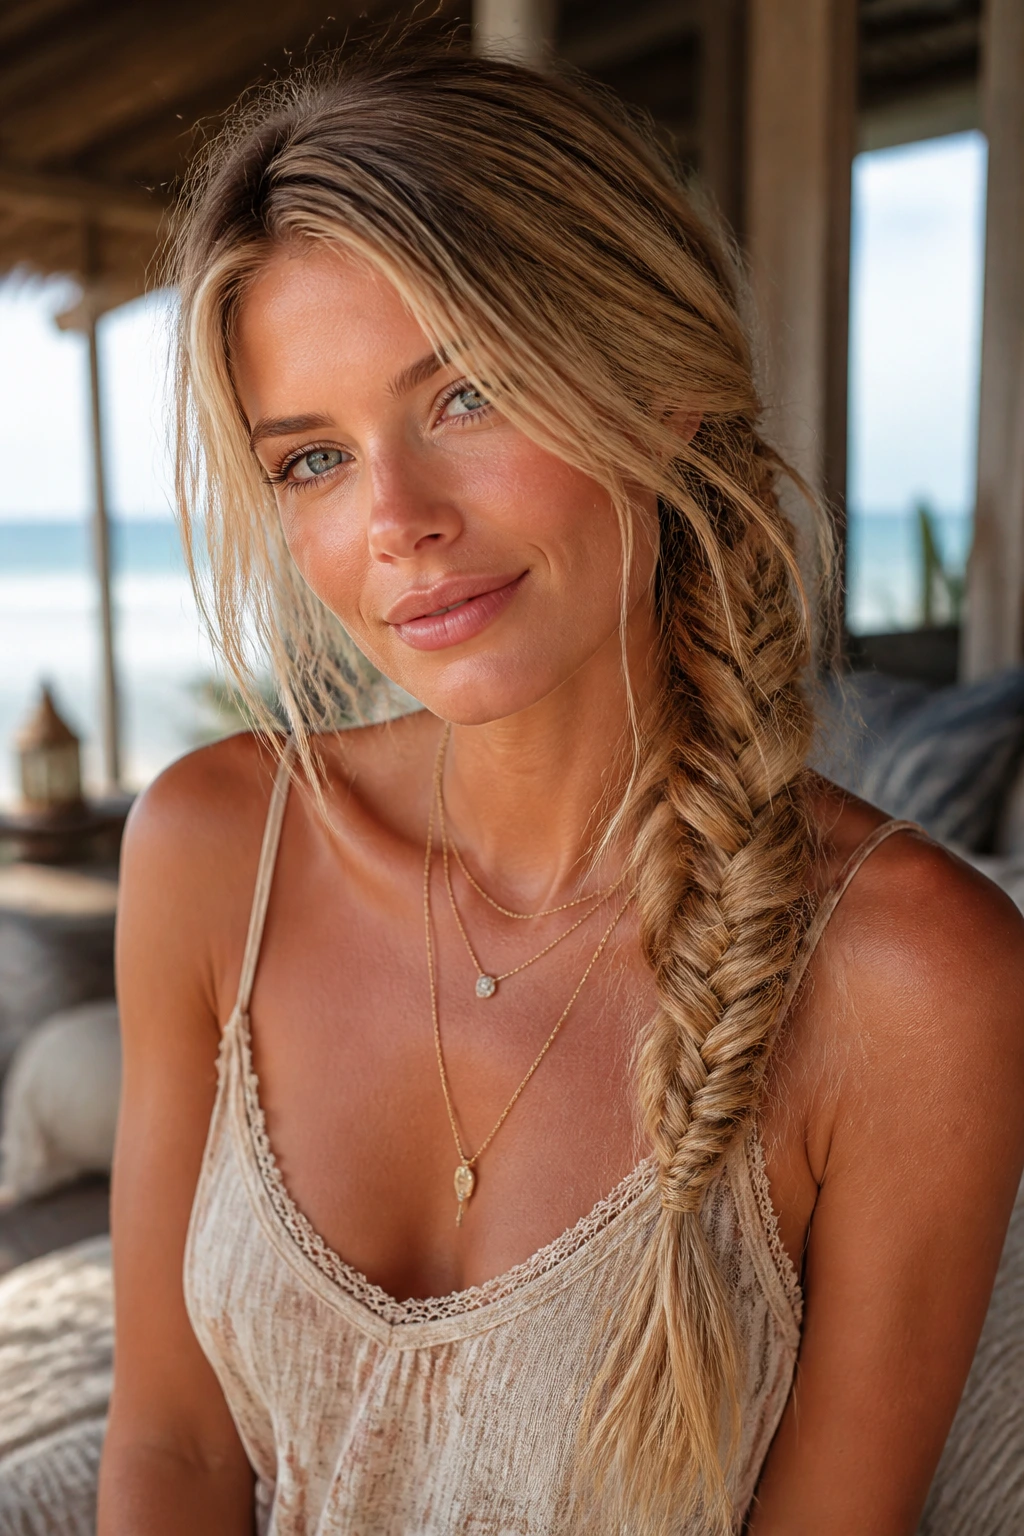
A messy side fishtail is forgiving in a way that a sleek braid never is. You do not need every strand to behave. In fact, a little mess helps. The braid sits over one shoulder, the ends stay soft, and the whole thing feels relaxed without looking unfinished.
Before you braid, rough up the roots with a bit of dry shampoo or texture spray. Then use your fingers instead of a brush so the hair keeps some natural separation. That separation is useful. It gives the fishtail pattern something to grip.
A few loose strands around the face help too, especially if the hair is long enough to fall past the collarbone. If you curl those front pieces with a 1-inch iron, the braid gets a softer frame. But the braid itself should stay the focus. Loose. Controlled. Slightly undone. That balance matters more than perfection ever does.
9. Halo Fishtail Crown
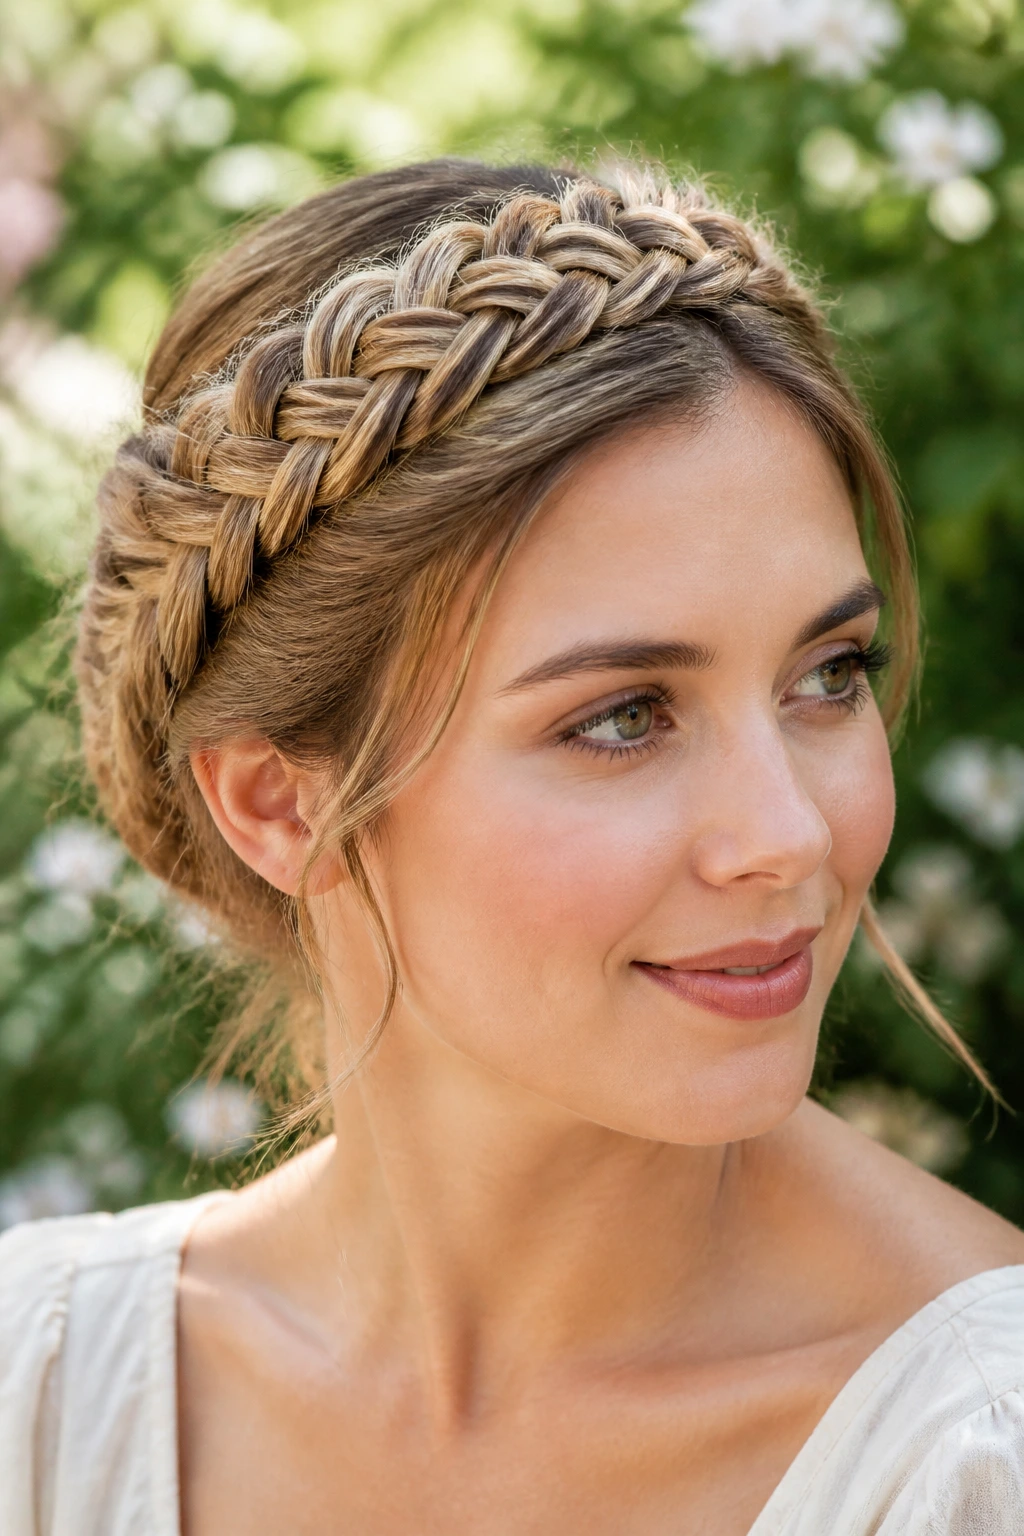
Can a fishtail braid act like a headband? Absolutely. A halo braid wraps around the head, and on long hair the fishtail pattern gives it more texture than a regular three-strand crown. It’s a pretty useful style when you want the hair up and off the neck but don’t want a full bun.
Where to hide the ends
Start behind one ear and braid along the perimeter of the head, either all the way around or from one side to the other. Keep the braid close to the hairline so it reads like a frame, not a loose side braid that wandered upward by accident. When you reach the opposite side, tuck the end under the start point and pin it flat.
- Use bobby pins that match your hair color.
- Cross two pins if the braid feels heavy.
- Smooth the crown before pinning so the braid sits evenly.
- Check the back of the head in a mirror. Always.
The halo look is one of the neatest protective options here, because the ends can be tucked in rather than left hanging.
10. Low Fishtail Bun
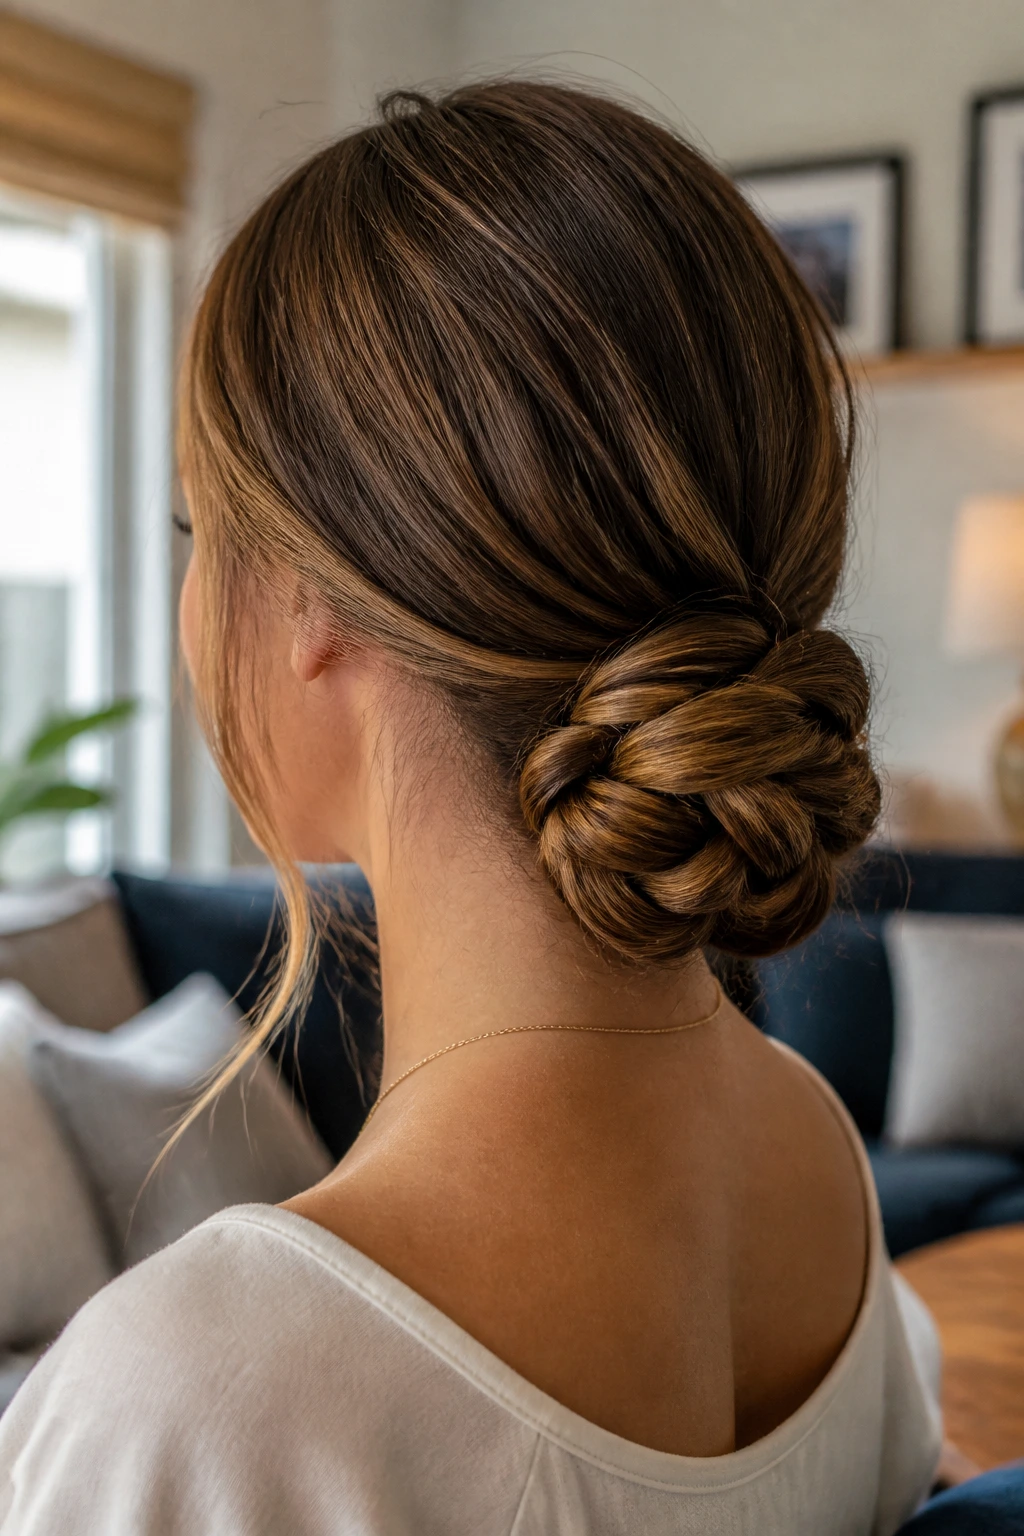
A low fishtail bun does a nice job of keeping long hair under control without making it look severe. The braid gives the bun some detail, and the bun keeps the length from swinging around your shoulders. That combination is useful for events, humid days, or any time you want your hair to stay put.
Tie the hair into a low ponytail at the nape first. Fishtail the tail nearly to the end, leaving about 2 to 3 inches free, then coil the braid into a bun and secure it with bobby pins or U-pins. If the braid feels bulky, fold it in half before wrapping. That keeps the bun flatter.
A few practical notes
- Thick hair may need 6 to 8 pins.
- Fine hair usually needs fewer pins, but a stronger elastic at the base.
- Keep the bun low enough that it doesn’t pull when you turn your head.
- Leave the braid slightly loose before coiling if you want more shape.
It’s tidy, but not severe. That’s a rare combination.
11. Waterfall Accent Into Fishtail Length
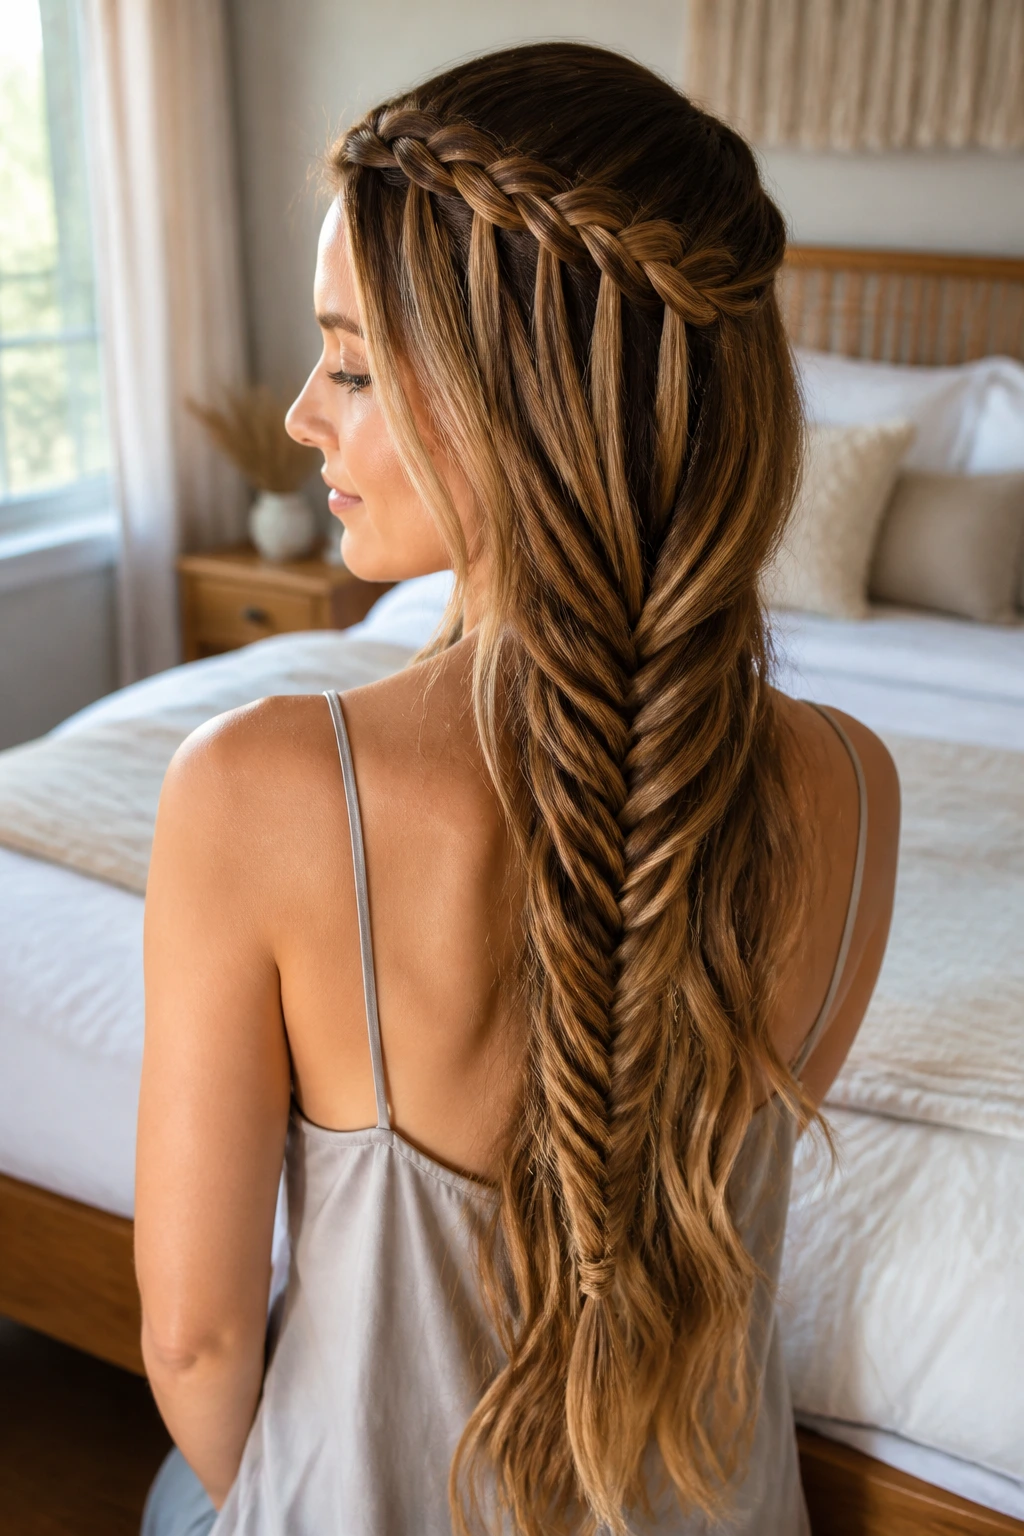
A waterfall accent makes the braid feel softer right from the start. Instead of braiding all the hair at once, you leave some strands dropping through the weave so the top section looks airy, then let the braid flow into a full fishtail through the lengths. On long hair, that transition is lovely because there is enough length to show both parts clearly.
The waterfall section usually sits best across the top back of the head, starting near one side and traveling toward the other. Keep the dropped pieces thin. Thick drops can make the braid look messy in a rushed way, and that’s not the goal here.
I like this one for long hair with some natural bend, because the free-falling pieces move a little while the fishtail below stays controlled. It feels less formal than a crown braid and more interesting than a simple side plait. That’s a good place to be. Not too dressed up. Not too plain.
12. Ribbon-Woven Fishtail
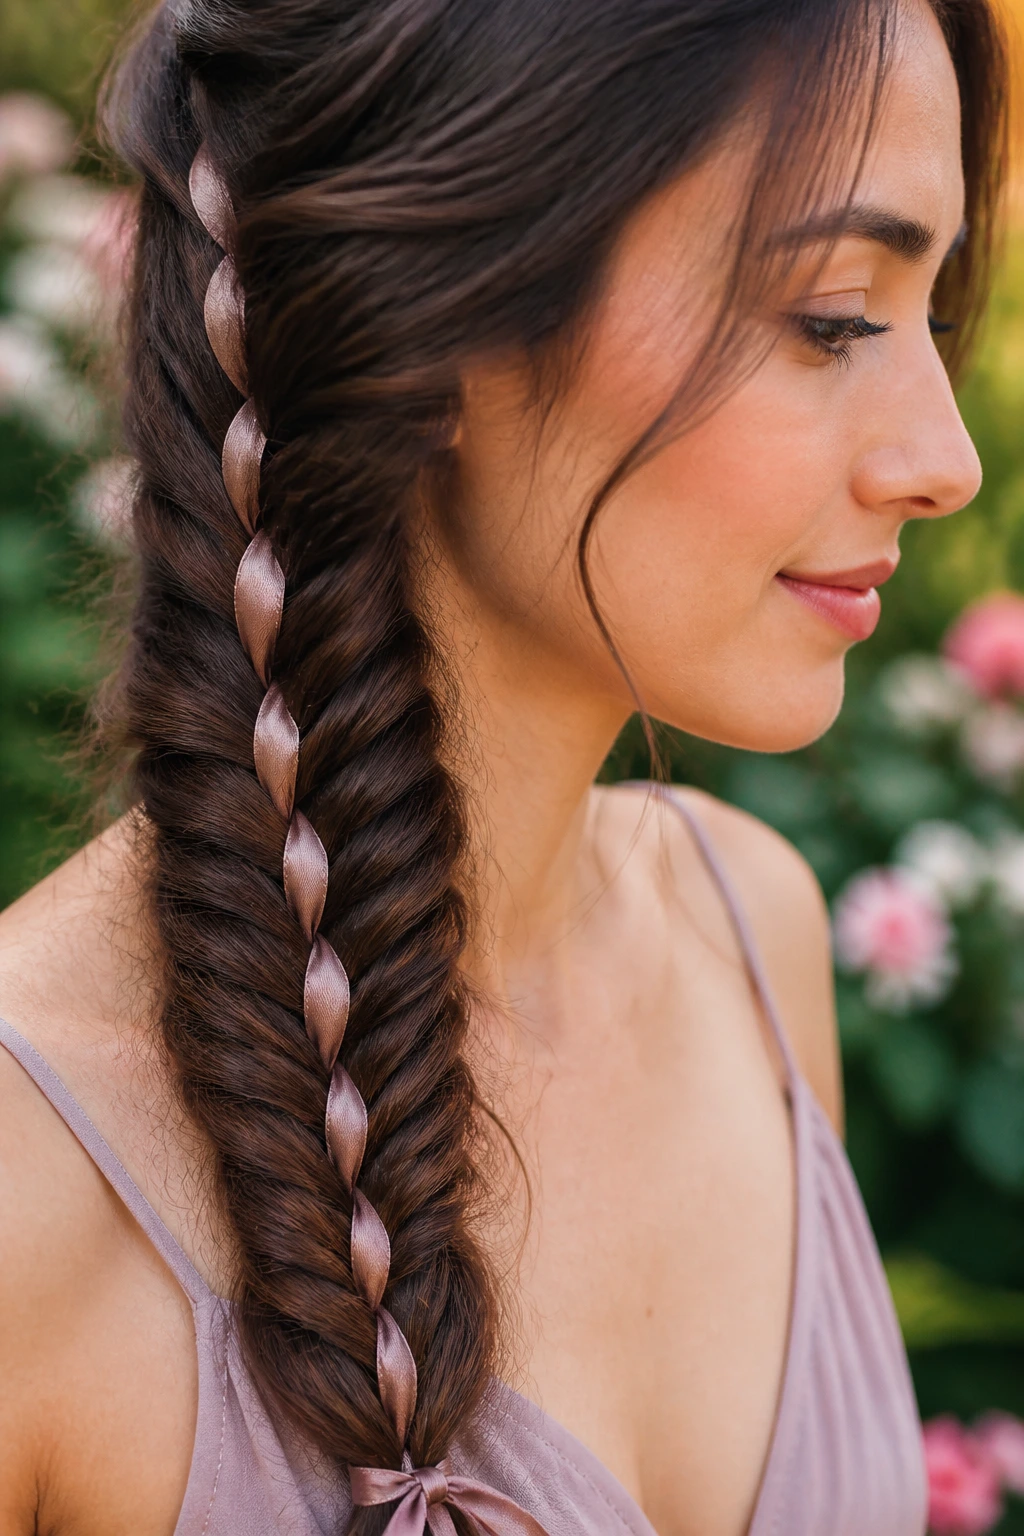
A ribbon woven into a fishtail changes the whole mood of the braid. The color shows through the pattern, and the long length gives that ribbon somewhere to go without ending too soon. It’s a small change, but it makes a big difference in photos and in person.
Pick a ribbon that is 1/4 to 1/2 inch wide so it doesn’t fight the braid. Satin looks smooth. Grosgrain holds shape better. If the ribbon is slippery, tie it around a small hidden section at the top before you start braiding. That keeps it anchored.
This style is useful when the braid needs a little more personality than hair alone can give. School events, weddings, holiday dinners, even a simple white tee and jeans — the ribbon shifts the tone fast. You do not need bright color either. A deep brown ribbon on dark hair can look understated in the best way.
13. Lace Fishtail Along One Side

A lace fishtail is what happens when you only feed hair into one side of the braid instead of both. That gives the braid a curved, sweeping shape along the head and leaves the rest of the length free. It’s a clean look, and on long hair it gives you a lot of room to show off the ends.
What makes it different
Because the braid pulls from just one side, the opposite side stays smoother and more open. That makes the shape lean, not heavy. It also helps if you want the braid to follow the line of a deep part or trace the curve of the hairline.
- Start with a side part or a deep off-center part.
- Add hair only from the upper side of the braid.
- Keep the lower side tight so the braid doesn’t drift.
- Finish with loose lengths left over one shoulder.
This one is beautiful when the hair is long enough to drape past the shoulder blade. Shorter lengths can do it too, but long hair gives the lace pattern more drama.
14. Braided Mohawk Fishtail
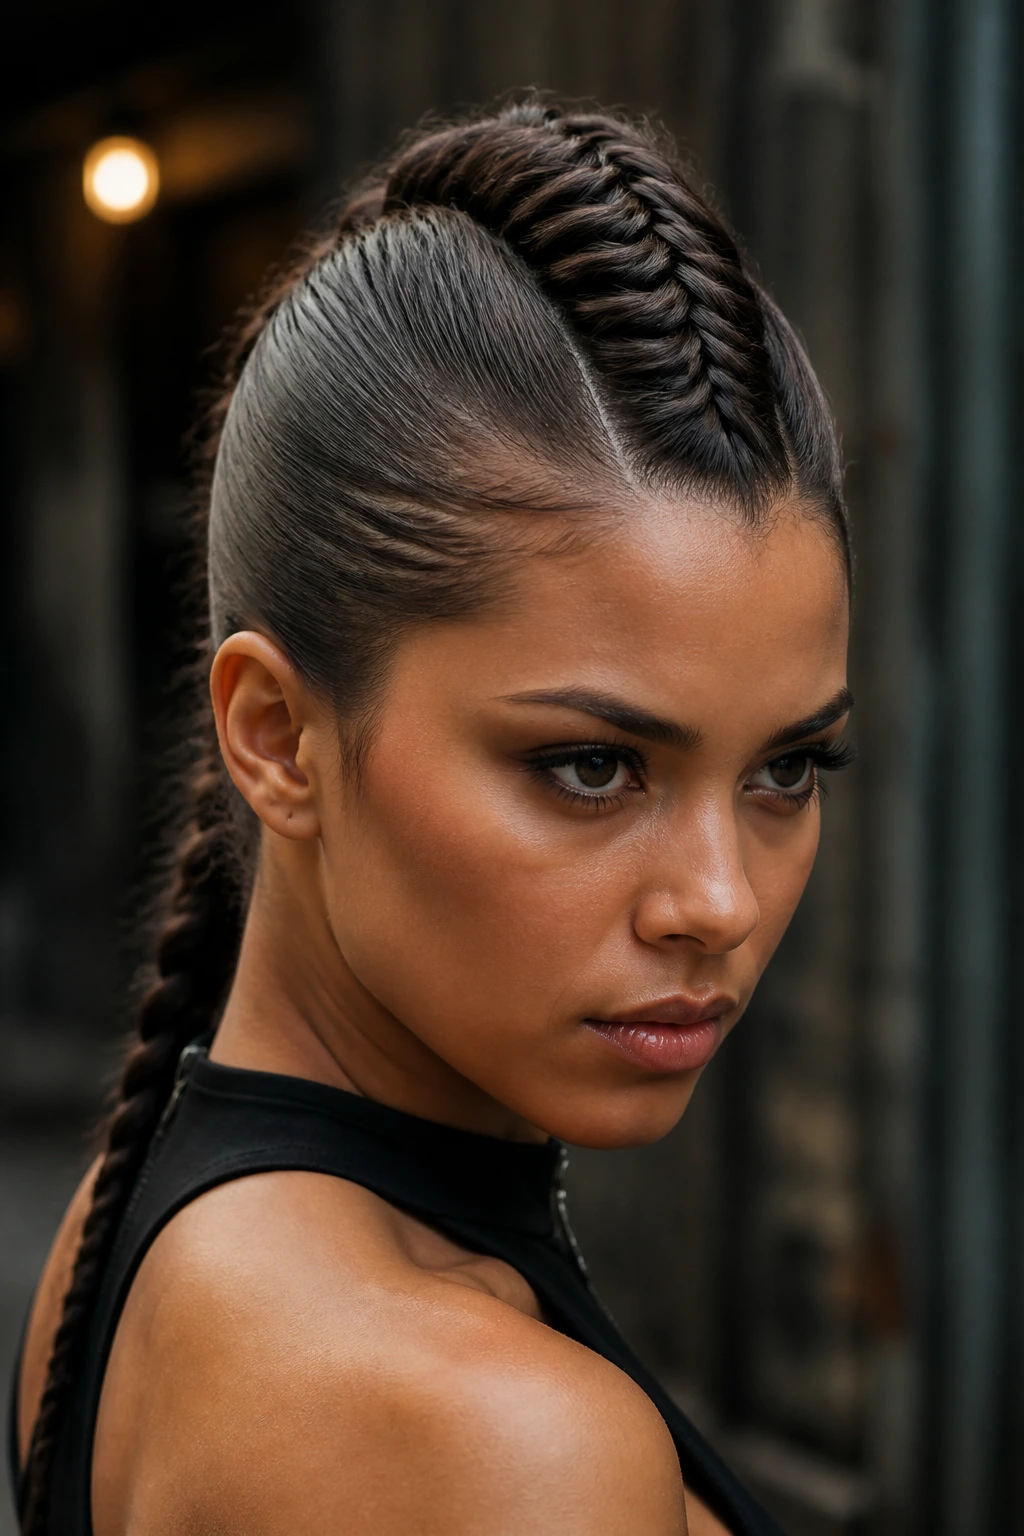
A braided mohawk fishtail has attitude. No pretending otherwise. The center section runs from the forehead back toward the nape, while the sides stay slicked, pinned, or tucked close to the head. On long hair, that center strip gives the braid real presence.
What makes it work is contrast. The sides are smooth and controlled, so the middle braid looks sharper by comparison. If you want more lift at the crown, tease the roots in the center section just a little before you braid. Not a mountain. Just enough to keep the braid from lying flat.
This style suits a night out, a concert, or any moment when you want the braid to feel stronger than soft. It can also be a smart way to handle long layers because the centered braid keeps most of the shorter pieces contained. A neat edge. A bit of drama. That’s the whole point.
15. Pull-Apart Oversized Fishtail
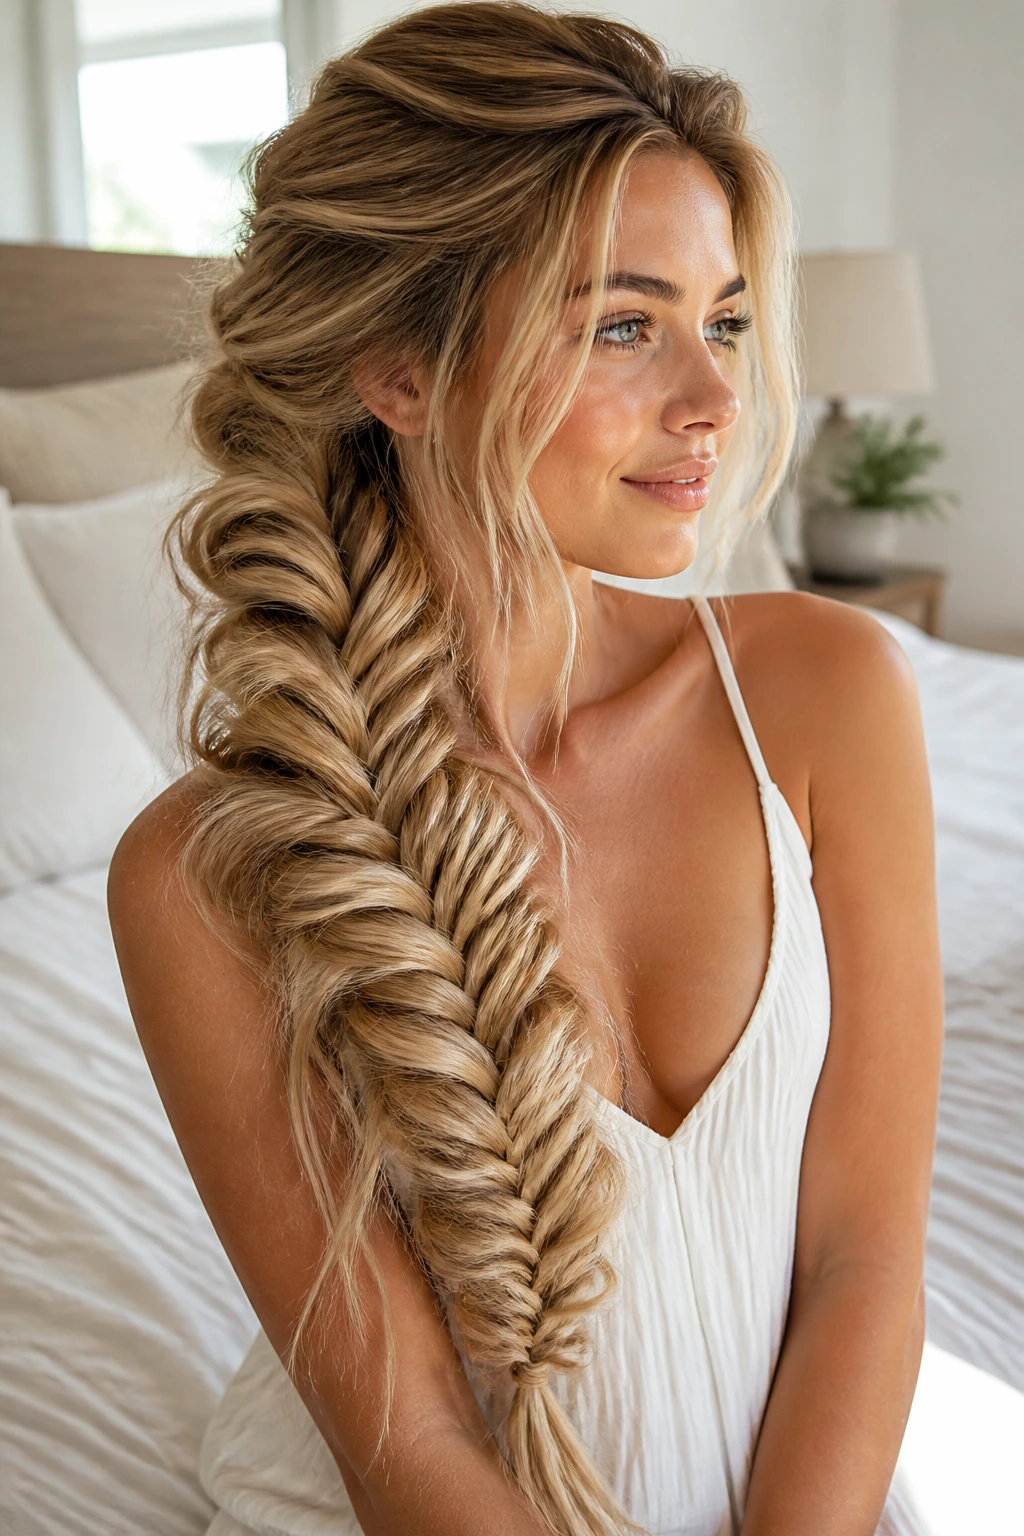
Why does a pull-apart fishtail look so full? Because the braid is built for it. The pattern is narrow at first, then you widen it with your fingers until it becomes a big, airy braid that takes up space in the best possible way. Long hair gives you the material to do that without the braid collapsing.
How to stretch it cleanly
Start by tying the braid off a little lower than usual. Then, after it’s finished, hold the top in one hand and gently tug the outer edges of each section outward. Pull a little, move down, pull a little more. If you try to widen the entire braid at once, the tension gets uneven.
- Keep the top few inches tighter.
- Pull the middle sections first.
- Leave the tail a little narrower so it doesn’t look stubby.
- Use your fingertips, not a brush.
This braid looks expensive in photos because the pattern has depth. It also works well on thick long hair that needs a shape with some presence.
16. Bubble Fishtail Ponytail
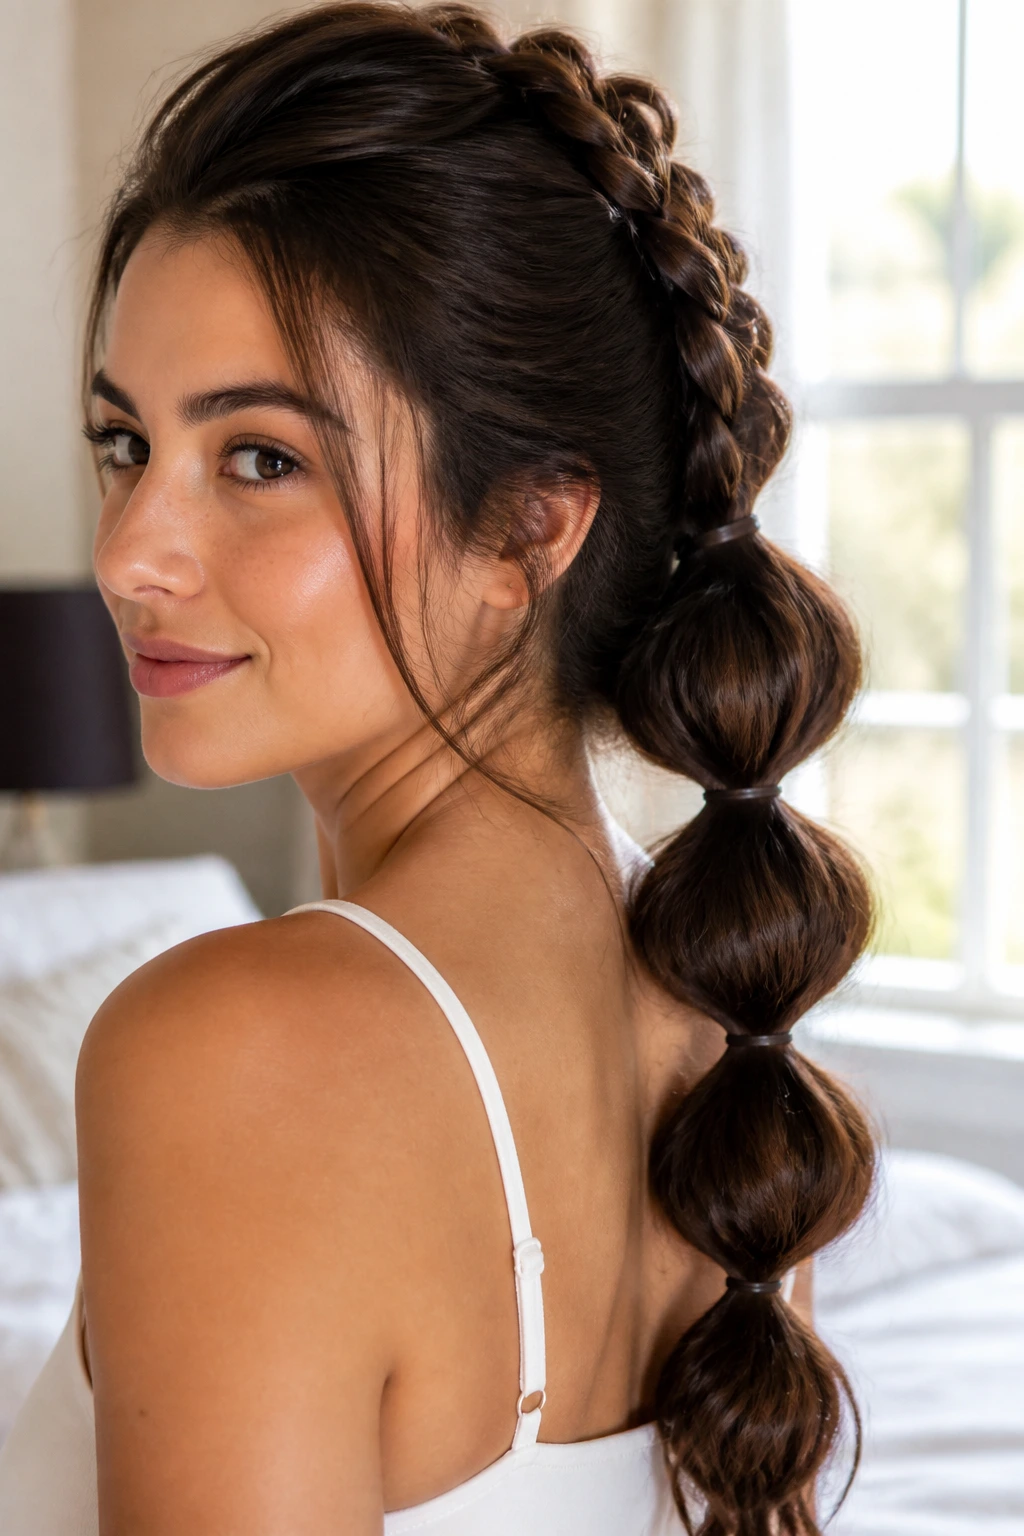
A bubble fishtail is a good answer when you want texture without a braid that takes forever. Braid the top or middle section into a fishtail, then switch the rest of the length into bubble segments with clear elastics spaced every 2 to 3 inches. Gently tug each section so it rounds out.
That mix of braid and bubble shape keeps the hair interesting all the way down. Long hair is the reason it works so well. Shorter hair can do it, but the bubbles need enough tail to look intentional, not cramped.
I like this style for active days because the elastics help hold the shape, and the braid at the top keeps the whole ponytail from looking too plain. If your hair is very thick, hide the elastics with thin wrapped strands. If it’s fine, keep the bubbles smaller so they don’t look sparse. Either way, the rhythm of the style carries the look.
17. Inverted Fishtail Braid
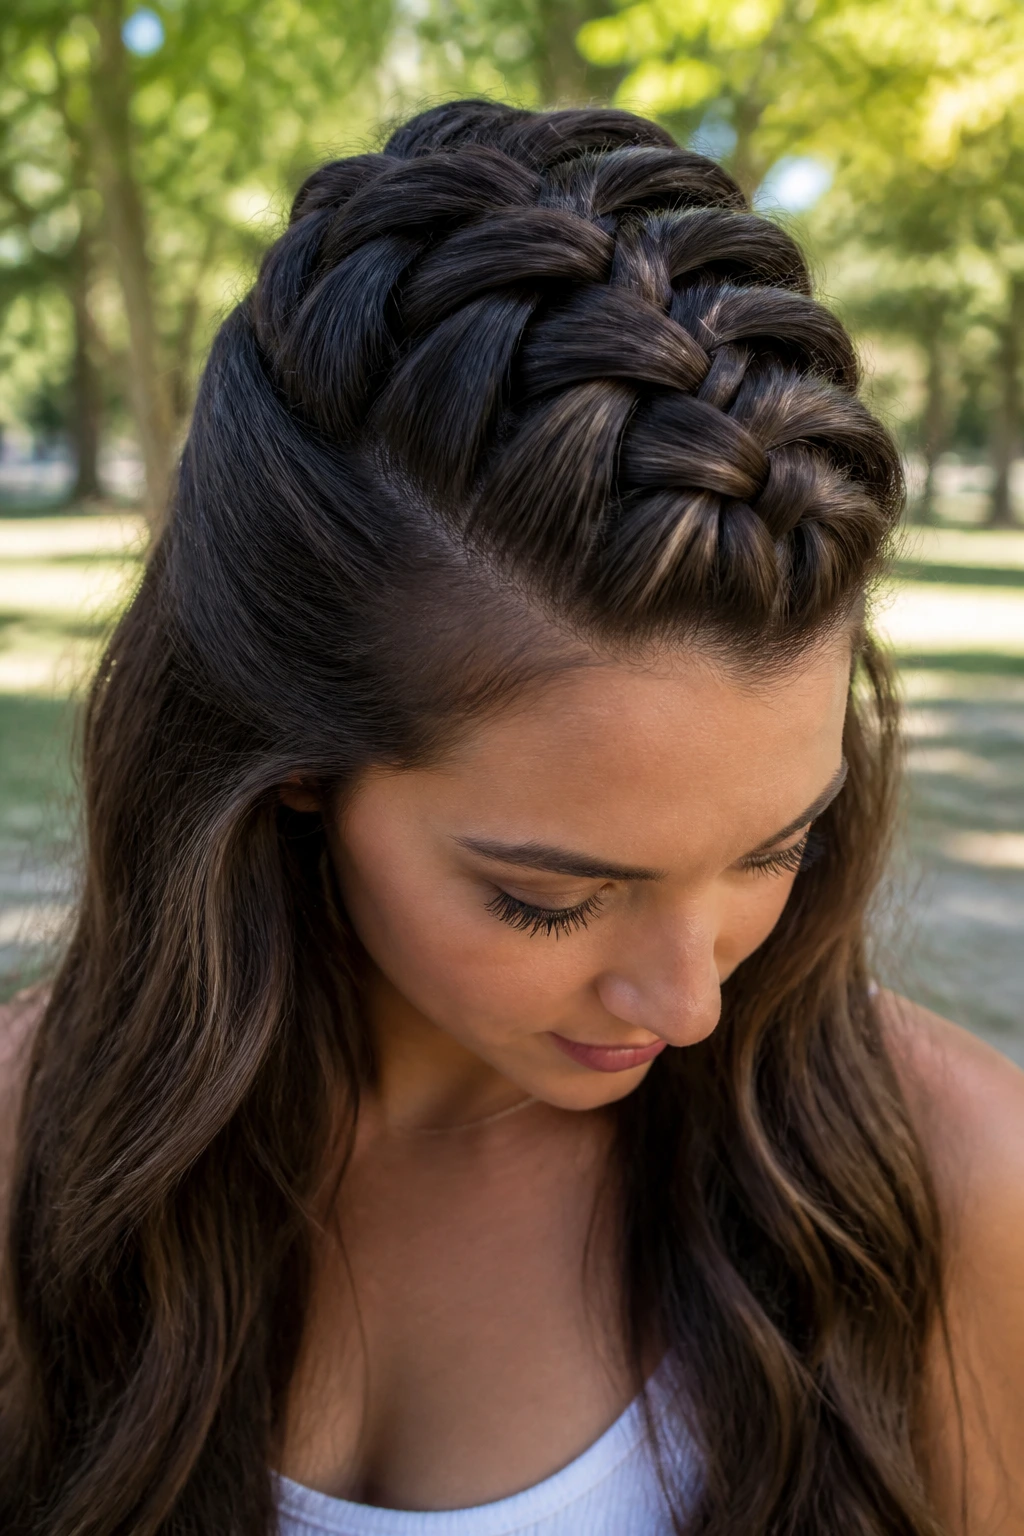
An inverted fishtail has a different feel from the standard version because the braid sits flatter and looks a little chunkier. The woven pieces create a raised texture that shows up fast on long hair, especially if the strands have a little grit to them. That flatter shape is useful when you want the braid to stay close to the head or lie neatly down the back.
The technique itself is not hard, but it does ask for patience. Keep the strands neat at the top, and cross each small outer piece under and across in a steady rhythm. If you rush, the pattern gets sloppy. If you slow down, the braid holds its shape better.
This version is a smart pick for layered hair, because the braid’s structure helps catch shorter pieces before they escape. It also looks good tucked into a low finish, where the flat texture can sit against the neck without sticking out awkwardly. Clean. Practical. Slightly unexpected.
18. Low Side Fishtail With Deep Part

A deep side part changes the whole personality of a fishtail braid. Instead of sitting evenly down the back, the braid starts with a strong sweep and lands over one shoulder with a little more shape around the face. On long hair, that asymmetry feels deliberate, not messy.
It’s a useful choice if you want the braid to soften a strong jawline or just break up a long, straight curtain of hair. The part gives the style some movement before the braid even begins. That matters. A braid can only do so much if the base is flat.
Keep the braid close to the shoulder and let the front pieces stay loose enough to move. Too many face-framing strands and the style starts to look unfinished. Too few, and the part can feel severe. I usually aim for one thin piece on the heavier side of the part and let the rest stay clean.
19. Crown Fishtail With Tucked Ends
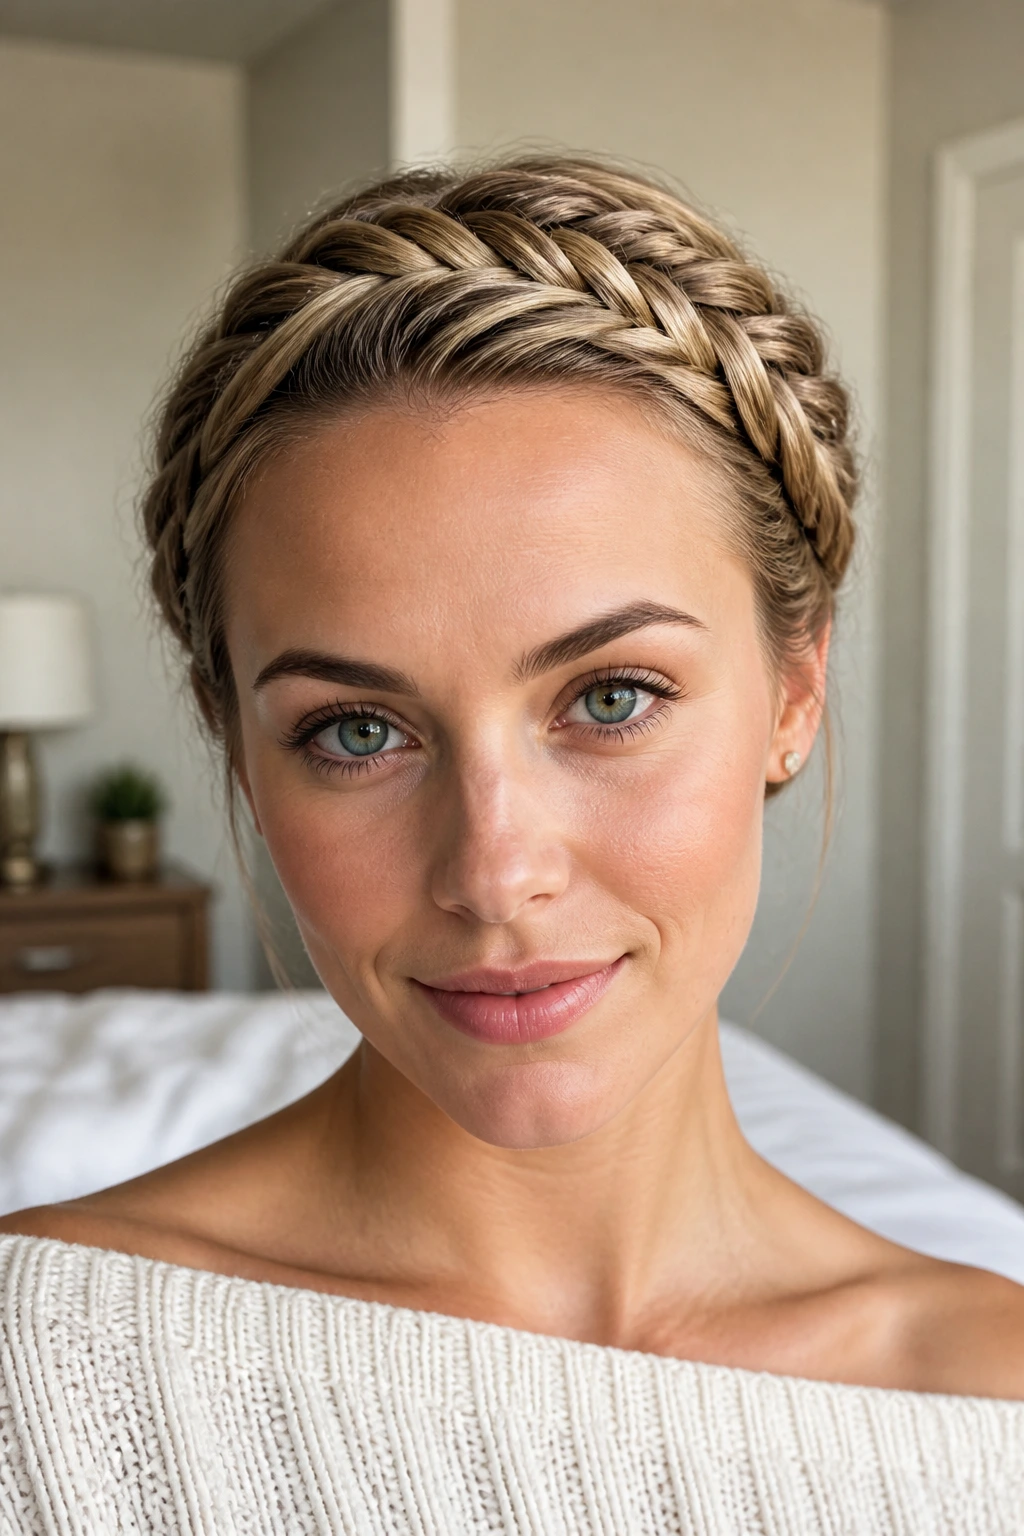
A crown braid looks especially tidy when the ends are tucked under the braid instead of left hanging. On long hair, that tucked finish keeps the style from becoming bulky at the nape, which is often the weak spot in crown styles. It’s a small detail, but it changes the whole line of the hairstyle.
The clean finish
Braid around the head from one side to the other, keeping the fishtail close to the hairline. When the braid reaches the opposite side, slide the ends beneath the crown section and pin them flat. If the tail is thick, fold it once before tucking so it sits lower.
- Use two pins at the tuck point.
- Hide the pin ends under the braid.
- Smooth the hair above the ears before pinning.
- Check that the crown feels comfortable, not tight.
This is one of the neatest protective braid styles on long hair because the ends are fully contained. No swinging tail. No awkward poking.
20. Twisted Fronts Into Fishtail Tail
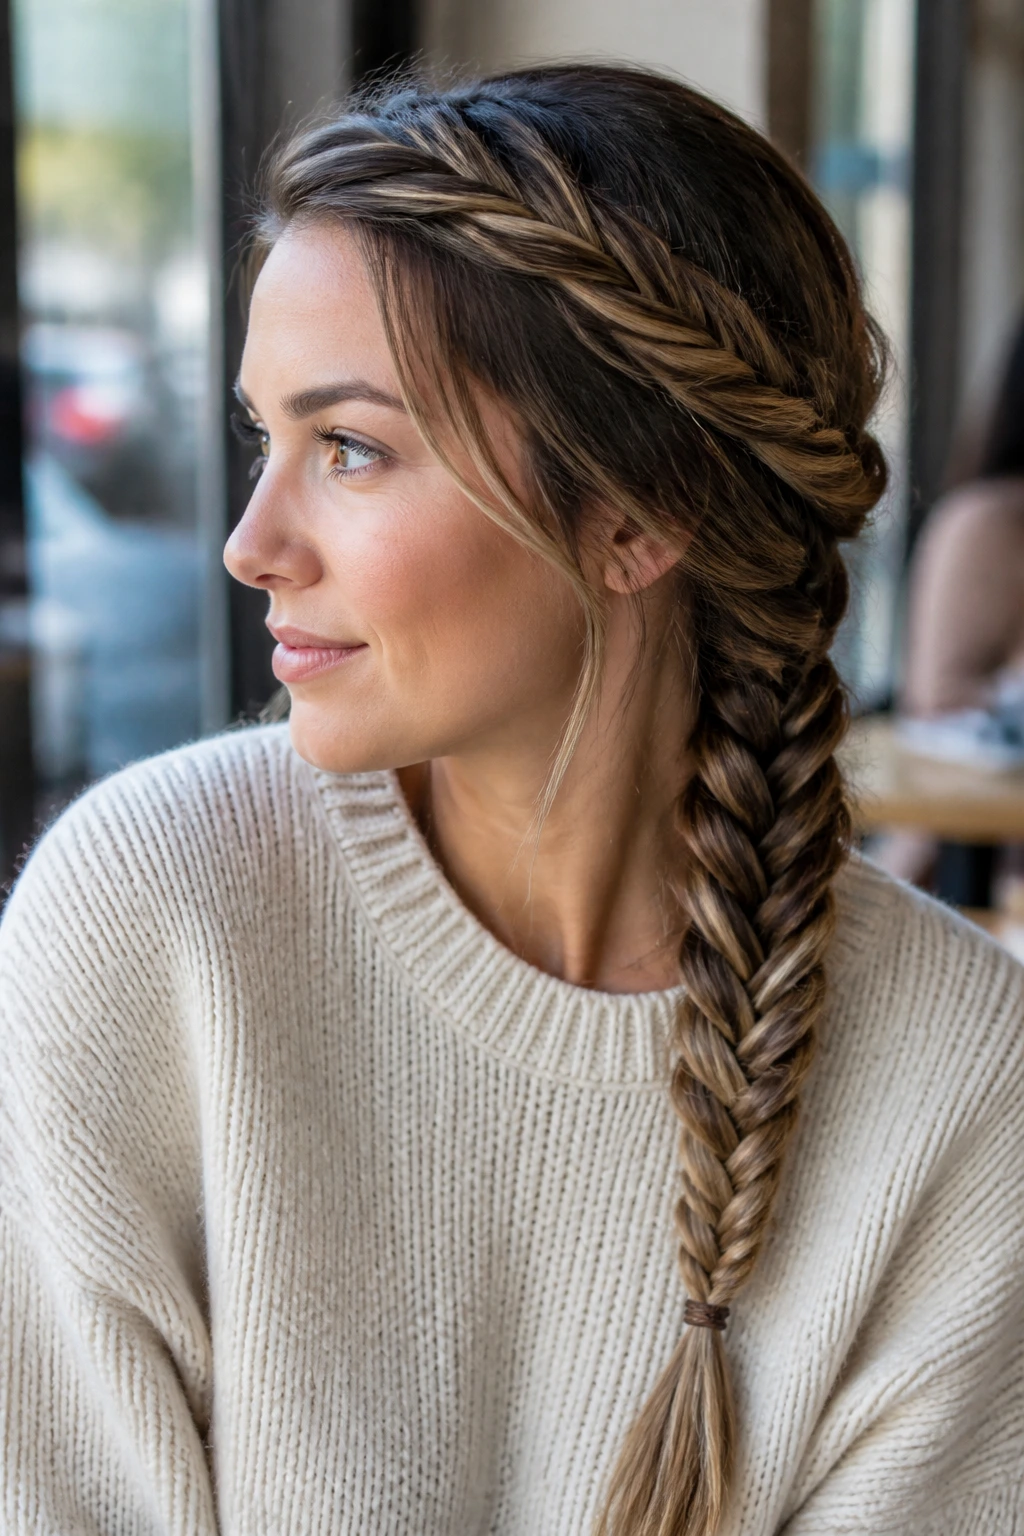
Twisting the front sections before the fishtail starts is a nice fix when you want the front to feel polished but not overdone. The twists hold shorter face layers back and create a smoother path into the braid. After that, the long tail can go into a standard fishtail with very little fuss.
Start by taking one section from each temple and twisting them backward toward the nape. Secure the twists together, then combine the rest of the hair into the braid. The front shape ends up neat, and the fishtail carries the detail through the lengths.
This style is especially handy if your hair has grown-out bangs or shorter layers around the face. Those pieces can be annoying in a straight braid. Twists solve that fast. They also make the style feel a little softer than a strict center-part braid, which I prefer for everyday wear.
21. Sporty Fishtail Bun
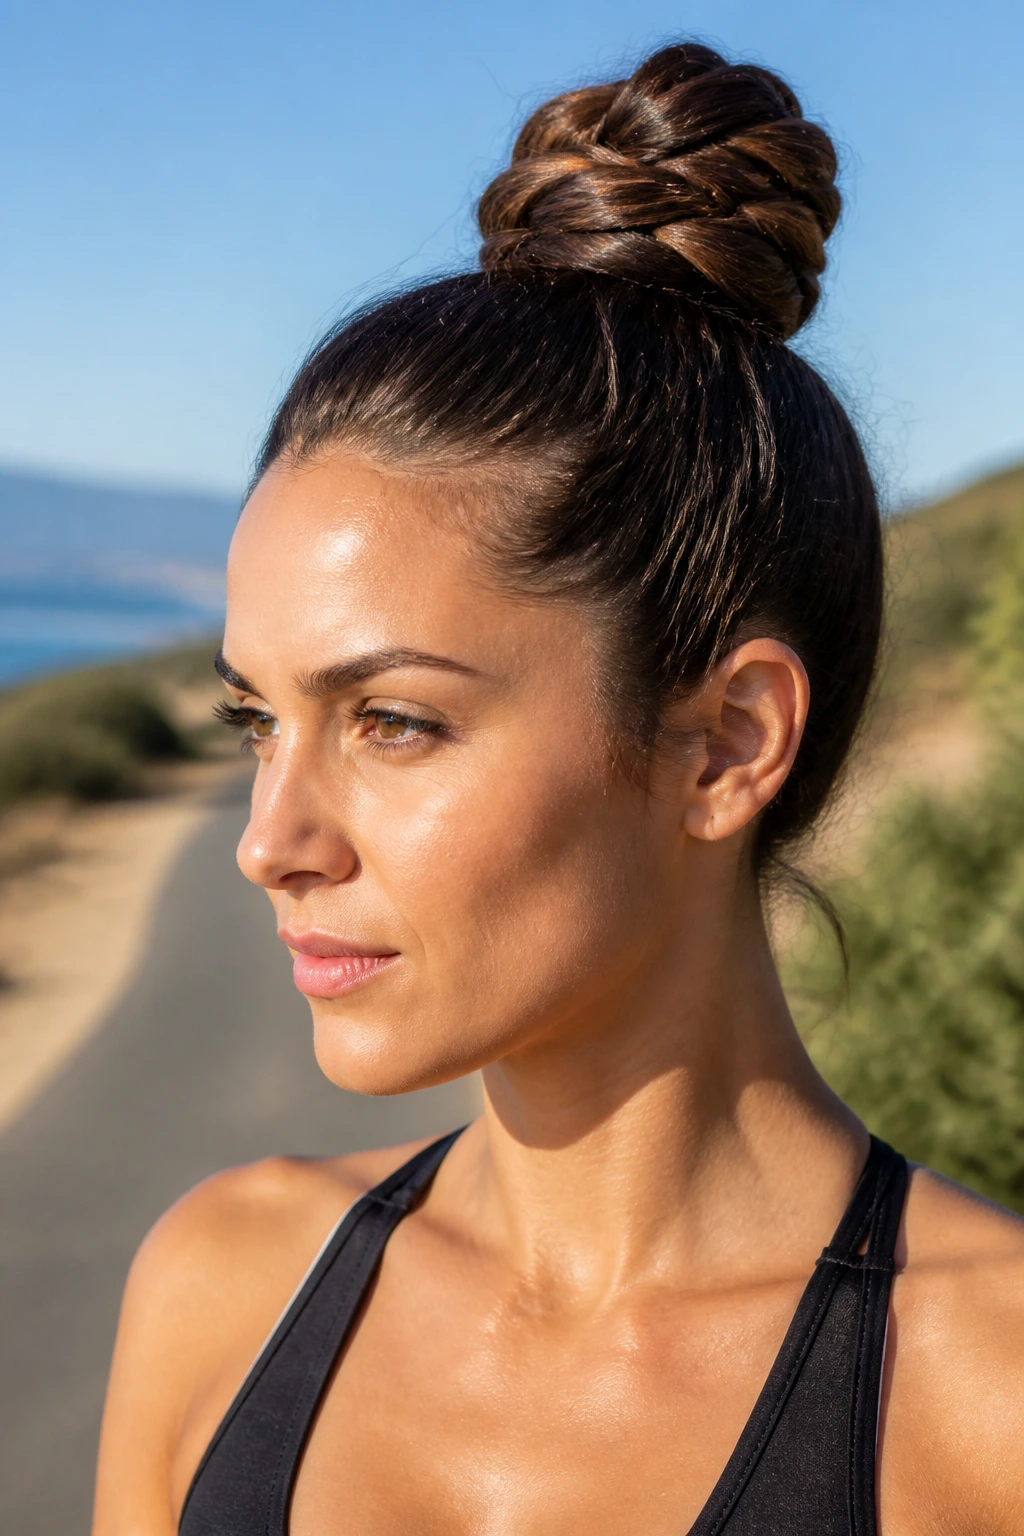
A sporty fishtail bun is one of the most practical ways to keep long hair secure and off your neck. The braid keeps the hair from puffing up, and the bun stops the length from swinging during a workout, walk, or long day of errands. It’s tidy without looking fussy.
How to lock it in
Pull the hair into a high or mid ponytail, fishtail the length, then coil the braid into a bun and pin it down. If the hair is thick, anchor the base with a strong elastic first, then add 4 to 6 bobby pins around the bun in a circle. A second elastic around the finished bun can help too.
The style works best when the crown is smooth before you start. Any bump at the base tends to show once the bun is pinned. If you sweat a lot or your hair slips easily, a little powder at the roots can make the grip better. Not glamorous. Useful. There’s a difference.
22. Soft Romantic Fishtail With Hidden Pins
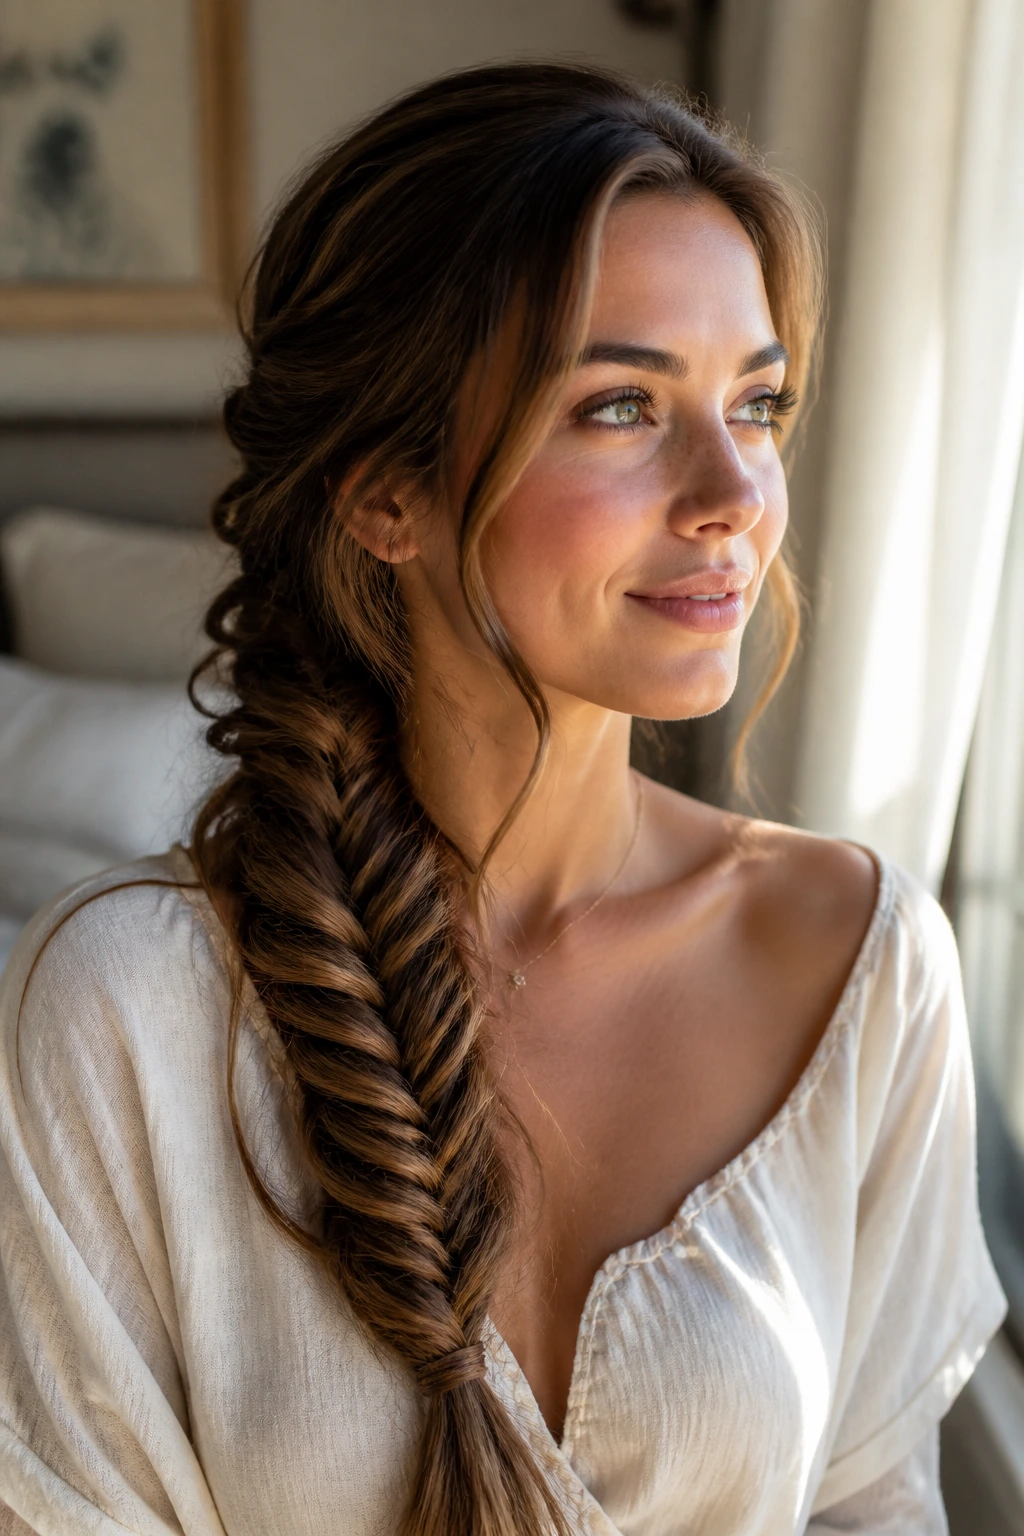
A soft fishtail with hidden pins is the one I’d pick when the goal is long hair that looks calm, not contrived. It can start as a low side braid, a loose back braid, or even a half-up fishtail, but the finish stays the same: the pins disappear, the shape stays soft, and the braid holds through the day.
Leave the outer edges slightly loosened, then tuck any stray ends under the braid and pin them where the braid overlaps itself. Hidden pins matter here because they keep the style from going floppy without shouting for attention. Use fewer pins than you think, then add one more only if the braid shifts.
This is the braid I like for dinners, family photos, and those in-between moments when you want your hair to look cared for but not overworked. It’s not loud. It doesn’t need to be. A long fishtail braid with a gentle finish already does the job.
