



Long hair can be gorgeous and annoying at the same time. One minute it falls in a heavy sheet down your back; the next, it’s sticking to your neck, tangling at the ends, and catching on every collar in sight.
That’s where crown braid hairstyles for long hair earn their place. They pull the length up and around the head, keep the style off your face, and make long hair feel intentional instead of just… present. The catch is tension. Pull the braid too tight and it looks stiff. Leave it too loose and it starts slipping before lunch.
There’s another thing people miss: long hair changes the math. A crown braid on waist-length hair is not the same animal as the same braid on shoulder-length hair. The weight is heavier, the sections need more grip, and the pins have to do real work. If you’ve ever finished a braid and felt it sag an hour later, that’s not you being bad at hair. That’s the braid asking for a different setup.
Some versions feel soft and romantic. Others are neat, architectural, and better for humid weather or a long day out. The fun part is that they all start with the same idea, then head in very different directions.
1. Classic Halo Crown Braid

This is the version most people picture first: a braid that wraps around the head like a halo and lands where it started. On long hair, it has a clean, almost old-world shape that looks polished without needing a mountain of product.
Why It Stays So Neat
The classic halo works because it keeps the braid close to the hairline and uses the head itself as the structure. That means the shape is doing half the job for you. Long hair gives you plenty of material, which sounds great until the braid gets heavy; keeping the braid snug but not tight is what stops it from drooping.
A side part helps here. So does a little grip at the roots — dry shampoo, texturizing spray, or even just hair that’s a day past wash day. Freshly washed hair can be too slippery. Freshly washed and very silky hair can be a headache.
Quick Styling Notes
- Start the braid about 1 inch behind the hairline so the style does not sit too far back.
- Use 6 to 10 bobby pins for fine hair, more for thick hair.
- Keep the braid base firm, then loosen the outer edges at the end if you want softness.
- Pin under the braid, not on top of it, so the shape stays clean.
Best tip: start lower than you think. A crown braid that begins too high can feel fussy fast.
2. Double Crown Braid for Extra Volume

Two braids solve a problem that one braid sometimes can’t: heavy, long hair that wants to slide. Splitting the hair into two braids — one on each side — spreads the weight and gives the finished style more structure.
It also makes the braid look fuller without needing fake volume tricks. That matters if your hair is fine at the roots but long through the ends. One braid can look skinny against the scalp. Two braids meet in the back, overlap a little, and suddenly the whole thing has presence.
I like this version for days when long hair feels heavy before I even touch it. There’s less strain at the temples, less pulling at the nape, and a little more room to hide the pins. If one braid starts loosening, the second braid usually helps hold the shape in place.
What to do: part the hair cleanly down the middle, braid each side toward the back, then cross the ends and pin them flat under the meeting point. Keep the crossings tight enough to hold, but not so tight that the scalp aches by noon. That ache is your warning sign.
3. Side-Swept Crown Braid
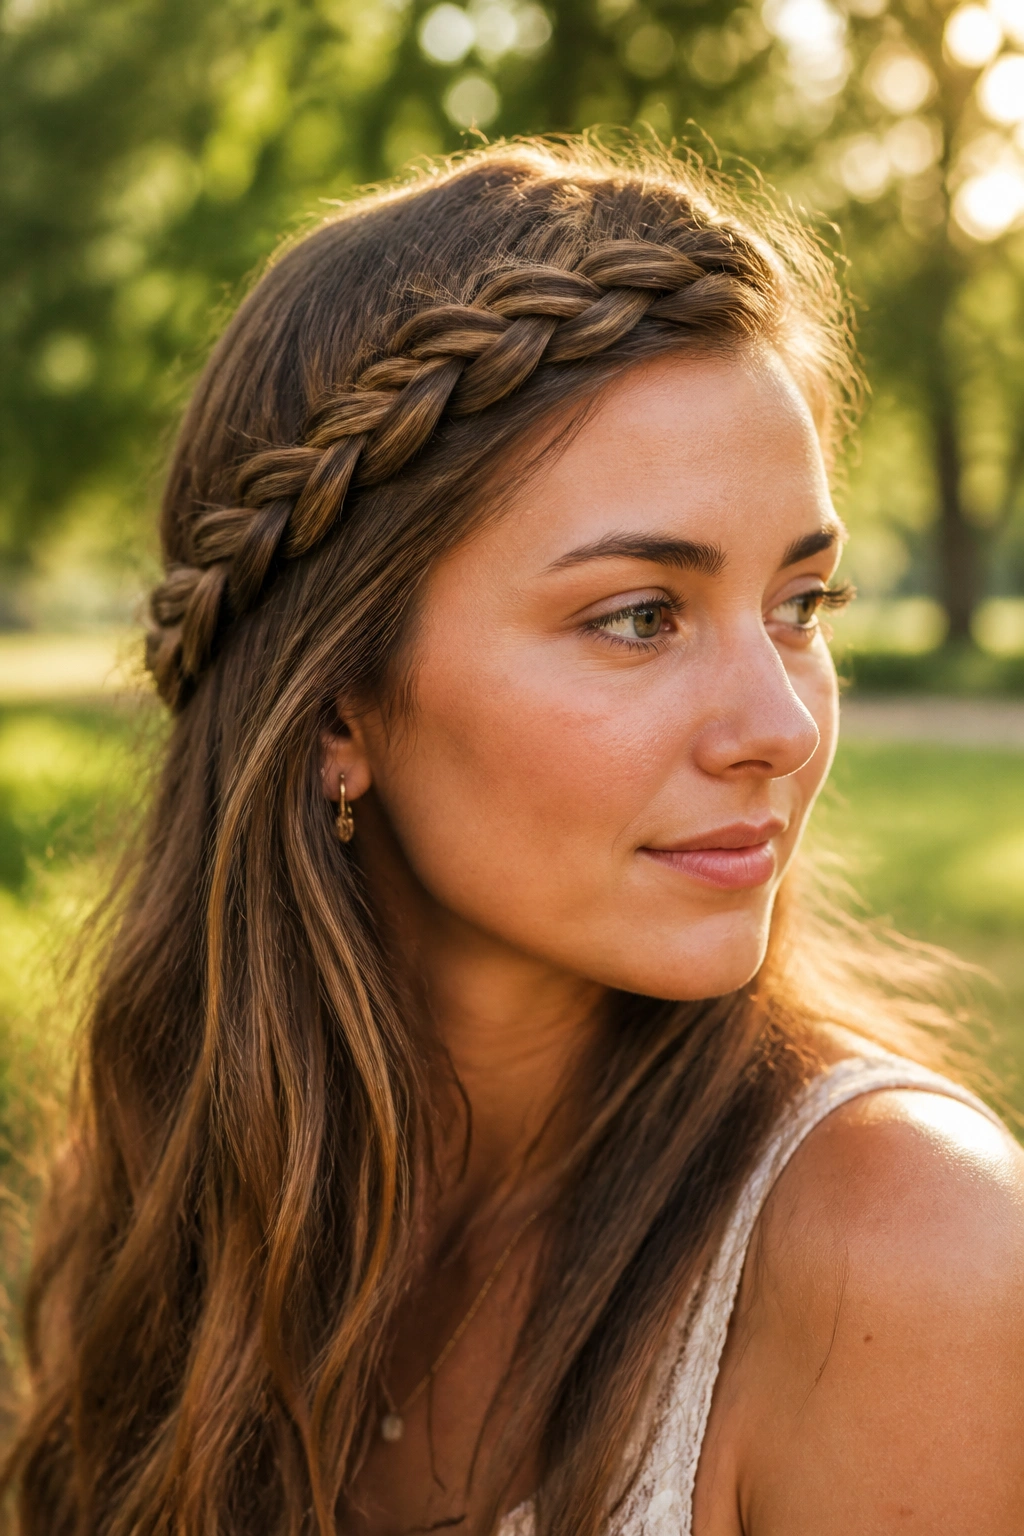
Why does a side-swept crown braid feel easier on very long hair? Because it gives the braid a place to rest. Instead of making the hair travel in a full circle, you let it flow from one side toward the other, which takes some of the strain off the front edge.
That little shift changes the whole mood. The style still reads as a crown braid, but it feels less formal and a bit more relaxed. It also plays nicely with side parts, big earrings, and face-framing layers that refuse to stay tucked in a strict halo.
How to Place It
Start the braid near one temple and work across the top of the head, keeping the braid just behind the front hairline. When you reach the opposite side, pin the tail low and hidden, near the ear or just behind it. The braid should look like it’s resting there, not fighting for balance.
This version is useful if you wear glasses. It avoids crowding the temples as much as a full wrap can. And if your hair is thick, the side sweep helps prevent that helmet feeling nobody wants.
A tiny bit of bend in the loose lengths keeps it from looking too stiff. Straight hair can work too, but a soft wave makes the braid and the rest of the hair feel like they belong together.
4. Dutch Crown Braid
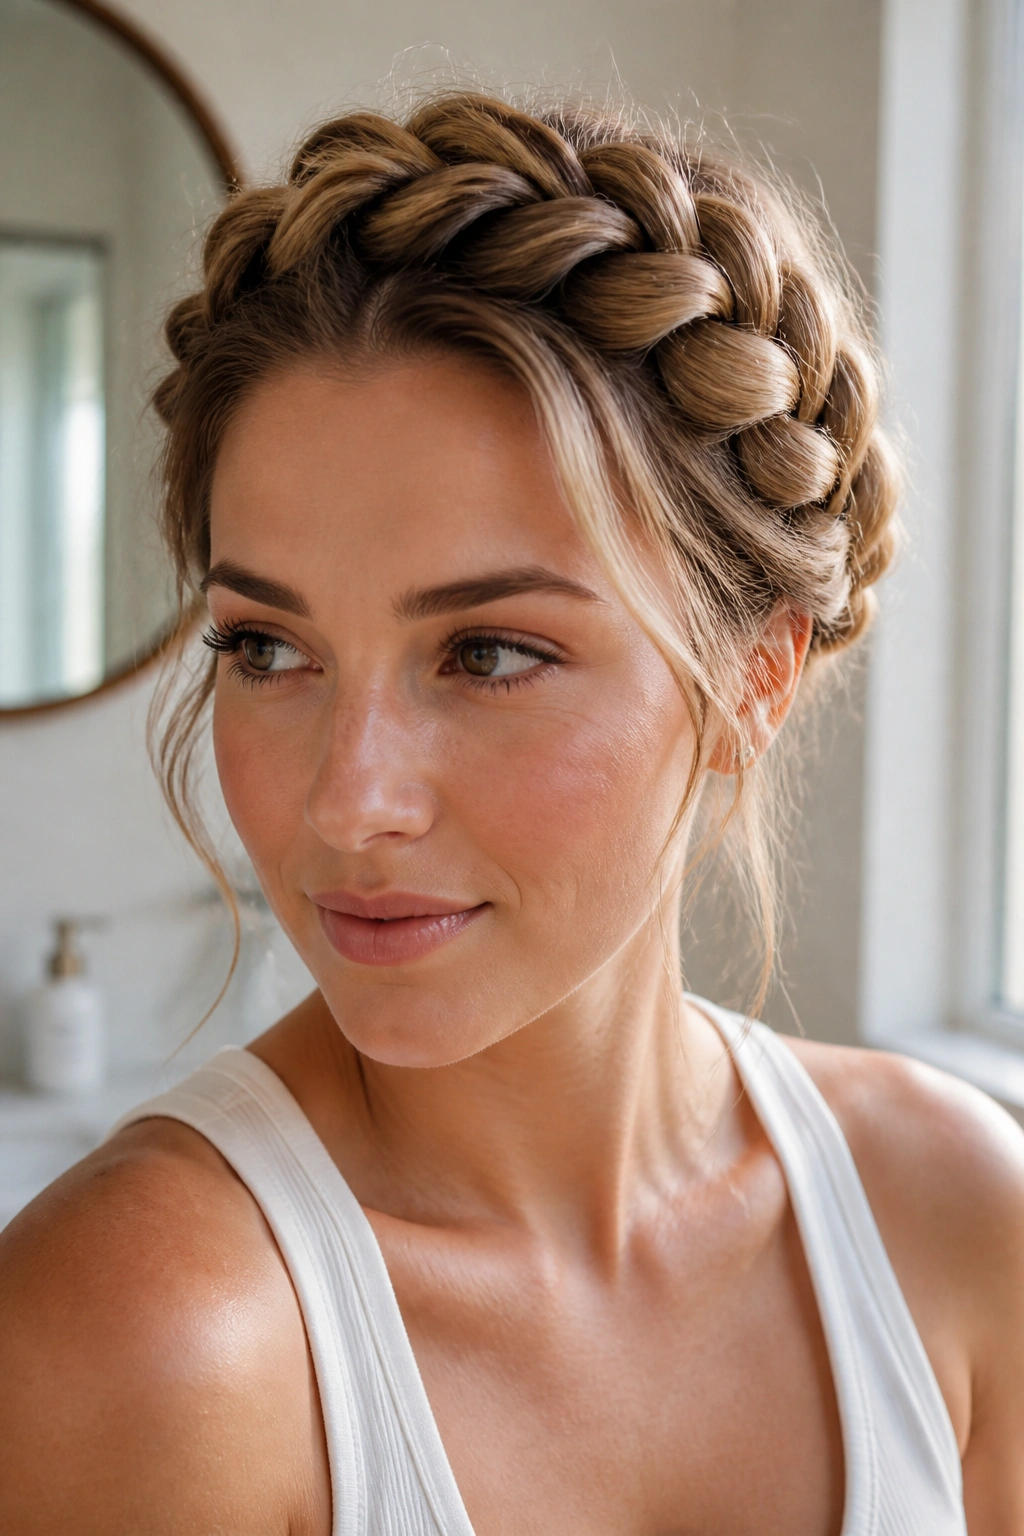
If you want the braid to sit up instead of sinking into the hair, Dutch is the move. The braid crosses under rather than over, which makes the plaits pop off the head and gives the whole crown more visible texture.
I reach for this when I want the braid to hold its shape in photos and in real life. The raised pattern is easy to see from the front, which sounds cosmetic until you realize it also gives the braid more grip. Slippery hair behaves better when the braid has a little bite.
What Makes It Different
- The braid looks more raised than a French crown braid.
- It grips better on sleek, fine, or freshly blown-out hair.
- It shows the pattern clearly, even from a distance.
- It can look too structured if you pull every section tight.
The main warning: don’t over-tighten the first inch of braid. That’s where people get into trouble. The braid ends up sharp at the roots and then puffy everywhere else. Start firm, not rigid.
If your hair is layered, Dutch braiding helps hide the shorter pieces better than a loose three-strand braid. Finish with a few small pins tucked under the braid line, and if you want a softer look, tug lightly at the outer loops after everything is pinned.
5. Boho Crown Braid with Loose Waves
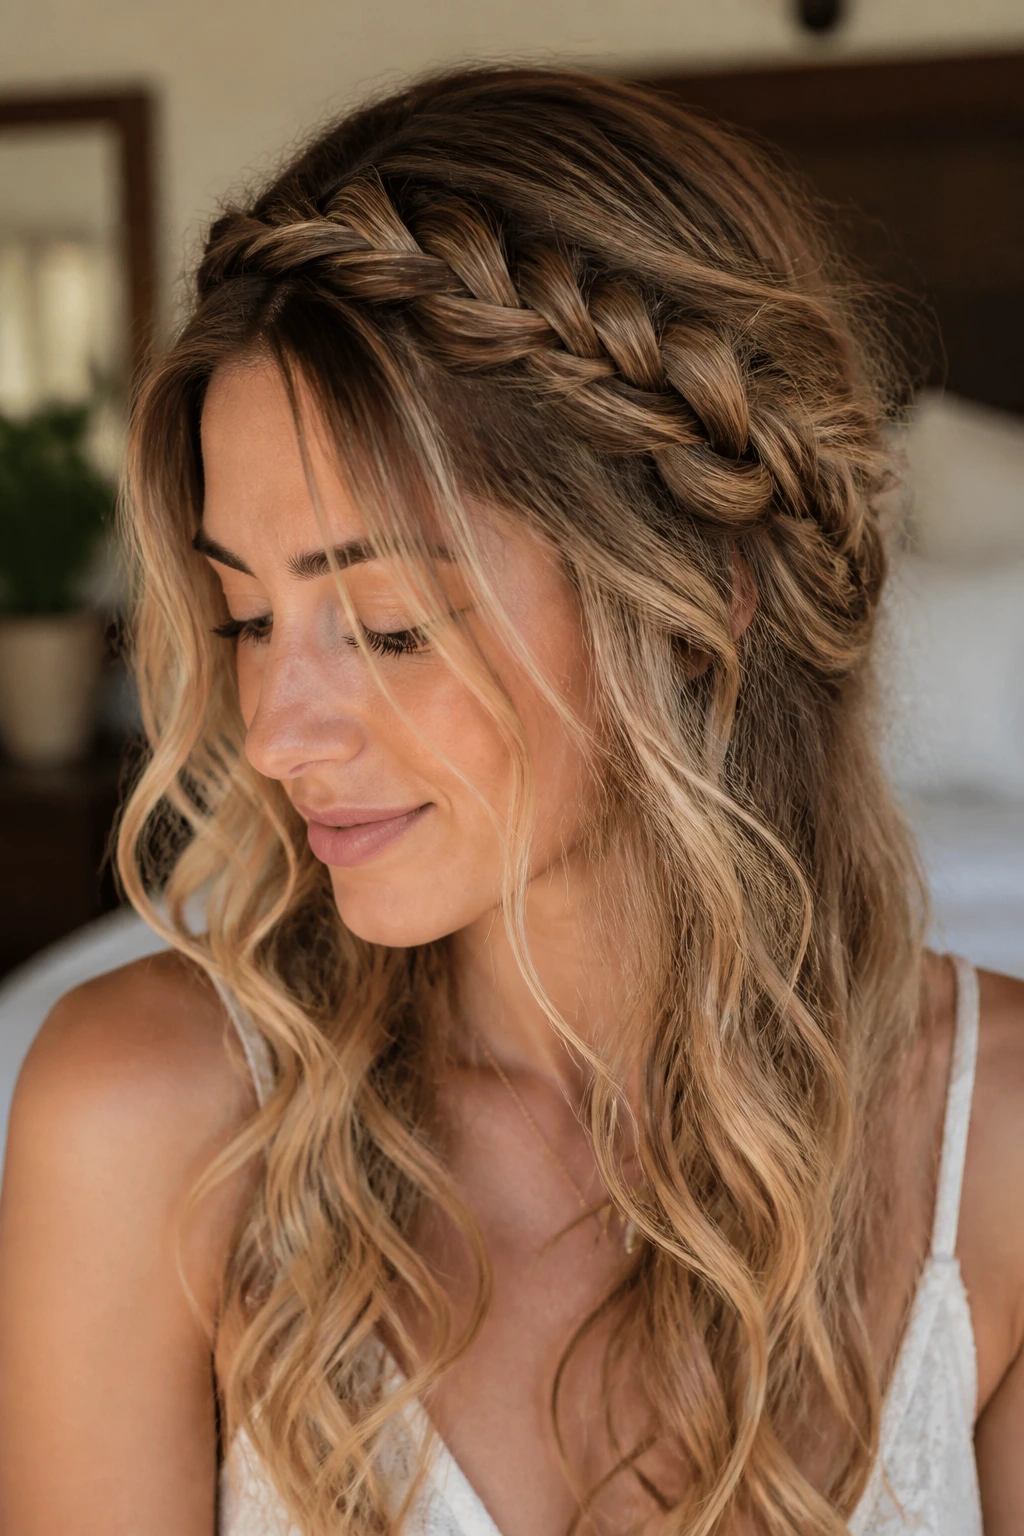
This is the version I reach for when I want long hair to look soft instead of styled to death. The crown braid stays visible, but the rest of the hair moves around it in loose waves, which keeps the whole thing from turning severe.
The best boho version leaves a few face-framing pieces out on purpose. Not by accident. Purpose matters here. Those pieces should be controlled enough to frame the cheekbones, not so wispy that they look like they escaped in a wind tunnel. A 1- to 2-inch section on each side is usually enough.
The braid itself should not be perfect. That sounds odd, but a little looseness gives the style room to breathe. Once the braid is pinned, pull the edges just a bit so it feels lived-in rather than packed tight against the scalp. Too much looseness, though, and the crown loses its shape. There’s a line.
I like this on hair with a soft bend already in it. If your hair is pin-straight, a few bends from a large-barrel iron or overnight braids make the braid and the loose lengths feel like they belong together. The point is not glam volume for its own sake. It’s movement.
6. Fishtail Crown Braid
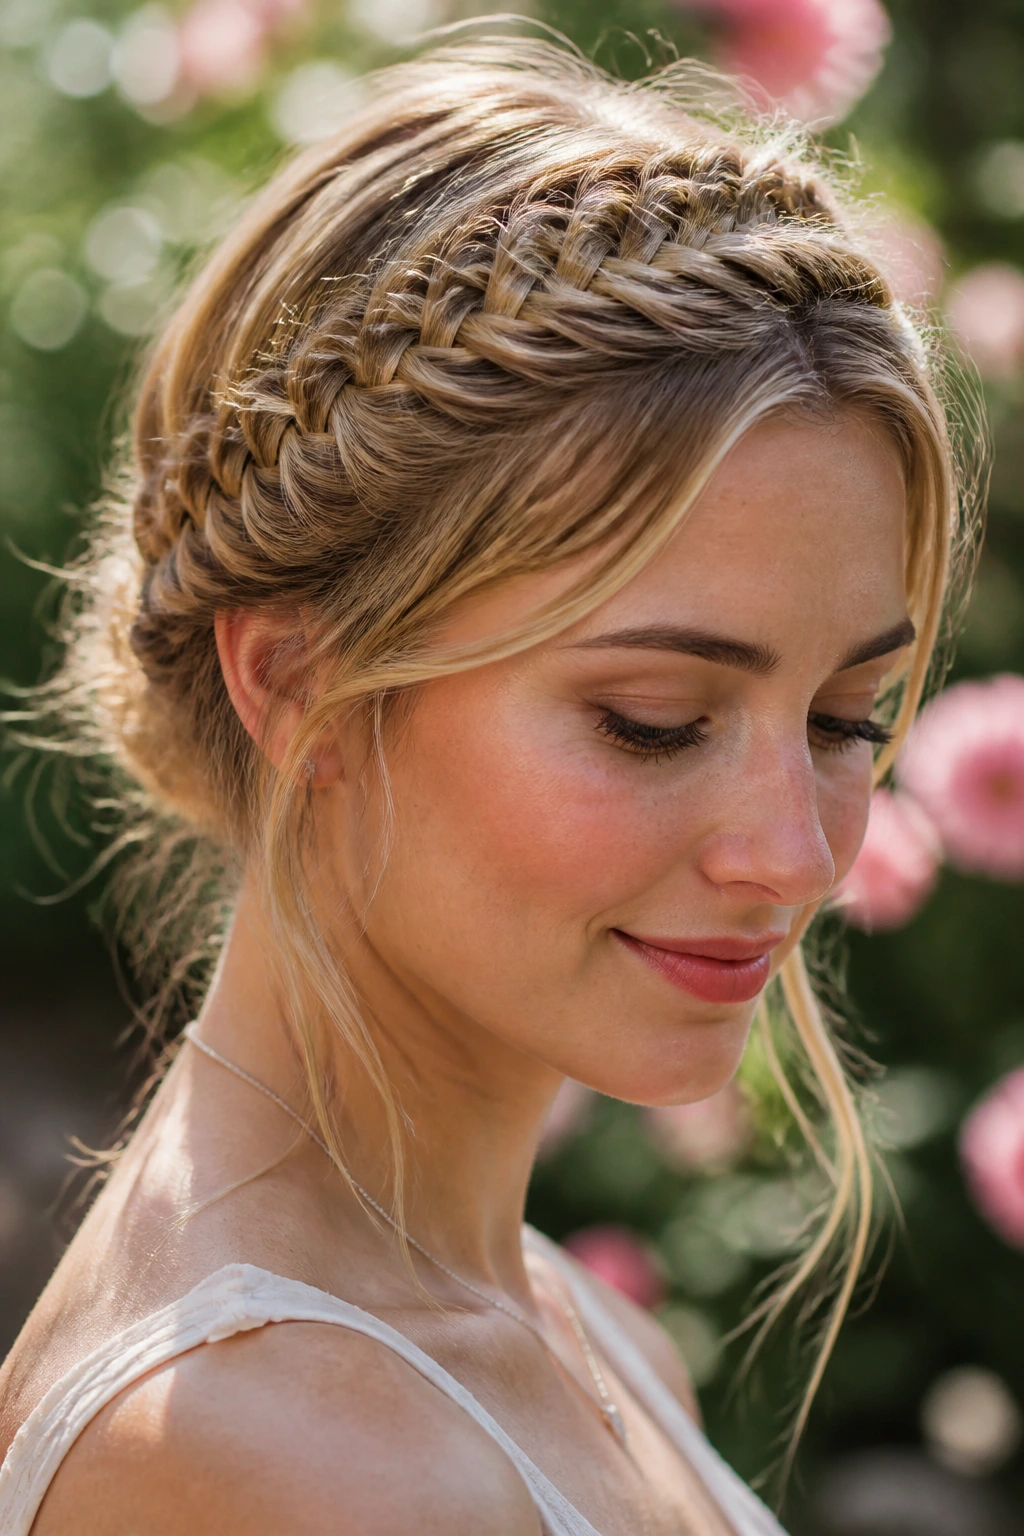
Unlike a standard three-strand braid, a fishtail crown braid uses tiny sections, which gives the finished style a finer, more intricate look. It takes longer. No way around that. But on long hair, the result is worth the extra minutes because the pattern stays interesting all the way around the head.
This style shines when you want the braid to look deliberate and a little more special than a basic crown. The tiny woven pieces break up solid masses of hair, which helps if your lengths are very smooth or a little too uniform. A fishtail crown also tends to age well during the day; even when a few pieces loosen, it still looks controlled.
It’s best for people who do not mind working in smaller sections. If you rush, the sections get uneven and the braid starts to look fuzzy. If you like detail work, though, it’s a satisfying braid to build.
My recommendation: use this on hair that’s been misted with light texturizer, then braid slowly from temple to temple. Finish with a few pins under the braid line and a careful tug at the outer edges only if the braid needs width.
7. Crown Braid Half-Up
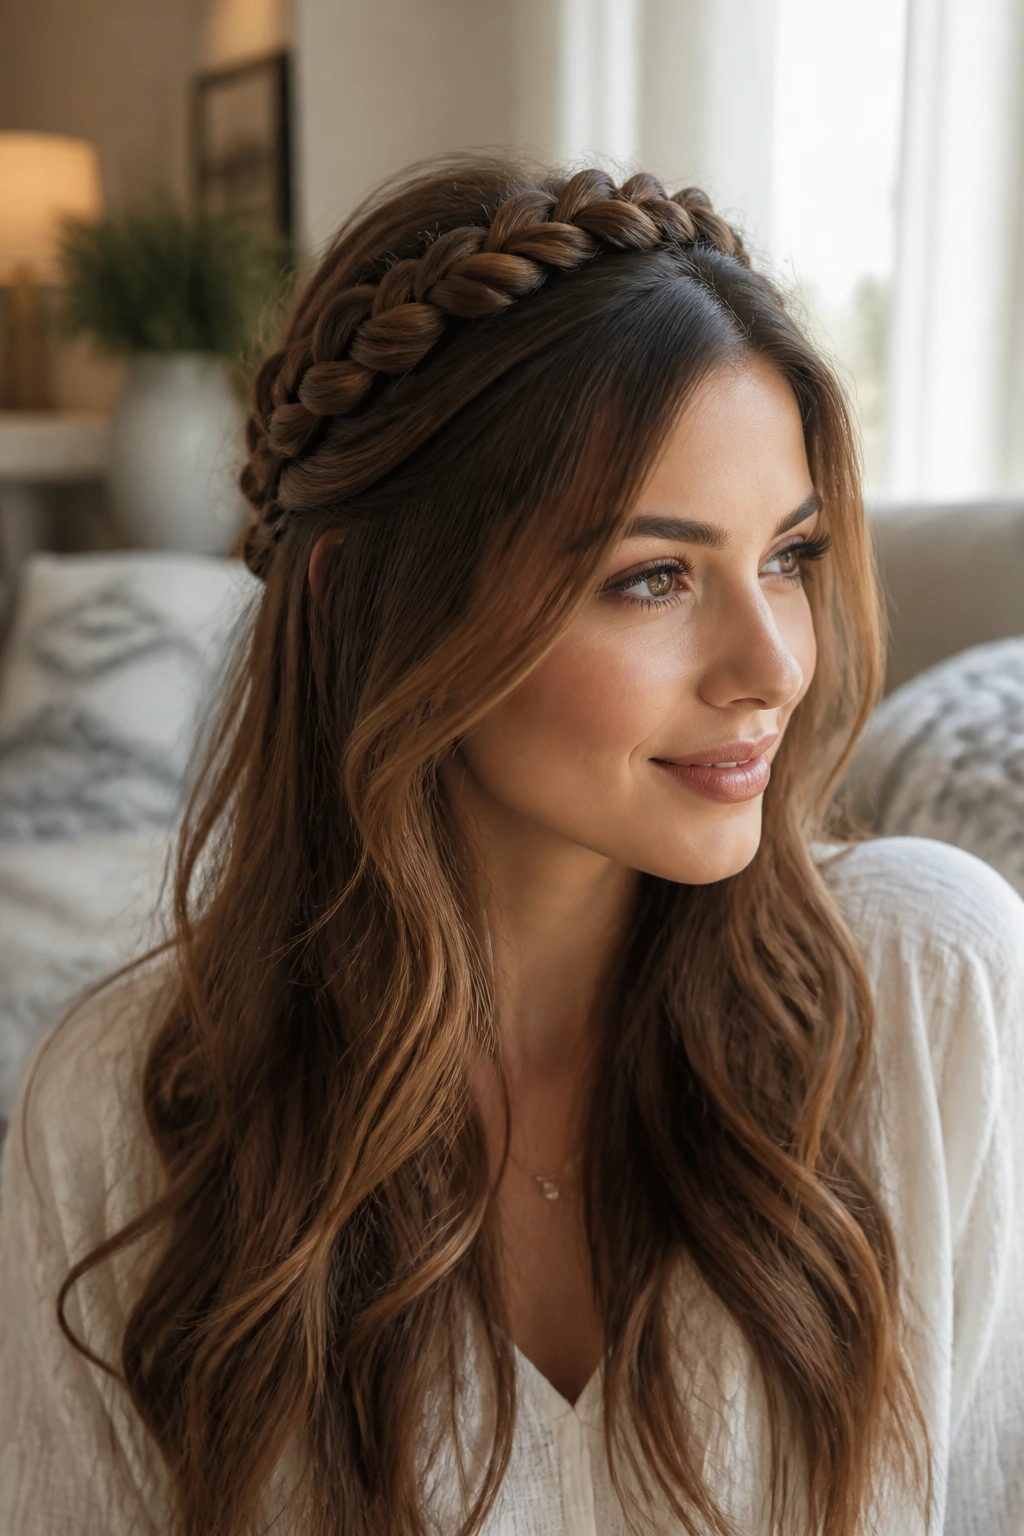
A half-up crown braid is the answer when you want the braid without hiding the length. The front and top sections are braided into a crown, then the rest of the hair stays down, which keeps long hair visible instead of tucked away.
That balance is why this version gets used so much. It clears the face, keeps the top polished, and still lets the ends do their thing. On long hair, that matters. You do not want to spend twenty minutes braiding only to make the length disappear unless that’s the goal.
Best Ways to Wear It
- Add soft curls to the loose ends for a fuller finish.
- Keep the braid tight enough that the front does not collapse.
- Use a small clear elastic to anchor the braid before pinning.
- Leave the back loose if you want movement, or brush it into a smooth sheet if you want something cleaner.
This version is kinder to heavy hair than a full crown wrap. The weight stays mostly down, which means less pulling on the scalp. It’s also a solid choice when you want a style that can move from daytime errands to dinner without needing a full redo.
8. Low Bun with a Crown Braid
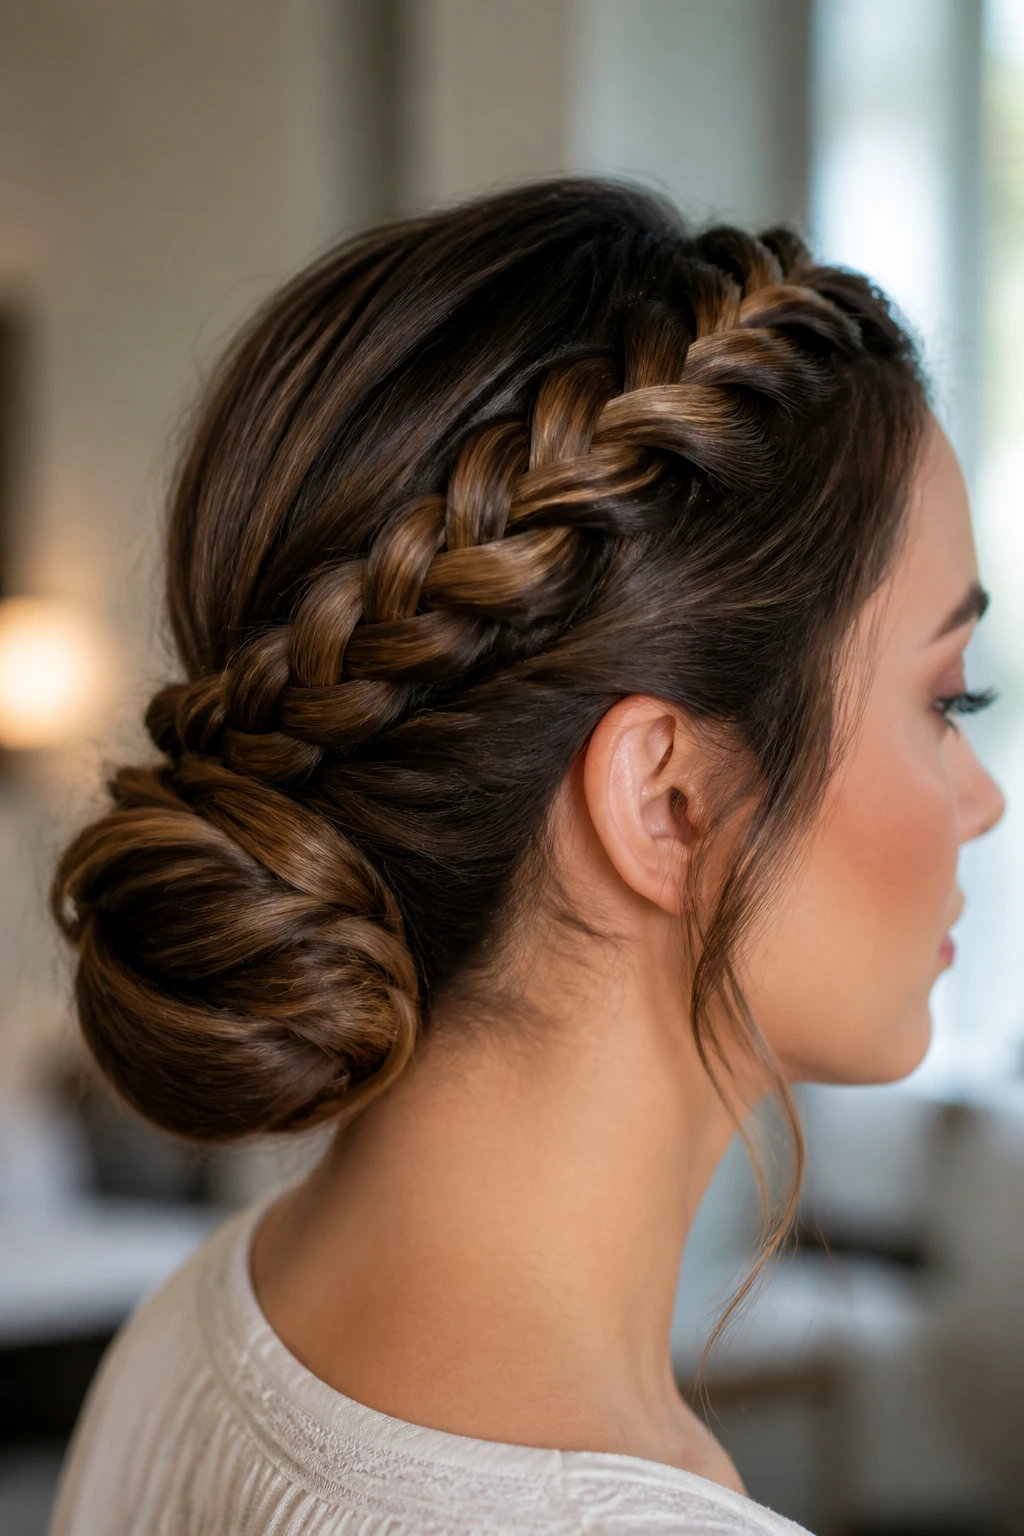
A crown braid tucked into a low bun is the style I’d pick when the hair has to stay put. Humidity, long meetings, wedding season, a day that starts early and ends late — this is the kind of braid that holds its nerve.
The braid creates the frame, and the bun gives the style a place to land. That matters on long hair, because leaving the ends loose can make the whole thing feel heavy and unfinished. A low bun removes the extra swing and keeps the braid from stretching under its own weight.
The neatest version starts with a crown braid that circles the head and then disappears into a bun at the nape. If your hair is especially long, fold the bun under once before pinning it, or the knot gets too bulky. No one needs a bun the size of a teacup.
This style is especially good if you like a polished finish but hate the feeling of hair brushing your neck. It also works better than loose crown styles for straight, silky hair because the bun gives the braid a strong anchor.
9. Rope-Twist Crown Braid
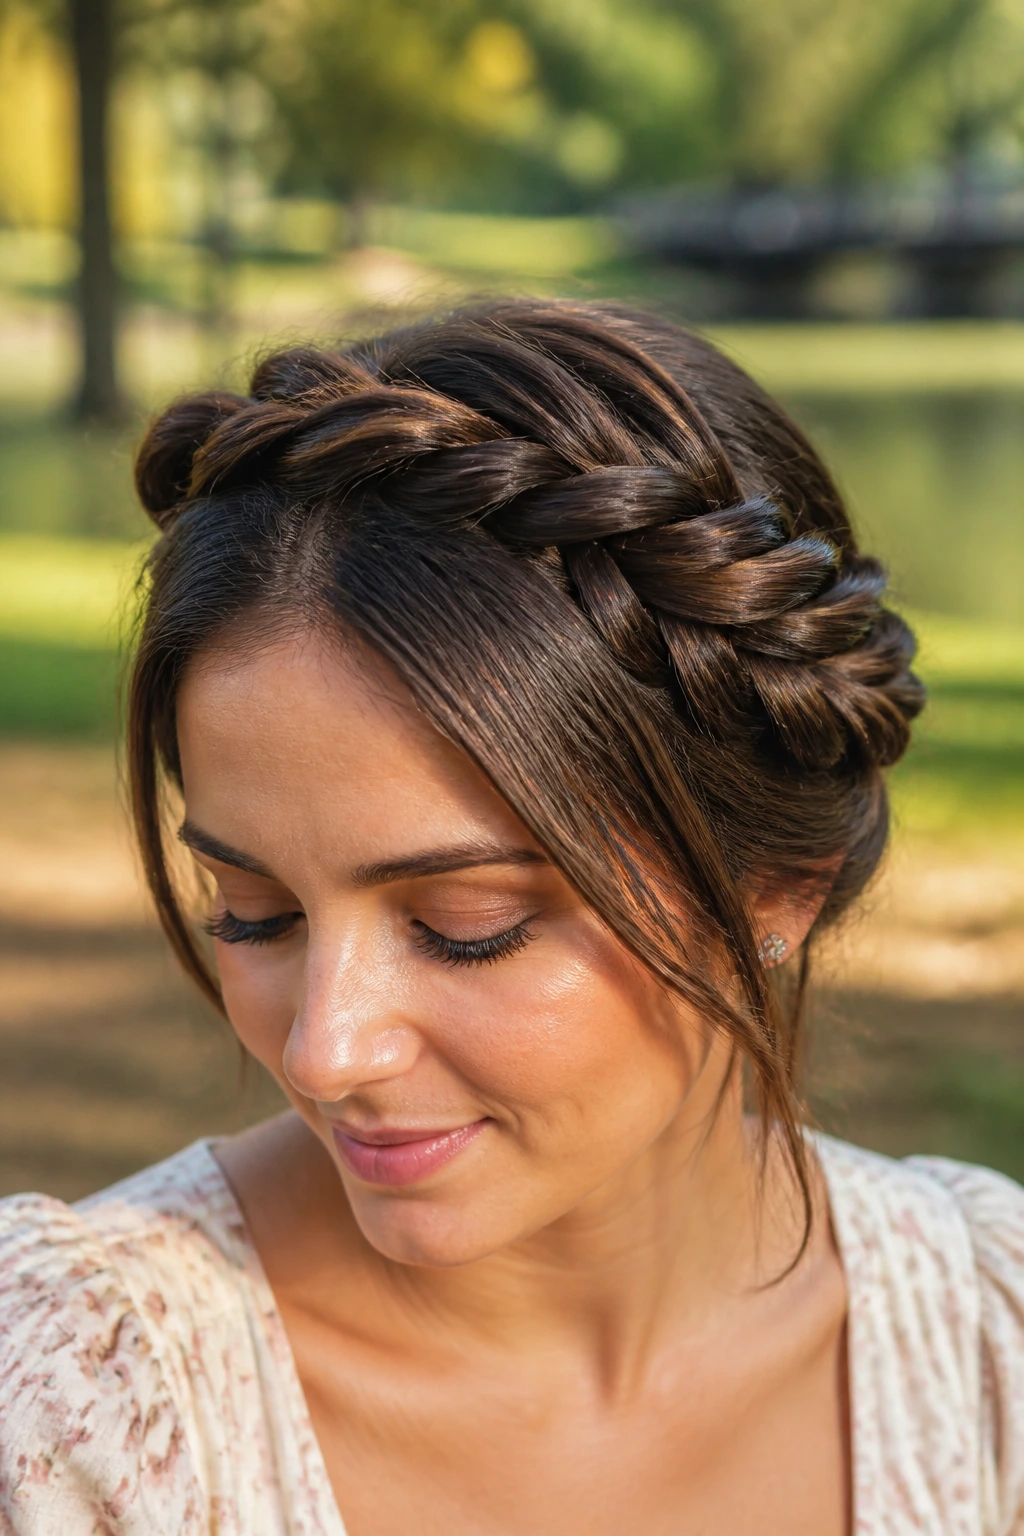
A rope-twist crown braid is the fast cousin in the family. Instead of crossing three strands, you twist two sections in opposite directions and wrap them around the head. The result feels softer than a standard braid, but it still gives that wrapped-around-the-crown look.
The appeal is simple: less hand work, less fiddling, and a smoother finish. Rope twists also make long hair look shiny because the surface stays compact. If your hair is full of layers or a little frizzy at the ends, a twist can sometimes look cleaner than a braid.
Here’s the catch. Twists can unravel if you do not secure them well. Use a small elastic at the starting point and a second one at the end, then hide both with pins. A tiny bit of serum on the mids and ends helps, but keep it away from the roots or the style can slide.
This is a good choice if your hair is already stretched out from a blow-dry and you want something that feels smoother than a loose braid. It’s also kinder on your hands if you braid often and your wrists are tired.
10. Crown Braid with Curtain Bangs
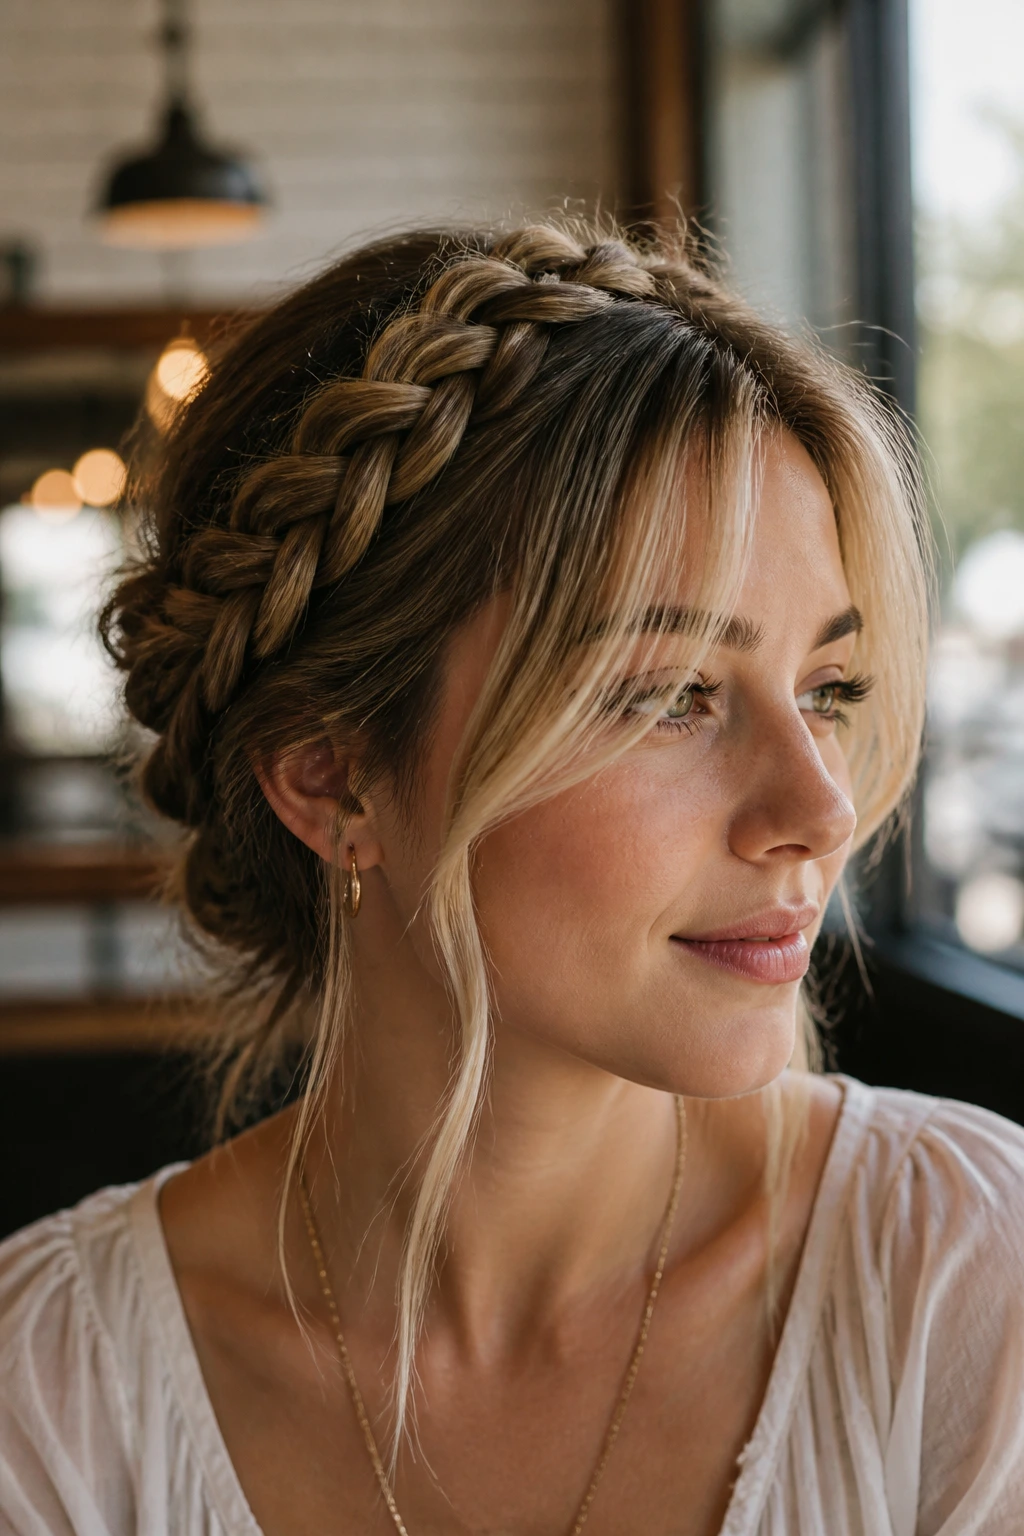
Can bangs and a crown braid actually work together? Yes, if you leave the front soft instead of trying to force every strand back. Curtain bangs or long face-framing pieces can make a crown braid look less severe and more wearable on long hair.
The trick is to treat the bang area as its own shape. Don’t drag those pieces hard into the braid unless you want a very strict finish. Instead, let them fall forward, then tuck only the sides into the braid path so the center part or bang split stays visible. That tiny detail keeps the style from feeling too pulled back.
How to Keep It From Looking Severe
Use a round brush or a flat iron on the bangs before you braid. They do not need to be pin-straight, but they should be smooth enough to sit where you want them. If the bang area frizzes up, the whole front of the style looks unfinished.
This version is useful for long hair because the length balances the softness at the front. A crown braid with blunt bangs can feel heavy on top; curtain bangs keep the eye moving and soften the line around the face. If you wear your hair with a middle part most days, this is one of the easier ways to make a braid feel like part of your regular look.
11. Pancaked Crown Braid for Thick Hair

Thick hair can make a crown braid look tiny if you leave it untouched. That’s where pancaking comes in — gently pulling the outer edges of the braid wider so the braid spreads out and looks fuller.
I like this on dense hair because it turns the braid from a tight rope into something with shape. The braid still has structure, but it stops looking compressed. On very thick long hair, that wider surface also helps the braid sit better against the head instead of bulking up in one spot.
A Few Details That Matter
- Braid loosely first, then pancake after the braid is pinned.
- Use a tail comb or your fingertips to pull the outer loops outward.
- Keep the center of the braid intact so it does not fall apart.
- Mist lightly with flexible-hold spray before you start widening.
Pancaking is a slow move. Pull a little, step back, pull a little more. If you tug too hard, you flatten the pattern and create frizz. That’s the part people get impatient with, and it shows.
This style works best when the hair has some texture already. Very silky hair can be pancaked, sure, but it usually needs a bit more product and more pins to keep the expanded shape in place.
12. Crown Braid with Ribbon or Scarf

A ribbon or scarf changes a crown braid fast. The braid stays the same basic shape, but the accessory adds color, contrast, and a little personality without forcing the hairstyle into something fussy.
For long hair, this is one of the easiest ways to make a braid feel special. A thin satin ribbon woven through the sections softens the braid line, while a scarf wrapped around the base or tucked through the braid gives a more relaxed look. Keep the ribbon narrow — about 1/4 to 1/2 inch wide — or it starts to compete with the braid instead of supporting it.
This style works best when the rest of the hair is simple. If the braid is already very textured and the scarf has a loud pattern, the look can get crowded fast. A plain black, cream, or deep-colored ribbon often does more than a busy print.
I also like this for people who want a crown braid but need some distance from the usual wedding-only vibe. A ribbon changes the tone. A scarf changes it more. The braid stops reading as formal costume and starts feeling personal.
13. Formal Crown Braid Updo
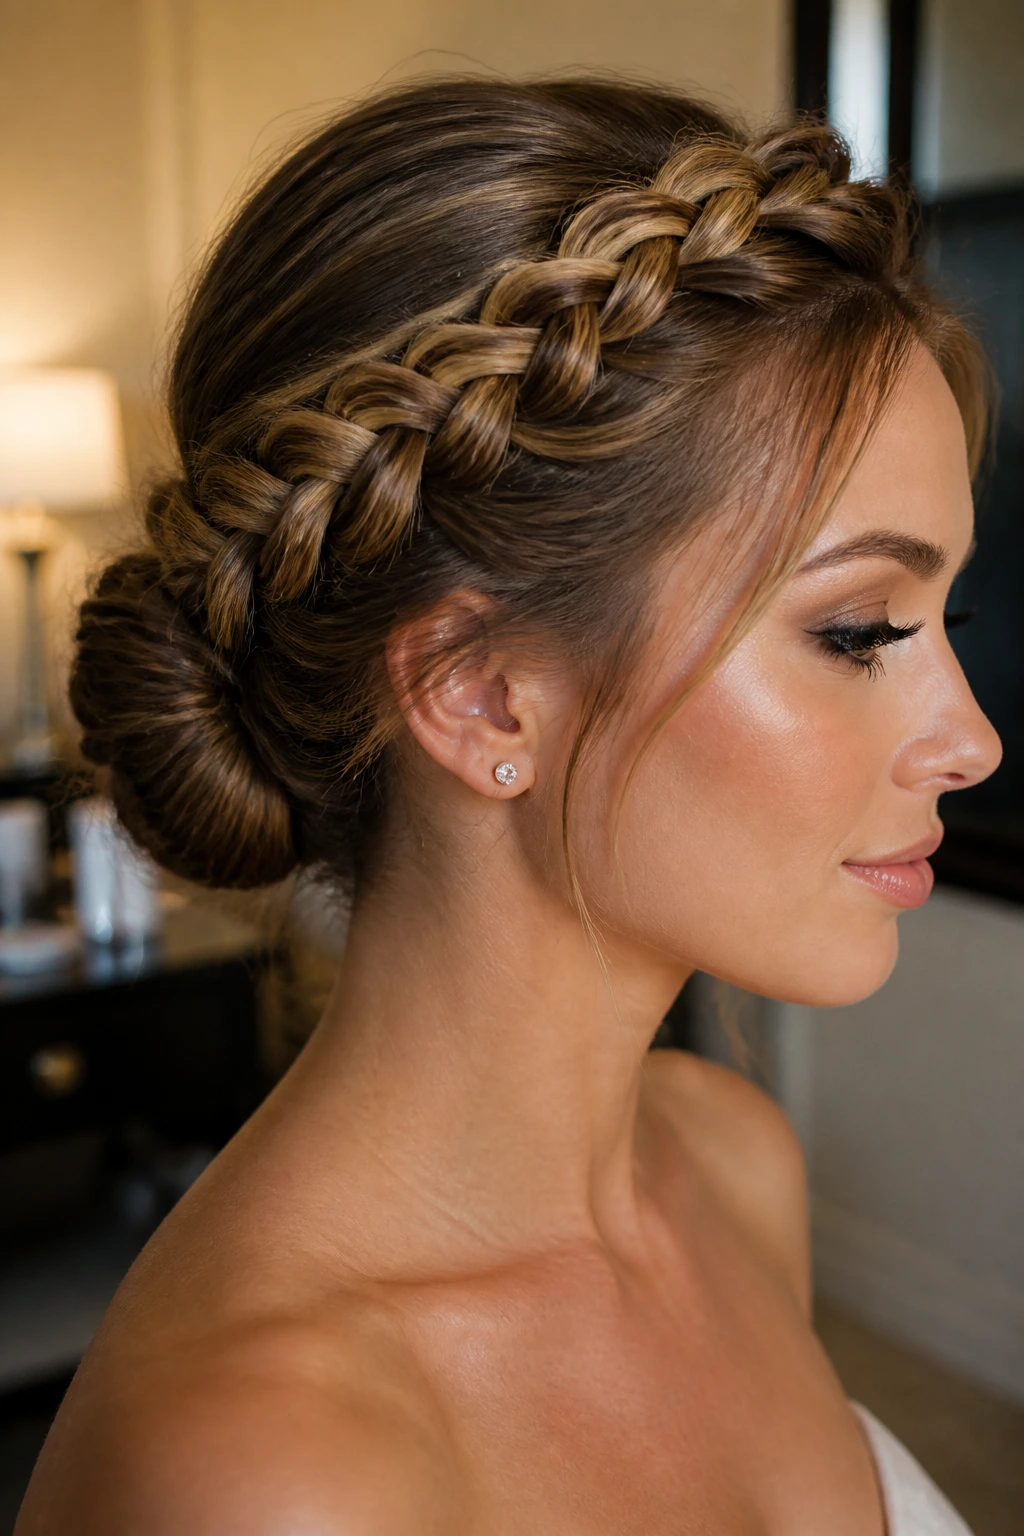
A formal crown braid updo is the version that means business. The braid circles the head, then the ends are tucked into a smooth chignon or coiled flat at the back so nothing dangles loose.
Unlike softer braid styles, this one is about control. Long hair can be a lot to manage in an event style, and this updo handles the bulk without making the head feel top-heavy. It also holds up better when you are moving around, hugging people, sitting through dinner, or dancing a little harder than planned.
The clean finish depends on prep. Brush the hair thoroughly, smooth the surface with a light cream or spray, and pin the braid into the bun with crossed bobby pins or U-pins. U-pins are worth using here because they hold the bun shape without bunching it up.
This is the style I’d choose for a more dressed-up setting where you want the braid to look deliberate, not bohemian. It suits long, thick hair especially well, because the extra length becomes part of the bun instead of hanging awkwardly at the back.
14. Messy Crown Braid for Layered Hair
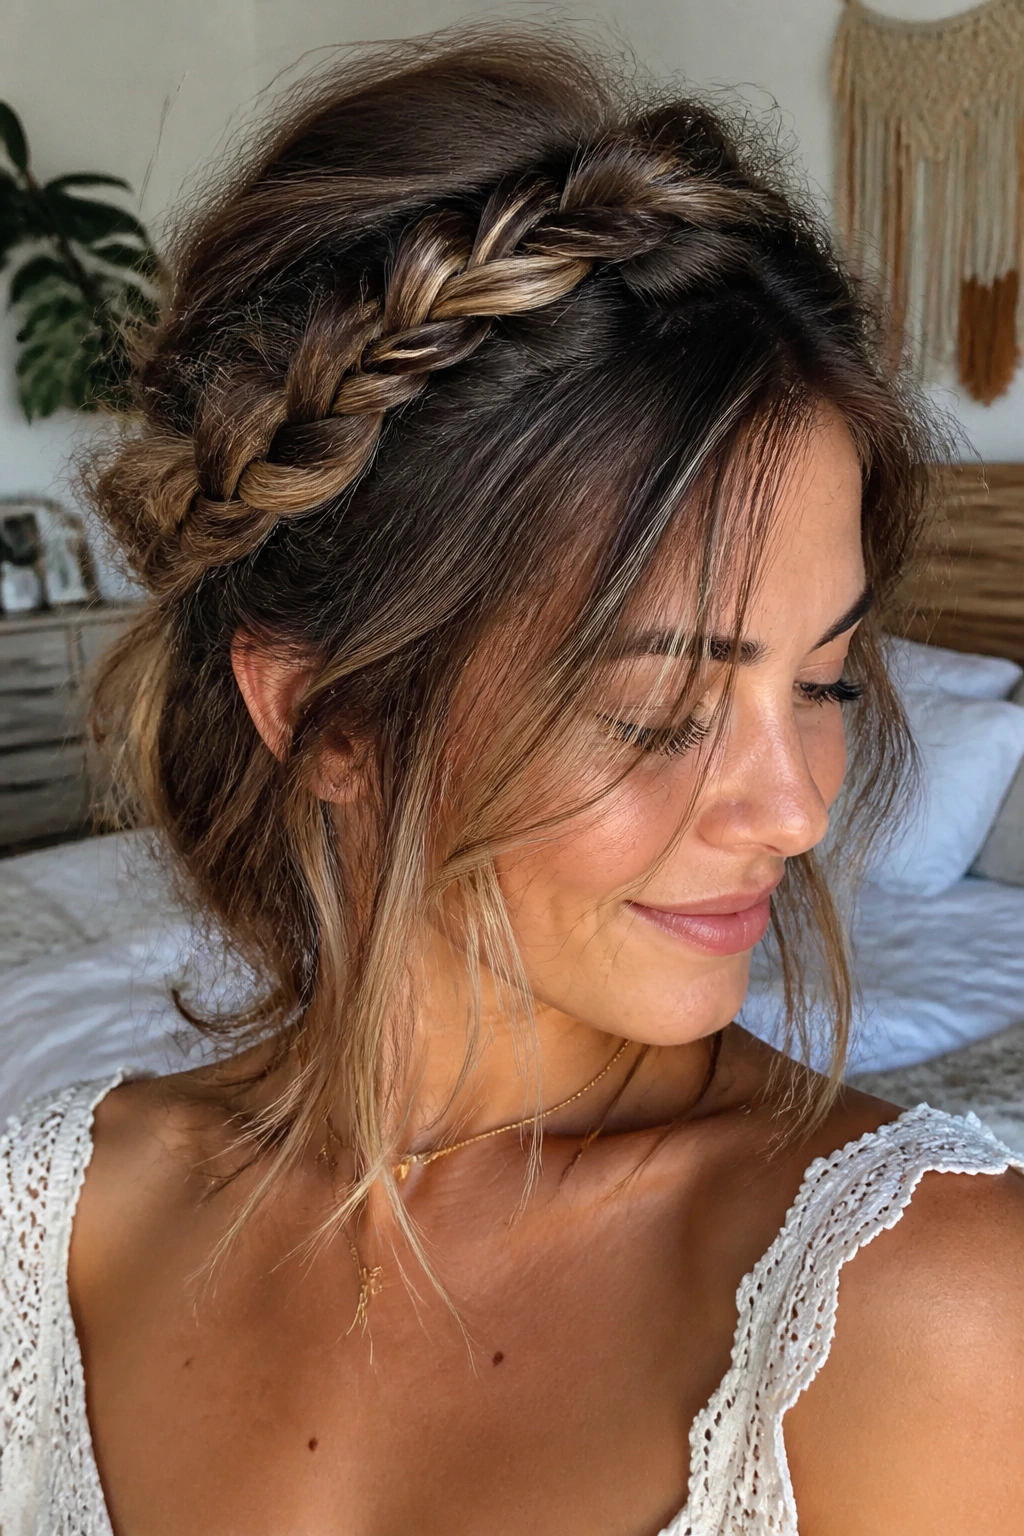
Layered hair can be a little rude in braid styles. Short pieces pop out. Ends slip. The braid looks good for five minutes, then one side decides to leave. A messy crown braid stops pretending that every strand needs to behave.
That is why this version works. It does not fight the layers; it builds around them. The braid can be softer, the pins can be more hidden, and the little escaped pieces actually help the style by making it look relaxed instead of overworked.
Why It Reads Better Than a Tight Finish
- Layers blend into a looser braid more easily.
- Texturizing spray gives shorter pieces something to hold onto.
- A few wisps at the temples make the style feel softer.
- The braid can be pinned with less pressure on the scalp.
The big mistake is trying to force a layered haircut into a crisp, perfect halo. That almost always ends with bumps and frustration. A messy crown braid looks best when you let the shape breathe and keep the braid slightly wider than usual.
If your hair is very layered, braid the top sections first and pin any short pieces under the braid as you go. That saves you from chasing flyaways at the end, which is a game nobody wins.
15. Extra-Long Crown Braid Wrapped Twice

Very long hair changes the whole crown braid game. Once the braid gets past mid-back or into waist-length territory, one loop around the head can start to feel like it is running out of room. Wrapping twice, or nearly twice, solves that problem.
This style makes the length part of the design instead of leaving it as a heavy tail that hangs off one end. You can braid around the crown, keep going, then wrap the remaining length into a second pass or tuck it into a low coil at the back. It sounds dramatic, but on extra-long hair it often looks cleaner than trying to stop halfway and hope the ends behave.
The key is distribution. Anchor the first section firmly at the temples, keep the braid close to the head, and hide the extra length under the second layer or bun. If the hair is thick, use pins in a crisscross pattern so the weight does not drag the style down after an hour.
This is the style for people who have a lot of hair and want to show it without letting it take over the room. It feels controlled, which is the whole point. Long hair should work for the style, not against it.
Final Thoughts
The best crown braid is not the tightest one. It’s the one that fits your hair density, your layers, and the amount of time you actually have in the morning.
If your braid keeps slipping, stop blaming your hands and look at the setup. Dry shampoo, a little texture, the right pin placement, and a braid that sits at the right height will do more than another five minutes of fussing. That part matters more than most people want to admit.
Long hair gives you options. A soft halo, a fishtail wrap, a low bun, a ribboned braid — they all solve slightly different problems, and that’s the fun of it. Pick the one that matches the day instead of forcing the same look every time.
