



Two-strand twist styles for natural hair work because they solve a very real problem: you want your hair to look cared for without spending your whole life touching it. They can read polished, casual, elegant, or playful, and the same basic technique can go in wildly different directions depending on section size, parting, length, and how you finish the ends.
That flexibility is the whole point. A clean base matters. So does shrinkage. So does the difference between hair that’s been gently stretched and hair that’s fighting you at the roots. A twist style that looks neat on day one but feels heavy, fuzzy, or tight by day three is not a win, no matter how good the photos look.
The smartest twist choices usually come down to three things: how much time you want to sit, how much weight your scalp can handle, and how much movement you want once the style is in. Get those right and the rest gets easier fast.
Start with the shape you can actually live in.
1. Classic Shoulder-Length Twists for Natural Hair
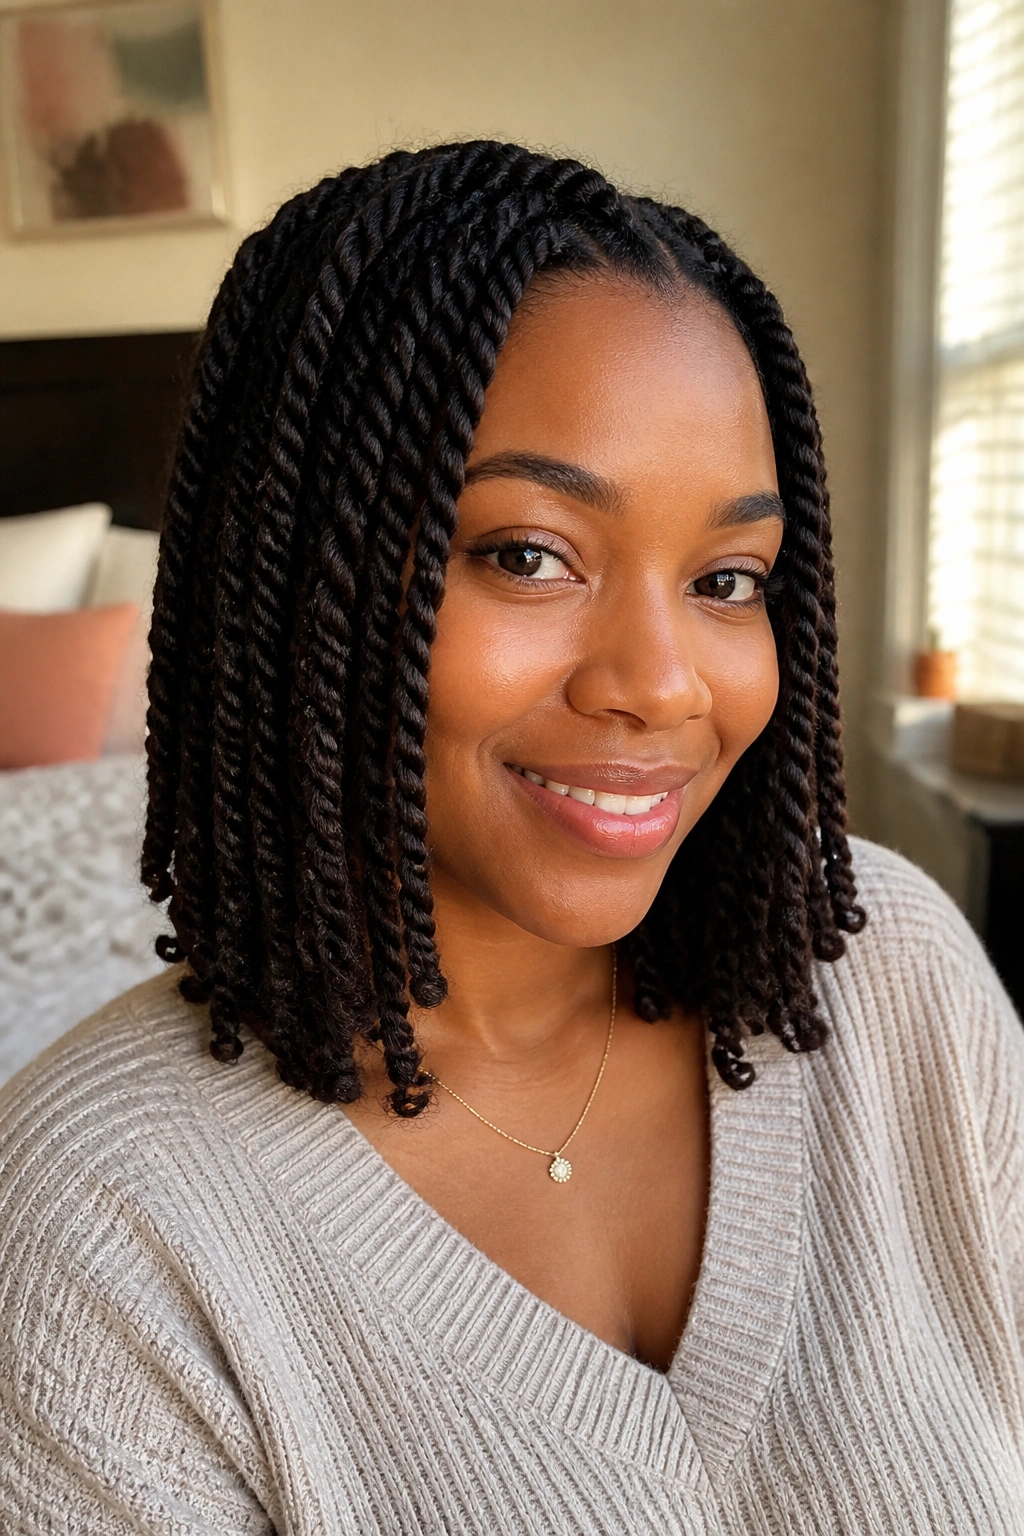
The shoulder-length twist is the dependable one. Not flashy. Not fussy. Just a clean, balanced look that sits in that sweet spot where the hair has enough length to move but not so much that it starts dragging at the roots by the end of the week.
Why it works so well
This length is kind to most textures because it gives the twist room to hang without getting tangled in your collar or rubbing against your coat all day. It also dries faster than longer styles, which matters more than people admit. Damp twists can feel neat for a few hours, then the base starts puffing while the center stays wet. Annoying.
- It keeps the shape compact enough for daily wear.
- It shows off parting without making the head look crowded.
- It can be worn down, pinned back, or tucked into a half-up style with almost no extra work.
- It tends to feel lighter than waist-length twists, especially around the nape.
My favorite thing about this length: it gives you enough twist to look finished, but not so much that sleeping becomes a wrestling match.
2. Jumbo Two-Strand Twists

Want something that looks intentional without asking for hours and hours in the chair? Jumbo twists are the move. They make a bold shape fast, and they suit dense hair especially well because fewer sections mean less parting and less time spent hunting for perfect symmetry.
The trade-off is weight. Bigger twists need cleaner tension at the root and a firmer twist down the shaft, or they start to loosen at the ends before you’re ready. That’s not a flaw; it’s just the nature of a larger rope shape.
Where jumbo twists shine
- They cut install time way down compared with smaller twists.
- They create a fuller silhouette on thick, coily hair.
- They look good with center parts, side parts, or a deep sweep to one side.
- They’re easier to take down than tiny twists, which your fingers will appreciate later.
Keep the base snug, not tight. That sentence matters. If the roots are pulled too hard, the style stops being protective and starts acting like a headache with parts.
3. Mini Twists

Mini twists are for the person who likes detail. Lots of it. They take longer to install, yes, and your arms will complain before the last section is done, but the finished result has movement that larger twists simply can’t fake.
The beauty of mini twists is that they behave almost like a loose curtain of ropey coils. Each twist stays defined, and because the sections are smaller, the style can last longer without looking bulky. They also work well if you want a set that can later be unraveled into a twist-out with a softer, fuller finish.
One thing people get wrong is product load. Too much cream or gel on tiny sections leaves the hair sticky and slow to dry. Too little, and the twists puff up too fast.
What to watch for
- Keep the sections small and even so the tension stays balanced.
- Use enough product to smooth, not enough to coat the hair.
- Let the roots set fully before you sleep on them.
- Separate only when the hair is completely dry if you plan to wear them as a twist-out later.
Tiny twists are a patience style. They reward patience.
4. Waist-Length Hanging Twists on Stretched Hair
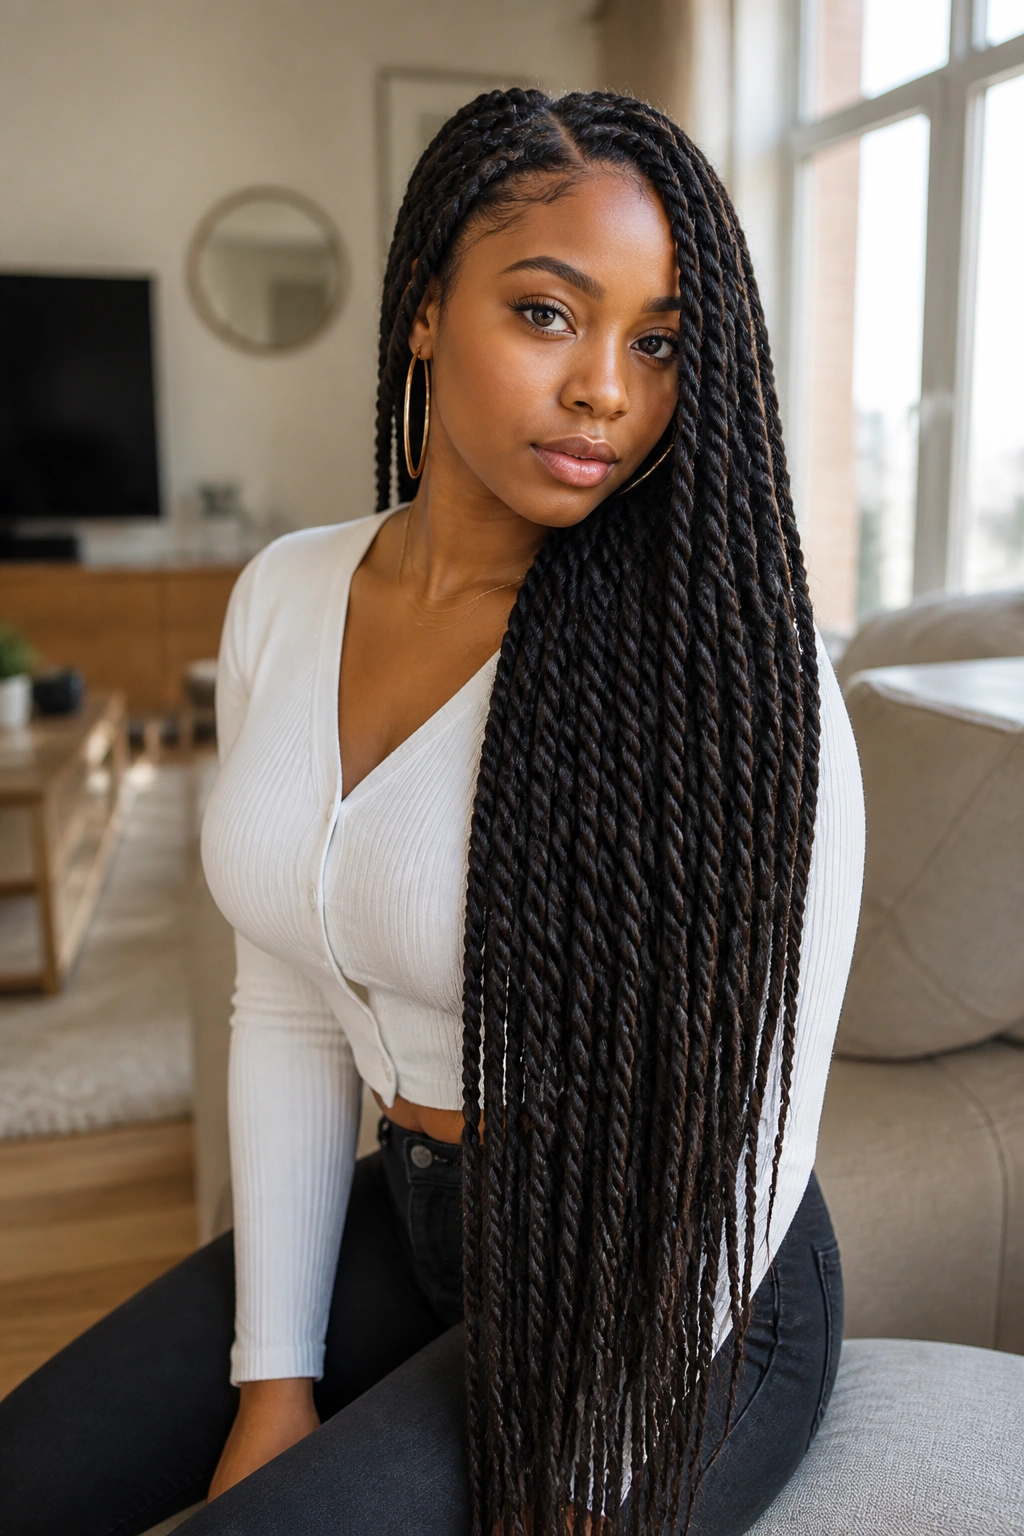
Long twists look luxurious, but they are not a casual decision. The weight shifts the whole experience, and the longer the hair hangs, the more you feel it when you turn your head, lean back in a chair, or tuck on a sweater. That is the price of drama.
I like this style most on stretched hair, not shrunken hair. Stretching gives the twists a cleaner line, shows the length better, and helps the finished style hang instead of bunching up at the root. If your hair is already very dense, long twists can feel heavy at the nape after a couple of days, so section size matters more than usual.
That extra length does one useful thing, though: it gives you room to style. You can tie it up, sweep it over one shoulder, or gather half of it back without the style losing its shape.
One caution. Long twists snag on everything. Zippers, bag straps, car seats, pillowcases. You name it.
5. Side-Part Two-Strand Twists

A side part changes more than people expect. The whole mood shifts. A center line can feel clean and symmetrical, but a side part gives the twists a little movement before they even move. The hair falls with more sweep, and the face gets a softer frame almost automatically.
Why the part matters
The part creates a visual anchor. On thicker hair, that can help reduce the feeling of too much bulk at the top. On finer hair, it can add a bit of lift without teasing or fluffing the roots. It also works well when one side of your hair grows differently from the other, because the asymmetry feels deliberate instead of accidental.
- It softens a strong jawline.
- It gives the crown a little height.
- It makes a simple style look more finished with almost no extra effort.
- It works well with medium or long twists that can drape across one shoulder.
If you like earrings, this style is a gift. One side stays open, and the line of the twists does half the styling work for you.
6. Middle-Part Two-Strand Twists

Middle parts can be unforgiving, which is exactly why they look so sharp when they’re done well. Every parting line is visible. Every section matters. There’s nowhere for sloppy work to hide, and that is part of the appeal.
This style gives a clean, balanced frame to the face and usually looks best when the twists are uniform in size from front to back. It’s especially nice if you like a direct, orderly look rather than something soft and sweeping. The symmetry can make the whole style feel more grounded, almost like the hair has been organized on purpose instead of just styled.
A middle part also plays nicely with longer earrings, structured necklines, and makeup that deserves room to breathe. That sounds small. It isn’t.
Messy parting shows here.
If the scalp line is crooked, the whole style can feel off-center even when the twists themselves are neat. A tail comb and a little patience are worth their weight.
7. Half-Up, Half-Down Twists

This is the style I keep coming back to when I want twists to look finished without going formal. The top section gets gathered into a puff, bun, clip, or ponytail, and the rest hangs loose. That simple split gives the style shape and keeps hair away from your face without hiding the length you worked for.
It also solves a real problem: long hanging twists can feel heavy after a while, especially on active days. Pulling the top section back shifts some of that weight and gives your neck a break. Better still, you can change the mood with the smallest tweak. A claw clip makes it relaxed. A wrapped top bun makes it sharper. A puff makes it playful.
Quick details that help
- Use a satin scrunchie or a soft tie so the top section does not crease hard.
- Keep the gathered section loose enough to avoid edge tension.
- Let a few face-framing twists fall naturally instead of forcing them back.
- Refresh the loose ends with a little oil on the fingertips, not a heavy coat.
The style looks casual. The planning behind it usually is not.
8. Twist Bob
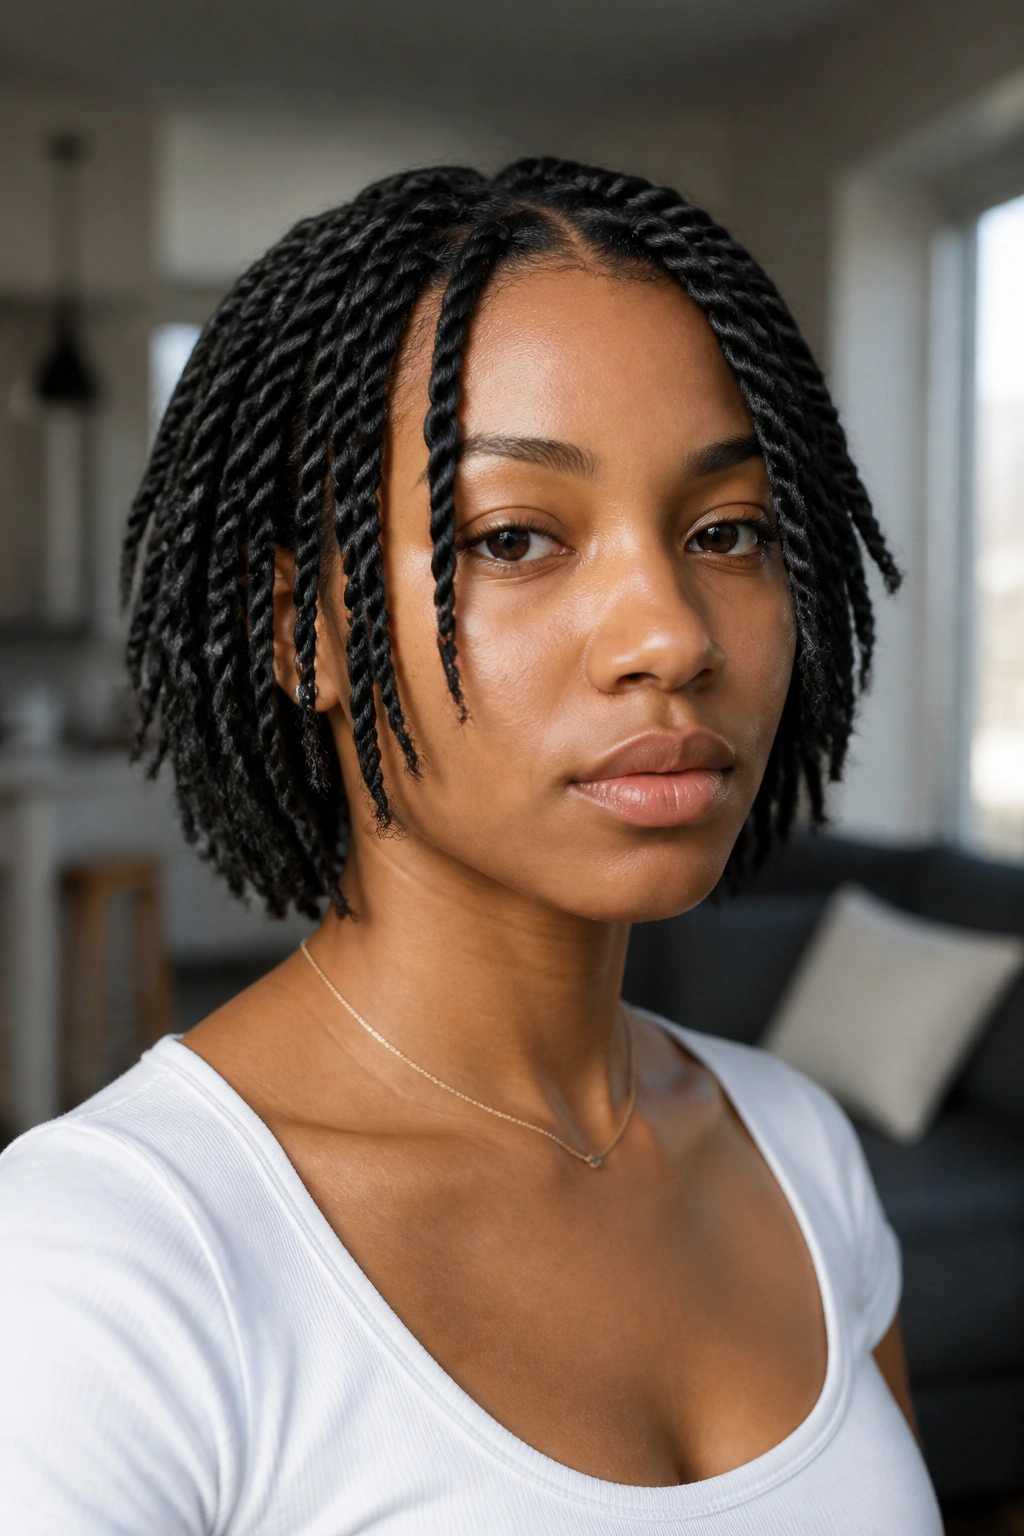
A twist bob hits the jaw or just below it, and that short length changes everything. The style swings when you move. It feels lighter on the scalp. It makes earrings, makeup, and even a plain T-shirt look more put together because the hair sits close enough to the face to matter.
This is one of those styles that looks tidy on a Monday and still makes sense by Friday. Shorter twists dry faster, are less likely to catch on scarves, and don’t drag the way longer sets do. If your hair is dense, a bob can also make the shape feel more controlled without flattening it.
A blunt bob gives a neat line. A slightly layered one feels softer and less boxy. Both work, but the layer choice changes the whole mood.
That is the trade-off. Shorter means lighter, but it also means less room to hide uneven ends. If your twist size varies wildly, a bob will show it fast.
9. High Ponytail Twists

A high ponytail with twists has attitude. It pulls the hair up and away from the face, shows off the neckline, and gives the whole look a little lift. It can feel sporty or polished depending on how tight you gather the base and how much of the length you let spill out.
Keep the base soft
The base should sit secure, not strained. If the hairline is pulled back too hard, the style stops being protective. A snug elastic at the crown is enough in most cases, and if the ponytail is heavy, wrapping a small twist around the base helps anchor it without adding another band.
- Place the ponytail where the head naturally curves, not too far forward.
- Smooth the roots with your hands first, not by yanking with a brush.
- Use a strong tie if the twists are long, but keep the tension even.
- Let the ponytail fan out a little instead of forcing it into a tiny knot.
This style is honest about its needs. It asks for control at the base and freedom at the ends. If you do both well, it looks clean from every angle.
10. Low Bun Twists

A low bun changes the whole energy of twists. The weight shifts to the nape, which feels calmer on the scalp and usually reads more polished than a high ponytail. It’s the kind of style you can wear to work, dinner, a meeting, or a wedding without it feeling out of place in any of them.
The trick is not to gather the twists too fast. If the ponytail stage is rushed, the bun ends up lumpy and awkward, especially with thicker hair. I like to smooth the twists back gently, secure them low, and then coil the length into a bun before pinning the edges in place.
If the twists are long, twist the tail once before wrapping it. That sounds fussy, but it cuts down the bulk.
Low buns are also easier to sleep in than people expect. Still not glamorous. Much easier. And if you leave a few tapered twists out near the temples, the style gets a softer finish that keeps it from looking too severe.
11. Crown Halo Twists
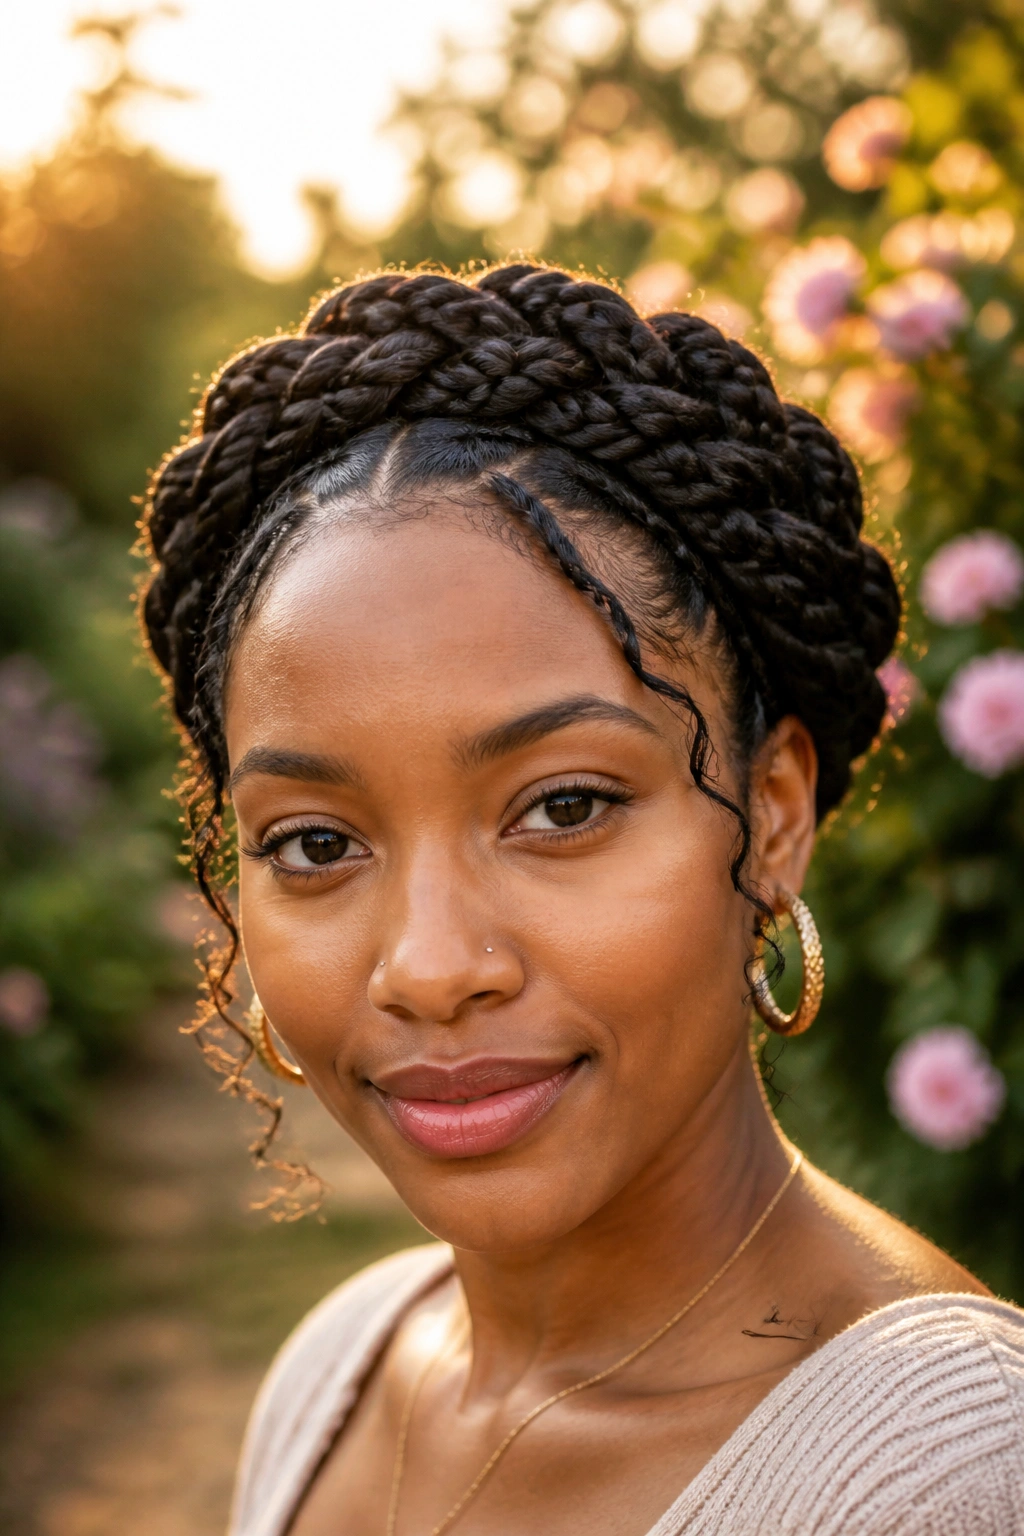
A crown halo twist style wraps the hair around the head so it sits like a soft ring or braid crown. It looks elaborate from a distance, but the structure is really just a neat path around the hairline with the ends tucked in carefully.
How the shape holds
The style works best when the twists have enough length to travel around the head without popping loose. Medium to long twists usually give the cleanest result. You can build the crown with your own hair or with twists that are already installed, then pin them in a circle and hide the ends under the next section.
- Anchor the first twist low and secure it with a pin before moving on.
- Cross each new twist over the last one so the circle stays smooth.
- Tuck the ends under neighboring twists instead of letting them sit on top.
- Use pins at the pressure points, not every half inch, or the scalp starts to feel crowded.
This style has a quiet kind of drama. Not loud. Just enough. It is the sort of twist look that makes a plain dress feel intentional.
12. Space Bun Twists

Space bun twists are playful, and I mean that in the best possible way. Two buns. One on each side. The center part stays visible, which keeps the look balanced even when the buns themselves are a little uneven or loose.
This style works because it breaks up the weight. Instead of carrying all the twists down the back, you shift them into two round shapes that sit high or medium on the head. On dense hair, smaller buns are often smarter than huge ones; giant buns can feel heavy and start leaning after a few hours. On finer hair, the style can be puffier and more relaxed without losing the point.
The face stays open, too, which makes the whole thing feel youthful without looking childish. That balance is harder to get than it sounds.
A tidy middle part helps. So does wrapping a tiny twist around each bun base to hide the elastic. Little detail, big difference.
13. Triangle-Part Twists
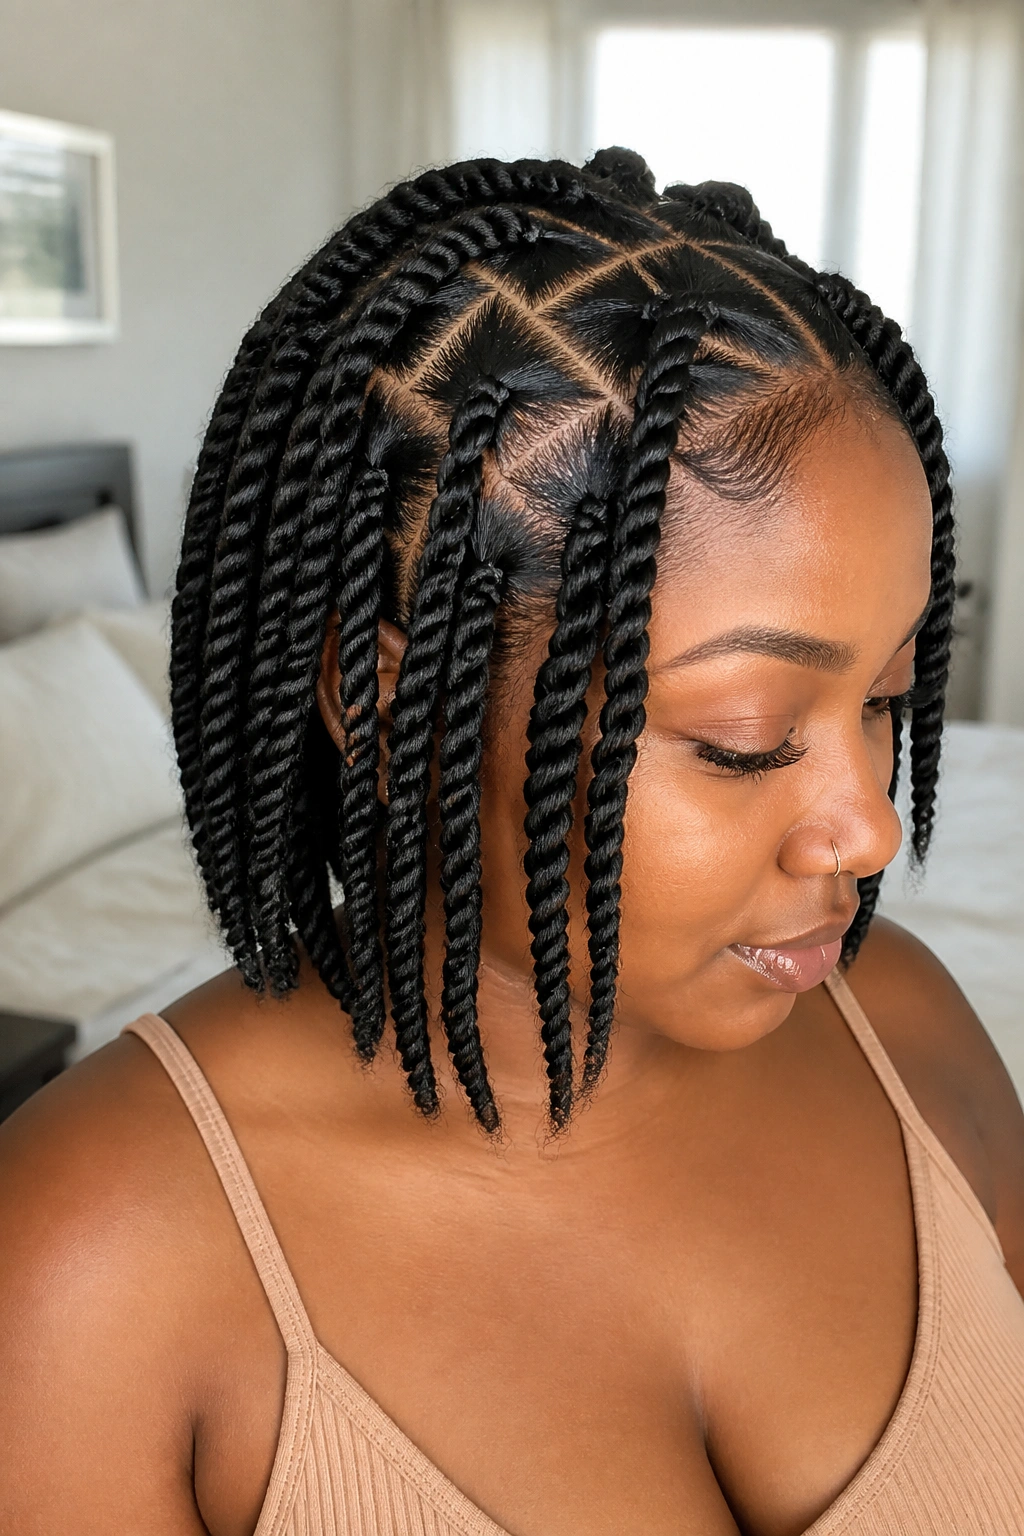
Triangle parts give twist styles a sharper, more interesting scalp pattern than standard squares. The look is subtle from far away, but up close it has a clean geometry that keeps the style from feeling flat or overfamiliar.
Why triangles matter
Triangles distribute the hair in a way that can soften the boxy feel some twist sets get when the sections are too regular. They also make grow-out look a little less obvious because the pattern breaks in a more natural way. On medium or long hair, triangle parts can create a nice visual rhythm down the head without making the twist set look busy.
- They add shape without adding extra hair.
- They work well on medium-density hair that needs a bit of movement at the root.
- They make even a simple twist size look more thoughtful.
- They can hide small inconsistencies better than perfect squares do.
You do need patience to part them cleanly. A rushed triangle section looks awkward fast. But when they’re done neatly, the whole head has a sharper finish that holds up in real life, not just in mirror selfies.
14. Twists with Beads and Cuffs

Beads change the sound and feel of twists. A few small clacks when the hair moves. A little extra weight at the ends. A more styled finish without touching the twist body itself. Done well, they make a simple twist set look deliberate instead of plain.
This works especially well on medium or longer twists because the beads need room to sit without crowding the ends. Heavy beads on fine hair can tug more than people expect, so lighter materials usually make more sense if your strands are delicate or your scalp gets tired easily.
What to think about
- Put beads on a few select twists instead of every single one if you want a lighter feel.
- Match the bead size to the twist thickness so the ends do not sag.
- Secure the end first, then slide the bead on, or the whole thing slips.
- Use cuffs or rings near the middle of the twist if you want detail without added weight.
This style has personality. Not every twist needs it, but when the hair feels too plain, beads fix that fast.
15. Twists with Curled Ends

Curled ends soften the whole line of a twist set. Instead of hanging straight and rope-like all the way down, the ends spring into a small curl or wave, which makes the style look gentler and a little more finished.
To get that shape, the ends usually need to be wrapped around a rod, flexi rod, or similar tool and dried completely before anything comes out. That last part matters. If the ends are even slightly damp, they droop, frizz, or collapse the minute the rod leaves the hair. Nobody wants that.
This style is a nice choice when you want movement at the bottom without cutting the length. It can also make medium-length twists feel a little fuller, since the curled ends add visual width near the shoulders.
I like this one when the rest of the twist is neat but the hair needs a softer edge. The curl says the style was planned. It does not shout.
16. Stretched Blowout Twists
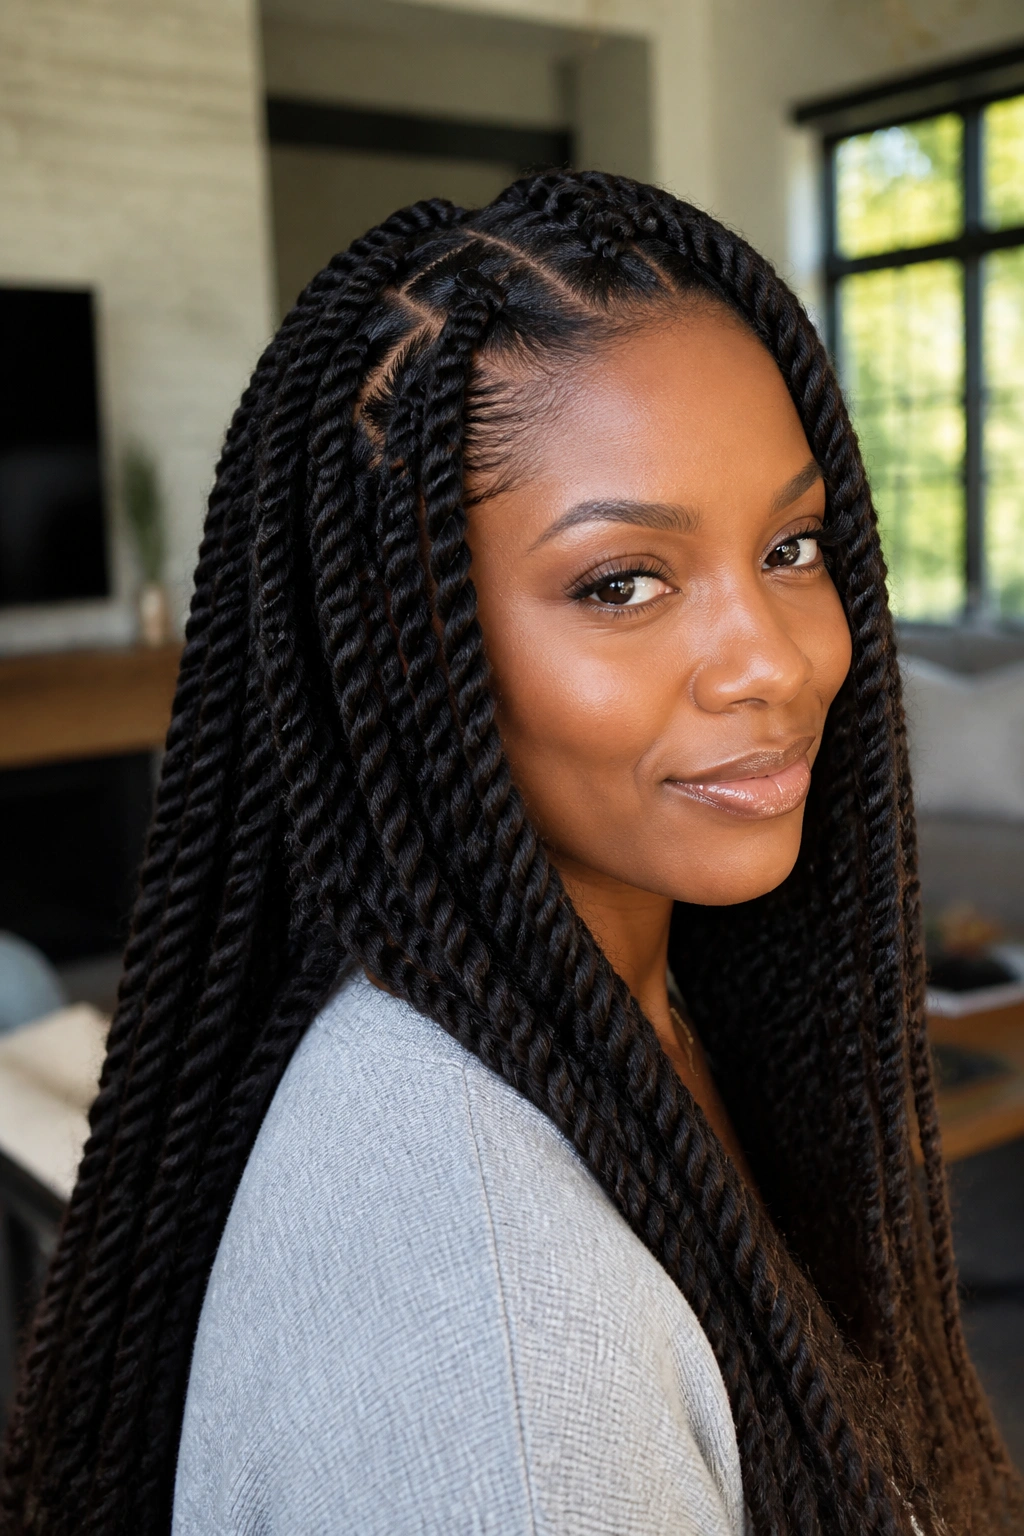
Twists installed on stretched or blown-out hair have a different personality from twists started on freshly shrunken coils. They hang longer, show more length, and usually look smoother through the body because the strands have already been elongated before the twisting begins.
That makes this style a smart pick when length is the goal. It also helps the parts look cleaner, since stretched hair tends to lie flatter at the root. But the prep takes longer, and if heat is involved, the risk goes up. Low heat is the only version I’d trust here if you’re using it at all. Band-stretching or a gentle tension method works too, and it avoids the whole hot-tool issue.
The twist itself can still be fully protective. The difference is the canvas underneath.
This is the style for days when you want the hair to hang instead of puff. If you prefer volume and shrinkage, you may like the opposite effect better.
17. Side-Swept Twists
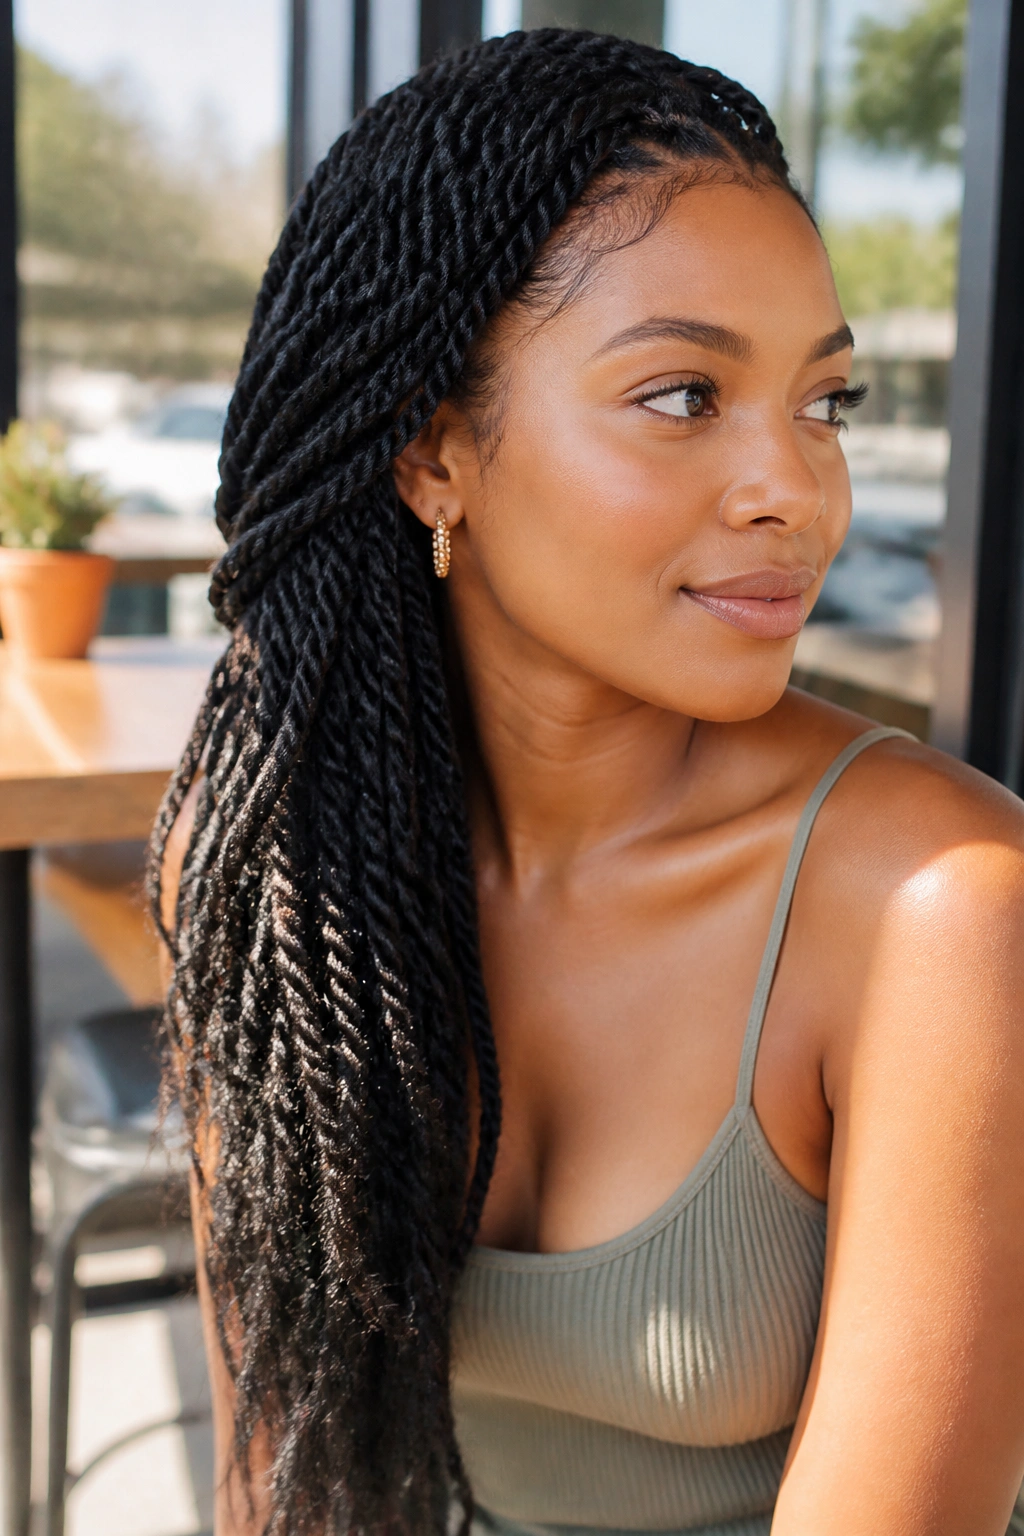
Side-swept twists are the easiest way to make a simple set look styled on purpose. Instead of letting the hair fall straight down the back, you bring the whole mass over one shoulder or tuck it so the weight leans to one side. That shift gives the style movement without changing the twist itself.
It also changes how the face reads. One side stays open, which makes earrings, glasses, or a sharp neckline stand out more. The other side carries the bulk, so the style feels balanced without looking stiff. This is one of those looks that works better in motion than in a flat photo. Turn your head and the whole thing moves.
If the hair is long, a loose pin near the opposite shoulder can keep the sweep from slipping back. If it’s shorter, a deep side part helps the twists stay where you want them.
Small adjustment. Big payoff.
18. Layered Face-Framing Twists

Layered face-framing twists are for people who want shape around the face without cutting the whole set into one uniform length. Some twists sit a little shorter near the cheekbones. Others fall longer in the back. The result is softer and more dimensional than a blunt row of twists all the same length.
Where the layers go
The shortest pieces usually belong at the front, where they can brush the temples or curve around the jaw. Longer twists in the back keep the style from shrinking into a box. That balance keeps the face open while still giving the back of the head enough coverage and movement.
- Shorter front twists soften a strong hairline.
- Medium pieces near the ears keep the shape from looking too heavy.
- Longer back twists hold the silhouette together.
- A few loose tendrils near the front can keep the look from feeling too formal.
I like this style for anyone who wants a twist set that feels shaped rather than simply installed. It has a little more thought in it, and that shows.
19. Tucked-and-Pinned Updo Twists
What do you do when you want all the hair off your neck but you do not want a stiff, shell-like bun? A tucked-and-pinned updo. It keeps the twists close to the head, hides the ends, and gives the style a cleaner outline than a quick top knot ever could.
The structure matters more here than the decoration. Start by gathering the twists into a low or mid position, then coil and pin them in layers. U-pins and bobby pins work better than one giant clip because they let you control where the pressure lands. If you try to pin the smooth surface only, the style loosens fast. Pin into the crossed points instead.
Small things that help
- Leave enough length in the twists so the shape can fold without bulging.
- Place pins under the overlap, not at the edge.
- Keep the crown slightly loose if you want height.
- Tuck ends under neighboring twists so nothing pokes out at the nape.
This is the style you reach for when the day needs your hair to stay put.
20. Short Twists on a Tapered Cut
Short twists on a tapered cut have edge. Literally and visually. The shorter sides and back keep the shape tight, while the longer top gives the twists room to move and show their texture. It is a strong look on natural hair because it makes the curl pattern part of the design instead of hiding it.
The cut does a lot of the styling work before you even start twisting. That means fewer pins, less bulk, and less time spent trying to force the hair into a shape it does not want. It also makes the neckline look clean, which is one of those small details that somehow changes the whole face.
This style is especially good if you like low-maintenance mornings. You can refresh the front twists, re-twist a few short sections near the temple, and be done. No giant pile of hair to reset. No dragging ends. No wrestling match with your scarf.
Short twists like this are proof that protective styling does not have to mean long hair. It just has to work with the hair you actually have, the way it grows, and the amount of time you want to spend in the mirror before breakfast.
