



A braid across the top of loose hair does something useful that a lot of other styles don’t: it makes the whole look feel finished without pinning every strand into submission. That’s why braided half up half down hairstyles keep showing up on long hair, layered cuts, curly textures, and protective styles alike. They keep hair off the face, show off length, and still let the bottom half move.
The trick is not just “add a braid.” It’s choosing the right braid for the hair you have. Fine hair needs grip. Thick hair needs clean sectioning. Curly hair needs space for shrinkage. Coily hair often looks best when the braid is anchored where the hair already wants to lie, not forced into a pattern that fights the texture.
A good half-up style also knows when to stop. Too much braid and you lose the easy part of the look. Too little, and it reads like an afterthought. The styles below sit in that middle ground, which is why they work so well in real life, not just in photos.
1. Classic Braided Half Up Half Down Crown
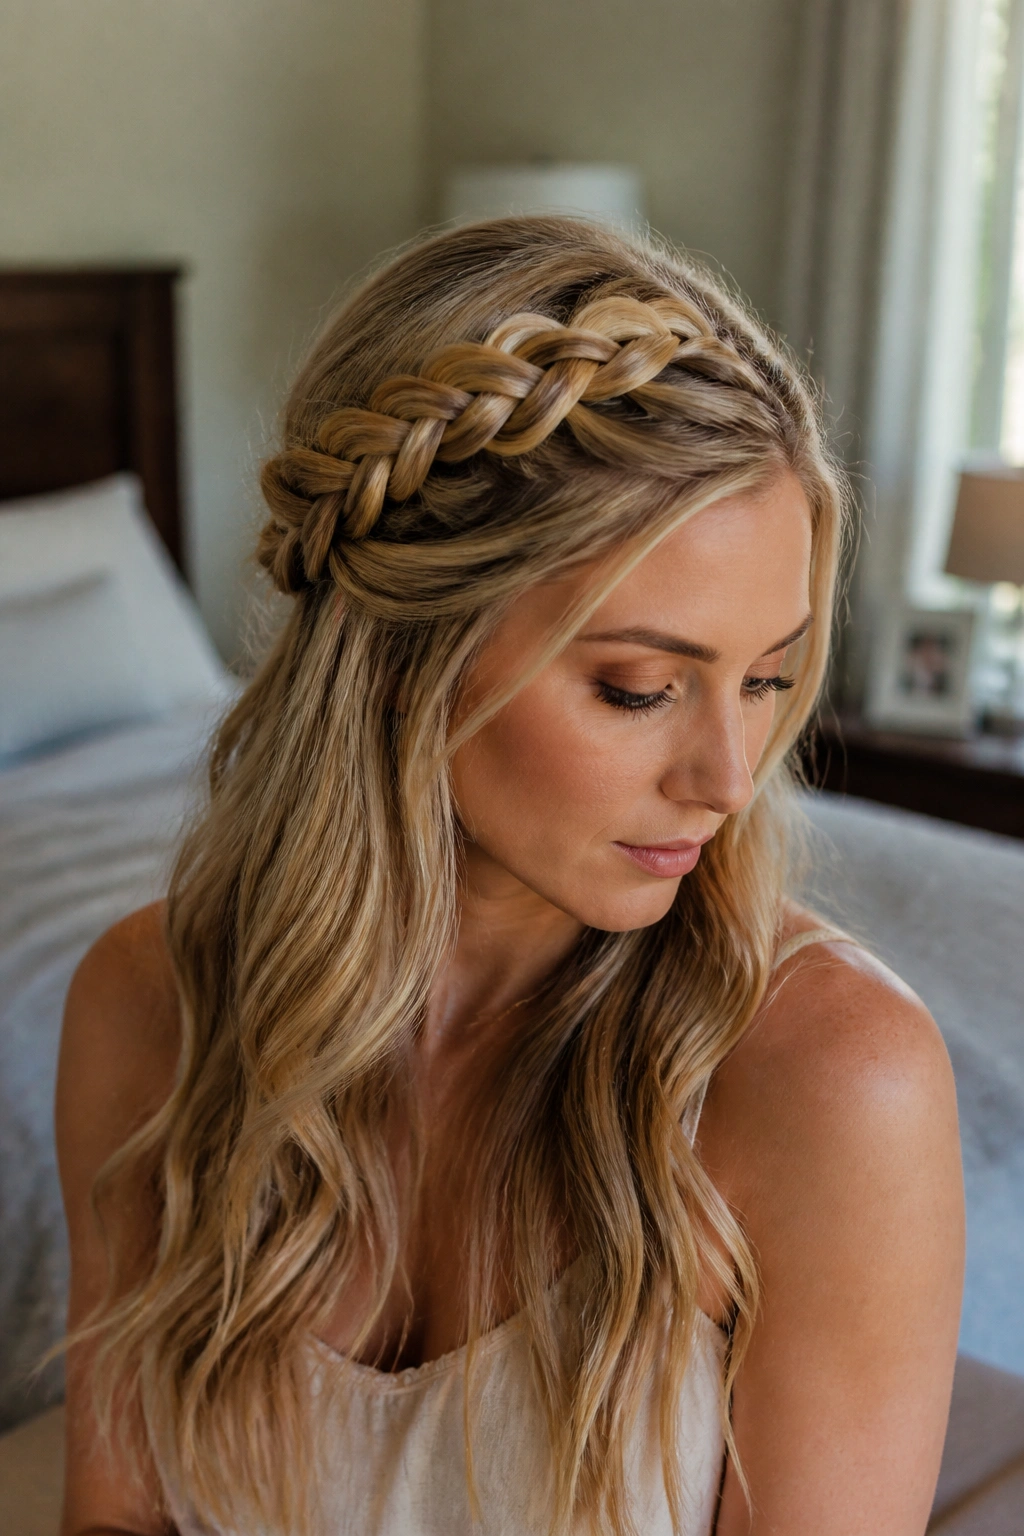
This is the version I’d hand to someone who wants the cleanest possible starting point. A simple braid runs from temple to temple across the crown, and the rest of the hair stays loose underneath. It feels polished without looking stiff, which is harder to pull off than people think.
Why it works so well
The braid acts like a frame. It pulls the eye up and keeps the front section neat, while the loose length gives the style softness and movement. On layered hair, it also helps hide pieces that want to pop out near the face.
A medium three-strand braid usually looks best here. Keep the section about 2 to 3 inches wide across the front, and start just behind the hairline so the braid has a little lift instead of hugging the forehead too tightly.
- Best on: medium to long hair
- Works with: waves, blown-out hair, soft curls
- Tool that helps: a rat-tail comb for a straight part
- Finish with: a light mist of flexible-hold spray
My favorite detail: gently pull the outer edges of the braid wider once it’s secured. Not a full pancake, just enough to make the braid look fuller and less tight.
2. Two Dutch Braids That Meet at the Back
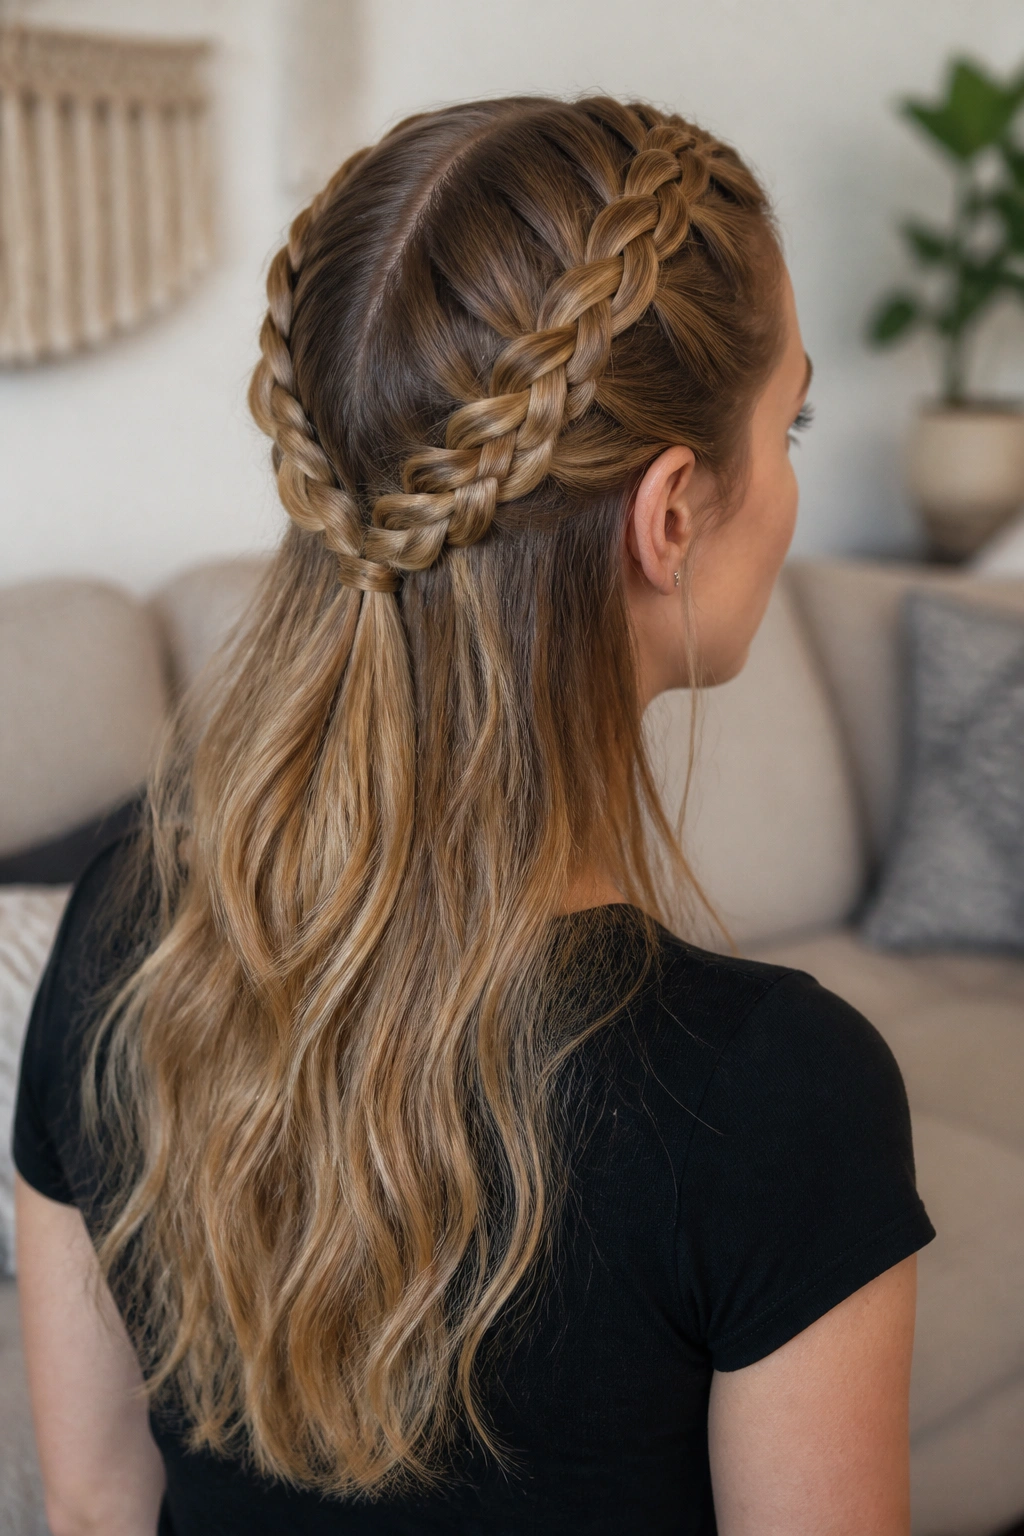
Why do two Dutch braids look so good in a half-up style? Because they bring structure without stealing the whole show. The raised braid pattern gives the top half more shape, and when the two braids meet at the back, the style suddenly feels intentional instead of casual.
This one is especially good if your hair tends to slip out of clips or if you want the front pinned back for a long day. The braids should start at the temples and travel back along the scalp, with the bottom half left free. Keep the part in the middle if you want it symmetrical. Go side part if you want it softer.
Where to place the braids
Start each braid no wider than 1 inch at the hairline, then feed in hair as you move back. That keeps the braid snug without becoming bulky at the crown. A lot of people pull too hard here. Don’t.
If your hair is thick, this style can look a little squat unless you leave a little height at the crown. Lift the section with your comb before you begin braiding. Tiny move. Big difference.
3. Fishtail Pullback With Soft Ends
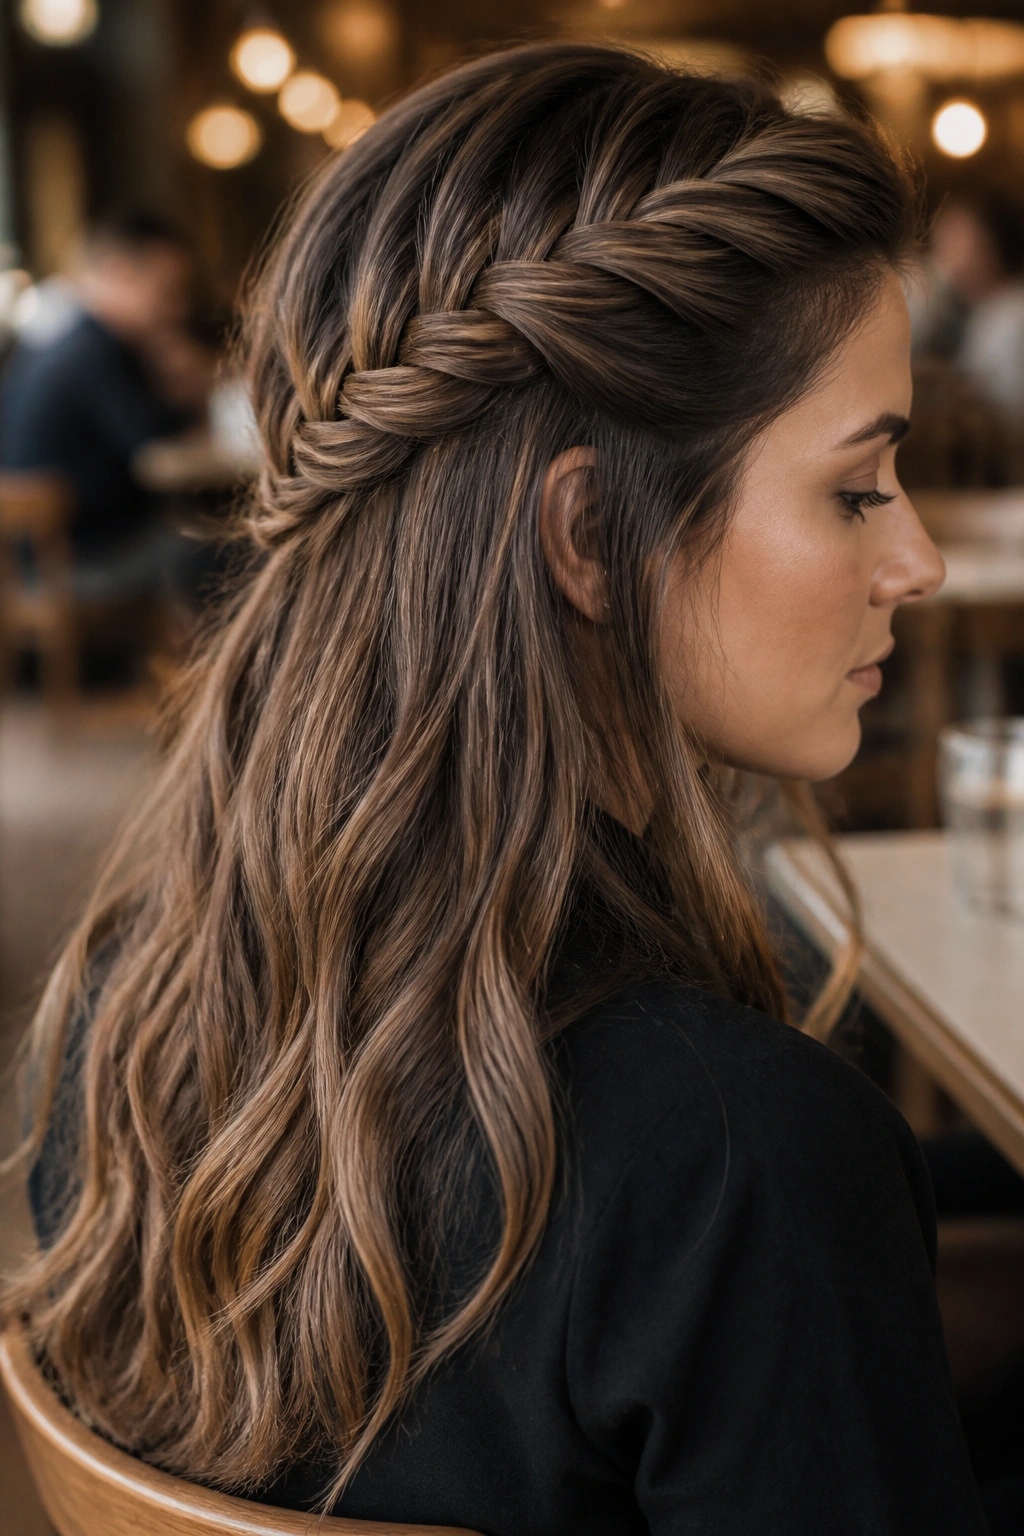
A fishtail braid brings texture that a regular braid cannot fake. The smaller weave pattern makes the top section look detailed, even when the rest of the hair stays simple and loose. It’s one of those styles that looks fancier than the effort it takes.
This version works best when the hair has a little grit. Day-two hair, light mousse, or a touch of texturizing spray helps the sections stay in place. If the hair is too slippery, the fishtail can collapse before you reach the midpoint.
What makes it different
A fishtail uses two main sections instead of three, and you keep crossing tiny pieces from the outside edges into the opposite side. That smaller movement makes the braid look woven instead of plaited.
- Keep the sections even, but not perfect
- Use 1/4-inch strands for a tighter look
- Pull the finished braid gently at the sides
- Leave the lower hair in loose waves or curls
It’s a smart pick for shoulder-length hair, too. Shorter lengths can still handle it, because the braid doesn’t need the same long runway a chunky braid does.
4. Waterfall Braid Across Sleek Hair
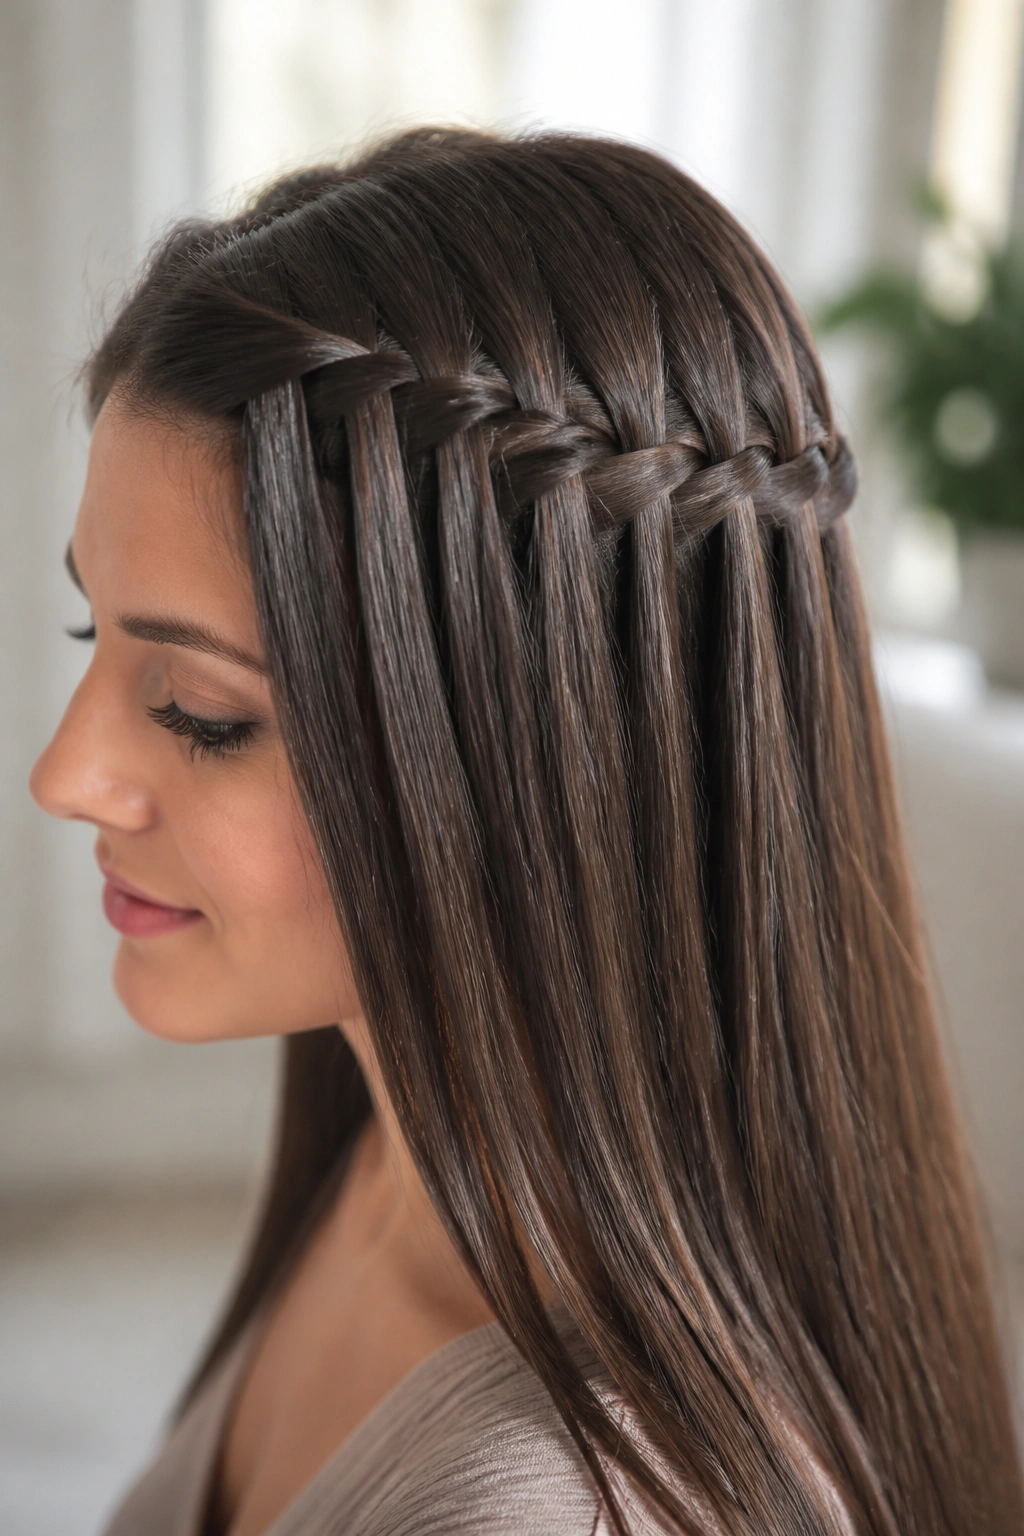
If you want the braid to look delicate, this is the one. A waterfall braid drops a strand every time you cross over, which creates those little open gaps that let the length underneath show through. It reads soft and a little romantic, but the technique itself is more controlled than it looks.
This style wants smooth hair. Straight hair works best, and stretched curly hair can also do the job. On very textured hair, the pattern can disappear unless you smooth the top section first with a small amount of cream or serum.
When waterfall braid works best
Think dinner, photo day, bridal hair, or any moment when you want something pretty without a big updo. The braid sits along one side or across the crown, and the loose strands underneath keep the style from feeling overdone.
A tail comb helps here more than people expect. Clean sections make the drops visible. If the strands are fuzzy from the start, the whole braid turns muddy fast.
One warning: don’t make the braid too tight. A waterfall braid looks better when the curves are soft and the dropped strands hang freely.
5. Rope Twists for Fine or Silky Hair
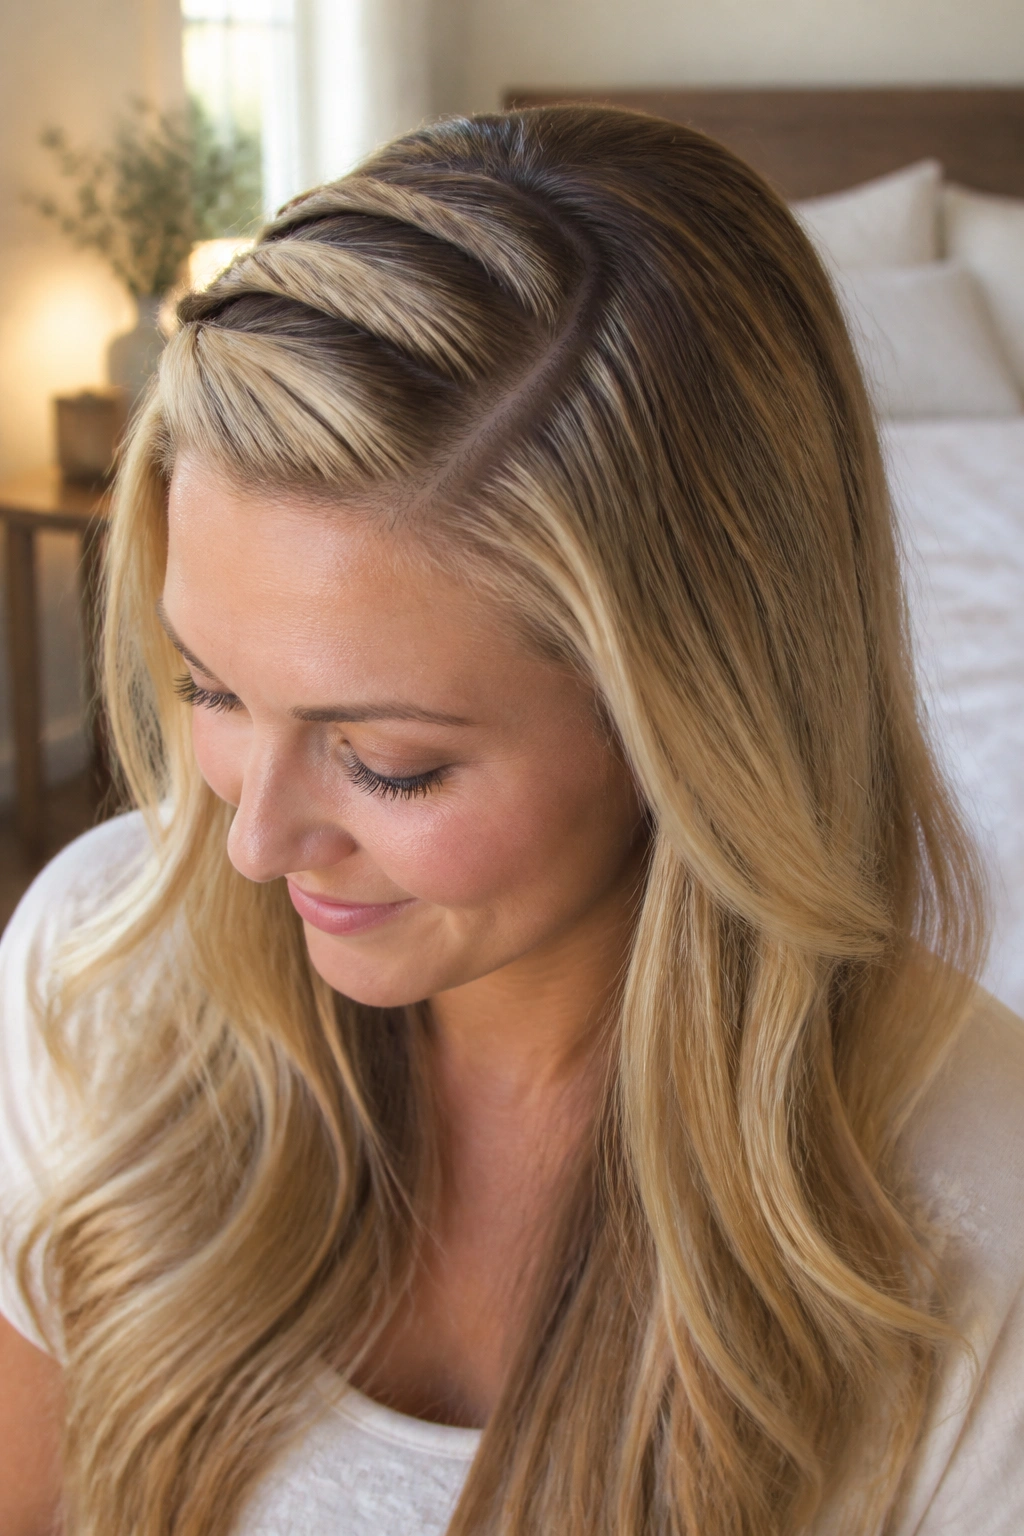
Rope twists are one of the best half-up choices when regular braids keep slipping apart. Two strands twisted around each other tend to hold with less effort than a three-strand braid, especially on hair that’s fine, silky, or freshly blown out.
The style is clean, quick, and honestly a little underrated. I reach for it when I want shape at the top but don’t want the braid to steal the whole look. It also works nicely when the ends of the hair are already curled, because the twist on top gives the loose length more contrast.
The small grip trick
Work a little mousse or lightweight styling cream into the front section before twisting. Not much. Just enough to give the strands some memory. Then twist each side away from the face before wrapping them together.
The most common mistake is twisting too loosely at the beginning. The base should feel snug; the ends can be softer. If the roots are loose, the whole twist starts to unwind.
This style loves a side part, but a center part can look sharp and modern if you keep the twists symmetrical.
6. Braided Bun at the Crown With Loose Length
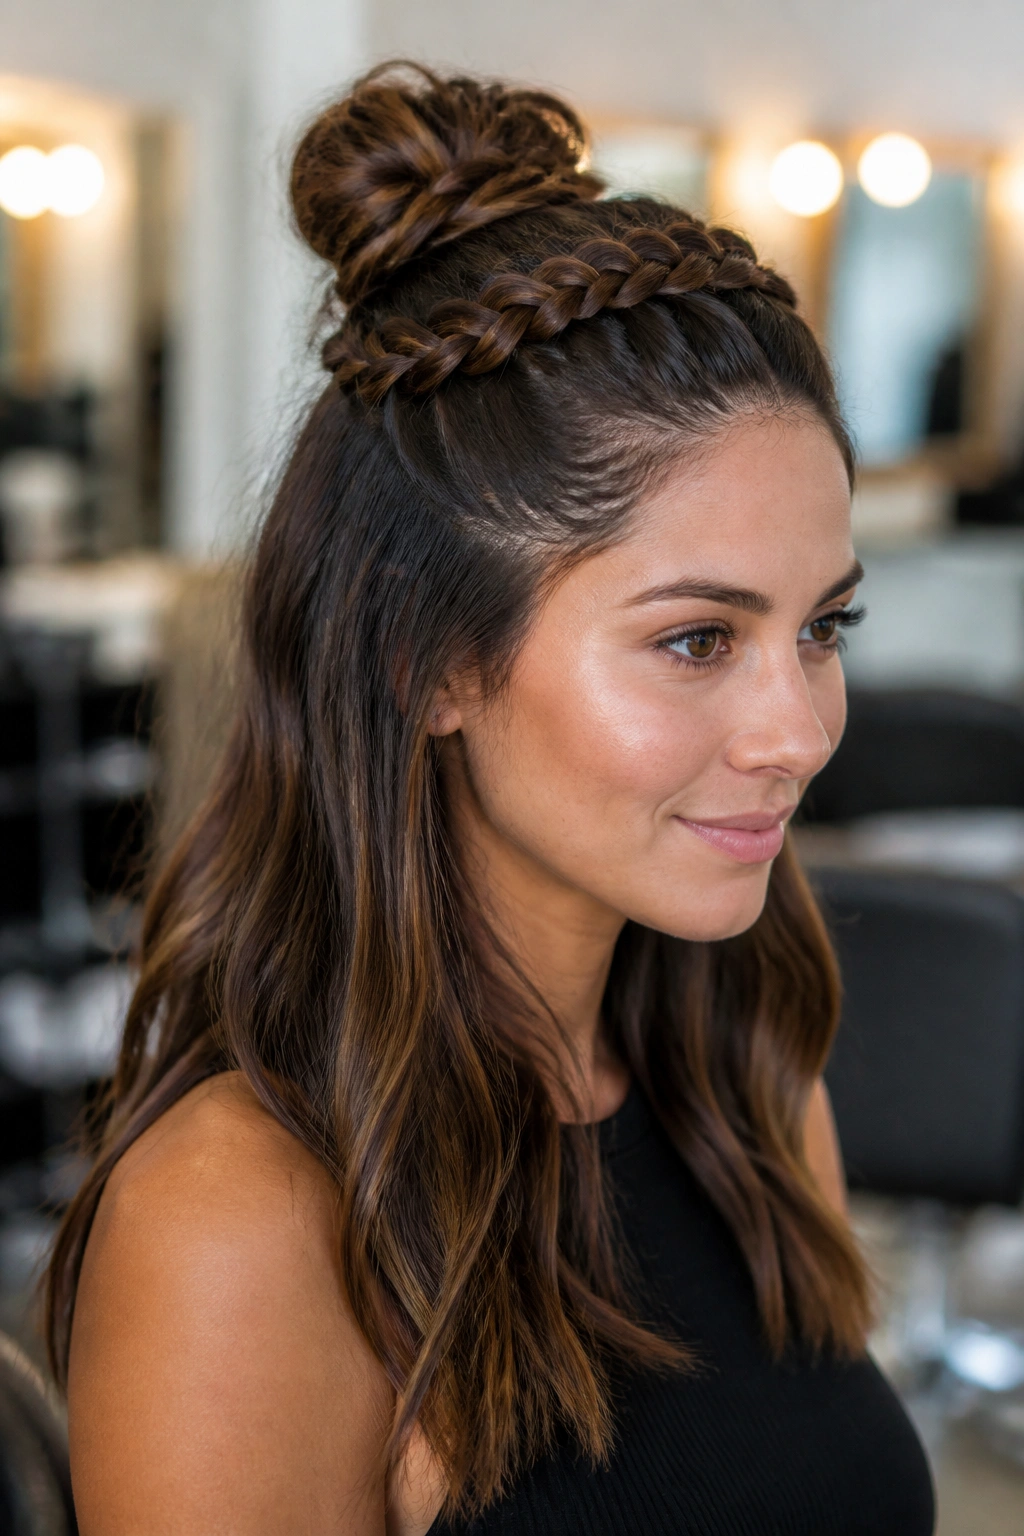
Want the upper half to look dressed up instead of casual? Put the braid into a small bun at the crown. That simple change makes the style feel more finished, and it keeps the top section compact while the bottom half stays loose.
The braid usually starts at the front or from each temple, then gathers into a knot or mini bun at the crown. Leave the lower hair down in curls, a blowout, or soft waves. The contrast is the whole point. Tight top. Soft bottom.
How to pin the bun
Use 2 to 4 bobby pins, crossed over each other if the hair is heavy. That cross pattern holds better than a single pin shoved in at random. If the bun feels lopsided, flatten the base before pinning instead of trying to fix it afterward.
This style is good for medium-length hair that does not fully want to stay in a ponytail. The braid gives the bun something to anchor to, which keeps it from sagging by midday.
A little loose face framing helps here. Too much polish and the style starts to feel severe. A few soft pieces change that fast.
7. Feed-In Cornrows With Curly Ends

This is where braided half up half down hairstyles start leaning into protective styling. Feed-in cornrows keep tension close to the scalp, and they make the top section neat while the back stays free. If you wear natural hair and want a style that can last, this is one of the strongest options.
The feed-in method means the braid starts small and gradually gets thicker as more hair is added. That gives the front a smoother look and keeps the braid from looking bulky right at the hairline.
- Part each section about 1/4 to 1/2 inch wide
- Keep the scalp parts clean and even
- Ask for medium tension, not tight edges
- Leave the back loose in curls, coils, or a puff
This style is one of the few that looks just as good with small accent curls as it does with a full curly back section. If your scalp is tender, keep the braids larger and fewer. Tiny braids look neat, but they can add unnecessary stress if they’re too tight.
8. Braided Half Up Half Down With Boho Mini Braids
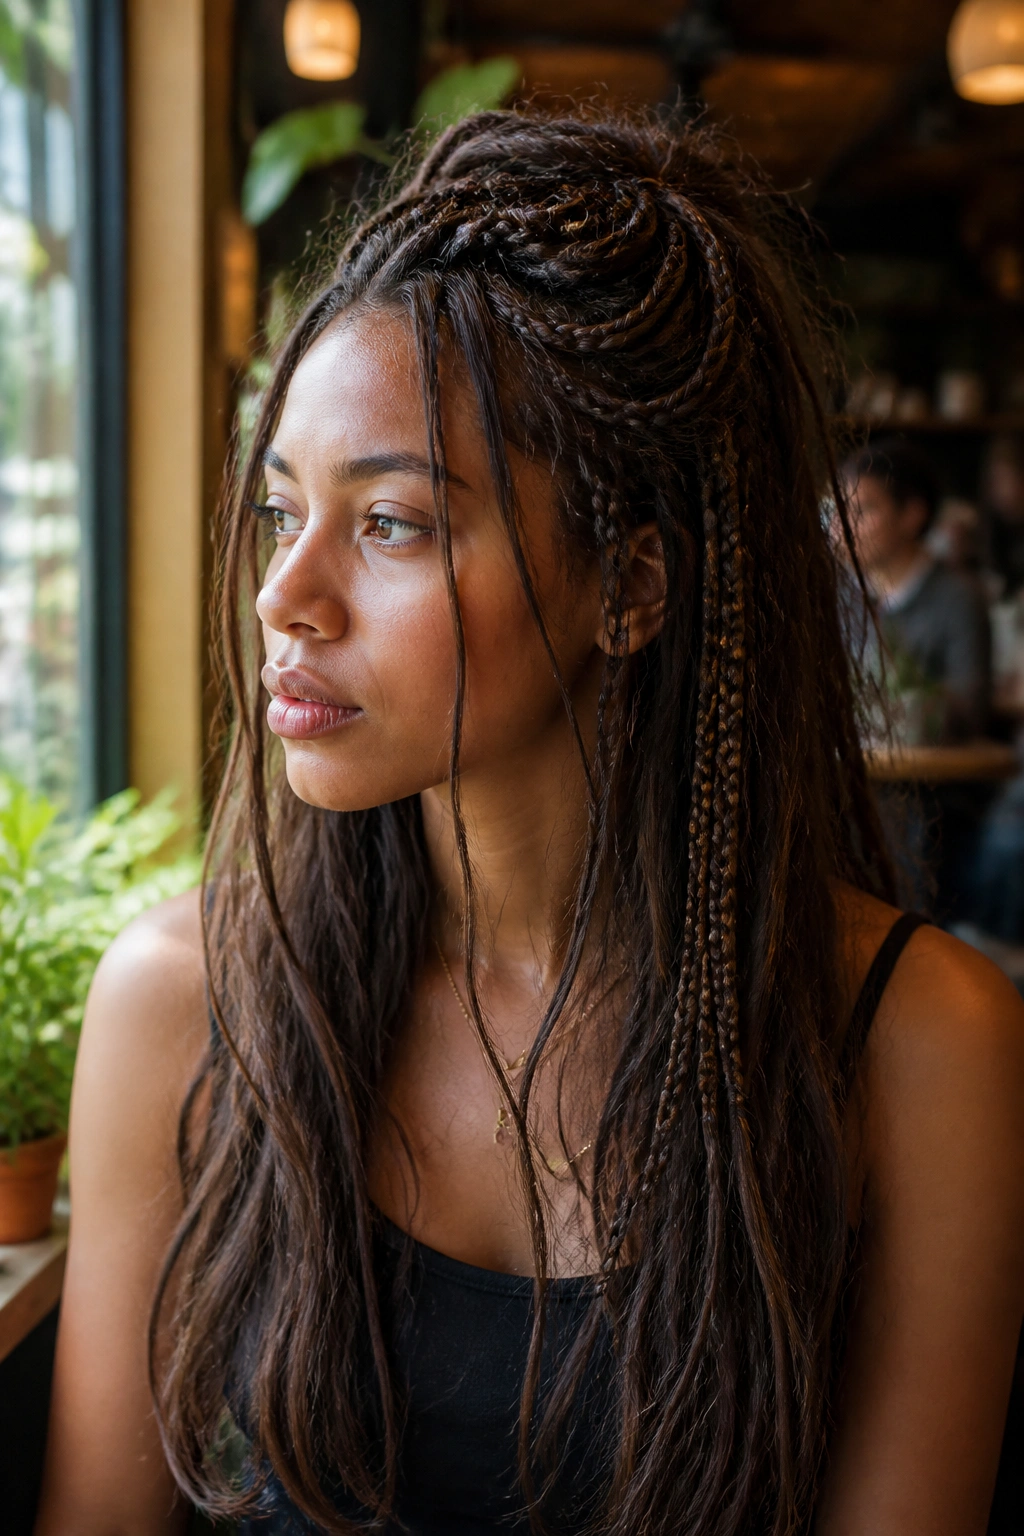
A little messiness helps this style. Boho mini braids scattered through the top section give the half-up shape texture, and the loose hair underneath keeps it from feeling too constructed. It’s relaxed in the best way.
I like this version when the rest of the hair already has wave or bend in it. The tiny braids sit among the loose pieces and break up the smoothness, which makes the whole style look lived-in instead of overworked. If your hair is straight, add loose bends with a curling wand first. If it’s curly, stretch the top a little so the braids show.
The small braids do not need to be identical. A couple of thinner ones near the face, a slightly thicker one near the crown, and a tiny braid tucked on one side can be enough.
It grows out well, too. That matters. Some braid styles look tired the second they loosen. This one just gets softer.
9. Boxer Braids for a Secure All-Day Hold
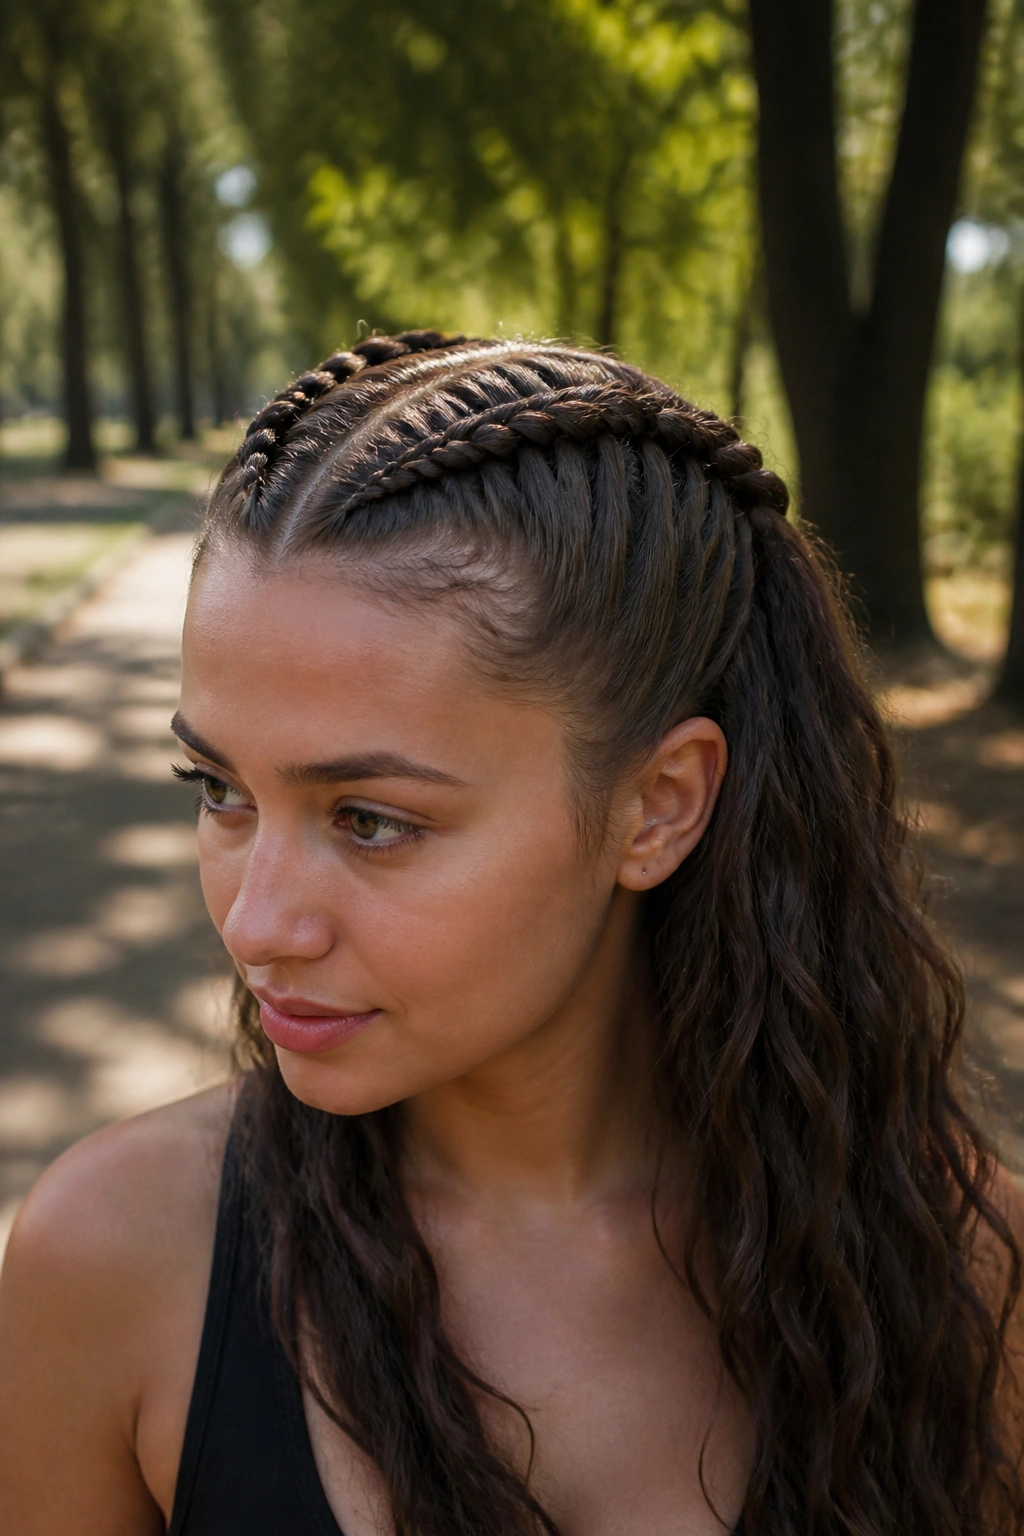
Boxer braids are the practical cousin in the group. They keep the front of the hair locked down, hold up well through movement, and still let the length fall loose in the back. If you work out, run errands, or just hate touching your hair all day, this style earns its place.
The top section is usually split into two Dutch braids that start near the hairline and travel back. Unlike a softer crown braid, boxer braids are built for hold. They should feel secure, but not punishing.
Best use case
This is the style I’d pick for busy days when the weather is sticky or the schedule is ugly. It keeps hair from flying into your face and still leaves enough length down that it doesn’t feel like a full sports braid.
A little flexible spray works better than hard shell hairspray here. You want movement, not crunch. If the braids are too tight around the temples, the style loses the whole point.
And yes, it can look polished. That depends on the parting. Straight parts make it sharper. Slightly curved parts make it softer.
10. Half Halo Braid With Straight or Wavy Hair
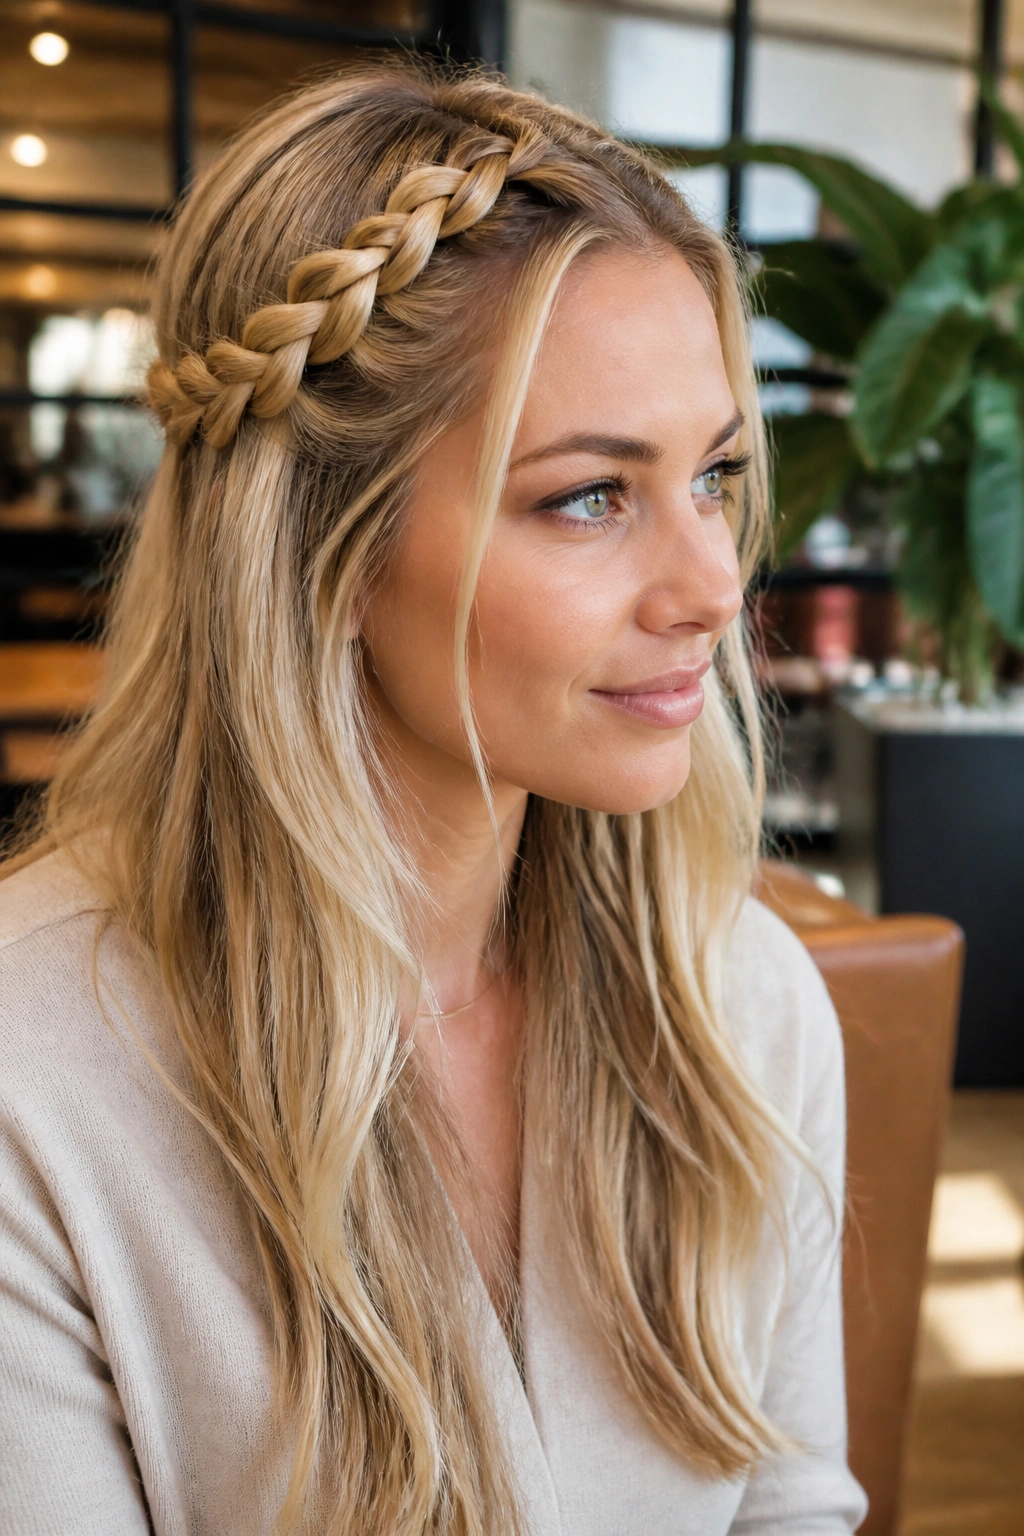
A half halo braid is a cleaner, more polished option than most people expect. Instead of braiding the entire head, you braid across the upper half in a curved line that follows the crown, then pin the ends so the lower hair remains free. It gives you that wrapped-around shape without the commitment of a full halo.
This style looks especially good when the hair underneath is straight or in soft waves. The braid creates structure up top, and the loose length keeps the result from feeling too formal. It’s a nice middle ground for work events, dinners, or anything that wants a neat finish.
The part placement matters. A braid that starts too high can make the crown look boxy. Start a little lower and follow the head shape instead of fighting it.
If your hair is very fine, a bit of dry texture spray at the roots gives the braid something to grab. If it’s thick, pin the braid flat in two places before you let the ends disappear into the back.
11. Deep Side Braid Pullback With Face-Framing Pieces

A deep side part changes everything here. The braid starts on the heavier side and sweeps backward, which gives the style a softer line than a center-parted braid. It looks relaxed, but it still pulls hair away from the face in a way that feels practical.
This one works on curls, waves, blowouts, and twist-outs. That flexibility is part of its appeal. You are not forcing the hair into a strict shape; you’re letting the braid follow the direction the hair already wants to go.
Where the part sits matters
Move the part about 2 to 3 inches off center, then keep the braid low along the hairline before pinning it back. That low path makes the style feel more natural. It also keeps the braid from sitting in one stiff line across the forehead.
If you like a little drama, leave two thin pieces out near the cheekbones. That small detail softens the whole look. Skip it if you want the face fully open.
I think this is one of the easiest styles to wear to work because it looks thoughtful without looking fussy. No big braid crown. No complicated pinning. Just a clean pullback with enough texture to feel finished.
12. Bubble Braid Sections With a Plaited Base
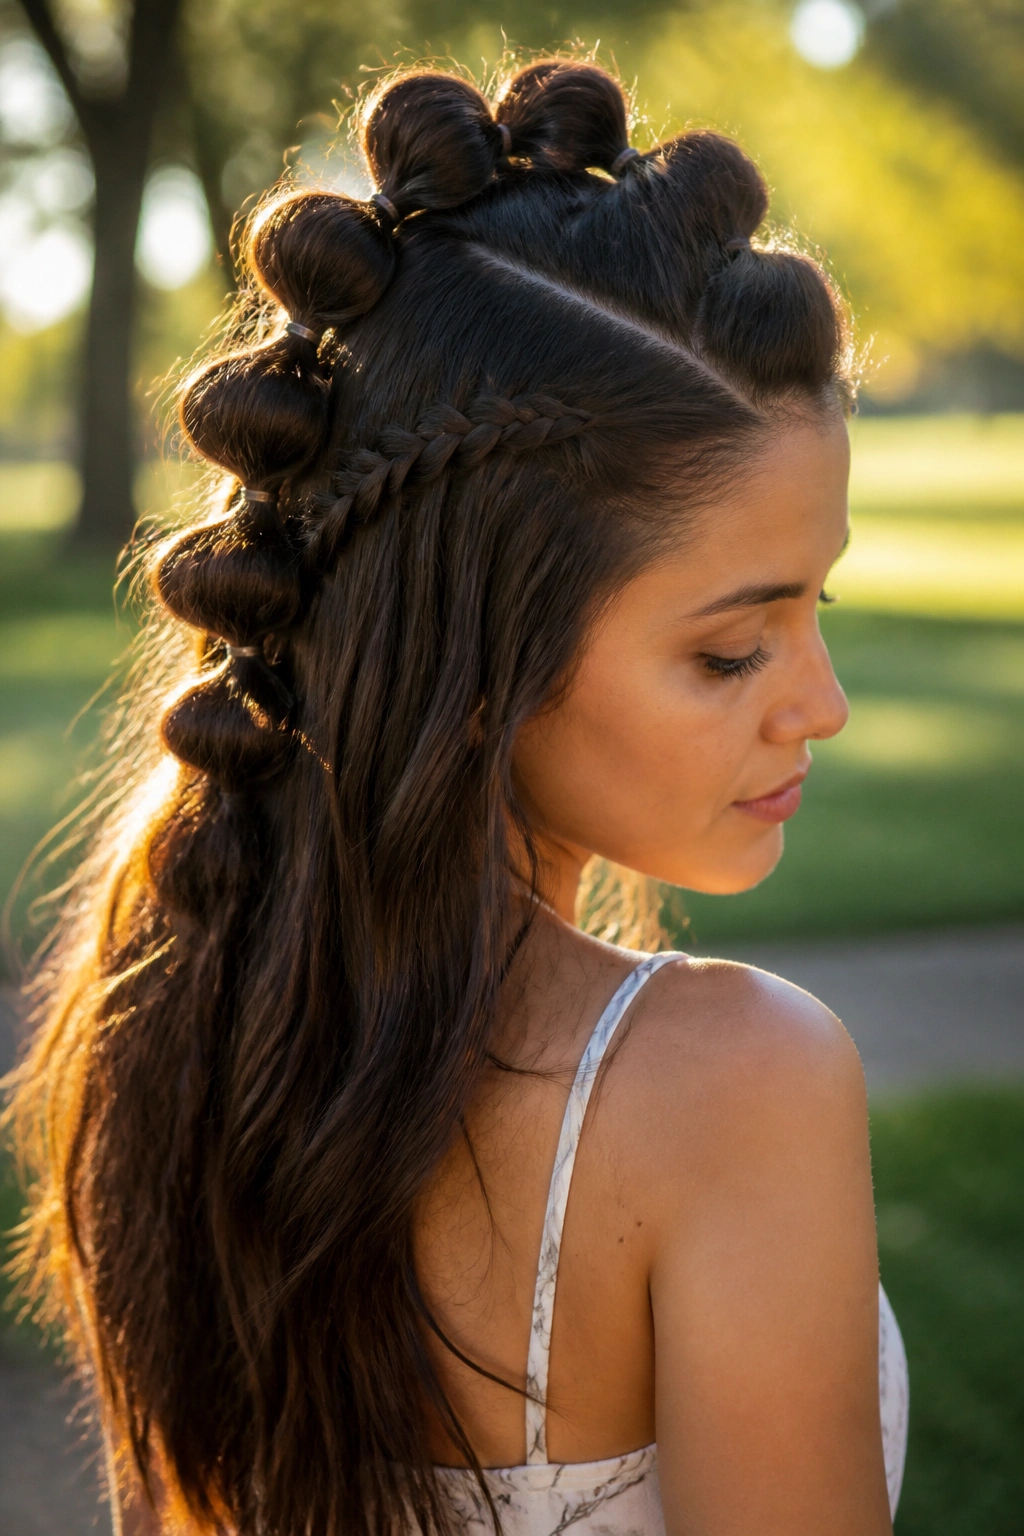
A bubble braid on top gives the half-up shape a playful edge, and the little plait at the base keeps it from looking childish. That combination is the trick. Without the braid, bubbles can feel too simple. Without the bubbles, the braid can look too traditional.
Start with a small braid from the front to the crown, then gather the loose top section into a ponytail or a few tied sections. Add clear elastics every 2 to 3 inches, then gently tug each segment outward until the “bubble” shape appears.
The base braid can be thin or medium. A thin braid gives the bubbles more room to show. A thicker braid makes the top feel bold and graphic.
This is a smart style for long hair because the bubbles give the length shape without making it heavy. And if you’re bored with standard braided half-up half-down hairstyles, this one changes the silhouette fast.
A satin ribbon tucked around one of the bubbles can make it feel softer. Tiny detail. Big payoff.
13. Knotless Braids Styled Half Up and Half Down
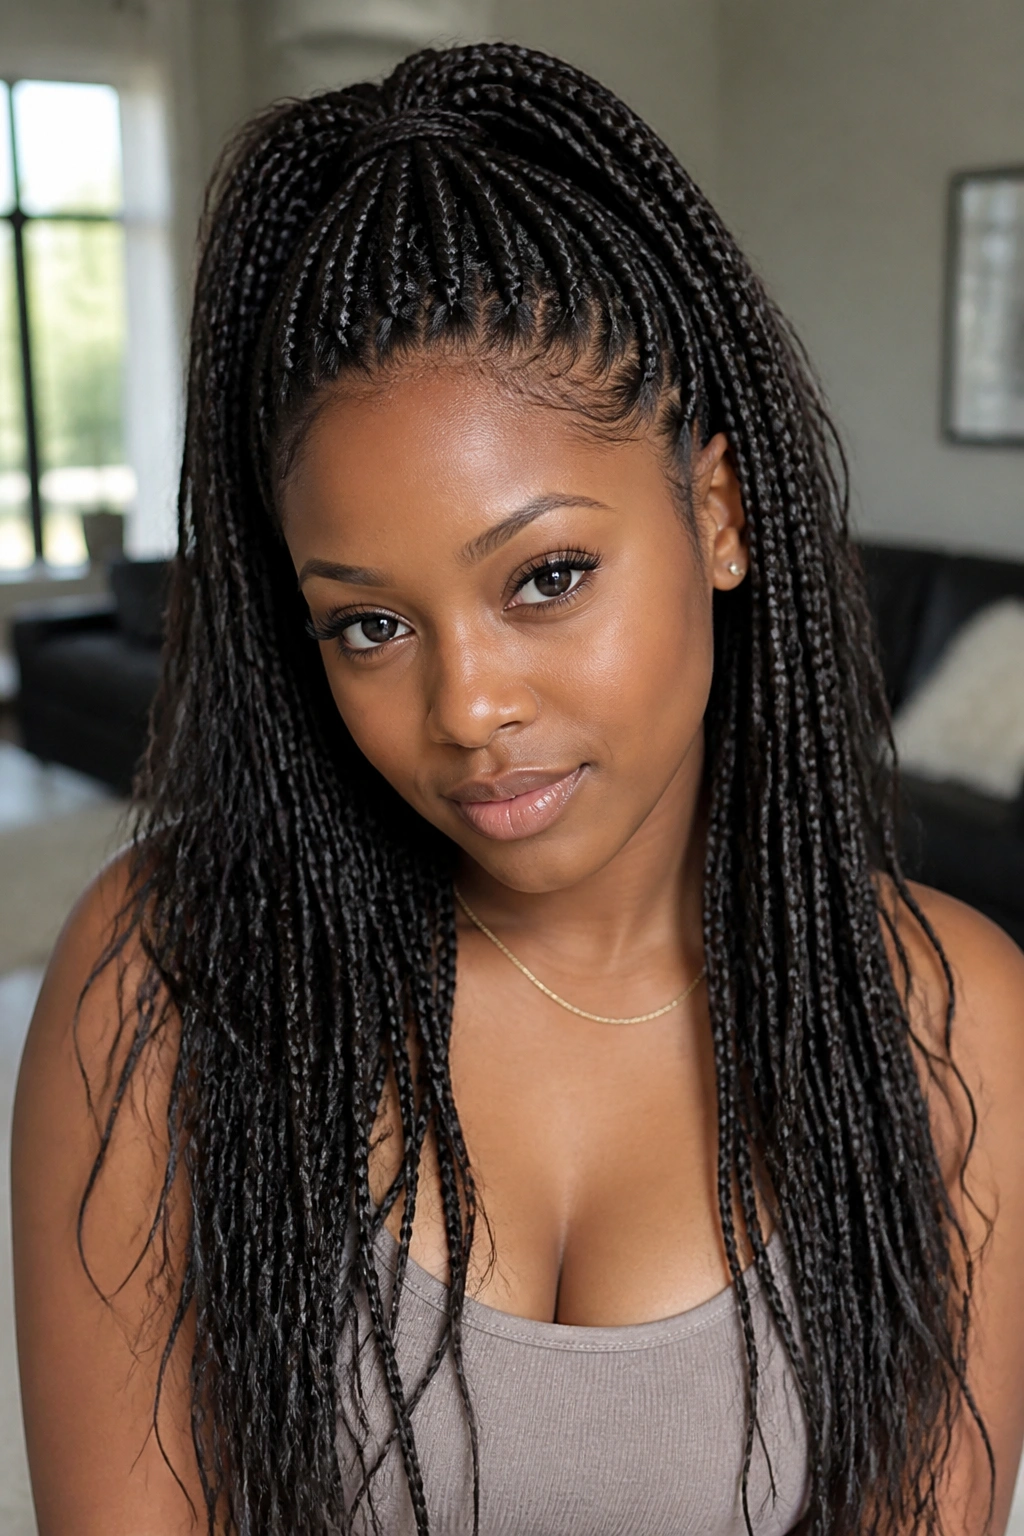
If you already wear knotless braids, half-up styling is one of the easiest ways to change the mood without taking the whole style down. Pulling the upper half into a high ponytail or bun keeps the braids off the face, while the lower half hangs freely and keeps the movement.
Knotless braids have a smoother base than traditional box braids, so they tend to sit flatter at the scalp. That makes the half-up shape less bulky and easier to shape into a top knot, a wrapped pony, or even a braided crown.
Good braid size
Medium knotless braids usually give the best balance. They’re light enough to gather upward without pulling the edges, and they still show enough braid detail when the hair is down.
- Use 2 to 3 large pins if the top feels heavy
- Wrap the base with a braid or a strip of braid hair for a cleaner look
- Keep the pony high only if your edges can handle it
- Try a low half-up hold if you want less tension
This is one of those styles that can look casual or dressed up depending on how neat the parting is. Clean parts make it sharp. A little frizz makes it more lived-in.
14. French Braid Mohawk for Extra Lift
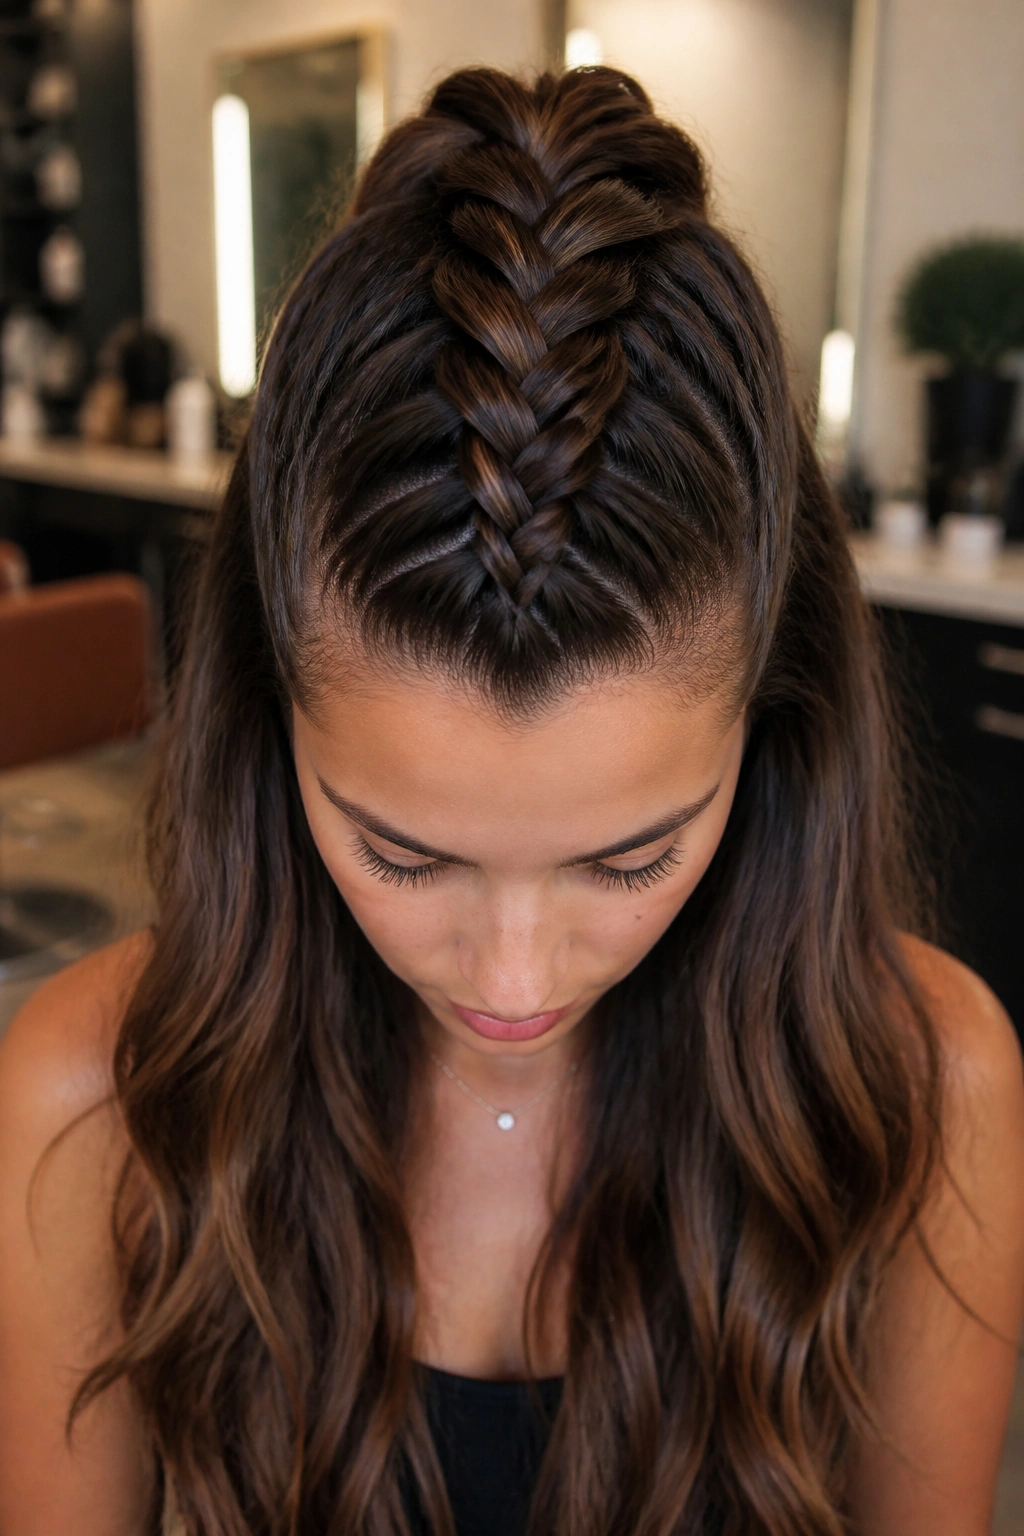
This one has the most height of the group, and I mean that in the best way. A French braid runs down the center top like a mohawk strip, while the sides stay smooth and the rest of the hair falls loose. It gives the crown lift and keeps the middle section visually strong.
The style works especially well if your hair tends to lie flat at the top. The braid creates shape where there wasn’t much before. That matters when you want your half-up style to feel bold instead of sweet.
A French braid differs from a regular braid because you keep adding hair as you move down the head. That makes the braid sit flush against the scalp at first, then loosen slightly as it reaches the crown. If you have layers, braid a touch tighter than usual so the shorter pieces stay tucked in.
This is the style I’d pick for a night out or any day you want your hair to read a little louder. The top does the work. The loose length just follows along.
15. Face-Framing Accent Braids for an Easy Finish
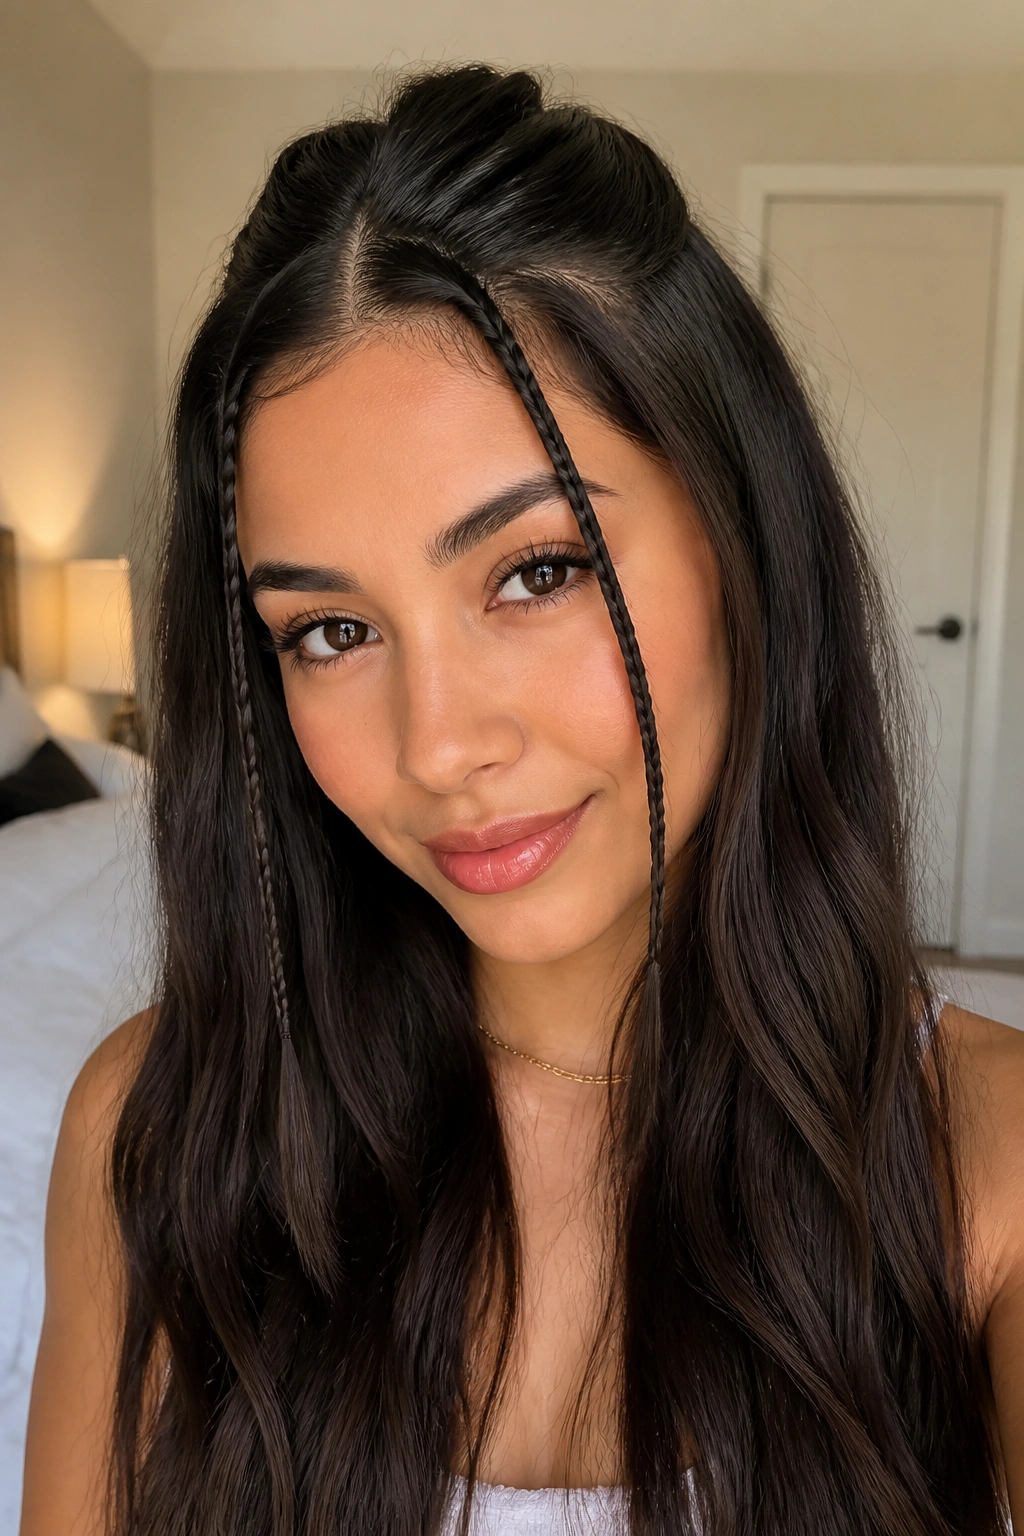
Not every half-up style needs a big braid. Sometimes two tiny accent braids near the front are enough to change the whole look. They pull the eyes toward the face, keep the front pieces neat, and leave almost all of the length free.
This version is the easiest one to wear when you want your hair to look intentional but you do not want to spend half the morning in front of a mirror. Section a small strip on each side, about 1/4 to 1/2 inch wide, braid them back, and secure them behind the ears or at the crown. The rest of the hair stays down.
A few small details make this better than it sounds:
- Keep the braids thin so they do not overpower the face
- Use matching elastics or tiny clear bands
- Add cuffs or ribbon only if the rest of the outfit is simple
- Leave a curtain piece if you want a softer shape
This style works on straight hair, curls, braids, and everything in between. It’s the one I reach for when I want the easiest possible lift with the least drama, and that probably explains why it keeps earning a place in the rotation.
