



Wash day ends, the curls are clean, and then the real question arrives: what do you do with coily hair when you want it to stay neat, soft, and comfortable without fighting its texture? The best coily hair styles for natural hair do not try to flatten coils into obedience. They work with the bend, the shrinkage, the spring, and the little bit of unpredictability that comes with tight texture.
That matters more than people admit. A style can look polished in the mirror and still feel awful by lunchtime if it pulls at the hairline, dries your ends out, or collapses the second you step into wind. The styles worth keeping in rotation protect the oldest part of the hair, leave the scalp calm, and still let your coils look like coils.
I’ve always had a soft spot for styles that survive real life. Commuting. Sleeping. A hoodie. A humid room. A quick run to the store when you did not plan to be seen by anyone. The good news is that natural hair gives you a lot of options, as long as you choose shapes that respect the texture instead of fighting it.
Some of these looks are quick. Some take patience. A few can stay in place for days, and a few are better for one sharp, defined day before they fluff out into something softer. That’s the trade-off, really. Clean parting, enough moisture, and a style that makes sense for the length you have right now.
1. Defined Wash-and-Go on Coily Hair

A wash-and-go is one of those styles people love to overcomplicate, which is a shame. Done well, it is one of the cleanest ways to show off coily hair’s natural shape without forcing it into another pattern.
The trick is not magic. It’s product order, water, and patience.
What Makes the Curl Clumps Hold
A solid wash-and-go starts on soaking-wet hair, not damp hair that is halfway dry and already frizzing at the edges. A creamy leave-in gives slip, and a gel with enough hold locks the curl groupings together before they separate into fuzz. If your coils are tight, small sections help more than aggressive finger-raking ever will.
A diffuser can speed things up, but air-drying is fine if you have time and you do not keep touching your hair. That part matters. Constant hands break the curl cast before it finishes setting.
- Work in small sections about 1 to 2 inches wide for stronger clumps.
- Apply leave-in first, then gel, smoothing downward with your palms.
- Use a soft microfiber towel or T-shirt only to blot drips, not to rough up the hair.
- Let the roots dry fully before fluffing, or the style will swell early.
Tip: if your hair is super dense, don’t chase every strand. Chase the shape.
2. Two-Strand Twist-Out
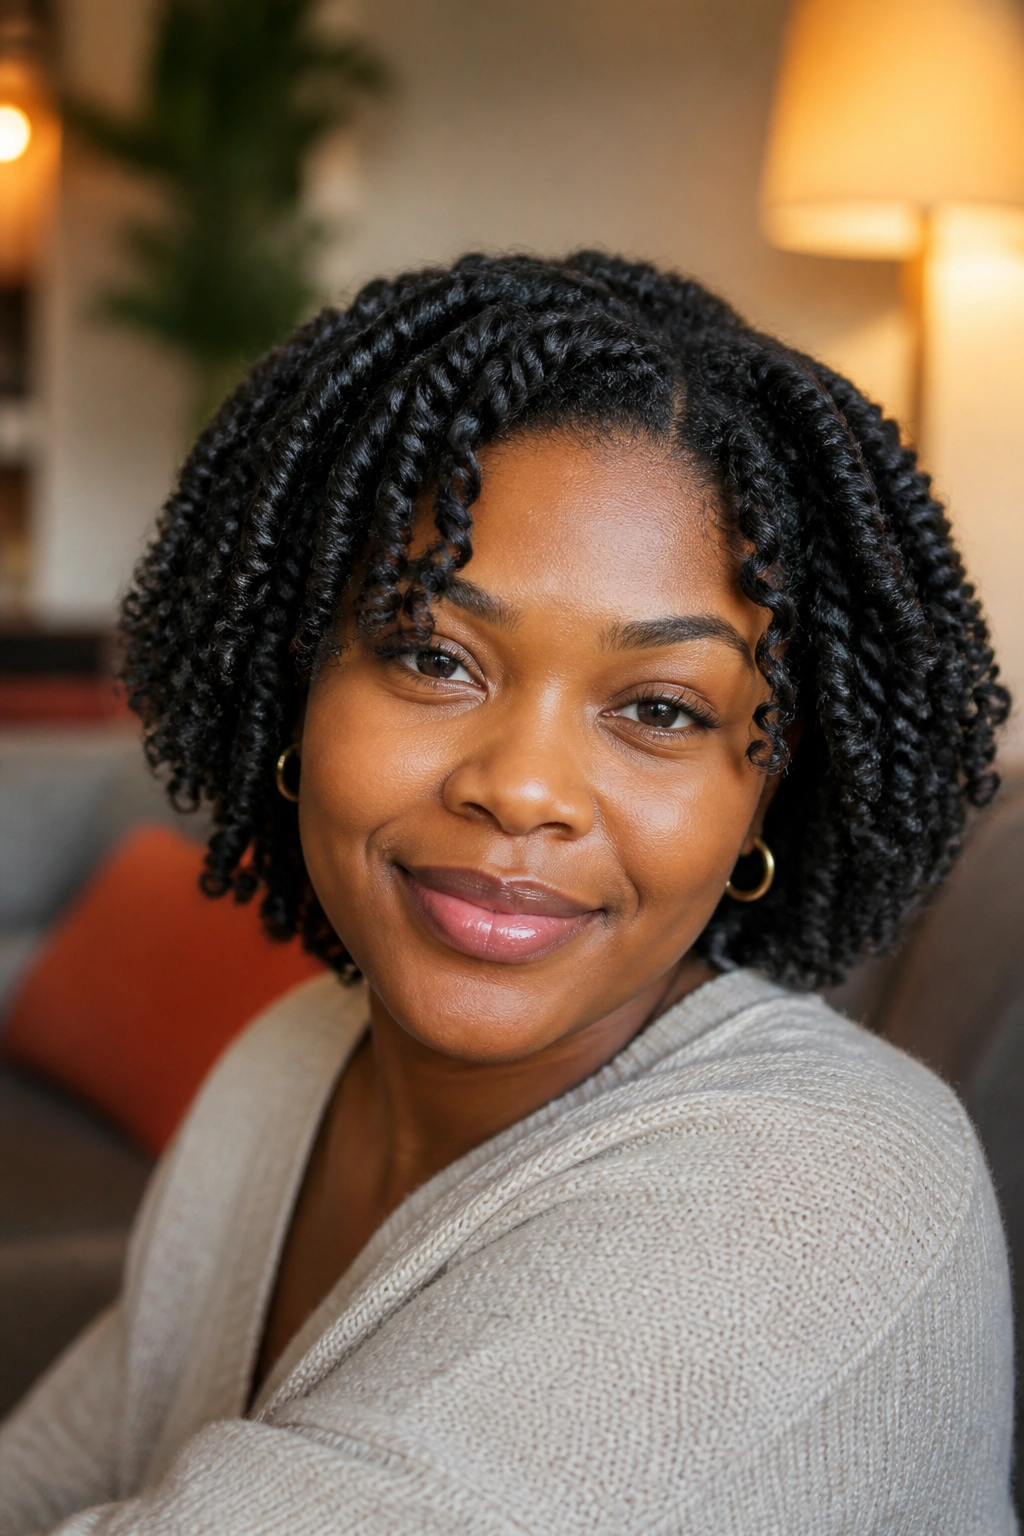
If you want stretch without heat, a twist-out earns its place fast. It gives coily hair more length than a wash-and-go, but it still keeps the curl pattern front and center.
What I like about twist-outs is the balance. They can look neat, soft, and a little fluffy all at once. That makes them easier to wear in real life than a style that is either perfectly defined or completely loose.
The setup is simple: moisturize, section, twist, dry fully, then separate with dry fingers coated in a tiny bit of oil. Not a lot. Too much oil can make the strands slide apart before you get the shape you want. The size of the twist changes the finish too. Six to eight medium twists give more stretch and body. Twelve to sixteen smaller twists give tighter definition and more uniform coils.
Sleep on satin. Always. A bonnet works. A satin pillowcase works too, if bonnets annoy you.
3. Braid-Out with Stretched Ends
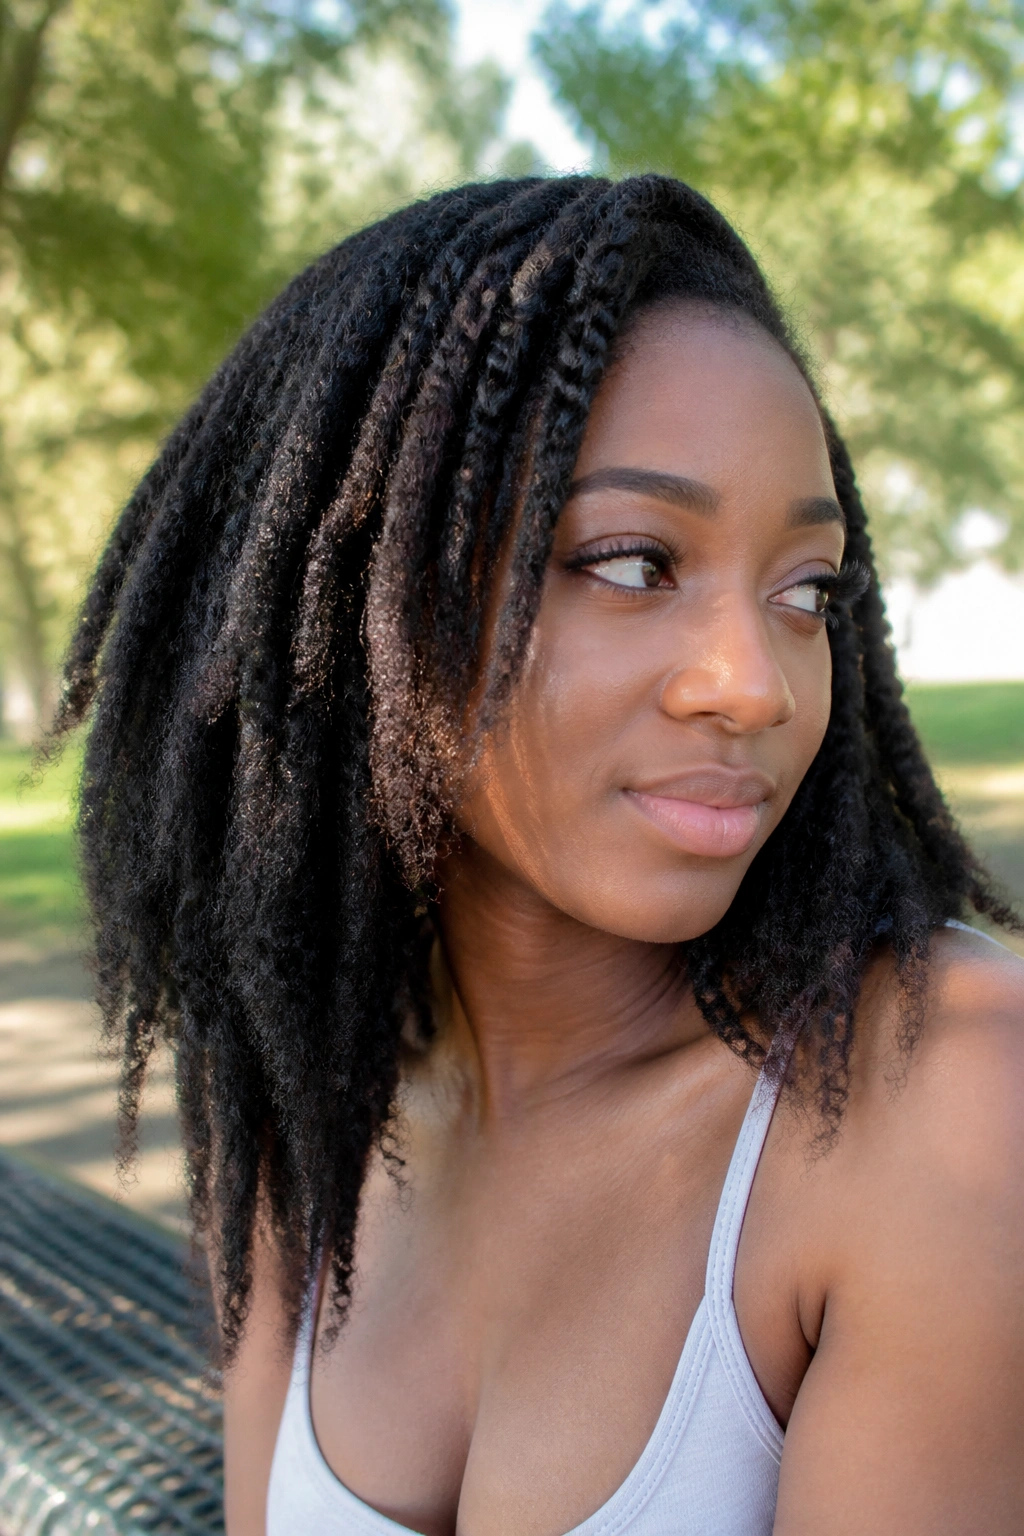
A braid-out is what I suggest when a twist-out shrinks faster than you want it to. Braids create sharper bends in the hair, which means a little more stretch and a little less spring at the ends. That is the whole point.
I’ve seen braid-outs save hair that was too soft for a twist-out on the first try. The style looks a touch more ribbed and less fluffy, which can be good when you want structure. It also photographs in a way that feels crisp without looking stiff.
The Small Details That Matter
- Use three-strand braids only if you want a tighter pattern; two-strand braids are easier to unravel cleanly.
- Make parts around half an inch to 1 inch if you want a balanced finish.
- Braid on hair that is moisturized but not slick with product, or the style will take forever to dry.
- Separate only when the braids feel dry all the way to the root.
A braid-out is a good move when your coils need more length at the ends, especially around the nape where shrinkage can get dramatic. It is not the fastest style in the room, though. If you rush the drying time, the whole thing falls apart. That’s the part people hate hearing.
4. Mini Twists
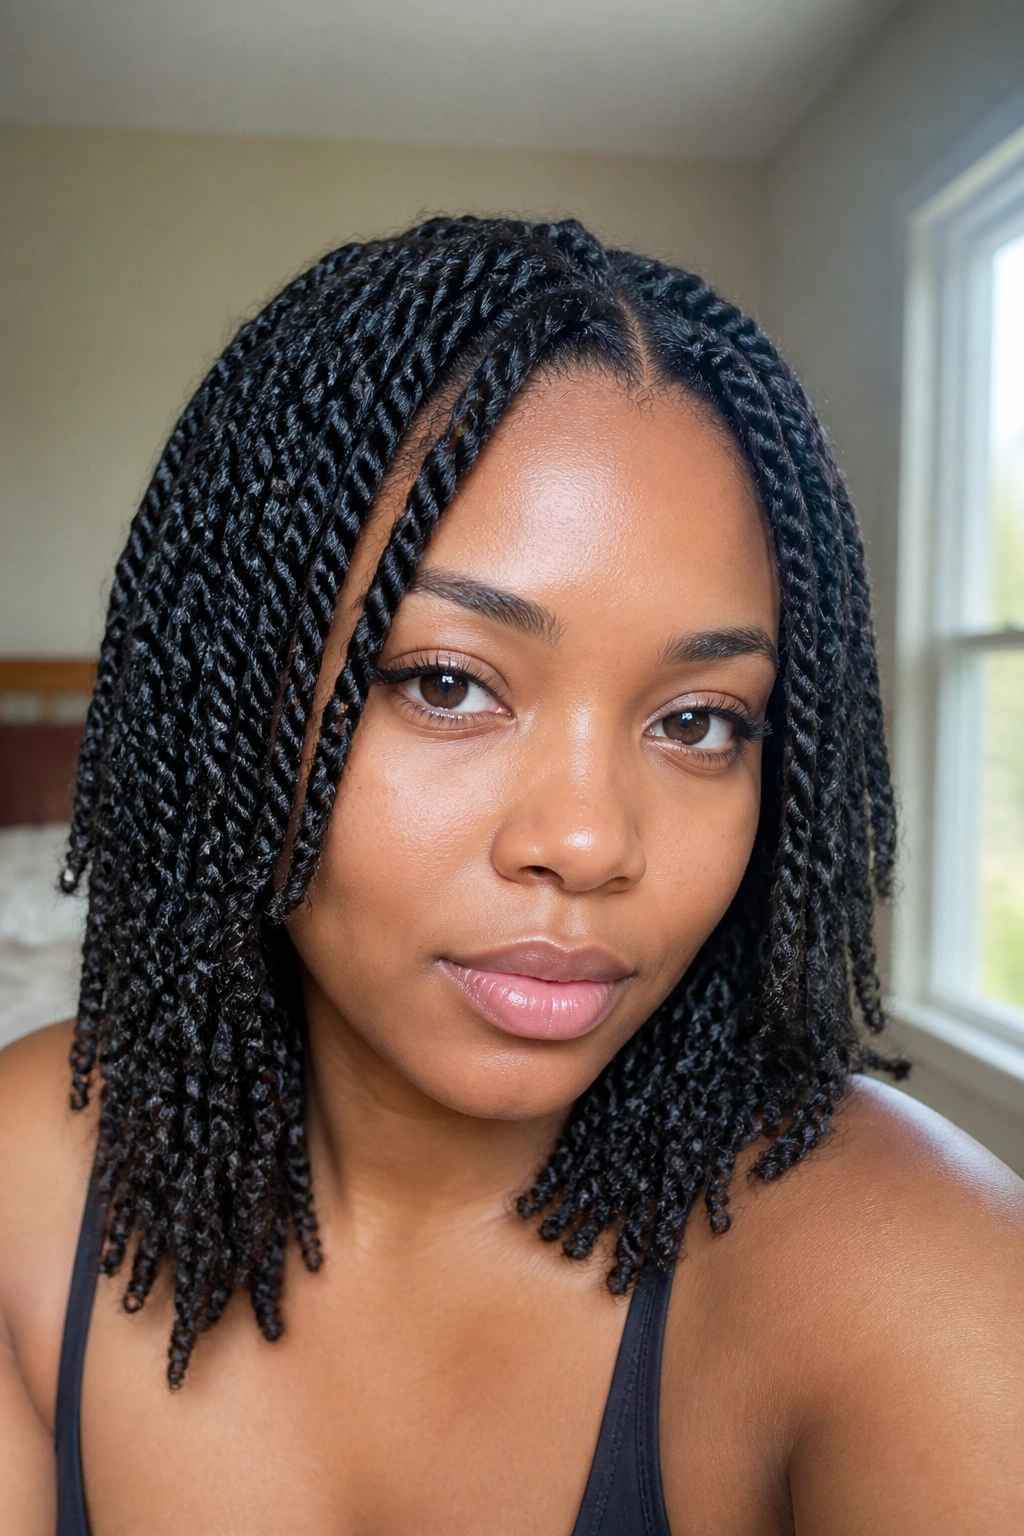
Mini twists are one of the best low-manipulation styles for natural hair because they give you shape, movement, and a break from daily styling. They’re not flashy. That’s part of their charm.
The smaller the twist, the more the style behaves like a soft, rope-like set of coils. They can hang, puff a little, or be pinned up without much drama. If your hair tangles easily, mini twists also make detangling simpler later because each section stays separate instead of collapsing into one giant knot.
I like them most on hair that’s at least a few inches long, though they work on shorter lengths too if you keep the parts small and neat. Quarter-inch parts give a tighter, more uniform look. Half-inch parts install faster and feel fuller. Neither is wrong. One is just more time on wash day.
The only real catch is tension. Pulling the roots too hard makes the scalp tired, and that is not a fair trade for a style that is supposed to protect you. Keep the base snug, not strained.
5. Flat Twists
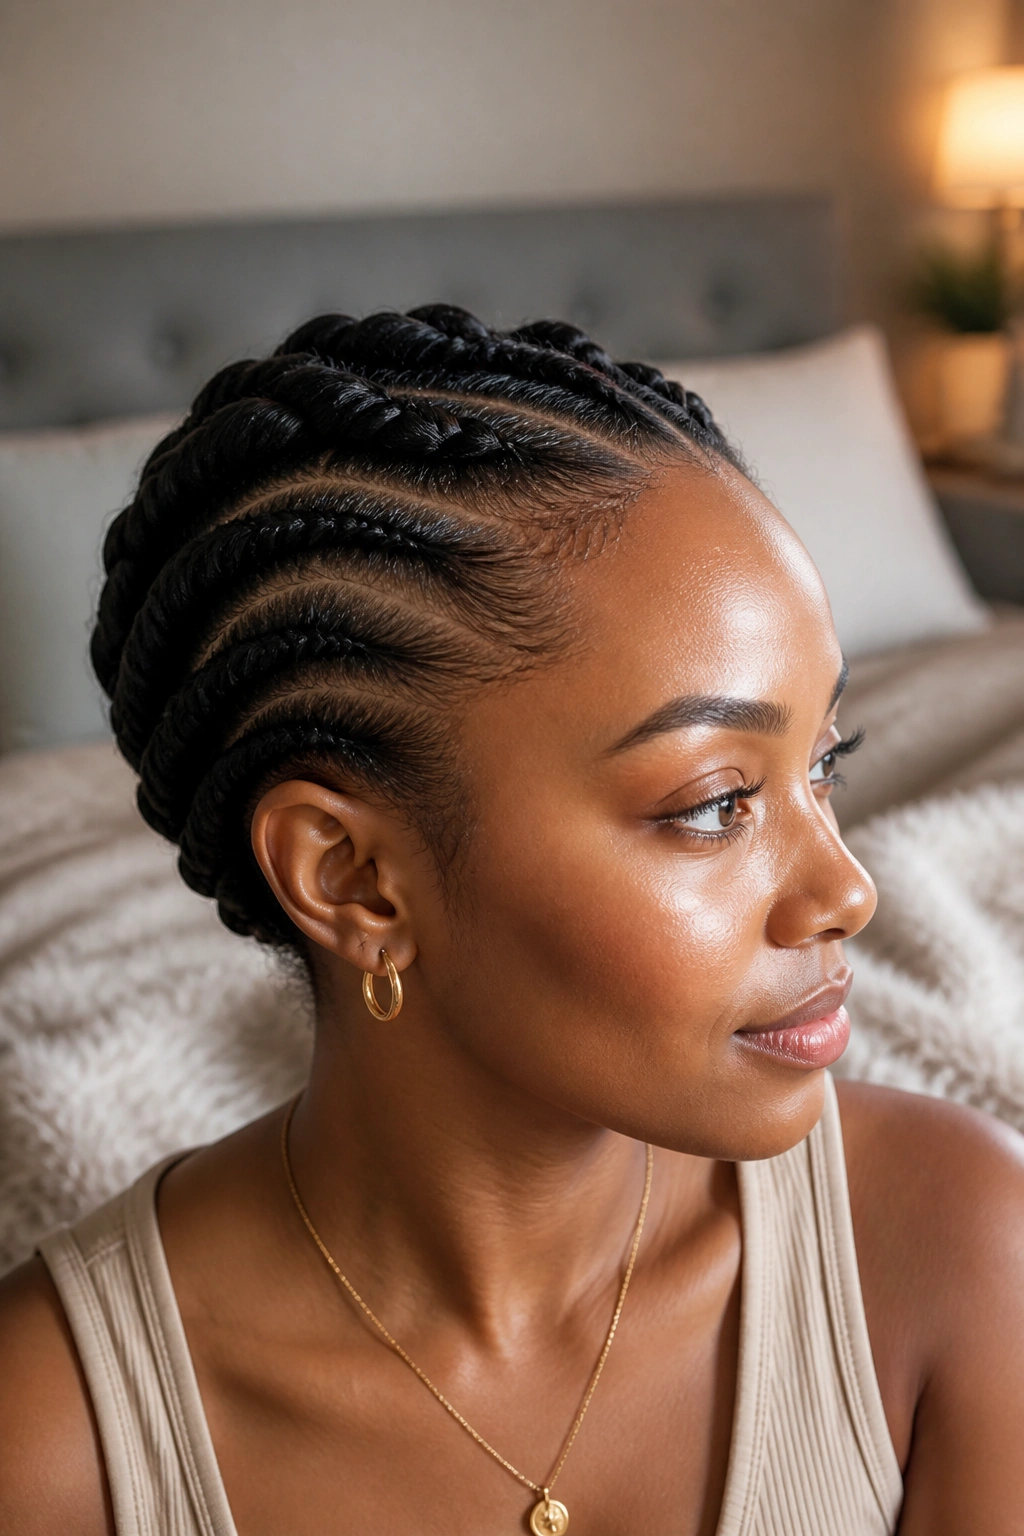
Why do flat twists look so clean even when the hair is thick and springy at the roots? Because they sit close to the scalp without the same bulk as traditional braids, and that makes them useful when you want a protective style that still feels light.
Flat twists work well for crown styles, side rows, and simple half-up looks. They also make a nice base if you want to tuck the ends into a bun or pin them into a low chignon. On coily hair, the style can hold a lot of shape with relatively little product. A little gel on the parting line goes a long way.
How to Wear It
If your goal is a polished look, twist the hair toward the face and sweep the ends backward. If your goal is comfort, keep the sections wider and the tension softer. Flat twists around the perimeter can give the hairline a rest while leaving the center loose.
I prefer flat twists when a regular braid would feel too heavy. They’re quicker to take down too, which matters if you do not want a long detangling session afterward.
6. Chunky Twist Updo
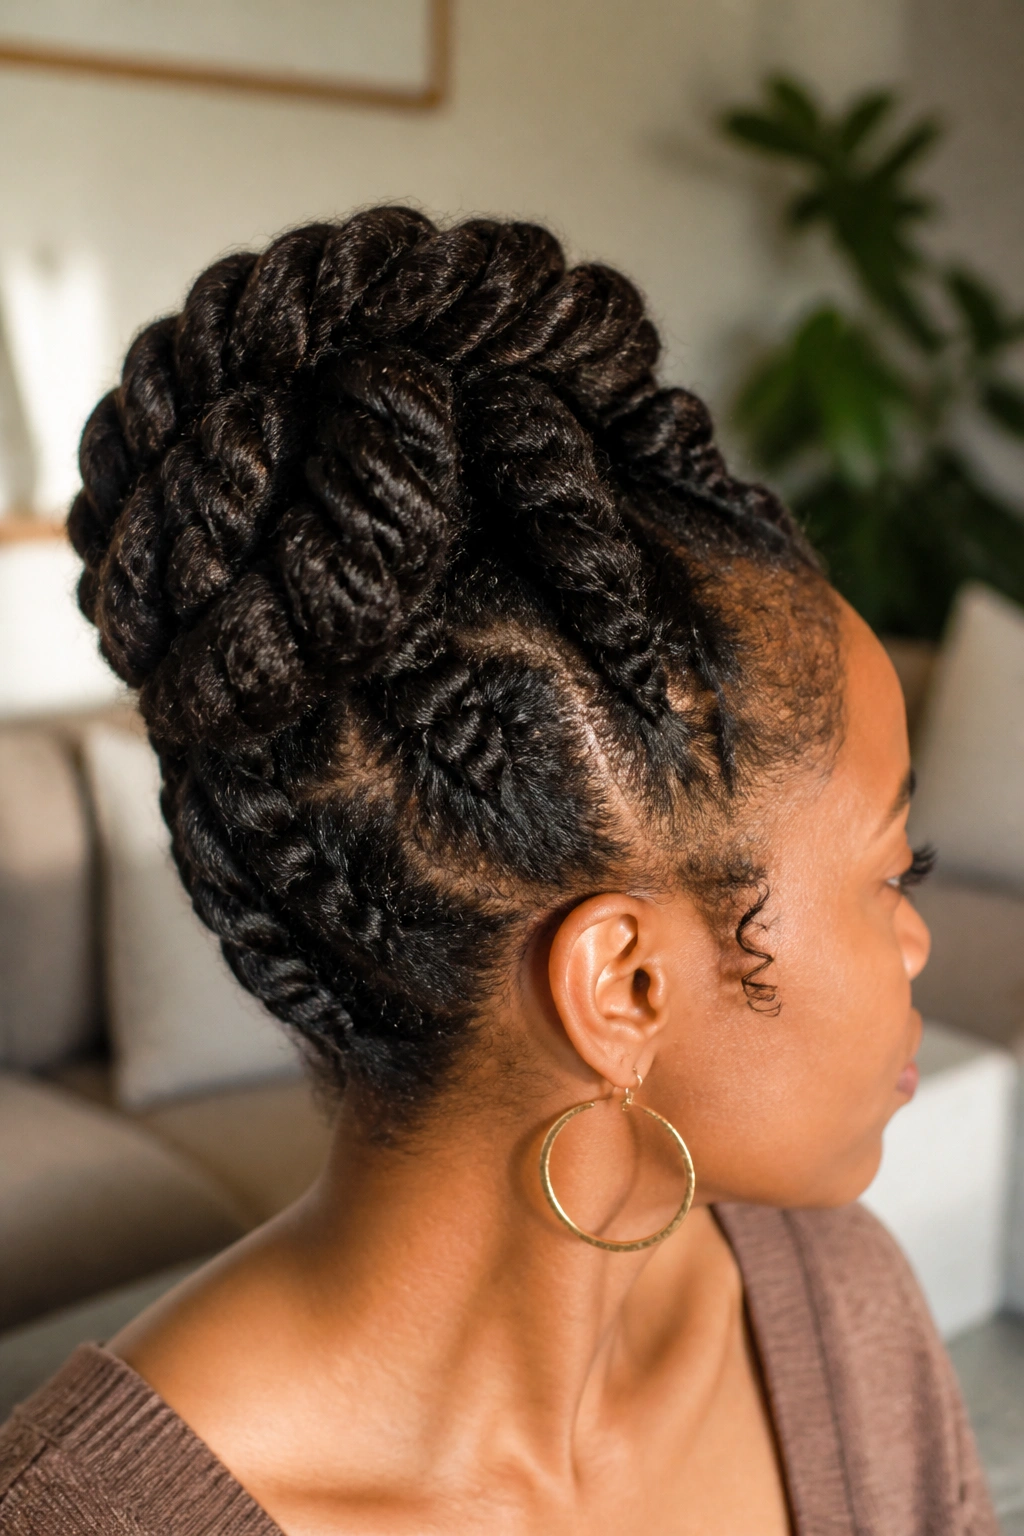
Unlike mini twists, chunky twists give you speed and a lot more movement. That makes them useful when you want something that looks deliberate but does not take half the day to install.
The style is built from larger sections, usually 1 to 2 inches wide, twisted and then pinned, tucked, or wrapped into an updo shape. Because the sections are larger, the finished look reads fuller and a little bolder. It’s one of my favorite options for medium to long hair when the goal is not to hide the texture but to shape it.
This is also a good choice if you like changing the silhouette. You can stack the twists low, build them toward one side, or sweep them into a soft knot at the back. That flexibility is the real win.
If you want the style to last, smooth the outer layer with a bit of styling cream before twisting. Don’t overdo the edges. Heavy product can make the roots tacky and shorten the wear time.
7. Bantu Knots

Bantu knots are one of those styles that look playful and architectural at the same time. They also pull double duty, which is why people keep coming back to them. Wear them as knots, then take them down later for a knot-out with lots of texture.
The basic setup is straightforward: section the hair, twist each part, and wrap the twisted strand around itself until it forms a compact knot. The size of the section changes everything. Smaller sections create tighter knots and a more defined knot-out. Larger sections give you chunkier knots that dry faster and feel less tight on the scalp.
What to Watch
- Start on moisturized, detangled hair so the knots form smoothly.
- Keep the base neat, but do not twist so hard that the scalp feels sore.
- Let the knots dry all the way through before taking them down.
- Use a light oil on your fingers when unraveling to reduce frizz.
The beauty of Bantu knots is that they do not pretend to be subtle. They have shape. They have presence. And if you like your styles with a little personality, that matters.
8. High Puff

The high puff is the style that refuses to apologize for shrinkage. It turns a full coil pattern into height, which is often exactly what natural hair wants to do anyway.
If you’ve never worn one for a full day, the appeal might not sound obvious. But once you gather the hair gently at the crown and let the ends fan out, the style does something useful: it keeps the face open, protects the ends from daily friction, and makes even a small amount of length look intentional.
A satin scrunchie or stretchy band is the safest way to get the puff up and in place. Too much tension at the base makes the style uncomfortable fast, and that’s a mistake people keep repeating. Smooth the front with your hands or a soft brush, but stop before the hairline gets slicked flat. A little texture at the edges looks better than a stressed-out scalp.
This one works best when the curls have a little moisture and a little hold. Bone-dry hair tends to puff in every direction.
9. Low Puff with a Side Part

A low puff with a side part feels softer than the high version, and that changes the whole mood of the style. It sits lower on the head, which takes some pressure off the crown and makes it easier to wear for long stretches.
The side part adds shape without needing extra accessories. You can make it crisp or loose, deep or shallow, depending on how much drama you want. On coily hair, a side part also helps the style read as intentional instead of like you just pulled your hair back in a hurry. Not that there is anything wrong with a hurry. We all do it.
I like this look for days when the hair needs to stay out of the way, but I still want texture visible around the face. The puff can be dense and round, or flatter and more controlled. Both work.
If your hairline gets sensitive, this is one of the easier styles to live in because it does not rely on high tension. The base can be wrapped with a scarf for a cleaner finish, but keep the wrap loose enough that your scalp is not fighting back by noon.
10. Cornrows into a Bun
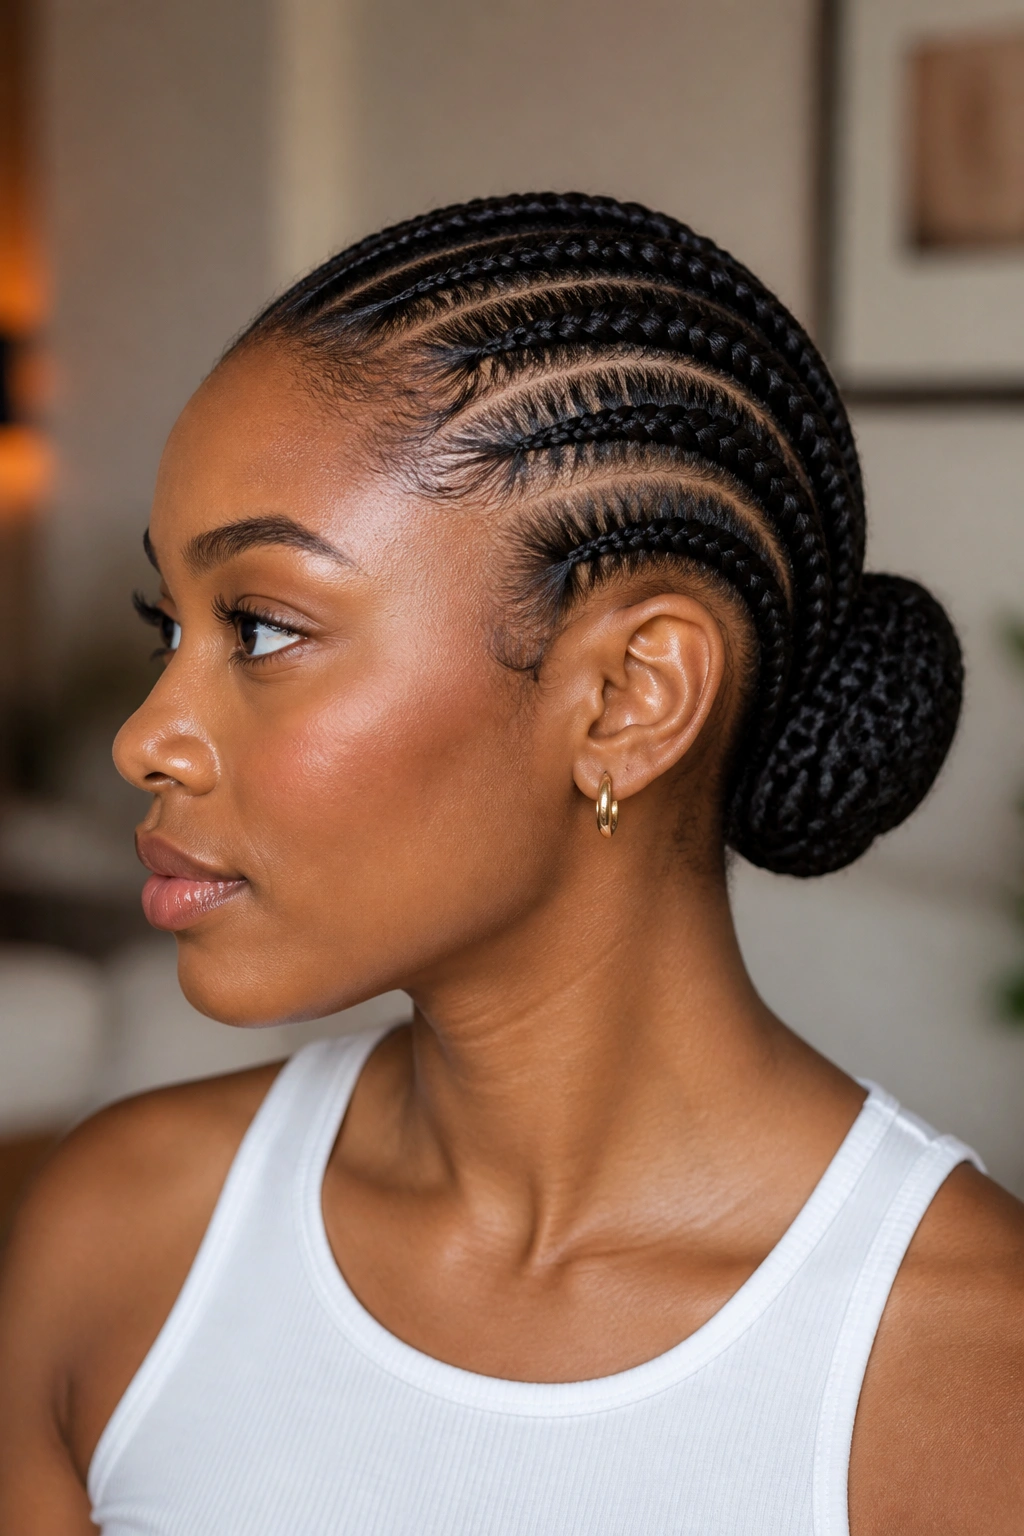
Why does this style last so well? Because the cornrows do the work of organizing the hair, and the bun keeps the ends tucked away where they are less likely to rub and frizz up.
Cornrows into a bun are a strong choice when you want a protective style that looks neat from every angle. The braid direction can be straight back, curved, or side-swept. Once the braids are in place, the remaining length is gathered into a bun that can sit low or high depending on the mood. Part sizes between 0.25 and 0.5 inch usually keep the look balanced without making the braids too bulky.
How to Keep It Comfortable
If the style hurts at the front, it’s too tight. Full stop. The American Academy of Dermatology has long warned about tension on the hairline, and that advice matters here more than anywhere else. Pretty braids are not worth a sore scalp.
A small amount of gel on the parts helps the rows look sharper. Just keep the bun itself soft. A hard, overwrapped bun can put pressure on the crown, and you will feel it when you turn your head.
11. Halo Braid
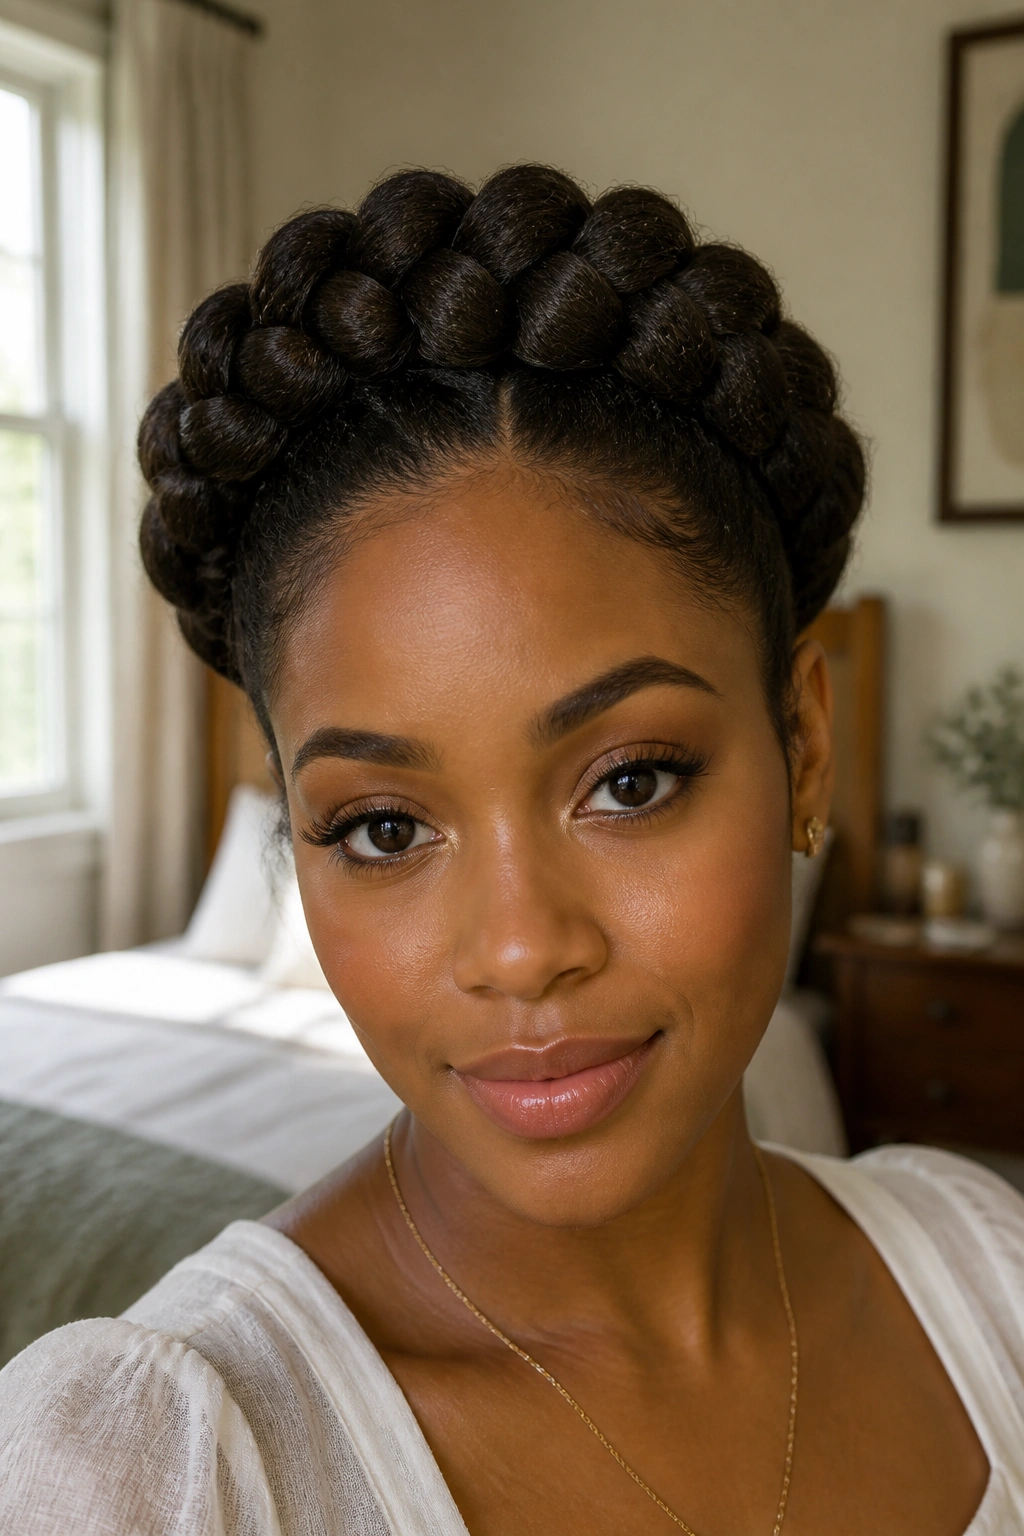
A halo braid circles the head like a crown, which is exactly why it stands out from a simple bun or puff. It clears the face, keeps the length contained, and gives coily hair a clean outline.
Compared with crown twists, a halo braid feels a little smoother and more sculpted. It can also handle thicker hair well because the braid distributes the bulk around the perimeter instead of stacking everything in one spot. If your hair is dense, that shape is useful. It keeps the style from looking like it’s trying too hard.
The finish depends on the braid size. A thicker halo braid looks relaxed and fast to read. A thinner one looks more detailed and takes more parting work. I usually prefer the thicker version for everyday wear because it holds up better when the hair starts to swell a little.
Use gel only where the braid starts and along the parting. If you coat the whole length, the braid can get stiff in an odd way. That is rarely the look people want.
12. Frohawk with Coily Sides

A frohawk gives you attitude without needing a cut. That’s the whole appeal. The sides are pinned, braided, or slicked close, while the center is left full and tall so the coils can stand up and move.
I like this one when a regular puff feels too plain. The center strip creates a line down the head, and that line changes the shape of the face in a nice way. It can look bold, polished, or a little edgy depending on how much height you leave in the middle.
Key Details That Make It Work
- Keep the side sections flat-twisted, cornrowed, or pinned back so they stay put.
- Tease the center only lightly if you want more volume.
- Use bobby pins that match your hair color when possible.
- Finish with a light hold spray instead of heavy grease.
The best frohawks do not look stiff. They move. If the sides are plastered down and the center is crunchy, the style loses its charm fast. Give the coils a bit of room.
13. Space Buns

Space buns can be sweet, sharp, or somewhere in between, depending on how clean you make them. On coily hair, they work especially well when the texture is dense enough to make the buns look full without stuffing them.
The style is built from two equal sections, usually left and right. Each side is gathered into a bun high on the head, or a little lower if you want the look to feel calmer. I like a few curls left out around the hairline because that keeps the style from feeling too exact. A little softness matters.
What people get wrong is making both buns too tight. That does not help the shape, and it can make your scalp complain by midafternoon. A better approach is to secure the ponytails first, then wrap each bun loosely and pin the ends underneath. That leaves the buns plush instead of flattened.
This one is good when you want a playful style that still keeps the hair off the shoulders. It’s not the most low-key option in the group, but it has range.
14. Pineapple Updo

Why do people keep calling the pineapple a sleep style when it works just fine for daytime too? Because a high, loose ponytail can be practical and flattering at the same time, especially on medium to long coils.
The point is not perfection. The point is height and shape. Gather the hair at the top of the head with a soft band, let the curls spill forward, and keep the base loose enough that the roots are not flattened into a sore knot. That easy lift at the crown gives the hair a lived-in look that still feels pulled together.
How to Wear It
If the hair is long, let the ends fan out and tuck a few sections so the silhouette stays round. If the hair is shorter, the pineapple turns into more of a curly top puff, which still works. Either way, a satin scrunchie keeps the base gentler than a tight elastic.
I reach for this style on days when I want a quick shape with no complicated parting. It’s one of the few looks that can feel casual and styled at once.
15. Finger Coils
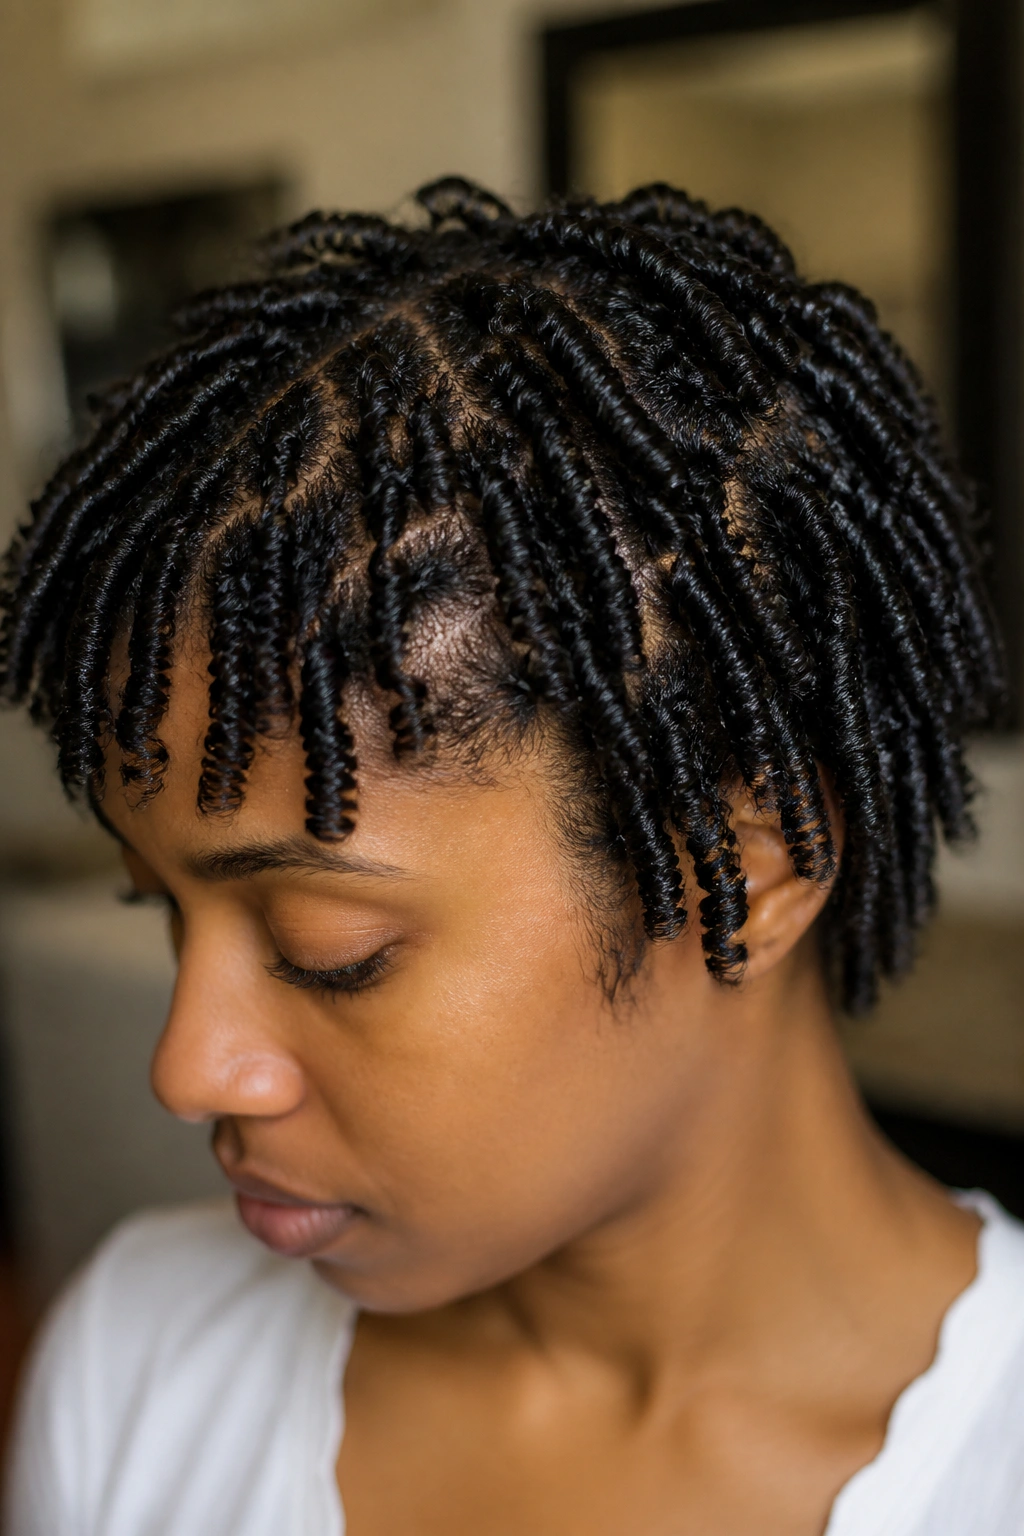
Finger coils are not fast, and I won’t pretend otherwise. But if you want each coil to look crisp and separate, they are hard to beat.
The process is simple enough: take a small section, apply cream or gel, then wind the strand around a finger until it forms a tight spiral. The smaller the section, the cleaner the result. Sections no wider than a pinky nail give the most definition. Larger sections speed things up, but the coils will look looser and less uniform.
Unlike twist-outs, finger coils give a sharper curl pattern from root to end. They also tend to shrink more, which is useful if you want a compact shape and not much frizz. On a tapered cut or short natural hair, they look especially neat because the shape stays visible.
Let them dry fully before separating or fluffing. If you rush that part, the style loses the clean ringlets that make it work in the first place.
16. Tapered TWA Shape
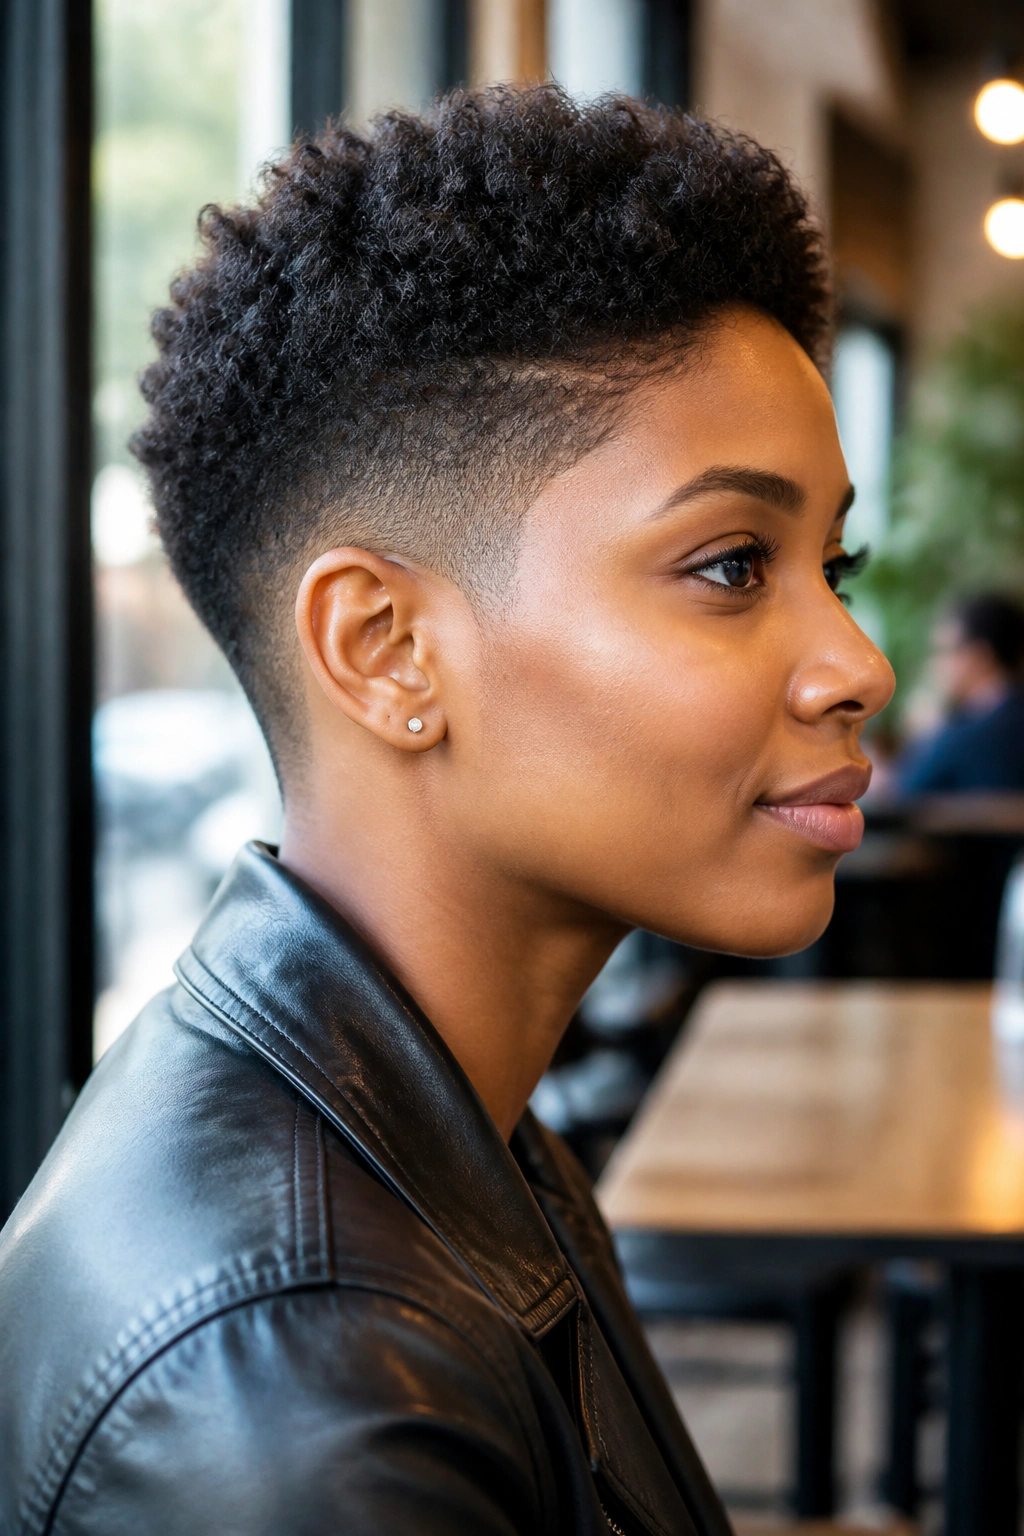
Short natural hair deserves more than the old “just grow it out” advice. A tapered TWA can look crisp, sculpted, and very much on purpose when the sides and nape are shaped well.
What makes this style different is the cut. The silhouette does half the work before you touch a drop of product. Shorter sides keep the neck open, while the top has enough length for coils, finger shaping, or a bit of fluff. That contrast gives the whole look structure.
I’d keep styling simple here. A light cream, a little oil on the scalp if needed, and finger-coiling or sponge shaping on damp hair is usually enough. Heavy product tends to sit on top of short coils and make them look dull. That is a waste.
If you want clean edges without stiff hair, use a small brush and light gel only at the hairline. The rest of the head should still look soft. That softness is part of the style, not a mistake.
17. Side-Swept Coils with Clips
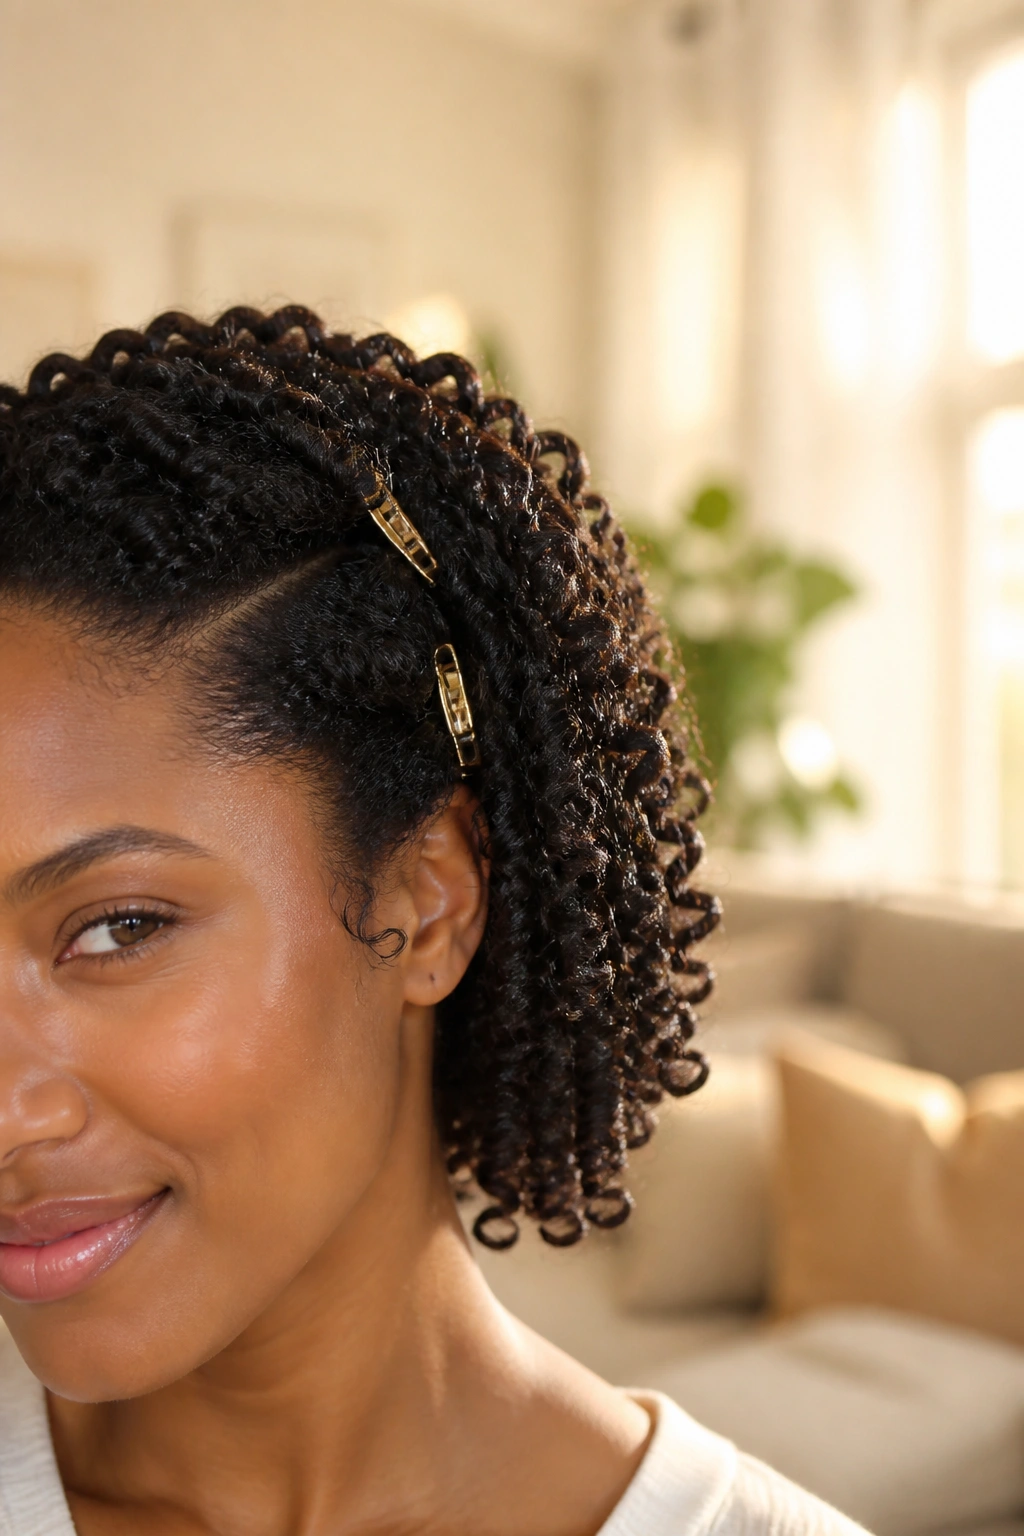
A deep side sweep is one of the easiest ways to make coily hair look styled without piling on a lot of product or tension. Move the hair to one side, set the part, and pin or clip the heavier side so the shape stays where you want it.
The nice thing here is the contrast. One side can sit fuller while the other opens up the face. Add a few barrettes, and the style suddenly feels more finished. You do not need sparkly clips if that is not your thing. A plain metal barrette or even a matte snap clip can do the job.
This look works especially well when the curls have been defined first, because the side sweep shows off the shape of the strands instead of hiding them. It’s a smart option for medium to long hair that needs to look polished without turning into a full updo.
Keep the accessory count low. Two or three clips are enough. More than that, and the style starts to feel crowded.
18. Crown Twists

Crown twists sit around the head in a way that feels a little softer than a halo braid, and that difference matters. The hair is twisted instead of braided, which gives the style a rounder, gentler look.
This is a good pick when the edges need a break but you do not want a heavy bun at the back. The twists can run along the front hairline and wrap around the perimeter, leaving the center fuller or tucked away. On coily hair, the shape helps distribute tension instead of concentrating it in one spot.
Best Use Cases
- Medium to long hair that can be twisted without slipping out.
- Styles that need to stay neat for more than one day.
- Hairlines that do better with soft, even tension rather than tight rows.
- Situations where you want a tidy finish without extra bulk at the crown.
I’d keep the twists medium in size. Too tiny and the style gets fussy; too large and the shape can fall apart early. A few strategically placed pins near the nape keep the whole crown from shifting.
19. Braided Headband with Loose Curls

A braided headband style gives you the look of a headband without the actual accessory. That’s why I keep it on the list. It keeps hair off the face, but it still leaves plenty of coils visible.
The basic idea is to braid a front section from temple to temple, then pin it across the head like a band while the rest of the hair stays loose. The back can be a wash-and-go, a twist-out, or even stretched curls from the day before. That mix makes the style feel easy instead of overdone.
Unlike a full updo, this keeps length on display. Unlike a totally loose style, it gives the front some control. That middle ground is useful when you want a polished look without hiding the texture.
A small braid works well for subtlety. A wider braid makes more of a statement. Either one looks better when the loose curls around it are defined enough to frame the face instead of frizzing at random.
20. Roll, Tuck, and Pin Updo

This is the style I reach for when the ends need a break and I still want the whole head to look finished. Roll, tuck, and pin updos are practical, and that is exactly why they stay useful.
The process is simple. Smooth the hair into sections, roll the lengths inward, tuck the ends under, and pin them in place with bobby pins or U pins. The style works best on stretched hair, braid-outs, or twist-outs because the sections are easier to shape. On very short coils, you can still do a smaller version, but the tuck needs to be neat or the pins will show.
A little cream at the surface helps tame frizz, but do not cake it on. Too much product at the crown makes the hair look dull and slippery, and the pins won’t grip as well. That is one of those small mistakes that ruins an otherwise smart style.
I like this updo because it feels calm. No fuss. No fighting the shape. Just tucked ends, a clean neck, and enough structure to carry you through a long day.
Final Thoughts
The best styles for coily hair do one of three things well: they define the texture, stretch it without heat, or tuck the ends away so they can rest. The styles that miss the mark usually try to force the hair into shapes it does not want to hold.
If you keep one rule in mind, make it this: comfort beats tightness every time. A style can look neat and still be wrong if it tugs at your scalp or dries your hair out. Coils respond best to moisture, gentle handling, and a shape that makes sense for the length you have right now.
Pick the look that fits your week, not your fantasy schedule. Some days call for a crisp wash-and-go. Some call for a puff. Some call for pins and a prayer. That flexibility is the good part.
