



Braided chignon styles have a habit of making hair look more expensive than the rest of the outfit deserves. A low braid tucked into a knot at the nape can rescue second-day hair, soften a sharp neckline, or make a plain dress look fully thought through.
What I like most is how wide the range is. One braided chignon can feel bridal, another reads as office-ready, and another works as a protective style that keeps the ends tucked away without looking bulky. The shape stays the same in spirit — braid, wrap, pin — but the mood changes a lot depending on the part, the braid type, and how neat you want the finish.
It also forgives a few sins. Slightly greasy roots? Helpful. Hair that lost its blowout? Even better. A chignon wants grip, and a braid gives you that grip without making the whole style feel stiff or helmet-like.
The real trick is balance. A braid that’s pulled too tight starts to look harsh fast, especially around the hairline. A bun that sits too high loses the elegance people come to this style for. Once the knot stays low, secure, and clean at the back of the head, the whole thing clicks into place.
1. Classic Low Braided Chignon

The classic low braided chignon is the style I’d hand to someone who wants their hair to behave. It starts with a simple braid, usually from the mid-lengths or from just below the nape, then gets wrapped into a compact knot at the back of the neck. Nothing flashy. No theatrics. It still looks polished from every angle.
Why It Works So Well
A braid gives the bun structure, which means you need fewer pins than you would with loose hair. That matters. A loose twist can slip, but a braid has its own little ridges and edges, so it clings to itself when you coil it. If you’re short on time, this is one of the easiest ways to make a low bun look deliberate instead of rushed.
- Best on hair that has a little texture, like second-day hair or a light mousse finish.
- Works with shoulder-length hair, but longer hair gives you more room to wrap the chignon neatly.
- Keep 4 to 6 bobby pins nearby and cross them in an X for extra hold.
- Pancake the braid slightly if you want more width and a softer look.
A tiny detail makes a big difference here: pin through the base of the braid, not the fluffy outer edge. The braid will hold better, and the bun won’t start slipping loose by dinner.
2. Side-Part Braided Chignon
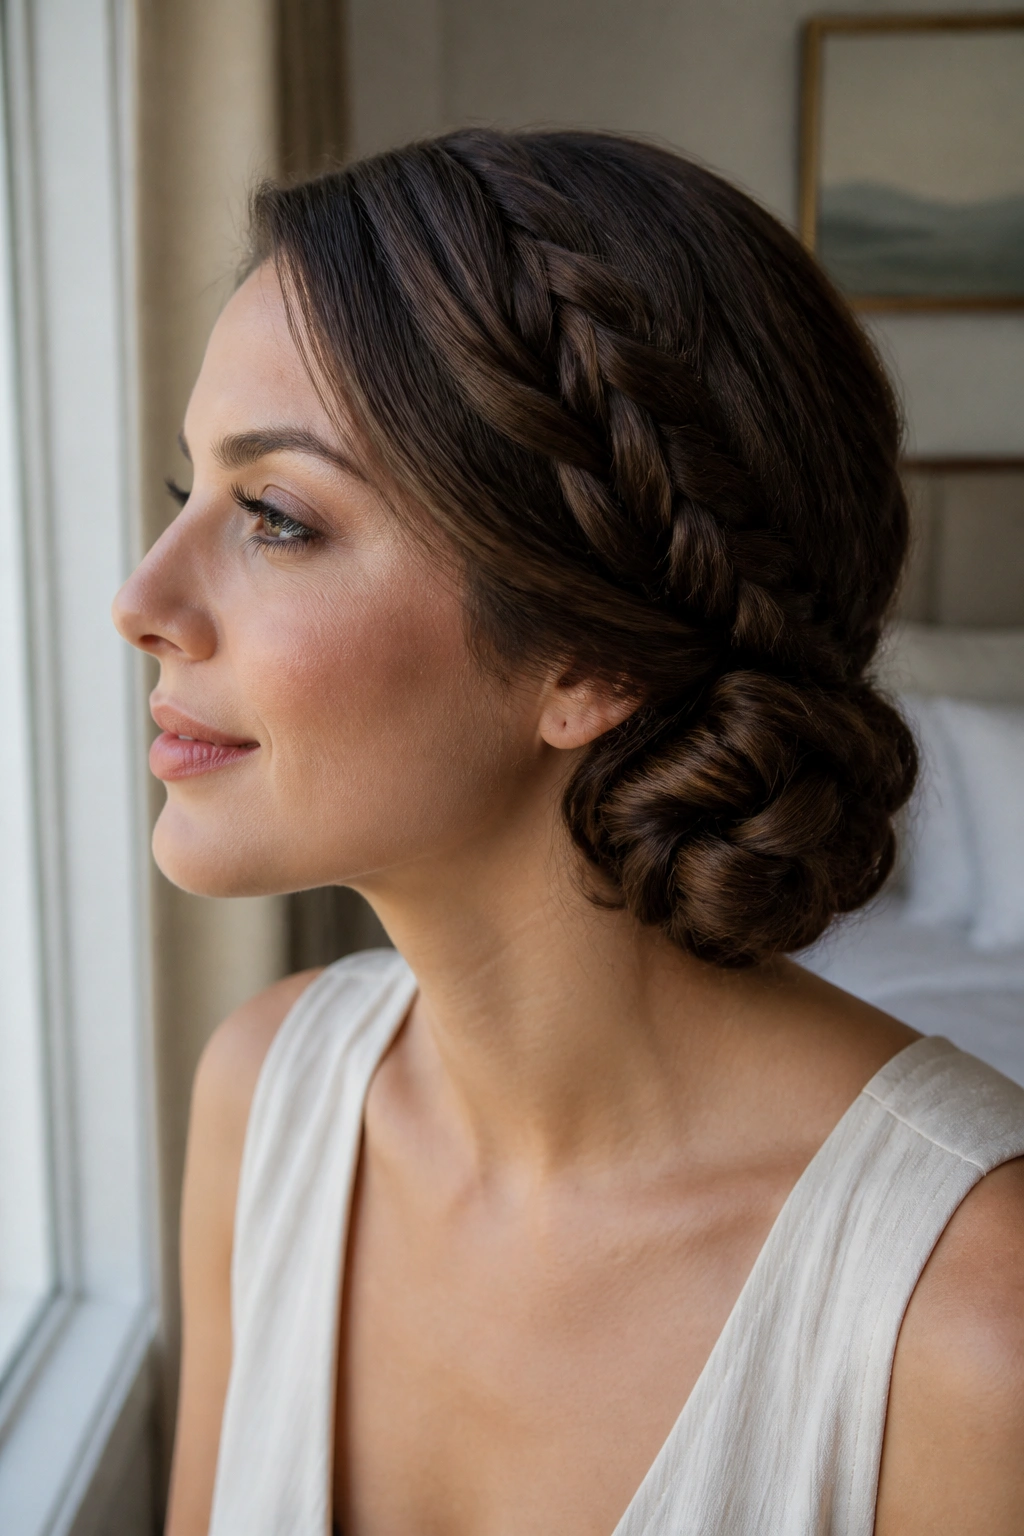
A side part changes everything. Seriously. Shift the hair just a little off-center, and the whole braided chignon suddenly feels softer, less severe, and a lot more flattering around the face.
The part can be deep or only slightly off to one side, but I like it about 2 inches from the center when the goal is elegance without too much drama. From there, braid the heavier side first and let it sweep into the nape. The eye follows the line of the braid, then lands on the low knot. That movement is what keeps the style from feeling flat.
This one is especially good if your face shape benefits from a little asymmetry. A strong jawline looks less sharp. Rounder faces get a bit of vertical length. And if your hair tends to fall limp around the crown, the side part gives you a built-in point of interest without needing curls or volume spray.
Use a fine-tooth comb or rat-tail comb to carve the part cleanly, then smooth the top with a pea-sized amount of gel or styling cream. Not more. Too much product turns the front into a slick sheet, and that’s a hard look to soften once it sets.
3. Dutch Braid Wrapped Chignon

Why does a Dutch braid make a chignon look more sculpted? Because the braid sits on top of the hair instead of sinking into it. That raised pattern creates visible texture from the crown all the way down to the bun, which gives the whole style a more dimensional finish.
A Dutch braid is braided underhand, so the strands pop out instead of blending into the scalp. Once it reaches the nape, you can coil the remaining length into a small chignon and pin it tight. The result looks more architectural than a standard braid. It has edges. It has shape.
How to Wear It
If you want the braid to read clearly, start with dry hair and a bit of texture spray at the roots. Clean, silky hair can make Dutch braids slide apart faster than you’d like. Once the braid is in place, gently widen each loop with your fingertips. Not too much. You want definition, not a stretched-out mess.
This style works best on medium to long hair, and it’s a solid choice when you want the back of the head to look finished even from a distance. A pearl pin or small comb at the base can be nice, but the braid itself already does most of the work.
4. Fishtail Braided Chignon
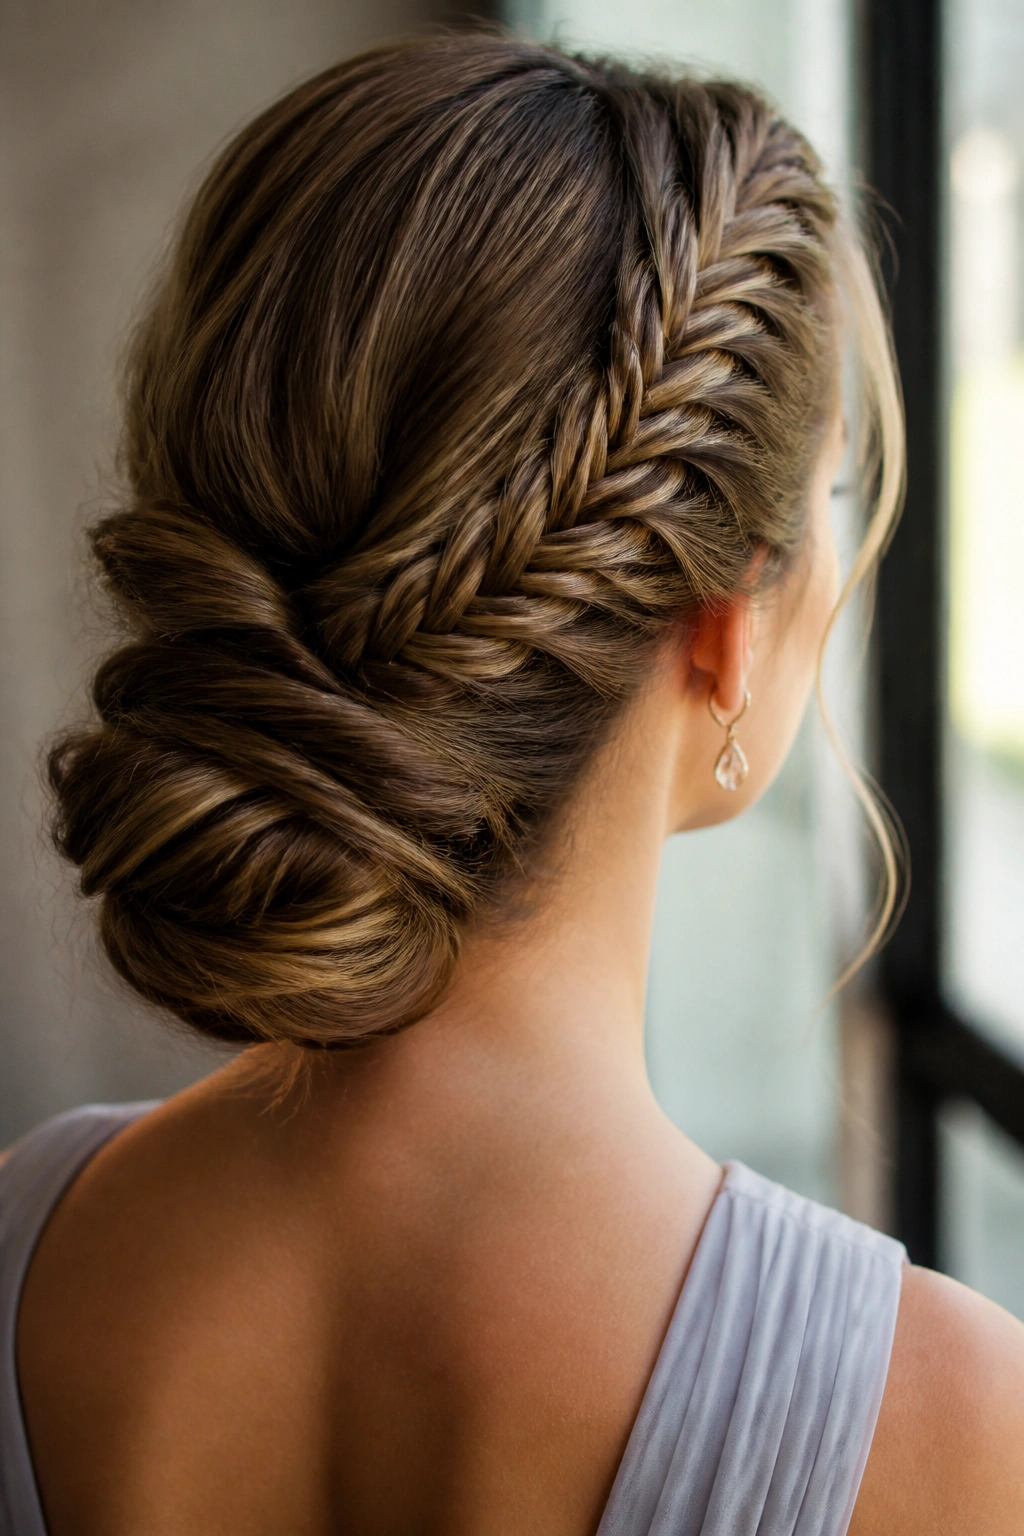
If you like hair that looks intricate from ten feet away and even better up close, the fishtail braided chignon is a smart pick. It has that woven, almost herringbone look that makes people lean in a little. The braid feels delicate, but the finished bun still sits low and secure.
What Makes It Stand Out
The fishtail pattern uses tiny sections from each side, so the braid ends up with a finer texture than a three-strand braid. That gives the chignon a dressier feel without needing a lot of accessories. It’s one of those styles that rewards patience. The smaller the sections, the cleaner the braid looks.
- Use ¼-inch pieces when you cross the strands for a tighter fishtail.
- Light texture spray helps the braid grip and keeps tiny flyaways from escaping.
- A clear elastic at the end keeps the tail compact before you wrap it.
- Pancake only the outer edge if you want more width without losing the pattern.
A fishtail chignon can look fussy if you rush it. It also falls flat if the braid is too loose at the start. Once you get the tension even, though, it becomes one of the prettiest braided buns in the whole lineup.
5. French Braid Into a Tucked Bun
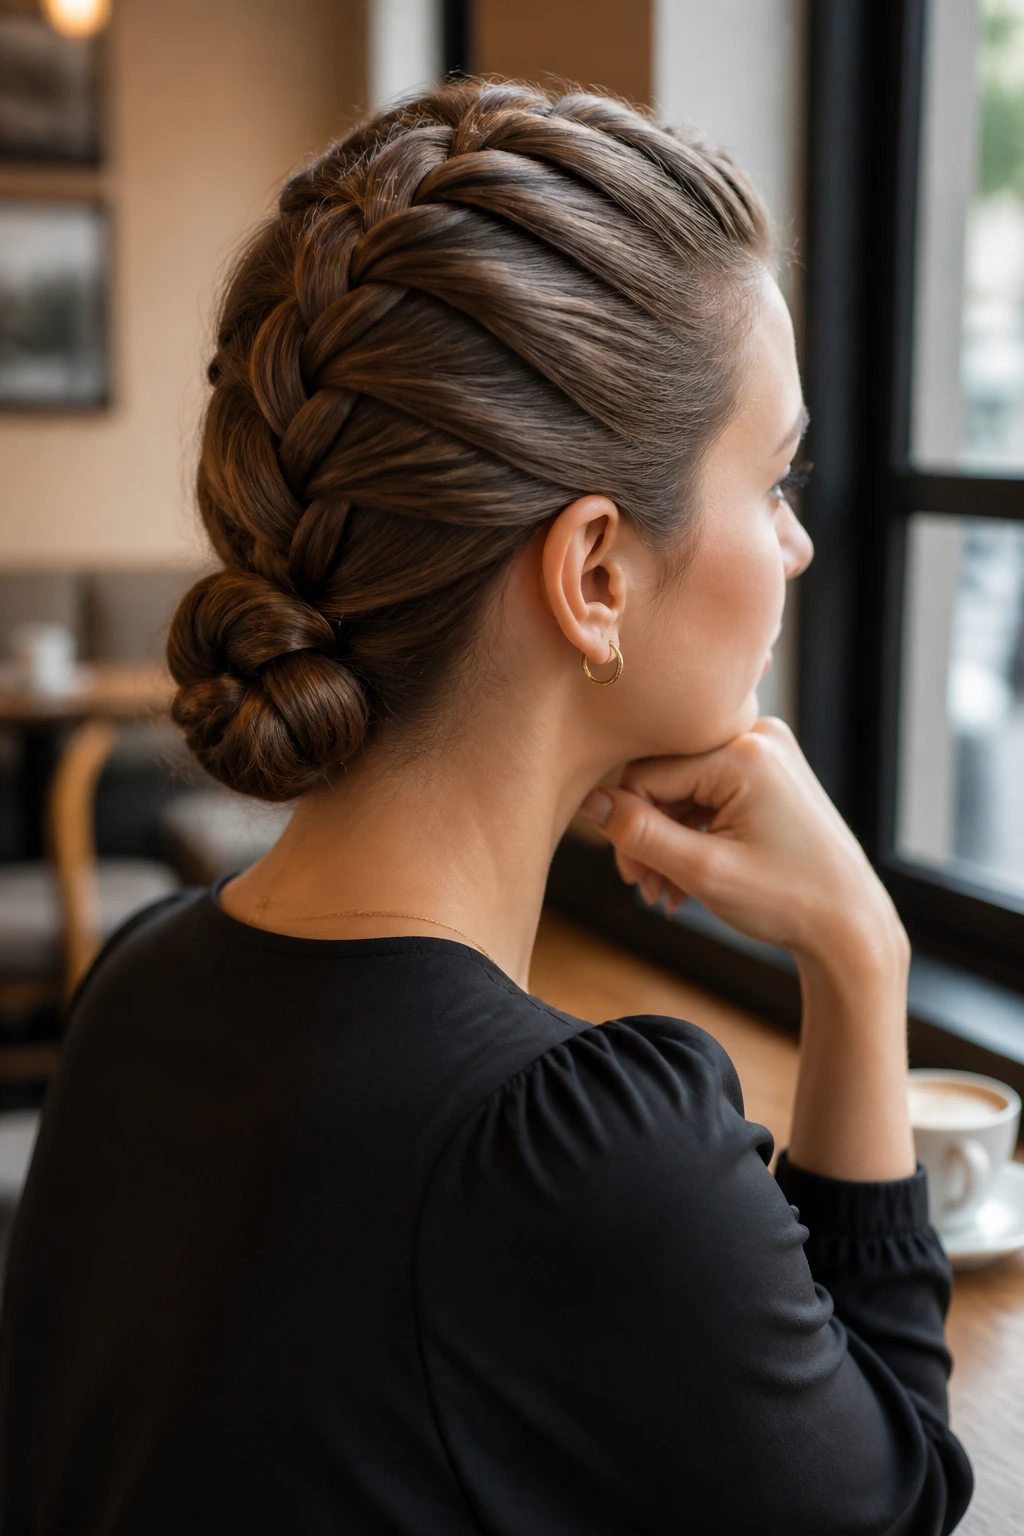
There’s something reassuring about a French braid that runs straight down the back and disappears into a tucked bun. It feels neat, almost calm. The braid starts near the hairline, travels through the center of the head, and feeds naturally into a low chignon at the nape.
That progression matters. A French braid builds structure as it moves, so by the time it reaches the back of the neck, the style already has its shape. You’re not fighting the hair into place at the end; you’re following the line that the braid set up for you. That’s why this version works so well for long meetings, formal dinners, and any day when you want your hair completely off your face.
Keep the crown smooth if you want a cleaner finish, but don’t pull the braid so tight that it starts to look stiff. A little lift at the roots makes the whole style feel less severe. I usually smooth the front with a light cream first, then braid with steady, even tension so the ridges stay neat.
The tucked bun at the bottom should be compact. If it spreads too wide, the style loses its elegance. Pin the bun close to the head, and make sure the braid tail is hidden under the fold rather than hanging below it.
6. Crown Braid Chignon
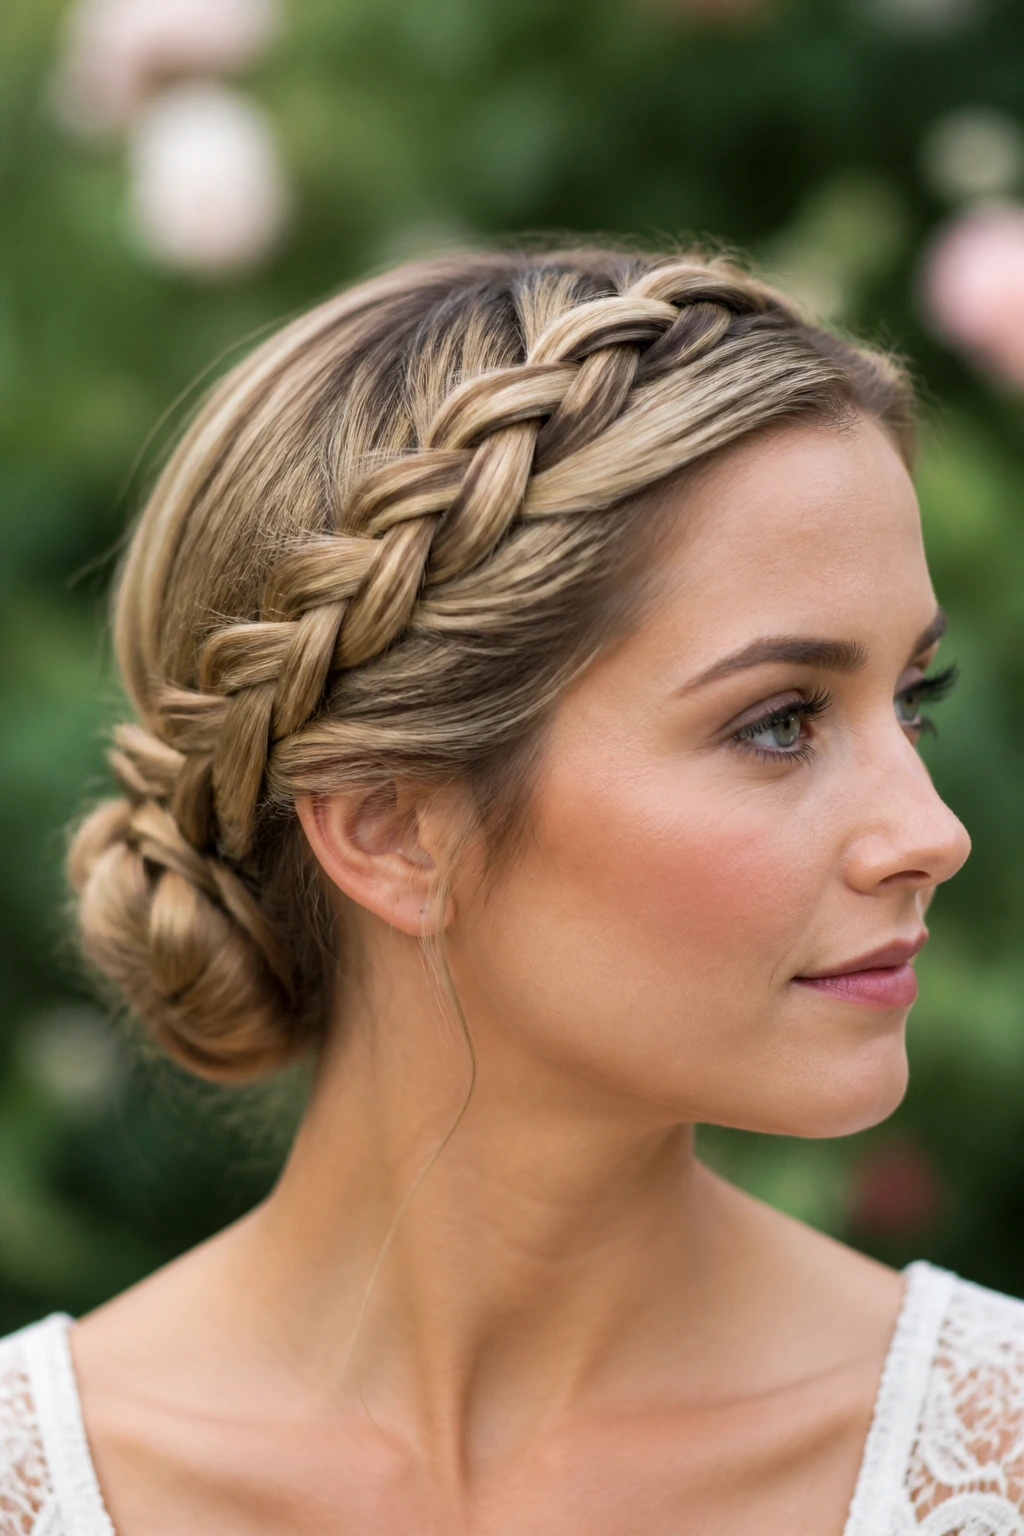
Unlike a low braid that stays mostly at the back, a crown braid brings the eye around the head first. That changes the whole feel. It frames the face, gives the style a little more presence, and makes the chignon at the nape feel like the final note instead of the main event.
This is a good choice when you want a braided updo that feels romantic but not overly soft. A single braid can start at one temple and sweep across the top of the head before landing near the opposite side of the nape. From there, the ends tuck into a low knot. If your hair is shorter, two braids meeting at the back can create the same effect with a little more control.
The braid needs to sit close to the head. Too much distance and the crown starts to puff in odd places. Too little and the braid loses that wrapped-around effect that makes the style feel special. A few hidden pins where the braid crosses at the back will keep the shape steady.
I like this one for dresses with open necklines. It leaves the face clean, the neck visible, and the back interesting without crowding the whole look with accessories.
7. Rope-Braid Chignon
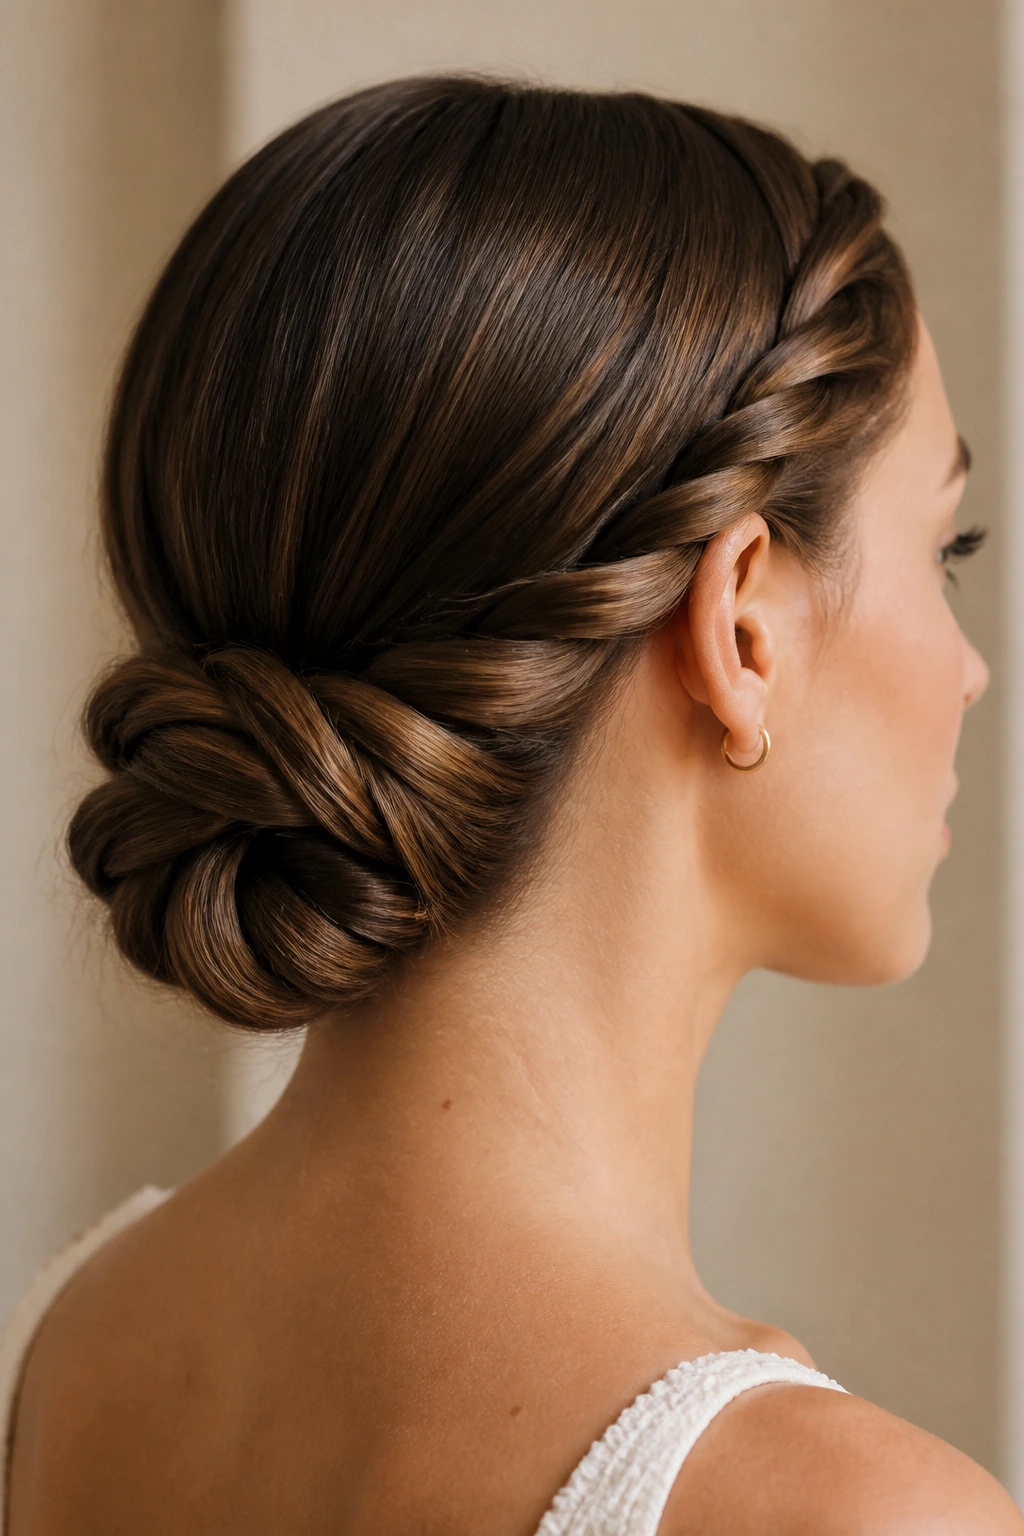
A rope-braid chignon looks simpler than it is. That’s part of the appeal. Twist two sections in the same direction, twist them together in the opposite direction, then wrap the rope into a low knot. Done well, it has a smooth, polished line that feels cleaner than a regular braid.
What Makes It Different
The rope braid creates a tighter spiral, so the texture reads as glossy and neat rather than woven. It’s a strong option when your hair is naturally very straight or when you want to keep the style close to the head. It also works well with extensions because the twist pattern helps hide the join.
- Twist each section in the same direction before crossing them together.
- Add a touch of serum only to the lengths, not the roots.
- Use 2 to 3 U-pins inside the coil and a couple of bobby pins at the edge.
- Keep the rope smooth; too much pulling makes it look frayed.
This one is especially nice if you want a chignon that feels sleek without looking flat. The twist gives it shape. The low bun gives it restraint. It’s a neat combination.
8. Braided Chignon With Face-Framing Pieces
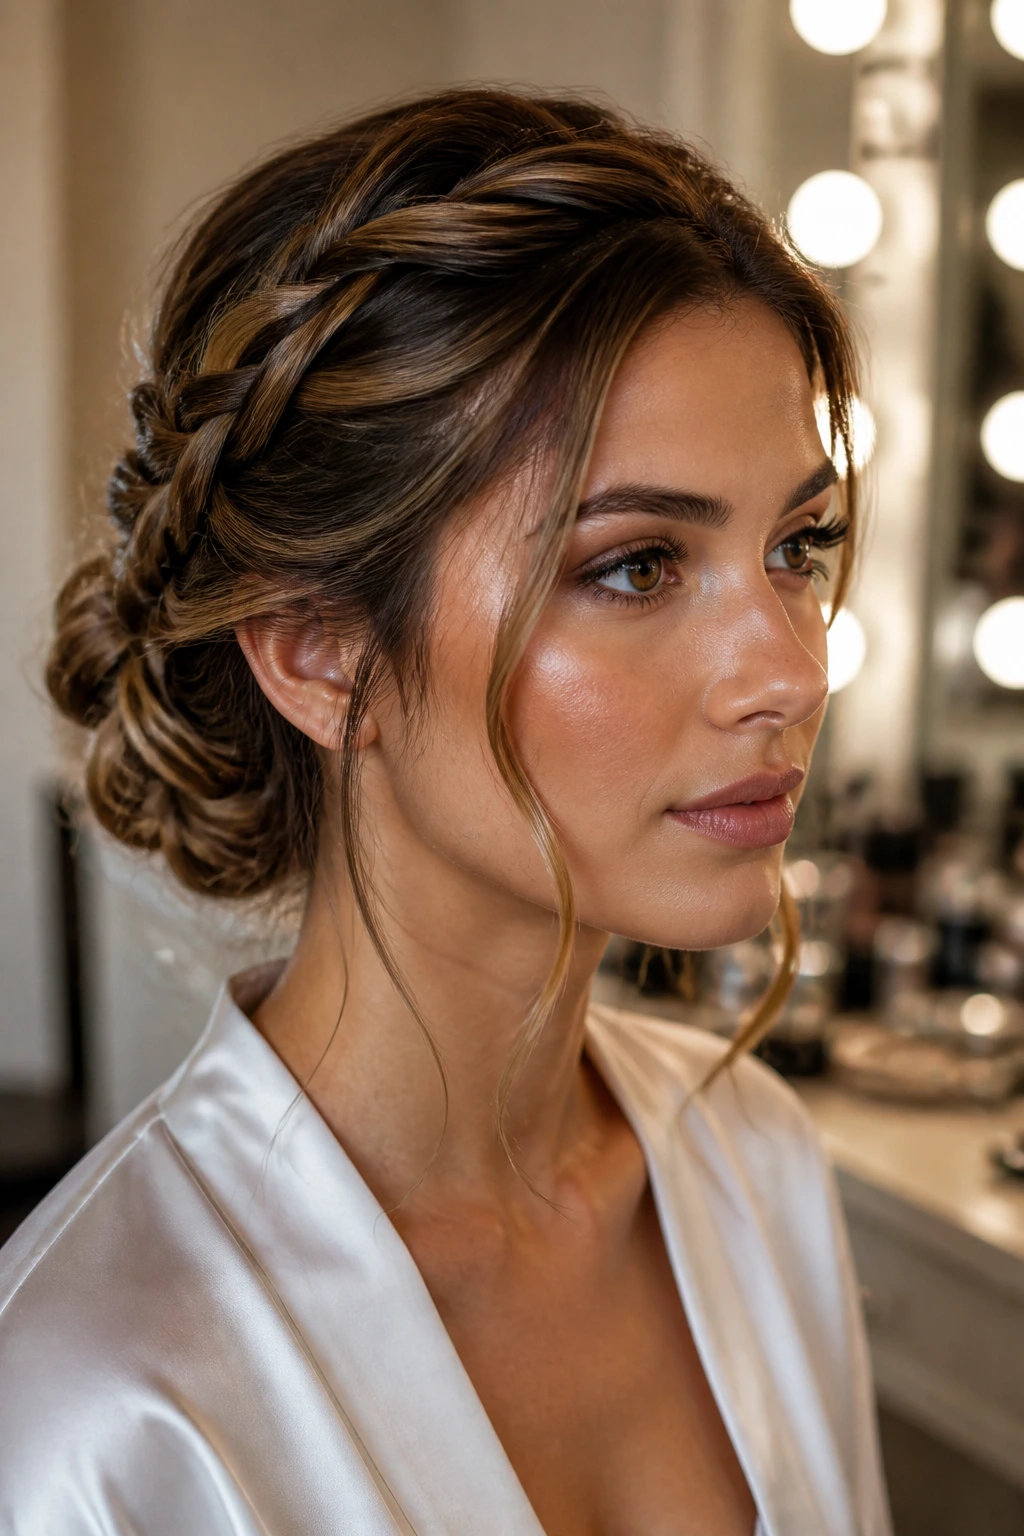
A little softness around the face keeps a braided chignon from looking severe. That’s the whole trick here. Leave out a couple of slim pieces near the temples, then braid the rest into a low chignon so the loose bits can do their job.
The pieces in front do not need to be thick. In fact, thinner tends to look better. You want enough hair to suggest movement, not enough to compete with the braid. If you like, bend them with a small curling iron or even a flat iron for a gentle curve. Keep the shape loose. Sharp curls can feel too staged next to the braid.
This style works especially well when the outfit is strong — a structured dress, a tailored blazer, a higher neckline. The chignon keeps the hair under control, while the face-framing pieces stop it from reading as too rigid. It’s a small trade, but it matters.
You can also tuck one side fully behind the ear and leave only a single tendril on the other side if you want an even cleaner look. That tiny asymmetry can be enough.
9. Double-Braid Woven Chignon
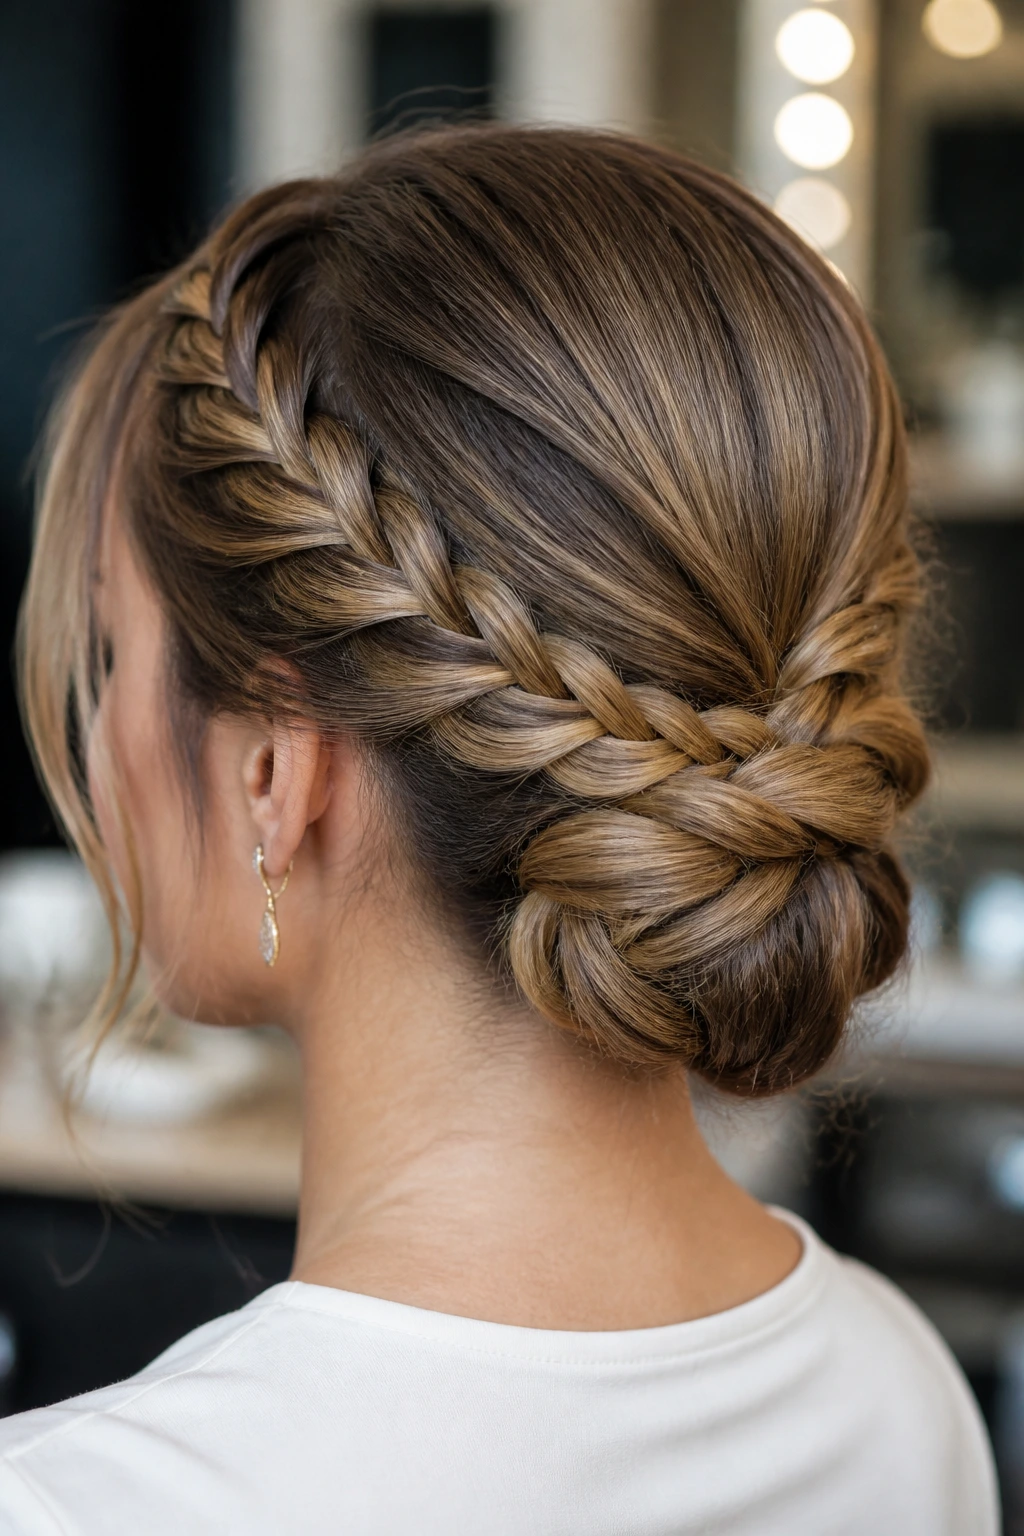
What happens when one braid feels too plain? You add a second one. A double-braid woven chignon uses two braids — often started from each side of the head — and brings them together into one low knot so the back looks layered and rich.
How to Use It
This style works well on thick hair, long hair, or hair with extensions, because there’s enough material to make the two braids feel balanced. Start each braid near the temple or just behind the ear, then guide them toward the nape. Once they meet, cross them over each other before wrapping them into the chignon. That little overlap keeps the center from looking too bulky.
The main thing to watch is symmetry. If one braid sits higher than the other, the whole style can look crooked from the back. Check both sides in a hand mirror before you pin the bun. A firm base and a tidy overlap are what make this one look intentional.
It’s a strong option for formal events, but it also works when you want a protective style that feels dressed up. The double braid gives the bun enough texture that you do not need much else.
10. Braided Chignon With Accessories
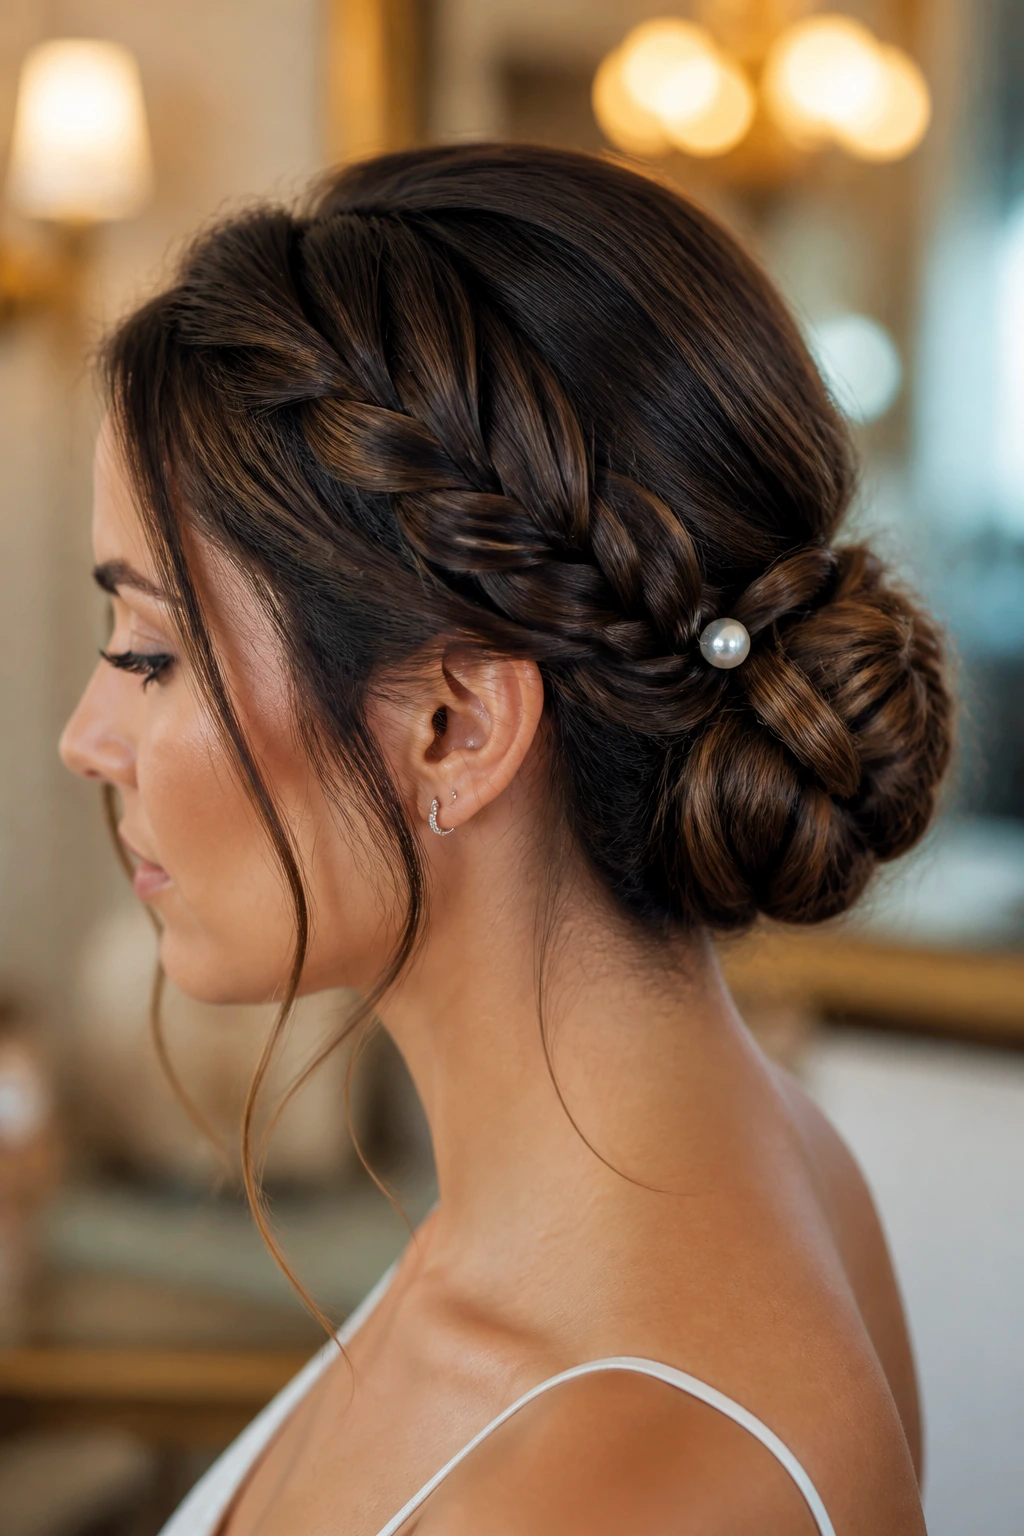
A plain braided chignon can change personality with one well-placed pin. That’s why accessories belong here. They don’t have to be loud. In fact, the best ones are usually small enough to feel like part of the hairstyle instead of sitting on top of it.
The braid gives you a clean surface for decoration, and the chignon gives the accessory a base to anchor into. A single pearl pin near the bun seam can make the whole style feel bridal. A slim metal comb at one side can sharpen the look. Even a ribbon woven through the braid can shift the tone from formal to romantic without changing the structure of the style.
- Pearl pins work best along the braid seam or tucked into the bun edge.
- A small comb should sit where the braid meets the knot.
- Ribbon looks best woven loosely through one braid, not all of them.
- Gold cuffs or rings are strongest when used on just one side.
One good rule: pick one focal point. Three accessories at once can make the style feel busy, and braided chignons already have enough detail on their own.
11. Twisted Braided Chignon
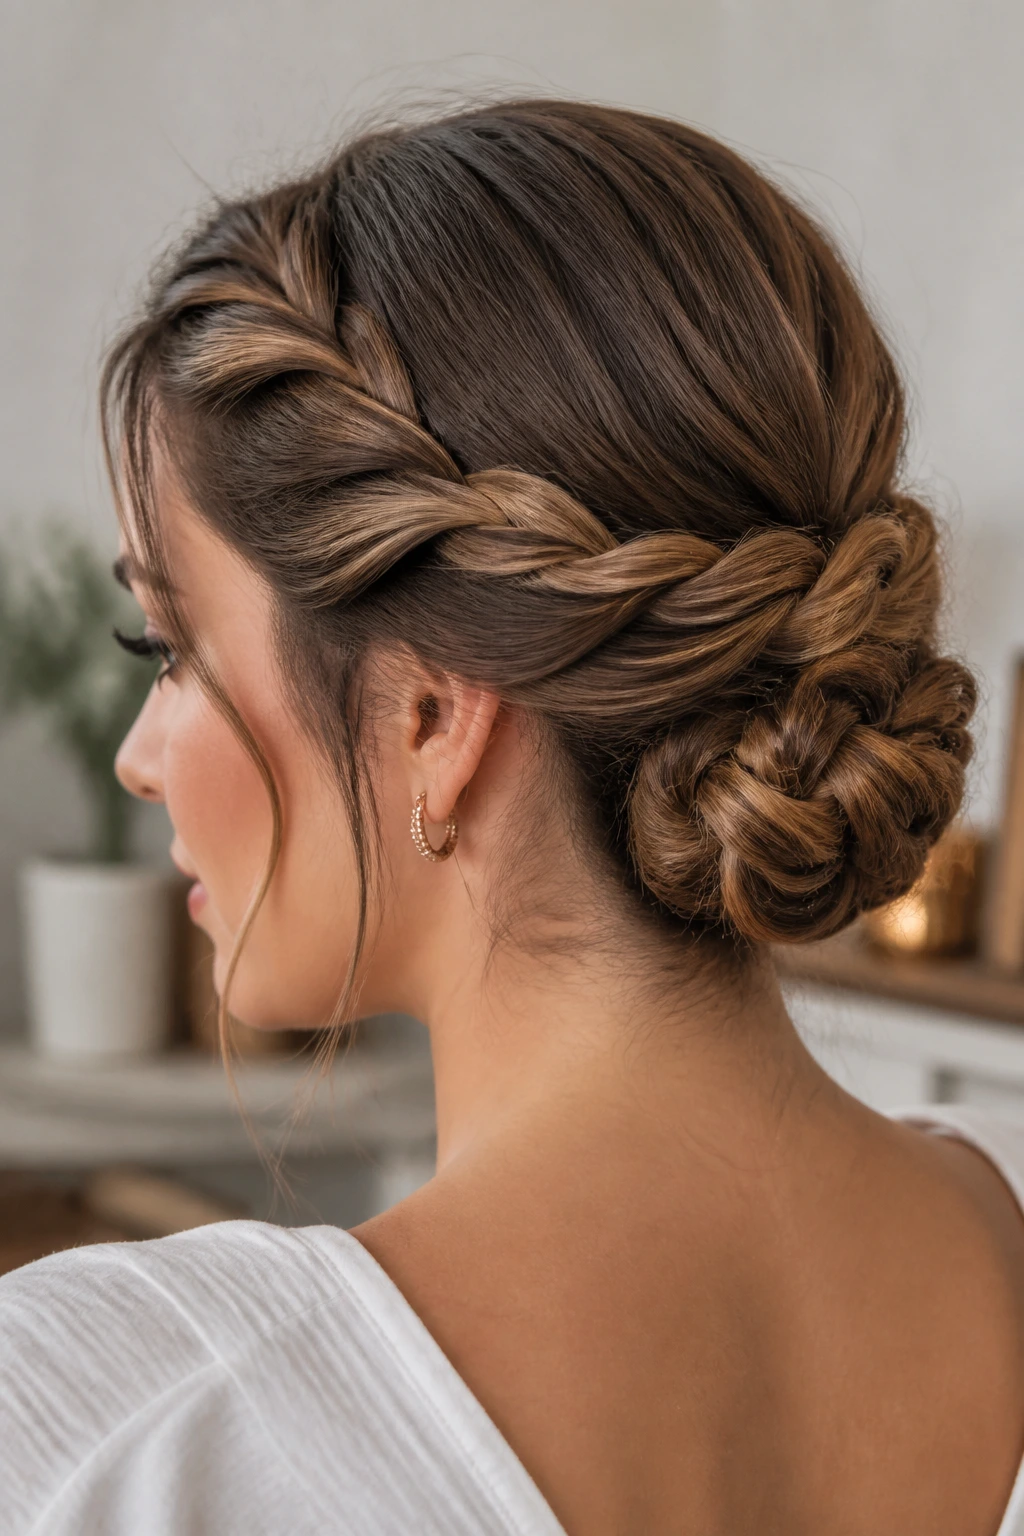
Twists and braids together can feel a little fussy in theory, but in practice they solve a real problem: fine hair often needs more shape than a single braid can give. A twisted braided chignon uses that to its advantage. The twists add width. The braid adds control. The bun ties it all together.
I like this one when the hair has a soft, slippery texture and needs a bit more grip. A light mousse at the roots and through the mid-lengths helps the sections hold their shape. Then you can create two side twists, feed them toward a central braid or merge them into a twisted braid, and gather everything into a low chignon.
The finish should feel springy, not crunchy. If the product leaves the hair stiff, the twists stop moving and the style loses its charm. You want the surface to look smooth, but the braid and twists should still have a little give when you touch them.
A few hidden pins at the base of the bun usually do the job. If the twists are too bulky, flatten the braid slightly before wrapping it. That keeps the chignon close to the head and stops it from puffing out in odd places.
12. Messy Braided Chignon
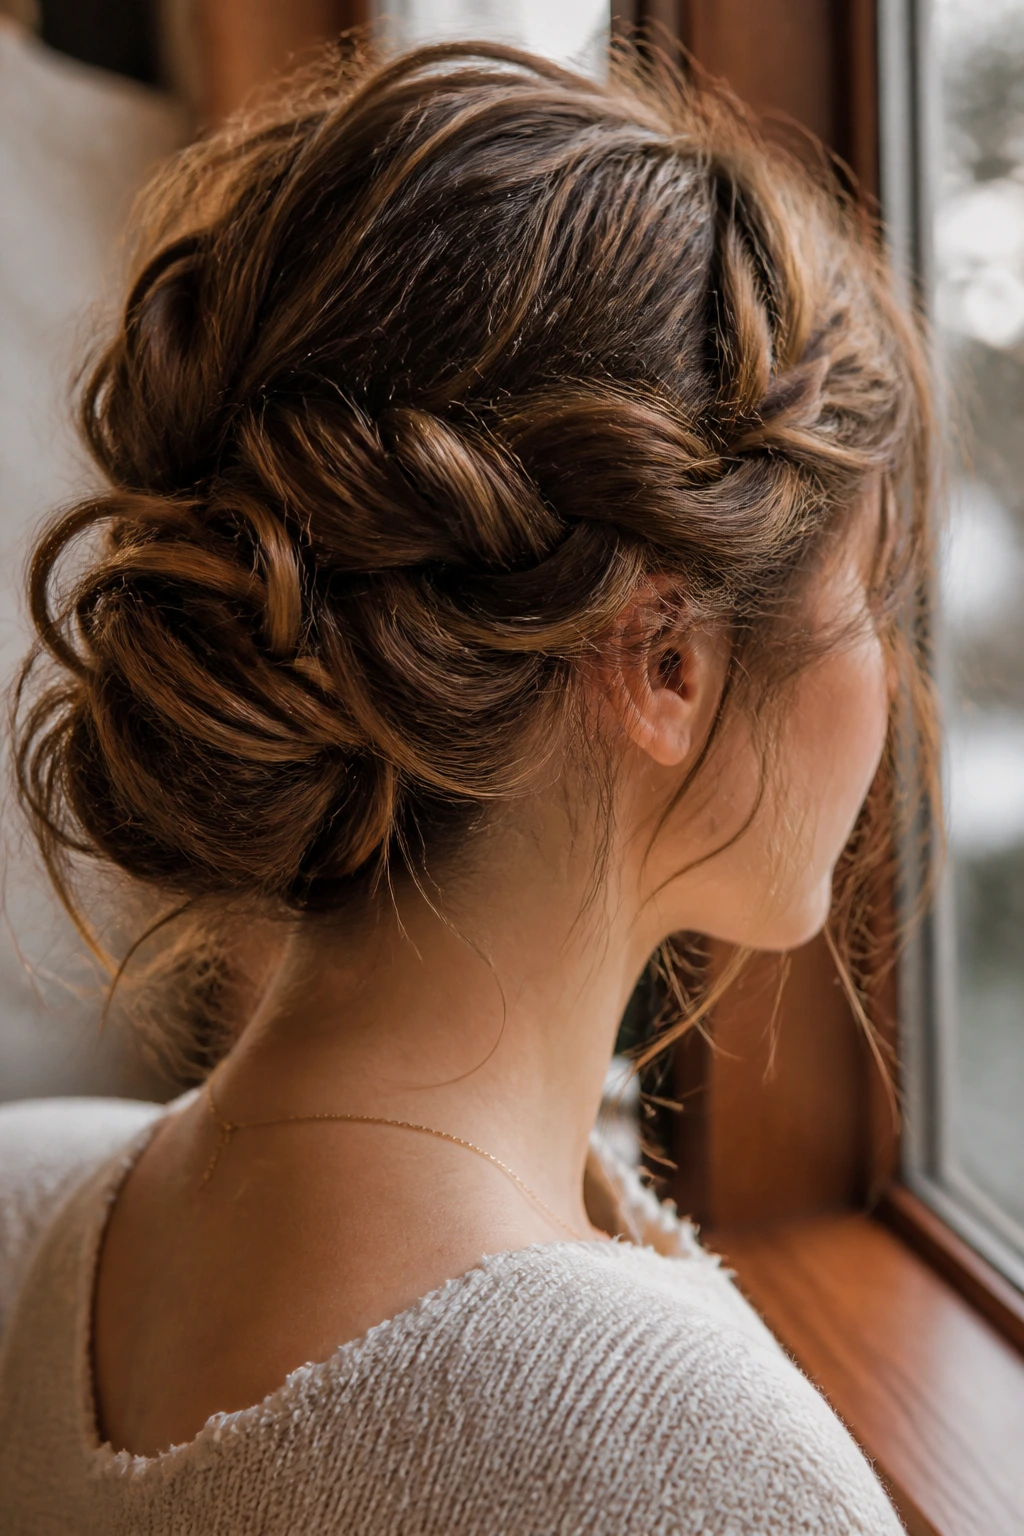
A messy braided chignon sounds casual, and it is, but the good versions still have control under the looseness. That is what separates it from a plain undone bun. The braid gives it direction. The softness around the edges keeps it from feeling overworked.
This style looks best when the braid is gently pulled apart after it’s secured, not before. That way you can widen the pattern without destroying the shape. Let a few strands slip free near the hairline and at the nape. Then pin the bun in a slightly irregular shape so it sits comfortably rather than perfectly round.
It’s a smart pick for softer dresses, knit tops, and any outfit that feels too formal with a slick updo. I’d also use it when the hair texture is a little rough and the idea of a rigid bun feels like too much work. The looseness buys you forgiveness.
That restraint is the whole trick.
A matte finishing spray helps here more than a shiny one. Too much gloss makes the messiness look accidental instead of styled. The goal is controlled softness, not collapse.
13. Sleek Center-Part Braided Chignon

A center part turns a braided chignon into something sharper and more modern-looking. The symmetry is the point. Both sides mirror each other, and the braid leads the eye straight down to the low knot without any detour.
Why It Reads So Clean
Start the part with a rat-tail comb and keep it narrow — about ½ inch wide at the front is enough if you want precision. Smooth each side with a small amount of gel, cream, or pomade, then braid low and tight enough to stay close to the head. The final chignon should sit right at the nape, not creep upward.
- A clean middle part is easier when you comb it in one pass.
- A light edge brush can flatten flyaways around the temples.
- Use bobby pins that match your hair color so they disappear into the braid.
- Finish with a soft-hold spray, not a crunchy one.
This style is especially useful when the outfit already has detail and the hair needs to stay quiet. Strong earrings, a dramatic neckline, a structured jacket — all of those pair well with the calm of a center-part braid. If the hair starts to puff at the crown, press it down with a silk scarf for a few minutes before you leave. It makes a real difference.
14. Cornrow-to-Chignon Protective Style
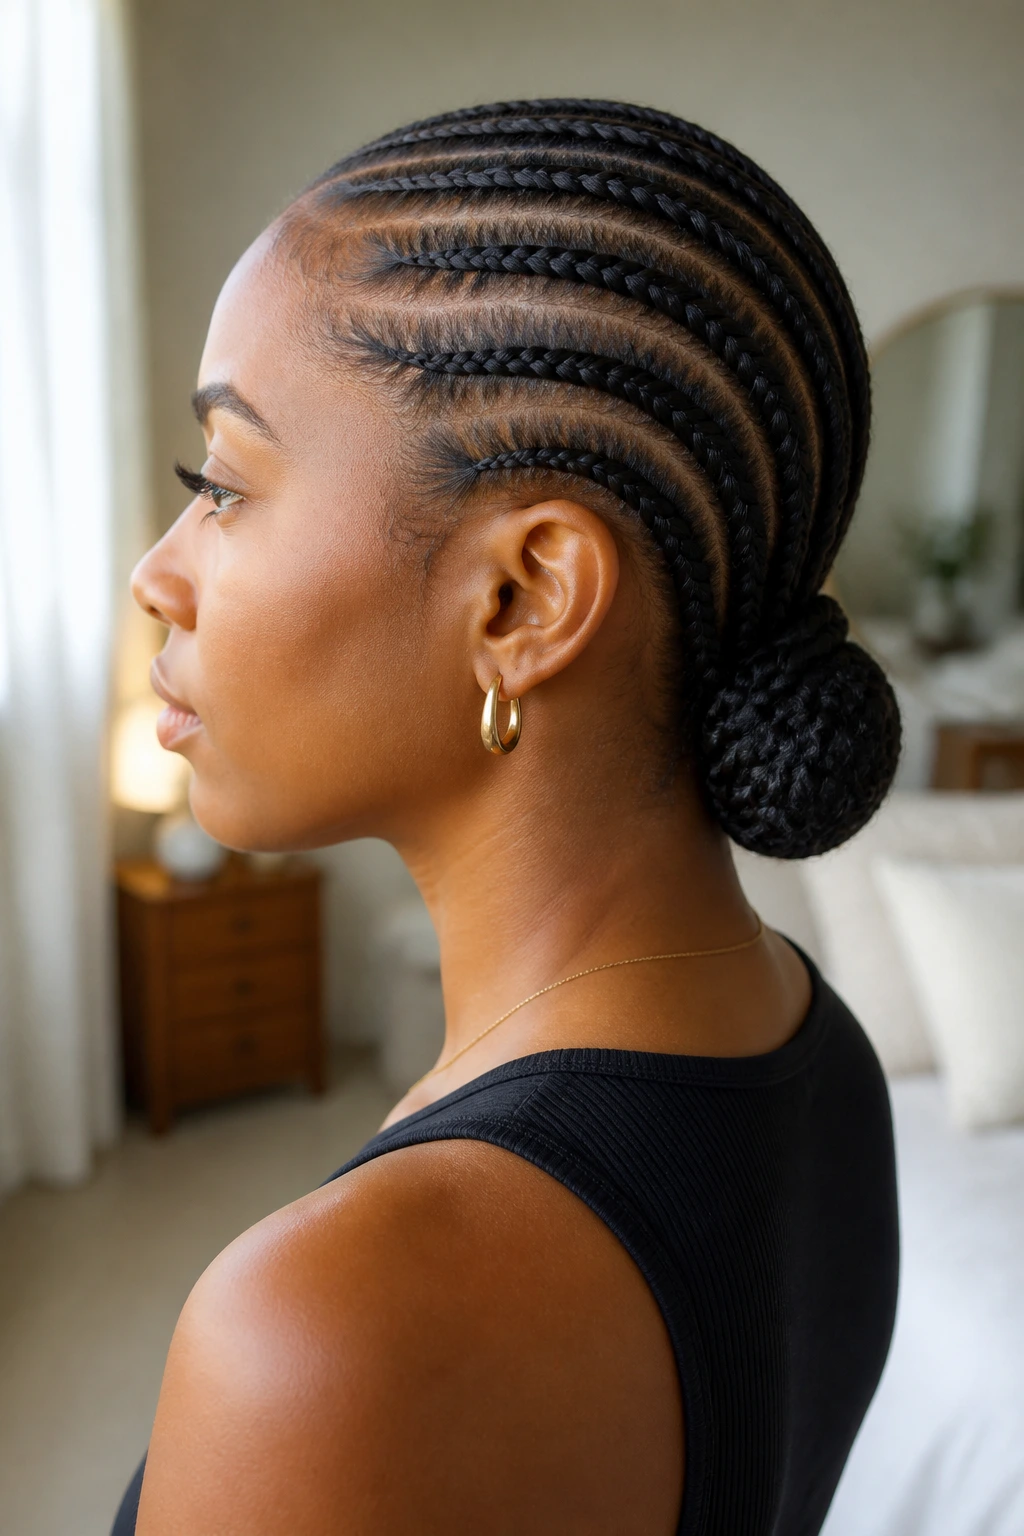
A cornrow-to-chignon style is one of the neatest ways to turn a protective braid pattern into something elegant. The cornrows carry the structure, and the low chignon at the back keeps the ends tucked away and out of the way.
This is a solid choice when the goal is low manipulation. Hair stays close to the scalp, the ends are secured, and the style can last with less daily handling than a loose braided bun. The parting needs to be clean, though. Cornrows that wander or bunch up will throw off the whole silhouette, especially once they’re pulled into the chignon.
What I like most is the balance between function and finish. You get a style that protects the hair and still looks intentional enough for dressier settings. A few braids can be directed straight back, others can angle slightly toward the nape, and then everything gathers into one compact bun. If you have tighter coils, this can be a much kinder option than repeatedly smoothing the hair into a slick bun every morning.
Just do not make the braids painfully tight at the hairline. A pretty style is not worth soreness. The scalp should feel secure, not stressed.
15. Stitch Braid Low Chignon

Why do stitch braids look so crisp? Because the parting gives them those clean, visible lines. When they’re gathered into a low chignon, the whole style has a precise, almost tailored finish that reads as polished without needing much decoration.
How to Get the Most From It
Stitch braids work best when the sections are mapped with care. A rat-tail comb is doing real work here, not just pretending. The braid should sit flat against the scalp, with the feed-in hair added in small, even bits so the line stays smooth. Once the braids reach the nape, they can be wrapped into a low bun or coiled into a braided knot.
- Keep the sections even so the “stitch” lines stay consistent.
- Use light tension, not hard pulling, near the edges.
- Add a satin scarf for a few minutes after styling if the front needs to lay flatter.
- Tuck the ends tightly under the chignon so the base doesn’t puff up.
This version is a favorite when you want the protective aspect to do the heavy lifting but still want a refined look. It has structure. It has clean geometry. And it stays neat long enough to be worth the setup.
16. Jumbo Braid Chignon
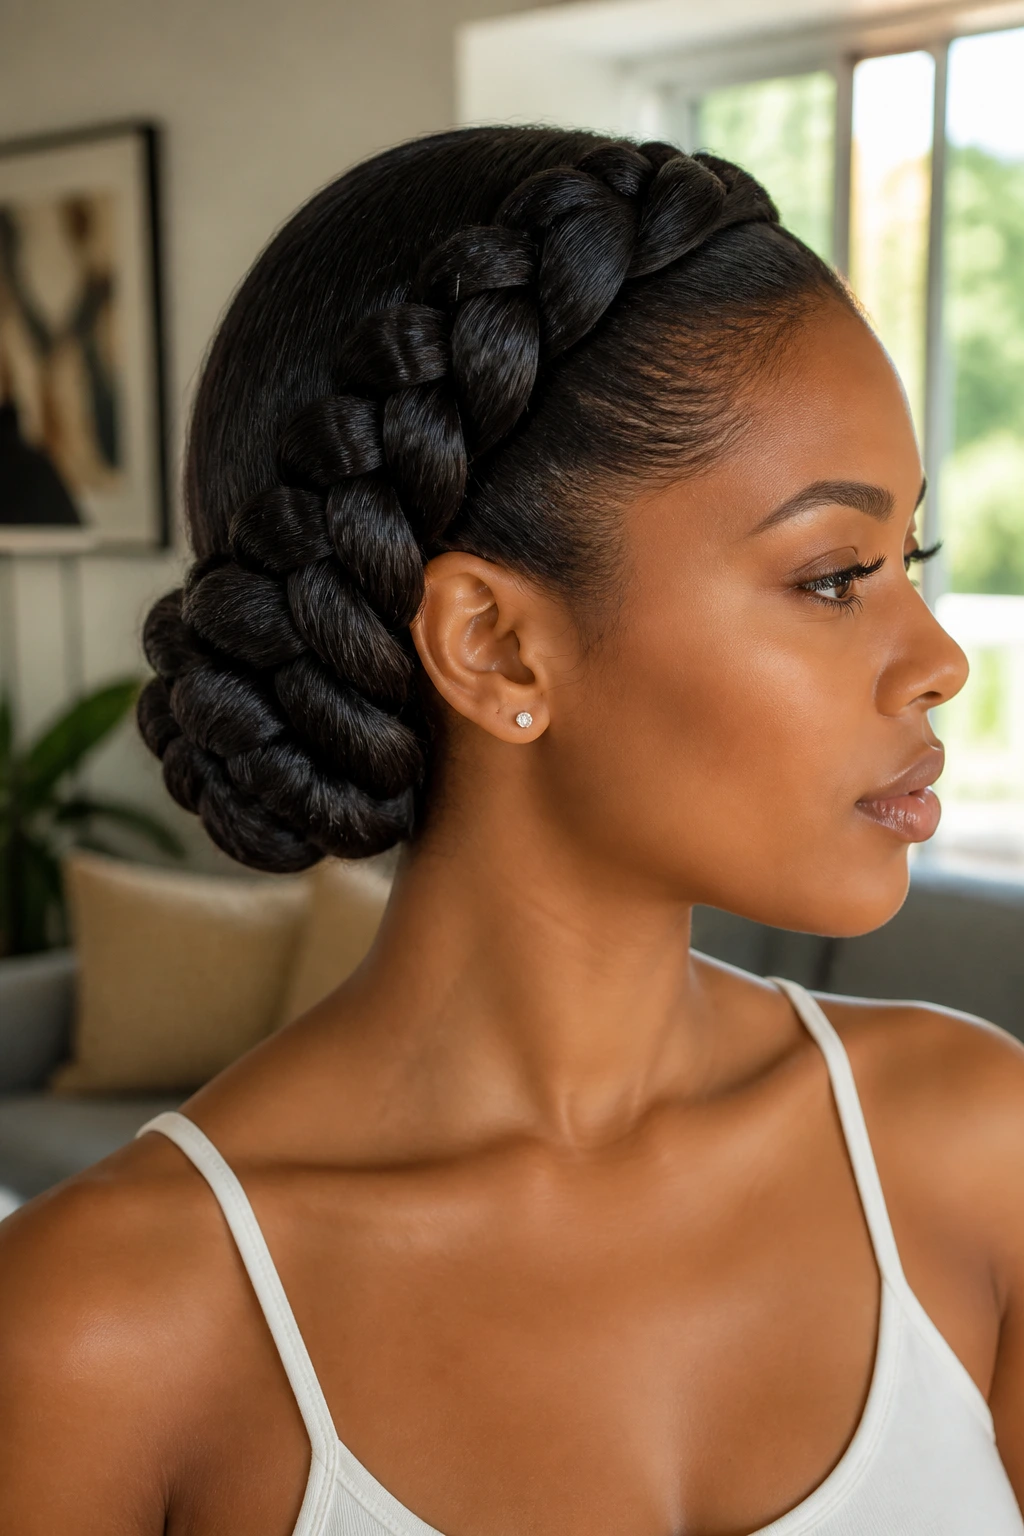
A jumbo braid chignon is the fast answer when you want the style to read from across the room. One thick braid, wrapped low into a bun, gives you that strong silhouette without a lot of moving parts. It’s bold in a quiet way.
This works especially well with added hair or with naturally thick hair that can hold a large braid without collapsing. The braid itself becomes the visual feature, so the bun can stay compact and simple. If the hair is very fine, a little braiding hair gives the style the mass it needs. That extra weight also helps the chignon sit low instead of springing upward.
- Secure the braid with 4 pins around the coil.
- Wrap the braid only once or twice so the pattern stays visible.
- Use a smoothing cream at the crown if the front needs to stay flat.
- Keep the ends tucked under the fold so the bun doesn’t unravel at the edge.
This style is one of those cases where less really does more. The braid is the statement. The chignon is the clean finish.
17. Braided Chignon for Curly Hair and Coils

Curly hair and coily hair bring their own logic to a braided chignon, and that’s part of what makes the style so good on textured hair. You do not need to erase the texture to make the look elegant. You just need to guide it.
On stretched hair, the braid pattern shows more clearly and the bun sits closer to the head. On fully natural hair, the shape gets fuller and softer, which can be lovely if you want volume. A little leave-in conditioner or light cream helps the strands stay smooth enough to braid without turning slippery. If the hair is very dense, dividing it into four sections first makes the process easier to control.
A braided chignon on coils often looks better when the ends are tucked neatly and the braid is not overly tightened. The texture itself gives you enough interest. You do not need to fight it. And if you want the style to last, a satin scarf at night keeps the front smoother and helps the braid line stay tidy.
The nice thing about this version is that it can look formal without losing the character of the hair underneath. That’s a hard balance to get right, and this style gets there with less effort than people expect.
18. Knot-Wrapped Braided Chignon

Unlike a braid that disappears completely into the bun, a knot-wrapped braided chignon lets the braid stay visible right at the seam. That little exposed line gives the style a more deliberate finish, almost like the braid is framing the chignon instead of vanishing into it.
This is one of my favorite evening versions because it looks intentional from the back. The braid can be wrapped around the base once, then tucked under itself so the knot sits cleanly in the center. A pair of strong U-pins placed across the top of the wrap will keep the structure from loosening as you move. If your hair is layered, a hidden elastic under the first wrap helps a lot.
The style suits formal dinners, gallery nights, and any situation where you want the back of your hair to feel as considered as the front. It also works nicely with a single statement earring or an open back, since the chignon does its part without crowding the rest of the look.
It is a small thing, but the eye notices it.
