



Face framing layered haircuts for long hair can change the whole mood of a cut without taking away the length people work so hard to keep. That’s the part I always come back to: the best versions do not feel like a dramatic chop, and they do not need to. A few smart front pieces, cut in the right place, can make long hair look lighter, softer, and more alive the second you part it.
Long hair without shape can look heavy fast. It hangs. It drags the face down. Sometimes the ends are healthy, the shine is there, and the cut still feels a little too solid. That’s where face-framing layers earn their keep. The shortest pieces near the face can hit the cheekbone, lip, or collarbone, and each landing spot gives a different effect. Cheekbone length opens the eyes. Lip length feels softer and more grown out. Collarbone length keeps things gentle and easy to wear.
The trick is not piling on layers everywhere. That’s how people end up with thin ends and a cut that looks fluffy in the wrong way. Good face framing is about placement. A little lift at the front. Some movement through the lengths. Enough structure to show your features, but not so much that the hair loses its long, expensive-looking line.
Some of these cuts are polished and sleek. Some are messier, piecey, and a little cooler around the edges. All of them work because they give long hair a job to do around the face instead of letting it just sit there.
1. Curtain Bangs With Soft Feathered Layers
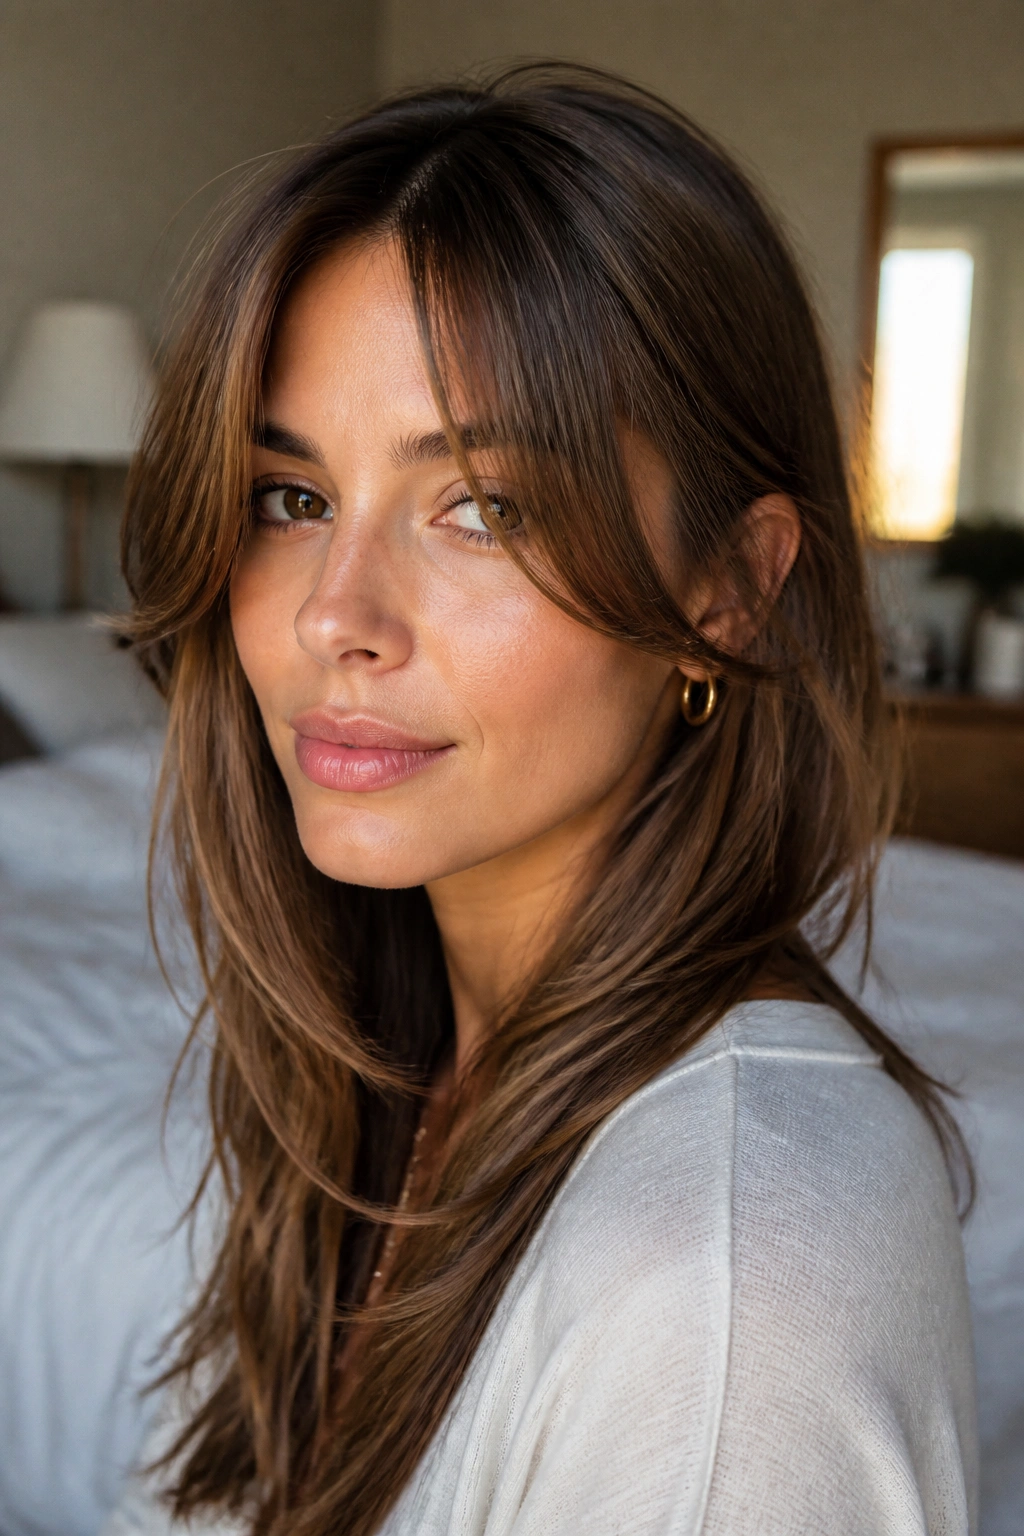
Curtain bangs are the easy answer when you want shape without committing to a short fringe. They split down the middle, brush the cheekbones, and melt into long layers instead of sitting on the face like a hard line. On long hair, that softness matters.
Why It Works on Long Hair
Curtain bangs pull the eye inward and upward at the same time. The shortest bits usually sit around brow to cheekbone level, then the layers taper down through the jaw and into the lengths. That gives you movement right where long hair often needs it most.
They also grow out in a kinder way than blunt bangs. That matters more than people admit. If you do not want a haircut that feels high-maintenance every three weeks, this is one of the calmer choices.
- Ask for the shortest piece to start near the brow or upper cheekbone.
- Keep the side pieces long enough to tuck behind the ear.
- Blow-dry them away from the face with a round brush.
- Use a light styling cream, not a heavy serum.
Tip: if your hair is very dense, ask for the bang area to be thinned only at the ends, never through the middle, or the whole front can go see-through fast.
2. Bottleneck Bangs With Collarbone Pieces

Bottleneck bangs are a little more shaped than curtain bangs, and that’s why they look so clean on long hair. The center is shorter, then the length opens out toward the temples and drops into face-framing pieces that land near the collarbone. The whole cut feels intentional without looking stiff.
They work especially well if you want the face to look slimmer without cutting a lot of length. The middle gap gives the forehead some air, while the longer sides soften the jaw. It’s a nice compromise if straight-across bangs feel too blunt for you.
The style looks best when the front is dry and slightly curved, not pin-straight. A medium round brush or even a large velcro roller can do the trick. Keep the ends airy. That part matters.
If you have wavy hair, this cut can be almost effortless on wash days. If your hair is very straight, it needs a little bend to keep the front from falling flat. But the payoff is worth it. The shape reads smart, not fussy.
3. Cheekbone-Grazing U-Shape Layers
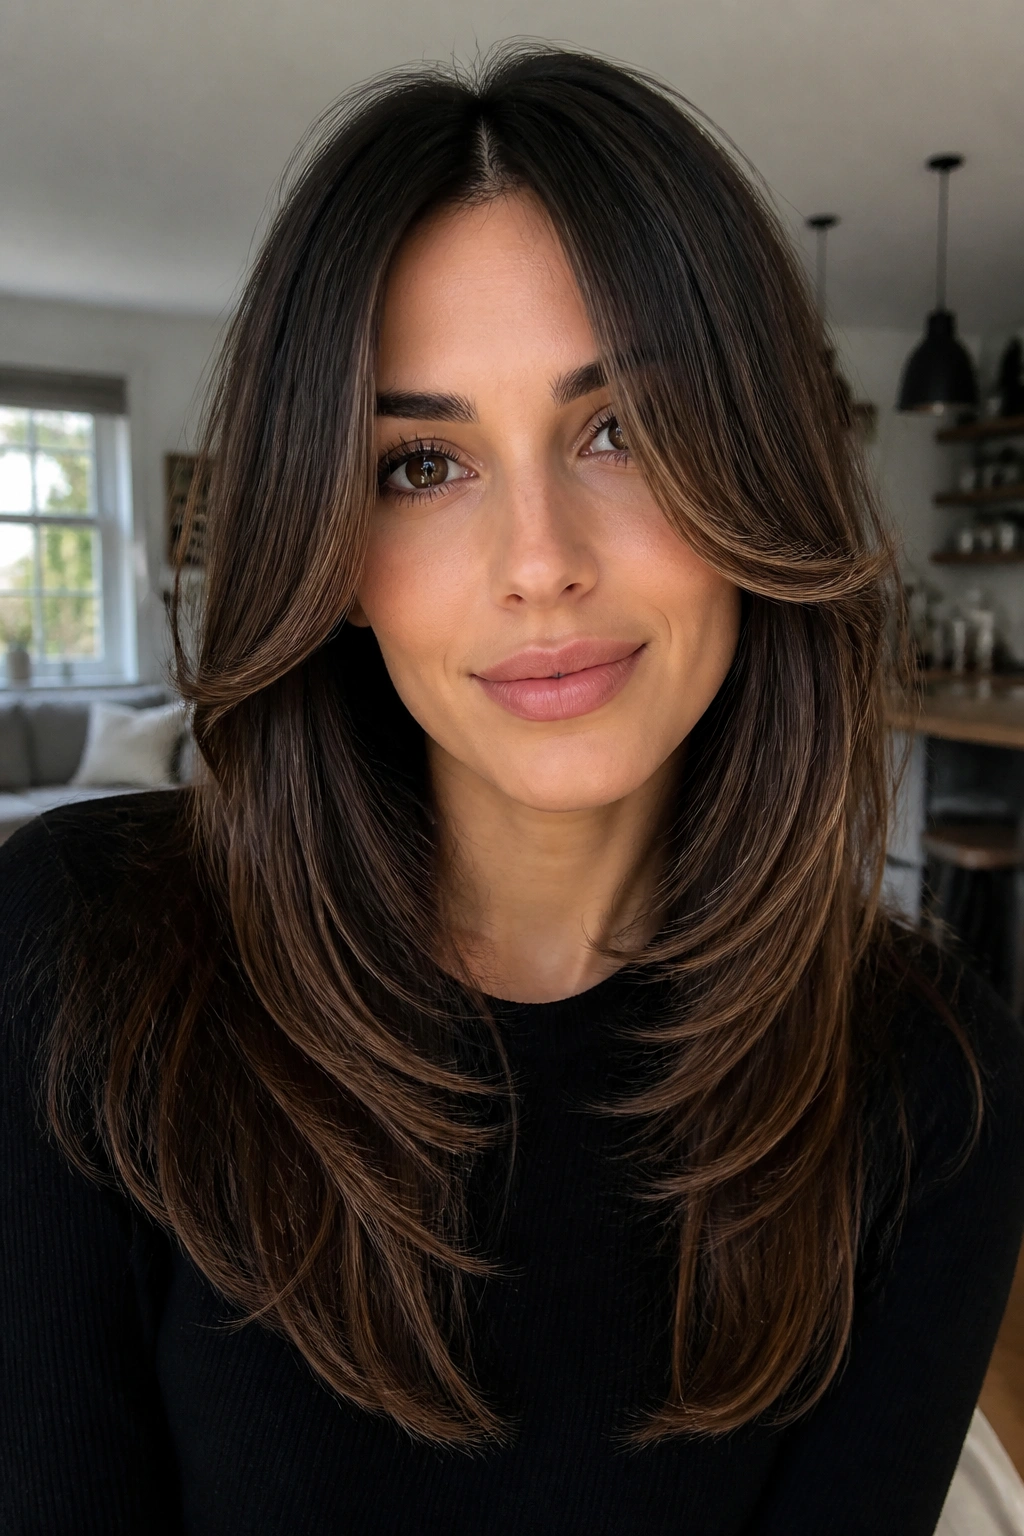
Why does one long haircut look soft and another just looks long? Usually, the answer is the outline. A U-shaped cut keeps the perimeter rounded in the back, and the face-framing layers start high enough to bring the eye up toward the cheekbones.
What Makes the Shape Work
The front pieces should not be cut too short. That’s the mistake. When they hit around the top of the cheekbone or just below it, they can soften a strong jaw and give rounder faces a little vertical length. If they’re chopped too high, the whole look turns busy.
This cut is especially nice on thick hair because the rounded outline stops the hair from looking boxy. The layers create a curve, not a triangle.
How to Style It
A soft bend is enough. A 1.5-inch curling iron, wrapped away from the face for just 8 to 10 seconds, gives a nice shape without making the layers look overdone. Let the front cool before you touch it. That part is annoying, but it matters.
A U-shape is one of those cuts that looks expensive when it’s done well. Not flashy. Just balanced.
4. Butterfly Cut With Lifted Front Layers
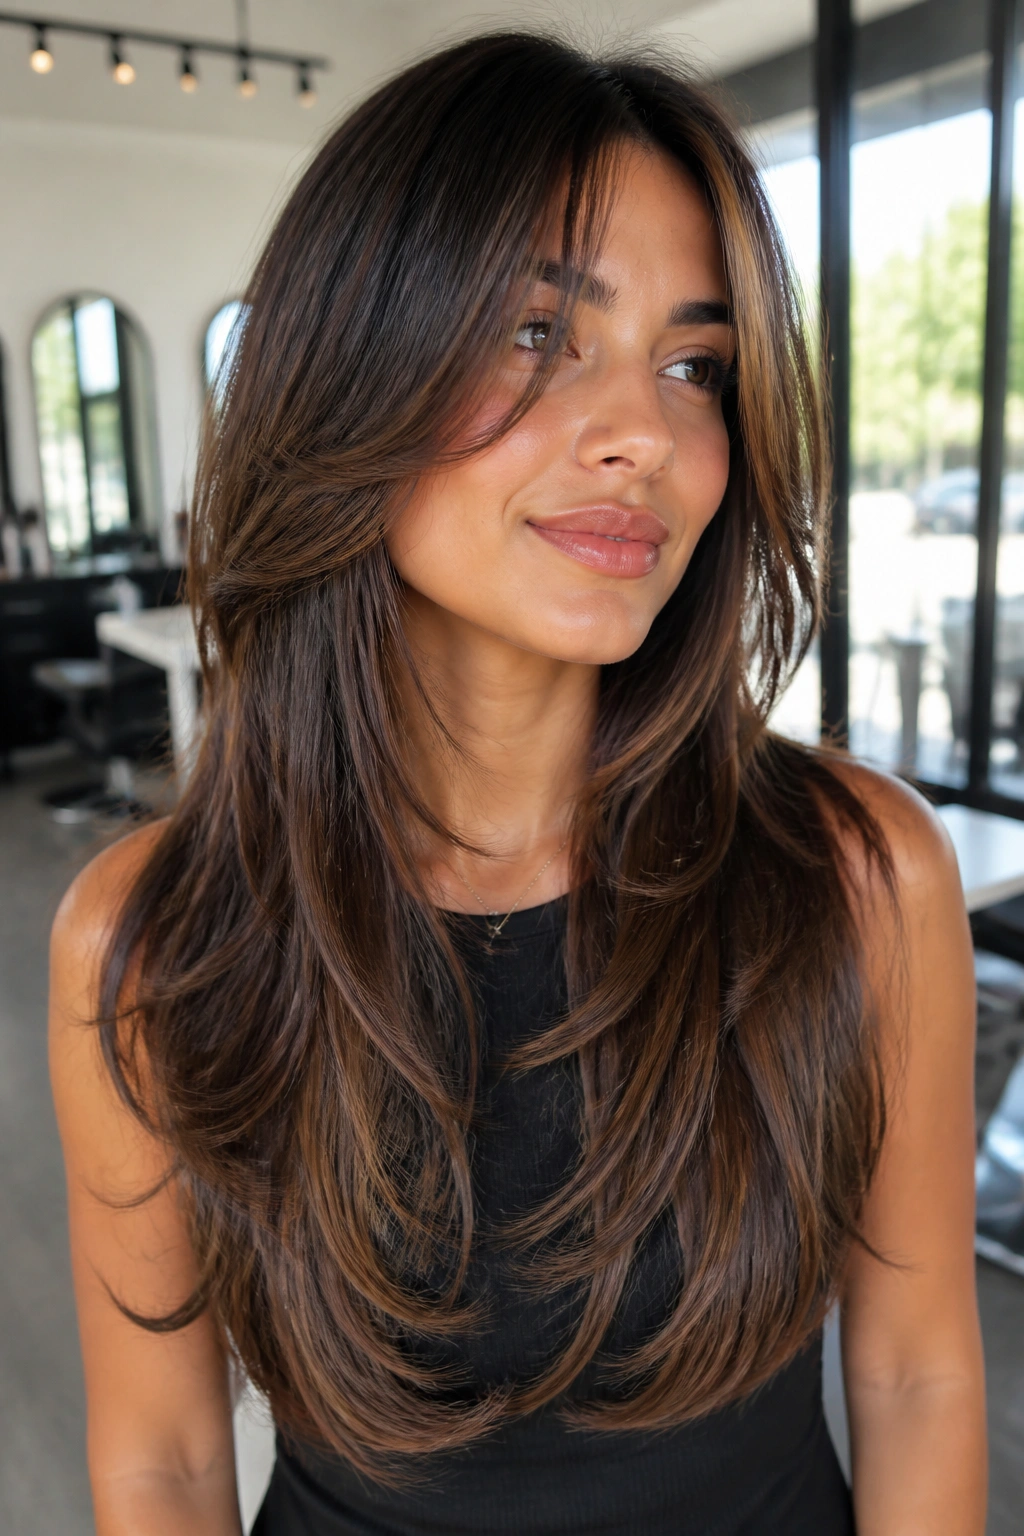
Picture long hair clipped up at the crown, then falling into two different stories: shorter pieces around the face and a much longer body underneath. That’s the butterfly cut, and it has a way of making long hair feel lighter without sacrificing the length people usually want to keep.
The shape is all about contrast. The top layers lift around the face and crown, while the bottom layers stay long enough to keep the sweep and swing. It gives you that bouncy blowout look even when the hair itself is straight or only slightly wavy.
What to Ask For
- Short face-framing pieces that start near the cheekbone or lip.
- A long layer that still reaches past the chest.
- Soft blending at the crown, not choppy steps.
- Enough removal around the front to stop the cut from feeling heavy.
This is one of the few layered cuts that can look dramatic and still stay wearable. It needs styling if you want the full effect, though. A quick round-brush blow-dry, especially at the roots near the face, makes the difference between “nice layers” and “wow, that moved.”
5. Jaw-Length Invisible Layers
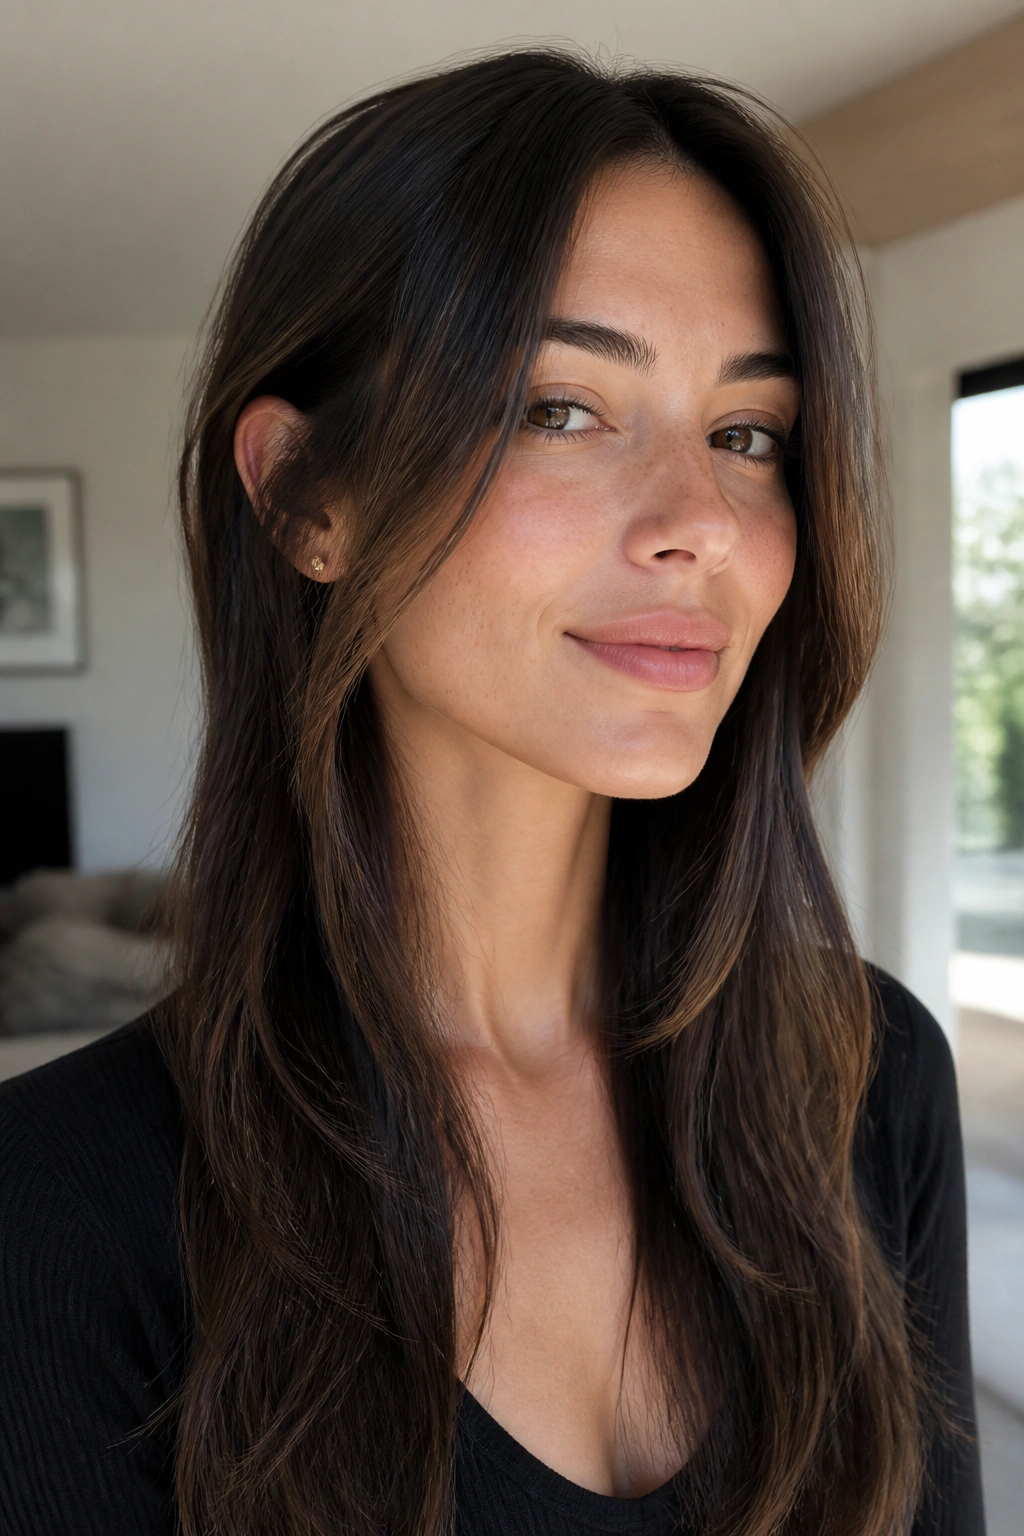
Invisible layers are for people who want shape without the obvious chopped look. The cut keeps the perimeter long and full, then sneaks in subtle layers underneath so the hair moves better around the face and through the ends. From the outside, it still reads as long hair. Up close, it has more air in it.
That’s the appeal. You get softness near the jaw and collarbones, but you don’t lose the dense curtain that some people like about long hair. It works especially well if your hair is straight or only slightly wavy, because the layering shows up in movement instead of in obvious steps.
Subtle is the point.
If you tuck your hair behind your ears a lot, this cut is sneaky good. The front pieces fall back into place without needing to be reworked every five minutes. And when you do wear it down, the face gets a little lift instead of being swallowed by the length.
Ask your stylist to keep the shortest front pieces below the chin if you want a gentler result. That small change can save the cut from looking too busy.
6. Long Shag With Piecey Front Layers
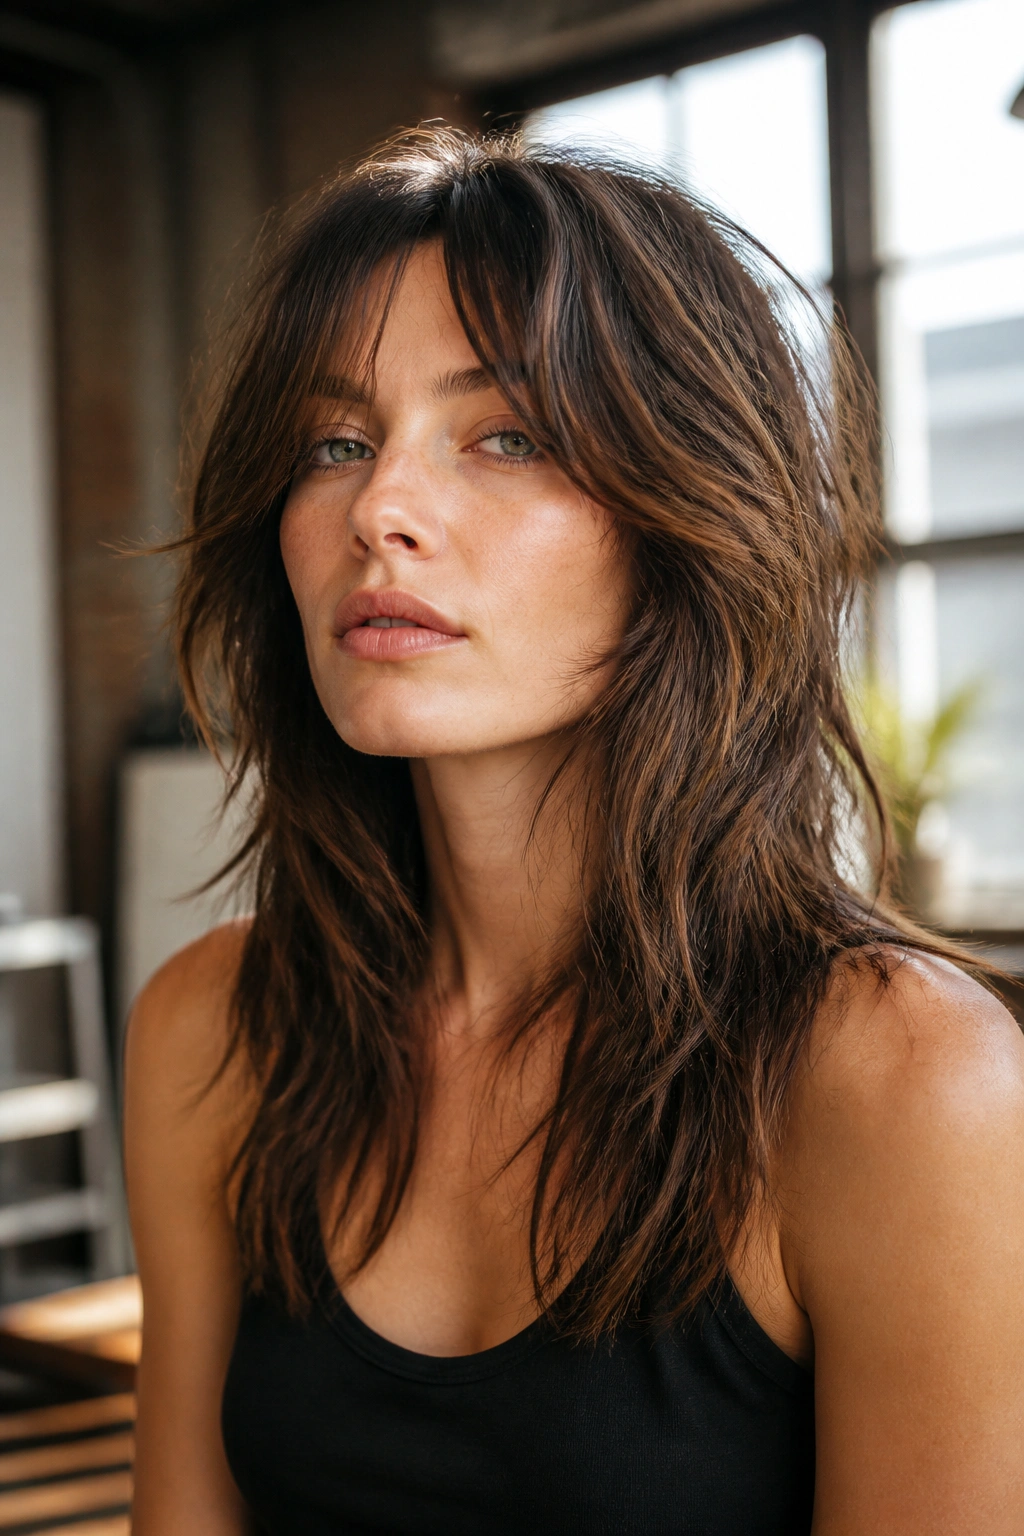
A long shag is not shy. It gives you texture, edge, and a front shape that looks like it has already lived a little. Unlike smoother layered cuts, this one keeps the ends a bit broken up on purpose, which is why it works so well on wavy hair and hair that likes to dry with personality.
The face-framing pieces are usually sliced in around the cheekbones and then broken up through the sides. That makes the whole cut feel lighter near the front without turning the length into a feather boa. Good shags still leave you with real length. They just stop pretending that every strand should behave the same way.
What Makes It Different
- More texture through the mids.
- Less polished blending.
- Better with air-drying than a glassy blowout.
- Stronger shape around the eyes and cheeks.
This cut is not the one I’d hand to someone who wants sleek, mirror-straight hair every day. It asks for a little mess. A little grit. A texturizing spray or soft mousse helps, but the real charm is in how imperfect it looks when the hair falls naturally.
7. Center-Parted Mermaid Layers
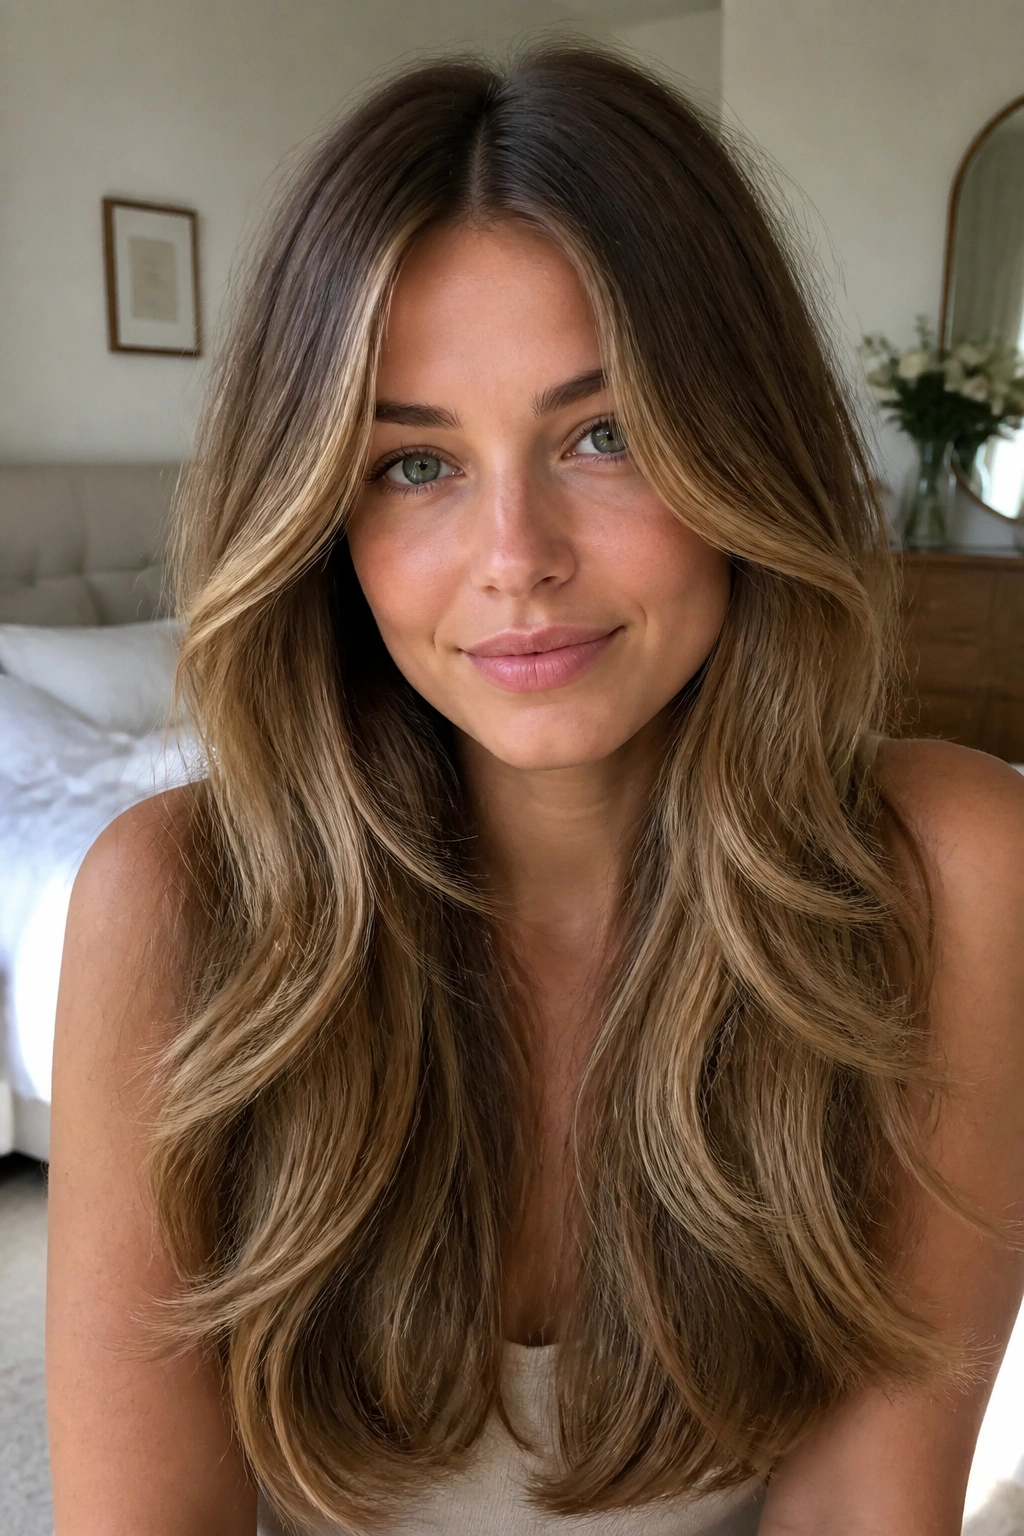
A center part can go flat fast if the hair is one solid curtain from roots to ends. Mermaid layers fix that by building movement through the front and mid-lengths without destroying the long, flowing shape underneath. The result is soft, romantic, and a little more alive than one-length hair.
The Shape That Matters
The front layers usually start around the lower cheek or lip, then drift into longer pieces that connect with the length. That placement helps the hair curve around the face instead of hanging straight down. If your features are very soft, this kind of framing can give the face more outline. If your features are sharp, it softens them a bit.
A center part makes the haircut read clean, but the layers keep it from feeling severe. That’s the balance here. The part is straight; the movement is not.
How to Get the Most From It
- Use a middle part while the hair is damp.
- Wrap the front pieces around a large brush or 2-inch iron.
- Direct the ends away from the face for a gentle swoop.
- Finish with a light shine spray, not a heavy oil.
This cut likes length. The longer the hair, the better the drape.
8. Side-Swept Fringe With Cascading Layers
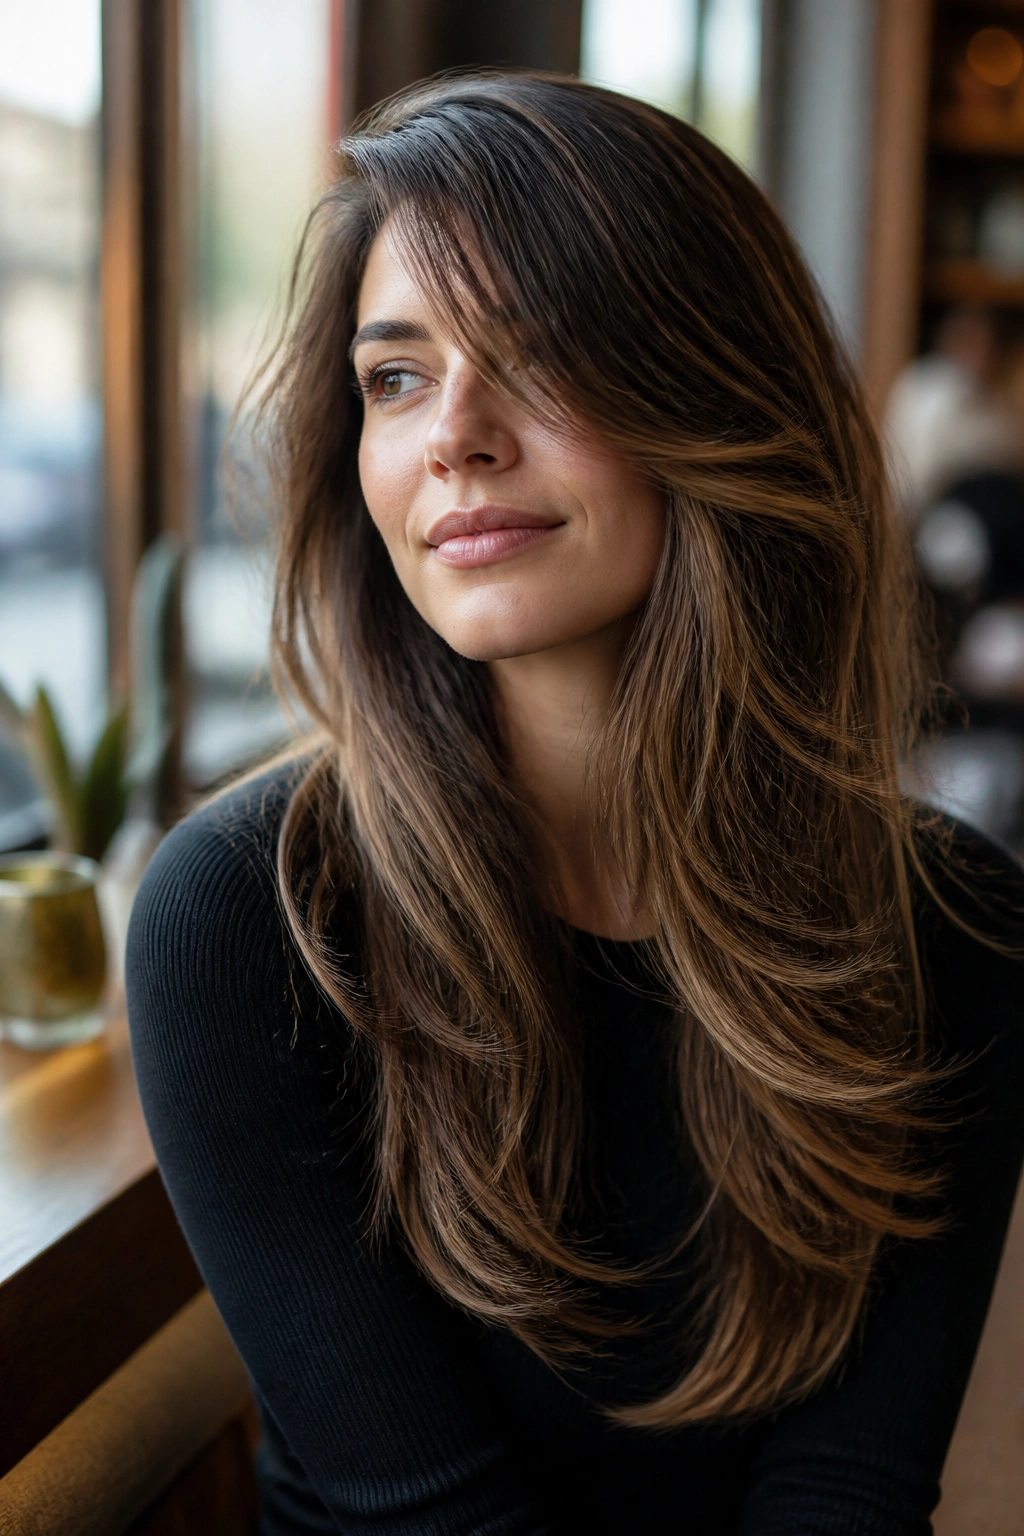
Want face framing without a center part? A side-swept fringe does the job nicely. It brings the eye across the face, softens a high forehead, and gives long hair a little old-school glamour without requiring a full fringe commitment.
The front should not be chopped too short. That’s where people get into trouble. A side-swept fringe works best when it has room to move, so the shortest section usually starts around the brow and drops into longer layers that can fall across the cheek or jaw. Done right, it looks relaxed. Done wrong, it looks like a side bang that wants a nap.
This cut plays well with straight hair, but it really wakes up with a bend. Even a single pass of a flat iron, curved away from the face, can make the fringe sit better. If your hair gets oily at the roots, the side-swept shape can save you on days when a full fringe would have given up by noon.
It also grows out quietly, which is a blessing. The front can slide into the rest of the layers instead of turning into a shape you have to fight.
9. Round-Brush Blowout Layers
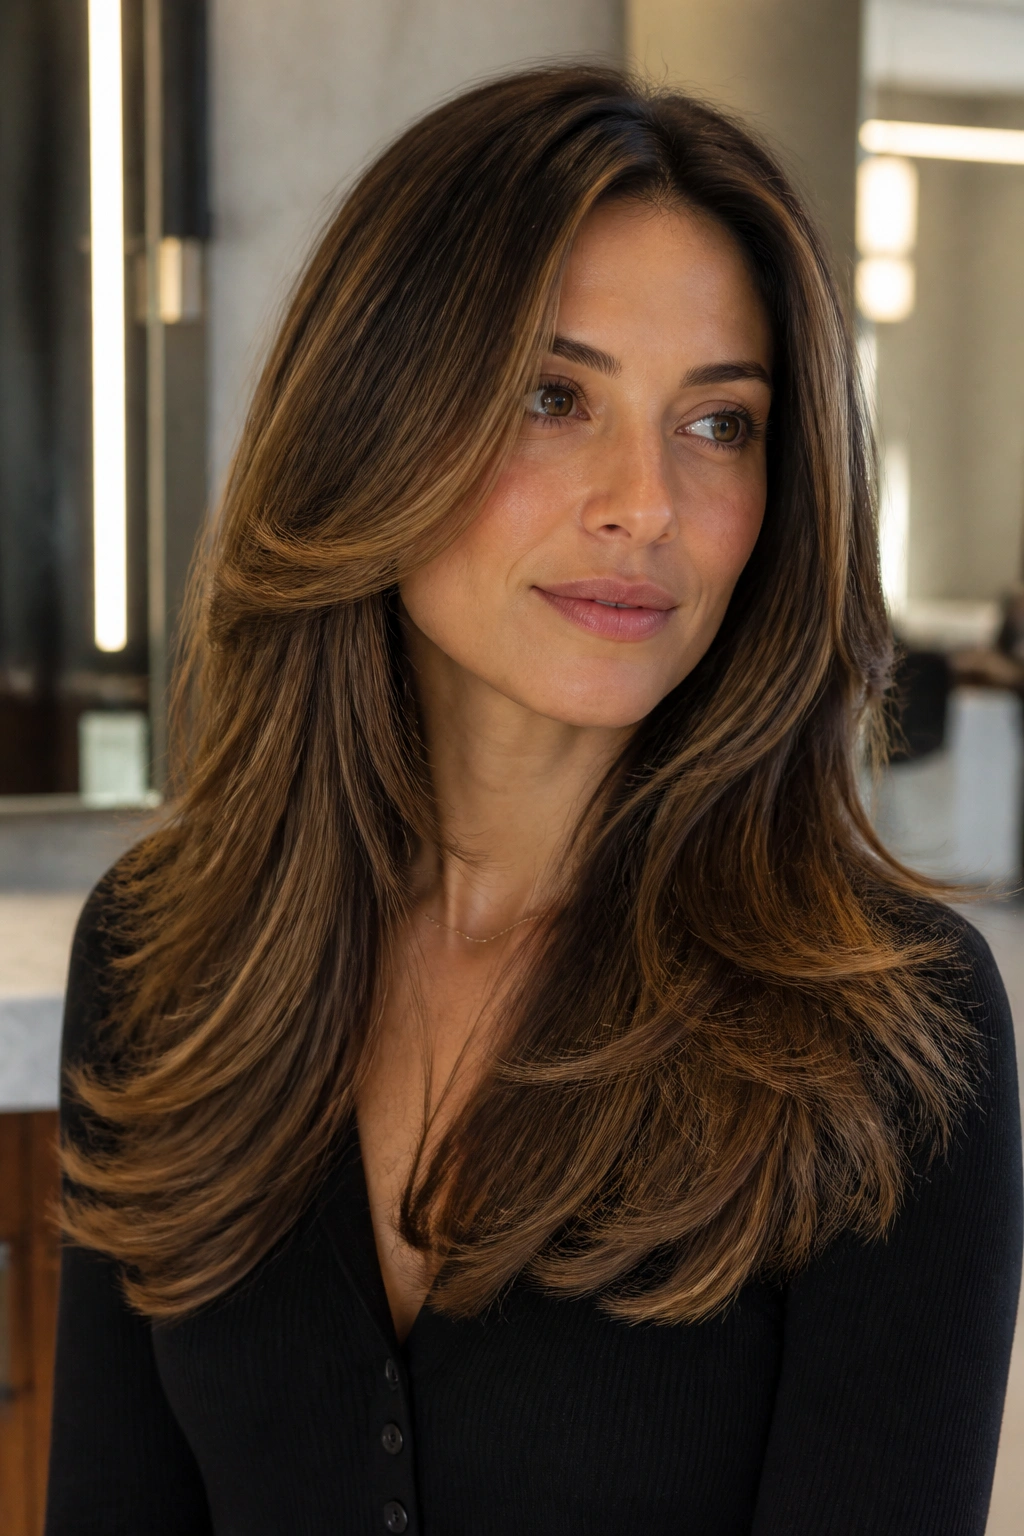
Some cuts are built for air-drying. This one is built for a round brush. You can still wear it natural, but the real point is movement at the front — that lifted bend that flips away from the face and gives long hair a salon-fresh shape.
The layers are usually cut to catch the brush at the cheekbones and collarbones. That means when you blow-dry, the front can arc out instead of hanging straight. It sounds small. It isn’t. A one-inch change in where the layer lands can decide whether the whole cut looks flat or lively.
Why Stylists Like This Shape
They can work with a 1.5- to 2-inch round brush and keep the front smooth while still making it move. The end result feels polished, but not stiff. Great for people who like a blowout and do not want to spend forty minutes on it.
Good Fit
- Straight or slightly wavy hair.
- Medium to thick density.
- Long hair that looks dull when it hangs flat.
If you want the front to flip out, ask for the shortest layer to graze the lip or chin, then taper softly into the lengths. That little detail changes the whole mood.
10. Collarbone Sweep With Blunt Ends
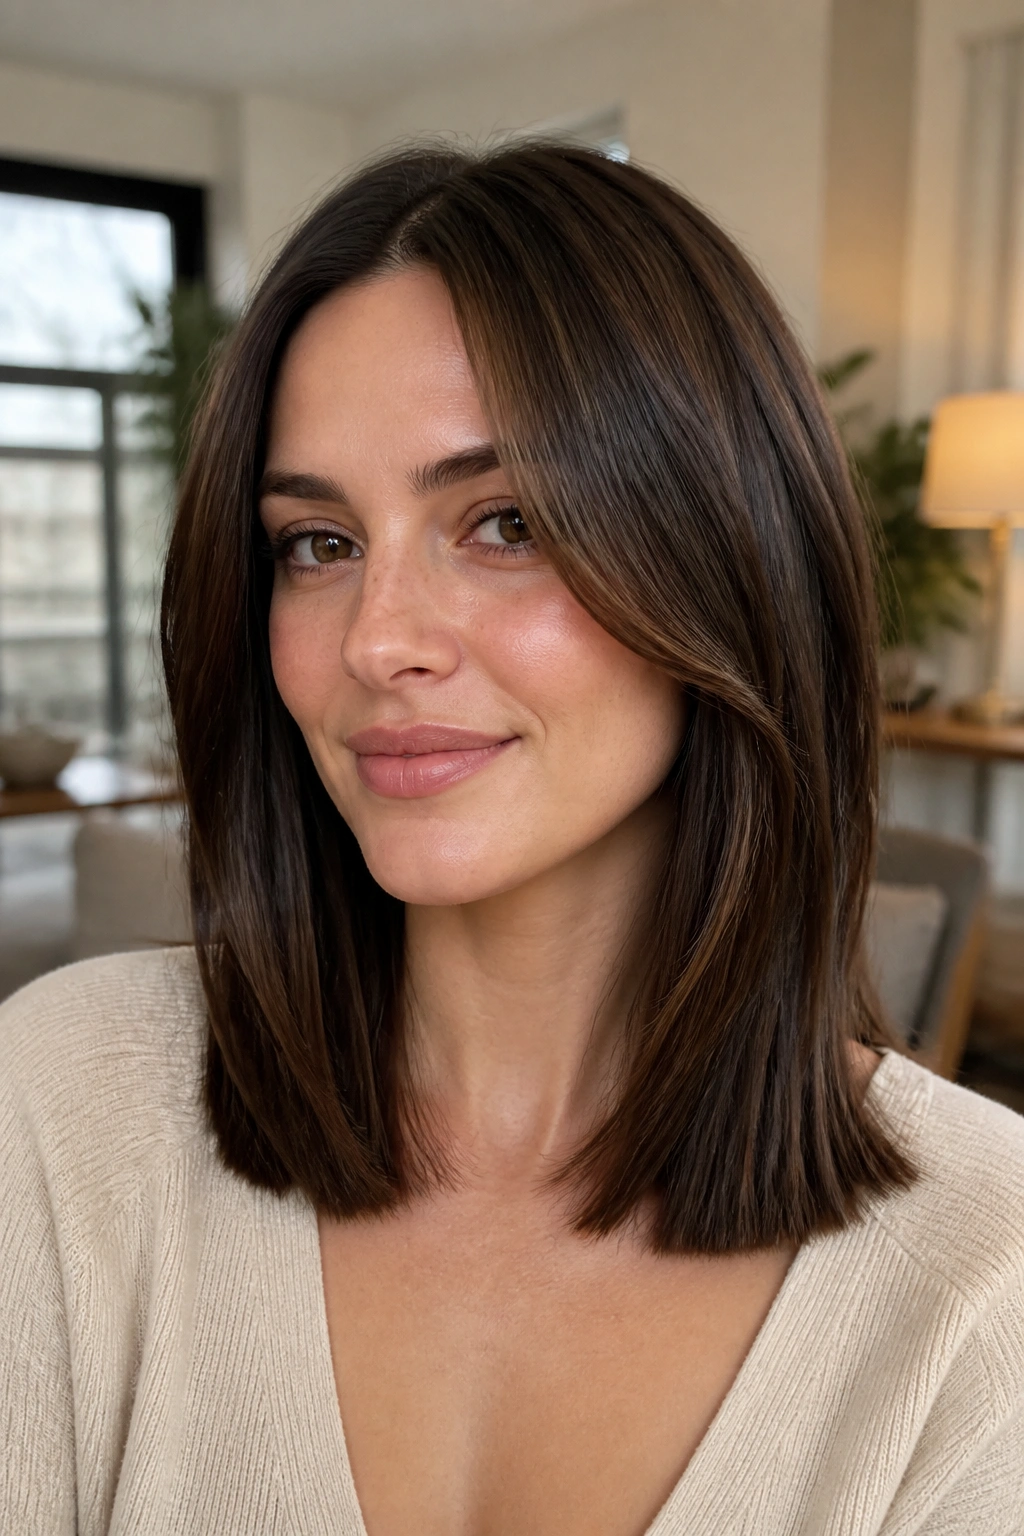
A blunt perimeter gives long hair weight. Add face-framing layers that sweep down to the collarbone, and you get a cut that feels solid at the bottom but soft around the face. I like this one for people who want structure more than fluff.
The blunt ends stop the hair from looking wispy. The front pieces keep the cut from feeling severe. It’s a good answer if you have fine to medium hair and you want the ends to look full in a ponytail, but the front to look a little more shaped when you wear it down.
This cut is also easy to live with. You do not need to style every section. A quick bend through the front and a smooth brush through the ends is enough most days. If you’re the kind of person who wants your hair to look tidy even when you barely touched it, this one deserves a serious look.
One thing I like here: it grows out gracefully. The front pieces can slide longer without ruining the whole line.
11. V-Cut Layers With Subtle Face Framing
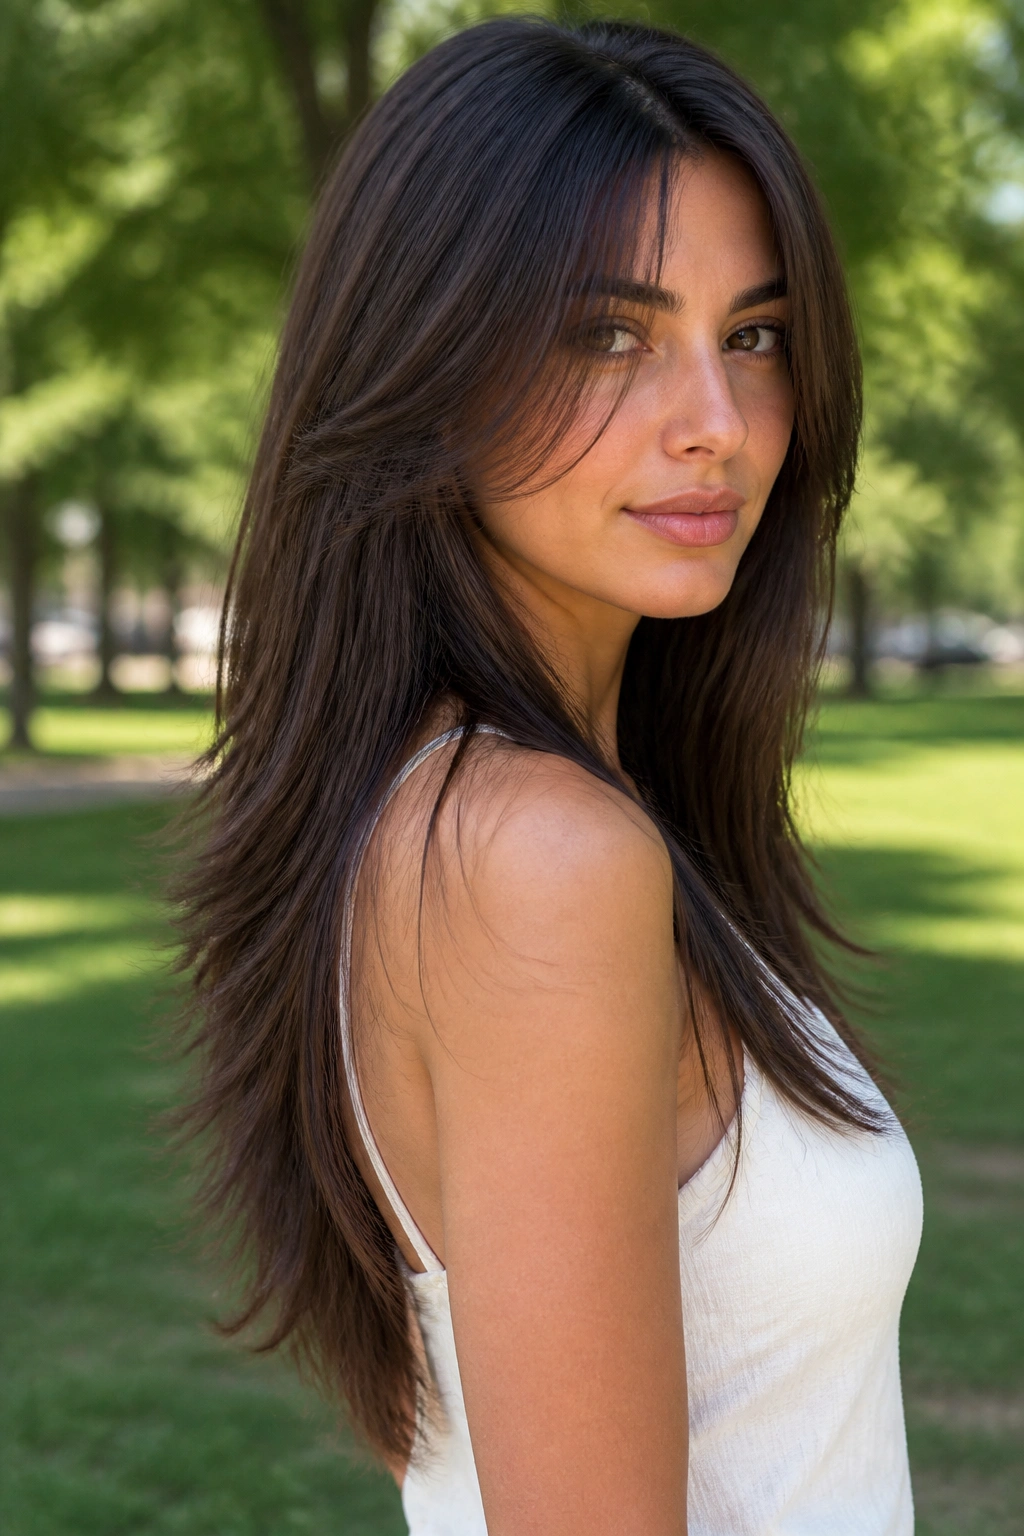
A V-cut is the sharper cousin of the U-shape. The back narrows more, which gives long hair a sleeker, more pointed outline. The face-framing pieces stay soft, so you get motion around the cheeks without losing the sharper finish through the back.
Unlike a rounded shape, the V draws the eye downward. That can be a smart move if you have thick hair and want the ends to feel lighter without giving up length. It also works well when the hair is very long, because the shape helps the bottom half of the cut look intentional instead of heavy.
The front layers should stay gentle. If they’re too short or too choppy, the whole cut loses its clean line. I’d keep the first face-framing piece around the lip or chin and let it angle into the rest. That way the front still softens the face, but the overall silhouette stays neat.
Best fit? People who like sleek ponytails, straight styles, and a little drama at the back without any fuss around the face.
12. Choppy Face Framing Layers For Thick Hair
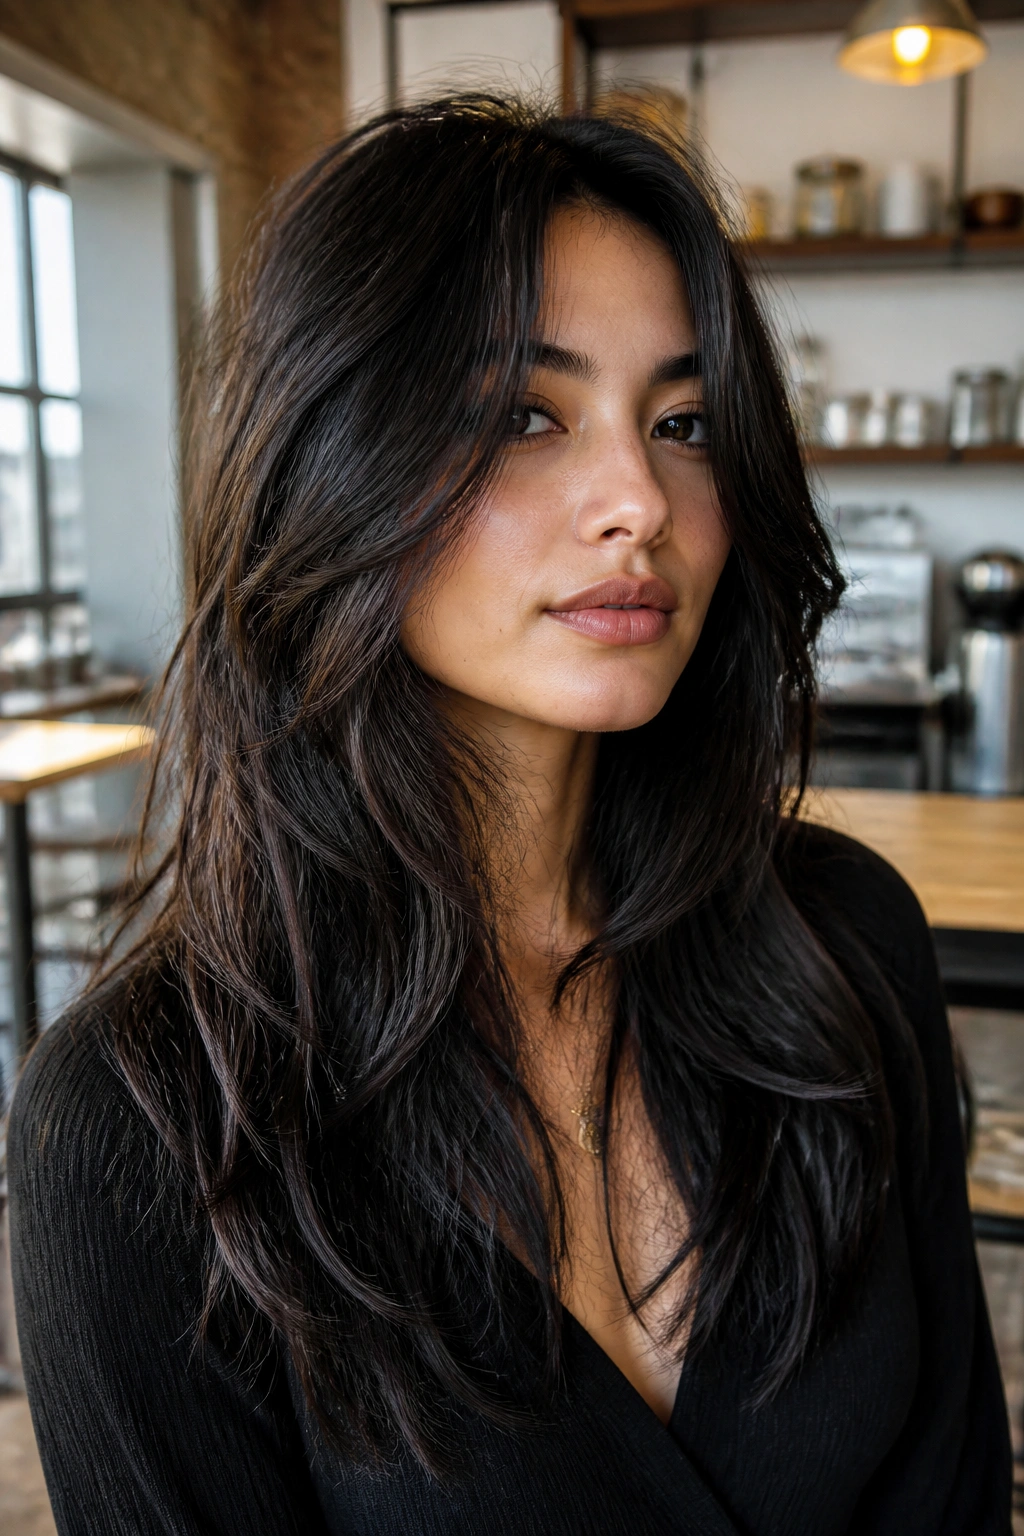
Thick hair needs room to breathe, and the front is where you can feel the weight first. Choppy face-framing layers remove that bulk without turning the whole cut into a feathered mess. The trick is to carve shape around the cheeks and jaw while keeping the lengths heavy enough to hang well.
What the Cut Does
It breaks up the front so the hair stops ballooning around the cheeks. That’s a big deal if your hair gets wide when it air-dries. The layers can start near the cheekbone and fall in uneven pieces toward the collarbone, which gives the cut some attitude and keeps it from feeling too sweet.
What to Ask For
- Point cutting instead of blunt chopping.
- Weight removal near the front, not all over the head.
- Layer pieces that move, but do not fray.
- Enough length left at the ends so the cut does not spring up too much.
This is a good choice if your hair takes forever to dry. Removing bulk around the face can shave a little time off the process, and that matters on a real morning, not a fantasy one. Thick hair can look gorgeous with shape. It just needs a stylist who knows where to take the weight out.
13. Curly Layers With Front Definition
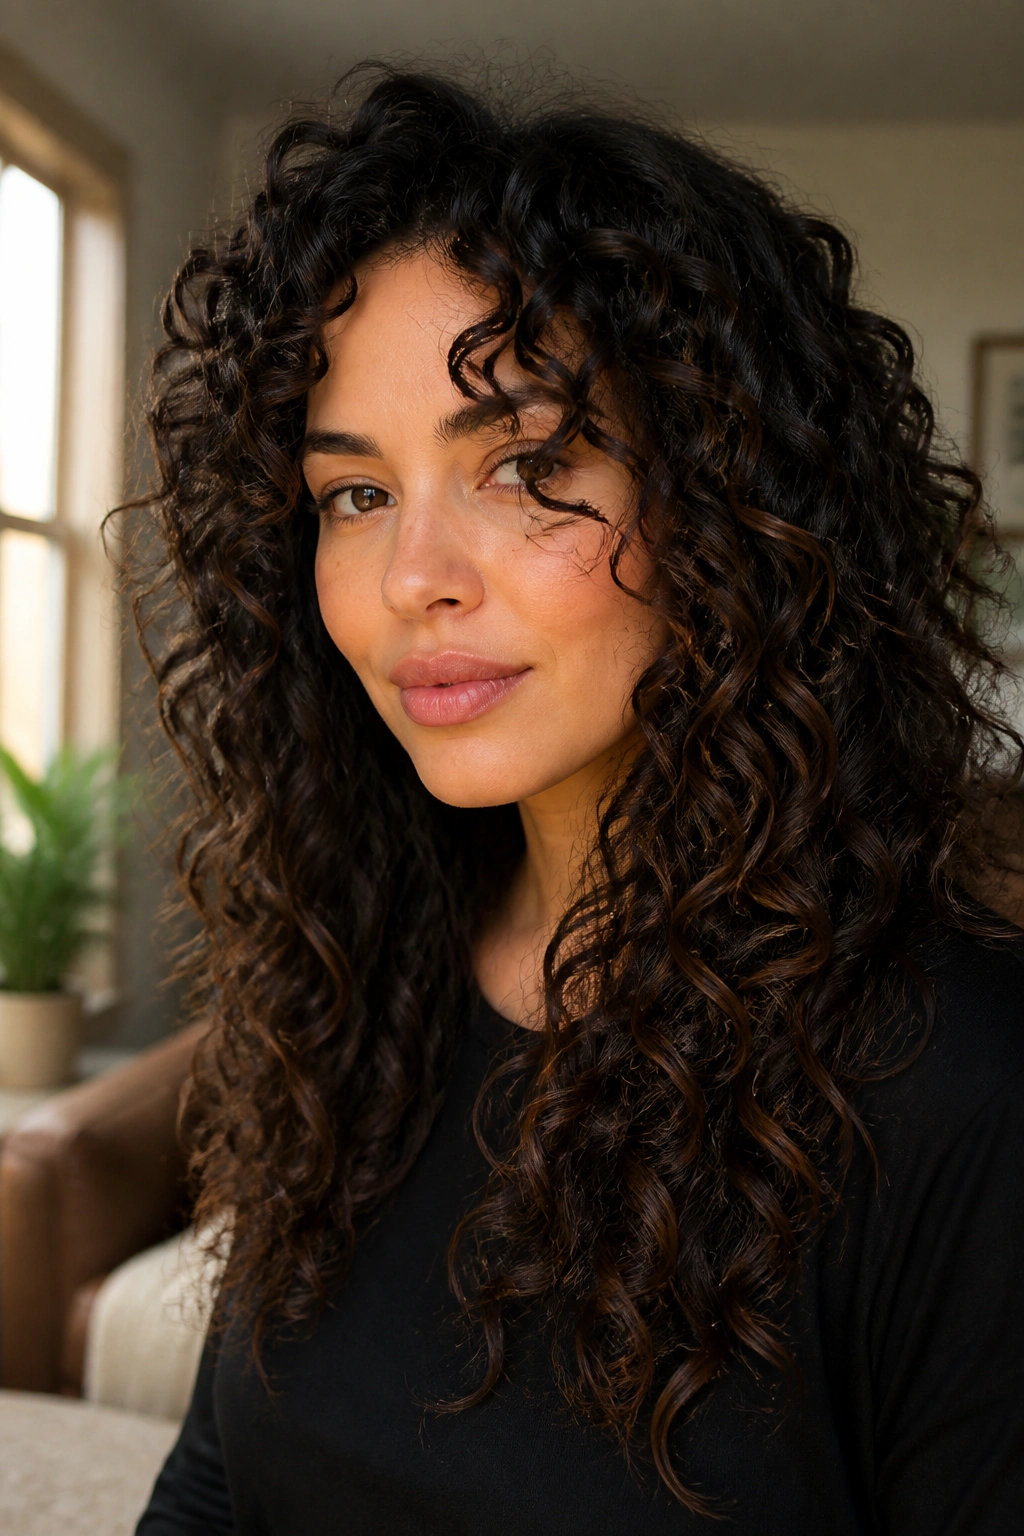
Why do some curly cuts hide the face instead of framing it? Usually because the front is cut like straight hair. Curls need room to spring, and the face-framing pieces have to respect that pattern instead of fighting it.
A good curly layer cut starts with the curl shape, not just the length. The front pieces should fall where the curls naturally sit when dry, which might be higher than you expect. If the curls shrink two inches or more, the shortest layer needs to be planned for that shrinkage or it lands too high and feels awkward.
How to Wear It
- Diffuse on low heat so the front keeps its shape.
- Use a curl cream with enough slip to stop frizz at the cheek.
- Pin the front away from the face while it cools if you want more lift.
- Trim often enough to keep the front pieces from collapsing into the rest.
Curly face-framing layers are one of those cuts that look better when they’re tailored in person, not copied from a photo of straight hair. Curls have their own opinions. You have to listen.
14. Razor-Soft Front Pieces For Straight Hair
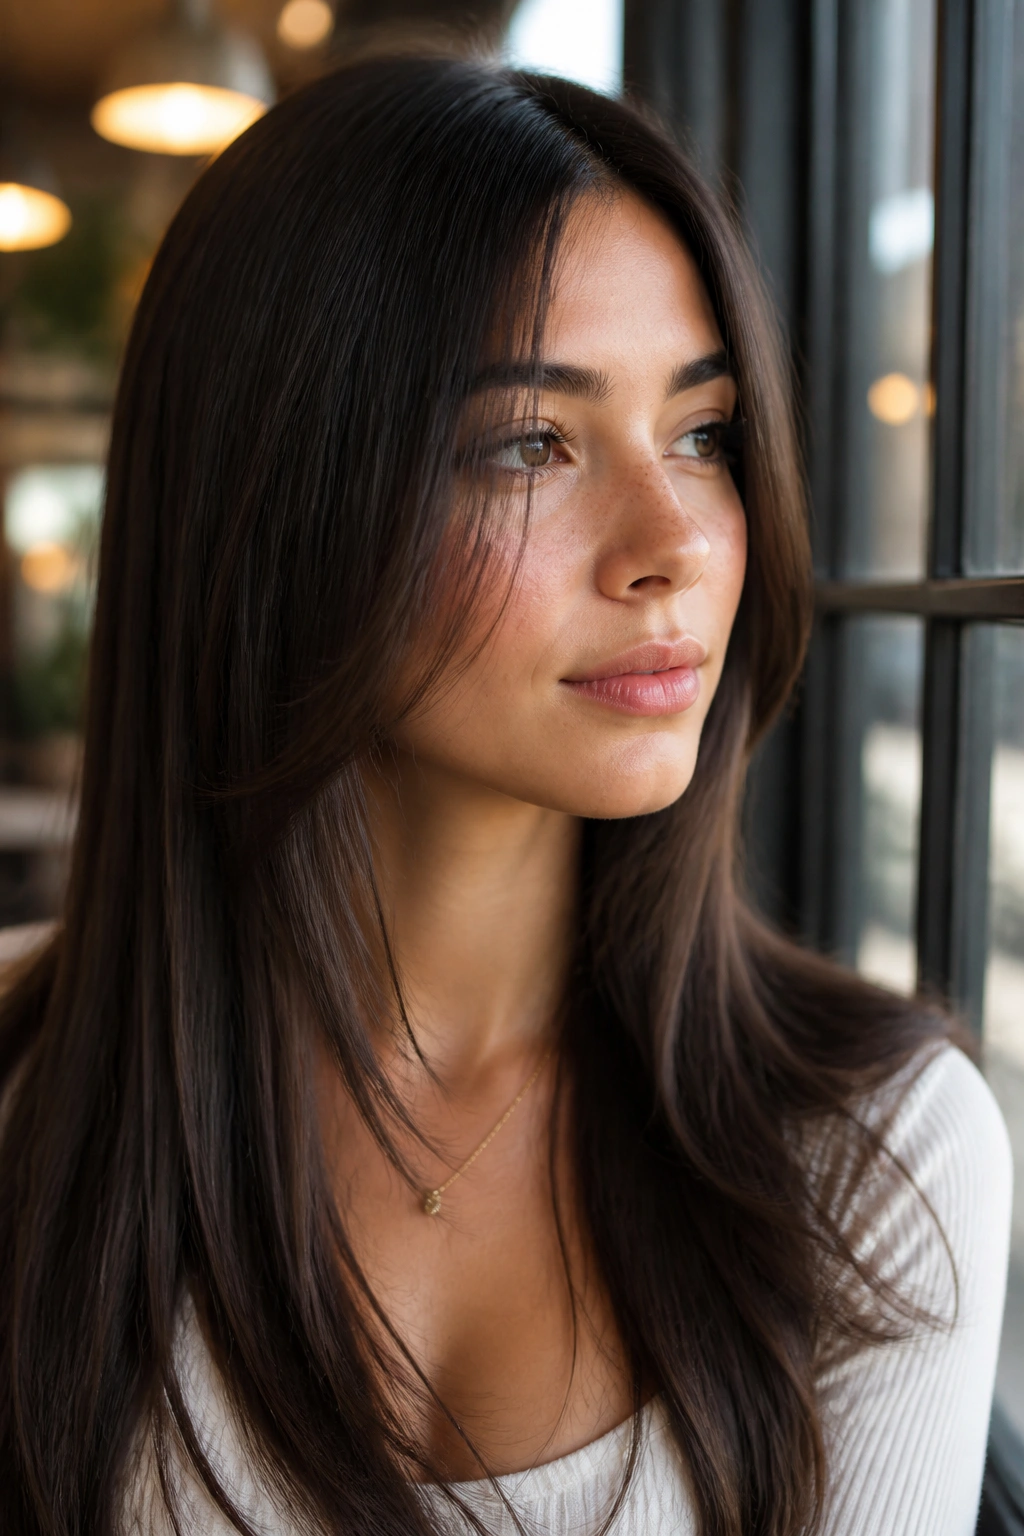
Straight hair can be stubborn about movement. It likes to hang. It likes to show every line. Razor-soft front pieces solve that by taking the edge off the front so the hair bends away from the face instead of sitting in one blunt sheet.
The effect is subtle but useful. Around the cheek and jaw, the ends look softer and less blocky. On long hair, that change is enough to make the whole cut feel lighter. A razor or slide-cut finish can also prevent the front from looking too chunky when the hair is tucked behind the ears.
That said, this technique is not for damaged ends. If the hair is brittle or split, a razor can make the damage more visible. Healthy hair handles it much better. Clean lines matter here, so ask for a stylist who likes precision, not random texture.
The nicest version of this cut usually starts around the cheekbone and drifts down to the collarbone. It’s simple. That’s the charm. No heavy layers. Just a front that moves.
15. Long Wavy Hair With Internal Layers
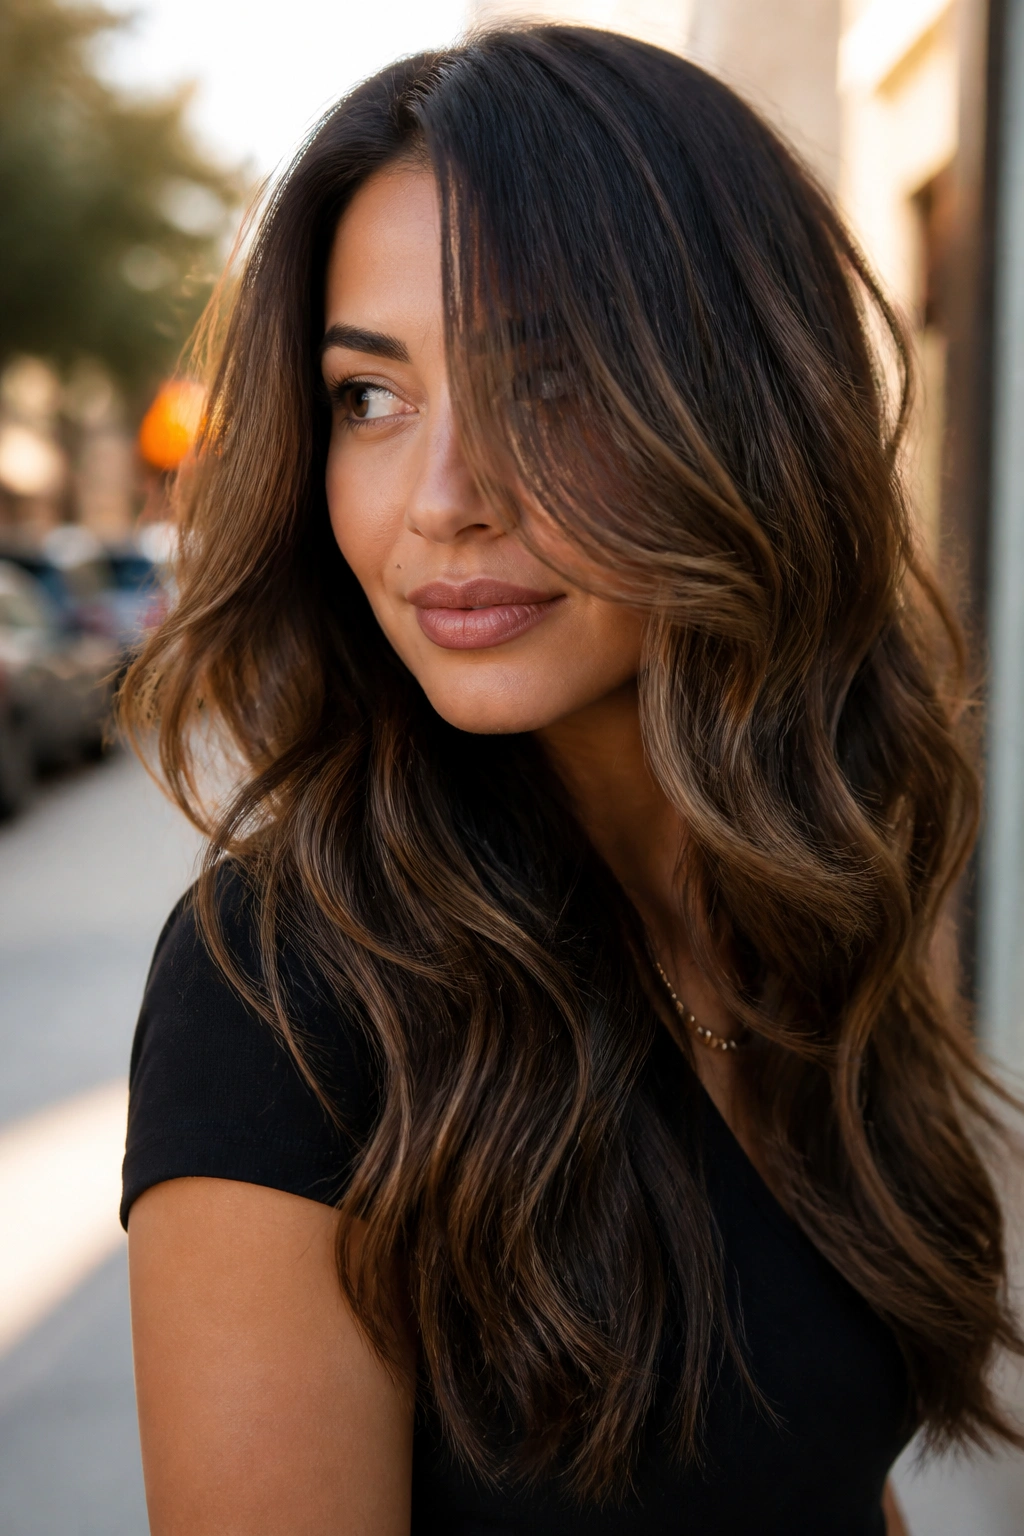
Wavy hair can carry a lot of shape without looking busy, and internal layers are a smart way to do it. The outside line stays smooth, while the inside layers keep the wave from getting heavy in the middle. You end up with movement that shows up when the hair sways, not when it’s sitting still.
The face frame should be soft enough to blend into the wave pattern. If the shortest pieces are too short, the waves can spring out in a weird way near the cheeks. Keep the front more gradual. Let the hair shape itself.
That’s one reason I like this cut for people who air-dry often. A light cream, scrunched through damp hair, is usually enough. Too much product weighs the pattern down and makes the layers collapse into each other. Less is better here.
The whole point is motion with a smooth outline. You want the hair to move when you turn your head, not look chopped into pieces every time the light hits it.
16. Dense-Hair De-Bulking With Long Front Frame
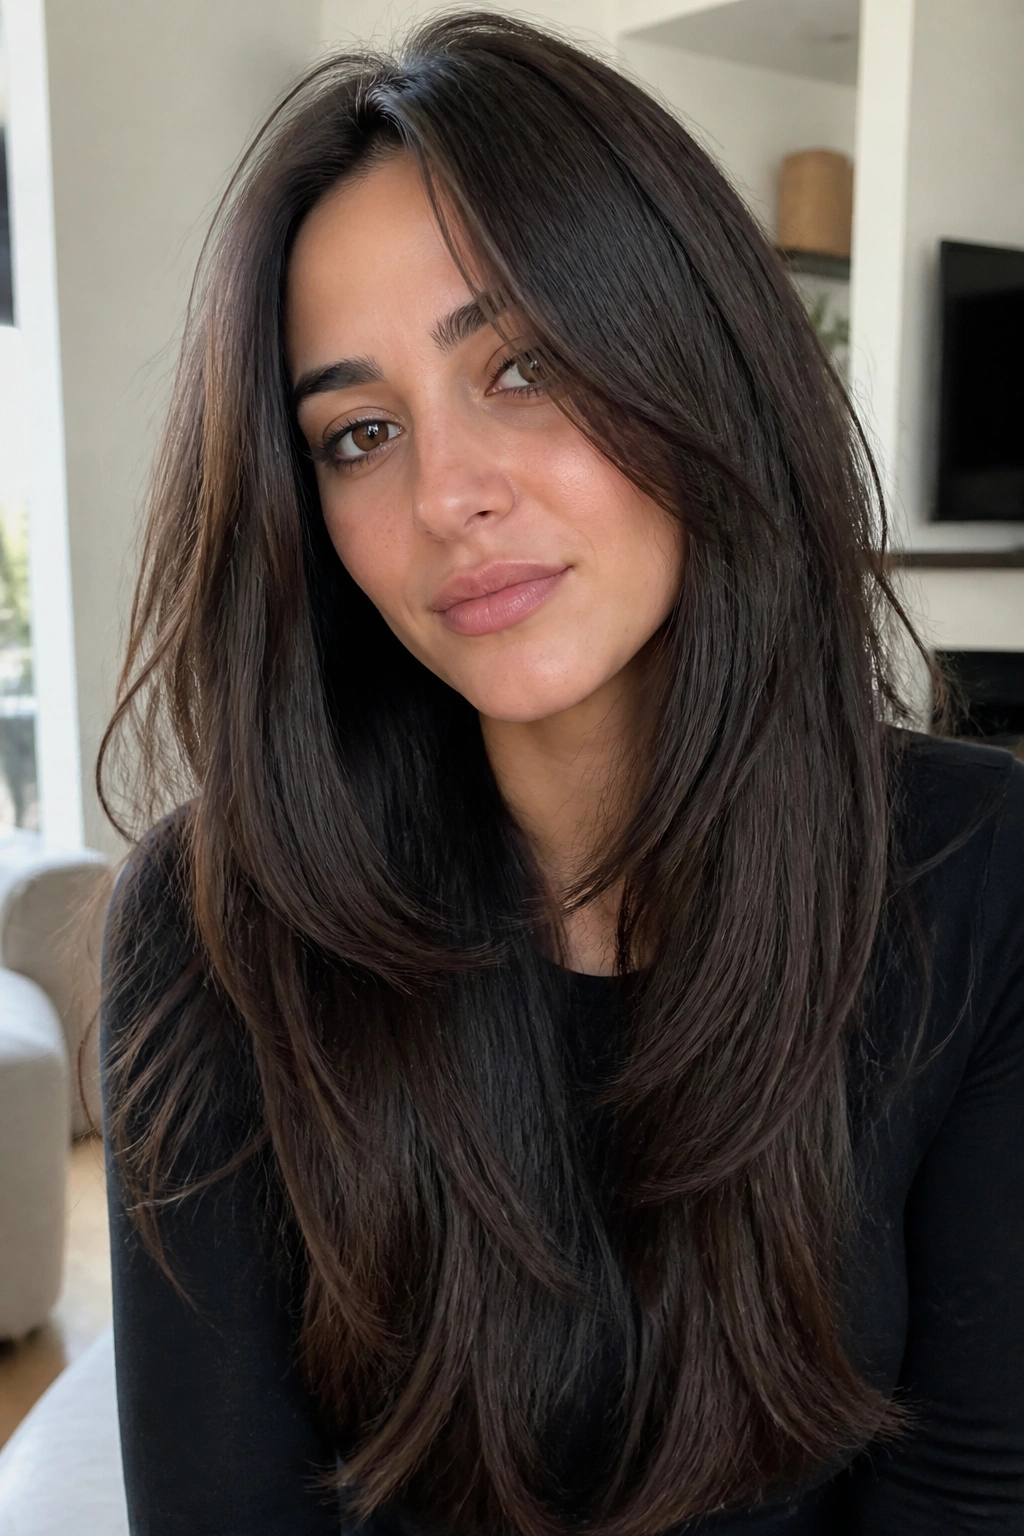
If your hair is dense, the wrong layers can make it puff out like a triangle. That’s why I prefer long front framing with careful de-bulking through the interior instead of aggressive short layers everywhere. The cut stays heavy enough to fall well, but the front stops feeling like a wall.
Unlike feather-heavy cuts, this one keeps a stronger perimeter. The stylist removes weight where the hair builds up — often under the crown and through the mid-lengths — while leaving the front pieces long enough to soften the face. That balance matters if your hair expands the second humidity shows up.
Dense hair usually dries slower, too. A cleaner interior can help. Less bulk means more airflow, and that means less time under the dryer or diffuser. Not glamorous. Useful.
This is a good choice if you want your hair to still look thick in a braid, a ponytail, or a low twist. The face frame does the cosmetic work. The internal shaping does the practical work. Both matter.
17. Whispery Layers For Fine Hair
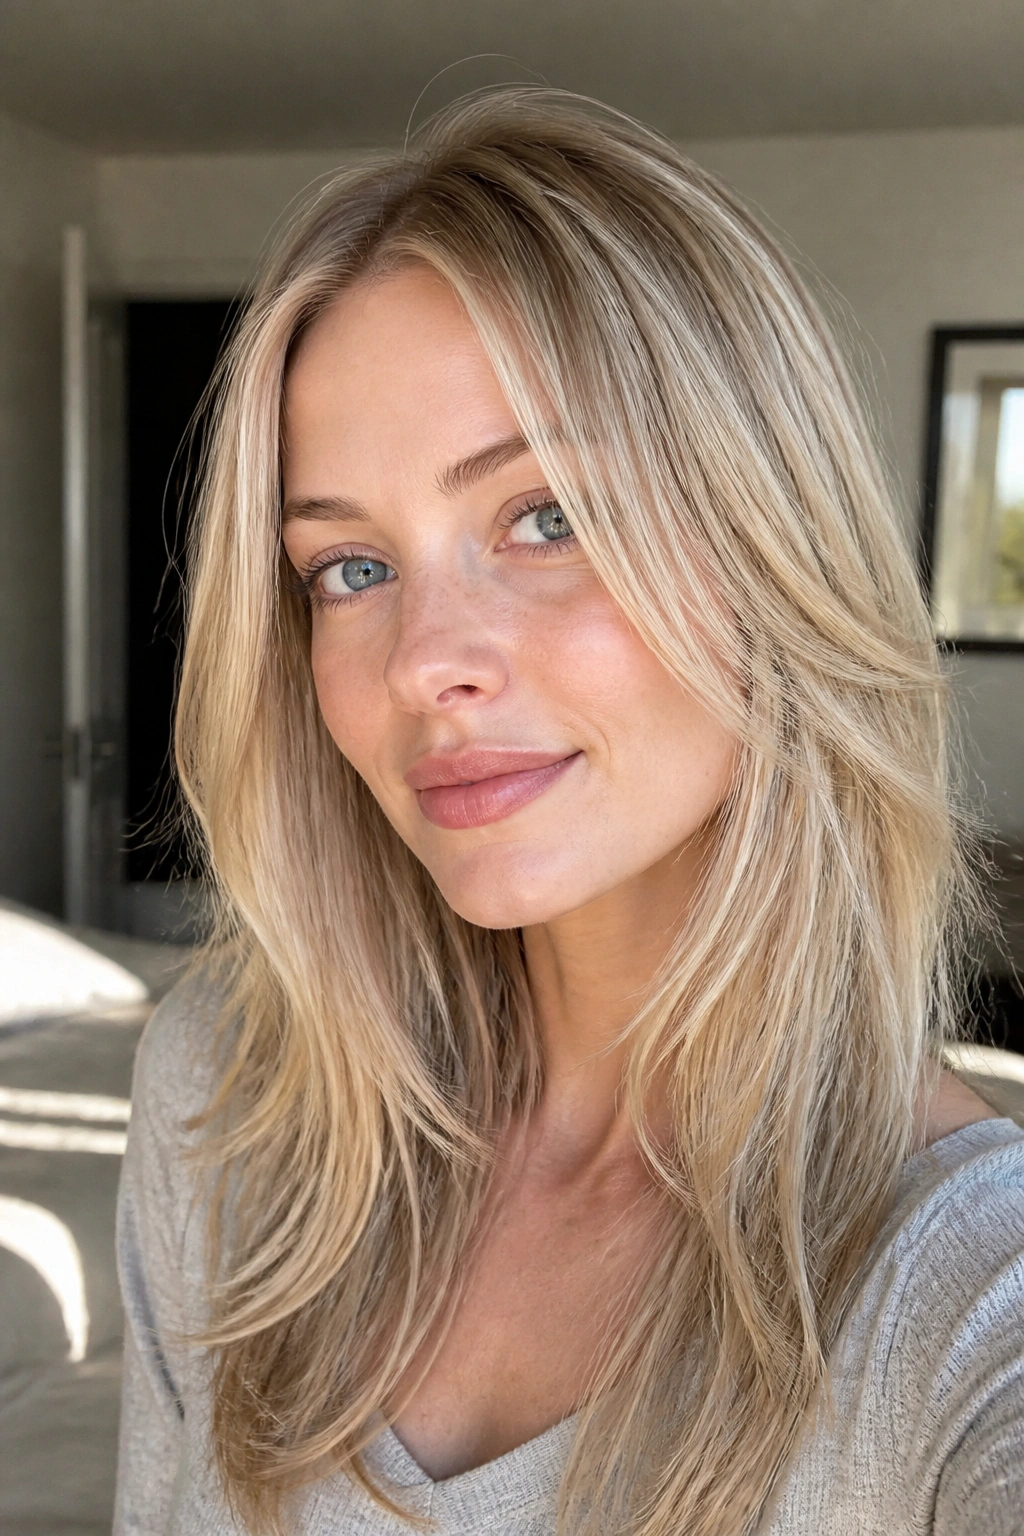
Fine hair needs restraint. Too many layers can make it look thin at the ends, which is the last thing anyone wants when they’re trying to keep long hair looking full. Whispery face-framing layers give shape at the front without eating the density off the bottom.
The shortest pieces should stay long enough to keep some weight. I usually like this style best when the front begins around the chin or a touch below, with the back left fairly solid. That keeps the hair from separating into little strings. A soft blow-dry at the roots helps a lot, too. Fine hair often needs lift, not more cutting.
Good Styling Moves
- Use mousse at the crown, not just oil on the ends.
- Blow-dry the front away from the face for 30 to 45 seconds each side.
- Keep the layers smooth instead of piecey.
- Skip over-texturizing sprays that dry the hair out.
This cut is quiet, but it works. If you want movement without sacrificing the appearance of fullness, it is one of the safer choices.
18. Wolf-Cut-Inspired Front Layers
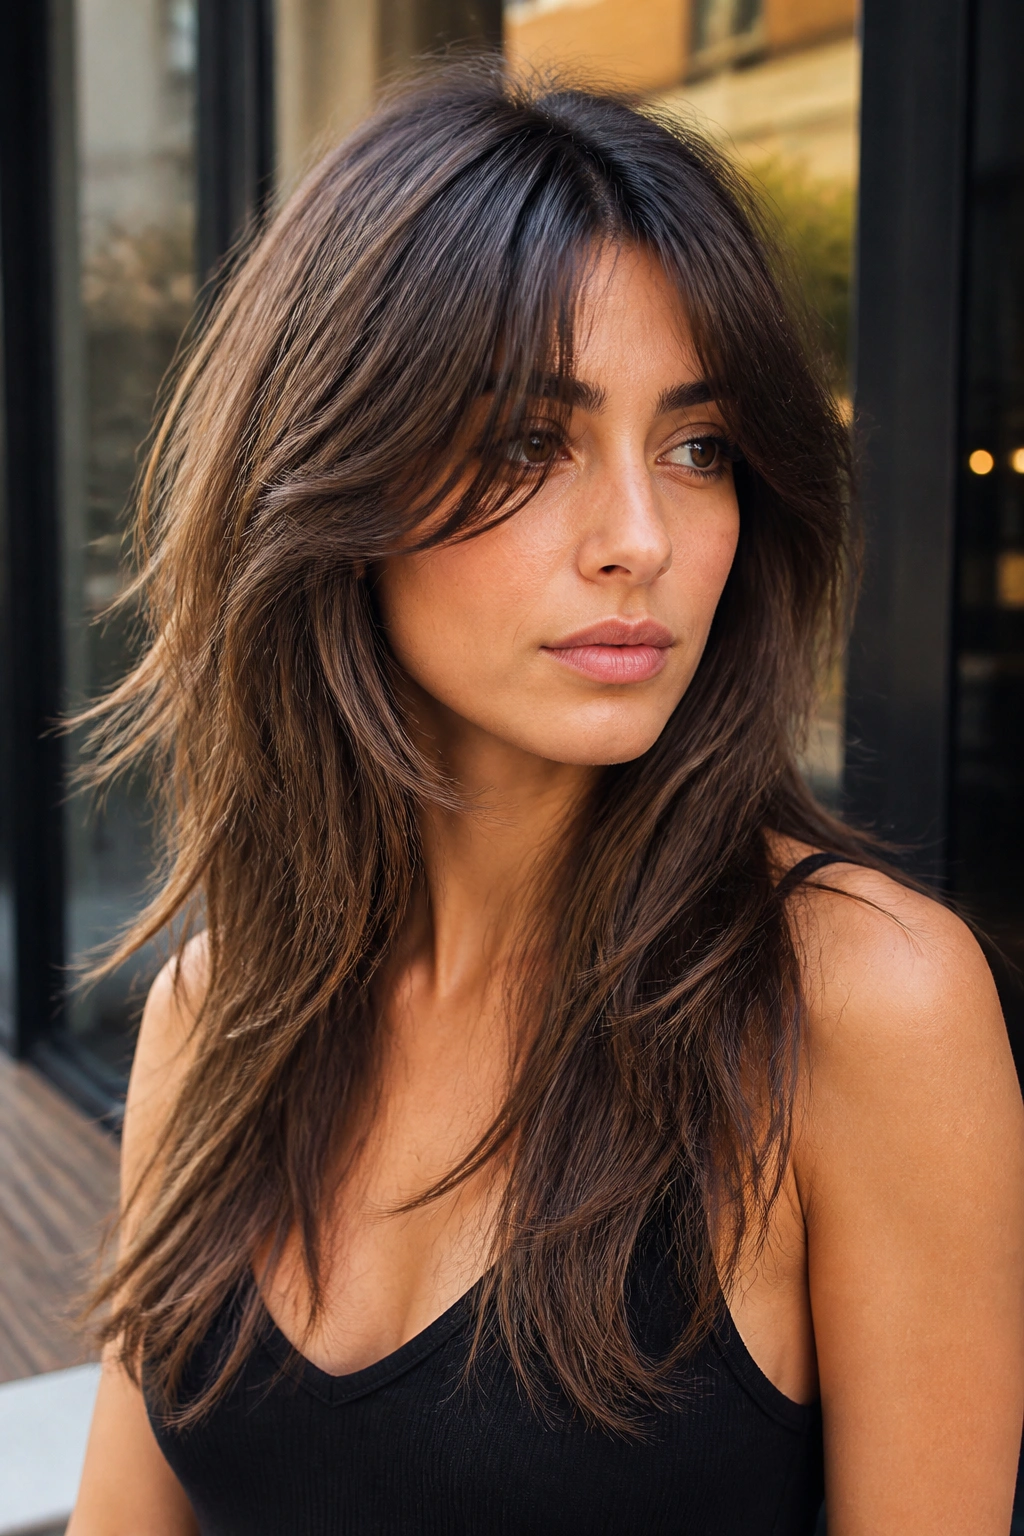
Can you borrow a little edge without signing up for a full shag? Yes. A wolf-cut-inspired front frame gives you some of that lifted, slightly wild shape near the face while keeping the length long and wearable.
The difference is in the blend. A true wolf cut can get choppy fast. This version stays softer through the front, with the shortest pieces around the cheekbone and longer pieces melting into the chest and back. It feels cooler than a classic layered cut, but not so extreme that you’ll hate it three weeks later.
This works especially well if your hair has some natural wave or you like to rough-dry it and leave it alone. The texture does a lot of the work. If your hair is pin-straight, you can still wear it, but you’ll probably need a little bend with a flat iron or a quick pass of a curling wand.
It is a good pick for anyone who wants the hair to have personality near the face. Not polished. Not precious. Just a little more alive.
19. Bang-Growing-Out Layers
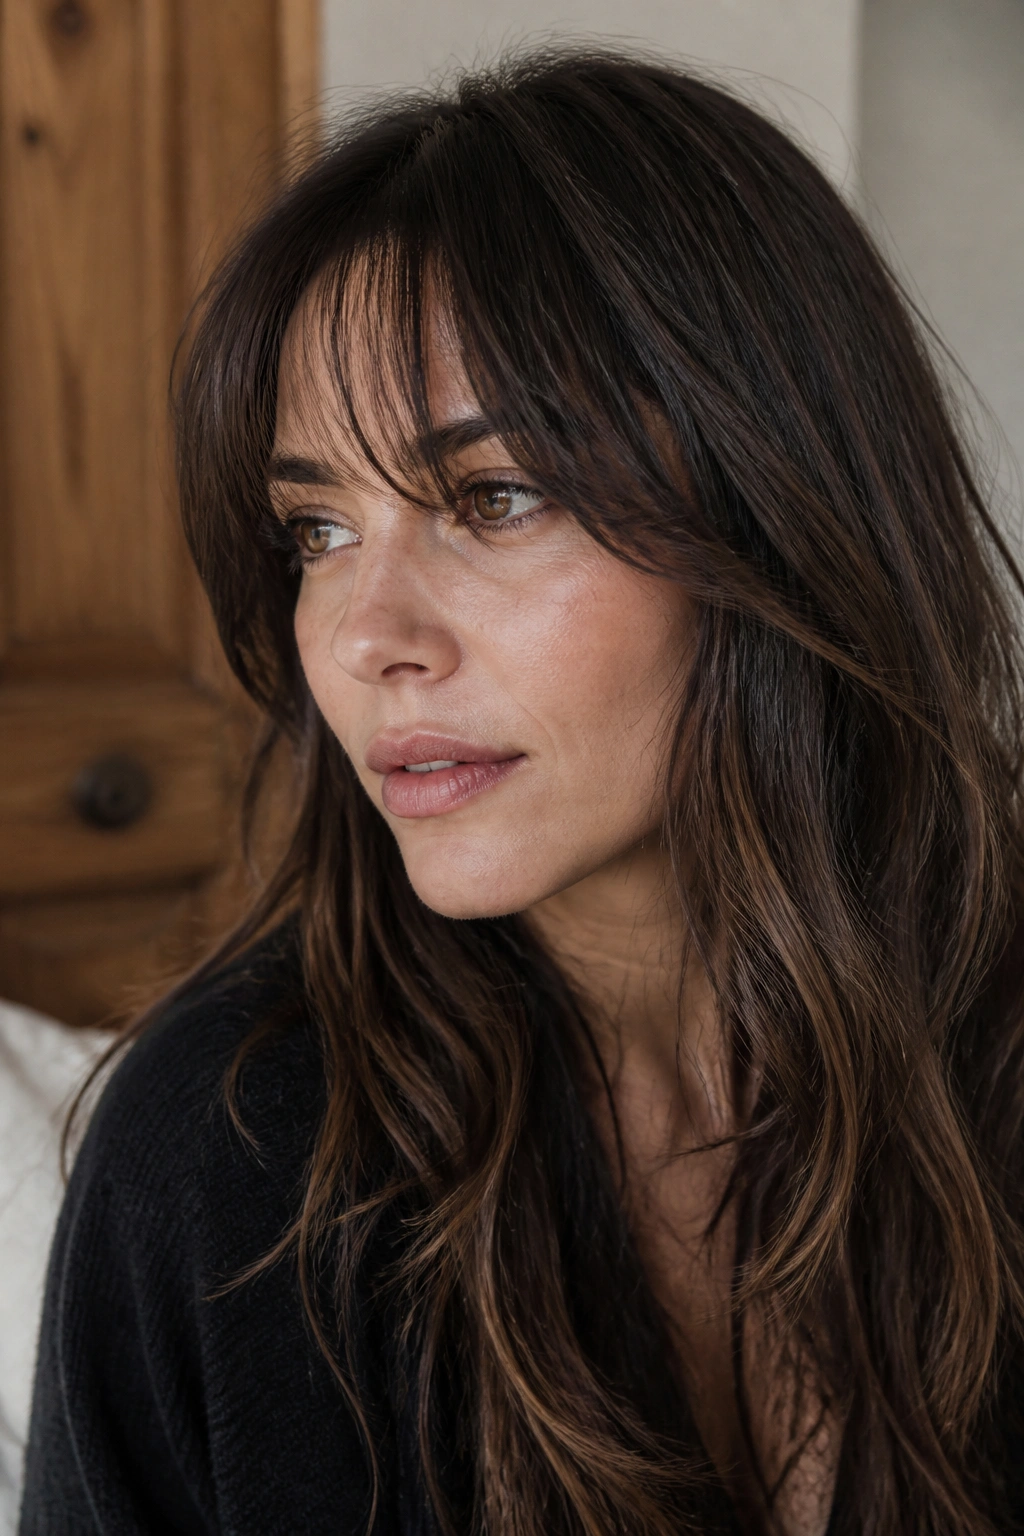
Growing out bangs can be miserable if the rest of the haircut does not help. The fringe ends up sitting in that awkward half-length stage, and the front looks split between two different haircuts. Bang-growing-out layers solve that by blending the old fringe into face-framing pieces on purpose.
The Shape to Ask For
Keep the shortest section around brow or cheekbone level, then ask for soft angles that move into the rest of the hair. The goal is to make the old bangs look like part of the design, not an accident. If the hair is thick, the front can be thinned lightly at the ends so it stops puffing out on the sides.
Why It Makes Life Easier
The front can be worn swept aside, parted in the middle, or tucked back without looking choppy. That alone is a relief. You can let the bangs keep growing while still having a cut that looks finished.
If you’re in the middle of this awkward stage, resist the urge to keep trimming the bangs into the same short shape. That usually just prolongs the mess. Better to let the layers do the blending for you. It feels slower for a while, then suddenly it does not.
20. Jaw-Skimming Maintenance-Light Frame
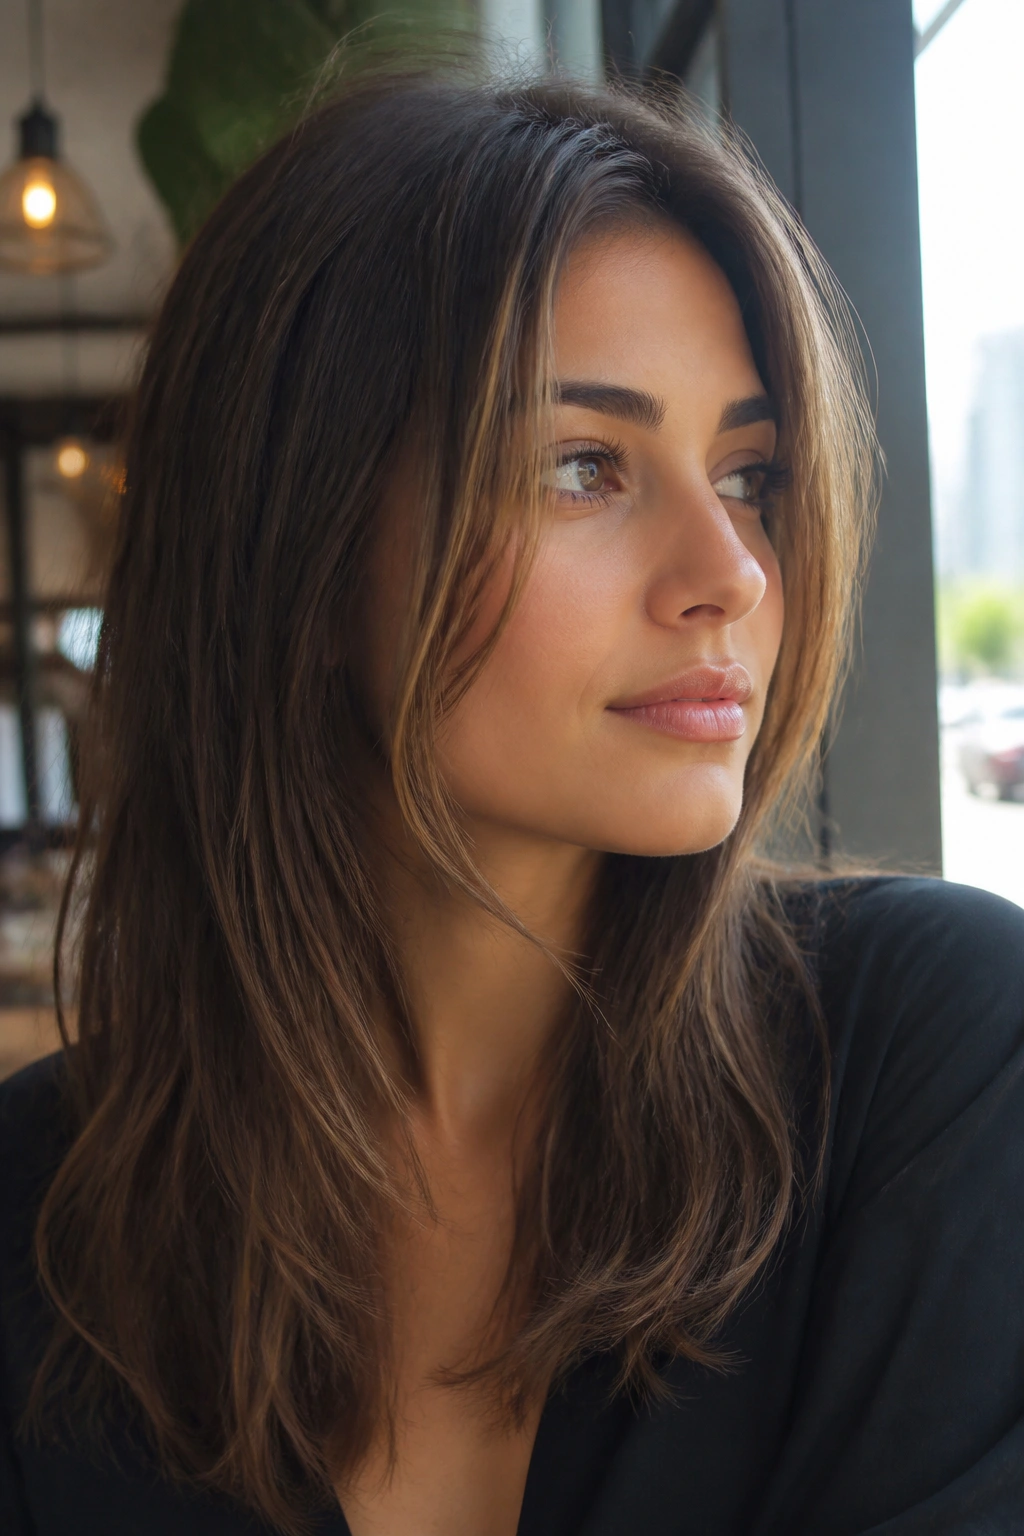
If you want shape but do not want to think about your hair every morning, this is the cut I’d start with. The front pieces sit around the jaw or just below it, which gives the face some structure without demanding constant styling. The rest of the length stays long and easy.
This shape grows out well because the shortest pieces are not so short that they turn strange fast. That matters. A lot of layered cuts look fine on day one and annoying by week six. A jaw-skimming frame usually keeps its line longer, especially if the back layers are kept soft and minimal.
The style works on straight, wavy, and even slightly curly hair, as long as the front is not overcut. It’s one of those rare cuts that can look tidy with a quick brush-through and still feel intentional when worn loose. You can tuck it behind the ears, clip back the front, or leave it alone and let the shape do its thing.
For people who wear long hair often but do not want a fussy routine, this is the one I’d trust first.
