



The right face-framing haircut for curly hair can change the whole mood of a head of curls. A blunt perimeter can make even pretty curl patterns feel heavy around the cheeks, while the right front layers can lift the eyes, soften the jaw, and make the whole cut look intentional instead of built by accident.
Curly hair does not all sit the same way, and that’s the part people forget. Density matters. Shrinkage matters. So does where your curls break open, where they clump, and whether your front pieces fall forward or bounce out to the sides like they’ve got opinions of their own. A shape that looks airy on one head can turn boxy on another in a hurry.
That’s why the smartest curly cuts are usually the ones that respect the curl pattern before they try to decorate it. Dry cutting helps. So does starting the face frame where the curl actually lands, not where a straight strand would land if you ironed it flat. The front of the cut should do a job: open the face, keep the line soft, and make the curls around your cheeks look like they belong there.
1. Soft Curtain Bangs for Loose Curls
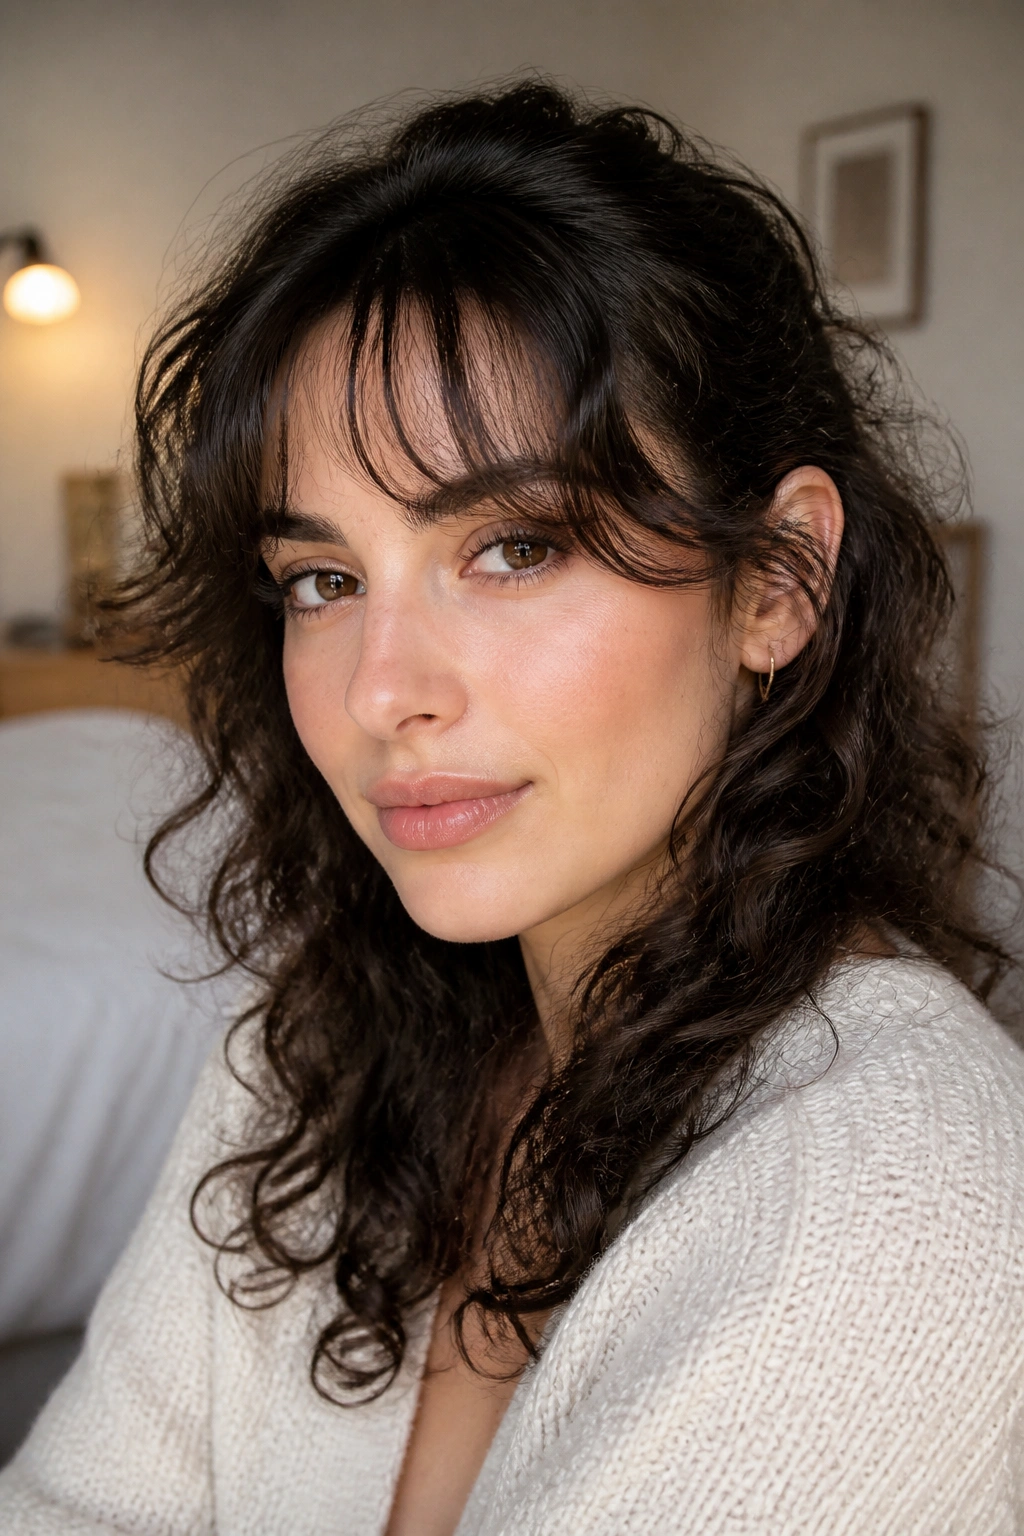
Soft curtain bangs are the easiest on-ramp if you want face-framing movement without chopping off a lot of length. They split the face instead of boxing it in, which is a big reason they keep showing up on curls that sit in the wavy-to-loose range.
Why They Work
The shortest point usually lands somewhere between the bridge of the nose and the upper lip when the hair is dry, then the pieces angle down toward the cheekbones. That shape gives you a little lift near the eyes without the hard line that straight bangs can create.
Loose curls love that kind of bend. They can fall forward, separate a little, and still read as soft. If your curls are thicker, ask for the side pieces to stay long enough to tuck behind the ear on day two.
- Best for 2b to 3a curl patterns
- Shortest point: nose bridge or upper lip when dry
- Side pieces: cheekbone to jawline
- Ask for point cutting, not a blunt chop
My favorite move: keep the center just long enough to skim the lashes when the hair is dry. It looks shorter once the curl springs up, and that tiny buffer saves you from an accidental baby bang.
2. Chin-Length Curly Layers

A chin-length frame can do more than a full bang ever will. It pulls the eye upward, gives the front of the haircut a clean shape, and takes weight off curls that otherwise sit like a triangle around the jaw.
That chin point matters. When the front pieces land right there, the face gets a little opening on both sides, which is especially nice if your curls puff at the cheeks or if your jawline tends to disappear under too much width. I like this length on round and square faces for that reason.
Keep the cut softly layered, not sliced into a hard edge. You want movement around the mouth and chin, not a shelf.
A good stylist will usually carve the front pieces just below the cheekbone and let them fall into the chin zone in a curve. That one change can stop the haircut from looking bottom-heavy, which is a real problem with curly bobs that were cut too straight.
3. The Curly Shag with Face Framing Pieces

Why do shags keep working on curly hair? Because curls hate being forced into one heavy shape, and the shag gives them room to breathe.
The crown gets a little lift, the sides lose some bulk, and the front pieces can live in that sweet spot between cheekbone and lip. The result is piecey rather than puffy, which is a much nicer place for curls to land. If you want a cut that feels lived-in instead of overly polished, this is one of the best bets.
How to Ask For It
Tell your stylist you want the fringe to blend into the front layers, not sit like a separate curtain. Ask for the crown to stay lighter than the perimeter, and for the ends to be textured with scissors or point cutting rather than shredded with a razor.
- Crown shorter than the sides
- Front pieces around cheekbone or lip length
- Soft, blended ends
- Enough density left at the perimeter so the shape holds
The shag can look wild if it’s over-thinned. That’s the catch. Leave enough hair in the front to keep the frame visible.
4. Long Layers Starting at the Cheekbone
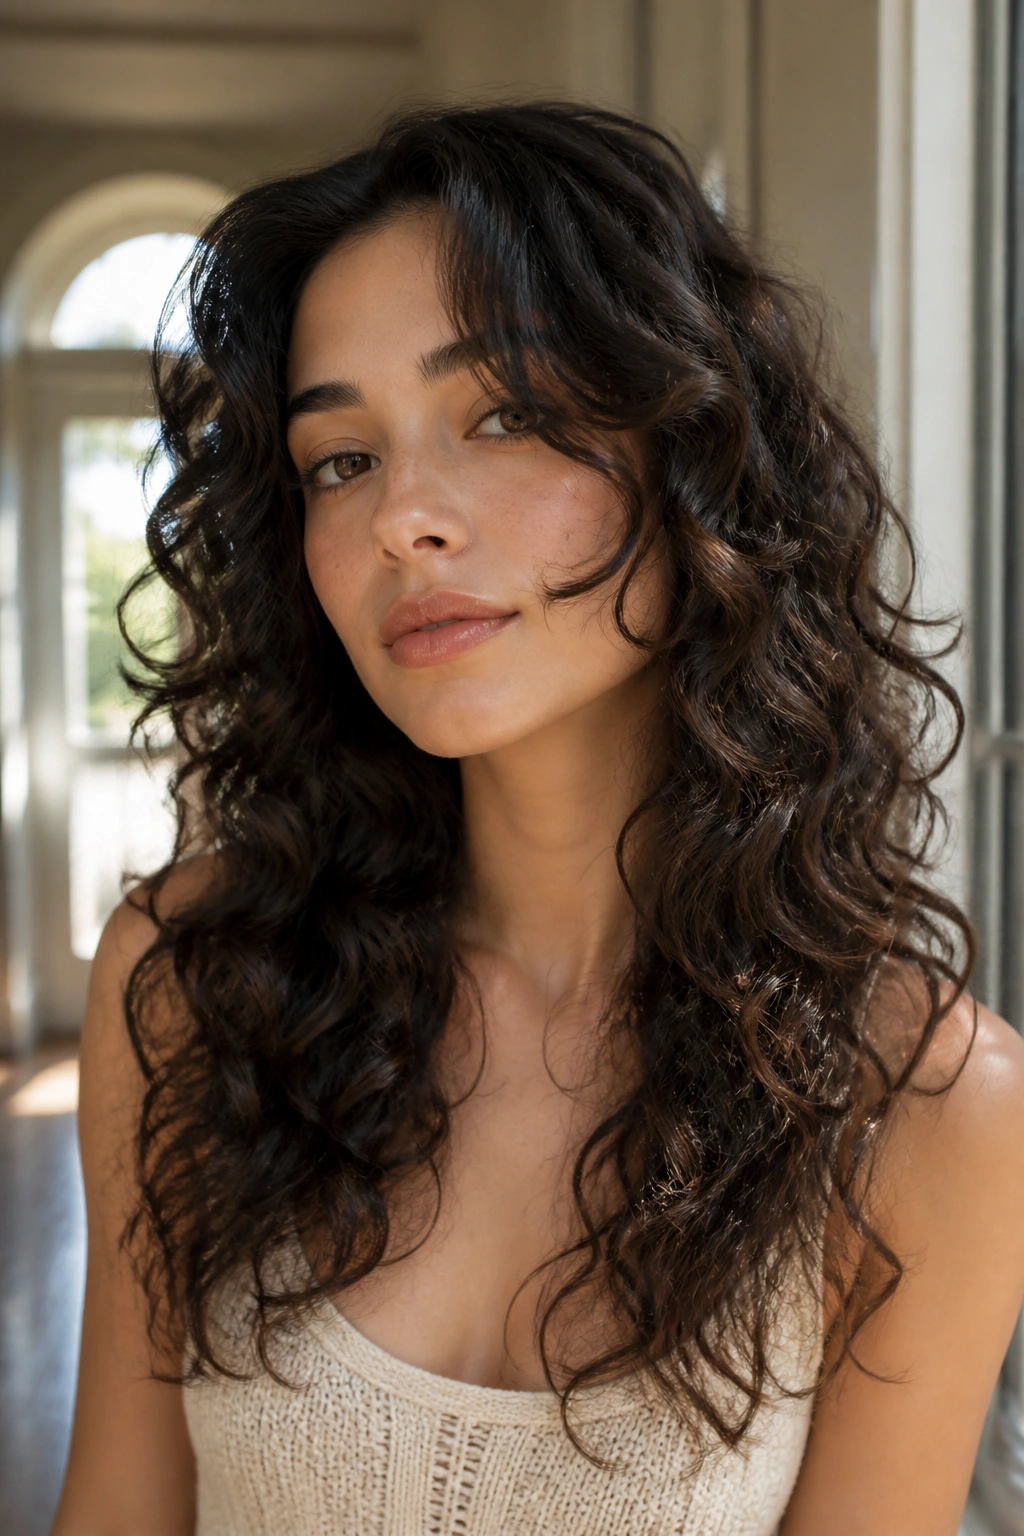
If your curls live past your shoulders, cheekbone-starting layers can make the whole cut feel lighter without sacrificing length. The face gets movement right where it needs it, and the rest of the hair still hangs long and lush.
I reach for this shape when someone says they want a change but not a dramatic one. The front pieces create the change. The back keeps the length. It’s clean, and it’s sneaky in the best way.
What to Ask For
Ask for the shortest front layer to begin around the cheekbone, then keep the lower layers long enough to preserve weight. Point cutting helps the pieces lie softer against the face, especially if your curls are springy or tight.
- Best for medium to thick curls below the collarbone
- Shortest front piece: cheekbone area
- Longest layer: keep the bottom length
- Style with a diffuser on low if the front needs help settling
Flat front layers are the thing to avoid here. They can make the cut feel dragged down instead of lifted.
5. Rounded Afro Layers with Face Framing
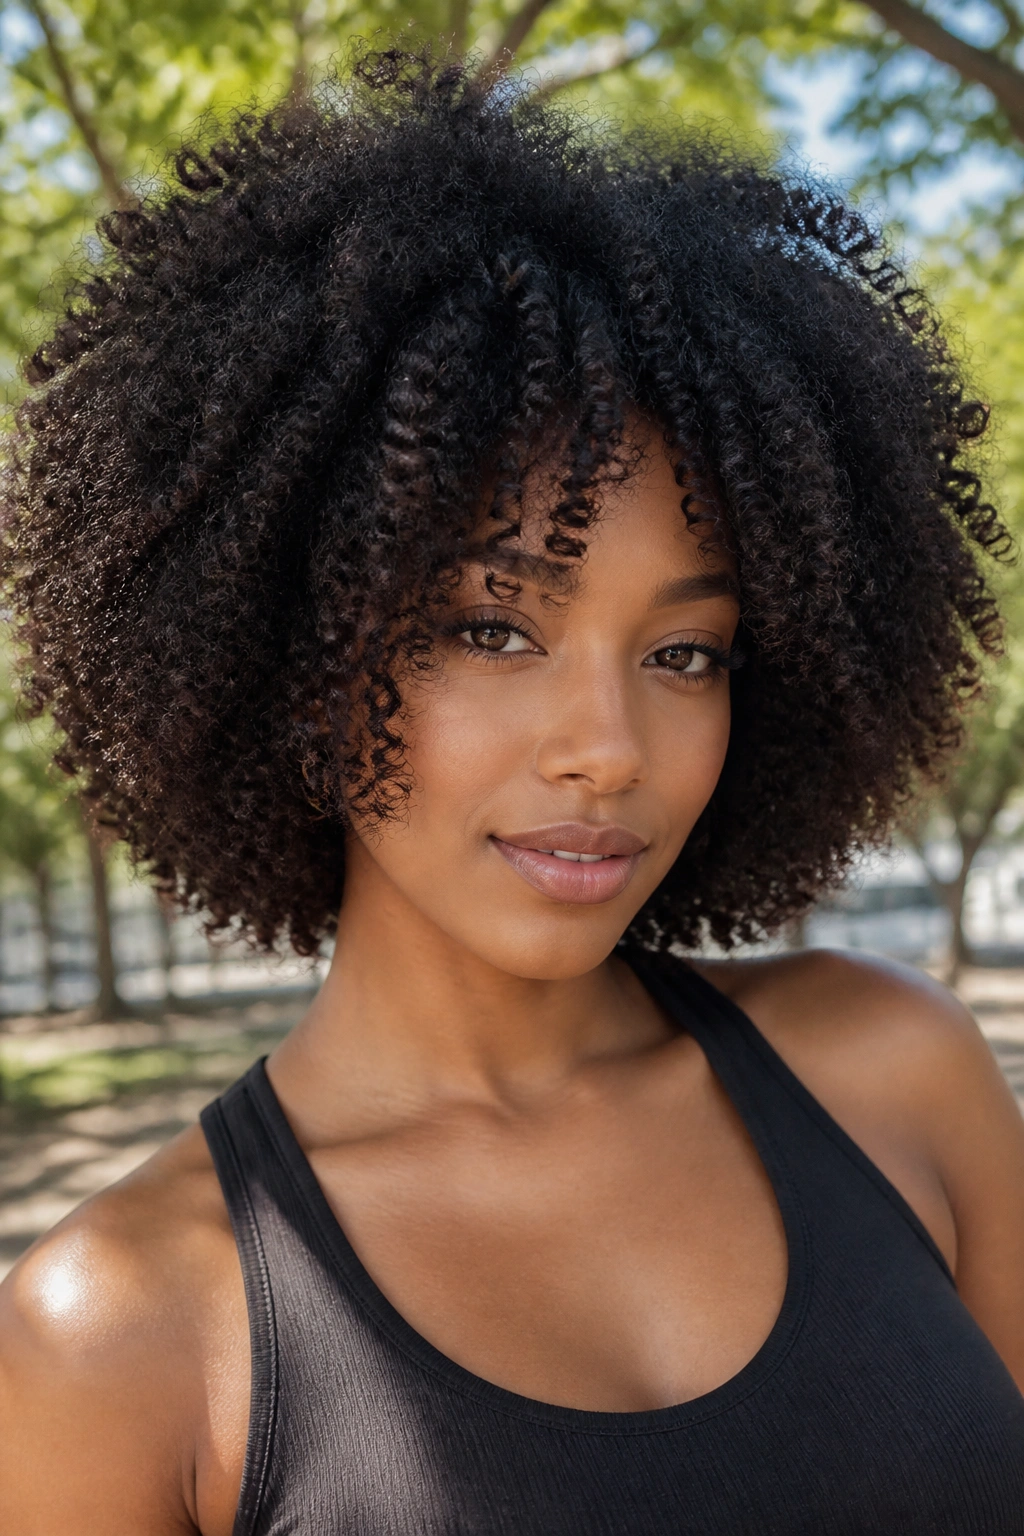
Rounded afro layers are about shape first and drama second. The silhouette stays full, but the front and temple area get carved so the face doesn’t disappear inside the volume.
That balance matters on coily textures, where a blunt edge can make the hair read wider than it is. A curved outline around the temples and cheekbones gives the whole cut more direction. You still get that gorgeous halo of texture. You just don’t lose the face in it.
Flat sides ruin the line.
The trick is to keep the top balanced with the sides, then use soft front shaping to guide the eye downward and inward. A good cut should look round when you spin in the mirror, not square or top-heavy. If the curls around the ears get too dense, the whole head can start to feel heavy, even if the length is short.
I’d ask for a dry shape, a gentle taper near the temples, and enough room at the front so the hair opens around the cheekbones instead of standing straight out.
6. Bottleneck Bangs for Loose Curls

Unlike blunt bangs, bottleneck bangs stay narrow in the middle and widen as they move outward. That shape is a gift to curls, because it lets the center stay light while the sides keep enough length to frame the eyes and cheeks.
The middle usually sits around the bridge of the nose or just below it, then the side pieces stretch toward the cheekbones. That makes the haircut feel soft instead of crowded. It also helps if your forehead is on the wider side and you want a little break in the center without a hard line across the face.
The best part is how low-stress they look on day two. Curls separate, bend, and do a little of their own thing, but the shape still reads clearly. I like bottleneck bangs on loose to medium curls when the goal is shape without commitment.
Ask your stylist not to over-trim the center. If that section gets too short, the whole thing can spring up into a tiny fringe faster than you expect.
7. Layered Lob with Tapered Front Pieces

A lob can feel safe until the front hangs too straight. Then the whole cut reads blunt, and curly hair usually deserves better than that.
Why It Works on a Lob
A collarbone-length lob gives curls enough room to bounce, while tapered front pieces stop the outline from feeling boxy. The length still feels grown-up and easy to wear, but the face gets a little opening around the jaw and mouth.
This shape suits people who want to wear their curls down half the time and clip them up the other half. The front layers should be long enough to sit around the cheekbone, then slide into the rest of the cut without a hard step. When the line is too steep, the lob can start looking dated fast.
- Collarbone length keeps the shape versatile
- Front pieces soften the jawline
- Works well with side parts or center parts
- Easy to air-dry with a curl cream and leave alone
If your curls are dense, ask your stylist to keep the interior light but the perimeter full. That keeps the front from feeling bulky without thinning the whole head into fuzz.
8. The Wolf Cut with Curly Fringe

The wolf cut gives curly hair permission to look a little wild, and I mean that in the good way. It leans into volume, texture, and a front shape that feels piecey rather than neat.
The curly fringe is the part that makes it work. If the fringe is long enough to break into little sections, it can frame the face without locking you into a strict bang. Shorter layers at the crown help the curls stack upward, while the longer ends keep the cut from turning into a puffball.
Fine curls need caution here. Too much removal at the top can leave the shape stringy. Denser curls can carry the cut much better because the layers still have something to sit on.
Shorter on top, softer near the face.
Ask for softness around the temples and a fringe that can sweep aside if you get tired of it. That flexibility is the whole point.
9. Side-Swept Front Layers

What if you hate the center part but still want the face framed? Side-swept front layers fix that without asking for a big haircut commitment.
The diagonal line pulls attention across the face instead of straight down it. That can be flattering on square or long faces, and it helps if one side of your curls always falls flatter than the other. A deep side part gives the cut a little motion before you even touch a diffuser.
How to Wear It
Keep the longer side of the front around the lip or jawline, and let the shorter side skim the cheekbone. The two sides do not need to match exactly. In curly hair, a little asymmetry often looks more natural than a perfect mirror image.
- Deep side part
- Longer side: lip to jaw length
- Shorter side: cheekbone length
- Great with a clip or tuck on the shorter side
This shape works best when the front layers are soft enough to move but not so short that they spring into a pouf. A tiny bit of imbalance is the charm.
10. Shoulder-Length Cut with Internal Layers
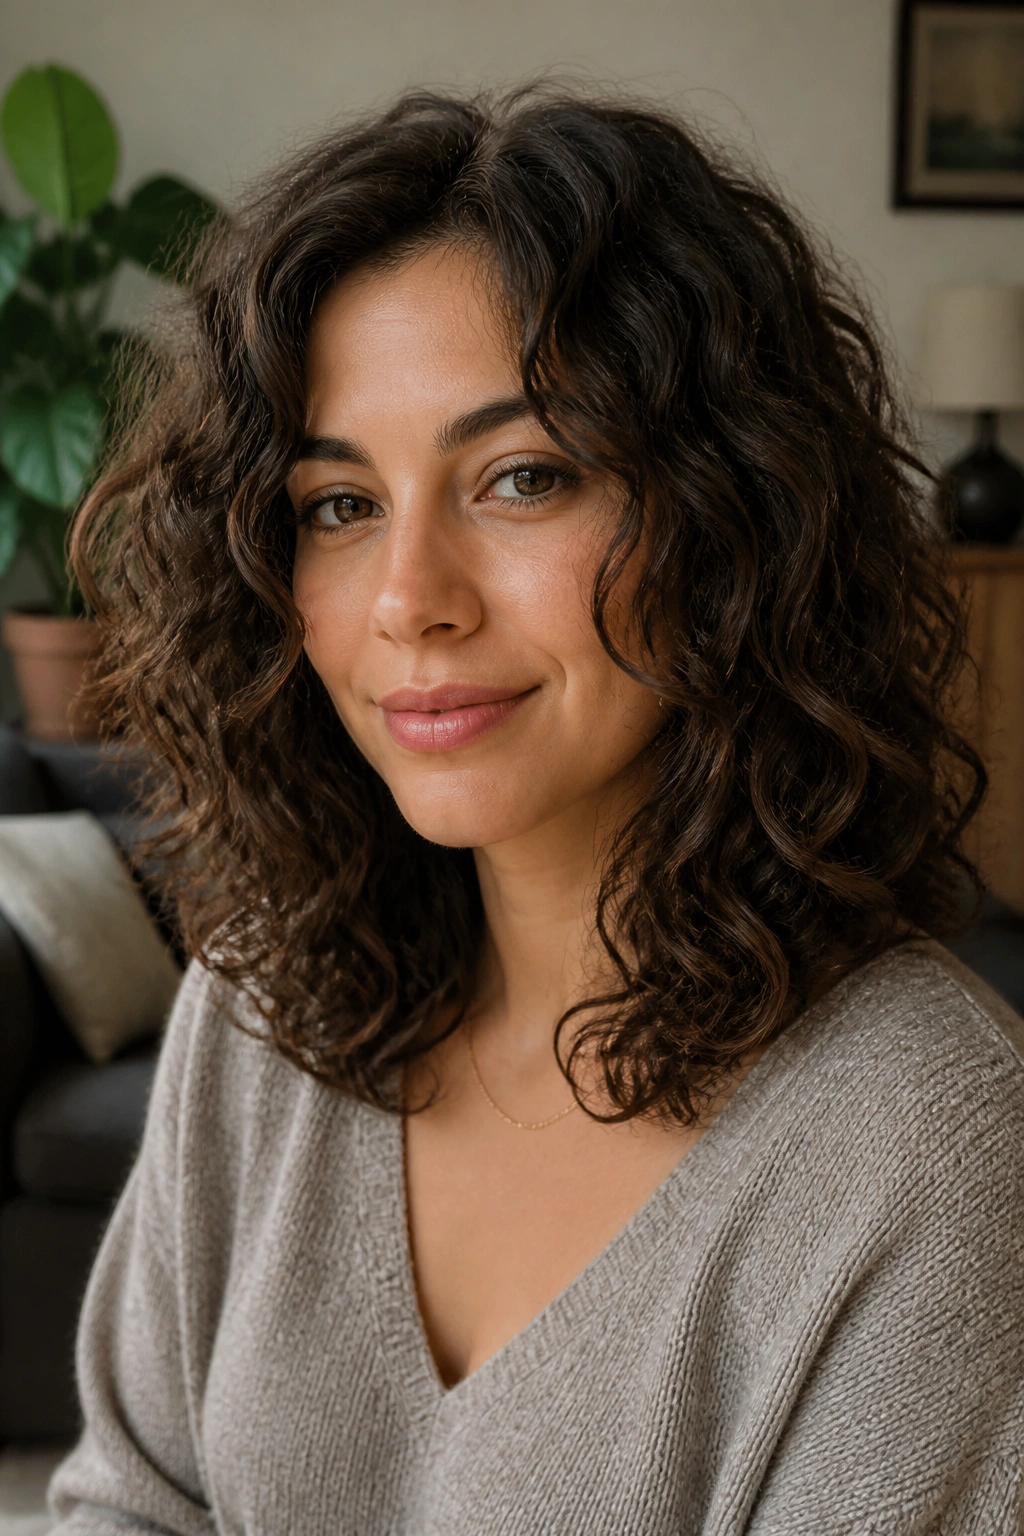
Some cuts show their shape only when you move. This is one of them.
Shoulder-length curly hair with internal layers keeps the outside line fairly full, while the inside gets enough weight removed to stop the front from hanging like one heavy curtain. The face ends up with movement, but the silhouette still feels clean. That’s a nice middle ground if you don’t want obvious bangs or a shaggy finish.
The trick is that the layers live inside the haircut, not all over the surface. So when the curls settle, you get softness around the cheeks and some lift near the crown, but the ends still look thick.
This is a smart option for thick curls that puff out at the sides. It also behaves well with a natural middle part, since the front pieces can curve away from the face without fighting the rest of the cut. If you have a cowlick at the front, this kind of layering tends to be easier to live with than a heavy fringe.
Ask for movement, not a lot of short pieces. That’s the whole game.
11. Curly Pixie with Side Fringe
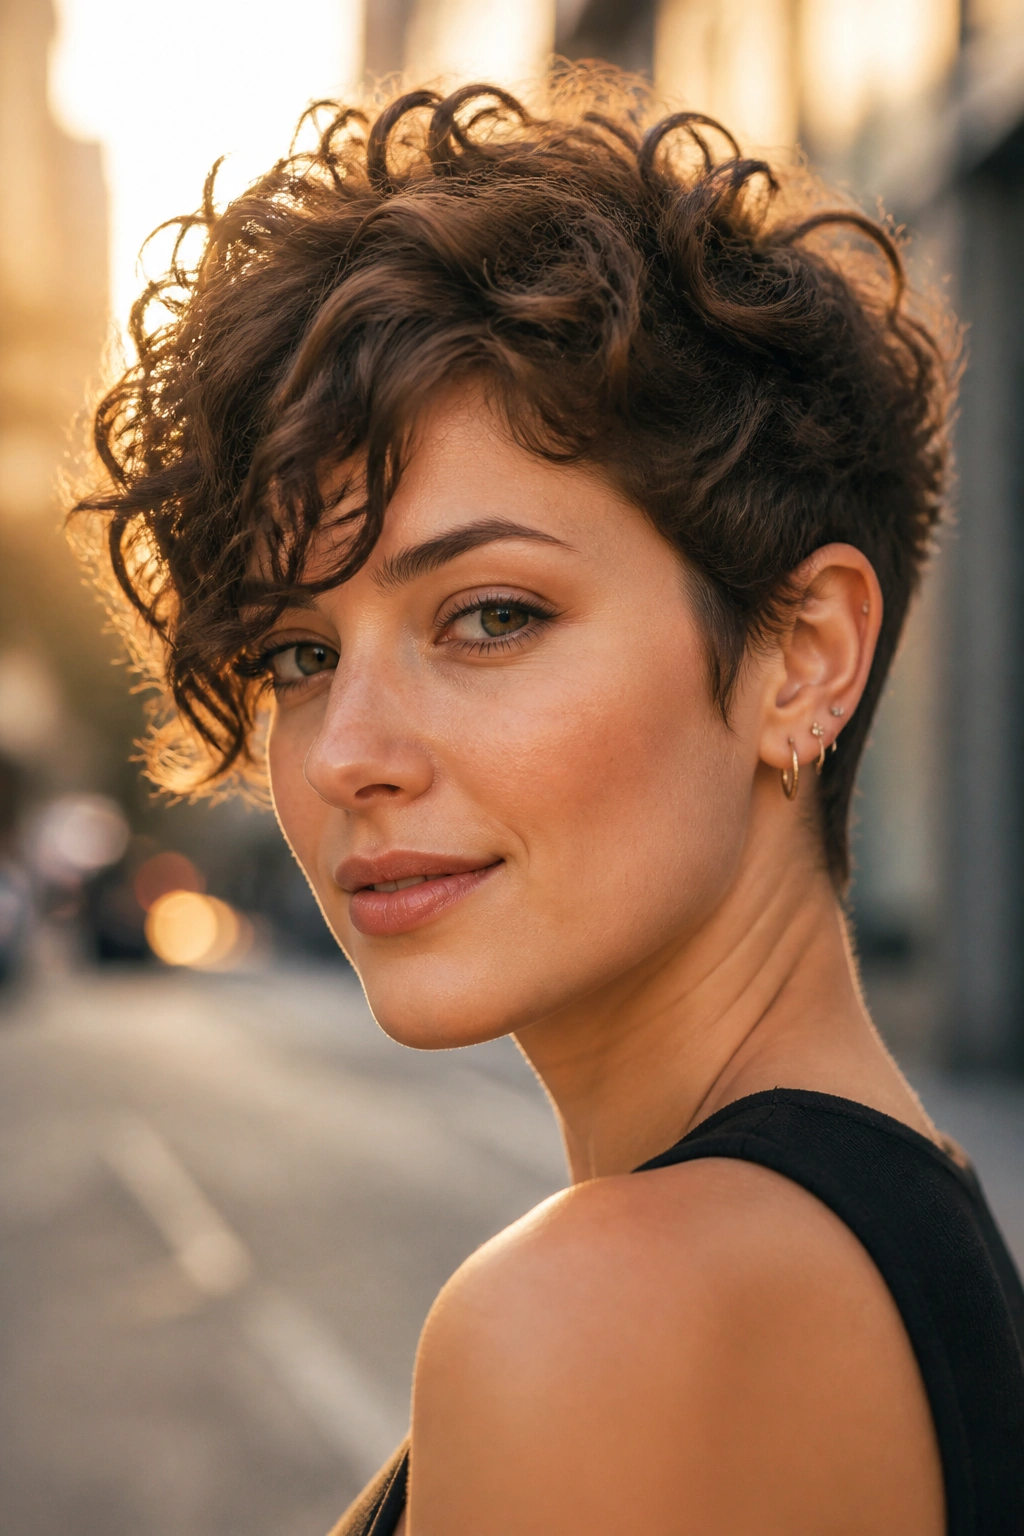
Short curls make face framing obvious because the line sits right at the eyes and temples. A curly pixie with a side fringe can open the face fast, and it usually looks sharper than people expect.
The side fringe should be long enough to sweep across the forehead or tuck behind one brow, depending on how your curls behave. Around the ears, the shape needs to stay soft so the cut does not turn blocky. The top can carry a little extra height, but not so much that it mushrooms.
- Keep the fringe long enough to move
- Lighten around the ears, not the crown only
- Avoid over-thinning the top
- Plan on trims every 6 to 8 weeks
This is not the cut for someone who wants to ignore maintenance for months. It grows out with attitude. That can be good. Or annoying. Usually both.
It looks especially nice with earrings and glasses, because the face stays open and the curls don’t crowd the frame.
12. Face Framing Haircuts for Curly Hair: The Deva Cut
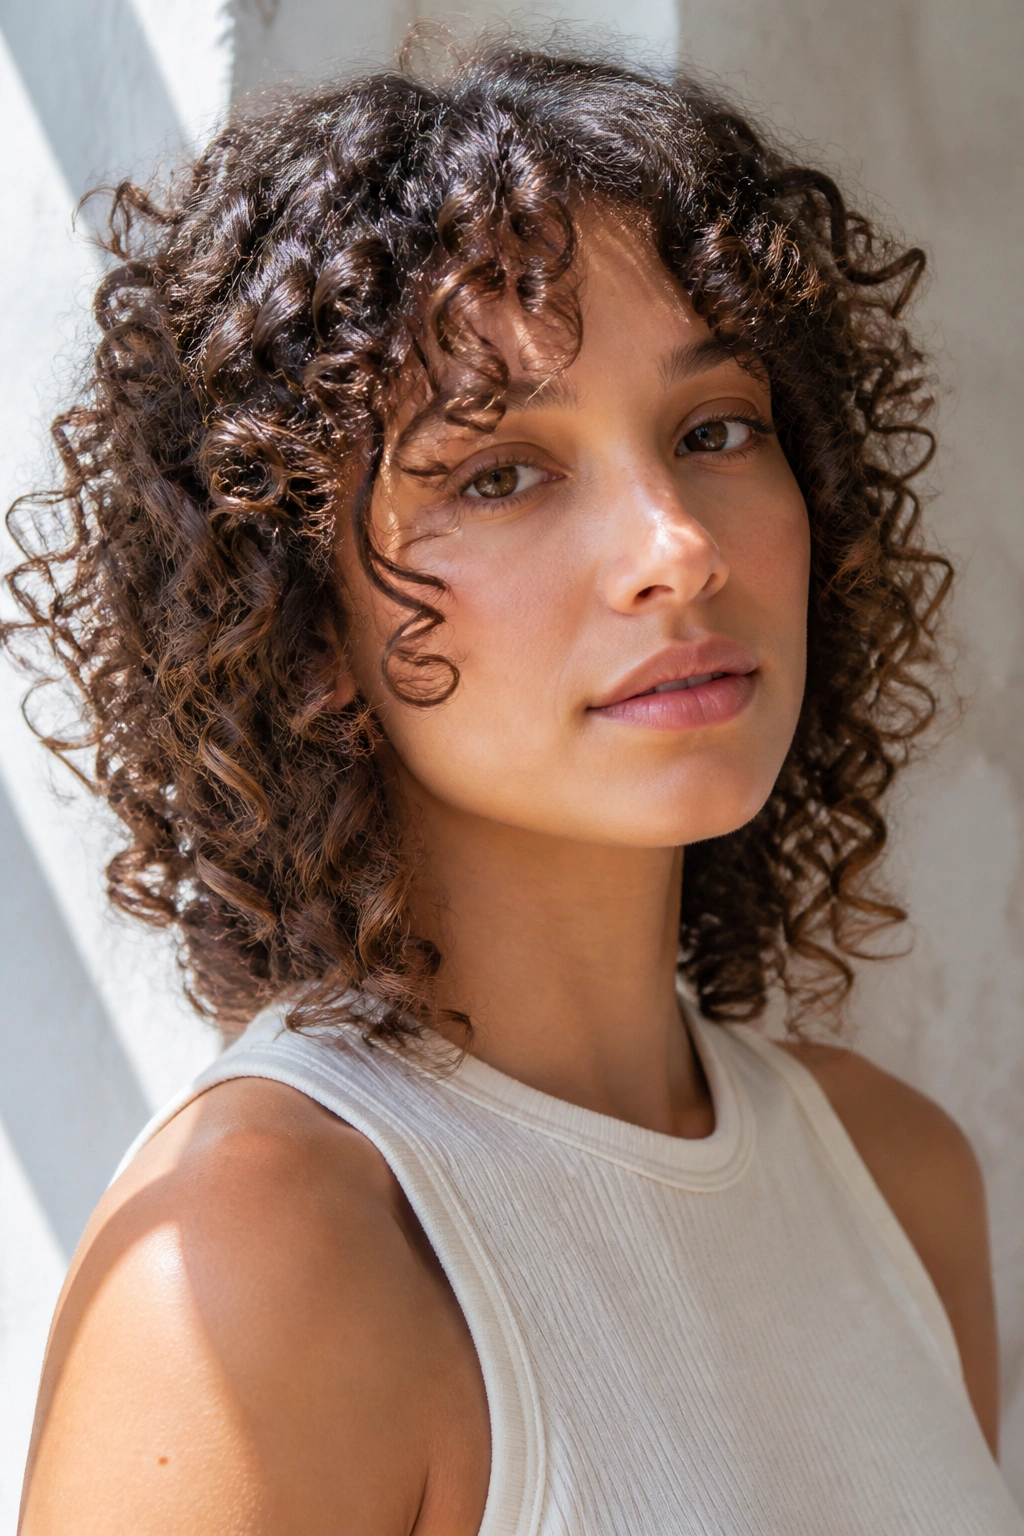
Unlike a wet, straight-across cut, a Deva-style cut follows each curl where it falls. That is the whole point, and it matters a lot when you want the face frame to sit in the right place after shrinkage kicks in.
The front can be carved around the cheekbones, chin, and lip with much more accuracy than a one-length cut. You are not guessing where the curl will land once it dries. You’re shaping it where it lives. That makes the front pieces more precise, especially when one side behaves differently from the other.
What to Ask Your Stylist
Ask for the hair to be cut dry, in its natural pattern, and checked in the mirror from both sides before anything gets shorter. Tell them which curl clumps tend to shrink up the most. That tiny detail saves a lot of regret.
- Dry cut only
- Natural part or natural fall
- Curls kept in clumps
- Front pieces cut to live around cheekbone and jawline
I like this approach on mixed curl patterns, too. When some sections bend tighter than others, the Deva method gives the stylist a chance to work with the real shape instead of the fantasy version.
13. Butterfly Layers for Curly Hair
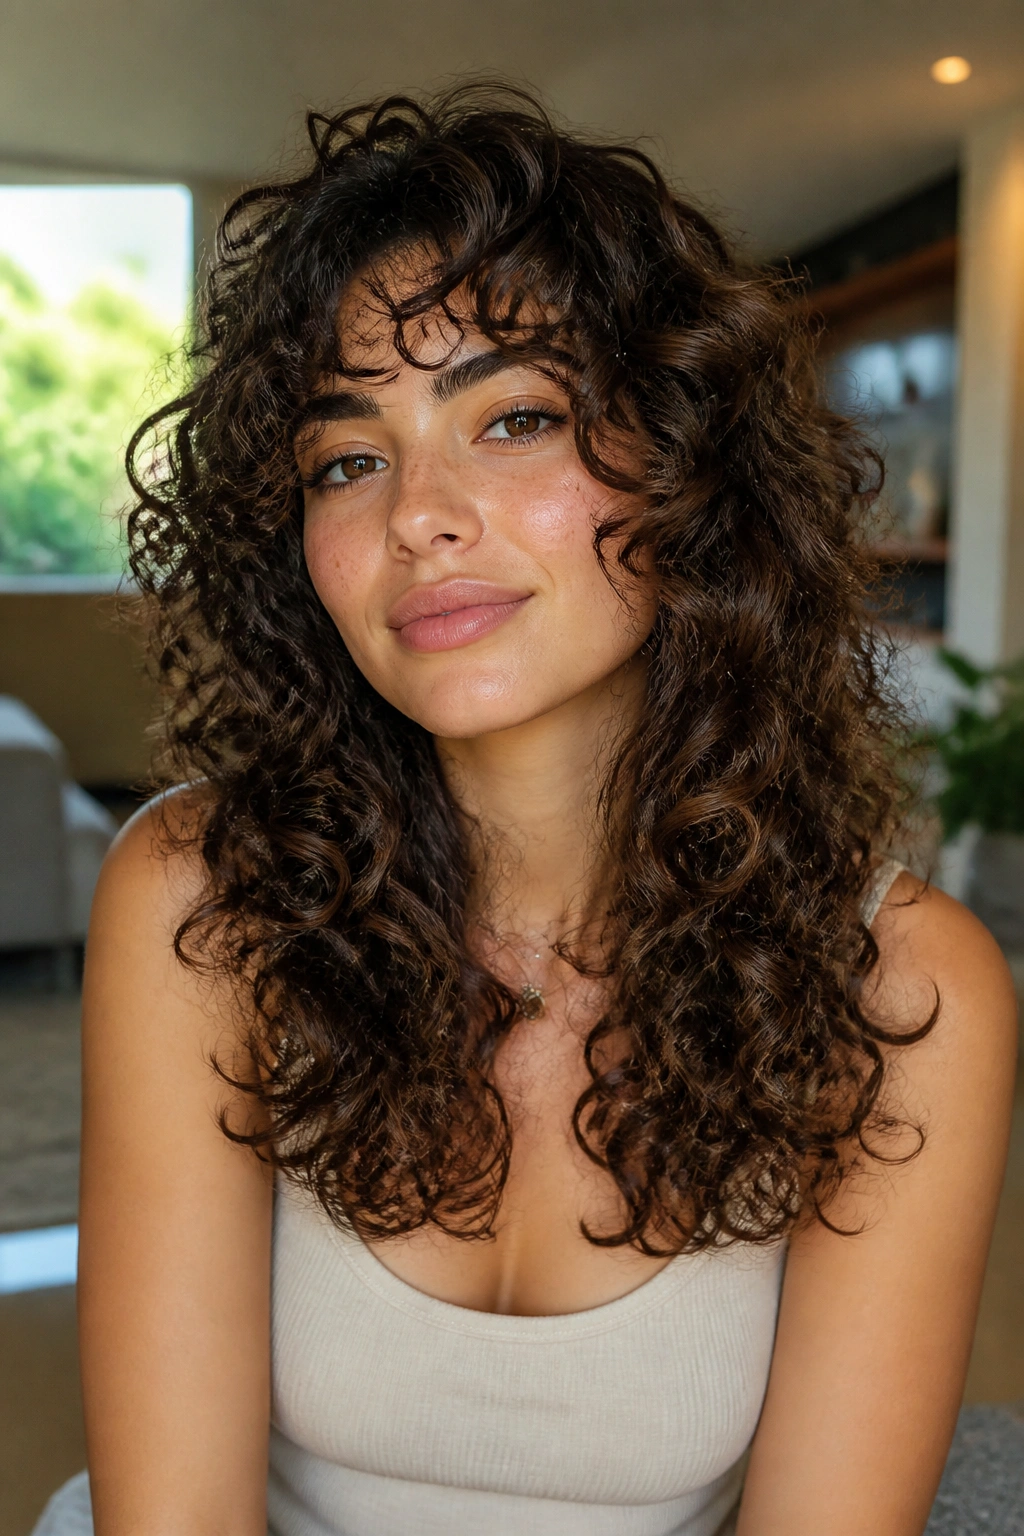
Butterfly layers are a good fit when your curls feel heavy at the front but you do not want to lose the length that makes the hair feel yours. The short upper layers lift the top and frame the face, while the longer underlayers keep the bulk and drama.
That split is the reason this cut reads airy in motion. The shorter pieces around the face can bounce up toward the eyes, then blend back into longer curls below. It gives the whole head a bit of swing without turning it into a shag.
The best part is how well it works with long curls that tie back often. Even when you put the hair up, those front pieces can fall out and soften the look around the cheeks. If you hate a severe ponytail face, that detail matters more than people admit.
Ask for the shortest layers to stay high enough to show movement, but not so high that the top half of the head collapses when you air-dry. That balance is touchy, and it’s worth discussing before the scissors come out.
14. Angled Curly Bob
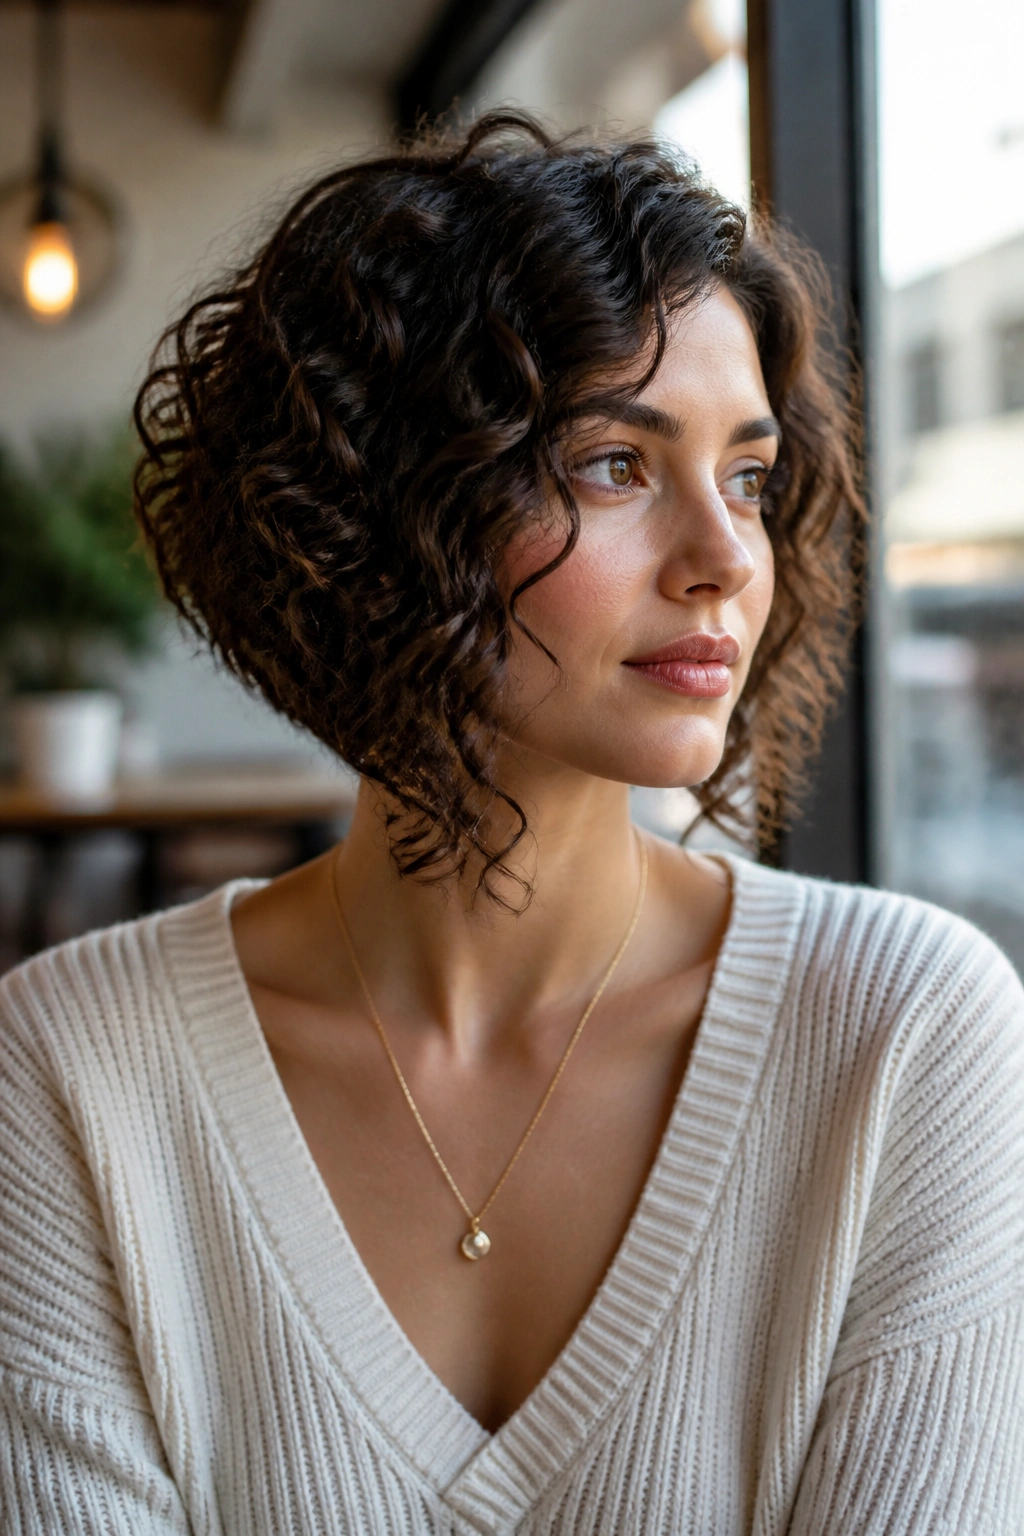
An angled bob can make curls look sharper without turning them stiff. The back sits shorter, the front stays longer, and the whole shape points the eye toward the jaw.
That angle works because it gives the curls a direction. Instead of flaring out at one equal length, the hair slides forward a little, which can slim a wider face and keep the shape from feeling blocky. On dense curls, this is a clean way to control bulk without flattening the texture.
I like the angle to be gentle, not severe. Too steep and the haircut starts reading like a triangle with a mission. A softer slope gives you shape without making the front feel disconnected from the back.
This cut tends to behave well when the curls are defined with a cream or gel and left alone. If you fuss with it too much, the line can puff. If you leave it, the shape usually settles nicely.
15. Ribbon Layers on Long Hair
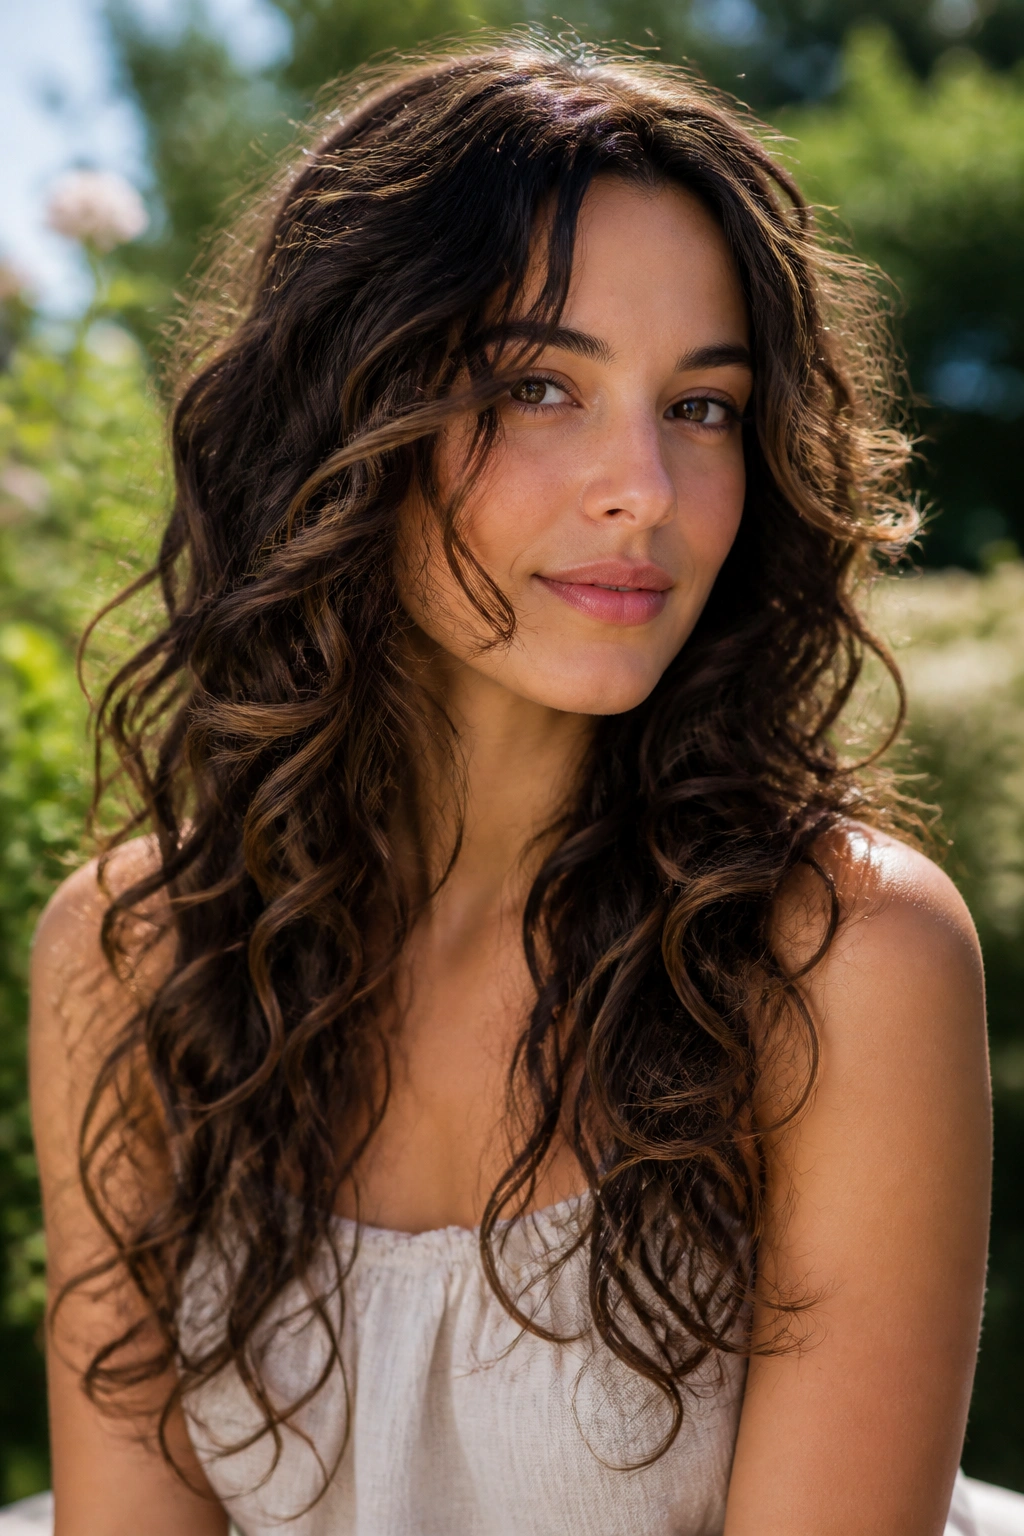
Want the face framed, not fully re-cut? Ribbon layers hit that sweet spot. They’re long, narrow layers that sit like soft strips through the front and sides, so the haircut keeps its length but gains movement.
The idea is simple: instead of chopping in obvious short pieces, the stylist carves a few elongated layers that bend around the face. That works especially well on long ringlets or waves that need a little life near the cheeks but still look best with weight at the bottom.
How to Style It
Use a light curl cream first, then scrunch in a small amount of gel if you want the pieces to hold their shape through the day. A diffuser on low heat helps the front stay defined without blasting it into frizz. Finger-separate only the pieces you want to open up.
- Best for long curls and ringlets
- Keeps length intact
- Softens the front without a dramatic change
- Looks polished when the curl clumps stay intact
This is a quiet cut. Not flashy. That’s part of the charm.
16. The Mixie Cut with Curly Framing

The mixie sits between a pixie and a mullet, so the face frame has to soften the jump from short to long. On curls, that contrast can look fresh instead of awkward, as long as the front is shaped with some care.
What makes it different is the mix of short sides, a playful top, and a longer back. The face gets opened up fast, but the front fringe and temple pieces still need enough softness to keep the cut from looking harsh. If those front curls are too short, the shape can feel severe.
This cut is for someone who likes a little edge and does not mind styling with fingers, not a brush. It usually needs a trim every 5 to 7 weeks if you want the shape to stay crisp. The longer back can grow out nicely, but the front loses its line faster than people expect.
Ask for softness at the temples and enough length in the fringe to tuck behind a brow if needed. That small detail gives you options on days when the curls have a mind of their own.
17. The U-Shaped Cut with Soft Front Pieces
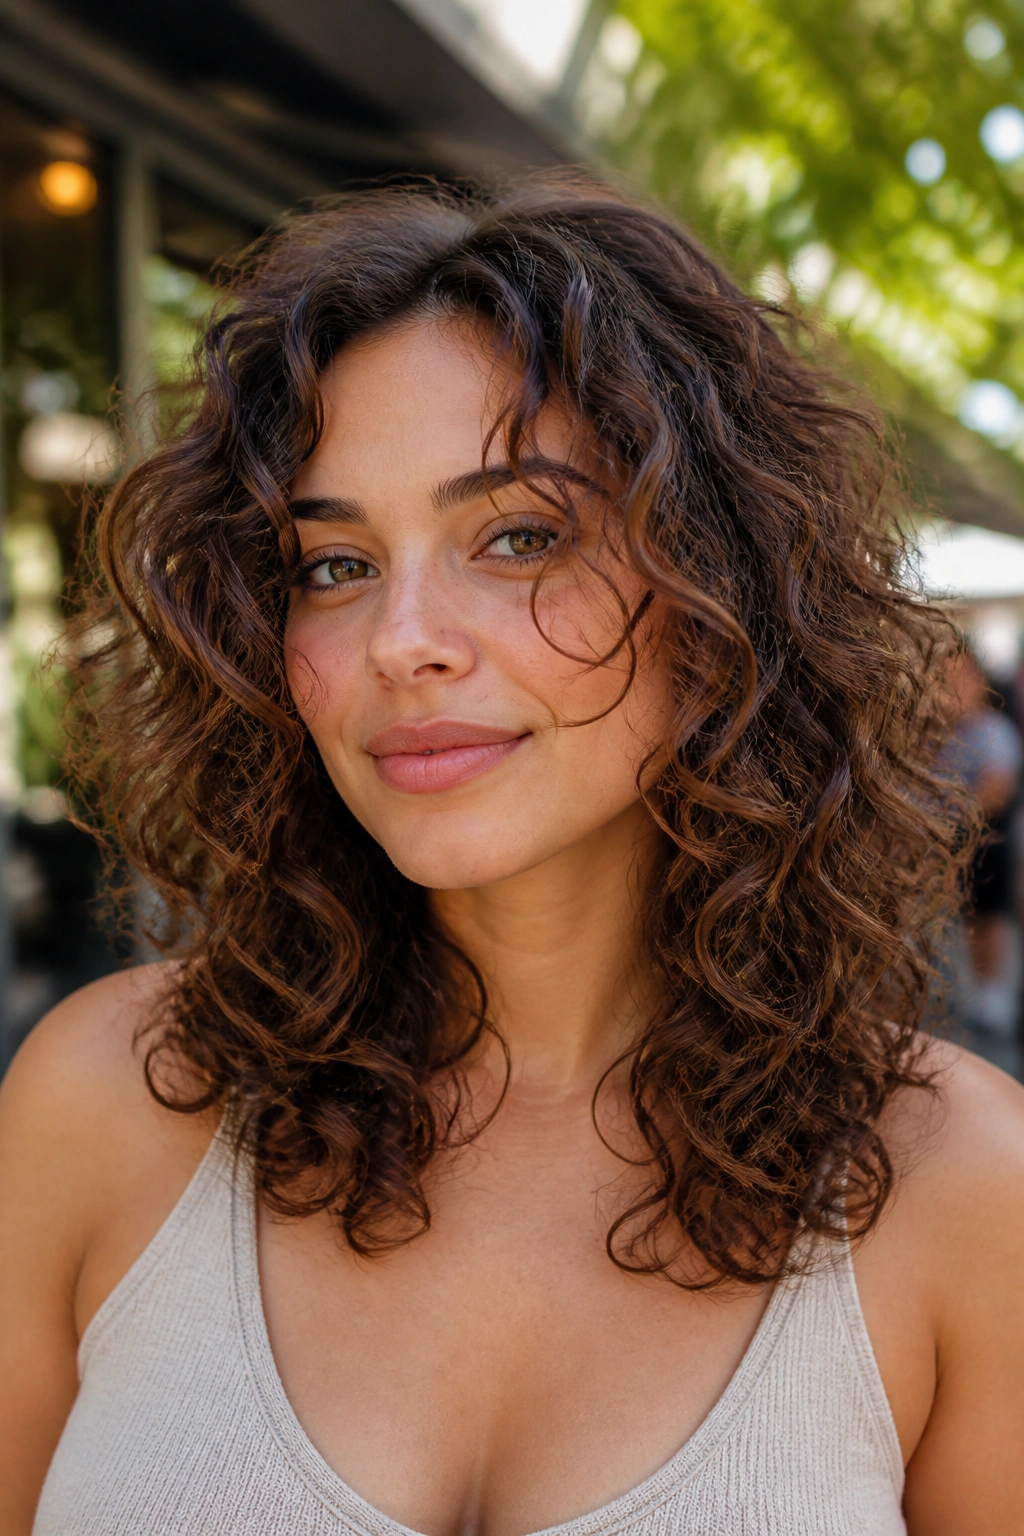
A U-shaped cut keeps the back fuller than a straight line, and on curly hair that can make the whole head look lush instead of wide. The soft front pieces stop it from feeling like a curtain.
That’s the appeal here. You keep the long, rounded outline in the back, but the front gets just enough carving to open the cheeks and jaw. It works well if you like your hair long and you do not want the front to hang as one heavy block.
A blunt back can feel like a curtain.
Soft front pieces help that. They give the hair a little lift near the face and create a curve that feels more natural when the curls dry and settle. If your hair is dense, this shape can keep the weight under control without chopping off inches you wanted to keep.
I’d ask for the front to start lower than the cheekbone if you want a gentle frame, or a touch higher if you want more obvious opening around the eyes.
18. Mid-Length Cut with Carved Cheekbone Layers

If the front of your curls disappears into the rest of the hair, carved cheekbone layers fix that. The shape gives the face a real outline, especially on mid-length curls that tend to sit somewhere between shoulder and collarbone.
Where the Layers Should Start
The first layer should usually begin just below the eye for loose curls, or closer to the cheekbone for tighter patterns. After that, the next layer can taper toward the jawline. You do not want the shortest piece jumping all the way above the cheekbone unless you’re chasing a stronger fringe effect.
- Loose curls: start just under the eye
- Tighter curls: start at the cheekbone
- Keep the next layer near the jawline
- Leave enough length to tuck one side behind the ear
The reason this works is simple: the eye goes to the carved front pieces first, then follows the curl shape down. It gives the haircut a focal point, which a lot of mid-length curly cuts badly need.
If you want softer definition without bangs, this is one of the more useful shapes around.
19. The Graduated Curly Bob with Fuller Front

A graduated bob works when you want lift in the back and shape in the front. The shorter stack at the nape gives the cut some body, while the fuller front keeps the face framed instead of exposed.
This shape can be excellent on dense curls because the back loses bulk where it tends to bunch up, and the front keeps enough length to curve around the jaw. The line feels neat, but not harsh. I like it on people who want the bob to look deliberate from every angle, not flattened from behind.
Too much stacking can puff.
That’s the thing to watch. If the graduation is too aggressive, the back can balloon and the front can get pushed forward in a way that looks old-fashioned. Ask for a softer stack and let the front remain longer, especially if your curls spring up a lot after drying.
This bob likes a side part or a loose middle part, depending on how much face opening you want.
20. Face Framing Haircuts for Curly Hair with a Soft Halo Frame
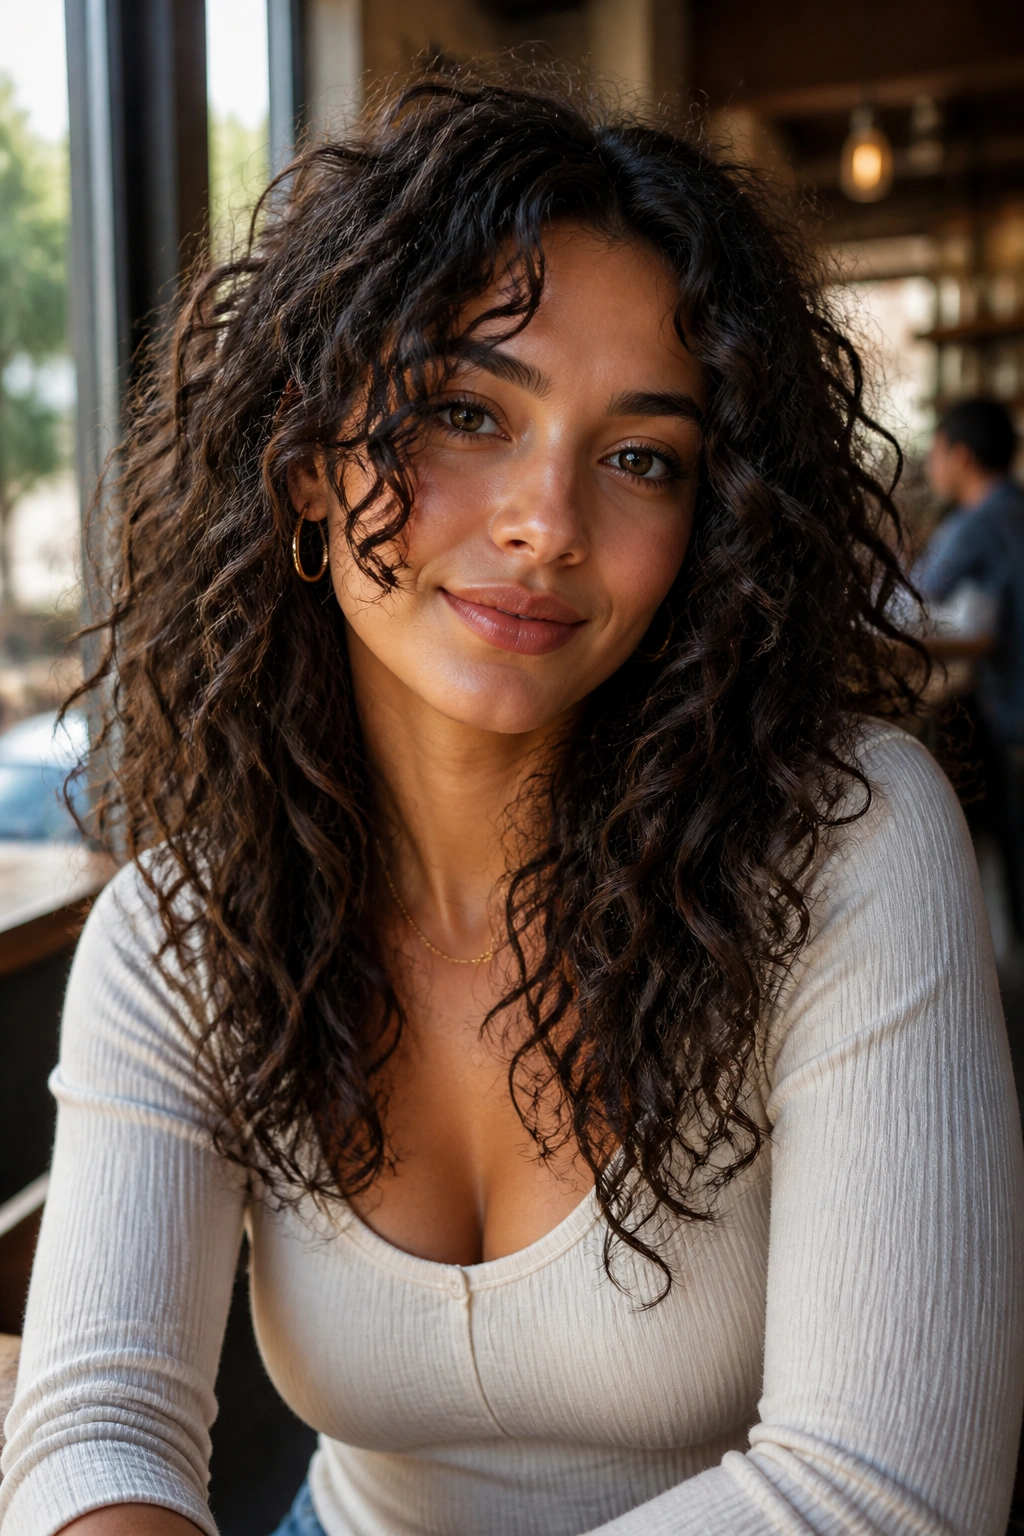
Not every curly haircut needs bangs, layers all over, or a dramatic chop. A soft halo frame keeps most of the length intact and uses just a few carefully placed front pieces to open the face.
That can be the nicest move of all if you love your curl length but want your features back. The pieces around the temples, cheekbones, and mouth are enough to break up the heavy curtain effect. The rest of the hair stays full, which means the cut still feels like yours when you wear it down, clipped back, or shoved into a loose half-up style.
I like this shape for people who are nervous about commitment. It gives you a real change in the mirror without turning the haircut into a whole new identity. Ask for only a few front points, keep the perimeter full, and make sure the shortest face-framing curl still feels long enough to live comfortably with shrinkage.
When the front moves and the rest of the hair still has weight, the cut lands in that rare place where it looks easy, but it clearly wasn’t accidental.
