



Five minutes is enough.
Not for a wedding braid. Not for something that needs thirty pins and a mirror on every wall. For a clean, wearable braid that gets hair out of your face and still looks like you meant to do it? Five minutes is plenty.
The trick is not fancy technique. It’s choosing braids that use a simple hand pattern, a small amount of sectioning, and a finish that does not need perfect symmetry. A rat-tail comb, one or two snag-free elastics, and a little grip from day-old hair will save you more time than any expensive styling product. Freshly washed hair can be slippery. Textured hair usually behaves better with a little leave-in and a good detangle first. Different hair, same rule: keep the sections clean and the tension light.
And one thing I wish more people said out loud: tight does not mean neat. Tight usually means sore. If you want these braids to count as protective styles, the hairline should feel secure, not pulled. That matters.
The first braid here is the one I’d teach anyone who thinks they “can’t braid.”
1. Classic Three-Strand Braid
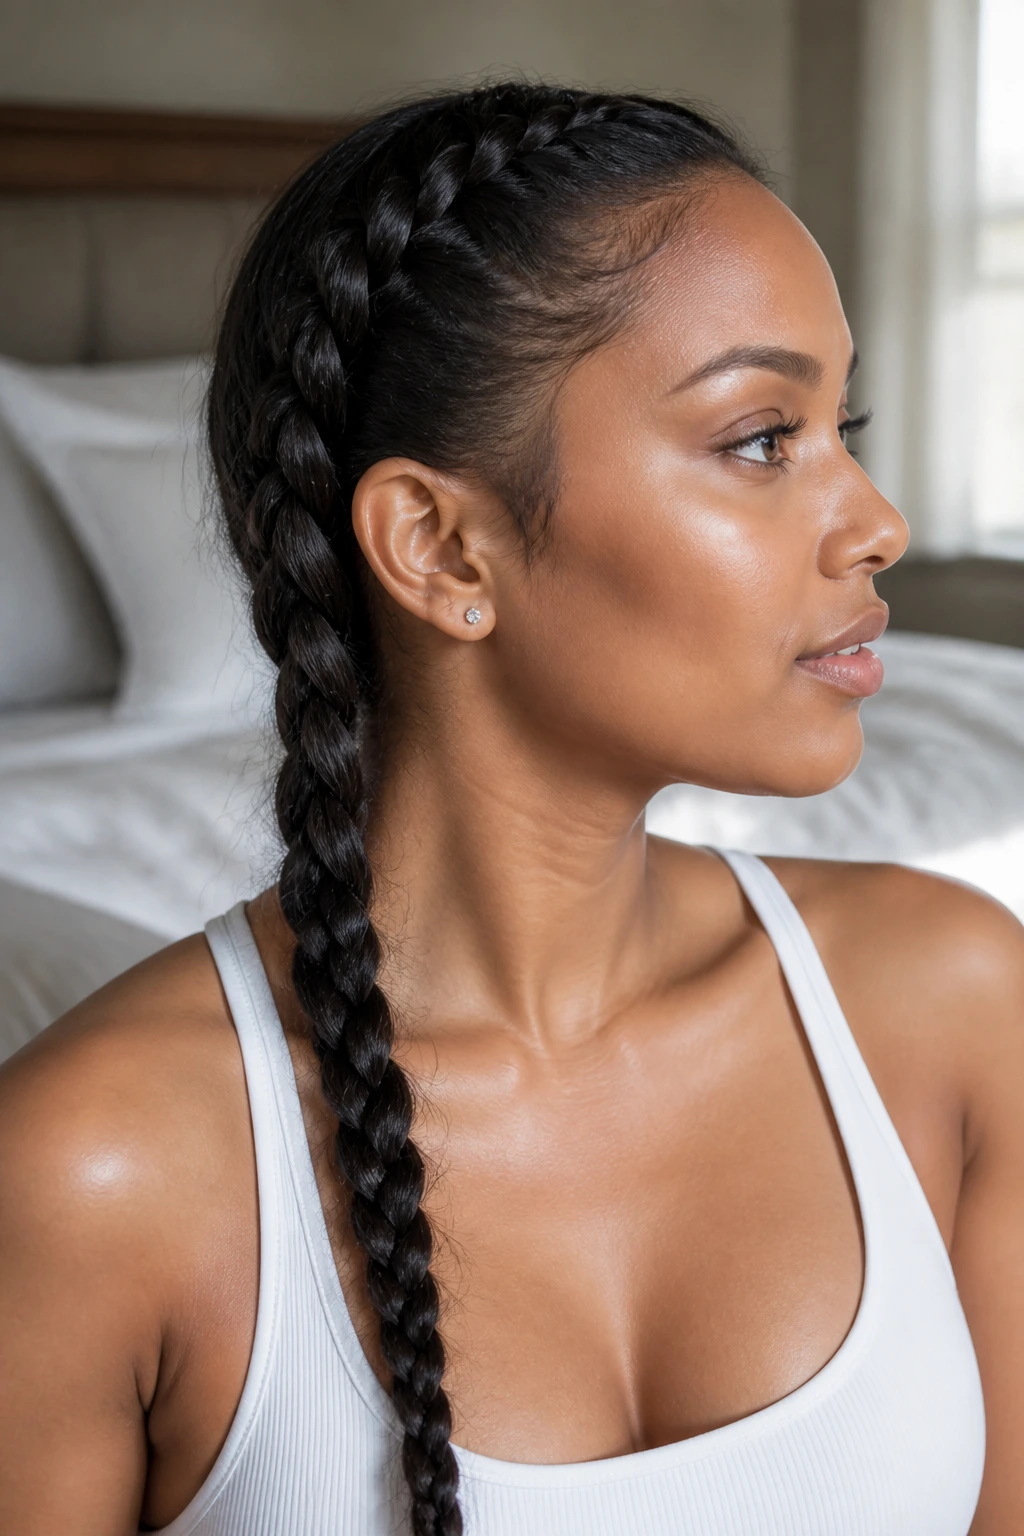
The classic three-strand braid is the calm answer to a messy morning. It works because it asks almost nothing from you: split the hair, cross one section over the middle, then the other, and keep going until the ends are tucked.
Why It Still Wins When You’re Rushed
This braid is fast because the pattern never changes. Once your fingers learn the rhythm, you can do it with half your attention on the clock and half on the mirror. It also forgives uneven layers better than a ponytail does, which is why it holds up so well on shoulder-length or longer hair.
If your hair is slippery, mist the lengths with water or rub a pea-sized amount of leave-in through the ends. Don’t soak the roots. That only makes the braid slide around while you’re trying to finish it.
- Works on straight, wavy, curly, and coily hair once it’s detangled.
- Can sit low, high, or off to one side.
- Takes less than 2 minutes after sectioning.
- Holds best with a small clear elastic or a coated snag-free tie.
Tip: Keep your hands close to the nape or the point where the braid starts. The farther your fingers drift, the looser the braid gets.
2. Low Side Braid
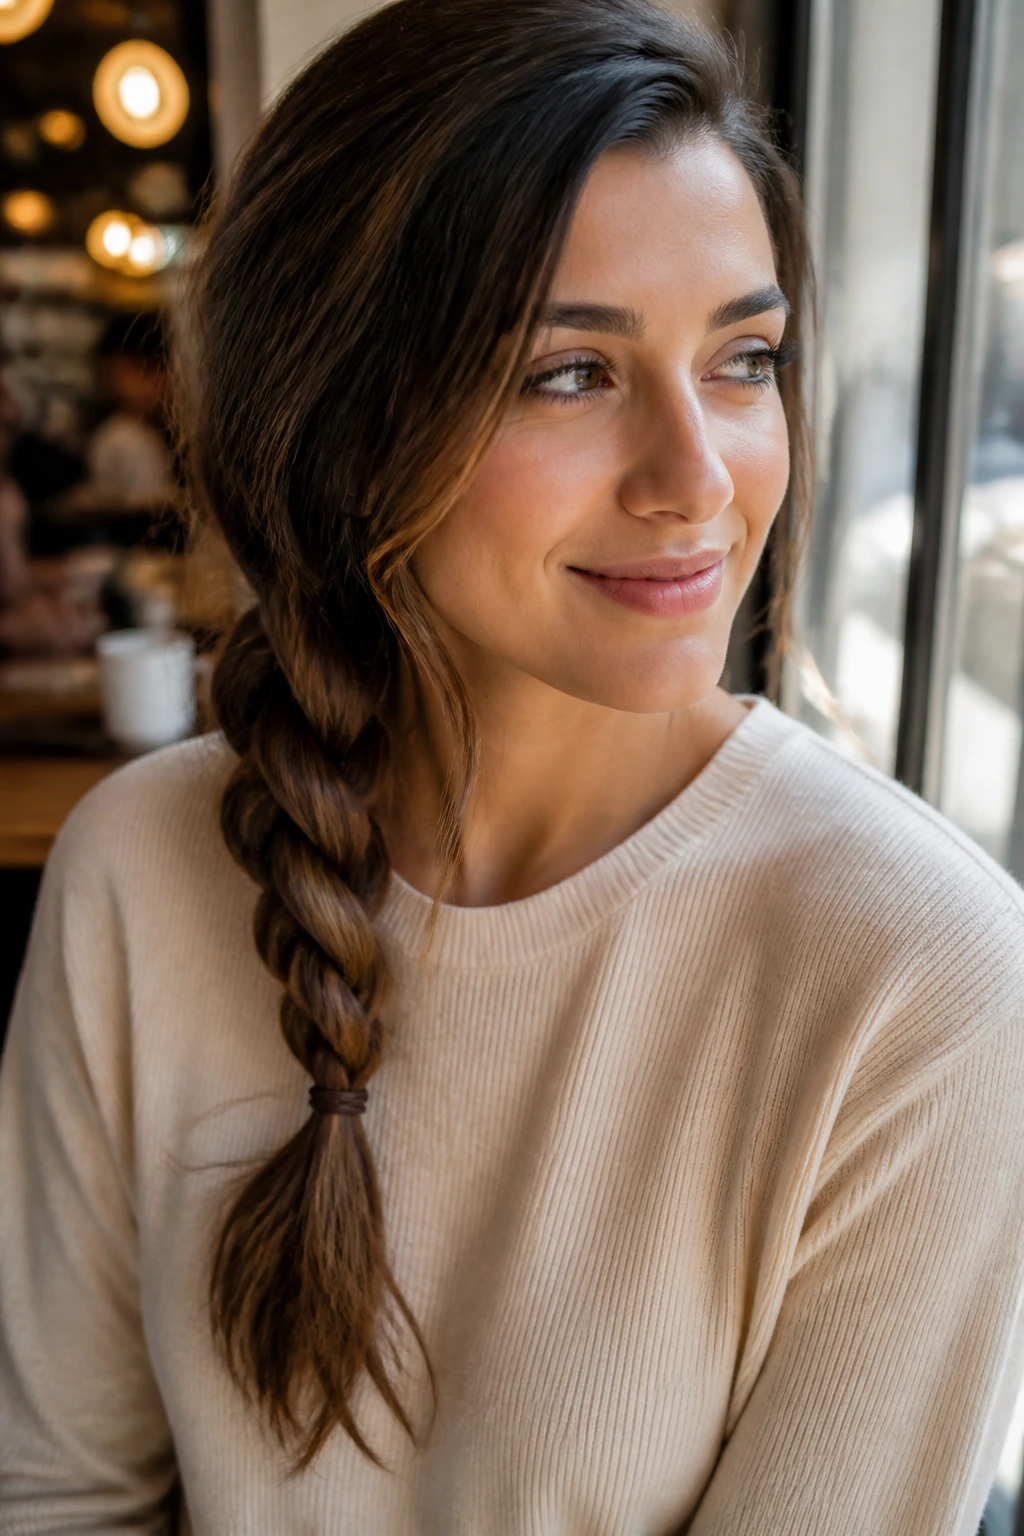
A low side braid hides a bad hair day better than almost any other quick style. That’s the whole appeal. You sweep everything to one shoulder, braid loosely, and suddenly the style looks intentional instead of rushed.
This one is especially useful when the top of your hair is flat but the lengths still have decent texture. Brush everything over one shoulder, start the braid just behind the ear, and work down in big, even sections. A side braid looks best when it doesn’t fight your natural fall line. If your hair has layers, let a few short pieces escape near the face. Perfectly sealed side braids can look a little stiff.
For curly or coily hair, smooth the outer layer with a small dab of styling cream first, then braid the lengths without stretching them too hard. You want the braid to sit heavy and soft, not tight and skinny. One small elastic at the end is enough.
3. French Braid
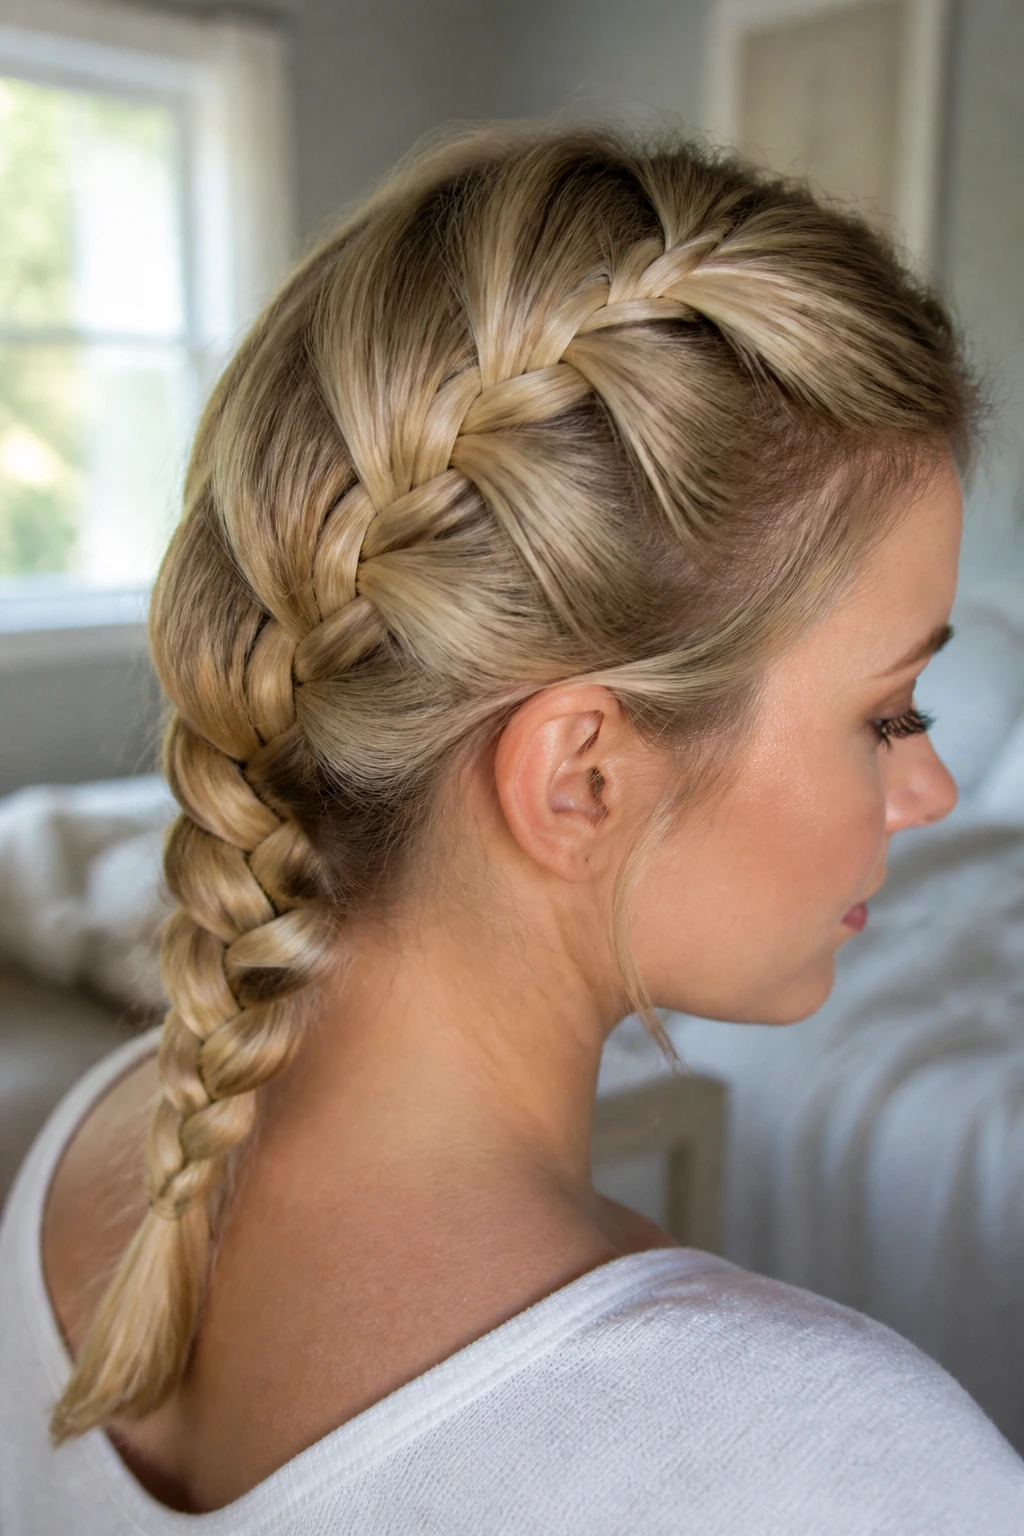
Need hair off your face without a hard, severe look? A French braid does the job and keeps the top of the head tidy while the braid grows downward. It looks more complicated than it is. The pattern is just three strands, plus a bit of hair added in as you go.
How to Keep It Fast
Start with a clean front section at the crown. Divide it into three pieces, cross the outer sections over the middle, and add a small slice of hair from each side before every crossover. The important part is size. Use larger sections than you think you need. Tiny sections take forever and make your arms hate you.
If your goal is a five-minute style, stop the French braid around the nape and finish the rest as a regular three-strand braid. That little shortcut saves time and still gives you the classic look people usually associate with a full French braid.
French braids work best on hair that has a bit of grip. If your hair is freshly washed and too silky, a dry shampoo mist at the roots can help. Not glamorous. Very useful.
4. Dutch Braid

If you want the braid to sit on top of the hair instead of melting into it, choose a Dutch braid. It’s the same basic logic as a French braid, but the sections cross under the middle instead of over it, which makes the braid pop visually.
That raised look is why I like it on thick hair and on anyone who wants the braid to read clearly from across the room. Start at the hairline, take three sections, and cross the side pieces under the center strand while adding hair from each side as you go. Keep the grabs even, but not tiny. Tiny sections make the braid look neat; they also make it slow.
- Best for medium to long hair with some texture.
- Sits nicely on thick hair because the braid has more shape.
- Can become a single braid, a ponytail braid, or two side braids.
- A little styling cream helps the part stay clean.
Watch for this: if you pull the braid too tight at the front, the crown can start to ache. Loose at the roots, firm through the lengths. That’s the sweet spot.
5. Fishtail Braid
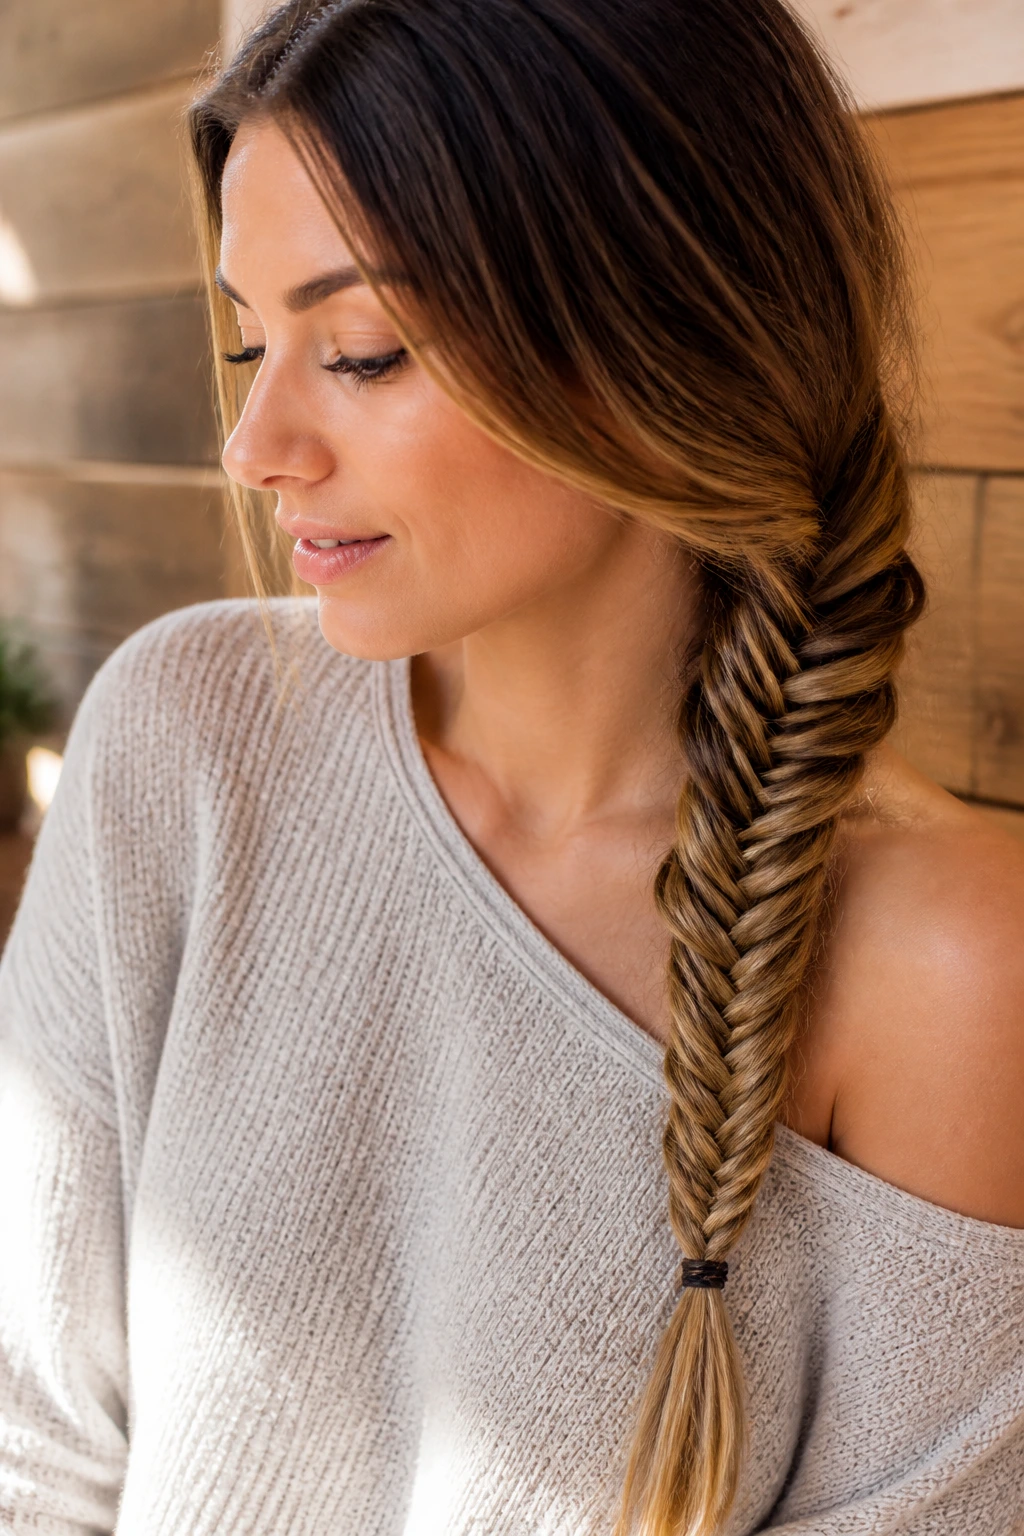
A fishtail braid looks intricate because the pattern is tiny, not because it is hard. That’s the part people get wrong. You only need two sections, and from each outer edge you move a thin piece across to the other side.
The braid takes a little patience the first few times, but it stays quick if you keep the pieces large. Smaller grabs make the pattern tighter and prettier, yet they slow you down. Bigger grabs look a little softer and take far less time. I usually tell people to start with a low side fishtail if they want to learn it, because you can see your hands better when the braid hangs over one shoulder.
A slightly rough texture helps here. Freshly washed hair can slip apart before the braid sets. If your ends are dry or layered, finish with a tiny elastic and tug the outer edges once the braid is secured. That softens the shape and hides the fact that you did it in a rush.
6. Rope Twist Braid
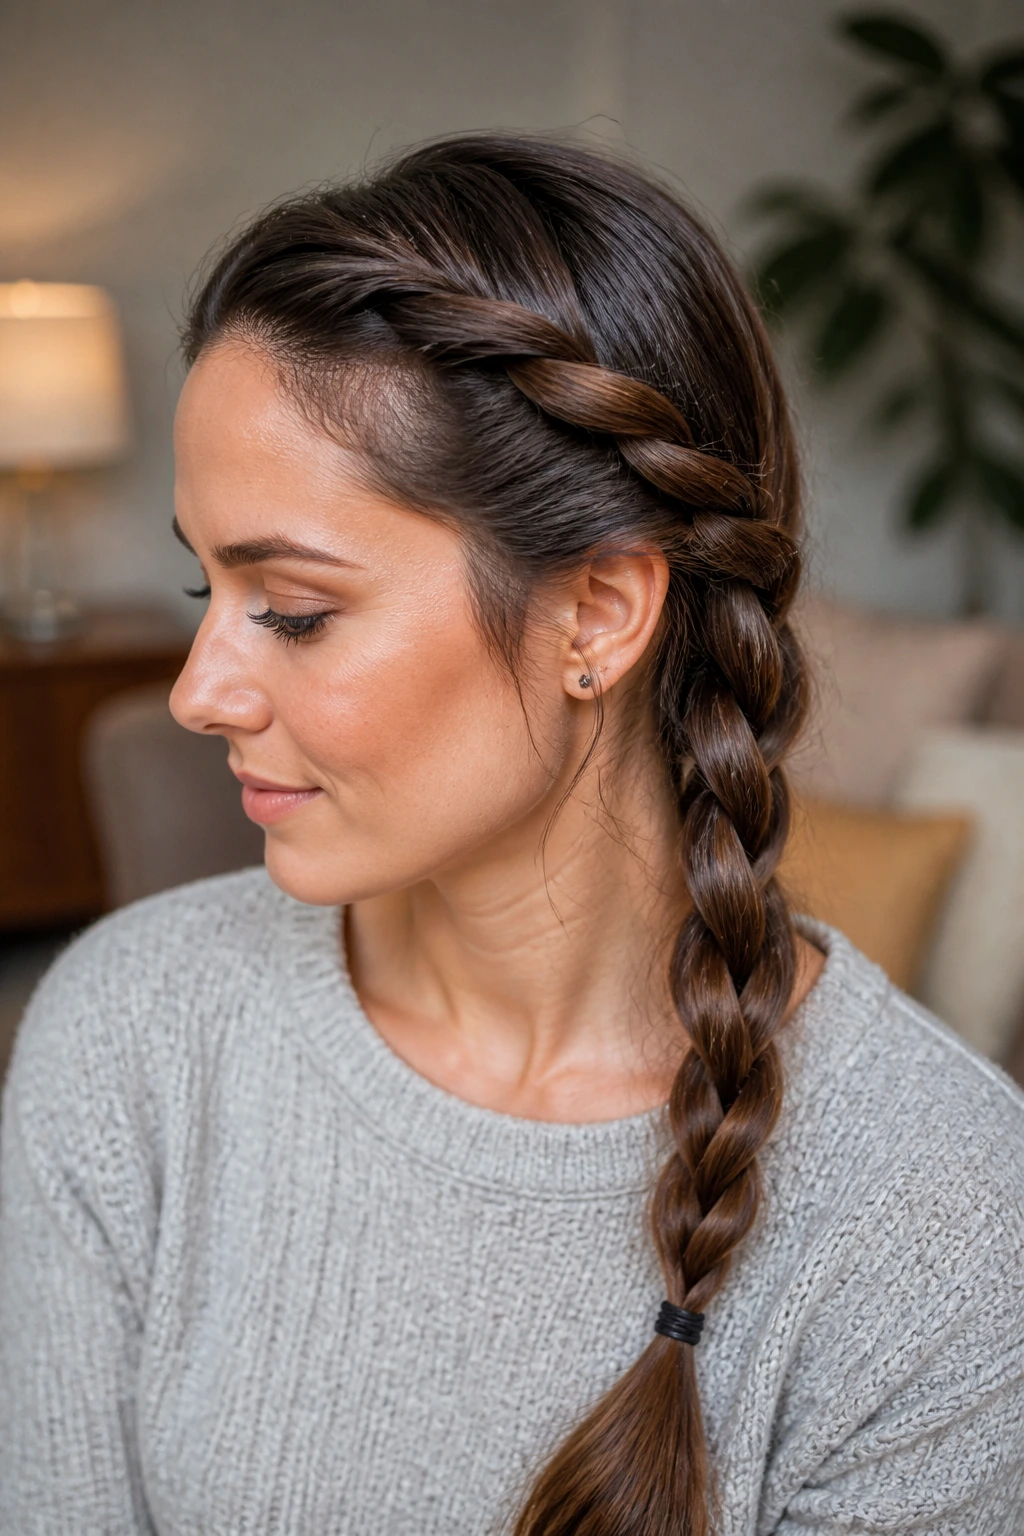
Unlike a three-strand braid, a rope twist only asks you to manage two sections. That’s why it feels so fast. You twist both sections in the same direction, then wrap them around each other in the opposite direction. Done right, it looks cleaner than a plain twist and takes almost no brainpower.
This style works well on straight hair, but it is especially useful on hair with a little wave or coil because the natural texture helps the twist hold. Start with two equal pieces, twist each one clockwise, then cross them counterclockwise around each other. If you twist both sections the same direction and then wrap them the same way, the braid falls apart. That’s the one mistake that bites people.
For a tighter finish, add a small elastic at the bottom and smooth the top with a light gel or styling cream. For a softer finish, stop halfway down and let the ends hang a little loose. Rope twists are one of those styles that can look polished or casual depending on how much you tug them apart at the end.
7. Half-Up Braid

A half-up braid solves the problem of wanting your hair down and out of your face at the same time. That’s a real problem, by the way. Not every day calls for a full updo, and not every braid has to take over the whole head.
Why It Earns a Spot on Busy Mornings
Pull back the top half of your hair, then braid just that section. You can keep it tiny, like a narrow braid from the temples, or make it wider and use it as a visual anchor before letting the rest of the hair fall loose. It works on short hair too, which people forget. You don’t need waist-length hair for this to look deliberate.
The fastest version is a half-up three-strand braid secured at the back with one small elastic. If you want the braid to sit flatter, braid it a touch looser and pin the end under a thin top layer of hair. That trick hides the elastic and makes the style look cleaner.
- Great for second-day hair.
- Good on fine hair because it adds a little shape at the crown.
- Easy to combine with a claw clip if you want extra lift.
- Takes less than 5 minutes once the top section is separated.
Small detail, big payoff: tease the crown with your fingers before braiding. Not a lot. Just enough to stop the top from lying flat.
8. Crown Braid

A crown braid looks like it took forever, which is exactly why it’s such a useful shortcut. If you treat it as two loose side braids pinned across the top of the head, it stops feeling impossible.
Start with a part in the middle or slightly off-center. Braid one side, then the other, keeping both braids low and soft rather than tight to the scalp. Cross them over the top of your head and pin the ends underneath with bobby pins. The whole point is to fake a halo, not create a museum-perfect braid.
This style is easier on medium to long hair, but short layers can still work if you keep the braids a little messy. A satin or silk scarf tied overnight helps the shape stay smoother the next day. And yes, a few face-framing pieces are fine. In fact, they often make the whole thing look less severe and more wearable.
9. Double Pigtail Braids

Two braids are faster than one when your hair is thick, slippery, or plain uncooperative. Split the hair down the middle, braid each side, and you’ve cut the work in half. That’s the charm.
The style feels almost old-school, and I mean that in a good way. It’s practical for school runs, workouts, errands, or any day when you want the ends contained without fussing over one large braid. The part doesn’t need to be ruler-straight. A finger part works fine if you’re in a hurry, and it often looks less harsh than a sharp comb line.
- Best on medium to long hair.
- Works well with a center part or a soft side part.
- Can be finished as classic braids, Dutch braids, or rope twists.
- Holds well with two small elastics and a light mist of hairspray.
Tip: Keep both braids at the same height. If one starts higher than the other, the whole style looks off even when the braids themselves are neat.
10. Bubble Braid
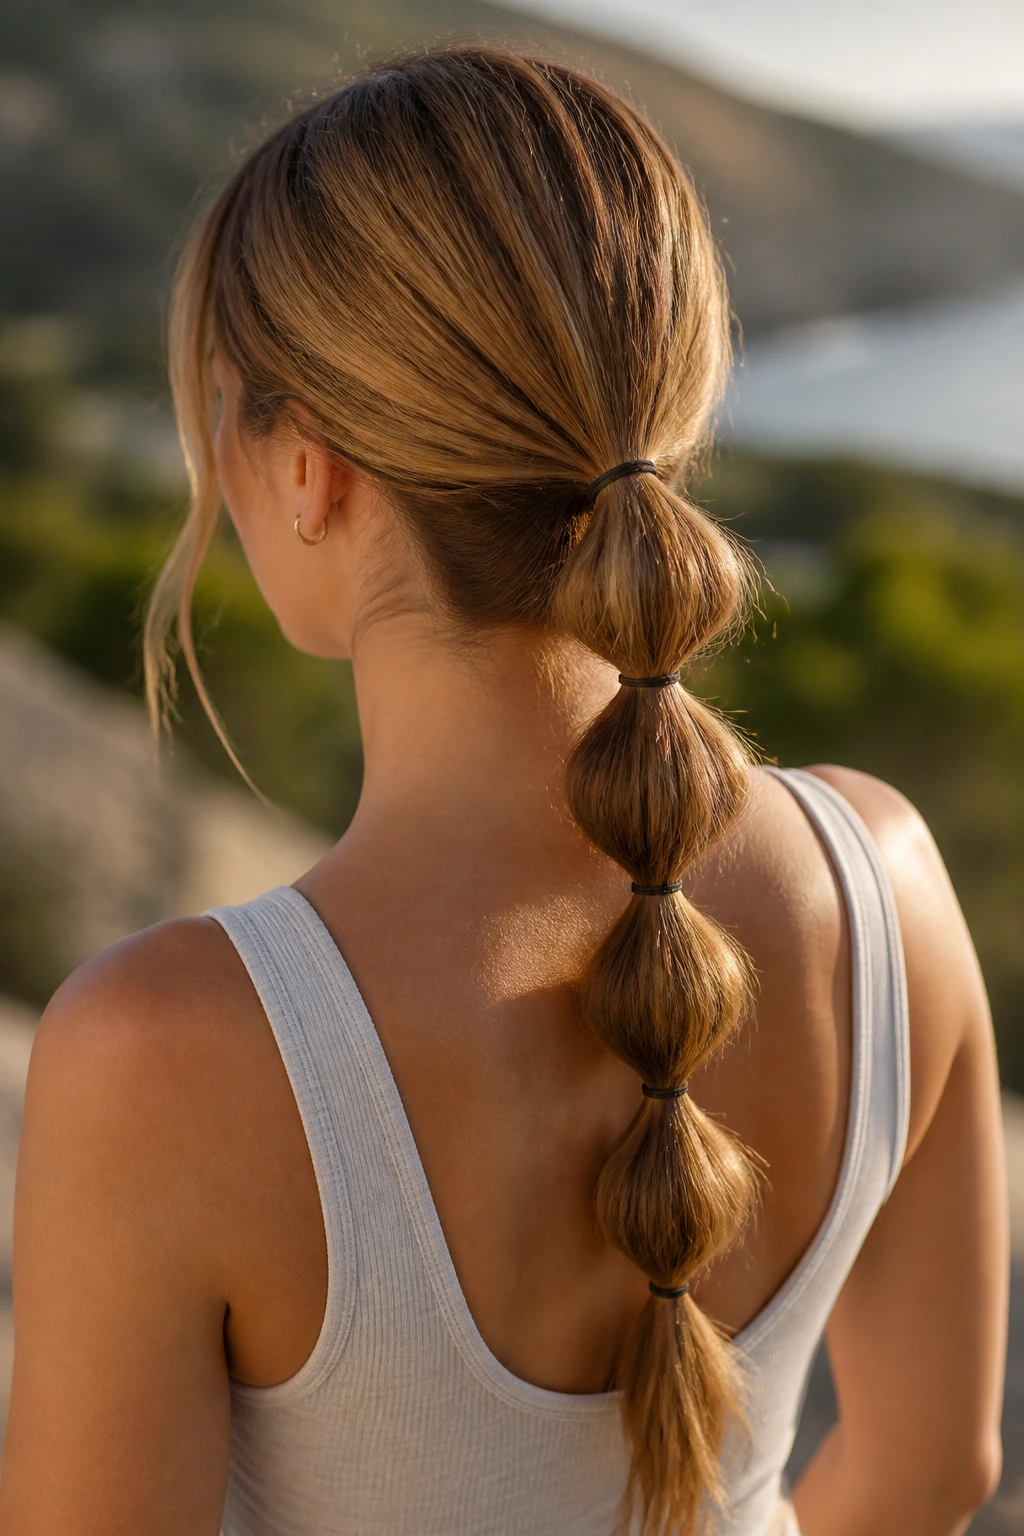
The bubble braid is the shortcut for people who like the look of a braid but want almost none of the hand work. It is not a true braid, which is fine. It earns its place because it gives you structure fast.
Make a low ponytail, then add small elastics every 2 to 3 inches down the length. Gently pull each section between the elastics so it puffs into a round “bubble.” That’s the whole trick. It’s especially useful on long hair where the ends can look stringy in a regular braid, because the bubbles hide uneven length and give the style more shape.
For a cleaner finish, wrap a thin strand of hair around the first elastic at the base of the ponytail. For a softer look, tug the bubbles wider and leave the crown a little loose. On coily hair, the sections can be less perfect and still look good. That’s one reason this style gets so much repeat use.
11. Scarf-Wrapped Braid
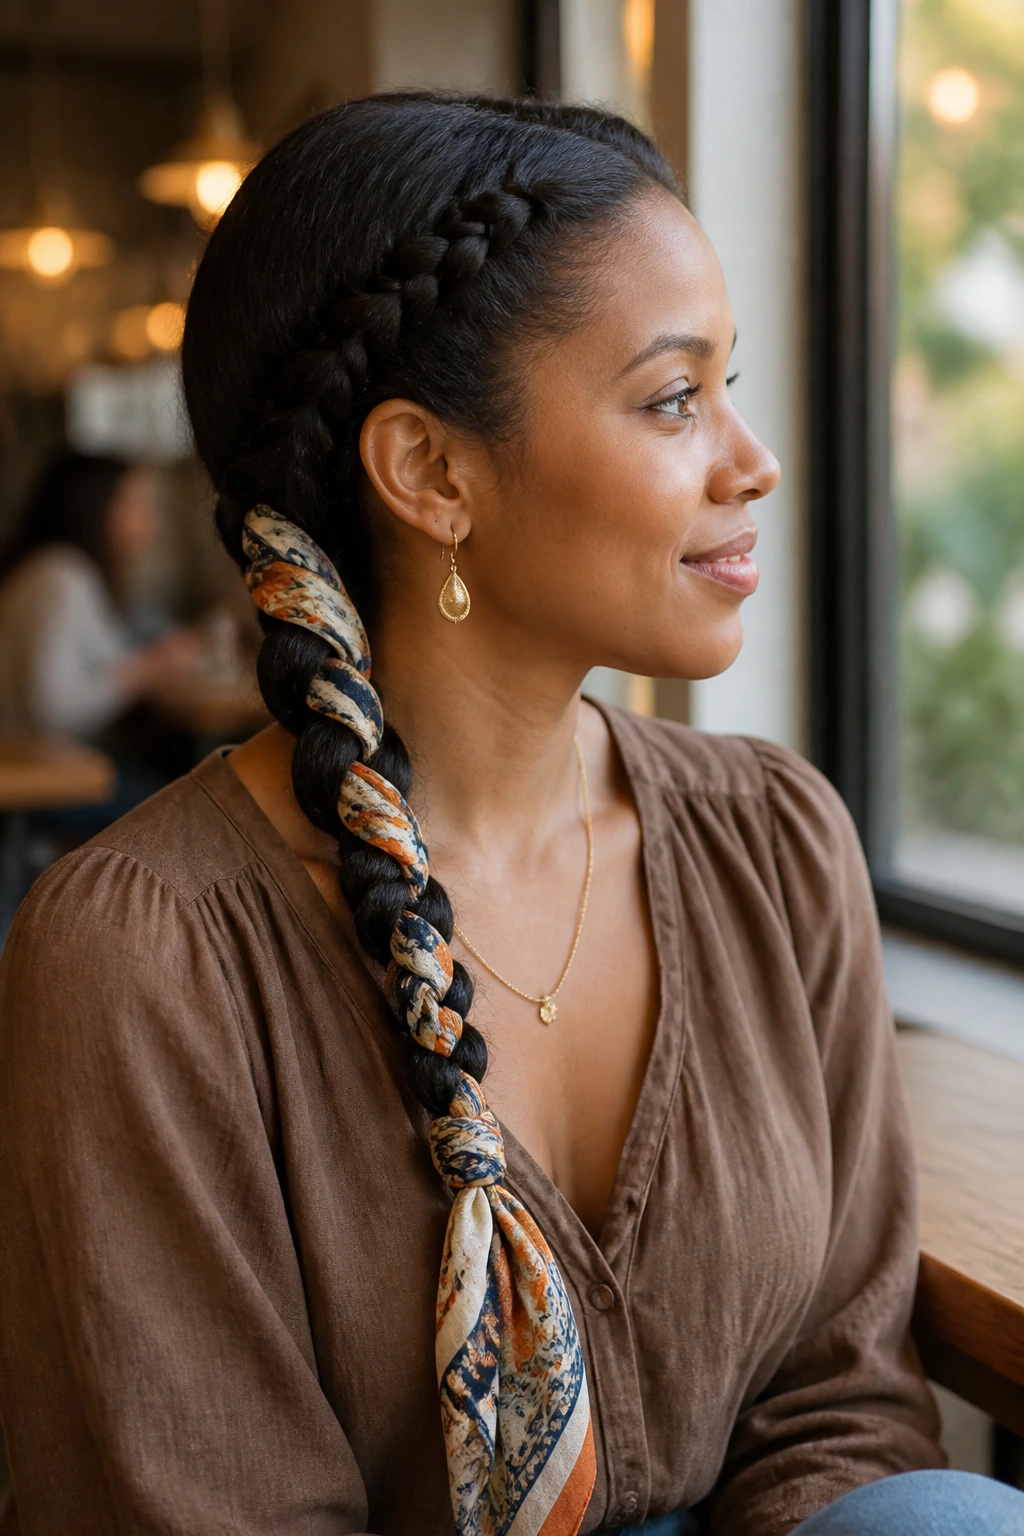
A scarf-wrapped braid does more than decorate the hair. It changes the whole feel of a braid in about thirty seconds.
Take a slim scarf — about 1 inch wide once folded — and either weave it into one of the outer strands or tie it around the base before braiding the hair over it. A silk or satin scarf slides better than a chunky cotton one, and it won’t fight the braid while you work. That matters when you’re trying to stay within a five-minute window.
This style is especially useful when the braid itself is simple but you want it to look finished. The scarf hides frizz, adds color, and makes plain hair feel styled without extra sectioning. It’s also a smart option for days when the ends need a little disguise. I like this best with a low braid or a side braid because the fabric can hang naturally instead of sticking out like an afterthought.
If the scarf is slippery, knot it once at the base before starting the braid. Saves time. Saves nerves.
12. Pull-Through Braid
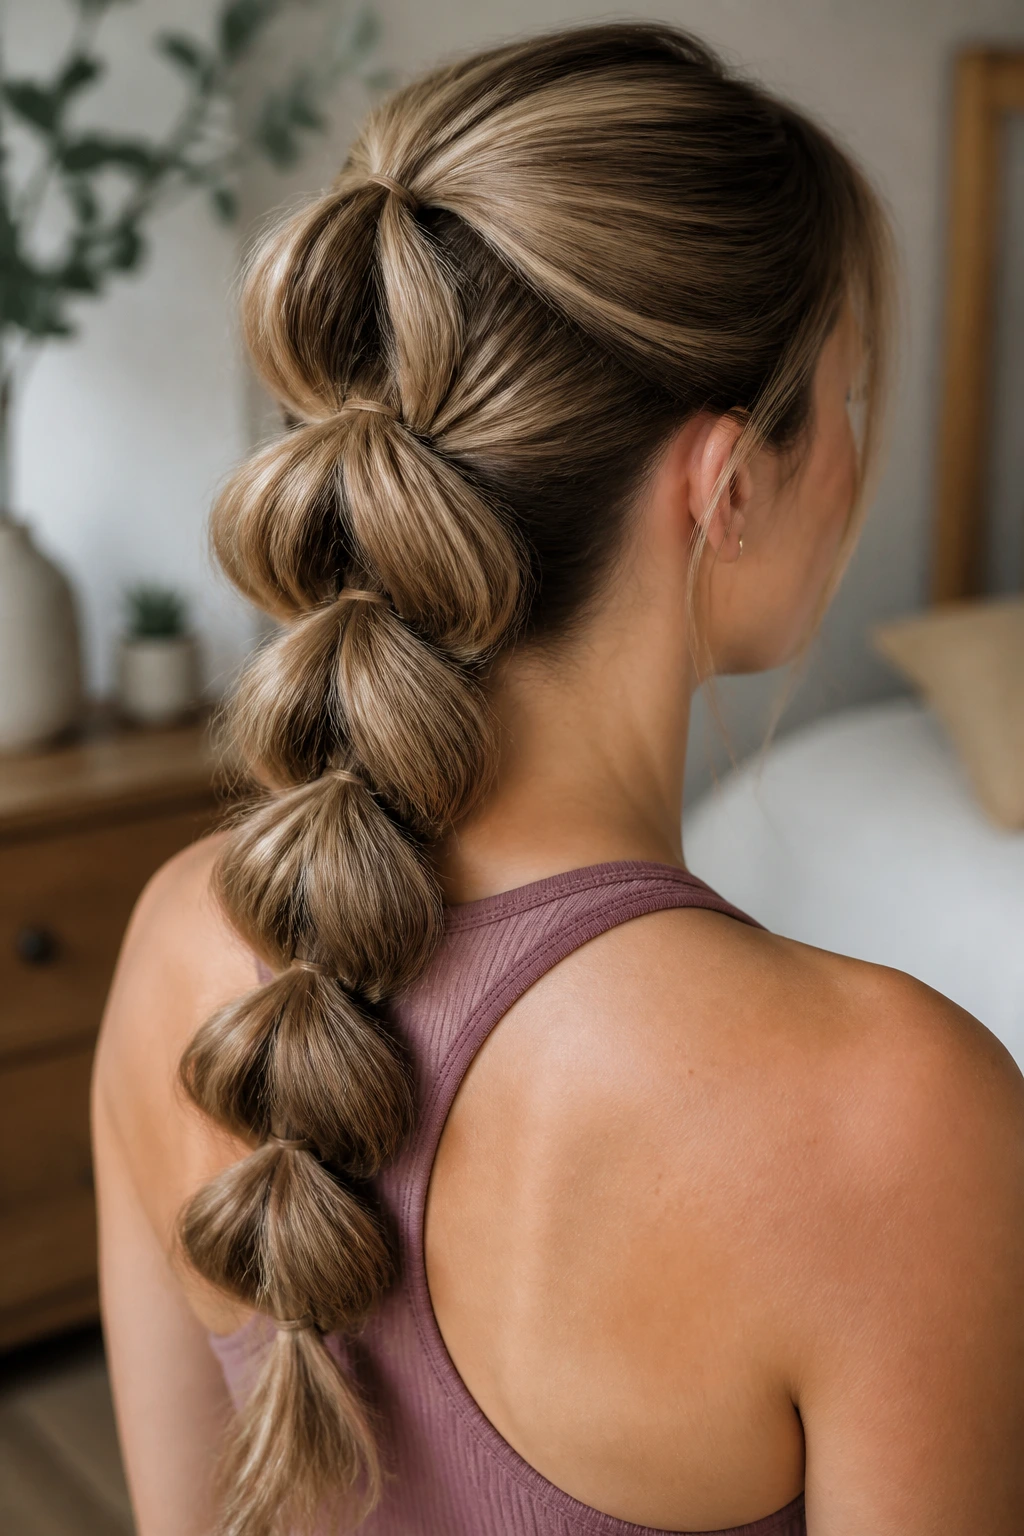
If braiding fingers tend to tangle, the pull-through braid is the one to try. It looks like a thick, glossy braid, but you build it from stacked ponytails instead of crossing strands over and over.
Start with a small top ponytail, split it in two, and clip the sections out of the way. Make a second ponytail just below it, then pull the first ponytail’s split pieces around that second ponytail. Keep repeating the pattern down the back. The sections need to be neat, but they do not need to be tiny. In fact, larger sections often look better and move faster.
This style is a favorite for long hair because the volume builds itself. You get the fullness of a big braid without needing perfect hand coordination. It also works well with extensions or very layered hair, where traditional braids can look thin at the ends. Use small clear elastics and flatten each ponytail before you split it. That’s the part that keeps the whole thing looking clean.
13. Waterfall Braid

Can a braid let pieces fall away on purpose and still look neat? Yes. That’s the whole point of a waterfall braid. It sounds fussy, but once you see the pattern, it becomes one of the easier braids to fake with confidence.
How to Keep It from Slipping
Work along one side of the head. Start a French braid near the temple, then drop the bottom strand each time you cross and replace it with a fresh piece from above. The loose strand creates the “waterfall” effect, while the rest of the braid stays anchored. The style looks best when the hair has a little texture, because silky strands can slide apart before you pin the end.
A small amount of texturizing spray or dry shampoo helps. So does a rat-tail comb for the first section. Keep your handedness in mind too: braid toward your stronger side if you’re learning. It makes the movement less awkward.
Waterfall braids shine on medium to long hair and they’re especially nice when you want the front of the hair styled but the back left loose. If the braid gets sloppy, pin it with a bobby pin under a top layer of hair and move on. No one will inspect it that closely.
14. Braided Ponytail
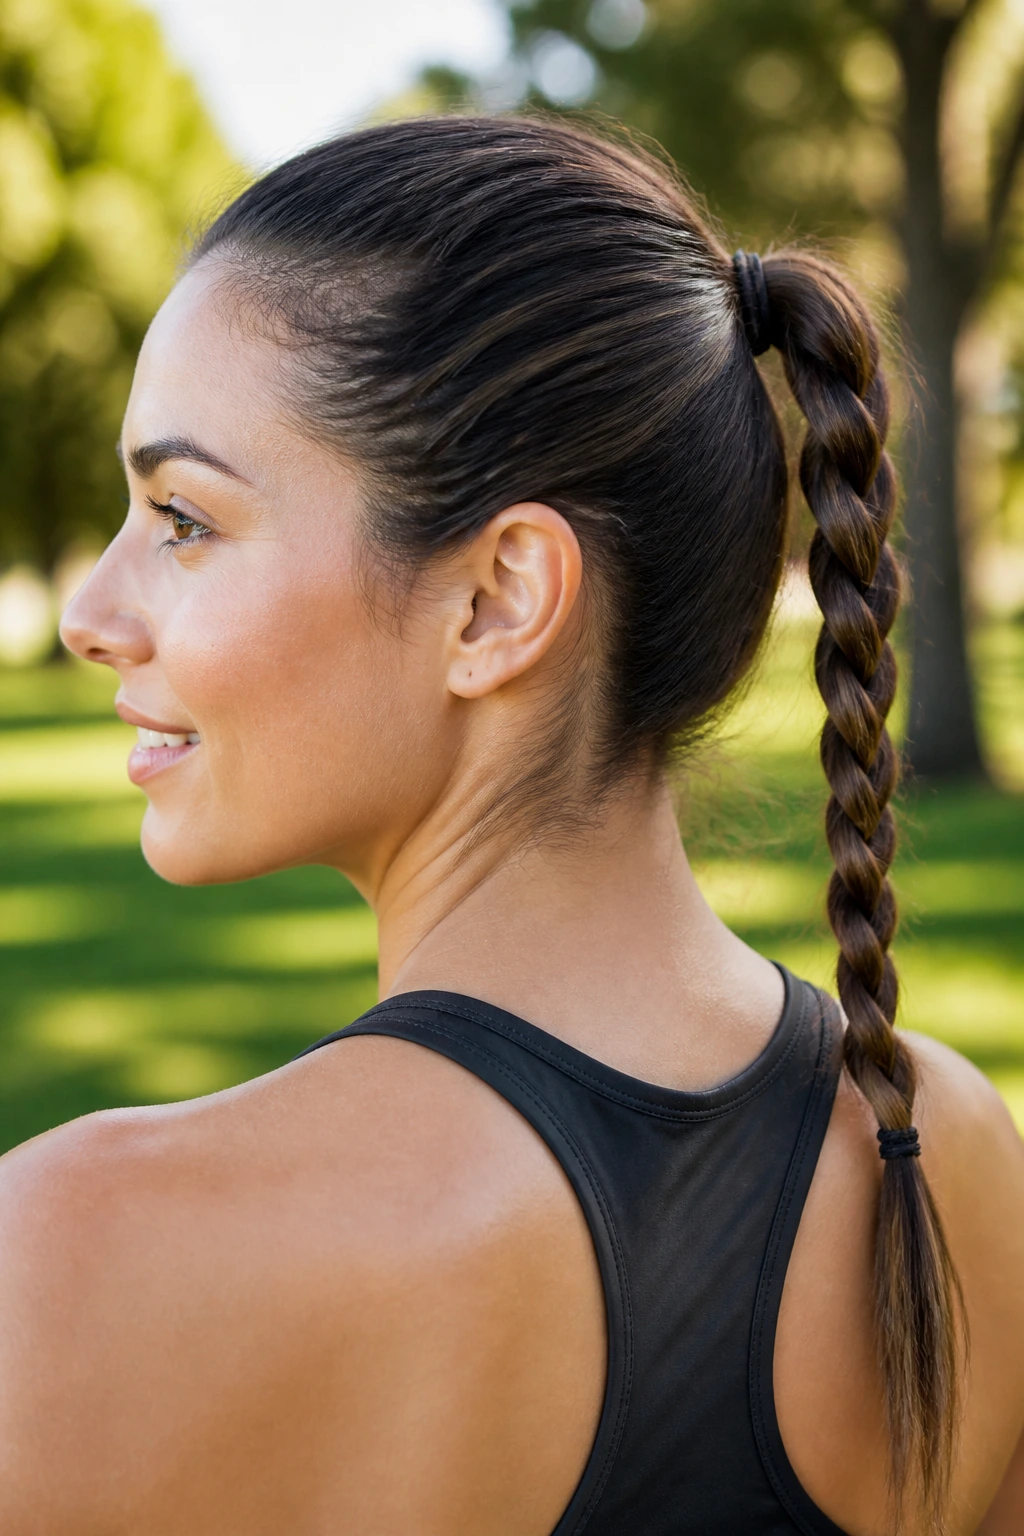
A braided ponytail is the blunt answer to flat roots and stringy ends. Put the hair in a ponytail first, and half the work is already done.
You can keep the braid simple. Once the ponytail is secure, braid the tail with a classic three-strand pattern or a fishtail if you want a little extra texture. The main advantage is speed: the crown is already controlled, so you only have to manage one section. It’s a smart choice for long hair because the braid hangs cleanly and stays out of the way.
- Best for workouts, long workdays, and travel.
- Works with high, mid, or low ponytails.
- Holds better if you wrap a thin strand around the elastic.
- Easy to switch into a bun later if needed.
I like this version when the top of the hair needs to be smooth but not stiff. If you want more lift, pull the ponytail tight first. If you want a softer shape, loosen the crown a little with your fingers after securing the base.
15. Milkmaid Braid
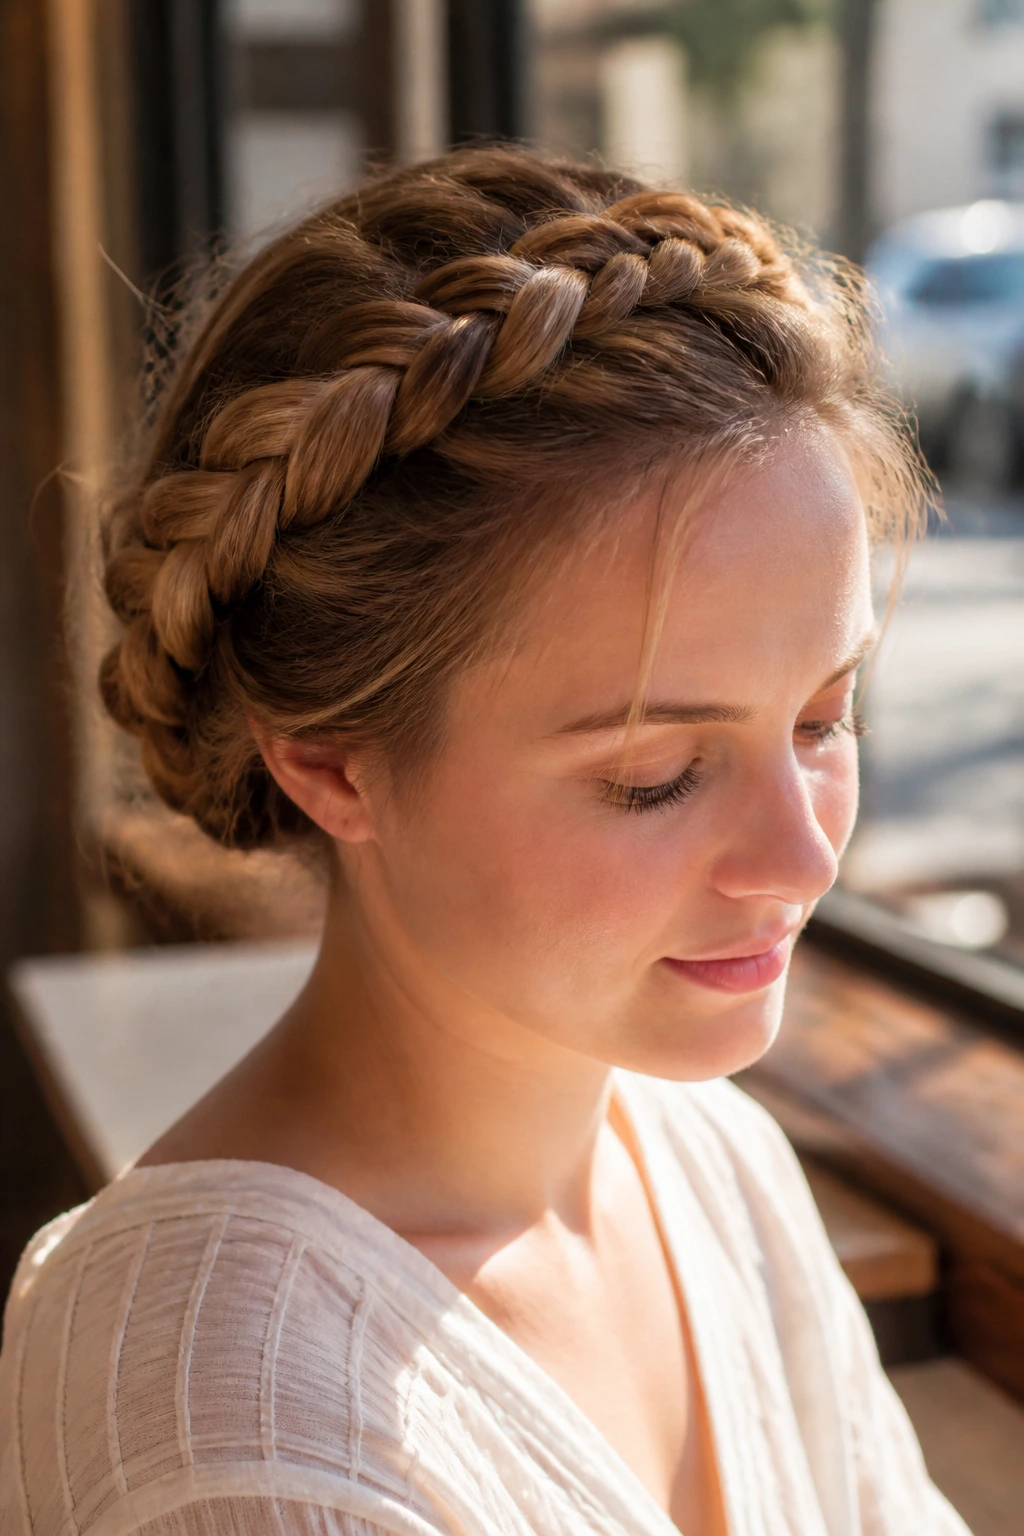
There’s something useful about a braid that sits across the top of the head and keeps every loose end under control. The milkmaid braid does exactly that, and it does not need to be fussy to work.
Braid two low pigtails, cross them over the crown, and pin them in place. That’s the basic version. If your hair is long enough, the ends can tuck underneath the opposite braid. If it isn’t, hide the tips under the pinned sections and use a couple of bobby pins to lock them down. The cleanest result comes from loose braids rather than tight ones. Tight milkmaid braids can look severe fast.
- Great for warmer weather or any day you want hair off the neck.
- Works well on hair with a bit of grip.
- Easiest when the braids start low behind the ears.
- A few face-framing pieces soften the shape.
Small warning: don’t overpin the style. Two or four pins placed well beat a dozen scattered pins every time.
16. Boxer Braids
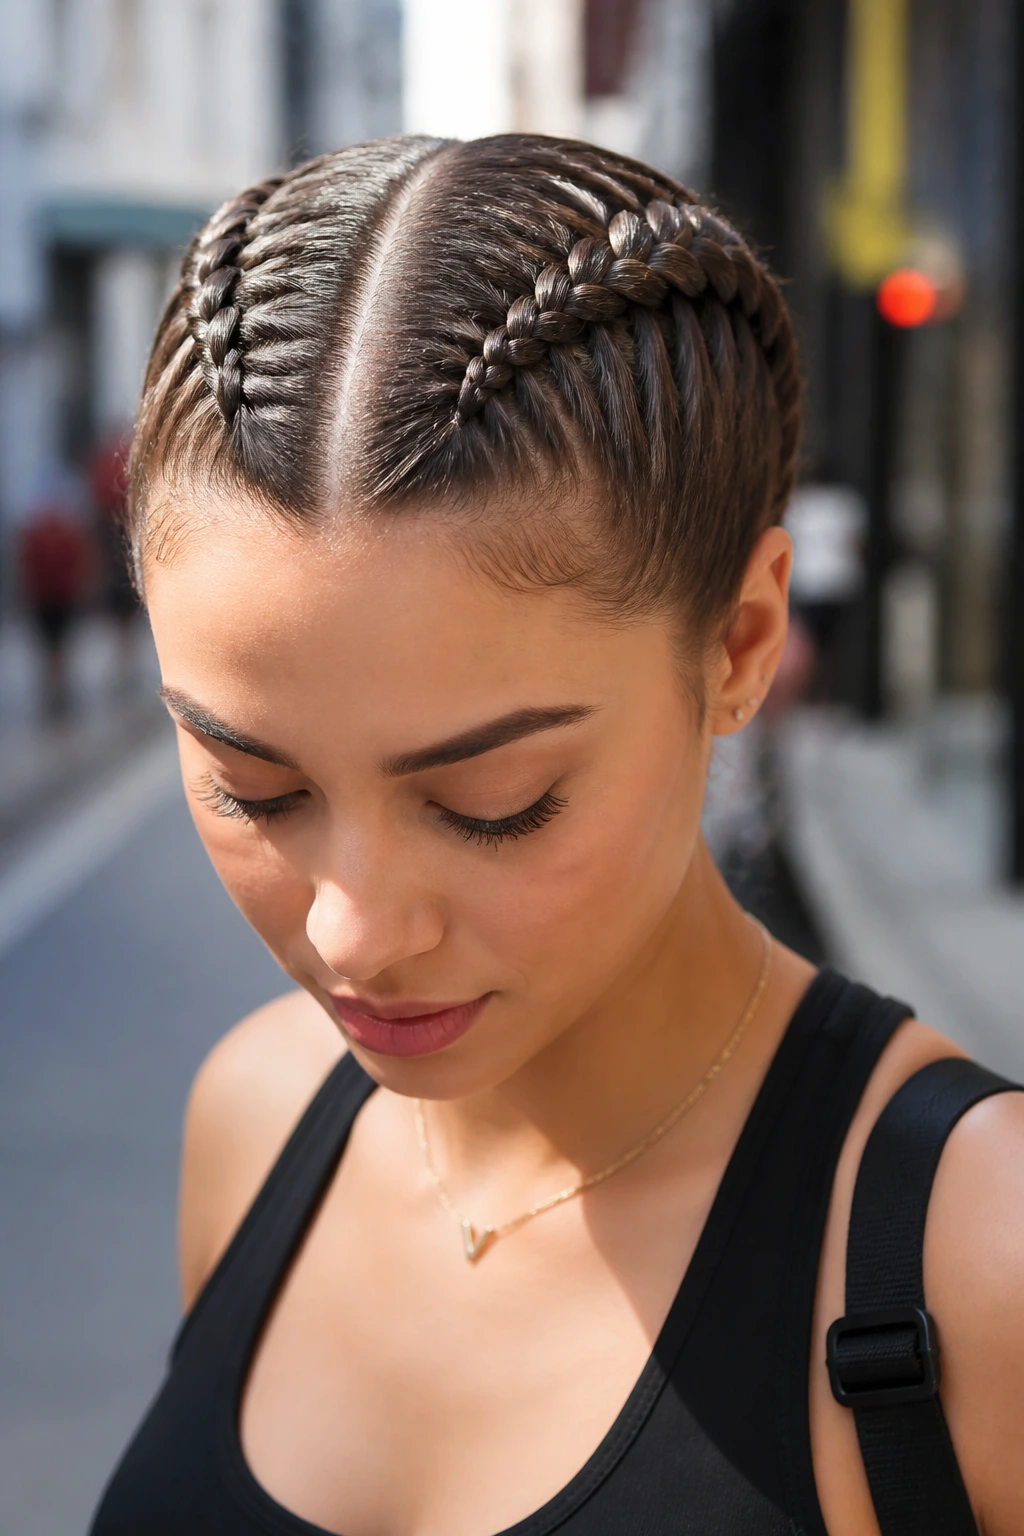
Boxer braids stay put. That is why people reach for them when the day is long and the hair needs to behave.
Technically, these are two tight Dutch braids running from the hairline to the nape, but the reason they work is simple: they divide the hair cleanly and keep the tension even on both sides. Start with a center part, braid close to the scalp, and keep your sections balanced as you go. The style is fast once your hands know the movement, though the first side is usually easier than the second. That’s normal.
This braid is excellent for thick hair, textured hair, and any day that calls for a style that won’t budge. It also pairs well with a little smoothing cream at the part line, especially if baby hairs tend to frizz up. If the braid feels too tight at the temples, loosen it a touch after securing the ends. There’s no prize for the most tension.
17. Face-Framing Accent Braids
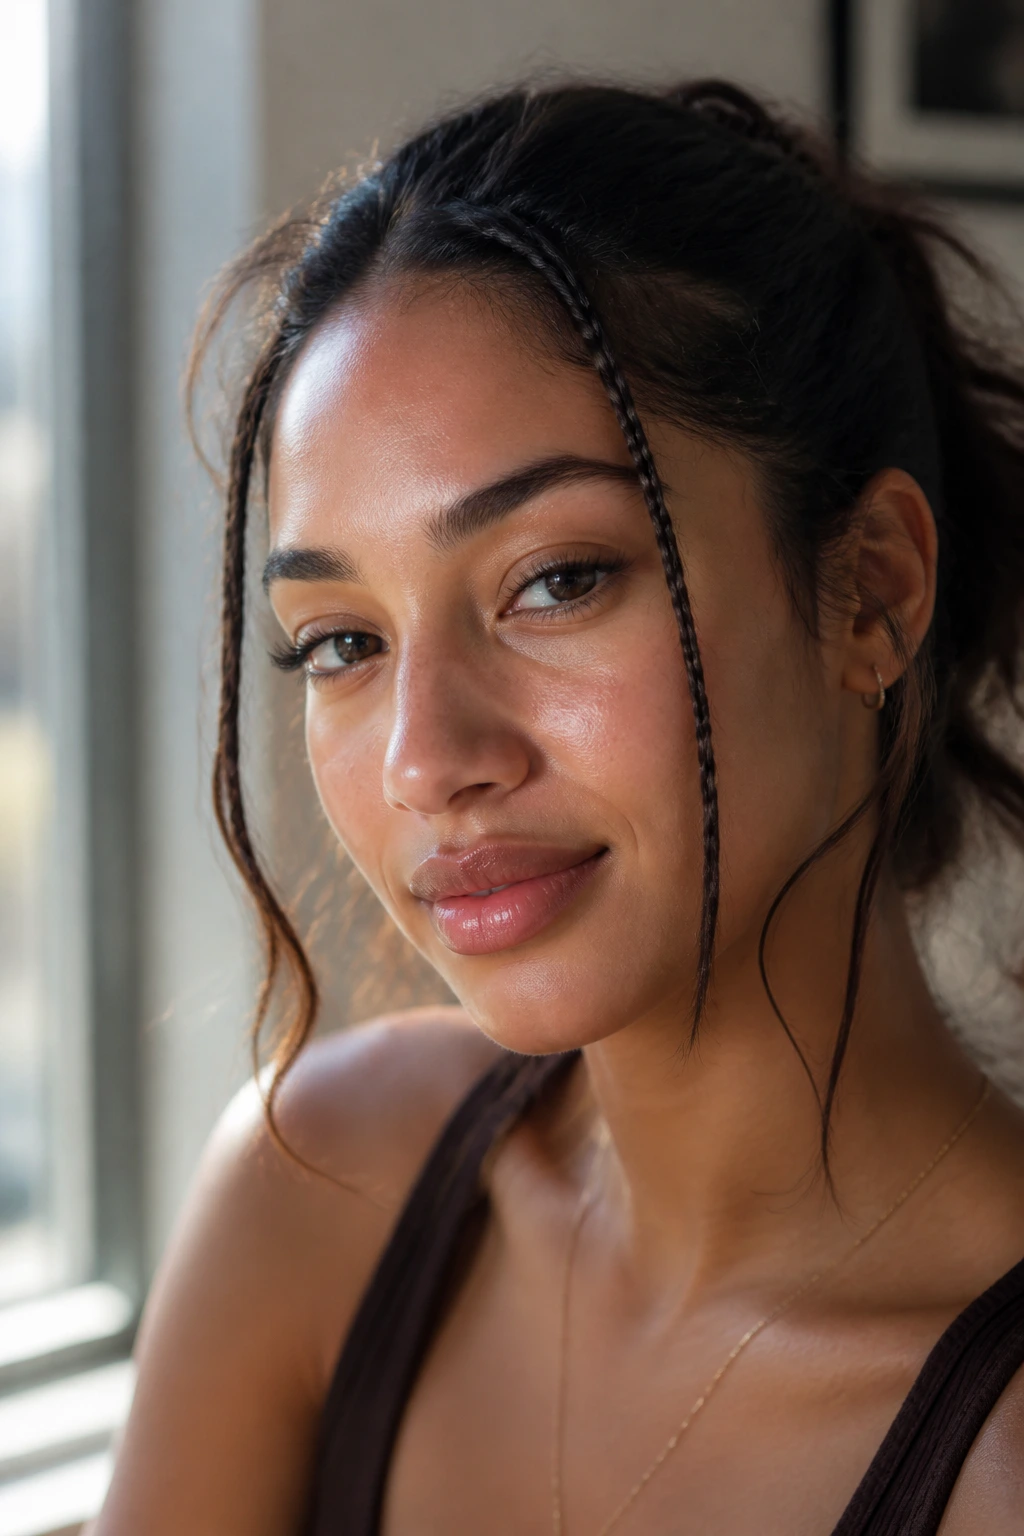
Want just enough braid to look styled? Face-framing accent braids are the answer. They’re tiny, fast, and easy to hide into the rest of the hair if you change your mind halfway through.
How to Wear Them
Take a narrow section near the temple — about the width of your pinky finger — and braid it down for a few inches. Secure it with a tiny elastic or tuck it behind the ear. You can do one side only, both sides, or even two slim braids on one side for a little more detail. On curly hair, these braids can break up the shape around the face in a nice way without taking over the whole style.
The point here is speed, so do not make the section too small. Tiny braids look delicate, but they can eat up time fast. If your hair is layered, keep the braid loose so short front pieces can blend into the rest of the style instead of sticking out.
These work well with ponytails, buns, loose waves, and even under a hat. Handy little style. No drama.
18. Braided Bun
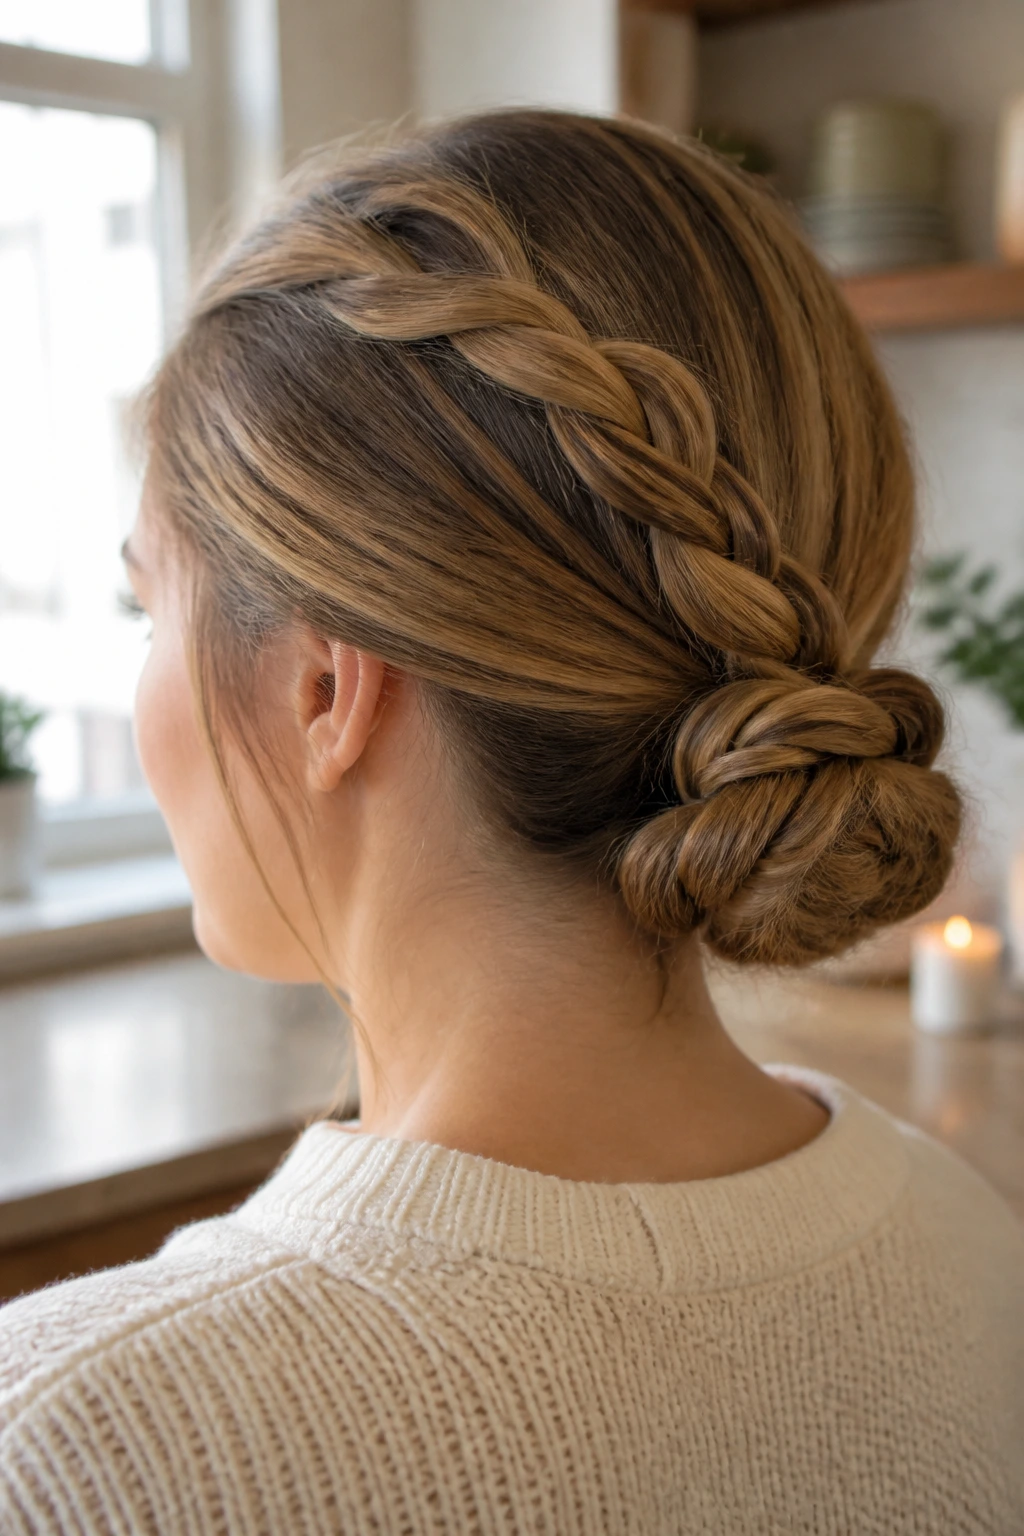
A braided bun keeps the ends tucked, which is why it feels tidier than a plain bun. You braid first, then coil. That extra step gives the style more structure without making it much slower.
Pull the hair into a low ponytail, braid the tail, and wrap it around the base into a bun. Pin it with 2 to 4 bobby pins in an X shape so the coil stays flat against the head. If the hair is long, you may need one extra pin at the far side of the bun where the weight pulls hardest. That’s the spot that usually slips.
This style is a strong pick for humid days, work settings, or any moment when you want your hair to look deliberately finished. It can be slick and neat, or a little soft around the edges if you tug the braid apart before coiling. I prefer the softer version. It looks less severe and gives the bun more shape.
One good habit: braid the ponytail all the way down before coiling, not halfway. Half-braided ends tend to poke out later.
19. Easy Feed-In Side Braid
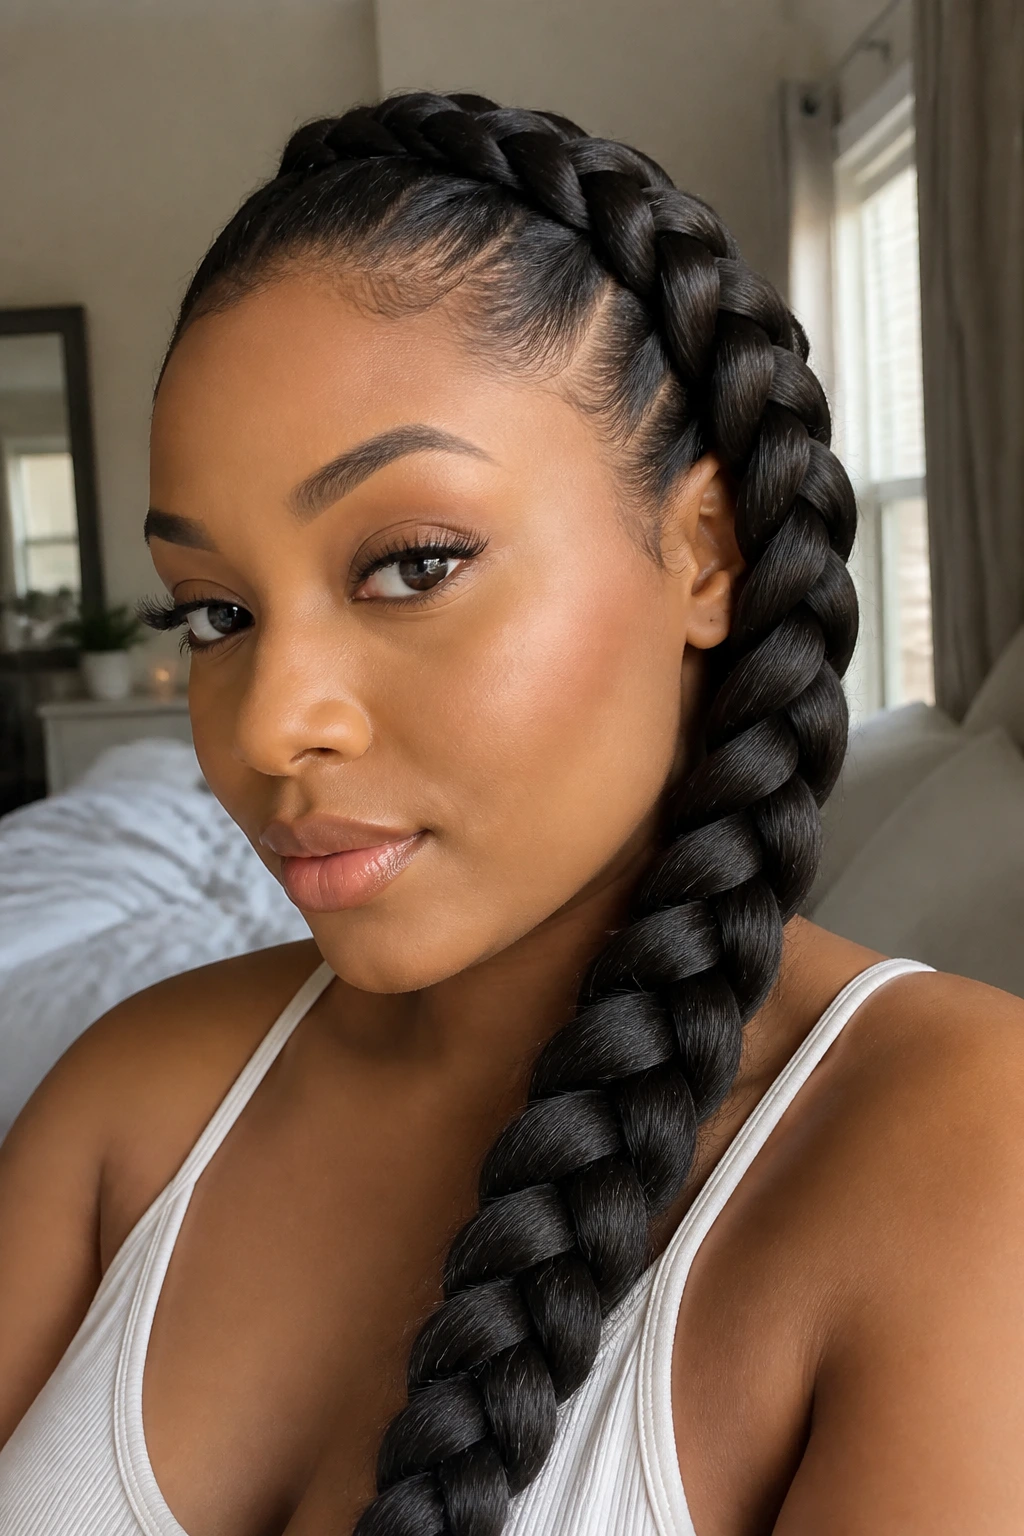
If you want a braid that starts neat and gets thicker as it moves down, an easy feed-in side braid is the move. The “feed-in” part just means you add a little hair as you braid, rather than starting with all of it at once.
Keep the sections bigger than you would for a salon-style feed-in braid. That is how you make it quick enough for a five-minute window. Sweep the hair to one side, start with a small base braid near the hairline, then add larger pieces from the top and back as you move downward. On natural hair, a small bit of styling cream or edge control can help the part stay clean. Use a light hand. Too much product slows you down and makes the hair sticky.
- Best for thick or textured hair.
- Looks fuller than a plain side braid.
- Works well with a side part or no visible part at all.
- Can be finished with one elastic or a wrap of hair at the base.
The whole style gets easier when you stop chasing perfect sections. Good enough is the point.
20. Braided Headband
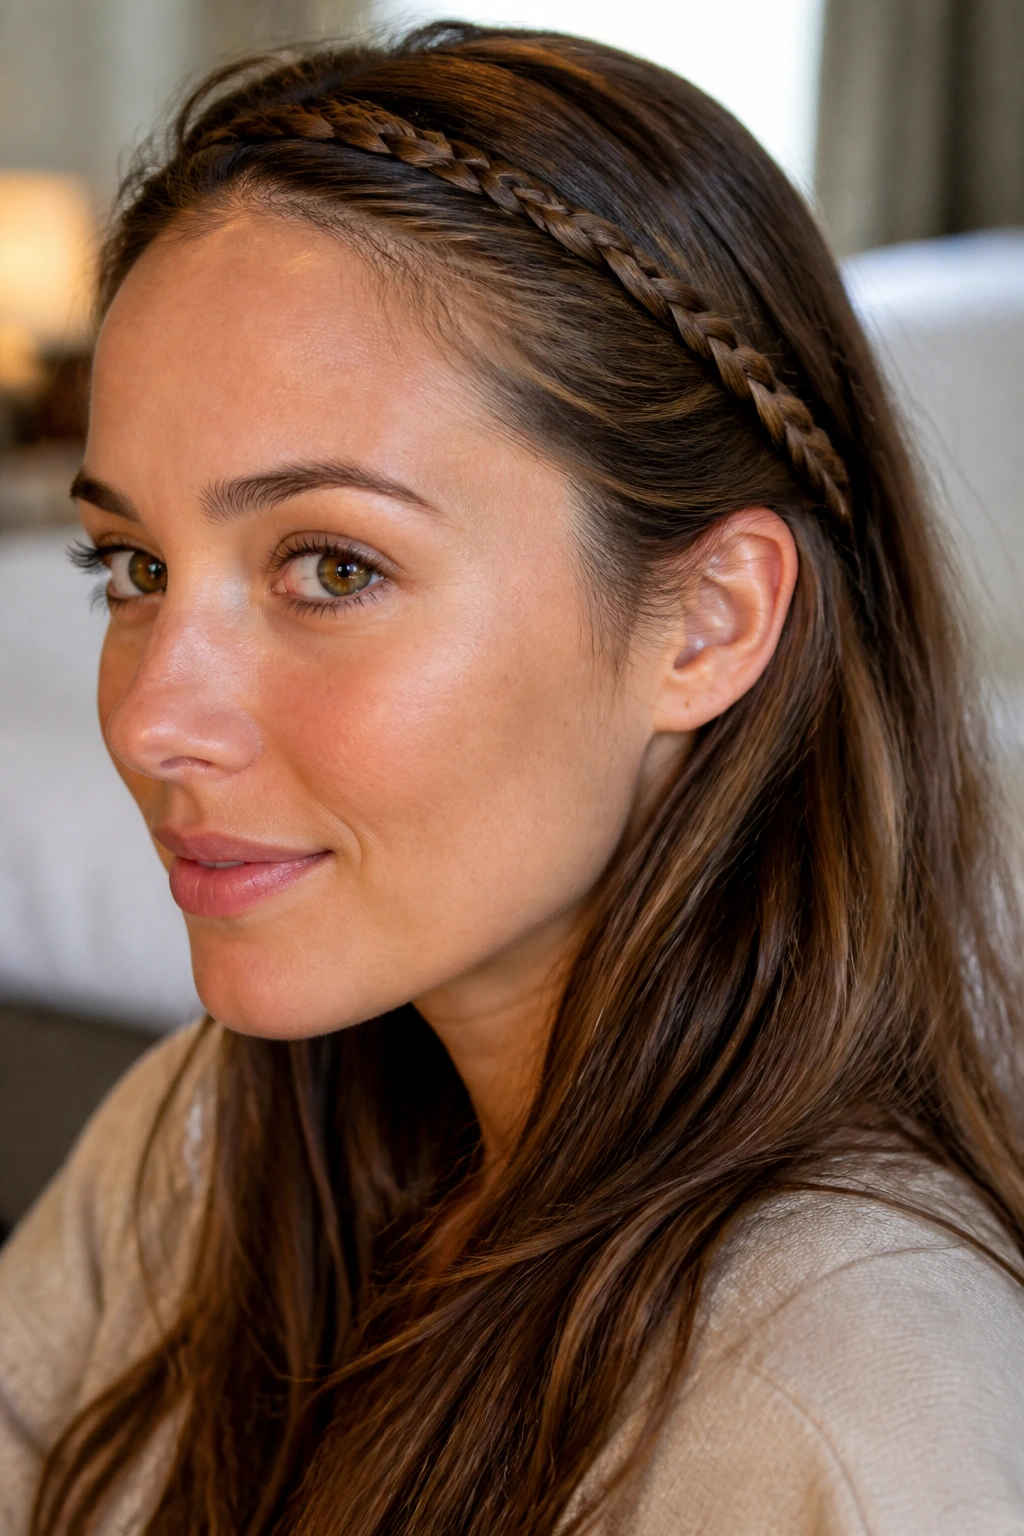
A braided headband is the fast answer when you want one clean detail near the face and nothing else. It looks delicate, but the method is straightforward: braid a small section and pin it across the hairline like a band.
Take a narrow section from just above one ear, braid it, then sweep it across the top or front of the head and pin it behind the opposite ear or tuck it under a loose layer of hair. If the hair is long, the end can disappear under the rest of the style. If it’s shorter, two pins crossing each other hold better than one lonely pin sliding around.
This one is useful when the rest of the hair is left down, especially if you need a little structure around the face without committing to a full braid. It also works on second-day hair better than fresh hair, since a little texture keeps the braid from slipping. Keep the section small, keep the braid soft, and do not overthink the placement.
Sometimes that’s all a hairstyle needs.
