



Dutch braid hairstyles for school have a built-in advantage: they look tidy before first period, and they usually still look decent when the day turns messy. That matters more than people admit. A braid that sits flat, grabs the hair firmly, and does not fall apart every time you pull on a hoodie is worth its weight in gold on a rushed morning.
The Dutch braid is the inside-out braid, which means the strands cross under instead of over. That one change gives the braid more height and a little more grip at the scalp, so it tends to hold shape better than a loose three-strand plait. It also makes the braid look fuller, which is handy if your hair is fine, straight, or a little slippery.
A good school braid does not need to be fancy. It needs to stay put, keep hair out of your face, and not take twenty minutes when the bus is already outside. If your hair is curly or coily, a Dutch braid can also help cut down on daily rubbing from collars and backpack straps — as long as you keep the tension comfortable and avoid yanking the front too tight.
Some of these styles are quick enough for a normal Tuesday. Others are a little more polished for picture day, concerts, or the kind of morning when you have five extra minutes and a mirror that actually works. Start with the one that matches your hair length, your patience, and how much chaos you expect before lunch.
1. Classic Twin Dutch Braids
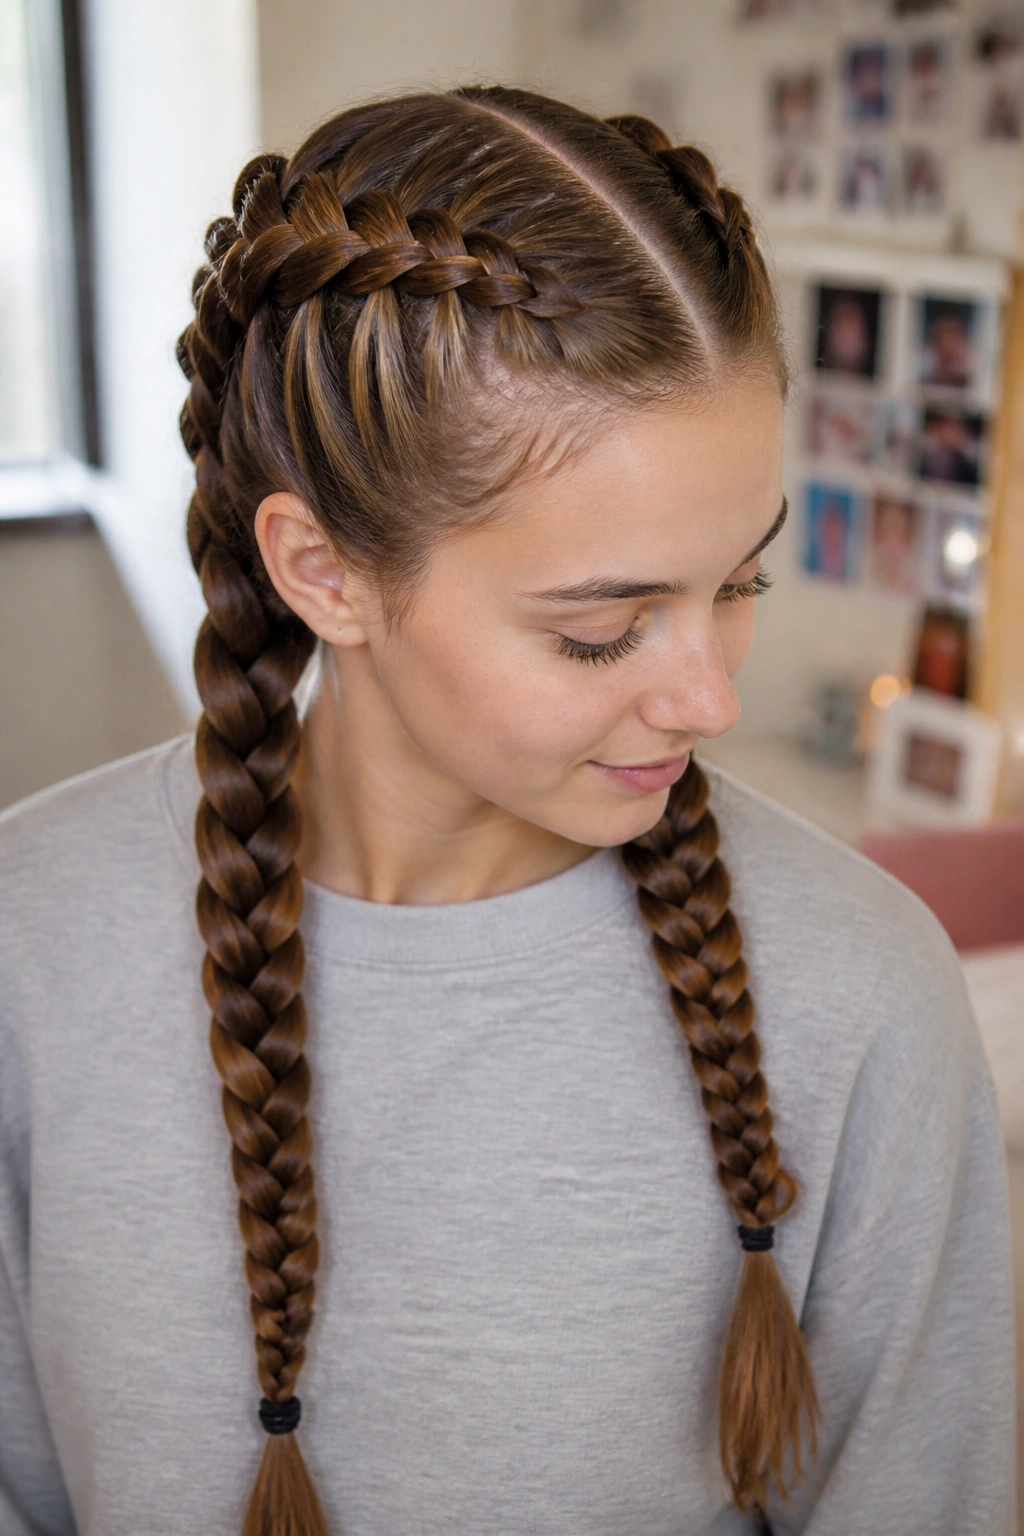
Twin Dutch braids are the old reliable. They split the hair into two neat lanes, keep the ends controlled, and make even second-day hair look intentional instead of forgotten.
Why They Work for School
They keep the weight balanced on both sides of the head, which helps if you hate that heavy feeling from one side braid swinging around all day. They also stay flatter under a backpack strap than a puffier style.
- Best for: medium to long hair, especially if it tangles fast
- Time needed: about 8 to 12 minutes once you know your part
- Tool that helps: a rat-tail comb for a clean center part
- Small upgrade: finish with clear elastics and gently widen the braid loops with your fingers
Tip: Keep the first three sections tight at the scalp, then relax your grip a little lower down. That gives you a neater crown without making your head feel squeezed.
2. One Thick Center Dutch Braid

A single Dutch braid down the middle looks cleaner than people expect. It pulls the hair back from the face, but it still leaves the rest of the style soft enough for school.
This one is a good choice if you are short on time and do not want to split the hair into two separate braids. It also works well with layered hair because the braid sits on top and does not need every strand to be perfectly the same length.
If your hair is very slippery, mist the roots with water or use a little styling cream before braiding. That extra grip matters. The braid holds better, and the pieces do not keep sliding loose while you are trying to finish the last few crosses.
Best look: clean part, smooth sides, braid ending in a low elastic or a small ribbon. Simple. Sharp. No fuss.
3. Dutch Braid Headband Across the Hairline
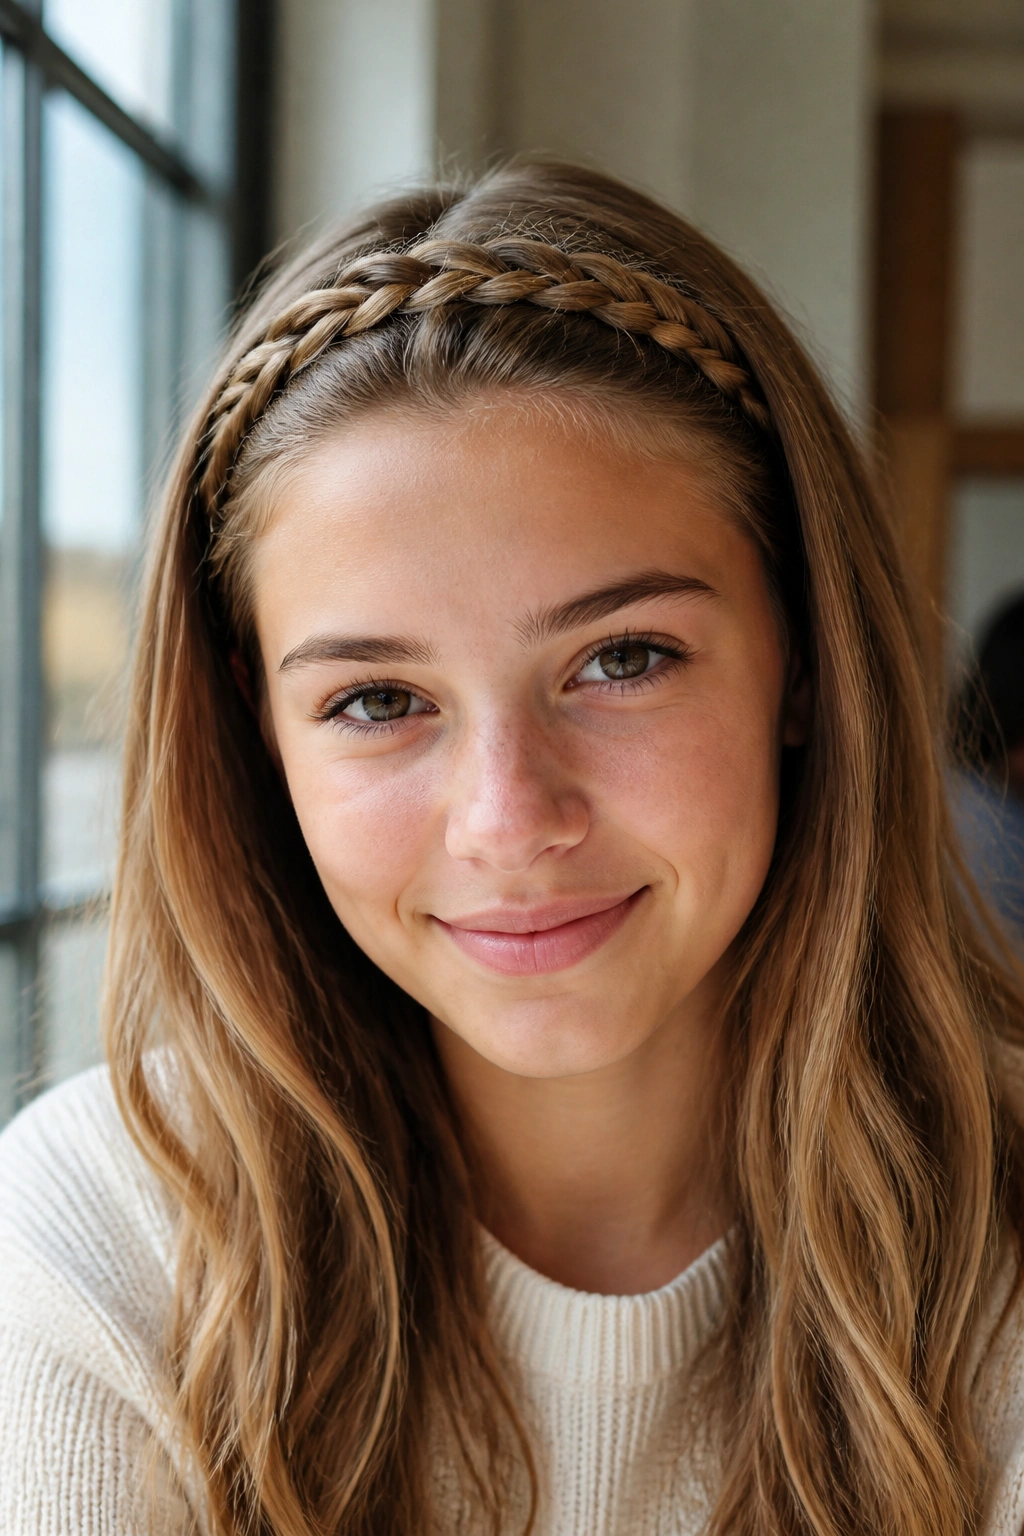
What if you want your hair down, but your bangs keep falling into your eyes during class? This is the fix I reach for first.
The headband braid starts near one ear, travels across the front hairline, and stops near the other side. It gives you that braided detail right where it shows, while the rest of the hair stays loose and easy.
How to Place It
Take a slim section from the heavier side of your part and braid it across the front, keeping it close to the scalp. Pin the end behind the ear with two bobby pins that cross like an X. That keeps the braid from sliding.
This one looks especially nice with straight hair, soft waves, or a blowout that has a little bend at the ends. If your school has a dress code that limits loose hair, this still feels neat without looking severe.
4. Half-Up Dutch Crown

You know those mornings when your hair looks fine until you try to do something with it? A half-up Dutch crown handles that mood pretty well.
Braid a Dutch section from one temple to the other, then stop at the back of the head and secure it. The rest of the hair stays loose, so the style still feels soft. But the front is out of the way, which is the real win when you are reading, writing, or moving between classes.
A tiny claw clip or two clear pins can help anchor the braid at the back. If your hair is thick, leave the lower half a little textured instead of forcing it pin-straight. That mix of tidy and loose is what keeps the style from looking overworked.
- Try it with: loose curls, a straight blowout, or natural texture
- Skip the heavy hairspray: it can make the braid stiff and crunchy
- Use a small ribbon bow: only if your school dress code allows it
5. Dutch Braid Into a Low Bun
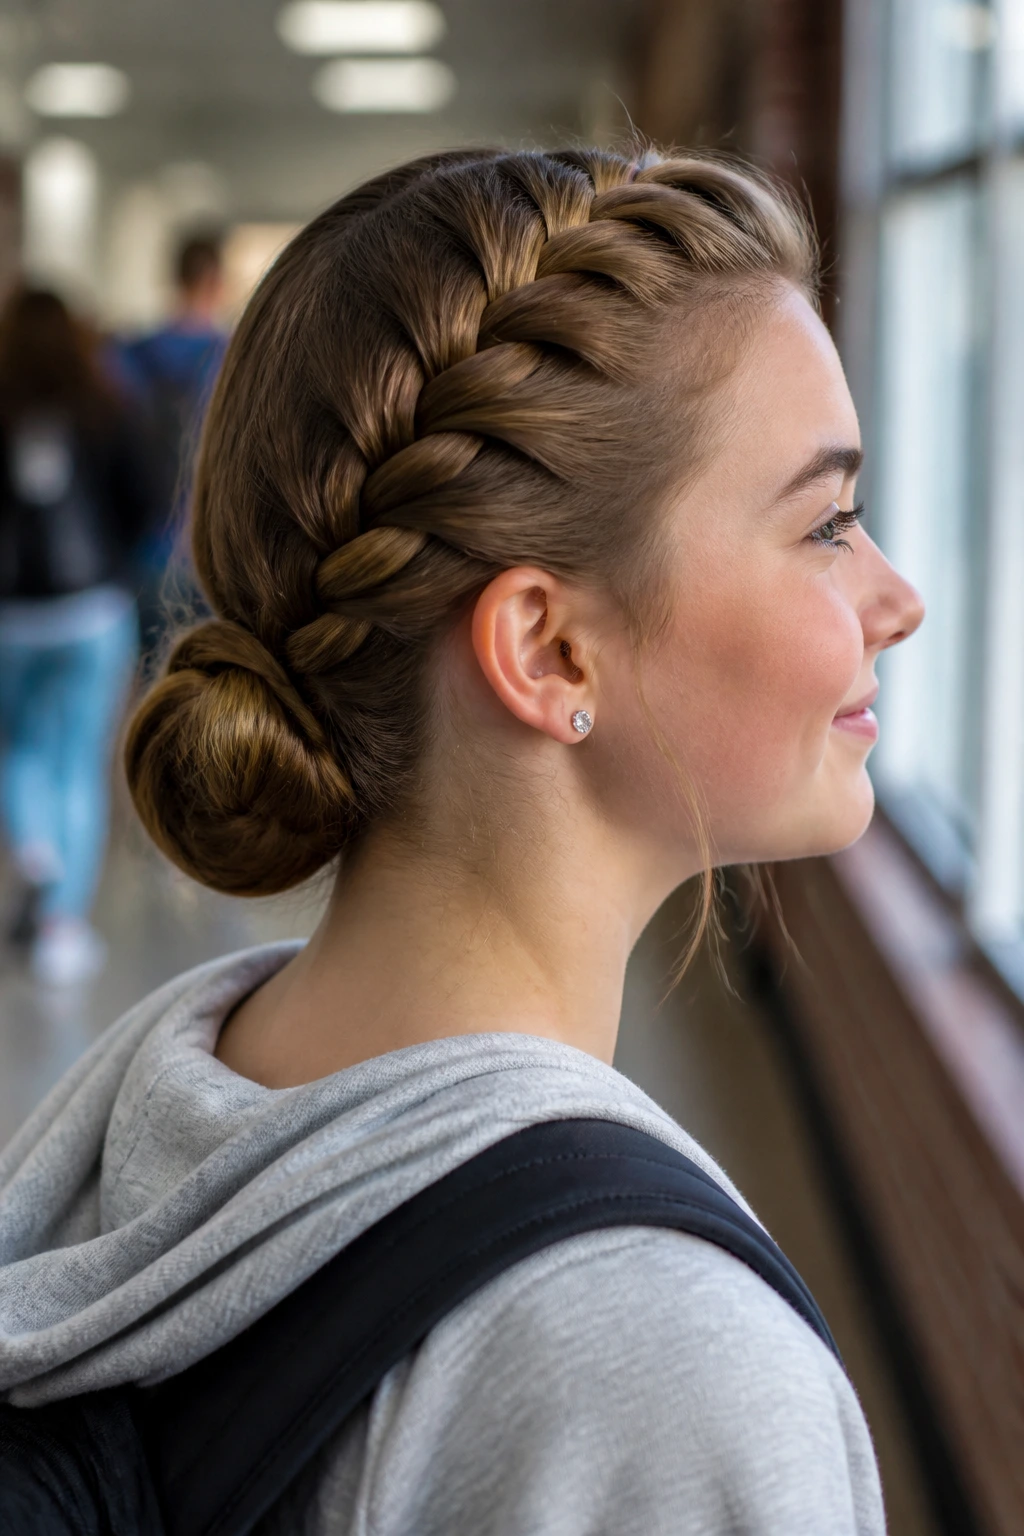
This one is the neat freak of the group, and I mean that in a good way. It is polished, secure, and hard to mess up once it is pinned well.
Start a Dutch braid at the crown and continue to the nape of the neck. Then twist the remaining length into a low bun and pin it flat. Four bobby pins usually do the job if the bun is not huge. If your hair is thick, use five or six and cross them in opposite directions.
The trick is to keep the braid snug enough that the bun has a strong base, but not so tight that your scalp protests by lunchtime. That tension balance matters more than people think. A bun built on a loose braid tends to sag; a bun built on a too-tight braid is miserable.
This style is especially useful for presentations, assemblies, or any day when you want your neck clear and your hair fully controlled.
6. Side-Swept Dutch Braid Over One Shoulder
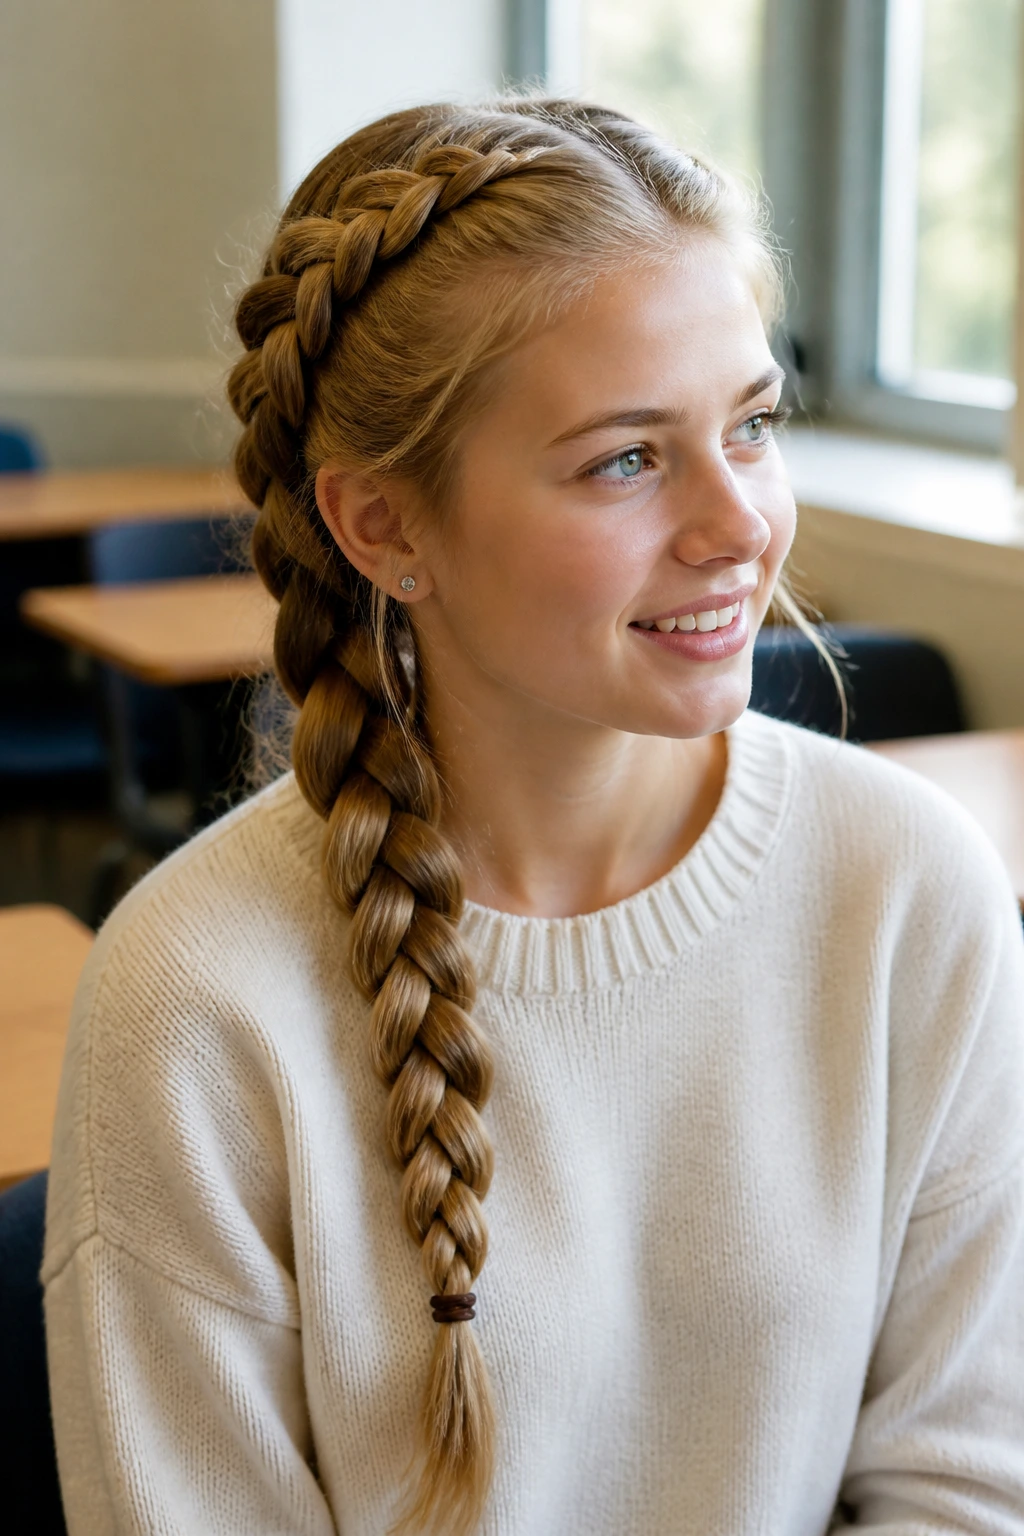
Unlike a straight-down braid, this one has a little more movement. It starts off to one side, travels diagonally, and falls over the shoulder instead of straight down the back.
That diagonal line changes the whole mood. It feels a bit softer, and it is a smart choice if your face shape looks better with volume on one side or if you wear glasses and want the braid to stay away from the temples.
What Makes It Different
A side-swept Dutch braid keeps the top close and tidy, then relaxes into a single braid that rests on the shoulder. It is less stiff than a center braid and a little more interesting than a basic side ponytail.
Use a deep side part if you want it to look fuller. If you want it to feel smoother, keep the part closer to the middle and let the braid angle down naturally. Either way, secure the tail low so it does not keep sliding forward every time you turn your head.
7. Dutch Braids with Ribbon Woven In
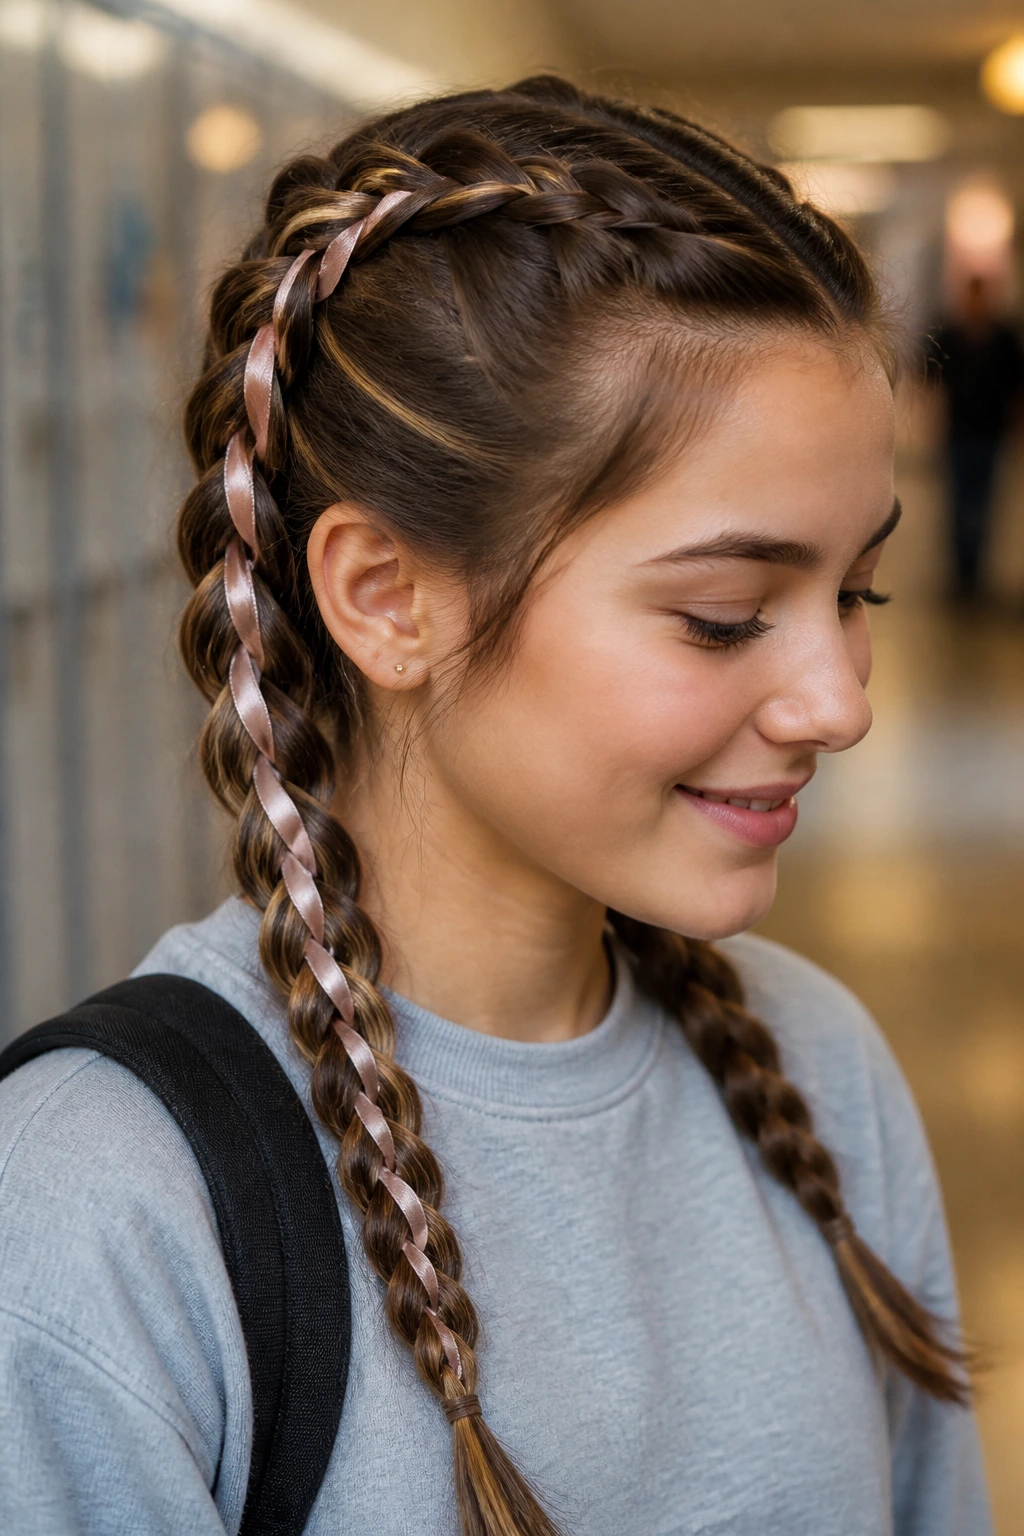
Ribbon changes the whole mood. A simple braid can go from plain to polished fast if you weave a slim ribbon through one of the strands.
Choose a narrow ribbon — about 1/4 inch wide is easier to manage than a thick one. Satin looks dressier, while grosgrain has a little more grip and tends to stay put better during a long school day. If your school has strict rules on accessories, check that first and keep the color subtle.
You can thread the ribbon into the braid at the start, or tie it to one strand and braid it in as you go. That second method is easier. It also keeps the ribbon from twisting weirdly in the middle, which happens more often than people expect.
A single ribbon works well for a uniform look. Two thin ribbons can be cute for school spirit days, but once you add too much color, the braid starts to look less like a class-day style and more like party hair.
8. Double Dutch Braids Into a Ponytail
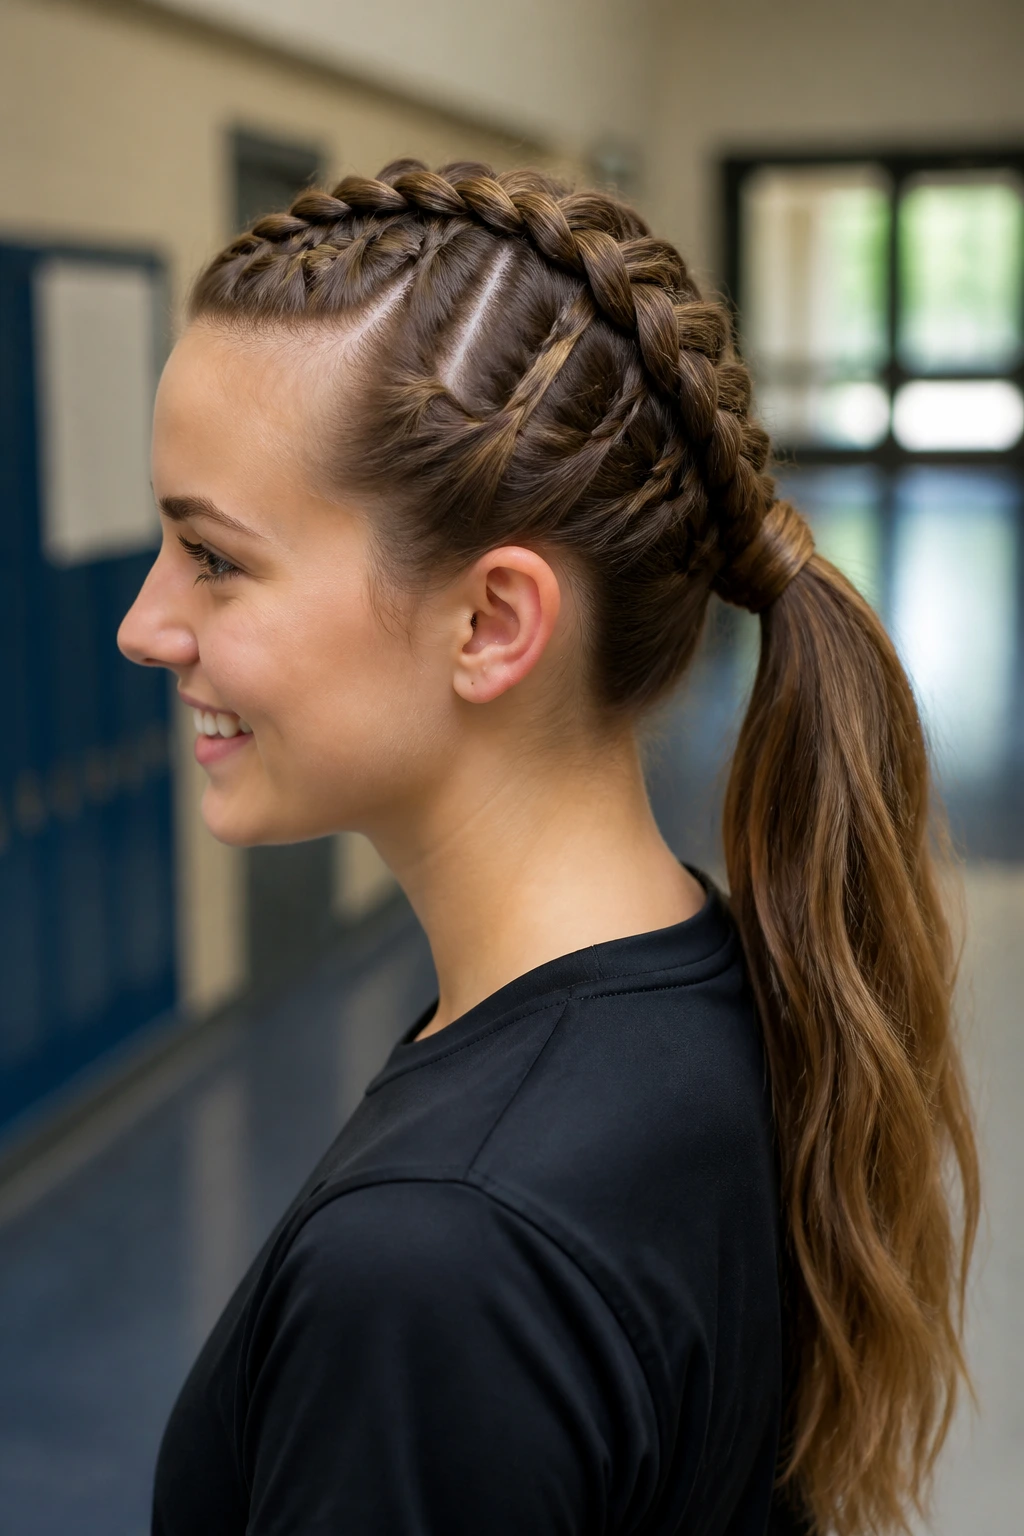
Two braids meeting into one ponytail is a practical little move. It keeps the top neat and still gives you a ponytail at the back, which means less hair bouncing around during PE or lab class.
How to Keep the Join Clean
Braid each side down to just above the nape, then gather both braids with the rest of the hair into one ponytail. Use one snag-free elastic for the join, then wrap a small strand around the elastic if you want it to look tidier.
The key is matching the braid height on both sides. If one braid sits much higher than the other, the finished ponytail looks lopsided. Keep the sections even, and the style suddenly looks much more deliberate.
This is a good style for active days. It is not fussy. It does not collapse easily. And if your school day involves sports, walking between buildings, or a windy bus stop, that matters more than looking perfect at 7:30 a.m.
9. Dutch Braid Pigtails with Curled Ends
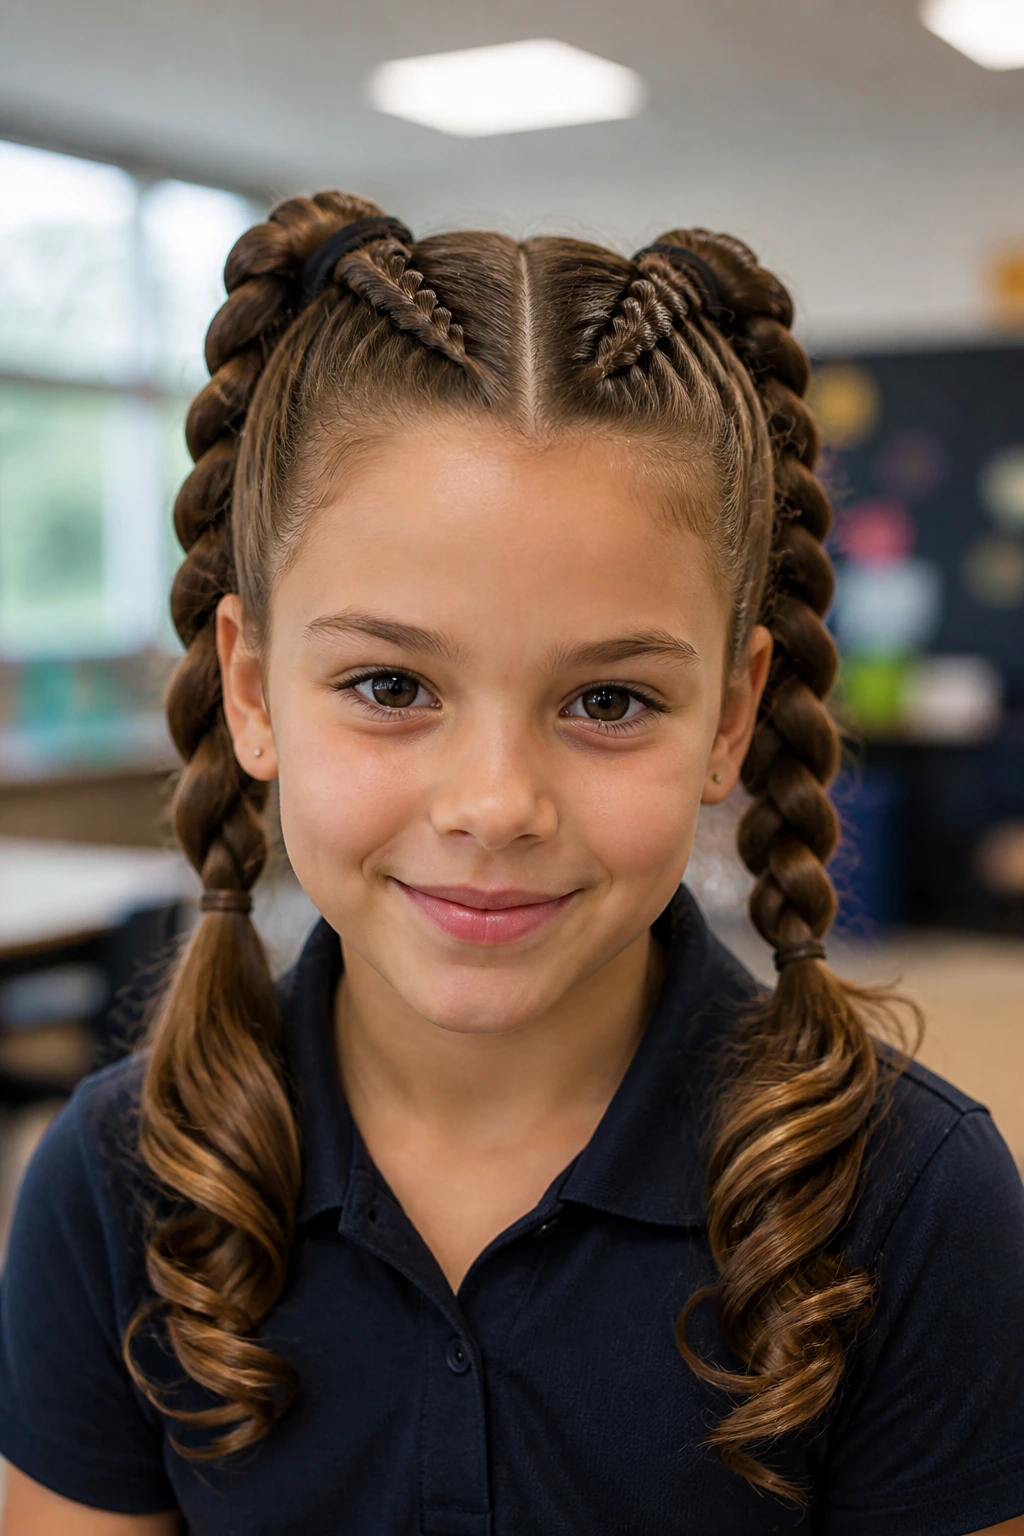
Pigtails sound playful, and this version really leans into that. The braids keep the top controlled, while the ends can be curled for a softer finish.
If your hair falls straight and flat at the bottom, curl the last few inches with a 1-inch curling iron or set them in flexi rods overnight. You do not need ringlets. A gentle bend is enough. That little curve keeps the style from looking too severe.
This version works nicely on shoulder-length hair too, as long as the braids are not started too low. Start them high enough to get a clean shape at the crown, then leave enough length at the ends for the curl or wave to show.
It is a cute choice for younger students, but honestly, older students wear it well too when the goal is tidy hair with a little personality.
10. Dutch Braid and Bubble Ponytail
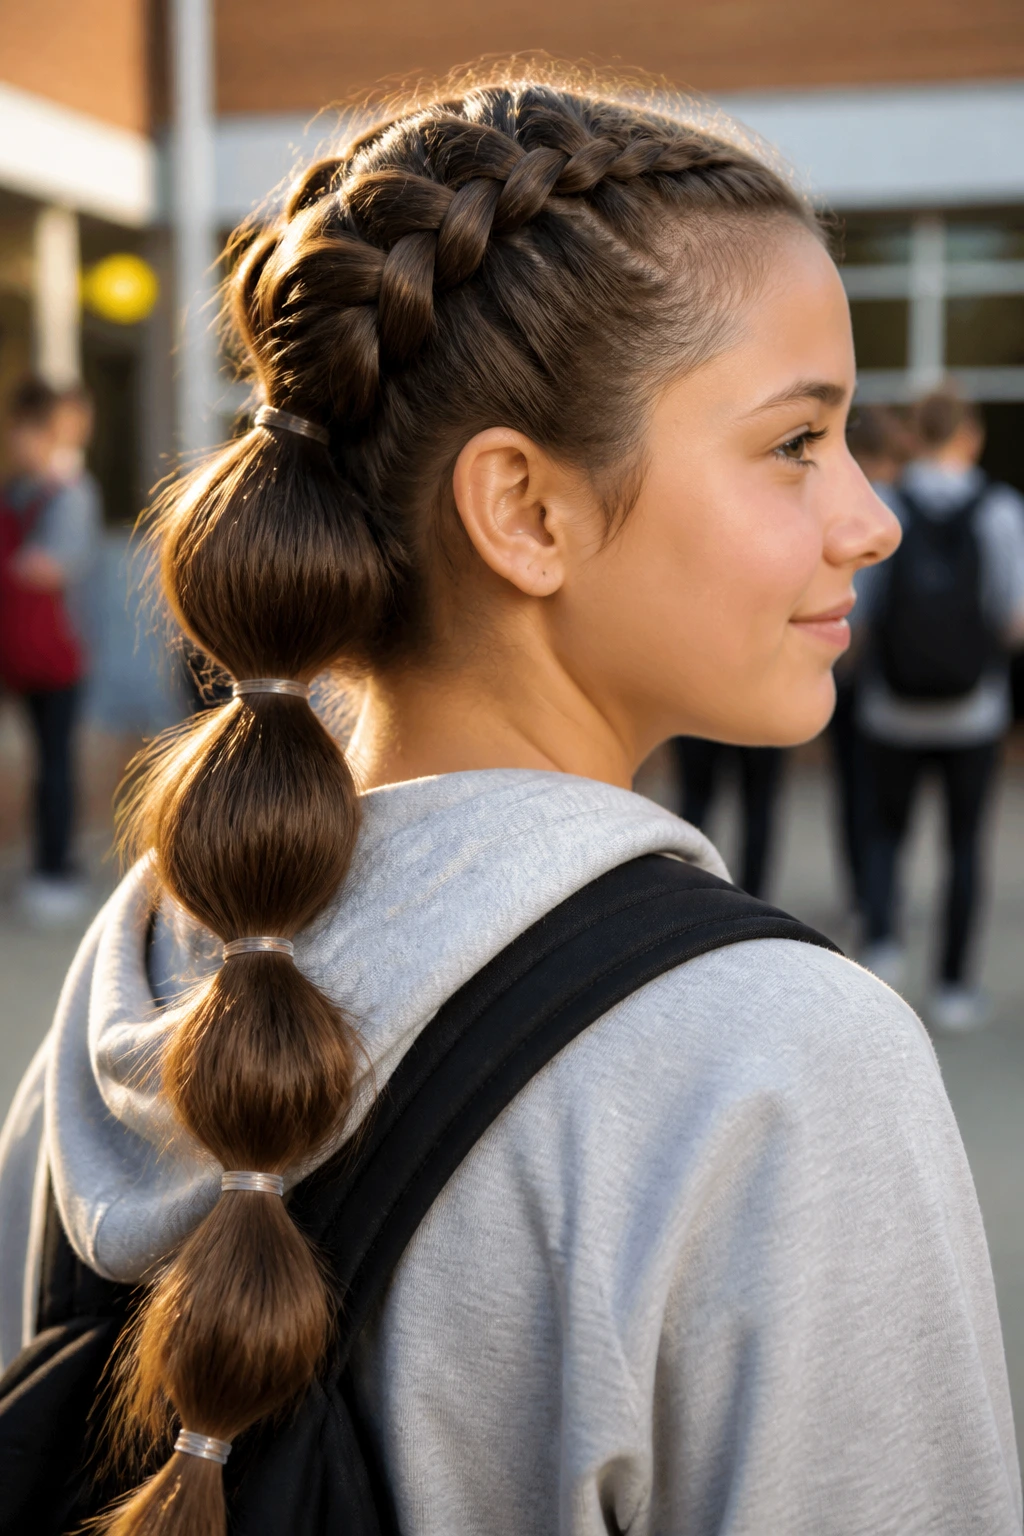
A Dutch braid into a bubble ponytail gives you structure up top and bounce at the end. The braid handles the front. The bubbles make the tail look fuller.
Braid from the front hairline or crown down to the back of the head, then gather the remaining length into a ponytail. Add clear elastics every 2 to 3 inches down the tail, and gently pull each section apart so it puffs into a bubble. That spacing is the whole trick.
If your hair is fine, lightly tug the bubbles wider. If your hair is thick, keep the bubbles smaller so the style does not turn bulky fast. Either way, smooth the top with a soft brush first so the braid and ponytail join cleanly.
This style is a nice middle ground for school. It looks put together, but it still has movement. And it stays fun without being messy.
11. Dutch Braided Space Buns
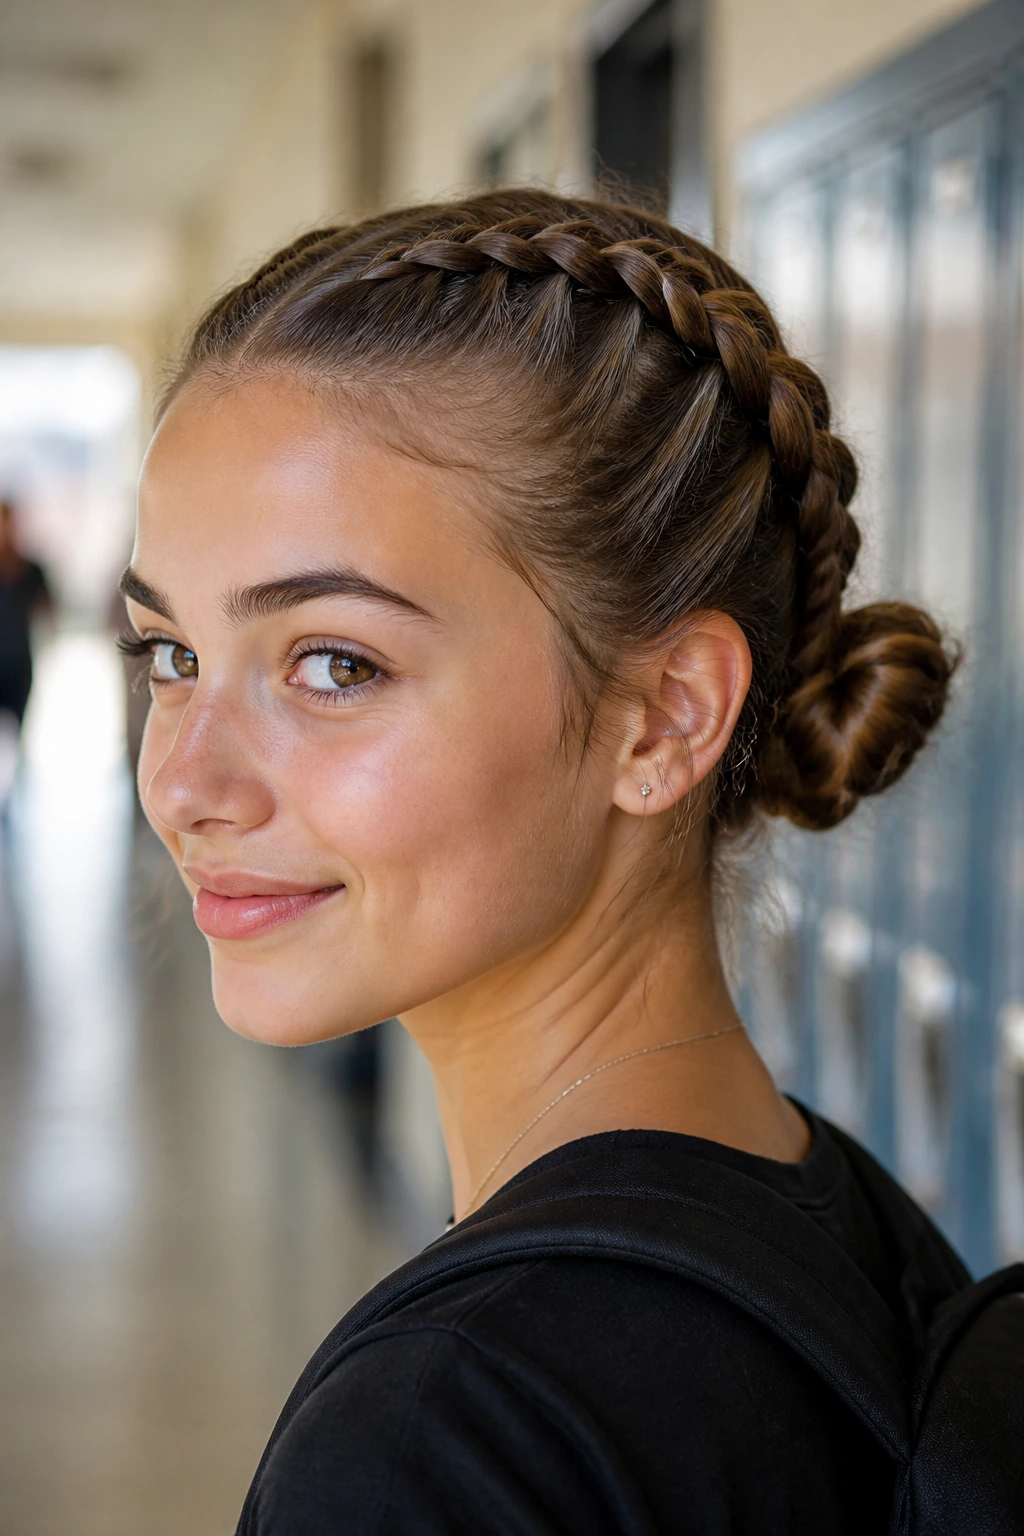
Space buns do not have to look costume-y. When the braids feed into them cleanly, they can look neat enough for school and still feel playful.
Start with two Dutch braids, one on each side, then twist the ends into compact buns near the back or slightly higher up. Keep the buns small if you want the style to stay school-friendly. Big buns can get wobbly, especially if you wear a hood or lean back in a chair a lot.
Best Way to Wear Them
- Keep the braids tight at the scalp so the buns have a solid base
- Pin the buns with bobby pins that match your hair color
- Leave the buns a little textured instead of slicking them flat
- Use a middle part if you want the look more symmetrical
This style works well on days when you want your hair off your neck and shoulders completely. It also holds up nicely if you have a long day and do not want to think about your hair again.
12. Halo Dutch Braid Around the Head
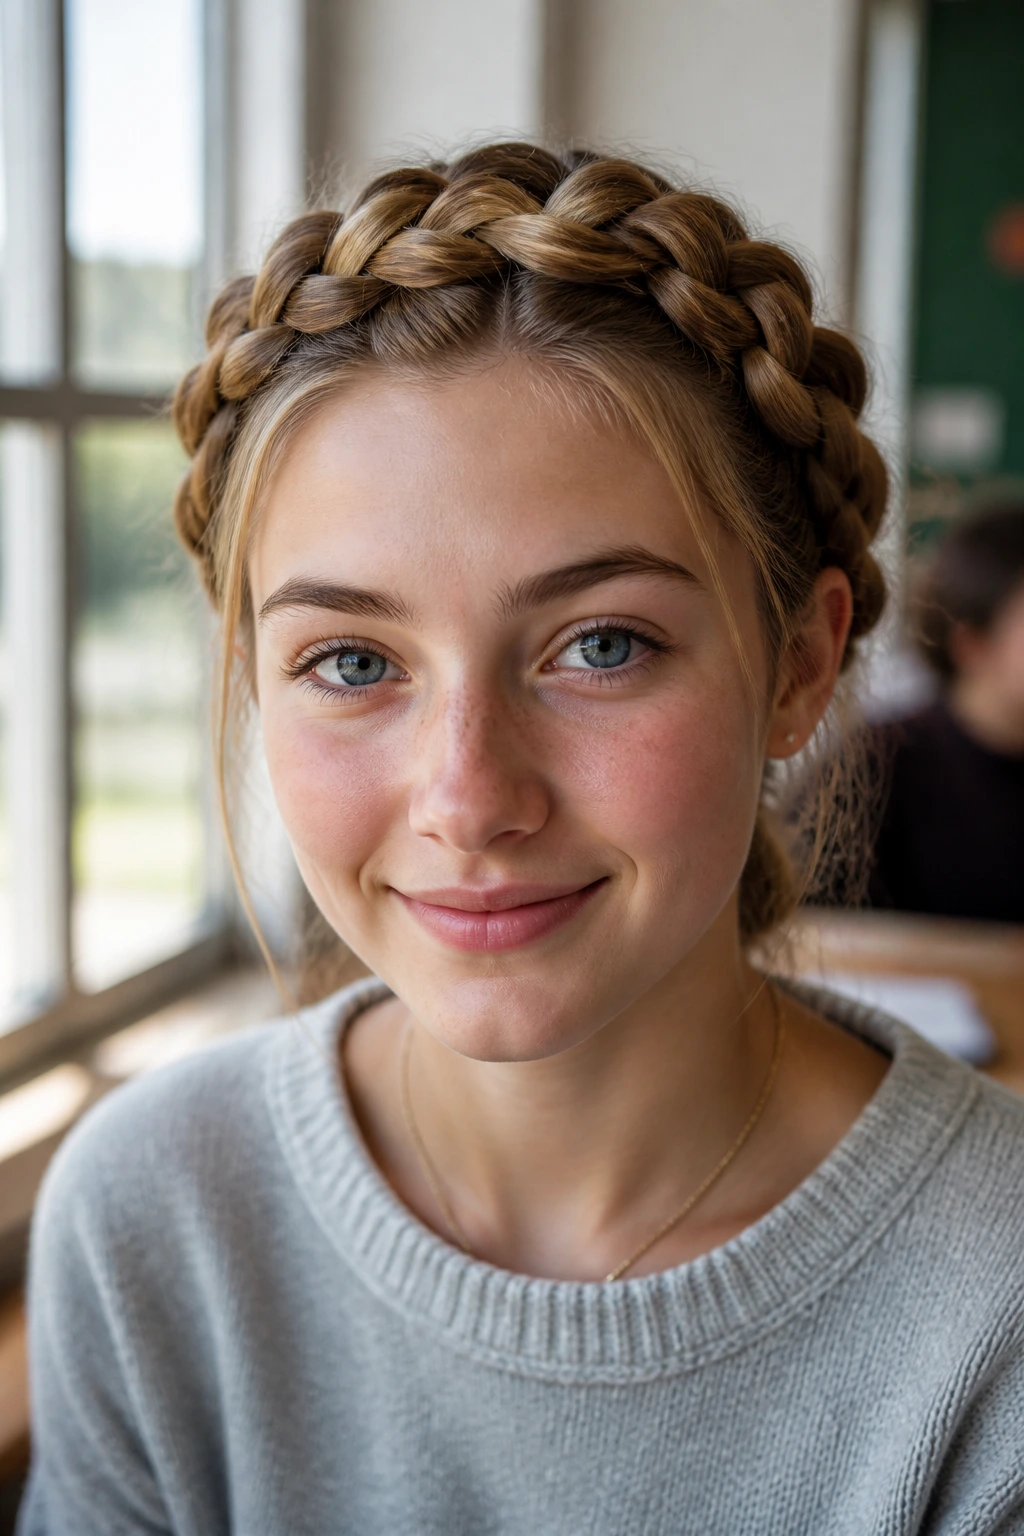
Why does the halo braid keep showing up in school styles? Because it keeps the ends tucked away and gives you a finished look without needing extra accessories.
The braid wraps around the head like a crown, usually starting on one side and traveling all the way around. It works best on medium to long hair, and it feels more secure if you pin the hidden seam underneath the opposite side with two crossed bobby pins.
Where It Shines
This style is solid for music performances, picture day, and dress-code days when you want hair fully controlled. It also keeps the front line neat, which helps if you hate flyaways sticking up around your face.
The halo braid does take a little more patience than a simple plait. Fair enough. But once you have the first few inches in place, the rest falls into a steady rhythm. Keep the sections even and the braid close to the scalp, and the shape stays smooth.
13. Dutch Mohawk Braid Down the Center
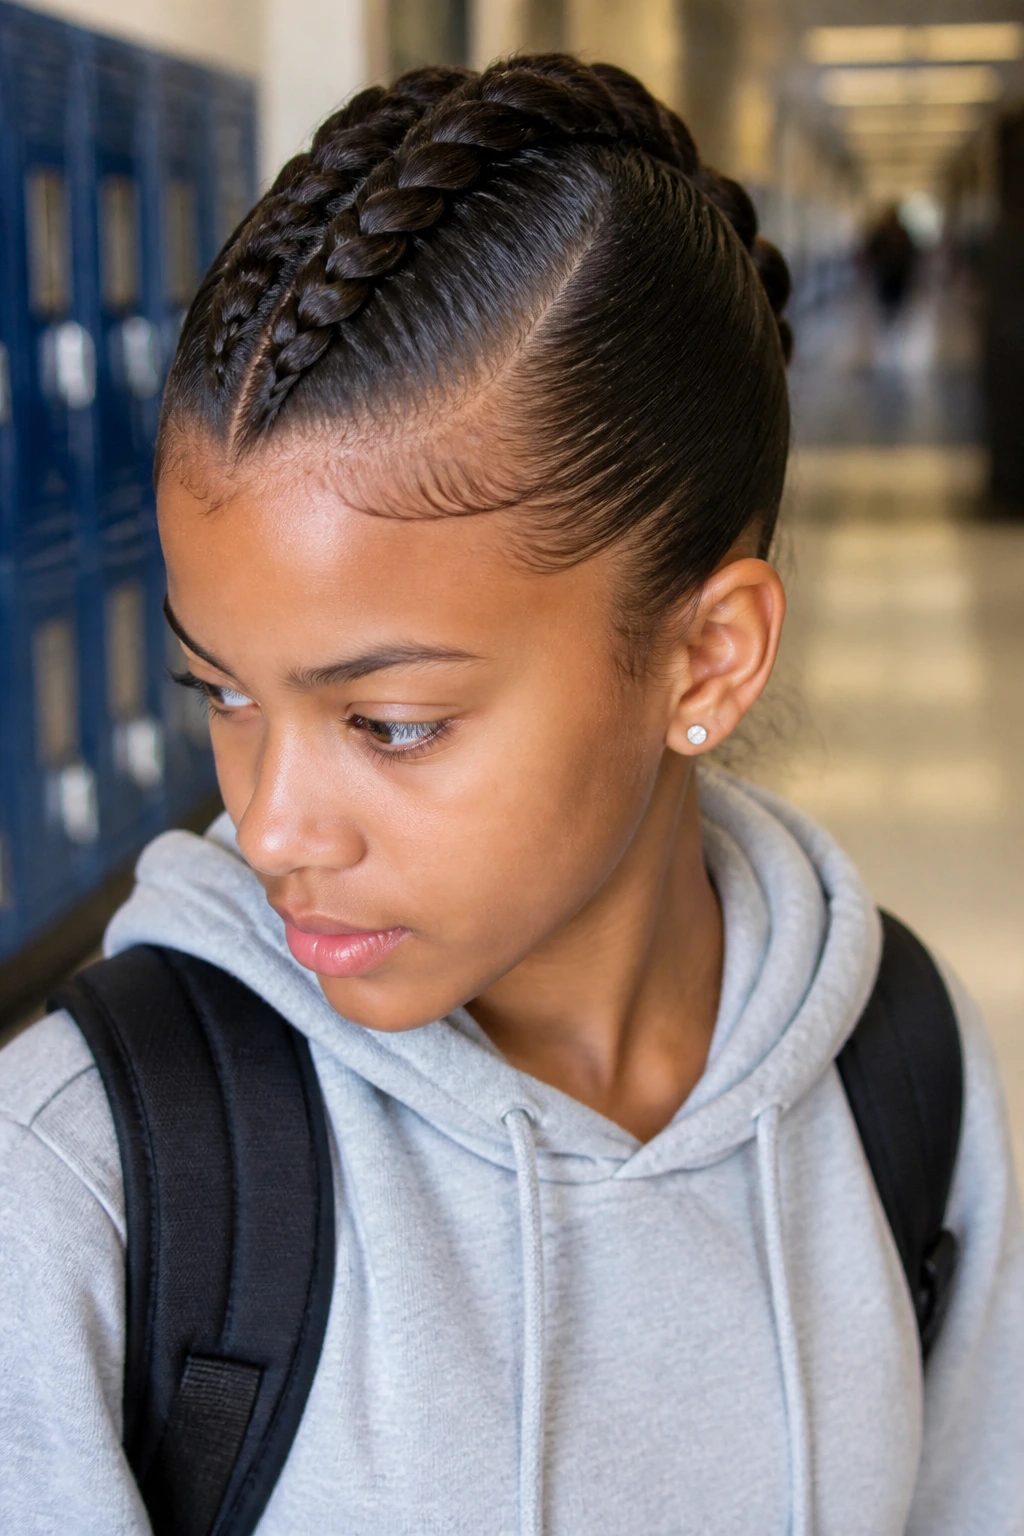
A center Dutch braid gives you more shape than people expect. It is bolder than twin braids, but still very school-appropriate when the sides are smoothed back.
This style starts at the front hairline and runs straight down the middle of the head, almost like a raised ridge. The sides can be tucked behind the ears, slicked back lightly, or left soft depending on how polished you want the final look to feel.
The mohawk braid is a smart pick if you want something with a little edge without dealing with loose side pieces all day. It also works nicely on thicker hair because the braid has enough structure to hold its shape.
Do not pull the braid too tight at the temple. That part gets uncomfortable fast. A firm braid is fine. A headache by second period is not.
14. Dutch Braid with Tiny Accent Braids
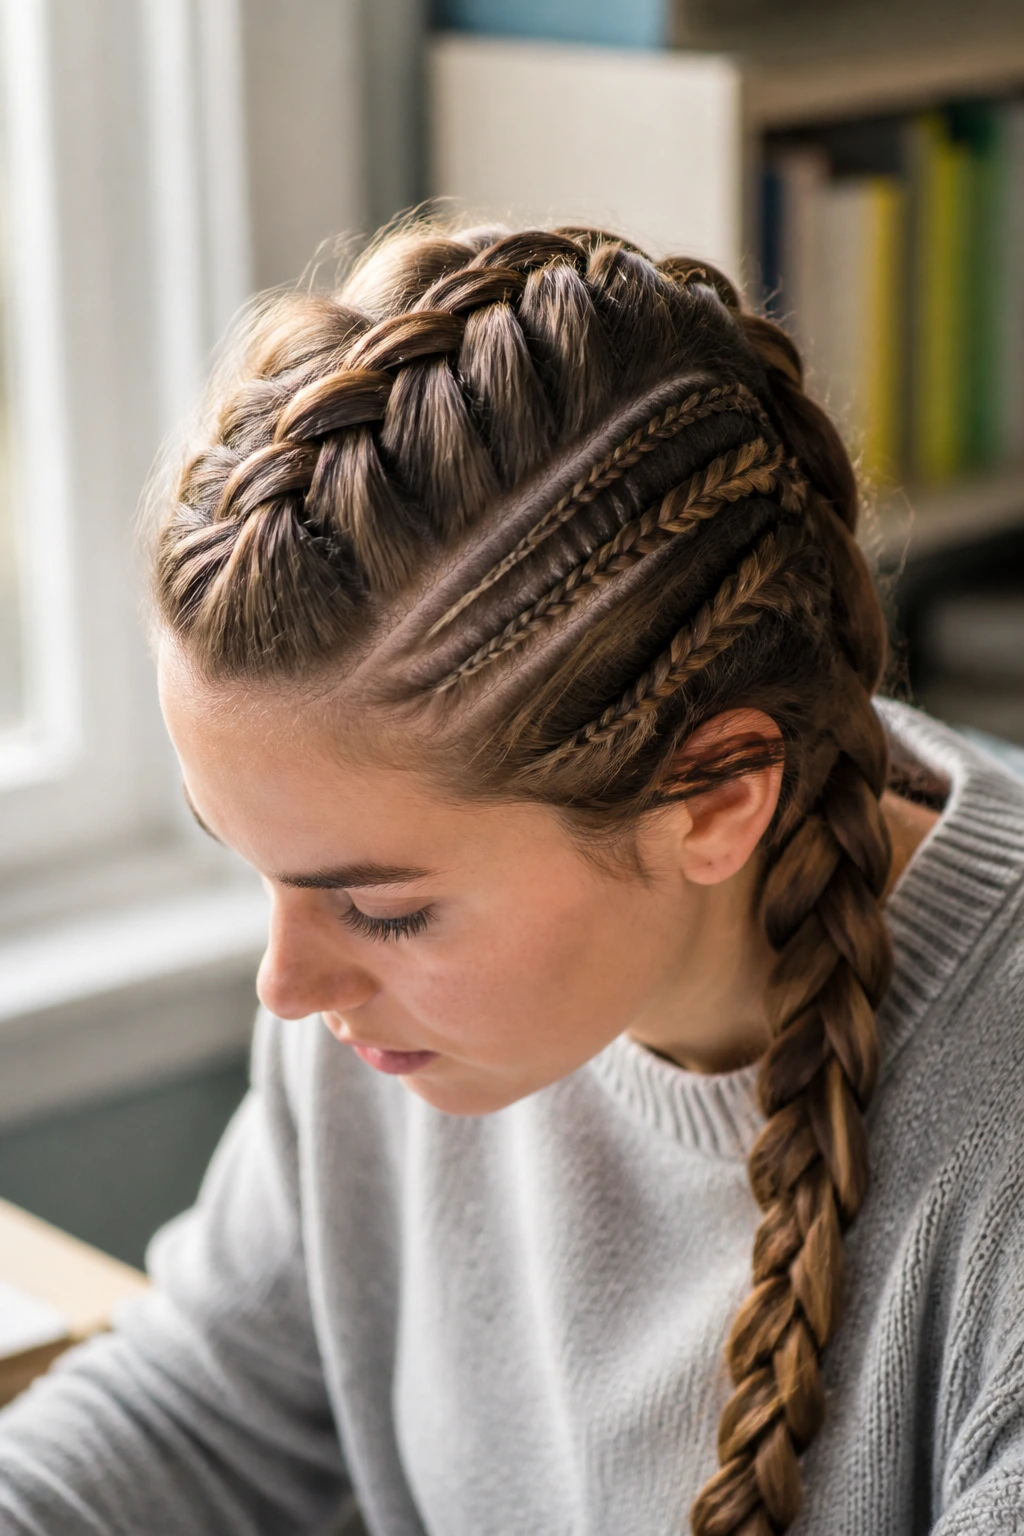
If you have an extra five minutes, tiny accent braids can make the main braid look a lot more intentional. They add detail without turning the style into a full production.
Braid two or three small sections near the part before feeding them into the main Dutch braid. You can place them on one side only for a slightly asymmetric look, or on both sides if you want symmetry. Keep the accent braids slim — about the width of a pencil or a little wider — so they do not crowd the center braid.
This style is nice for days when you want something a little more personal. It is also a quiet way to use up fresh wash-day hair, because the tiny braids help keep the front from puffing up too quickly.
A couple of clear elastics and a soft brush are enough here. No need to make it complicated.
15. Dutch Braid with a Claw Clip Finish
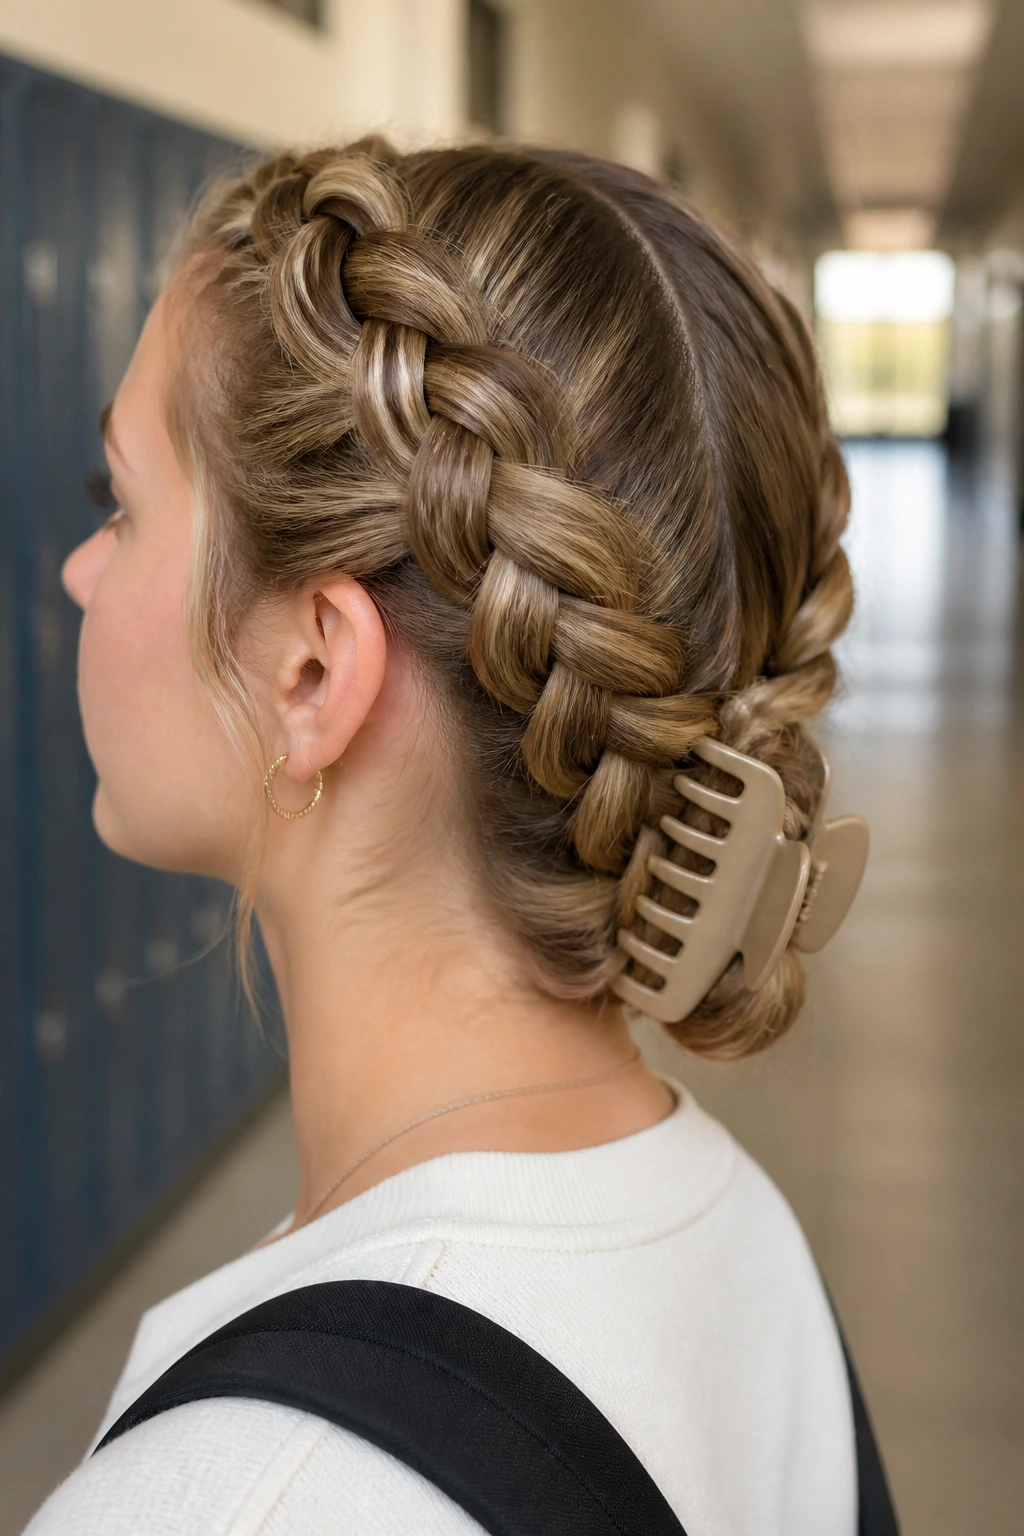
Unlike a full updo, this style keeps the braid visible and lets the length disappear into a clip at the end. That makes it fast, and fast is a beautiful thing on a school morning.
Braid from the top of the head to mid-length, then fold or twist the remaining hair upward and catch it with a large claw clip. A medium clip works for fine hair. Thick hair needs one of the bigger, sturdier clips or the whole thing will sag after the first class change.
What Makes It Useful
It gets the front hair off your face, but it does not require a full bun or a lot of pinning. That makes it handy for shoulder-length hair, layered cuts, or anyone who wants an easier version of an updo.
If you want the style to stay put longer, tease the hair lightly at the crown before clipping. Not a lot. Just enough to give the clip something to grab. Then smooth the front with your hands instead of using a heavy product that can make the hair look greasy.
16. Dutch Braid Ponytail for PE Days

For gym, running, and every hallway sprint you did not plan to do, this is the hard-working option. It keeps the top tight and lets the tail move freely.
Start a Dutch braid at the front and stop where you want the ponytail to sit, usually low or mid-height. Then gather the rest of the hair into a ponytail and secure it with a snag-free elastic. If the tail feels loose, loop it through the elastic twice instead of three times. That gives a firmer hold without snapping the band.
Make It Stay
- Smooth the braid with a soft brush before you start
- Use a little water or gel at the hairline if flyaways are a problem
- Tie the ponytail low if your backpack straps keep catching high ponytails
- Wrap a small strand around the elastic if you want a cleaner finish
This one is not delicate. It is a workhorse. And on PE days, that is exactly what you want.
17. Zigzag Part Dutch Braids
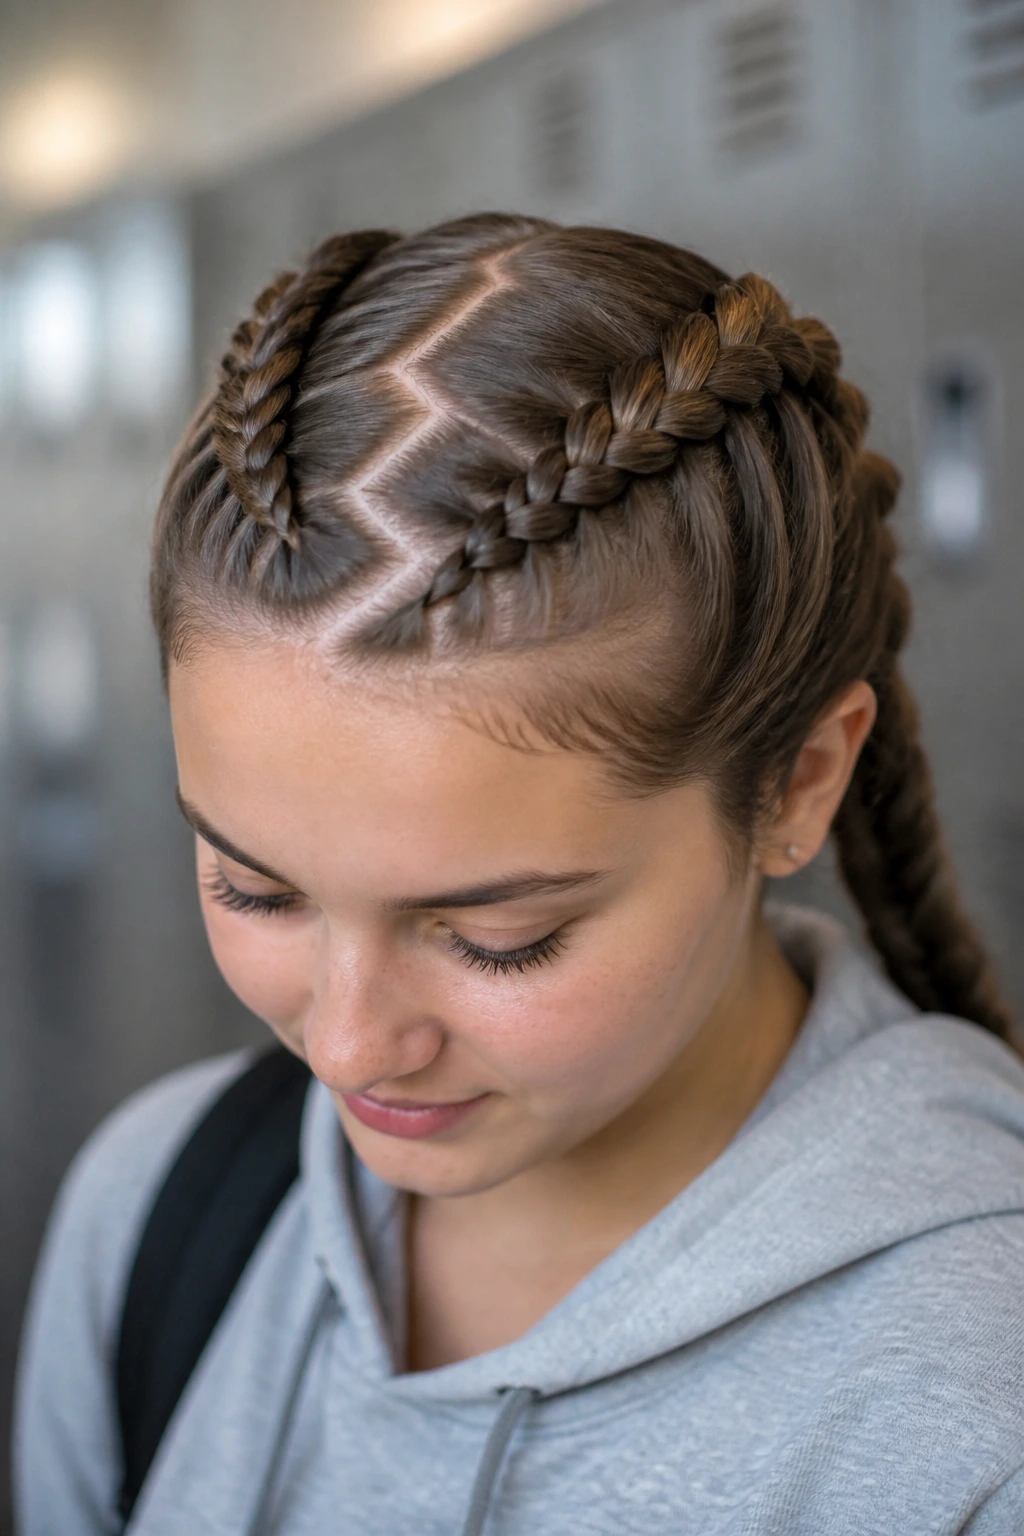
The part line looks sharp before the braid even starts. That is the whole appeal here.
Use a rat-tail comb to draw a zigzag part from the front hairline back toward the crown, then braid each side as a Dutch braid. Keep the sections small and clean so the zigzag stays visible. A tiny bit of styling gel on the parting line helps the shape hold, especially if your hair is fine or has a lot of baby hairs.
Small Details That Matter
- Make the zigzags shallow if you want a softer look
- Use a mirror in front of you and a second mirror behind if you can
- Keep the braid tension even so the pattern does not get swallowed up
- Pair it with clear elastics so the parting detail stays the star
This style is a little more decorative than the others, but it still feels practical. It works well on picture day or any day when you want people to notice the braid before they notice the rest of the outfit.
18. Dutch Braid Into Fishtail Ends
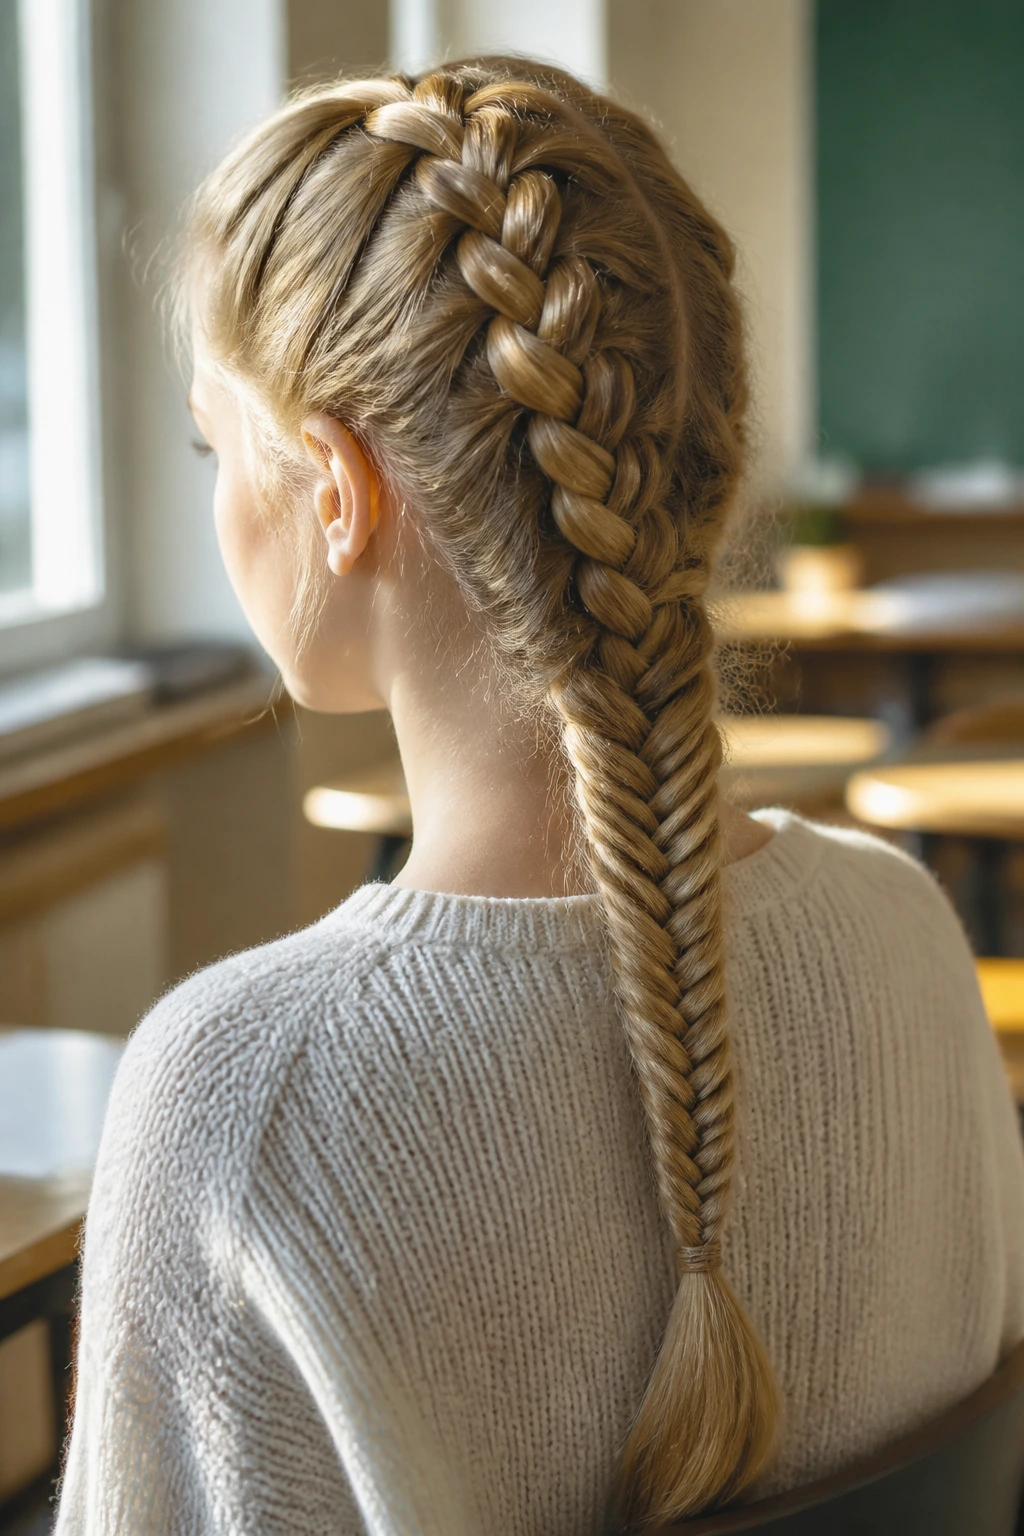
Switching from Dutch braid to fishtail at the bottom changes the finish without making the whole style harder. That is why I like this one.
Braid the top section in the usual Dutch style until you reach past the shoulders, then split the remaining hair into two sections and fish the small pieces across from side to side. The top stays bold and raised; the bottom gets finer and more detailed. It is a nice contrast.
If your hair is thick, this transition helps the tail look less bulky. If your hair is fine, it adds texture without making the braid too heavy. A tiny elastic at the switch point keeps the change clean, especially if the ends are layered.
This style does take a bit more hand coordination than a standard three-strand braid. Still, it is not as fussy as people think. Once the Dutch section is set, the fishtail part mostly repeats the same motion.
19. Tucked-In Dutch Braid Bun

Need something neater than a messy bun but less formal than a sleek chignon? This is the middle ground.
Braid a Dutch section from the front or crown down to the nape, then coil the remaining length under itself and tuck it into a bun. Pin it flat with four to six bobby pins, depending on how much hair you have. The pins should feel firm, not pokey.
This style is good for school events, presentations, choir, or any day when you want your hair to look finished from every angle. It also holds well under a cardigan or blazer, which matters more than it sounds like it should. Loose ends tend to catch on clothing. Tucked ends do not.
If you want a softer look, loosen the braid slightly before pinning the bun. If you want a sharper look, smooth the sides first and keep the bun small and low. Either way, the style reads neat without feeling stiff.
20. Loose Dutch Braid with Face-Framing Pieces
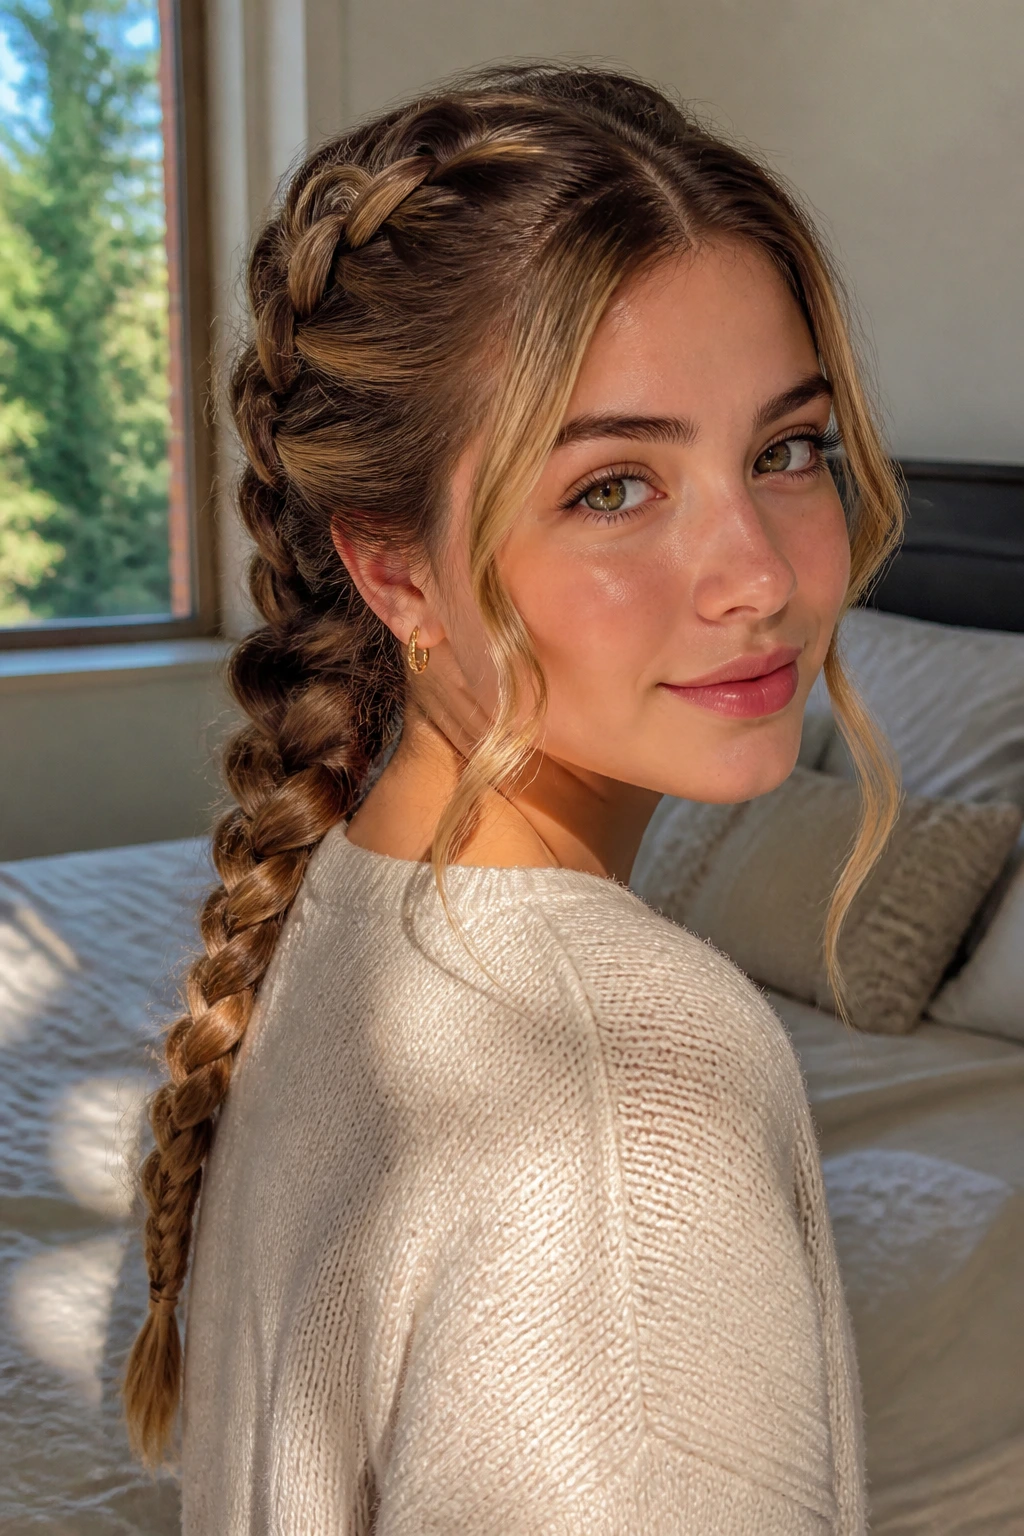
This is the version I reach for when I want polish without stiffness. It looks done, but not overdone.
Leave two thin face-framing pieces out at the front — about 1/2 inch wide on each side is enough — and braid the rest of the hair into a loose Dutch braid down the back. Do not pancake the braid too much. A little fullness is fine, but the goal here is softness around the face and a braid that still shows its shape.
A small amount of lightweight serum on the ends can keep the loose pieces from frizzing out by lunch. If your hair is naturally wavy, let the front pieces stay wavy. If it is straight, tuck them behind the ears once the braid is done and pull them forward again only if you want that softer frame.
This one works when you want a school hairstyle that feels calm, tidy, and a little pretty without trying too hard. That’s a nice place to land.
