



Two-strand twists are one of the few styles that can look calm, neat, and fully dressed at the same time. They work on natural hair, stretched hair, freshly washed hair, and that in-between stage where your curls are dry but not yet begging for a full redo.
For Black women especially, that matters. A good twist style gives your hair a break from daily combing, helps hold moisture in the strand, and can move from errands to dinner to a work meeting without needing a full reset. The hard part is not finding a twist style. It’s picking the one that fits your density, your length, and how much patience you’ve got that day.
I’ve always liked twist styles because they’re honest. If your parts are sloppy, you’ll see it. If your hair is well-moisturized, you’ll see that too. And if you set them properly — damp, detangled, and not pulled tight at the root — they hold shape in a way that feels polished without looking stiff.
Some twists sit close to the head. Some have swing. Some are meant to be worn out. Others end in a bun, a puff, or a soft curl. The styles below cover the versions I reach for most often when I want hair that looks intentional and still lets my scalp breathe.
1. Shoulder-Length Classic Two-Strand Twists
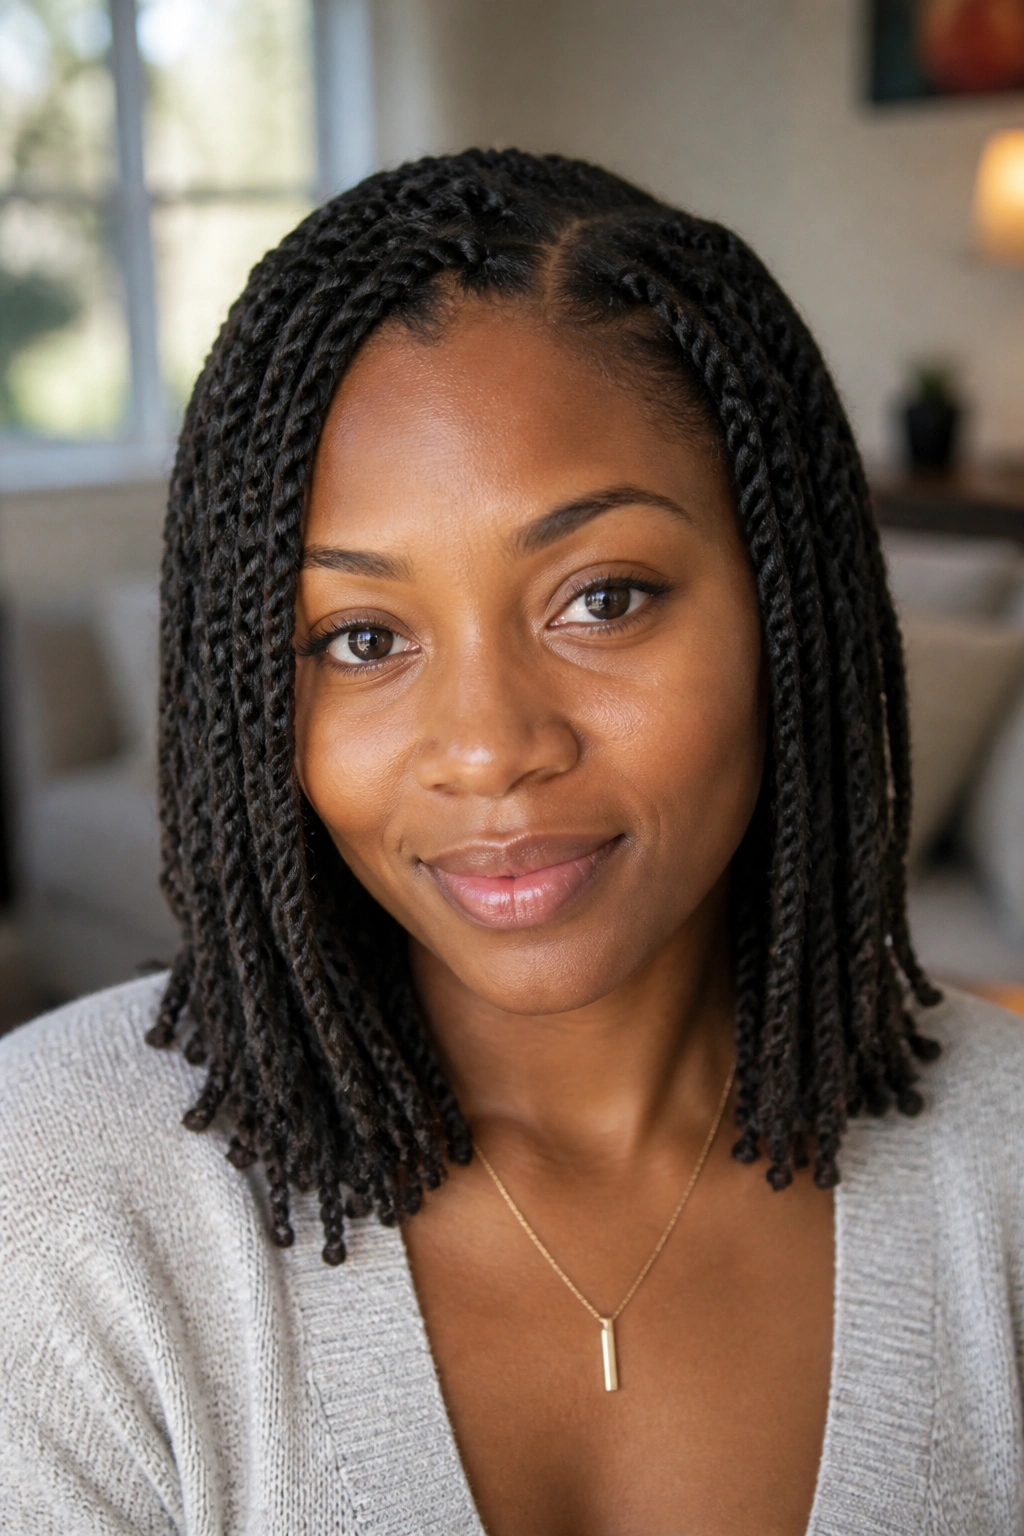
If you want the safest place to start, start here. Shoulder-length twists are easy to live with, easy to refresh, and easy to style up or down without fighting your own hair every morning.
Why This Length Works So Well
At shoulder length, the twists are long enough to feel like a real style, but not so long that they drag on your neck or get caught in every zipper and collar. That sweet spot matters more than people admit. When twists are too long, they can start to feel heavy by day three. When they’re too short, they can puff up faster and lose shape.
This length also gives you a little room to play. You can pin one side back, tuck the ends behind your ears, or gather the whole set into a low puff if the day gets busy. It’s the kind of style that does not ask for much.
What Makes It Easy to Wear
- Keep your sections about ¾ inch to 1 inch wide if you want a clean, medium-size twist.
- Use a water-based leave-in first, then a small amount of twisting cream or butter.
- Start twisting on stretched, detangled hair so the roots stay neat longer.
- Finish with a light oil on the ends if your hair tends to feel dry by midweek.
My favorite part: this length gives you enough movement to keep the style from looking flat, but it still behaves. That balance is hard to beat.
2. Jumbo Two-Strand Twists with Soft Ends
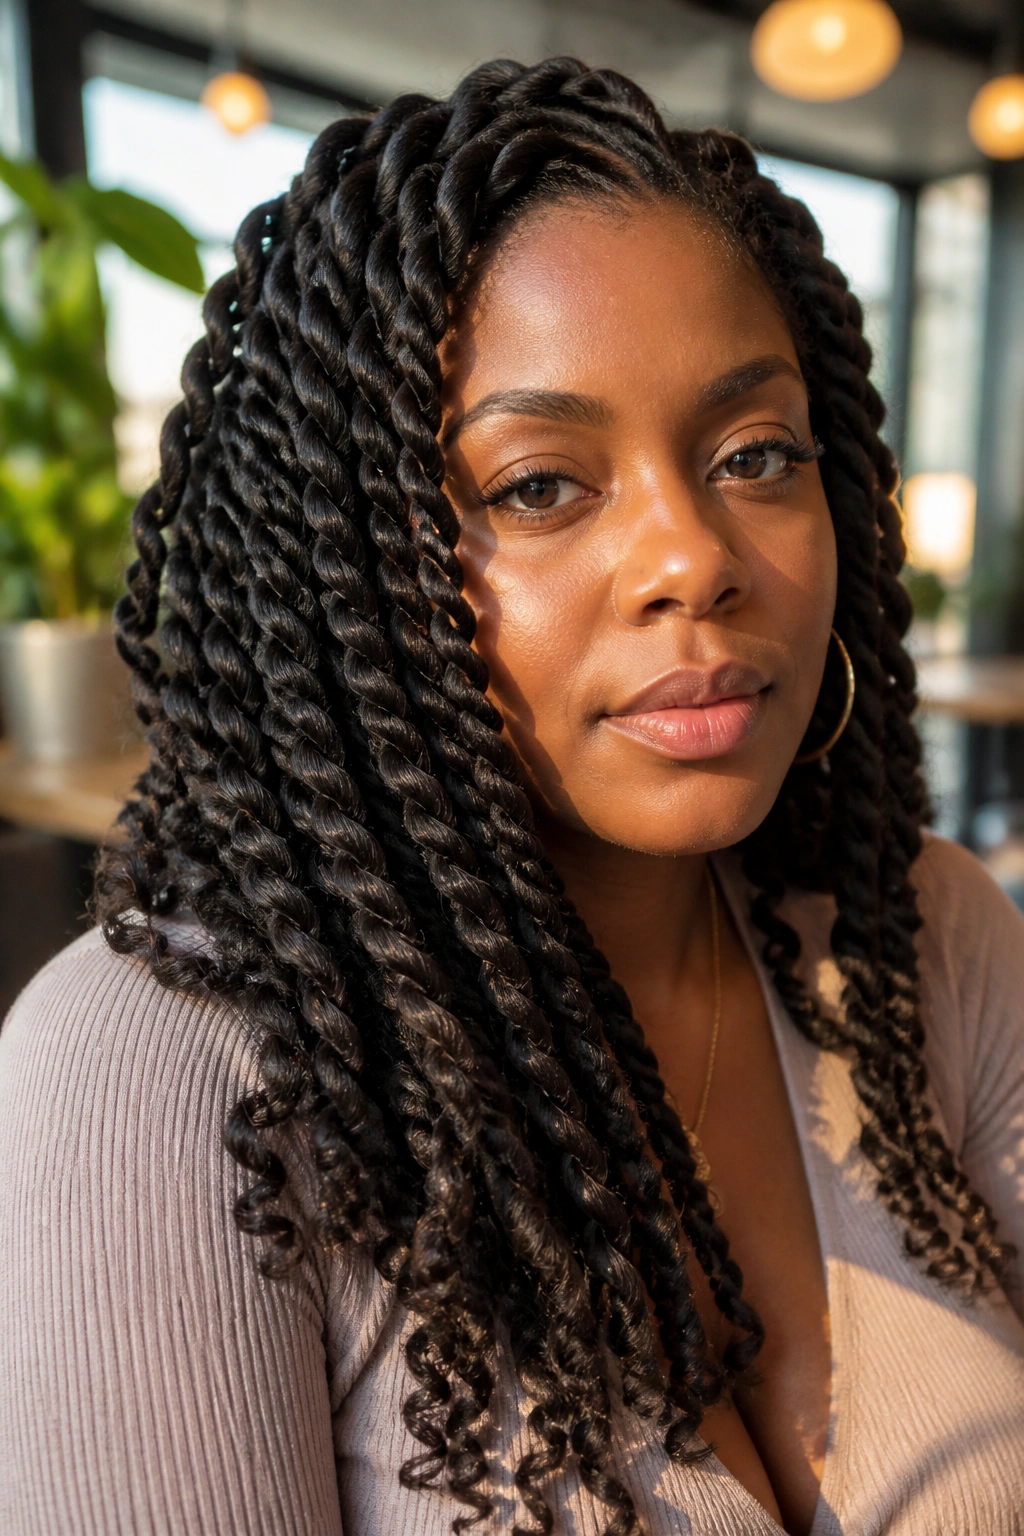
Big twists are not lazy twists. They’re a deliberate choice, and when they’re done well, they look bold without trying too hard.
Why Bigger Sections Change the Whole Mood
Jumbo twists install faster, which is the obvious upside, but the better reason to wear them is shape. A thick twist shows off texture in a way smaller twists sometimes hide. You see the rope pattern. You see the coil. You see the parting, too, which can be a feature when the sections are clean.
They also work well on hair with a lot of density. Fine hair can wear jumbo twists, sure, but thick coils and tight curls usually hold the shape better and keep the ends from looking flimsy. That’s the real trick here: the style needs enough hair to look full from root to tip.
One caution. Big twists can feel heavy if they’re too long or if the base is pulled too tight. Keep the root tension gentle, especially around the temples and nape. Your scalp should feel secure, not squeezed.
Where Jumbo Twists Shine
- Medium-to-long hair with good density
- Quick styling days
- Shorter wear periods of about 5 to 10 days
- Looks that want a little drama without a lot of work
A blunt truth: if your parts are messy, jumbo twists show it fast. Clean sectioning is half the style.
3. Mini Two-Strand Twists for Long Wear

Why do mini twists stay neat so much longer? Because smaller sections move less, frizz less, and let you stretch out the wear time without the twists looking bulky or stiff.
The Small-Section Advantage
Mini twists take longer on install day. That part is unavoidable. But the payoff is real. Since each twist has less hair in it, the style tends to lay flatter at the root and stay neat around the hairline longer than a chunky set would. They also work beautifully if you like to keep your hair in a low-manipulation style and still be able to wear it down.
The other thing people forget: mini twists can double as a base for a twist-out later. You can wear them for a few days, then take them down for more volume and a softer pattern. That gives you more than one look from the same install, which is the kind of efficiency I respect.
How to Keep the Roots from Puffing Too Fast
- Part with a fine-tooth tail comb and clip away each completed row.
- Use sections about the width of a pencil or small marker.
- Start on hair that has been stretched a little, not freshly shrunk.
- Seal the ends lightly; do not soak them in product.
That last point matters. Too much cream at the ends makes mini twists feel greasy long before they actually loosen.
4. Two-Strand Twists with Curled Ends

Picture soft ends brushing your shoulders instead of blunt twist tips that stop dead. That’s the appeal here. Curling the ends softens the whole look and gives the style a little swing.
What the Ends Need to Hold a Curl
You usually get this finish by wrapping the ends on flexi rods, perm rods, or tiny rollers after the twist is installed. Mousse or setting foam helps, but the real difference is drying time. If the ends are even a little damp when you take the rods out, they’ll frizz and separate in odd places.
That means patience. Annoying, yes. Worth it? Also yes.
The style is especially good when you want your twists to feel dressier without stacking them into a full updo. Curled ends make the whole look softer around the face and shoulders. They also hide a lot of the bluntness that can happen with freshly cut or uneven ends.
A Few Things That Help
- Use small rods for tighter curls and larger rods for looser bends.
- Dry the ends fully under a hooded dryer or overnight.
- Remove the rods only when the hair feels cool and dry to the touch.
- Separate the curled ends gently instead of pulling them apart hard.
If you like your twists to read as soft and finished, this one does the job.
5. Chin-Length Twist Bob

A bob changes the whole mood. It makes two-strand twists look sharp, modern in the plain-language sense, and easy to wear without a lot of extra styling.
Why the Bob Keeps Showing Up
Chin-length twists are one of the most flattering cuts for women who want the shape to frame the face instead of hanging below it. The length brings the focus up toward the eyes and cheekbones, and that can be a big deal if you want a style that feels light on the neck. It’s also easier to tuck behind one ear, which is a small thing until you catch yourself doing it all day.
A twist bob works best when the cut is shaped on purpose. If the back is a touch shorter and the front sits just a bit longer, the whole style gets movement. Flat one-length bobs can work, but they sometimes look boxy if the twists are thick.
That tiny detail matters.
Best Uses for a Twist Bob
- Office-friendly days when you want less bulk
- Warm-weather wear, because the neck stays clear
- Shorter install time than waist-length twists
- Easy pinning for a half-up look
If you have dense hair, ask for slightly smaller sections in the back so the bob doesn’t bunch up at the nape. Nobody wants a triangle sitting under the ears. Been there. It’s not cute.
6. Twist-Out from a Fresh Set

Unlike wearing the twists in their original form, a twist-out is about release. You install the twists, let them set, take them down carefully, and wear the pattern and volume that come after.
Why This Style Gives You Two Looks
A twist-out usually gives you more fullness at the roots and a softer finish along the length. That makes it useful if your hair feels too shrunken when it’s freshly twisted or if you want texture without the tighter look of a full protective set. Medium twists tend to give the most balanced result: enough definition to hold a pattern, enough room to separate for body.
The key is drying. I cannot stress this enough. If the twists are not fully dry before you take them down, the result is frizz in the parts you wanted to keep defined. That’s not a cute kind of frizz. That’s the kind that makes you want to start over.
How to Wear It Without Losing Definition
- Let the twists dry completely before unraveling.
- Rub a little oil between your fingertips before separating.
- Take each twist down slowly from the end up.
- Separate only once or twice if you want a cleaner pattern.
A twist-out is the style for days when you want softness and shape, not a stiff finish.
7. Half-Up, Half-Down Two-Strand Twists
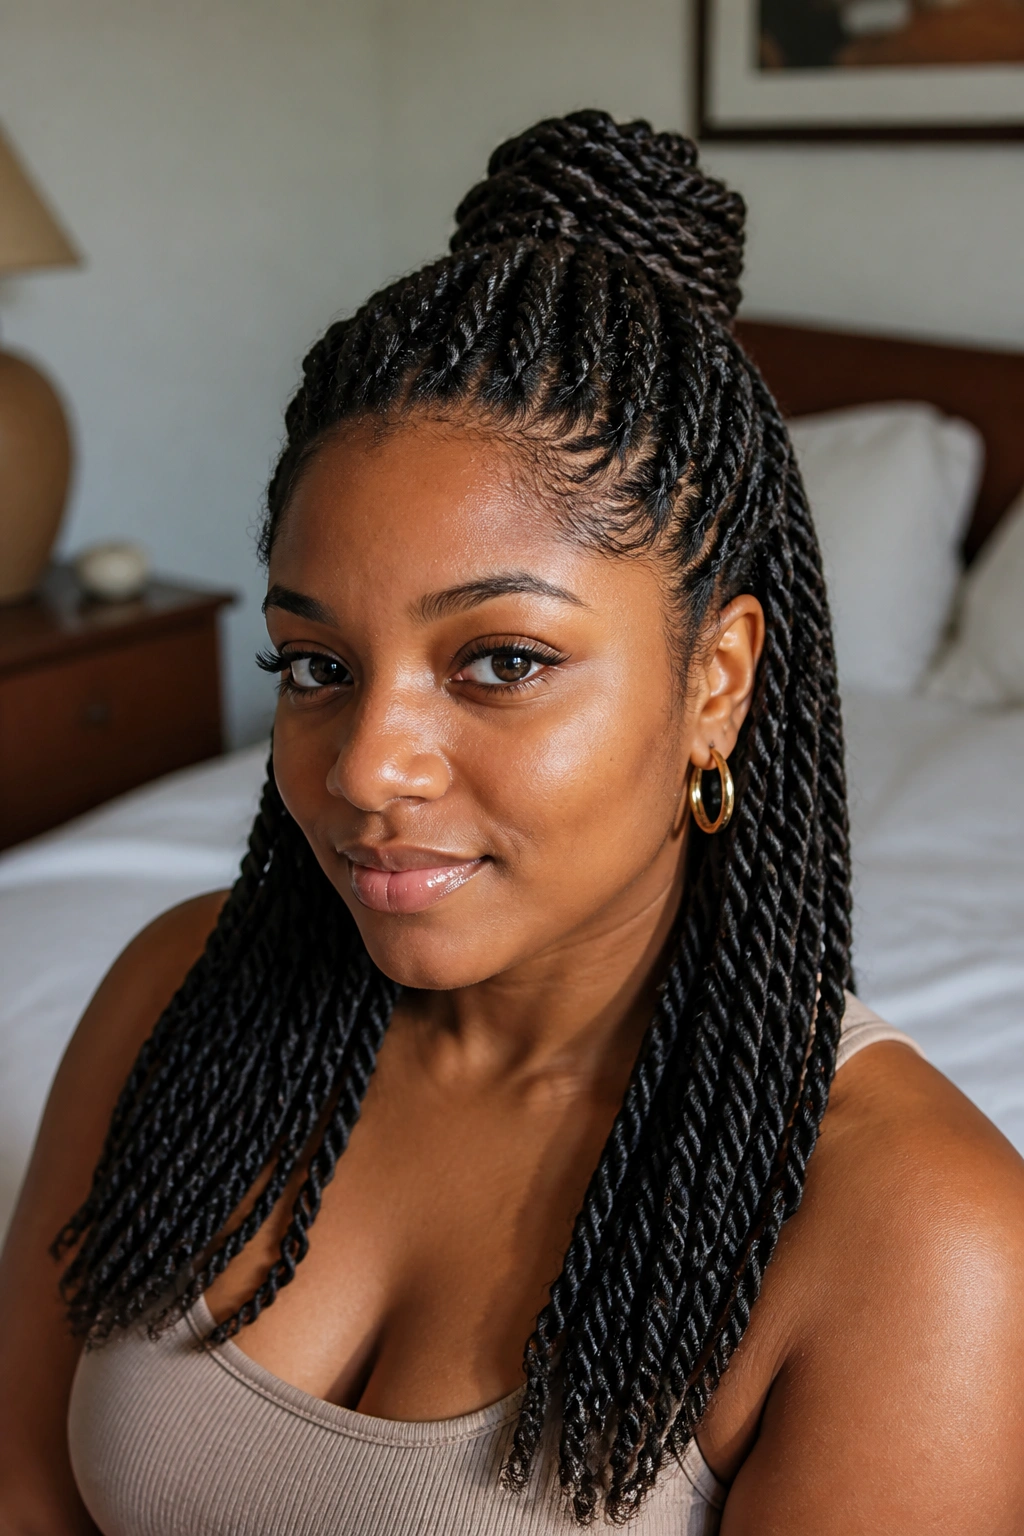
This is the style I reach for when the front needs to look tidy and the back needs room to move. It keeps your hair off your face without hiding the length you worked for.
Where the Part Should Sit
The top section does not need to be huge. In fact, a half-up style usually looks better when the lifted portion starts around the crown and leaves enough twists down below to show off fullness. Pull too much hair up and the style turns heavy. Pull too little and it looks accidental.
A snag-free band works better than a tight rubber band. So does a small claw clip if your twists are medium-sized. If the set is chunky, pinning often gives a cleaner finish than trying to stretch one band around everything.
Why It Works So Often
- Keeps hair off the face and neck
- Lets the lower twists hang freely
- Works with medium, long, or layered twists
- Can look casual or dressed up with the same base
If you want the style to feel softer, leave a few twists loose around the temples. If you want more structure, wrap the lifted section into a small knot and pin it flat. Both versions work. One is just more playful.
8. Side-Swept Two-Strand Twists
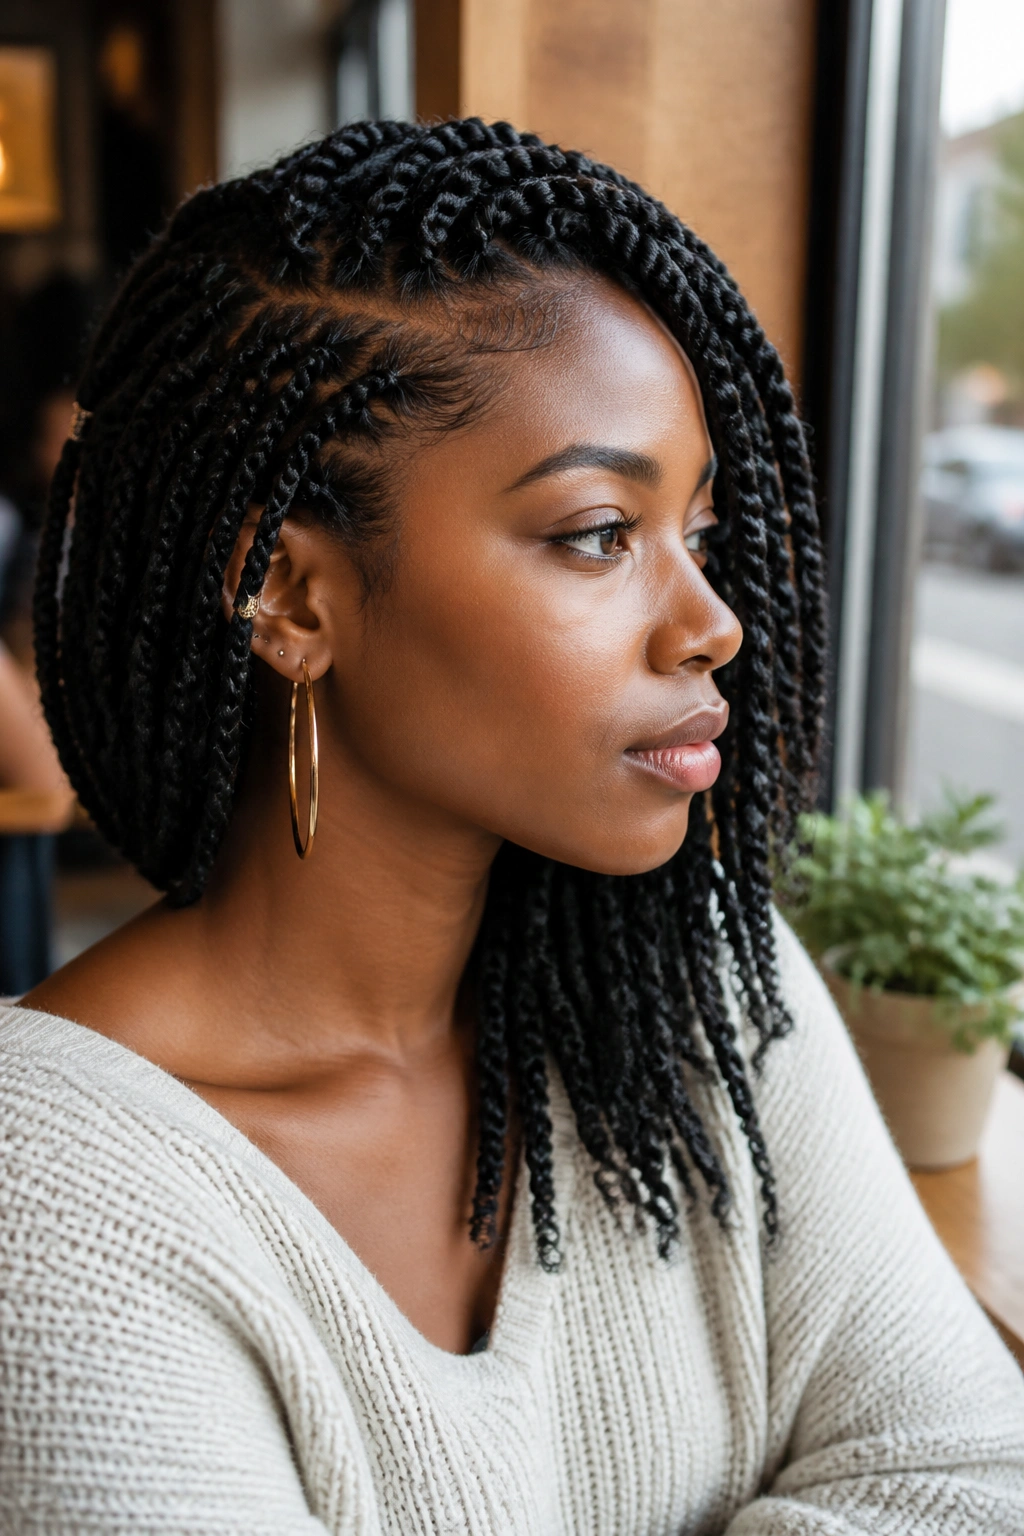
Why does a side sweep look more polished than a center part? Because asymmetry gives the eye somewhere to land. It feels deliberate, even when the styling is fast.
The Shape Does the Work
Side-swept twists are good for people who like a little movement around the forehead and cheek. The style softens angular features and can make the whole set feel less boxy, especially if the twists are medium or long. You can sweep the full front section to one side or just pin the first row over.
I also like this style because it works when your roots are not perfect. The sweep forgives a lot. A center part will expose every crooked line you made while rushing. A side part is kinder.
How to Get the Sweep to Hold
- Make the part with a tail comb, then widen it slightly with your fingers.
- Pin the heavier side with 2 or 3 bobby pins in an X shape.
- Smooth the front lightly with edge control, not a heavy slab of gel.
- Keep the parting area clean so the sweep sits flat.
That X-shaped pinning trick matters. One pin slides. Two pins hold. Three is overkill unless your hair is thick and stubborn.
9. Beaded Two-Strand Twists

There’s something satisfying about beads on twists. A little sound. A little movement. A little nod to childhood that still looks grown when the color and size are chosen well.
Why Beads Still Work on Adult Styles
Beads can turn a plain set of twists into something with personality fast. Wooden beads feel earthy. Clear or gold cuffs look sharper. Cowrie shells give the style a more traditional, rooted feel. The trick is not to overload the hair. Too many beads on fine twists will drag the ends down and make the style feel uneven.
Placement matters too. You do not need beads on every single twist. A few around the face or only on the outer row can give you the same effect with less weight.
What Helps the Style Stay Comfortable
- Choose lightweight beads for fine or medium hair.
- Keep the twist ends sealed before adding hardware.
- Use bead clamps or lined beads so they do not snag.
- Limit the number of beads on short twists to avoid pull at the ends.
If the scalp starts to feel tugged by the weight, take the beads out. Easy. Cute is not worth a sore crown.
10. High Puff with a Twisted Base
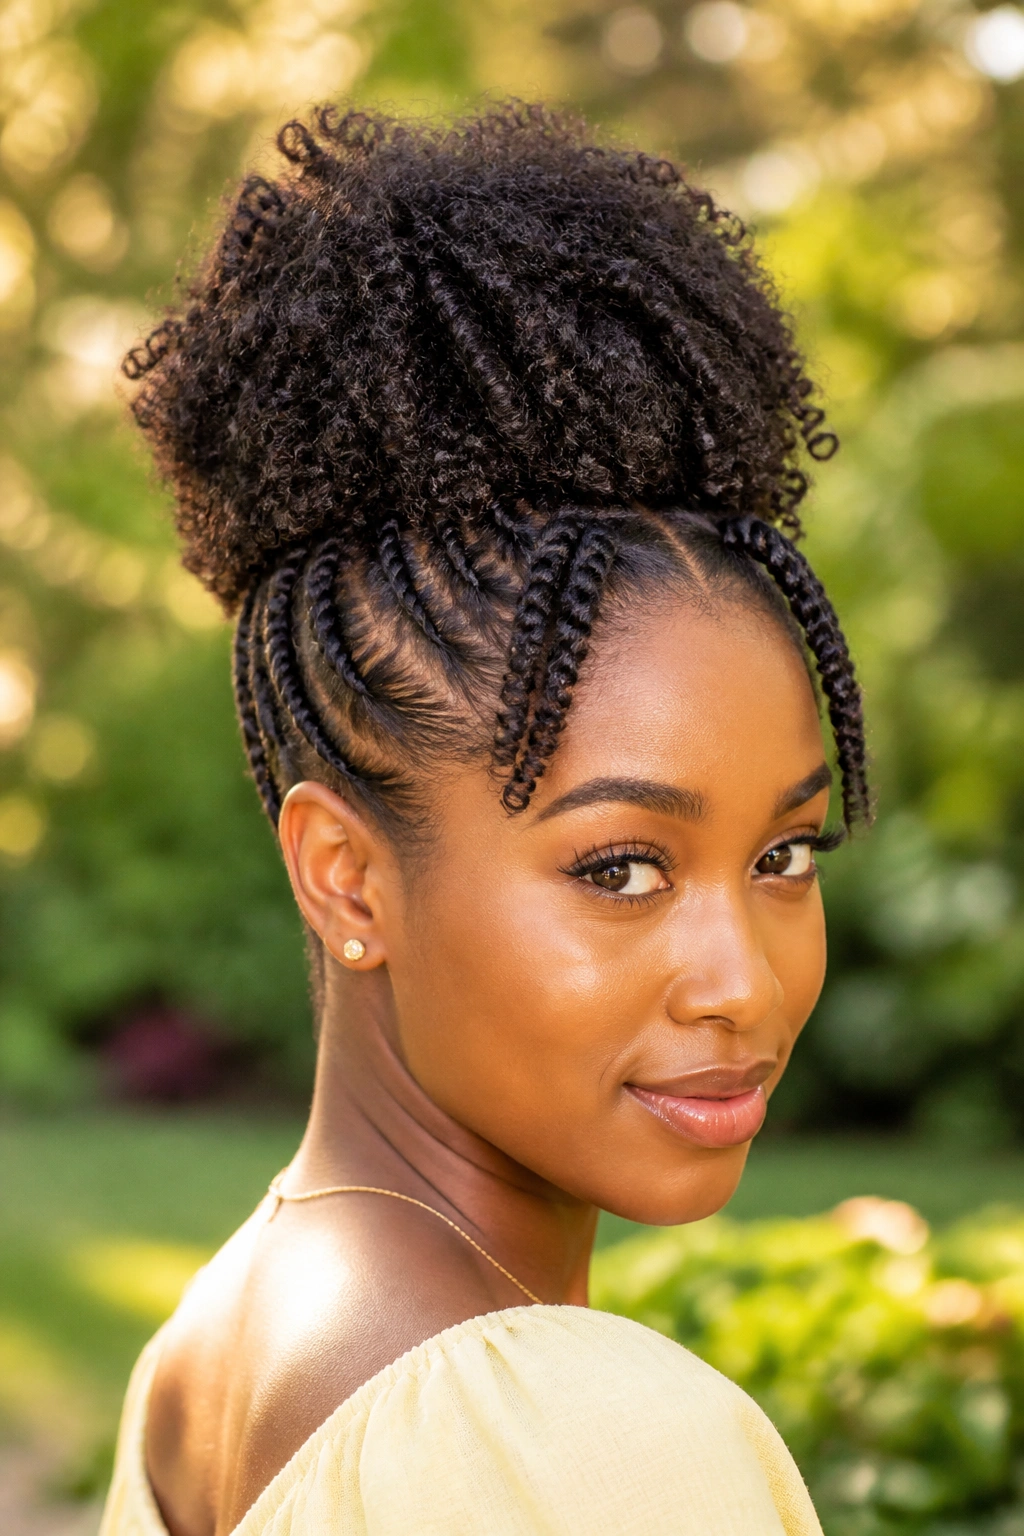
Unlike a plain puff, this version gives the front and sides a cleaner finish before the hair gets gathered up. That one change makes the whole style feel more styled and less rushed.
The Shape at the Crown Matters
The twisted base gives the puff a frame. Instead of pulling everything straight back, you can twist the front and side sections toward the crown, then gather the rest into a puff. That keeps the front neat and lets the top of the style hold up better through the day.
This is one of my favorite options for hair that wants movement but not a full down style. It lifts the face, clears the neck, and still leaves texture visible. If your hair is thick, the puff can look lush without needing much product. If your hair is softer or more loosely coiled, the twists help give structure before the puff takes over.
When to Wear It
- On busy days when you need hair off your shoulders
- After a few days of wearing loose twists
- In humid weather, when down styles start to collapse
- On second-day hair that still has good shape at the roots
A satin scrunchie helps here. So does not pulling the puff too tight. Your crown should look lifted, not strained.
11. Two-Strand Twists into a Low Bun
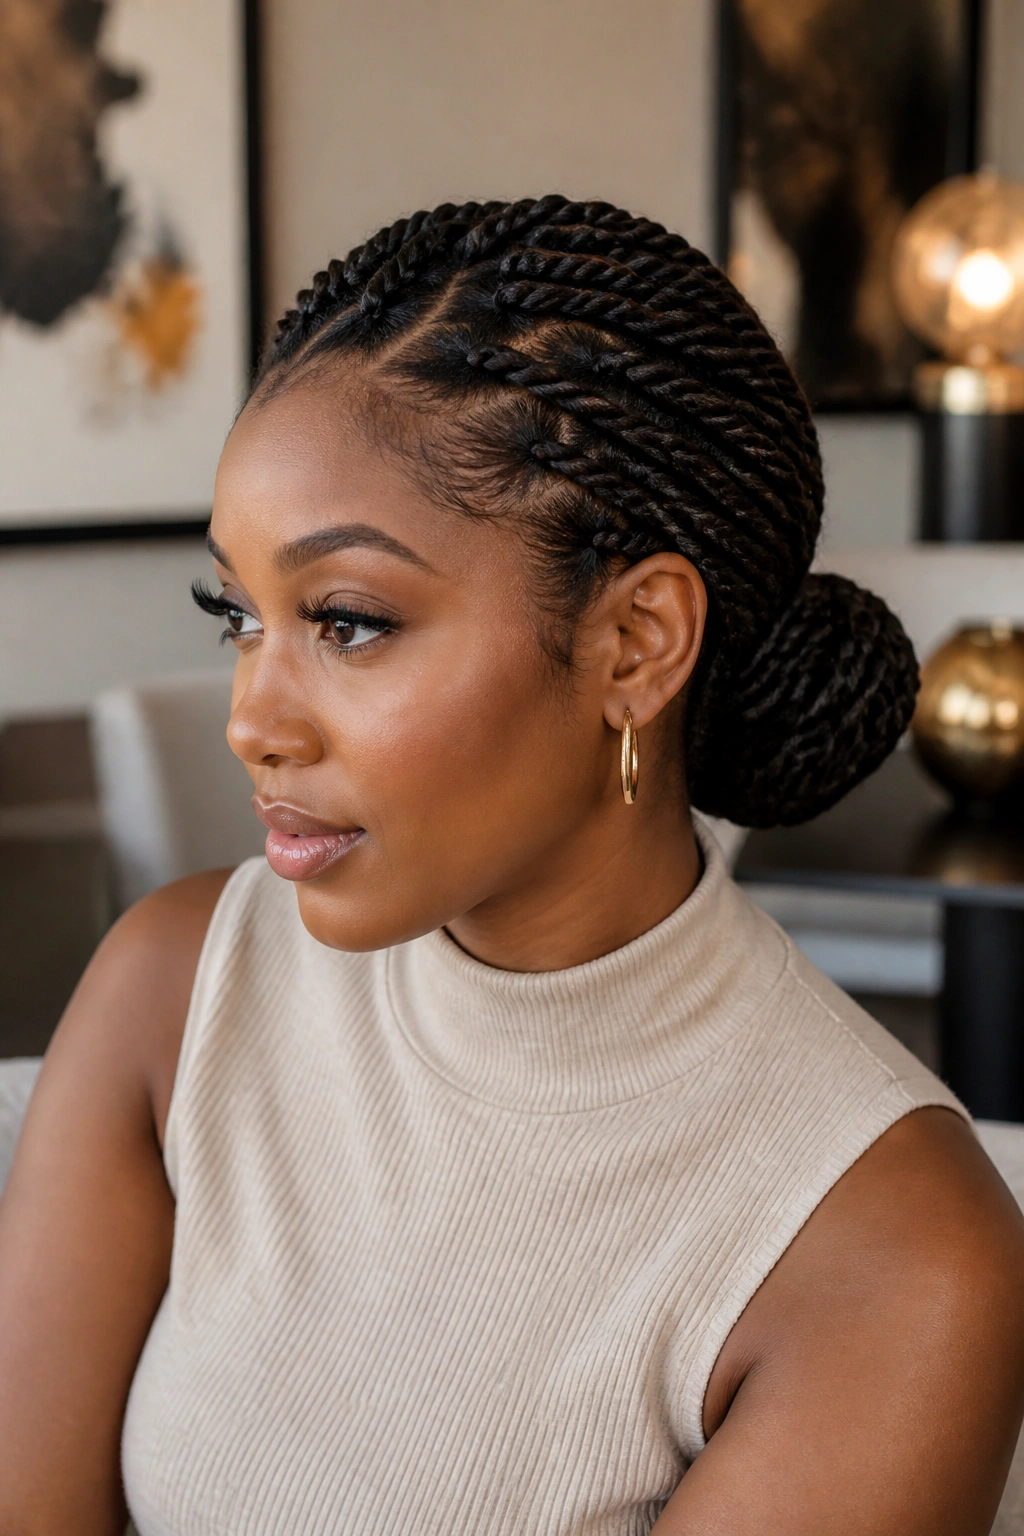
A low bun is one of those styles that quietly saves the day. It takes the bulk of your twists and tucks them away at the nape, which can feel like a relief when your hair has had enough attention for the week.
Why the Low Bun Keeps Coming Back
This style works because it’s calm. No height. No drama. Just twists gathered low and wrapped into a bun that sits close to the neck. It looks good with clean parts, but it also forgives twists that have loosened a little. That makes it useful if you’re stretching an old set.
I like the low bun for events where you want your face to stay open and your hair to stop being the main task. You can keep it sleek with a clean middle part, or make it softer by leaving a few twists loose at the front. Either way, the base should feel anchored, not cinched.
A common mistake is building the bun too high. Then it stops reading as elegant and starts looking like you were halfway through taking your hair down and gave up. Keep it at the nape. Cleaner that way.
What Usually Helps
- Gather the twists with a snag-free band first
- Wrap the lengths around the base in one direction
- Secure with U-pins or long bobby pins
- Tuck the ends under so they do not poke out
This one is not flashy. It is reliable. There’s a difference.
12. Two-Strand Twist Mohawk

This one brings drama fast. The mohawk shape gives you height through the center of the head while keeping the sides smooth, which is a strong look when you want your twists to read bold without extra color or beads.
Why the Center Strip Changes the Style
A twist mohawk works by contrast. The center stays full, raised, and visible, while the sides are pinned down or braided close to the scalp. That line down the middle gives the eye a path to follow, and the style ends up looking more sculpted than a simple down set.
It is a good choice for dense hair because you need enough volume to make the center strip stand up on its own. Fine hair can still wear it, but you may need a few hidden pins or a base twist to keep the shape from slipping. The sides should be smooth enough to create contrast, not so tight that they hurt by lunch.
A Few Practical Details
- Make the center section slightly wider than you think you need
- Pin the sides flat near the temples and behind the ears
- Keep the front line clean so the shape reads clearly
- Use a light oil on the exposed scalp if the part area feels dry
It’s a strong style. It looks even stronger when the base is neat.
13. Triangle-Part Two-Strand Twists
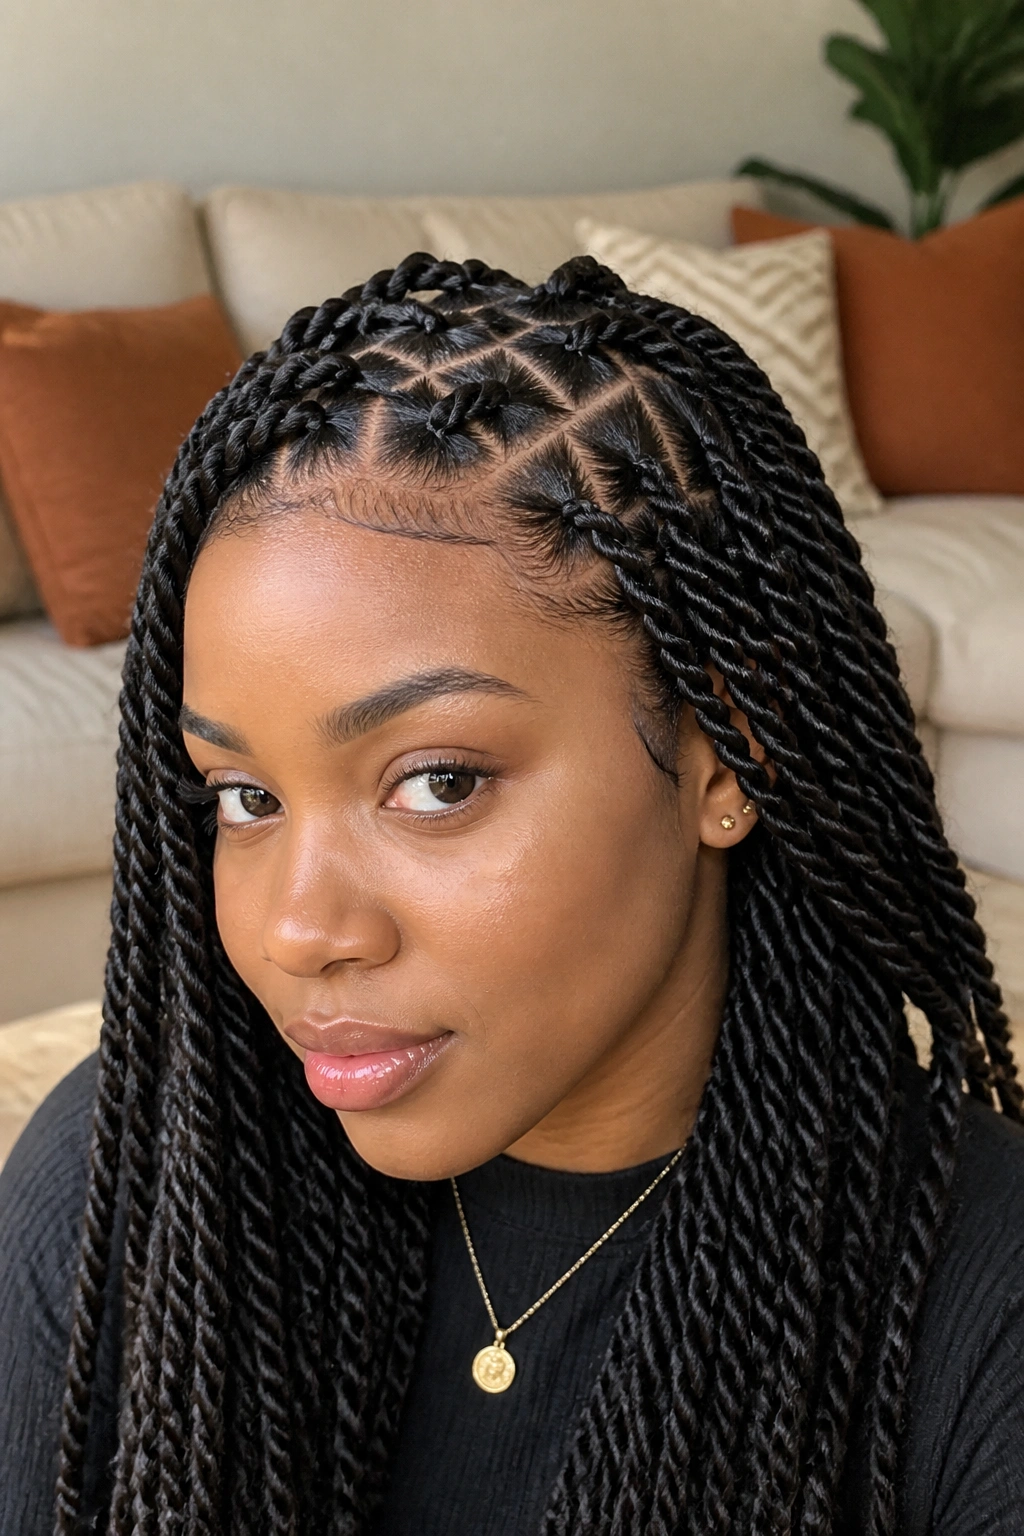
Why do triangle parts change the whole look? Because the sectioning itself becomes part of the design. The twists may be simple, but the scalp pattern makes them feel sharper and less expected.
The Geometry Does More Than People Think
Triangle parts catch the eye in a different way than square parts. Instead of a grid, you get angles. That little shift makes the style feel fresh even if the twists are a familiar size. If you like hair that looks structured but not stiff, triangle parts are a good way to get there.
The parts also help if you want the twists to sit a bit more naturally around the head. They can reduce the boxy look that sometimes happens with uniform square sections, especially on short to medium lengths. On tight curls, they also help each twist fall in a slightly different direction, which keeps the style from looking flat.
How to Part Without Losing Patience
- Use a rat-tail comb and clip away finished sections
- Work in rows from front to back or back to front — whichever keeps your hands calmer
- Keep the triangles consistent in size, not perfect in shape
- Mist the roots lightly if your hair starts to dry out during sectioning
Perfect triangles are not necessary. Clean, even shapes are enough. That is the part people forget while chasing neatness.
14. Front Cornrow and Twist Combo

If you want the front to stay flat and the rest to stay soft, this mixed style earns its place. It gives you the structure of cornrows along the hairline with the movement of two-strand twists through the rest of the head.
Where This Style Earns Its Keep
The front cornrows help control bulk around the face, which is useful if your hairline frizzes fast or if you want to keep the first few inches especially smooth. From there, the twists take over and let the rest of the style move freely. It is a smart split: tidy where the eye starts, loose where the hair can breathe.
I like this for longer wear because the front tends to stay neater than a fully twisted hairline. It also gives you more options when you want to wear the twists down one day and pinned back the next. The braid-to-twist transition is doing more work than it looks like it is.
Small Details That Help
- Keep the cornrows shallow and close to the scalp
- Transition into twists at a clean, even point behind the hairline
- Use a bit of gel at the front only if your hair tolerates it
- Avoid pulling the braids too tight across the temples
That last warning matters. Pretty is not worth a tender scalp.
15. Halo Crown Twists
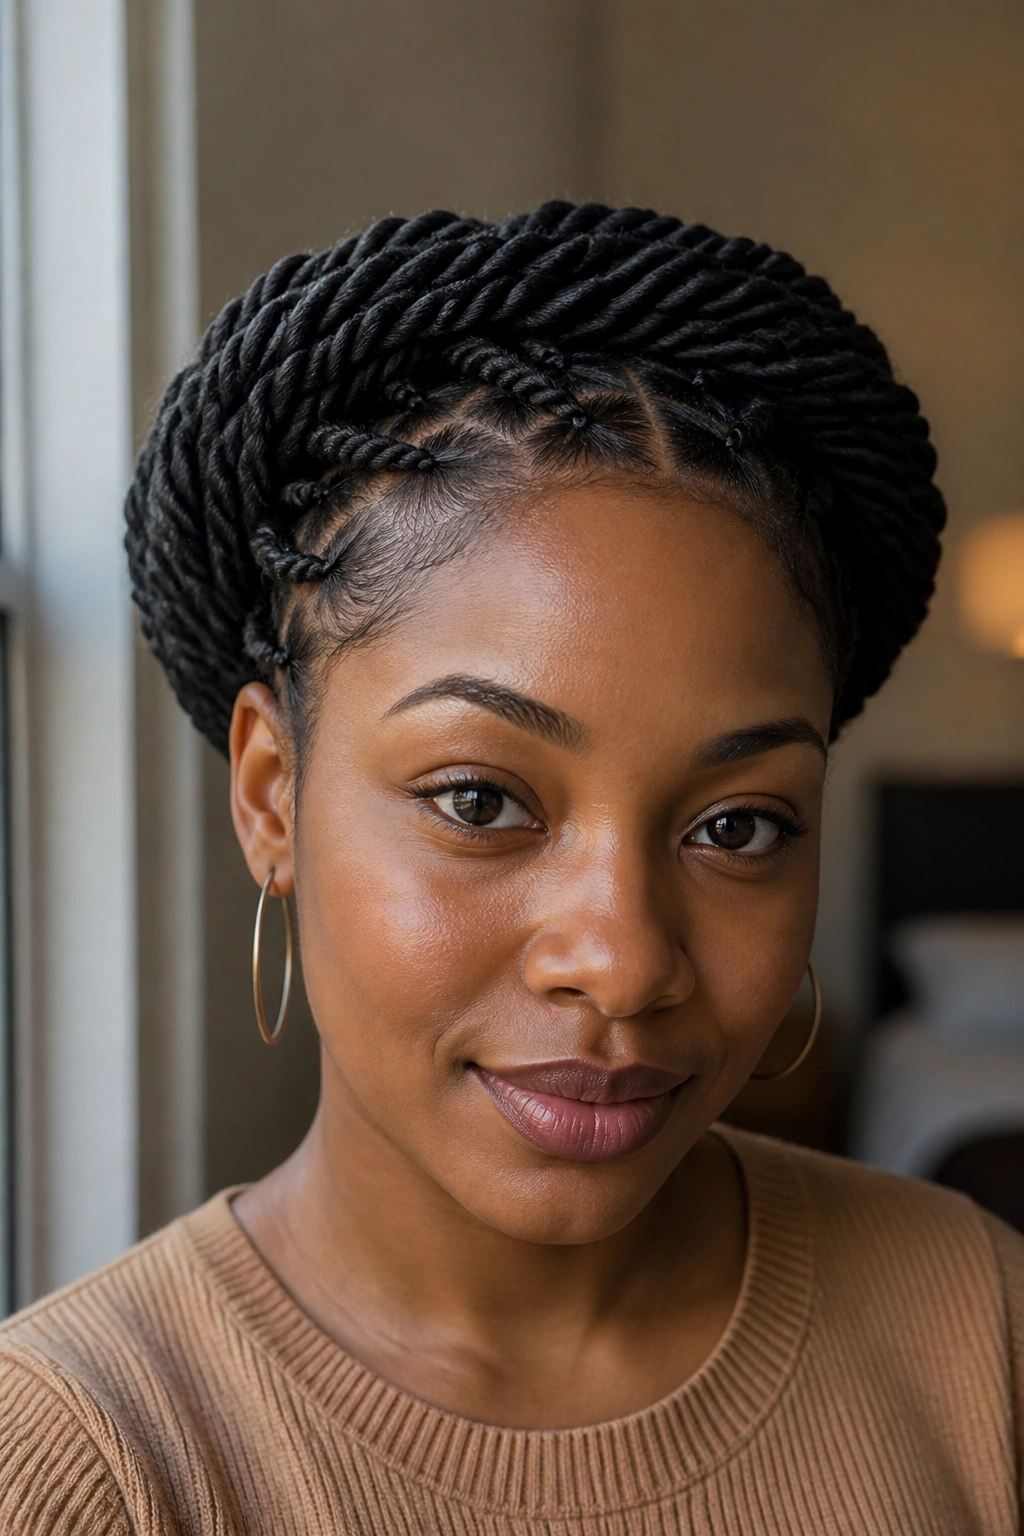
A halo of twists around the head never looks accidental. It reads as finished, even when the styling itself is pretty simple, and that makes it a strong option when you want your hair to carry the whole look.
Why the Crown Shape Stands Out
The halo style wraps the twists around the perimeter of the head so they sit like a crown instead of hanging loose. It keeps the nape clear, frames the face softly, and makes the whole style feel deliberate without needing extra decoration. You can wear it low and smooth or a little fuller if you want more volume around the top.
This is one of those styles that works for formal events, yes, but it also works on days when you just want your hair off your shoulders and still want to feel put together. The pins stay mostly hidden, which I appreciate. Visible pins can ruin the line of the style if you overdo them.
How to Keep the Crown in Place
- Build the twists on medium-length hair or longer for easier wrapping
- Tuck the ends under as you circle the head
- Secure the perimeter with flat bobby pins placed under the twist line
- Keep tension even so one side does not feel tighter than the other
A good halo twist does not need much else. Maybe earrings. Maybe a clean part. Maybe nothing at all. It is one of the rare styles that can stand on its own and still leave room for the rest of your outfit to speak.
