



A crown braid updo can save a hair day that was headed in the wrong direction and still look like you meant to dress up. That’s why it keeps showing up for weddings, dinners, dates, and any event where you want softness near the face but none of the fuss of loose hair slipping over your shoulders.
The good versions are never too tight. That matters more than people admit. A braid that hugs the hairline too hard can flatten the whole look, tug at the temples, and make the style feel less romantic than stern, which is not what anyone wants from a crown braid updo.
What makes this style so useful is the range. It can look airy and undone, polished and formal, or textured and boho, depending on how you part the hair, where you hide the pins, and how much you leave out around the face. Small choices change everything. The braid can be wide and soft, narrow and neat, or built from twists and loops instead of a straight three-strand pattern.
1. Loose Halo Braid With Soft Tendrils
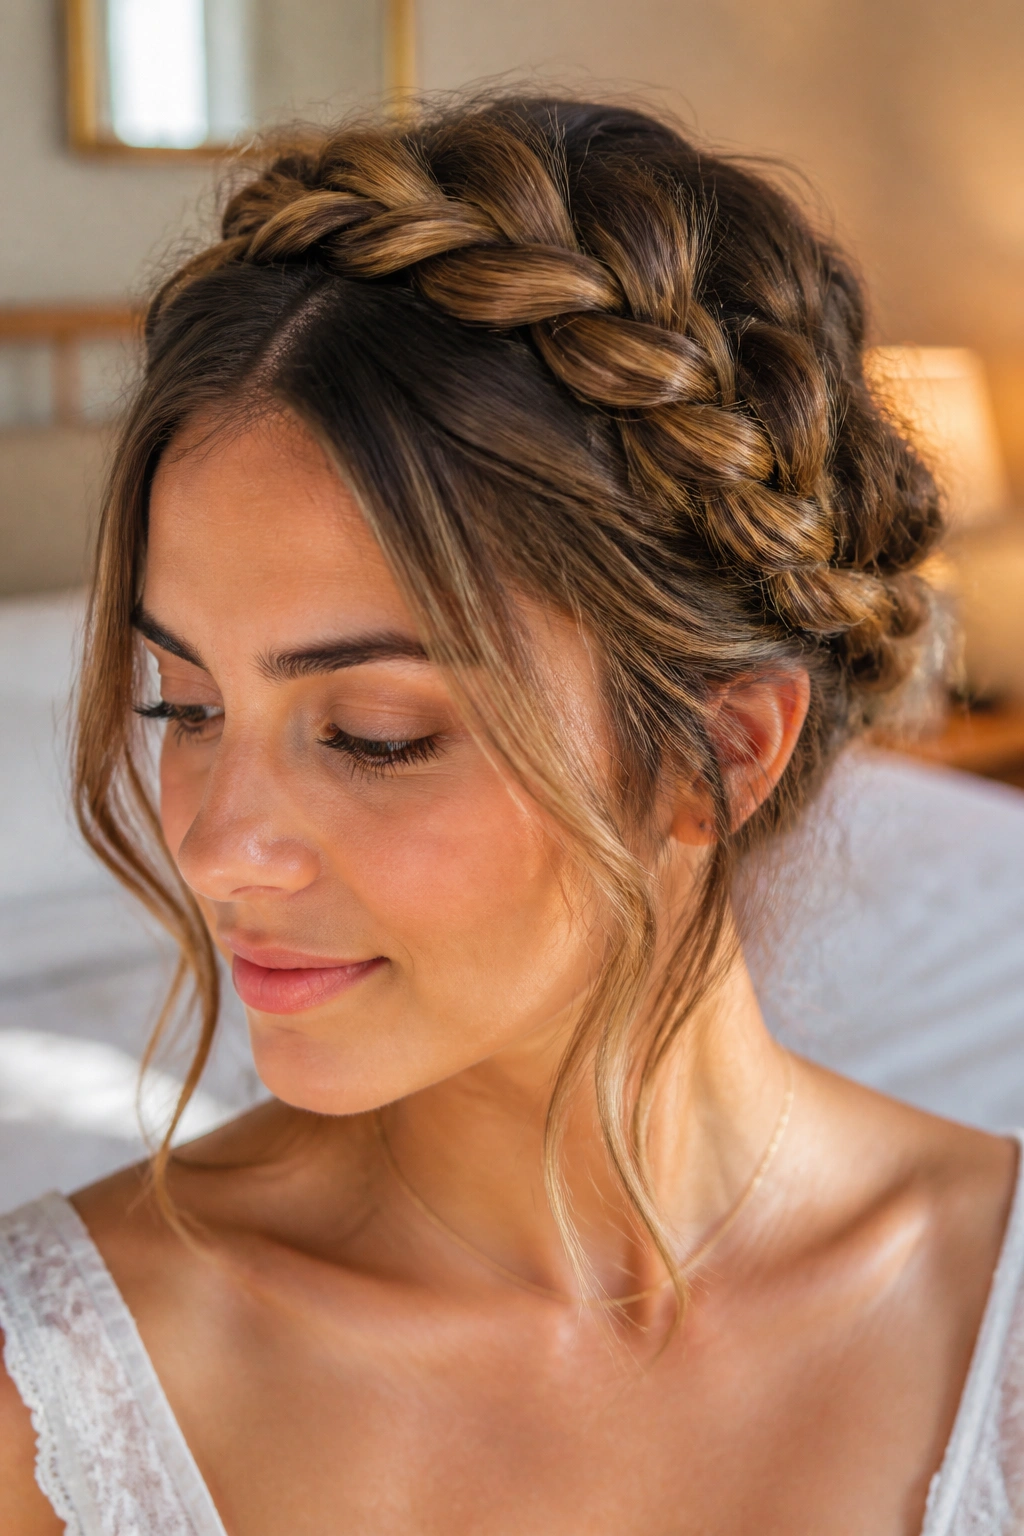
This is the version people picture first when they hear crown braid updo. It wraps around the head like a soft band, then leaves just enough hair free at the temples to keep the look from feeling rigid.
Why it works
A loose halo braid gives you shape without stealing all the softness from your face. The trick is to braid at a medium grip, not a death grip, and to gently pull at the braid once it’s pinned so the edges look full.
Keep the front pieces around 1/2 inch to 1 inch wide if you want that wispy finish. Anything thinner can look stringy, and anything thicker starts to read more like a side bang than a frame.
- Start with hair that has a little grip; second-day hair or a light texturizing spray helps.
- Leave two front tendrils out before you begin braiding.
- Secure the braid behind one ear with 2 crossed bobby pins so the shape stays put.
- Mist the finished style with a flexible-hold spray, not a hard shell.
Best for: weddings, engagement photos, date nights, and any outfit that needs a softer neckline.
2. Dutch Crown Braid Into a Low Bun
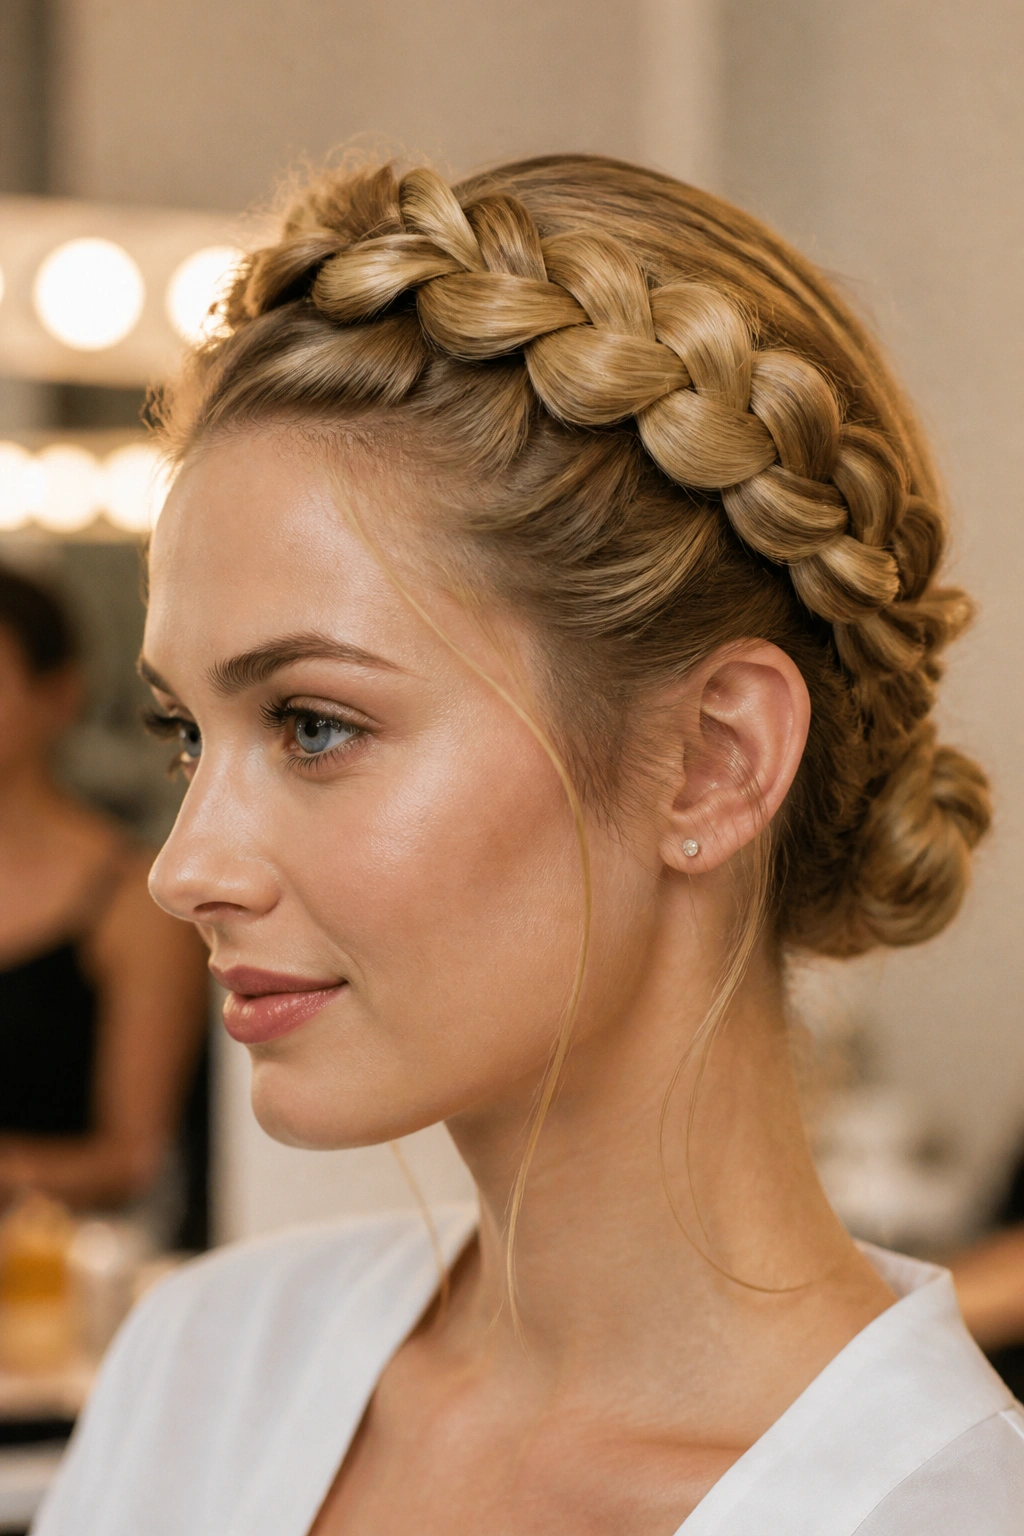
This one looks more sculpted from the front. The braid sits a little higher because a Dutch braid pops off the scalp, and that raised edge gives the style more presence without making it stiff.
It’s one of my favorites for formal events because it holds its shape better than a loose braid on very smooth hair. If your hair tends to slip out of styles, prep the roots with a touch of mousse and blow-dry them in. That tiny bit of texture matters.
The bun at the nape should stay small and neat. A huge bun steals the show, and the braid stops looking like the main event. Keep the bun tucked low, then pin from underneath so the pins disappear.
Use this when you want: a polished profile, a stable style, and a braid that still feels soft around the face.
3. Milkmaid-Inspired Crown With Hidden Ends

Two braids. One clean cross-over. No drama. This is the style that looks almost easy, which is exactly why it works so well.
The milkmaid shape gives you that wrapped, crown-like finish, but the hidden ends make it feel neater than a classic boho version. I like it for hair that’s medium to long and a little layered, since the tucked ends can disappear under the second braid instead of poking out.
What to watch for
- Part the hair straight down the center if you want symmetry.
- Braid both sides with even tension so one side doesn’t sit lower.
- Tuck the ends under the opposite braid, then pin them flat against the head.
- If the hair is fine, rough it up first with dry shampoo at the roots.
It reads sweet, but not childish. That balance is the whole point.
4. Fishtail Halo Updo With a Loose Knot
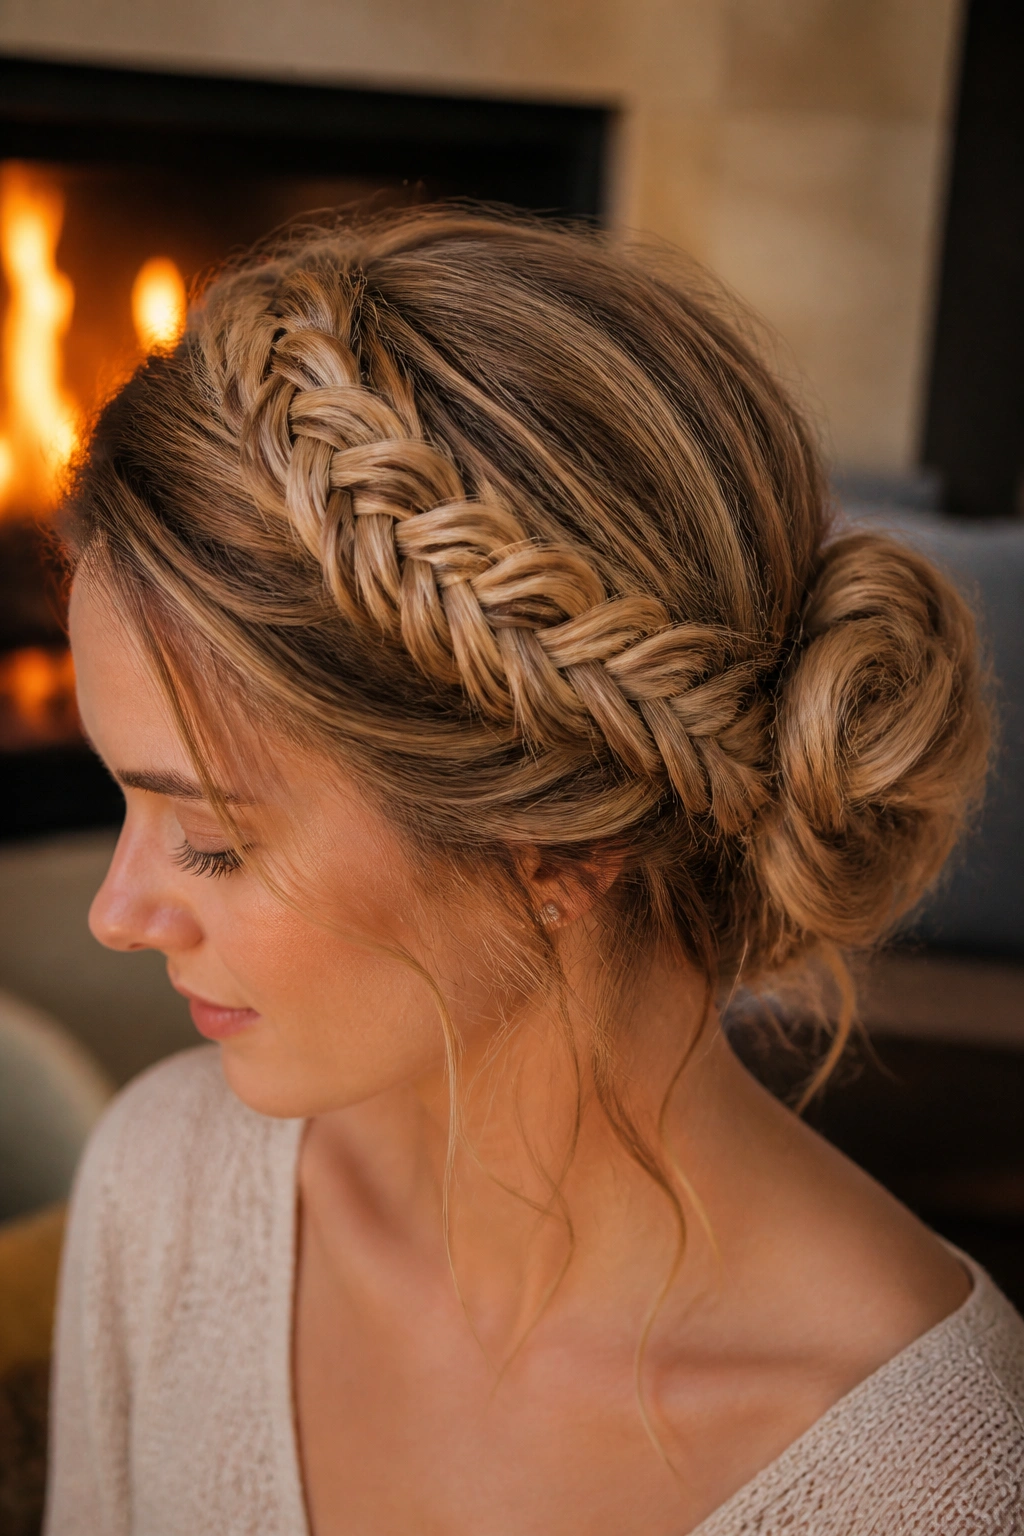
Why does a fishtail crown look so romantic? Because the weave is small and busy, which gives the whole style a soft, almost lace-like texture. It’s a little more detailed than a regular braid, so it catches the eye even when the rest of the hair stays quiet.
This style shines on highlighted hair, balayage, or anything with tone variation, since the pattern shows off the lighter and darker pieces. Start the fishtail braid near one temple, travel around the crown, and gather the ends into a loose knot instead of a tight bun.
How to keep it readable
The braid should be pancaked gently once it’s secured. That means pulling the edges apart with your fingers, not yanking them. If you pull too hard, the braid collapses and turns fuzzy fast.
A few face-framing pieces around the jaw soften the knot and keep the look from feeling overworked. That little imbalance is what makes it pretty.
5. Braided Crown With Side-Swept Bangs

A side part changes everything. The braid still circles the head, but the weight shifts slightly to one side, which makes the whole style feel less formal and a touch more relaxed.
This is the move for anyone who wants a crown braid updo but does not want the straight-on symmetry that comes with a center part. Side-swept bangs or long fringe pieces break up the line near the forehead and make the style look softer in photos.
The braid itself can be French or Dutch, but keep the beginning a little looser at the temple. If you start too tight, the part looks severe. If you start too loose, the braid loses definition, so there’s a narrow sweet spot.
One clean pin behind the heavier side usually does more than a dozen tiny ones. Less hardware, better shape.
6. Rope-Braid Halo With a Chignon
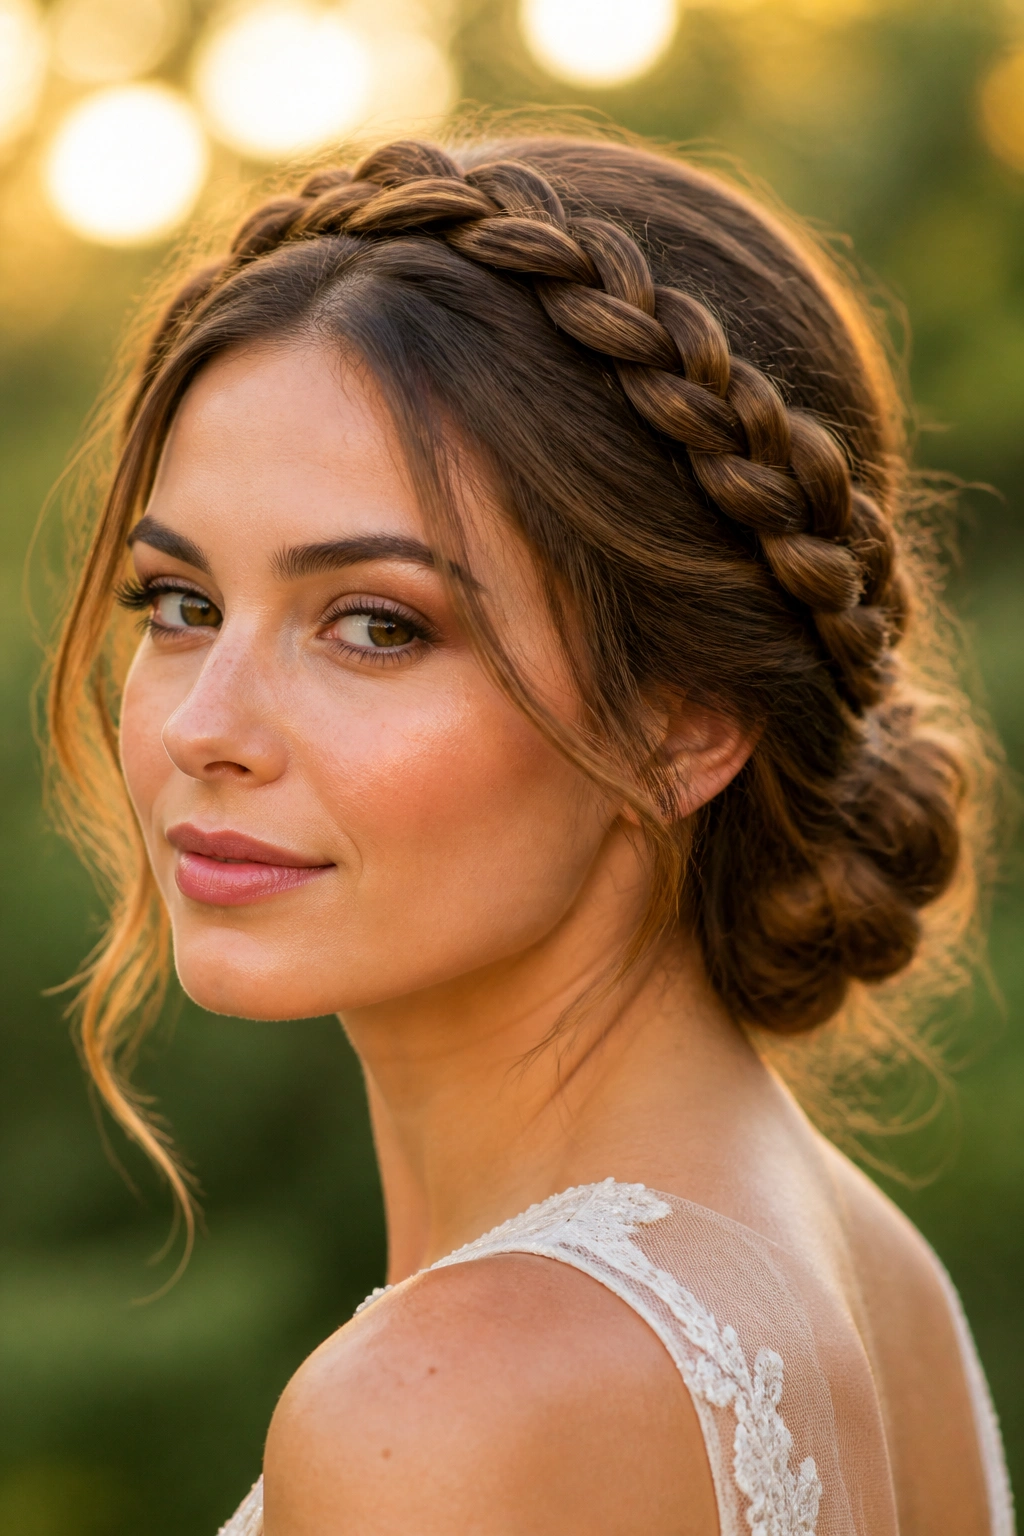
Two twists. That’s all you need if you want something elegant without a lot of hand strain. A rope braid uses two sections instead of three, and that makes the texture look smoother and a little more glossy than a standard braid.
It’s also a smart choice when your arms get tired fast. Rope braiding around the head takes less finger work than a full French braid, which sounds like a small thing until you’re halfway across the crown and your shoulders start complaining.
Quick styling notes
- Twist each section in the same direction before crossing them over.
- Keep the tension even so the braid doesn’t bow out in one spot.
- Finish with a low chignon that sits flat against the neck.
- Use 6 to 8 bobby pins if your hair is thick, fewer if it’s fine.
This version looks especially clean on glossy straight hair, but it can work on waves too. The braid just reads a little fuller.
7. Chunky Pull-Through Crown Braid
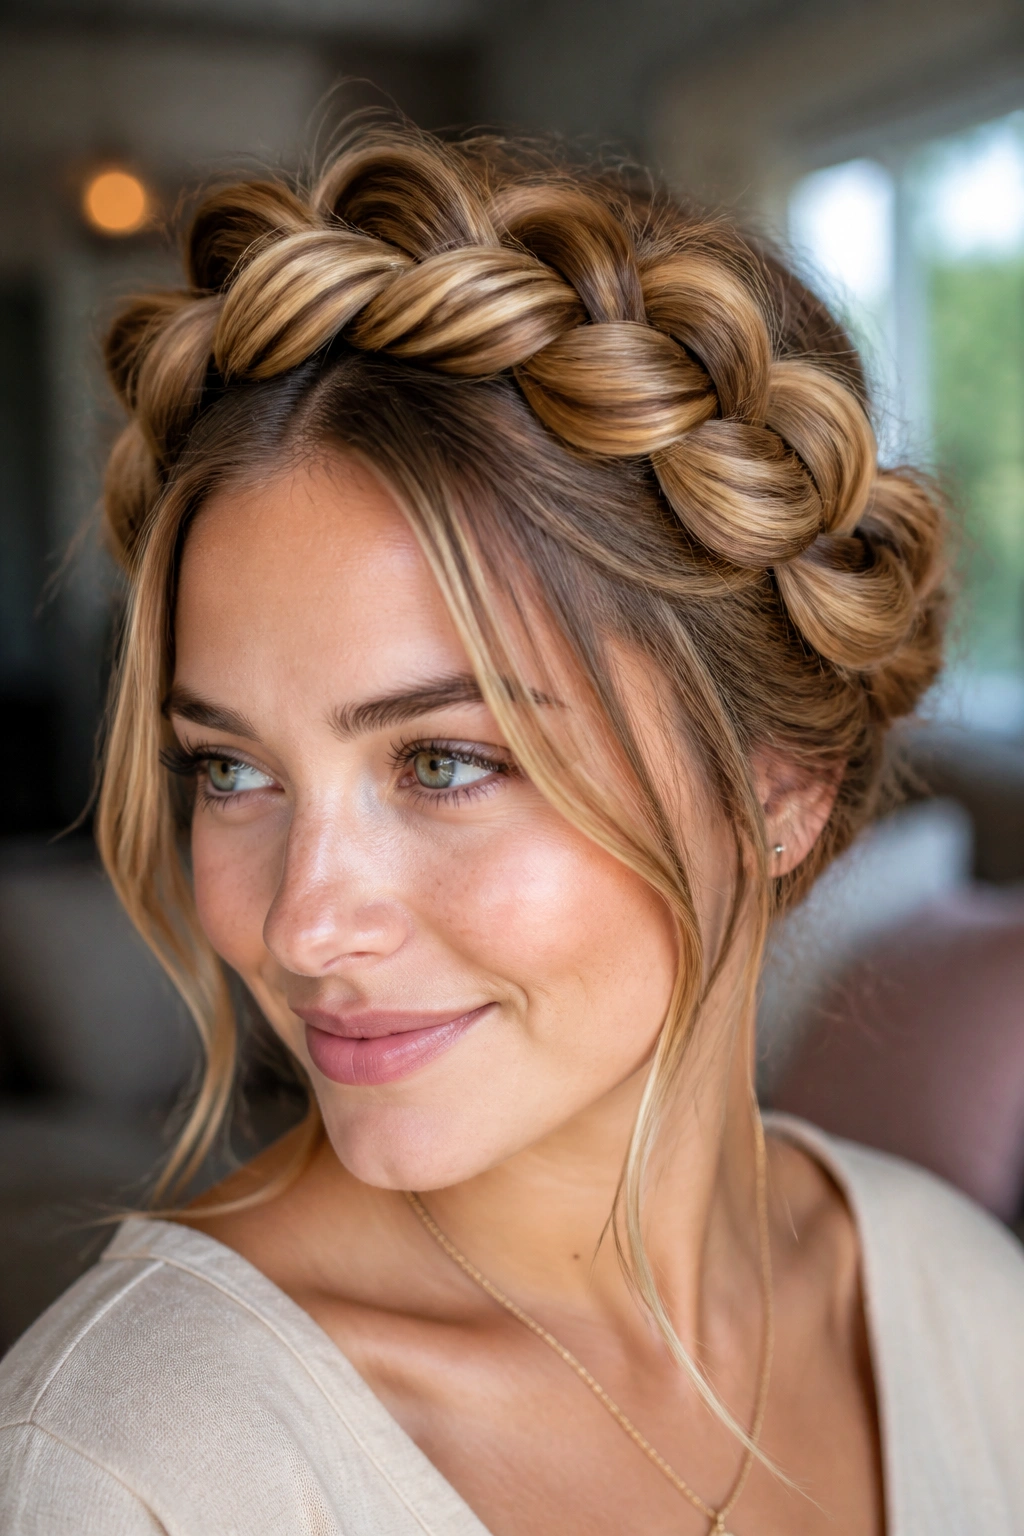
If you’ve ever wanted a braid that looks thick even when your hair isn’t, this is the one. Pull-through braids create a stacked effect using small elastics, and that makes the crown look fuller without asking your hair to do more than it can.
The best part? It stays impressive from the side. Real braided crowns can go flat near the back, but the pull-through version keeps that lifted shape all the way around. It’s one of the few styles that can make medium-density hair look like you spent an hour on it when you probably didn’t.
What makes it work
Use clear elastics every 2 to 3 inches and gently pull each bubble apart after securing it. Don’t yank. Just widen it enough to fill space.
A little backcombing at the roots near the temples helps the first section stand up better. After that, the pattern does the rest.
8. Messy Boho Crown Braid Bun
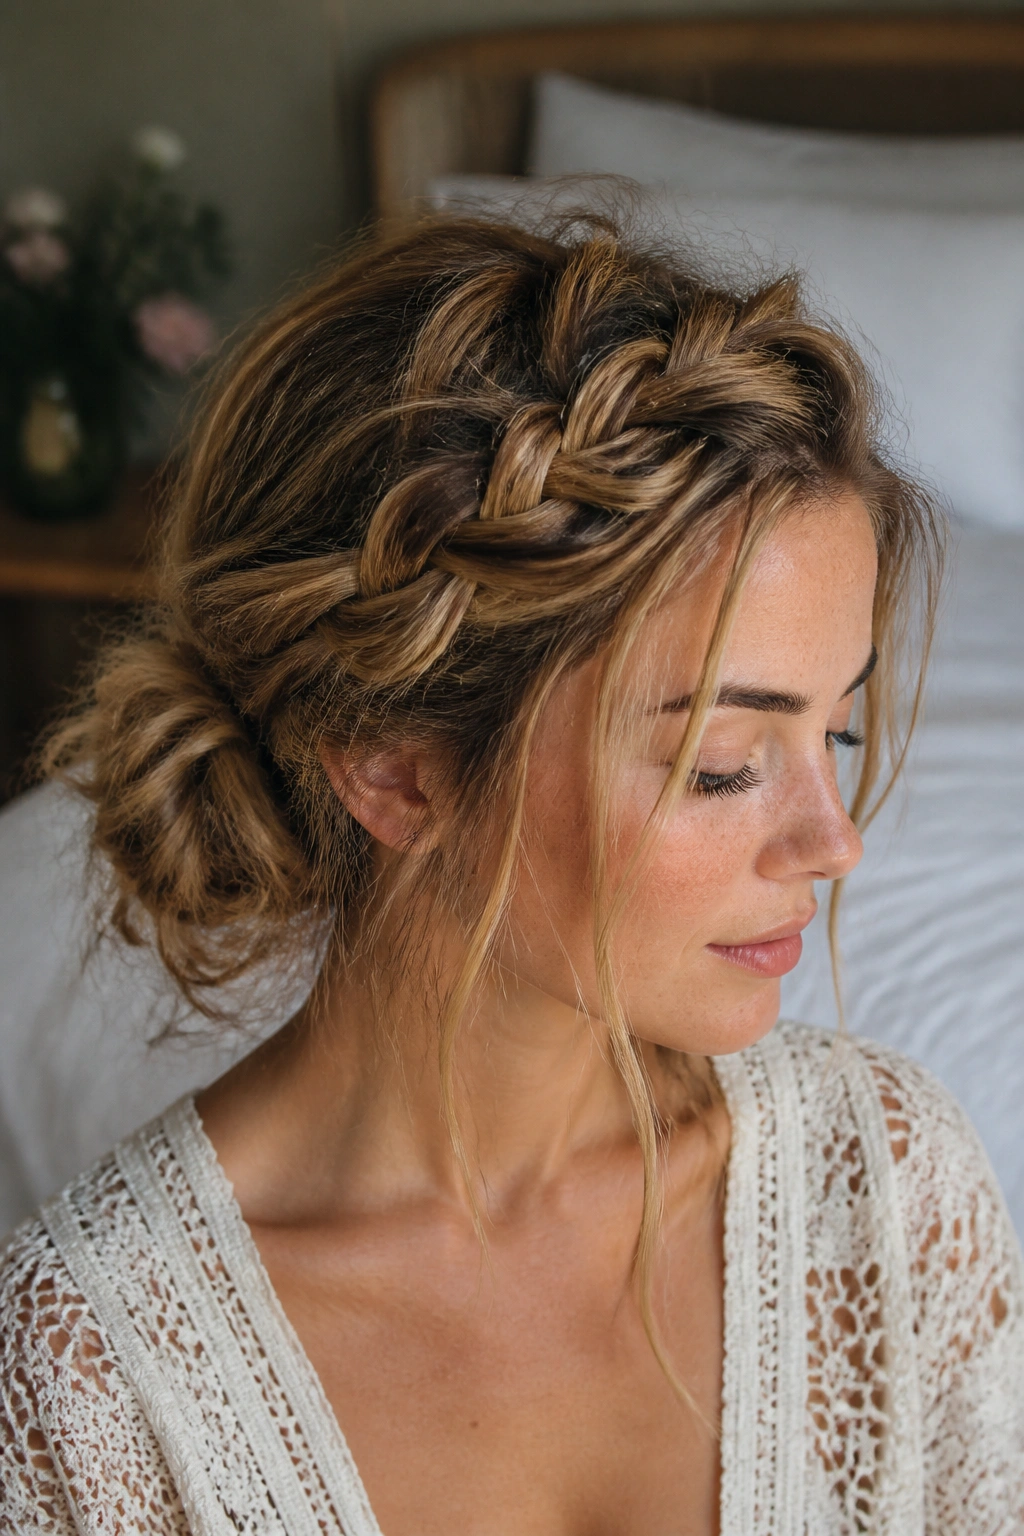
Not every romantic updo needs to look freshly pressed. This one is better when it looks slightly lived-in, with uneven texture, soft flyaways, and a bun that sits a little loose instead of locked down.
A boho crown braid bun usually starts with waved hair or heatless bends, then gets a loose braid around the hairline before the ends are pinned into a knot at the back. The charm is in the slack. Too much smoothing and the whole thing loses its charm.
Second-day hair is your friend here. Freshly washed hair can be too slippery, and then you spend half the afternoon trying to keep the braid from sliding.
A few curled pieces around the ears keep the style from turning into a plain bun with a braid on top. That little bit of movement matters.
9. Sleek Center-Part Crown Braid With a Low Knot
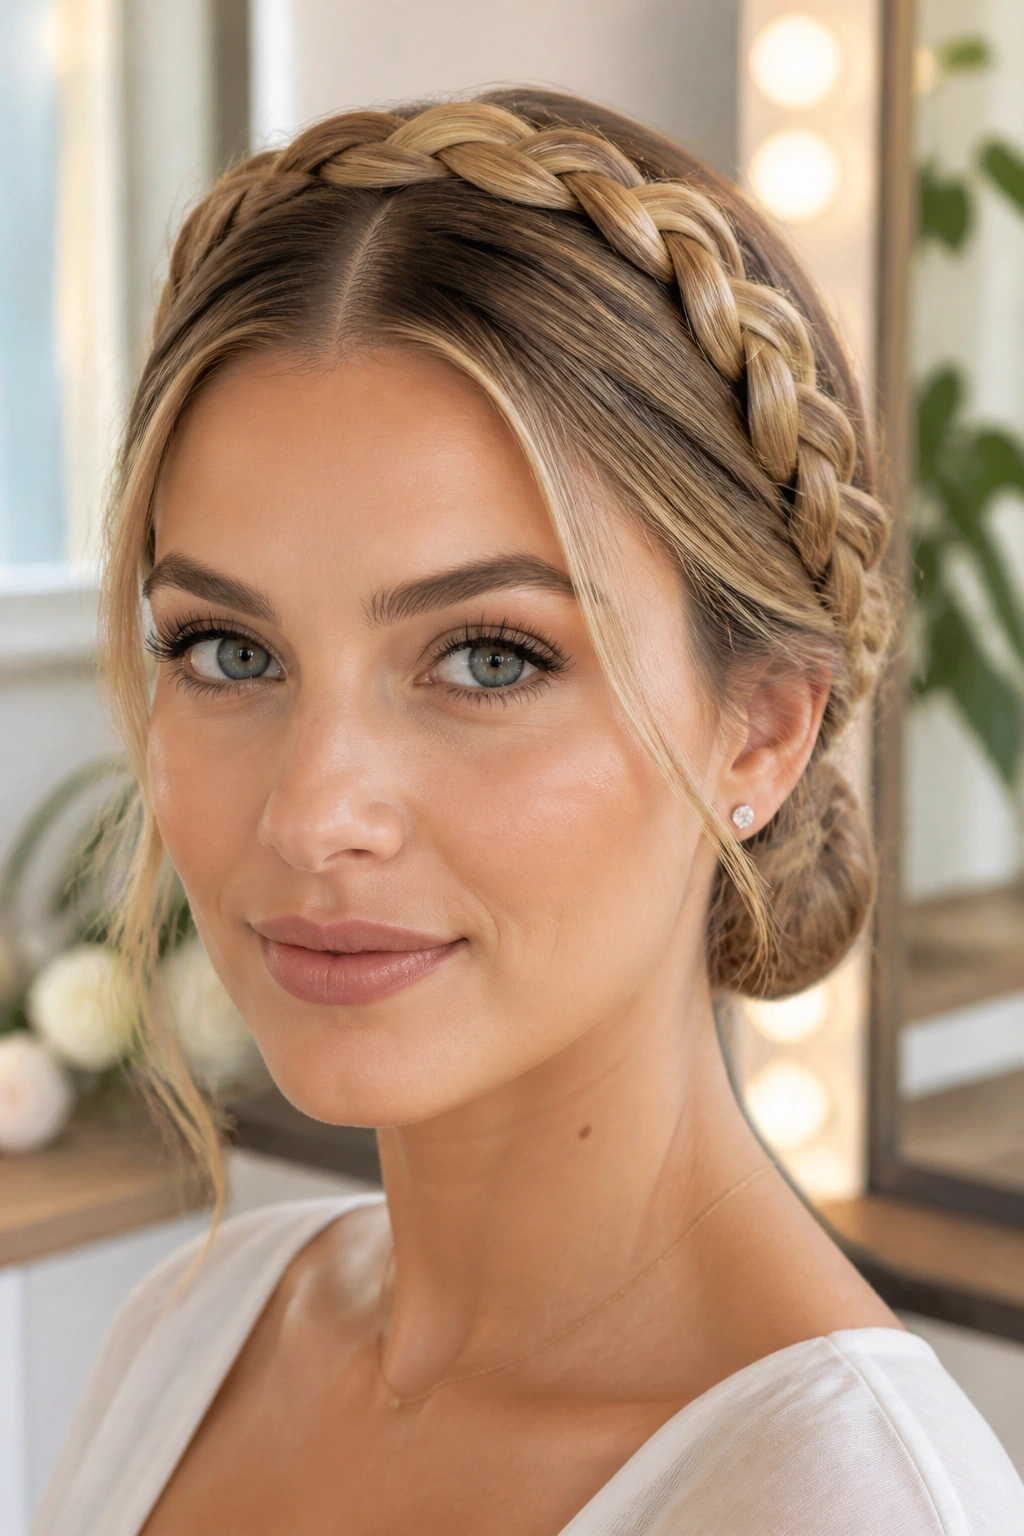
Some looks need polish, not fluff. This is one of them. A clean center part and a smooth crown braid give the style a sharper edge, which works nicely when the dress or neckline already has a lot going on.
Start by smoothing the hair with a lightweight cream or gel along the part line. Then braid tightly enough that the sections stay neat, but not so tightly that the braid looks narrow and flat. A low knot at the back keeps the silhouette refined.
The finish here depends on detail. If the part is crooked, you’ll see it immediately. If the roots are frizzy, the whole style reads messy in the wrong way. A tail comb and a little patience go farther than extra products.
A small but useful note
Wrap the knot close to the nape, not halfway down the back of the head. That keeps the crown braid visually connected to the rest of the style.
10. Curly Hair Crown Braid Updo
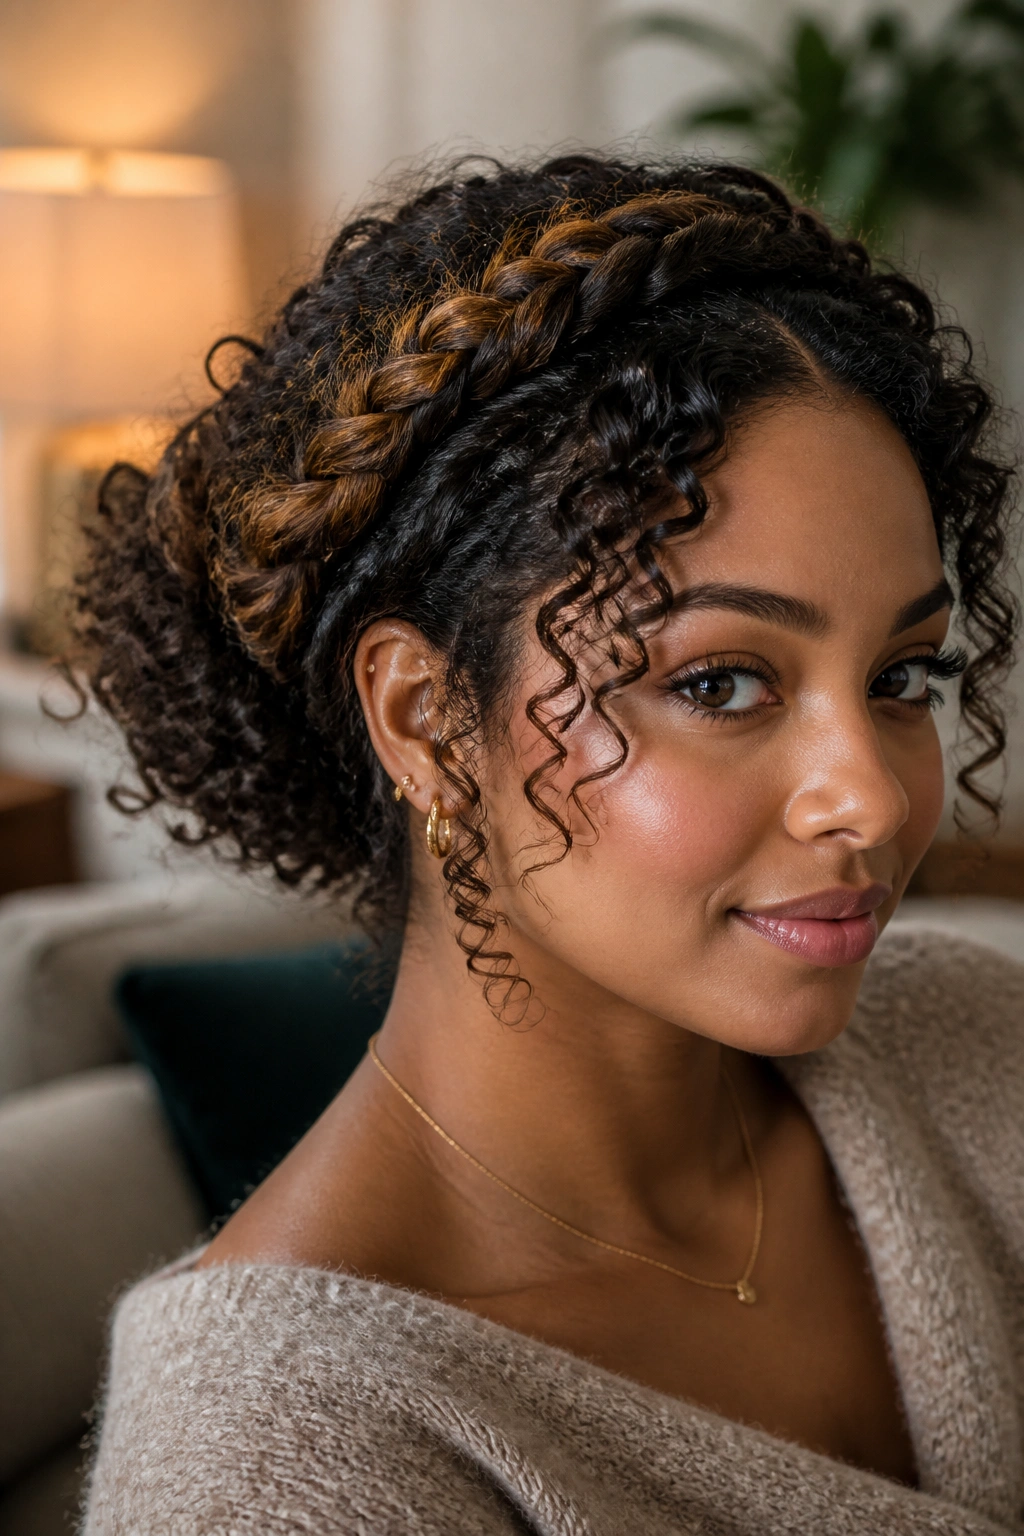
Curly hair does not need to be straightened to work in a crown braid updo. In fact, the texture often makes the style look richer, because the braid and the curls each bring something different to the shape.
The key is to braid the crown area, then let the rest of the curls stay full instead of forcing them into a tight knot. A low puff, a curly bun, or even a pinned coil cluster can sit under the braid and keep the style balanced.
Prep matters here
Use a leave-in conditioner or a light cream first, especially around the hairline. Curly hair can dry out fast when it’s handled a lot, and a dry braid starts to frizz sooner than you’d like.
Pinning trick
Place bobby pins where the braid meets the puff, not just on the outside. That gives the style more hold and keeps the crown from sagging after an hour or two. Honestly, that placement does half the work.
11. Short Hair Faux Crown Braid
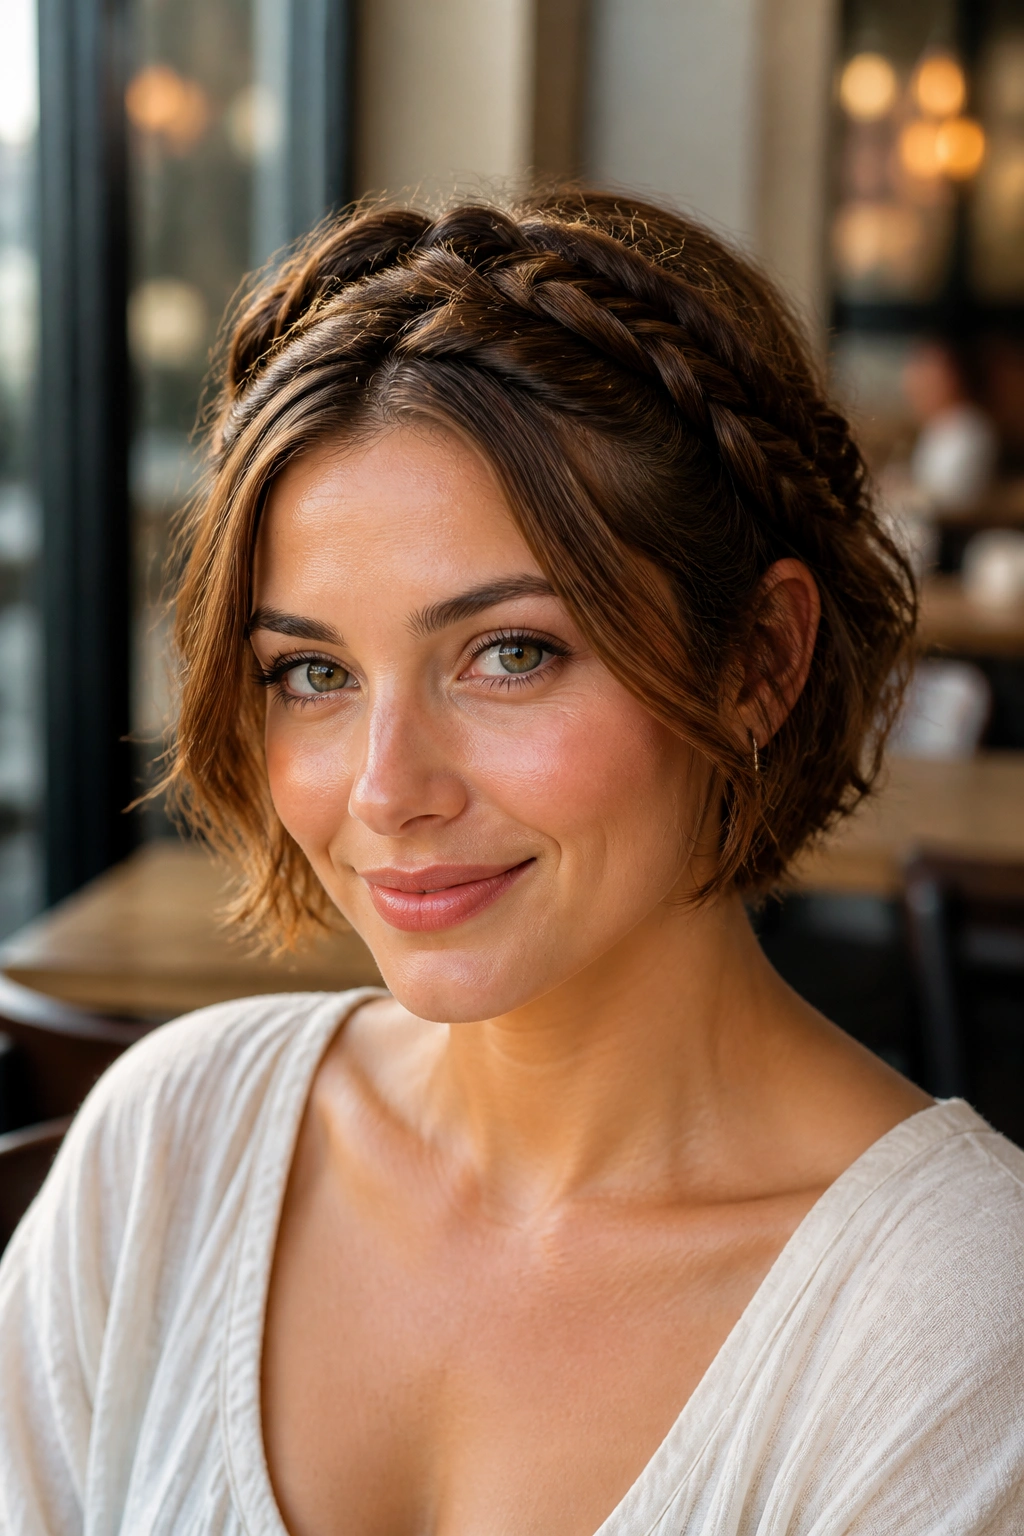
Short hair can absolutely play this game. You just have to cheat a little, and there’s nothing wrong with that.
Instead of trying to braid all the way around the head in one long line, create small braids from each temple and cross them toward the back. Pin the ends under other sections so the braid reads like a full crown even if the hair only reaches the chin or collarbone.
This approach is especially good if your hair is bob length with a few layers. The layers help hide the pin points, which is half the battle. Use a small amount of pomade or styling wax on the very ends so they don’t stick out like little hooks.
The result feels delicate rather than overbuilt. That’s what makes it work.
12. Braided Rose Bun Wrapped by a Halo Braid

The texture on this one is the draw. A rose bun twists the hair into a spiral at the back, and the halo braid frames it like a wreath. It sounds fussy, but it’s really just braid, twist, pin, repeat.
I like this style for formal dinners and dressier events because it looks more crafted than a basic low bun. The spiral shape gives the back of the head some interest, which matters when your hair is pulled up and away from the shoulders.
You do need enough length to make the bun coil properly. If the hair is too short, the rose shape gets messy and the whole style falls apart. Longer layers can still work, but pin the ends carefully so the spiral stays tight in the center and soft at the edges.
A tiny decorative pin in the middle of the bun can finish it off without making it look overdone.
13. Double Braids Meeting at the Nape

Two braids from the front. One join at the back. Very clean. Very useful. And a little easier to handle than a full wrap-around braid if your hair is thick or hard to section neatly.
This style works because it gives the same crown effect from the front while keeping the back more controlled. Each side can be braided from the temple down toward the nape, then crossed and tucked into a low knot or flat twist.
What stands out
- The left and right sides do not need to be identical, but they should feel balanced.
- Keep the braid width even so the join doesn’t look lopsided.
- Use a small elastics-first approach if your hair slips easily.
- Hide the last inch of each braid under the knot with a pin pushed upward.
It has a tidy shape without feeling severe. That’s the sweet spot.
14. Side Crown Braid With a Low Side Bun
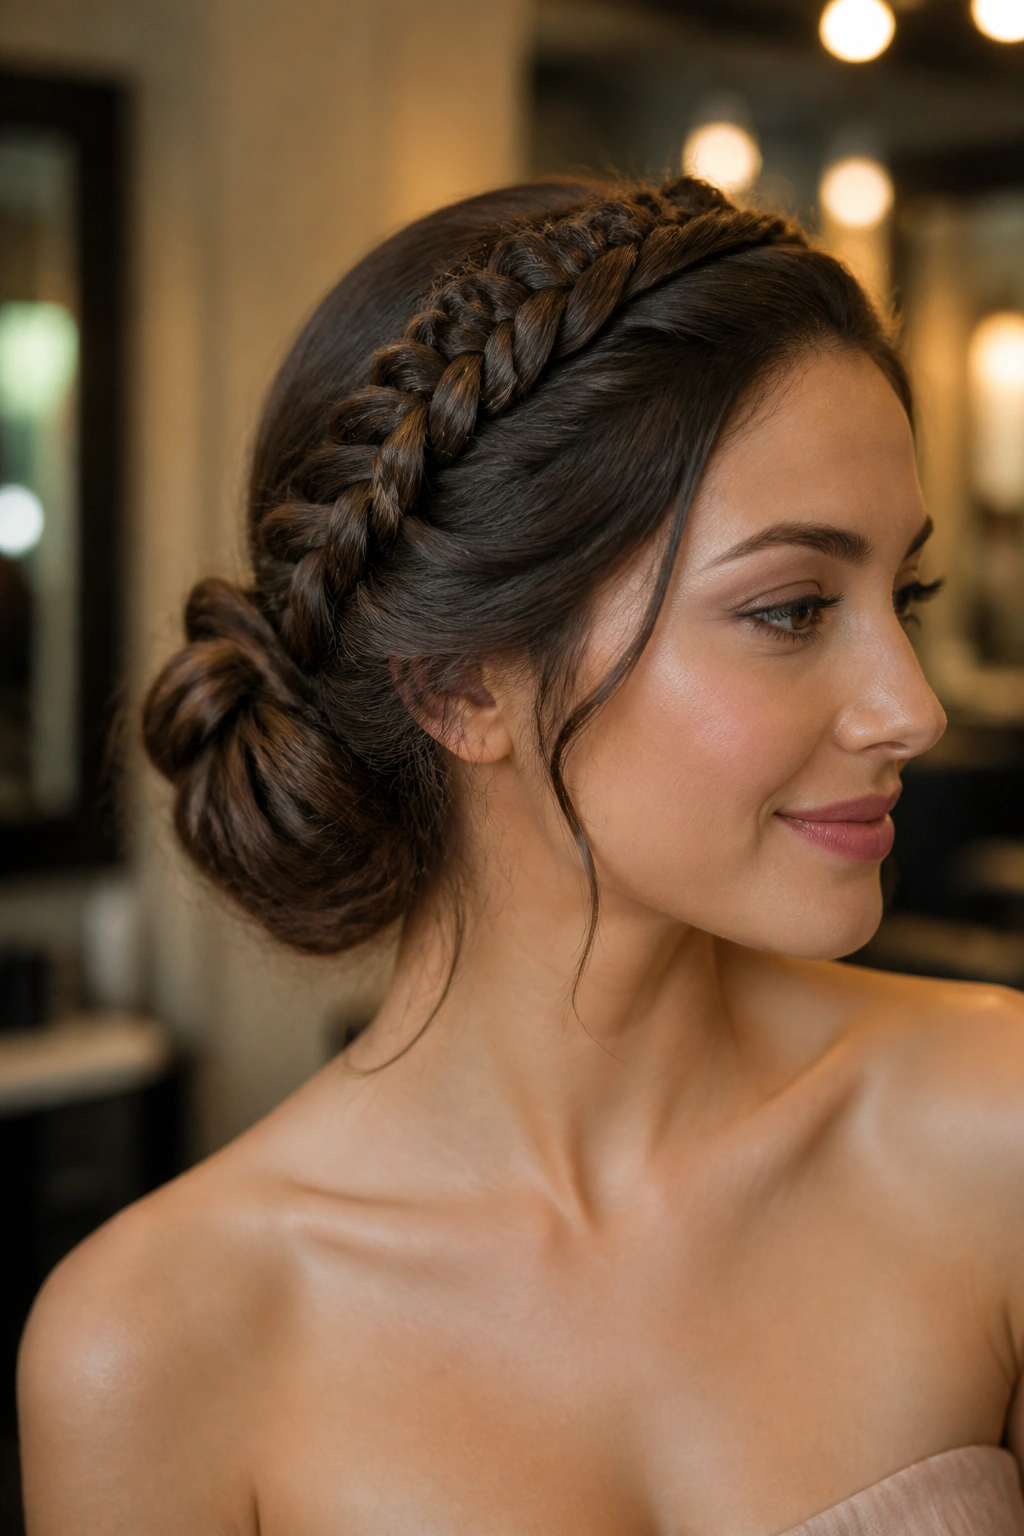
Sometimes the prettiest option is the one that leans off-center. A side crown braid draws the eye across the head, then drops into a side bun that sits near one ear or just below it.
That shift does a lot. It softens the face, keeps the neckline open, and gives the style a little movement even when everything else is pinned down. It’s also a good fix for hair that grows flatter on one side, because the side bun creates a useful focal point.
The braid should start near the heavier side of the part and travel across the crown in a gentle curve. If you pull the braid too far back, it turns into a standard halo. If you keep it too far forward, it starts crowding the forehead.
A side bun with a few loose ends tucked underneath makes the whole shape feel less formal and more wearable.
15. Lace Braid Crown With Loose Ends

Why choose a lace braid instead of a French braid? Because it lets you add hair only from one side as you go, which creates a lighter ribbon-like effect around the head. The braid looks softer right away.
This is a smart choice when you want a crown braid updo that feels airy rather than heavy. It’s also kinder to layered hair, since the added sections help keep shorter pieces inside the braid instead of dropping loose halfway through.
How to style it
Start at one temple and work around the crown, adding hair from the top side only. Keep the lower edge clean so the braid hugs the hairline without flattening the whole style. Once the braid reaches the opposite side, pin the ends under a folded section and leave a few ends loose if you want a softer finish.
That little spill of ends can look charming if they’re curled first. Straight ends, not so much.
16. Twisted Crown Updo With Braided Back Detail

Twists make this style feel a little less formal than a full braid, and that’s a good thing when you want romance without stiffness. Start with two twisted sections at the temples, then connect them with a small braid or woven detail at the back.
It’s a nice option for fine hair, since twists often hold shape better than a heavy braid that can collapse under its own weight. The back detail gives you texture where it counts, while the front stays smooth enough to show off your part and your cheekbones.
If you want more grip, spray each section lightly before twisting. Wet hair is too slippery for this; dry hair with a hint of product behaves much better.
A few hidden pins under the twist line keep the style from loosening when you move around. That part is boring. Necessary, though.
17. Braided Bun With Pearl Pins
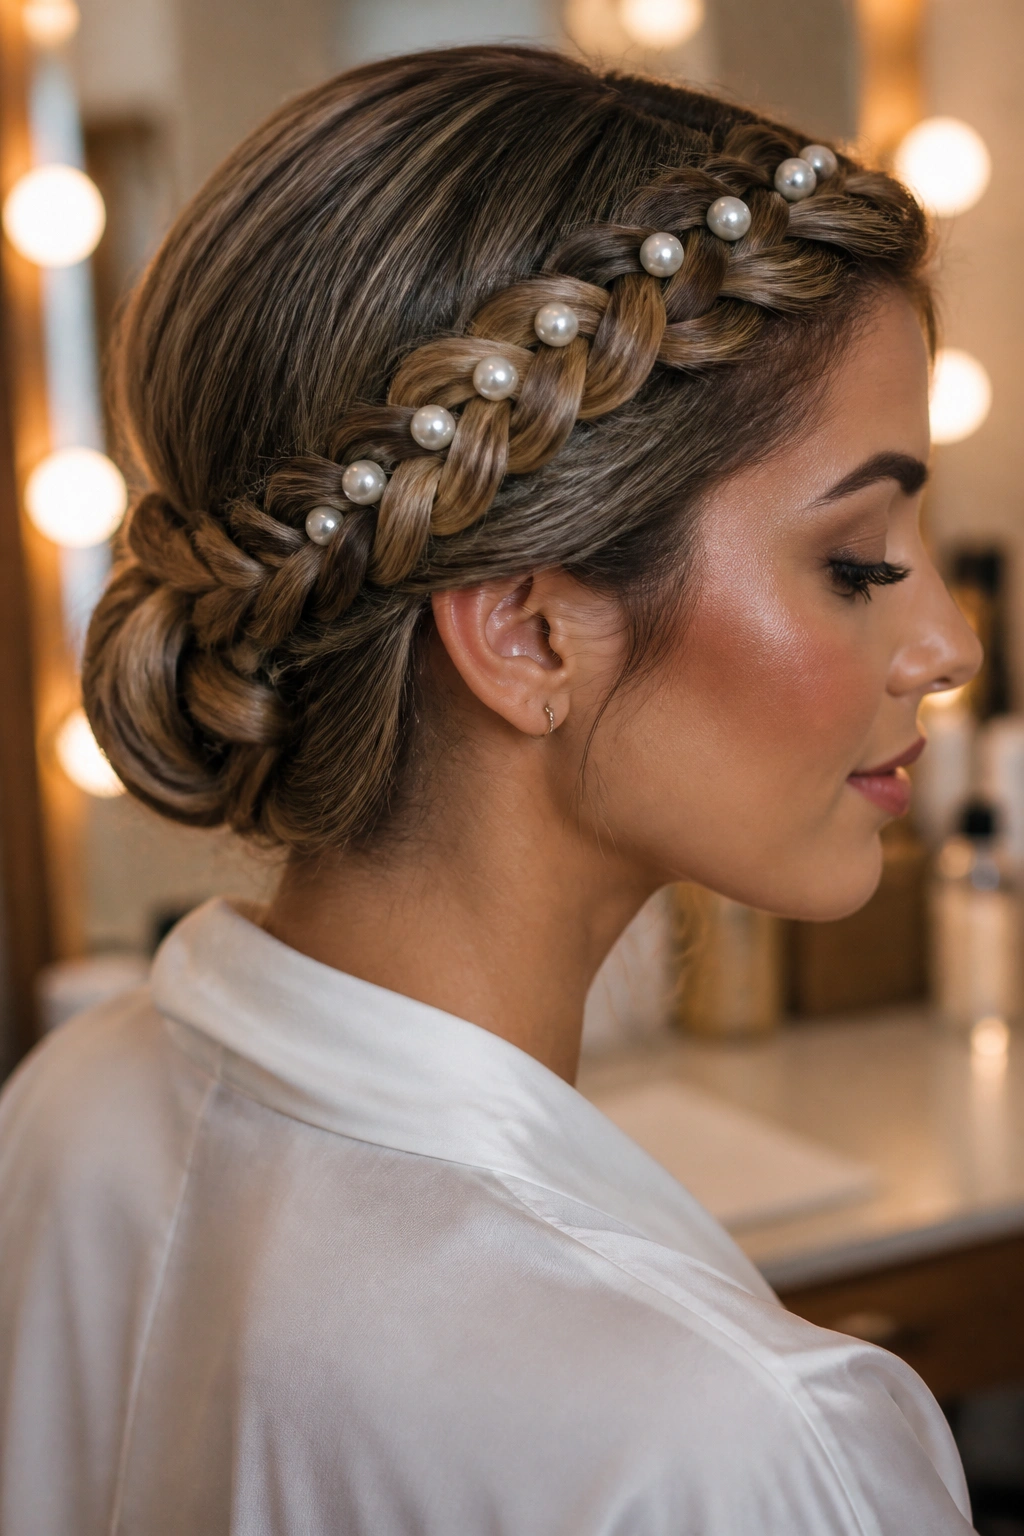
A pearl pin changes the mood fast. The braid can be simple, even plain, but the tiny decorative pins make the style feel finished and special without loading it down.
This one works well when the braid circles the crown and ends in a bun near the nape. Once the bun is secure, place pearl pins along one side of the braid or cluster them near the knot. Don’t scatter them randomly. A loose pattern looks accidental; a thoughtful line of 3 to 5 pins looks deliberate.
Good placement ideas
- Follow the curve of the braid near the temple.
- Tuck one or two pins into the bun itself.
- Leave one side clean if your earrings are bold.
- Keep the pearl size small if the braid is already thick.
That balance matters. Too many decorations and the braid disappears.
18. Halo Braid for Natural Coils and Curls
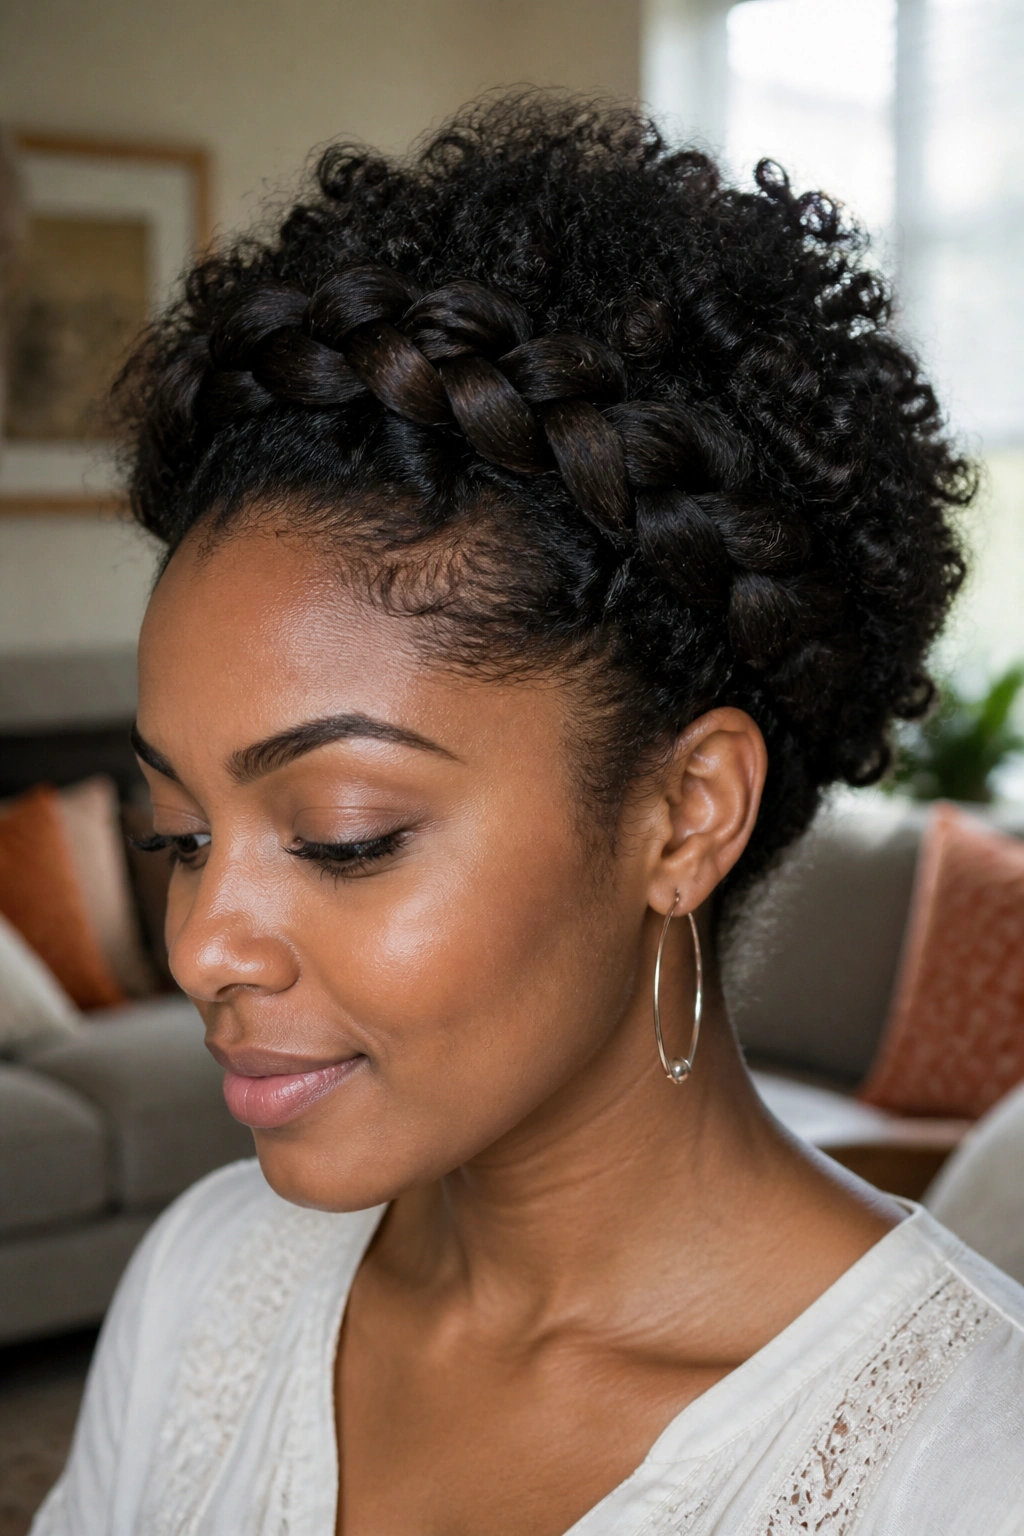
Natural coils and curls can make a halo braid look richer than straight hair ever could. The texture adds depth around the hairline, and the contrast between smooth braid sections and soft curls feels warm without trying too hard.
The best version keeps the crown braid neat while letting the coils hold their own shape in the bun or puff beneath it. That means moisture first. Use a leave-in, seal lightly if your routine calls for it, and do not braid dry, brittle hair that’s begging for more slip.
A wide-tooth comb or fingers are usually enough for sectioning. Fine-tooth combs can work, but they can also make the roots too flat if you press too hard.
This style is a nice protective choice when the braid stays low-tension and the ends are tucked in a way that doesn’t pull at the hairline. A smooth edge and a soft finish. That combination lasts.
19. Grown-Up Festival Crown Braid With Ribbon
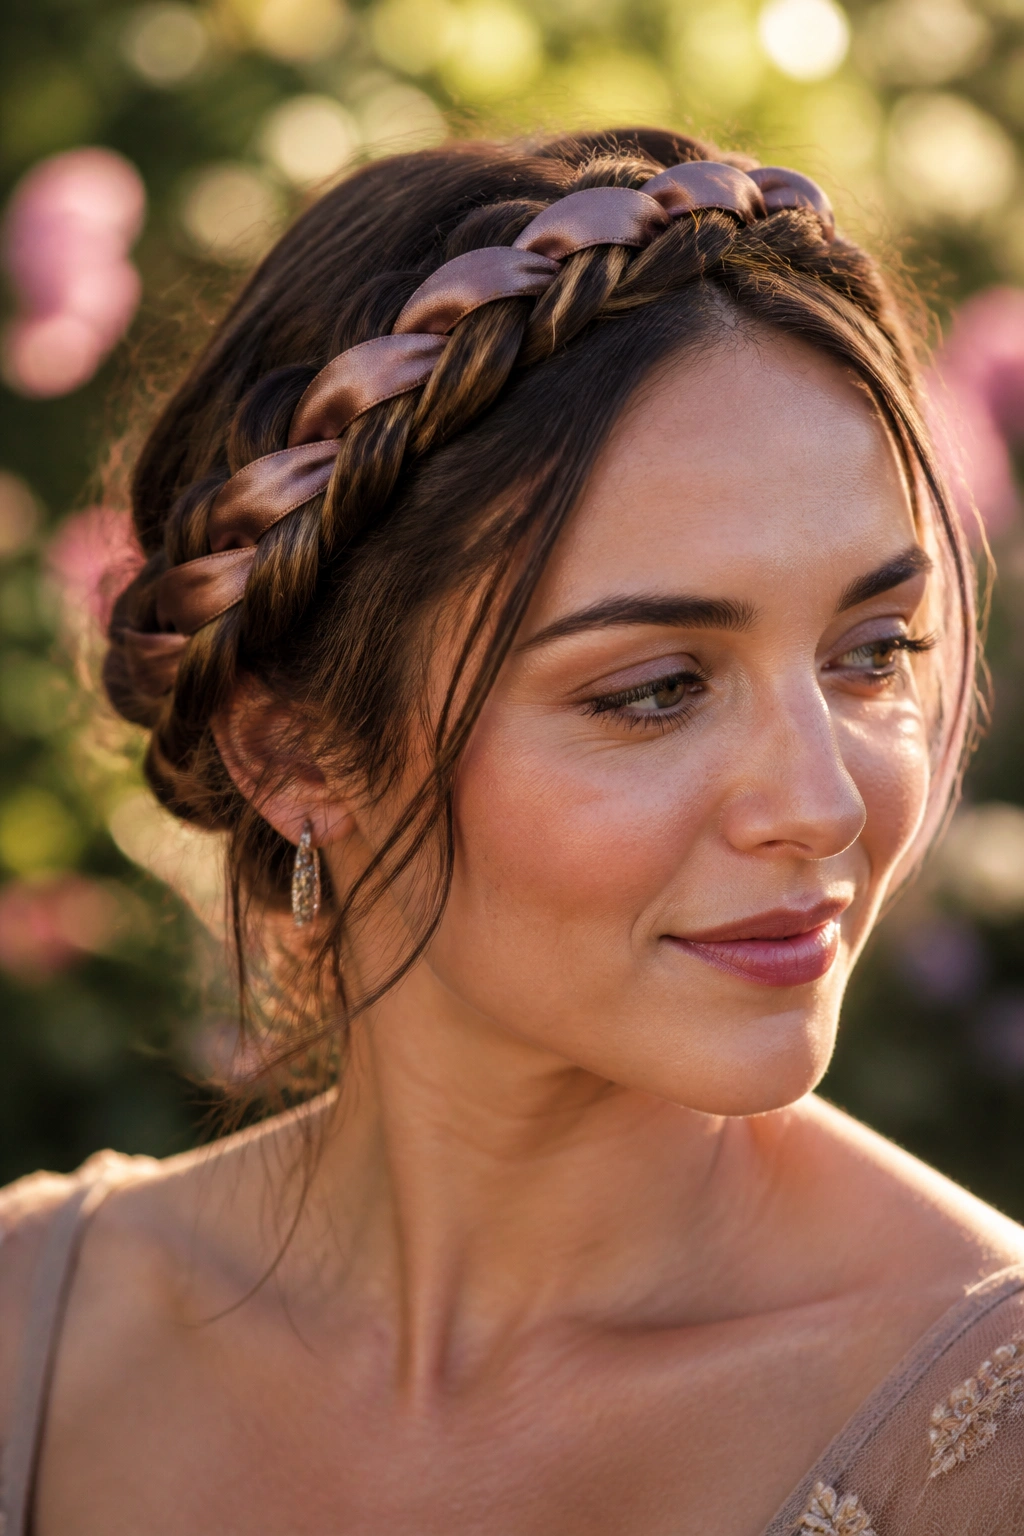
Ribbon in a braid can go wrong fast if the ribbon looks like a costume prop. But when the color is muted and the width is narrow, it can add just enough detail to make the braid feel special.
This version is good for anyone who wants a romantic crown braid updo with a little more personality. Thread a satin ribbon through one side of the braid or weave it in from the start if you’re comfortable managing the tension. Keep the ribbon flat as you go so it doesn’t twist and bunch in random places.
A soft gold, dusty rose, or deep green ribbon tends to look calmer than bright synthetic colors. The braid should still be the star. The ribbon is only there to support it.
Use this when the outfit is simple and the hair needs one thoughtful detail. Not more. Just one.
20. Soft Crown Twist-and-Braid Updo
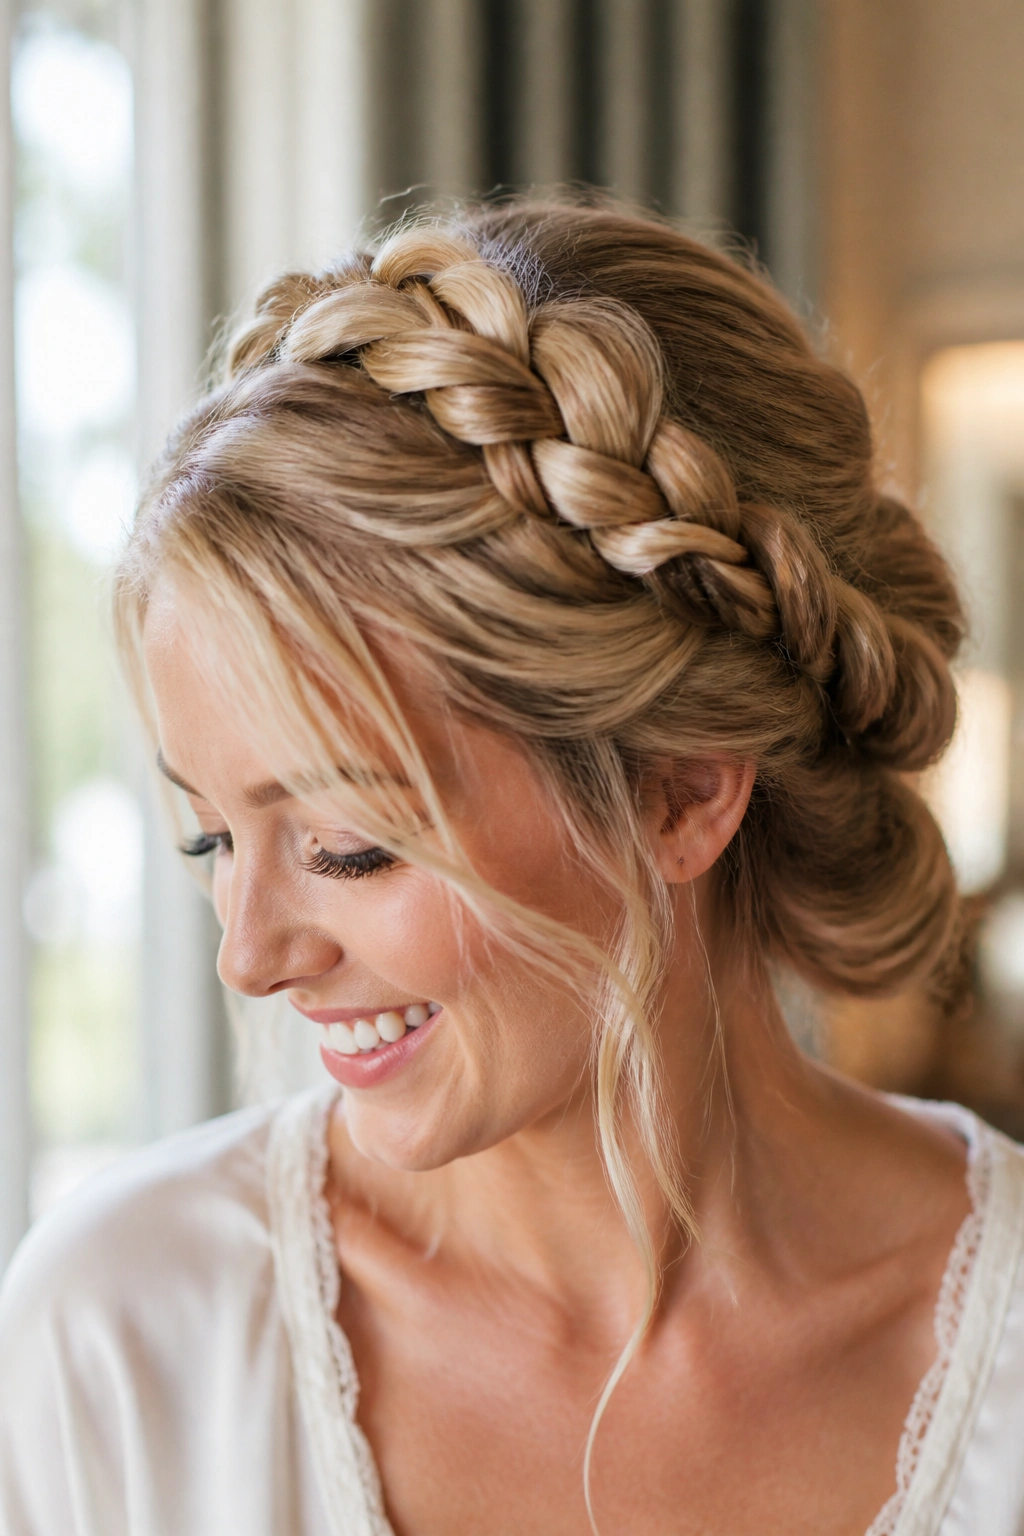
This is the style I reach for when I want the crown effect without a lot of fuss. Twists at the front soften the hairline, a braid around the crown gives the shape, and the back gets pinned into a low roll or tucked knot that sits close to the neck.
It’s forgiving, which is half the reason it works so well. If one side ends up a little fuller than the other, the style still looks intentional. If a few pieces fall loose around the face, even better. That softness is the point.
How to keep it looking polished
Use a light cream or spray before sectioning, then pin from the inside so the hardware stays hidden. Once the style is set, tap the braid gently with your fingers to loosen the edges just a touch. Do not over-pull it. A crown braid updo should feel shaped, not stretched.
This last version is the one that can go from daytime to evening without a restart, and that’s a useful kind of pretty.
