



Mixed hair can do two things at once: hold a curl in one section and go soft, puffy, or almost straight in another. That is exactly why so many natural curl hairstyles for mixed hair fall apart when they are borrowed from people with one texture all over their head. The style is not the problem. The texture map is.
The smartest looks work with that mix instead of fighting it. Loose waves at the crown may want lighter product, tighter coils near the nape may need more slip, and the hairline usually wants the gentlest touch of all. Tension is the real enemy here, not curl pattern. Pull too hard and the front starts to ache, the shape gets stiff, and the style looks older than it is.
Texture wins.
And that is good news, because mixed-texture hair gives you range. You can wear a shape that looks polished one day, playful the next, and protective when the weather or your schedule gets messy. The styles below lean into shrinkage, movement, and the little differences from section to section, which is the only sane way to handle hair that does not all behave the same way.
1. Wash-and-Go: Natural Curl Hairstyles for Mixed Hair
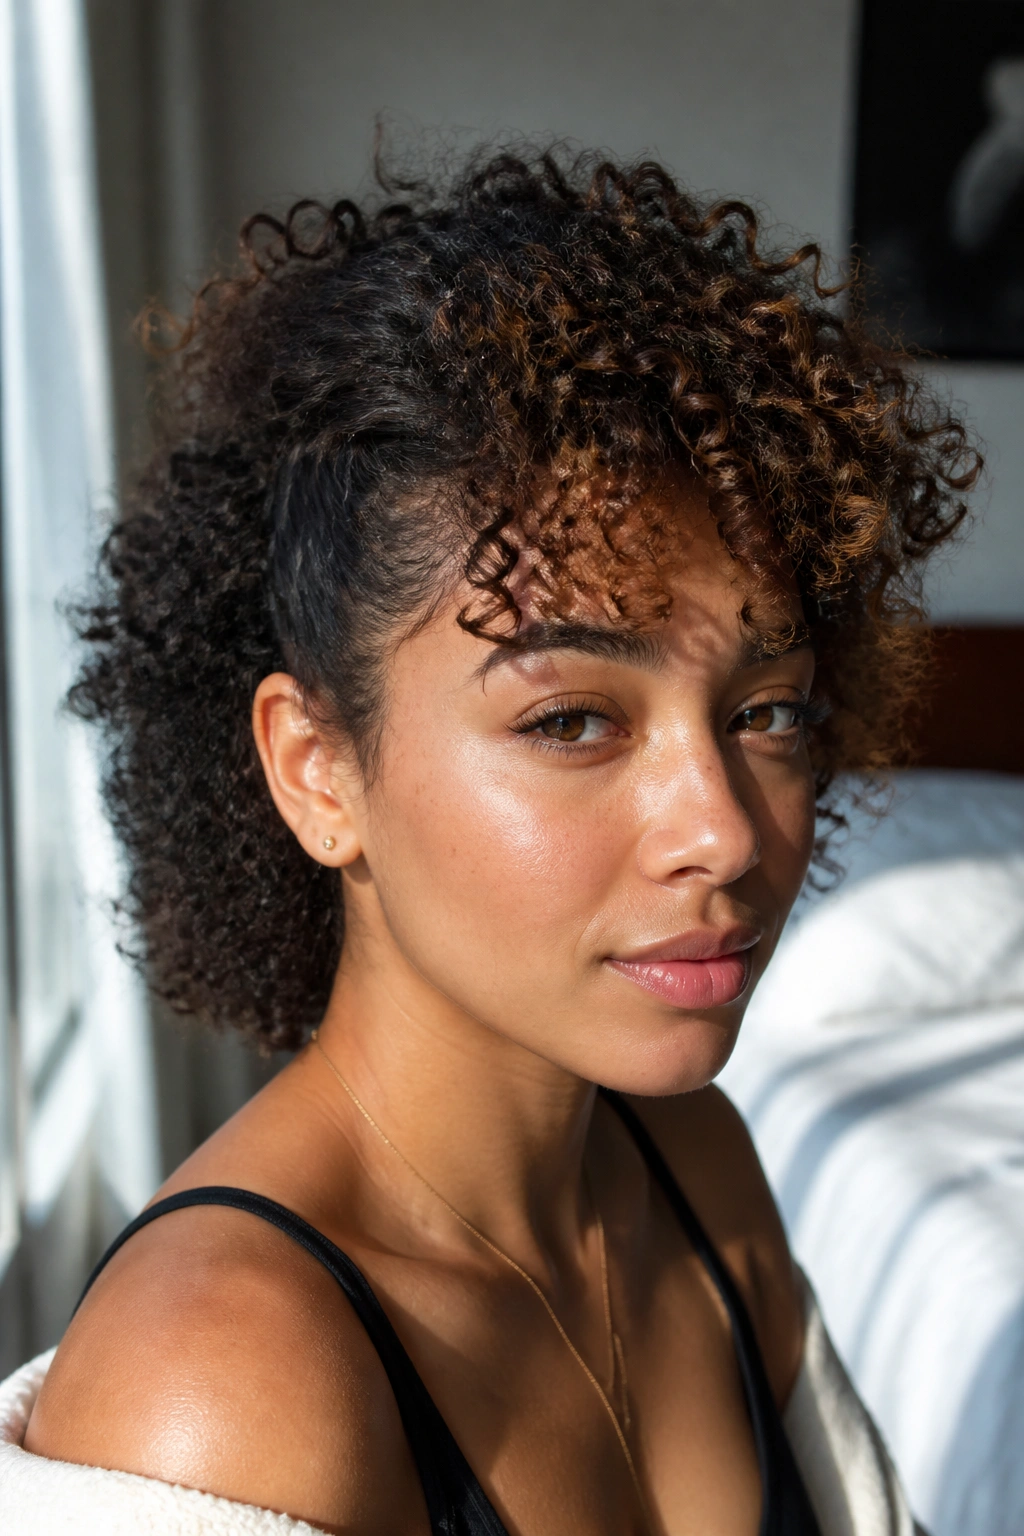
A good wash-and-go is the closest thing to a truce between different curl zones. If your looser pieces near the crown collapse under heavy cream but your tighter curls at the back drink it up, this style lets you tailor product by section instead of forcing one formula everywhere.
Why It Works for Mixed Hair
The trick is product placement, not product pile-on. Use a light leave-in on the softer sections, then a gel or foam that gives hold without turning the curls into helmets. Mixed hair often has one area that frizzes fast and another that needs coaxing to stay defined; a wash-and-go lets you treat each part like it has its own personality, because it does.
Quick Styling Notes
- Use a wide-tooth comb or fingers on soaking-wet hair so the curl clumps stay together.
- Apply product in small, sectioned layers instead of scrubbing it through all at once.
- Scrunch from the ends upward to encourage shape without stretching the curl pattern.
- Diffuse on low heat and low speed if you want more lift at the roots.
One thing people get wrong: they keep touching the hair while it dries. Leave it alone. The set matters more than the styling. Once the cast forms, you can scrunch out the crunch with clean hands or a tiny bit of oil. That’s when the style starts looking like hair, not product.
2. Half-Up Pineapple Puff
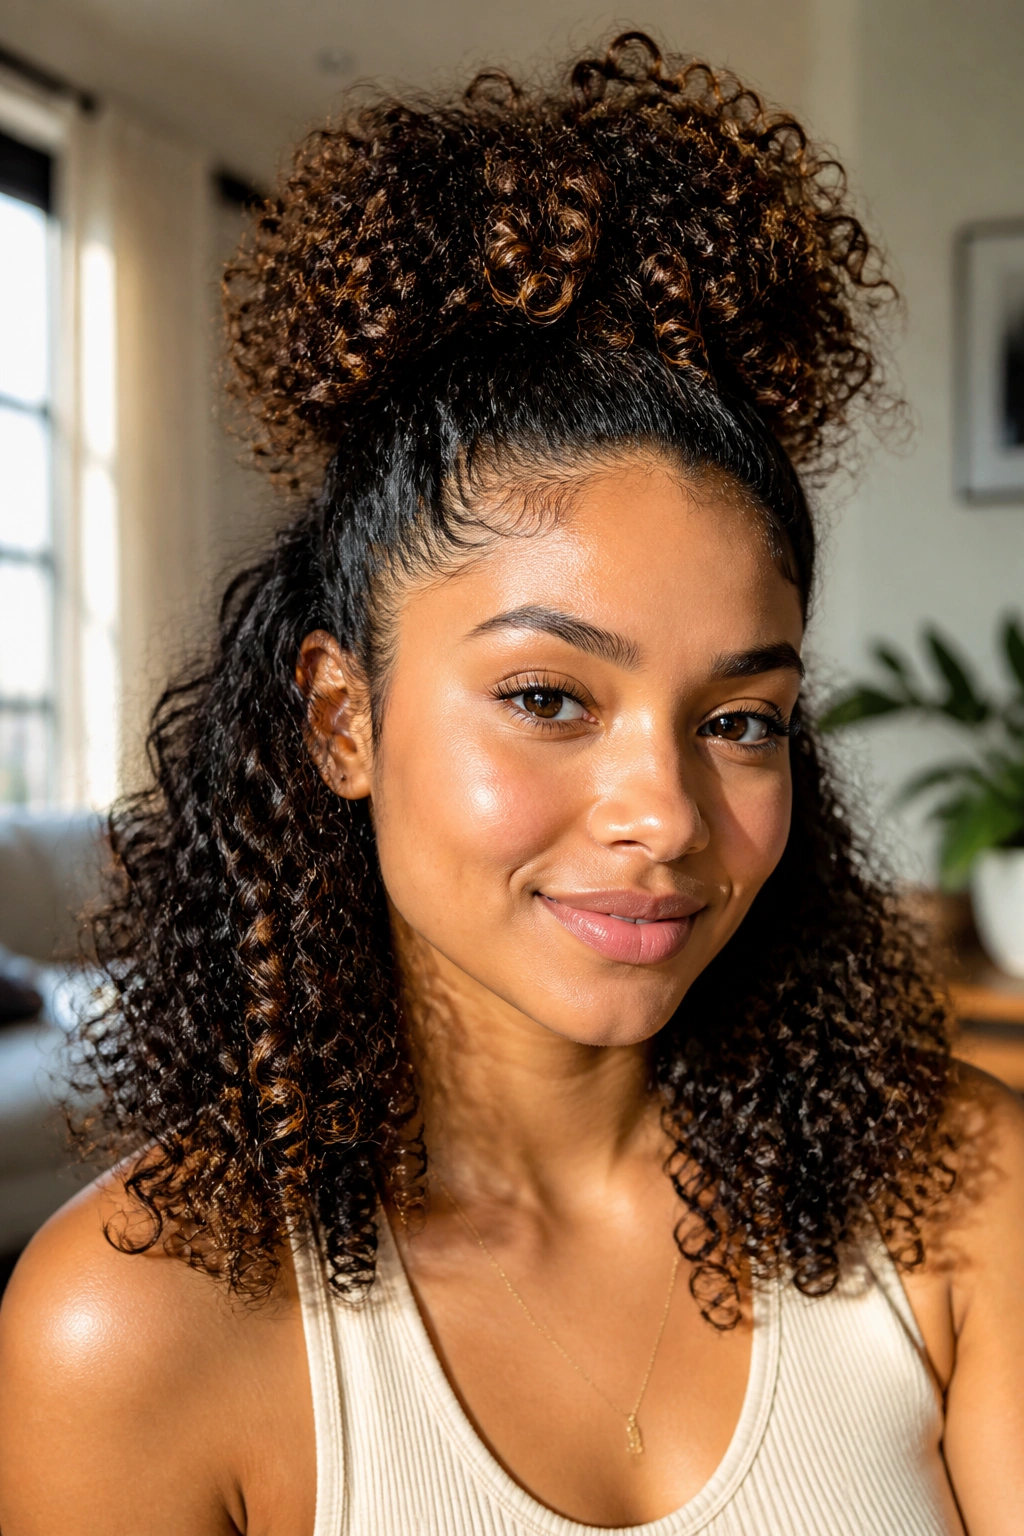
Why does the half-up pineapple puff save so many mornings? Because it keeps the top section out of the way while letting the bottom curls keep their shape. That balance matters a lot on mixed hair, where the top can flatten faster than the back.
Pull the crown and upper sides into a loose puff high enough to show off the face, then leave the rest free. The result feels casual, but it is not careless. If your hair has tighter curls underneath and looser pieces around the top, this shape gives each texture room to do its own thing.
How to Set the Top Section
Start with dry or almost-dry hair. Wet hair tends to stretch too much, which makes the puff sag by midday.
Use a soft scrunchie or a spiral tie. Metal clips and tight elastics are a bad idea here; they leave dents, and dents on mixed hair are sneaky because they show up right when you need the style to look smooth. Gently lift the top section, twist once if you need control, and leave a few face-framing pieces free if that feels right.
This style is especially useful for school runs, errands, or those days when you want the back to stay curly without rebuilding the entire head. It is easy, but not lazy. There is a difference.
3. Curly High Puff That Keeps the Crown Lifted
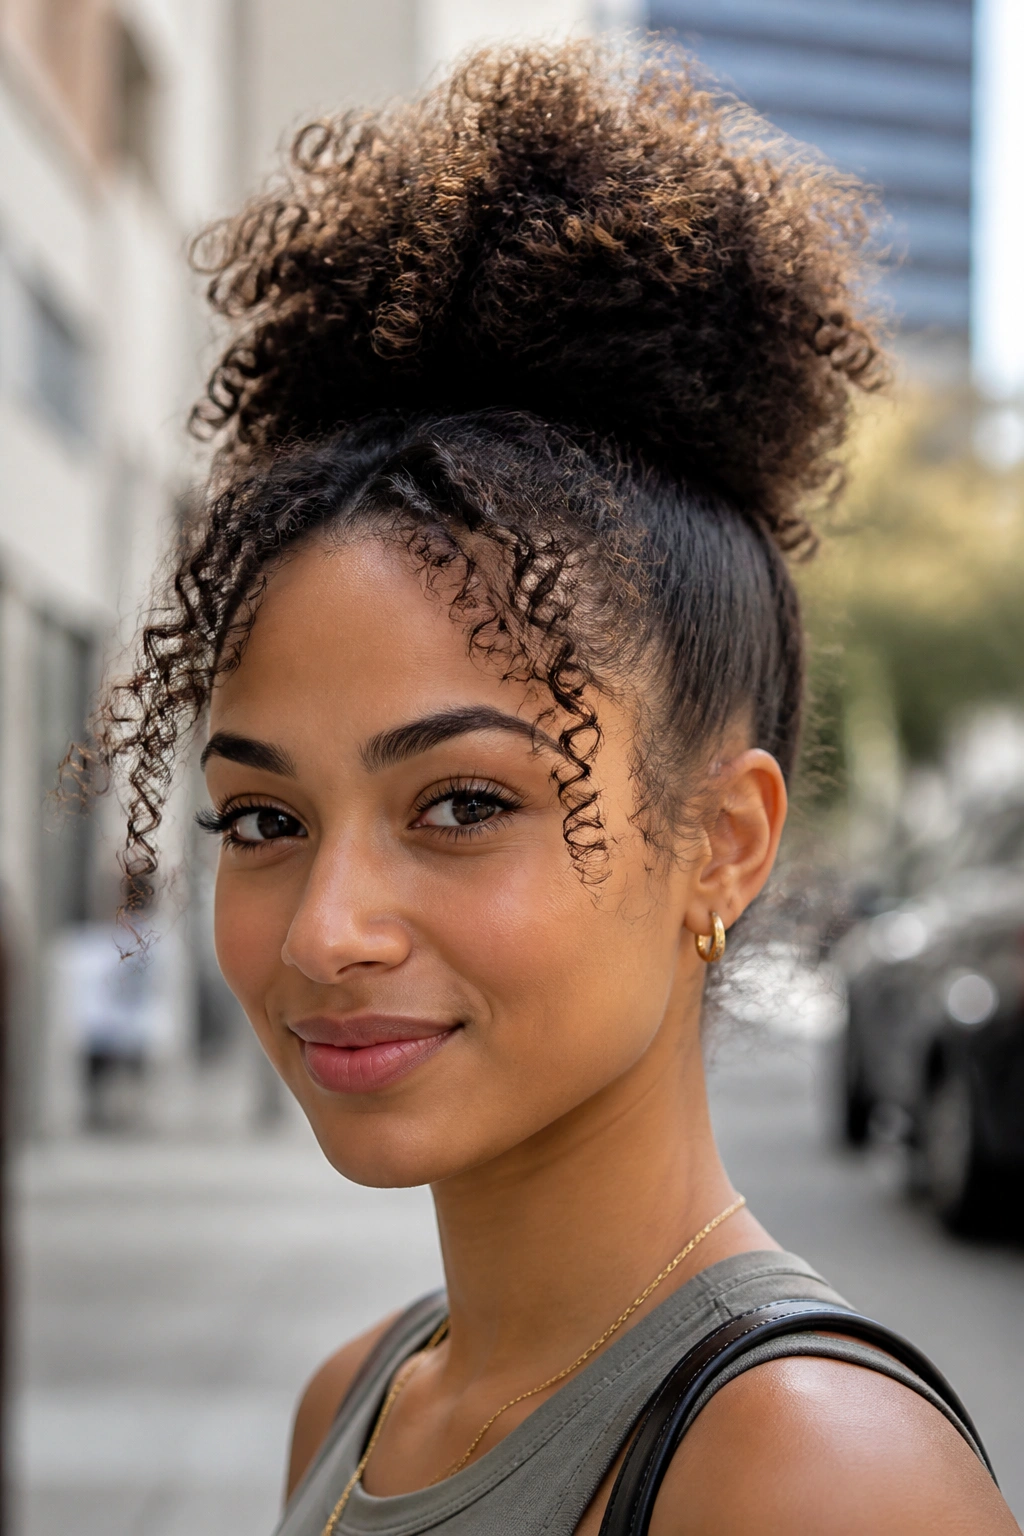
A high puff can look sharp or sloppy depending on the tension, and mixed hair makes that line even thinner. If the front of your hair is looser, this shape gives the crown a clean lift while the rest of the texture stays soft and visible.
Picture a humid day, a fast errand, and hair that has already started doing its own thing. The high puff solves the problem fast, but only if you stop short of yanking the sides back so hard that the hairline looks strained. Lift the roots, don’t flatten the edges.
- Smooth the perimeter with a little gel or mousse, using a toothbrush or narrow brush.
- Gather the hair high, but leave enough slack that the puff sits naturally.
- Wrap the tie once or twice only; three times is often too much.
- Let a few curls escape at the front if the style starts to look too formal.
The best high puffs have movement. They do not look glued down. On mixed hair, that softness is part of the charm, and it keeps the style from fighting the texture that makes it interesting in the first place.
4. Two-Strand Twist-Out With Soft Ends
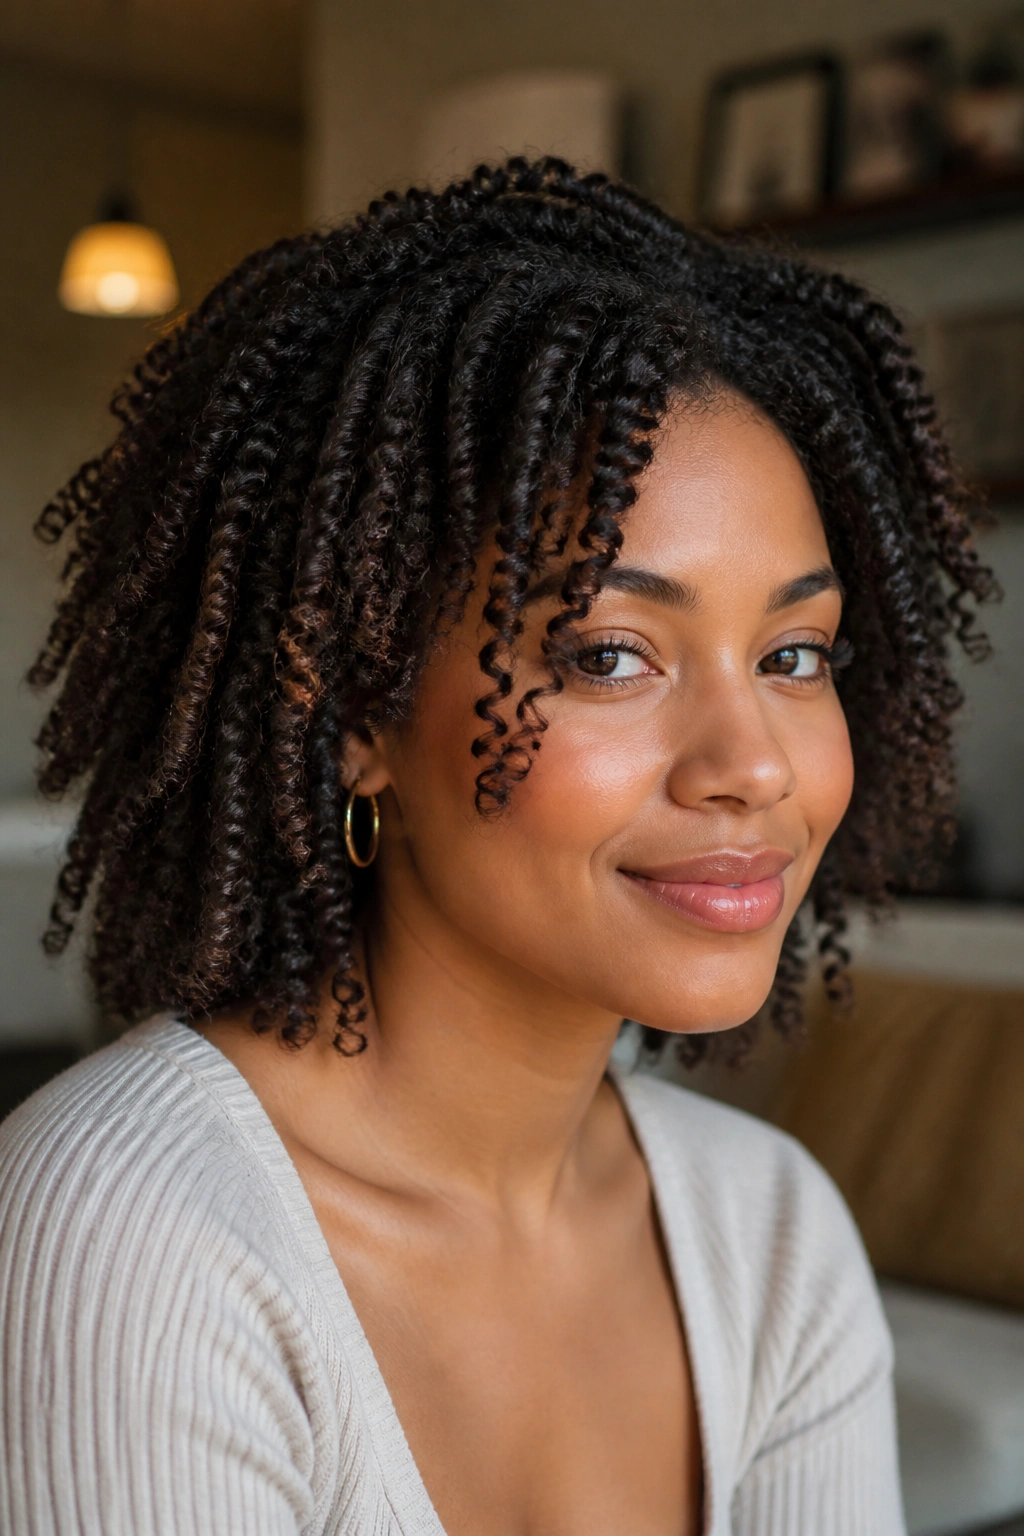
The two-strand twist-out is one of those styles that sounds simple until you try it on hair with more than one texture. Then it gets good. The tighter sections hold the twist pattern beautifully, while the looser sections break into soft bends that make the whole style feel richer, not messy.
I like this one for hair that gets tangled easily but still wants definition. Twist-outs give you shape without making every strand obey the same line, and that is often the sweet spot for mixed hair. You are not trying to erase the differences. You are trying to make them sit well together.
Use medium-sized twists, about the width of your index finger, if you want a balanced finish. Smaller twists give more definition and more time under your hands. Bigger ones dry faster but leave a softer result. Either way, let the hair dry all the way before you unravel it. Half-dry twists frizz fast and stay frizzy.
When you take them down, separate only as much as needed. Too much finger-separating makes the ends puff out before the rest of the style has a chance to settle. A tiny bit of oil on your fingertips helps. So does patience. Annoying, yes. Useful, also yes.
5. Crown Braid With Loose Curls
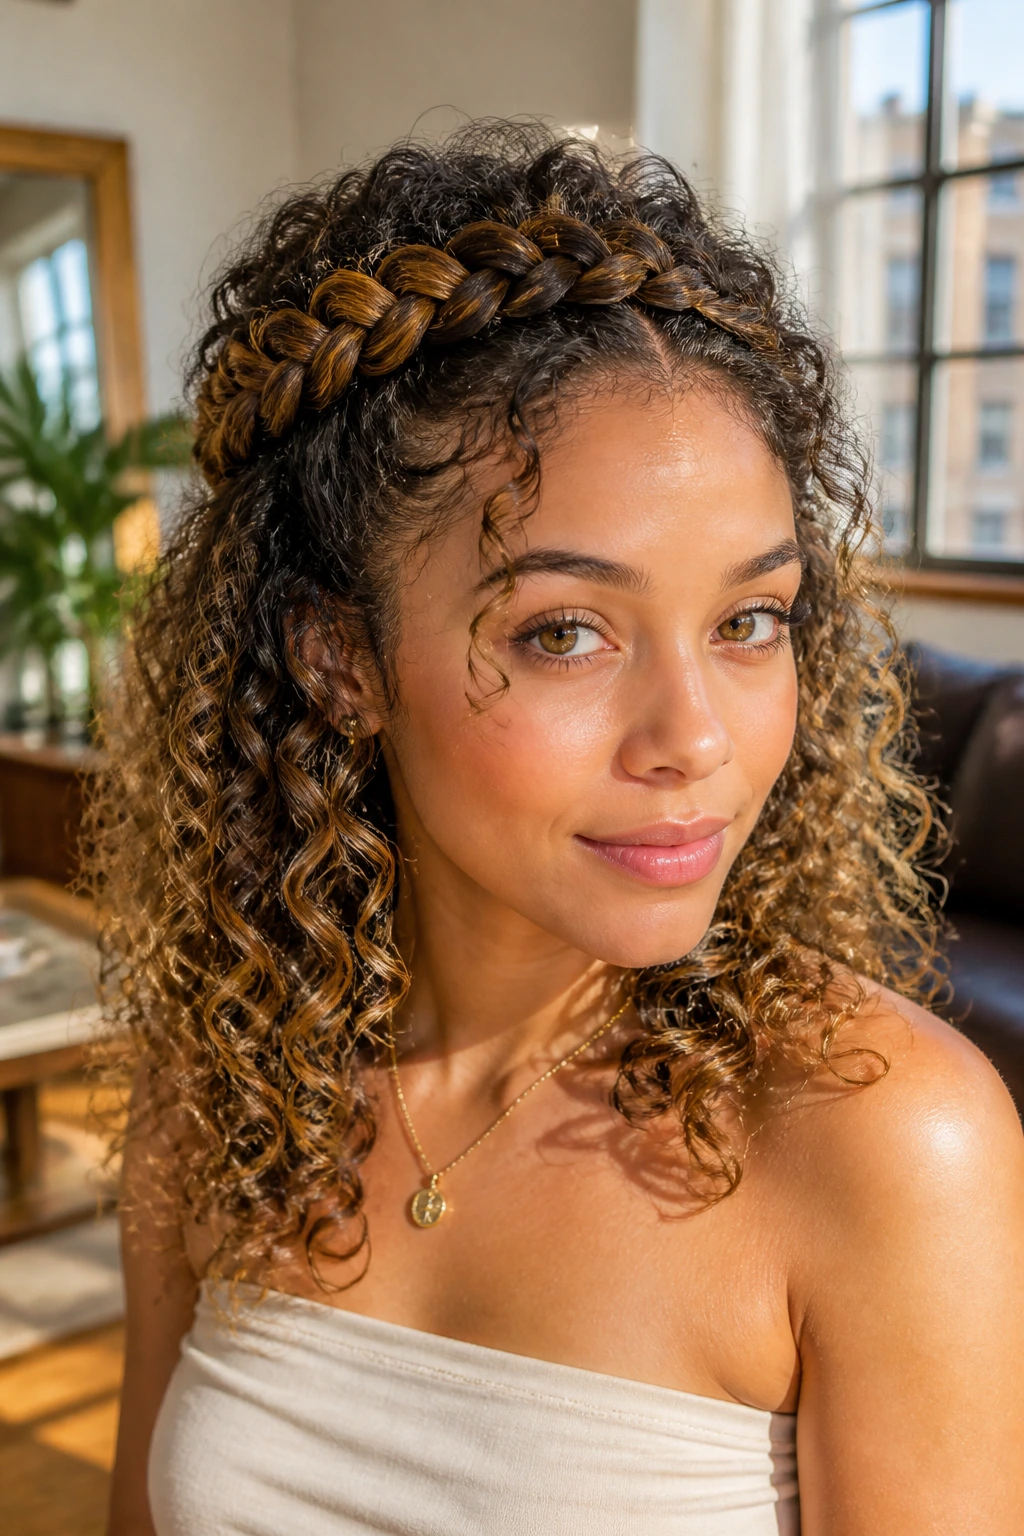
A crown braid with loose curls is basically the grown-up answer to wanting your hair off your face without giving up length. Compared with a full braid that tucks everything away, this style keeps the top clean and lets the lower curls do the pretty work.
That split matters on mixed hair because the front often needs more control than the back. A braid around the hairline keeps the shape from expanding into a halo of frizz, while the curls below keep the style from feeling too severe. It is one of the few looks that can go from casual to dressed up without changing much.
You do not need a tiny, tight braid for this. A braid that starts with a 1- to 1½-inch section near the temple is enough to frame the face and anchor the look. Keep the braid a little loose so it sits flat without digging in. If the hair around your temples is finer or more fragile, start the braid a touch farther back and let a few wisps stay out.
This is the style I reach for when I want structure but not stiffness. It works. Cleanly.
6. Space Buns on Curly Lengths
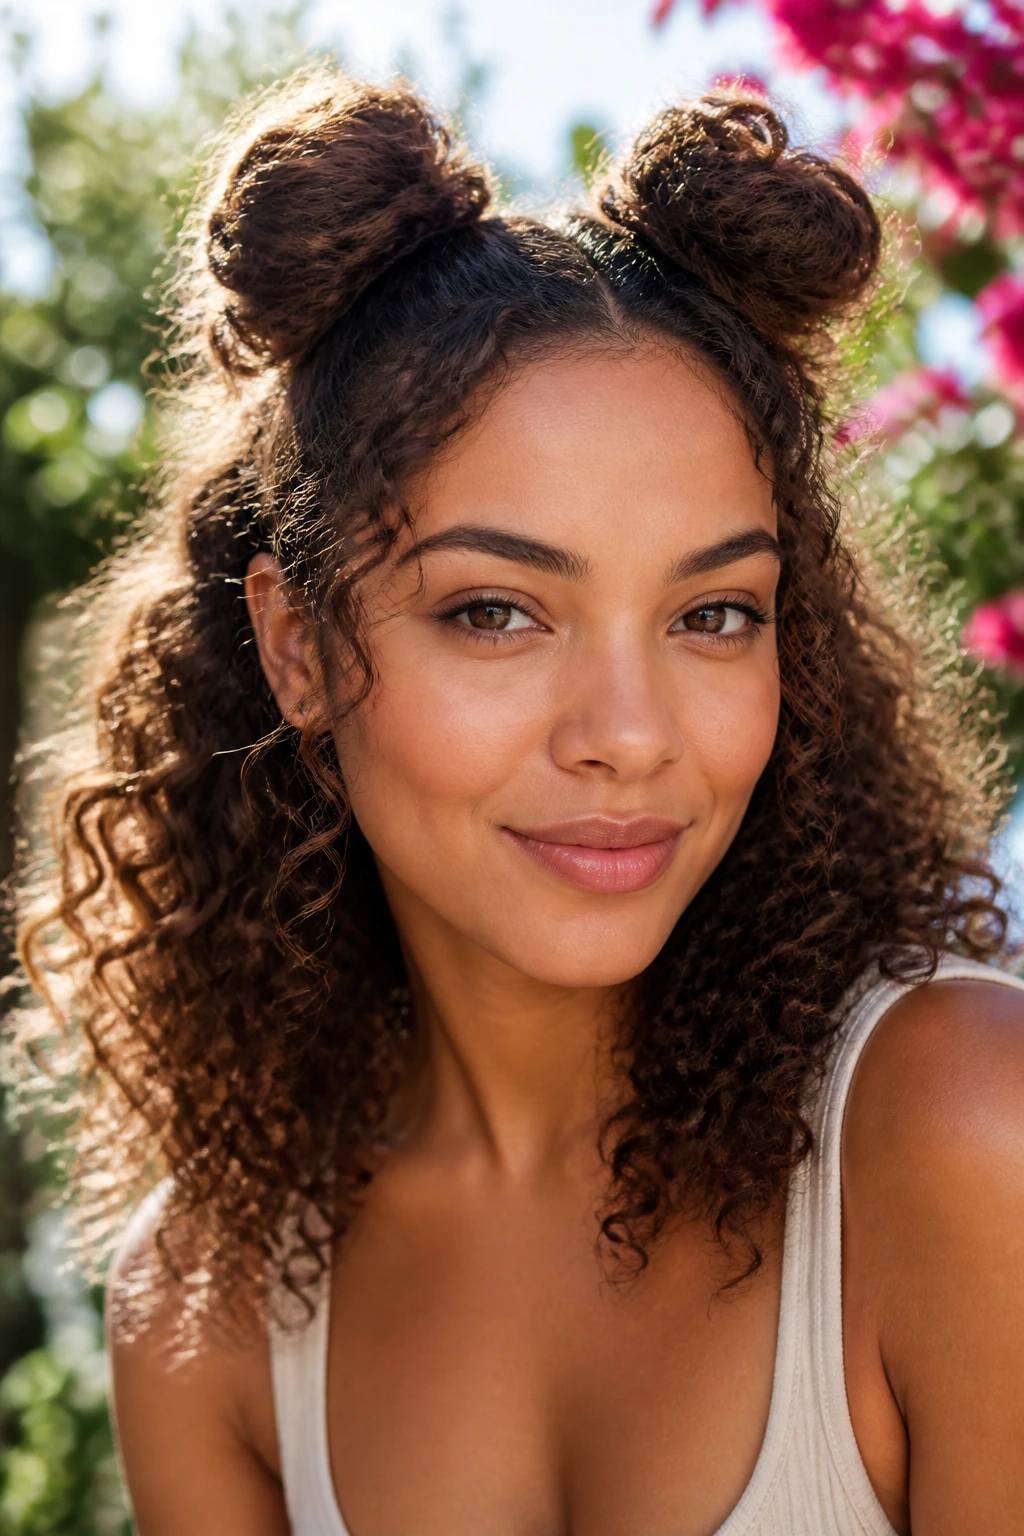
Space buns are not childish on mixed hair. They are practical. And when they are done softly, they solve one of the main headaches of mixed curls: keeping the top under control while not crushing the lower texture into a sad little bun.
Split the hair down the center and gather each side into a high bun, but do not pull every curl tight. Leave the ends fluffy or let them loop out a bit. That little bit of softness makes the style look intentional instead of overworked. Tight buns can flatten the curl pattern fast, especially if the hair is already dry.
Keeping the Buns Soft, Not Hard
Wrap each bun once around itself and pin it instead of cranking the elastic until the scalp feels pulled. Use 2 to 4 bobby pins per side, depending on thickness. If your hair has a looser top layer and tighter underneath, the looser section often wants a little gel around the edges, while the rest may only need a light mist of water.
Space buns are good for long days, dance rehearsals, and any time you want a style that can get a little messy without falling apart. Messy is part of the point. If one bun leans higher than the other, that is not a disaster. It is part of the shape.
7. Side-Part Cascade in Natural Curl Hairstyles for Mixed Hair
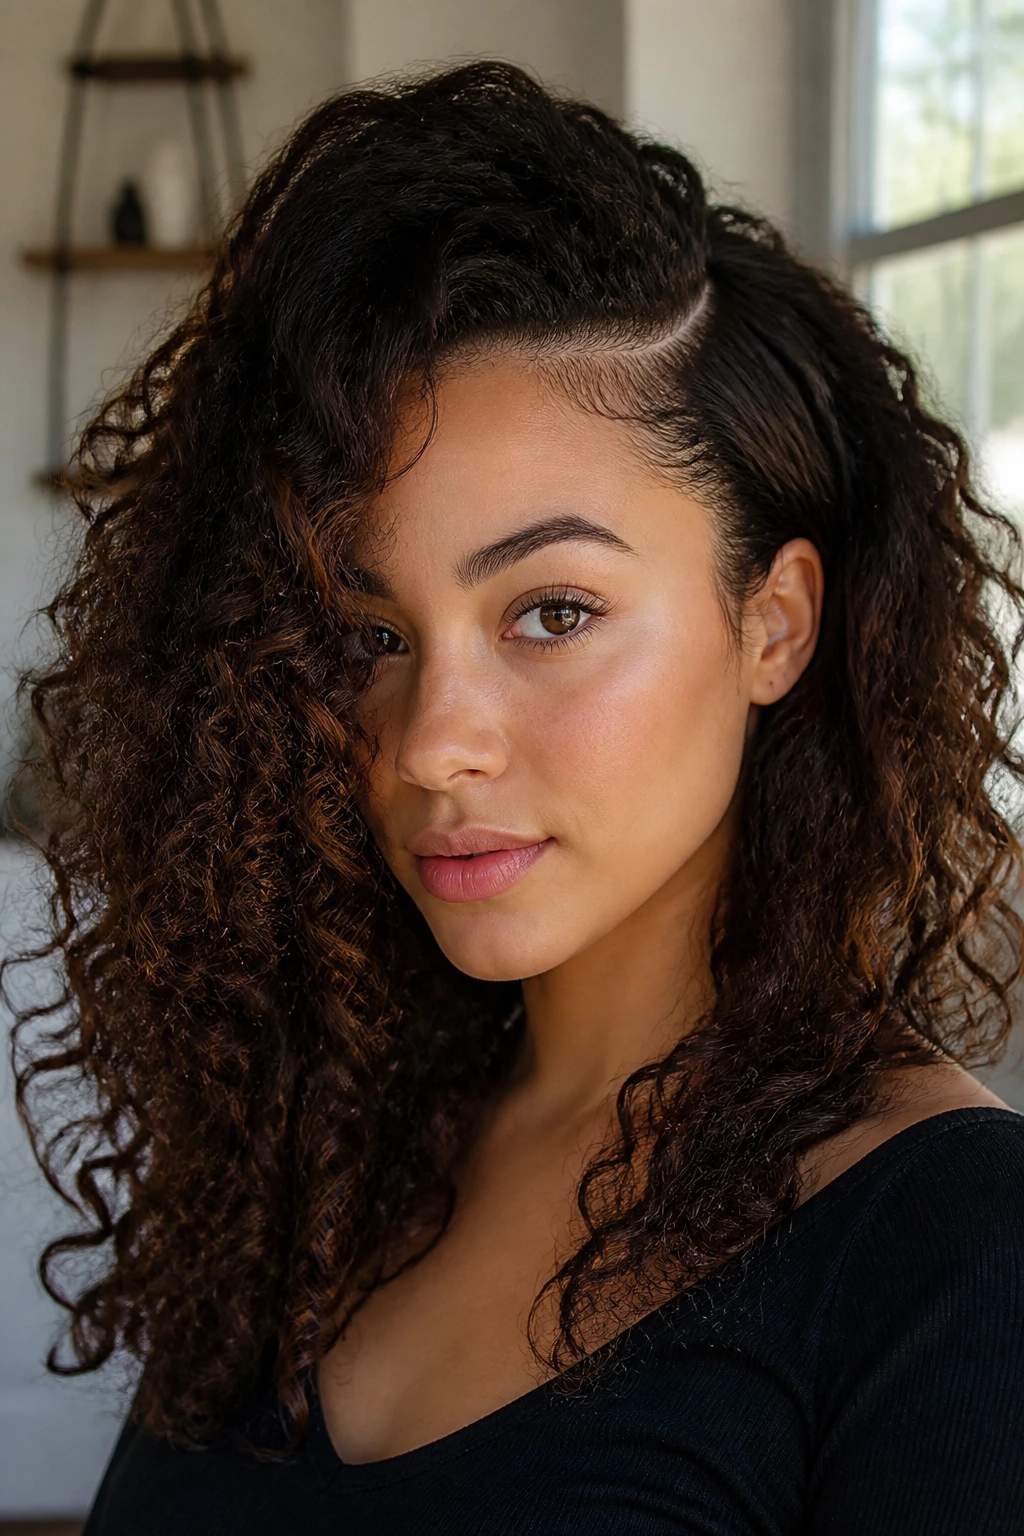
A deep side part can rescue hair that looks flat at the crown by giving the curls somewhere to fall. On mixed hair, that simple shift changes the whole mood of the style, especially when one side has tighter definition and the other side needs a little more room to show off.
The beauty of a side-part cascade is that it does not ask every curl to act the same. You can tuck one side behind the ear, pin just the front section, and let the rest spill over the shoulder. That asymmetry is the point. It makes the different textures look deliberate, not accidental.
A tiny root lift helps here. Use a pick at the crown only after the hair is dry, then stop. If you fluff while it is wet, the shape widens too early and you lose that clean fall along the side of the face. A little cream at the front, a little gel at the part, and a lot less touching than people think they need. That is usually the formula.
This look works when you want curls visible, but not wild. It has a softer edge than a full updo and more polish than leaving everything loose.
8. Flat Twists Into a Puff
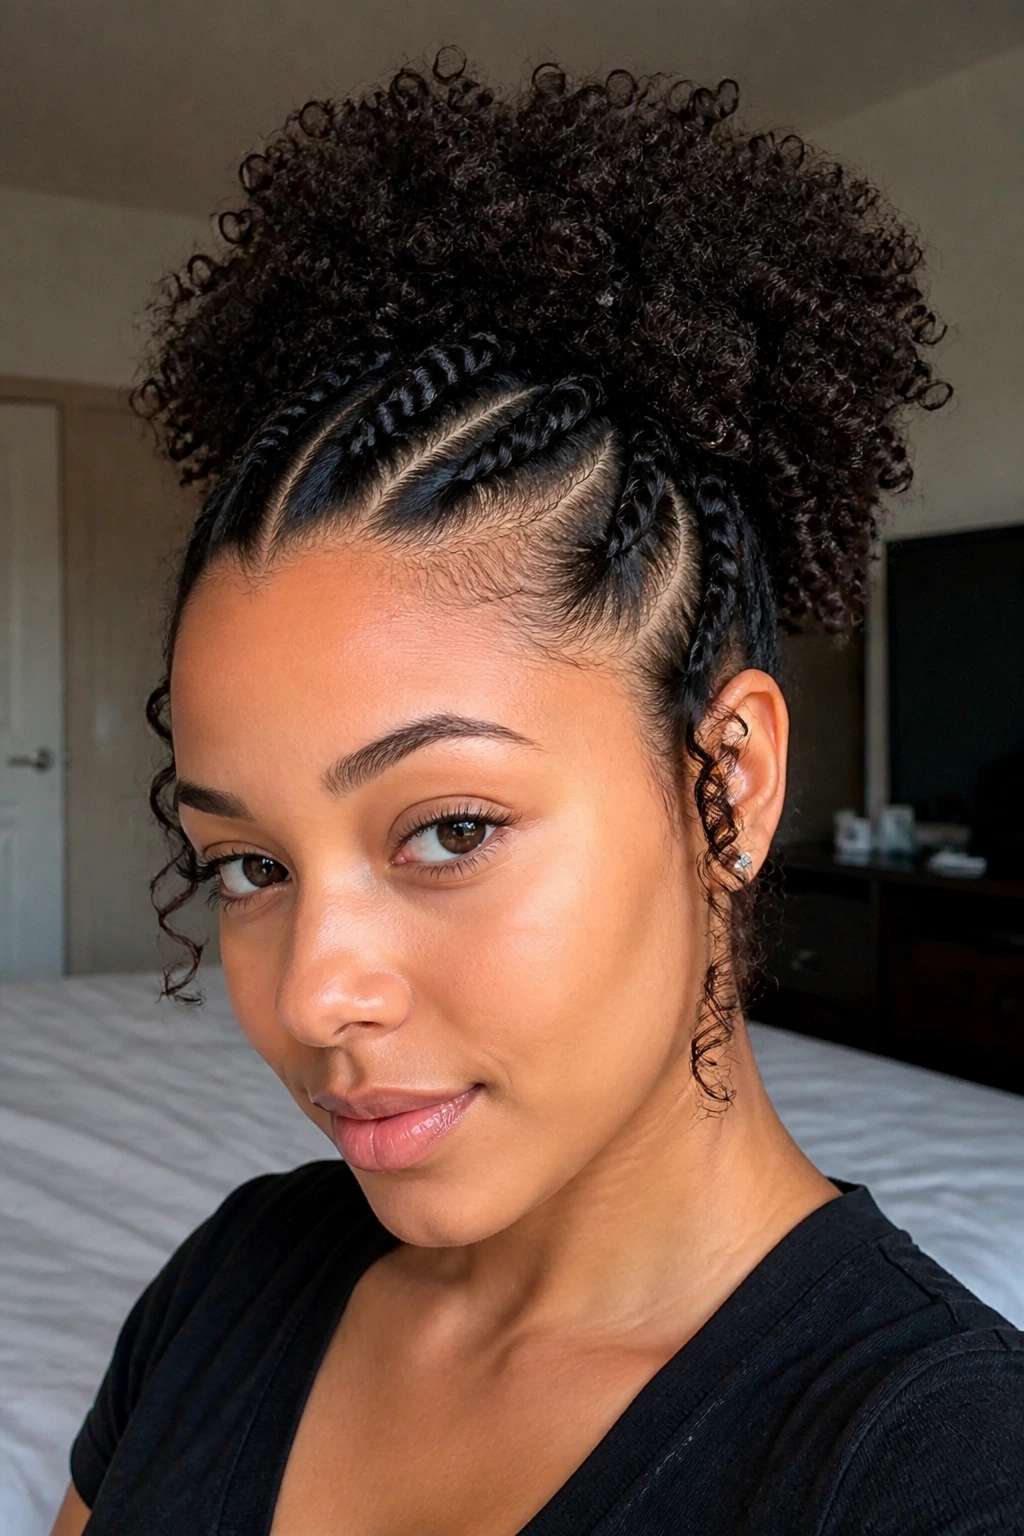
What makes flat twists so useful? They tame the front without stealing the show from the back. On mixed hair, that is a smart trade, because the scalp area usually needs more control than the ends.
Ask for, or create, two to four flat twists starting at the front hairline and running toward the crown. Stop there. Let the rest of the curls gather into a puff, a bun, or a loose cloud, depending on length. The front gets shape. The rest gets freedom.
What to Ask the Style to Do
- Keep the twists medium-sized, so they sit flat without looking thin.
- Leave the twist ends tucked or pinned so they do not unravel by lunch.
- Use a little gel only on the roots; too much all over can make the twist sections look stiff.
- Aim the twists back or slightly to the side if the hairline is delicate.
This style lasts because the structure is doing the work. You are not relying on every curl to cooperate at once. Mixed hair usually appreciates that kind of honesty. Some sections want containment, others want volume, and flat twists let both happen in one look.
9. Bubble Braids Over Curls
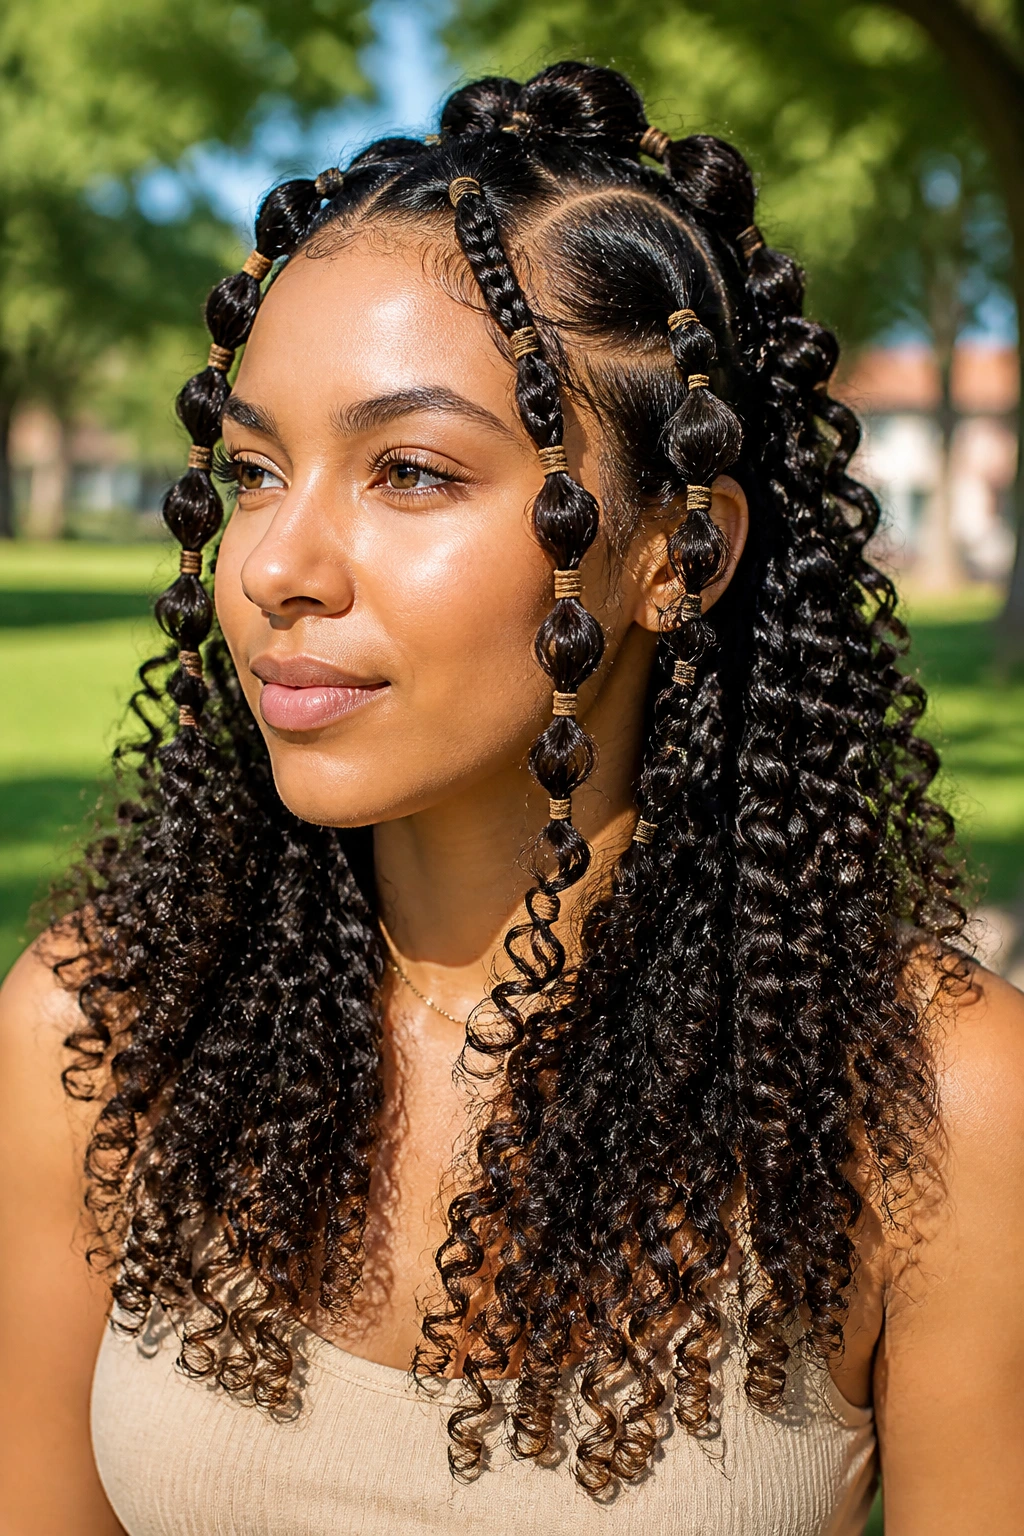
Bubble braids are one of those styles that look fussy in photos and almost absurdly easy in real life. On mixed hair, they work because the elastics create shape even when the curl pattern varies from one section to the next.
Picture a weekend where you need the hair to survive wind, movement, and a few hours of not thinking about it. Bubble braids do that. Gather the hair into a low ponytail, a side pony, or two puffs, then add small elastics every 2 to 3 inches down the length. Gently tug each section outward until it rounds into a bubble.
The magic is in the control points. Each elastic acts like an anchor, which helps sections with different textures hang together instead of separating into their own little moods. Do not pull the bubbles too wide if your hair is fine; they can look sparse fast. A little puff is better than a stretched-out mess.
This is also one of the easiest styles to refresh. If the top starts to soften, slide in one more elastic higher up and pin the edges. Done. No drama.
10. Braided Halo With a Curly Back
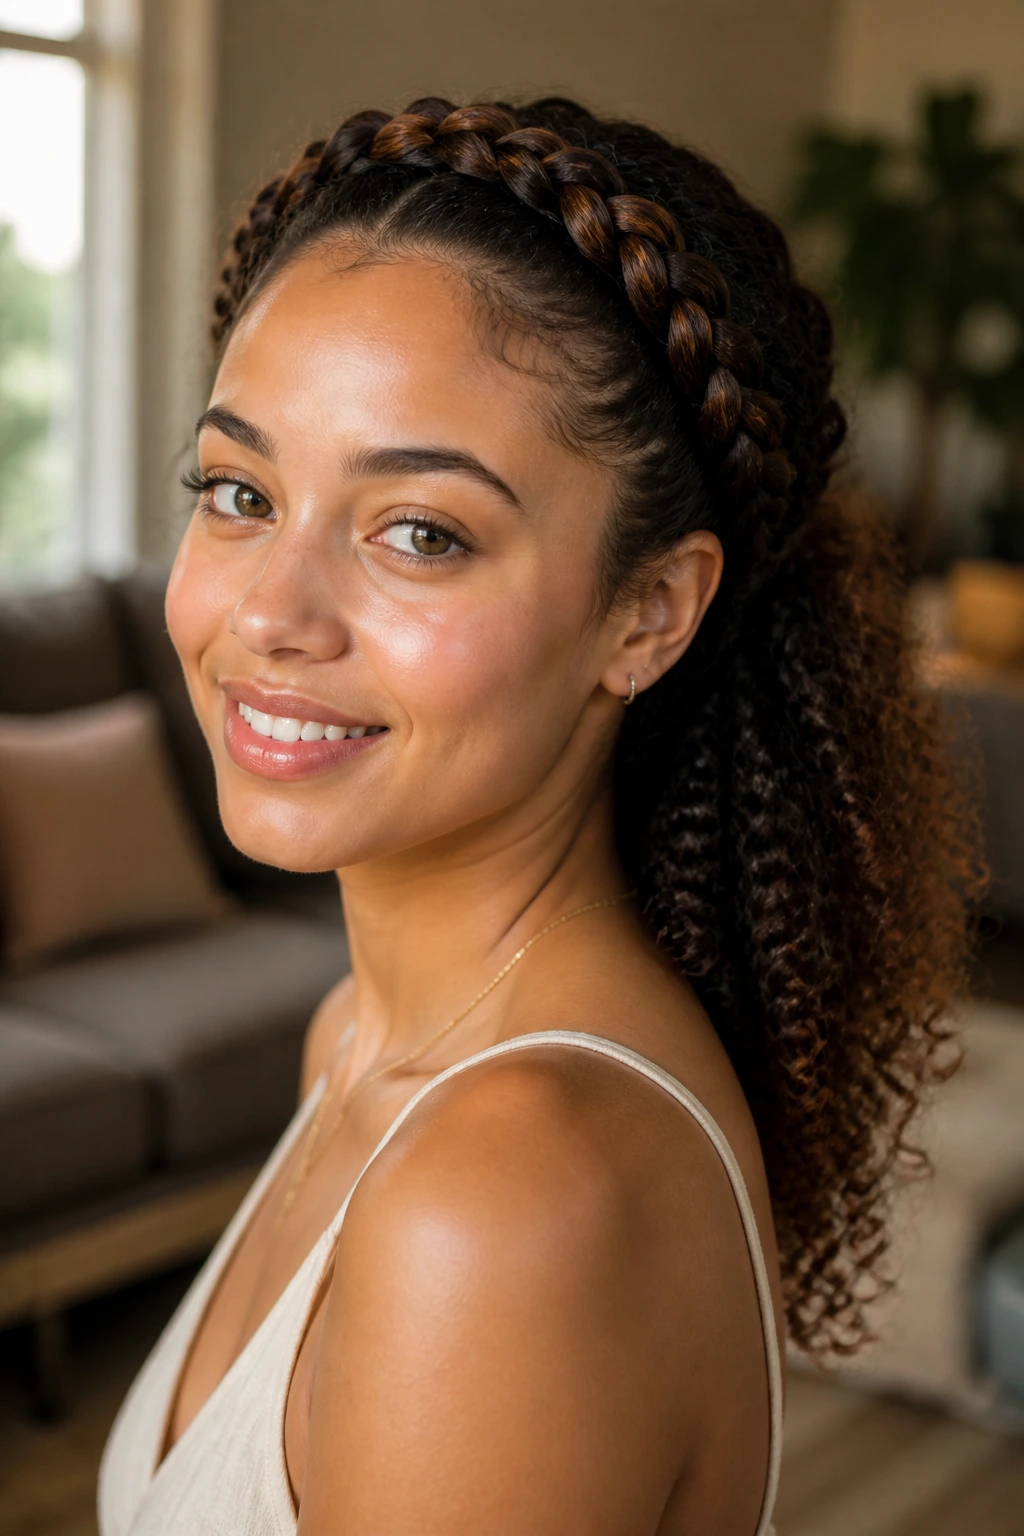
A braided halo looks more polished than it is. That is part of its appeal. The braid keeps the front and sides tidy, while the back curls stay loose enough to keep the style from feeling stiff or formal.
For mixed hair, the halo braid is useful because it gives the hairline a clear job. The front section gets braided around the head, usually from one ear toward the other, and the rest of the hair can stay curly, coiled, or softly stretched. The braid becomes the frame. The curls are the picture.
I like this for events where you want your face open and your neckline visible. It is also a solid pick if the nape curls tangle easily, since the braid keeps most of the hair from rubbing against coats, collars, or seatbacks. Use a little edge gel only where needed. Too much product at the temples tends to make the braid look hard instead of smooth.
One small detail matters here: the braid should sit close enough to hold, but not so tight that it lifts the skin. If your scalp feels pulled, the braid is too tense. No style is worth that.
11. Chunky Roll Tuck
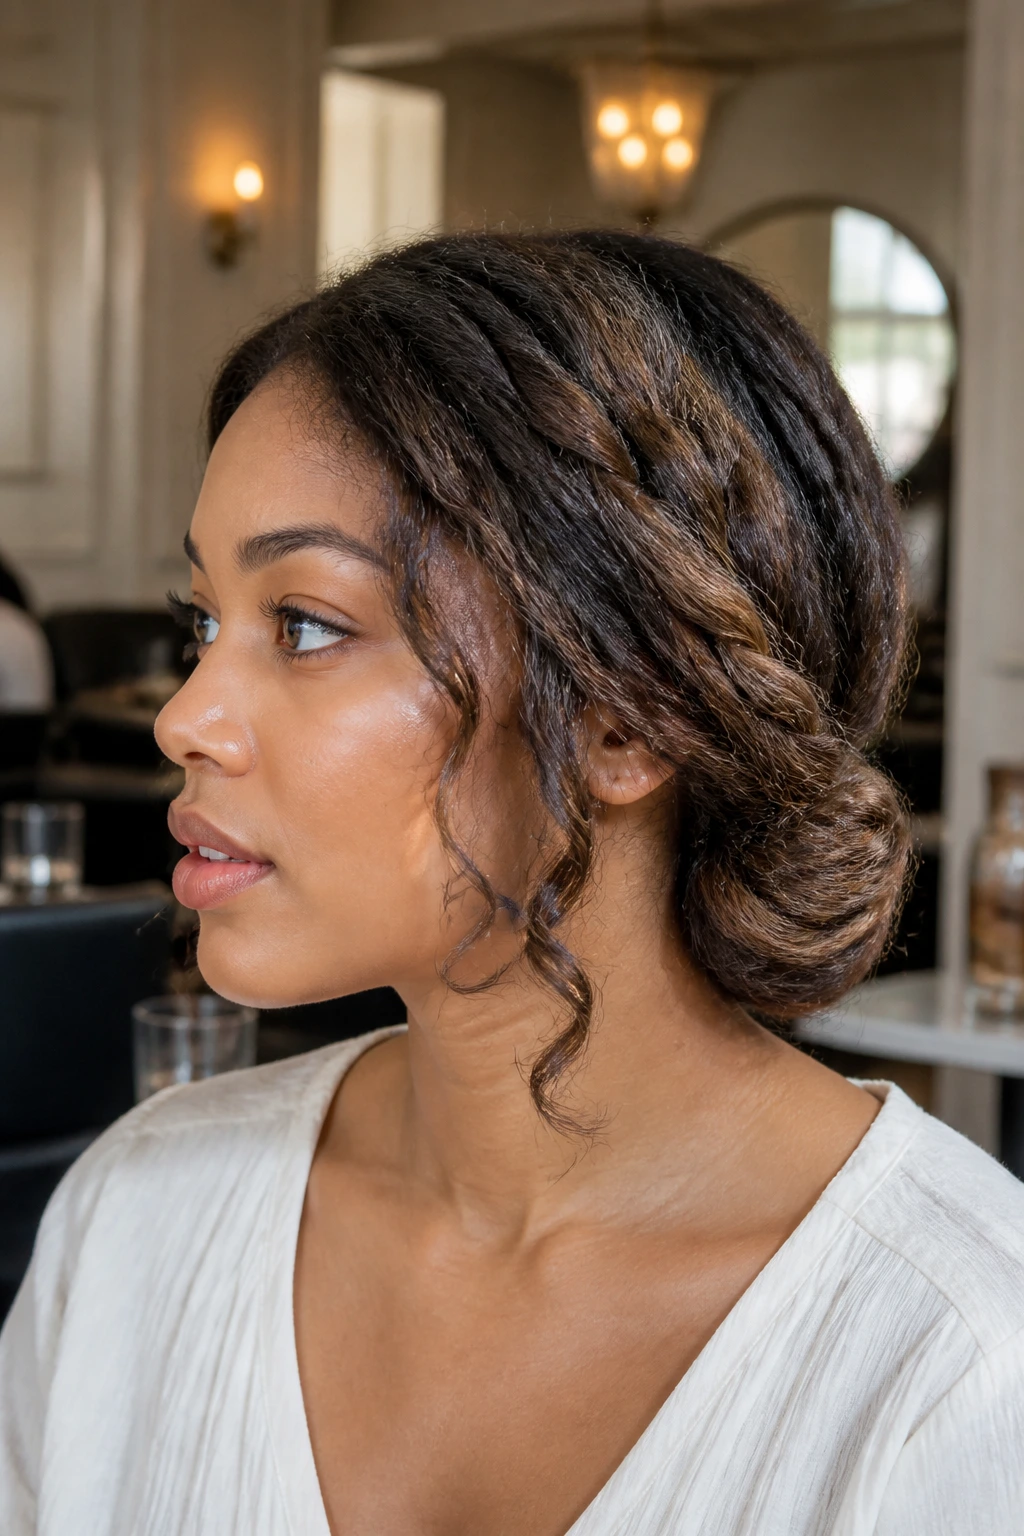
Unlike a classic bun, the chunky roll tuck keeps the shape softer and less obvious. It is the hairstyle version of “I made an effort, but I am not announcing it.” On mixed hair, that relaxed shape is a gift, because the different textures can be tucked in without needing perfect uniformity.
The style works best on shoulder-length hair or longer layers. Roll the hair upward or inward at the nape, tuck the ends under, and pin the roll into place with 2 to 5 pins depending on density. A low-profile clip can help, but I prefer pins because they sit flatter and let the curls keep a little texture at the edges.
This is the style I would choose for a dinner, a workday, or any time the hair has gone a little frizzy but not enough to start over. It hides uneven ends well. It also keeps the neck clear, which sounds minor until you try wearing your hair down with a scarf or a high collar.
The best part? It looks better when it is not perfect. If a few curls pop out near the temple or nape, leave them. That loose edge keeps the roll from reading as too formal.
12. Claw-Clip Sweep for Loose Curls
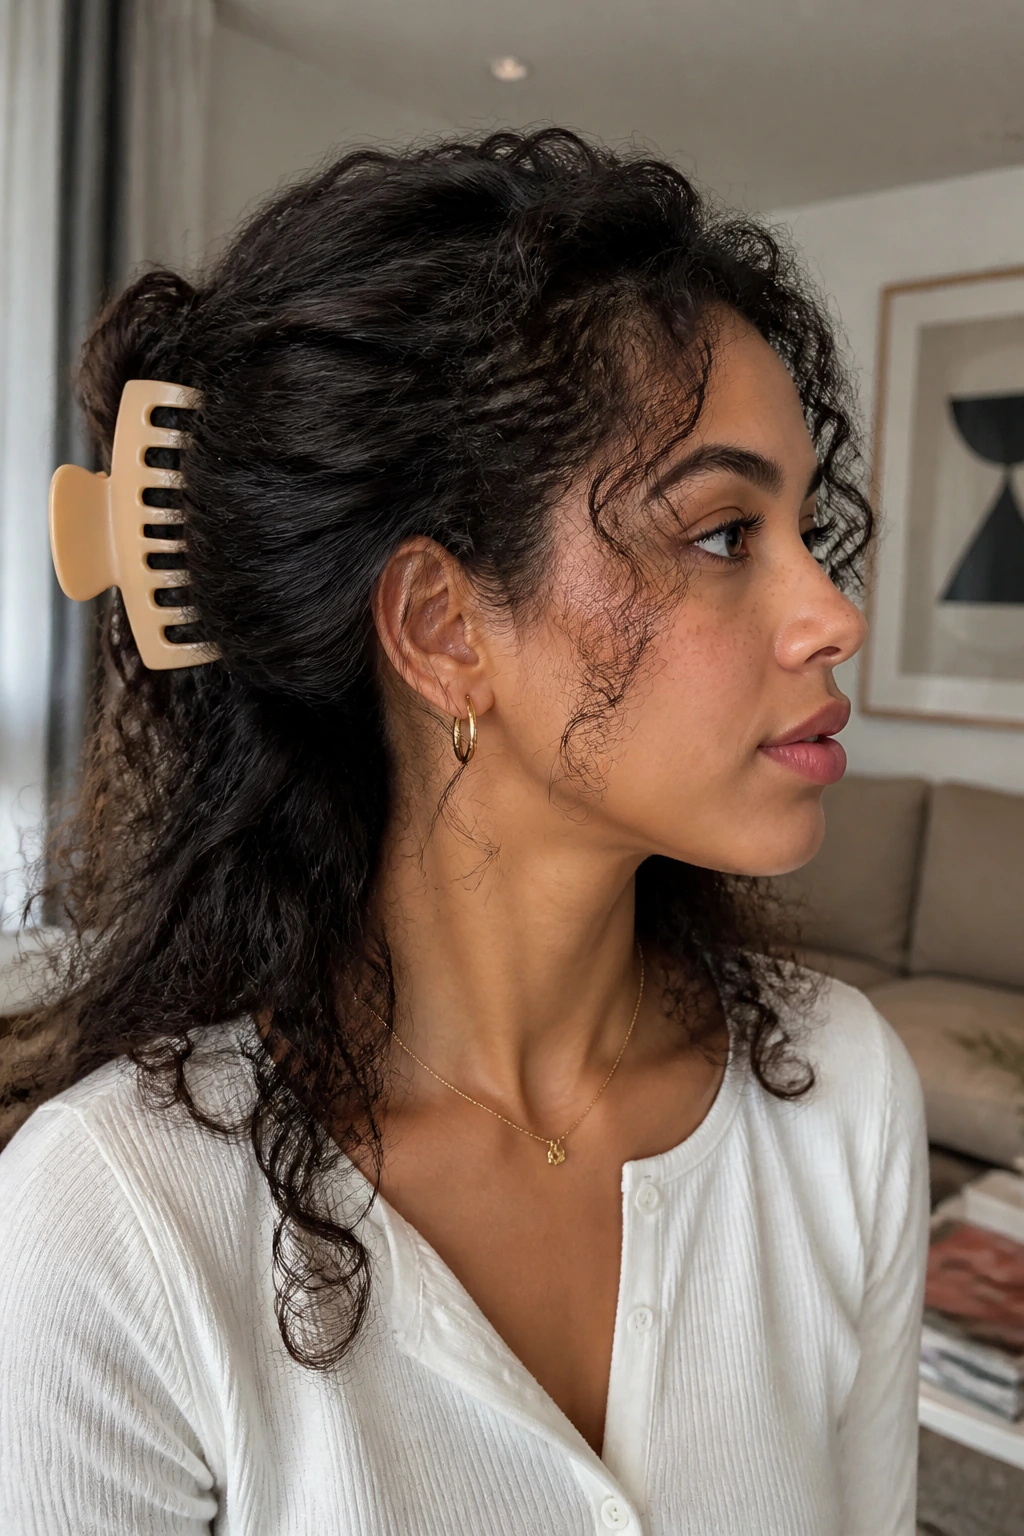
A claw clip can be a cheap little miracle if you buy the right size. Tiny clips are cute, sure, but they do not do much for mixed hair unless your hair is very fine. A medium or large claw clip gives the curl pattern room to fold without crushing it.
Why the Clip Matters
The clip creates one clean fold instead of a tight tie point. That means less tension at the roots and fewer dents through the middle of the style. For mixed hair, especially hair that has one area with more shrinkage than another, that loose fold helps the style sit naturally instead of forcing every section into the same shape.
How to Get the Most From It
- Twist the hair once before lifting it into the clip.
- Leave the ends free if the hair is long enough; that soft tail looks better than a packed knot.
- Aim the clip vertically for height, or horizontally for a flatter look.
- Keep the front light. A little fringe or curl fall near the cheeks softens the whole style.
This one is good when you want your hair up for an hour or six, not necessarily all day. That is okay. Not every style needs to survive a storm.
13. Mini Braids With Curly Leave-Out
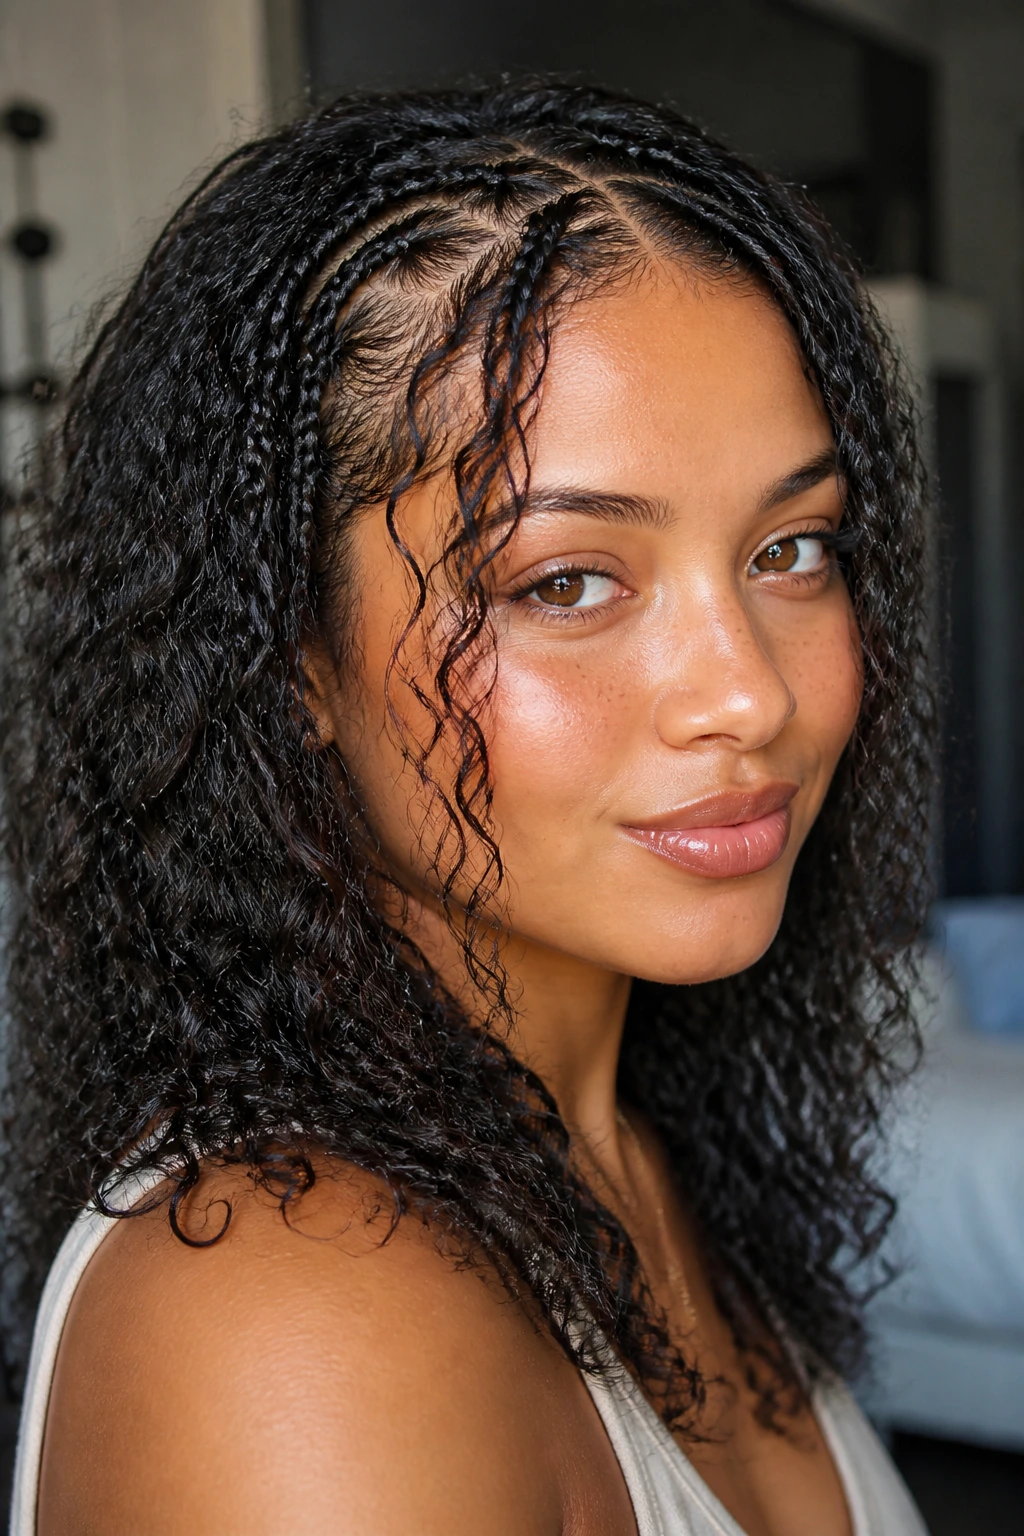
Mini braids are the easiest way to make mixed texture look intentional instead of accidental. A few slim braids near the front or scattered through the hair can organize loose sections while leaving the natural curls in the rest of the style to breathe.
This works especially well when one part of the head grows in looser and another part springs tighter. The braids act like little visual anchors. They give the eye a pattern to follow, so the difference between textures reads as design, not damage. That is a big deal, and people underestimate it.
You do not need a full head of braids to get the effect. Try 4 to 8 tiny braids around the hairline, or braid the top half and leave the lower curls out. Keep the braids loose enough that they do not pull at the scalp after a few hours. If they sting, they are too tight. Period.
This style also stretches nicely overnight if you want extra length the next day. Just do not braid the leave-out too tightly or you lose the softness that makes the whole thing work. A little looseness is what lets the curly ends contrast with the neat braids.
14. Curly Frohawk
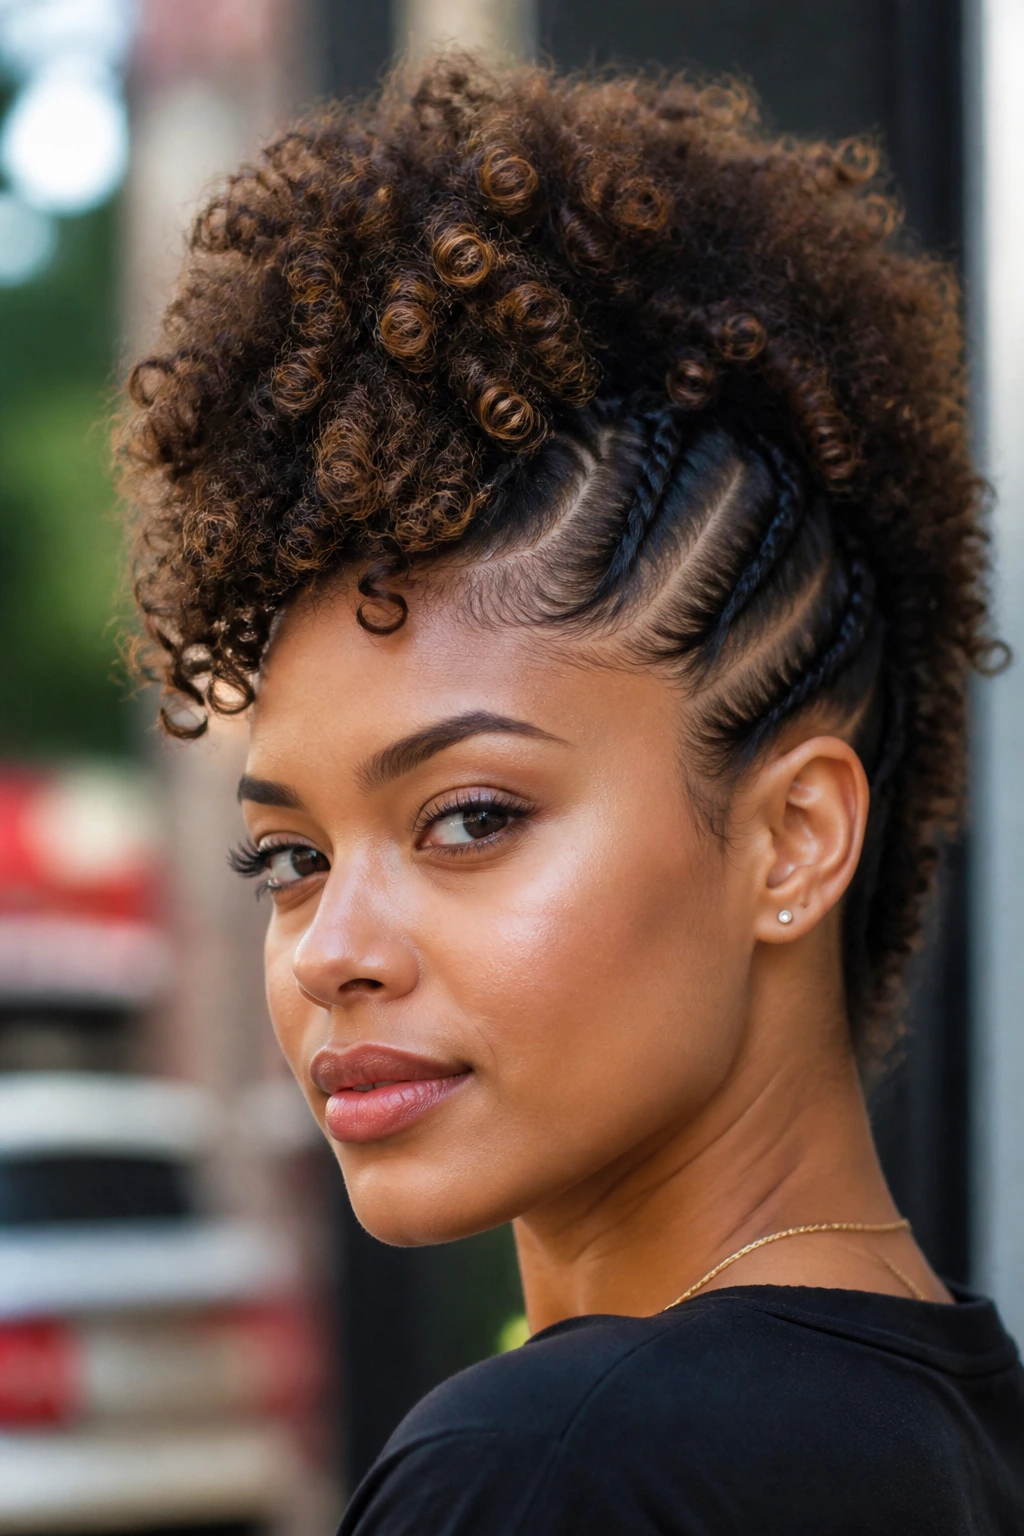
Need drama without a lot of pinning? The curly frohawk gives it to you fast. It pushes the sides up and in, leaving a ridge of volume through the middle that works especially well when the hair has mixed textures and lots of natural body.
The shape is the draw. Side sections get pinned or twisted toward the center, and the top stays high and full. That middle line can be all curls, all coils, or a mix of both. Because the sides are controlled, the center gets to be the star. It looks bold without asking for perfection.
How to Build the Ridge
Start by sectioning the hair from temple to temple across the crown. Pin or flat-twist the sides back first, then fluff the middle section upward with fingers. Use a few pins underneath the ridge so the shape stays lifted without obvious hardware showing through.
This style is useful when you want a strong outline and do not care if the texture is a little wild. In fact, the wildness helps. If your curls separate unevenly, that extra height makes the style feel more alive, not less tidy.
15. Low Bun for Natural Curl Hairstyles for Mixed Hair
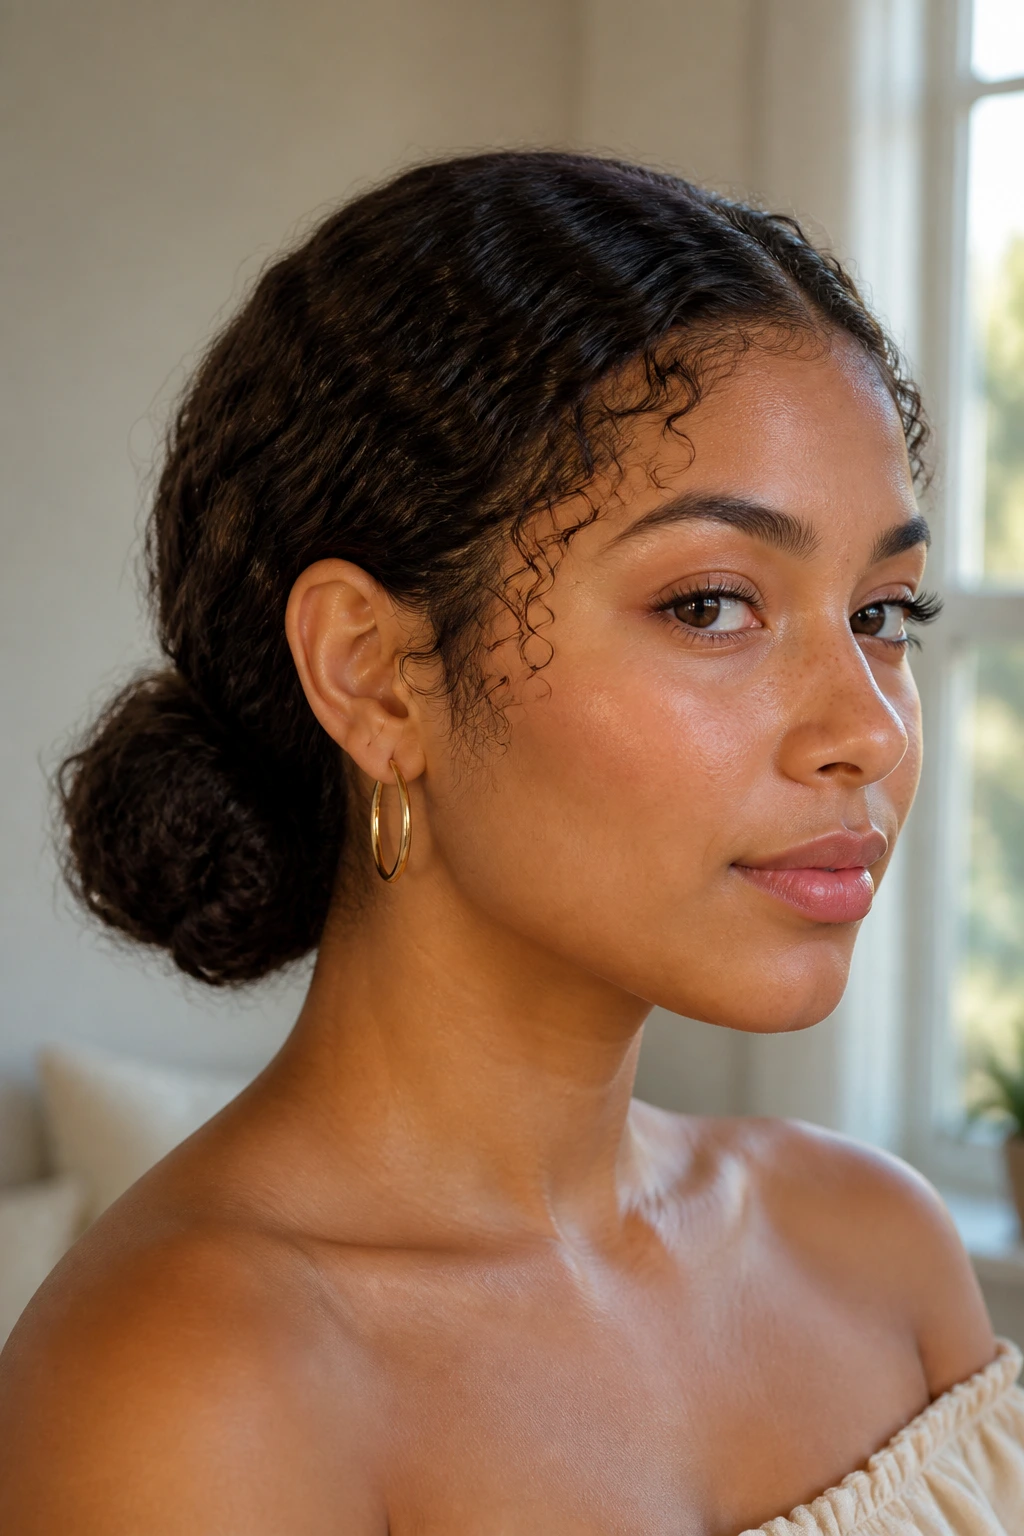
The low bun is the style you reach for when you want polished hair and zero drama. It works on mixed hair because the low placement keeps the tension away from the top of the head, where breakage and soreness tend to show up first.
A good low bun does not need to be sleek in the fake, shellacked sense. It can be soft at the crown and neat at the nape, which is often the better choice for hair with more than one curl type. The front stays controlled. The bun stays compact. The texture still shows up around the edges in a way that feels honest.
- Gather the hair at the nape rather than in the exact center of the head.
- Use a satin scrunchie or soft elastic so the bun does not crease badly.
- Smooth only the top layer if needed; there is no prize for flattening every strand.
- Finish with a tiny bit of gel or edge control around the temples if the style needs a cleaner line.
I like this style for events where the hair should stay put but not look severe. It has enough structure to read as intentional and enough softness that the mixed texture still comes through.
16. Headband Tuck Style
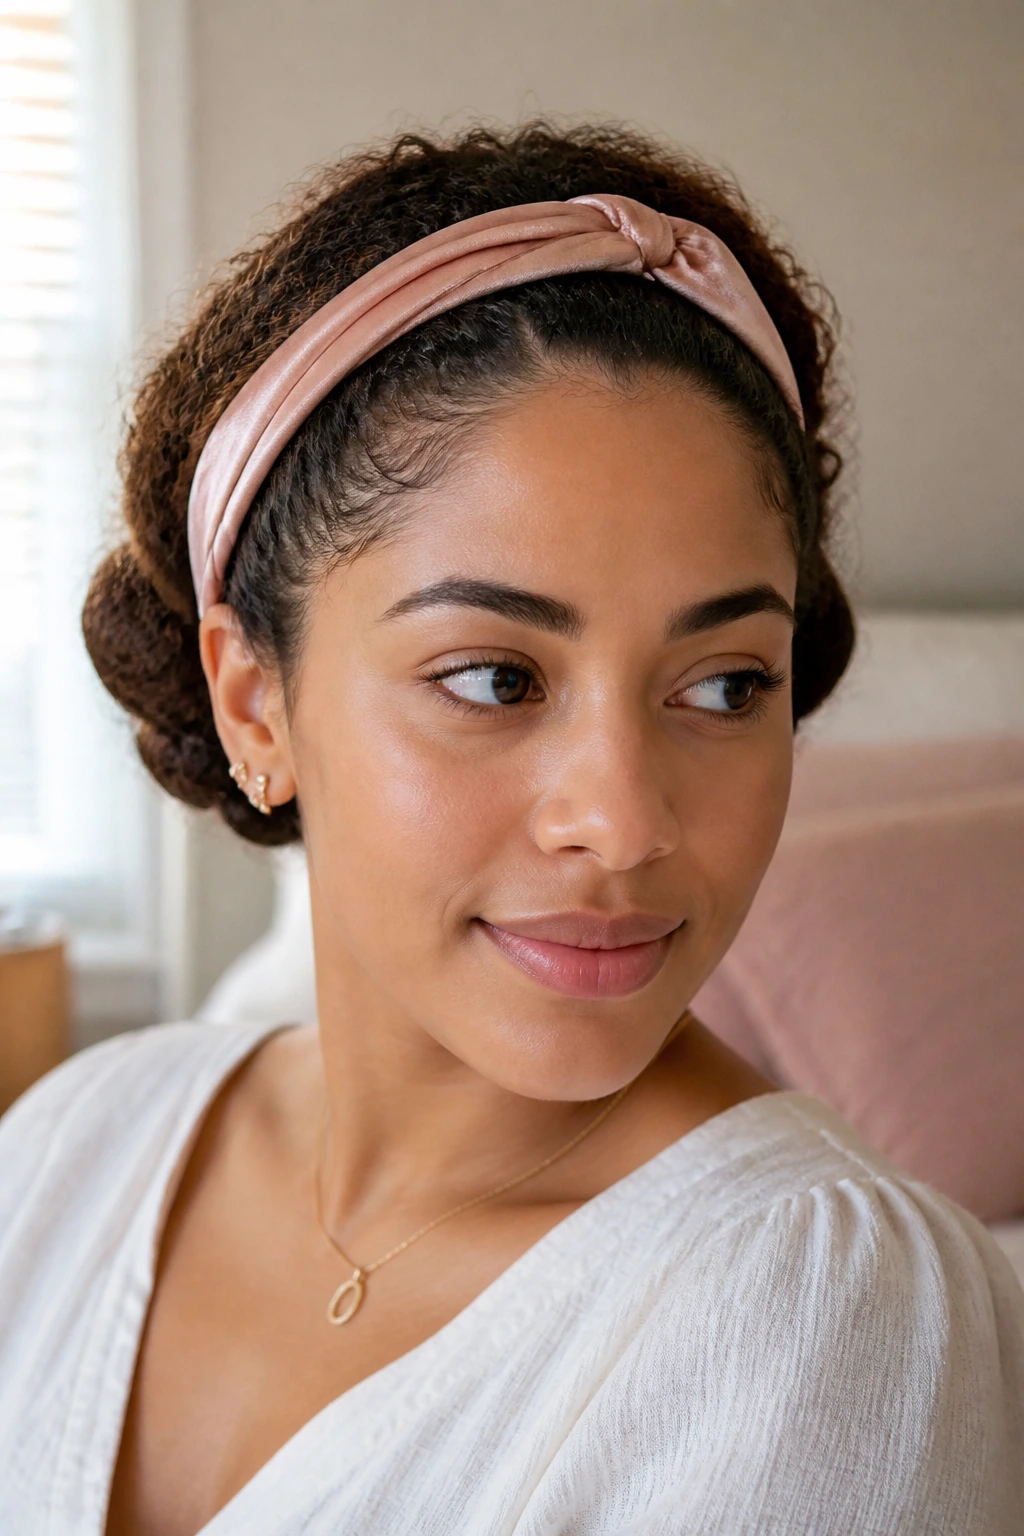
A headband tuck style is one of the easiest ways to use texture instead of battling it. Put a soft headband over the crown, then tuck the lengths up and under until the hair forms a rolled shape at the back. Mixed hair tends to handle this well because the tuck hides unevenness and keeps the curl pattern from needing to look identical everywhere.
This is a nice option when the hair is mid-length and some sections are straighter than others. The headband gives you a line to work around. The tuck gives you a place to hide frizz, shrinkage, or the awkward half-day-between-washes stage that everybody pretends not to know about.
Cotton headbands can snag. A stretchy fabric band or a smooth satin-lined piece is kinder, especially if the hair is fragile at the front. Slip the ends under gradually instead of shoving them in all at once. That sounds fussy, but it keeps the shape cleaner.
What I like here is the softness. The style looks relaxed but not random, and that is a rare thing.
17. Dutch Braid Into Curls
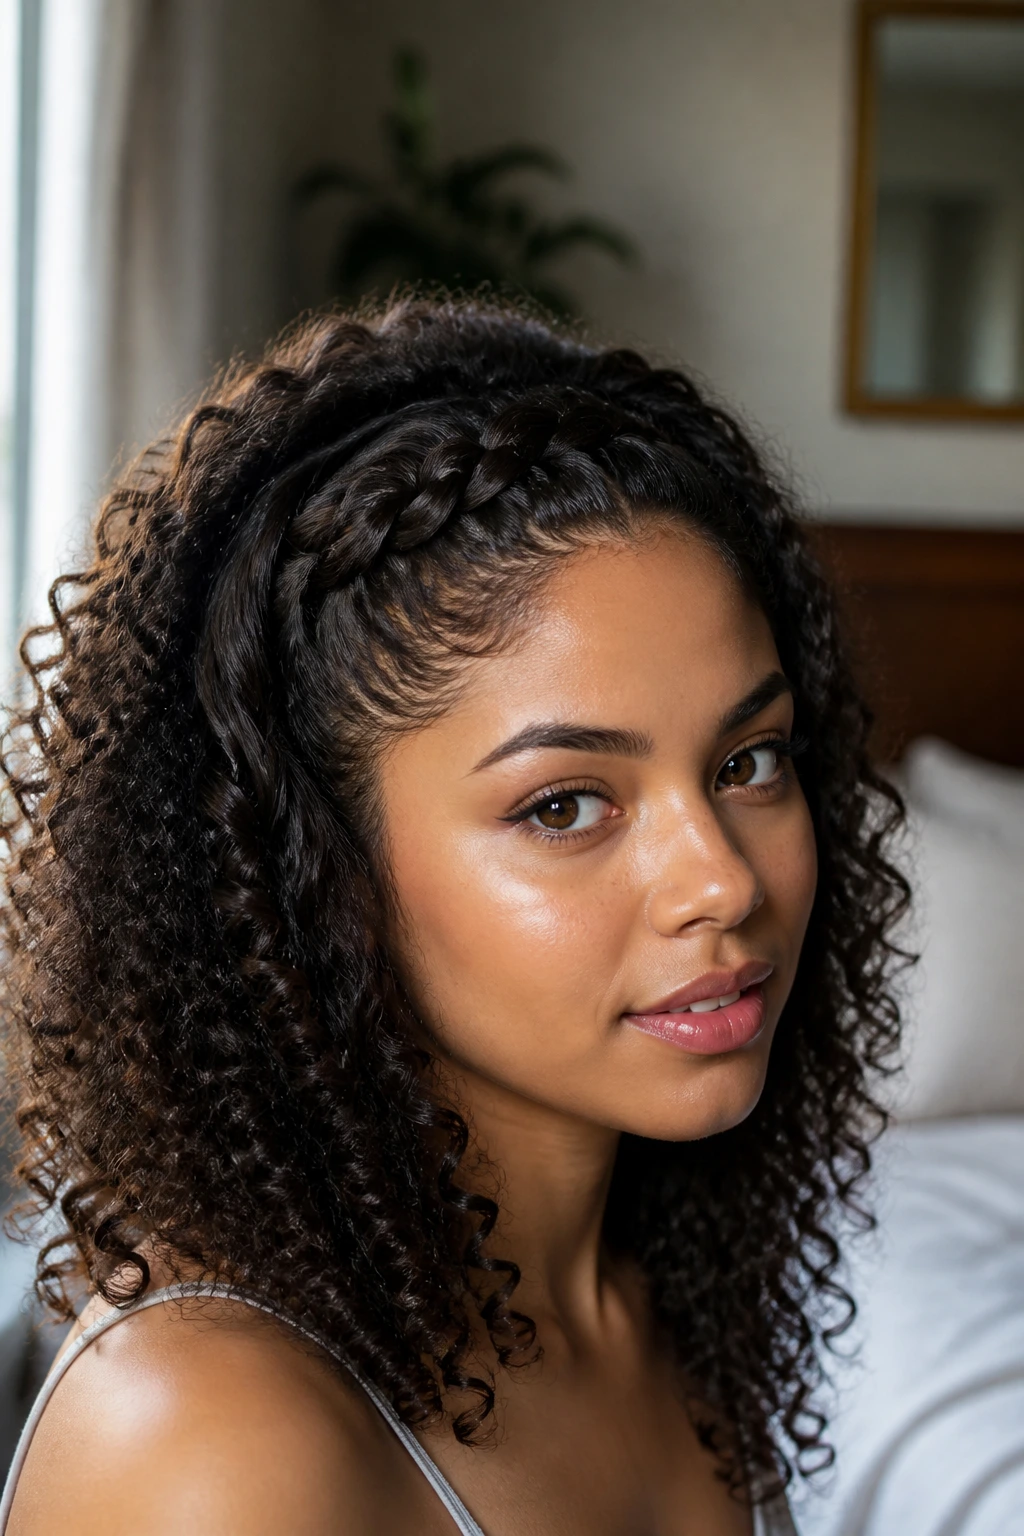
Unlike a French braid, which can blend into the head, a Dutch braid sits up and gives shape. That raised line matters on mixed hair because it separates the top section from the rest of the style and keeps the front from getting lost under its own volume.
Start the braid at the hairline and work it down toward the crown or nape, depending on where you want the braid to stop. Leave the rest of the hair curly. The contrast is the whole point. Tight curl sections below a clean braid above can look sharper than a full braid ever would.
This is a solid style for days when you want hair that stays put but still shows off the curl pattern at the ends. It also helps if the front pieces are softer or shorter than the rest, because the braid gives them a job. If you are new to braiding your own hair, keep the sections chunky. Tiny braid sections are harder to control and usually not worth the extra time.
A little frizz near the braid is fine. It softens the line. Too much polish can make the style look stiff.
18. Three-Puff Style
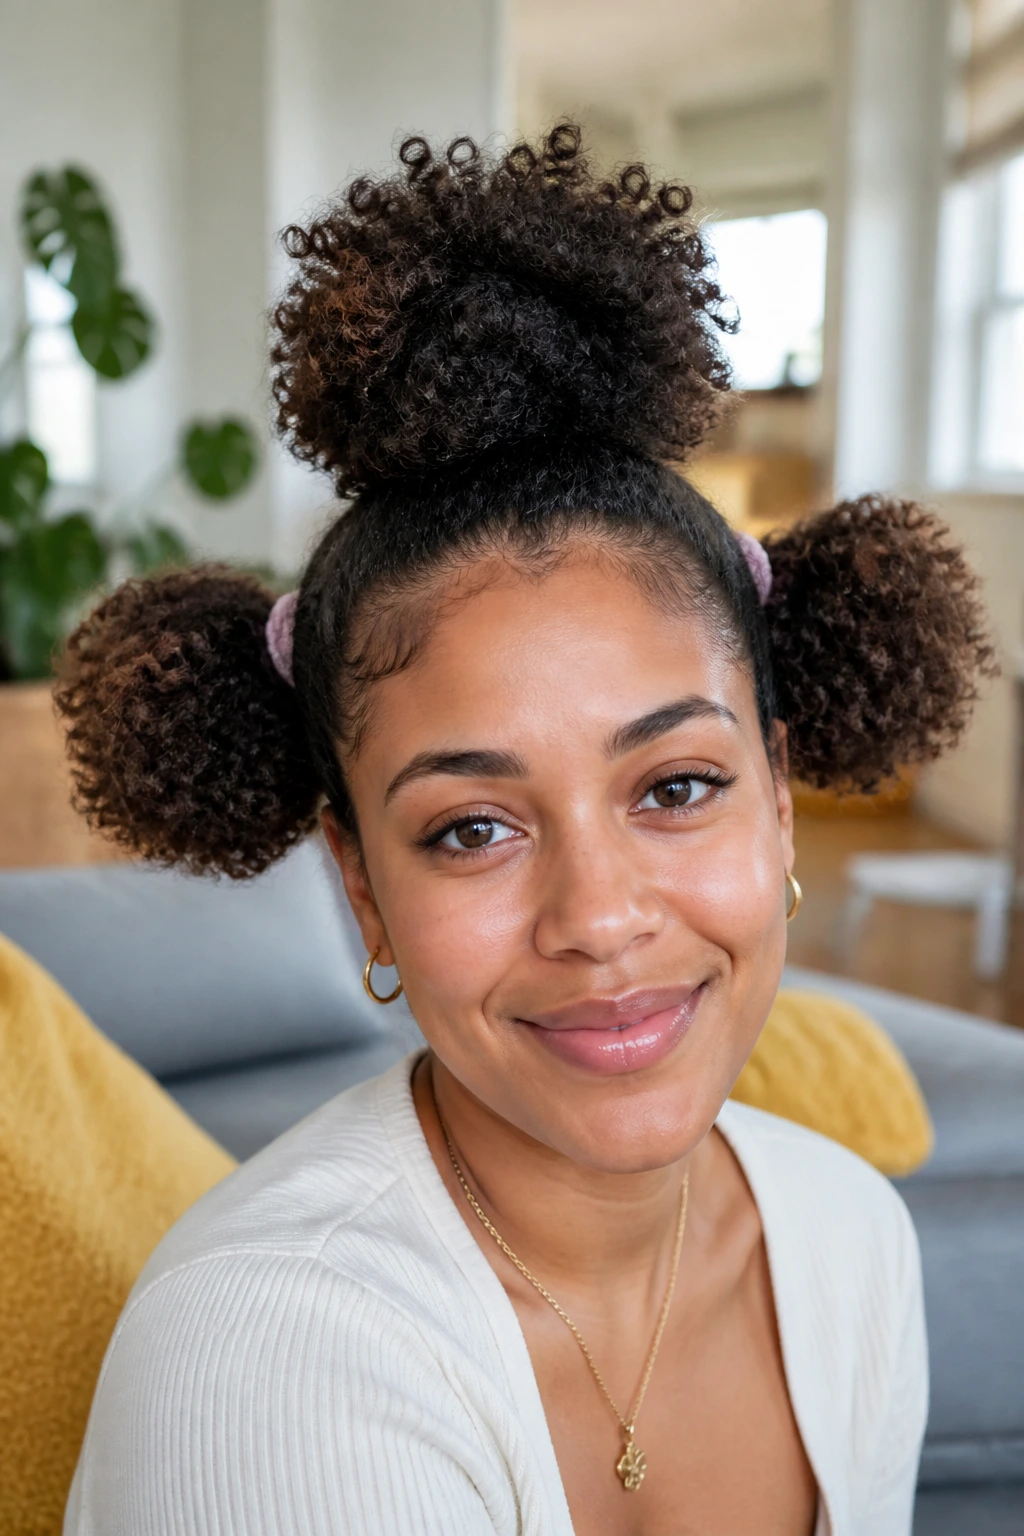
Three puffs solve a very specific problem: how to make mixed hair look playful and organized at the same time. Instead of forcing one giant shape, you divide the head into three zones and let each one keep its own little puff.
How to Build the Sections
- Make a top puff near the crown.
- Split the lower half into two smaller side puffs, or keep the back puff larger if that suits the density better.
- Use soft ties, not tight elastics that leave dents.
- Keep the section sizes balanced by eye, not by ruler. Hair rarely divides perfectly anyway.
The style works because each zone gets a different amount of tension. That matters on mixed hair, where the front may be finer, the middle denser, and the back more coily. One section does not have to carry the whole load.
A three-puff style has a fun shape, but it is not only for kids. It looks good on thick hair, on shorter mixed textures, and on days when you want volume without a full down style. The structure keeps it from becoming a puff cloud that swallows your face.
19. Side Braided Ponypuff
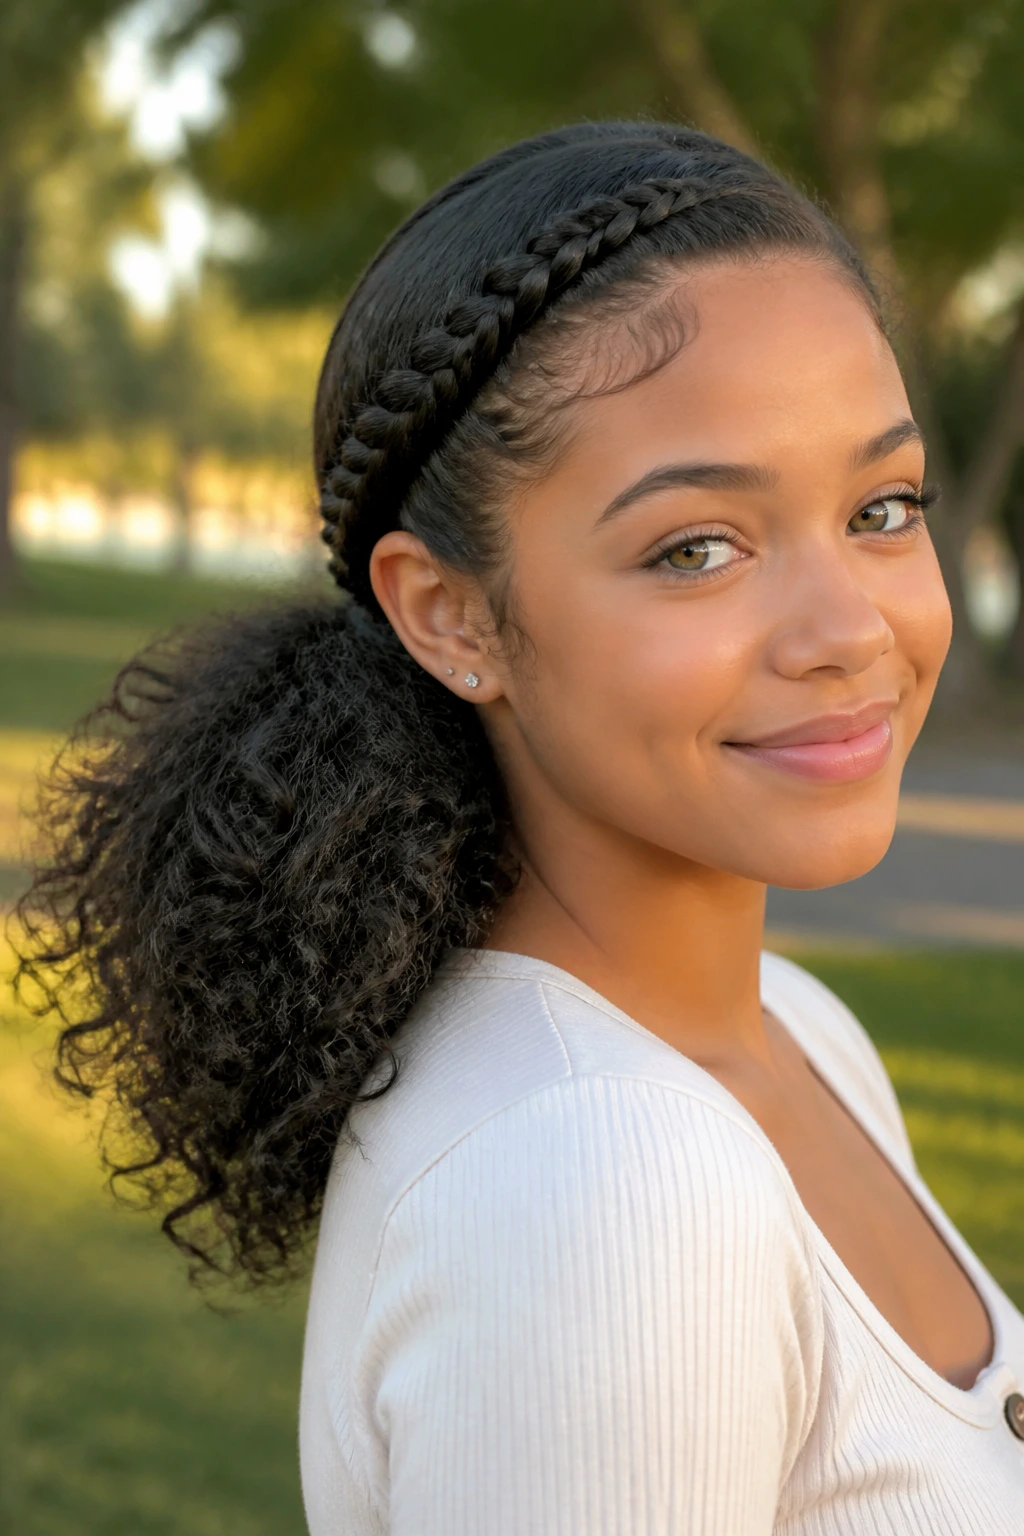
This is the style that saves a day-two wash look. A side braid along the hairline gives the front a clear shape, and the ponypuff keeps the back easy and full. Mixed hair benefits from that split because the front usually needs more help than the back does.
The side braid can be a single cornrow, a Dutch braid, or even a simple flat twist if braiding is not your thing. Once it is secured, gather the remaining hair into a side puff or side ponytail and let the ends stay curly. The contrast between the tidy front and the loose body is what makes the style feel finished.
A small detail changes the whole thing: place the puff lower if your hair is thick, higher if it is fine. A low puff keeps the silhouette softer. A high one gives the braid more drama. Either way, the style stays useful because it controls the section most likely to frizz first.
I like this one for busy mornings. It works hard without looking try-hard.
20. Long Twist-Out Layers
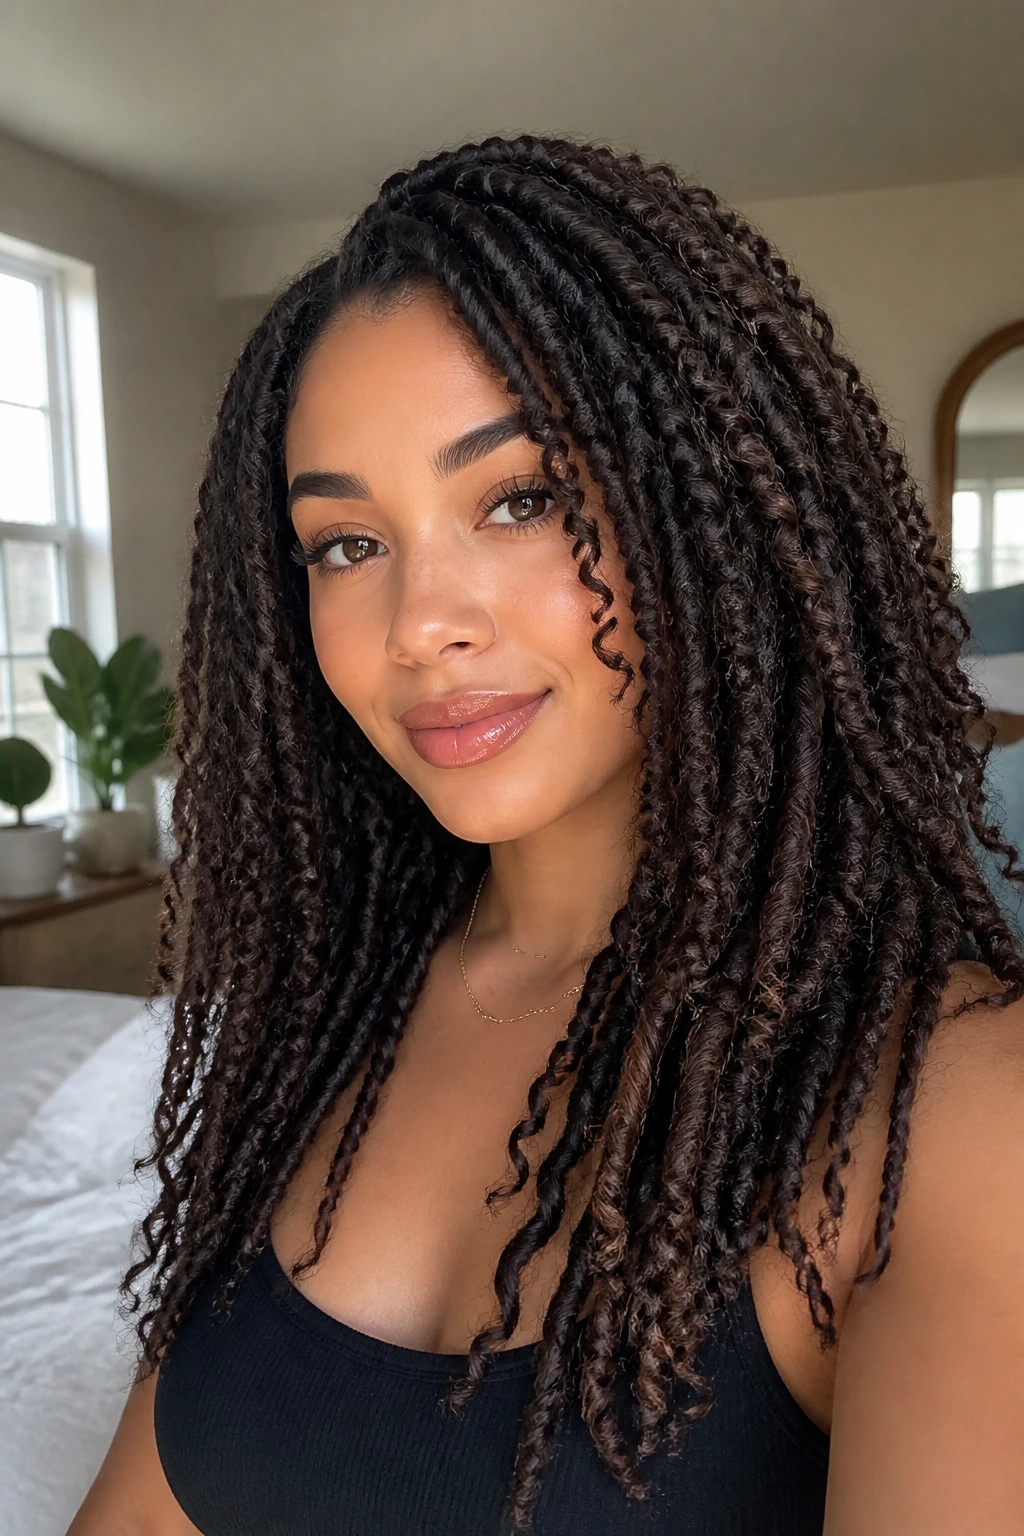
Can a twist-out look soft instead of sculpted? Absolutely. If you keep the twists chunky, separate them with care, and let the layers fall naturally, the result can look airy rather than stiff. That is a nice place for mixed hair to land.
The layered effect comes from how the twists unravel. Tighter sections may hold more visible definition, while looser sections create movement and lift. Together, they make the hair look fuller without needing teasing or heavy product. Use a light oil on your fingertips when separating, and stop before the curl clumps turn into frizz clouds.
How to Keep It From Puffing Up Too Fast
Let the hair dry completely before taking the twists down. That part matters more than people think. If even one section stays damp, the shape can swell unevenly and the style loses the clean layer effect.
A side part gives the twist-out more direction, and a little root lift at the crown helps if the front tends to sit flat. Do not over-fluff. The whole point is movement, not a big halo that grows wider every hour.
This is the style for someone who wants volume and shape without pretending the texture is the same from root to tip.
Final Thoughts
Mixed hair looks best when the style respects what each section is already doing. Some parts want hold. Some want space. Some need both on the same head, which is exactly why these natural curl hairstyles for mixed hair work better than one-size-fits-all ideas.
The smartest styles are rarely the tightest ones. They leave room for curl variation, keep tension away from the hairline, and let the texture do some of the heavy lifting. That is not a compromise. It is a better plan.
If you remember one practical thing, make it this: choose the style based on the most fragile section of your hair, not the strongest one. That one shift saves a lot of frustration, and honestly, it makes the whole process feel less like a battle.
