



4C hair does not reward fussy styling. It rewards patience, a little moisture, and styles that work with shrinkage instead of trying to fight it. That’s why so many 4C natural hair styles for beginners look simple on paper and end up being the ones people wear on repeat.
The first mistake is usually chasing perfection. A clean part helps, sure, but a style that survives a school run, a workday, or a humid commute matters more than a polished photo. If your coils are tight, dense, and thirsty, you need shapes that hold without a wrestling match at the mirror.
I’ve always liked styles that look better after they settle. Twists, puffs, braids, tucked buns, even a good banded style can take a head of 4C hair from “what am I doing?” to “oh, that actually works” with very little drama. The trick is knowing which styles ask for skill and which ones mostly ask for clean sections, enough slip, and a soft hand.
Some of these are protective. Some are just easy. A few sit in the middle, which is where most beginners live anyway. Start with the ones that fit your length, your patience, and your hands, and the rest gets easier fast.
1. High Puff

A high puff is the style that saves the day when your hair is soft, full, and not in the mood to be manipulated. It pulls all that texture up and out, which gives you height, shape, and a little drama without requiring braid skills or a full wash-and-set routine.
Why It Works So Well
4C hair has a lot of body, and the high puff lets that volume do the work for you. The key is to gather the hair at the crown with a stretchable band or puff cuff, then smooth only the perimeter so you do not flatten the whole head.
A little leave-in on the front and sides helps the puff look neat. A dab of gel at the hairline can tame frizz, but don’t chase every coil into submission. That usually makes the style look stiff.
Keep the band loose enough to slide on without yanking. If your edges feel tender after styling, the puff is too tight.
What To Do
- Start on stretched or lightly blown-out hair if you can.
- Use your fingers or a soft brush to gather the hair at the crown.
- Secure with a satin or snag-free elastic.
- Fluff the puff from the ends outward so it looks round, not flat.
- Wrap your edges with a scarf for 10 to 15 minutes if you want a cleaner finish.
2. Low Puff

Why do so many people start with a low puff? Because it asks less of your edges and less of your arms. The style sits closer to the nape, so it tends to feel calmer, neater, and easier to control when your hair is thick or a little dry.
That lower placement also helps if your crown is frizzy and your sides are shorter. You can smooth the back and let the puff do its thing while leaving the top part of your hair less pulled. It’s a small change, but it matters.
A center part gives the style a clean look. A side part feels softer and hides uneven shrinkage better. Both work.
How to Place It
Use a wide band or a puff cuff and gather the hair just above the nape. If the puff looks lopsided, loosen the section above it and gently lift the roots with your fingers instead of adding more tension. That part matters.
This style is especially handy on day-two hair. The texture has usually settled by then, which means less puff, less fuzz, and less fuss.
3. Two-Strand Twists

Two-strand twists are the beginner’s workhorse. They look simple, they protect the ends, and they give you two hairstyles in one: wear them as twists, then unravel them later for extra fullness if you want that look.
The technique is straightforward, but the quality comes from section size. Keep the parts even, apply a little leave-in or cream, and twist each section from root to tip with steady tension. Not tight. Steady. Tight twists can leave your scalp sore and make the ends look ropey instead of smooth.
I like this style on hair that is slightly damp and stretched. Wet enough for slip, dry enough to hold shape. That balance saves you from the mushy, fuzzy twist problem that so many first-timers run into.
Your twists do need time to dry. If you unravel them too soon, they’ll puff up fast and lose that clean spiral. Overnight is better. A full day is even better if your hair is dense.
4. Mini Twists

Mini twists are for the person who wants low maintenance and is willing to spend a little time up front. They take longer to install than chunky twists, but once they’re in, they hold their shape well and sit neatly for days.
What Makes Them Different
The small section size is what gives mini twists their tidy look. You’ll usually work with parts that are much smaller than the width of a fingertip, and that means the style moves less, frizzes less, and tucks away more of the hair.
They’re also a smart choice if your hair tangles easily. Smaller twists mean smaller sheds getting trapped inside each section. That sounds boring. It matters a lot.
How to Wear Them
- Use a rat-tail comb for clean parting if your hair likes neat grids.
- Apply a light cream or gel on each section before twisting.
- Twist in the same direction all over so the style lays evenly.
- Sleep with a satin bonnet, not a loose scarf that slips off.
- Refresh the roots with a little water and leave-in if they start to look dry.
The catch is time. Mini twists are not a five-minute style. They are a “put on a show and settle in” style.
5. Twist-Out
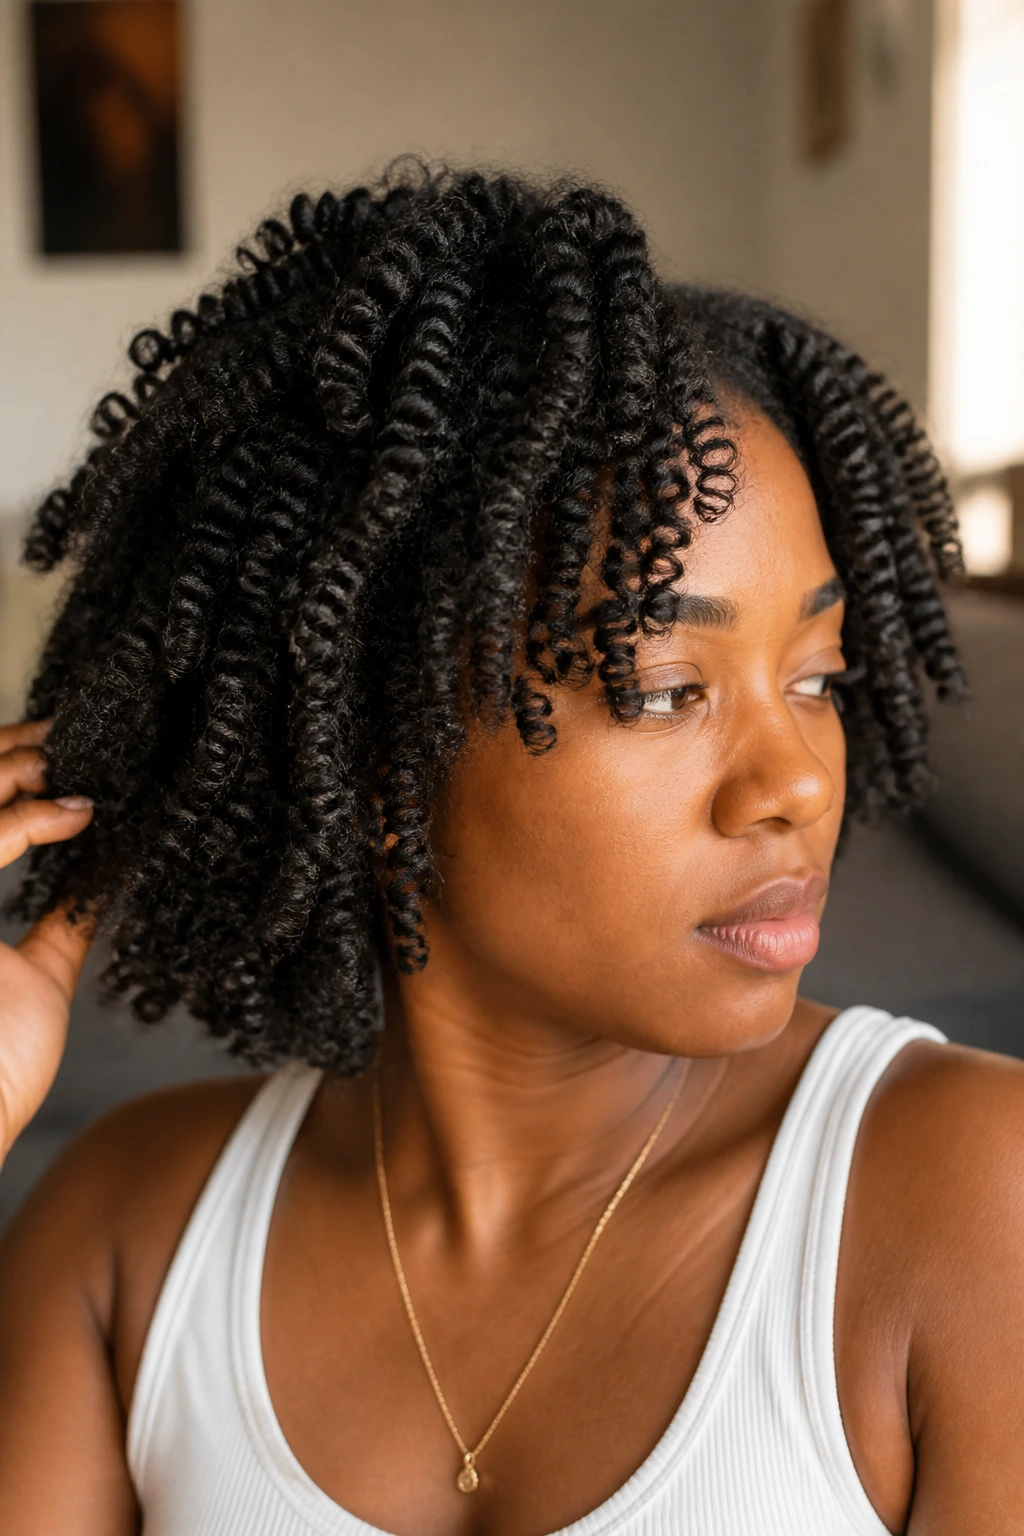
A twist-out is what happens when you take those two-strand twists down and let the pattern show itself. It usually gives you more stretch, more shape, and more movement than wearing the twists in. That’s why so many people keep coming back to it.
The real difference is how dry the hair is before you unravel it. If the twists are even a little damp, they’ll separate into frizz faster than you want. Dry hair, a little oil on your hands, and a slow unwind make a huge difference.
Why It Looks Different From Twists
Twists keep the hair locked in place. A twist-out loosens that shape and gives you a softer finish, almost like a cloud with pattern. It’s not a sleek style. It’s meant to look touchable.
How to Get the Most From It
Take the twists down one by one, coating your fingers with a tiny bit of oil so the strands slide apart without snagging. Then separate each twist only once or twice. Keep going and you’ll end up with fluff instead of definition.
A twist-out is best when you want body without a lot of daily restyling. It’s not the fastest style, but it’s one of the most forgiving when done on fully dry hair.
6. Braid-Out
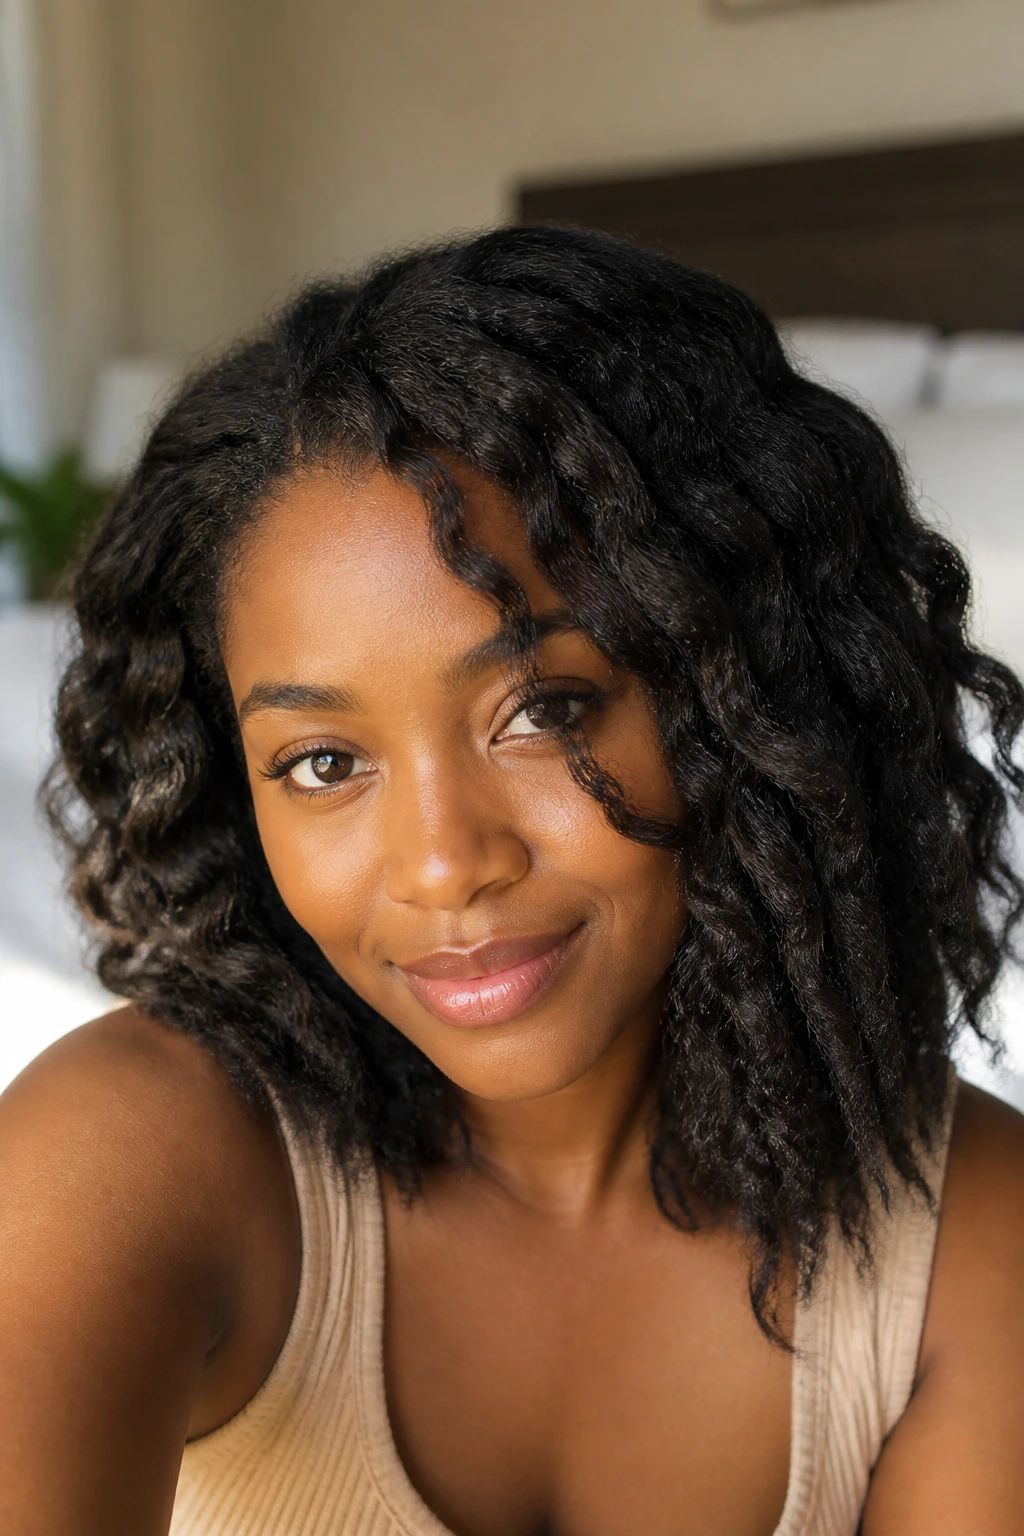
A braid-out gives a different finish from a twist-out, and I like that it stretches 4C hair a little more. The braid pattern flattens the strand set, so the final look tends to be more elongated, with a softer wave and less spring at the root.
That makes it useful if your hair shrinks hard and twists pop open too fast. Three-strand braids are not the point here; I mean the classic three-part plait done on damp, moisturized hair. Four to eight braids across the head is enough for a beginner. More braids mean more definition. Fewer braids mean bigger sections and looser shape.
Leave the braids in until they’re dry all the way through. Then open them slowly, starting from the bottom. If you rush this part, the ends get fuzzy and the whole look loses its clean line.
A braid-out usually lasts a bit longer at the root than a twist-out. It’s a good fit when you want volume without the same amount of puff.
7. Flat Twists

Flat twists are the style I point people to when they want something neater than loose twists but less intimidating than cornrows. The hair is twisted close to the scalp, so it stays put, and the shape can be as simple or as dressy as you want.
Why They Feel Manageable
The movement is easier to learn than tight braid work. You add hair as you twist, but you’re not trying to make every stitch look tiny and perfect. On 4C hair, that’s a relief.
Flat twists can live at the front of the head, run straight back, or create a crown shape if you want a more polished look. They also pair well with a puff or bun in the back, which keeps the style from feeling heavy.
Key Details to Watch
- Keep the parts clean so the twists sit flat.
- Use a cream with enough slip to help the hair glide.
- Don’t over-tighten the roots; flat twists should hug the scalp, not dig into it.
- Finish the ends with a small twist, braid, or pin them into place.
There’s a reason people keep reaching for this style. It works on short hair, medium hair, and stretched hair without asking for much.
8. Finger Coils
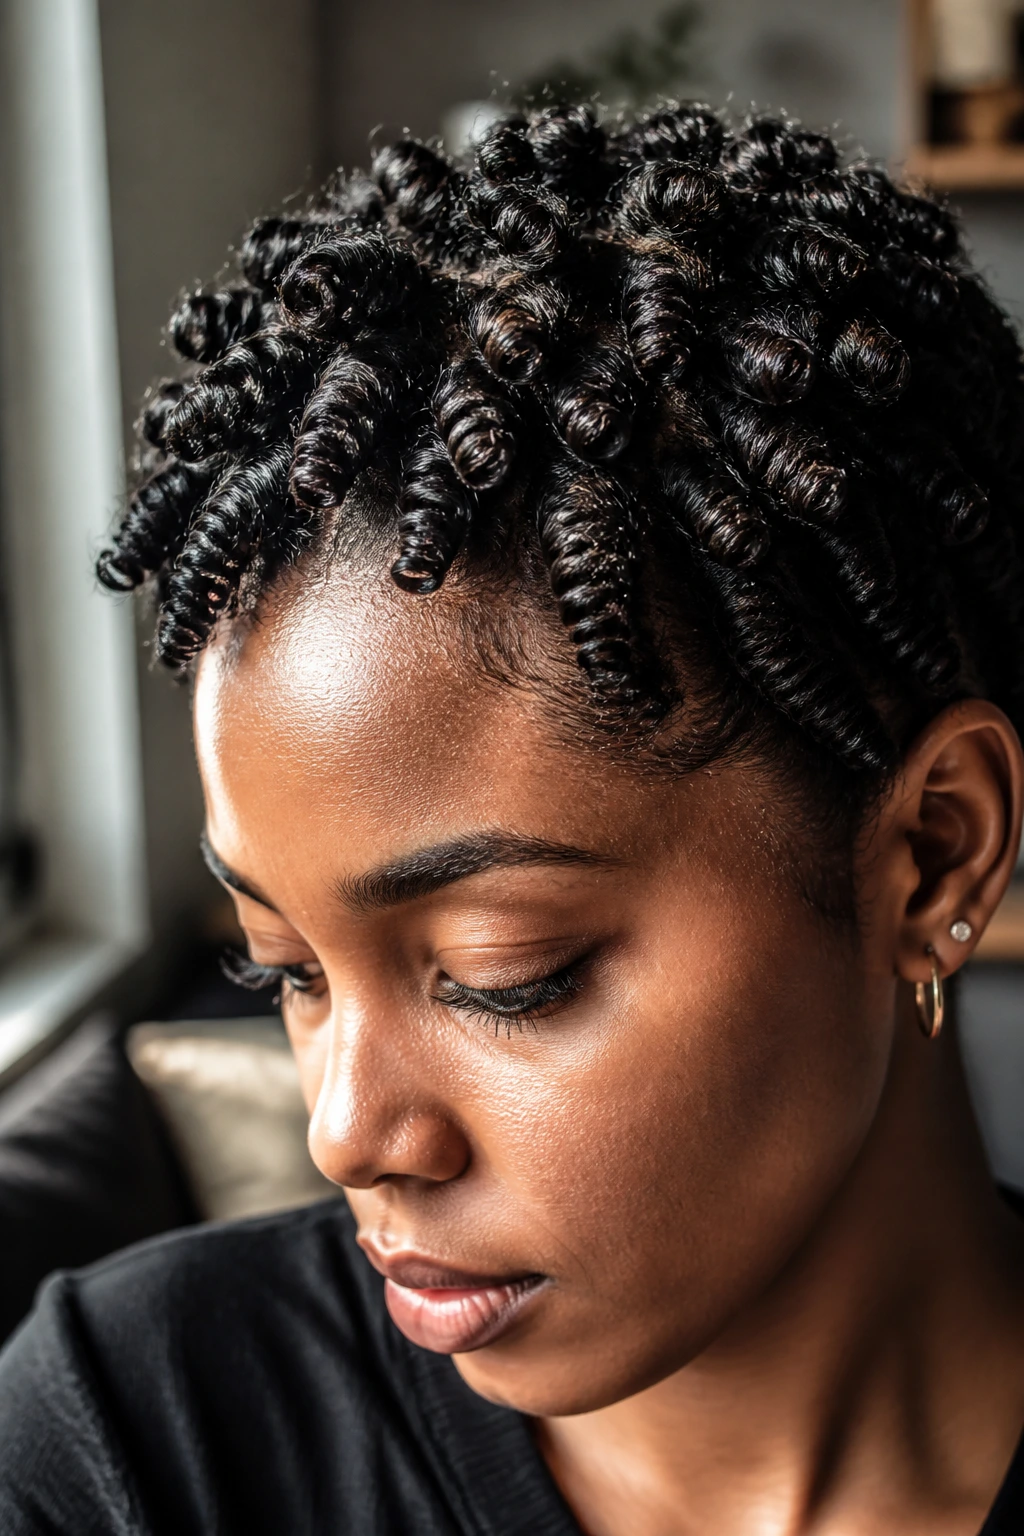
Can finger coils make short 4C hair look deliberate instead of random? Absolutely. That’s the whole charm. Each coil gets formed by hand, so the result has a tidy, springy look that makes very short hair feel styled rather than ignored.
The setup is simple: damp hair, a little curl cream or gel, and small sections. You wrap each piece around your finger until it forms a coil, then let it spring back on its own. The smaller the section, the neater the coil. The larger the section, the more relaxed the shape.
How to Wear Them Without the Crunch
Use enough product to give hold, but not so much that the hair gets gummy. That sticky feeling often means you’ve gone past what the coil needs. A clean, soft coil is usually better than a stiff one.
Finger coils are best on hair that is short to medium length and willing to stay defined for a few days. They’re not the fastest style on this list, but they give a very clean finish with almost no tools.
If you want them to last, do not disturb them while they dry. That part is non-negotiable.
9. Bantu Knots

Bantu knots are one of those styles that look decorative even when the person wearing them did not spend forever styling. The hair is sectioned, twisted, and wrapped into little knots across the head, which gives you a sculpted look right away.
What I like about them on 4C hair is how flexible they are. Wear them as knots and you get a bold protective style. Take them down after they dry and you get a knot-out with a lot of definition and bounce. Same prep. Two different results. Nice deal.
The size of each knot changes the final look. Smaller knots give tighter curls later. Bigger knots give chunkier texture and are faster to install.
They do need to dry fully, especially if the sections are thick. A damp center takes forever to dry and can leave the roots flat or frizzy. That is the part people underestimate.
10. Cornrow Bun
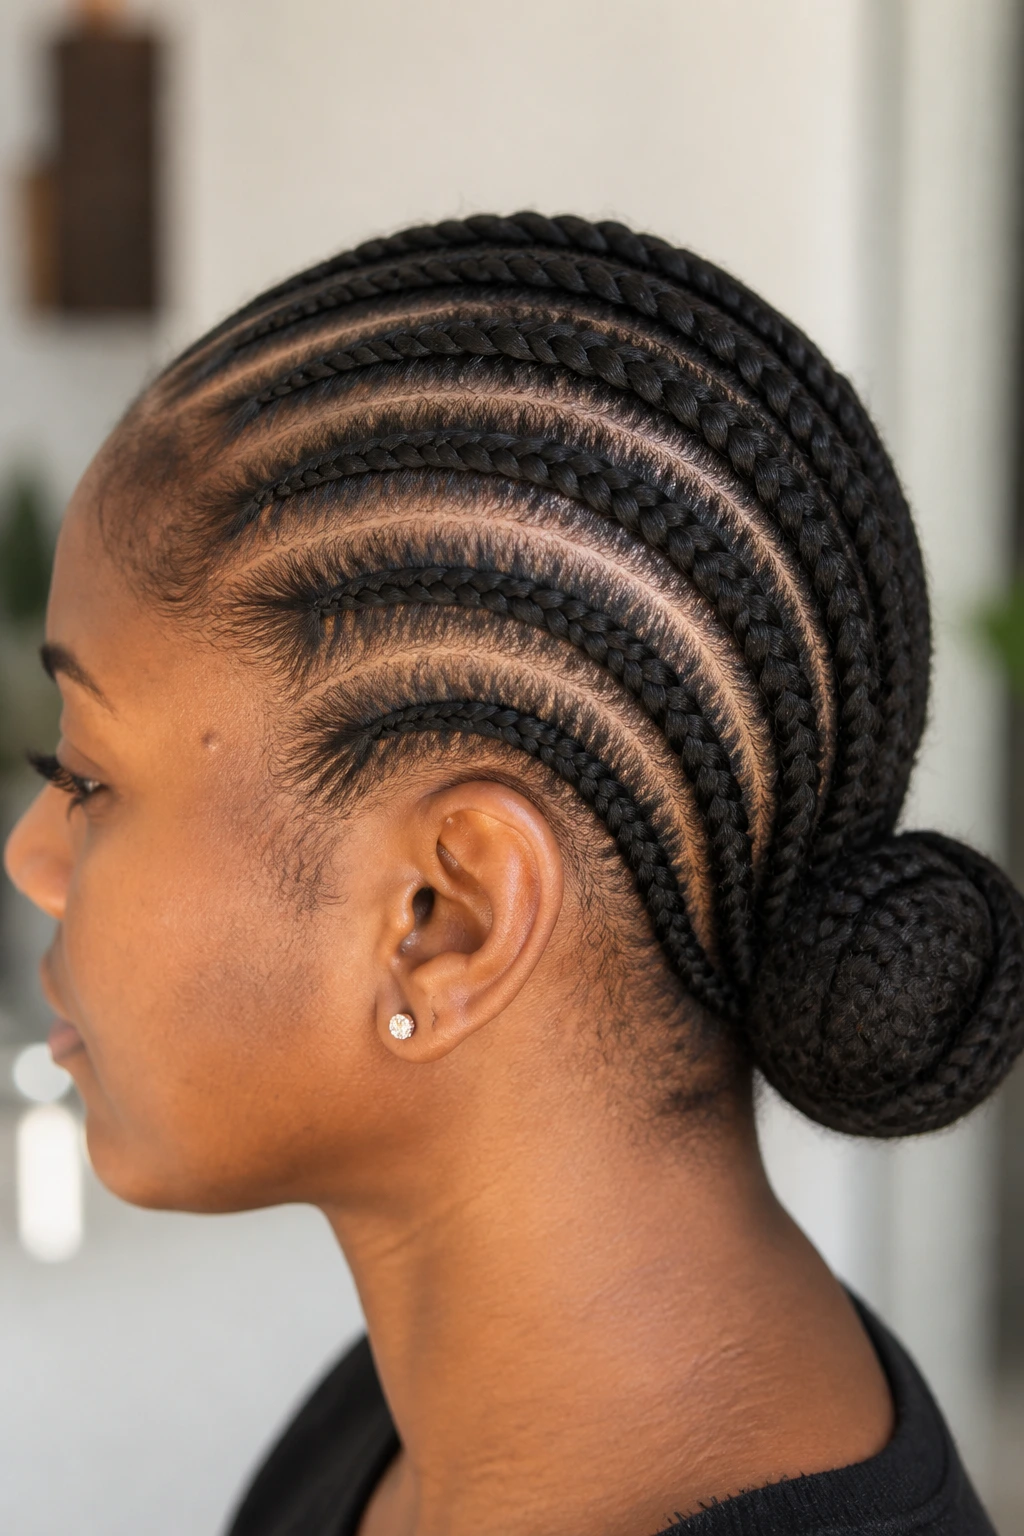
On mornings when your hands are still waking up, a cornrow bun is hard to beat. It keeps the hair close to the scalp, gets it off your neck, and gives you a clean finish without a lot of loose pieces to babysit.
A Simple Way to Build It
Start with 2, 4, or 6 straight-back cornrows, depending on how much hair you have and how much braiding you can handle. If you’re new to braiding, bigger rows are easier to control. Tiny rows look neat, but they ask for more precision and more time.
Once the braids reach the nape, gather the ends into a bun. A soft elastic helps, but bobby pins can do the rest. The bun doesn’t need to be huge. It just needs to stay put.
What to Watch For
- Keep the tension even from the hairline to the ends.
- Smooth the roots with a light gel, not a heavy coating.
- Wear the style with a scarf for a few minutes after setting.
- If your scalp feels sore, the rows were pulled too tight.
A cornrow bun gives you a neat profile and a strong hold. It’s the kind of style that looks more complicated than it is.
11. Halo Braid

A halo braid gives you that wrapped-around-the-head look without asking for a full head of tiny braids. Unlike styles that leave a lot of loose hair exposed, the braid moves around the perimeter and keeps the focus on shape.
This works best on stretched hair or hair that has a little length to grip. If your coils are very short, the braid can slip or puff out before you finish the loop. That’s not a failure. It just means the style wants a bit more length or a little help from pins.
The look is especially good when you want your face clear and your ends tucked away. It’s neat, practical, and a little dressier than a basic bun. I’d reach for it on days when I want to look put together without wearing a tight style.
A dab of gel along the part line makes the braid cleaner. Then pin the end under the crown and hide the seam. Easy enough. Fussy enough to look intentional.
12. Headband Tuck
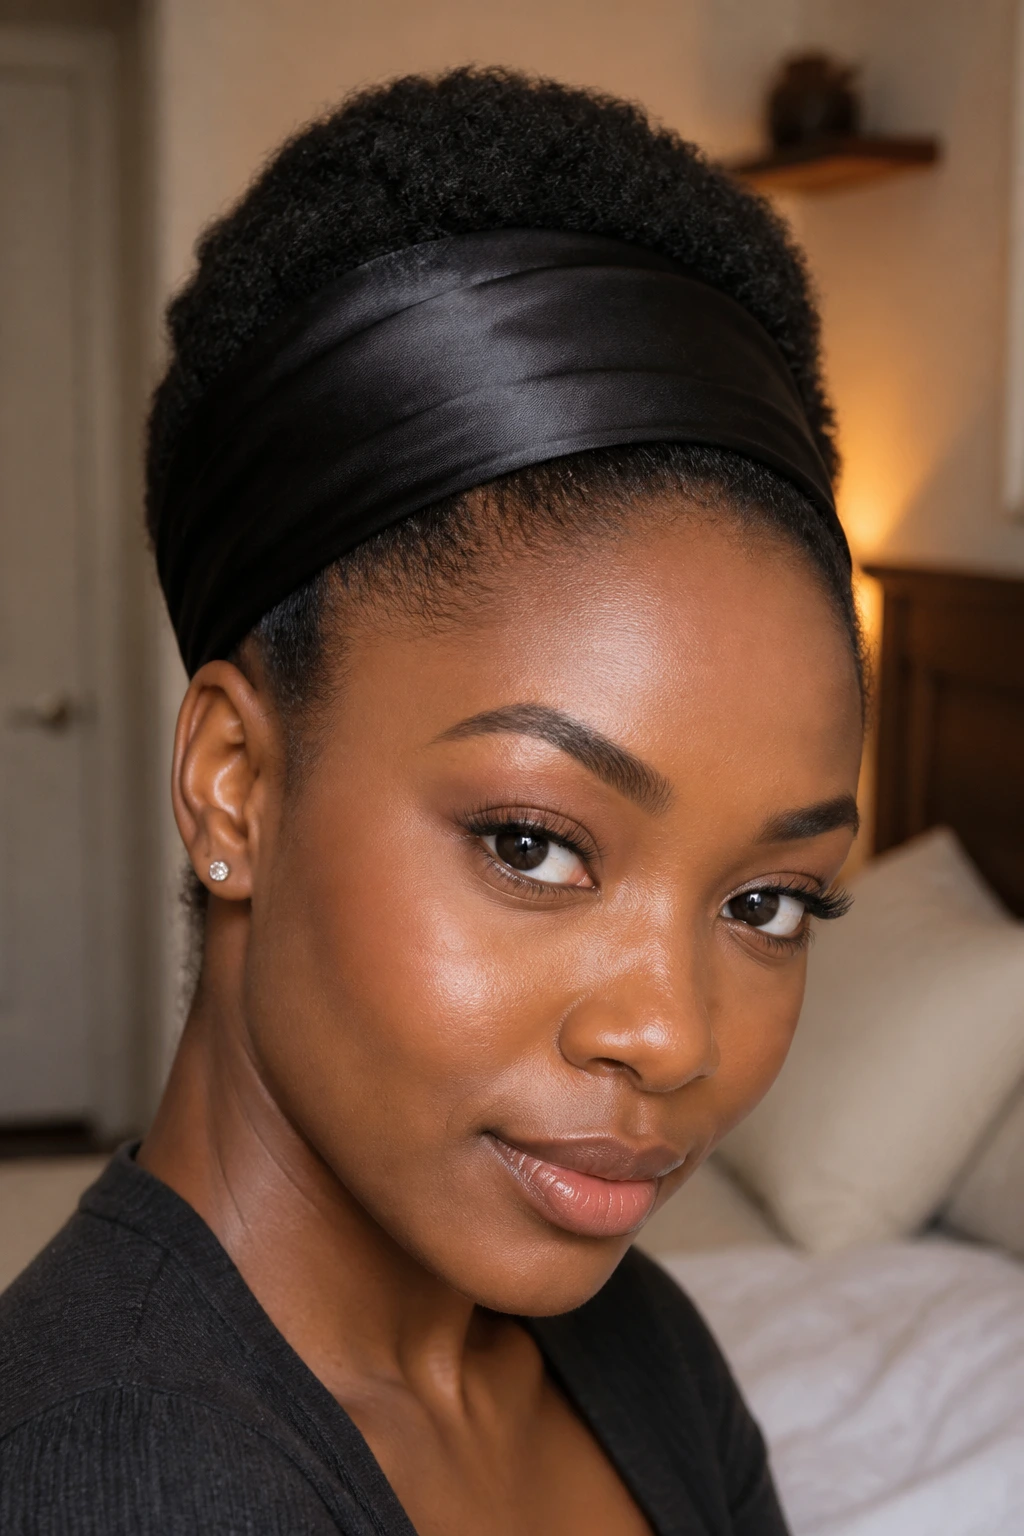
A stretchy headband can rescue a lot of hair days, and that’s not an exaggeration. The headband tuck is one of the simplest 4C natural hair styles for beginners because the band does half the work for you.
Why It’s So Useful
If your hair is stretched, old, or a little dry, this style gives it structure without forcing you to rewet or restyle everything. You place a wide headband over the front, then tuck the back length up and under the band until the shape looks smooth.
Quick Facts
- Best on shoulder-length hair or longer.
- A wide satin or jersey band works better than a thin elastic.
- Takes about 5 to 10 minutes once your hands know the motion.
- Looks cleaner when the ends are already stretched or lightly twisted.
The tuck can be as loose or as neat as you like. A soft, airy tuck feels casual. A tighter tuck, with the ends pinned under, looks more polished.
Do not use a band that bites into your scalp. If it leaves a deep mark, it’s too small.
13. Space Buns
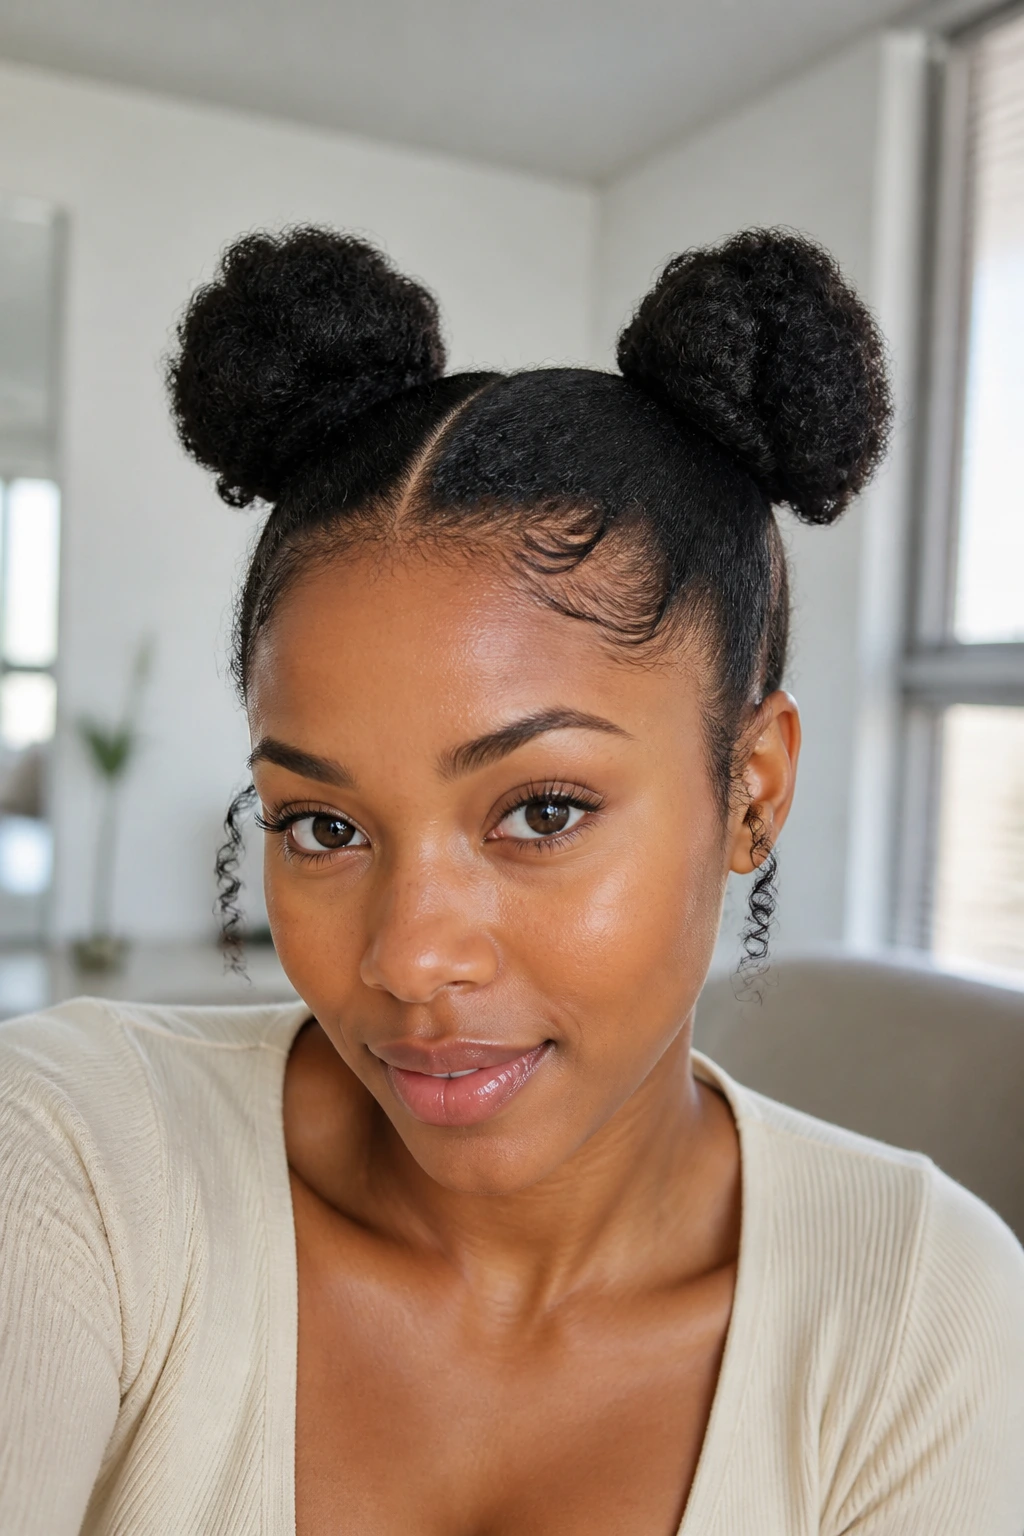
Two buns. That’s the whole idea, and it still works. Space buns give 4C hair a playful shape fast, especially when the hair is thick enough to build height on both sides of a center part.
The trick is not to over-slick the hair at the scalp. A little control is good. A helmet is not. You want enough hold to keep the parts clean, then enough softness in the buns so they don’t look flat or overworked.
This style lands well on medium-length hair, stretched hair, or hair that has been twisted first and then pinned into buns. If your hair is short, smaller buns work better than forcing oversized shapes.
I’d wear space buns when I want something light and easy to read from across the room. They’re casual, but they don’t look lazy. There’s a difference.
A middle part keeps the symmetry strong. A side part softens the whole look. Pick the one that fits your face shape and move on.
14. Frohawk with Side Puffs
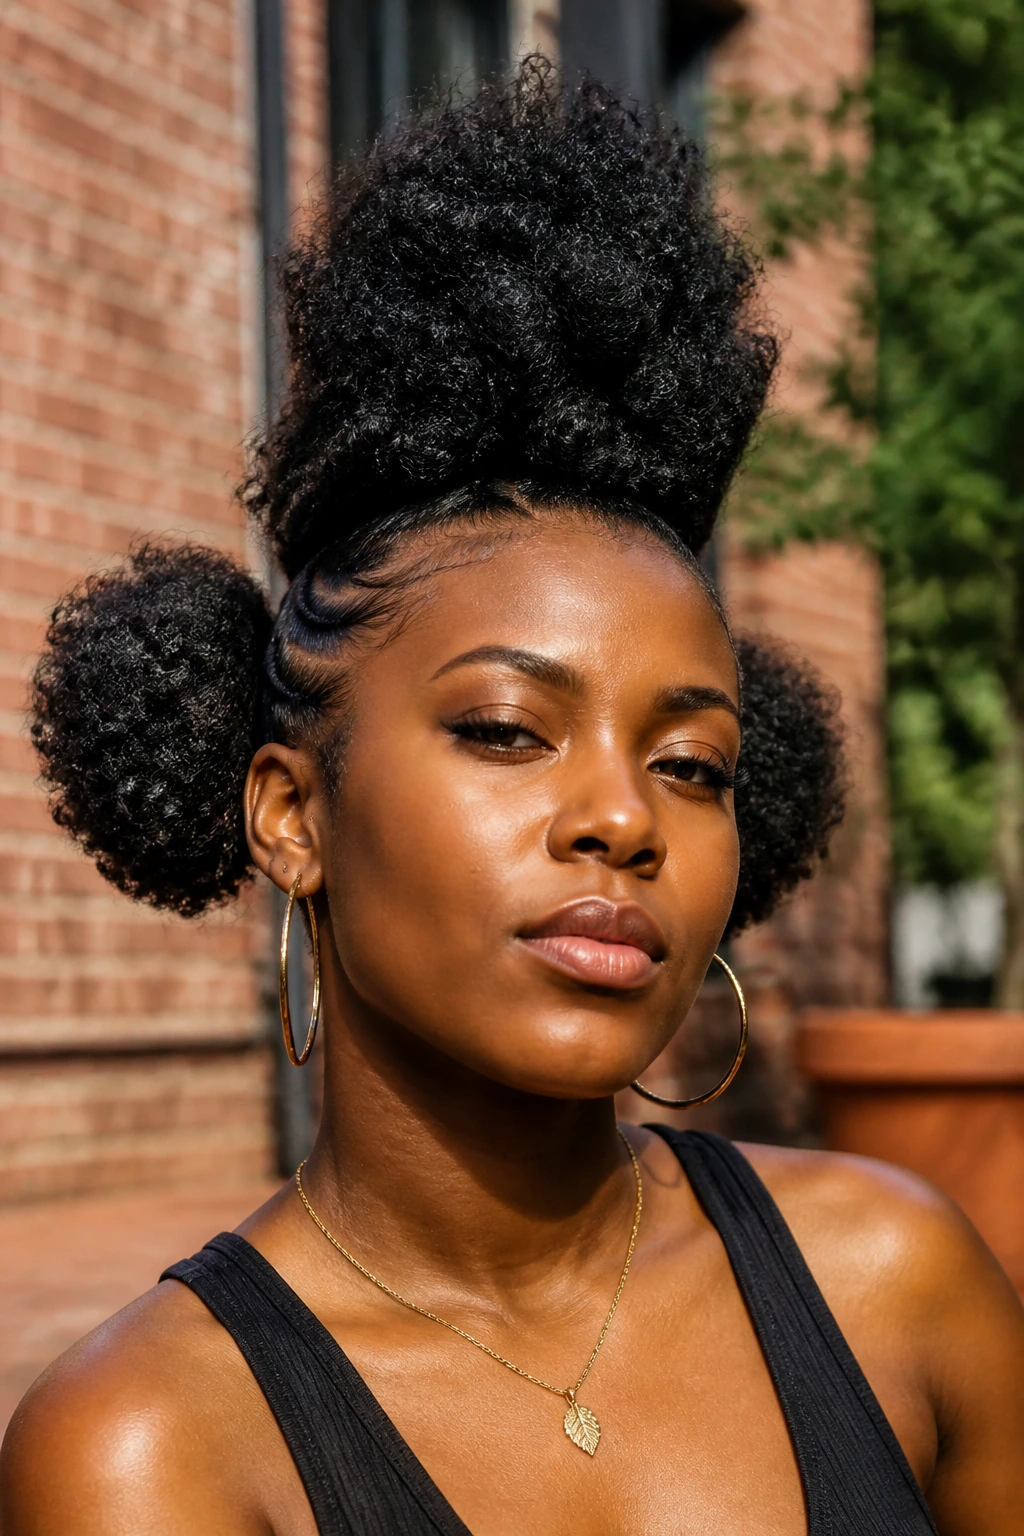
Want height without flattening the sides? A frohawk with side puffs hits that balance. The middle section stays big and full while the sides get tucked, twisted, or pinned so the whole style has a mohawk shape without the commitment of shaved sides.
What Makes It Work
The style depends on contrast. The center should stay lively and full, while the sides are contained. You can use flat twists, mini twists, or simple gathers on the sides, then leave the middle free or puffed out. That difference gives the shape its energy.
It’s also a good one for thick 4C hair because the volume becomes part of the design. You are not fighting bulk. You’re framing it.
How to Keep It Looking Clean
- Part the sides first so the center section is easy to shape.
- Use small bands or pins to secure the side sections.
- Fluff the middle only after the sides are set.
- Add small clips or cuffs if you want the style to look finished without more tension.
This is a style with personality. Not subtle. That’s the point.
15. Braided Ponytail
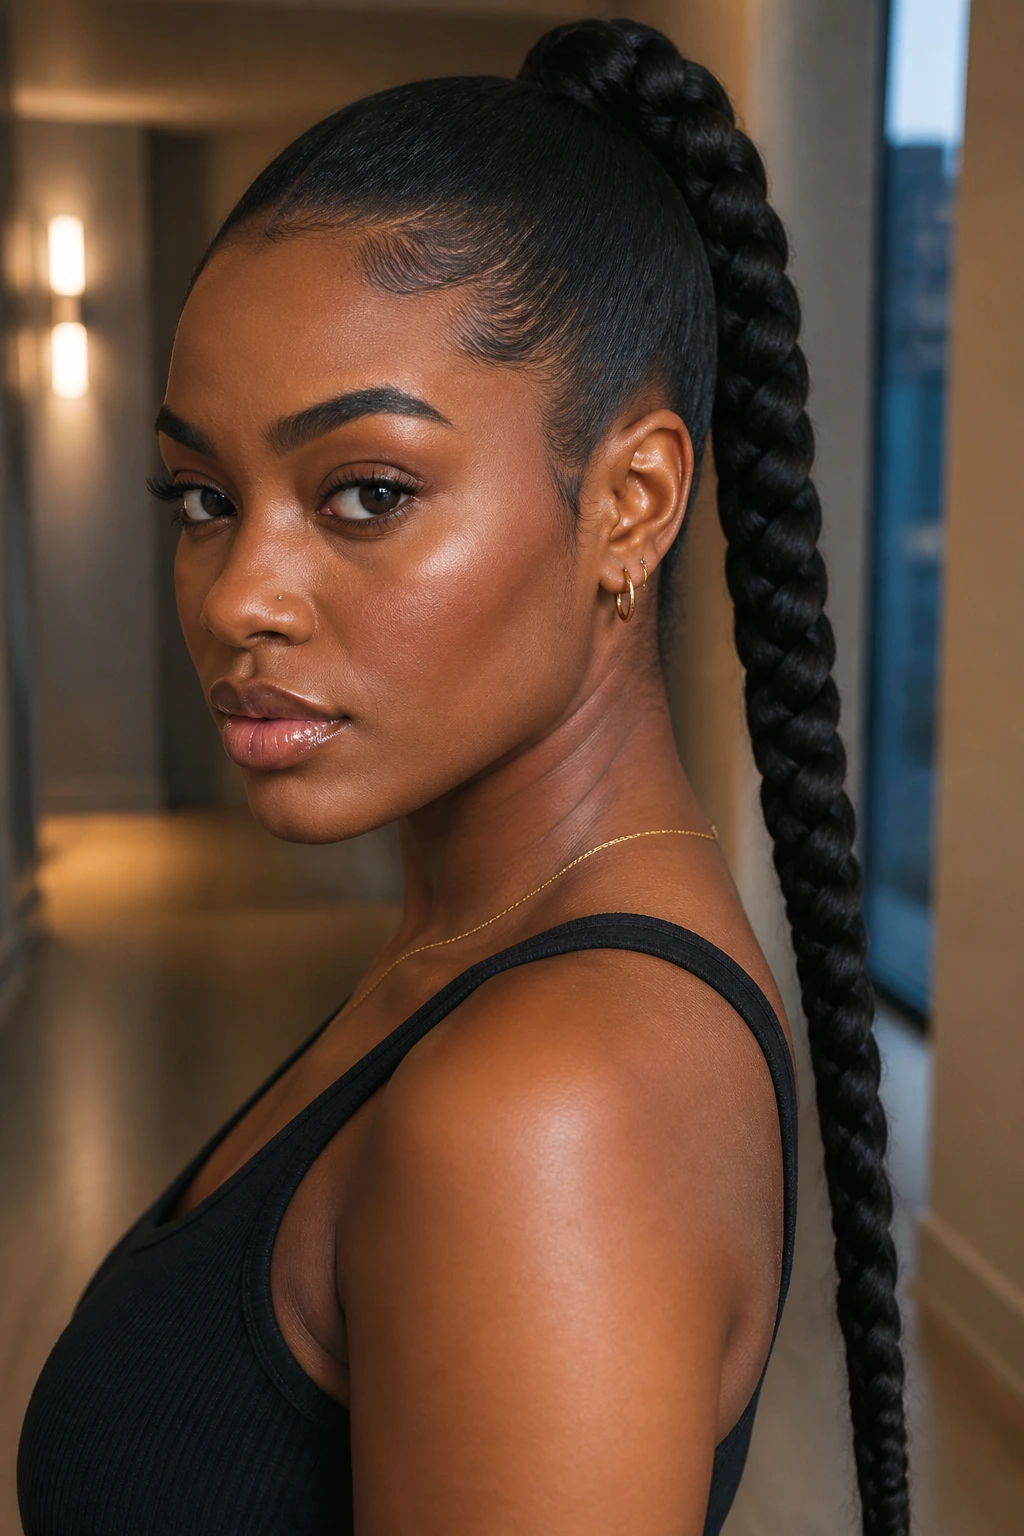
A braided ponytail is the kind of style that looks neat from the front and stays out of the way from behind. You gather the hair into one ponytail, then braid the length so the ends stay controlled instead of free and frizzy.
That makes it useful when your hair is long enough for a ponytail but you do not want to keep touching it all day. It’s also a good bridge style if you’re learning how to handle your hair and want something slightly more polished than a loose puff.
The part at the front matters. A clean middle part feels sharp. A deep side part feels softer. Once the ponytail is secure, you can smooth the base with a small amount of gel or cream, then braid the length without pulling too hard.
If the ends are dry, seal them first. Dry ends snag fast when you start braiding, and that makes the braid look rough. A little moisture goes a long way here.
16. Tucked Low Bun

A tucked low bun is one of those styles that quietly gets the job done. It keeps the hair close to the nape, looks tidy from every angle, and works on hair that is stretched, twisted, or simply ready to be put away.
How to Build It
Start by gathering the hair at the back of the head with your fingers or a soft brush. Smooth the surface only as much as you need, then twist or fold the length upward and tuck it under itself. Pins hold the shape. That’s the whole engine.
Small Details That Help
- Use 4 to 8 bobby pins, depending on length and thickness.
- Keep the bun low so the weight sits comfortably.
- Smooth the perimeter with a tiny bit of gel.
- Wrap the style with a scarf for 15 minutes if you want the base flatter.
The nice thing about this bun is that it doesn’t need a lot of decoration to look finished. A small clip, a silk scrunchie, or a side part can change the mood without changing the structure.
If your scalp feels tight after styling, loosen it. A bun should sit. It should not grip.
17. Side-Part Afro with Clips

A side-part afro with clips is proof that you do not need a complicated style to look put together. Sometimes all 4C hair needs is shape, a clean part, and one or two clips that say, “Yes, I meant this.”
This works especially well on short to medium hair. You pick the roots lightly for lift, make a clean side part, and let the hair fall where it wants. Then place clips on the flatter side or just above the ear to anchor the shape.
The beauty of this style is that it leaves room for texture. You are not forcing every coil to lie down. You are framing the fro, which feels a lot more honest and a lot less stiff.
I like this when the hair is fresh, moisturized, and not begging for a full set of twists. It is quick, and it still has shape. A small pick at the roots helps. A heavy hand does not.
If you want a little polish, tuck one side behind the ear and leave the other side fuller. That tiny imbalance looks good on purpose.
18. Jumbo Rope Twists

Jumbo rope twists are fast, sturdy, and much less intimidating than small braids. Two large sections are twisted around each other, which creates a thick rope-like look that reads as intentional even when you do it in a hurry.
The size is part of the appeal. Bigger twists mean fewer sections, less parting, and less time in the chair. They also create a fuller shape, which looks good on dense 4C hair. If your hands are still learning, this is a friendlier entry point than tiny box braids.
Why Beginners Like Them
- They are quicker than mini twists.
- They sit neatly on thick hair.
- They can be worn down, pinned up, or tucked into a bun.
- They stretch the hair without making it feel overloaded.
Use a little cream for slip, then twist each pair tightly enough to hold but not so tightly that the roots hurt. The style looks best when the sections are equal in size. Uneven rope twists can unravel early and look lopsided.
Jumbo twists also make a good base for other styles later. That is a nice bonus.
19. Two Cornrows Into a Bun
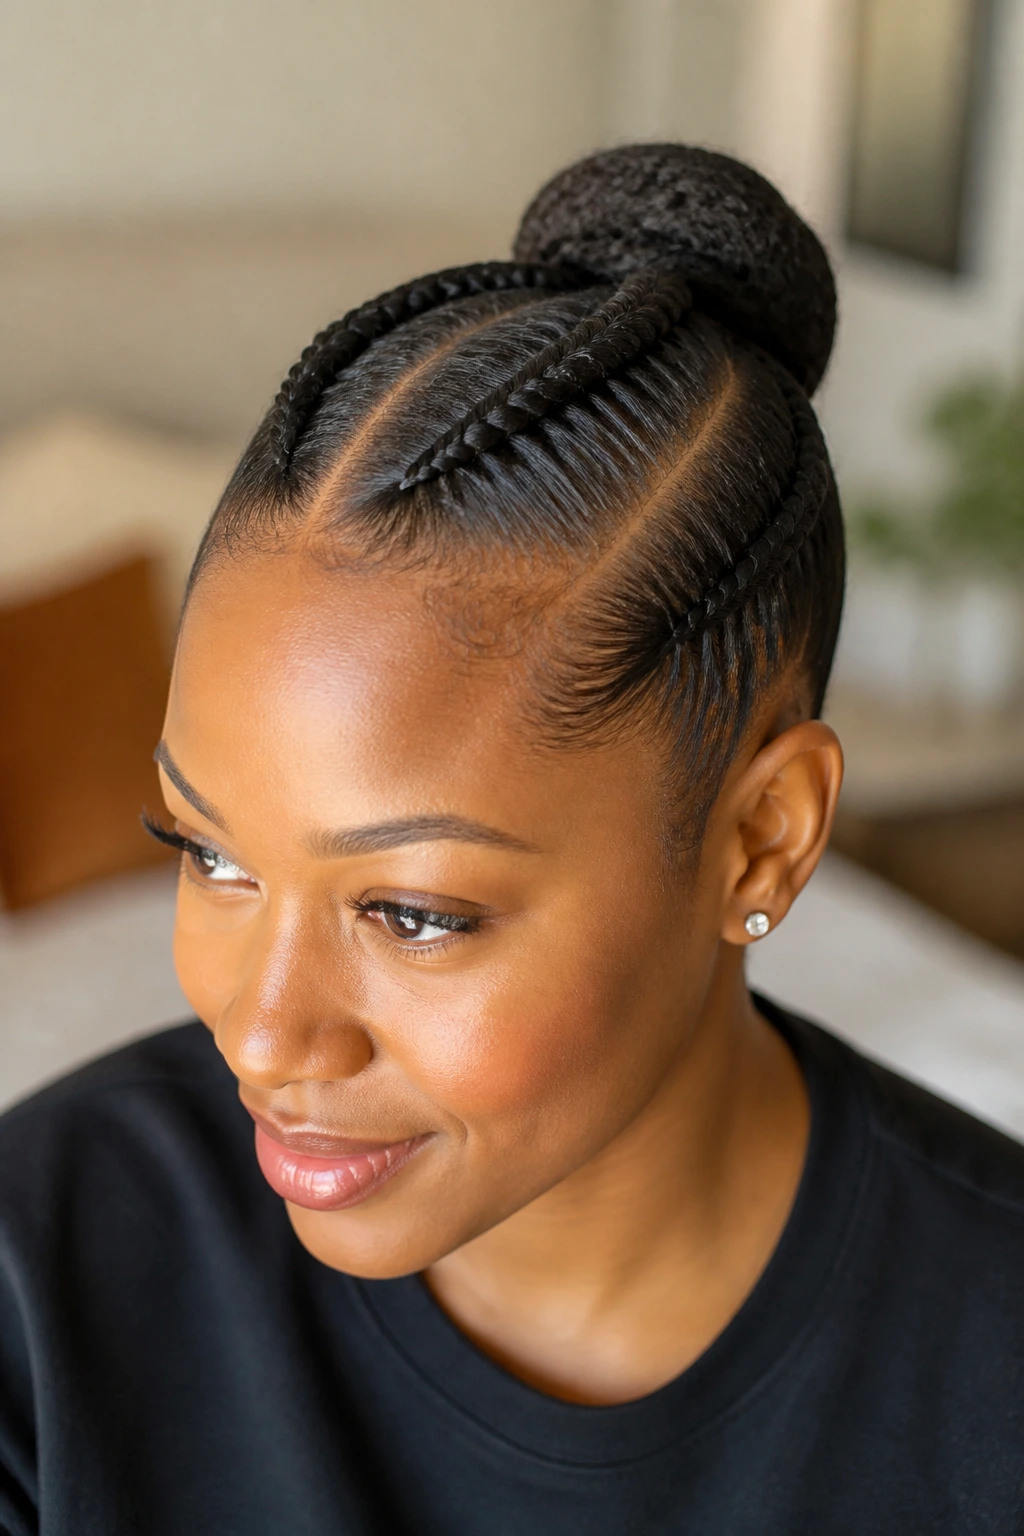
Can just two braids really count as a style? Yes. When they are clean, centered, and pulled into a bun, two cornrows into a bun can look sleek without turning your whole morning into a project.
This one is useful when you want your hair fully off your face and neck but still want the look to feel neat. Two wide cornrows run from the front hairline back toward the crown or nape, then the loose ends gather into a bun. Simple. Straightforward. Reliable.
The trick is keeping the sections even so one braid doesn’t look thicker than the other. A sharp middle part helps, but you can also angle the braids slightly if your hairline is uneven or your growth pattern fights a perfect center.
If you’re new to braiding, this is a solid practice style. The rows are big enough that you can see what your hands are doing. You learn faster when the braid is not microscopic.
A soft hold gel and a scarf for a few minutes after styling usually improve the finish. Not magic. Just good setup.
20. Half-Up Half-Down Puff

A half-up half-down puff gives you the best of both moods: some hair lifted, some hair free. It’s a nice compromise when you want volume near the top but still want to show off the length or texture on the bottom.
This style works well on 4C hair because shrinkage becomes part of the look. The top puff can sit high and full, while the bottom half stays loose, stretched, braided, or left in its natural shape. That mix keeps the style from feeling heavy.
I like this one for days when a full updo feels too strict and a full fro feels too casual. It lands somewhere in the middle. That middle ground is useful.
You can make the top section as clean or as loose as you like. A center part gives it shape. A side part softens it. If the lower half gets too puffy, a few large twists or a light stretch overnight can calm it down without changing the whole style.
It’s also one of the easiest ways to ease into styling your own 4C hair. You get shape, movement, and enough room to make small mistakes without the whole look falling apart. That matters more than people admit.
Some styles are about control. This one is about balance. And sometimes that’s the better move.
