



Long hair changes the braid game. Braid hairstyles for long hair can look polished, but they can also slip, puff out, or pull at the scalp if you rush them.
That’s the part people leave out. A braid on waist-length hair is not just a braid on bigger canvas; it behaves differently, especially if your hair is very slippery, very layered, or very thick at the ends. Second-day hair usually grips better. Freshly washed hair can be a pain.
Some styles below are fast enough for school runs and office mornings. Others take a few extra pins, a tail comb, or five quiet minutes you may not feel like giving. Worth it, though. Long hair shows every weave, every curve, every little choice, so the right braid can look far more intentional than loose hair ever could.
1. Classic Side Braid for Long Hair

A classic side braid is the easy yes. It works when your hair is clean, messy, wavy, pin-straight, or somewhere in between, and it looks especially good on long hair because the length gives the braid weight.
Pull all your hair over one shoulder, smooth the top with your fingers or a soft brush, and start the braid just below the ear. Keep the first few passes snug, then relax your hands a little as you move down. That keeps the braid from looking stiff.
A tiny bit of texture spray at the roots helps a lot. If your hair is slippery, the braid will start to sag before lunch. If it’s layered, leave a few short face pieces out on purpose. That little bit of softness keeps the style from looking too school-photo neat.
2. French Braid Down the Back
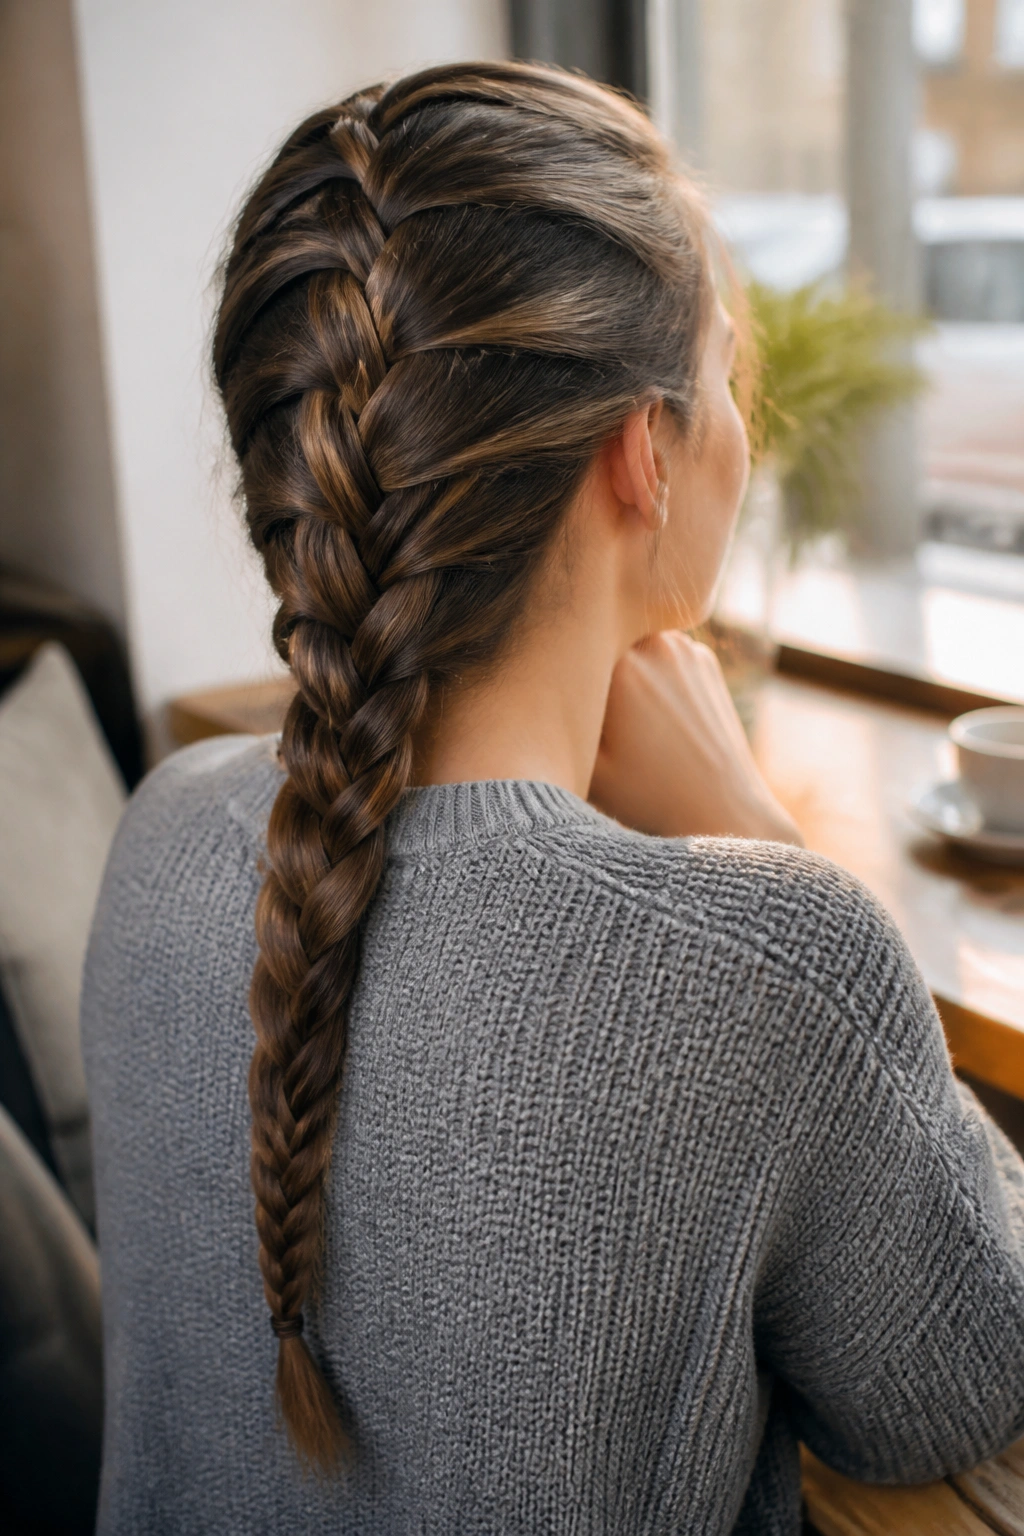
Need a braid that stays put through a long day? A French braid is still one of the best answers. It pulls the hair in at the scalp, which means less shifting and less frizz around the crown.
Start at the top center of the head, divide into three sections, and add a bit of hair from each side as you go downward. Keep the part line clean. Not perfect. Clean. There’s a difference, and long hair shows it.
This style shines when you want your hair secure without going full ponytail. It’s tidy, but not boring. If you stop at the nape and finish with a regular braid, the ends can swing freely and still look polished.
3. Dutch Braid with Raised Texture
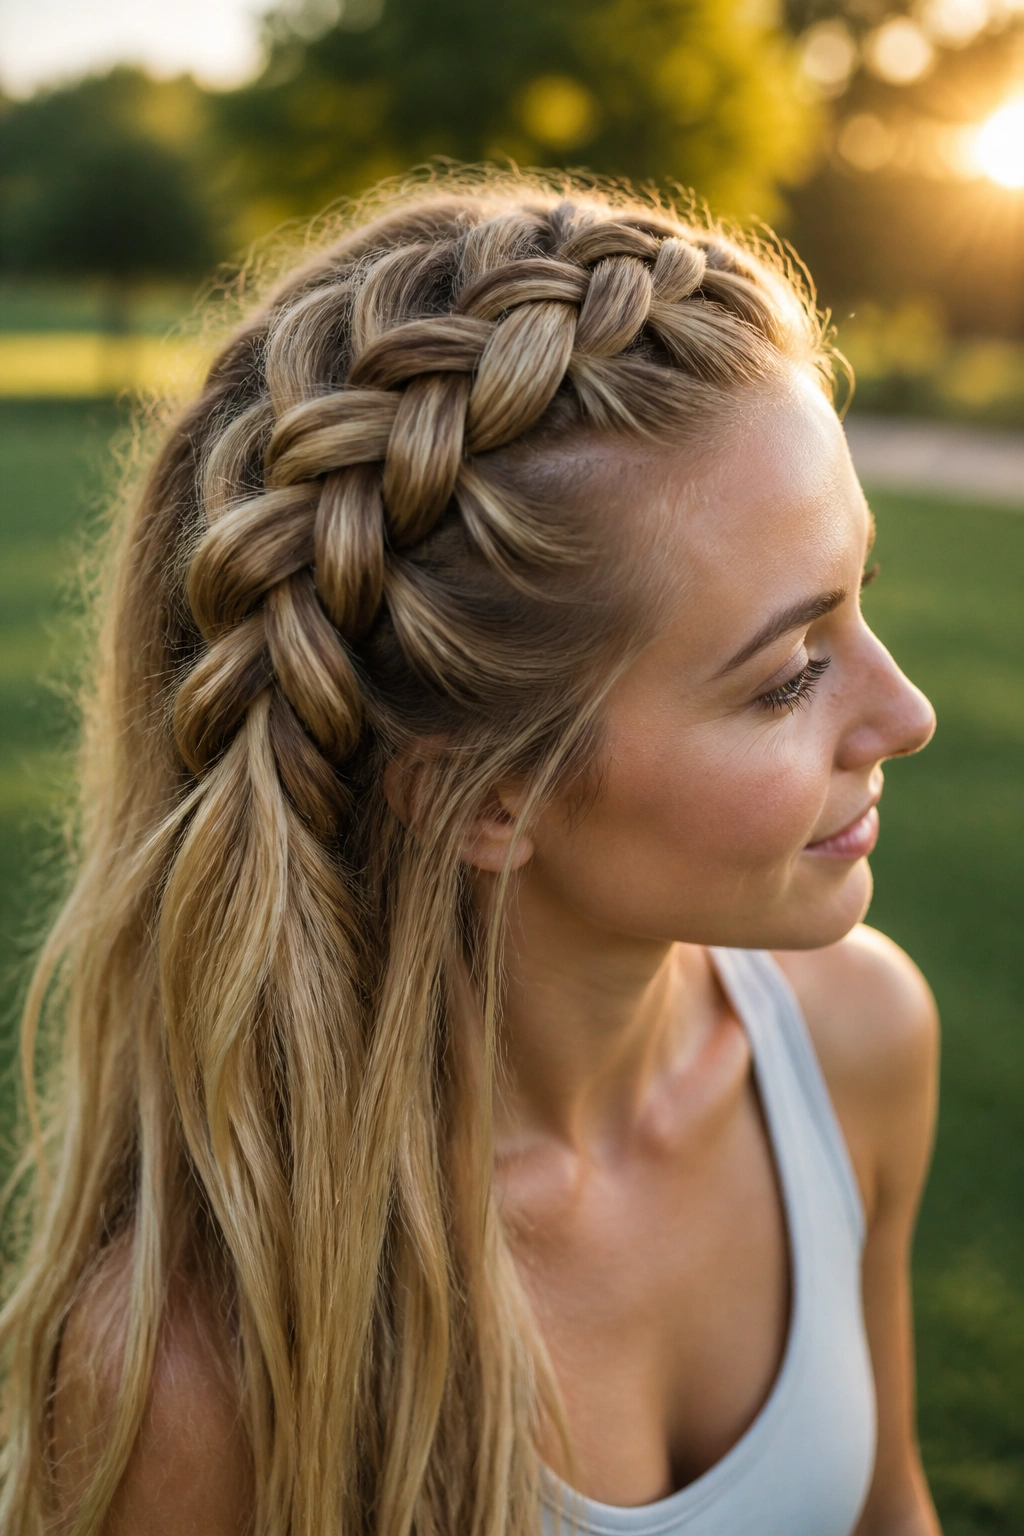
A Dutch braid gives you that raised, almost rope-like look that sits on top of the hair instead of sinking into it. On long hair, that raised pattern makes the braid read more clearly from a distance.
The trick is simple: cross the sections under instead of over. That one change flips the braid outward. It also creates a fuller shape, which is why this style works well on finer hair that needs a little visual bulk.
After you tie it off, loosen the sides with your fingers. Don’t yank. Just pinch and widen the braid bit by bit. The shape should look soft and full, not shredded.
4. Fishtail Braid
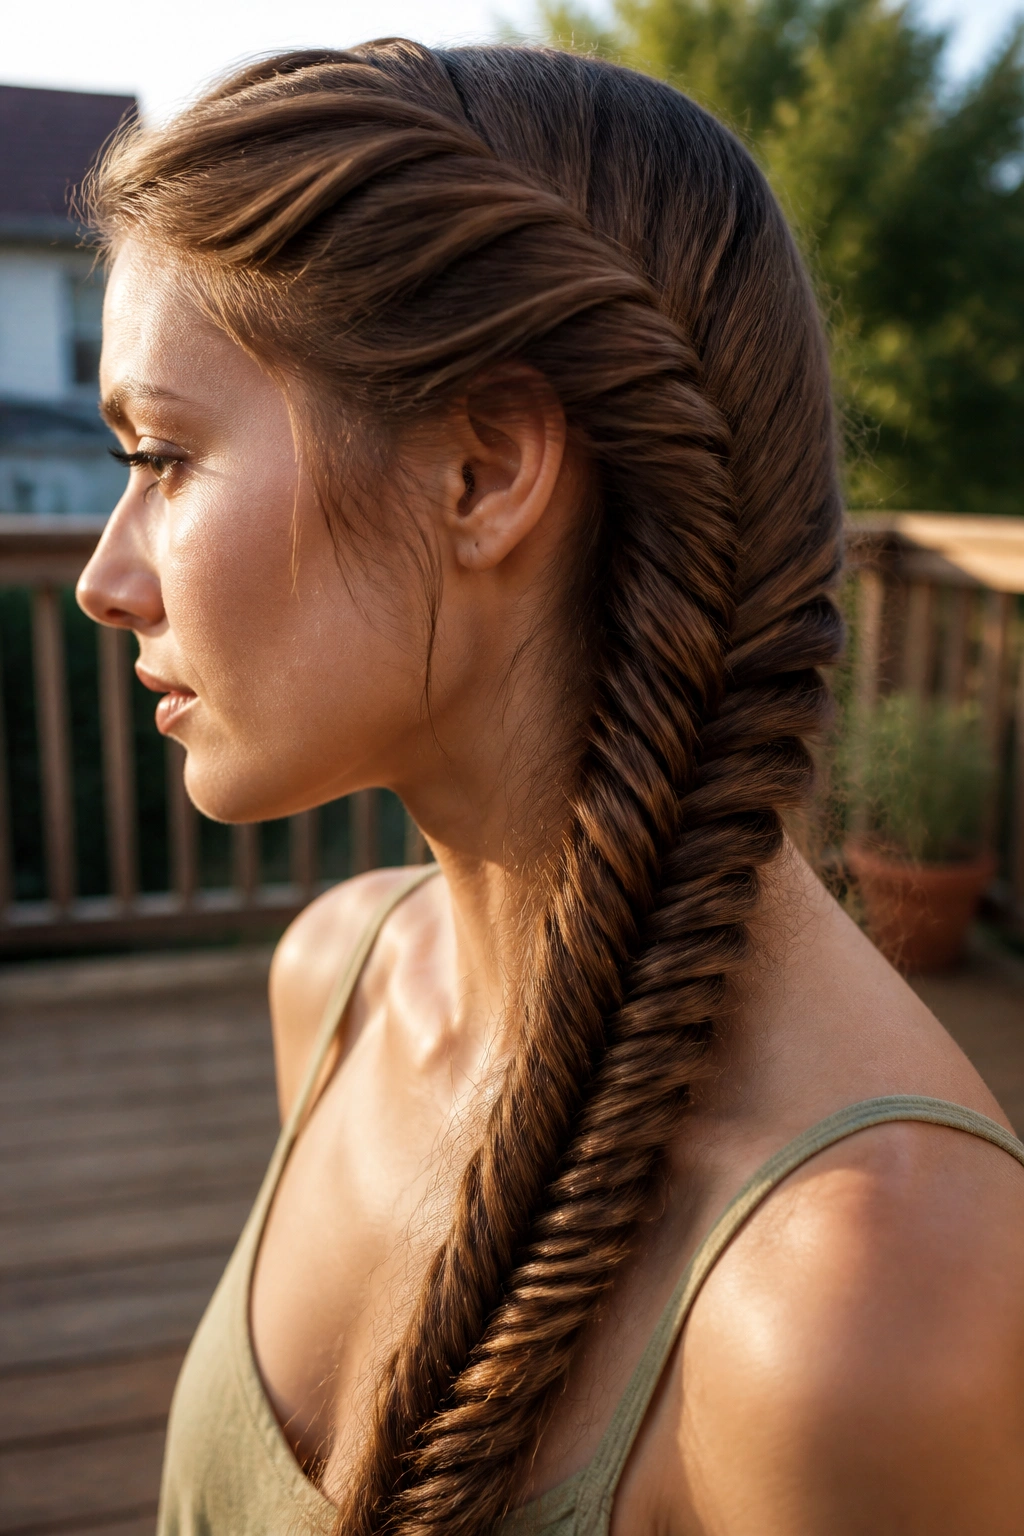
A fishtail braid looks intricate, but it’s built from two sections, not three. That makes it a little easier to track than people expect, though your fingers do need patience.
Split the hair into two large sections. Take a thin piece from the outside of the left section, cross it into the right, then do the same from the right side back to the left. Keep those pieces small if you want a tight pattern; make them thicker if you want a looser, chunkier braid.
What makes it work on long hair
- The length shows off the tiny woven pattern.
- Smooth hair gives the cleanest look.
- Wavy hair makes it softer and less fussy.
- A light serum on the ends keeps the tail from fraying.
Best move: start with brushed, slightly textured hair. Too silky, and the sections slip all over the place.
5. Milkmaid Braids
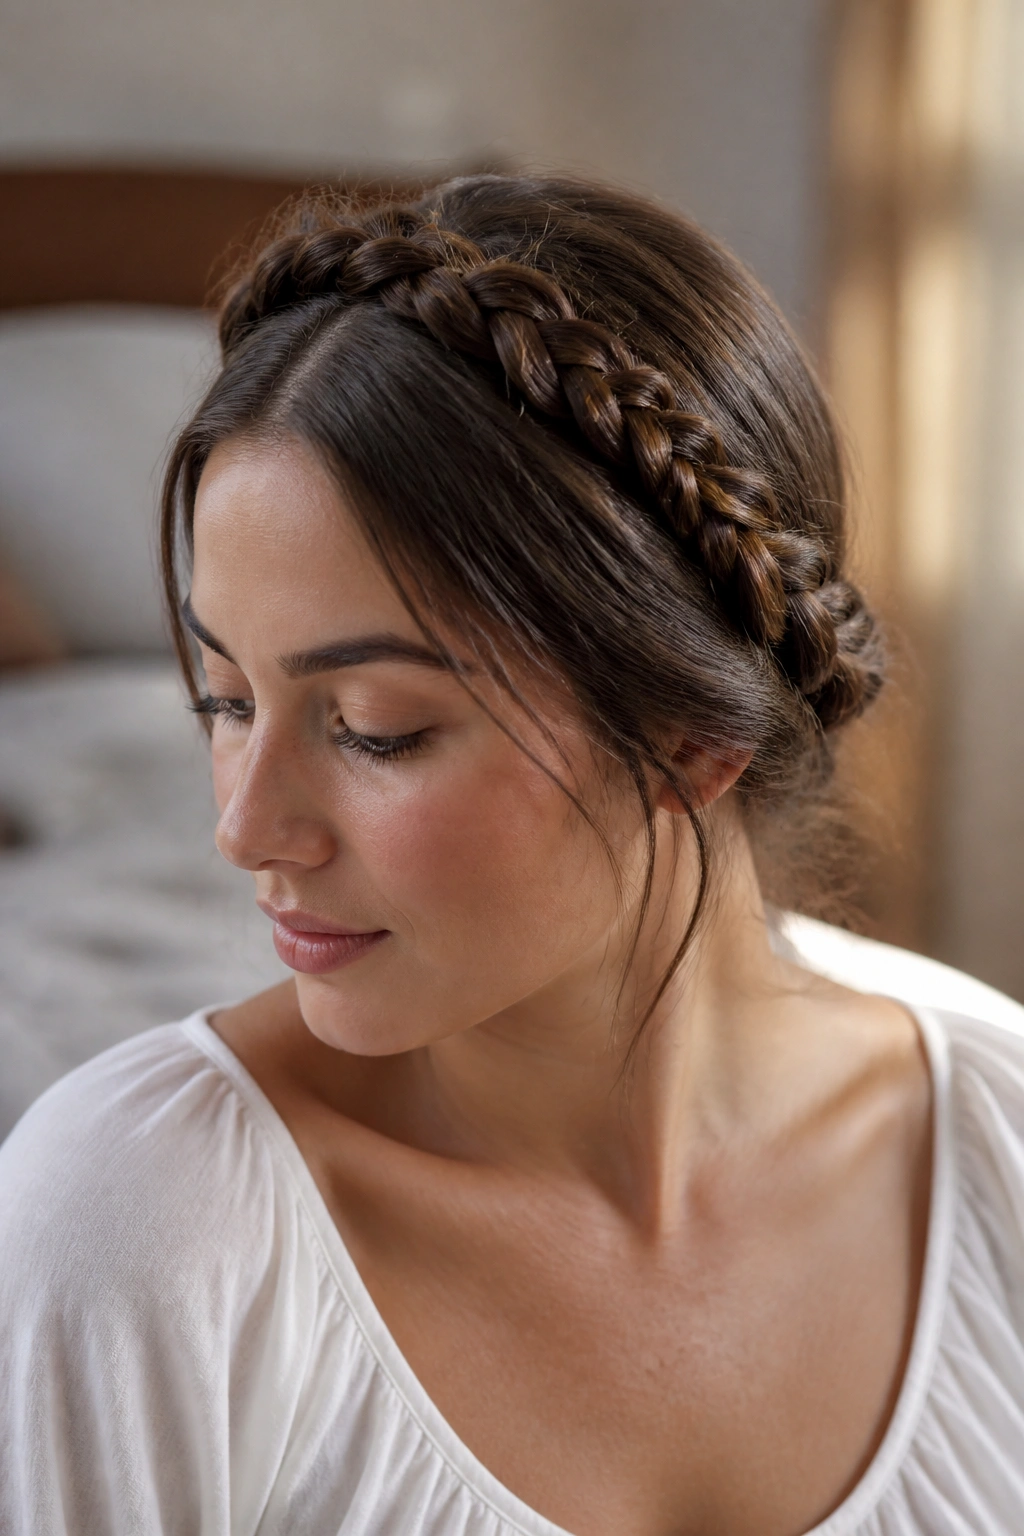
Two braids pinned across the crown give long hair a soft, old-fashioned feel that I still think looks better than it has any right to. It’s the kind of style that looks harder than it is.
Make two low braids, one on each side, then bring them up and across the top of the head like a headband. Pin them in place with bobby pins that match your hair color. Tuck the ends underneath so nothing sticks out.
This works especially well when you want your hair up but not tight. It’s also kind to the neckline, which matters more than people admit. If the braids are too thick to wrap easily, loosen them first and then pin. That saves you from the awkward “too bulky for the crown” problem.
6. Waterfall Braid

I reach for a waterfall braid when I want hair down but not plain. It keeps the length loose while adding a little structure through the top section, which is a nice trade-off on long hair.
You braid across the head, but every time you drop a strand, you let it fall and replace it with a new section from above. That falling strand creates the “waterfall” look. The loose pieces can stay straight, wave softly, or curl at the ends.
This braid looks best when the hair has some movement. Bone-straight hair can make the pattern feel flat, so a quick bend with a curling wand helps. Not mandatory. Just useful.
7. Crown Braid
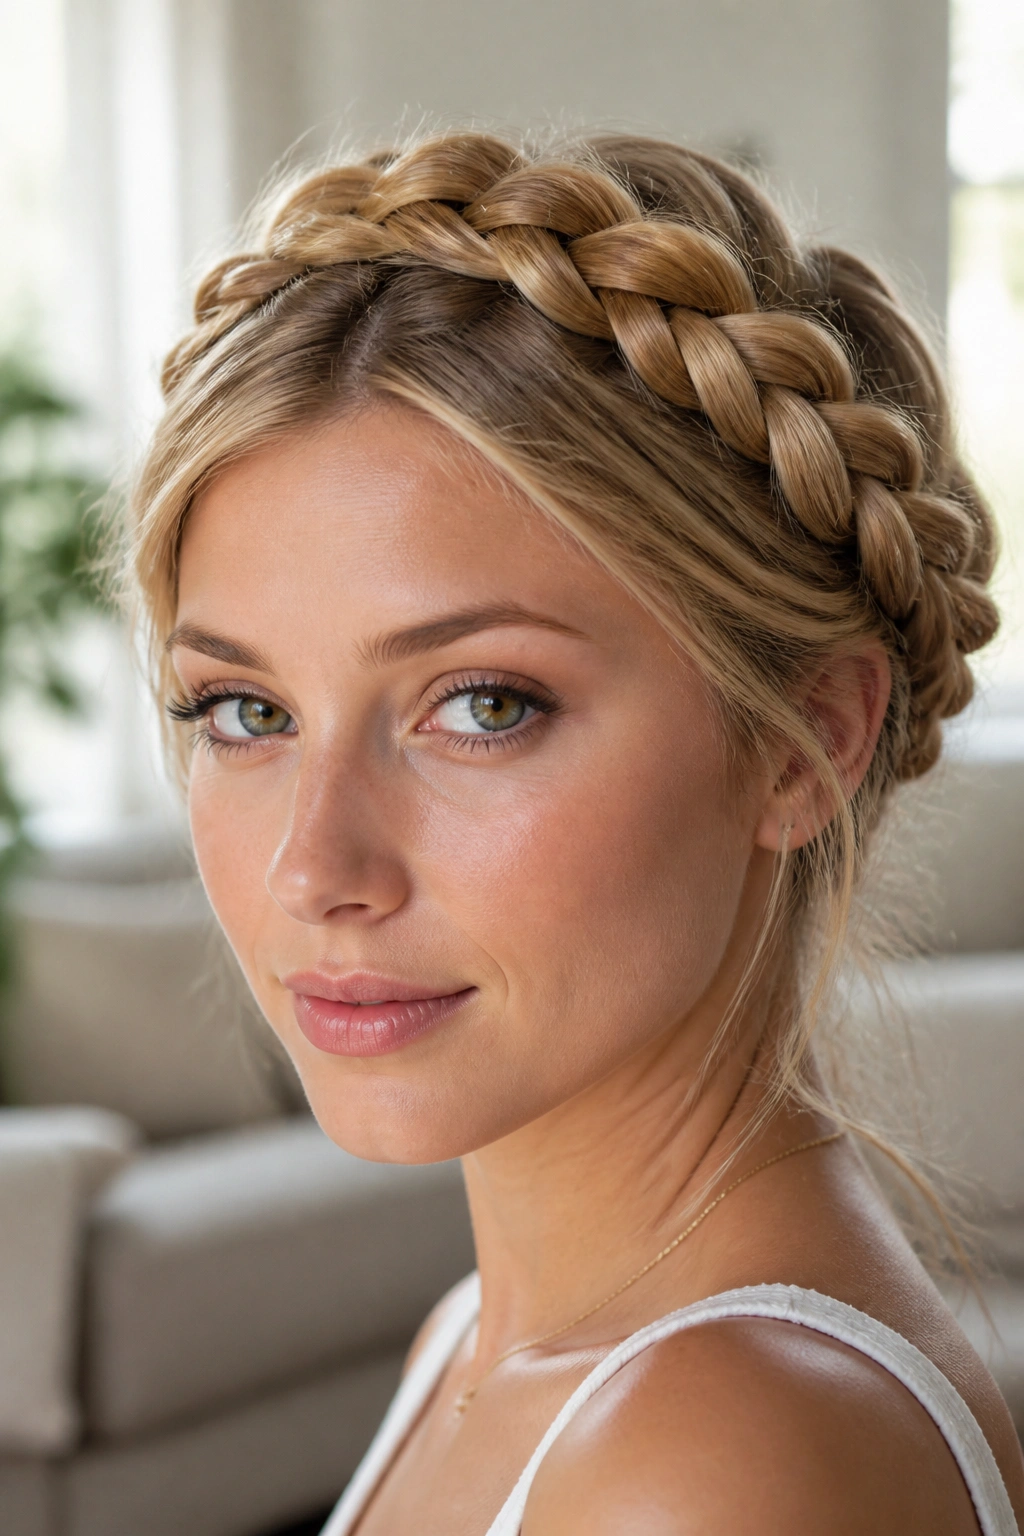
A crown braid wraps around the hairline and makes long hair feel dressed up fast. It’s one of those styles that does a lot without needing a lot of decoration.
You can braid around the head as a full halo or start with two side braids and pin them together. Either way, the shape matters more than the exact method. Keep the braid close to the head, and use pins every few inches so it doesn’t slide.
The style works best when the roots are not too slippery. A little dry shampoo at the crown can give the hair enough grip to hold the braid where you want it. If the ends are short or layered, hide them with a tucked-under pin rather than trying to force them into the braid.
8. Boxer Braids
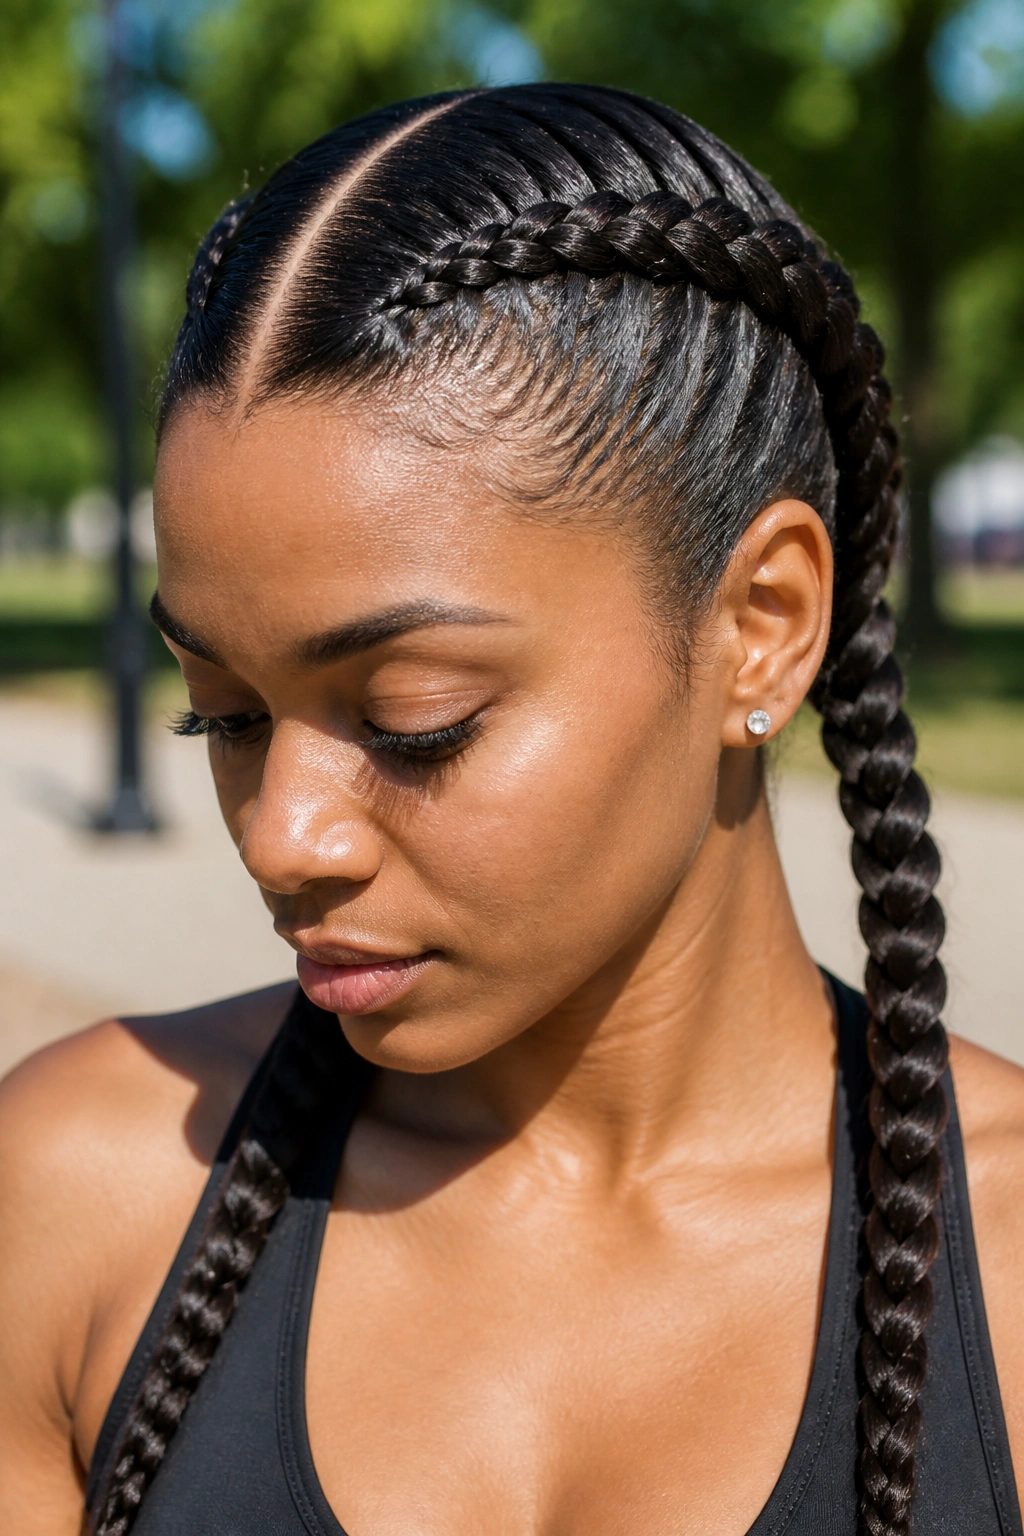
Why do boxer braids keep showing up in gym bags, travel days, and long weekends? Because they stay in place. That’s the whole story.
These are two tight Dutch braids, usually parted straight down the middle. They keep long hair off the face, off the neck, and away from backpack straps, which is more useful than it sounds until you’ve worn them for six hours.
A thin line of gel or edge control at the part helps the style look crisp. Not greasy. Crisp. If your hair is very thick, keep the sections even from the start so one braid doesn’t end up fatter than the other. That imbalance is obvious on long hair.
9. Bubble Braid Ponytail

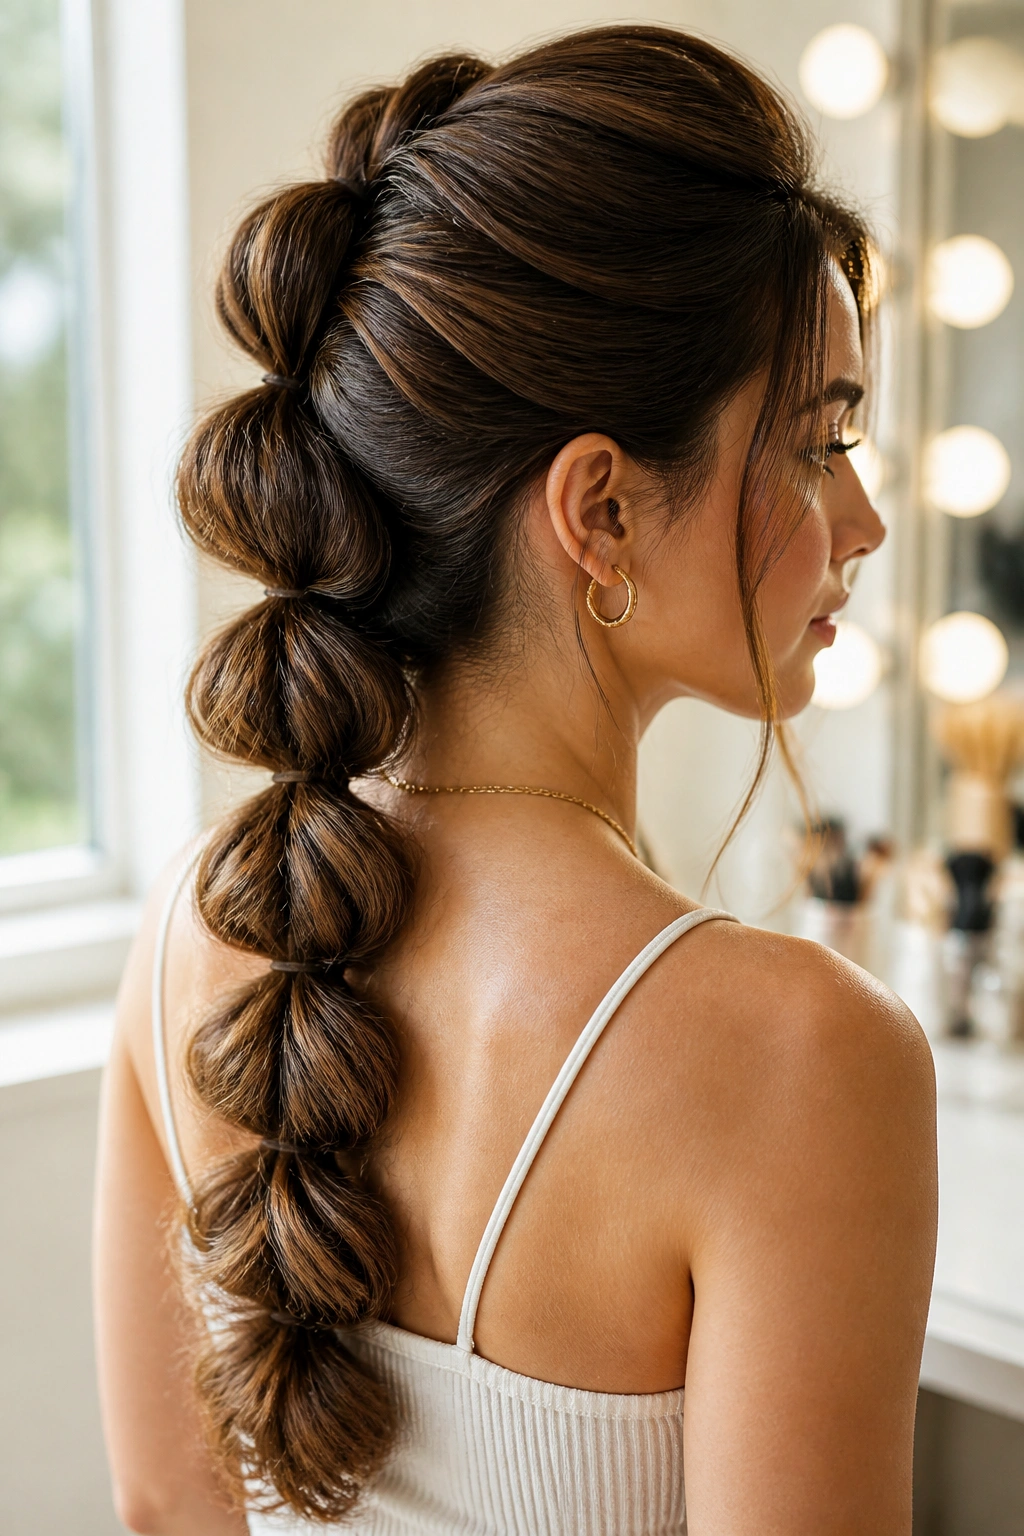
A bubble braid gives you drama without much handwork. That’s why it’s a favorite when your hair is long enough to make each bubble look full and round.
Gather the hair into a ponytail, then add clear elastics every 2 to 3 inches down the length. After each elastic, gently pull the hair between the bands outward to puff it into a bubble. If you want a softer look, tug only a little. If you want bigger shape, tug more.
Quick details that matter
- Use 4 to 6 elastics for mid-back length hair.
- Hide each elastic with a tiny wrapped strand if you want a cleaner finish.
- Works well on thick hair and wavy hair.
- Looks fuller if you backcomb the ponytail lightly first.
This one is easy to overdo. Stop before the bubbles start looking lumpy.
10. Pull-Through Braid
A pull-through braid is not a braid in the strict sense. I still love it. It gives long hair a huge, plump braid shape without requiring the same finger choreography as a classic plait.
You build it from stacked ponytails. Each new ponytail gets split and folded around the one below, creating that braided look. It’s a smart option if your arms get tired fast or if your hair is so thick that traditional braiding feels like wrestling a rope.
The nice part is the volume. Long hair makes this style look rich and full, especially if the ends are layered. Use small clear elastics, and keep a tail comb nearby so the sections stay even. Uneven pieces show more than you’d expect.
11. Rope Braid

A rope braid has a twisted, springy look that feels neat and slightly sporty. It’s one of the cleanest styles you can do on long hair when you want something simple but not plain.
Divide the hair into two sections, twist both in the same direction, then wrap them around each other in the opposite direction. That counter-twist is what holds the shape. Skip the second direction and the whole thing falls apart.
This braid behaves well on smooth hair and on hair that tends to frizz at the ends. Add a tiny bit of cream to the palms first. Not much. Too much product makes the twists collapse into each other and turns the braid heavy.
12. Four-Strand Braid
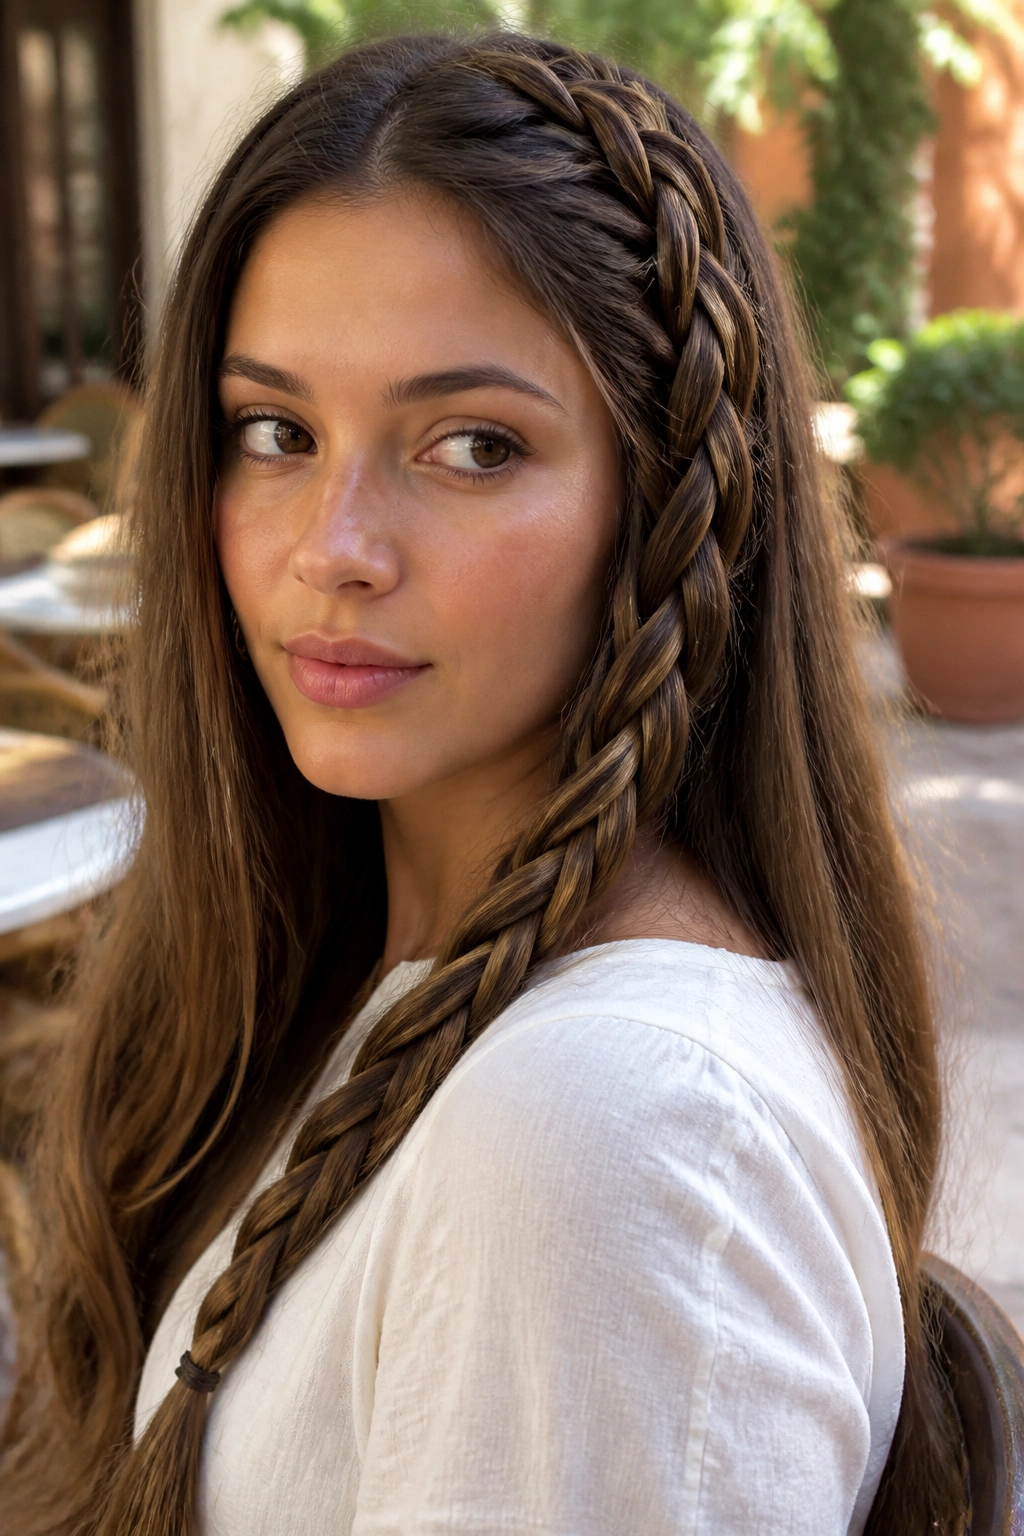
The four-strand braid looks like a ribbon woven through itself. The pattern is tighter and flatter than a three-strand braid, which is part of the appeal on long hair.
Once you get the rhythm, it clicks. Cross one strand over, then tuck another under, and keep the pattern steady. The first few times, clip the loose sections out of the way so your fingers don’t lose track. That tiny bit of preparation saves a lot of swearing.
How to keep your place
- Name the strands in your head from left to right.
- Clip the two center pieces together if your hands need a pause.
- Work on hair that has some grip, not freshly oiled lengths.
- Finish with a small elastic and smooth the tail.
This braid is worth learning if you like styles that make people stare twice.
13. Five-Strand Braid
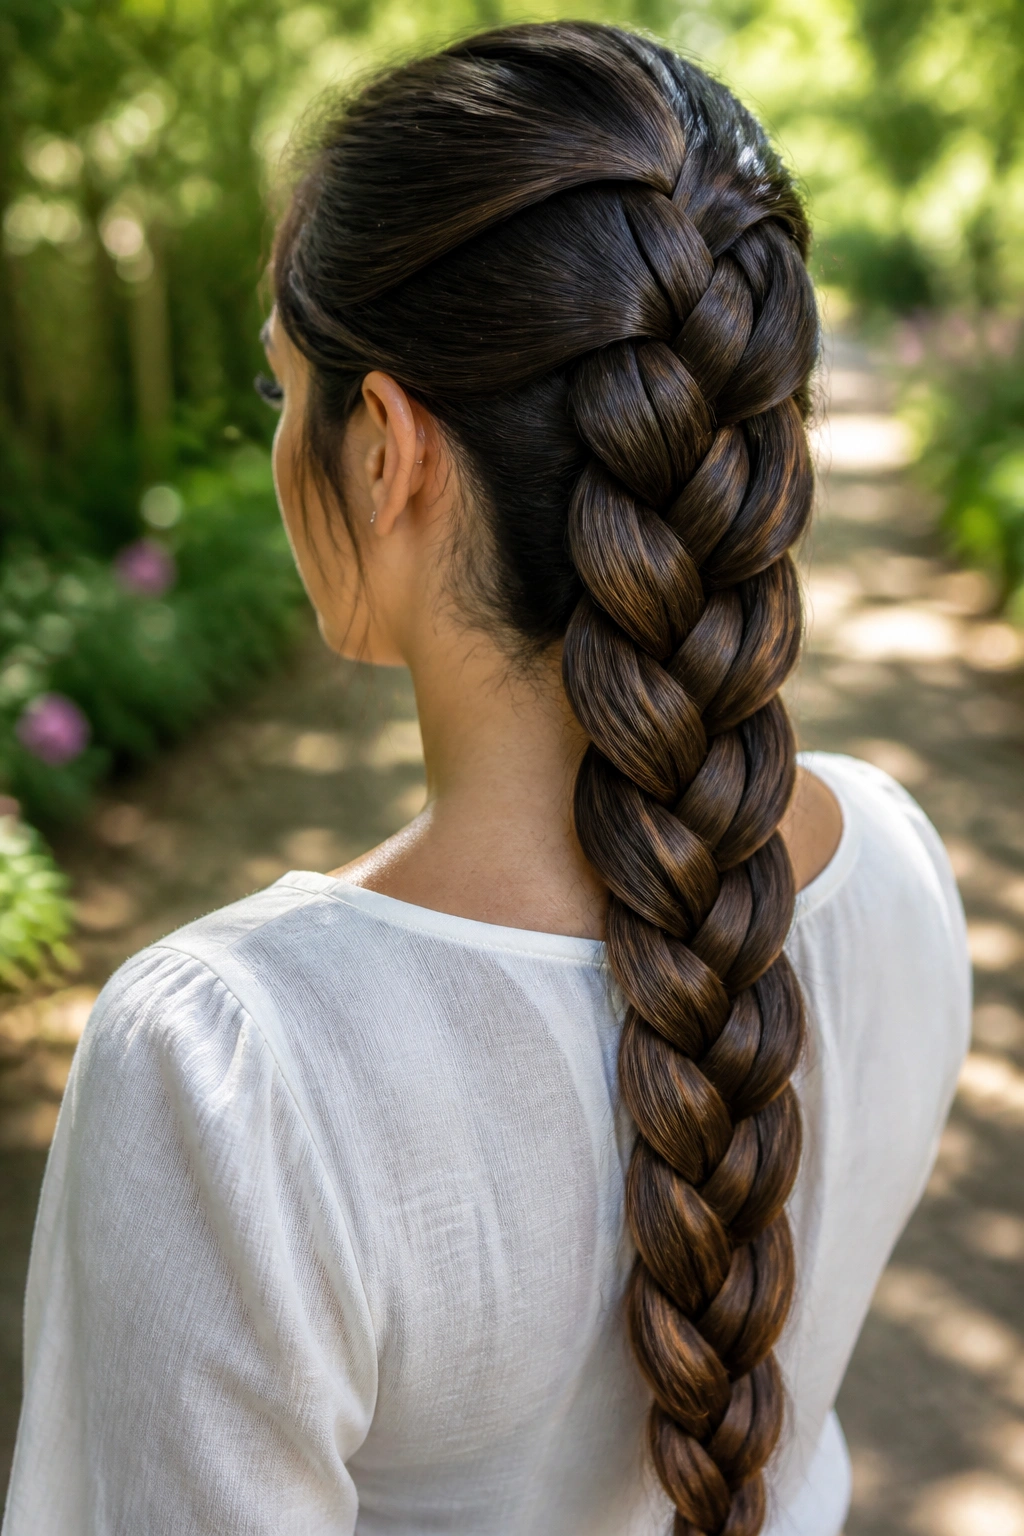
A five-strand braid looks more complicated than it is. The reward is a wide, detailed pattern that really shows off long hair.
The main challenge is keeping the strands organized. Use clips at the base if you need them, and don’t let the sections drift into each other. A little mess at the start turns into a bigger mess by the middle. Long hair does not hide that.
It’s best on straight or lightly wavy hair, where the pattern can sit flat and visible. If your hair is very thick, section it carefully so the braid doesn’t become too bulky to hold. It’s a pretty braid, but it asks for patience. That’s the trade.
14. Lace Braid
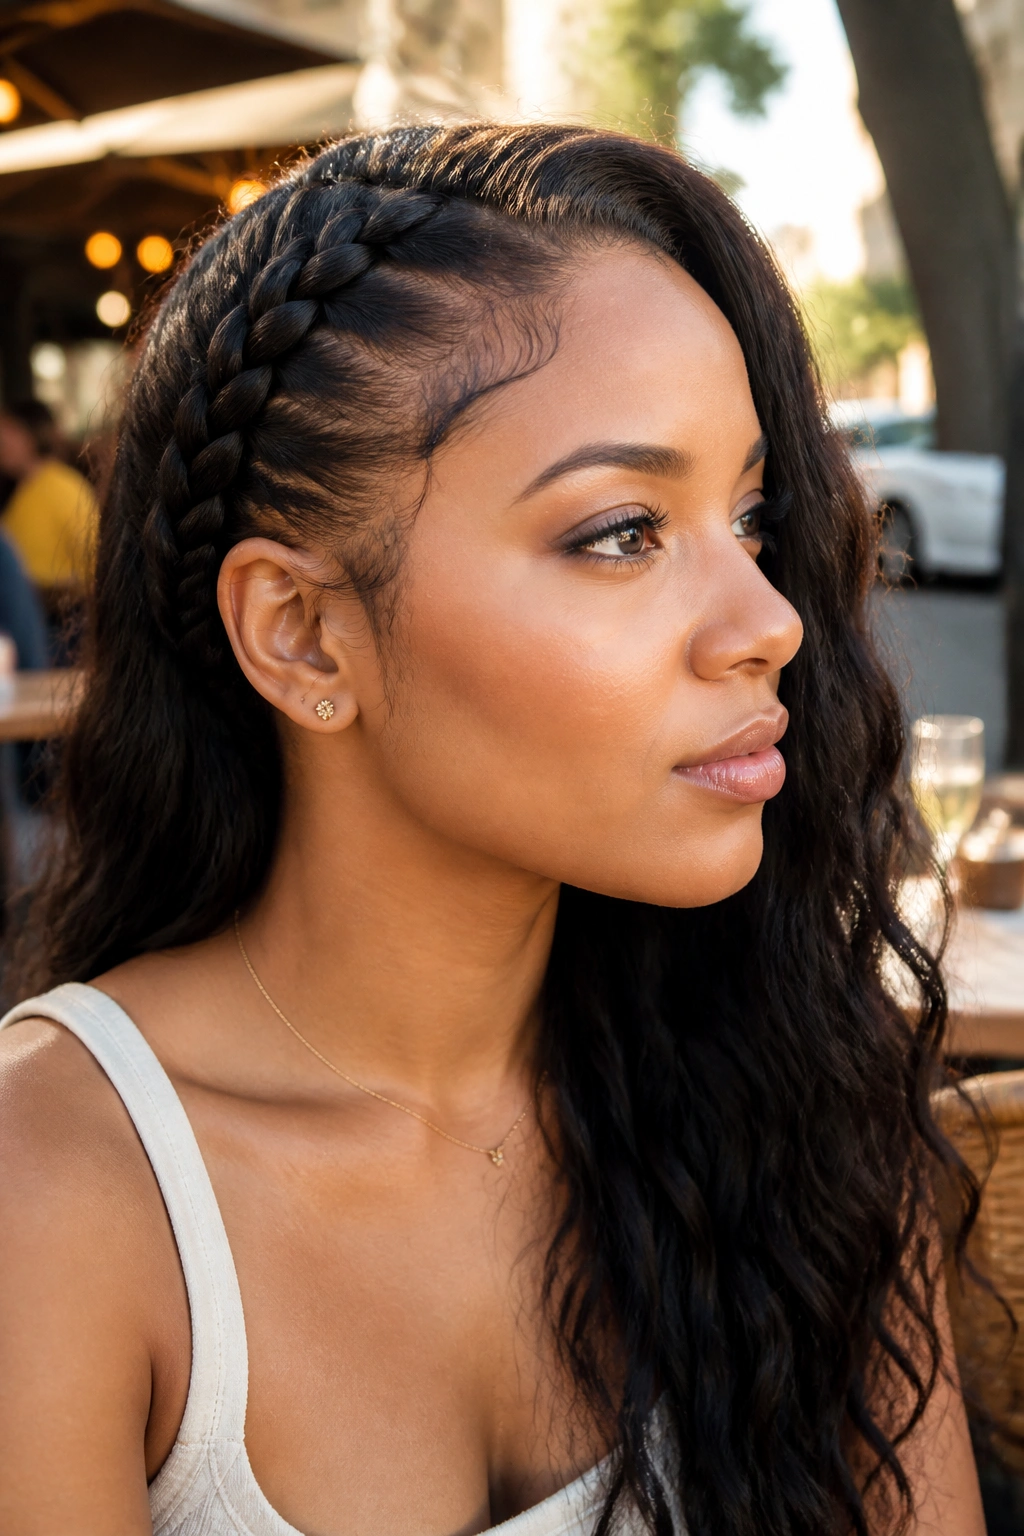
Want a braid that hugs one side and leaves the rest loose? A lace braid does exactly that. It feels softer than a full French braid and works well when you want to keep hair out of your face without putting everything up.
The technique is similar to a French braid, but you only add hair from one side as you move down. The other side stays constant. That creates a braid that looks like it’s draped over the hair instead of woven through all of it.
It’s a smart style for long hair with bangs growing out, face-framing layers, or a side part that refuses to behave. Pin the end behind the ear, or continue it into a low braid if you want more length involved.
15. Half-Up Braided Knot

A half-up braided knot keeps the top section tidy while leaving the length free. It’s one of the easiest ways to make long hair feel styled without losing the drama of the length itself.
Braid or twist two small side sections back toward the crown, then tie or knot them together at the back. You can leave the rest of the hair straight, curled, or waved. The braid becomes the detail, not the whole point.
This style is good on second-day hair because the top section gets enough grip to stay put. A dry texture spray at the roots helps if your hair is slick. Keep the knot low if you want it casual, or place it higher for a more lifted shape.
16. Braided Low Bun
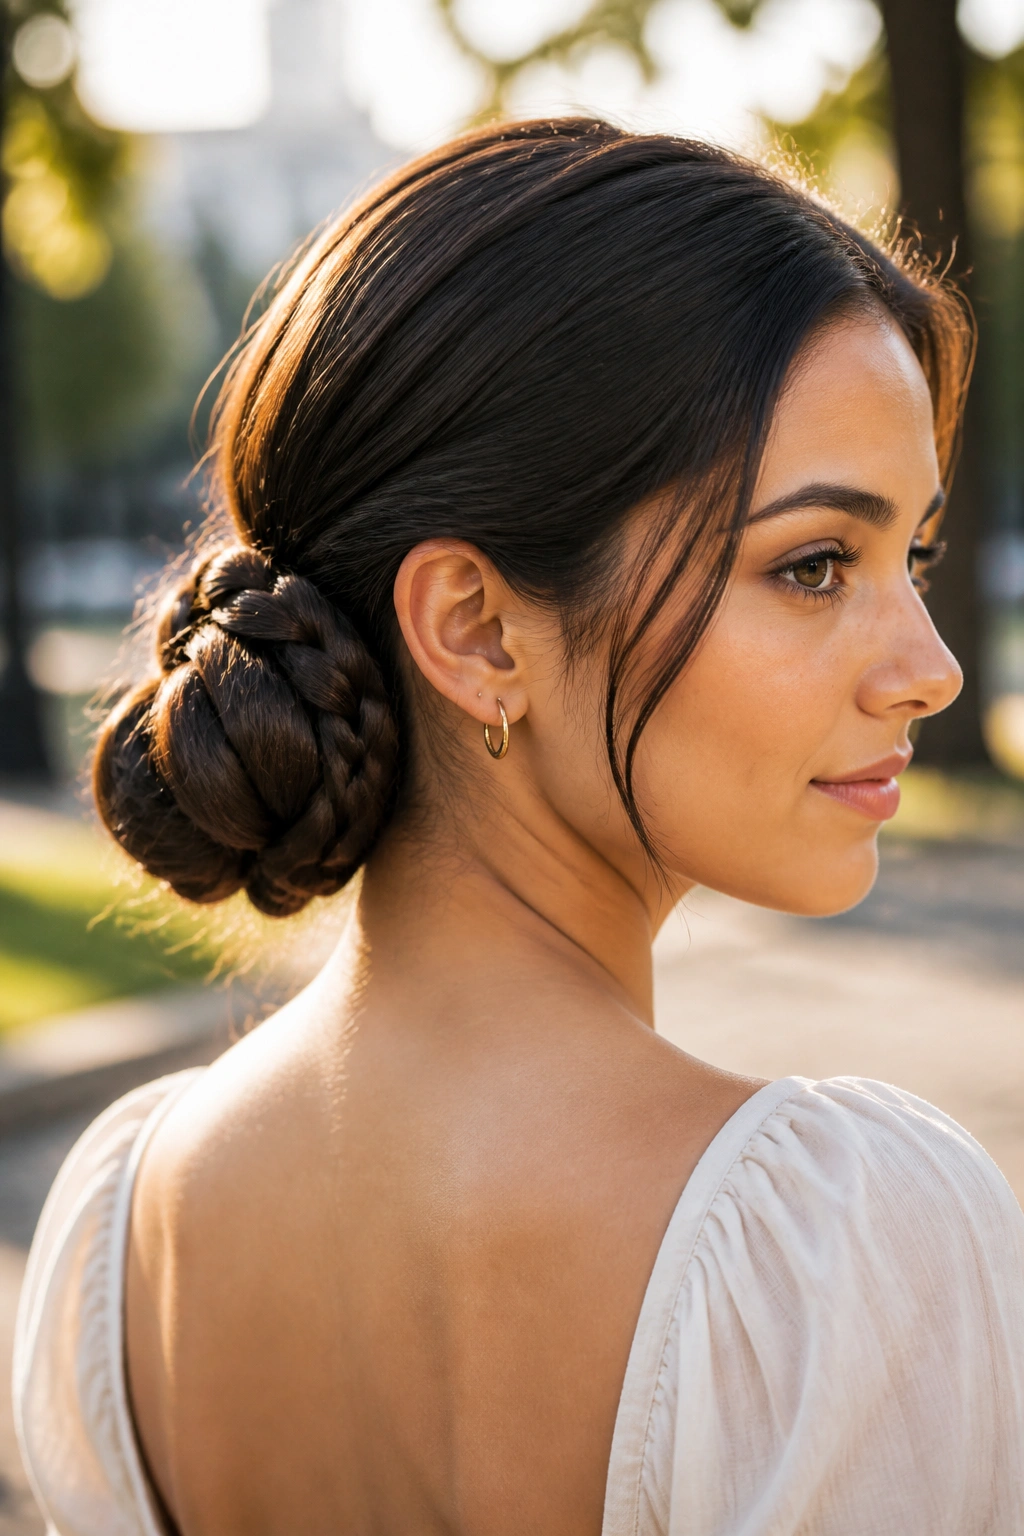
A bun can still show off long hair. The braid gives it shape, and the bun gives it structure. Together, they make a style that looks much more deliberate than a plain twist.
Start with a low ponytail, braid the length, and coil it into a bun at the nape. Or braid the whole tail first and wrap it around the base. Either version works, but the braided version keeps the bun from looking too smooth or too small.
Use bobby pins in a crisscross pattern so the bun stays anchored. That matters more than the size of the bun itself. If the ends poke out, tuck them under the coil and pin them flat. Done badly, this style looks rushed. Done well, it looks expensive without trying too hard.
17. Wrapped Braided Ponytail
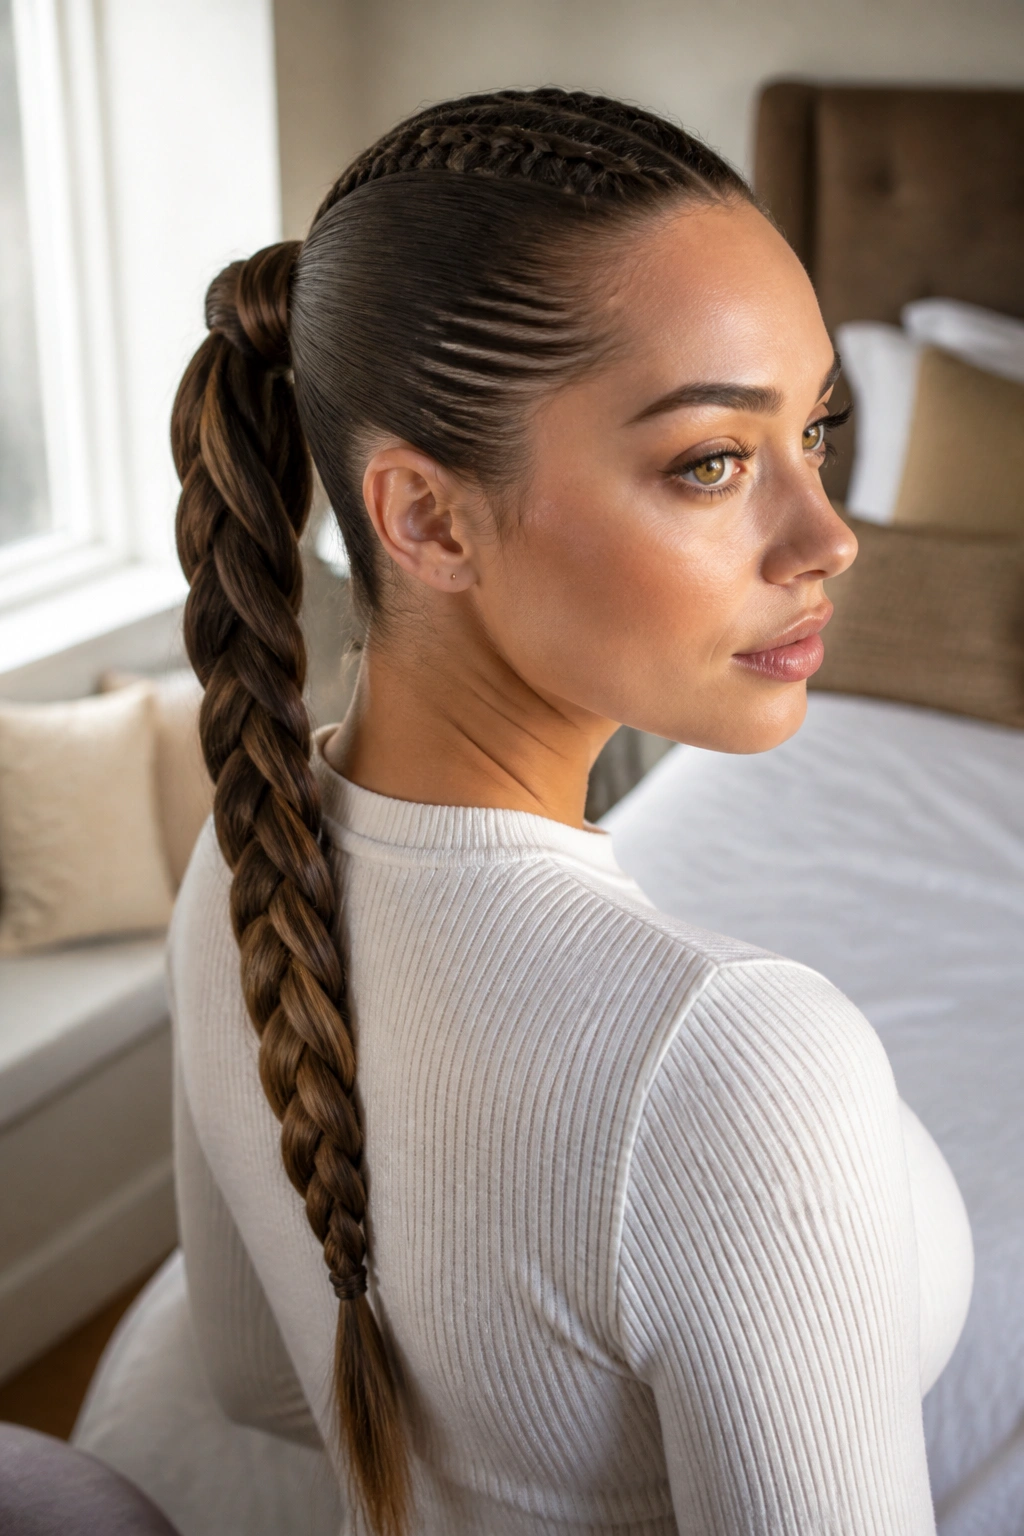
A wrapped braided ponytail starts sleek at the crown and ends polished at the tie. It’s one of my favorite styles for long hair because it keeps the length visible while cleaning up the top.
Braid a narrow section near the part, pull the rest into a ponytail, then wrap a small strand around the elastic to hide it. That little detail changes the whole look. It makes the ponytail read finished, not thrown together.
The hair should be smooth but not limp. If the ends are dry, a drop of oil on the last 3 inches makes the tail look healthier. Don’t overdo it at the roots. That just makes the style collapse.
18. Boho Accent Braids
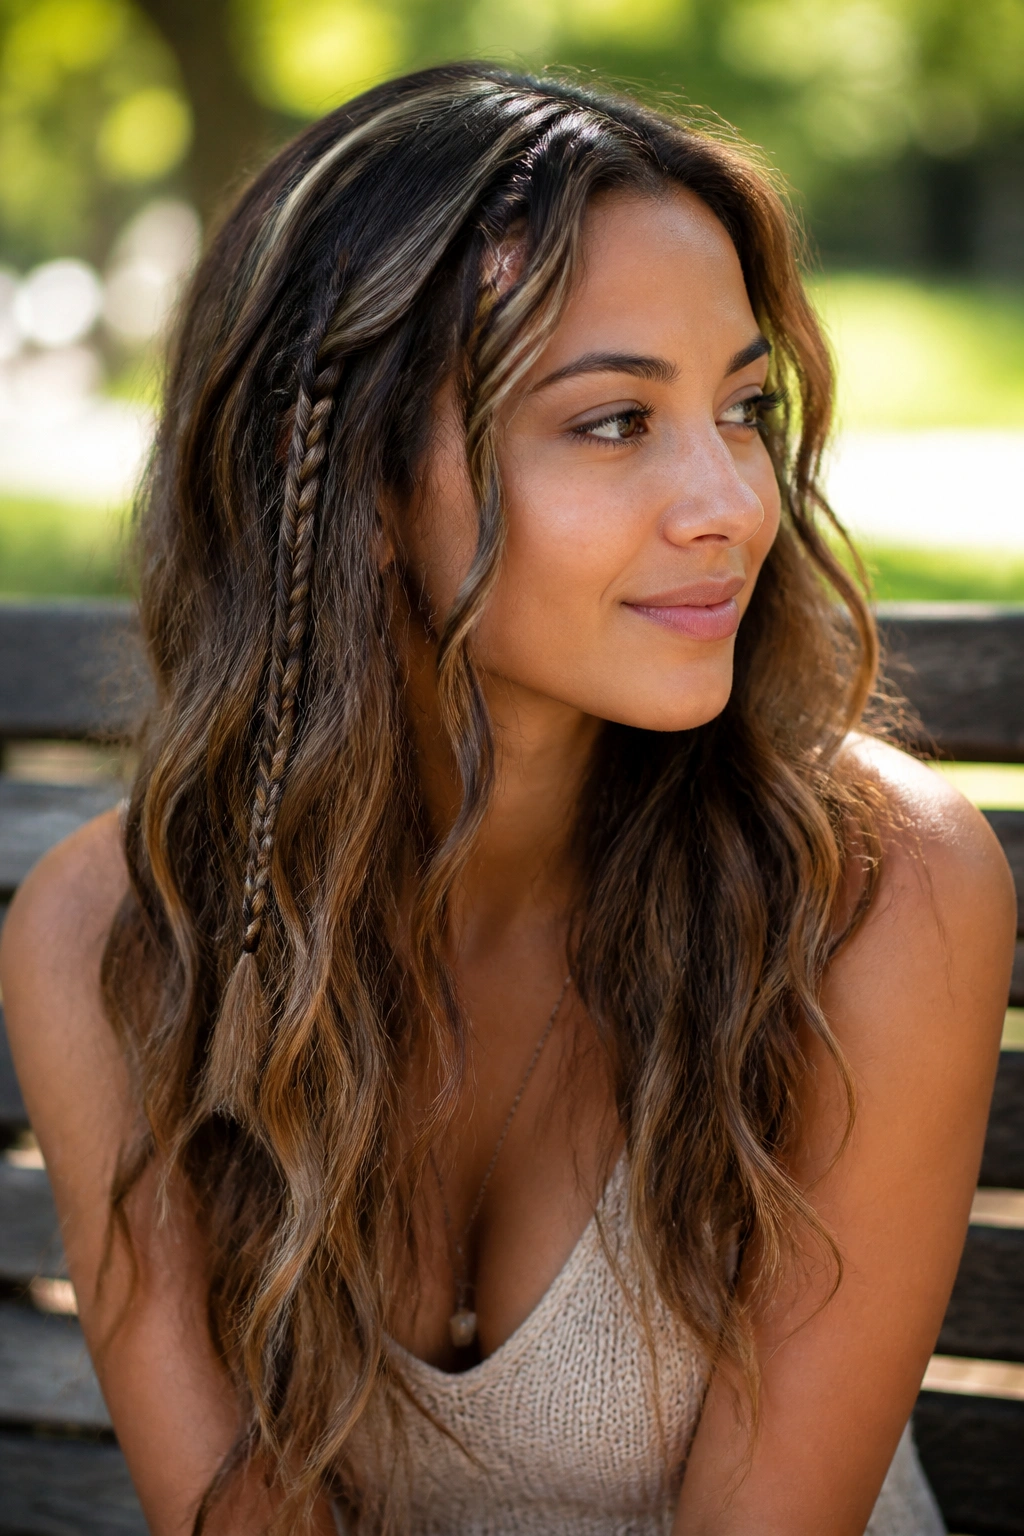
This is the style people reach for when they want hair down but not plain. Tiny accent braids scattered through long waves can give the whole head a more relaxed, lived-in feel.
Place one or two slim braids near the temples, or tuck a few into the layers at the back. Keep them narrow so they don’t overpower the rest of the hair. If your hair is wavy, the texture does half the work for you.
Where to put them
- Near the face to frame the cheekbones.
- Under the top layer for a hidden detail.
- Along one side when you want an asymmetrical look.
- Mixed into curls for a softer finish.
Messy is fine here. Actually, messy is the point.
19. Mermaid Braid
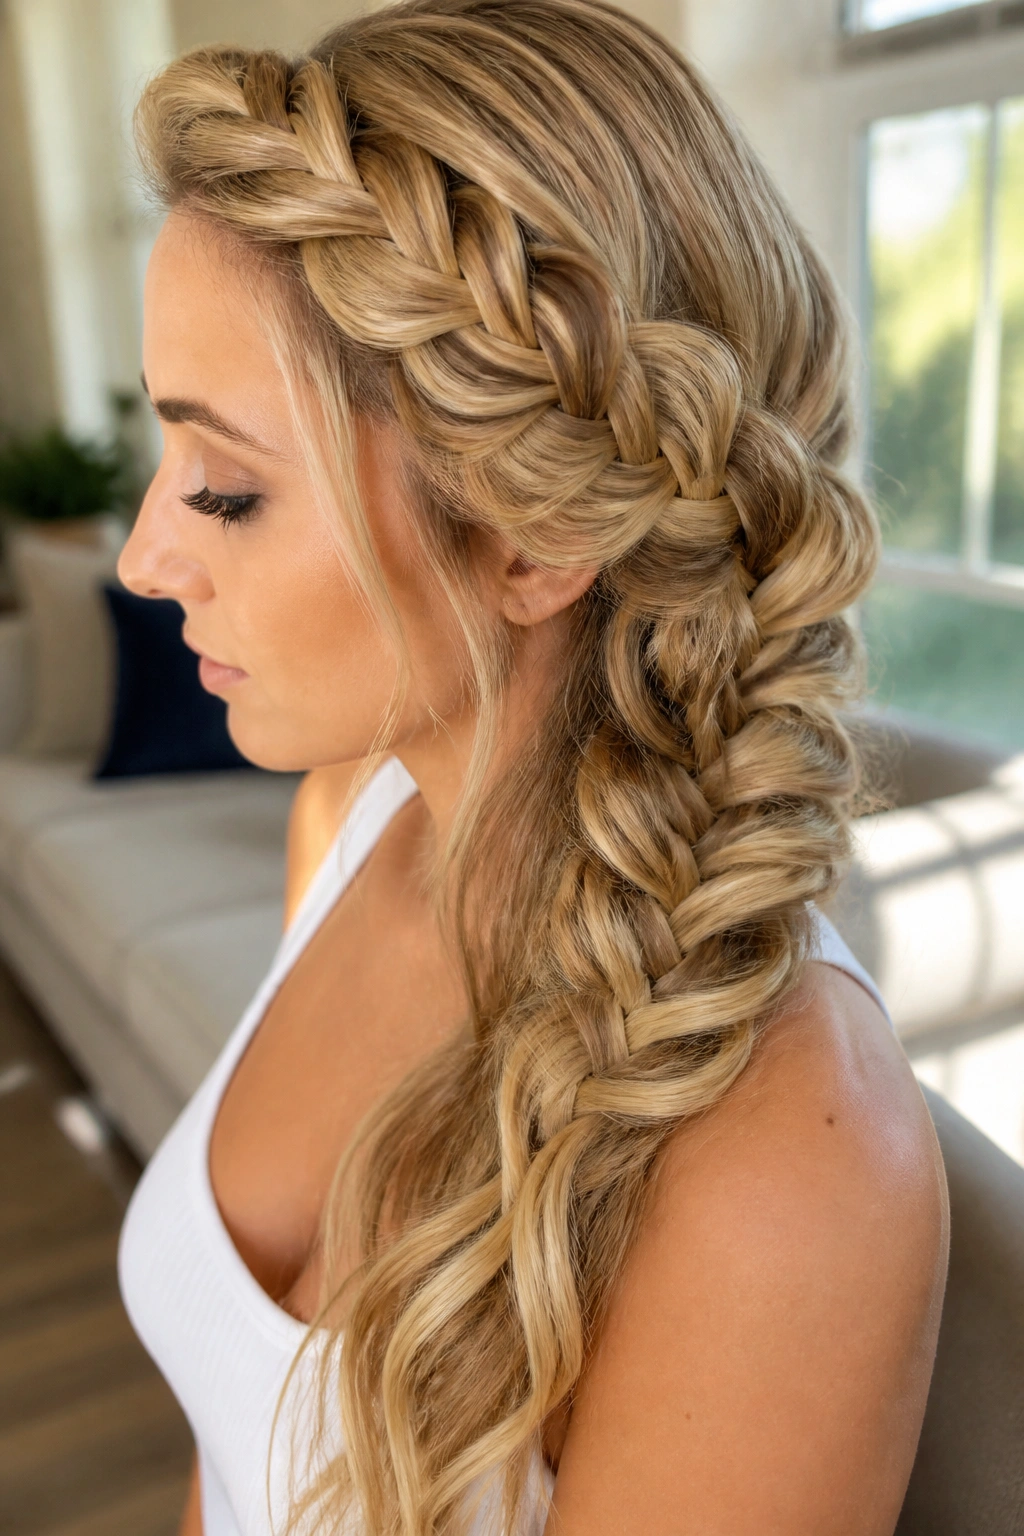
A mermaid braid is really a widened braid with attitude. On long hair, the broad pattern and loosened sides make it look rich, almost like fabric.
Most versions start as a side braid or loose three-strand braid, then get pancaked wide by gently pulling at the edges. That widening step matters. Without it, the style can look like a regular braid that tried too hard. With it, the whole thing has that heavy, flowing look people love.
It works especially well if your hair has highlights or balayage, because the raised sections catch the color changes in a nice way. If your hair is very layered, secure the shorter pieces with a little styling cream before you start. It keeps the finish calmer.
20. Ladder Braid

Ever want a braid that looks engineered? A ladder braid does that. It’s one of the more striking braid hairstyles for long hair, and it needs length to show off the horizontal pieces.
Usually, you create a base braid and then weave smaller sections across it to form the “rungs.” The result looks structured, almost architectural. It is not a quick morning braid, so I’d save it for days when you can sit still for a bit.
Use clips to hold the sections as you work. Long hair helps because there’s more room for the pattern to repeat without bunching. If your hair slips a lot, add a touch of grip spray first. Otherwise the rungs drift out of place and the ladder loses its shape.
21. Snake Braid

The braid doesn’t stay straight, and that is the point. A snake braid bends and curves in a way that makes long hair look playful without needing much extra styling.
You braid a section, then tug one side of the braid outward and push it into a curved shape. Some people coil it into a snake-like S pattern and pin it flat. Others use it as an accent off a ponytail or half-up style. Either way works.
This style likes long lengths because the curve has room to travel. A short braid tends to run out of shape too fast. If you want the snake to hold, mist the section lightly before you bend it. Dry, fluffy hair is harder to control.
22. Infinity Braid
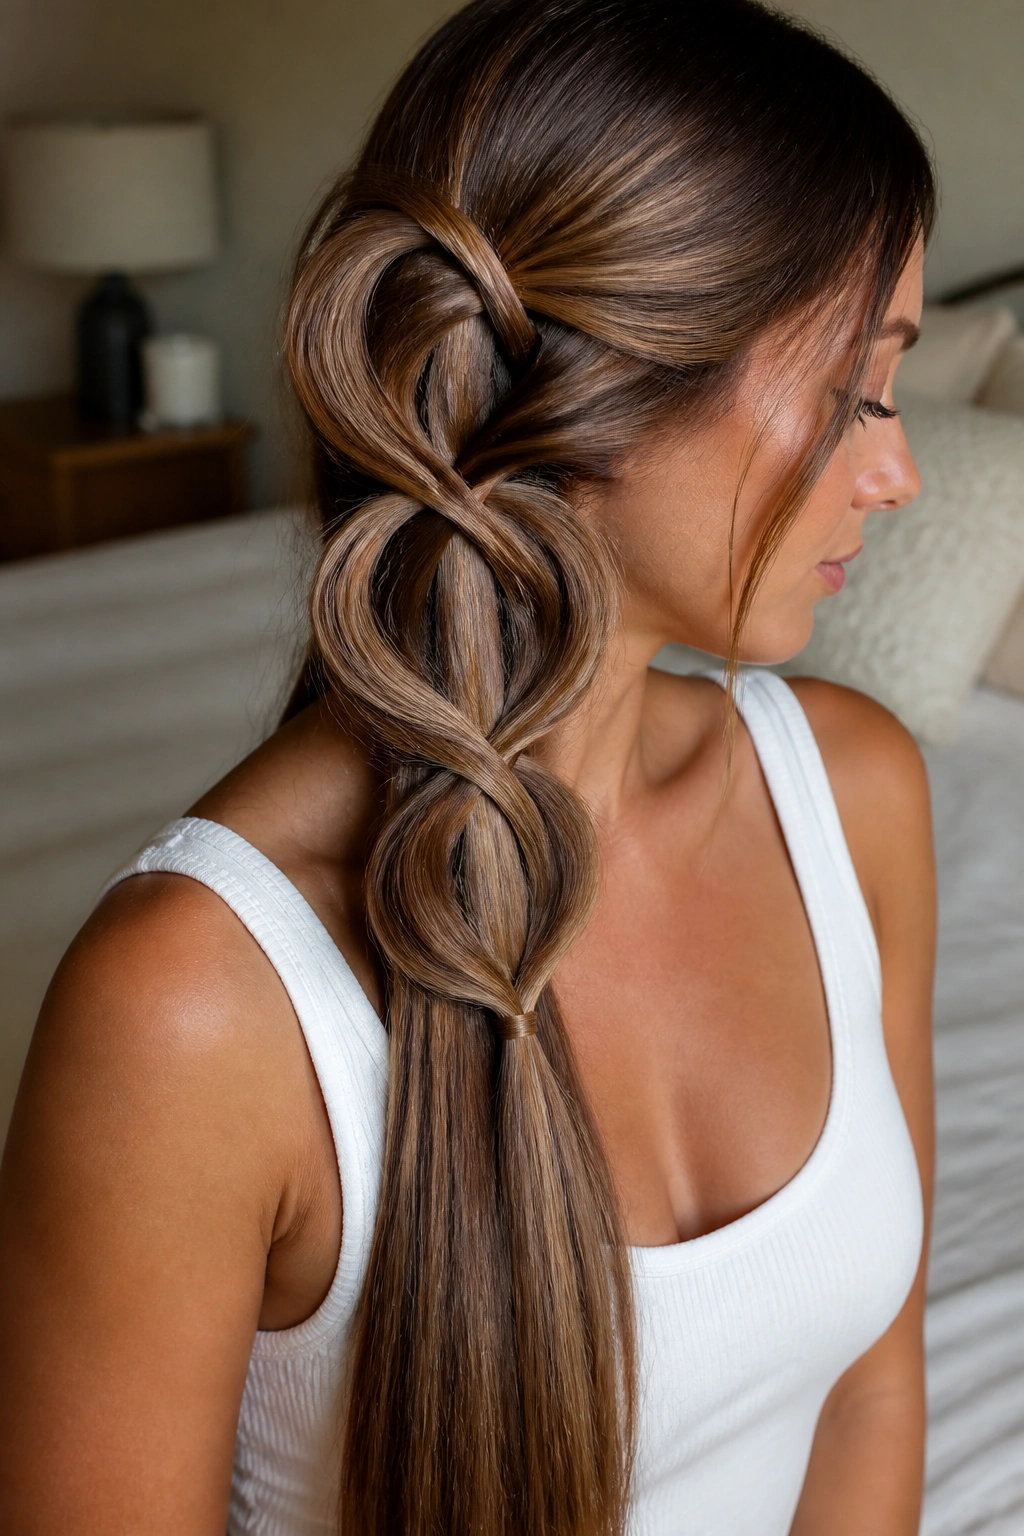
The infinity braid loops in and out like a stitched ribbon. It sounds fancy, but the real magic is the repeating motion. Once your hands learn the pattern, it becomes easier than it looks.
The braid usually starts from a small section and builds a figure-eight weave around a central strand. It’s not the fastest style on this list, and I would not try it when you’re already late. But on long hair, the pattern shows clearly and has a nice, tidy finish.
It’s a good accent braid for someone who wants something more special than a standard plait. Smooth hair helps the loops stay visible. If the hair is layered, use a little pomade on the shorter ends so they don’t break out of the pattern.
23. Jumbo Braid

Sometimes one huge braid beats three tiny ones. A jumbo braid gives long hair a bold shape fast, and it works especially well when you want the braid to feel substantial instead of delicate.
You can create it with a three-strand braid using larger sections, or even pull the sides apart after braiding to inflate the width. Keep the parts loose but even. If you make the sections too tight, the braid loses that thick, chunky look.
This style is good for thick hair, and it’s also forgiving if the length isn’t perfectly layered. A little frizz adds texture here. Too much shine can make the braid look flat, so don’t drown it in serum. The shape should feel full, not slicked down.
24. Micro Braids at the Hairline
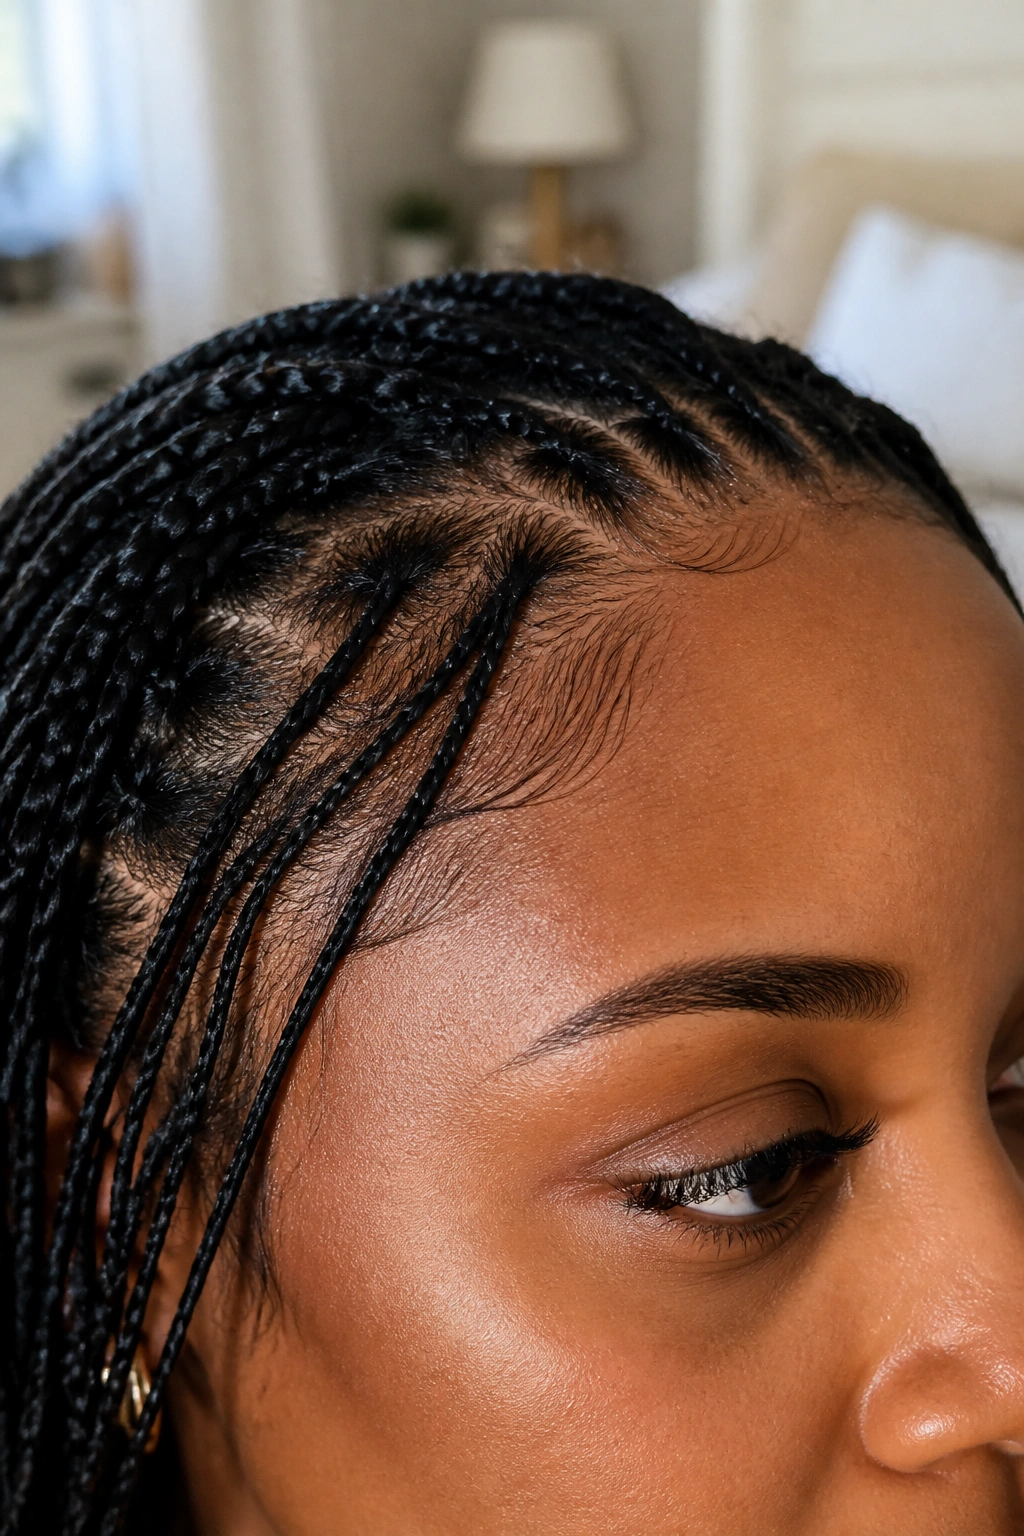
Small braids at the hairline can change the whole look. They clean up the face, break up a heavy curtain of hair, and add detail without touching the rest of the length.
Braid two or four tiny sections near the front, then let the rest of the hair fall loose or gather it into a low style. Keep the braids narrow and neat, especially around the temples. If they get too wide, they start to compete with the length instead of framing it.
A few placement ideas
- One braid on each side for balance.
- Several tiny braids at the crown for texture.
- A single braid tucked behind one ear for a softer shape.
- Paired with loose waves for a relaxed finish.
These are small details, but they do a lot of work.
25. Feed-In Side Braid
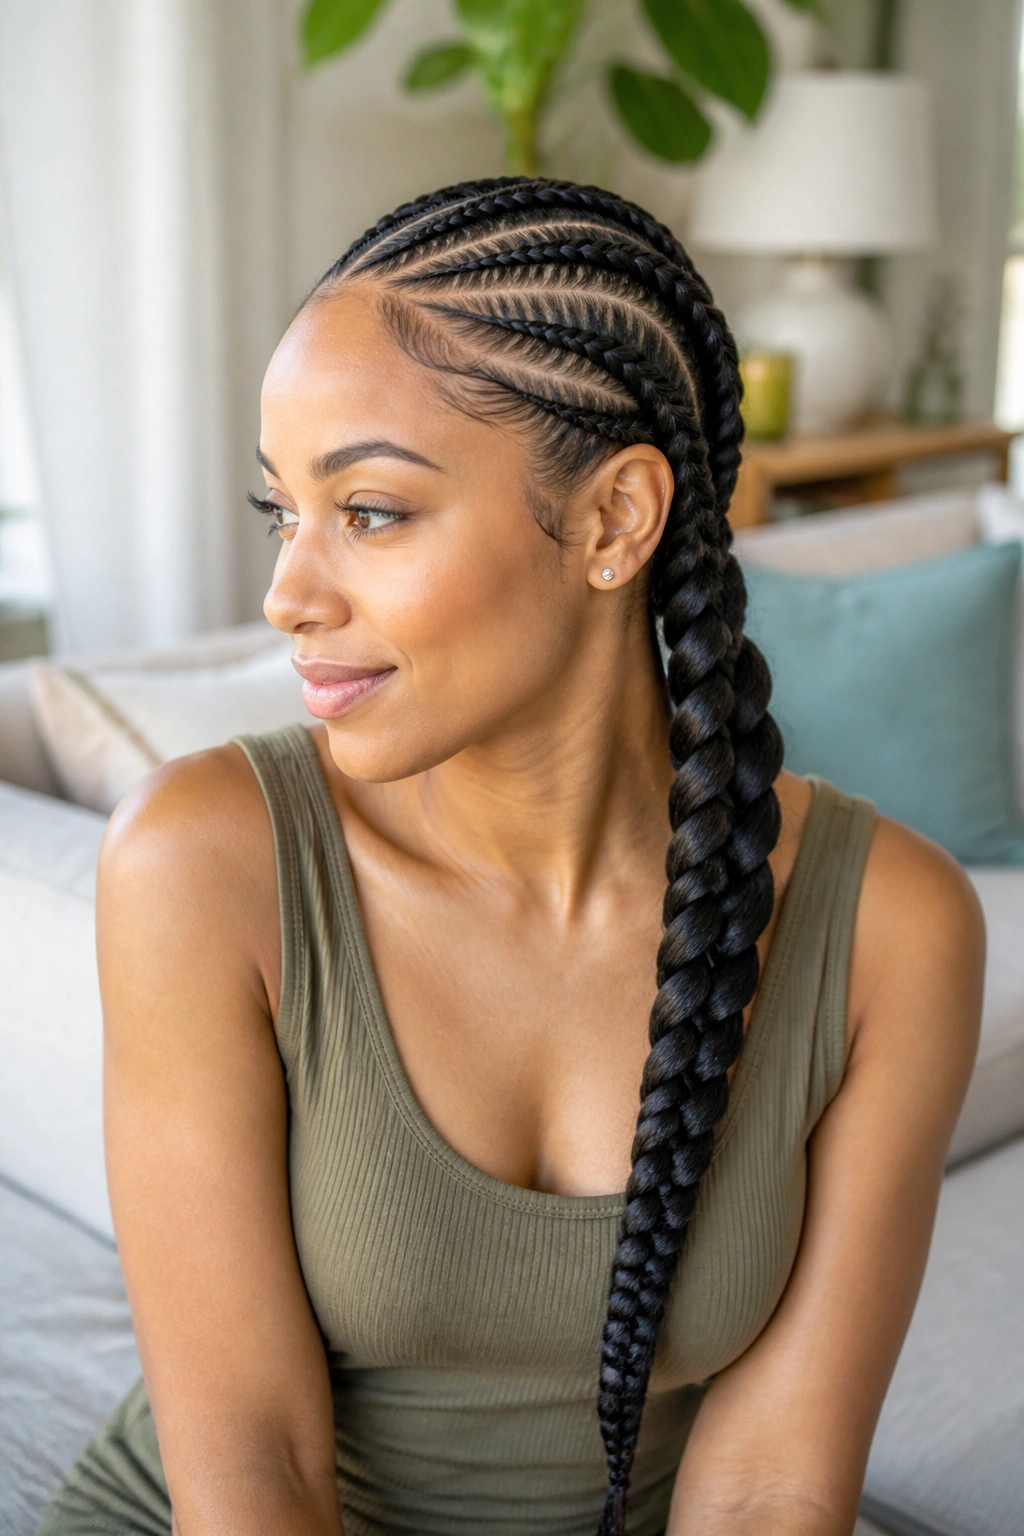
Want a braid that starts slim and ends full? A feed-in side braid gives you that gradual build. The shape looks clean at the top and richer as it moves down the length.
You begin with a small section near the hairline, then keep adding hair as you braid toward one shoulder. The added hair makes the braid widen slowly, which looks smooth on long hair. It also keeps the top from feeling too bulky.
A sleek part helps here. So does a bit of styling gel at the roots. If the sides puff up too much, the shape loses that tapered feel. Long hair gives the braid room to stretch out, which is why this style reads so well on people with lots of length.
26. Heart Accent Braid

The heart braid reads playful, but it needs neat sectioning to work. The best versions use two curved braids or twists that meet to form the top of the heart, then tuck into a point below.
It’s a nice choice for special events, school pictures, or any day when you want the hair to look a little more deliberate. On long hair, the style has enough length to shape the curves without everything falling apart halfway through.
You will need patience. That’s the honest part. A tail comb, a few clips, and a mirror that lets you check the back all help. If the sections are uneven, the heart shape looks lopsided fast. Keep the curves soft rather than sharp, and the result feels sweeter.
27. Braided Space Buns
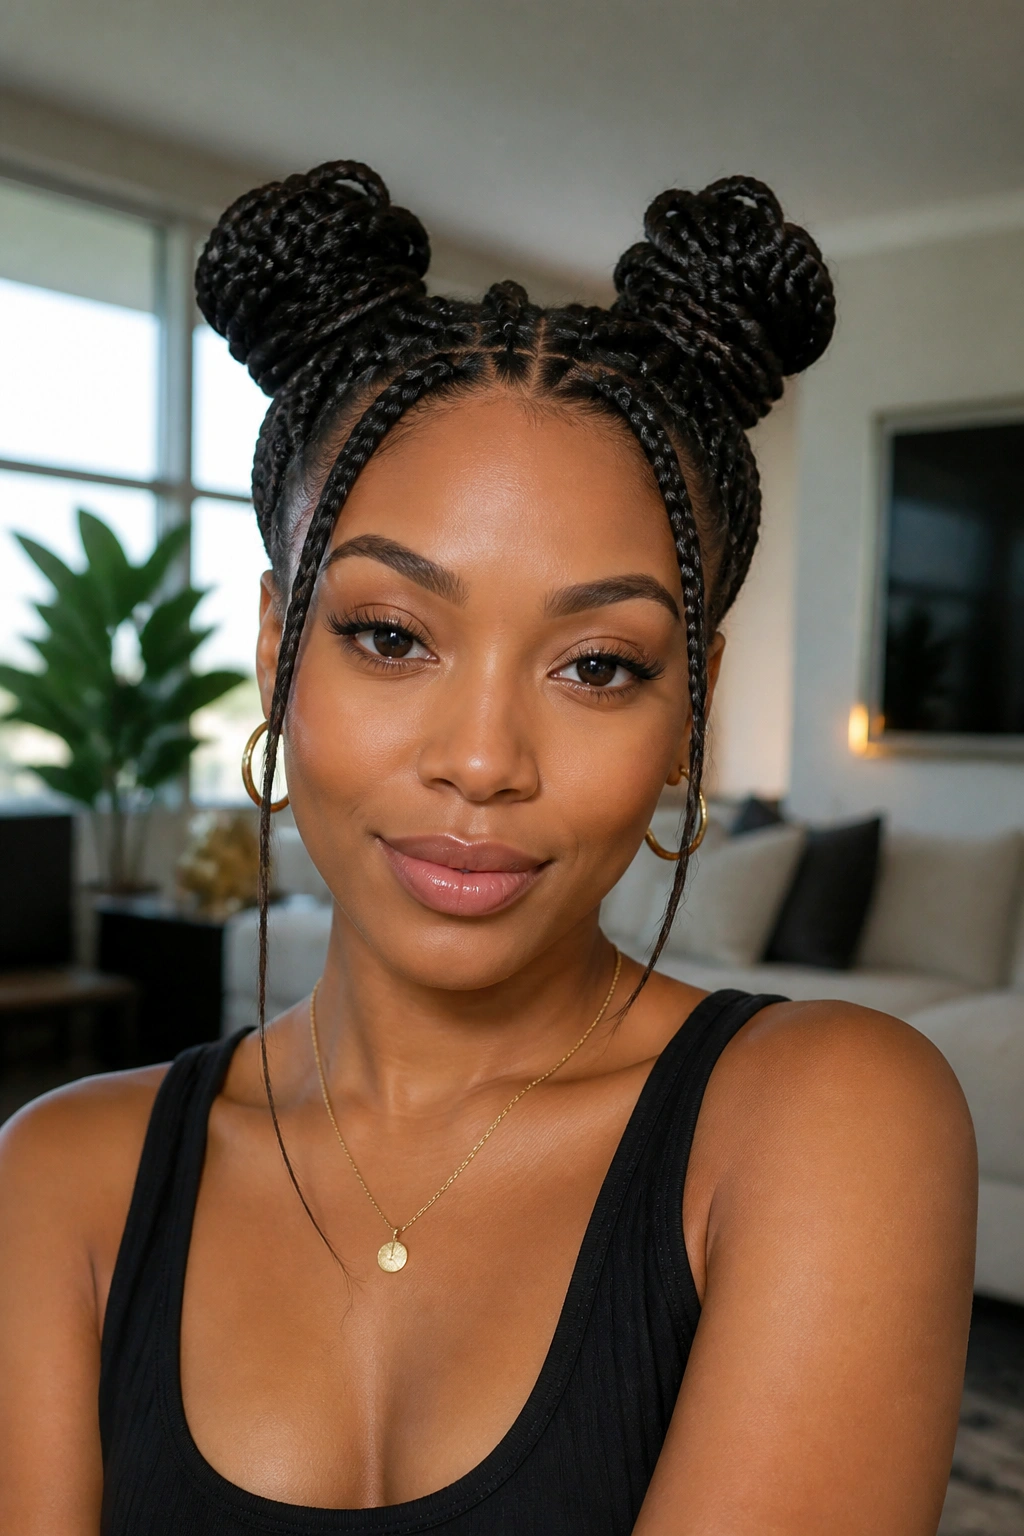
Space buns can still feel grown-up when the braid does the work. Braiding the pigtails before wrapping them into buns adds texture and keeps long hair from looking too flat.
Part the hair down the middle, make two pigtails, braid each one, and coil them into buns near the top or back of the head. Pin the ends underneath so nothing pokes out. Long hair gives the buns extra body, which is the whole point.
This style is great when you want something fun that still keeps the hair controlled. If the buns feel too neat, tug a few pieces loose around the face. If they feel too loose, add one more pin. That’s usually the difference between charming and messy.
28. Half-Crown Twist Braid

A half-crown braid sits softly around the head and leaves the length free. It has the shape of a crown braid without the full commitment, which makes it easier to wear on an ordinary day.
You braid or twist from one side, carry the section across the back, and stop before wrapping all the way around. That leaves the lower hair loose, so you get movement and coverage at the same time. It’s a smart fix when the front of your hair won’t stay out of your face.
This style pairs well with waves because the top stays neat while the ends stay loose. If the braid slips, secure it with pins from the underside so they disappear into the hair. The goal is a soft line across the crown, not a hard band.
29. Ribbon-Woven Braid
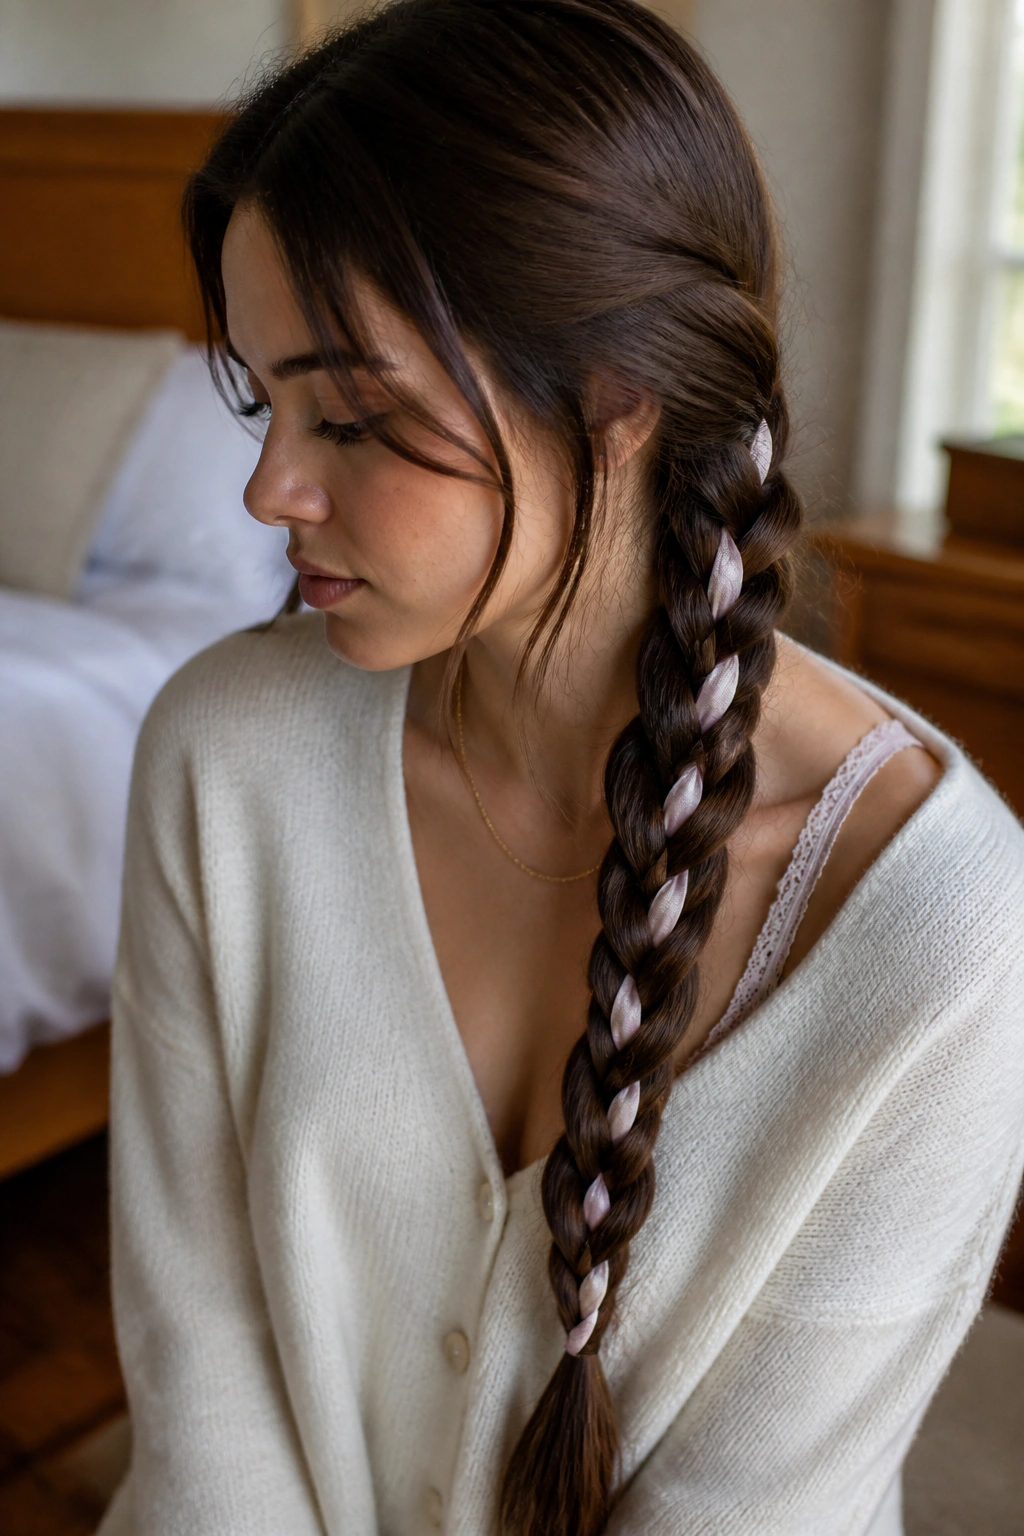
A ribbon changes the whole braid without changing the technique much. If your long hair needs a bit more color or a dressier finish, weaving in ribbon is a low-effort way to get there.
Choose a ribbon that is narrow enough to move through the braid without bunching — about 1/4 inch to 1/2 inch wide works well. Satin gives a smooth finish, while grosgrain holds its shape a little better. Tie it at the base of the section and braid it alongside the hair.
What to watch for
- Keep the ribbon flat so it doesn’t twist.
- Match the ribbon width to the braid size.
- Use one color for a clean look or two for contrast.
- Trim the ends after tying so they sit neatly.
This is one of those details that looks fussy in the best way.
30. Braided Bubble Pony with Wrapped Ends

Finish strong. A braided bubble pony with wrapped ends gives long hair volume, movement, and a clean ending all in one style.
Start with a braid at the top or front section, gather the rest into a ponytail, and add elastics down the length to create bubbles. Then wrap a small strand around the final elastic so the base looks polished instead of obvious. The braid at the top keeps the style interesting; the bubbles give it height and shape.
This one works especially well on very long hair because the bubbles have room to open up. If your ends are dry, tuck them under the final wrap so they don’t stick out. A light mist of hairspray is enough. Heavy spray can make the bubbles stiff, and that kills the whole effect.
Final Thoughts
The best braid for long hair is the one that matches the day you actually have. A gym morning, a wedding, a work meeting, and a lazy Sunday each call for something different, and that is half the fun.
I’d start with the styles that use your hair’s own texture instead of fighting it. If your hair slips, add grip. If it puffs up, smooth the roots first. If the ends look thin, use a fuller braid shape and let the length do its job.
One spare elastic, a handful of bobby pins, and a tail comb can carry you a long way. The rest is practice. And a little patience.
