



A good puff can save a rough morning fast. On natural 4C hair, it gives shape, height, and a finished look without asking for a full wash day, and that matters when your coils are doing their own thing by 8 a.m.
Hair puff styles for natural 4C hair are not one-note. Placement changes everything. So does stretch, shrinkage, the kind of band you use, and whether you smooth the front or let it stay fluffy and free. A puff can read polished, playful, soft, sharp, or even a little dramatic if you give it the right frame.
There’s also a practical side people skip over. A puff that looks cute for 20 minutes and gives you a headache by lunch is not a win. Same with edges pulled tight, flimsy elastics that snag, or product piled on until the hair feels tacky and heavy. Cute should not cost you your scalp.
The styles below lean into what 4C hair does best: volume, shape, and texture that holds its own. Some are quick, some buy you more wear, and some work better on stretched hair than fresh coils. That’s the part worth paying attention to.
1. The Classic High Puff for Natural 4C Hair
The classic high puff is the one that never leaves the rotation for long. It sits near the crown, lifts the face, and makes even a simple tee-and-jeans day look intentional. On 4C hair, the height does a lot of the work because shrinkage turns into shape instead of fighting against it.
Why It Works So Well
A high puff gives dense coils room to breathe. When the band sits at the crown, the hair piles upward instead of pulling down around the head, which keeps the style looking full even if your length is modest. That matters more than people admit. A puff doesn’t need long hair; it needs smart placement.
How to Wear It
- Smooth the front and sides with a light gel or edge control if you want a cleaner finish.
- Gather the hair at the crown, then secure it with a snag-free elastic or a puff cuff.
- Fluff the puff with your fingers once it’s set so the shape looks round instead of flat.
- If the roots feel tight, loosen the band and move it a half-inch higher.
Best tip: tie a satin scarf around the base for 5 to 10 minutes before you leave the house. It helps the front lay down without making the puff itself collapse.
2. The Low Puff at the Nape

A low puff is the style I reach for when my scalp feels tired. It sits near the nape, feels calmer than a high puff, and keeps the weight lower on the head. That can make a huge difference if you wear puffs often or if your hair is thick enough to feel heavy by mid-afternoon.
This version has a softer mood. Not sloppy. Softer. It works with a middle part, a side part, or no part at all, and it pairs well with scarves, earrings, or a collared shirt when you want the hair to stay out of the way.
The real win is comfort. A low puff usually puts less tension on the crown, which is where a lot of people start feeling that little ache that turns into a full-on scalp complaint. If your hair is freshly moisturized and slightly stretched, the puff sits smoother and the back of the head looks neat instead of bulky.
I like this one for days when I want the shape, not the fuss. You still get the puff look. You just don’t have to carry it so high.
3. The Side Puff With a Deep Part
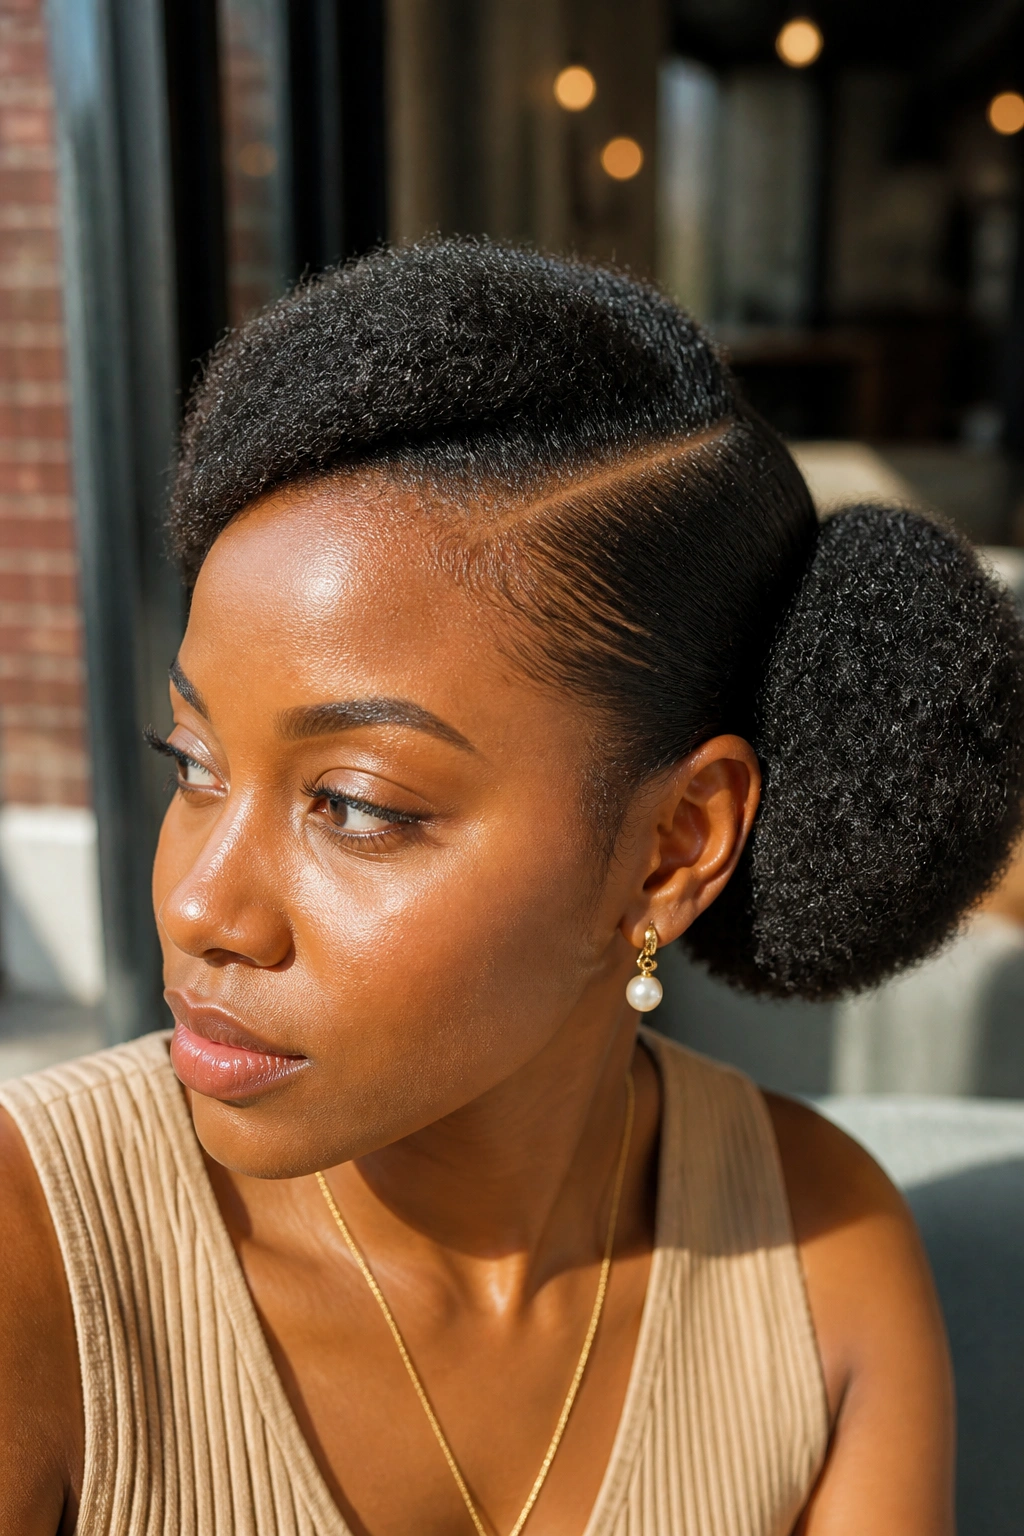
Why does a side puff feel more styled than a centered one? Because the whole shape shifts off balance in a way the eye notices right away. A deep side part breaks up the bulk of 4C hair, and that can make the puff look more deliberate without adding extra work.
Why the Side Placement Works
A side puff gives the face some room. The puff sits lower on one side, while the part pulls the hairline in a cleaner direction. That makes it useful when your hair is extra dense or when you want to soften a rounder face shape without cutting anything.
It also helps on stretchier hair days. If the roots have some elongation from banding, the side puff doesn’t look oversized or puffy in the wrong places. It just looks full. There’s a difference.
How to Style It
- Make the part while the hair is damp or lightly moisturized, before it starts fighting back.
- Pull the puff to the heavier side, then secure it just above the ear or slightly behind it.
- Leave one front section out if you want a little movement near the cheekbone.
- Keep the front smooth, but do not flatten it so hard that the hairline looks scraped back.
A side puff is one of those styles that looks more complicated than it is. That’s useful. A little asymmetry goes a long way.
4. The Half-Up Puff With Loose Length
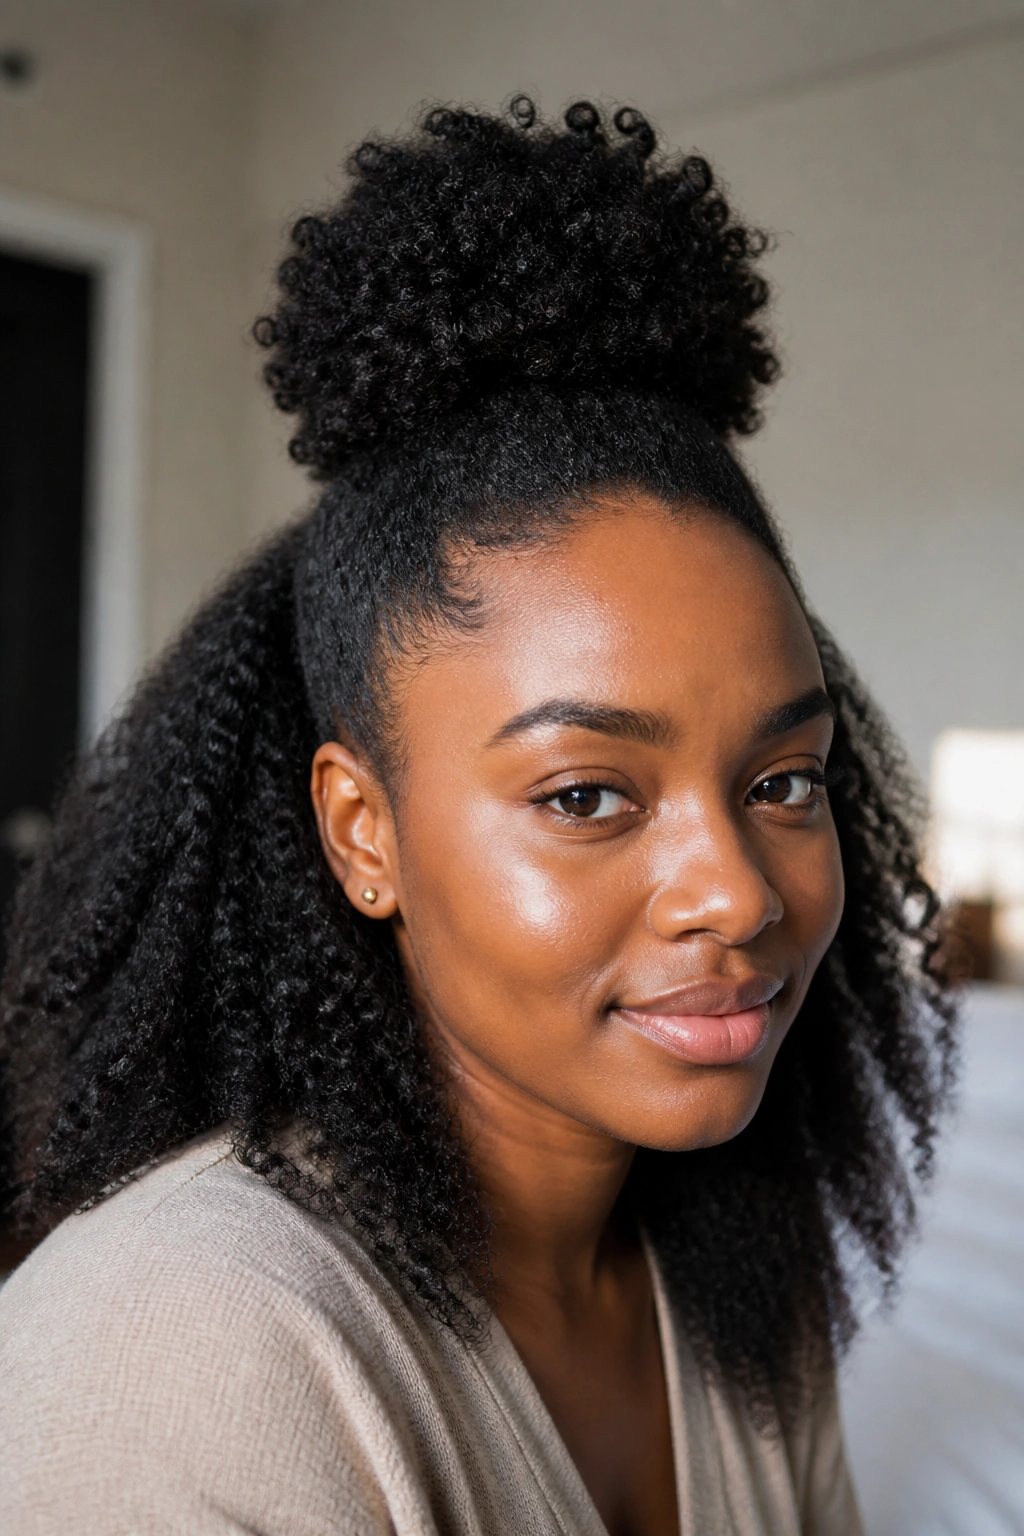
Picture this: you want the height of a puff, but you also want some hair left down because the full updo feels too strict. Half-up puff styles hit that middle ground neatly. The top section gets lifted into a puff, and the rest stays loose, stretched, or curled down the back.
It’s a good move for twist-outs, braid-outs, or stretched 4C hair that still has enough softness to hang a little. The top puff gives you shape near the face, while the loose length keeps the style from feeling heavy on top. There’s a softness to it that full puffs do not always have.
Best Features of This Look
- The top puff keeps hair away from the forehead.
- The loose length shows off texture without needing perfect definition.
- It works well when the back of the hair is already stretched from a previous style.
- You can dress it up with a barrette, clip, or a thin scarf.
One thing I like here is the way it handles “in-between” hair. You know the kind — not long enough to do everything, not short enough to ignore. This style makes that awkward middle stretch look planned.
5. The Double Puff Pigtails

Two puffs are not childish when the parts are clean and the shape is balanced. On 4C hair, double puffs can look sharp, playful, and very put-together if you keep the sections even and the base smooth. They also spread the volume out, which helps if one giant puff feels too top-heavy for your head shape.
The best version starts with a center part or two side parts that meet cleanly at the back. From there, each section gets its own puff. The symmetry matters, but not in a stiff way. If one puff sits a little fuller than the other, that can still look good as long as the parts are tidy.
This style works especially well when your hair is dense and you want to show that density off instead of forcing it into one mound. And yes, it can be grown-up. Pair it with hoops, a sharp brow, or a simple tee, and it stops reading like a school style right away.
A little tip from experience: set the parts first, then moisturize. If you reverse that order, your fingers slide all over the place and the lines get messy fast.
6. The Pineapple Puff
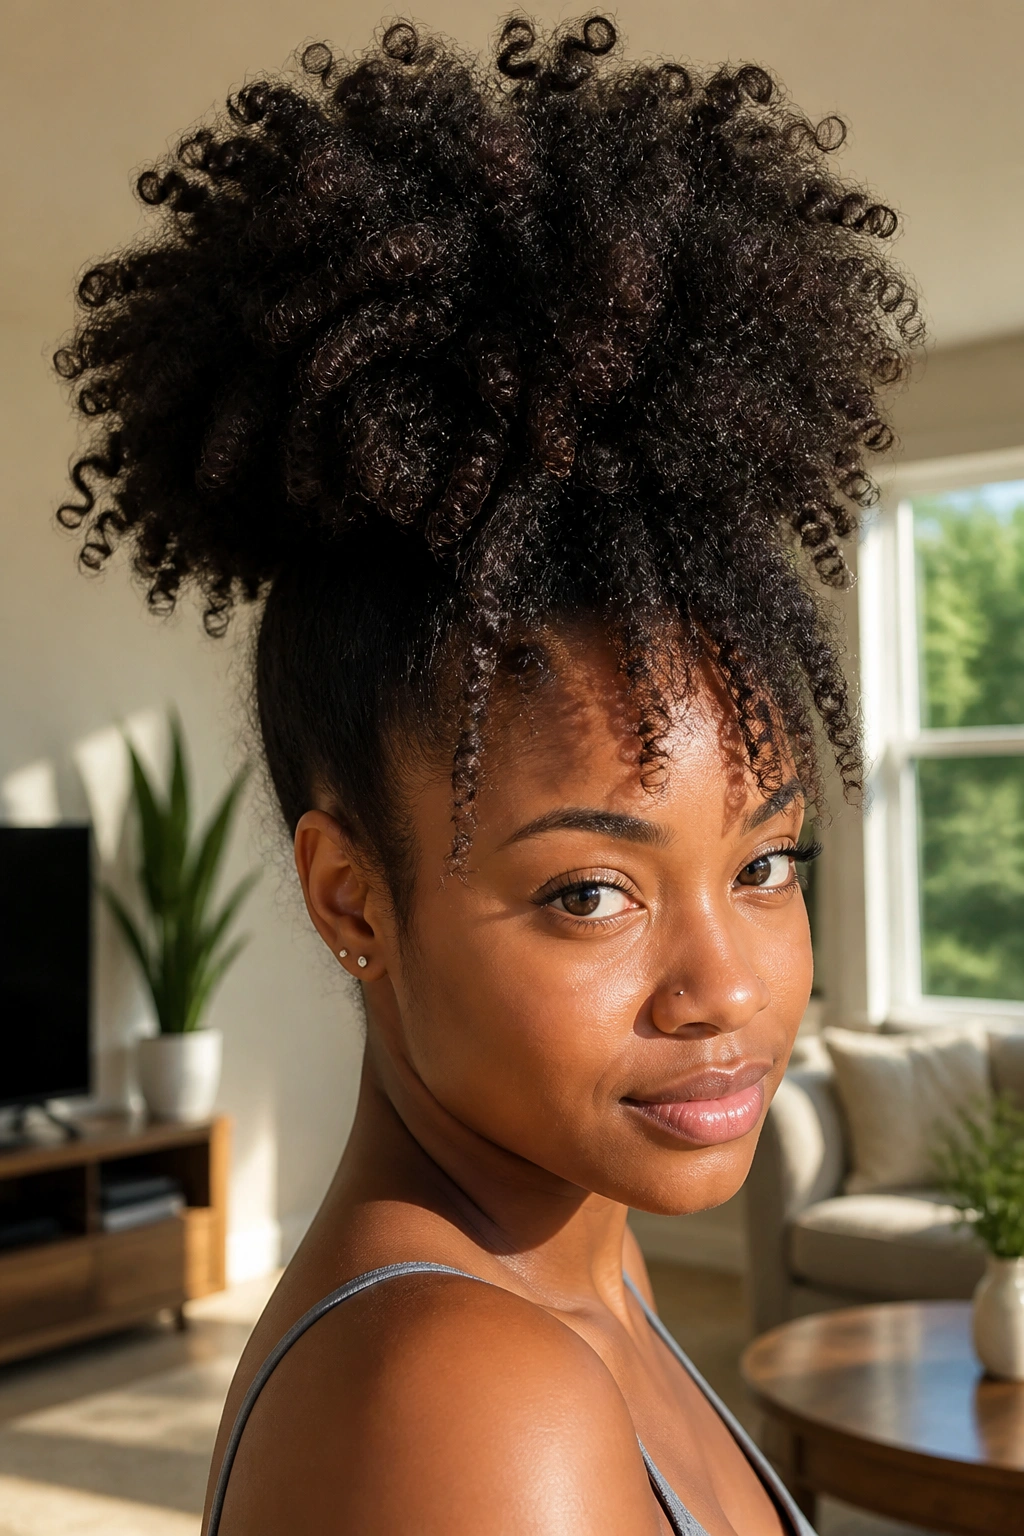
A pineapple puff gets its name from the way the hair sits high and forward, not from the fruit bowl comparison people make when they are being cute. The shape is loose, lifted, and a little carefree, which is part of the appeal. It’s also a smart choice for 4C hair that has been stretched overnight or preserved in twists.
What Makes It Different
Unlike a strict high puff, the pineapple version usually leaves the ends or lengths a bit more relaxed. The hair gathers loosely toward the front or top, then falls in a rounded cluster that keeps the style soft. That means less tension and less fuss around the perimeter.
It’s a good daytime style if your hair already has some curl pattern or stretch from a twist-out. It also works as a transition style when you don’t want to restyle from scratch but still want the hair off your neck.
How to Get the Most From It
- Use a satin scrunchie or soft elastic so the base does not dent the hair too hard.
- Gather the hair high, but keep the hold loose enough that the coils still puff outward.
- Let a few curls or coils fall forward if they want to.
- Smooth only the front hairline if you need a cleaner finish.
The pineapple puff is not about force. It works because the hair is allowed to keep some of its natural shape.
7. The Sleek-Edge Puff

Unlike a fluffy puff that leans casual, a sleek-edge puff frames the face with a smoother perimeter. The puff itself stays full, but the front, sides, and sometimes the nape get brushed down with gel or edge control so the whole style reads cleaner. It’s one of the few puff styles that can move from errands to dinner without looking out of place.
Why It Feels More Polished
The smooth front creates contrast. The puff gets to be big and textured while the hairline stays controlled, and that contrast is what makes the style look finished. You do not need to plaster every strand down. In fact, too much product can make the front look stiff and flaky by the end of the day.
What Helps
- Use a small brush or toothbrush with a light gel.
- Smooth in short strokes instead of dragging the brush through the whole head.
- Wrap a silk scarf around the front for 5 minutes after styling.
- Keep the puff itself free so it still has movement.
If your hairline is sensitive, go easy here. Pretty edges are not worth a sore scalp. The style should look refined, not tight.
8. The Twist-Out Puff
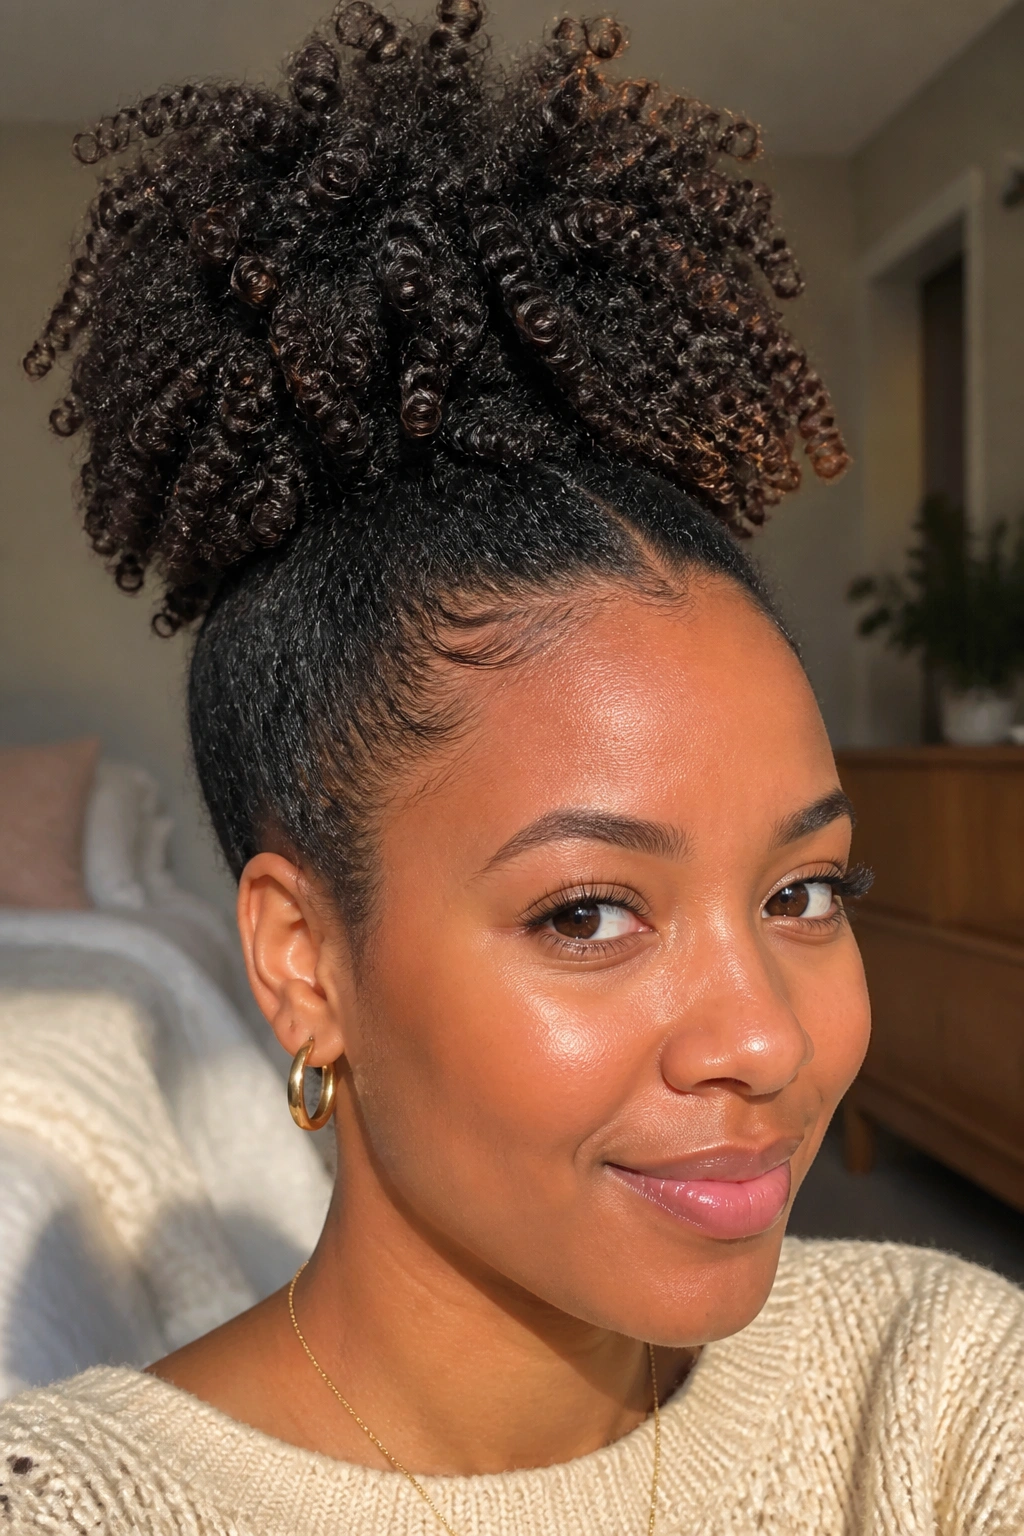
A twist-out puff is one of my favorite ways to rescue hair that has too much body for a loose twist-out but not enough length to hang neatly. The twist-out texture gives the puff some definition, so the style looks fuller at the root and more interesting at the ends. It is a nice middle ground between “let it all out” and “pin everything up.”
The best part is the visual texture. You can usually see the twist pattern still living in the hair, which gives the puff more shape than a plain pulled-back look. That matters on 4C hair because twist-outs often make the length look longer than the raw shrinkage does.
A Few Things That Help
- Separate the twists only when they’re fully dry.
- Use a pick at the roots if you want more lift.
- Keep the front section smooth so the puff doesn’t look messy.
- Add a tiny bit of oil to your hands before fluffing to reduce frizz.
This style has a little more personality than a basic puff. It feels lived-in, not overworked.
9. The Braided Front Puff

Front braids buy you time. That’s the honest truth. When the front of the hair is braided or flat twisted and the back is gathered into a puff, you cut down on the amount of daily smoothing the style needs. You also get a clearer frame around the face, which helps the puff in back feel more structured.
Why the Front Braid Changes Everything
The front braids act like a small anchor. They keep the hairline neat and let the puff do the big visual work at the back. This is especially handy if your edges tend to frizz early or if you want the style to stay presentable for more than one day without a full reset.
A couple of braids is enough. You do not need a full head of cornrows unless you want that look. Two, four, or six neat front sections can lead into the puff nicely.
What to Watch For
- Do not braid too tight. The style should feel secure, not sharp.
- Keep the braid size even so one side does not look heavier.
- Moisturize the front first, since those sections get handled the most.
- Use a soft elastic at the puff base so the braid ends stay comfortable.
This is one of the more practical puff styles for natural 4C hair when you want a little extra staying power.
10. The Mohawk Puff
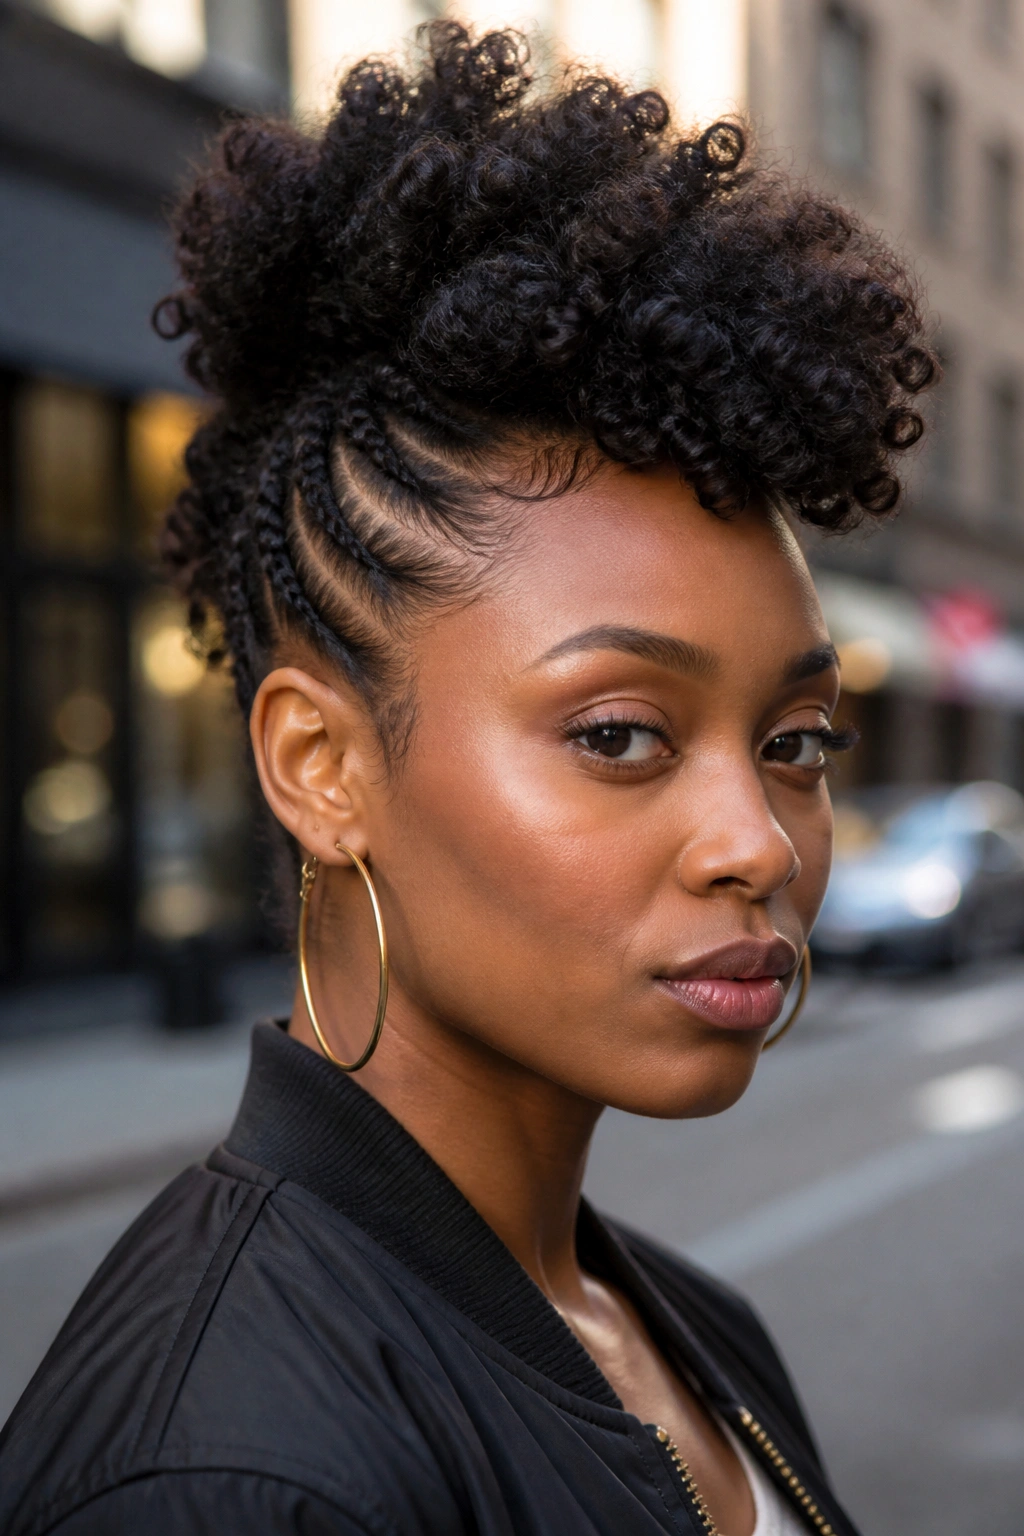
Three soft ridges, one puff down the middle. That’s the whole appeal. The mohawk puff uses side sections that are braided, twisted, or pinned flat, while the center section rises into a full puff. It creates a strong shape without needing a complicated set of steps.
The style works best when the hair has enough density to hold volume in the center. If your 4C hair is thick, this one can look especially good because the puff sits like the centerpiece and the sides act almost like a frame. The contrast is what makes it pop.
There’s a slight edge to this look, but it doesn’t have to feel hard. Keep the side sections soft and neat, not scraped down tight. A small amount of gel along the part lines is enough. Too much product on the sides can make the style look flat in a way that kills the shape.
I like this one for days when a regular puff feels too plain. It gives shape from every angle, and it holds up well in photos without needing a lot of fuss.
11. The Picked-Out Afro Puff
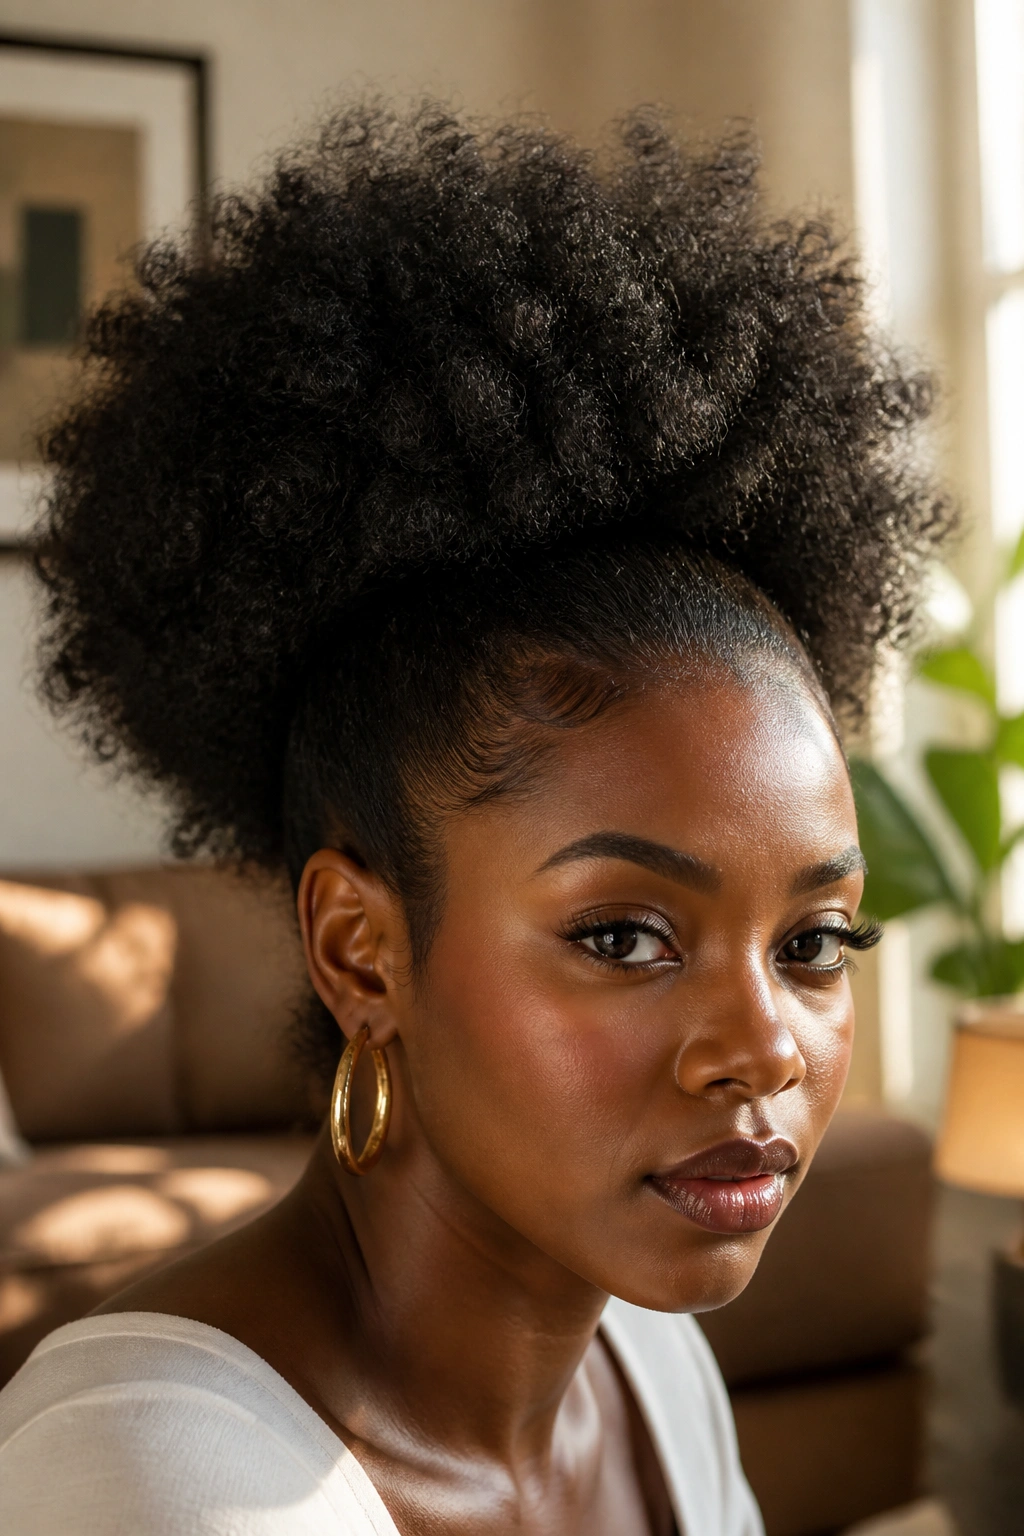
Can a puff be big and still look shaped? Yes, if you pick the roots and leave the ends alone. That’s the trick behind a picked-out afro puff. Instead of pressing the whole style into a tight ball, you lift the roots with a pick so the puff gets a soft halo and more width.
What Makes It Stand Out
This version lets 4C texture look expansive on purpose. The roots rise, the sides fill out, and the puff reads more like a rounded afro shape than a compact ponytail. It’s especially nice when your hair has been stretched just enough to keep some length but still holds its coil pattern.
The main mistake people make is picking too far down the shaft. That creates frizz where you do not want it. Stick close to the roots. A few gentle lifts are enough to build shape.
Use It Like This
- Start with moisturized hair so the coils stay soft while you shape them.
- Pick only at the base of the puff.
- Stop when the puff looks rounded, not fluffy in random spots.
- Smooth the perimeter lightly if you want the shape to look cleaner.
This style is for people who like volume and are not afraid of it. Good. It should be seen.
12. The Center-Part Twin Puffs

When one puff feels too heavy, split it. A center-part twin puff gives you two balanced shapes and a clean line down the middle, which makes the whole style look more deliberate than the usual quick puffs. It can read sweet, sporty, or sharp depending on how high you place the sections.
The center part is doing a lot of the visual work here. It creates order before the puffs even go up, so the final look feels tidy even when the puffs themselves are full and fluffy. That’s useful for 4C hair because the texture already brings plenty of energy; the part keeps it from looking chaotic.
This style is especially good when your hair is dense at the crown and you want to distribute the volume instead of stacking it all in one place. It can also help if one section of hair is shorter or more shrunken than the other, since the puffs are separated and easier to shape individually.
A small detail matters here: keep both base bands at the same height. If one sits much higher than the other, the symmetry falls apart fast.
13. The Bang Puff
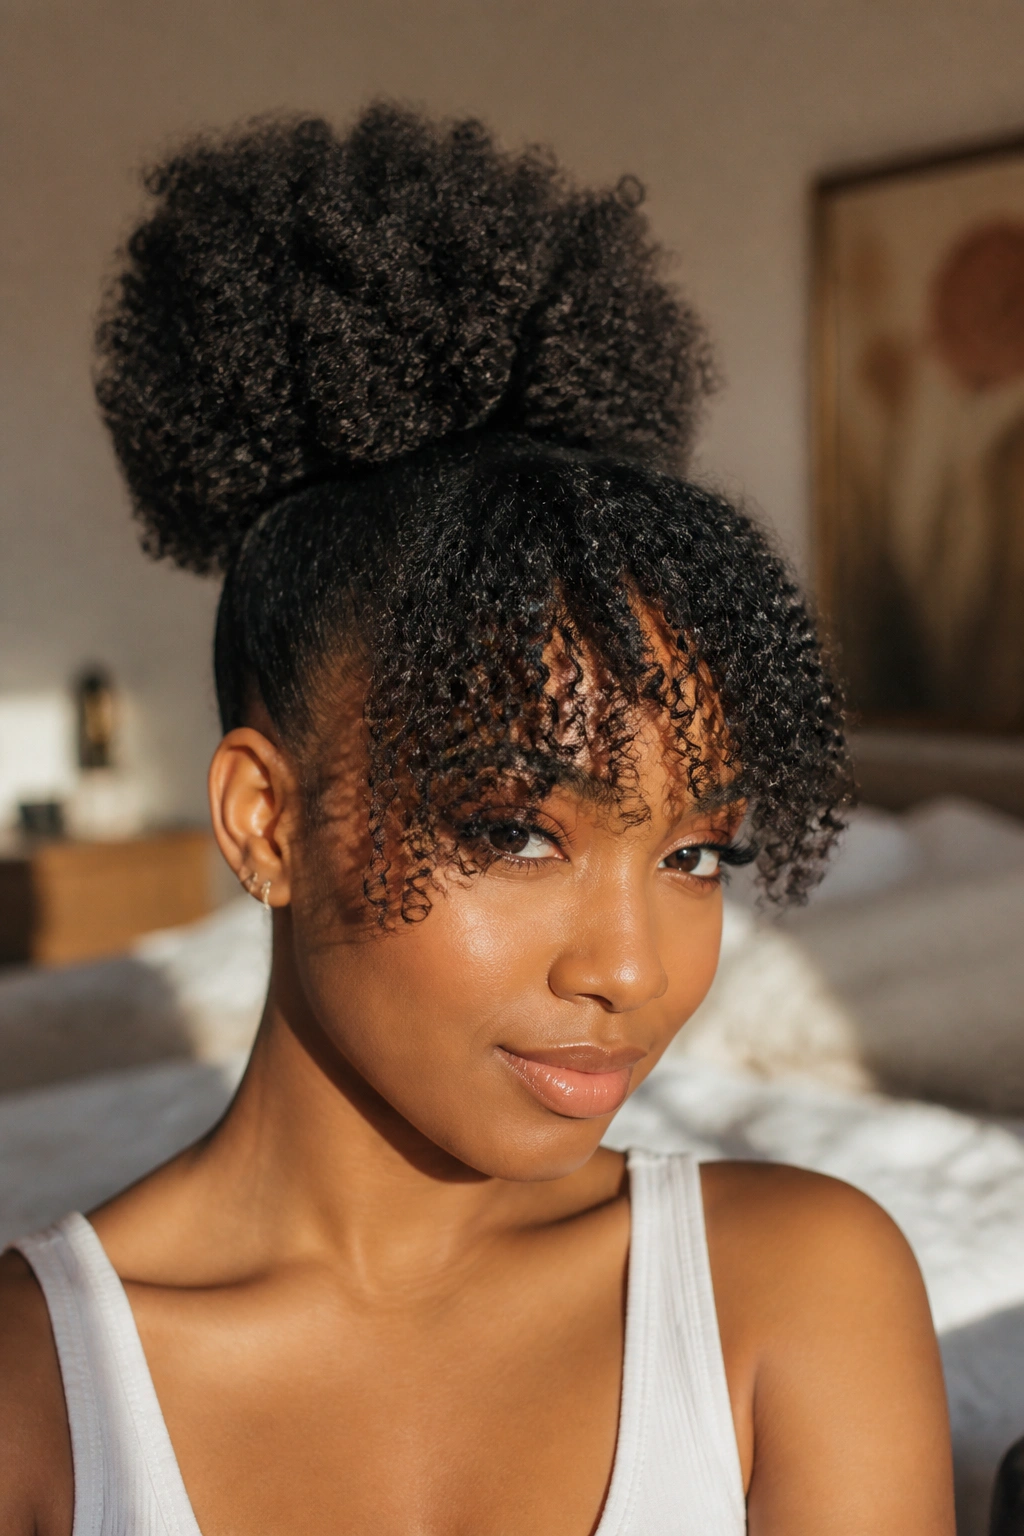
A bang puff steals volume from the front and gives it a little face-framing drama. Instead of pulling every front strand back, you leave a section out as a bang, then gather the rest into a puff. The result can be soft, bold, or a little retro depending on how you shape the front.
Why It’s a Good Switch-Up
The bang changes the whole mood. It breaks the forehead line, frames the eyes, and gives your puff a more styled look without asking for extra hair accessories. On 4C hair, the bang can be a flat twist, a rolled section, or a softly pinned curl, and each version changes the final shape.
It also helps on days when your front sections are not cooperating. Rather than forcing them into the puff and fighting frizz all morning, you let them live in their own space.
How to Make It Work
- Decide how much hair you want to leave out before you gather the puff.
- Define the bang while the hair is still damp, then pin it until it sets.
- Keep the puff slightly back on the head so the front shape has room.
- Use a light touch with gel; heavy product can make the bang look stiff.
This one is especially nice if you like your styles to feel a little more personal than basic.
14. The Scarf-Wrapped Puff
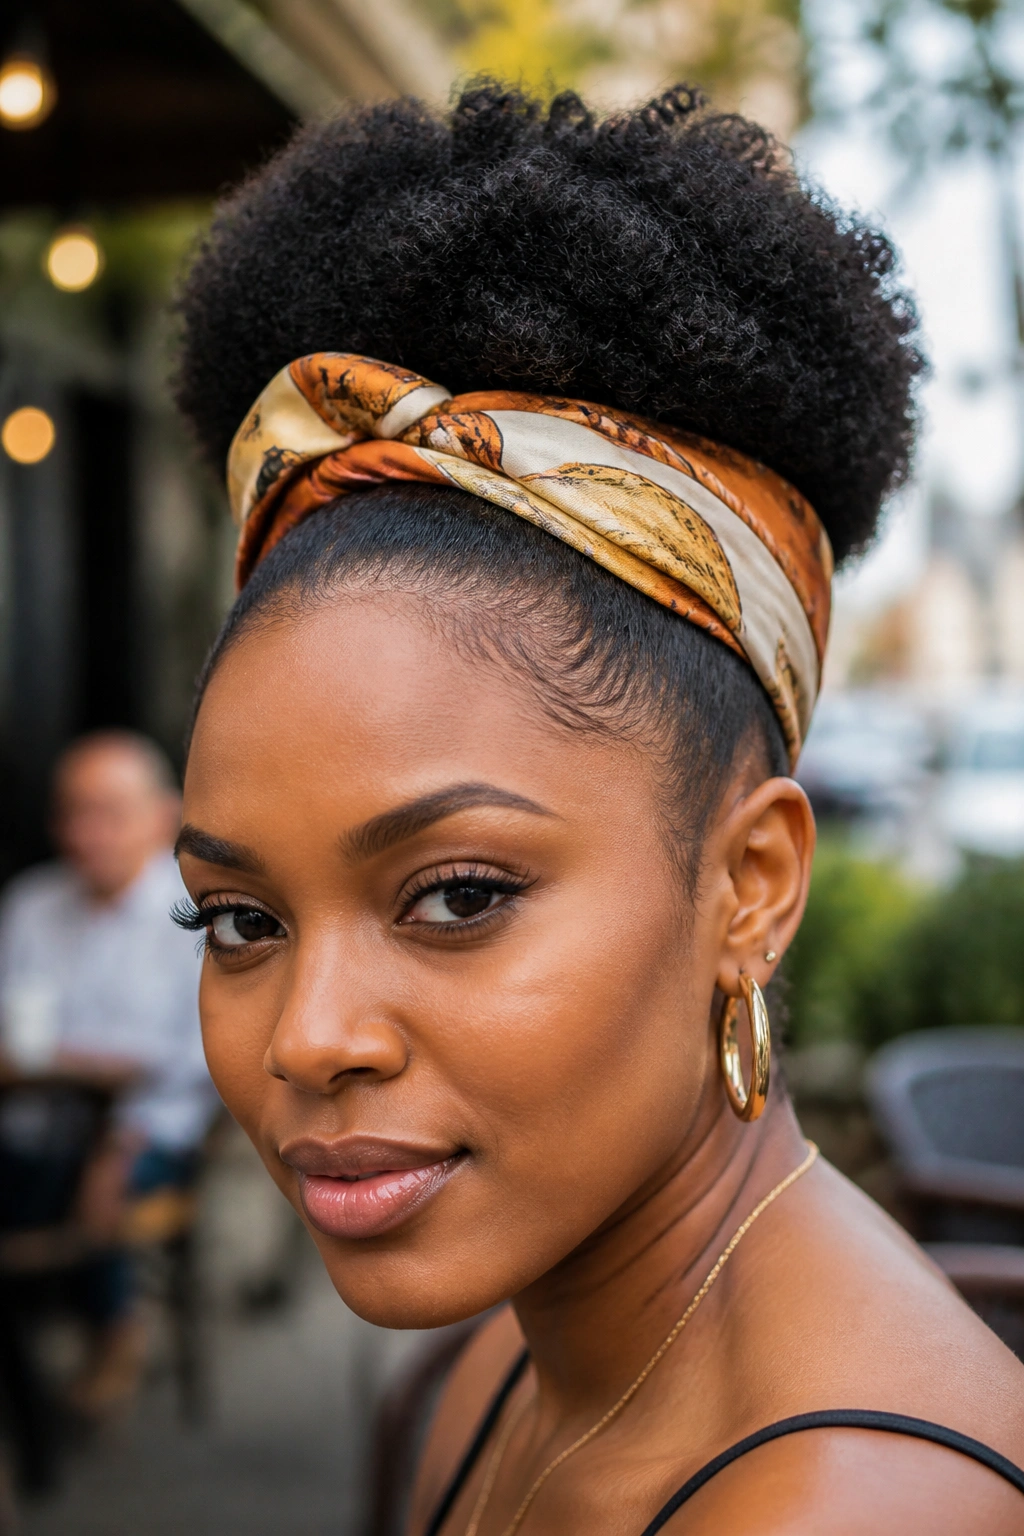
A scarf turns a simple puff into part of the outfit. That’s the easiest way to say it. You can use a silk scarf, satin wrap, or a printed headband to frame the puff, protect the hairline, and hide the spots that need a break. On 4C hair, that kind of cover can be a lifesaver on a day when the roots are frizzy but the puff still has good shape.
The scarf can sit above the puff like a crown, wrap around the base, or cover the front edges while leaving the volume out in back. Each placement sends a different message. Narrow scarf? Cleaner and sharper. Wide wrap? Softer and more dramatic. Bright print? The scarf becomes the point, not the accessory.
Best Ways to Wear It
- Use a satin or silk scarf when you want less friction.
- Tie it snug enough to stay put, but not so tight that it presses the temples.
- Let the puff stay visible; otherwise the style stops being a puff and becomes a wrap.
- Match the scarf placement to the event, not to some rule.
A scarf-wrapped puff is practical, but it does not have to look like a backup plan. It can be the whole look.
15. The Braided-Base Puff Ponytail
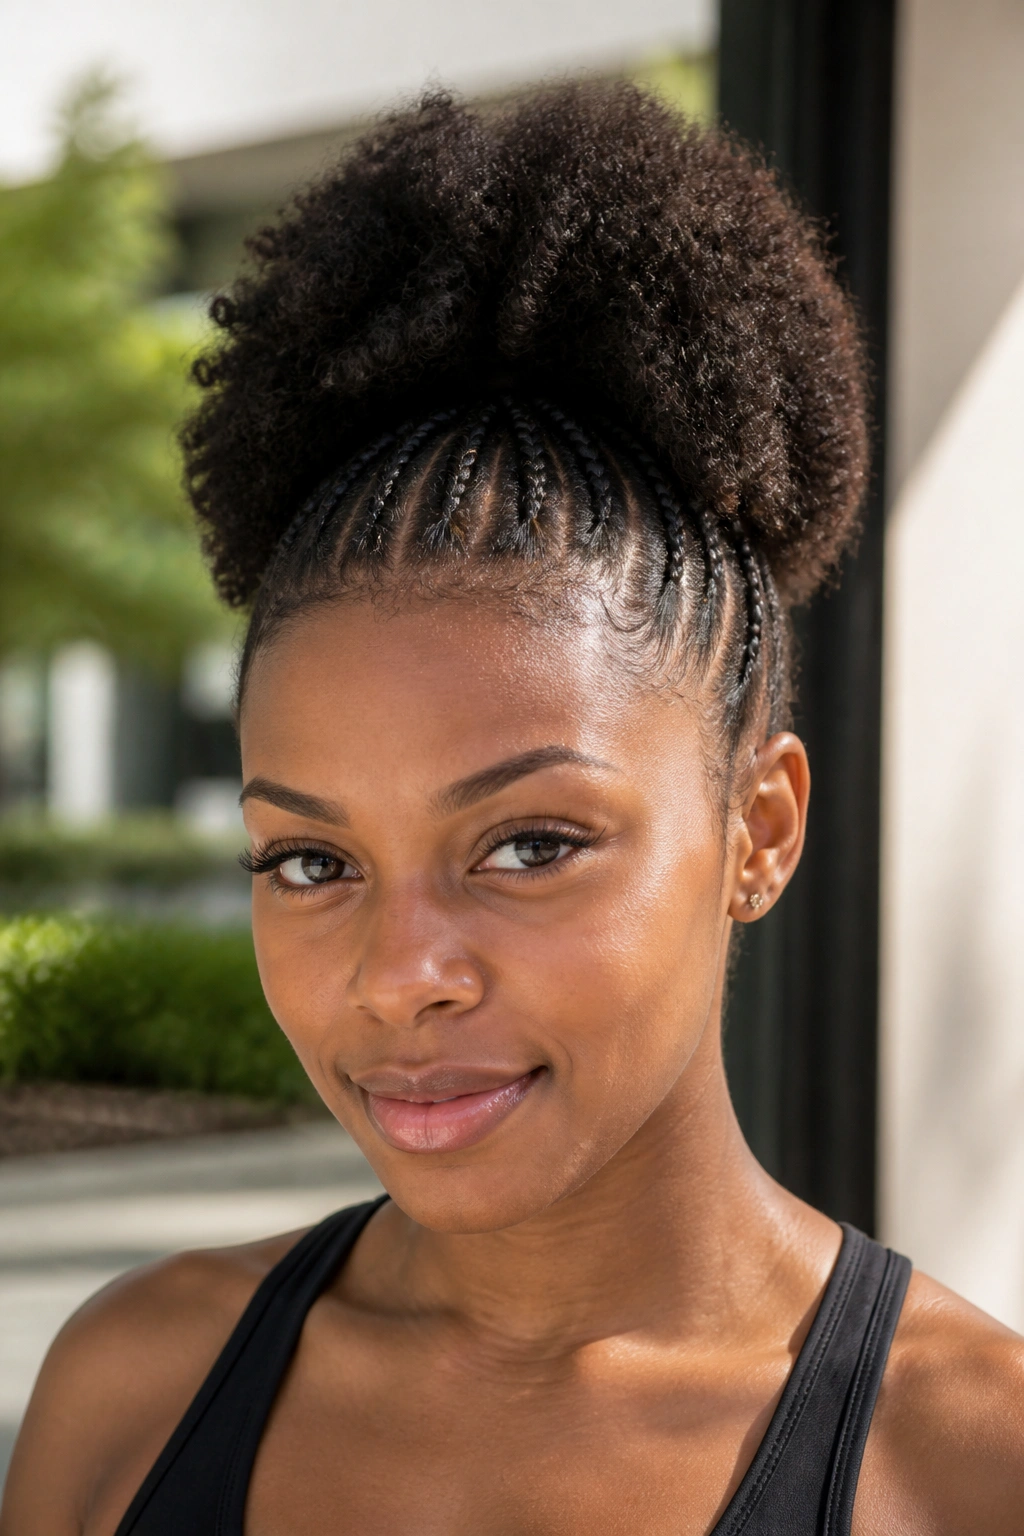
If you want the puff to last longer, build a braid or flat twist at the base. That small detail changes the whole feel of the style. The base stays neat, the tension spreads more evenly, and the puff sits in a steadier position instead of wobbling around as the day goes on.
This version is especially useful for long days, gym runs, or any situation where you want your hair to behave a little better than usual. The braided base keeps the roots from puffing out too fast, which can make the style look fresh for longer. It also gives you a clean line where the puff begins, and that line makes the style look more intentional.
Why It’s Worth Trying
- The base feels more secure than a plain elastic alone.
- The style tends to hold shape better if you move around a lot.
- It works well with added accessories like cuffs or small clips.
- You can do it on stretched or shrunken hair, depending on the finish you want.
If your hair is thick, use a bungee cord or a strong but gentle elastic before you braid the base. If it’s shorter, keep the braid small and close to the scalp so it anchors the puff without pulling.
Final Thoughts

The best puff styles are the ones that respect the hairline first and the shape second. That sounds simple, but it matters. A puff with good placement, a soft hold, and a little moisture can look fresh for hours without asking your scalp to suffer for it.
4C hair gives you more room to play than people sometimes assume. High, low, side, braided, wrapped, picked out, or split into two — each version changes the mood in a real way. Choose the one that fits your hair’s length, your scalp’s mood, and how much styling energy you want to spend that day.
Keep one satin scrunchie, one soft brush, and one scarf close by. That trio solves more puff problems than most people expect.
