



Long hair has a way of looking heavy when it hangs loose all day. A braid fixes that without making the whole style feel stiff or overdone, and that’s why loose braid hairstyles for long hair keep showing up in real life, not just in photos. They give you shape, movement, and a little polish, while still letting the hair look like hair.
The catch is tension. Pull too hard and the braid goes flat, the scalp feels tight, and the style starts looking formal in the wrong way. Leave a little room through the sections and the whole thing softens up fast. That tiny shift changes everything.
A braid that sits too tight does the opposite.
Long hair also has its own rules. The weight can drag a style down by lunchtime, layers can slip out, and silky strands love to escape from neat weaving. So the smartest loose braid looks a bit relaxed on purpose, with enough structure to hold shape and enough softness to keep the length from feeling boxed in.
1. A Soft Side Braid That Falls Over One Shoulder

A side braid is the easiest place to start because the shape does most of the work for you. Sweep the hair to one side, braid it loosely, and let the tail sit over one shoulder instead of hanging straight down your back. That small change makes long hair feel lighter right away.
The trick is in the tension at the crown. Keep the first few passes a touch loose so the braid doesn’t hug the scalp too tightly, then gently pull the outer edges after you secure it. That’s the part people skip, and it’s exactly what gives the braid that soft, fuller look.
One-sentence rule: don’t overthink the finish.
A side braid works especially well on hair that has a little texture or day-two grit, because the strands grip better and the braid stays open instead of collapsing. If your hair is very smooth, a mist of dry shampoo or texturizing spray at the mid-lengths gives the braid something to hold onto. Use a small elastic at the end, then wrap a thin strand of hair around it if you want the finish to look cleaner.
2. The Messy Fishtail Braid That Looks Fuller Than It Is

A loose fishtail braid gives long hair a lot of visual detail without needing perfect sections. That is the appeal. Even when the braid is a little uneven, it still looks intentional because the pattern itself does the heavy lifting.
Why It Works on Thick or Layered Hair
Fishtails break the hair into small pieces, which helps long layers blend in instead of sticking out in strange places. Start with two main sections, then take tiny pieces from the outside of each side and cross them over. Keep the pieces small and uneven in a relaxed way; if every grab is the same size, the braid starts feeling rigid fast.
Pull the braid apart after it’s secured. Not aggressively. Just enough to widen each little rung and open up the shape. That’s the move that makes a fishtail look thicker than it really is.
- Works well with hair that already has wave or bend.
- Needs a little patience at the start.
- Holds up better if the ends are lightly texturized.
- Looks best when the tail stays slightly undone.
Tip: If the fishtail keeps slipping, braid it when the hair is not freshly washed. A little natural oil gives the sections more grip.
3. A Half-Up Crown Braid That Keeps Length Down
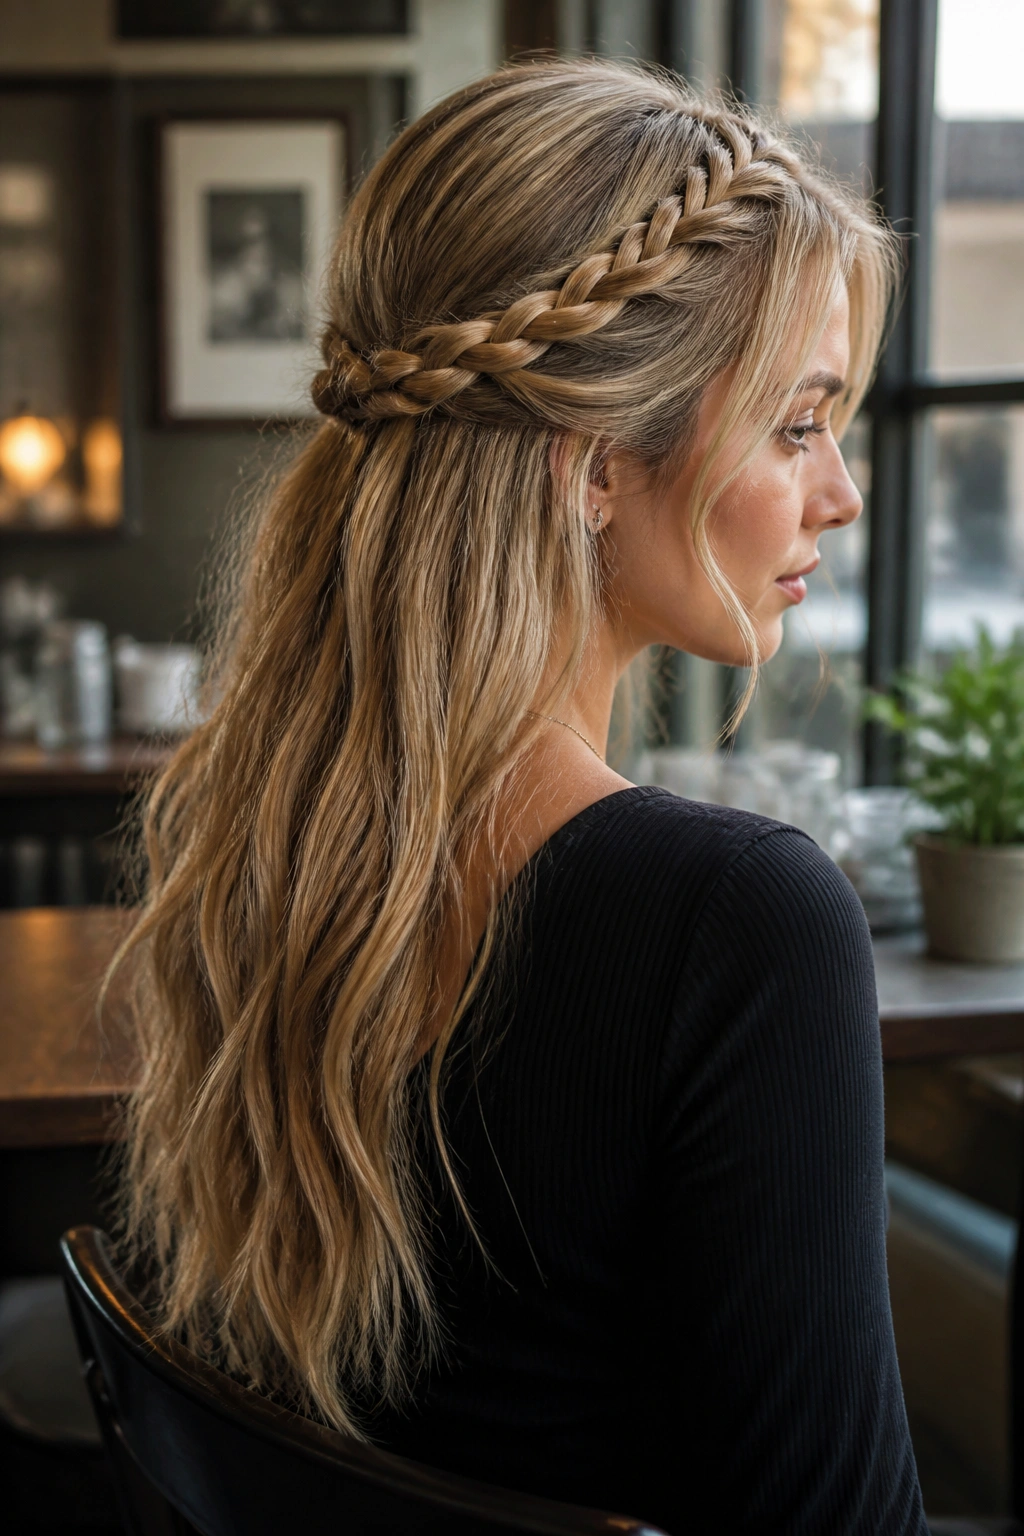
Why does a half-up crown braid feel easier than a full updo? Because it lets the length stay visible while the braid handles the top half of the hair. You get the neatness around the face and the movement in the back, which is a nice trade.
Start by taking two sections from either side of the head near the temples. Braid them back toward the crown, then pin them together or cross them at the back. The braid can be a standard three-strand braid, a rope braid, or even a tiny Dutch braid if you want more shape. The important part is keeping the braid low enough that it doesn’t sit like a headband.
How to Keep the Crown from Sliding
Use two crossed bobby pins instead of one. It sounds small, but it matters. The pins grip each other and the braid, and that makes the style hold better on slippery hair.
Leave a little lift at the roots before you pin. If the top is crushed flat, the braid looks attached to the head instead of resting on it. A little teasing at the crown—just a quarter-inch of hair, not a nest—gives the style some air.
This one is good for brunch hair, weddings, and any day when you want the front of your hair out of your face without giving up the length.
4. A Low Dutch Braid with a Relaxed Pull

A low Dutch braid gives long hair a chunkier shape than a regular braid, and the raised texture looks good when you loosen it out. Braid under instead of over, start low near the nape, and keep your hands soft. That’s the whole mood.
Because the braid sits low, it works well for long hair that gets heavy by noon. The structure stays near the neck, where it can support the weight better, and the tail doesn’t pull at the scalp. If you’ve ever had a braid that seemed to sag halfway through the day, this solves part of that problem.
What Makes It Stay Soft
- Start with a clean center part or a deep side part.
- Pull the outer loops a little after braiding.
- Leave two short pieces near the ears if you want a looser frame.
- Finish with a small elastic and tuck it under a sweater collar or scarf if the ends are long.
The braid looks especially good when the sections are not razor neat. A bit of unevenness gives it life. Too neat and it starts to feel like a school hair day. Too messy and the shape disappears. The sweet spot is right between those two.
5. A Pull-Through Braid Made for Serious Length

A pull-through braid is one of those styles that looks complicated and is secretly friendlier than it seems. It’s also one of the best loose braid hairstyles for long hair because long hair gives it more to work with. The extra length makes the linked sections look dramatic in a good way.
You build it with small ponytails secured one below the other, then pull the lower ponytail through the top one and fan the pieces out. Repeat. The braid doesn’t rely on traditional weaving, so it’s a nice option if your hands get tired fast or your hair is very thick.
The Sections That Matter
The size of each section changes the whole look.
- Larger sections give a chunky, modern braid.
- Smaller sections create a tighter, cleaner pattern.
- Clear elastics keep the structure invisible.
- A wide-tooth comb helps the sections stay smooth before each tie-off.
When you finish, tug the sides of each loop outward with your fingertips. Not too much. Just enough to make the braid look full and soft. This style holds especially well if you use a little mousse or light cream before starting, since the strands need some grip.
6. A Waterfall Braid With Long, Flowing Ends

A waterfall braid is the prettiest kind of orderly chaos. Hair is lifted into the braid, then one section drops out to become part of the loose length below, so the style looks lacy without pinning everything up. It’s delicate, but not fussy if you keep the sections small.
This braid works best when the hair has been brushed smooth and the top layer is easy to separate. A little smoothing cream on the mid-lengths helps the strands slide into place without puffing up. If the hair is very layered, take extra care with the dropped pieces so they fall evenly rather than sticking up.
The nicest part is how much movement stays in the style. The braid runs across the head, but the long ends still swing freely. That balance is hard to beat.
One-sentence note: waterfall braids hate rough handling.
Use a light hold spray once the braid is in place, then finger-comb the loose ends so they don’t feel stuck together. For an evening look, curl just the lowest few inches. For daytime, leave the length straight and let the braid do the talking.
7. A Rope Braid Ponytail With Soft Movement
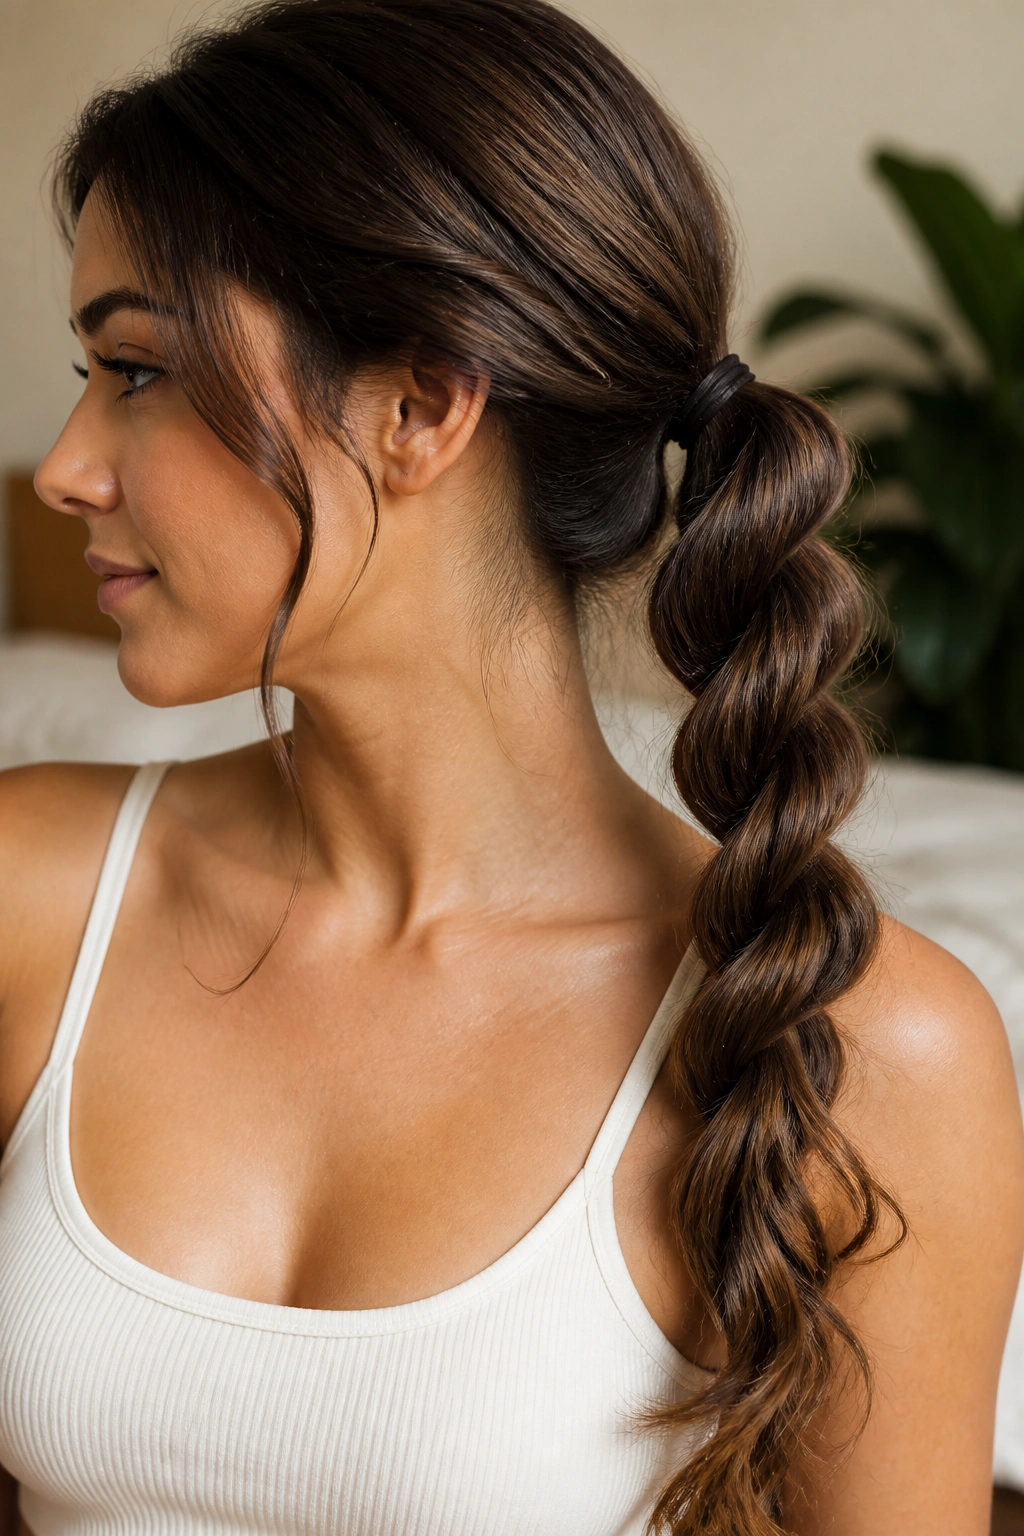
Not every braid needs weaving. A rope braid is just two sections twisted around each other, which makes it fast, clean, and good for long hair that keeps swallowing more complicated styles. It also gives a nice spiraled texture that sits well in a ponytail.
Gather the hair low, mid-height, or high, depending on how casual you want it to look. Divide it into two sections, twist each one in the same direction, then wrap them around each other in the opposite direction. That opposite motion is what helps the braid hold together. If you twist both steps the same way, the braid starts to unwind.
This style is especially useful when the ends of your hair are dry or frayed, because the twist hides a lot. Wrap a small strand around the elastic if you want the base to look cleaner. A few loose face-framing pieces make the whole thing feel less sporty and more lived-in.
It’s the braid I reach for when I need my hair up and don’t feel like fighting with it.
8. Two Loose Braids with a Clean Center Part

Why do two loose braids feel easier than one? Because the weight gets split. Instead of pulling the whole head into a single line, you get symmetry, balance, and a little room around the neck. It’s practical, and it still looks styled.
A clean center part sets this one up well, especially on long hair that has enough length to drape over both shoulders. Braid each side loosely, leaving the first inch near the scalp a little soft. If the braids start at the temples, the shape feels more relaxed. If they start lower, the look leans quieter and a bit more classic.
A Small Trick That Helps
Before braiding, mist the roots with dry shampoo or texture spray and brush it through. That little bit of grip makes the sections easier to control, which matters more on sleek hair than people admit.
These braids also make a nice base for the next-day wave pattern. Sleep in them, and the hair comes out with a bend that looks effortless without being messy. I know, people say that phrase too much. Still true here.
A single elastic at each end is enough. No need to pile on accessories.
9. Milkmaid Braids Worn Low and Soft

Milkmaid braids can look fussy, but the low version is one of the easiest soft updos to wear. Instead of wrapping the braids high and tight around the head, keep them low and let a little hair sit near the ears. The result feels gentler and less costume-like.
Braid two sections, one on each side, then cross them at the back and pin them into place along the head. The ends can be tucked under or left to mix into the braid path. Long hair helps here because you have enough length to pin without the whole style feeling short or thin.
Where the Pins Go
- Put one pin where the braid crosses behind the ear.
- Put a second pin where the braid lands at the opposite side.
- Hide the pin under a coil of braid, not on top.
- Use a matching pin color if your hair is dark or very light.
A few wispy pieces around the temples keep the style from feeling severe. Don’t flatten the crown too much, either. A tiny bit of lift there makes the whole braid sit better.
This one likes second-day hair. Freshly washed hair can be slippery, and milkmaid braids need enough grip to stay put.
10. A Side-Swept Lace Braid with Face-Framing Pieces

A side-swept lace braid is what I reach for when I want hair off the face but still want most of the length down. It starts like a French braid, but you only add hair from one side as you work across the head. That makes the braid lie along the hairline in a graceful diagonal.
The “lace” part is less about romance and more about control. Because you’re only picking up hair from one side, the braid stays narrow and neat without taking over the whole head. It’s a good choice for long layers, since the loose ends can stay down and move around the shoulders.
How to Keep It Looking Soft
Leave two slim pieces loose near the front. Not huge chunks. Just enough to frame the cheekbones and soften the braid’s line. Use a flat iron or curling wand on those pieces only if the rest of the hair is already textured; you don’t want the front to look disconnected from the body of the style.
A lace braid like this also works well with earrings, because the braid clears the side of the face and gives the ear room to show. Small detail, big difference.
11. A Bubble Braid Finished with Tiny Braid Anchors
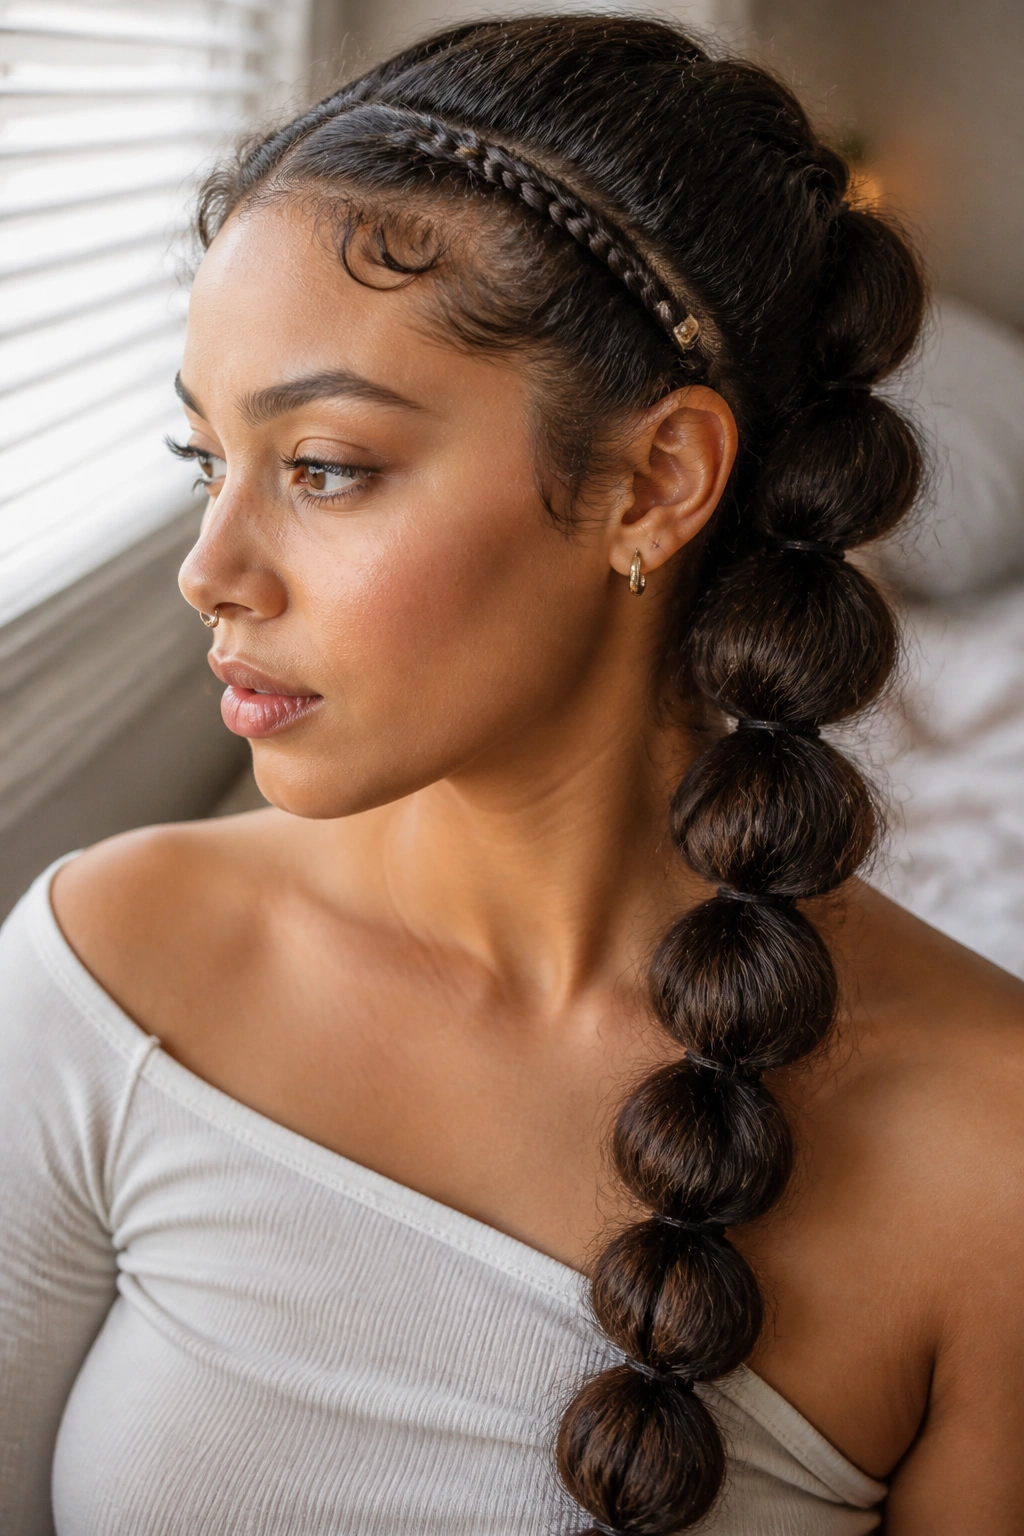
Bubble braids are a smart trick when you want drama without a lot of weaving. On long hair, the bubbles create shape fast, and a few tiny braids at the top or sides keep the style from looking too plain. It’s a nice hybrid if you like playful hair but still want something that feels thought-out.
Start with a ponytail, then secure it again every few inches with clear elastics. Gently pull each section outward until it rounds into a bubble. The hair between elastics should puff a little, not explode. That balance matters. If the bubbles are too wide, the style loses its line.
Tiny Braids, Small Job, Big Payoff
Braid a skinny section from one side before gathering the ponytail, or add two mini braids near the temples and feed them into the base. That gives the whole style a more finished edge and keeps it in the braid family.
This style is especially good for long hair that feels flat in a normal ponytail. The bubbles create volume from the hair you already have, which is a nice cheat. Use a soft scrunchie or a wrapped elastic at the base so the look stays gentle.
12. A Four-Strand Braid with Rope-Like Texture
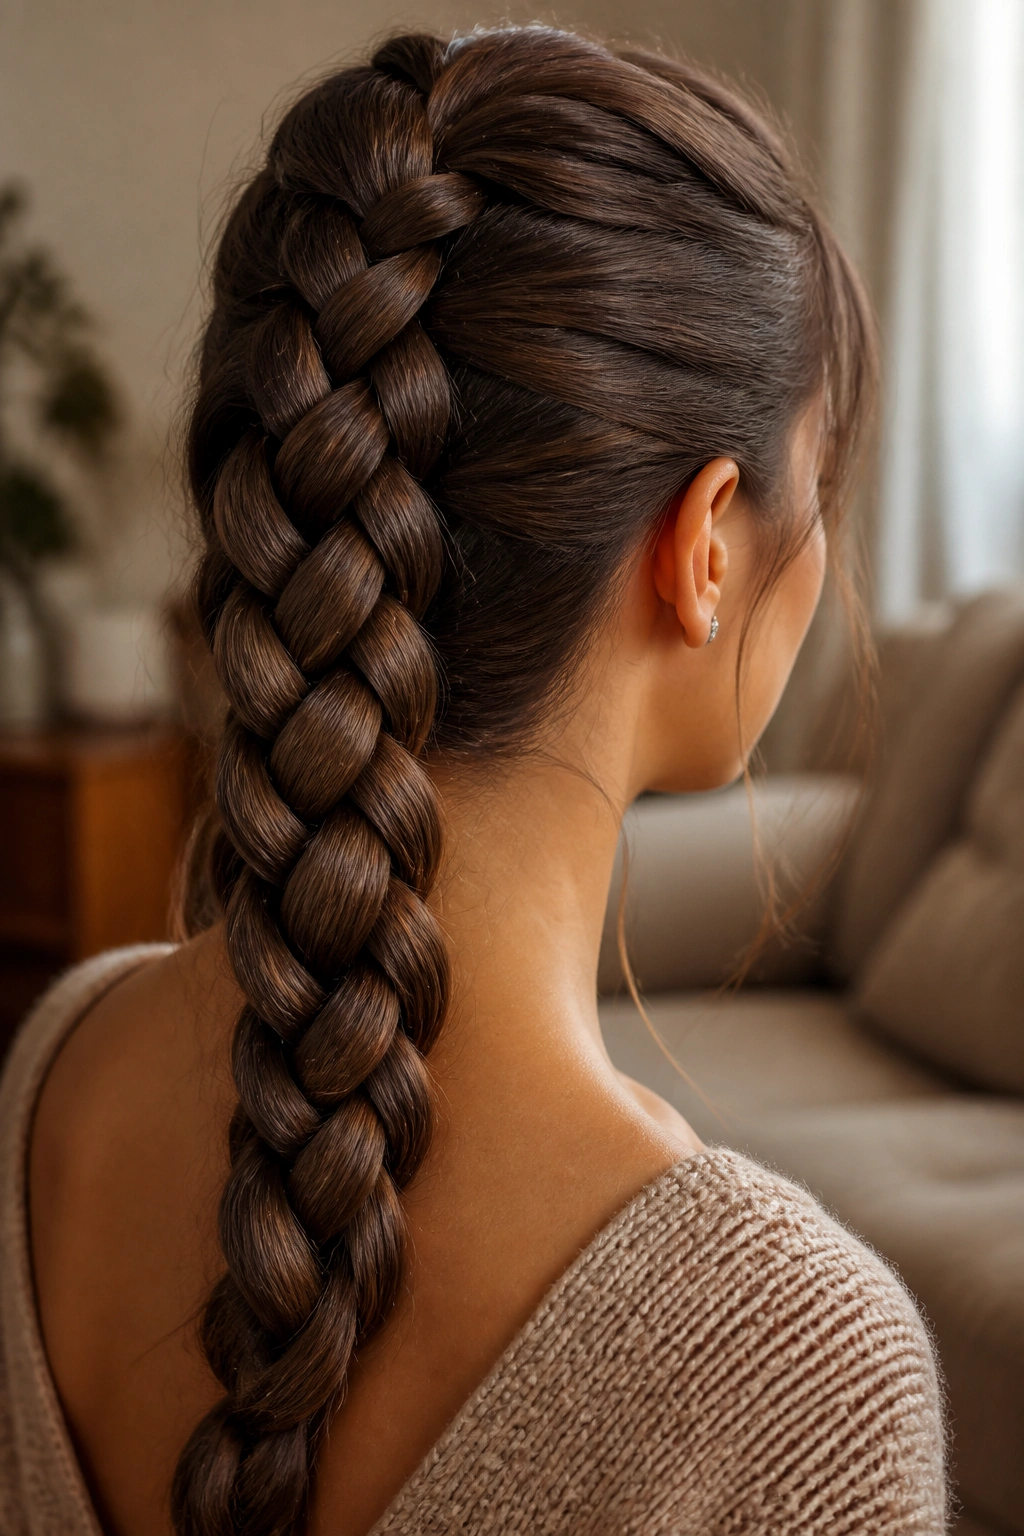
A four-strand braid looks richer than a basic three-strand braid because the pattern has more movement in it. It’s one of those styles that rewards long hair without making you work with tiny sections. The braid comes out broad, a little rope-like, and more textured than people expect.
The first pass can feel awkward. That’s normal. Once the sections are set, the pattern repeats in a steady rhythm, and the shape becomes easier to control. Keep the hands even and don’t yank the strands tight at the base, or the braid will lose its softness before you’re halfway down.
A little tension goes a long way here.
If your hair is layered, smooth the shorter pieces into the braid with a light cream before you start. The added slip helps, oddly enough, because the sections lay flatter. Then pull the finished braid apart lightly from both sides to widen it.
This braid is one of my favorites for thick hair that needs a style with some presence.
13. An Accent Braid Blended Into Beachy Waves
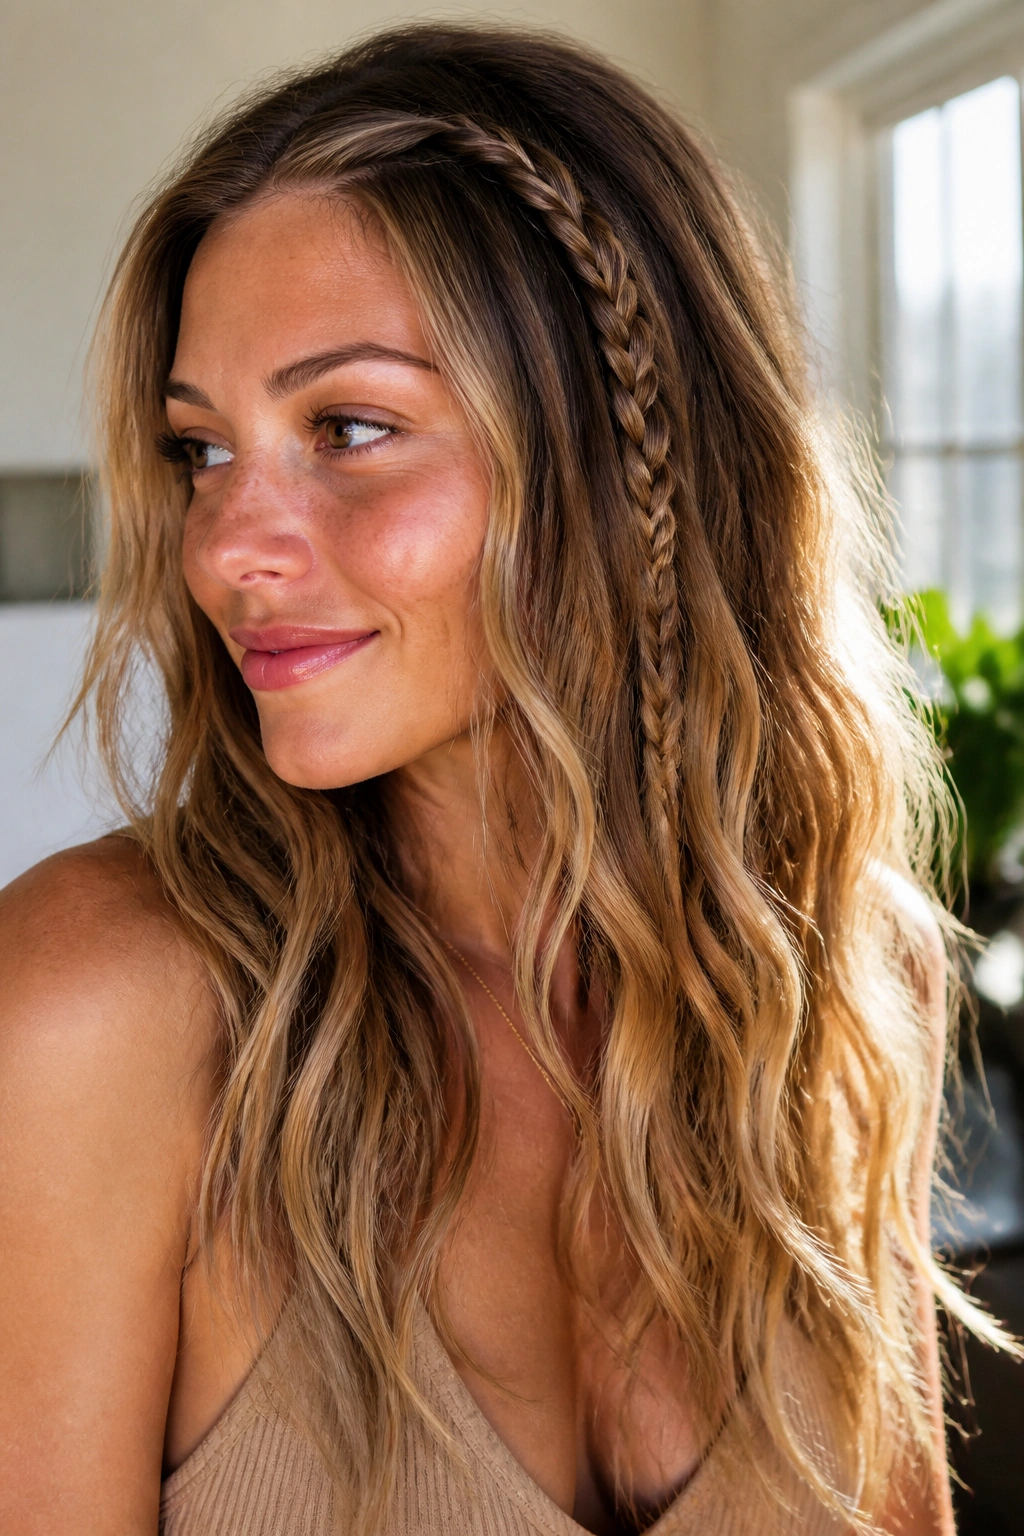
Can a tiny braid matter that much? Yes. An accent braid near the temple, behind the ear, or along one side of a part can change the whole feel of long hair without stealing the show. It adds structure where you want it and leaves the rest loose.
The braid itself can be narrow, just a half-inch to an inch wide, and it only needs to run a few inches before blending into the rest of the hair. That makes it easy to wear with waves, straight hair, or soft curls. If the rest of your hair is loose and textured, the braid reads like a deliberate detail rather than an extra feature.
How to Get the Most From It
- Start with a clean section so the braid doesn’t pick up stray pieces.
- Keep the braid slightly loose so it doesn’t feel pinned to the scalp.
- Secure it with a tiny elastic or tuck it into the rest of the hair.
- Curve the braid toward the back if you want the style to open the face.
This one is lovely for long layers because it gives the top half something to do while the ends stay free. Small effort, good payoff.
14. A Chunky French Braid That Ends in a Loose Ponytail
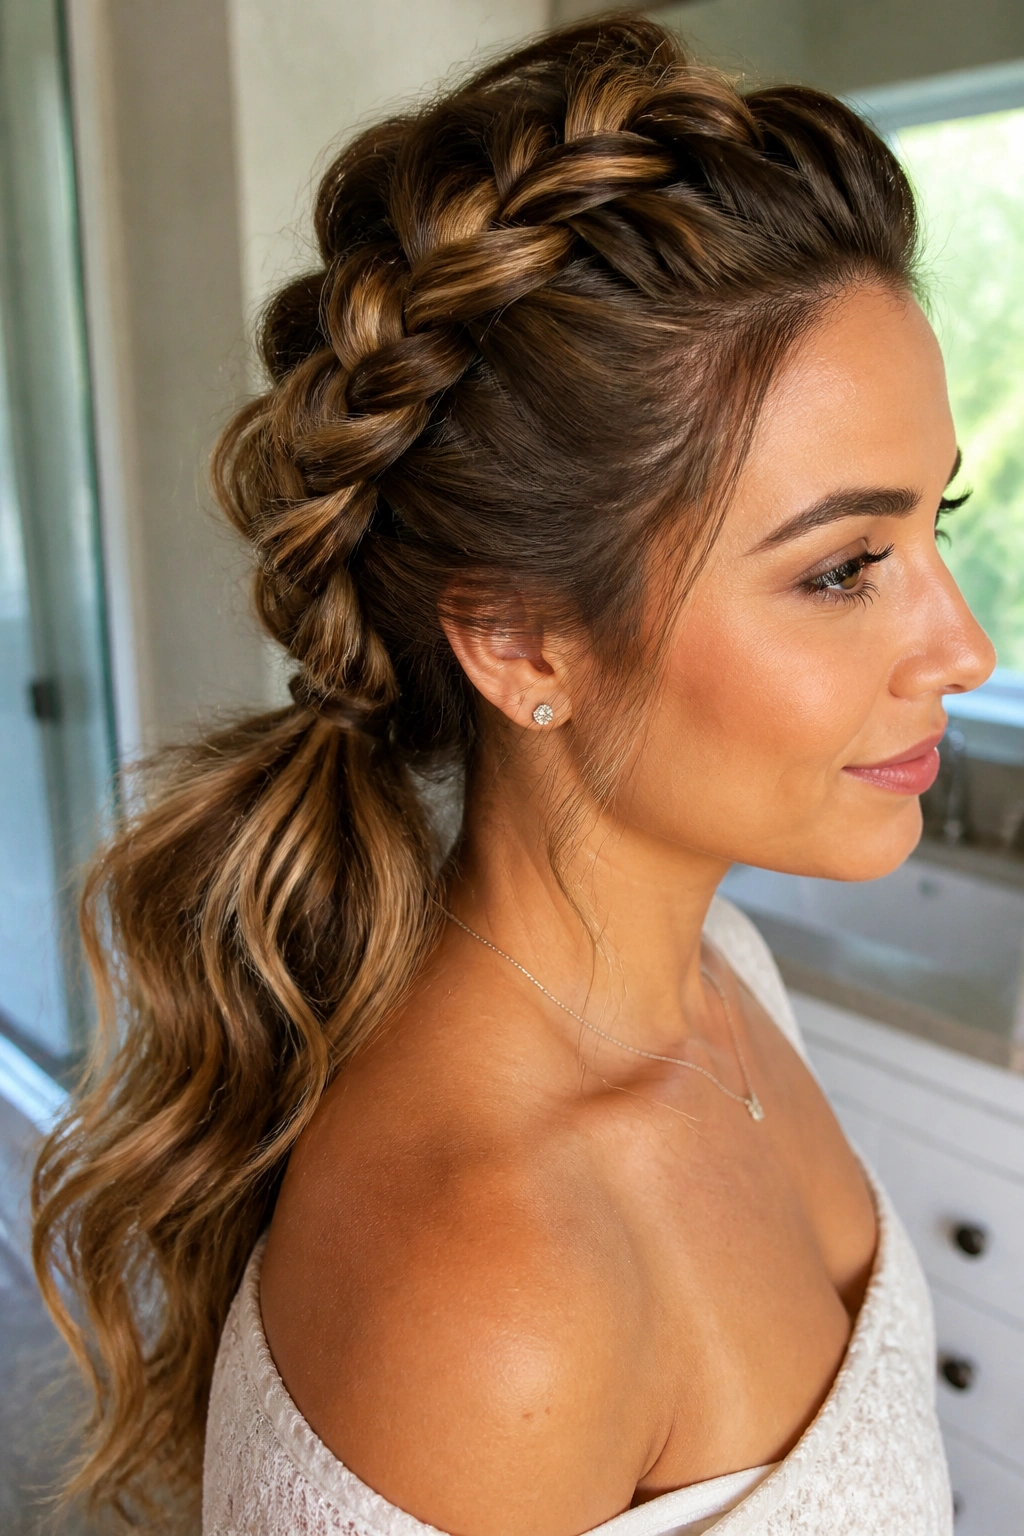
A chunky French braid is one of the easiest ways to make long hair look controlled without making it rigid. Start at the front hairline, add large sections as you braid back, and stop once you reach the crown or the back of the head. Then let the rest fall into a loose ponytail.
That halfway finish is the whole point. You get the clean line through the top and the ease of a ponytail through the length. The braid also keeps the front secure, which helps if your hair slips forward whenever you move.
If you want it softer, lift the braid outward after it’s tied off. Pull each side a little with your fingertips until the braid broadens and the edges look a bit fuller. That step matters more than people think.
A few loose strands near the temples keep the style from feeling too gym-class neat. If you’re wearing it on day-two hair, even better. The braid takes on more shape when the hair has a bit of grip.
15. A Twisted Braid Bun with Loose Pieces Around the Face

A twisted braid bun is what happens when you want the hair up, but not too polished. Braid the length first, or twist two sections together, then wrap the result into a low bun at the back. Leave a few pieces out around the face and at the nape. Those loose strands keep the style from looking severe.
Long hair gives this one a nice advantage. There’s enough length to coil without the bun needing to sit tiny and tight. Pin it with four to six bobby pins, depending on thickness, and tuck the ends underneath so they don’t poke out. If the bun feels too neat, pinch a few coils apart until the shape loosens.
Where the Twist Goes
Some people start the braid at the nape. Others start a braid at each side and gather them into a bun. Either works. The important part is leaving the front soft and not winding the hair so tightly that it feels helmet-like by the end of the day.
This style is useful when you need your hair off your shoulders but still want movement around the face.
16. A Pull-Back Braid Held with a Claw Clip
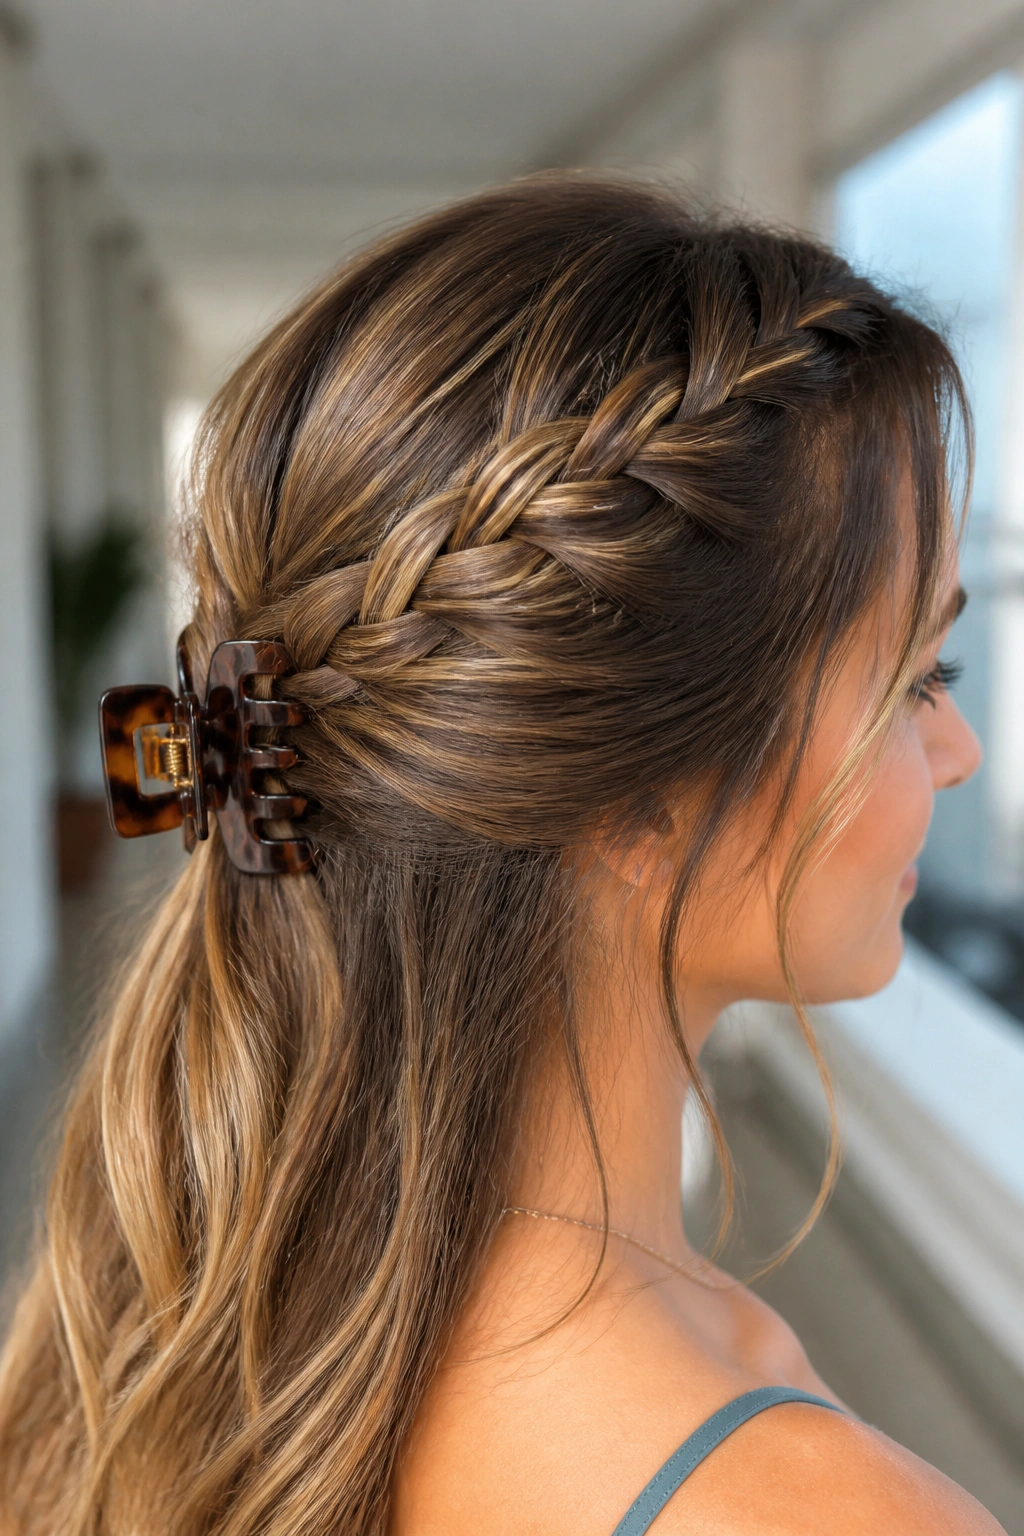
A claw clip and a braid make an unexpectedly good pair. Braid the top section or a small section from each side, pull it back, and clip it at the back of the head. The rest of the long hair stays down, so you keep the length while getting the front under control.
This style works because the braid gives the clip something textured to hold onto. A plain twist can slide. A braid gives the clip more grip. That matters on fine or silky hair, where clips tend to slip if the base is too smooth.
One-sentence note: the clip should sit low, not high.
Pick a clip that fits the amount of hair you’re holding. Too small, and it will bite into the braid and slide out. Too big, and the whole thing sits awkwardly. A medium clip usually handles long hair better than people expect, especially if the braid is kept compact.
Leave the ends loose and soft. The contrast is what makes this style work.
17. A Ladder Braid That Shows Off Long Layers

A ladder braid looks intricate because the eye has to follow the “rungs” as they move down the hair. On long layers, it becomes a clever way to keep the hair controlled while still letting the ends fall freely. The braid can sit across the back of the head or angle down one side.
The pattern needs clean sections, so a smoothing spray or a lightweight cream helps before you start. If the hair frizzes easily, work on brushed hair and use your fingers only after the braid is secure. That keeps the little ladder pieces visible instead of fuzzy.
Best Hair Setup
- Long layers should be lightly smoothed first.
- Straight or softly waved hair works better than very fluffy texture.
- A rat-tail comb makes sectioning easier.
- Small clear elastics keep the pattern neat at the endpoints.
This is not the fastest braid on the list. Fine. Some styles are about speed, others are about the line they make. If you enjoy the detail and don’t mind spending a few extra minutes, the ladder braid gives long hair a more deliberate shape than most loose braids can manage.
18. A Loose Festival Braid with Tendrils and Soft Texture
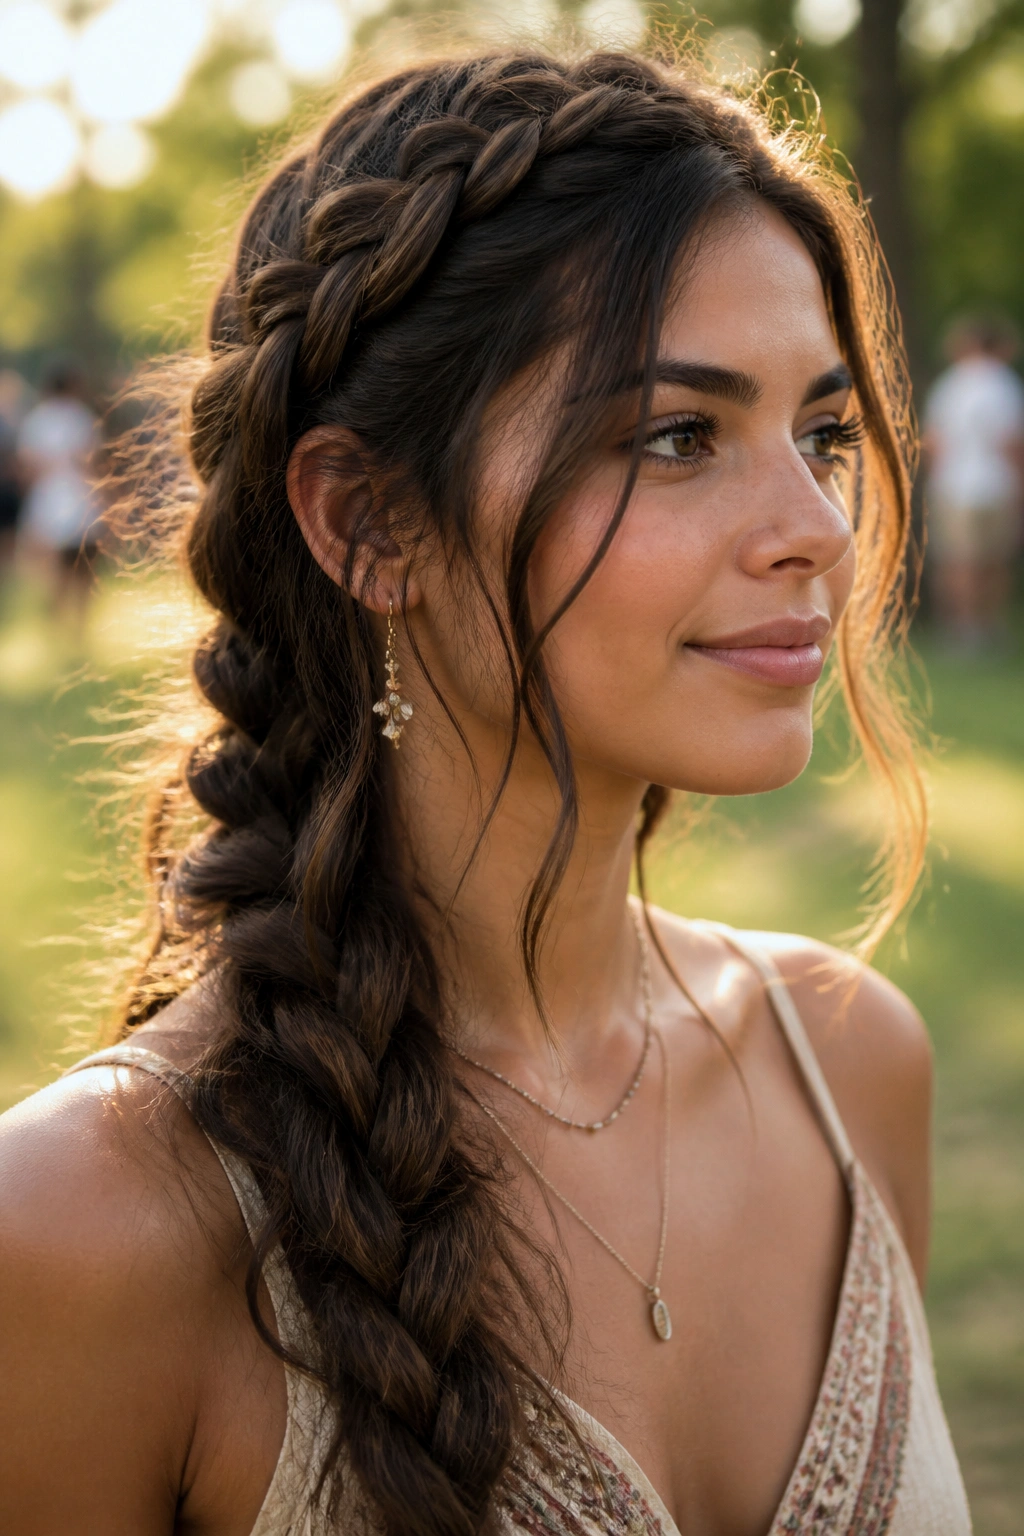
A loose festival braid is the style that forgives a little chaos. That’s why it works so well on long hair. Start with one braid, add a few smaller braids near the hairline or around the crown if you want more texture, then leave the rest of the length soft and moving.
This is the place for tendrils. Short face-framing pieces, wisps at the temples, a bit of bend through the ends—those details keep the style from feeling too fixed. You can curl a few strands or leave them straight if the hair already has a natural wave. Either way, the braid should feel relaxed, not precious.
If you’re aiming for a more bohemian look, tuck in a thin ribbon, a subtle cuff, or a small wrapped elastic near the end. Keep the accessory small. The braid should still read first.
Long hair makes this style easier because you have room to layer details without crowding the shape. That’s the advantage, really. You can add a braid near the front, leave one braid along the side, and still keep the length visible through the back.
A loose braid never has to be perfect to work. It only has to hold its shape long enough to let the hair move, and long hair is generous that way. Give it a little grip, keep the tension soft, and don’t smooth every stray piece into obedience. The loose ones are often what make the braid feel like yours.
