



The quickest way to spot a good hairstyle that shows off natural texture is simple: you can still see the pattern.
That sounds obvious, but it gets lost fast. A lot of styles flatten curls, stretch coils into submission, or bury waves under so much product that the hair stops looking like hair. The styles that work best do the opposite. They let shrinkage happen, they keep curl clumps intact, and they give the shape room to breathe.
Natural texture is not a flaw to smooth away. It’s the whole point. Tight coils, loose waves, zig-zag bends, fluffy roots, and springy ends each bring something different to a style, and the best looks lean into that instead of fighting it. When a style is built well, you can see the movement from across the room.
I keep coming back to one simple truth: the difference between “done” hair and “good” hair is usually the structure underneath. Clean parting, enough moisture, the right amount of stretch, and a shape that suits the head instead of chasing a photo from somewhere else. Get those pieces right and natural texture does the heavy lifting.
1. Wash-and-Go With Defined Curl Clumps
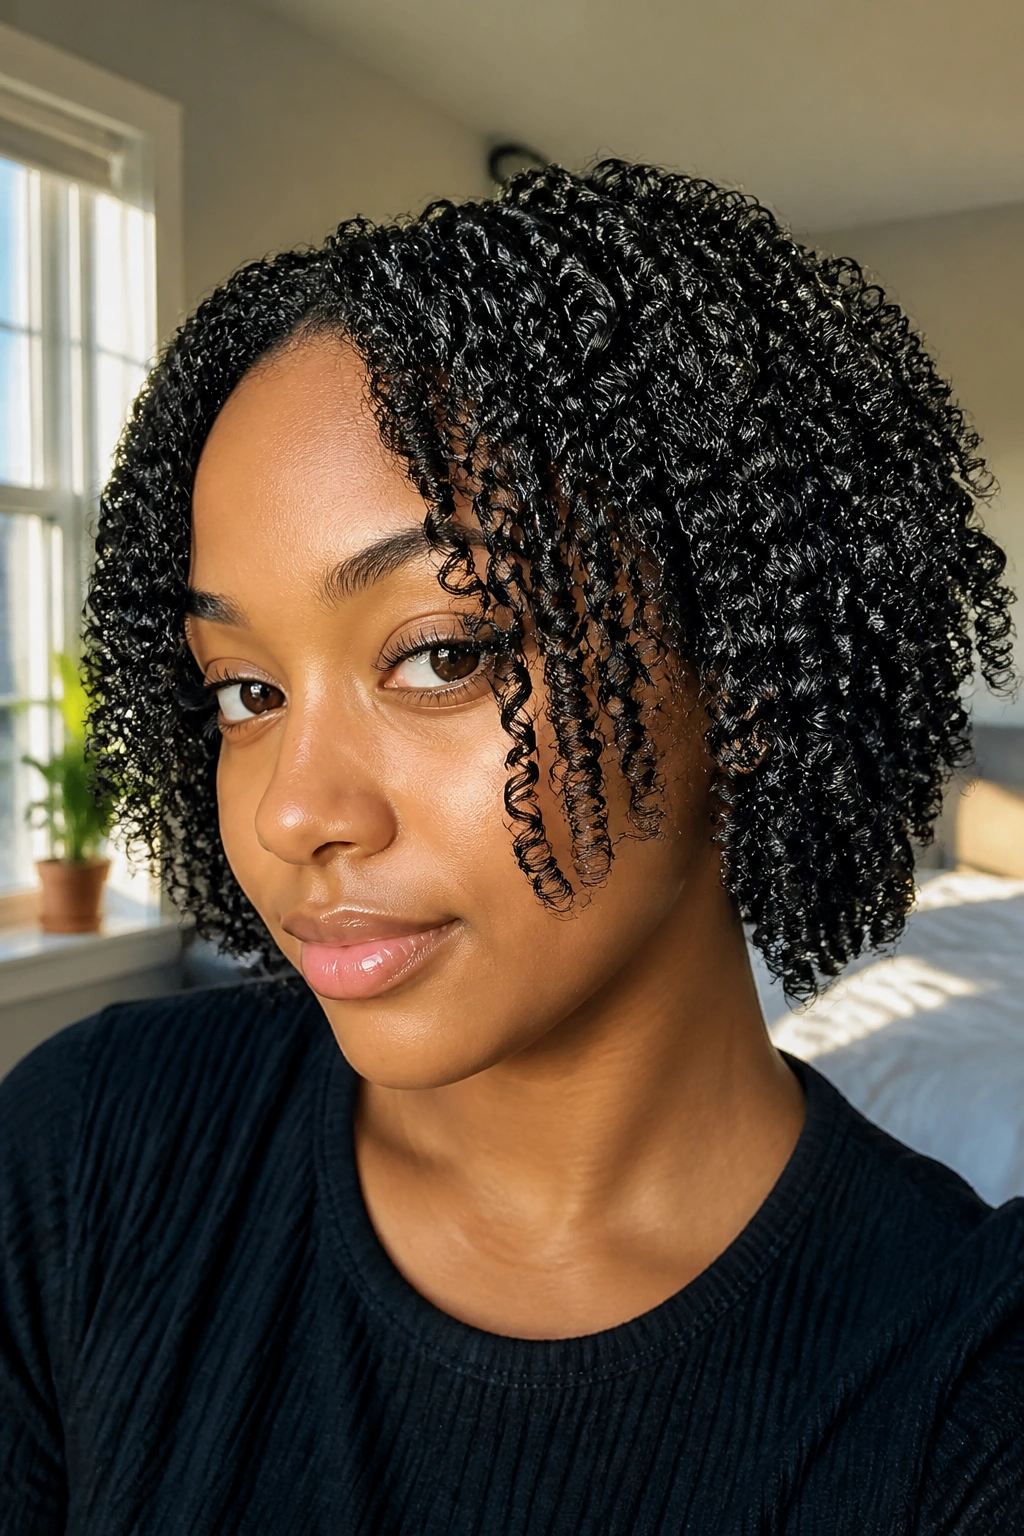
A strong wash-and-go is still one of the clearest ways to show off natural texture. It puts the curl pattern on display instead of hiding it under twists, pins, or heavy styling. If your hair likes to coil, bend, or wave in its own direction, this style lets that personality stay visible.
Why the Curl Clump Matters
The whole trick is clumping. When curls sit together in neat little groups, the style looks glossy, defined, and full of movement. A lightweight leave-in, followed by a gel with enough hold, usually gives the best shape. I like to apply everything on soaking-wet hair, section by section, because dry patches frizz up faster than you’d expect.
A diffuser helps if you want more lift at the roots. Air-drying works too, though it takes patience. Don’t break up the curls while they’re still soft and damp. That’s how you end up with frizz instead of definition.
How to Keep It Sharp
- Work in 4 to 8 sections so the product reaches every strand.
- Use a pea-sized amount of leave-in per section, then layer gel on top.
- Smooth the hair with your fingers or a brush, moving from root to end.
- Stop touching it once the curls have set and feel dry on the outside.
If the hair feels slippery but not wet, you’re in the right zone. That’s the moment where the style is ready to dry without getting overhandled.
2. Finger Coils on Short or Tapered Hair
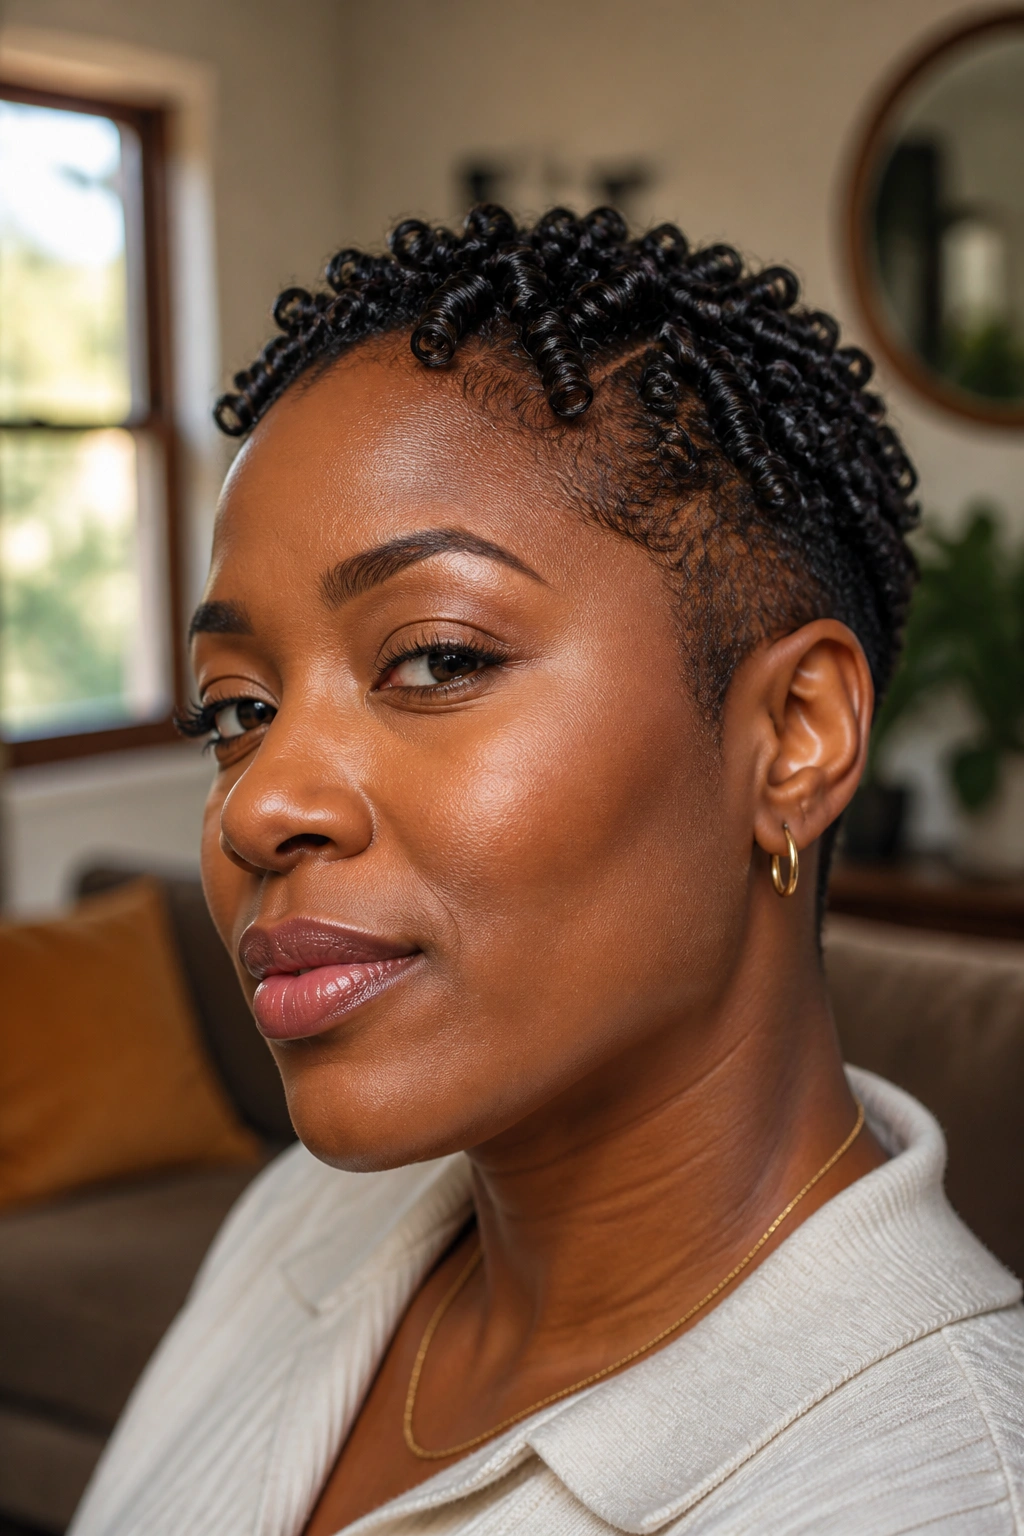
Finger coils are slow, and I mean that in the best way. They give short hair a clean, polished look while keeping the curl pattern front and center. On a tapered cut, coils can make the shape look sharp and intentional instead of fuzzy at the sides.
The method is simple: take small sections, add a bit of cream or gel, and wrap each strand around your finger until it springs into a neat spiral. The size of the section matters. Too large, and the coils lose definition. Too tiny, and you’ll spend half the day at the mirror.
I like this style when the curl pattern is uneven or when a cut has different lengths that need a little order. It makes every bend look like it was meant to be there. That clean spiral on the ends? It’s the whole show.
Drying time matters more than people think. If the coils are still damp when you start separating or styling around them, they puff up fast. Let them set fully, then leave them alone for a minute before fluffing the roots with a pick.
3. Twist-Out With Stretch and Softness

Why does a twist-out make hair look fuller than a wash-and-go? Because the twists stretch the strands just enough to show length while still keeping the curl pattern obvious. You get a little more volume at the end, a little more definition at the root, and a shape that feels soft rather than stiff.
How to Use It
Start on damp hair, not drenched hair. Add a leave-in and a cream with some slip, then twist in sections that match the texture you want to see later. Smaller twists give tighter definition. Bigger twists give thicker, looser waves. That part is worth deciding before you start, because the set changes the whole mood of the style.
Let the twists dry all the way through. Overnight is common, but some hair needs longer, especially if the sections are chunky. Undo them with oiled fingers, not rough hands, and separate only as much as you need. If you pull the strands apart too many times, the ends go frizzy before you even leave the house.
A twist-out is one of those styles that rewards patience. The finish looks casual, but the prep is doing a lot of quiet work.
4. Braid-Out With Big, Soft Waves
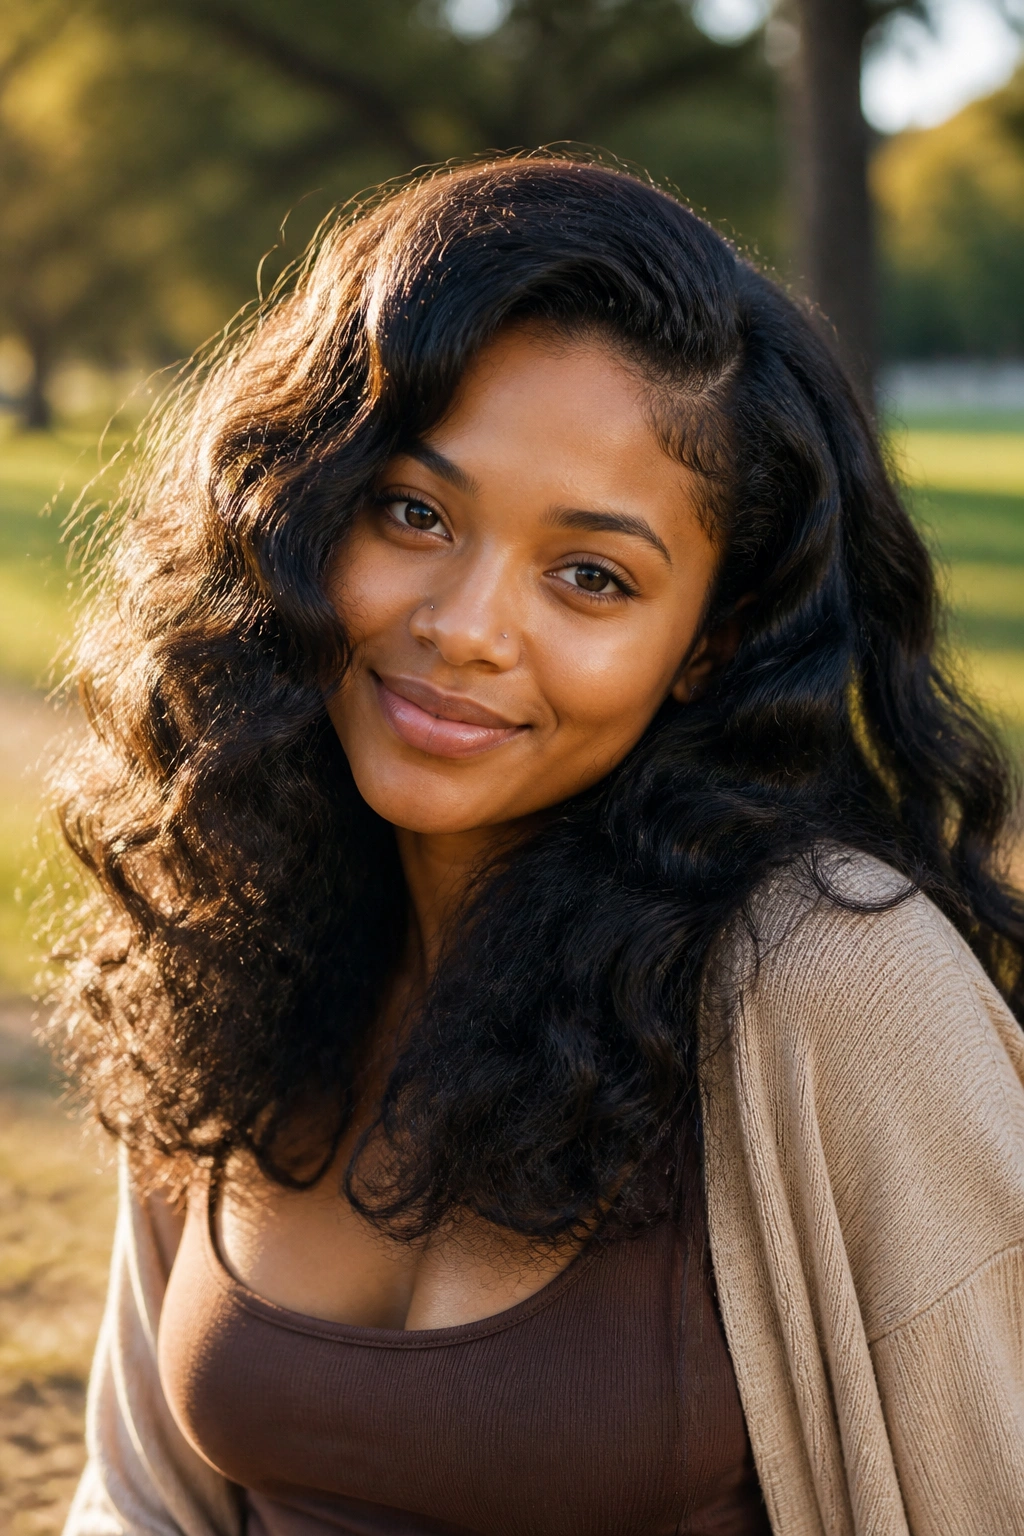
You braid your hair at night, take the braids down in the morning, and suddenly the texture has this thick, rope-like wave that sits somewhere between polished and playful. That’s the charm of a braid-out. It stretches the hair a little more than a twist-out, so shrinkage eases up and the pattern shows up in a broader shape.
The result is usually chunkier and a touch more elongated than a twist-out. That makes it a good choice when you want visible texture but do not want the style to balloon into a full cloud. I reach for braid-outs when the hair feels a little too dense for coils alone and needs more direction.
- Best on hair that’s already moisturized and lightly stretched.
- Works well when you want less shrinkage than a twist-out gives.
- Needs full dry time, or the waves collapse into frizz.
- Looks best when each braid is separated only once or twice.
There’s no need to chase perfect uniformity here. A little variation in the wave pattern makes it look more natural, and frankly, more expensive-looking too. The hair should move.
5. High Puff That Lets the Roots Speak
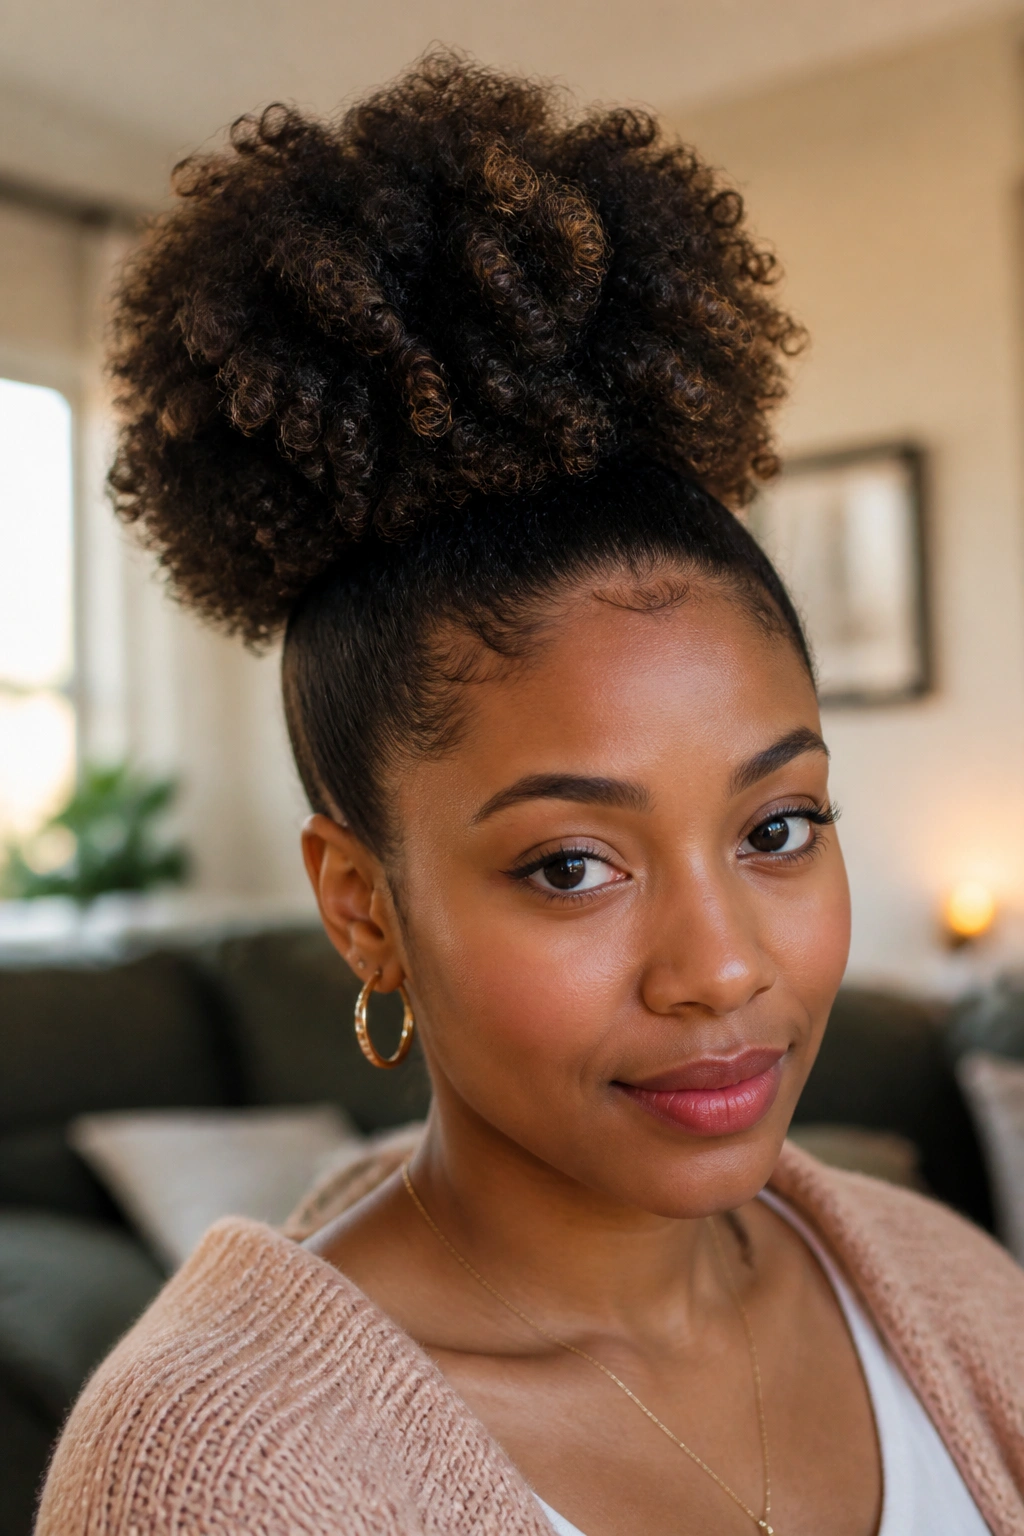
A high puff can look simple from a distance, but the best ones are all about shape. The front is smooth, the puff sits high, and the natural texture is the part everyone notices first. It works because it gathers the hair without erasing what the hair wants to do.
The base matters. Use a soft brush, a little gel at the perimeter, and a stretch-friendly band or puff cuff that does not yank at the edges. If you have dense coils, a double band can help hold the puff up without pulling the scalp down. That detail sounds small. It is not.
Do not pull the puff tight.
That’s where people get into trouble. A too-tight puff can flatten the crown and leave the edges angry by lunchtime. A better version sits high enough to show fullness, but not so high that it feels like the hair is hanging on for dear life.
The best part is the contrast. Smooth sides, fluffy crown, textured ends. That mix is what gives the style its shape.
6. Pineapple Updo for Second-Day Curls
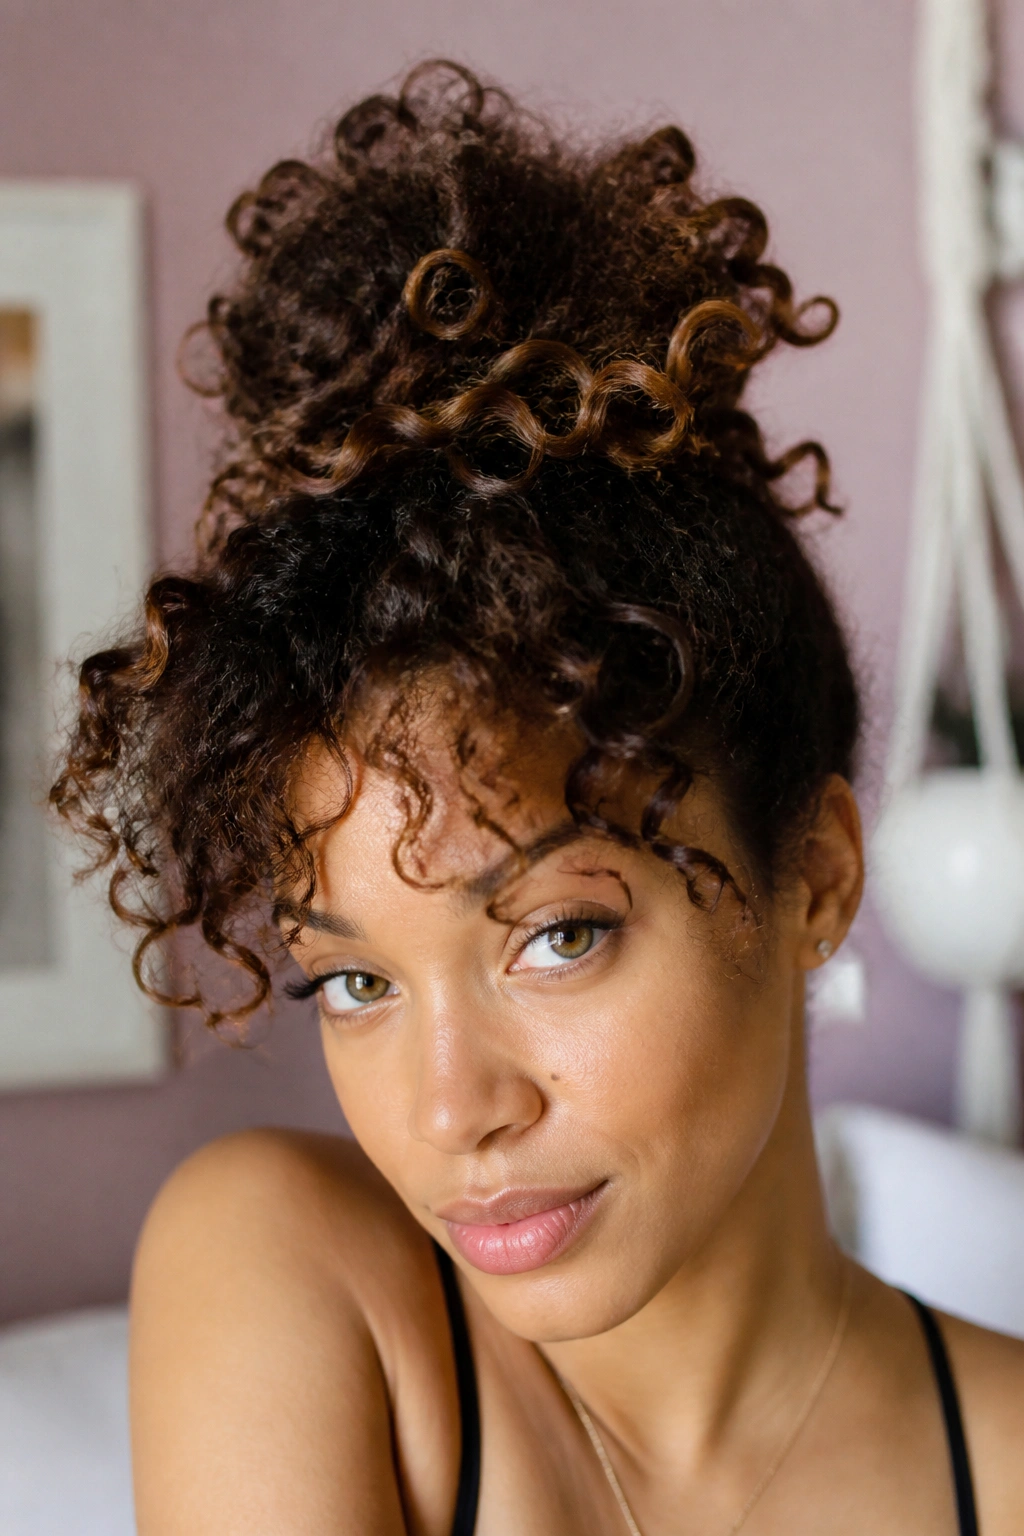
Unlike a sleek bun, the pineapple keeps the curls piled high and loose, which means the shape stays soft instead of compressed. It is a preservation style first and a day style second, and that’s why it works so well on longer curls and coils that need a little protection between wash days.
The setup is simple. Gather the hair at the very top of the head with a satin scrunchie, leave the curls loose enough to keep their spring, and let the ends fall forward. If you’re wearing it out, a few face-framing pieces can keep it from looking like bedtime hair. If you’re sleeping in it, a silk or satin scarf makes a huge difference.
This style is one of my favorites for people who want to keep definition without starting over. It buys you time. It also keeps the hair from getting smashed at the back of the head, which is usually where curls lose their shape first.
The pineapple does not ask the hair to behave. That is the point.
7. Flat Twists Into a Low Bun
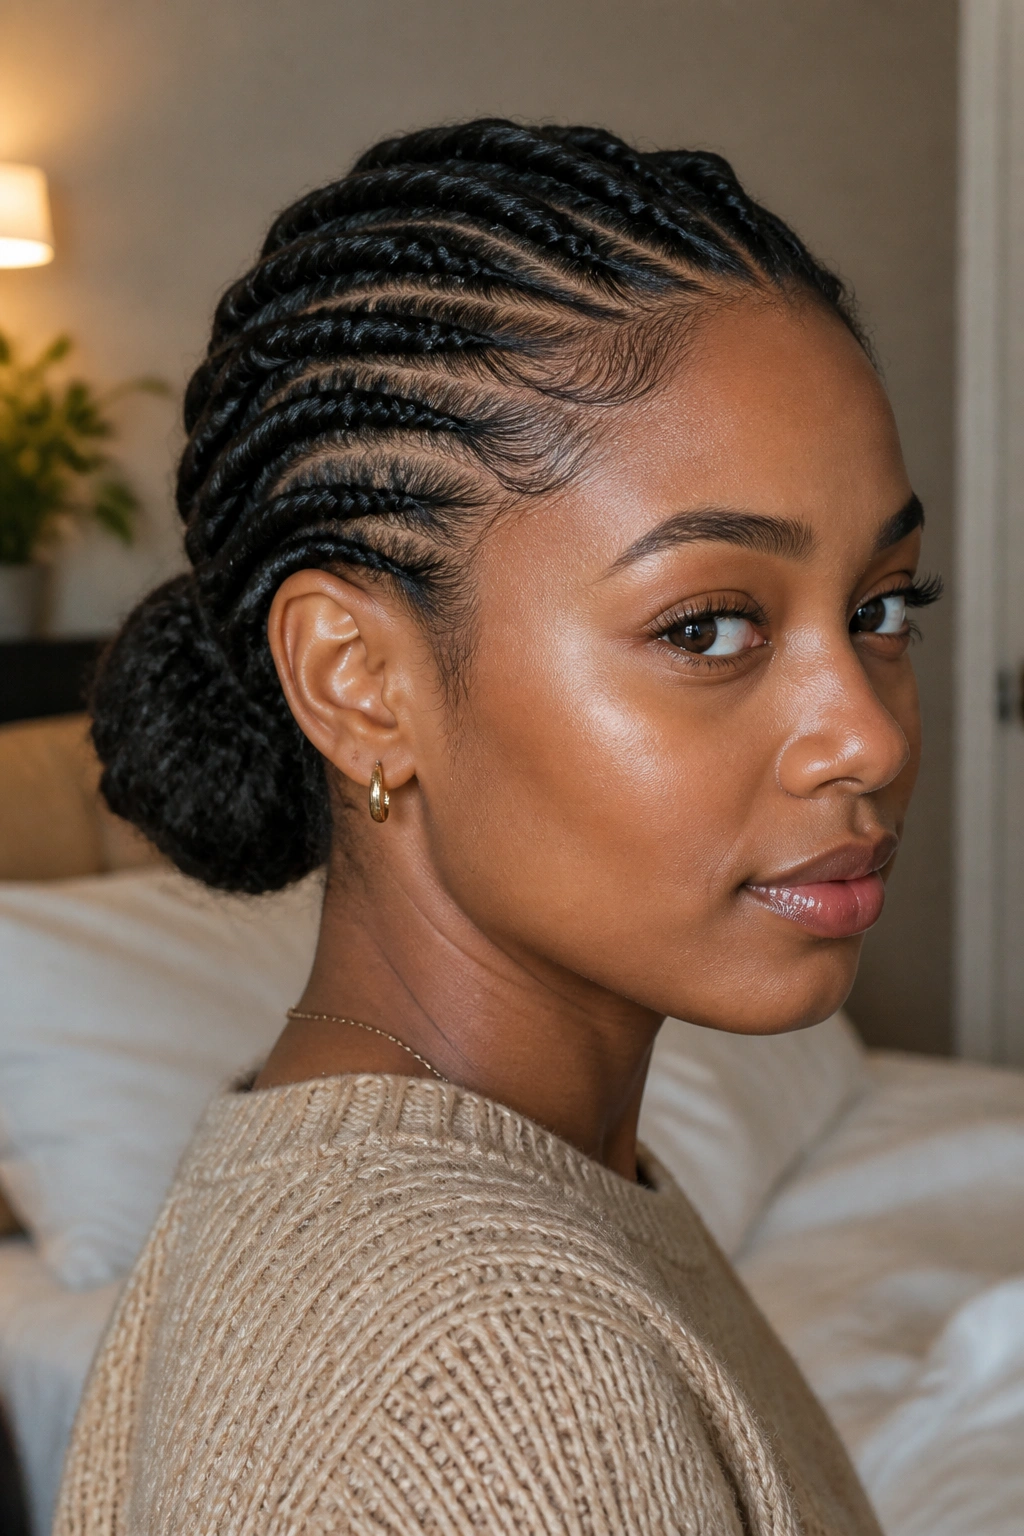
Flat twists are the quiet workhorse of natural hair. They keep the scalp neat, make the parting visible, and feed into a low bun that feels tidy without looking stiff. If you want the hair protected and the texture still visible near the roots, this one makes a strong case for itself.
Why the Parting Matters
Clean parting gives the whole style structure. A rattail comb, a small amount of gel, and damp but not soaking hair are usually enough to get the lines crisp. From there, the twists hug the scalp, which keeps the style close and controlled. That close fit is part of what makes it look so clean.
A Few Details That Help
- Part the hair in 2 to 4 sections, depending on density.
- Apply leave-in first, then a light gel or edge control at the roots.
- Twist each row tightly enough to hold, but not so tight that it aches.
- Pin the bun low at the nape with U-pins or a covered hair tie.
Keep the base low and neat. The style looks sharper when the twists sit close to the scalp and the bun stays compact rather than puffing out at the sides.
8. Mini Twists That Hold Their Shape
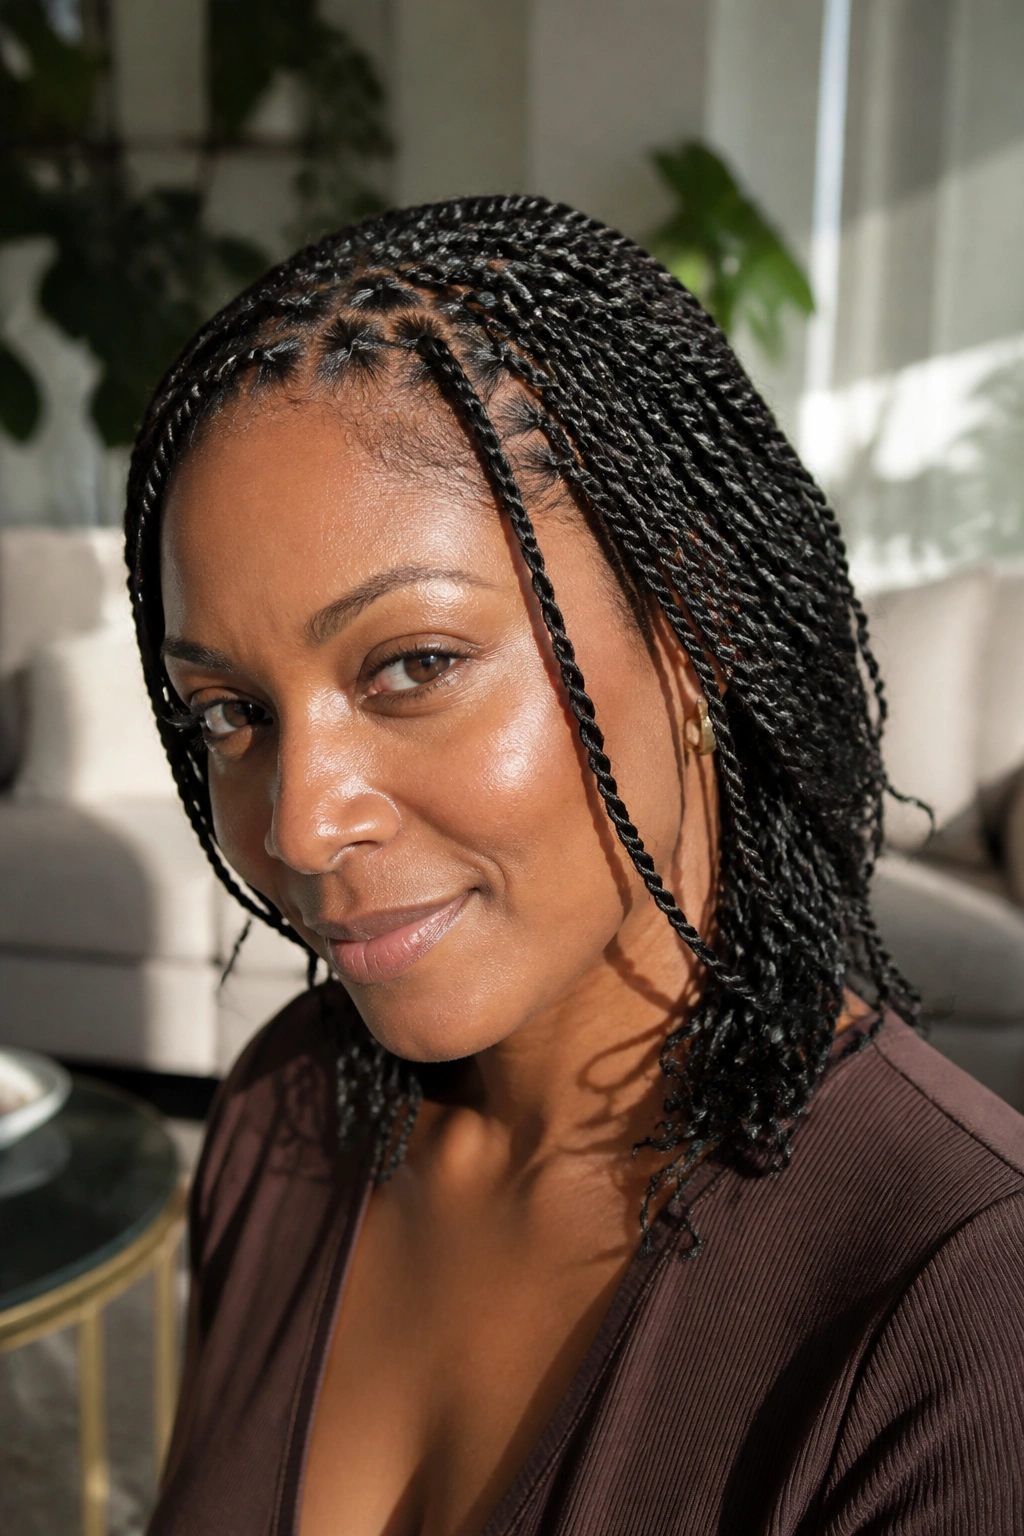
Mini twists are for people who want their texture to show up even on a busy week. Each twist is small enough to mimic the natural shape of the hair, but together they give the head a fuller, more organized look. It is a protective style, yes, but it also has a nice visual rhythm that plain braids sometimes miss.
The size of the parts matters here. Tiny sections create more movement and more visible detail, while larger parts look looser and softer. I prefer to install them on clean, damp hair with a creamy leave-in and a bit of gel at the roots. Too much product makes the twists sticky. Too little and they fray early.
They can stay neat for a while if you sleep in a satin bonnet and keep your hands out of them. That said, the style does not need to be perfect to work. A few soft frizzed edges often make mini twists look better, not worse.
If you want low drama and a lot of texture, this style earns its keep.
9. Two-Strand Twists With a Side Part
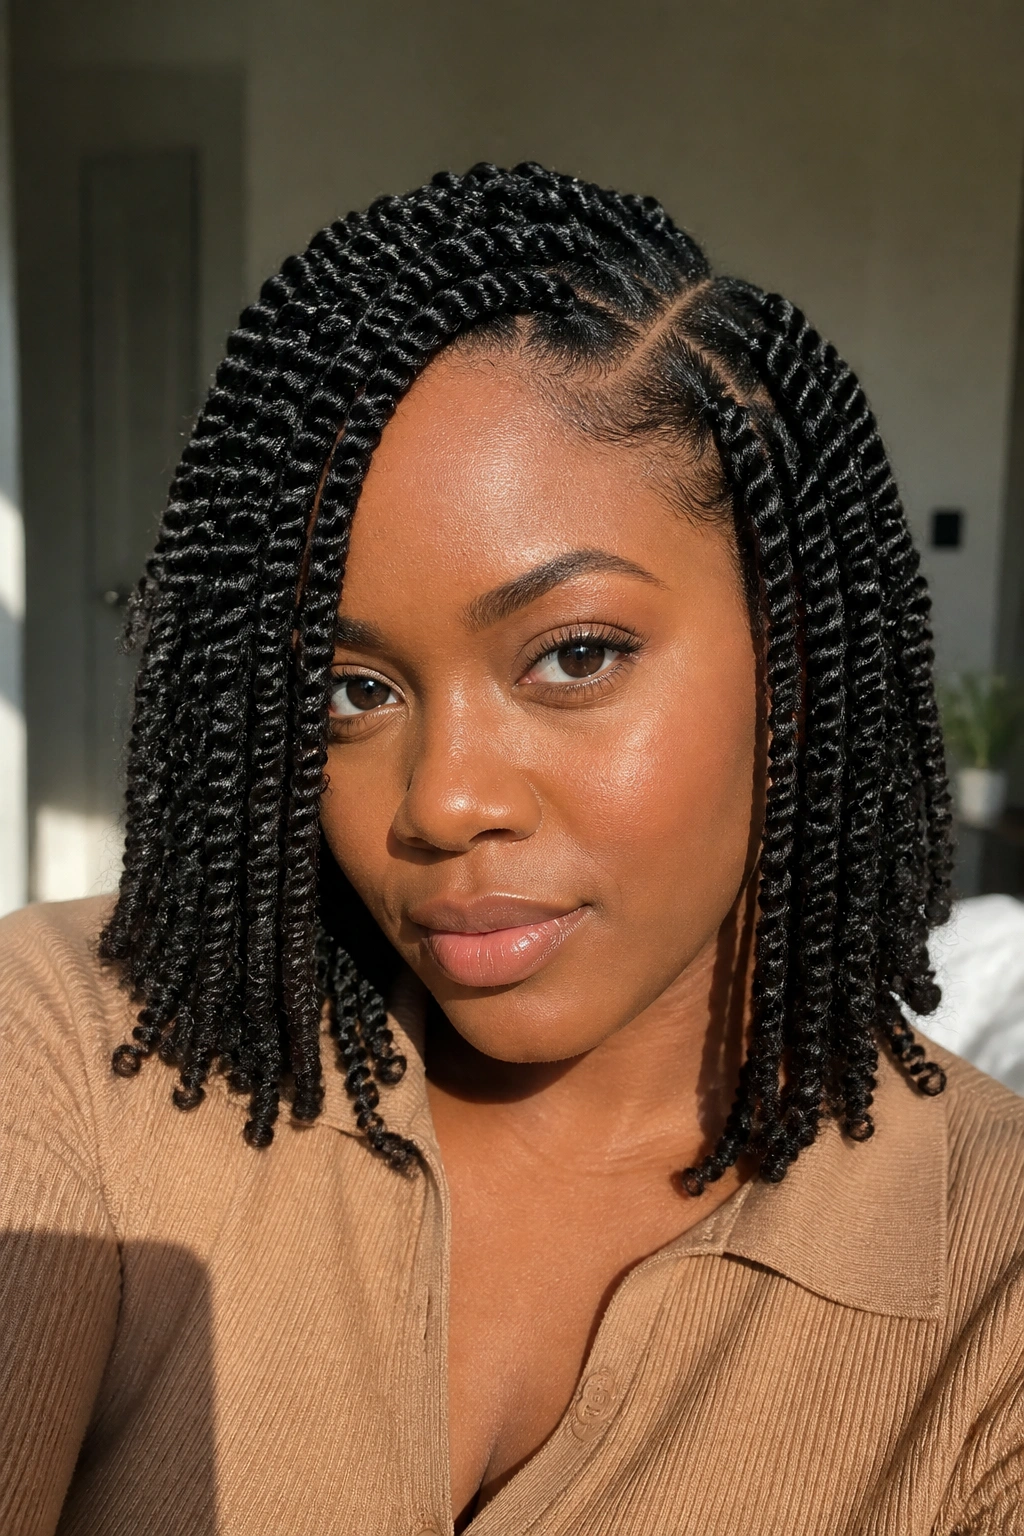
Can a protective style still look soft? Absolutely. Two-strand twists do that better than almost anything else because they keep the hair contained while letting the curl pattern peek through in every rope-like section.
The side part changes the whole mood. A center part feels tidy and balanced. A deep side part gives the face a little movement and makes the twists fall with more shape. I like that small shift because it turns a basic style into something that frames the eyes instead of just sitting there.
What to Watch For
The twists should be smooth at the root and evenly tensioned down the length. If the roots puff up too much right away, the style looks unfinished. A little cream helps, but the real work is in the sectioning and the direction of the twist. Twisting in the same direction every time keeps the pattern from looking messy.
This style is good if you want stretch without the hard crispness of braids. It also gives you an easy take-down later, which is a nice bonus. Not every protective style needs to be a commitment.
10. Bantu Knot-Out With Springy Volume
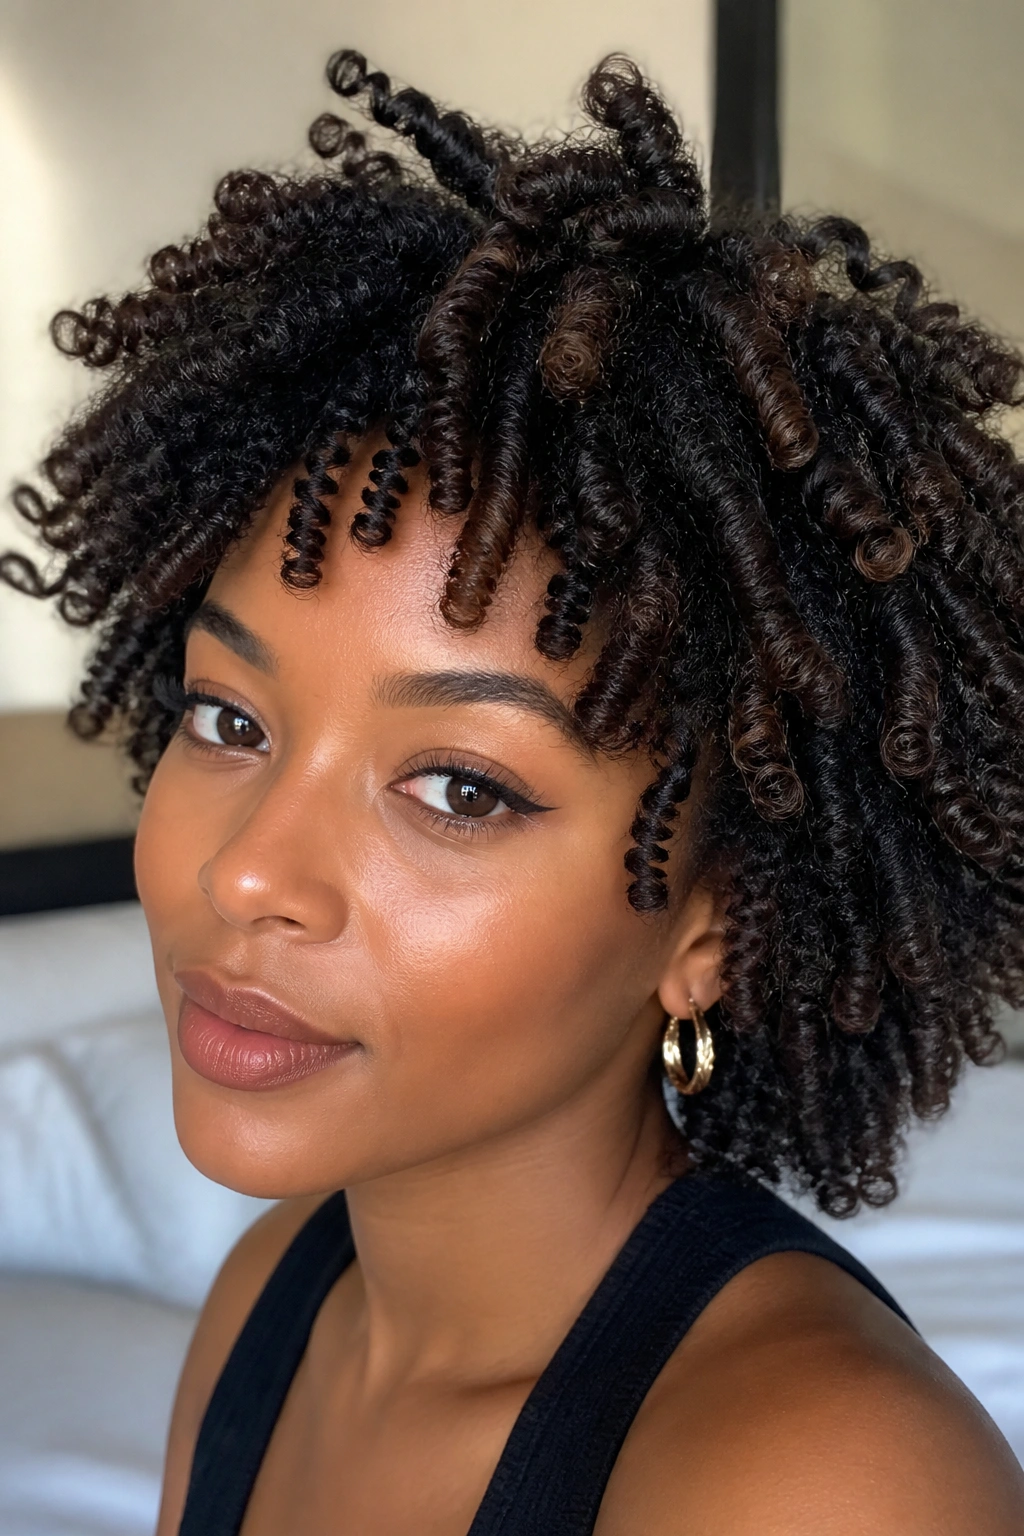
A Bantu knot-out starts with hair that looks tiny and tidy. Then you take the knots down and the whole thing turns into a halo of springy curls and bends. That before-and-after contrast is part of what makes the style so fun.
The shape comes from the coiling. Each section is wrapped into a knot, tucked flat, and left to set until it dries completely. When the knots come out, the hair releases into a defined pattern that has lift at the roots and a soft bend through the length. It is one of the best styles for people who want texture with a bit of drama.
- Set the knots on damp hair, not wet hair.
- Use a cream or mousse that holds without crunch.
- Let every knot dry fully before unraveling.
- Separate each coil with lightly oiled fingers to keep frizz down.
The style looks best when the parts are clean and the knots are the same size. A few slightly uneven knots are fine. They usually make the final shape look less forced.
11. Rounded Afro Shaped With a Pick
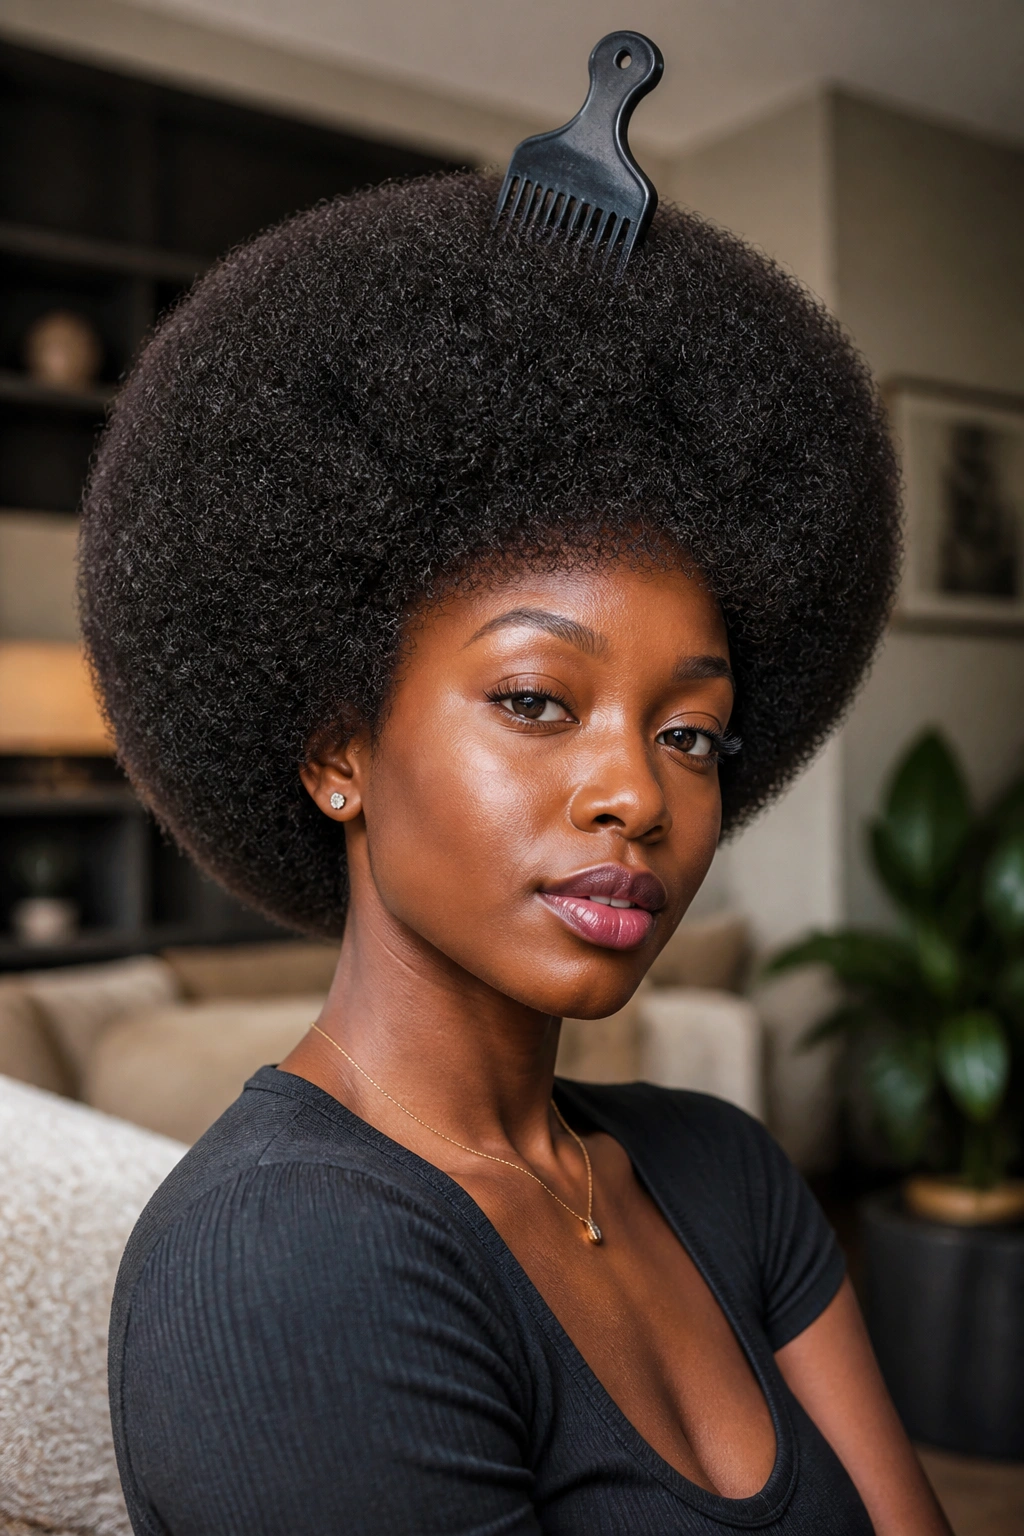
A good afro is sculpted, not hacked at with a pick until it looks startled. That might sound blunt, but I mean it. The best rounded afros keep the natural texture front and center while controlling the outline enough that the shape reads on purpose.
The trick is to work from the roots, not the ends. Lift the hair gently with a pick or a wide-tooth comb, then stop before you break apart the pattern too much. If the hair is dry, a mist of water mixed with leave-in can bring some life back into the curl without soaking it. From there, use your hands to shape the sides and top.
A trimmed afro holds its line better than one that has been left to do whatever it wants. Even a small trim at the perimeter can make the whole style look cleaner. That is especially true if the ends have started to look thin compared with the denser roots.
One-sentence truth: shape beats size. A round afro that follows the head looks more polished than a bigger one that has lost its line.
12. Knotless Braids With Face-Framing Texture
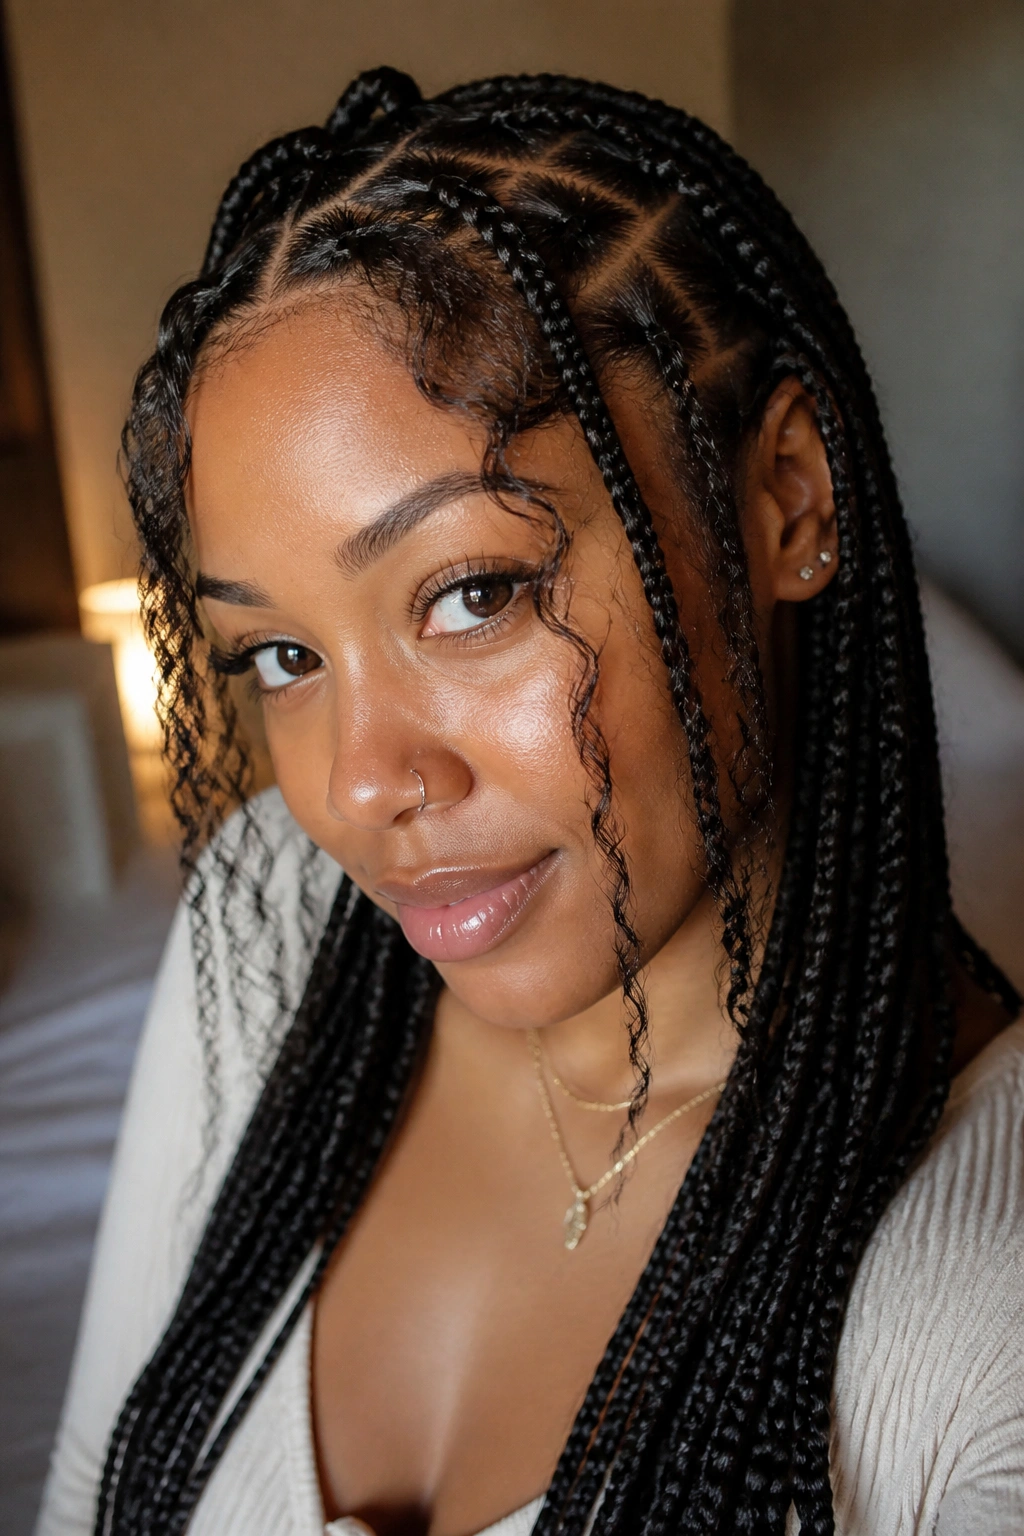
Unlike classic box braids, knotless braids start with your hair and feed in the added hair gradually. That means less tug at the scalp, a flatter base, and a more natural look around the hairline. If you want protective styling but still want to see texture near the face, knotless braids are a smart choice.
The face-framing pieces matter more than people think. Leave out a couple of curled tendrils, or use your own natural hair in front if the length works. That small move stops the whole style from feeling sealed off. It lets the texture sit in plain sight, which is exactly what this list is about.
I also like knotless braids because they move better. The braid base lays softer, and the ends have more swing. If you wear them with curly ends, the style gets even more life without giving up the protective part.
Use a braid size that matches your density. Tiny braids can take forever and put too much stress on the install. Chunkier braids are easier on the head and still show plenty of texture.
13. Fulani Braids With Beads and a Clean Center Part
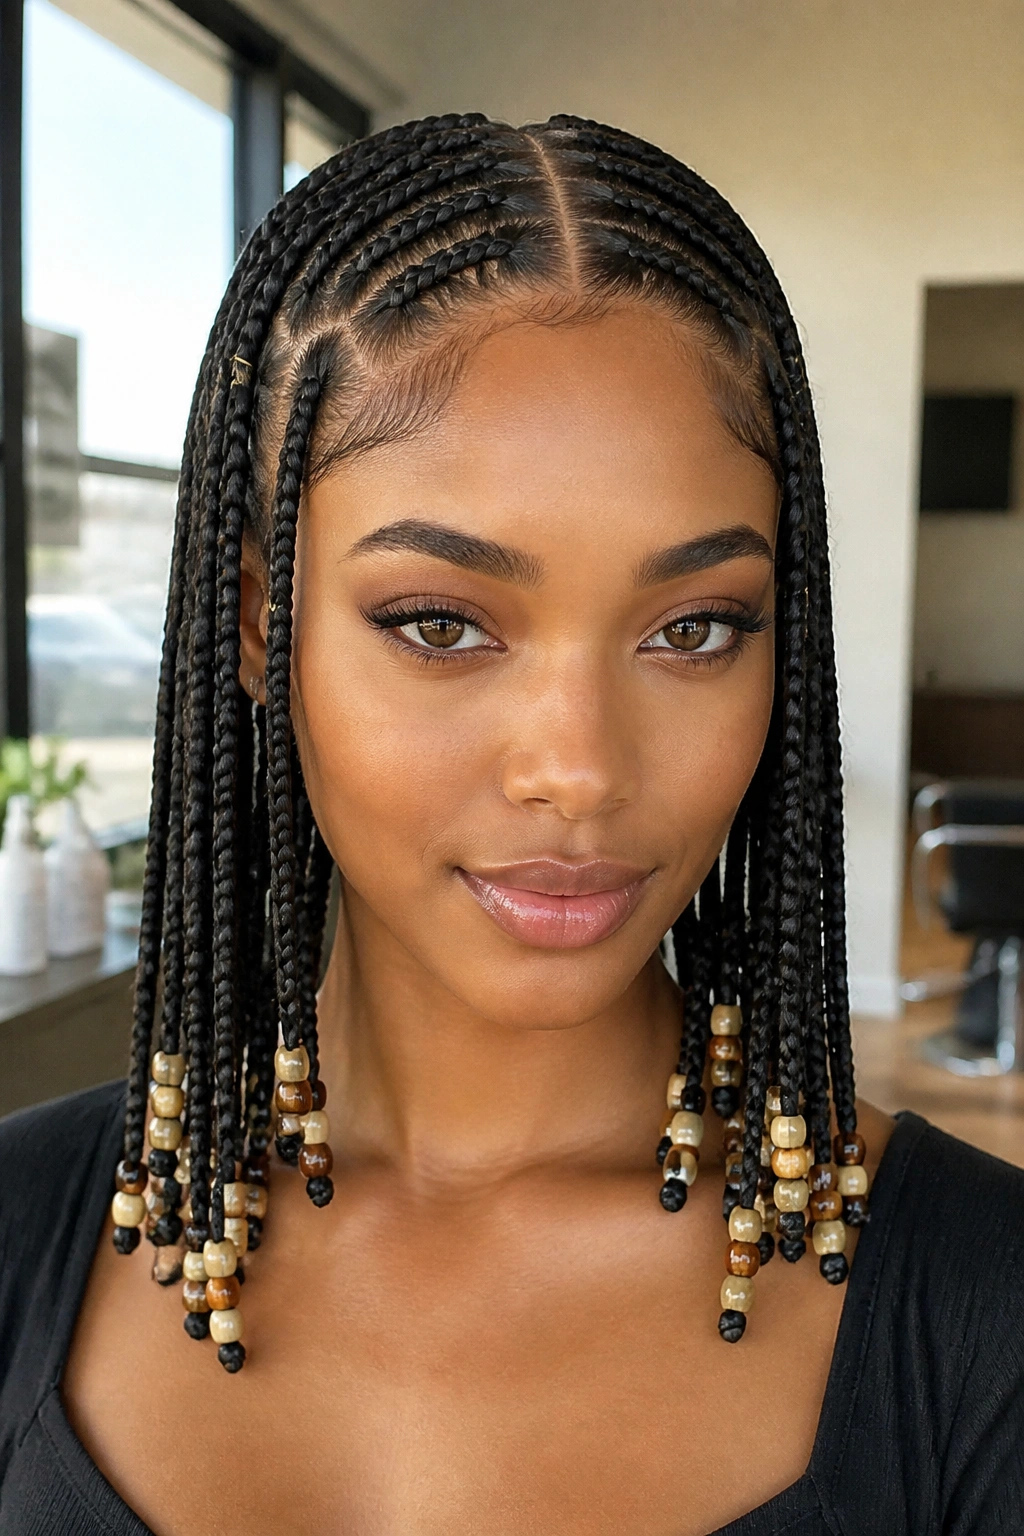
Fulani braids are one of those styles that can look busy fast, so the best versions stay sharp and balanced. A center braid, a few side braids, and beads at the ends are usually enough. Add texture where you want it, and leave the rest clean.
How the Layout Frames Texture
The center part gives the face a strong line, while the side braids create a frame around the head. That frame lets the natural texture around the edges or at the crown stay visible instead of getting swallowed by the braid pattern. If you leave a few small curls out near the temples, the style feels softer and more alive.
The beads should be used with restraint. Four to six per braid is usually enough unless you want extra weight and sound. Too many beads pull the braid down and make the style feel crowded. It also changes the movement in a way that can flatten the shape.
- Keep the parts crisp and even.
- Use a light hold product at the roots only.
- Add small curly pieces if you want softness at the hairline.
- Choose bead weight that won’t tug after a few hours.
A low bead count keeps the style cleaner. That one choice makes the whole look read as thoughtful instead of overloaded.
14. Goddess Braids With Curly Pieces
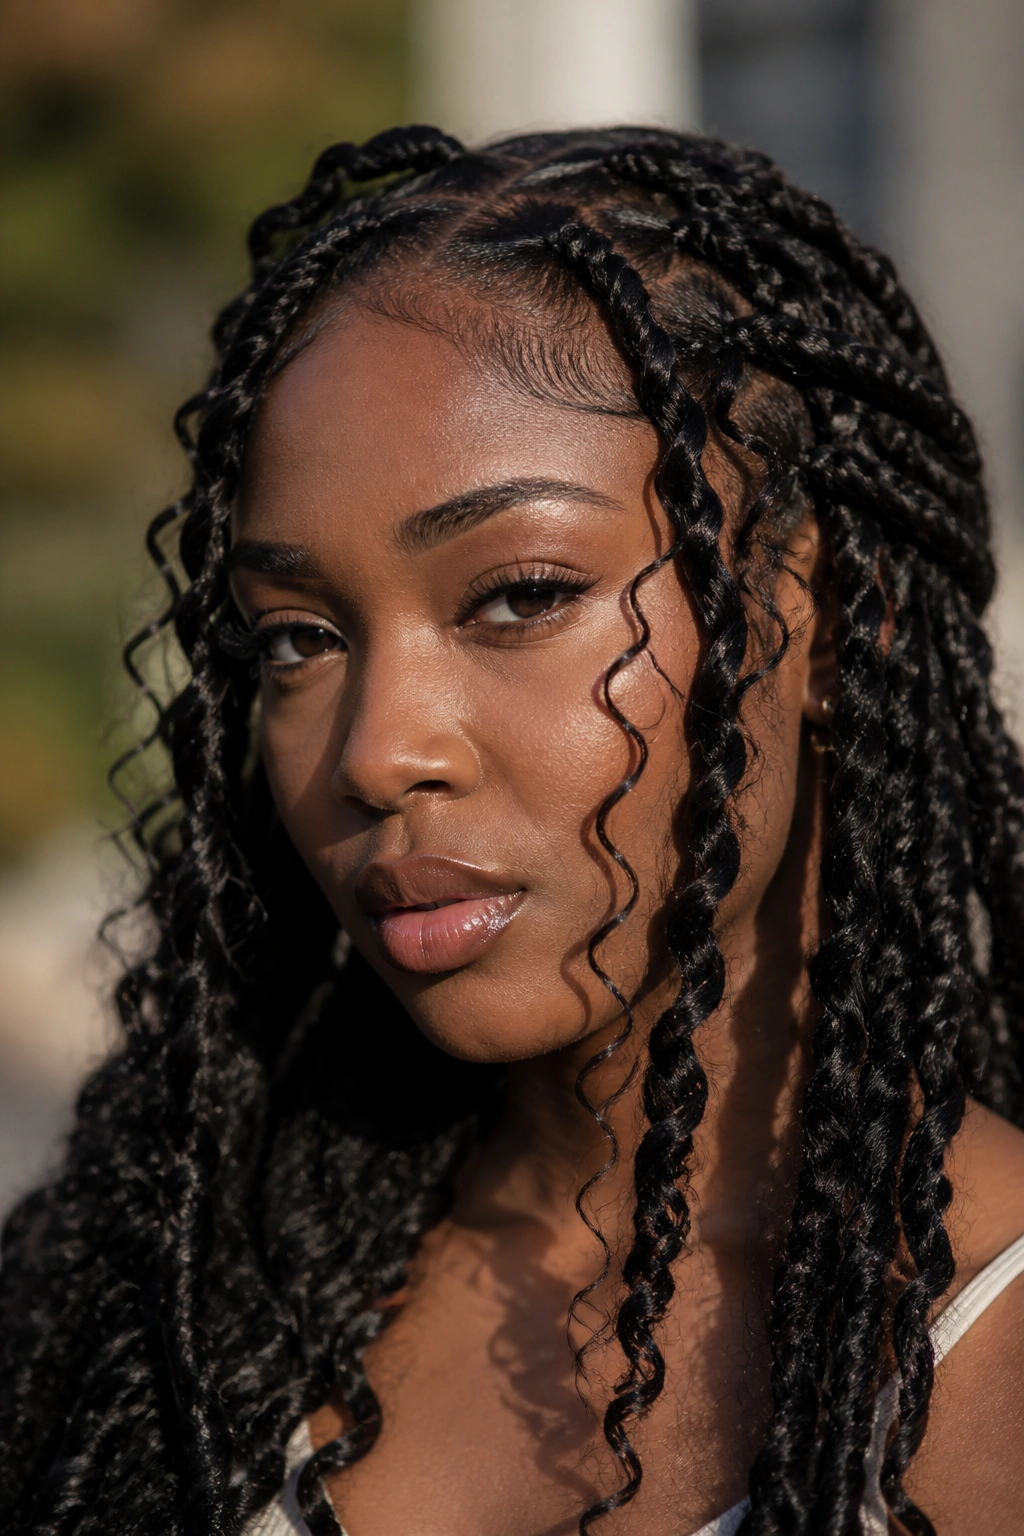
Goddess braids work because they mix two textures in one style: smooth braided rows and loose curly pieces that move around them. The contrast is the whole appeal. The braids hold the shape, and the curls keep the style from looking too rigid.
I like this style when someone wants protection but still wants the hair to feel soft around the shoulders. You can weave curly pieces into the braid, leave a few tendrils out, or build the style into a low bun with curls spilling from one side. The curl pieces should not be too uniform. A little variation gives them life.
The roots need to be neat, but the finish should not be overworked. If the braid line is clean and the curl pieces are moisturized, the style already has enough to say. Edge control can help at the perimeter, though a thin layer is plenty. More than that tends to get shiny in a not-so-good way.
This is one of the styles that looks expensive with almost no effort on the viewer’s part. The hair is doing a lot, and it should.
15. Halo Braid With Loose Tendrils
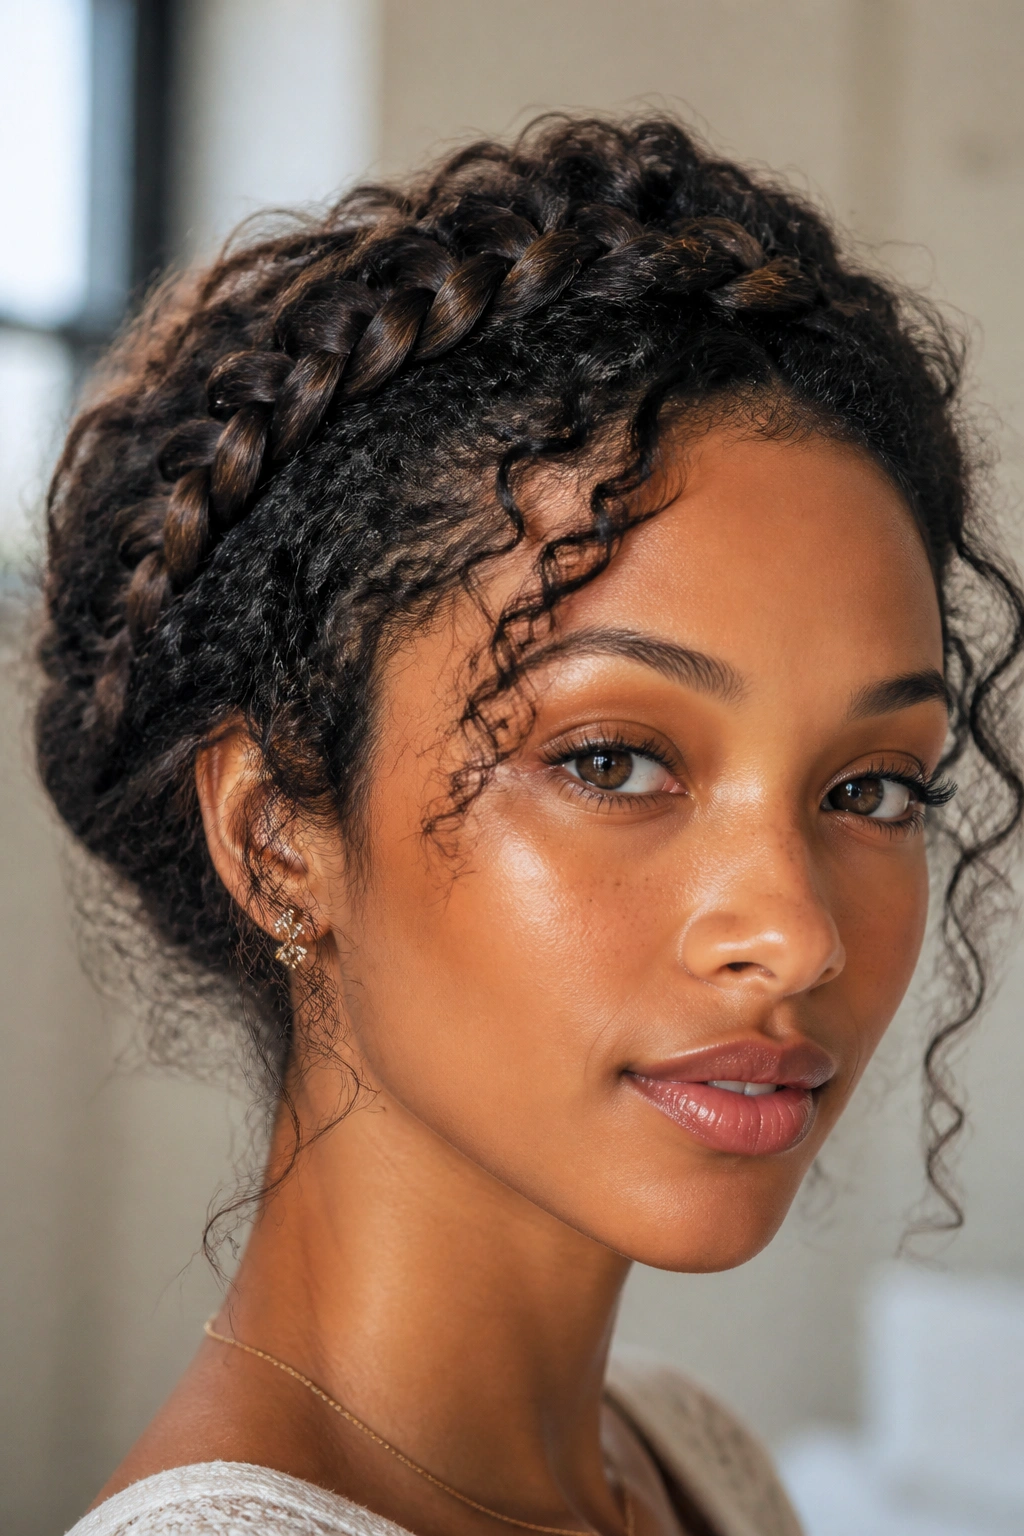
Why does a halo braid work so well on natural texture? Because it keeps the hair lifted off the face while still leaving enough softness around the edges to show movement. It also gives the crown a clear shape, which is useful when the hair is dense and wants to expand.
How to Keep It From Looking Flat
Start the braid behind one ear and work it around the head, keeping the tension even. Once the braid is pinned in place, tug lightly at the outer edge so it looks fuller. That small bit of pulling changes the whole shape. It turns a tight rope into a braid that reads from every angle.
A few loose tendrils around the ears or at the hairline help a lot. They break up the hard line of the braid and let the curl pattern peek through. If the hair is very curly, those tendrils can be left natural. If it is coily, a quick twist or coil on the front pieces keeps them defined.
This style is quiet in the best way. It looks finished without looking fussy.
16. Loc Updo With a Curly Fringe
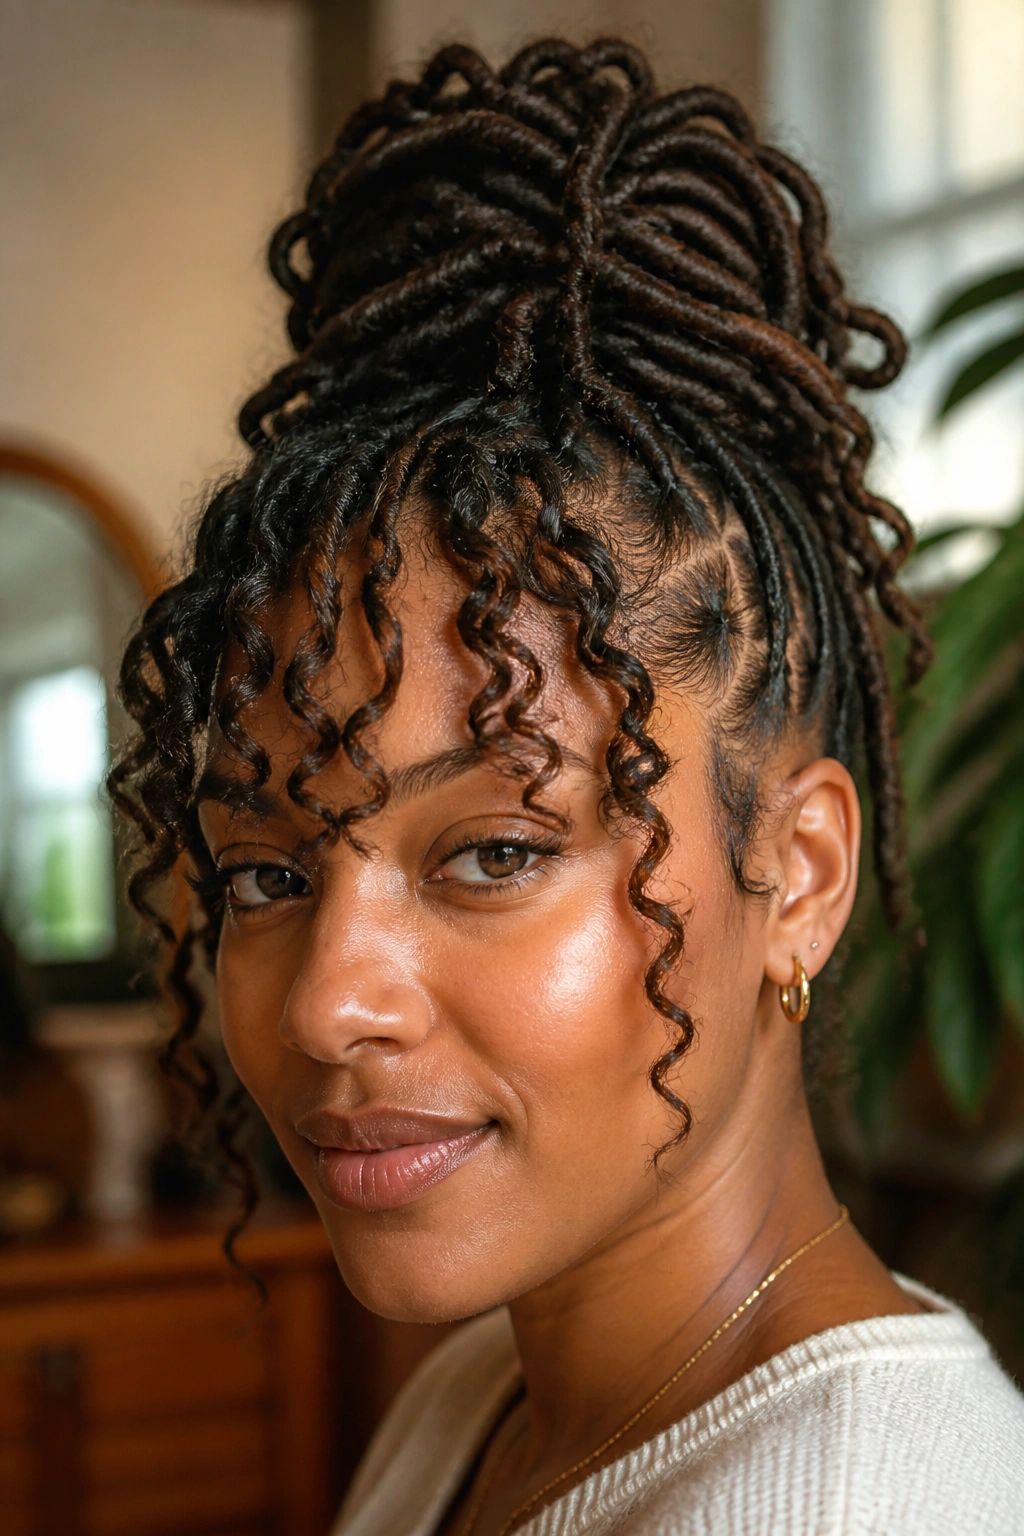
Locs do not need to be hidden away to look tidy. A loc updo can show off texture beautifully, especially when a few loose pieces are left in the front to soften the face. The updo gives you shape; the fringe gives you movement.
The structure can be simple. Sweep the locs upward into a bun or a wrapped crown, then pin them in place with long hairpins or a snug tie. Leave three to five locs free near the front, or pull out a few curly pieces if your locs have that texture on the ends. That contrast keeps the style from looking sealed shut.
- Works well with medium and long locs.
- Uses pins better than bulky clips.
- Keeps the neck open on warm days.
- Benefits from a lightweight oil on the scalp, not heavy grease.
The fringe is the part I care about most. It softens the whole look and gives the style some swing when you turn your head. Without it, the updo can feel a bit severe.
17. Twist-and-Tuck Faux Hawk
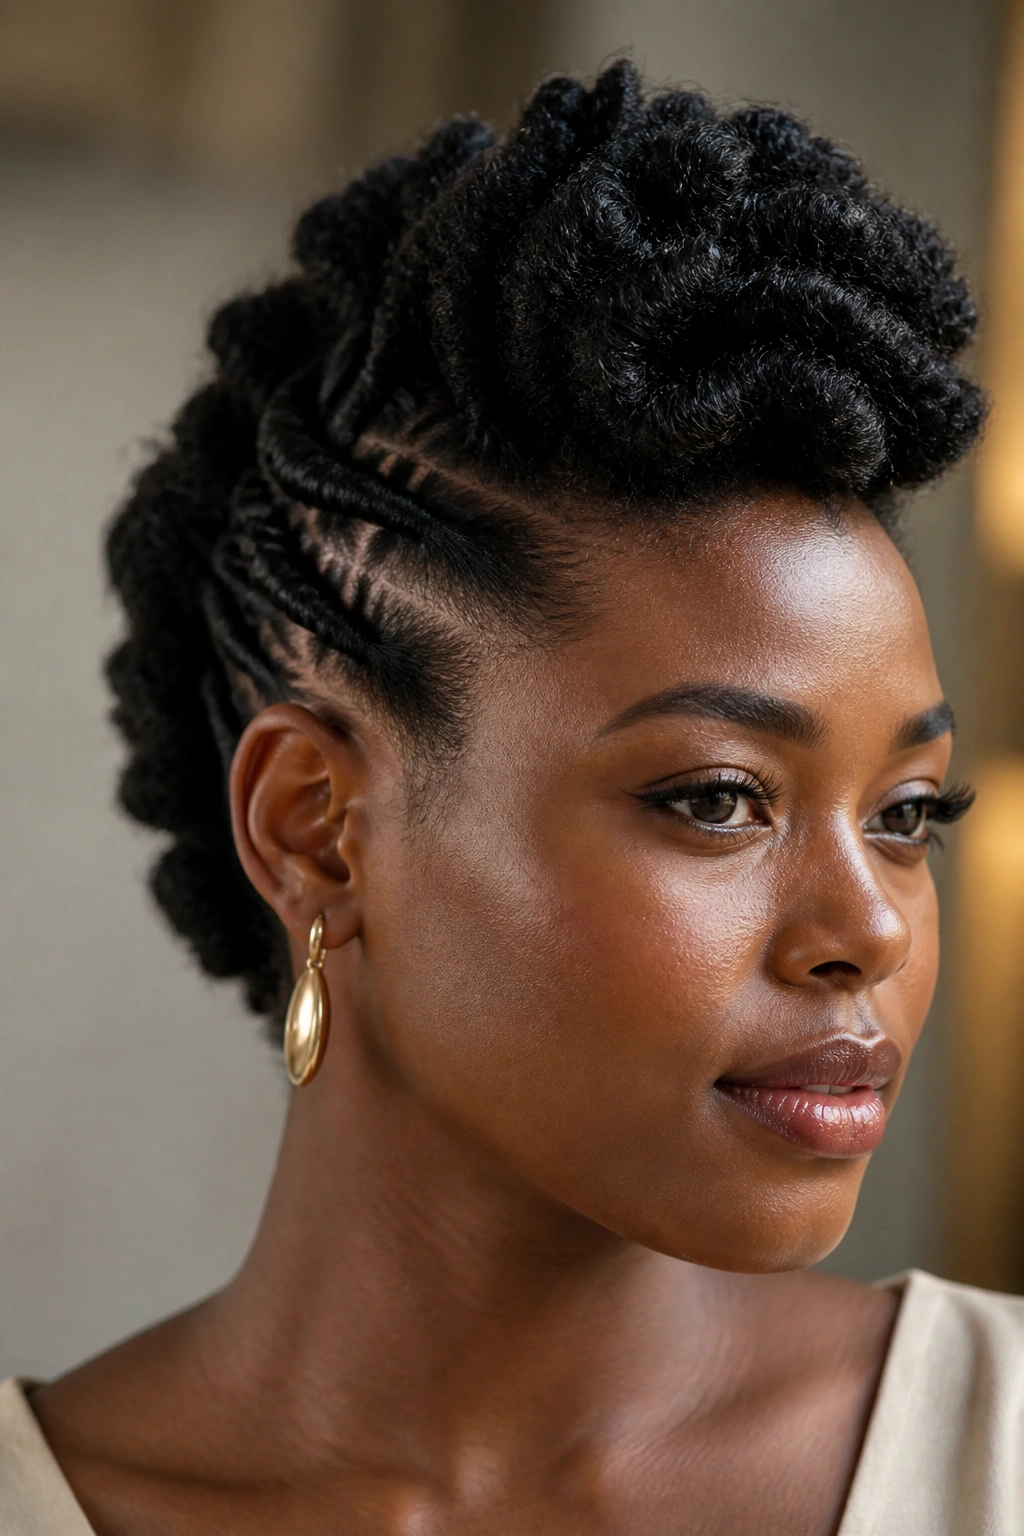
A faux hawk made from twists is one of the easiest ways to show off texture and shape at the same time. The sides are pulled back or flat-twisted tight, while the center gets volume, height, and enough room for the natural curl pattern to stay visible. It has a little attitude. Good.
The trick is in the balance. If the sides are too flat and the middle is too loose, the shape collapses. If the middle is too tight, it loses the whole point. I like to build the style with a few flat twists along the sides, then tuck the ends inward at the nape and crown the center section so it stands up on its own. Pins do a lot of work here, and a little mousse helps the texture stay put.
This style suits people who want something sharper than a puff but less formal than a braided updo. It works on coils, curls, and stretched hair. It also gives the jawline a nice frame, which is why it reads so clearly in photos and in person.
One-sentence rule: lift the center, smooth the sides, stop before it gets helmet-like.
18. Cornrow Ponytail With a Full Curly Tail
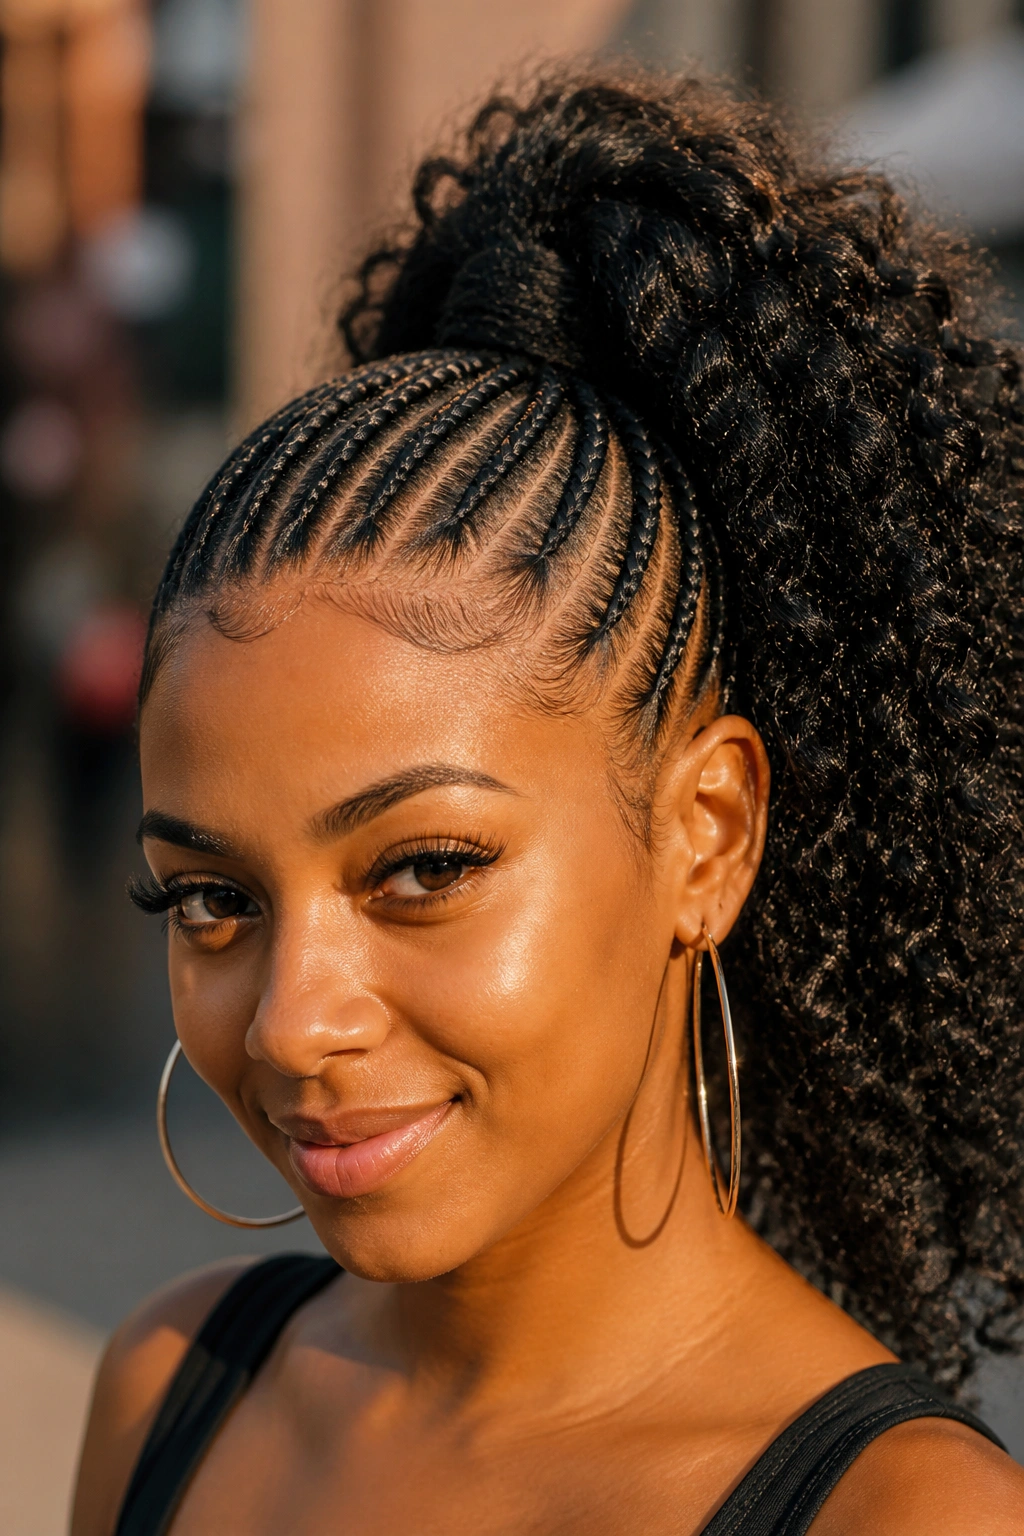
Unlike a tight braided bun, a cornrow ponytail leaves the length free so the texture can swing. That swing is the payoff. The front stays clean and controlled, while the tail carries all the movement.
This style works especially well when the braids start at the hairline and feed into a ponytail at the back or crown. The key is to keep the base neat and let the tail stay fully textured, whether that means your own curls, a defined twist-out tail, or a stretched natural tail with visible bend. If the front is too bulky, the whole style loses its line. If the tail is too flat, it misses the point.
A wrap around the base helps hide the tie and makes the ponytail look finished. A little moisture on the tail keeps the curls from puffing into dryness by the end of the day. I also like this style for active days, because the front stays secure and the tail still moves when you walk.
Hair should move when you turn your head. This one does.
The best hairstyles that show off natural texture do one thing well: they leave the hair’s own pattern visible. Sometimes that means a big puff. Sometimes it means a tiny coil set, a braid-out, or a braided updo with a few curls left free where the eye wants to land.
If you want the style to look intentional, start with the shape, not the accessory. Clean parts, enough moisture, and a tension level your scalp can live with matter more than extra beads, extra gel, or extra drama. The texture is already there. The job is to frame it, not flatten it.
