



Long hair has opinions, and it usually shares them the minute you try to pin it up. A flat bun looks too heavy, a high ponytail feels ordinary, and a loose twist can collapse if the pins are timid. That is why twisted updo hairstyles for long hair keep showing up in real life—they give all that length somewhere to go without turning the head into a brick.
The best twist styles do two things at once. They control weight at the nape and create enough texture for pins to grab, which matters more than people think when hair is silky, layered, or freshly washed. A little dry shampoo at the roots, a bit of mousse through damp hair, or even a rough blow-dry can change the outcome more than another three pins ever will.
I like twisted updos because they can be sharp or soft, formal or relaxed, and still feel believable on long hair. Some sit low and clean for weddings or work. Others lean messy, with a few face pieces left out on purpose, because hair that reaches past the shoulders does not need to be forced into one personality.
The 18 styles below cover the range I actually use when the length is doing the most. Some are easy enough for a weekday. Some are saved for dressier nights. A few need a mirror on the side, a tail comb, and patience that lasts longer than five minutes.
1. Low Twisted Chignon for Long Hair

A low twisted chignon sits right at the nape, where it can use the curve of the head instead of fighting it. That alone makes it one of the calmest-looking long hair updos you can wear.
Why it holds so well
The shape starts with two side sections twisted back toward the center, then the rest of the length folds under itself into a compact knot. Because the bun stays low, the weight is spread out instead of stacking on top of one point. That means fewer pins, less sagging, and less of that “my hair is pulling against my scalp” feeling.
- Best for medium to thick hair that needs control.
- Works on second-day hair, which has enough grip to stay put.
- Usually takes 6 to 10 bobby pins, depending on thickness.
- Looks especially clean with a side part or a soft middle part.
My favorite trick: slide the last two pins in a crossed “X” pattern. It sounds small, but it keeps the chignon from slipping after an hour of turning your head around.
2. Side-Swept Rope Twist Bun

If your hair keeps escaping a standard bun, a side-swept rope twist bun is the fix. It looks more styled than a plain knot, but it does not demand the kind of precision that makes people give up halfway through.
The rope twist is simple: split a section into two strands, twist each one in the same direction, then wrap them around each other in the opposite direction. That tiny change in direction is what gives the twist its grip. On long hair, the length of the strands gives the bun a richer shape, so the finished style looks fuller without needing padding.
Pushing the bun slightly off-center changes the whole mood. It softens a long face, shows off one earring better than the other, and feels less stiff than a centered bun that sits like it was measured with a ruler. I reach for this one when the outfit already has clean lines and the hair needs a little movement.
It also behaves better than it looks. That is the nice surprise. A few pins through the base and one hidden under the twist usually do the job, and the side placement keeps the style from feeling severe.
3. Twisted Halo Bun
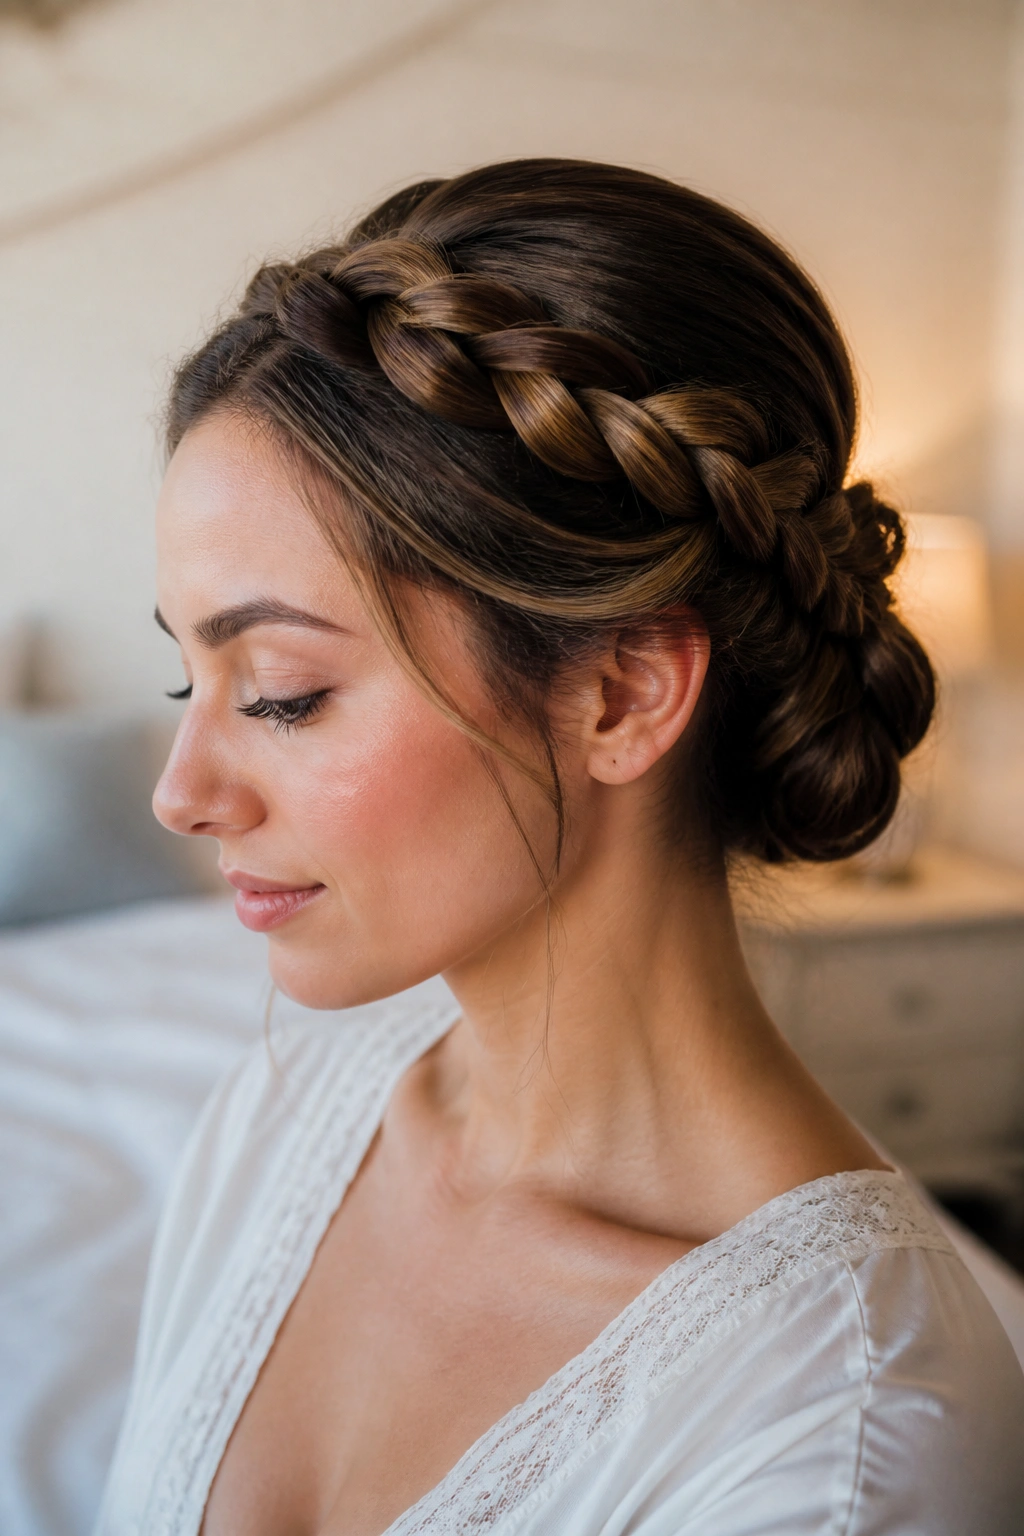
What makes a halo twist look polished instead of fussy? Placement, mostly. A halo that sits too high starts to look like a costume piece. One that hugs the head and tucks into a low bun feels deliberate.
The style works by taking two sections from the temples, twisting them back around the head, and meeting them at the nape where the rest of the hair becomes a bun. On long hair, the halo section has enough length to feel lush, not skimpy, which is half the battle. Leave the crown a little soft. Tight roots make the whole thing look hard.
How to wear it
- Leave about ½ inch of looseness along the hairline so the twist can curve naturally.
- Pin underneath the twist, not on top of it, or the seam will show.
- Add a light shine spray only to the finished surface, not the roots.
- Let the bun sit low if your face is round; a low anchor keeps the halo from rising too much.
This one works beautifully for weddings, dinner events, or any night when you want the hair off your neck but still want shape around the face.
4. Romantic Side-Twist Knot

You have ten minutes, a dress with a soft neckline, and no patience for a severe updo. That is where a romantic side-twist knot earns its place.
The style starts by sweeping the hair to one side and twisting it back in sections before folding everything into a loose knot just behind one ear. It is less rigid than a classic bun, and that is the point. The twist creates direction; the knot keeps the shape from unraveling. A few face-framing pieces at the temples make it feel lived-in instead of overworked.
- A side part makes the shape softer.
- Loose ends can be tucked or left to peek out.
- Small combs work better than big claws here.
- A little texture spray helps the knot hold without stiffness.
I like this for long hair that has layers, because the layers give the twist some movement and stop the knot from looking heavy. It is also one of the few styles that looks better if it is touched once after pinning. Tug a little. Let a strand fall. Then stop.
5. Classic French Twist with Loose Face Pieces
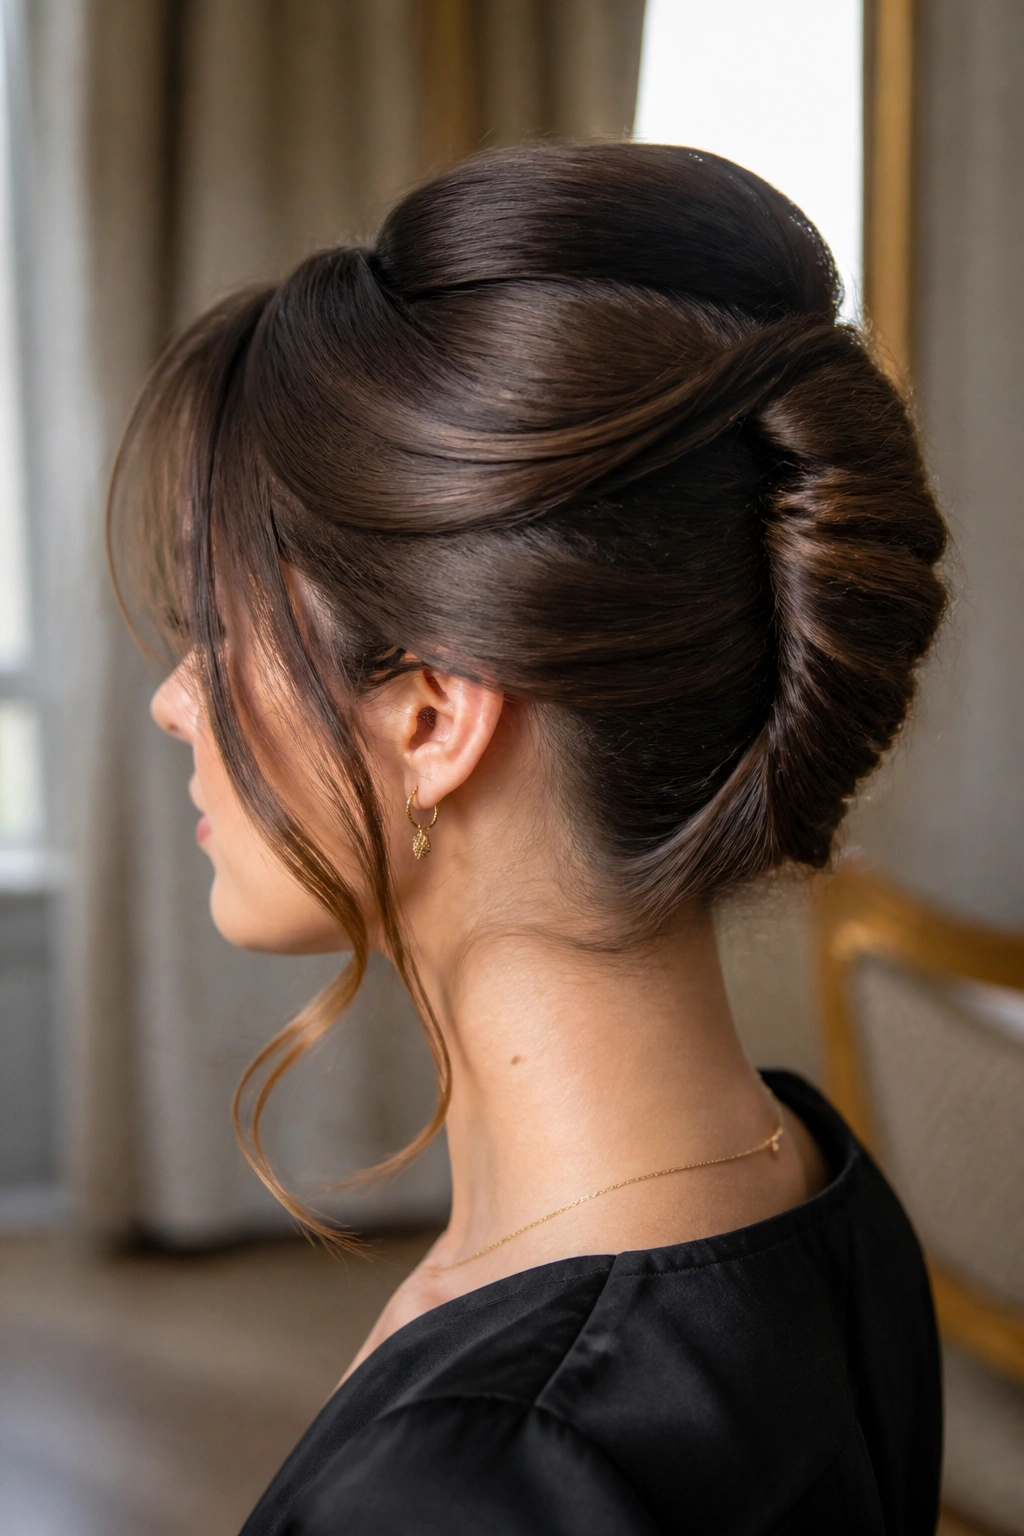
A French twist sounds old-fashioned because it is old-fashioned, and that is part of the appeal. On long hair, though, it gets a little more presence than people expect. The length makes the roll thicker, so the back of the style looks full instead of narrow.
The trick is to keep the top smooth and the roll vertical, then stop before it gets too tight. A French twist on long hair should feel controlled, not armored. If the hair is layered, clip the shorter pieces before you start twisting so they do not slip out of the seam. A few loose pieces around the cheekbones can soften the structure, especially if the dress or jacket has a strong neckline.
I think this is one of the best options for work events, formal dinners, and anything that asks for polish without sparkle. It is not the easiest style on the list. It does ask for a little patience, and U-pins make life easier than regular bobby pins. But once it is in place, it stays elegant in a way that never feels trendy or forced.
The finish should look smooth at the top and tucked at the back, with the roll sitting just above the nape.
6. Half-Up Twisted Top Knot for Long Hair

Unlike a full updo, this half-up version leaves the length visible, which is why it works so well when you want shape without hiding the hair you spent all week growing out. It keeps the face clear, adds height at the crown, and still lets the rest of the hair fall down the back.
The twist starts at the temples or just above the ears. Bring those sections back, twist them once or twice, and secure them into a small top knot or wrapped knot near the crown. The lower half can stay straight, waved, or curled. That mix is what makes the style feel easy rather than formal.
This one is especially good for layered hair, because the top section gives you control while the loose length keeps movement. If your hair is very thick, make the knot small and neat. If it is finer, tease the crown for 10 seconds before you pin anything. That tiny lift makes the whole shape hold better.
I reach for this on days when I want my hair off my face but do not want a full commitment. It is low effort, and it looks like it took more thought than it did.
7. Braided Twist Low Bun

A braid changes the texture of a twist in a useful way. It gives the style more grip, more structure, and a little visual detail right where a plain twist might look flat.
What the braid adds
Instead of twisting the side sections straight back, braid them loosely first, then fold them into a low bun. That extra pattern helps the hair stay put, especially if the strands are fine or freshly washed. On long hair, a braid also keeps the bun from becoming a heavy lump; the braid lays some of the bulk along the head before the bun gathers it.
- Works well with a center part or a soft side part.
- Better for slippery hair than a plain twist alone.
- A loose pancake braid creates more width.
- Cross-pin the bun so the braid seam does not unravel.
How to keep it neat
Keep the braid loose enough to flatten slightly, then pin under the bun instead of on the outer edge. If you pull too hard on the braid, the twist loses its shape and starts looking stiff. Leave a little softness near the ears and let the bun sit low enough to touch the nape.
This is one of those styles that looks more complicated than it is, and I am not complaining about that.
8. Messy Twisted Top Knot

This one is messy on purpose, and that is the whole point. A twisted top knot works because it cheats a little: the twists hide the fact that the bun is fast, and the looseness keeps it from looking flat.
Start by gathering the hair high, twisting it in two or three thick sections, then wrapping those sections around each other before pinning the knot on top. Long hair gives the knot a lot of shape, so you do not need padding unless the hair is very fine. After it is pinned, pull a few pieces apart with your fingers. Not too much. Just enough to break the outline.
A good messy top knot should still have an anchor. If the base is loose, the whole style drops by lunch. I like to secure the knot first with an elastic, then add two or three pins to hold the twists in place. That keeps the look soft without making it fragile.
This is the style for errands, casual dinners, and days when you want height at the crown but do not want the hair to look overworked. It is relaxed, but not lazy. There is a difference.
9. Gibson Tuck with Twists

Want an updo that looks more complicated than it is? The Gibson tuck with twists has that effect every time, and long hair gives it enough length to look full even when the roll stays tidy.
The basic idea is simple: twist sections from the sides, bring them to the back, and tuck the remaining length into a soft roll that sits low on the head. It has a vintage feel, but the twist keeps it from looking costume-like. On long hair, the tucked section usually has enough mass to create a thick line across the back, which is what makes the shape so satisfying.
How to wear it
- Keep the roll low at the nape for the cleanest shape.
- Tuck the ends in sections, not all at once, or the roll bulges.
- A tail comb helps smooth the top without flattening the crown completely.
- Works well on layered hair if the shortest pieces are pinned first.
I like this style for afternoon events because it feels finished without being strict. There is a little softness around the edges, but the overall line stays neat.
10. Twisted Faux Hawk Updo

A twisted faux hawk is what I suggest when a normal bun feels too safe. It brings a little edge to long hair without making you look like you borrowed the style from a music video.
The shape comes from twisting the sides back tightly enough to keep them sleek, then building volume down the center line from crown to nape. That center strip can be made of loops, small knots, or one big twisted ridge. The side sections should stay close to the head, because that contrast is what gives the style its lift. If the sides puff out, the faux hawk loses the point.
- Best on thick or textured hair.
- Works with straight hair if you prep with texturizing spray.
- Strong pins matter here, because the center ridge carries a lot of weight.
- A small amount of volume powder at the crown helps the top sit up.
The style looks dramatic in a good way. It keeps the long length controlled, but the outline still has energy. I would wear this for a night out before I would wear it to a boardroom, and I mean that kindly.
11. Double-Knotted Low Bun

Two knots are often easier to control than one. That is the appeal of a double-knotted low bun on long hair: it spreads the hair out in stages, which makes the final shape feel secure instead of bulky.
The first knot gathers the hair and gives it a base. The second knot locks that base in place and adds the visual twist that makes the bun look intentional. On very long hair, this is useful because the extra length can be folded into the second knot rather than shoved into one tight coil. The result is cleaner at the nape and less likely to swell up in the middle.
I like this one for thick hair that tends to fight pins. You can place the first knot a little lower than you think, then build the second knot on top with the remaining length. If the bun needs more control, use one elastic between the knots and another at the base. That sounds fussy, but it is not. It is just practical.
The style feels sculpted without becoming stiff. It is one of the better choices when you want the back of the head to look neat from every angle.
12. Rolled Side Twist Bun

Unlike a classic French twist, this rolled side bun keeps the motion softer and pushes the shape toward one side instead of straight up the back. That small shift changes the whole mood of the style.
The hair is gathered low, rolled inward, and tucked so the bend of the roll lands slightly off-center. On long hair, the roll becomes thick enough to look plush without needing fake volume. The side placement also gives the neck line a little space, which matters if the neckline is high or if you want one shoulder to stay visible.
This style works especially well for people who want polish but do not love the strictness of a vertical twist. It is less formal than a French twist, less casual than a loose knot, and easier to shape around earrings or a dress with asymmetry. If your hair has a few layers around the face, leave them soft. They help the roll feel less severe.
I would recommend this for dinners, date nights, and polished daytime events. It sits in that useful middle ground where the hair is clearly styled, but not overdone.
13. Crown Twist with Low Bun

A crown twist pulls the eye upward before everything settles into a low bun, and that is why it flatters long hair so well. It gives the style a bit of lift at the temples without making the whole thing tall.
Where to place the crown twist
Take two sections from either side of the part, twist them back toward the crown, and pin them where the head starts to round toward the back. Then gather the rest into a bun at the nape. The shape should feel like a soft frame around the face, not a tight band across the forehead. If the crown twist sits too low, it loses its lift. Too high, and it starts to look theatrical.
- Good for long hair that needs more shape at the top.
- Helps balance a fuller lower half of the hair.
- Looks neat with a center part or a slightly off-center part.
- A few hidden pins under the bun make the crown twist stay anchored.
This is a good style when the face needs a little opening around the temples. It also works on hair that has a bit of natural wave, because the texture helps the twist sit naturally.
14. Twisted Updo with Hair Pins and Pearls
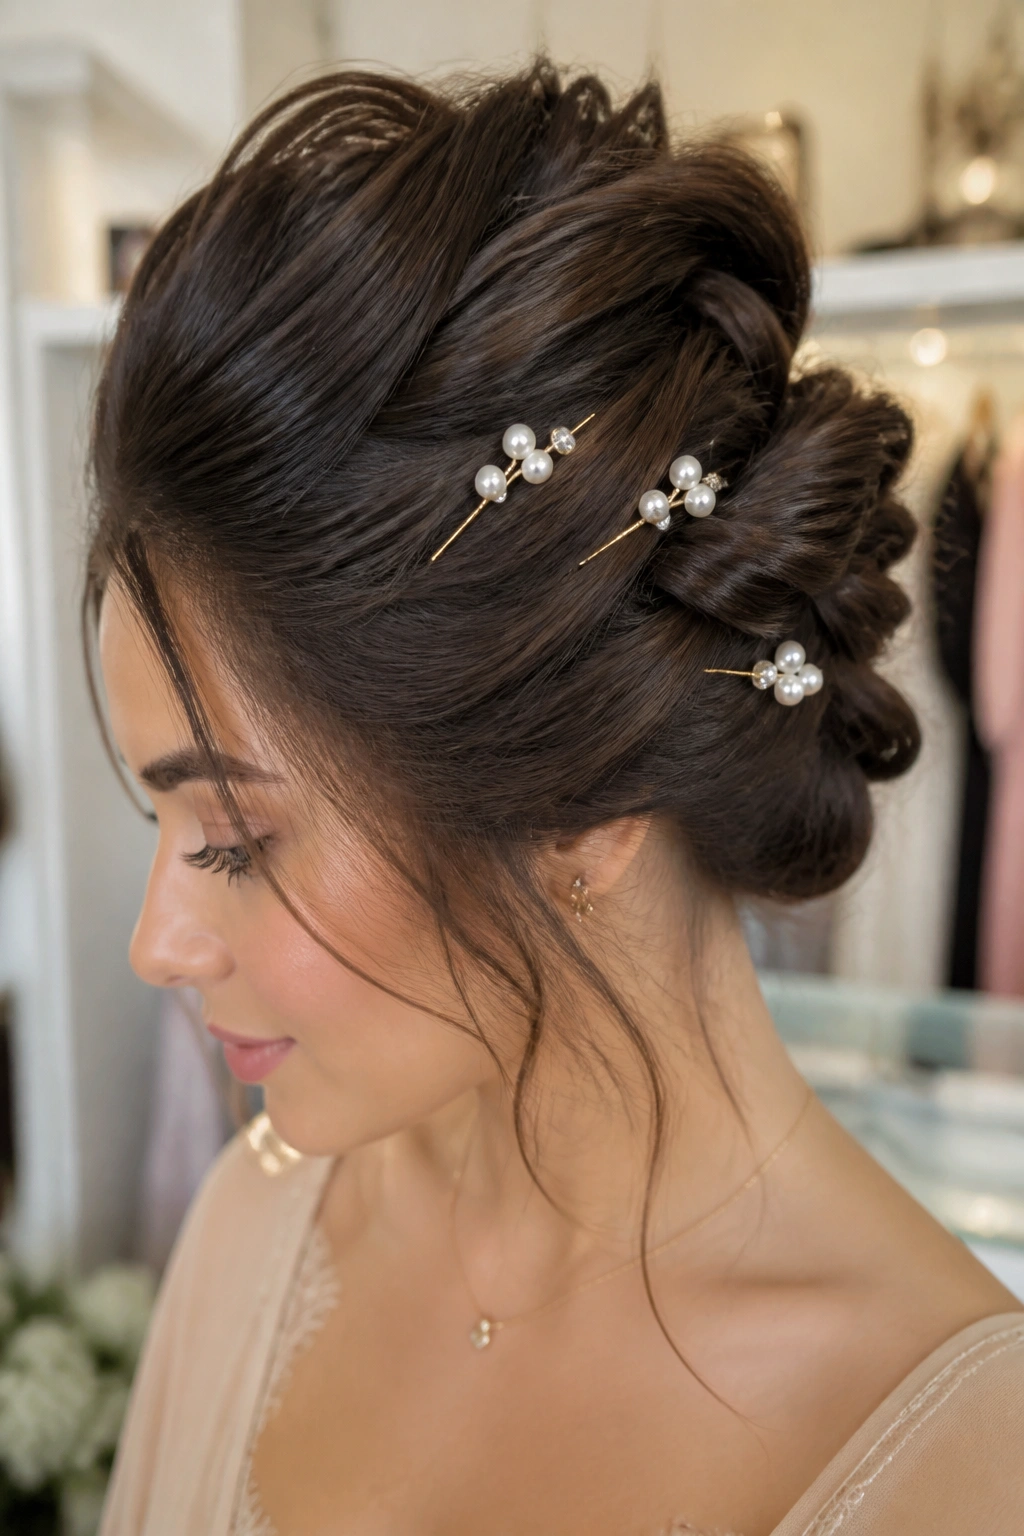
Accessories can save a simple twist from looking plain. A twisted updo with hair pins and pearls is proof of that, and long hair gives the design enough surface area to hold the detail without crowding it.
The trick is restraint. Three well-placed pins usually look more refined than seven scattered ones. Put one at the seam of the twist, one near the bun base, and one slightly higher if the style needs balance. Pearls soften the line of the twist, while gold pins make the shape feel sharper. That is a small difference, but it matters in the mirror.
I like this approach when the hairstyle itself is clean and the outfit needs a little finish. The accessories should not fight the twist; they should sit inside it like punctuation. If the hair is dark, matte gold shows more clearly. If the hair is light, pearls stand out without looking loud. Simple as that.
This is the style I reach for when I want the hair to look done in a way that still feels human. A little polish. Not a helmet.
15. Voluminous Curly Twisted Updo
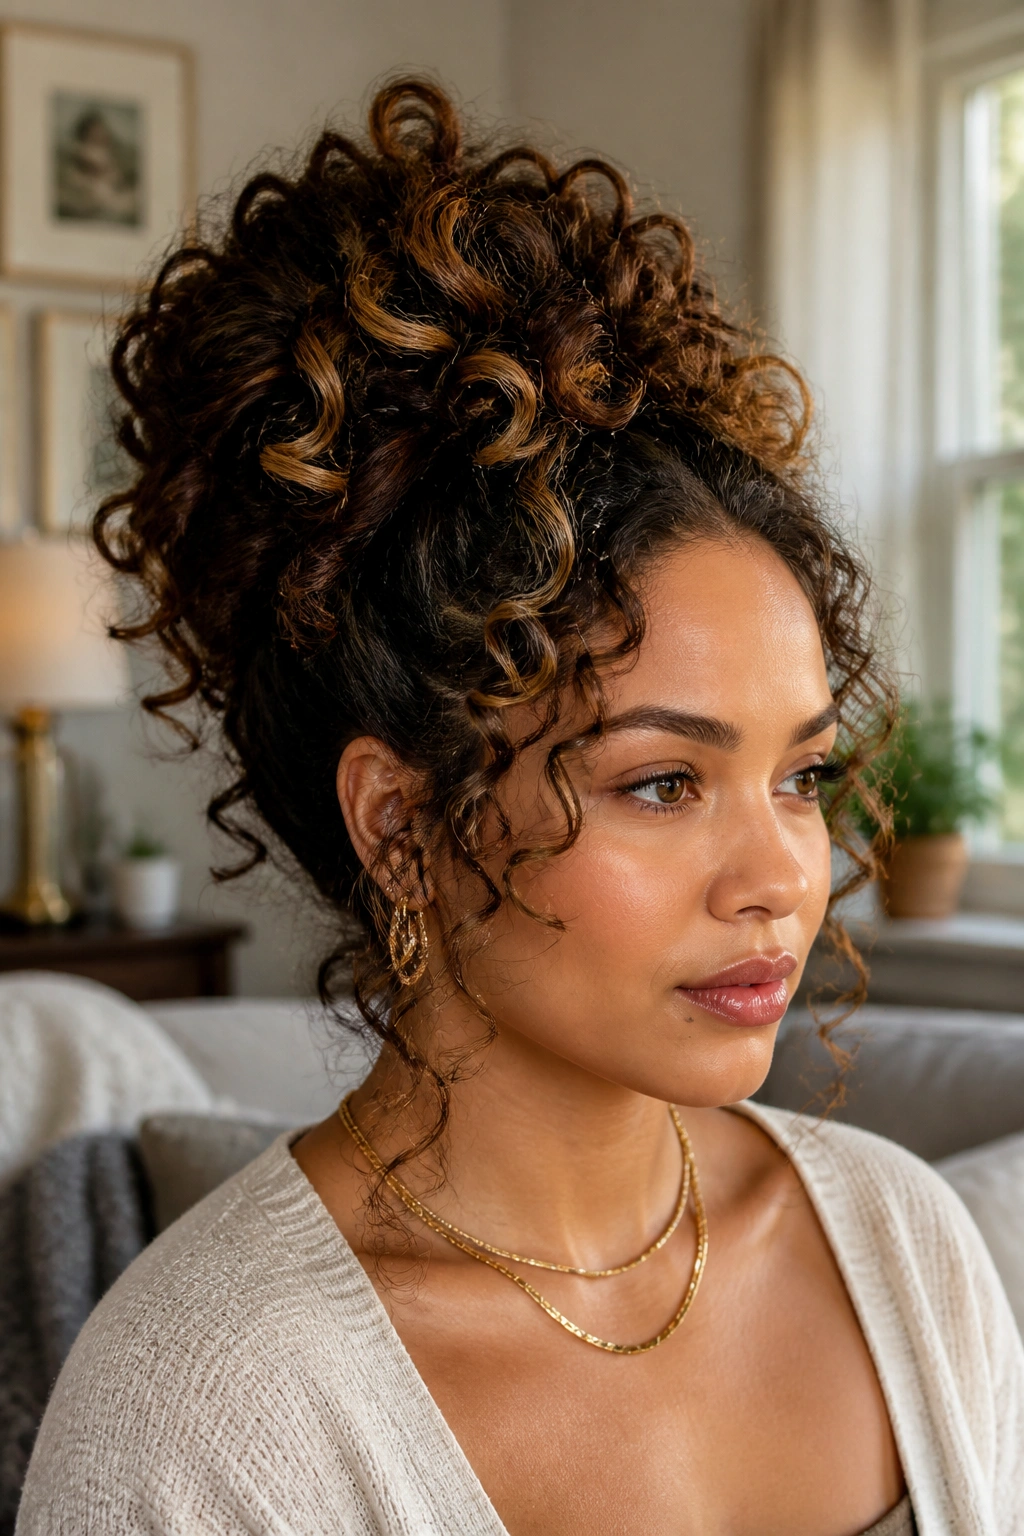
How do you keep curls from collapsing inside a twist? You do not squeeze them into submission. You pin them in sections and let the shape breathe.
A voluminous curly twisted updo works because the curls bring their own structure. Instead of brushing them flat, gather them in loose panels, twist each panel back, and pin it where the curl naturally wants to sit. Long curly hair gives you a lot to work with, so the style can look full without much extra teasing. If the curls are dry, mist them lightly with water or a curl refresher before pinning. That keeps the shape soft instead of frizzy.
How to wear it
- Pin curls after they cool, not while they are still warm from styling.
- Leave 2 to 4 curls around the face if you want movement.
- Use flexible-hold spray, not a hard lacquer that turns the curls crunchy.
- Let the top stay slightly lifted so the style does not collapse toward the scalp.
This one is good for long hair that already has texture. It is also a solid choice when you want the updo to look fuller from the side without adding fake volume.
16. Sleek Center-Part Twisted Bun
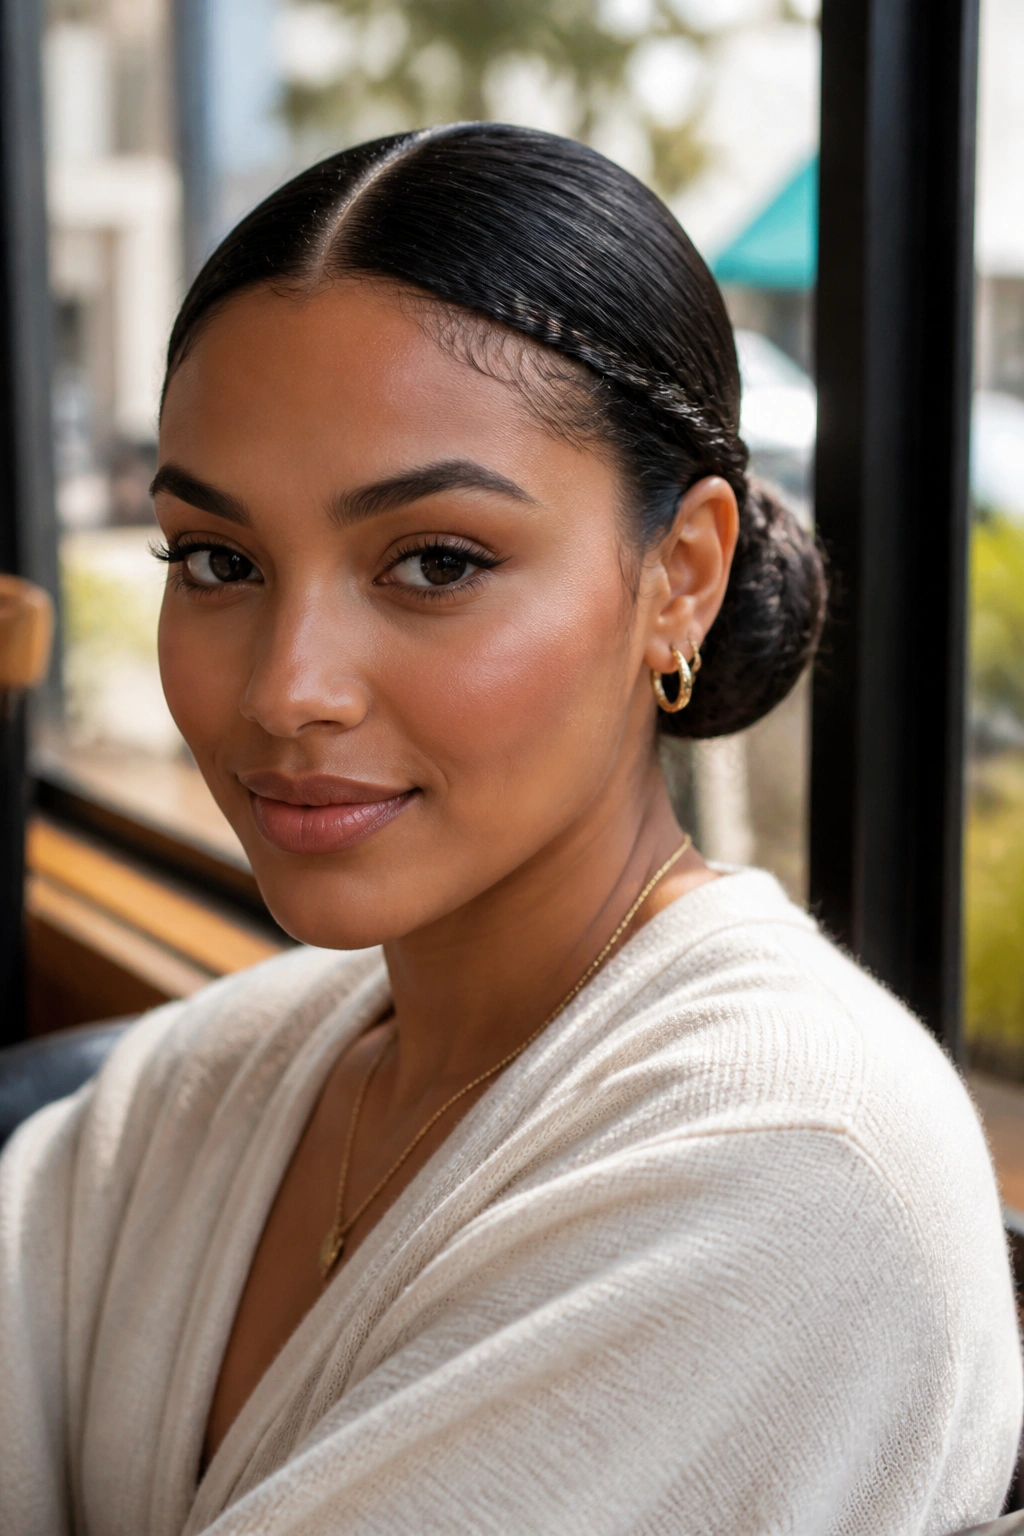
Some days need sharp lines. A sleek center-part twisted bun gives them exactly that, and long hair makes the finished shape look crisp instead of skimpy.
The center part creates symmetry, then the two sides twist back along the hairline and meet at a low bun. The front needs to be smooth, so a light styling cream or gel helps keep flyaways down. A toothbrush or small edge brush works better than a big comb for cleaning the part and the temples. That extra control is what makes the style look intentional.
I like this one for tailored clothes, high collars, and cleaner makeup looks. It is not the softest style in the list, but it does a very good job of framing the face without distracting from the rest of the outfit. The bun itself can stay compact or slightly rounded, depending on how much length you need to hide.
If your hair is very thick, work in small sections and pin as you go. Waiting until the end makes the bun harder to control, and there is no good reason to fight with it.
17. Infinity Twist Bun

The infinity twist bun looks harder than it is, which is part of why people love it. The hair loops in a figure-eight path, and long hair gives the loops enough length to stay visible instead of disappearing into one blob.
Start by dividing the hair into two sections. Twist each section, then cross them in a looping motion so the ends feed back into the center of the bun. It sounds fussy written out, but the visual result is smooth and elegant once the pins go in. On long hair, the repeated loop creates a thicker center, which helps the bun stay balanced from side to side.
I prefer this style when I want the back of the head to look more interesting than a regular knot. It has texture, but it is not messy. It has symmetry, but it is not stiff. That is a useful line to walk.
If your ends are very long, tuck the last few inches under the bun before you pin the final loop. That keeps the shape neat and stops the tail from poking out by the end of the night.
18. Protective Twisted Updo for Long Hair
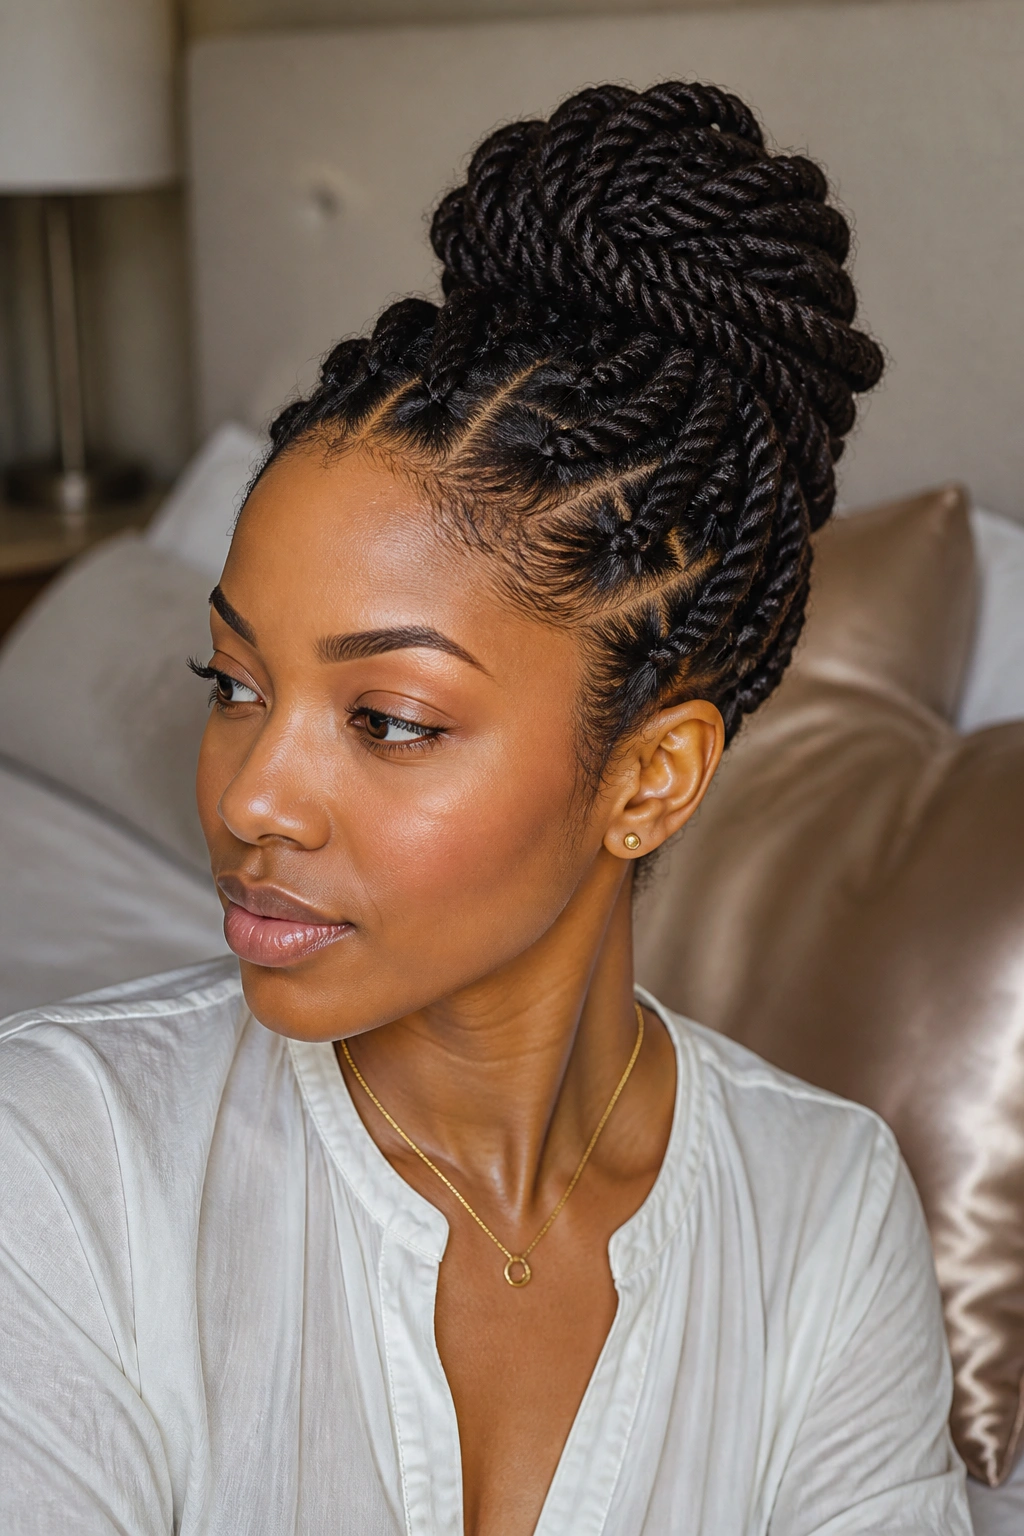
Unlike a loose fashion twist, a protective twisted updo on long hair has a job to do. It should look good, yes, but it also needs to keep the hair tucked, reduce snagging, and avoid pulling too hard at the edges.
This is the style I point people toward when they want length control without harsh tension. Start with moisturized hair, use a leave-in conditioner or cream that suits your texture, and keep the twists smooth enough to hold but not so tight that the scalp feels strained. If your hair is natural, coily, or prone to dryness, sectioning matters more than speed. Clean parts, gentle twisting, and satin at night make a bigger difference than trying to force the whole thing into one perfect shape.
A good protective updo can be low, tucked, and simple, or it can be dressed up with a side twist and a wrapped bun. The real goal is that the hair stays organized and the ends stay protected. That matters far more than chasing a glossy finish that may fall apart after two hours.
If you only keep one style in regular rotation, make it this one. It respects the texture, it works with long hair instead of against it, and it still leaves room for a little personality.
