



Edges can change the whole mood of natural hair in ten seconds. A neat swoop makes braids look crisp. A tiny curl at the temple softens a bun that would otherwise feel severe. That is why 15 edge styles for natural hair matter more than people give them credit for.
The trick is not finding one “right” look. It’s matching the edge style to the hair under it, the shape of your hairline, and how much product your hair can actually hold without going stiff or flaky. Some styles need only a soft brush and a pea-size dab of gel. Others want a firmer edge control, a rat-tail comb, and a scarf for five or ten minutes so the shape sets cleanly.
Small detail. Big difference.
I care a lot about tension here, because a cute hairline is not worth a sore scalp or thinning temples. The American Academy of Dermatology has long warned against tight styles that pull on the hairline, and that warning applies here too. If the style needs a hard yank to look neat, it is probably too much. Use a light hand, keep the front sections small, and remember that “laid” should never mean stressed.
If you usually wear the same little swoop every time, good. But there are better, softer, bolder, and lower-tension ways to frame natural hair — and the best one depends on the style sitting underneath it. Start with the gentler looks first, then move toward the graphic ones once you know how your edges behave.
1. Soft Swoop Edges for Natural Hair
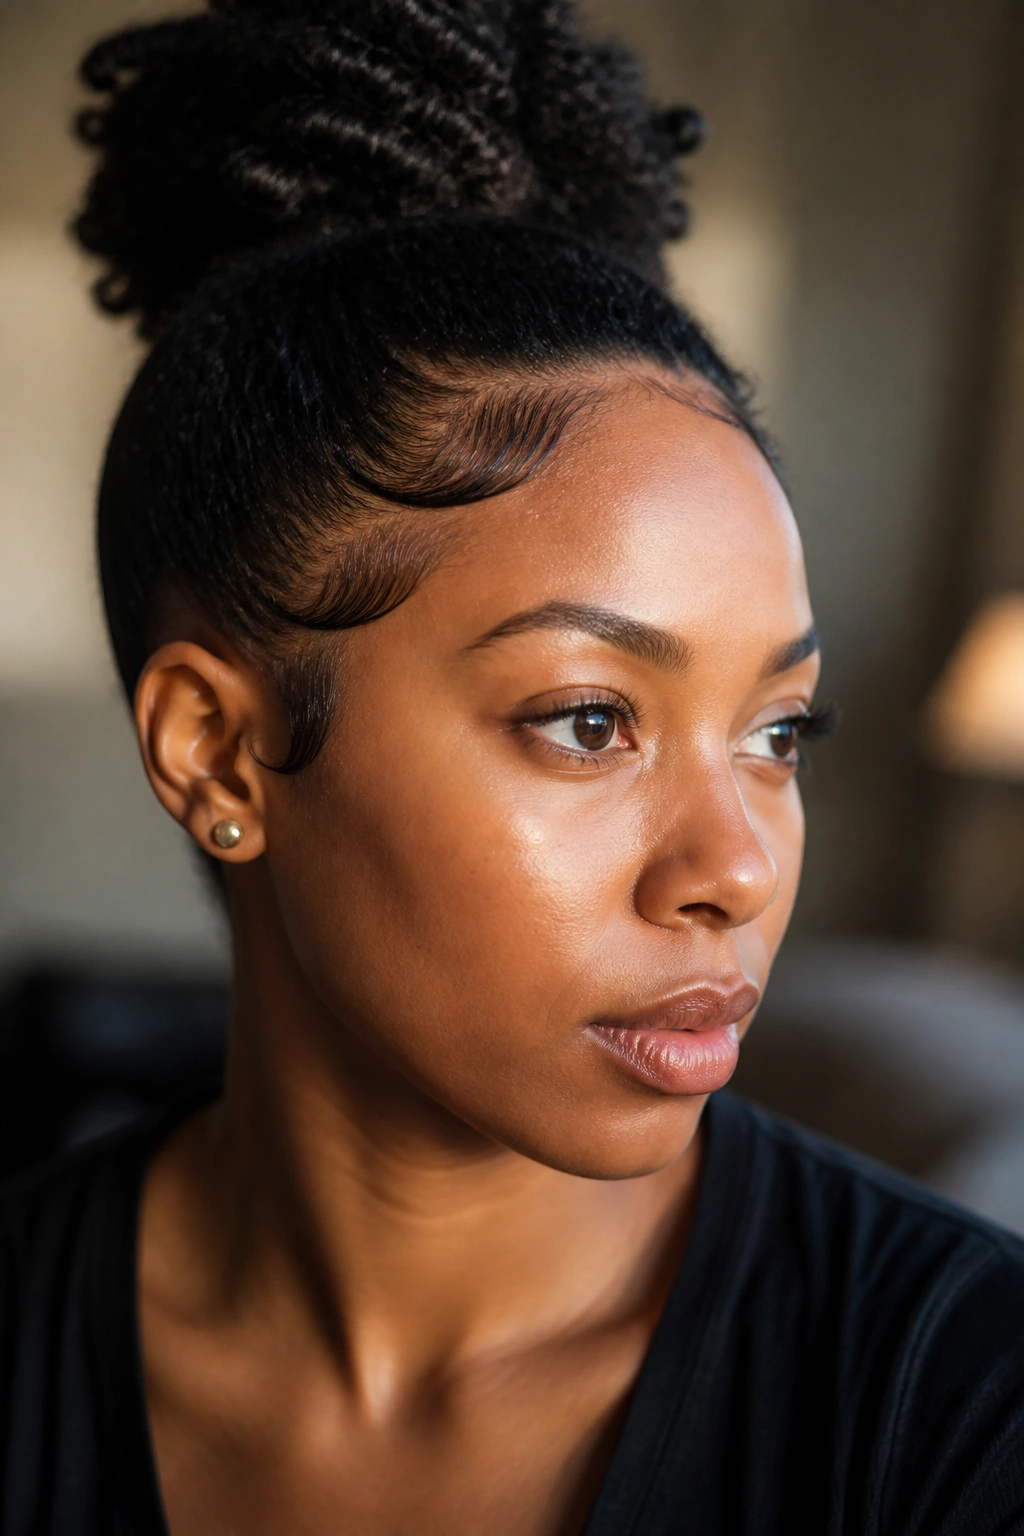
Soft swoops are the easiest place to begin because they look finished without looking fussy. They trace the natural curve of the hairline, usually at the temples, and they work with braids, twist-outs, puffs, and low buns without stealing the show.
Why This Style Works
The appeal is in the restraint. A soft swoop gives the front of the hair a little movement, but it does not carve sharp lines into the hairline the way a more sculpted style can. That makes it a strong everyday option when you want polish and your edges are fine, short, or a little uneven.
A soft brush, a tiny amount of edge control, and a clean part are enough. Start at the temple, brush the hair in a shallow curve, and stop before the swoop gets too long. Shorter is usually better here, because the style should frame the face, not sit on it.
Quick Facts That Help
- Use a rat-tail comb or edge brush for the first pass.
- Work on slightly damp hair, not soaking wet hair.
- Keep the product layer thin so it does not flake.
- Set the shape with a satin scarf for 5 to 10 minutes.
Tip: If your hairline is tender, make the swoop smaller instead of tighter. That one change saves a lot of grief.
2. Classic Side Swoop
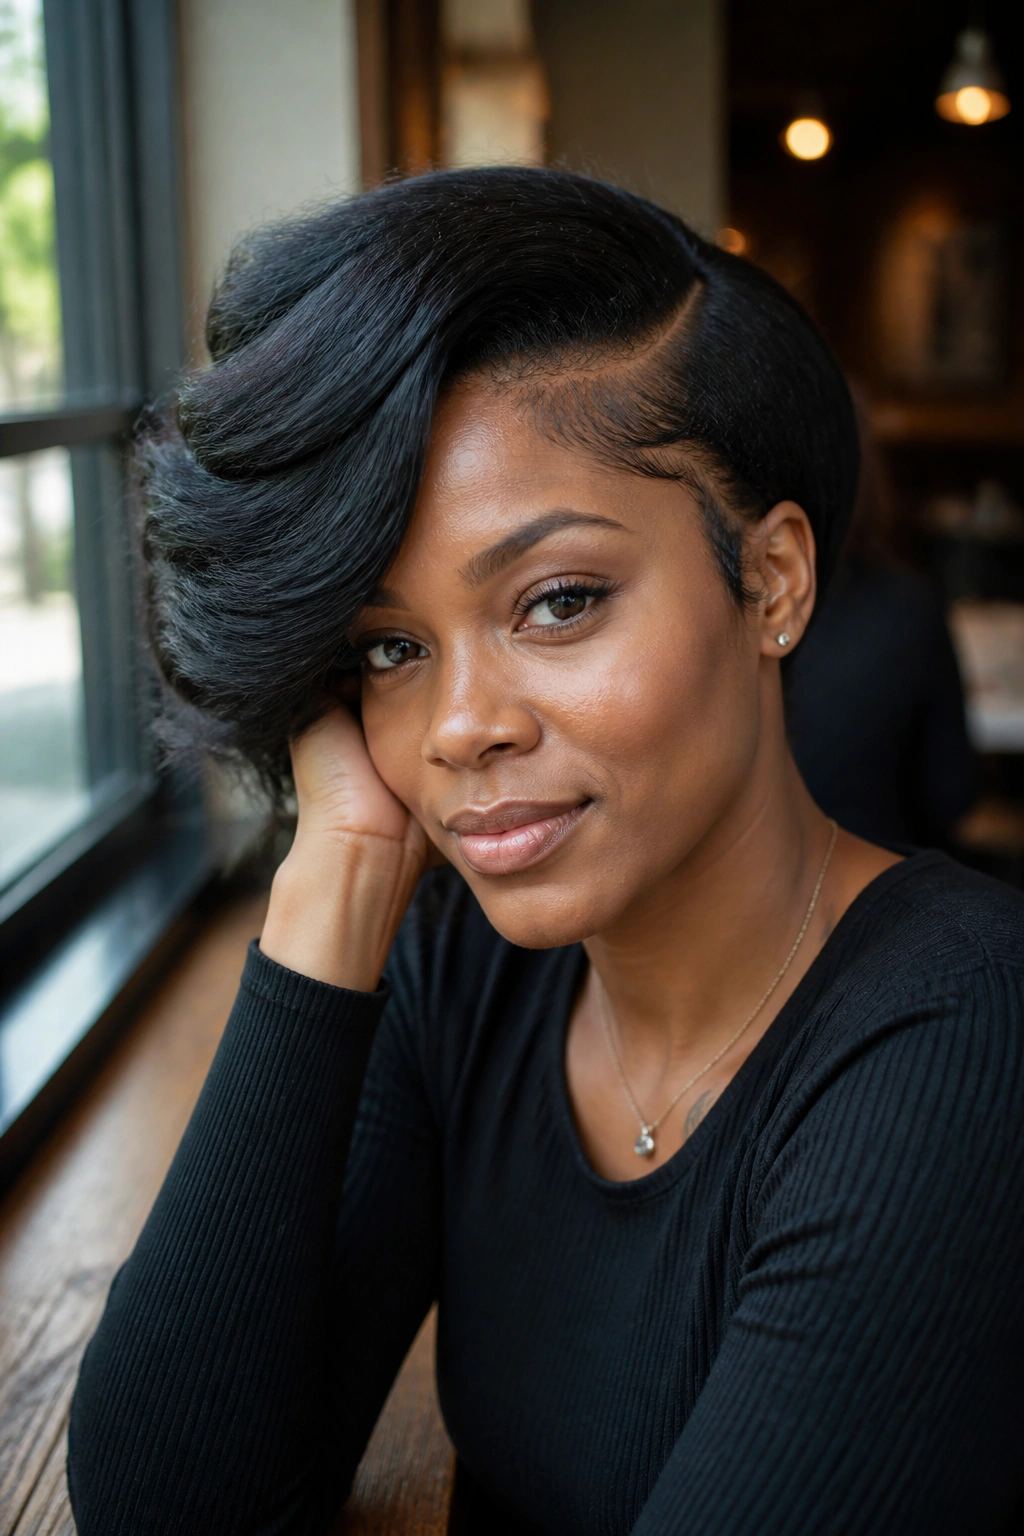
A side swoop is a clean, directional look that follows the movement of a side part or side ponytail. It’s one of those styles that makes natural hair seem more intentional without trying too hard, which is probably why it shows up so often with knotless braids, side buns, and deep side parts.
What makes it different is the direction. A soft swoop frames the face. A side swoop pushes the eye across the forehead and toward one side, which can make a low bun or braided style feel longer and more streamlined. If your face reads round or square and you like a little elongation, this one pulls that off without drama.
The best way to do it is to keep the front section on the heavier side of the part and brush it down and over at a gentle angle — not straight down, not straight back. The shape should follow the line your part already made. That’s the whole trick.
A side swoop is also one of the more forgiving styles if your hairline is not perfectly even. You can lean a little more on the fuller side and keep the thinner side softer. No one needs mirror-image perfection at the temples.
3. Double Swoop Frames
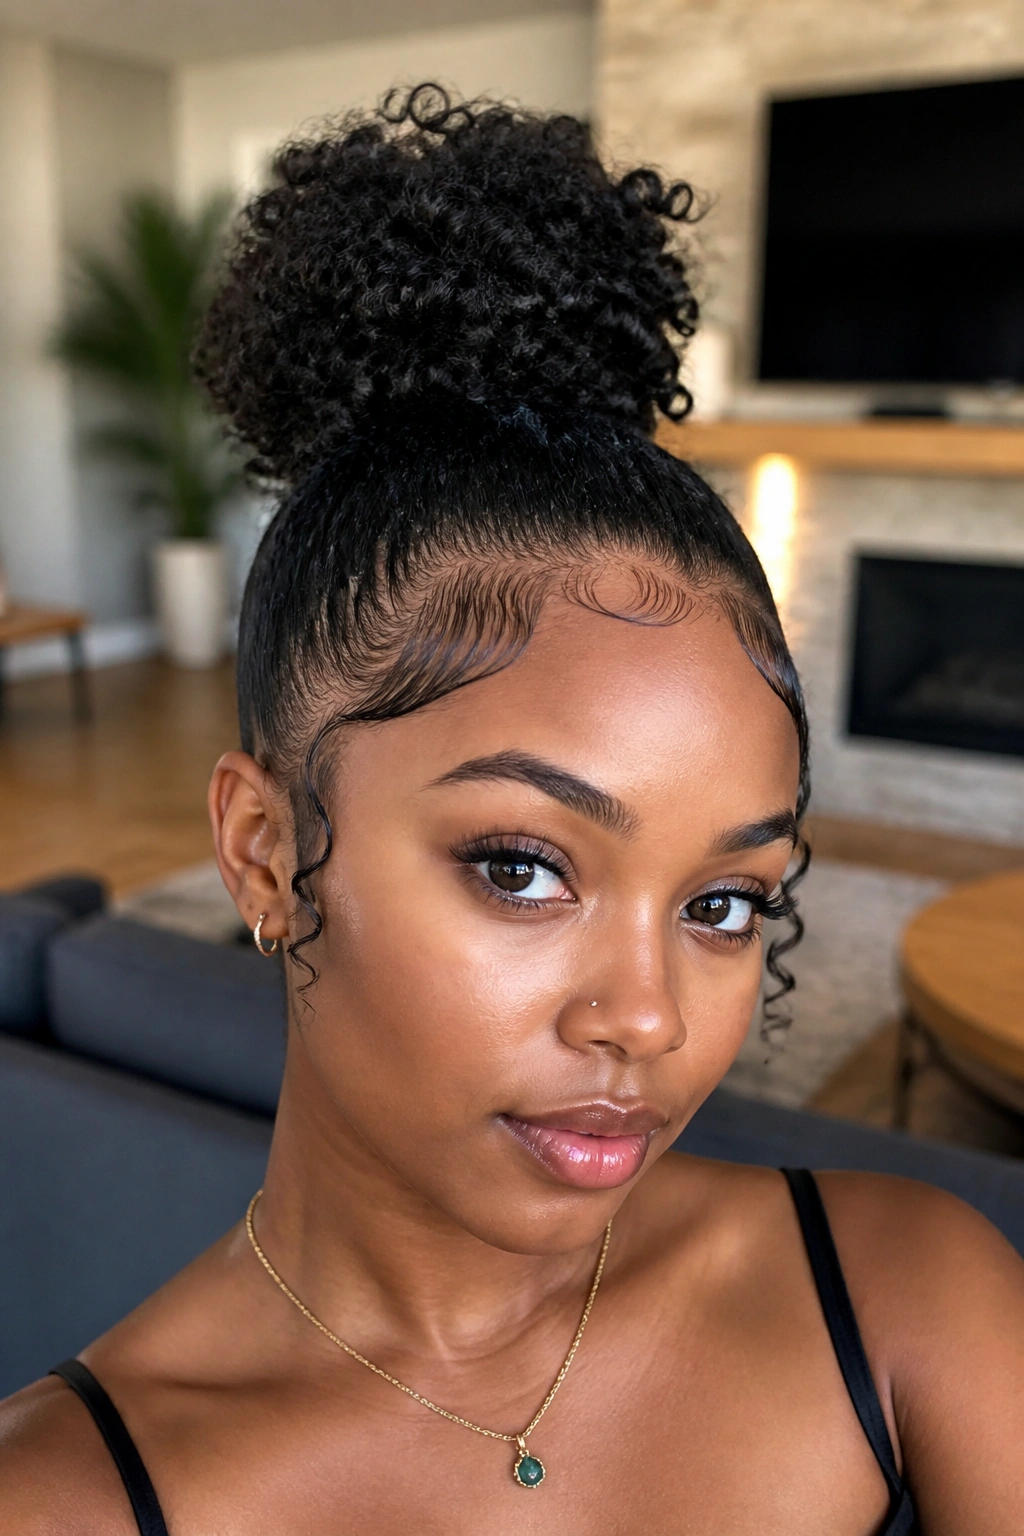
Why do double swoops look so polished? Because they create balance without making the front of the hair look crowded. Two small curves at the temples can frame braids, buns, or a puff in a way that feels deliberate and neat.
How to Place Them
Start by sectioning two narrow strips at the front, one on each side of the face. Keep each piece small — roughly the width of a pencil or a slim rat-tail comb. Brush the first swoop in a shallow C-shape, then mirror the general direction on the other side without forcing the exact same curve. Hairlines are not twins. They rarely behave like twins either.
This style works well when the hairstyle under it is already symmetrical. Think middle-part braids, a centered bun, or a puff pulled straight back. The double swoops echo that balance and make the face look framed rather than overloaded.
A lot of people make the mistake of making both swoops too thick. Then the front gets heavy and the style loses its snap. Keep them narrow, keep the product light, and let the rest of the hair breathe.
Best for: formal buns, braided crowns, and styles that need a soft but structured finish.
4. Zig-Zag Edge Detail
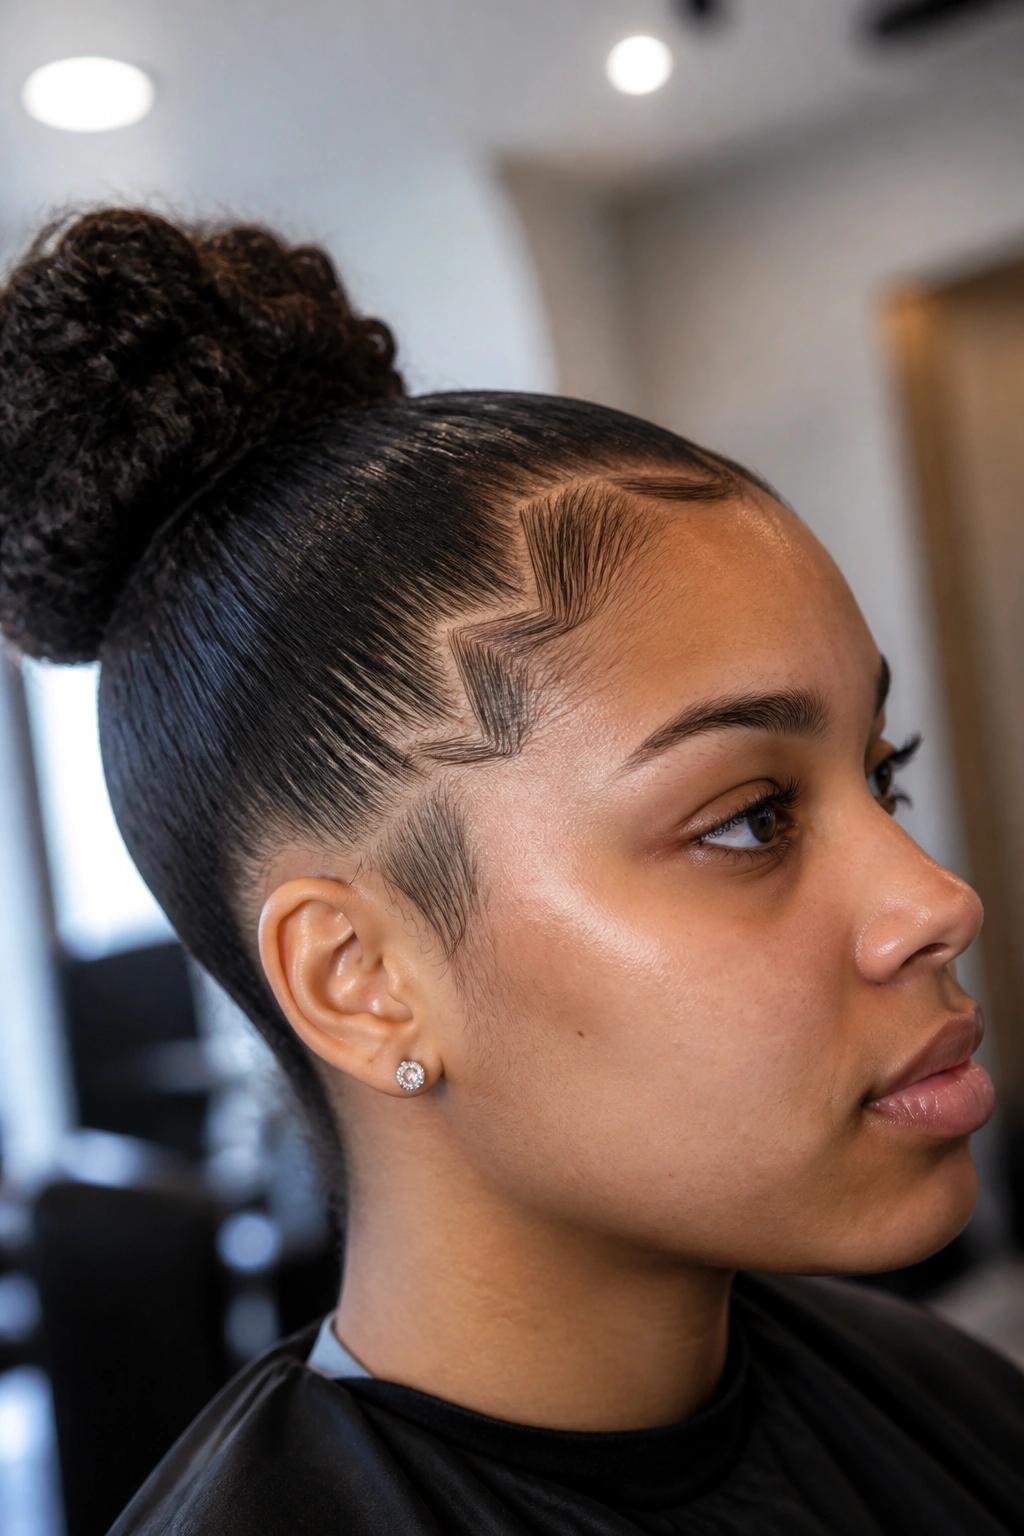
I still think zig-zag edges have a little personality in them. They remind me of the kind of hairline detail you notice from across the room, not because it shouts, but because the shape is different enough to catch your eye.
A zig-zag works best when the rest of the style is clean. Box braids, stitch braids, cornrows, or a sleek puff make a good base because the front can carry one graphic detail without looking busy. The line is the point. You are not trying to make baby hairs disappear; you are drawing a tiny pattern with them.
Use the tail of a fine comb to create a shallow series of angles, then brush each segment into place with a firm but controlled stroke. Keep the zig-zag in one zone — usually the front center or one temple — instead of running it all the way across the hairline. That keeps the look sharp instead of messy.
- Fine comb tail for the line.
- Firm-hold gel or edge control.
- Small sections only.
- A scarf set for 10 minutes.
What to watch for: If the angles are too wide, the style stops reading as zig-zag and starts looking accidental. Tight, small points are better.
5. Heart-Shape Baby Hairs for Natural Hair
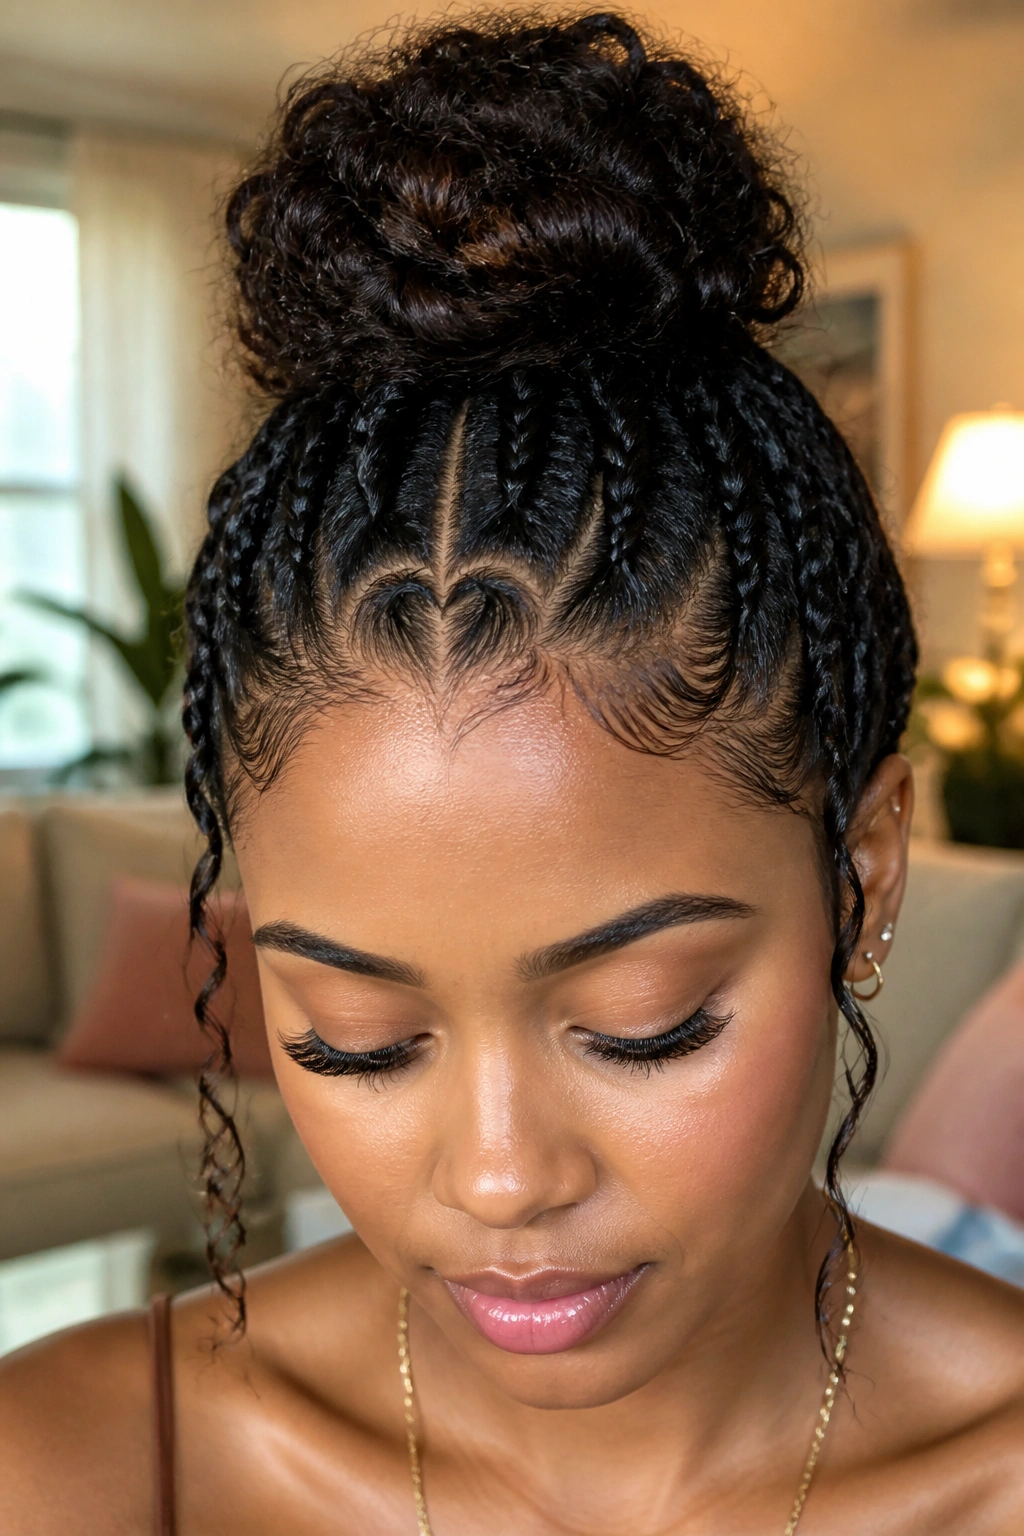
Heart-shaped edges are playful, but they are not childish when the rest of the style is clean. The shape works best when the heart is small and sits at the center front or just off to one side, where it reads like a detail instead of a costume.
The practical part matters more than the shape itself. You need enough control to bend two small curves toward each other and enough restraint to keep the heart from getting bulky. I usually think of this as a style for medium-density edges or a front hairline that can hold shape without frizzing out after twenty minutes.
A heart can sit on top of braids, a sleek bun, a high pony, or a half-up style. It works because the shape gives the front a focal point. The eye lands there, then moves on. That is cleaner than trying to lay every baby hair into a separate swirl.
The mistake I see most often is making the heart too large. Once it gets broad, it starts to look like a design sketch instead of a hair detail. Keep the curves close together and use just enough product to hold the outline. Small is smarter.
If you like a little personality in your protective styles, this one delivers it without needing glitter, clips, or anything extra.
6. Finger-Wave Edges
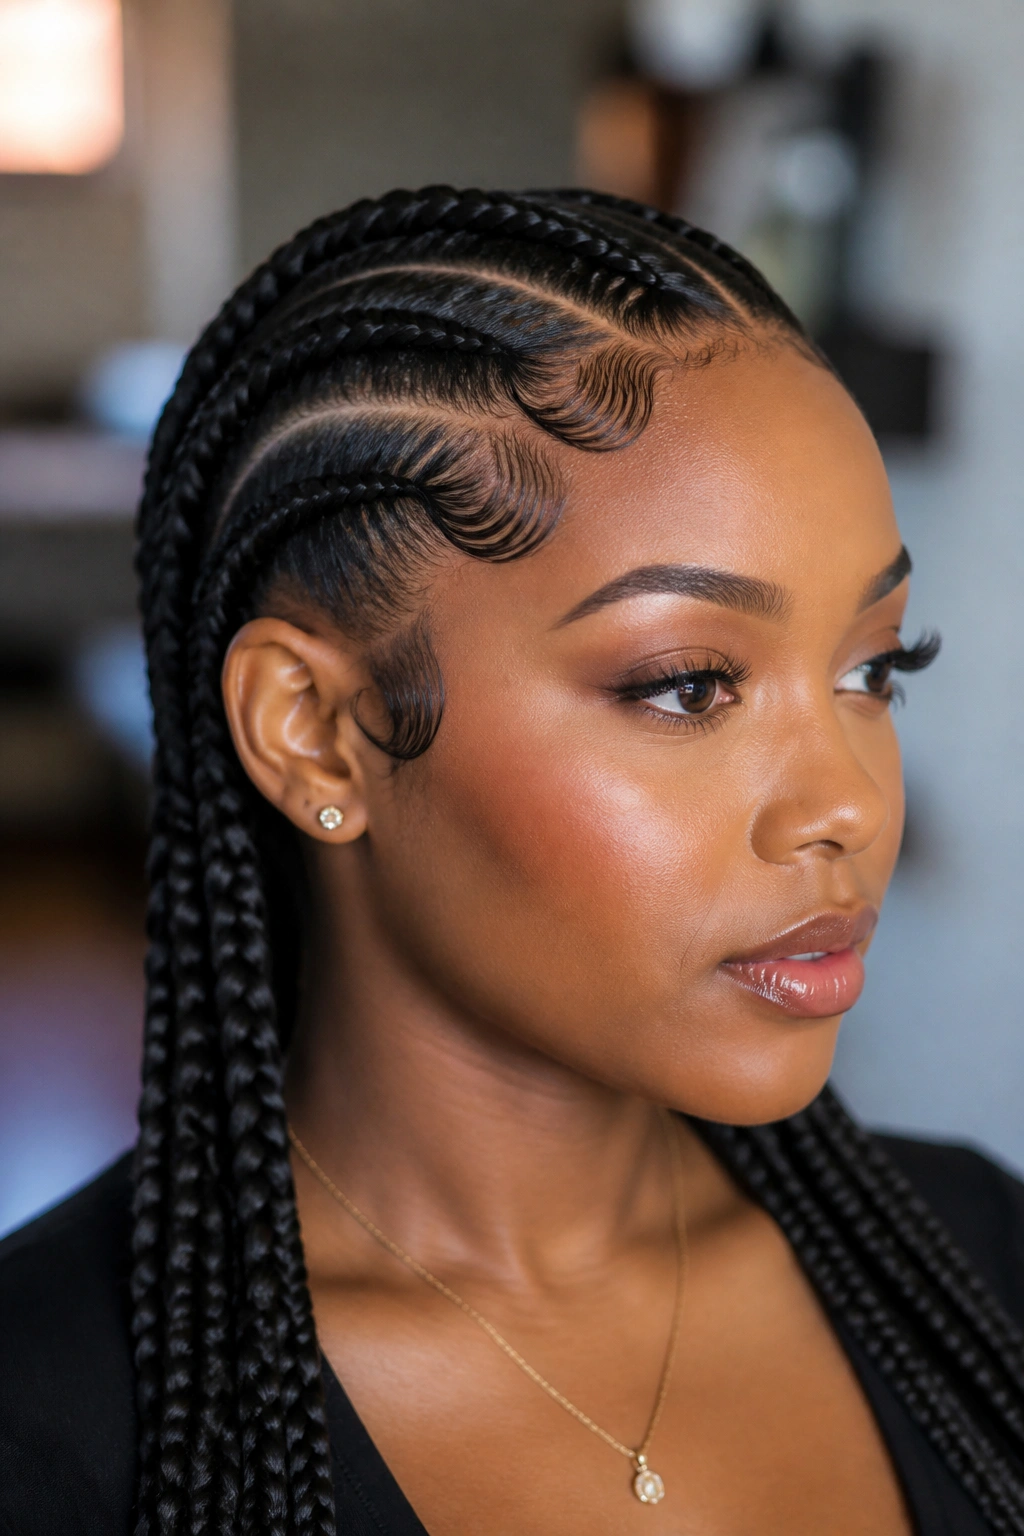
Finger-wave edges are the closest thing baby hairs have to old-school styling. They use repeated S-curves instead of one single swoop, so the front looks sculpted in a soft, rolling way rather than brushed flat.
Unlike a basic swoop, finger waves need rhythm. The first curve bends one way, the next bends back, and the pattern keeps moving in a shallow line along the front. That makes the look especially good with silk presses, slick buns, and neat braided styles that already have a polished feel. If the hair underneath is textured and full, the waves give the front a clean border without flattening all the life out of it.
The best tool is usually the tail of a comb paired with an edge brush. Put a thin layer of gel on the first section, shape the first wave, then set the next one right next to it before the hair dries. If you wait too long, the style gets stiff in the wrong places.
This is not a rushed style. It rewards a steady hand and a little patience. But the payoff is worth it if you like a front hairline that feels dressy without looking loud.
A quick scarf wrap helps the curves stay put and keeps the surface smooth instead of fuzzy.
7. Curly Temple Tendrils
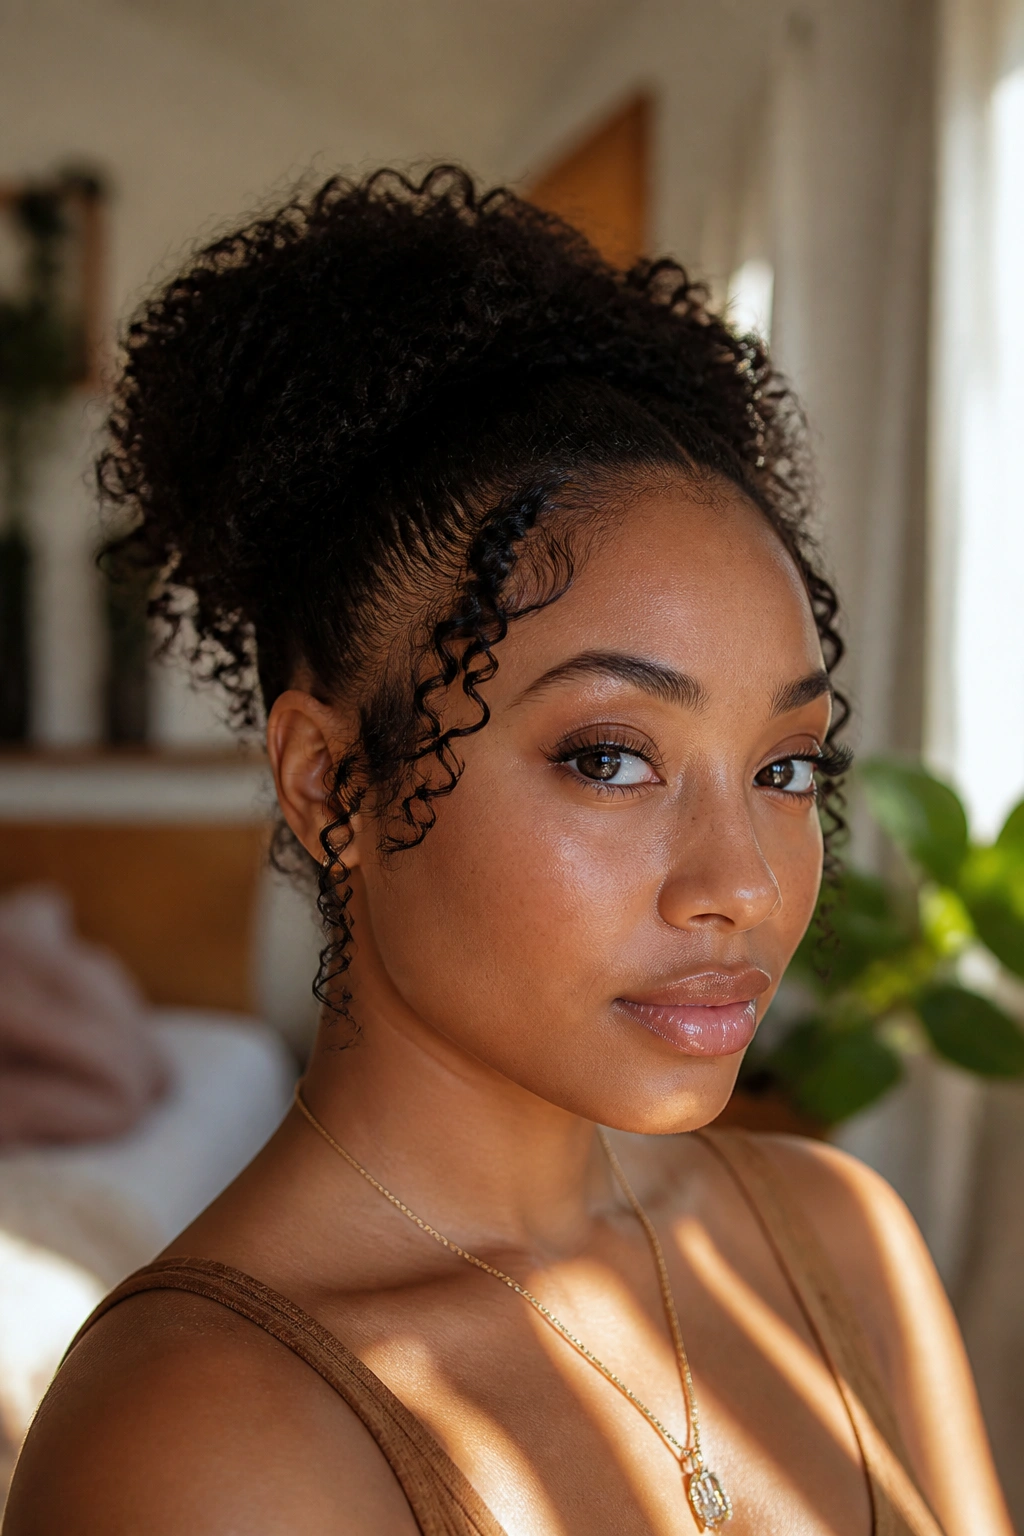
What if you do not want your edges laid flat at all? Then curly temple tendrils are the move. They keep the front soft and textured, which is a lot kinder to a hairline that gets irritated by gel or repeated brushing.
How to Style Them
Start with a small amount of leave-in or curl cream on the front hairs, then separate 2 or 3 tiny pieces at each temple. Coil them around your finger or a small styling wand, depending on the length. The goal is not perfect ringlets. The goal is shape — little bends that sit naturally beside the face.
This style works best with puffs, locs, wash-and-go styles, and braids that already have a lot going on. The curls keep the front from feeling too severe, and they add movement when the rest of the hair is pulled back. If your edges are short, that is fine. Short pieces often curl better than long ones in this style anyway.
- Use cream, not a heavy gel.
- Keep the curls tiny.
- Let them dry fully before touching.
- Skip brushing after the curl is set.
Good news: this is one of the lowest-tension ways to style the front of natural hair. It is not the longest-lasting option, but it is gentle, and that matters.
8. Sideburn Swirls for Natural Hair
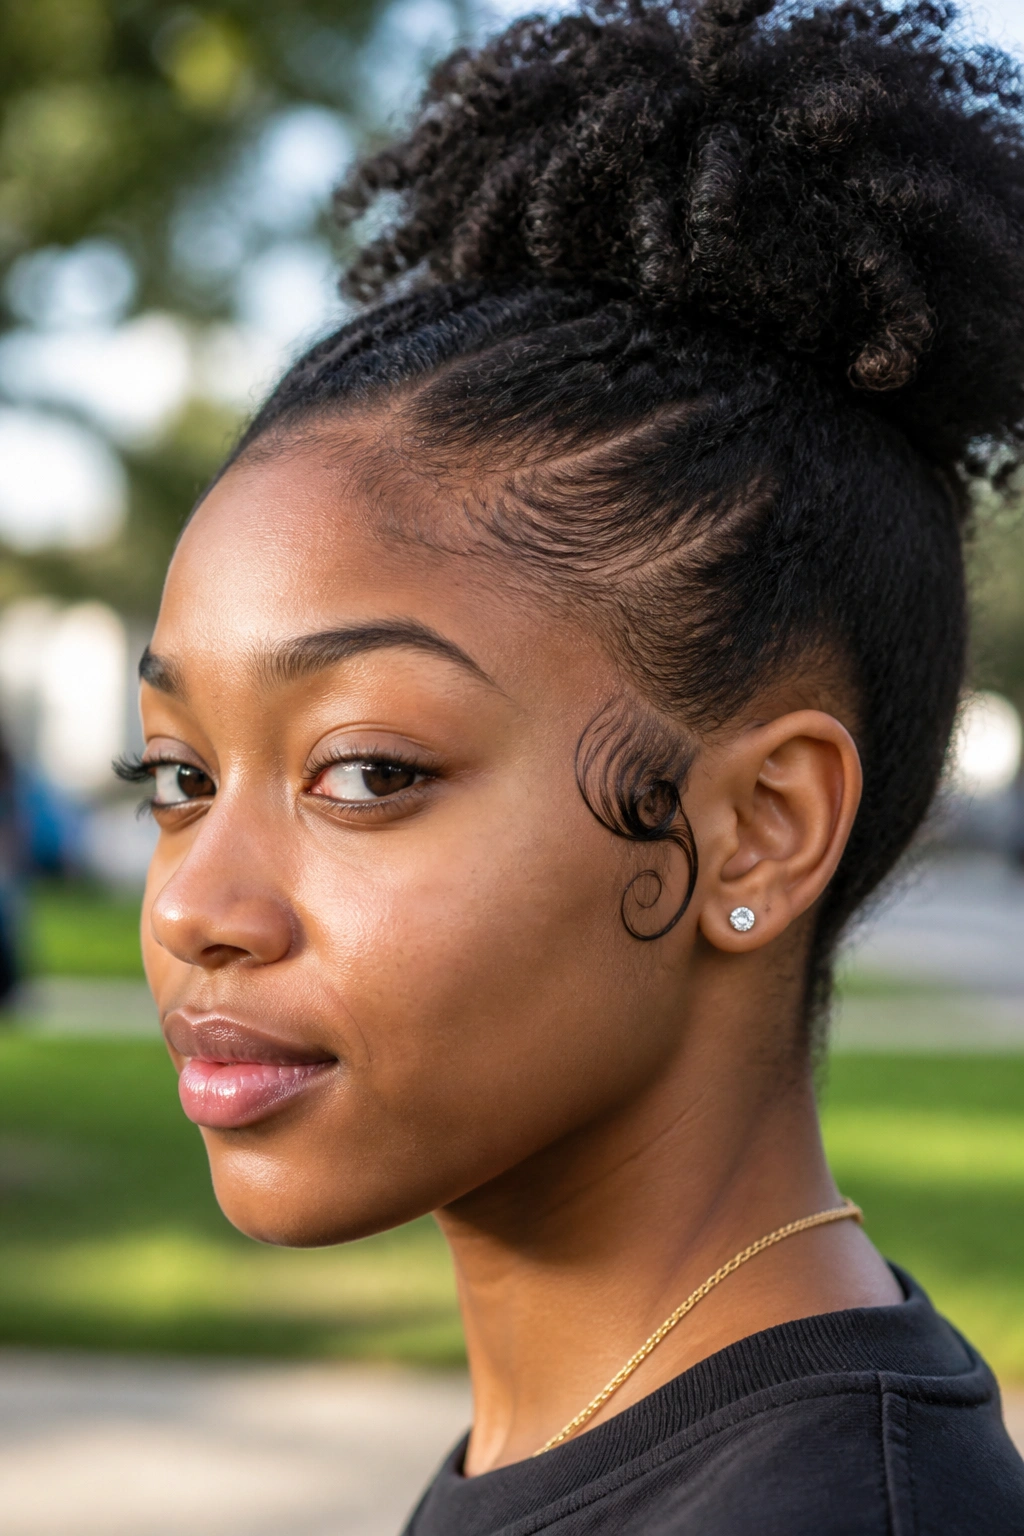
A sideburn swirl can change the whole profile of a style. The curve sits lower than a temple swoop and usually follows the sideburn area down toward the cheekbone, which gives the hairline a softer edge.
I like this one on short natural styles because it puts the attention where the face naturally narrows. A high puff, a bob-length twist-out, or a sleek braided pony can all take it well. It also works when the front of the hairline is sparse and the side area has a little more density, since you are not asking the most delicate hairs to carry the entire design.
The swirl itself should be tight enough to read as intentional, but not so tight that it looks drawn on. Start with a small, curved brush stroke, then tuck the end back toward the hairline so it forms a soft spiral. A dab of edge control at the base helps hold the curve without making the whole side hard.
One thing I appreciate about this style is that it can be asymmetric. You do not need both sides to match exactly. Sometimes one swirl is enough, especially if the hair underneath is already busy with braids or coils.
Clean, low, and slightly unexpected. That is the appeal.
9. Feathered, Wispy Edges
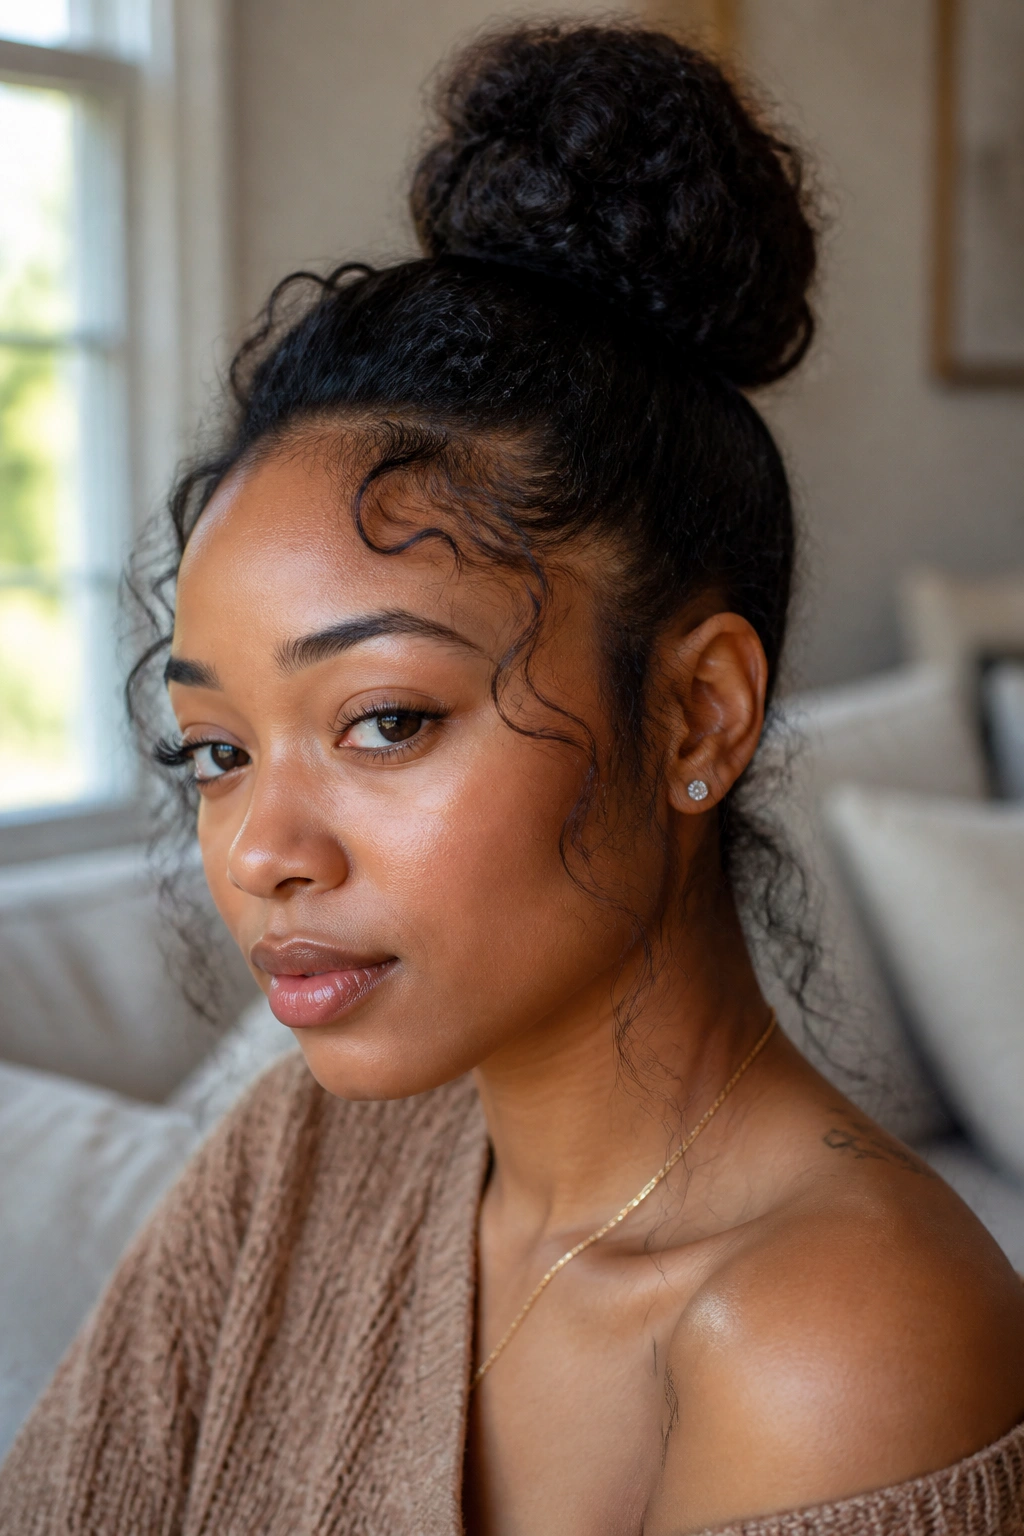
Feathered edges are for people who want the front of the hair to look touched, not shaped into a little sculpture. The finish is airy, with a few fine hairs left loose around the temples and forehead instead of brushed into one fixed line.
This is one of the most wearable styles for everyday natural hair because it feels light. A small amount of mousse or soft-hold cream, a quick brush, and a little finger shaping can be enough. If you have ever looked at a hard, shiny edge line and thought, no thanks, this is the opposite of that.
The downside is staying power. Feathered edges will not hold up as long as a stiff lay, especially in humidity or after a long day. But that trade-off is often worth it when your hairline needs a break or when the rest of the style is loose and textured.
- Best with wash-and-gos.
- Good for low buns and puffs.
- Works when you want movement, not crisp lines.
- Needs less product than a sculpted style.
One-sentence truth: not every edge style has to look carved.
10. Clean Minimal Edges for Natural Hair

Do you need a design at all? No. Sometimes the smartest edge style is the one that does the least, and that clean-minimal look can be sharper than a row of swirls if the rest of the hair is already neat.
This style is basically a polished outline. The front is brushed back just enough to smooth flyaways, the temples are flattened lightly, and the hairline still looks like hair — not like a paste-up project. It works especially well with middle-part braids, low buns, short natural cuts, and any style where you want the face to stay open.
When to Use It
Use a soft brush, a tiny amount of gel, and a satin scarf. That is it. If the brush starts dragging, stop and add less product, not more. Too much edge control at this stage gives you flakes or that tacky, stiff feel that shows up under good lighting.
This is also the style I’d choose when the hairline is fragile, newly growing in, or simply tired. You do not need a lot of movement at the front to look finished. Sometimes a smooth frame is enough.
It’s tidy. It lasts. It never feels overworked.
11. Crisscross Forehead Lines
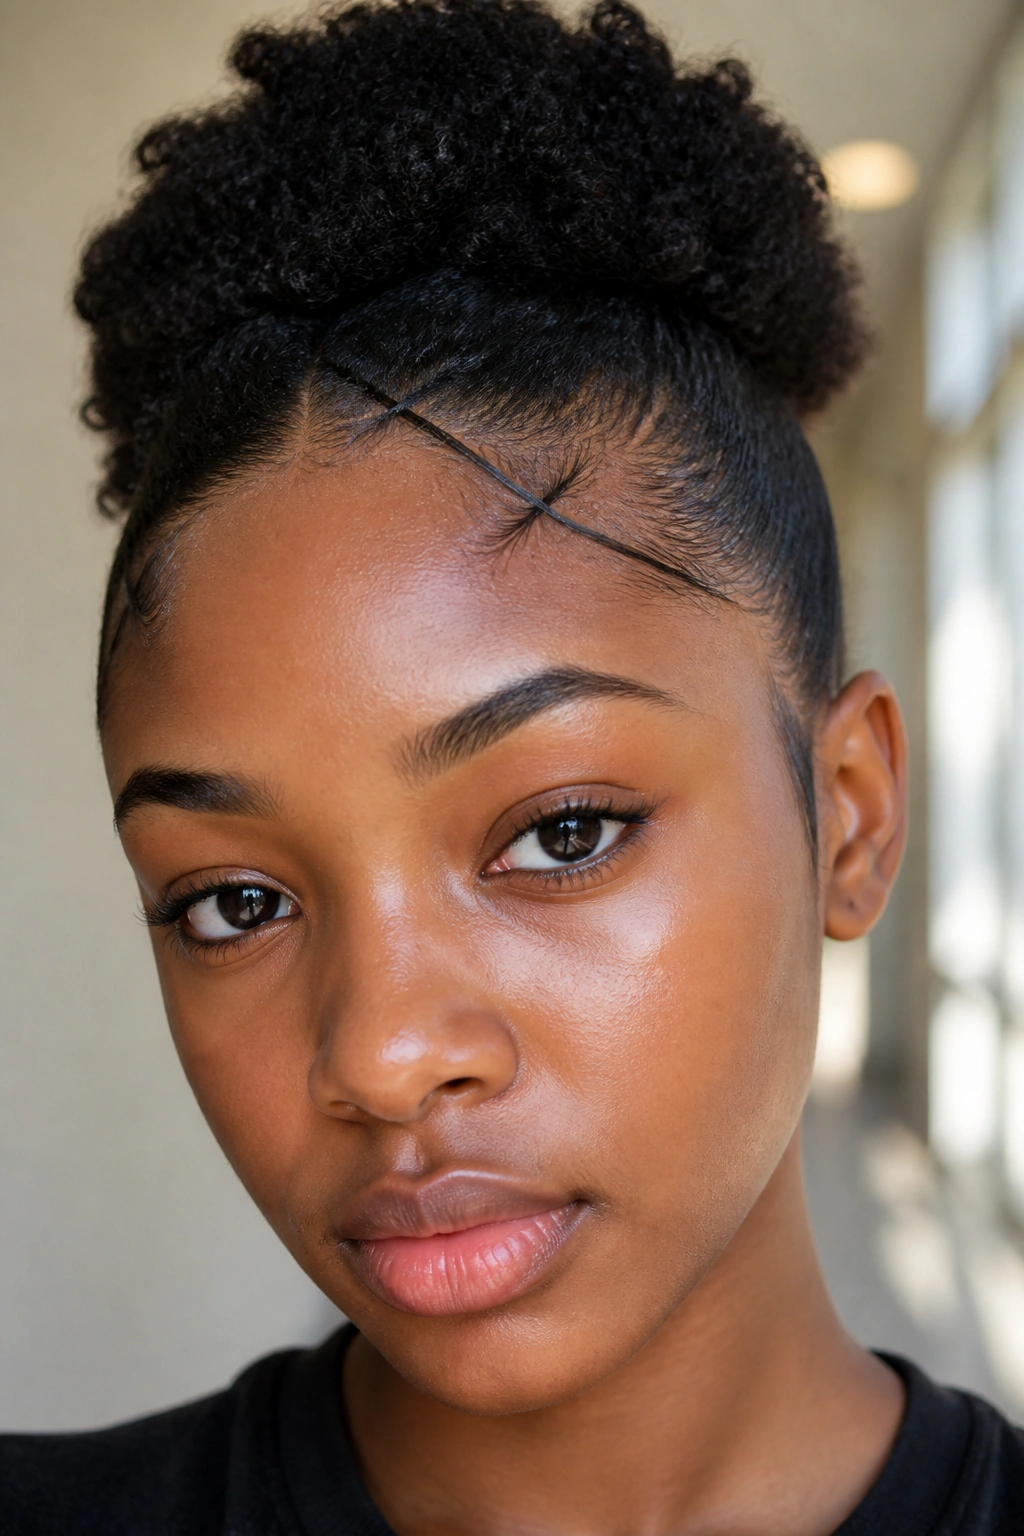
Crisscross edges are the kind of detail people either love right away or decide is not their thing. I like them because they bring a little structure to the front without needing full waves or curls.
Unlike swoops, crisscross lines use two narrow strokes that cross or overlap near the temple or front center. That tiny X-shape can sit beside braids, a puff, or a bun and give the style a sharper, more graphic edge. It is a good fit for kids’ styles, braided styles with clean parts, or any look that already has crisp lines running through the hair.
You need a steady hand for this one. Section two small strips, brush the first down and across, then bring the second back the other way so the lines meet cleanly. Keep the sections thin. Thick pieces turn the shape muddy fast.
The style works best when the hairline can hold a clean bend without frizzing at once. If your front hairs are coarse or springy, smooth them first with a little cream before adding gel. That gives the cross a cleaner edge and cuts down on flyaways.
Watch this part: if you make the crossing lines too wide, the style loses the crisscross effect and turns into a messy overlap.
12. Temple Curls with a Clean Middle
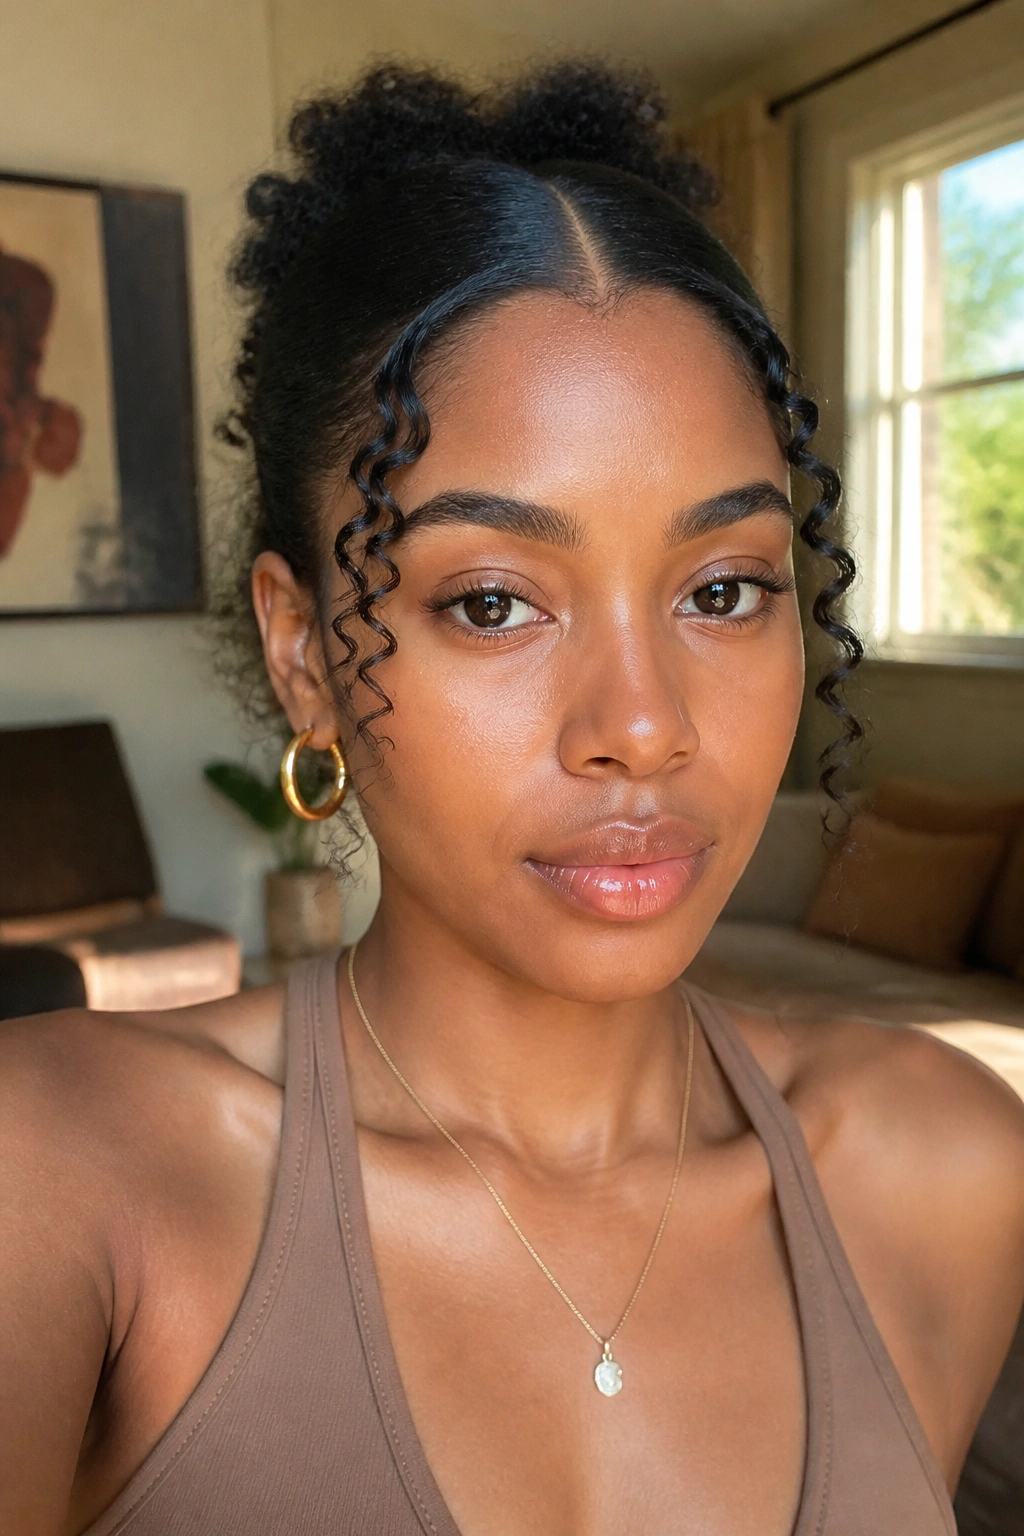
A clean middle with curled temples is one of the easiest ways to frame natural hair without overstyling the front. The center stays brushed down or smoothed back, and the temple pieces get the curl or swirl treatment.
Why This Split Works
The shape keeps the eye moving. The middle gives you a neat anchor, while the sides soften the face. That makes it a strong choice for middle-part braids, low buns, or any style where the part line already does some of the visual work. It also helps when the center of the hairline is fuller than the sides, because you are not forcing the thinnest areas to do all the heavy lifting.
I like this layout for a reason that is simple enough to sound almost boring: it looks balanced. One clean center section and two curved side accents are easier to maintain than a fully styled front, and they usually age better through the day.
- Smooth the center first.
- Shape the temple curls second.
- Keep the curls small and close to the face.
- Set the style with a scarf if you want the edges to hold.
If you have ever wanted something between “barely styled” and “fully laid,” this sits in that middle space nicely.
13. Halo Frame Edges

A halo frame gives natural hair a soft crown around the forehead. The line arcs from one temple toward the other, following the head shape in a way that feels graceful without needing a lot of extra detail.
This style shines with braided crowns, high puffs, and buns that sit close to the scalp. It is especially handy when you want the hairline to look finished from the front but do not want separate swoops on each side. One curved outline can do the job more cleanly than three or four little shapes fighting for attention.
The best version stays low and smooth. You are not making a literal headband out of the edges. You are building a gentle frame that supports the hairstyle underneath it. A soft brush and a small amount of edge control usually work better than a thick gel layer, because the line needs flexibility to stay neat.
One thing to avoid: making the halo too wide across the forehead. That can shorten the face and make the front feel crowded. Keep the curve close to the hairline, then stop.
A satin scarf helps here more than people think. Ten minutes can turn a decent shape into a much cleaner one.
14. Freestyle Mixed Edges
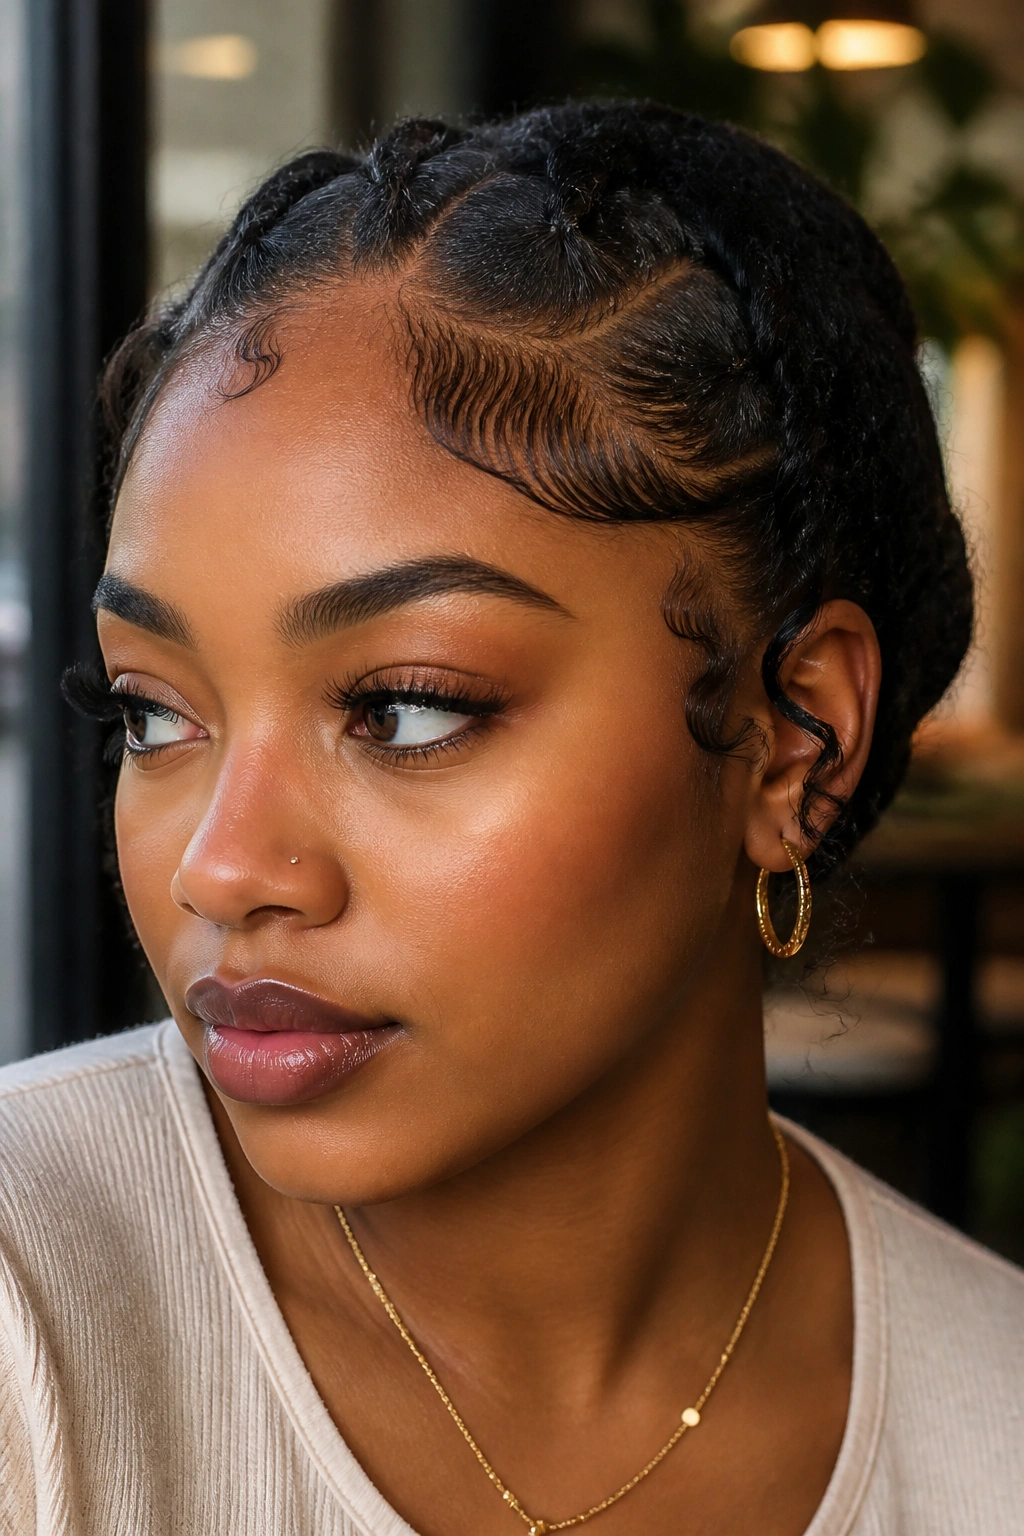
Matching edges can be boring. Sometimes the best answer is a mix: one side swoops, the other curls, and the front center stays plain or lightly brushed.
That kind of freestyle look works because it feels personal. It also helps when your hairline is uneven, because you can give more attention to one area and keep the other lighter. A lot of people assume freestyle means messy. It does not. It means the style has a loose plan instead of a rigid pattern.
The trick is to keep one thing consistent. Maybe the curves all bend in the same direction. Maybe you use the same product on every section. Maybe the finish stays soft, even if the shapes differ. Without that common thread, the front starts looking random.
Freestyle edges work well with creative protective styles — colored braids, stacked buns, half-up looks, and knotless styles with a lot of texture. They also give you room to work around the natural shape of your hairline instead of forcing a fake symmetry.
No need to overthink it. Pick two or three small shapes, keep them narrow, and let the rest stay quiet.
15. Low-Tension Edges for Natural Hair
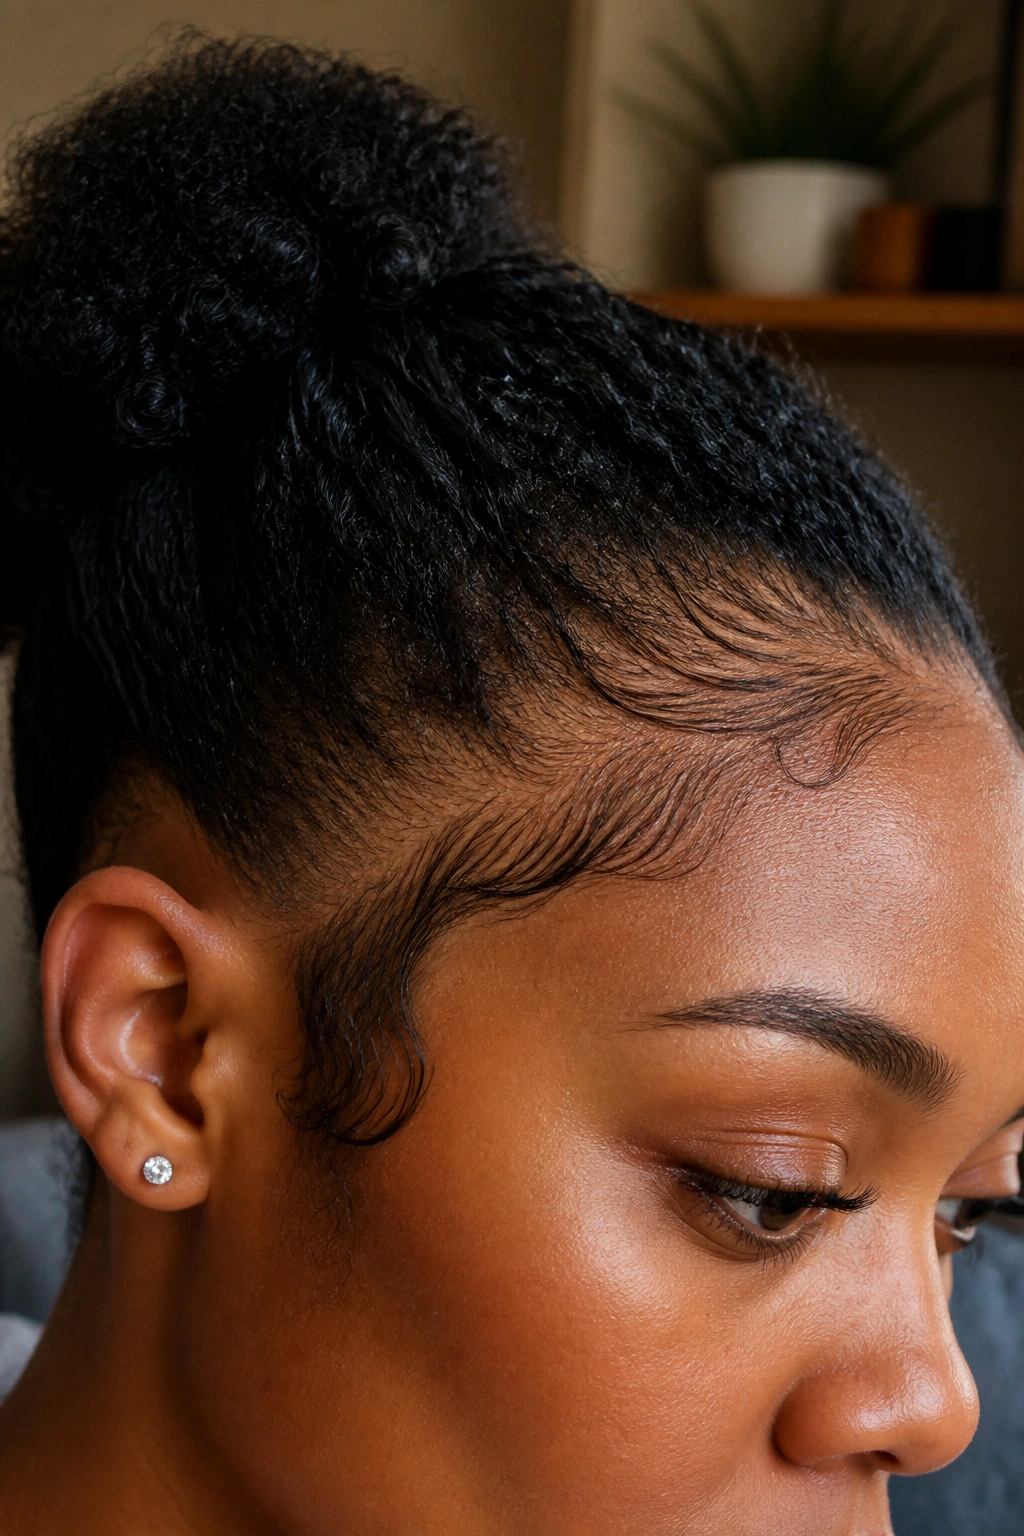
If your hairline is tired, this is the style to choose. Low-tension edges are not flashy, but they can be the smartest-looking option in the room because they keep the front neat without pushing the hairs past what they can handle.
What It Looks Like in Practice
Think soft brush strokes, tiny sections, and almost no pulling. You smooth only the front hairs that need help, leave the rest alone, and stop before the style starts to feel hard. The finish can still be clean. It just does not scream for attention.
This style is especially useful if you wear protective styles often. Braids, twists, wigs, and slick buns can all put repeated stress on the same front hairs if you keep laying them down the same way every time. A lower-tension approach gives the hairline some breathing room. That matters more than another dramatic swoop.
- Use a light gel or cream.
- Keep the brush pressure gentle.
- Avoid daily relaying if the front is delicate.
- Refresh with a damp brush instead of piling on more product.
My blunt take: if your edges are thinning, soreness is your cue to back off, not style harder. A neat front does not need to be tight to look good.
And that is the real point with edge styling on natural hair. The best styles are the ones that make the whole look feel finished while leaving the hairline in decent shape for tomorrow. Fancy is fun. Gentle lasts longer.
