



Hair that actually looks like hair is the whole point here. When curls, coils, and waves are left to do their thing, the style does not need to shout; the shape speaks first. Natural texture hairstyles work because they stop fighting the bend, spring, and shrinkage that already live in the strand.
The common mistake is trying to smooth every flyaway into submission. That usually leaves hair looking stiff, not styled. A better approach is to let the pattern stay visible at the root, through the mid-lengths, and all the way to the ends if you can get there.
Some of the looks below are soft and loose. Some are neat and tucked in. A few are the kind you can wear on a grocery run, then keep on for dinner because they still look like you meant it.
Texture should be visible, not erased. That’s the bar.
1. Wash-and-Go for Natural Texture

A wash-and-go is the bluntest way to show real texture. You cleanse, condition, apply product to wet hair, and let the curl pattern decide the shape. No tricks. No hiding.
Why It Works
A good wash-and-go keeps curls grouped instead of letting them dry into a frizzy halo. The hair dries in the exact shape you set, which is why this style can make coils look springy and waves look soft without extra manipulation. The key is to use enough water and enough hold, not a huge pile of cream.
Start with soaking-wet hair if your strands like to clump. Smooth in a leave-in, then add gel in small sections no wider than two inches. Prayer hands, finger raking, or a quick scrunch all work, but don’t keep going back in once the pattern starts to form.
- Best for curl patterns that clump easily.
- Works well with a diffuser or air-drying.
- Needs light product layering, not heavy butter.
- Can look stringy if you overload the hair with cream.
Tip: Apply gel while the hair still feels slippery and wet. If it has already gone dry and fluffy, the definition usually gets weaker.
2. Twist-Out

A twist-out gives texture more shape than a wash-and-go, which is why I reach for it when I want the curl pattern to look deliberate instead of airy.
The style starts with two-strand twists on damp hair. Smaller twists create a tighter, more defined finish; chunkier twists give you bigger waves with more movement. Either way, the hair has to dry all the way through before you take the twists down. If the center is even a little damp, the ends frizz fast.
I like a light cream under a soft-hold gel here, not a thick butter. Heavy products can make the twists look fuzzy at the roots and sticky at the ends. Clean separation matters, too. Unravel with a drop of oil on your fingertips, then stop after one or two passes so you don’t break the curl clumps apart.
Dryness is non-negotiable.
If you want a twist-out that reads as polished, do the boring part well: neat sections, even tension, and patience while it sets. That part is not glamorous. It does the work.
3. Braid-Out

Why does a braid-out look different from a twist-out even when the products are the same? Because the braid compresses the hair more tightly and gives it a flatter, ripple-like pattern instead of a spiral.
That little difference changes the whole mood. Braid-outs usually stretch the hair a bit more at the roots and leave a defined zigzag through the ends. On looser textures, the result can look like soft waves. On tighter textures, it lands somewhere between crimped and curled, which is exactly why people love it.
How to Keep the Pattern Crisp
Braid the sections while the hair is damp, not dripping. If the hair is too wet, the center of the braid takes forever to dry and the definition goes limp. Keep each section the same size, and braid with enough tension to set the shape, not enough to pull the scalp sore.
- Use three small braids for a tighter pattern.
- Use fewer, thicker braids for a softer wave.
- Sleep with a satin scarf or bonnet.
- Separate only after the braid is fully dry.
A braid-out is one of those styles that looks simple until you do it wrong. Then every uneven section shows.
4. Afro
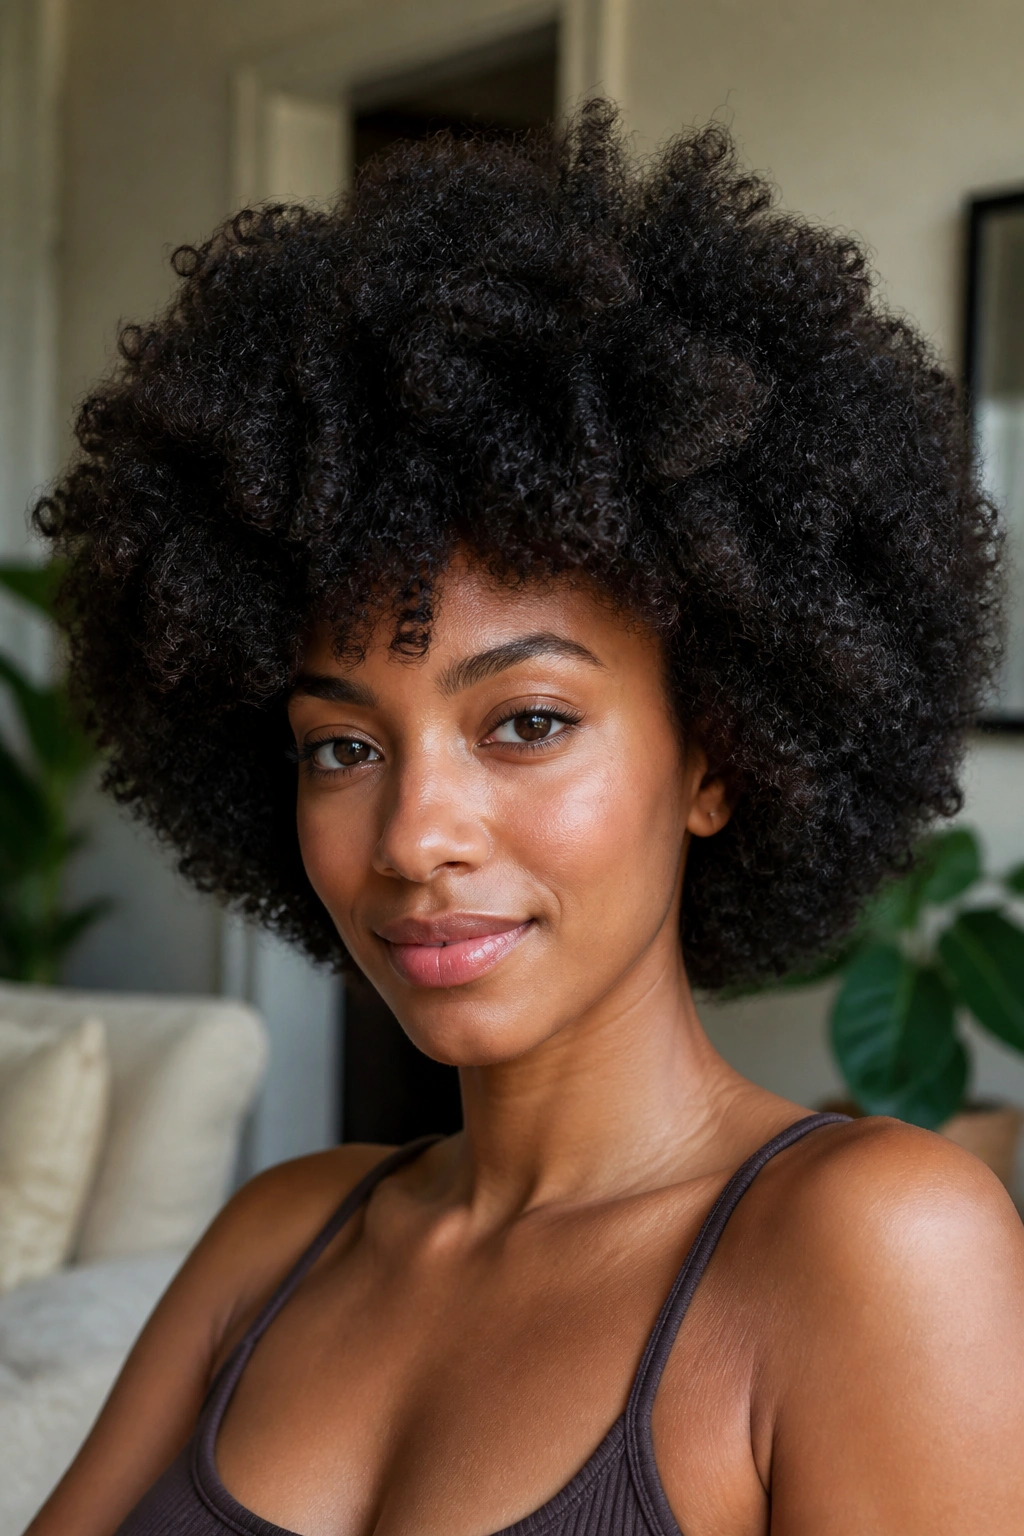
A good afro does not need a trick. It needs shape, moisture, and enough room for the texture to breathe.
I think people underestimate how much a rounded afro shows about the hair itself. You can see density, curl tightness, shrinkage, and the way the strands collect into a cloud of texture. When the cut and the shape work, the style looks honest in the best way.
Pick the roots gently with a wide-tooth comb or a hair pick, then stop before you wreck the surface. The goal is lift, not fluff for the sake of fluff. If you pull too much at the ends, you lose the outline and the whole look turns fuzzy.
- Works beautifully on short, medium, or long natural hair.
- Looks best when the shape is even around the head.
- Needs moisture at the ends so the curl pattern does not dry out.
- Can be side-parted or center-parted for a different mood.
The afro is not a fallback. It is a statement. And when the shape is right, it is one of the clearest ways to show natural texture without covering a single strand.
5. High Puff That Lifts Natural Texture
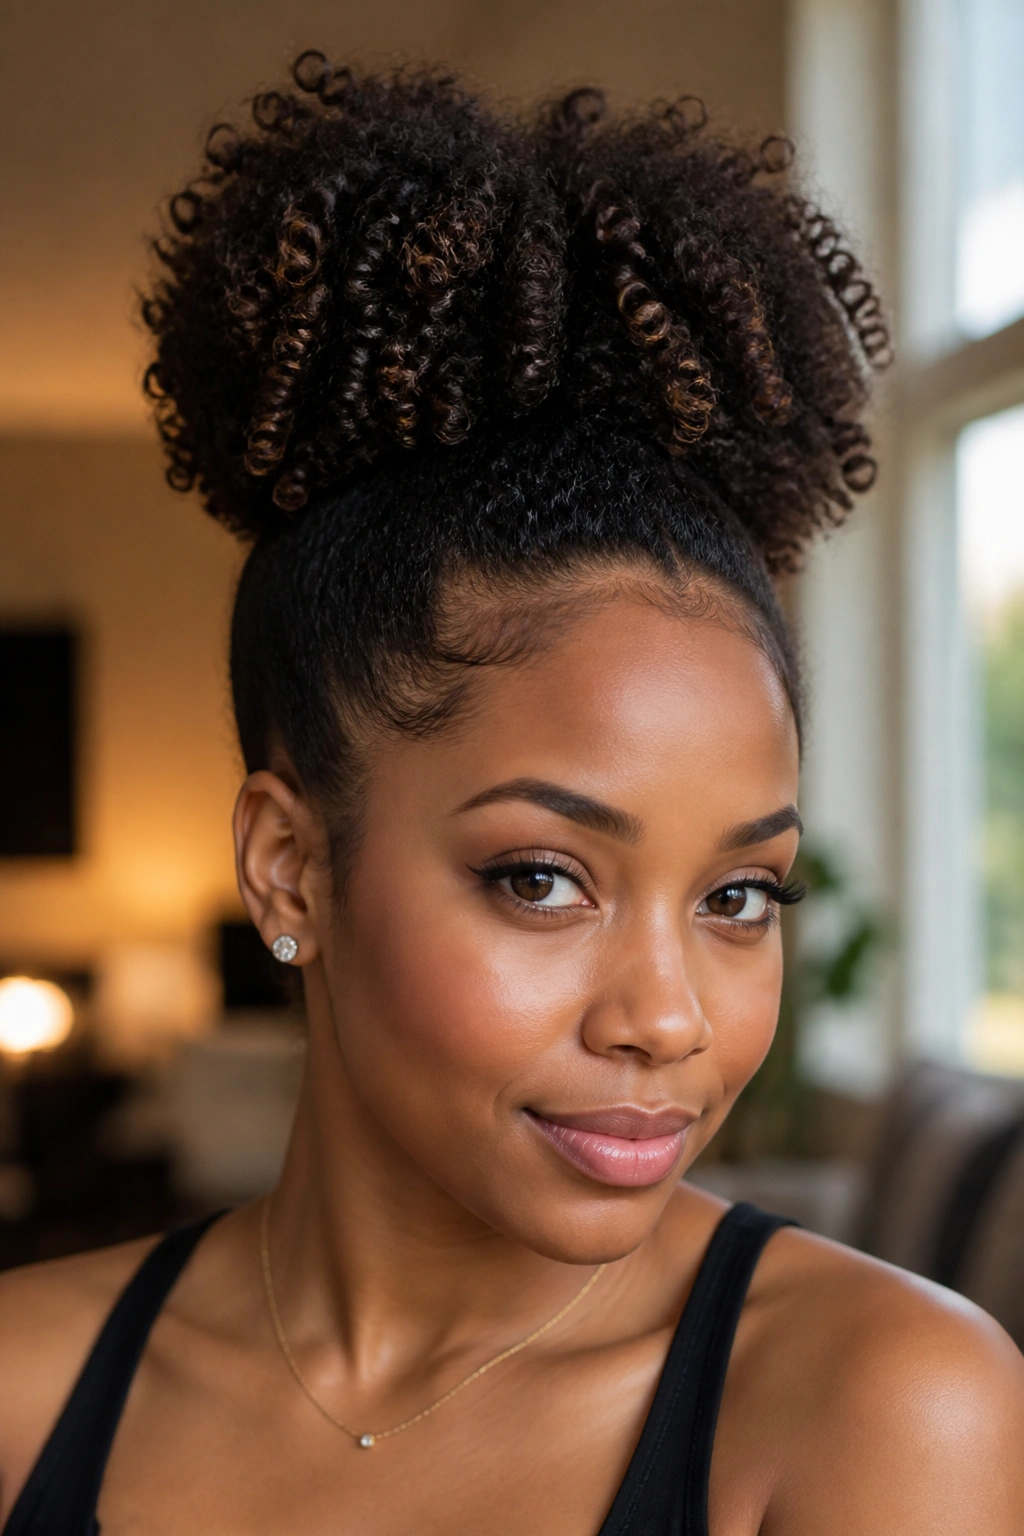
The high puff is what happens when you want your hair up, but you still want the texture to be the main event. The crown gets lifted, the sides are smoothed back, and the puff sits right where people can see it.
It works because the style gives coils and curls some height without flattening the pattern. You keep the front neat with a soft brush or your hands, then gather the hair with a stretchy band or a puff cuff. The band should hold, not bite. If it leaves a hard dent or makes the edges sore, it is too tight.
A high puff can rescue a twist-out that has gone a little old, too. If the ends are getting softer or the root definition is fading, pulling the hair up gives you a fresh shape without starting over. That is part of the charm.
The style looks best when the puff is full and the hairline is not overworked. Leave a few soft pieces around the temples if you like a gentler frame. Smooth, then stop.
6. Finger Coils
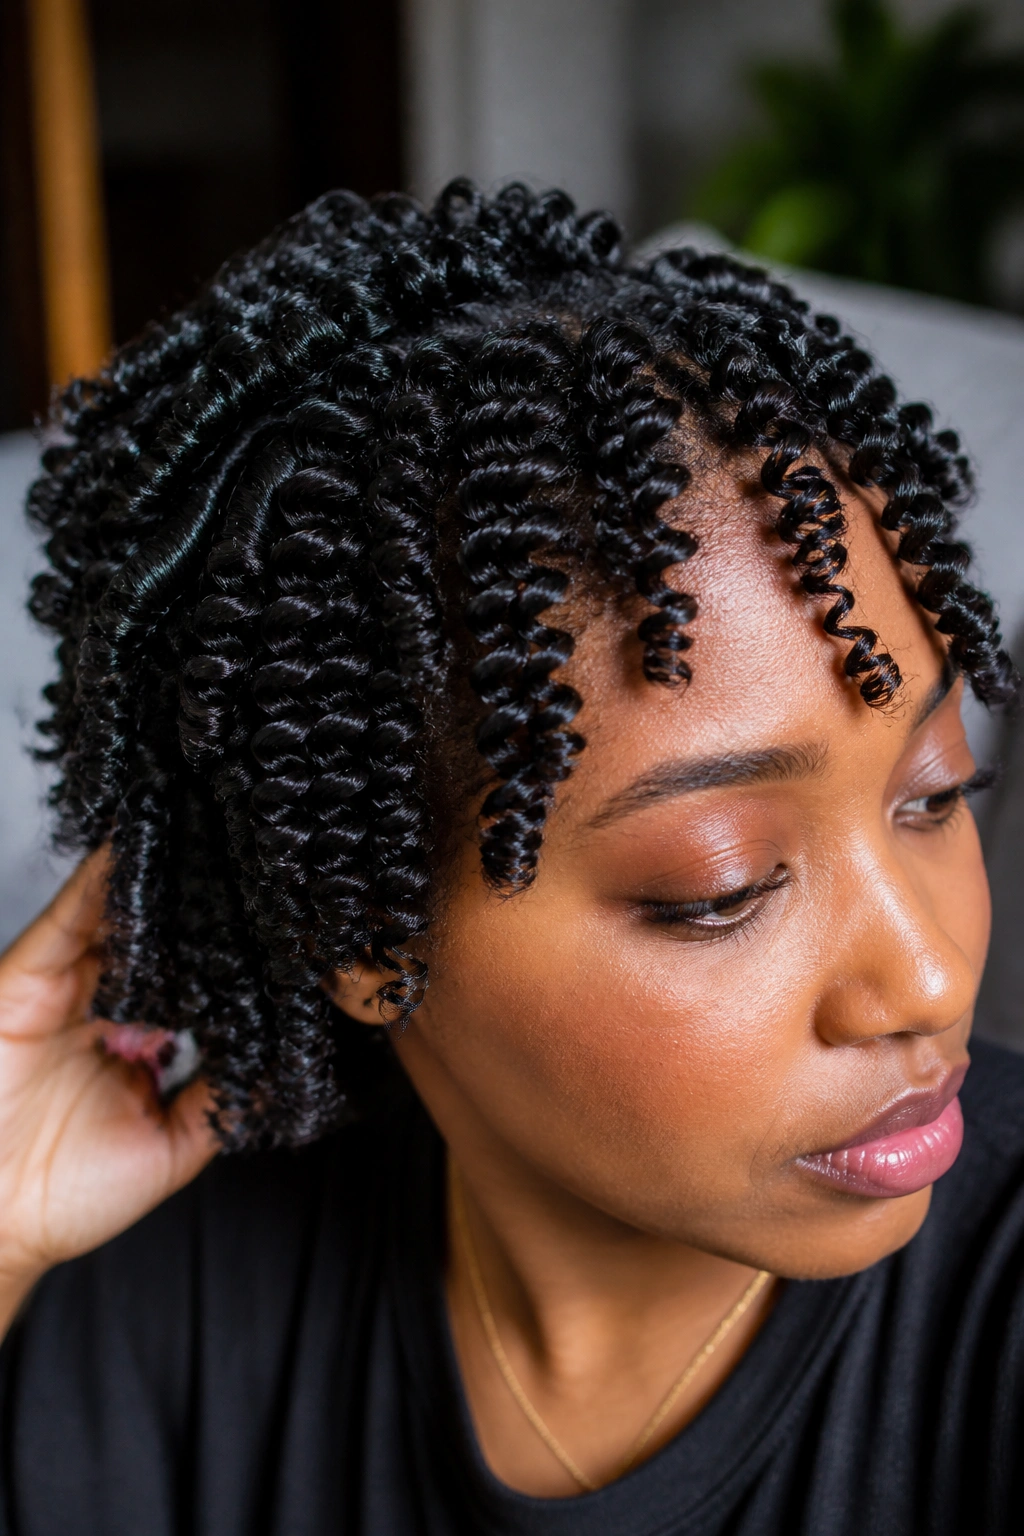
Finger coils are a little obsessive in the best way. Each coil gets wrapped around a finger, one section at a time, which means the final shape is clear before the hair even dries.
Unlike a twist-out, finger coils turn the curl into the style instead of borrowing shape from it. That makes them a smart choice for short hair, tapered cuts, or tighter textures that like visible definition. They also work well when you want the ends to look tidy instead of fluffy.
Use very small sections if you want the coils to stay separate. Larger sections make the look softer, but they also lose that clean spiral finish faster. A curl cream plus a light gel usually gives enough slip and hold. Too much cream, and the coil slides open before it dries.
Finger coils are not fast. No pretending there.
Still, they reward patience in a way a lot of styles do not. The texture sits front and center, every spiral shaped on purpose, and the result holds its line longer than you’d expect if you leave the coils alone once they set.
7. Mini Twists
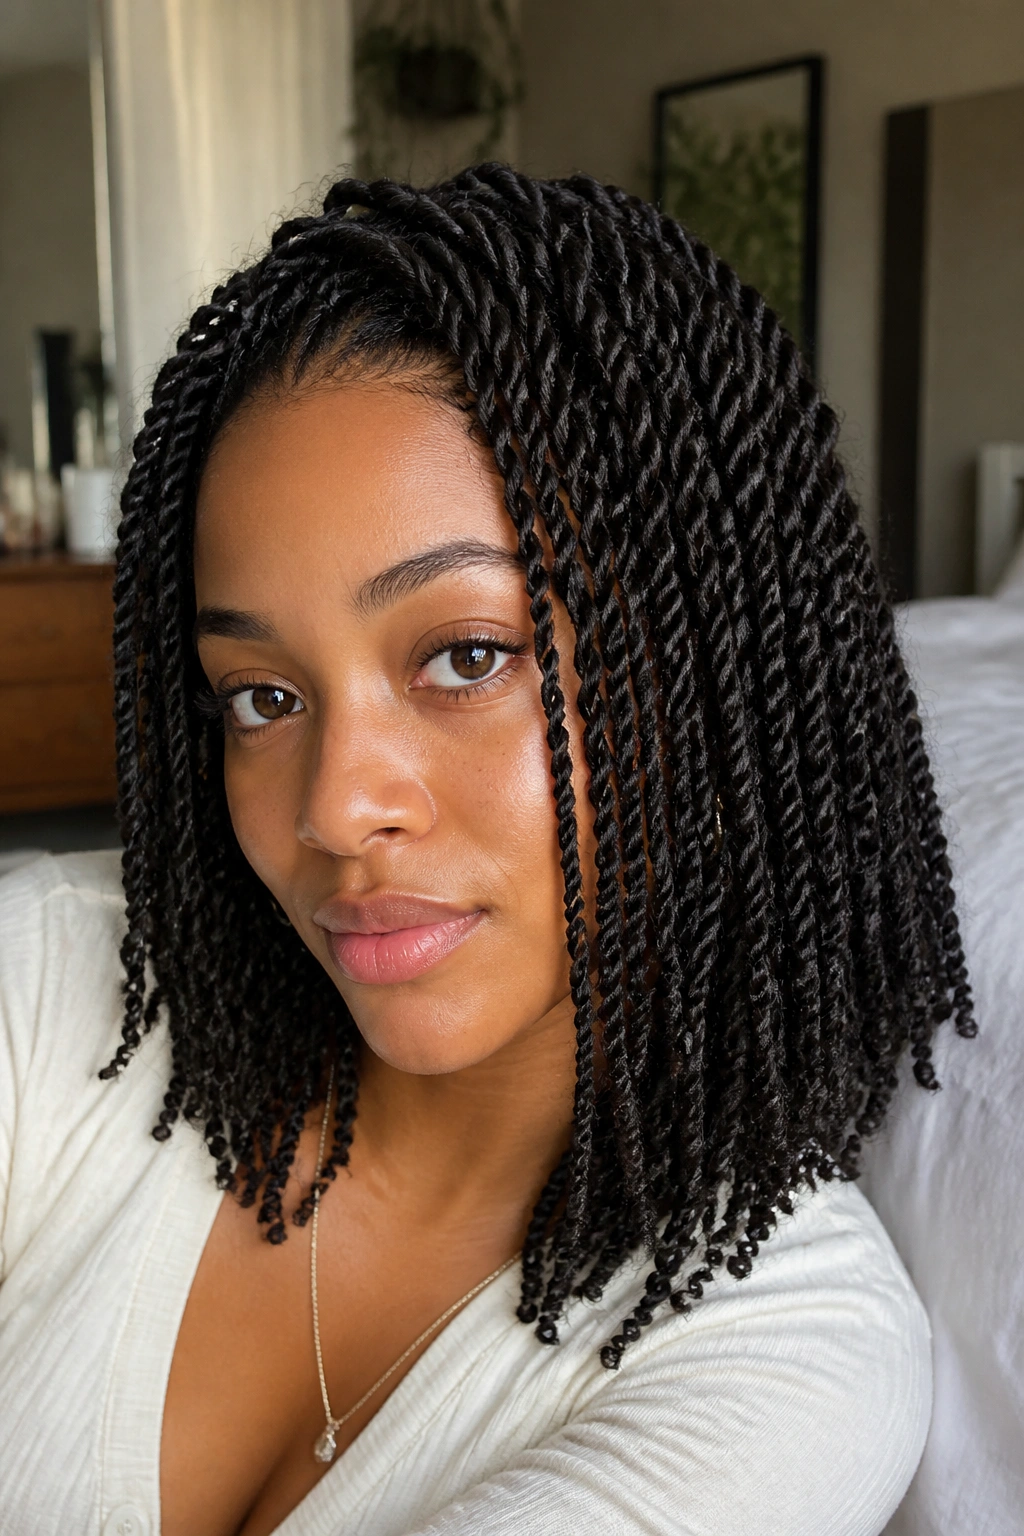
Mini twists are one of the quietest ways to show texture, and that is exactly why they work. They sit neatly on the hair, but they still let shrinkage, density, and curl direction show through at the ends.
Why They’re So Useful
The small size makes the hair look uniform without freezing it. You get a protective style, but you still see the natural bend of the strands once the twists loosen a little. That soft opening-up is part of the appeal. It makes the style look lived-in, not stiff.
Mini twists also give you a lot of flexibility. You can wear them down, pin them up, or separate them for a fuller finish later. The roots stay neat longer than bigger twists, which is handy if your hair puffs up fast and you do not want to redo the whole head every few days.
- Good for low-manipulation styling.
- Works well on dense, coily hair.
- Easier to refresh than bigger twist sets.
- Looks best when the parts are clean and even.
If your mini twists get a little softer after a few days, that is not a failure. That’s the style settling into a more natural shape. I like them that way.
8. Flat Twists

When the twists lie close to the scalp, you see the direction of the hair before you even notice the volume. That’s why flat twists show texture so well.
They’re neat at the roots, but they still leave room for the hair to reveal itself in the lengths or in the twist-out pattern later. Flat twists can run straight back, curve around the head, or sit on one side only. A little gel at the roots helps the sections stay smooth, but the rest of the hair should stay soft enough to move.
Where Flat Twists Shine
They work especially well on short-to-medium natural hair because they can control bulk without hiding the curl pattern. They also make a strong base for styles that need a clean front and a textured finish at the back. If your hair frizzes near the scalp, flat twists tame that area without pressing the whole head flat.
A flat twist-out is worth the extra effort if you want waves with a bit of lift. The result has more body than a braid-out and less spiraled definition than finger coils, which gives it a nice middle ground.
Some styles show texture in the ends. Flat twists show it in the path the hair takes to get there.
9. Bantu Knot-Out
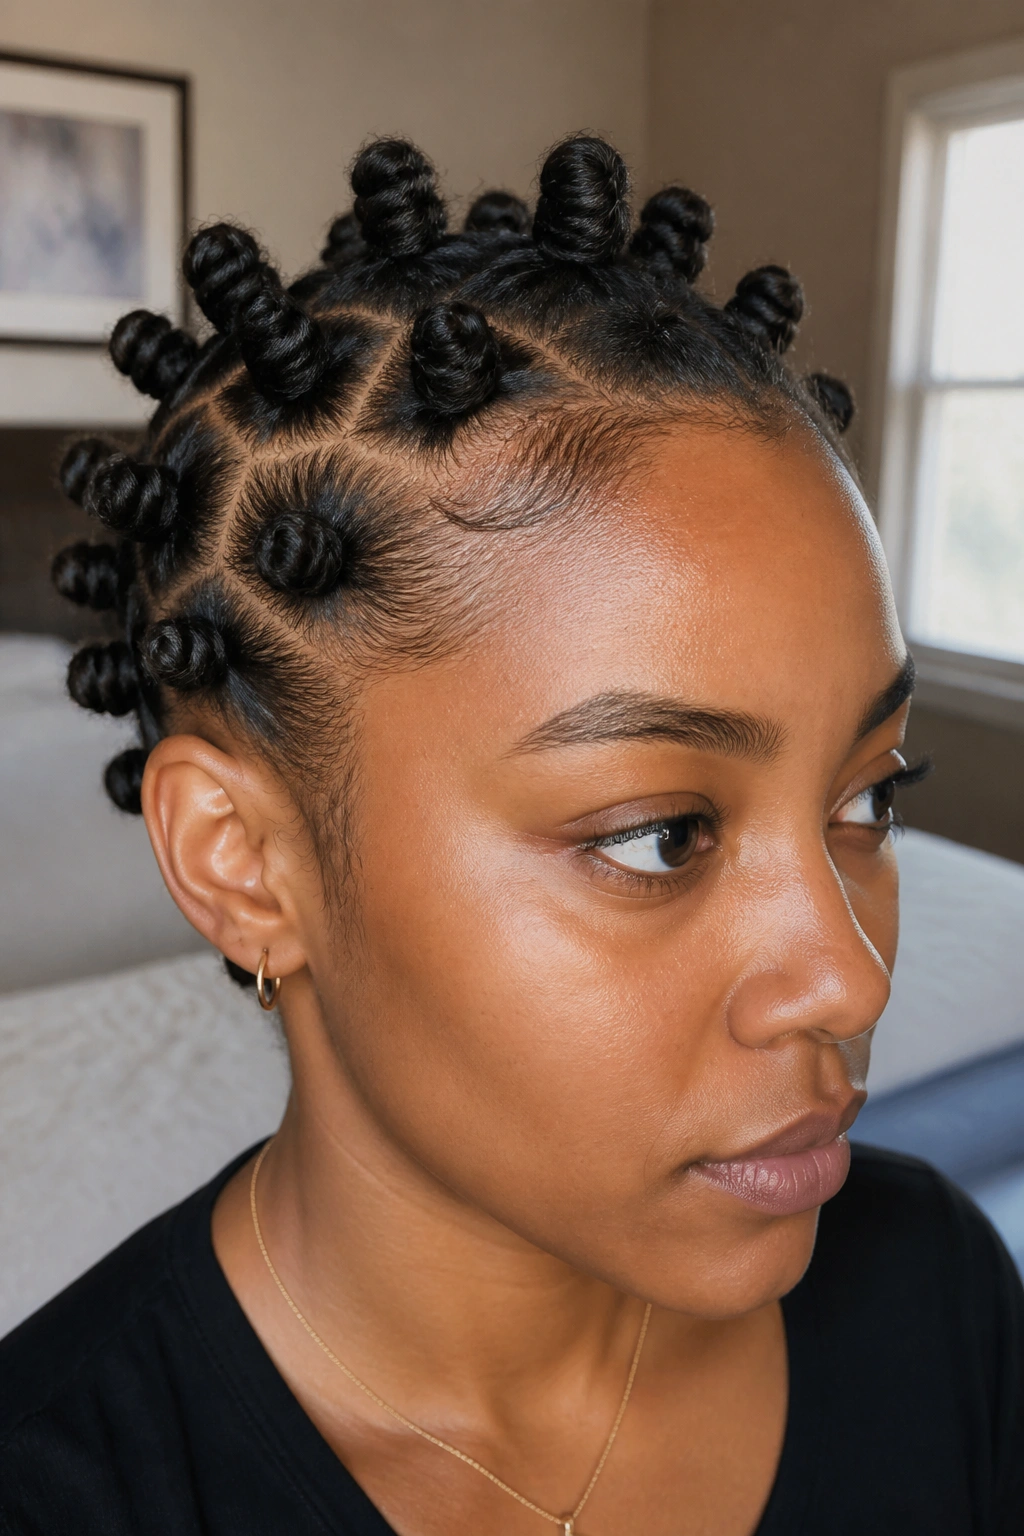
Want a style that gives you springy curls without a curling iron? A Bantu knot-out is one of the best answers.
The knots themselves can be worn as a style, which already shows the natural bend and density of the hair. Take them down later, and you get a defined curl pattern with a lot of shape. Small knots make tighter spirals; larger knots give you softer waves and more width.
Dryness matters here more than people think. Wet knots stay damp in the center forever, and that leaves the pattern weak or uneven when you unravel them. Set them on fully dry hair, or give yourself enough drying time that the inside is no longer cool to the touch.
A clean part makes the finished look better, too. Even if the knots are meant to be playful, the shape reads more clearly when the sections are tidy.
Bantu knots are one of those styles that can feel a little old-school in the best way. They never hide the texture. They frame it.
10. Low Puff

Some days the high puff feels too loud, and the low puff makes more sense. It sits closer to the nape, keeps the crown smooth, and still lets the natural texture show in one full, rounded shape.
The lower placement changes the whole look. You can see more of the scalp line, more of the side profile, and more of the hair’s body near the base. It feels a little softer than a high puff, and that makes it easy to wear with a side part or a few face-framing pieces.
- Best when you want a tidy crown and a full puff at the back.
- Works with a satin scrunchie or a soft stretch band.
- Leaves room for the hair to stay fluffy instead of crushed.
- Pairs well with laid edges, but the edges do not need to be sleek.
A low puff is useful on days when the hair is in-between styles and you do not want to force a fresh set. It gives the texture a resting place without flattening it. That alone makes it worth keeping in rotation.
11. Tapered Cut for Showing Natural Texture
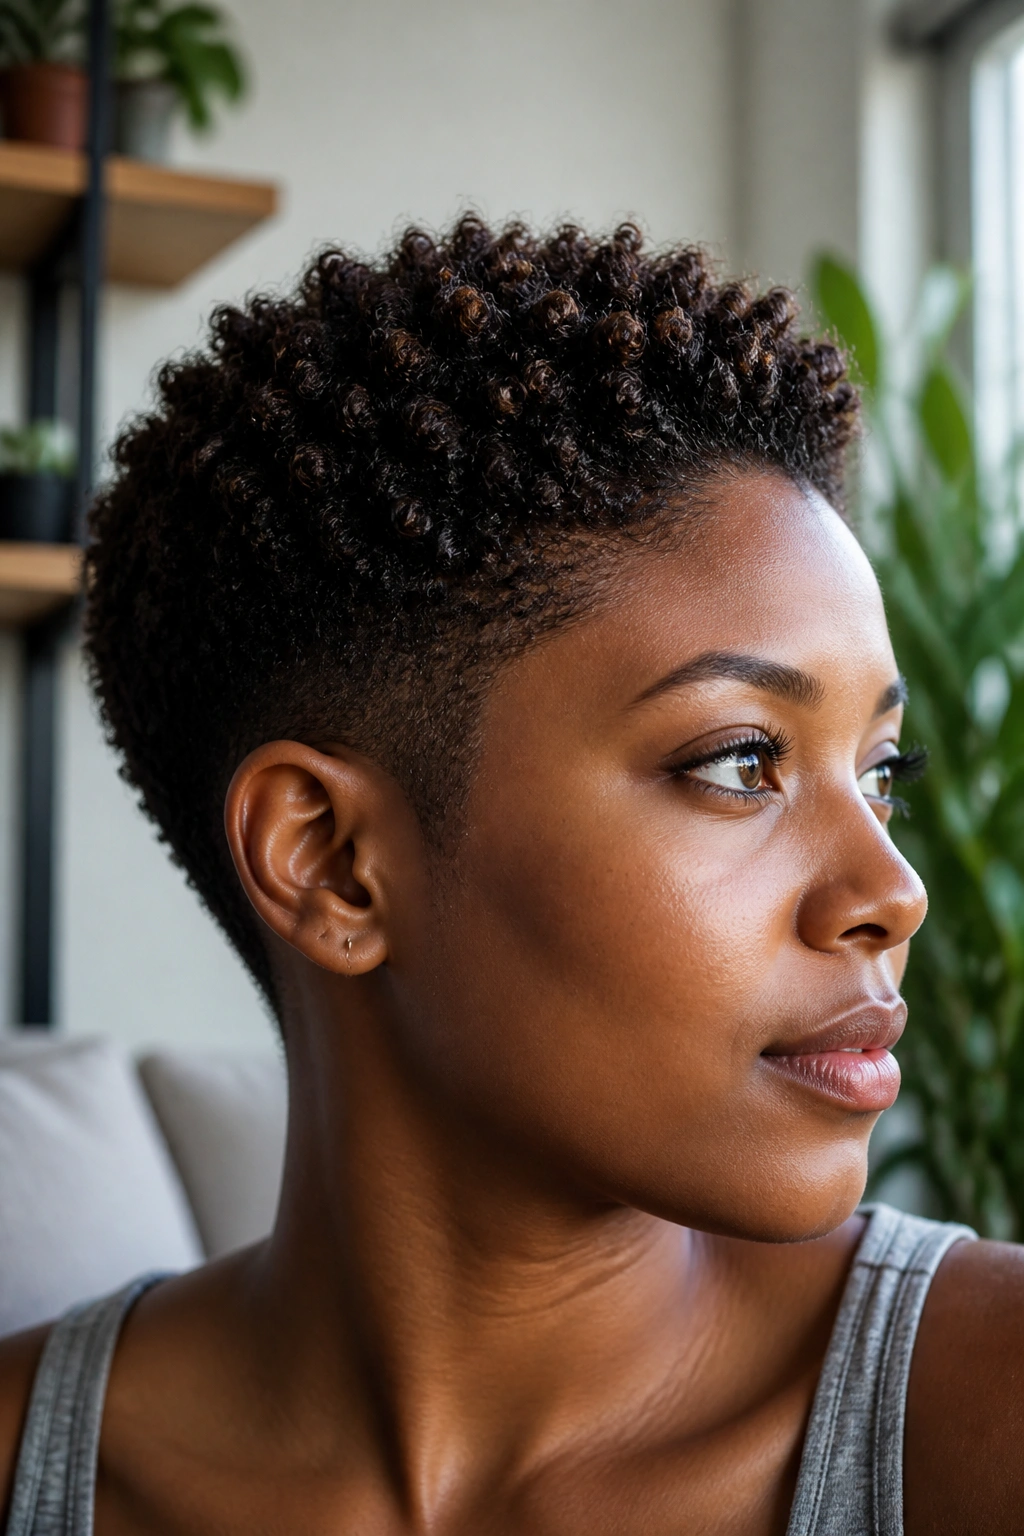
Long hair is not the only way to show texture. A tapered cut puts the curl pattern right where people look first: the crown, the sides, and the hairline.
The shorter shape removes extra weight, which means the curls can spring up instead of hanging heavy. That gives you a clearer read on the curl type, the density, and the shape of the coil itself. On tighter textures, a tapered cut can look sharp and soft at the same time. On looser curls, it makes the pattern seem more defined because the outline is so clean.
Why the Shape Does the Work
With less length to drag the curls down, the top has a chance to stand up on its own. That is why tapered cuts often show more movement than longer styles with the same texture. They do not hide behind bulk.
This is also one of the easiest ways to keep styling simple. A little leave-in, a touch of curl cream, and a small amount of gel on the front can be enough. Overloading it only weighs down the top, which defeats the point.
If you like a style that looks shaped even on a lazy morning, this is a strong choice. The cut does half the talking.
12. Curly Shag
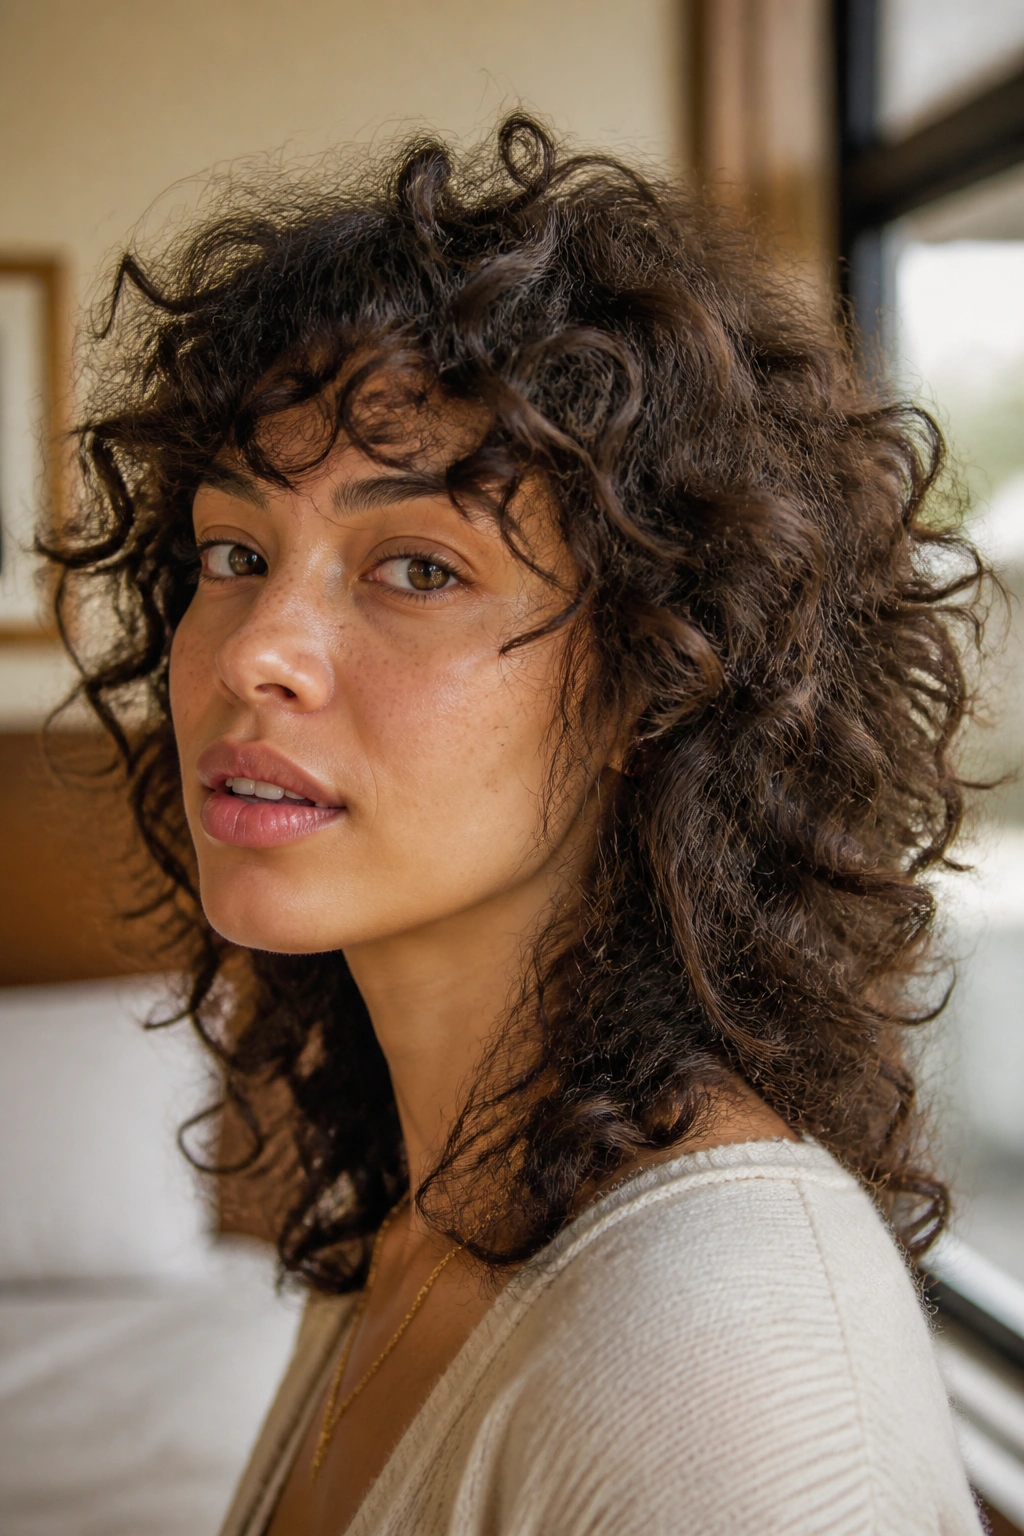
A blunt cut can hide what your curls do best. A curly shag does the opposite.
The layers break up bulk and let each curl sit a little more on its own, so the texture reads as movement instead of a single heavy shape. Around the face, that makes the hair look softer. Through the crown, it stops the dreaded triangle effect that can happen when all the weight sits at the bottom.
The shag works on waves, curls, and coils, but the cut has to respect the hair’s shrinkage. A dry cut often helps because the stylist can see where the curls land instead of guessing. That matters more than people think. Wet curly hair lies.
My favorite thing about a curly shag is that it looks styled even when it is not overworked. Air-dry it, diffuse it, clip the roots a little while it dries — all of that helps, but the cut itself does a lot of the heavy lifting.
It is one of the easiest ways to make natural texture feel like the point, not the afterthought.
13. Frohawk
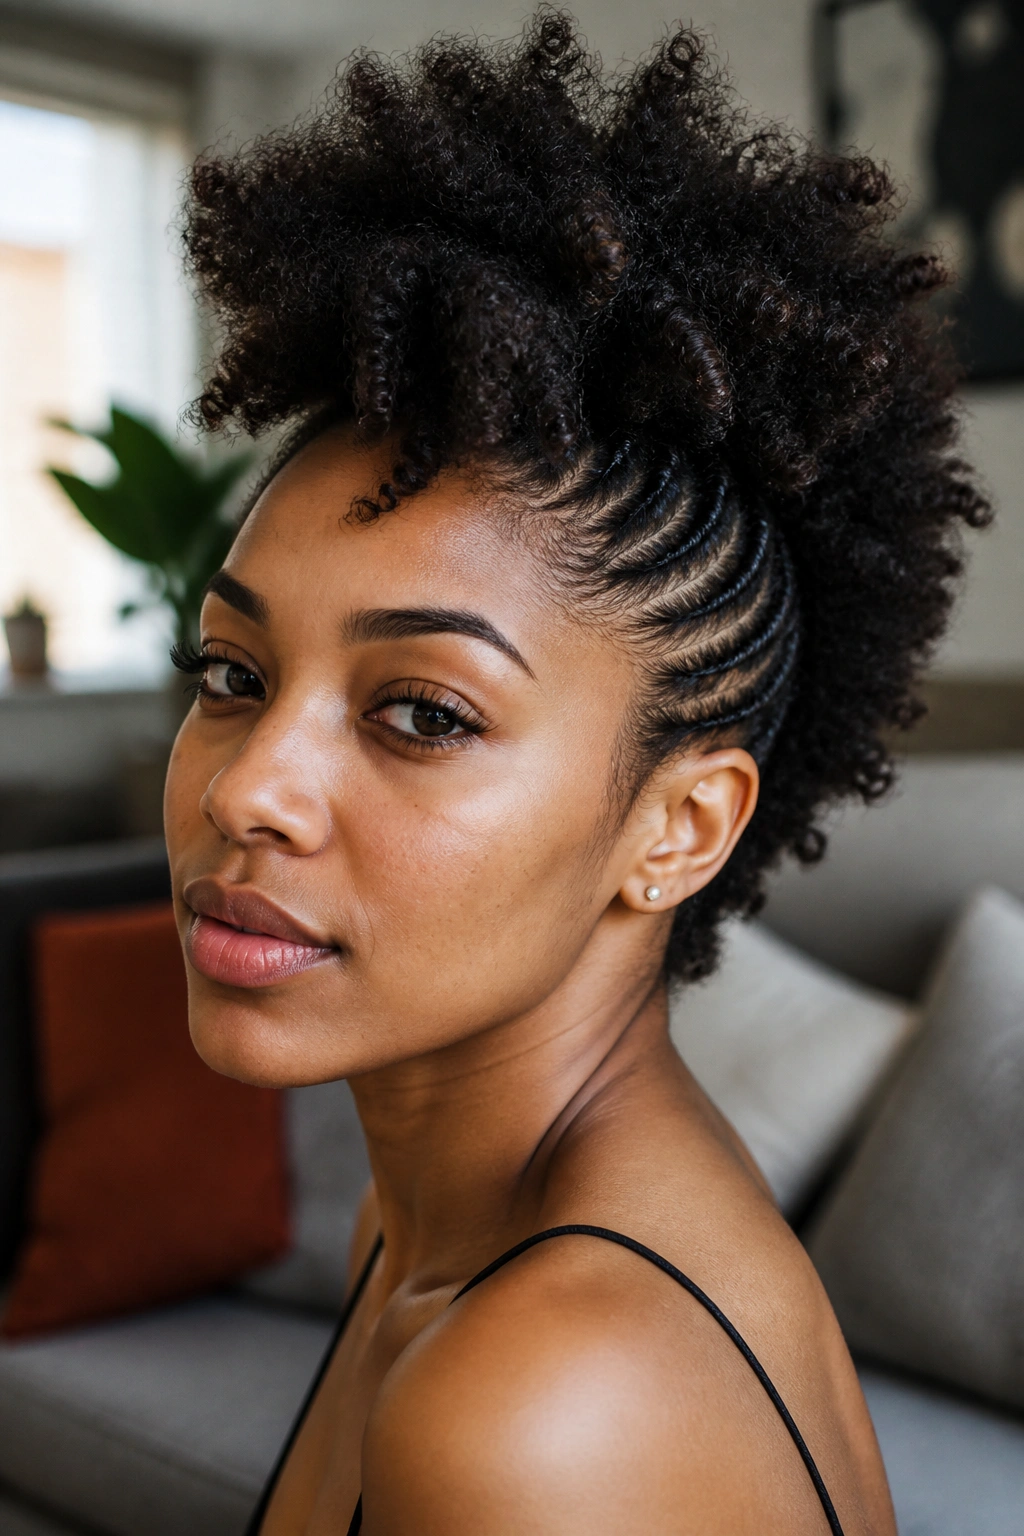
Pin the sides up and suddenly the middle row becomes the whole story.
A frohawk works because it turns the texture into a strip of height and movement right down the center of the head. The sides can be slicked back, braided, or pinned tightly, while the top stays loose and full. That contrast is what makes the style pop. You get structure and softness in the same look.
This one is especially good for second- or third-day hair. The curl pattern has already settled a bit, so the top holds shape without needing a ton of product. Use a few bobby pins under the side sections and keep the center as untouched as you can.
- Good for medium to long natural hair.
- Works with pinned sides or flat braids.
- Lets the center texture stay visible from front to back.
- Can be dressed up without losing its natural feel.
A frohawk looks like you planned the outfit around the hair, which is half the fun. It is bold, but not fussy. And the texture gets to stay the star.
14. Half-Up, Half-Down for Natural Texture

Why does this style keep showing up? Because it does two jobs at once.
The top section gets lifted or clipped back, which gives the face some shape and takes pressure off the roots. The bottom stays free, so the curls, coils, or waves can move and show their pattern. That split is useful on days when you want control without hiding the texture.
The trick is to keep the top soft. If you brush everything back hard, the style loses its easy feel and starts to look like a workout. A loose puff, a small clip, or even a tiny bun works better than a tight pull. The bottom pieces should also stay hydrated, since they are the ones people actually notice first.
How to Keep the Bottom Pieces Defined
A little water mist goes a long way. Add a touch of leave-in or gel to the ends if they have puffed up more than you want, but do not soak the whole head. The style works best when the roots are controlled and the lengths still feel free.
Half-up, half-down is a solid choice when you want texture and polish in the same breath. No drama. Just shape.
15. Pineapple Updo

A pineapple is one of the simplest ways to keep texture visible while pulling the hair up and away from the face. The hair gathers high on the head, usually with a soft scrunchie or scarf, and the ends spill forward or to the side.
The reason it works is simple: the curls stay stacked instead of stretched out. That keeps the texture obvious, especially on longer hair where loose curls can get weighed down if they sit flat. If your hair is shoulder-length or longer, the pineapple often looks like a soft fountain of curls at the crown.
It also protects the shape overnight, which is why so many people wear it to sleep and then keep it on for part of the next day. A silk or satin tie matters here. Cotton roughs up the surface and steals the shine.
It should look loose.
If it turns into a tight knot with flat edges, it has gone too far. The pineapple is at its best when it feels casual, high, and a little airy, like the hair made the decision itself.
16. Halo Braid with Loose Curls
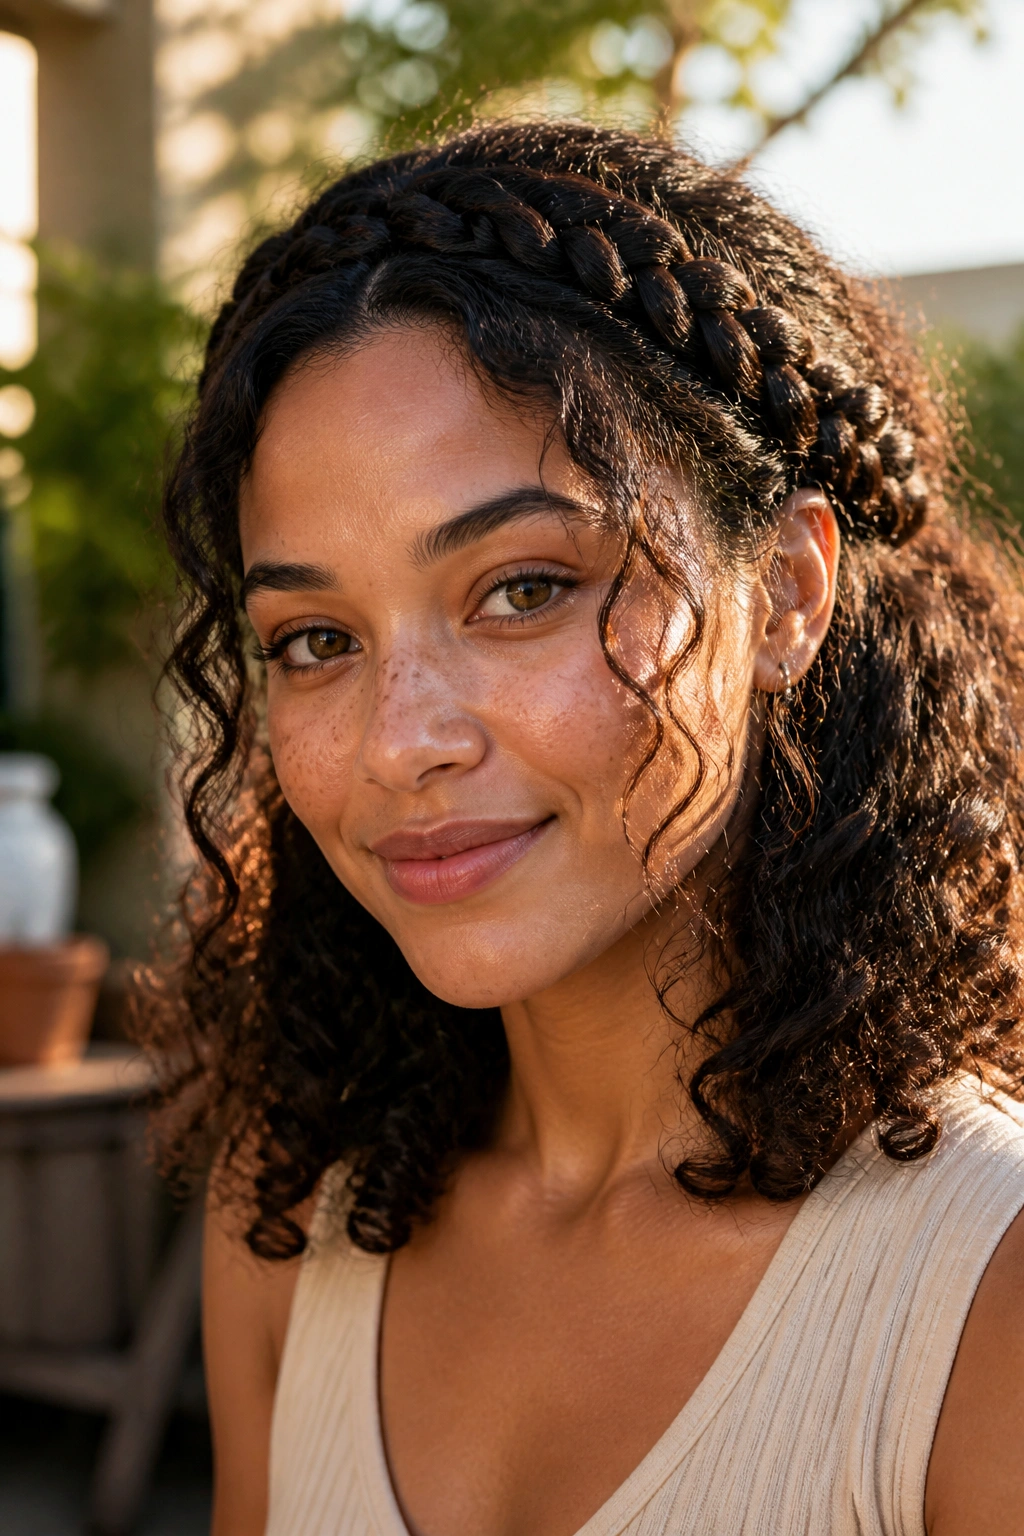
Unlike a full crown braid, a halo braid with loose curls lets the texture stay visible around the face and at the ends.
That balance is what makes it work. The braid around the hairline gives structure and keeps the style secure, while the rest of the hair stays free enough to show curl pattern. On medium to long natural hair, the contrast can be lovely: the front is neat, the body has movement, and the ends still bounce.
This style is useful when you want something more put together than a wash-and-go but less hidden than a full tucked-up updo. A light curl cream on the loose pieces is usually enough. Heavy product near the braid can make the front look greasy, and that is a fast way to ruin the clean line.
I also like halo braids for days when the front of the hair needs a break. The braid keeps hands off the hairline, which is nice if you are tired of refreshing the same section over and over.
Texture stays visible, but the shape feels finished. That combination is hard to beat.
17. Space Buns

Two buns. That’s it. And yes, they can still show texture.
Space buns work well because they split the hair into two sections and let the natural bend stay visible in the ends or the loose pieces around the face. You can make them neat, puffy, or somewhere in between. If the hair is already textured, the buns do not need to be perfectly smooth to look intentional.
What Makes Them Work
The style is especially handy when the roots need a little control and the rest of the hair needs to stay soft. A center part helps the symmetry, but the buns themselves do not need to be mirror images. A slight asymmetry can look better, honestly.
- Good for short-to-medium hair with enough length to gather.
- Works with loose curls falling around the temples.
- Can be worn sleek at the roots or fluffy all over.
- Easy to pair with second-day texture.
If you want the style to show more curl pattern, leave a few pieces out near the front or let the ends stay curly instead of tucking them completely inside the bun. The more the hair can move, the more texture you see.
18. Side-Parted Curly Ponytail
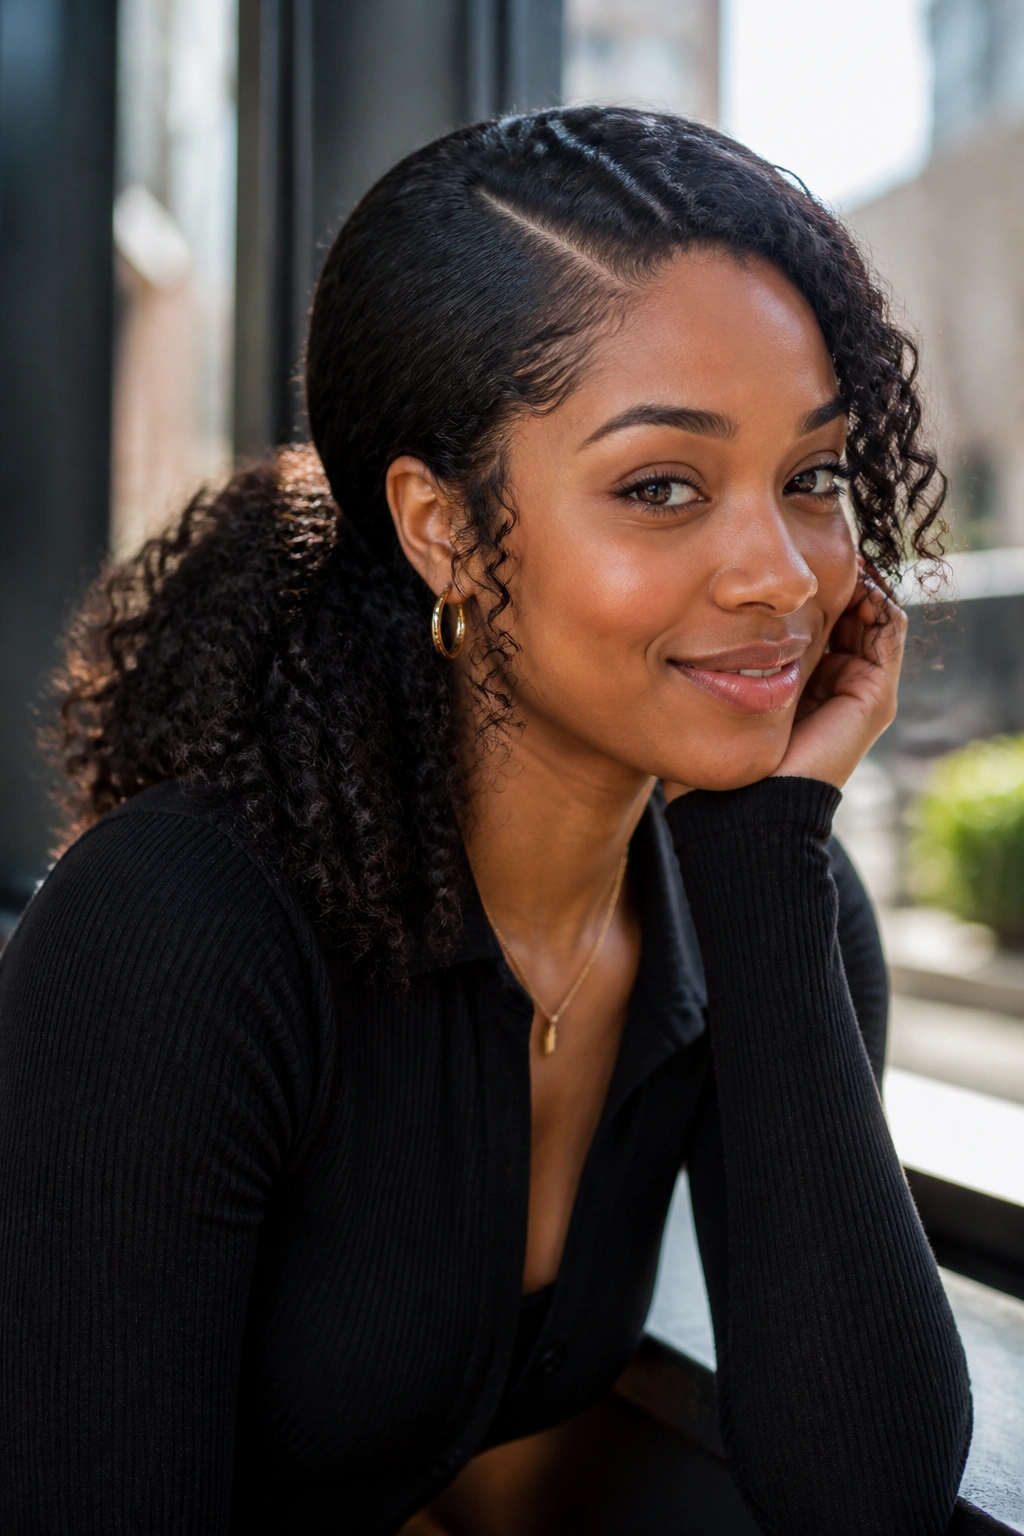
A side-parted curly ponytail is one of the easiest ways to make texture look intentional. The part gives direction, the ponytail gives lift, and the curls at the back stay in full view.
This style works because it frames the face without hiding the hair’s natural shape. You can wear the ponytail high, mid, or low, but the side part is the part that makes the texture feel styled instead of just gathered. A small section wrapped around the base also helps the finish look clean without freezing the hair into place.
I like this look when the curls are still defined but need a little order. Brush only the top inch or so, then leave the rest alone. If you smooth too far down the head, the ponytail loses the softness that makes it interesting.
A side-parted ponytail is also one of the better choices when you want the texture to stay visible from every angle. It reads as simple, but not plain.
Texture shows up fastest when you stop trying to sand it down. A clean part, the right amount of hold, and a shape that fits your density will do more than a shelf full of creams.
If a style asks for too much flattening at the root, it usually hides the part of your hair that makes it interesting. Start with the shape your hair already wants, then leave enough room for it to breathe.
