



Waterfall braid hairstyles for long hair have a funny little problem: they look soft and airy, then they punish sloppy sectioning immediately. On a shoulder-length cut, you can sometimes get away with a loose hand. On long hair, every strand has more weight, more drag, and more chances to sag before you finish the second side.
Weight matters.
That’s why the styles that actually work on long hair are the ones that respect the hair’s length instead of fighting it. A good waterfall braid keeps the dropped pieces clean, the braid line readable, and the rest of the hair moving in a way that feels intentional—not like the style gave up halfway through.
The basic move is simple enough. You braid across the head, drop one strand each time you stitch, then replace it with a fresh piece from above so the released hair falls into that waterfall effect. The catch is that long hair exaggerates everything: clean parts look cleaner, but messy ones look messier too. If your hair is very silky, a little texture spray helps. If it’s layered, smaller sections usually look better than chunky ones.
Some versions are easy and casual. Others need a curling wand, a few bobby pins, or a ribbon that doesn’t fray when you blink at it. The good part is that long hair gives you room to play, and that means the best waterfall braid ideas don’t all look alike—they each use the length in a different way.
1. Classic Half-Up Waterfall Braid
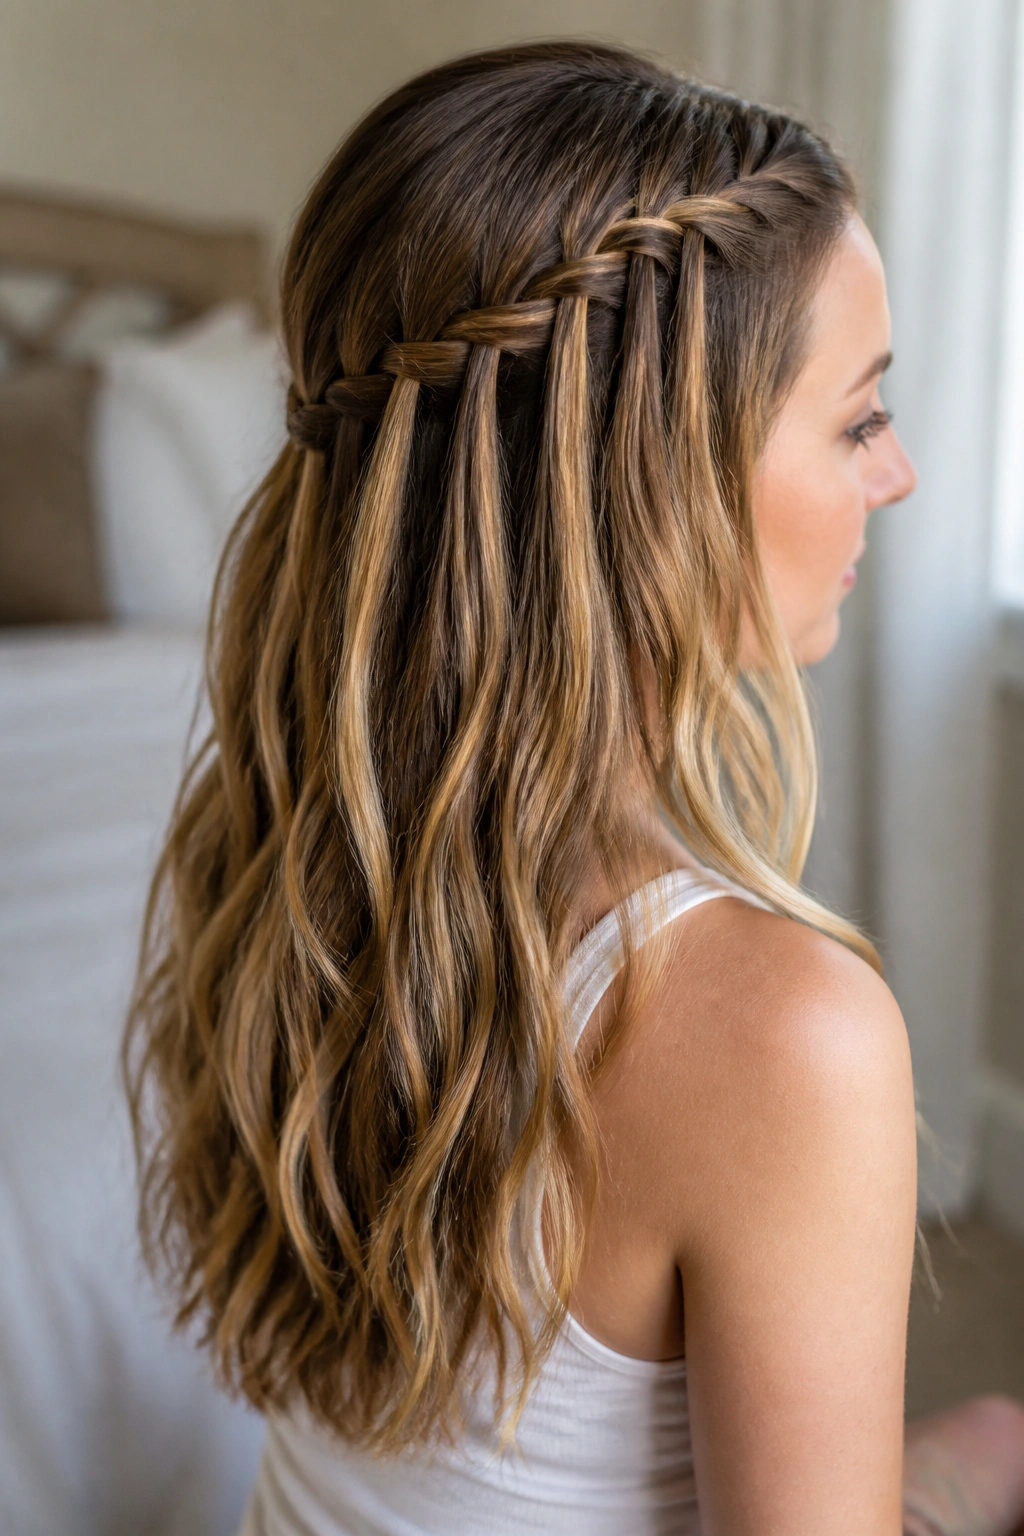
This is the version people picture first: a braid that starts near the temple, crosses the back of the head, and lets strands drop in a neat line while the rest of the hair hangs loose. On long hair, it has the nicest balance of structure and movement because the cascade has enough length to show up.
Why It Sits So Well on Long Hair
Long hair gives the dropped pieces room to fall without getting lost. Shorter cuts can make a waterfall braid look chopped off; longer lengths make the whole thing read like a proper style instead of a braid experiment.
The trick is to keep the woven sections slightly tighter than you think you need. Not tight-tight. Just firm enough that the braid stays visible against the loose hair. If the braid is too soft, the dropped strands blend in and the whole look turns fuzzy.
- Use a tail comb to keep the part clean near the front.
- Keep each working section about pencil-width to 1/2 inch.
- Leave the cascade pieces smooth instead of teasing them.
- Finish with light-hold hairspray from about 10 inches away.
Best tip: keep the dropped strand a little smaller than the strand you replace it with. That tiny difference makes the braid look crisp instead of puffy.
2. Deep Side Waterfall Braid

A side waterfall braid changes the mood fast. It feels less symmetrical, more relaxed, and a little more flattering around the face because the braid starts off to one side and drifts diagonally instead of sitting straight across the back.
On long hair, that diagonal line gives the style a strong shape. A center-start waterfall can feel very balanced, which is nice, but a deep side version has more movement and usually holds better if your hair has a stubborn cowlick near the hairline. It also works well when you want one shoulder to carry most of the drama and the other side to stay simple.
I like this version for thick hair because the side path helps control bulk. The braid doesn’t have to travel as far across the head, so it can stay neat without turning into a wrestling match. If your ends are layered, the side sweep also hides shorter pieces better than a straight-across braid.
A little side-swept wave at the front makes this one feel finished. A flat side part can work, too, but the texture should stay soft so the braid doesn’t look severe. The whole point is to let the hair move.
3. Double Waterfall Braid with a Center Part

Why does two braids often look cleaner than one on long hair? Because the symmetry does the heavy lifting for you. A center part with matching waterfall braids on both sides creates a frame around the face, and that frame keeps the loose lengths from swallowing the style.
How to Wear It Without Overloading the Hair
The mistake people make here is making both braids too thick. That sounds luxurious on paper, but on long hair it can look bulky at the crown and drag the style down. Better to work with smaller top sections and let the two braids meet the back of the head with a little breathing room.
The result is polished, but not stiff. You get the airy waterfall effect twice, which looks especially good when the rest of the hair is worn straight and glossy or softly waved. If the hair is very dense, the double braid also gives you more control over the front pieces, which helps keep everything in place through the day.
What to Watch For
- Keep the part straight from forehead to crown.
- Match the braid thickness on both sides, even if one side feels easier.
- Pin the ends together low at the back with 2 to 4 bobby pins.
- Leave the loose lengths smooth so the center line doesn’t disappear.
This style is a little more work. Worth it, though.
4. Waterfall Braid with Soft Curls
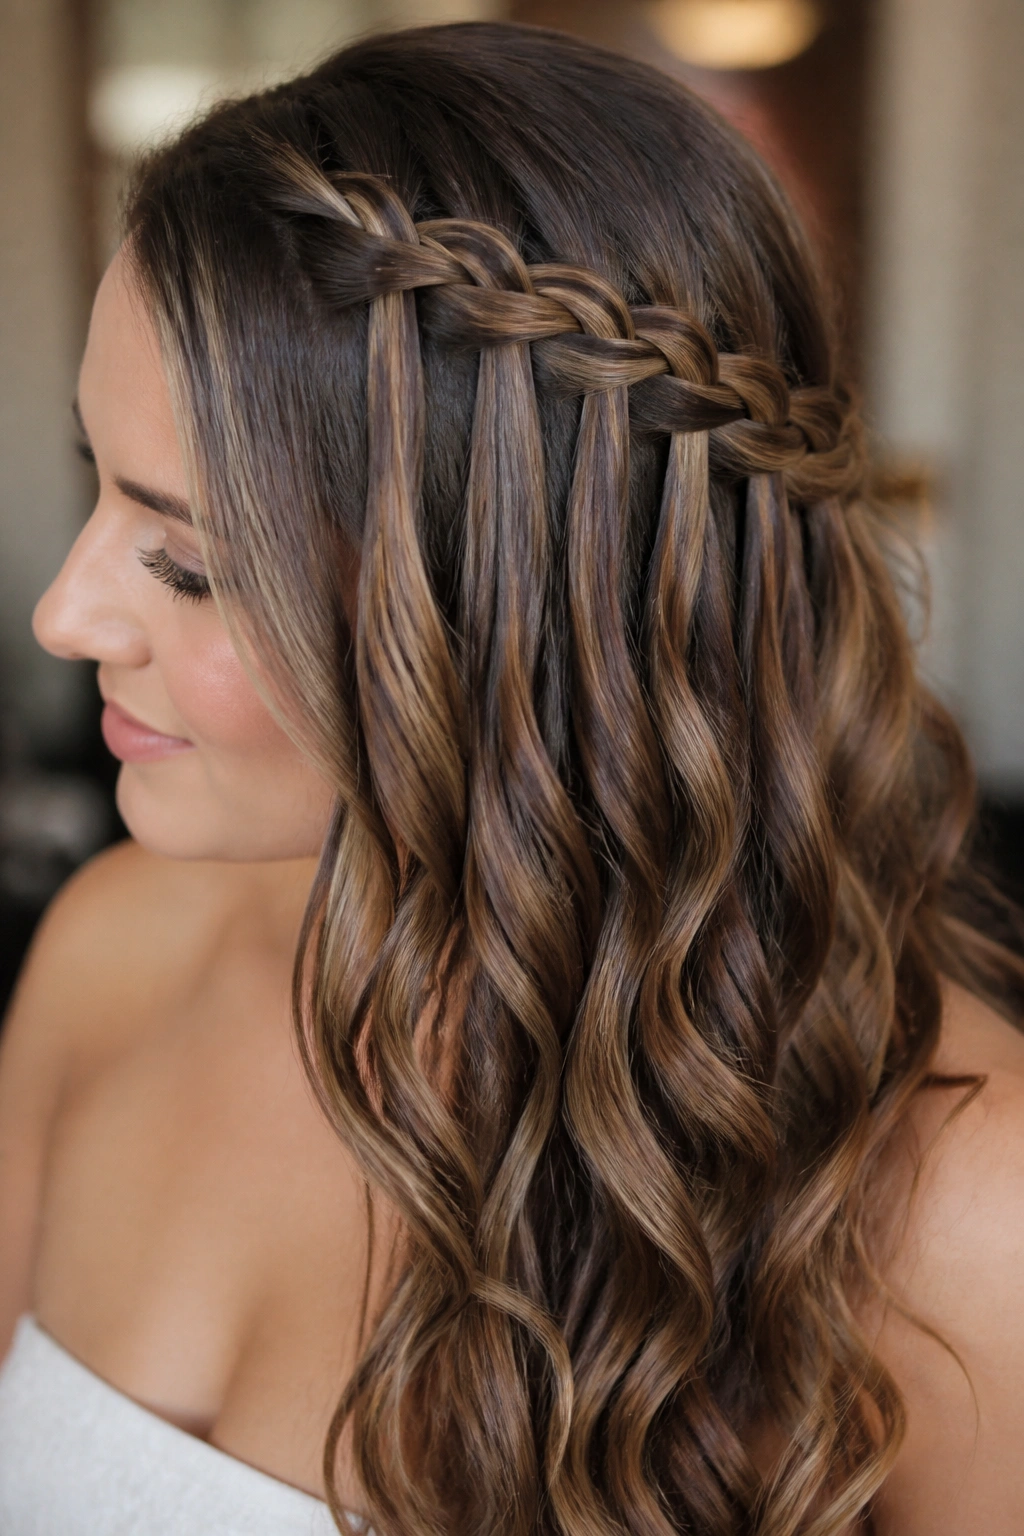
If your ends always look a bit flat after a braid, curls fix that fast. A waterfall braid with soft curls keeps the loose hair from hanging there like an afterthought; the curl pattern gives the fallen strands the same visual weight as the braid itself.
Picture the braid sitting near the crown, then the rest of the hair dropping in loose bends that start around mid-length. That midpoint curl is the sweet spot. If you curl all the way up to the roots, the style can get too busy. If you only curl the very ends, the waterfall pieces lose shape before they reach the shoulders.
The Best Way to Build the Shape
Use a 1-inch curling iron or wand and wrap sections away from the face. Leave the last 1 to 2 inches out if you want the ends to look relaxed instead of formal. That tiny uncurling at the bottom makes a big difference.
- Curl after the braid is finished so you can see where the dropped strands land.
- Mist each loose section with a light heat protectant first.
- Let the curls cool in your hand for a few seconds before touching them.
- Break the curls up with fingers, not a brush.
The braid and the curls should feel like one idea. If the curls are too polished and the braid is too loose, the style splits in two.
5. Waterfall Crown Braid
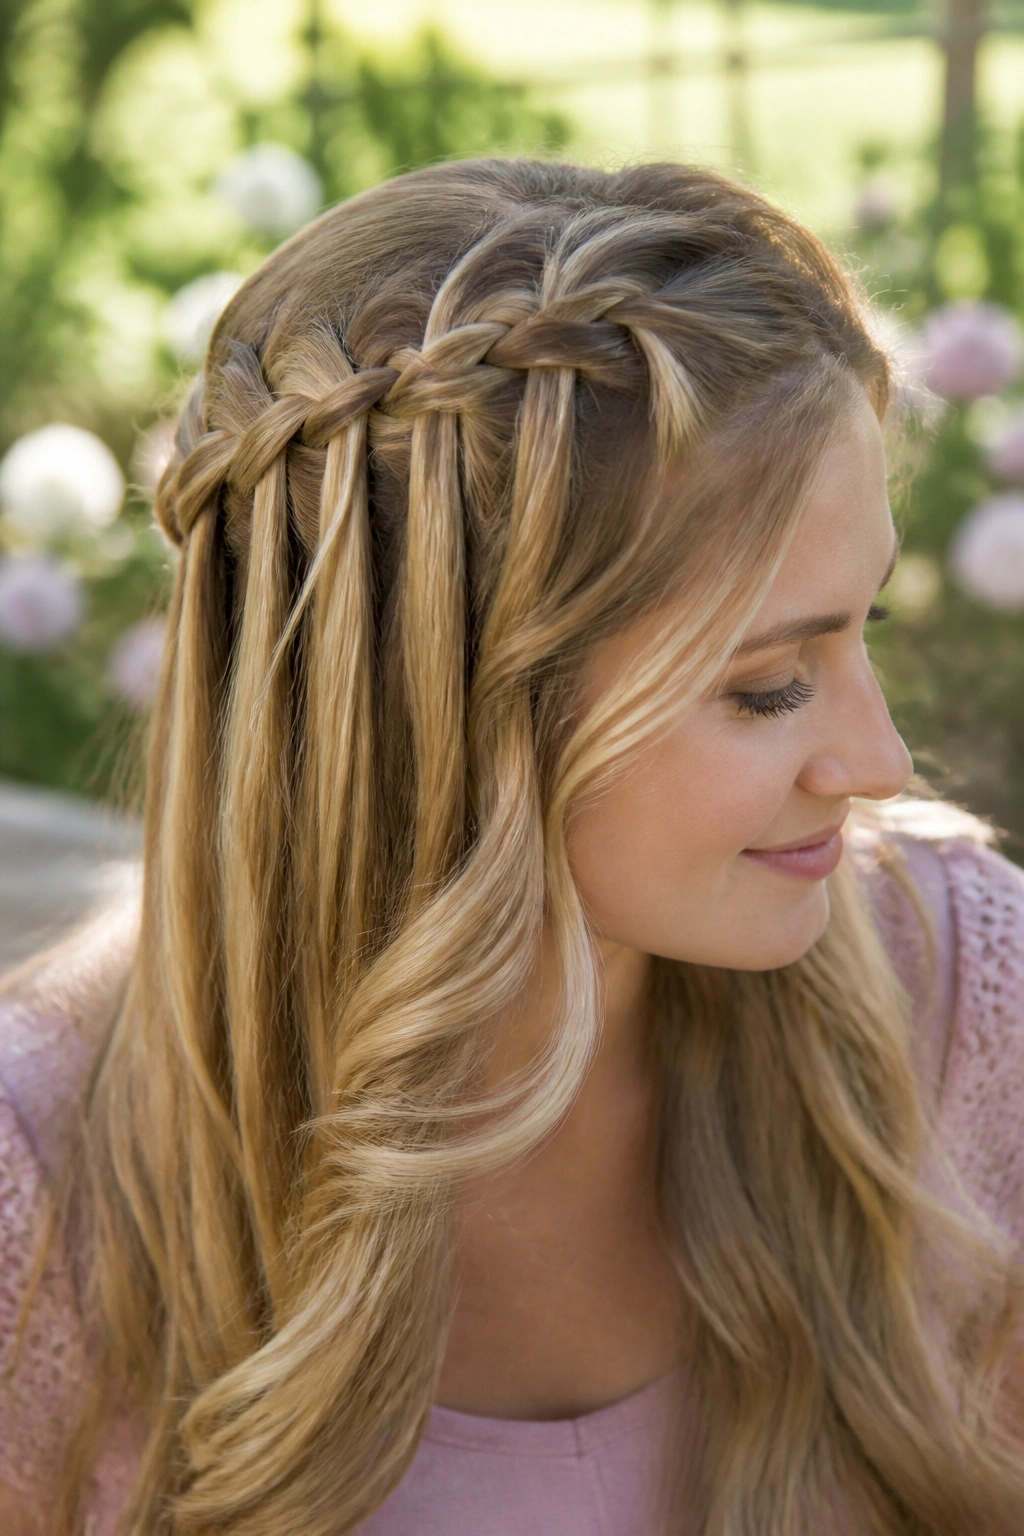
A crown braid with waterfall sections is one of those styles that looks fancier than the effort suggests. The braid wraps around the head like a soft halo, but the waterfall pieces keep it from looking too strict or bridal in the overly-perfect sense.
Long hair gives this version real substance. Shorter hair can struggle to finish the loop without a lot of pinning, but longer hair lets the braid travel farther and keeps the shape steady. That extra length also makes the loose cascade more dramatic, especially if the hair is straight or lightly waved.
The best part is the balance. You get the feeling of hair being controlled, but not hidden. The braid sits at the perimeter, and the loose lengths fill in the center, which creates a nice contrast between structure and movement. It’s one of the few braid styles that can look dressed up without needing a ton of accessories.
A bit of styling cream around the hairline helps the crown stay smooth. Not a thick layer—just enough to keep tiny frizz halos from taking over the outline. If your hair is very slippery, anchor the braid with hidden pins every few inches. You won’t see them, and your neck will thank you later.
6. Waterfall Braid into a Low Ponytail
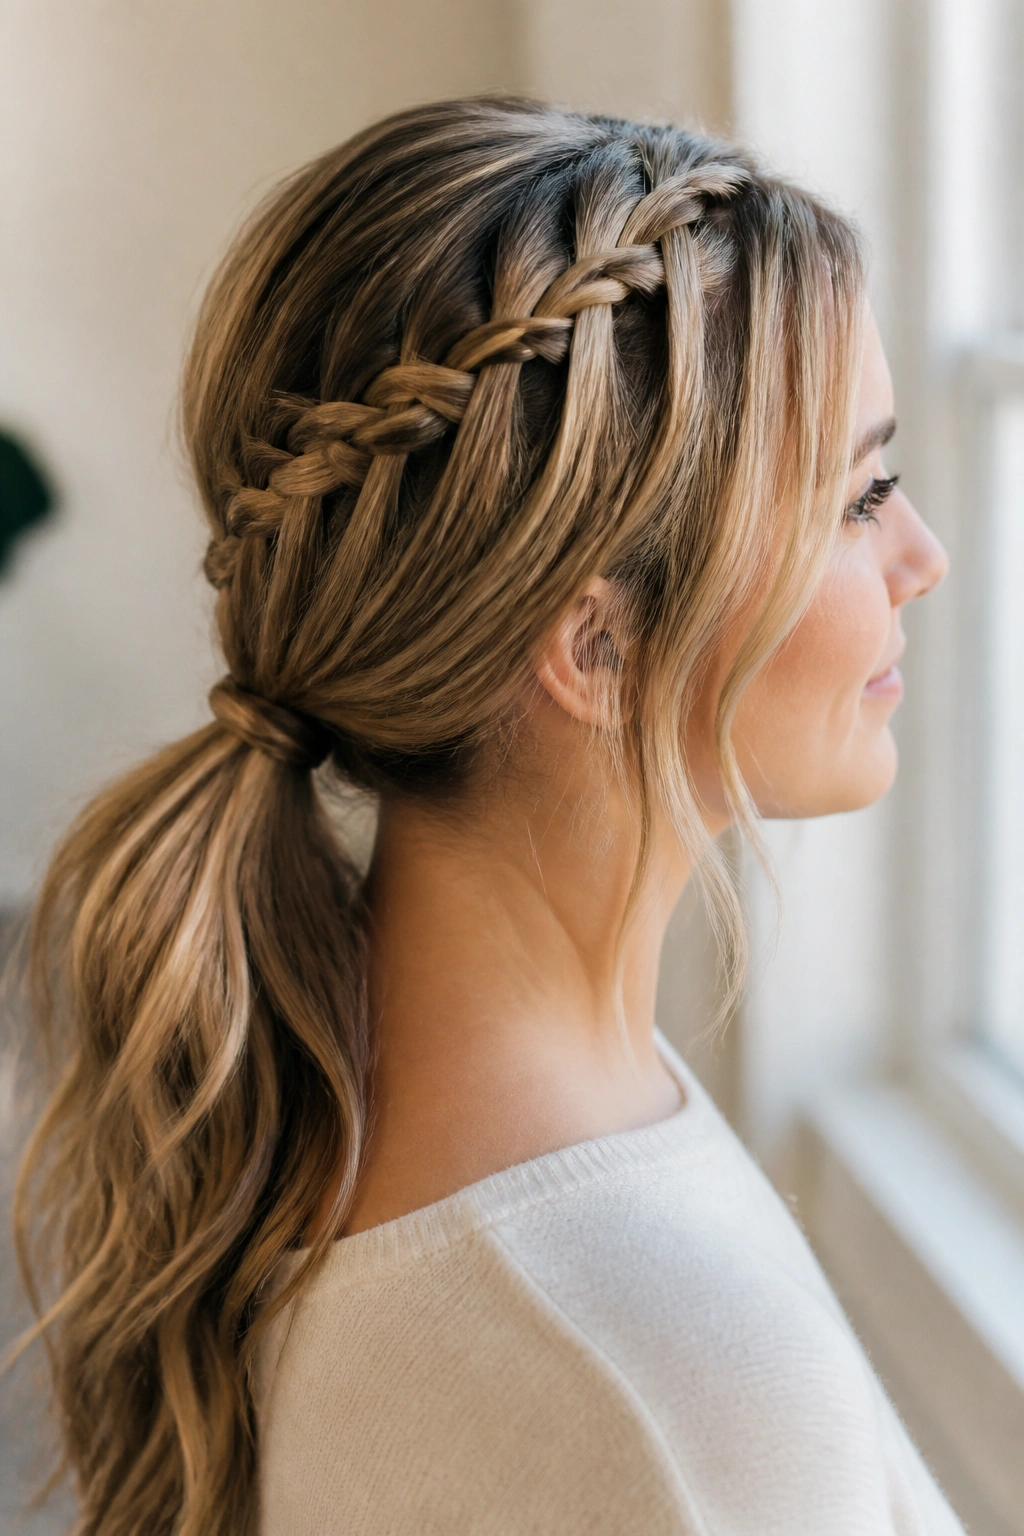
Unlike a plain low ponytail, this style gives you softness around the face before the length gets pulled back. The waterfall braid acts like a little front panel, while the ponytail keeps the rest of the hair practical and out of the way.
That mix is the reason it works so well for long hair. A full waterfall braid can sometimes feel too loose if you need your hair controlled, but a low ponytail can feel plain. Put them together and you get something in the middle—clean enough for a workday, pretty enough for dinner.
The part that matters most is the transition point. Gather the hair at the nape only after the braid is finished and the loose strands have settled where you want them. If you pull the ponytail too high, you lose the relaxed line that makes this style appealing in the first place.
This is also a smart option if your ends tangle easily. Brush the ponytail section before you tie it off, because once the braid is anchored, fixing knots gets annoying fast. A wrapped strand around the elastic gives the finish a nicer look, and it takes about 20 seconds. Easy win.
7. Waterfall Braid with Fishtail Ends
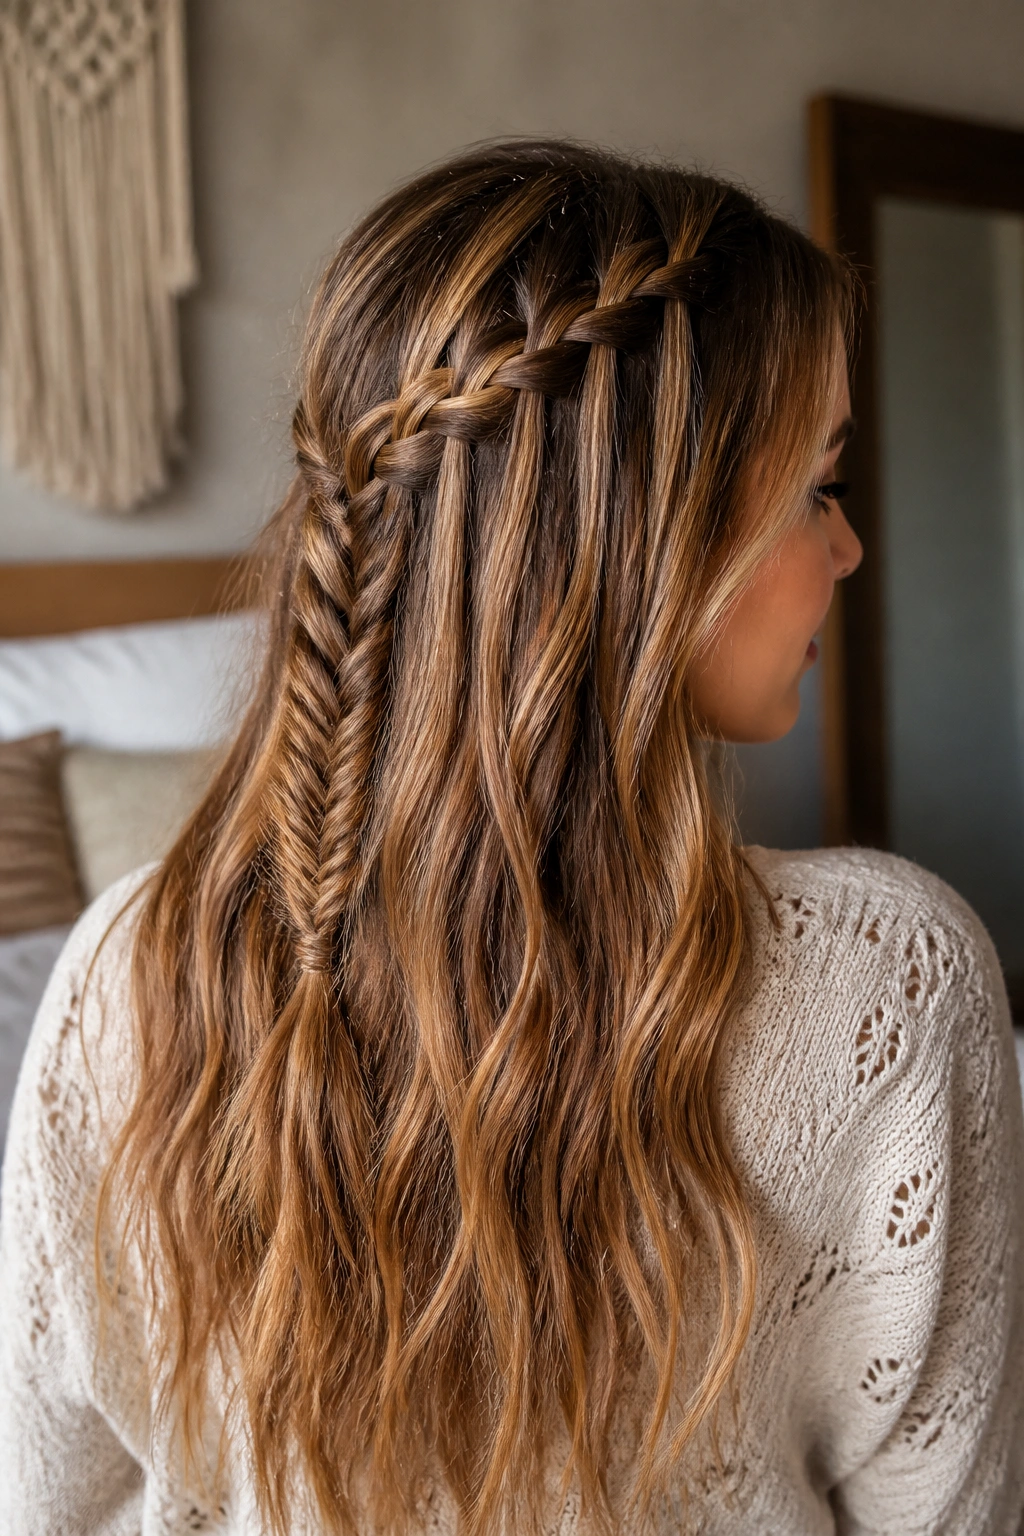
The switch from a three-strand waterfall into fishtail ends gives the style more texture without making it look heavy. That matters on long hair, where too much detail in one spot can start to feel overworked.
Where the Change Happens
You braid the front section in the usual waterfall pattern, then once you’ve reached the point where you want the style to end, you split the remaining hair into two halves and fishtail the tail. That transition is what gives the braid its personality. It starts airy, then tightens into something more detailed.
What Makes It Different
- The waterfall part stays soft and visible.
- The fishtail tail adds a rope-like finish.
- The style works especially well on hair that’s at least mid-back length.
- Fine hair looks fuller with this combo than with a single loose braid.
This version likes texture. A bit of dry shampoo or styling powder near the roots helps the braid grip better, and the fishtail section looks stronger when the hair isn’t too slippery. If you want one style that feels intricate without being fussy, this is a solid choice.
Small tip: keep the fishtail loose. Tight fishtails can look neat from a distance and stiff up close, which is not the mood here.
8. Waterfall Braid with Ribbon Woven In

A narrow ribbon does more than decorate. It changes the line of the braid itself, which is why this style can look so fresh even when the braid pattern is simple.
On long hair, ribbon gives the waterfall sections a clear edge. A 1/4-inch to 1/2-inch ribbon is usually the easiest to manage because it sits flat and doesn’t bulk up the braid. Satin looks dressier; grosgrain feels more casual and grips a little better. Both work. Wide ribbon is a headache unless your hair is extremely thick.
The best trick is to anchor the ribbon where the braid begins, then let it travel with one of the strands as you braid. You do not need to overthink every stitch. If the ribbon twists a little, that is fine; too much perfection makes it look stiff. I’d avoid ribbon that frays heavily at the cut edge unless you seal it first, because frayed ends can snag in the braid and drive you nuts by the middle of the day.
This version shines when the outfit is simple and you want one detail that feels deliberate. Not loud. Just enough to make the braid look finished from three feet away.
9. Boho Waterfall Braid with Loose Waves
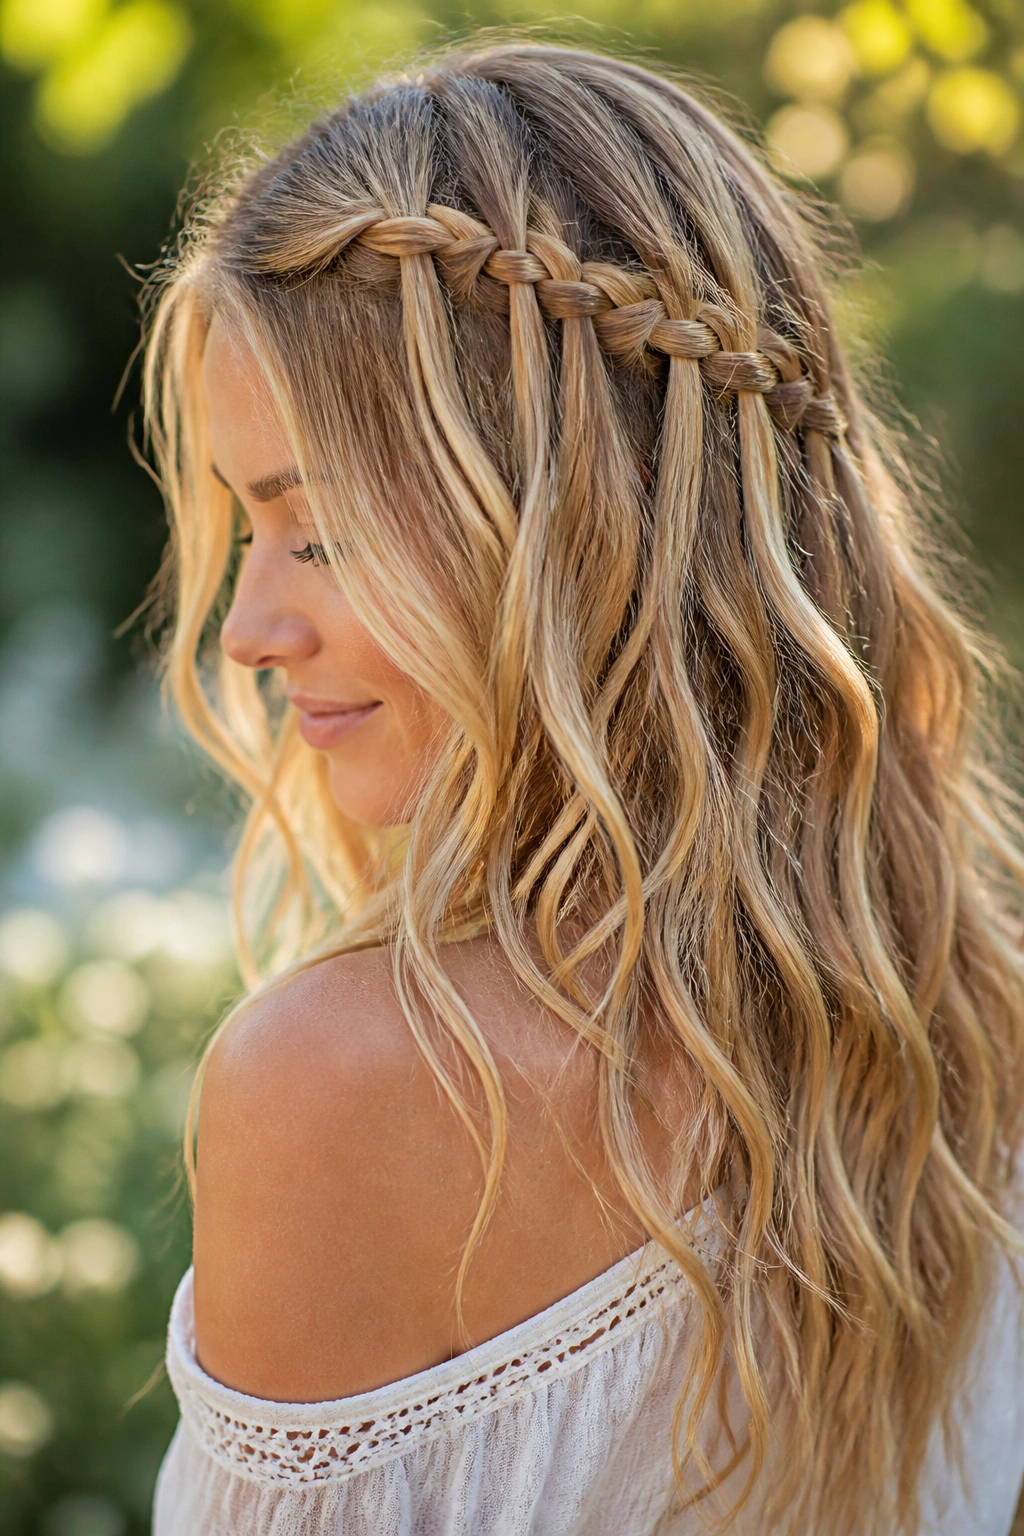
Why do waves matter so much here? Because the braid needs something to sit on. Straight hair can look sleek and clean, but loose waves give the braid a softer base and make the cascading strands blend into the rest of the length instead of hanging in separate chunks.
How to Get the Most From It
Start with a loose wave pattern using a 1.25-inch curling wand or large-barrel iron. Alternate the curl direction from section to section so the waves don’t lock into one stiff shape. Then brush them out once they cool. That gives you the kind of bend that feels lived-in rather than curled to death.
The braid itself should stay a touch looser than the classic version. The point is texture, not precision. A boho waterfall braid looks best when the crown is soft and the ends have movement. If your hair is very long, leave the bottom third freer so the waves can actually show.
A few face-framing pieces help too, especially if your layers are long enough to fall naturally around the jaw. The style gets its charm from looking slightly undone, but not messy. There’s a line there. Stay on the right side of it.
10. Waterfall Braid into a Low Bun
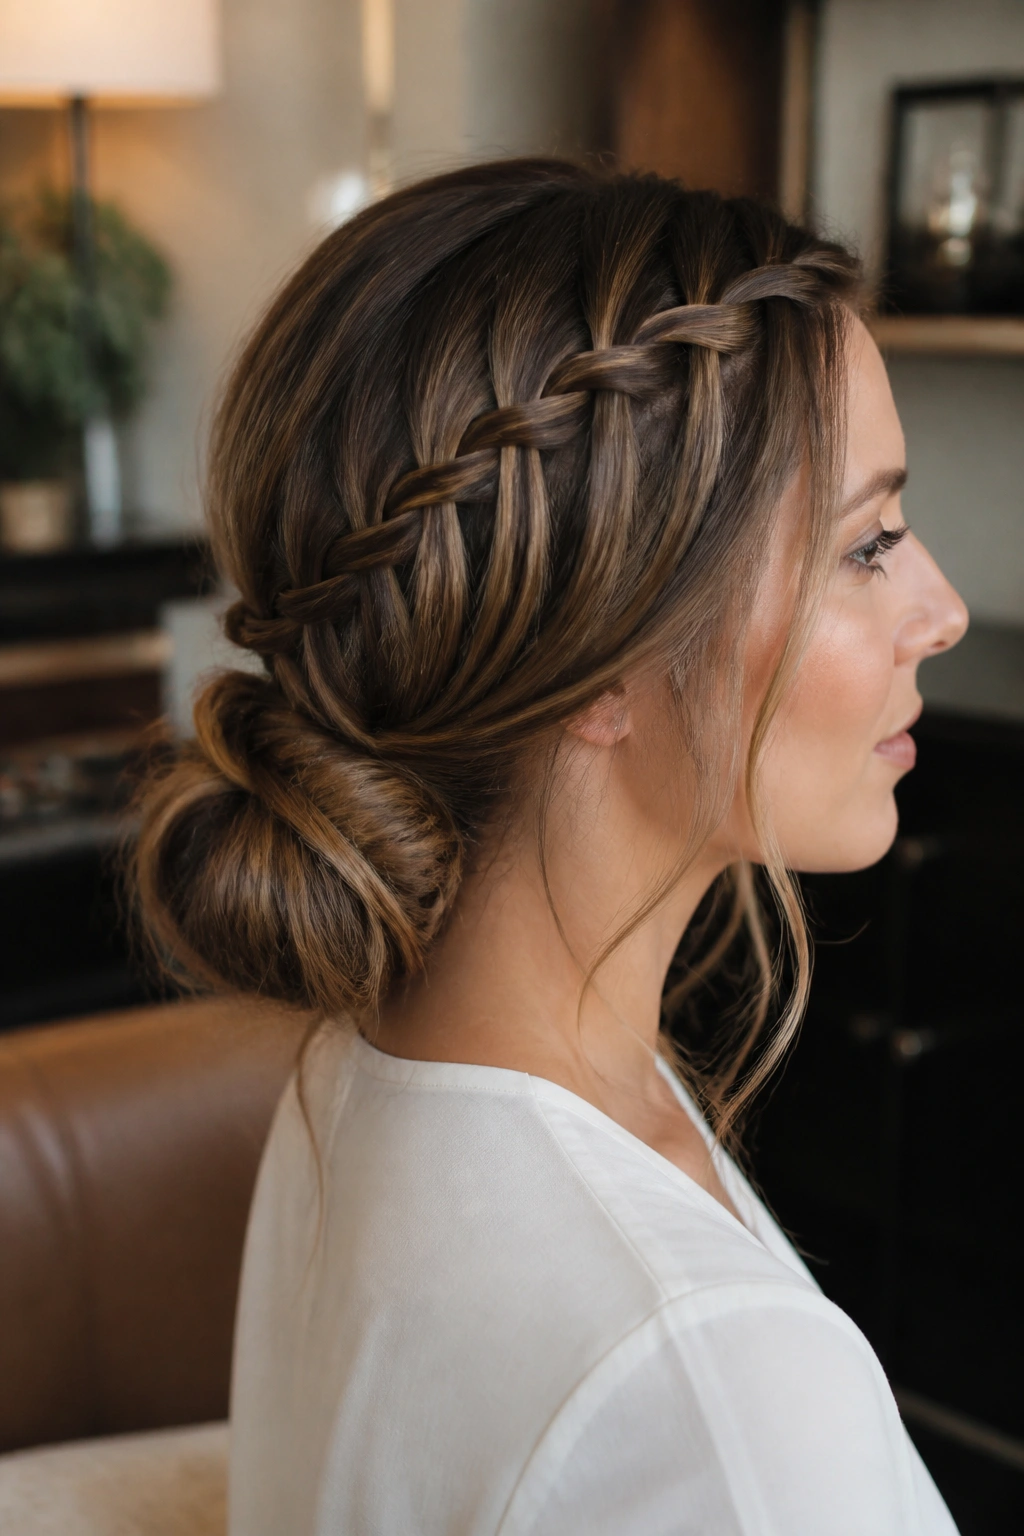
If you need your hair off your neck but still want something prettier than a standard bun, this one does the job. The waterfall section gives the front and sides a softer shape, then the remaining length is tucked into a low bun at the nape.
It sounds simple because it is. That’s part of the appeal. The braid creates interest where people see your face first, and the bun handles the practical part in back. On long hair, this is especially handy because the bun has enough material to feel full without padding.
What Makes It Hold Up Better
- Start the waterfall braid on one side and end it just behind the ear.
- Gather the remaining hair low, not at the mid-head.
- Twist the bun first, then pin around the base with 4 to 6 bobby pins.
- Pin the braid into the bun from two angles so it doesn’t slide.
A low bun can look a little plain if the finish is too neat, so leave the braid slightly soft and let a few fine strands break around the ears. That keeps it from feeling severe. The whole style works because it has contrast: soft up front, secure at the back.
11. Asymmetrical Waterfall Braid
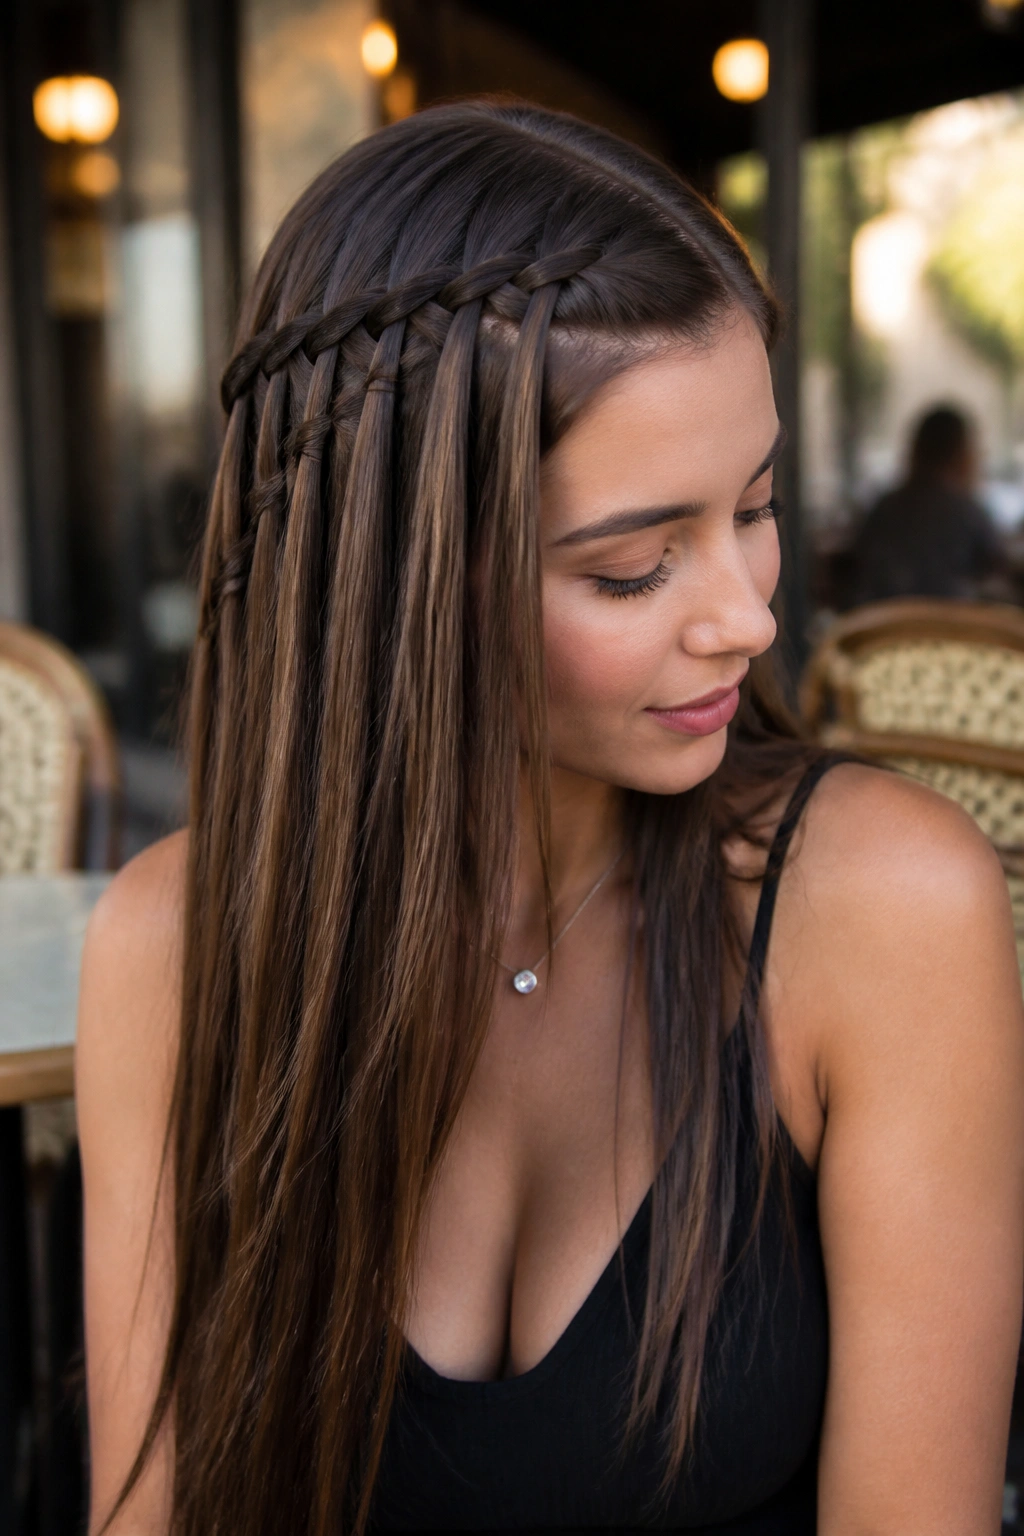
Center parts get a lot of attention, but they are not mandatory. An asymmetrical waterfall braid starts off to one side and runs across the head at a slant, which gives the style a less predictable shape and makes long hair look a little more dynamic.
This is the version I reach for when a symmetrical braid feels too tidy. The diagonal line changes the way the hair falls over the shoulders, and that alone can make the whole style feel more interesting. If your face is narrower, the off-center shape also adds width where you want it. If your face is broader, it can soften the line without pulling everything straight back.
The braid itself should stay relatively small so the angle reads clearly. Big sections flatten the diagonal and make the style look accidental. Small sections keep it sharp. A side tuck behind one ear can help balance the weight if the braid is pulling more hair toward one side than the other.
One little thing: asymmetry looks best when you commit to it. Halfway measures are where styles go bland.
12. Waterfall Braid with Face-Framing Pieces
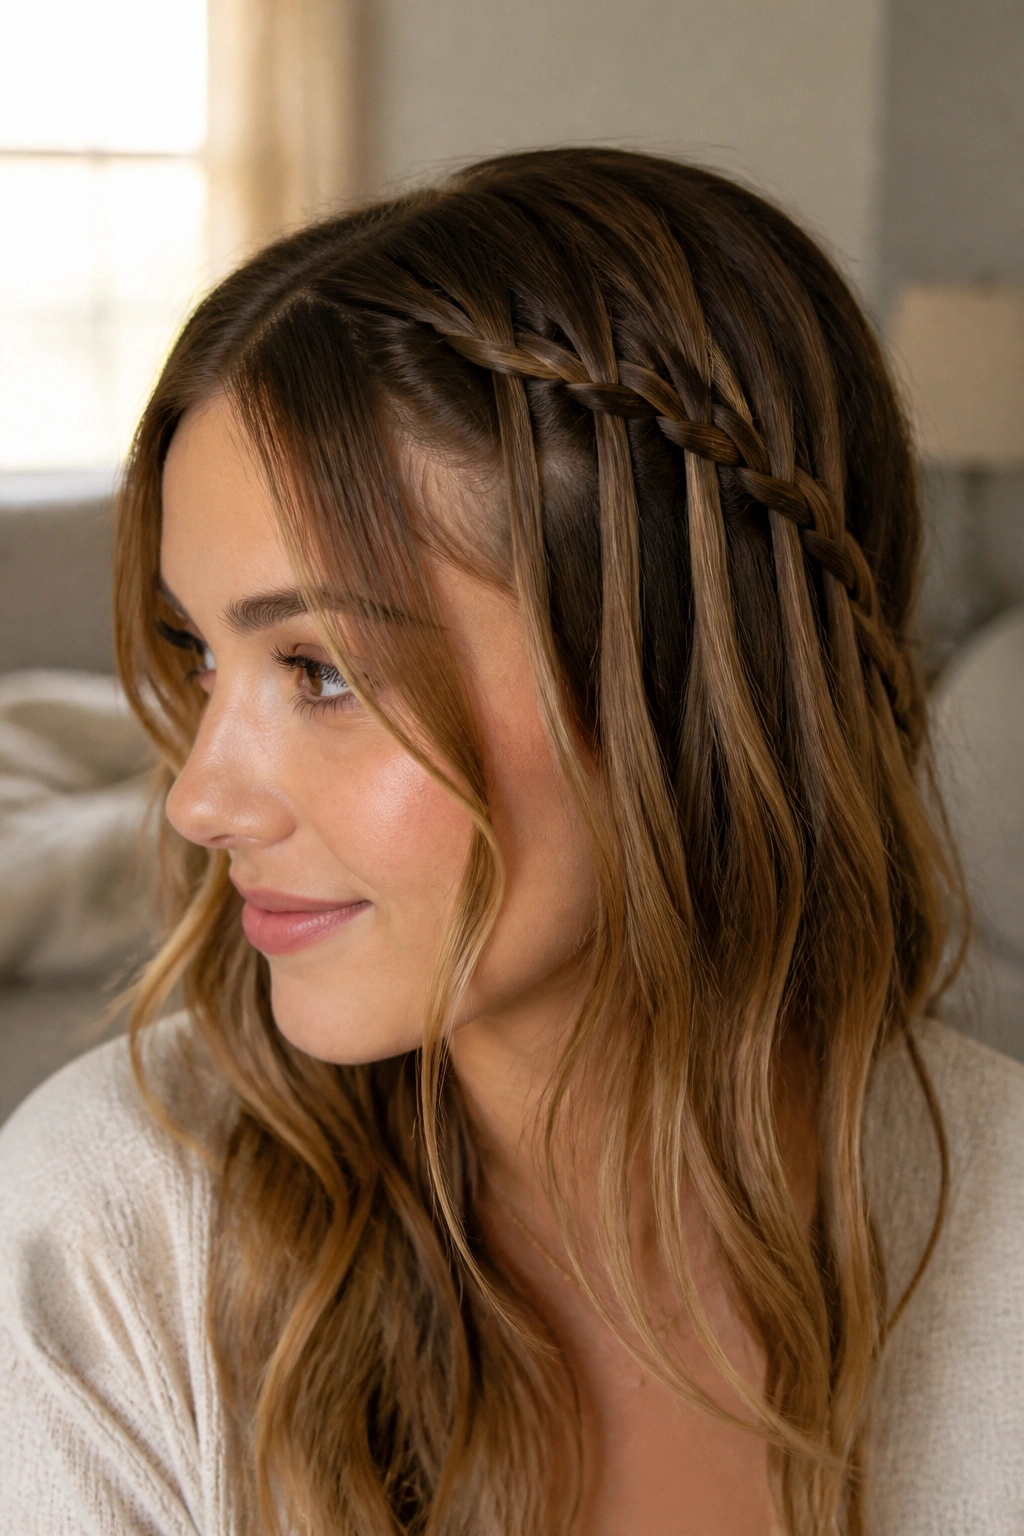
Unlike the fully swept-back waterfall braid, this version leaves two front pieces out on purpose. Usually they’re about 1 inch wide, sometimes a touch more if the hair is thick and the face-framing layers are long enough to cooperate.
That small change softens the whole look. The braid still does the decorative work, but the front pieces keep it from feeling too pulled together. For long hair, this is useful because the extra length can sometimes make a braid feel heavy near the crown. The face-framing strands break that weight visually and bring the style back toward the face.
It’s a good fit if you like soft edges around the cheekbones or if your haircut has longer curtain pieces that look best when left loose. A tiny bend through the front sections helps them blend into the braid instead of hanging as separate strips. I’d keep the braid itself neat and the front pieces loose on purpose—do not curl every inch into submission, because that kills the easy feeling.
If you only want one part of the style to feel polished, make it the braid. Let the front do the softer work.
13. Waterfall Halo Braid for Thick Hair

Thick hair can make a lot of braid styles feel bulky, but a waterfall halo braid uses that density instead of fighting it. The braid travels around the head in a soft ring, and the dropped pieces add movement without making the crown look too heavy.
What to Watch For with Thick Hair
The biggest mistake is taking sections that are too large. Thick hair tempts you to grab more than you need, but that makes the braid stiff and can make the halo sit too far away from the head. Smaller sections lie flatter and are easier to pin.
You also want to control the loose pieces as you go. If the released strands are left wild, they can puff up and start competing with the braid shape. A quick pass with a smoothing cream on the mid-lengths helps. Not much. Just enough to keep the texture from exploding.
- Divide the hair into two clean working zones before you start.
- Pin the halo every 2 to 3 inches as it wraps around.
- Keep a handful of hidden pins ready near the crown.
- Smooth the loose lengths once at the end, not after every braid stitch.
Best tip: braid with the head slightly tilted forward if your hair is very dense. It makes the sections easier to see and keeps the halo line from drifting upward.
14. Waterfall Braid with Twists
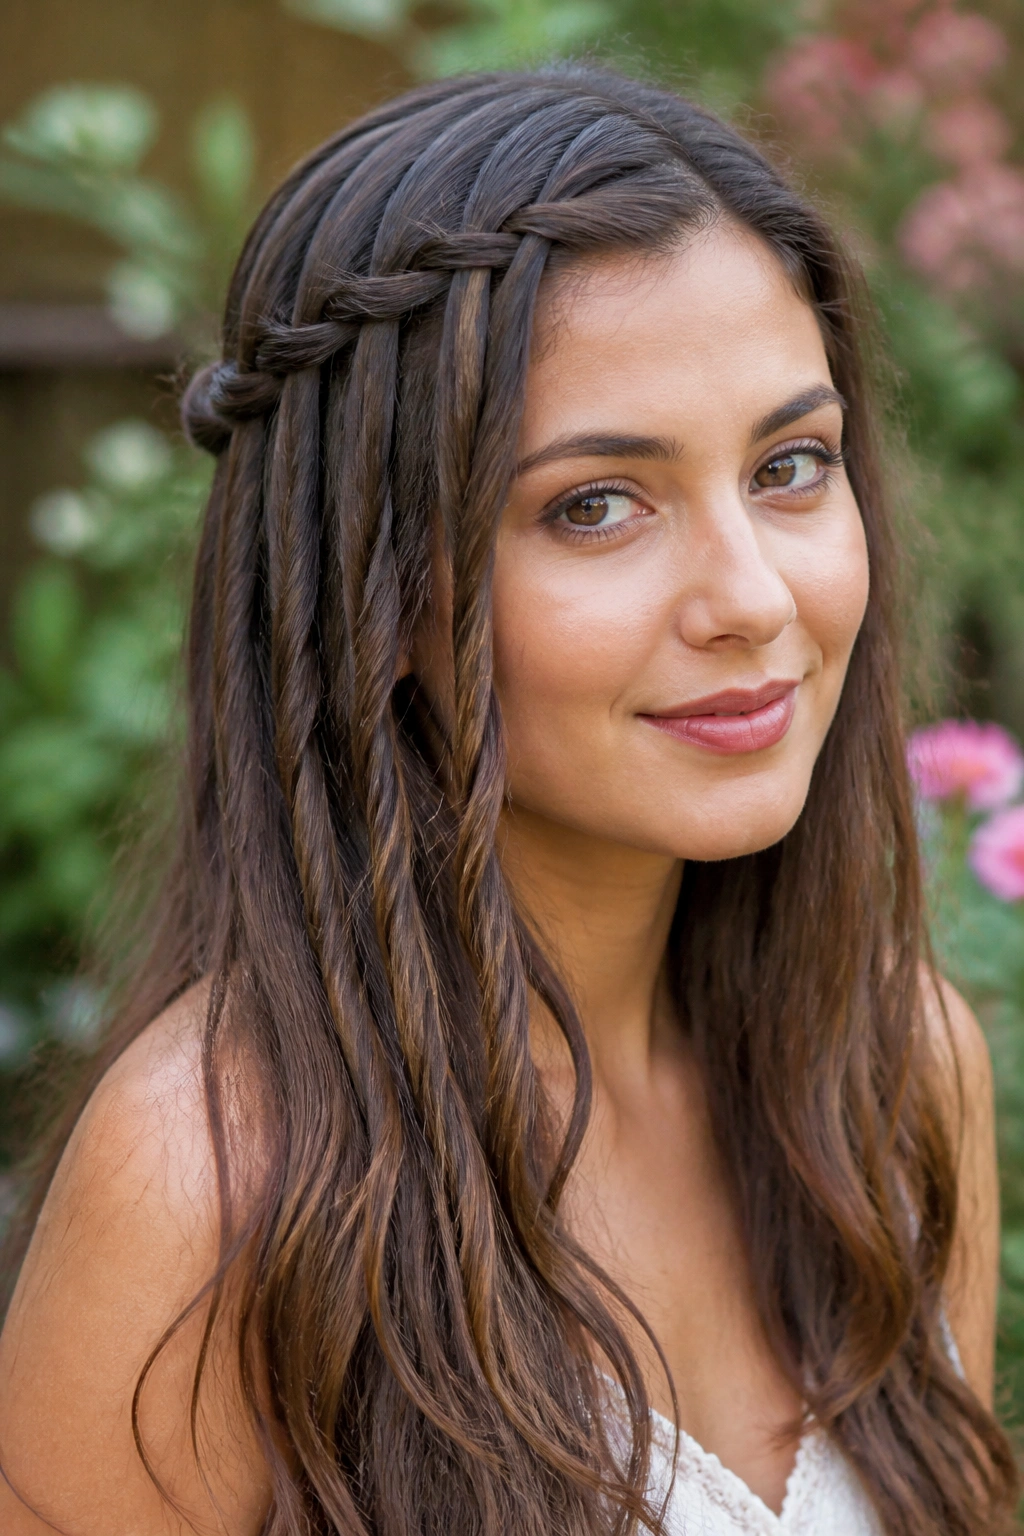
A twist can do half the work of a braid without looking lazy. That’s why this style is so useful: you keep the waterfall effect, but the released sections get folded into soft twists instead of a second braid or a plain hang.
The twist makes the style feel a little lighter around the edges. It also suits hair that wants to separate into chunky layers, because the twist gathers those layers into a smoother line. Long hair shows this detail well; shorter hair can lose the twist shape fast, but length gives it room to stretch.
The best part is that this version is faster than styles that ask for extra plaits or complicated looping. You still need clean parting, though. Twist sections that are too thick will collapse, and ones that are too thin disappear. Aim for a middle ground and keep the tension even from root to end.
I like this look for days when a full braided style feels like too much effort but I still want the front to seem intentional. It has that slightly undone quality, only with a little more structure. Nice middle lane.
15. Waterfall Braid into Sleek Chignon
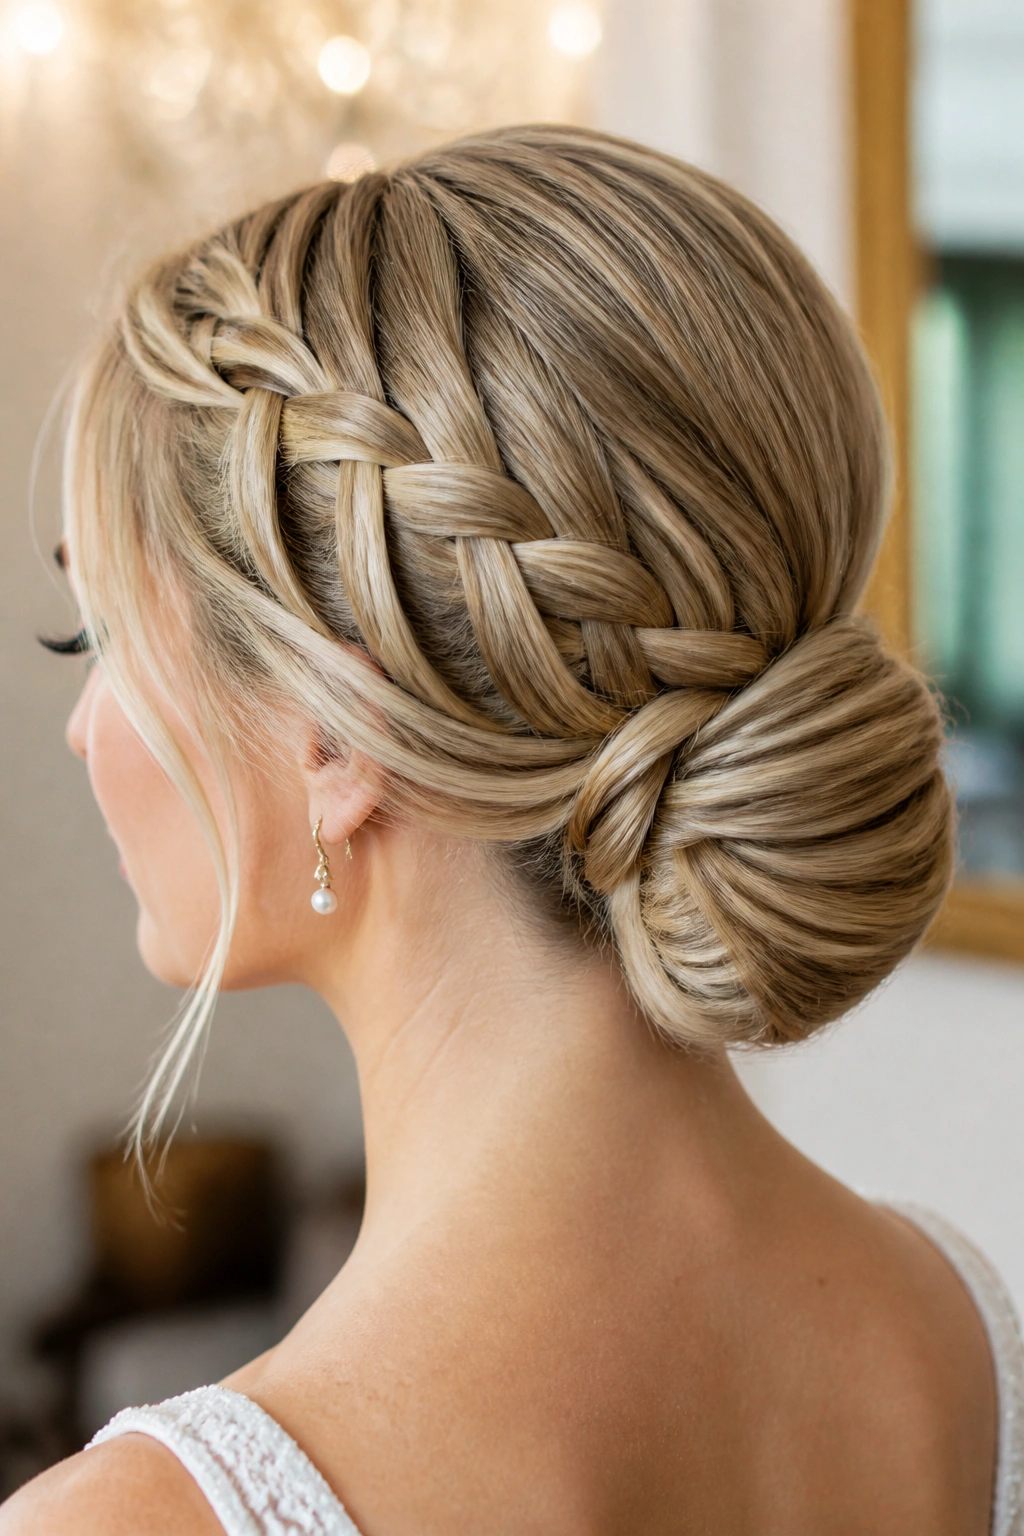
What if you want the softness of a waterfall braid, but you need the hair fully tucked away? A sleek chignon solves that problem. The braid gives you movement at the front and sides, then the length is pulled into a low knot that sits flat at the nape.
This version works especially well for formal events because it keeps the silhouette clean. The braid adds detail where people notice first, and the chignon handles the rest without adding bulk. Long hair gives the knot enough mass to look full even when it’s pinned tightly, so you don’t need padding unless your hair is very fine.
How to Keep It Polished
Start with a smooth base and build the waterfall braid before you gather the length. Once the braid is finished, brush the remaining hair into a low ponytail and twist it into a compact chignon. Pin the bun first, then cross-pin the braid into the base so the two parts act like one style instead of two separate ideas.
A light mist of shine spray on the top surface helps, but don’t overdo it. Too much product near the crown makes the braid look greasy instead of sleek. If you have shorter layers around the nape, tuck them under with a small pin before the final spritz.
This is the style I’d pick when I want the braid to be seen, but I do not want hair falling in my face all night. It’s neat, feminine, and practical in a way that some prettier styles just aren’t.
