



Braided half up hairstyles for weddings solve a messy little truth about bridal hair: soft curls on their own can sag, and a full updo can feel a bit too formal when you still want movement around the shoulders. A braid gives you structure. It gives the stylist somewhere to pin, somewhere to hide elastics, and somewhere to keep the whole shape from slipping after the vows, the photos, and the first five hugs.
I’ve always liked half-up styles for weddings because they do two jobs at once. They keep hair off the face, which matters more than people think once you’re leaning in for conversations, dancing, or crying through speeches, and they still let the length show. That matters with a strapless gown, a lace back, a veil, or even a simple dress that needs a little hair detail to feel finished.
Texture changes everything. Fine hair needs a braid that looks soft and a little full; thick hair can take a bigger, more built-out shape; curly and coily hair often looks best when the front is controlled and the ends are left with their own life. And yes, day-old hair usually behaves better than freshly washed hair. It grips. It listens. Fresh shampooed hair tends to slip.
The styles below range from polished to bohemian to protective-friendly, because wedding hair should match the dress, the venue, and the way you actually wear your hair instead of forcing one shiny “bridal” formula onto everybody. The first one is where most people should start, especially if they want something soft, safe, and easy to wear for hours.
1. Waterfall Braid with Soft Waves
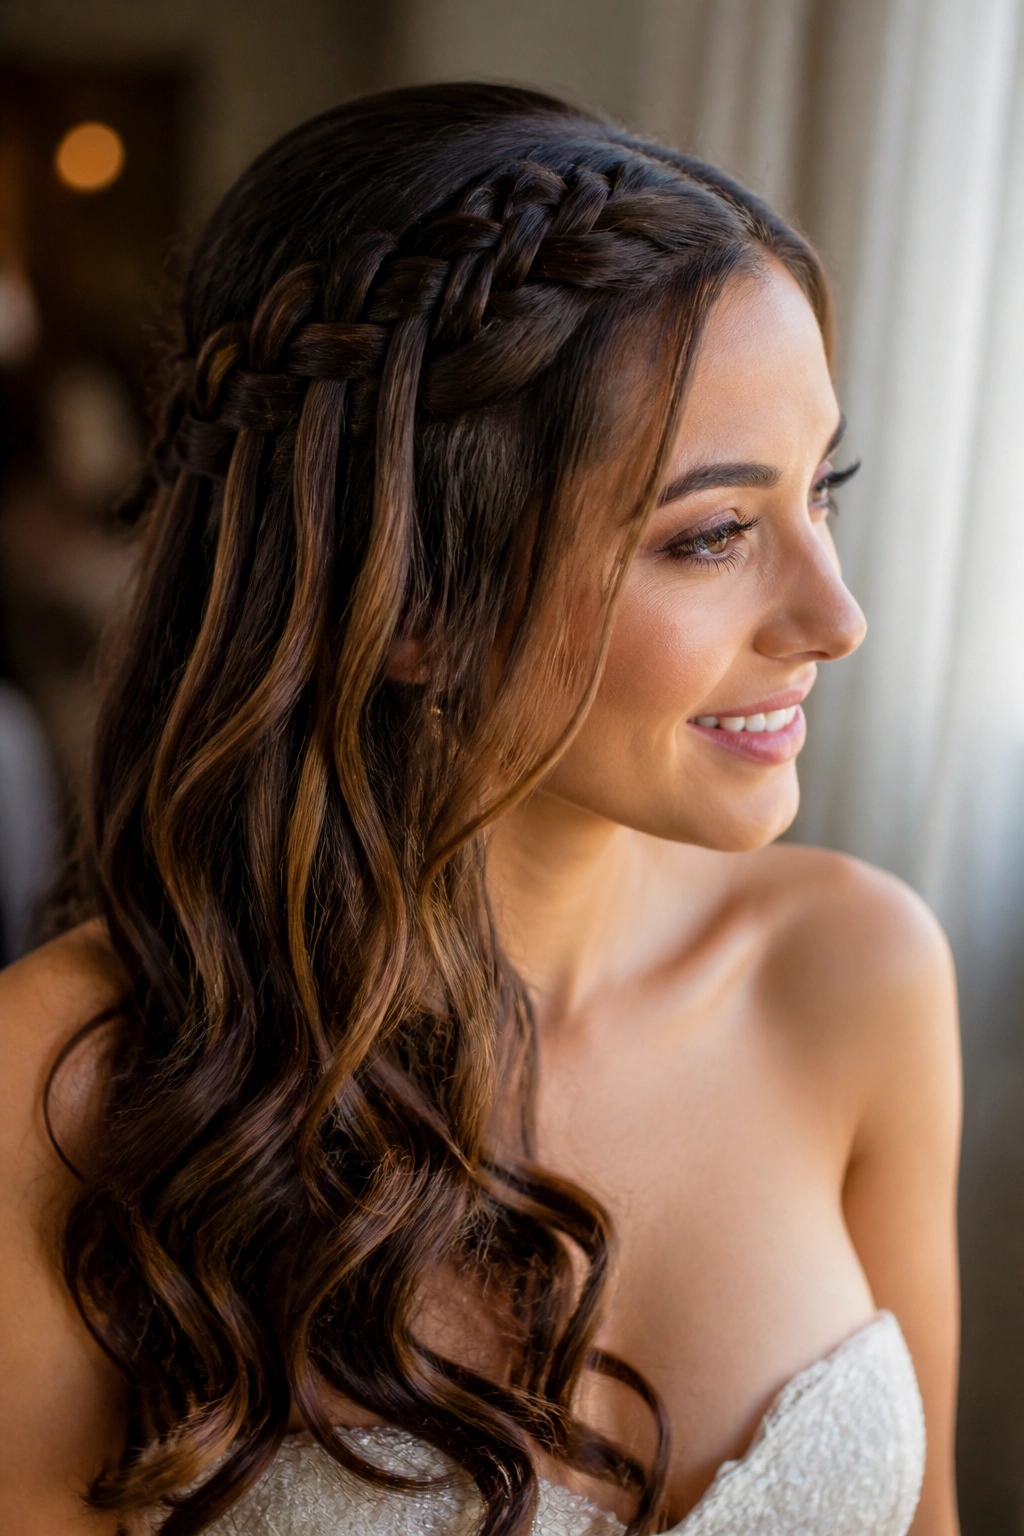
A waterfall braid has that lovely, airy look that feels made for wedding hair. One strand drops through the braid instead of being tucked in, so the front edge looks light and almost lace-like, while the rest of the hair keeps its length and movement.
Why It Works for Weddings
The trick is placement. Start the braid a little above the temple and let it travel toward the back of the head, not too low. If it sits too close to the ear, the whole style can look heavy and oddly flat. If it’s too high, it starts competing with the part and loses the soft sweep that makes it pretty in the first place.
Loose waves underneath keep the style from feeling stiff. I like a 1-inch curling iron for most medium-to-long hair, then I brush the curls out so they fall into soft bends instead of ringlets. A flexible-hold hairspray is enough here; you want the hair to move when someone hugs you.
- Best on shoulder-length hair or longer
- Braid section should be about 1 inch wide
- Works well with a side part or soft center part
- Keep the cascade pieces slightly thicker if hair is fine
Tip: leave the front pieces a touch longer than you think you need. That extra bit makes the braid look softer once the curls settle.
2. Sleek Crown Braid with Lift at the Crown

If the dress has a high neckline or a lot of beadwork, this is the style I reach for first. A crown braid gives the top of the head shape without stealing attention from the dress, and it stays neat longer than loose curls alone.
The braid usually starts near one temple, arcs across the top, and anchors on the other side just behind the crown. What matters is the lift underneath. A little backcombing at the roots—nothing wild, just enough to keep the braid from lying flat—gives the style a nicer profile from the side. That small bit of volume makes the whole thing feel more bridal and less like a school-day braid.
Keep the finish smooth. Use a pea-sized amount of smoothing cream on the front sections, then braid with even tension. Too much tension makes the braid sharp and tight, which looks harsh next to a wedding dress. Too little and it falls apart before cocktail hour.
I like this one for brides who want a veil comb tucked under the braid. The braid gives the comb something sturdy to sit against, and the crown shape holds up well when the veil comes off later. It’s tidy, sure, but not severe. That’s the sweet spot.
3. Side Dutch Braid with Loose Face-Framing Pieces
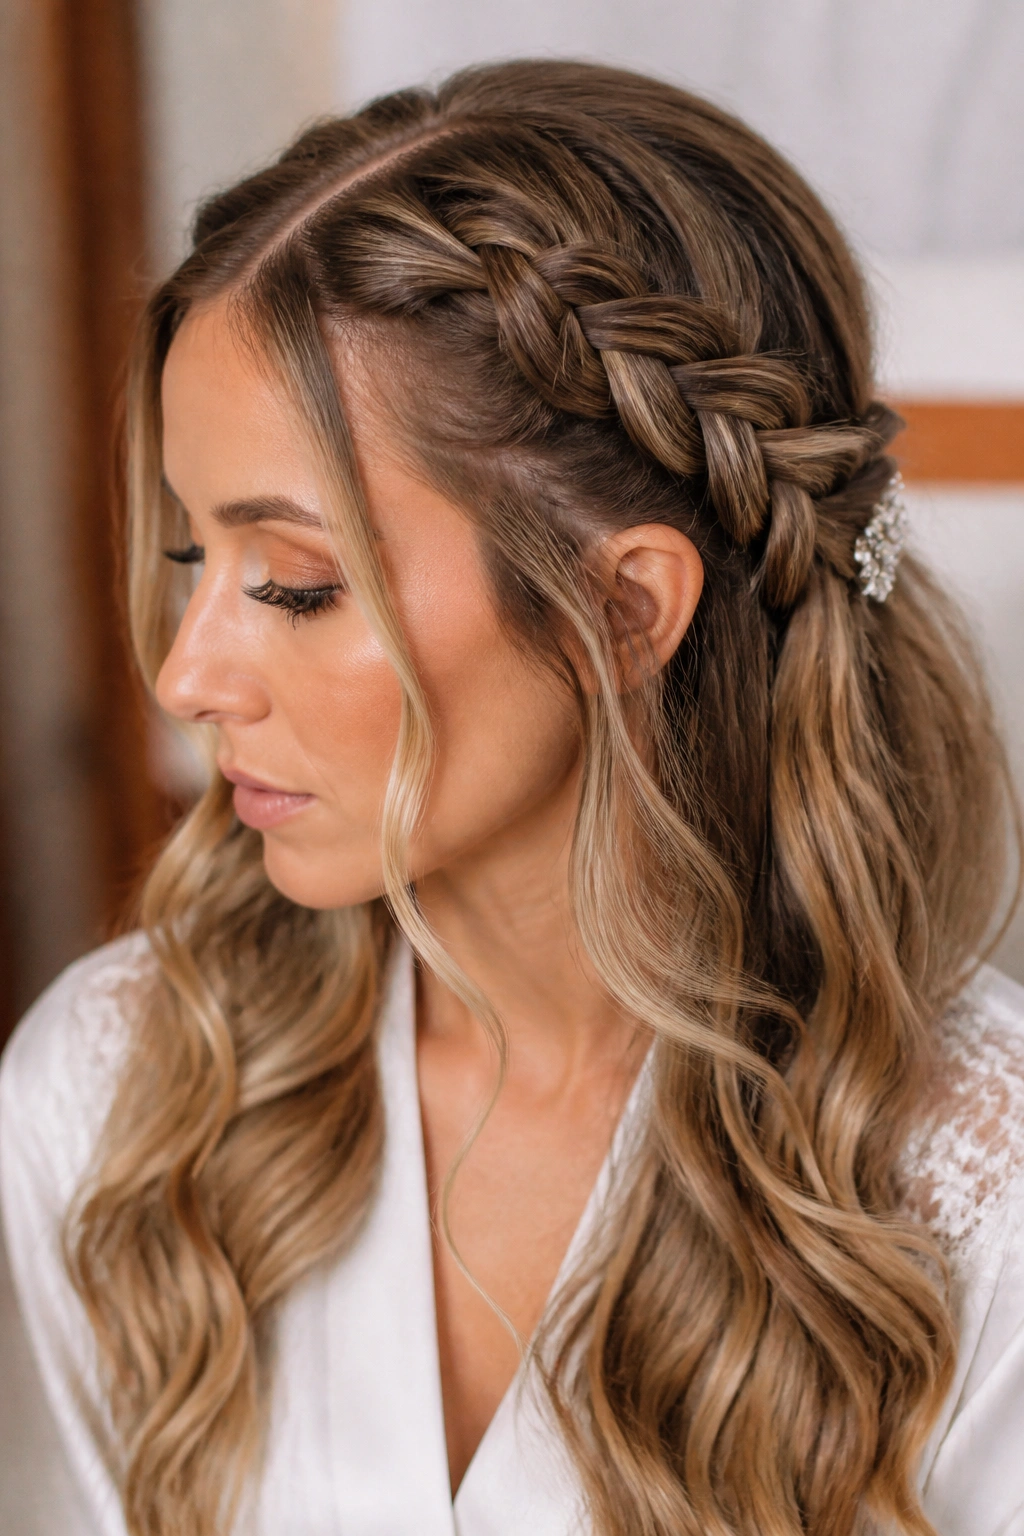
Want braid detail without the hair looking stiff? A side Dutch braid gives you that carved-in look, but the half-up version keeps it softer than a full braided crown. The braid sits on top of the hair instead of sinking into it, so the pattern reads clearly even in photos shot from across the room.
How to Use It
Start with a deep side part and braid from the heavier side toward the back center of the head. Keep the braid snug near the scalp, then release the last inch or two so it flows into the rest of the hair instead of ending in a tiny knot. That little release matters. It keeps the braid from looking like a strict sports braid dressed up for a wedding.
The face-framing pieces should stay loose and lightly curled. I usually pull out two narrow sections near the cheekbones, curl them away from the face with a 1.25-inch wand, and let them fall where they want. It softens the whole look and gives the braid a place to end visually.
A small crystal pin tucked where the braid meets the back section is enough. You do not need much else. The braid is the detail. Everything else should support it, not fight it.
4. Two Mini Braids Meeting in a Center Twist

I reach for this one when someone says they want their hair to feel relaxed, but not messy. Two slim braids come from the temples and meet in the center back, where they feed into a soft twist or knot. It has that “I didn’t try too hard” mood, except it still takes pins and planning to hold together through a long event.
The appeal is balance. The front stays open, so the style works with almost any neckline, and the center join creates a neat visual anchor. It also makes a nice home for a veil comb, because the crossed braids create a sturdy little base without needing a full updo.
- Keep each braid pencil-thin to 1/2 inch wide
- Braid close to the hairline for a cleaner shape
- Use matte bobby pins if the hair is dark
- Finish with a light mist of shine spray on the ends
The style is especially kind to fine hair, because the smaller braids don’t drag the rest of the hair down. And if you’re nervous about an overly fussy bridal look, this one behaves. It reads calm. Not plain. Calm.
5. Fishtail Half-Up with Brushed-Out Curls

A fishtail braid looks more intricate than it actually is, which is one reason it shows up so often in wedding hair. The weave creates a narrow, detailed line through the top section, while the rest of the hair keeps its softness. Done right, it feels elegant without turning hard or overbuilt.
The important part is not to start too high. A fishtail that begins at the very top of the head can look a little childish, like a school braid with better styling. Start just below the crown instead, so the braid sits like an accent rather than the main event. That keeps the length visible and gives the waves room to breathe.
I like this one best when the curls are brushed out into a loose, fluffy shape. It makes the braid feel less severe and helps the style catch the light in a more natural way. The braid itself should be tight enough to hold, but the ends can be lightly pancaked—gently pulled wider—so the pattern looks fuller.
Pearl pins work well here, but only if you use them sparingly. One at the join. Maybe two more along the curve. Any more and the braid stops looking like a braid and starts looking crowded.
6. Rope Braid with a Polished Finish
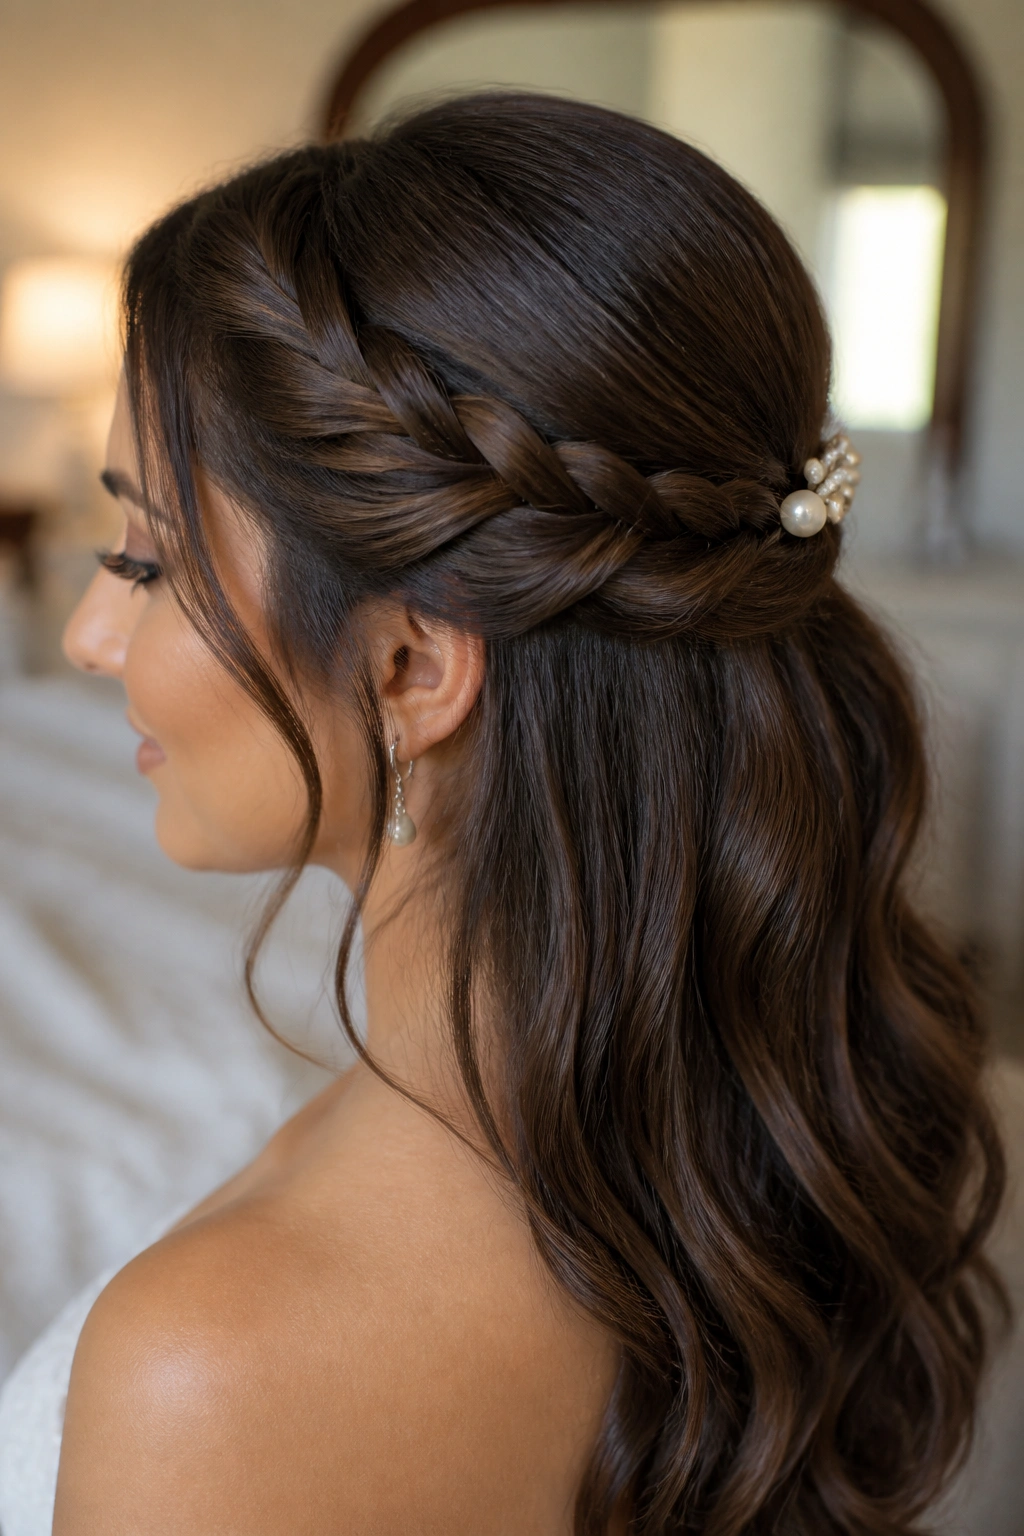
Unlike a fishtail, a rope braid gives you a cleaner line and takes less time. It’s just two sections twisted in opposite directions and wrapped around each other, which sounds simple because it is. That simplicity is the point. The style looks crisp, and on straight hair it often holds a neater edge than a softer braid.
This is the one I’d pick for someone who wants the braided part to read from a distance. Rope braids catch the eye fast because the twist creates a strong line through the half-up section. They also behave well with a slightly glossy finish, which makes them a nice match for satin dresses, structured bodices, or sleek makeup.
It’s best for medium to long hair that isn’t too slippery. If your hair is very soft, a little texturizing spray at the roots helps the twist keep its shape. If your hair is thick, keep the rope braid narrow so it doesn’t overpower the back section.
I like to tuck the ends under a small pearl comb or a pair of hidden pins. That keeps the braid from dangling and keeps the half-up shape looking neat from all angles. Easy. Clean. A little dressy without getting fussy.
7. Boho Crown Braid with Tiny Flower Pins

There’s a reason people keep coming back to this look for outdoor weddings. A boho crown braid feels relaxed, but it still gives the hair enough shape that it won’t vanish in a sea breeze or flatten into the shoulders after an hour. It has texture, lift, and a bit of romance without leaning precious.
Why It Works for Weddings
The braid should sit along the upper half of the head, not tight against the hairline. Leave a little breathing room so the style doesn’t look glued on. Once the braid is secured, gently widen the outer edges with your fingertips. Not a lot. Just enough to soften the line and keep it from feeling too neat.
Tiny flower pins are enough to dress it up. I prefer mini rose pins, baby’s breath, or pearl-and-flower combs spaced a few inches apart, rather than one big floral cluster. That way the braid still feels like hair, not a bouquet attached to the head.
- Works well with soft waves or a low-texture blowout
- Place flower pins 2 to 3 inches apart
- Keep the braid slightly loose for movement
- Best when the front pieces are curled away from the face
Tip: don’t overfill the braid with accessories. One or two small accents look intentional; ten little pins can make the style feel crowded.
8. Pull-Through Braid for Thick, Long Hair
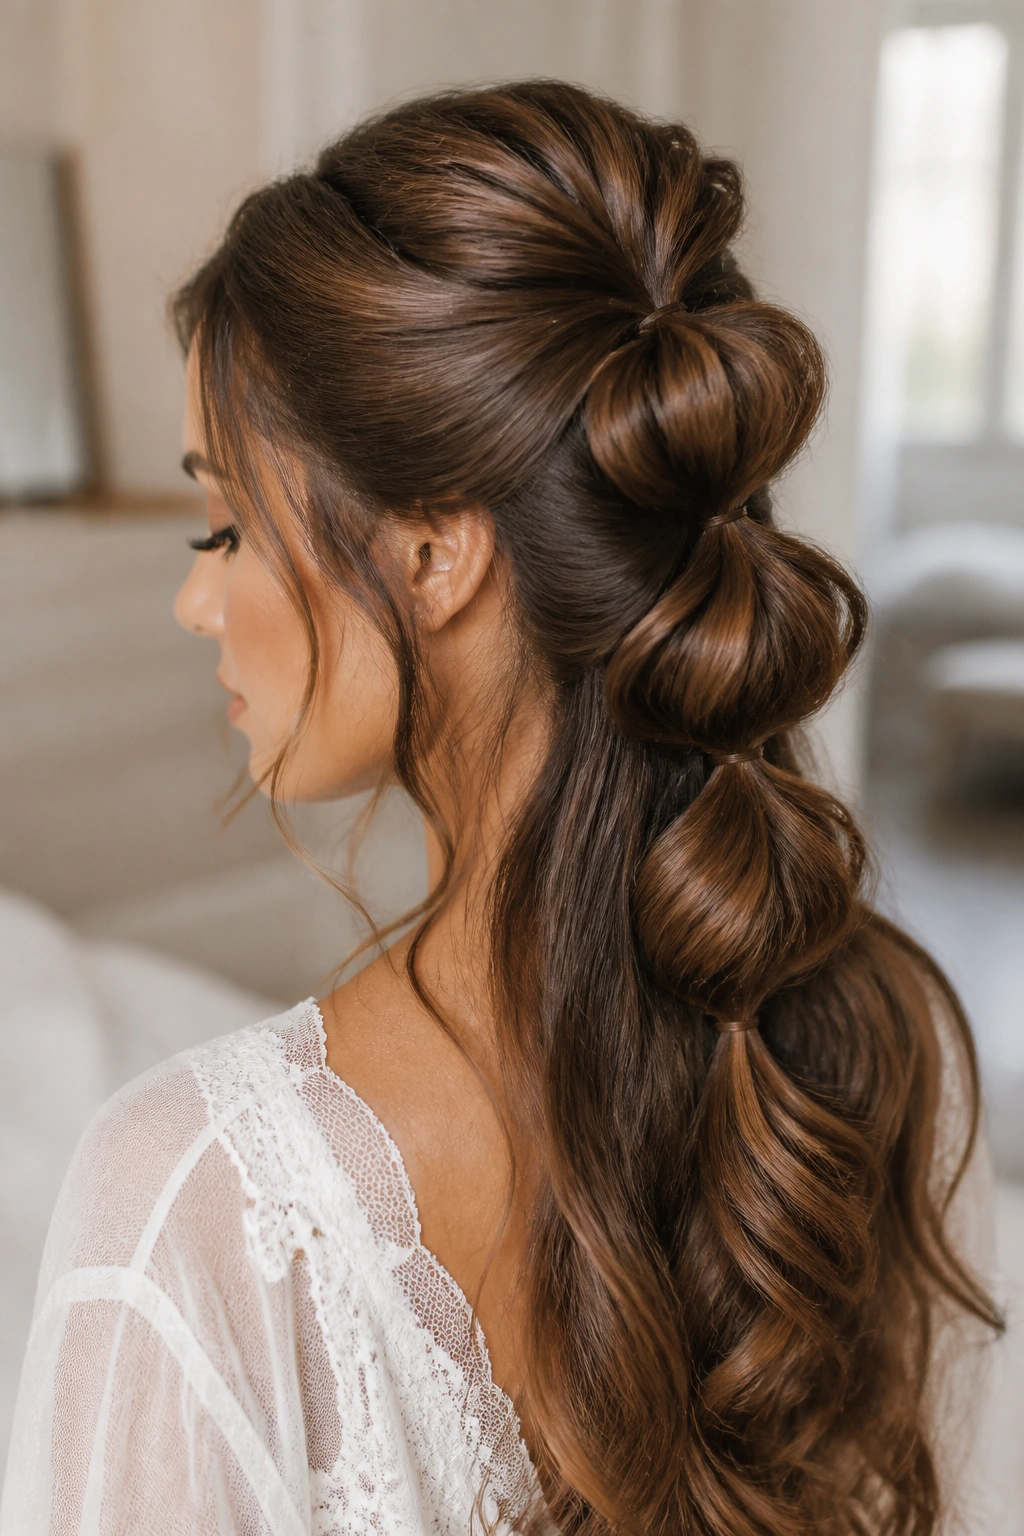
This is the one I suggest when hair is heavy and ordinary braids collapse under the weight. A pull-through braid looks full because it’s built from a stack of ponytail sections, not a single woven plait. That means it can hold up serious density without turning into a thin rope by the end of the evening.
The structure is clever. Each section gets tied with a small clear elastic, then flipped and layered so the braid builds outward. The shape ends up almost sculptural, which is nice when the rest of the hair is left soft and curled underneath. It has a little drama. Not too much, though.
For wedding hair, I like to keep the half-up portion high enough to create lift but not so high that it feels like a cheer style. Start around the top of the ears and work back toward the crown. If the hair is very long, you can extend the pull-through braid into a long tail and curl the ends loosely.
Use a couple of hidden bobby pins where the top section meets the loose hair. That keeps the weight balanced. And because the braid has such visible volume, it doesn’t need much else. A few polished curls and you’re done.
9. Waterfall Braid into a Low Twist

What if you want movement at the front and less volume in the back? This style handles both. A waterfall braid starts the conversation at the temple, then the loose strands from the braid gather into a low twist near the nape, leaving the lengths visible but under control.
How to Use It
Work one side at a time if the hair is thick or hard to manage. Begin the waterfall section about an inch behind the hairline, then let the dropped pieces feed into a soft twist or tucked knot at the back. That join point matters more than people think. If it’s too high, the twist looks cramped. If it’s too low, the braid and the twist feel disconnected.
This is a smart choice for brides who want to wear a veil for the ceremony and remove it later without the hair feeling unfinished. The twist sits low enough to hide the comb, and the waterfall section keeps the sides from going flat.
A tiny bit of shine spray on the loose pieces helps the drop strands blend into the twist. Keep the twist soft, not tight. A hard little knot under the braid kills the whole effect. It should look gentle, almost collected by hand.
10. Braided Halo with a Tucked Knot
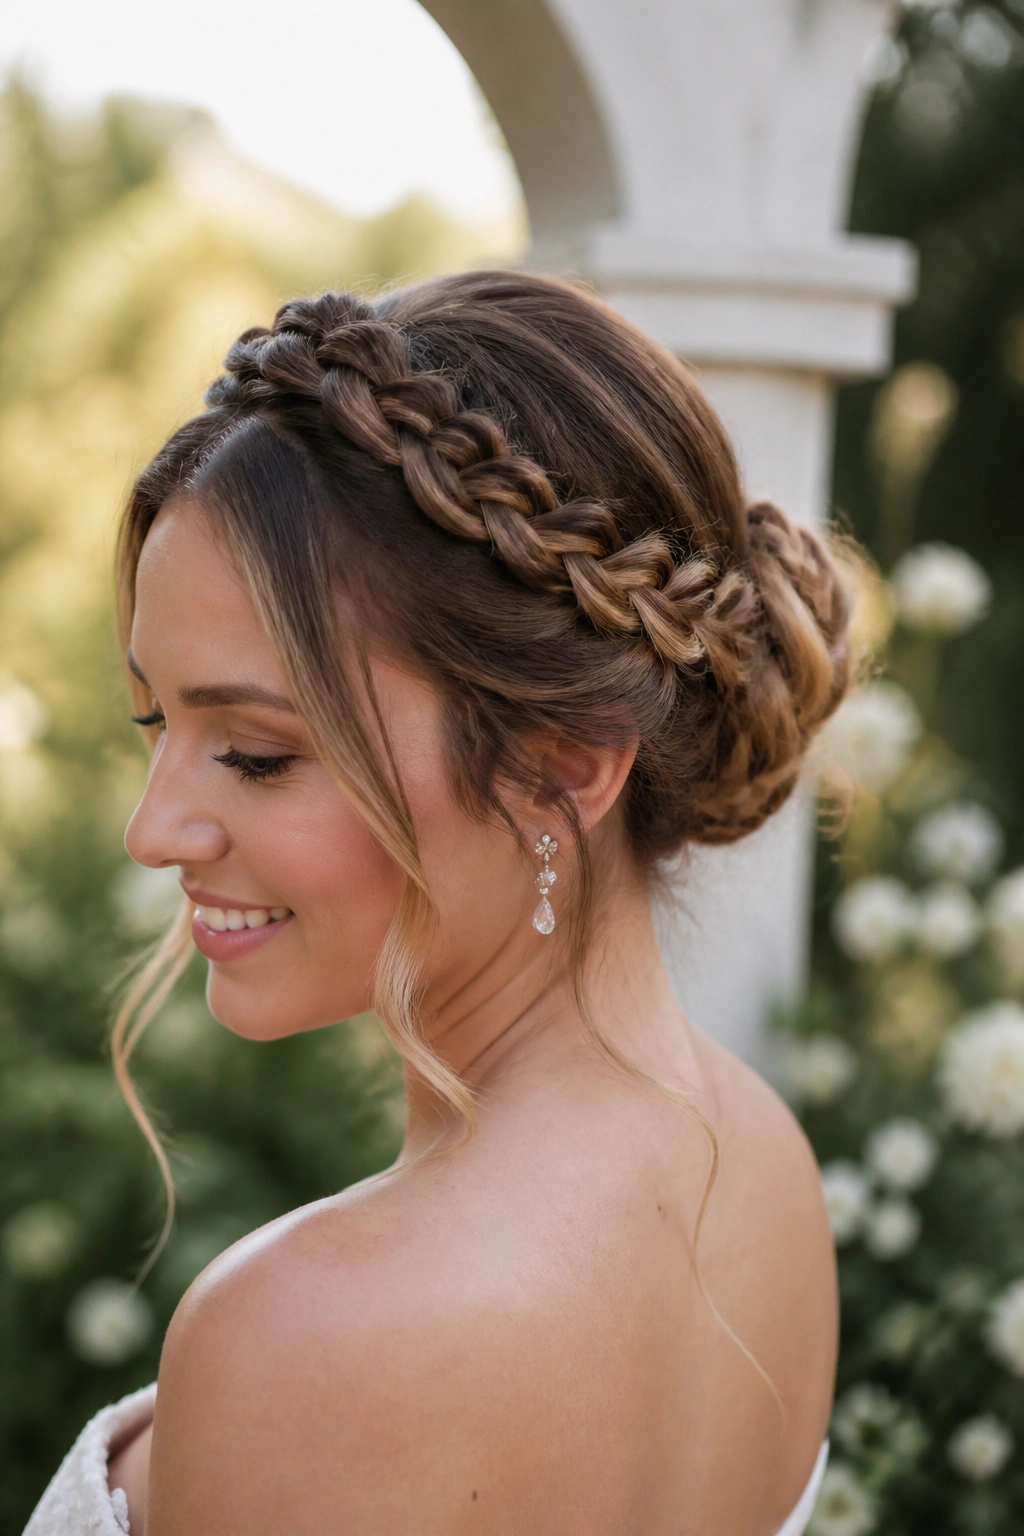
I keep coming back to this style for brides who want hair off the face but still want length down the back. A braided halo gives you that frame around the head, while the tucked knot at the rear keeps the style compact enough to stay put through a long reception.
The halo should sit about 1 to 2 inches above the hairline. That small gap prevents the braid from feeling like a tight headband. If the braid rides too low, the forehead starts to look crowded. Too high, and it loses the halo effect that makes the style so flattering in photos.
Once the braid reaches the back, tuck the ends into a small knot or twist and pin the knot flat. I use 6 to 8 bobby pins for most medium-thick hair, crossed in opposite directions. It sounds fussy, but it’s the difference between a style that lasts and one that slides down the back of the head by dessert.
- Best for medium-length and long hair
- Works with veil combs placed under the halo
- Keep the knot tucked low so the length still shows
- Add a few curled tendrils at the temples if you want softness
The whole thing reads neat from the front and soft from the side. That’s a useful combination.
11. Twisted Half-Up Braid with Pearl Pins

Twists are the quieter cousin of braids, and that’s exactly why this style works so well at weddings. The top section can be twisted from both sides and then folded into a loose braided effect at the back, with pearl pins placed where the sections cross. It gives you structure without making the head look busy.
Pearl pins do the heavy lifting here. A single row of them along the twist line can turn a simple half-up into something ceremony-ready without adding bulk. I like pins that are small enough to vanish into the hair from a distance but still catch the eye when someone leans in close. Big pearls tend to look a little costume-y unless the dress is very formal.
The finish matters. Keep the hair smooth at the roots and softer through the ends. If the top is too fluffy, the pearls disappear into texture. If the hair is too sleek all the way through, the twist can feel severe. You want a middle ground.
This is a good option for medium hair that needs a little help staying in place. It also behaves nicely under a veil because the twist line creates a natural anchor without needing a giant comb.
12. Milkmaid-Inspired Half-Up Braid

A full milkmaid braid wraps all the way around the head, which can be lovely, but it also hides a lot of hair. This half-up version keeps the shape and the old-world feel while leaving the lengths visible down the back. That makes it easier to wear with modern dresses and less likely to feel like a costume.
What makes it different is the placement. The braids curve across the top and sides, then stop short of a full crown. The result is lighter on the head and easier to pair with a veil or hair jewelry. It also suits brides who want the braid to feel structural rather than soft and wispy.
I’d recommend this style if you like a clean neckline but don’t want a full bun. It looks especially nice with lace, square necklines, and simple dresses that need a little shape around the face. Keep the braids medium-width so they read clearly, and don’t overloosen them. A milkmaid shape needs enough definition to hold the idea together.
A pair of narrow ribbons woven through the braid can work here too, though I’d keep the color close to the dress or bouquet rather than choosing something loud. The braid should stay the star.
13. French Braid with Airy Ends

A French braid in a half-up style is the sturdy one in the group. It doesn’t try to look whimsical first; it focuses on hold, shape, and a clean line through the center of the head. Then the airy ends take over and soften the whole thing, which is exactly why it works so well for weddings.
Why It Works for Weddings
Start the braid high enough to lift the crown, but not so high that it looks like a sports braid. A little backcombing at the crown helps the braid sit with more presence, especially if the hair is fine. If the hair is thick, skip the teasing and let the braid do the work.
The key is the finish at the ends. Stop the braid around mid-back and secure it where the loose lengths begin, then curl those lengths in wide sections. A 1.5-inch curling iron gives a softer fall than tight curls, and the style looks less stiff once the curls are brushed out.
- Good for veils, pins, and combs
- Braid holds better on second-day hair
- Airy ends keep the style from feeling heavy
- A light mist of texturizing spray helps the braid grip
My advice: keep the braid narrow if your dress is detailed. A wide braid can compete with lace or beadwork faster than people expect.
14. Ribbon-Woven Braided Half-Up Style

Ribbon changes the whole mood of a braid. Even a simple three-strand braid becomes wedding-ready when you weave a narrow ribbon through it, because the ribbon creates a clean line of color and gives the style a more dressed-up feel without needing extra volume.
The best ribbon is usually 1/4-inch satin or silk, not something stiff and wide. A narrow ribbon slides through the braid more easily and doesn’t fight the hair. Match it to the dress, the flowers, or the shoes if you want a coordinated look, but keep the tone soft. A white ribbon against pale blonde hair can disappear; an ivory ribbon usually reads better.
Tie the ribbon off under the braid with a clear elastic or hide the ends under a pin so they don’t poke out later. That little cleanup step matters more than most tutorials admit. Loose ribbon ends have a habit of unraveling right when the camera comes out.
This style works especially well with half-up waves because the ribbon gives the eye a starting point, then the length carries the shape downward. It feels romantic without being sugary. That’s a nice line to walk.
15. Side Fishtail Draped Over One Shoulder
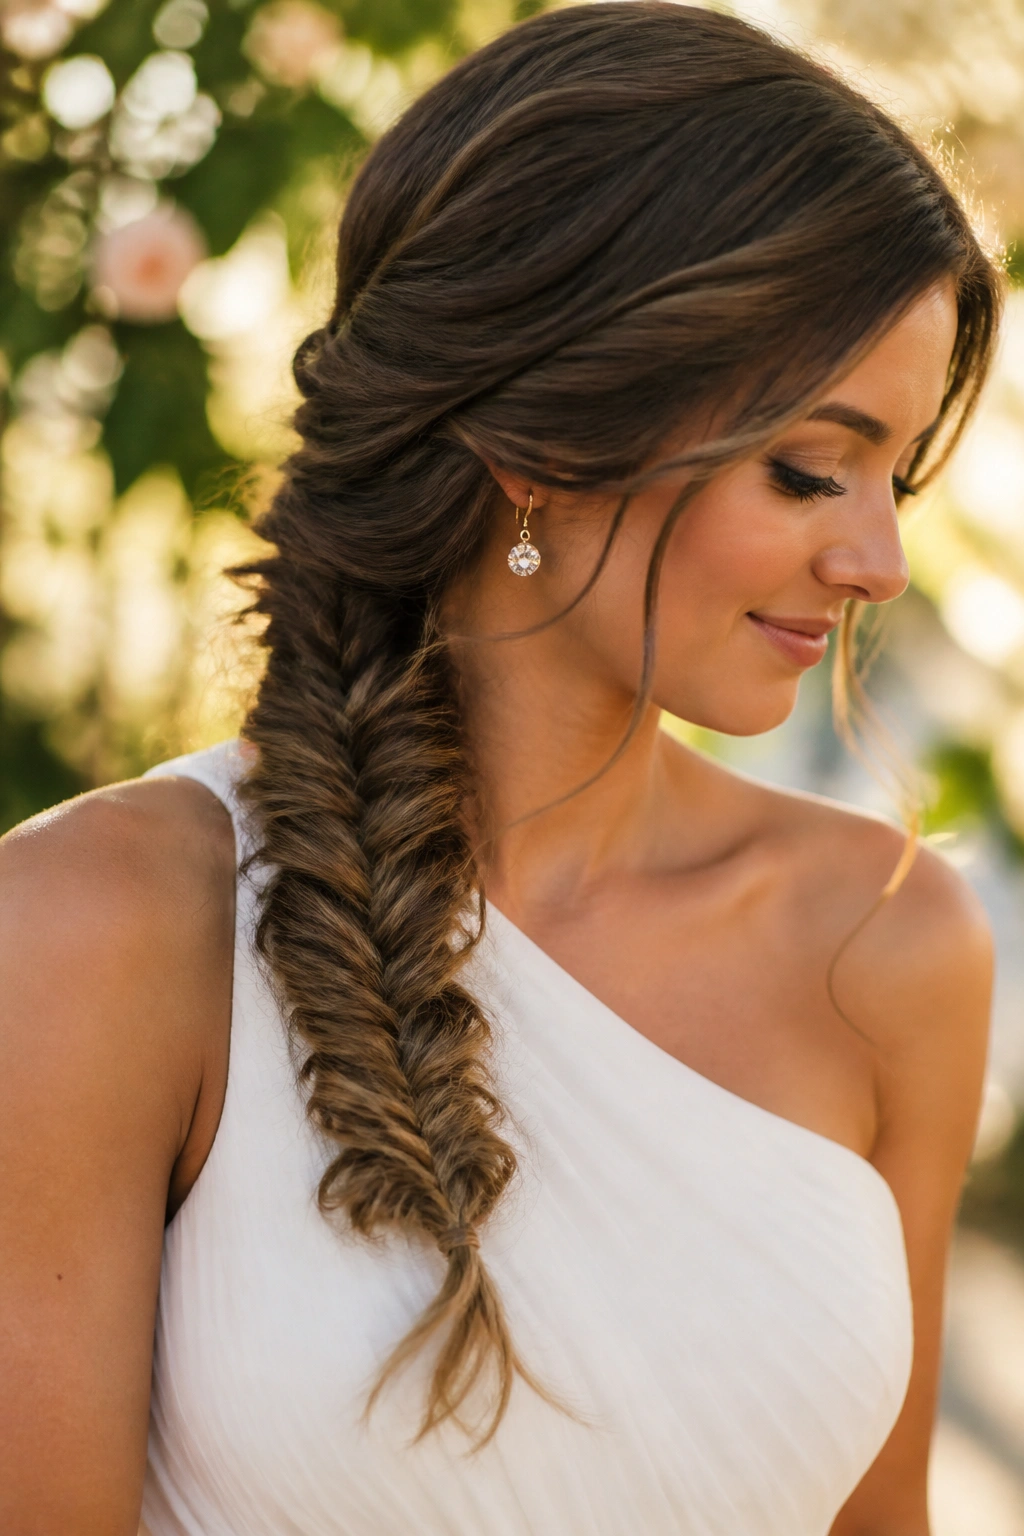
Want the braid to show from the front and the side at the same time? A side fishtail draped over one shoulder does that beautifully, especially with one-shoulder gowns or dresses that have extra detail on one side. It creates asymmetry on purpose, which can make the whole look feel more styled and less expected.
Styling Notes
The braid should start from a deep side part and travel diagonally across the back before resting over the shoulder. That diagonal line is what makes the style feel alive. If you keep it too centered, it loses the drama. Too far to one side and it starts to feel off-balance.
I like this version with brushed-out waves underneath, because the braid has enough pattern on its own. The loose side should stay smooth and tucked back so it doesn’t fight the fishtail. A small pin or two near the shoulder helps keep the braid from sliding forward during the ceremony.
- Best with statement earrings
- Works nicely for one-shoulder or off-shoulder dresses
- Use a light serum on the ends for shine
- Keep the braid loosely pancaked for a fuller line
The whole look has a little movement built in. That’s why it photographs so well in profile.
16. Braided Half-Up Bun with Soft Curls

This is the style I suggest when someone wants a little height but doesn’t want a full topknot. The braid feeds into a small bun at the back of the crown, while the rest of the hair falls in soft curls. It gives you lift without making the head look tall or top-heavy.
The bun should stay compact. Think golf-ball size or slightly larger, depending on hair thickness. If it gets too big, the style starts to look like a full updo with some hair left down, which is a different thing entirely. The braid is there to frame the bun and keep the front sections tidy.
Soft curls around the face make this style feel gentle instead of strict. I usually leave two slim pieces out near the cheeks and curl them away from the face with a medium barrel iron. That keeps the look from feeling boxed in.
- Secure the bun with 3 to 5 pins, depending on thickness
- Place the braid just behind the crown
- Leave the ends curled, not tucked away
- Good choice if you need a stable base for a veil comb
This one feels quietly formal. It doesn’t shout, and that’s part of why it works.
17. Twisted Half-Up Style for Natural Coils
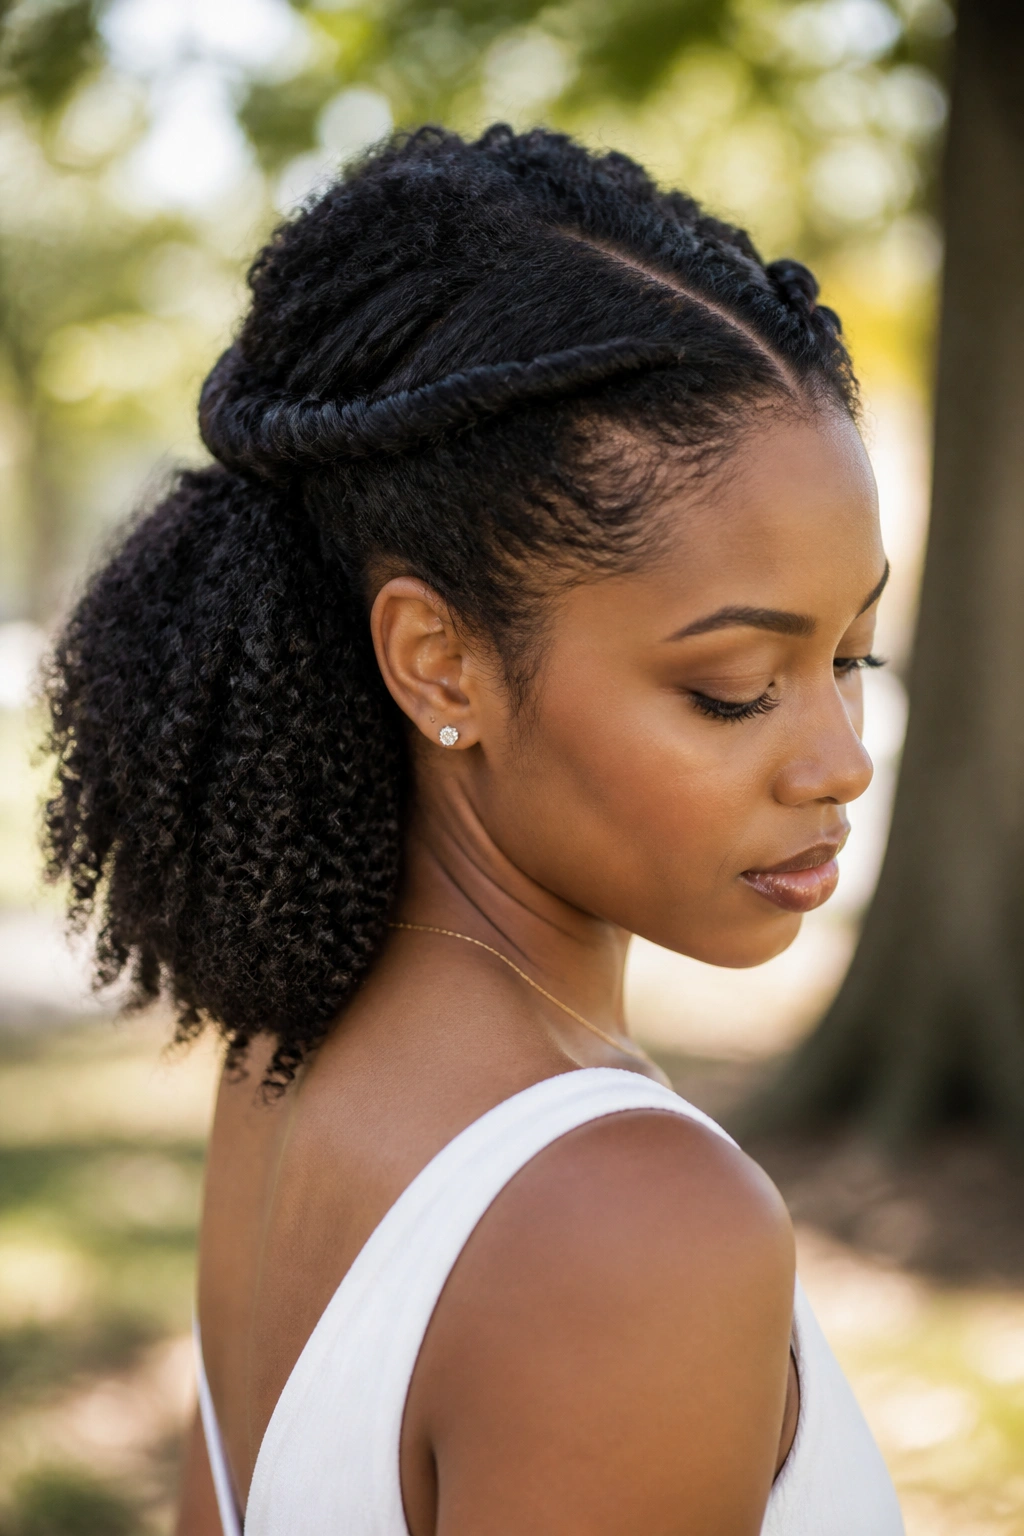
Natural coils deserve their own space in wedding hair, not a forced version of someone else’s braid idea. A twisted half-up style keeps the front controlled while letting the texture in the lengths stay honest. If the hair is stretched, the twists show clearly; if it’s in a twist-out or soft blowout, the shape gets even more body.
I like using two flat twists or braided sections from the temples that meet near the back, then pinning them over a defined puff, curly half-down length, or stretched coils. That keeps tension low around the hairline and lets the front look polished without pulling hard on the edges. A braided style like this can be protective when it’s done gently. When it’s done too tight, it stops being protective very fast.
The finish can go in a few directions. A satin-covered pin gives a soft, elegant look. Small gold cuffs give a little shine. If the curls are fuller, skip extra accessories and let the texture hold the attention on its own. It already has enough shape.
For brides wearing locs, this idea still works. The twist or braid sections can anchor the top half while the locs hang loose and styled underneath. It’s neat, secure, and still feels like the hair belongs to the person wearing it.
18. Minimalist Braid Crown with Sleek Lengths

Some wedding looks need less decoration, not more. A minimalist braid crown gives you a clean band of braid across the top, then leaves the lengths straight and glossy underneath. It’s the style I’d hand to a bride wearing a modern satin dress, a sharp blazer, or jewelry that already does plenty of talking.
The braid itself should be narrow and controlled, almost like a trim rather than a feature. Start just behind one temple, bring it across the crown, and pin it flat so the rest of the hair can stay smooth. That contrast between the braided top and the sleek lengths is what makes the look feel intentional.
This style is good when the dress has strong lines. It keeps the hair from competing with the outfit. It also works if you want something that feels less romantic and more crisp. A center part, polished ends, and one clean braid band can look far more modern than a pile of curls.
I like this one for brides who wear bold lipstick or statement earrings. The hair stays quiet, which gives the rest of the look room. And that restraint can be the smartest move in the room.
