



Tight curls and coily hair do not need taming. They need the right shape, the right tension, and a little respect for shrinkage.
That’s the part people miss. A style can look polished in the chair and still fall apart on the walk to the car if it fights the texture instead of working with it. The best hairstyles for tight curls and coily hair tend to do three things at once: protect the hairline, give the curl pattern room to spring, and hold up when you sleep on them. Not every style has to be a protective style in the strict sense, but it should behave like one.
I also think there’s a big difference between a style that is merely cute and one you’ll actually wear for three or four days without getting annoyed. The second one matters more. Every time.
1. Wash-and-Go for Tight Curls
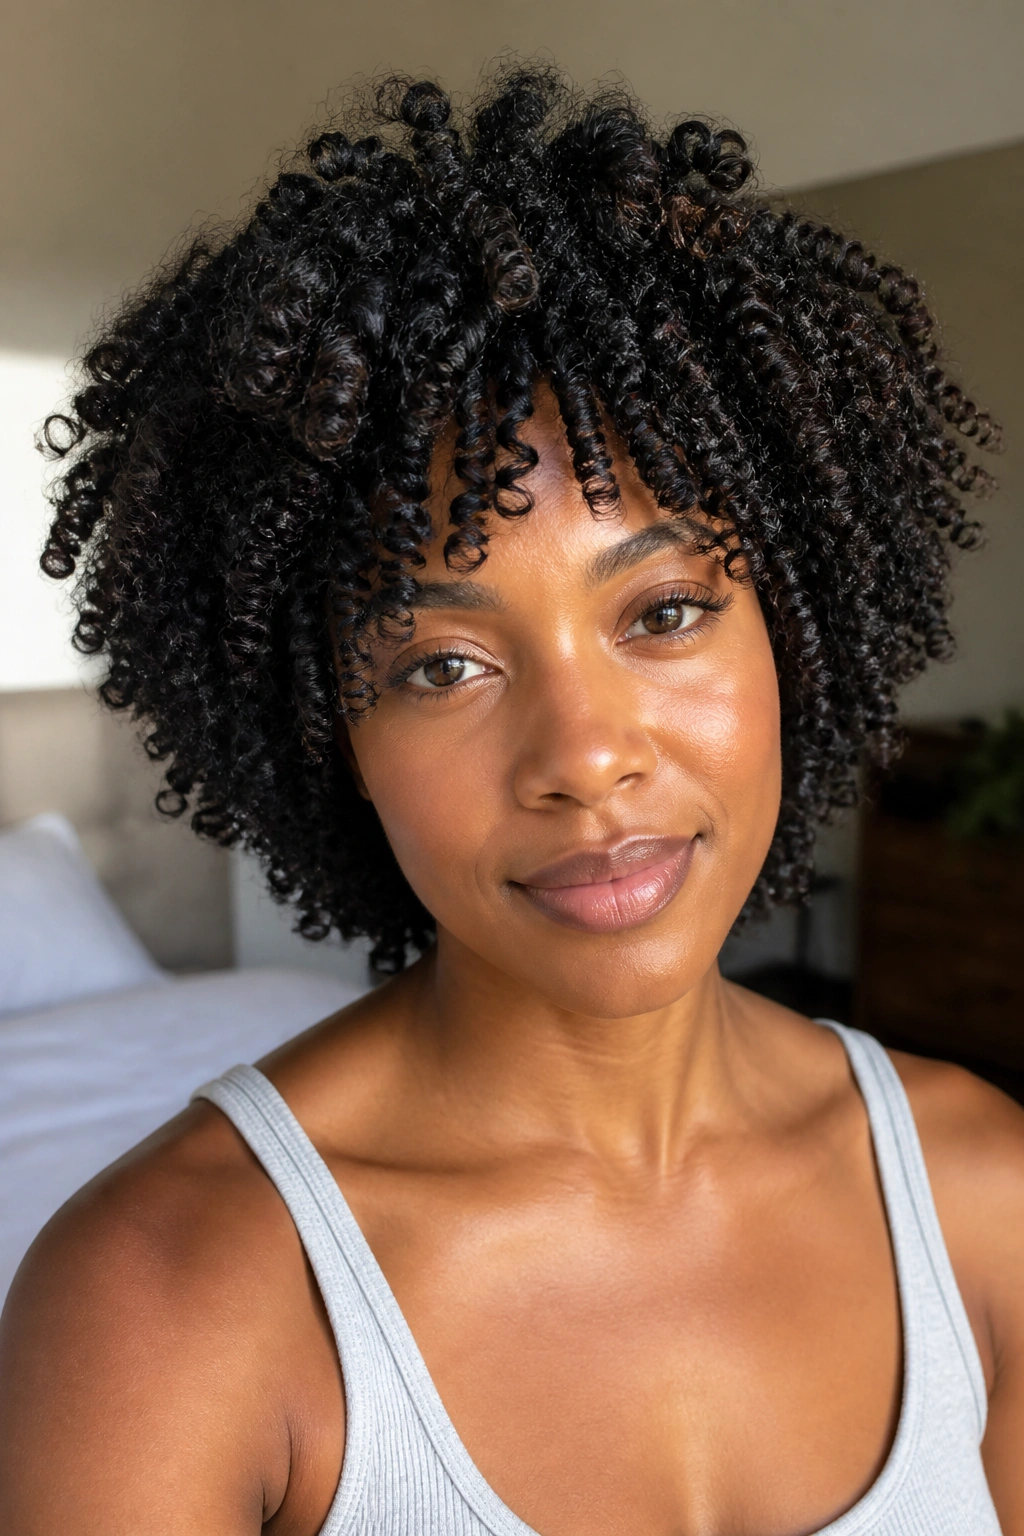
A good wash-and-go is not “do nothing and hope for the best.” It’s a very intentional curl set that lets tight coils dry into a defined shape instead of a fluffy blur.
Why It Works on Tight Curls
The trick is water, hold, and patience. Tight curls and coily hair usually need more product than looser textures because the curl pattern has more bends, more surface area, and more places for frizz to sneak in. Start on soaking-wet hair, smooth in a leave-in, then layer a strong-hold gel or cream-gel over small sections. That tiny bit of sectioning makes a huge difference.
- Use four to eight sections so every coil gets coated evenly.
- Rake product from roots to ends, then scrunch upward.
- Air-dry if you want maximum softness, or diffuse on low heat for faster drying.
- Don’t touch the hair until the cast is dry. Seriously.
A wash-and-go works best when you want shape, spring, and lots of curl definition with no added braids or twists. If your coils are dense, a wash-and-go can shrink up more than you expect, so the silhouette may look shorter than it feels. That is normal. It’s part of the charm.
2. Two-Strand Twists for Coily Hair
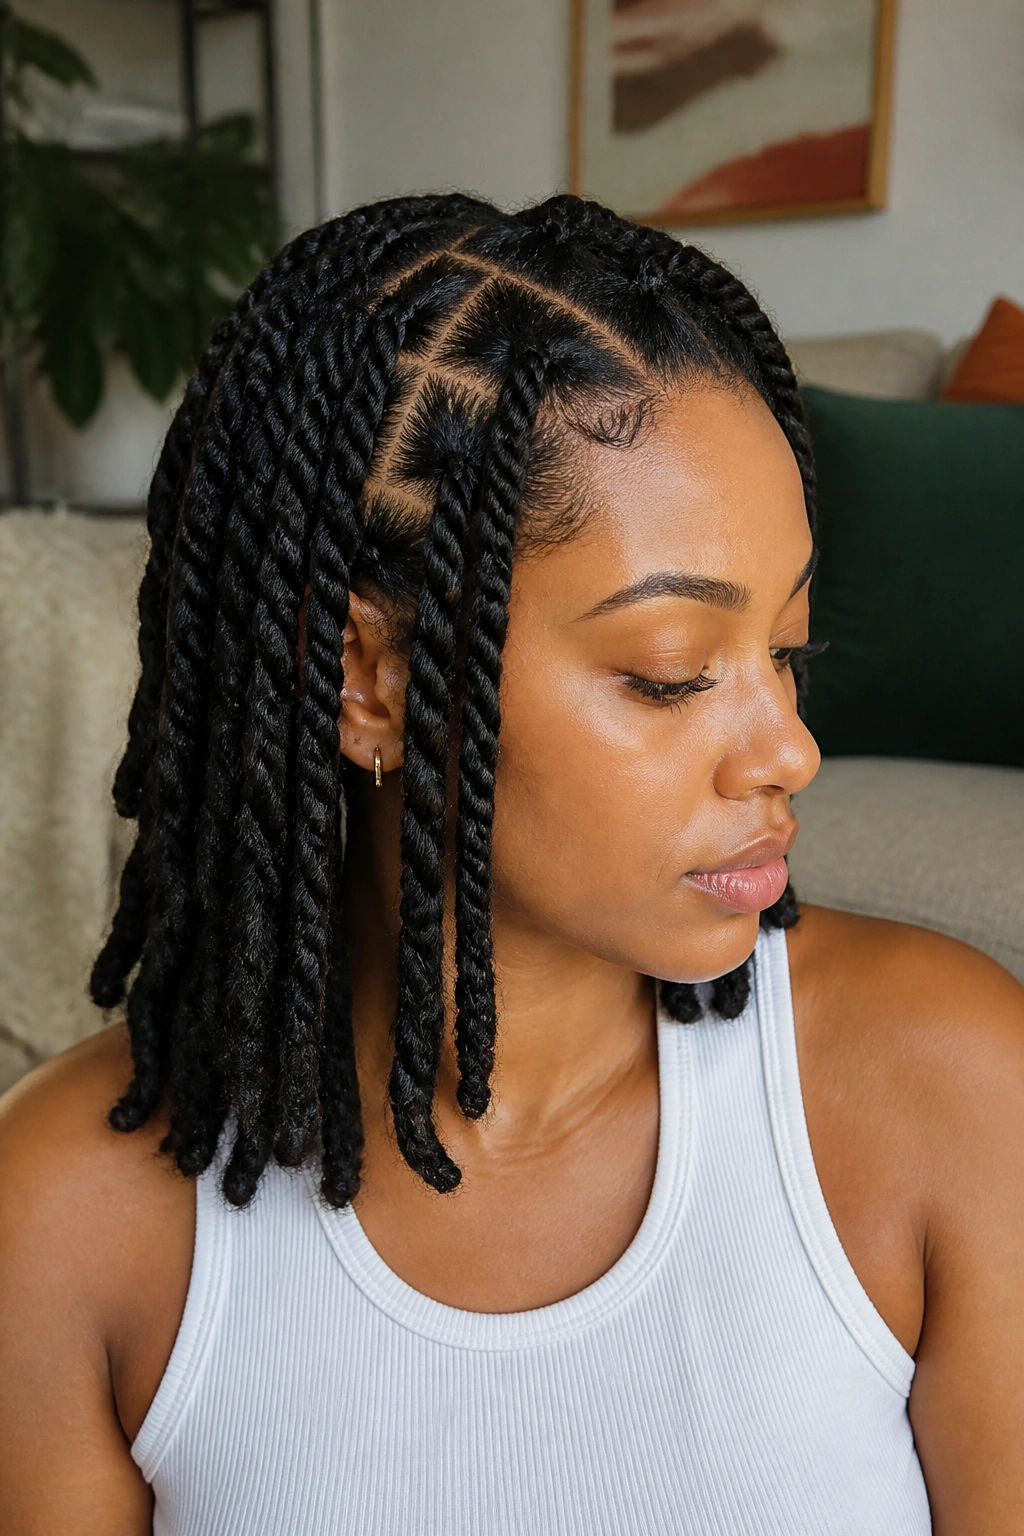
Two-strand twists are the quiet workhorse of coily hair styling. They look neat, they stretch the hair a little, and they can stay in place long enough to make your week less annoying.
What I like about twists is that they do not demand perfection. A part can be slightly crooked and the style still reads as clean. Once the hair is moisturized and detangled, twist in medium-sized sections if you want a faster install, or go smaller if you want more definition and more days of wear. Smaller twists usually hang longer; bigger twists give a fuller, chunkier look.
Sleep in a satin bonnet or on a satin pillowcase, because cotton will rough up the twist pattern fast. You can wear twists out as a style, pin a few back, or unravel them into a twist-out later. That flexibility is the whole appeal. They’re also one of the easier styles to refresh with a little water and leave-in on the ends.
3. Braid-Outs for Stretched Coils
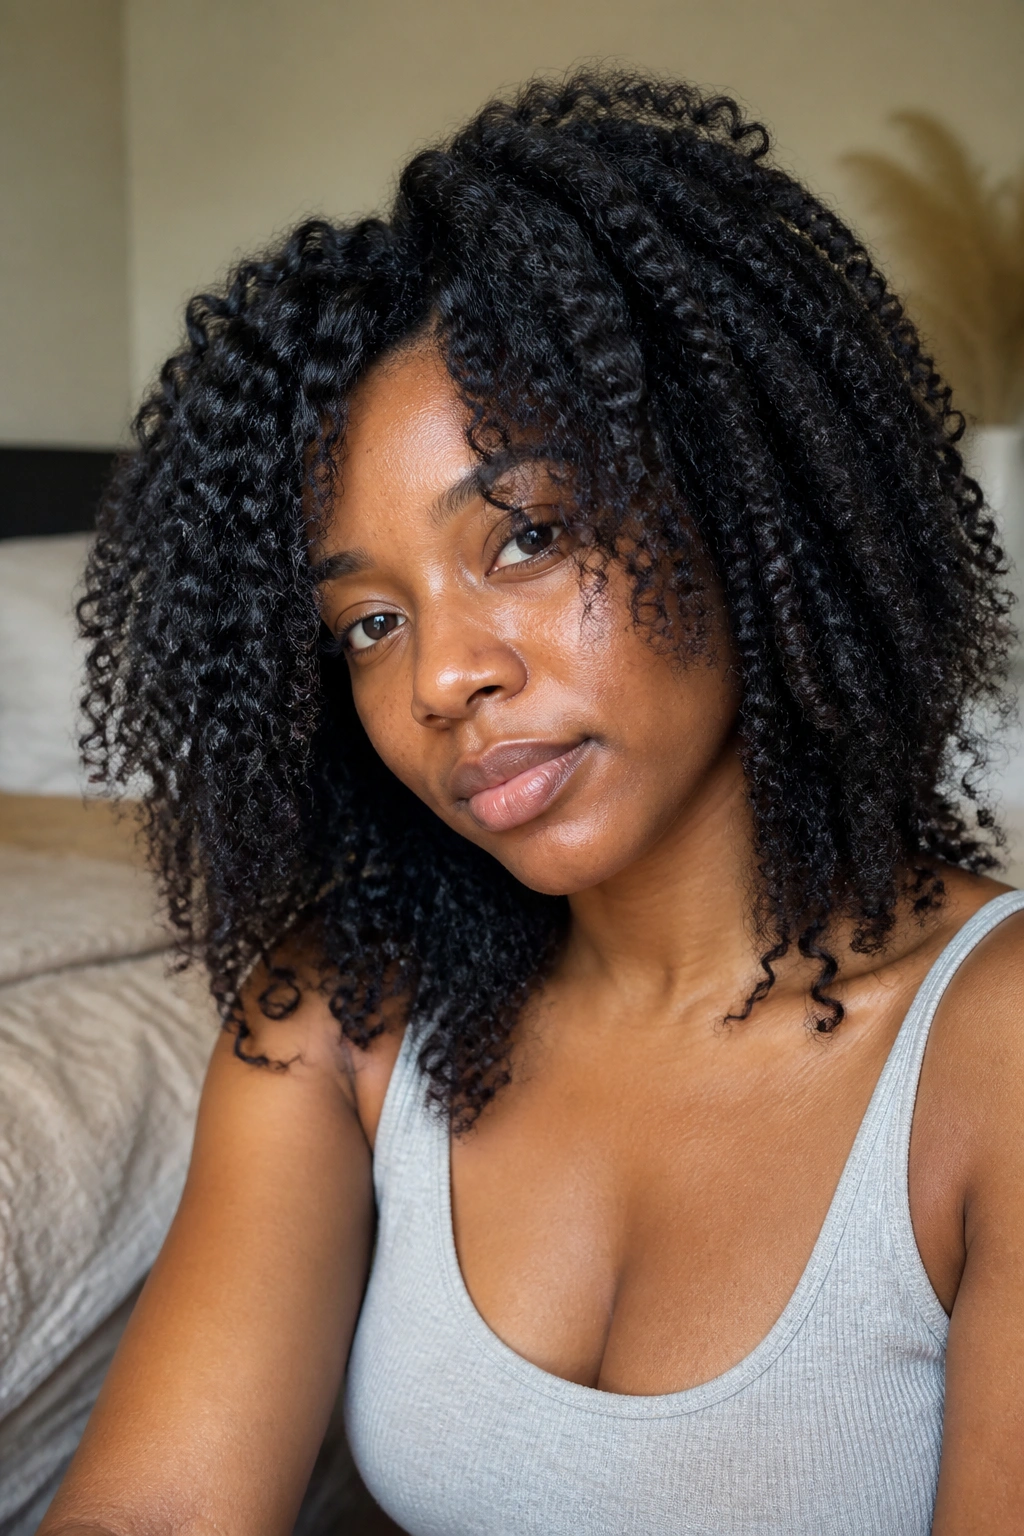
Why do braid-outs sometimes look fuller than twist-outs? Because braids give the hair a different kind of stretch and a more zigzag texture when you take them down.
How to Get the Most From It
A braid-out is a smart move when your hair loves shrinkage but you want a little length showing. Start on damp hair, not dripping wet hair, and work in medium sections. Three-strand braids create a smoother wave pattern, while larger braids create more volume and less curl clumping. If your hair is very dense, smaller braids can help the finished style look more even.
Let the braids dry all the way. Not almost dry. All the way. If the inside is still damp, the pattern falls flat and frizz shows up early.
- Use a creamy leave-in for slip.
- Add a light gel or setting foam if you want the braid-out to hold longer.
- Unbraid with oiled fingers, then separate only once or twice.
- Stop separating when the shape looks balanced, not when every strand is separated.
The best braid-outs have body at the roots and soft bends through the lengths. They should move when you turn your head. Not stiff. Not crunchy. Just shaped.
4. High Puff
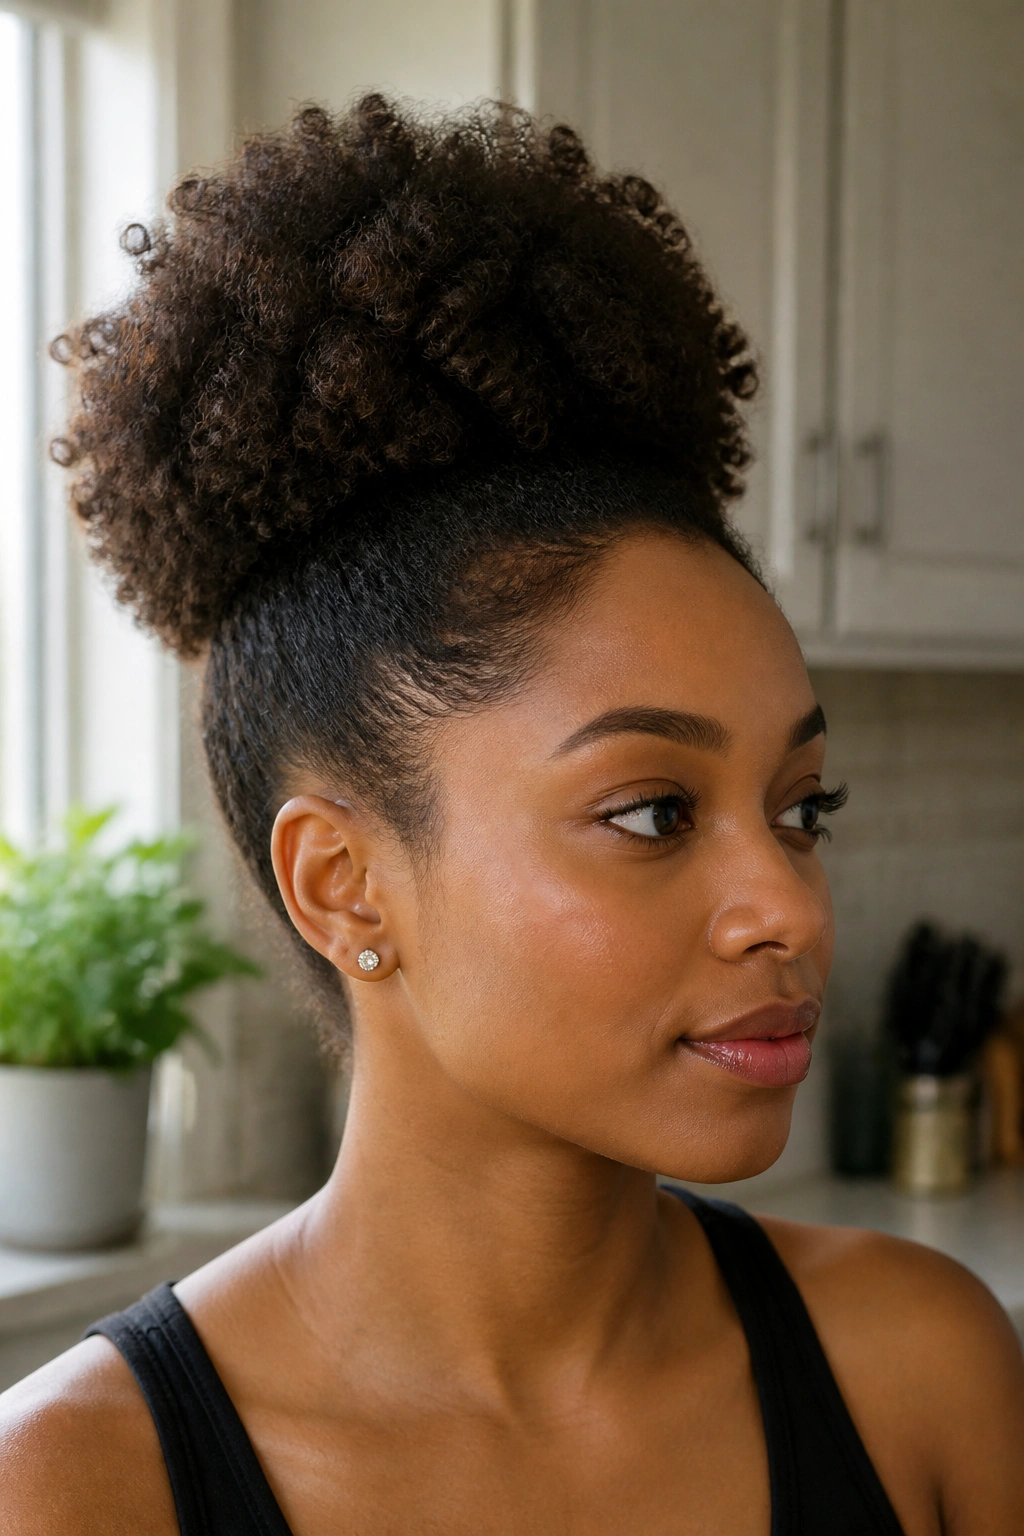
The high puff is the quickest way to make tight curls look intentional on a rushed morning. It pulls the hair upward, keeps the shape off your neck, and shows off the texture at the crown.
Use a soft brush or your hands to gather the hair where the puff feels comfortable, then secure it with a stretchy band or puff cuff that does not pinch. Too much tension around the hairline will show up later as soreness, and that is not worth it. A little edge control can smooth the front, but you do not need a shellacked hairline for this style to work.
The best high puffs have a round shape and a bit of lift at the front. If your hair is thick, let the puff be thick. Don’t fight it into a smaller shape just because a mirror made you nervous. The volume is the point.
This one works especially well on medium to long coily hair, but even shorter hair can fake the shape with a little fluffing and a wide headband.
5. Low Puff With a Side Part
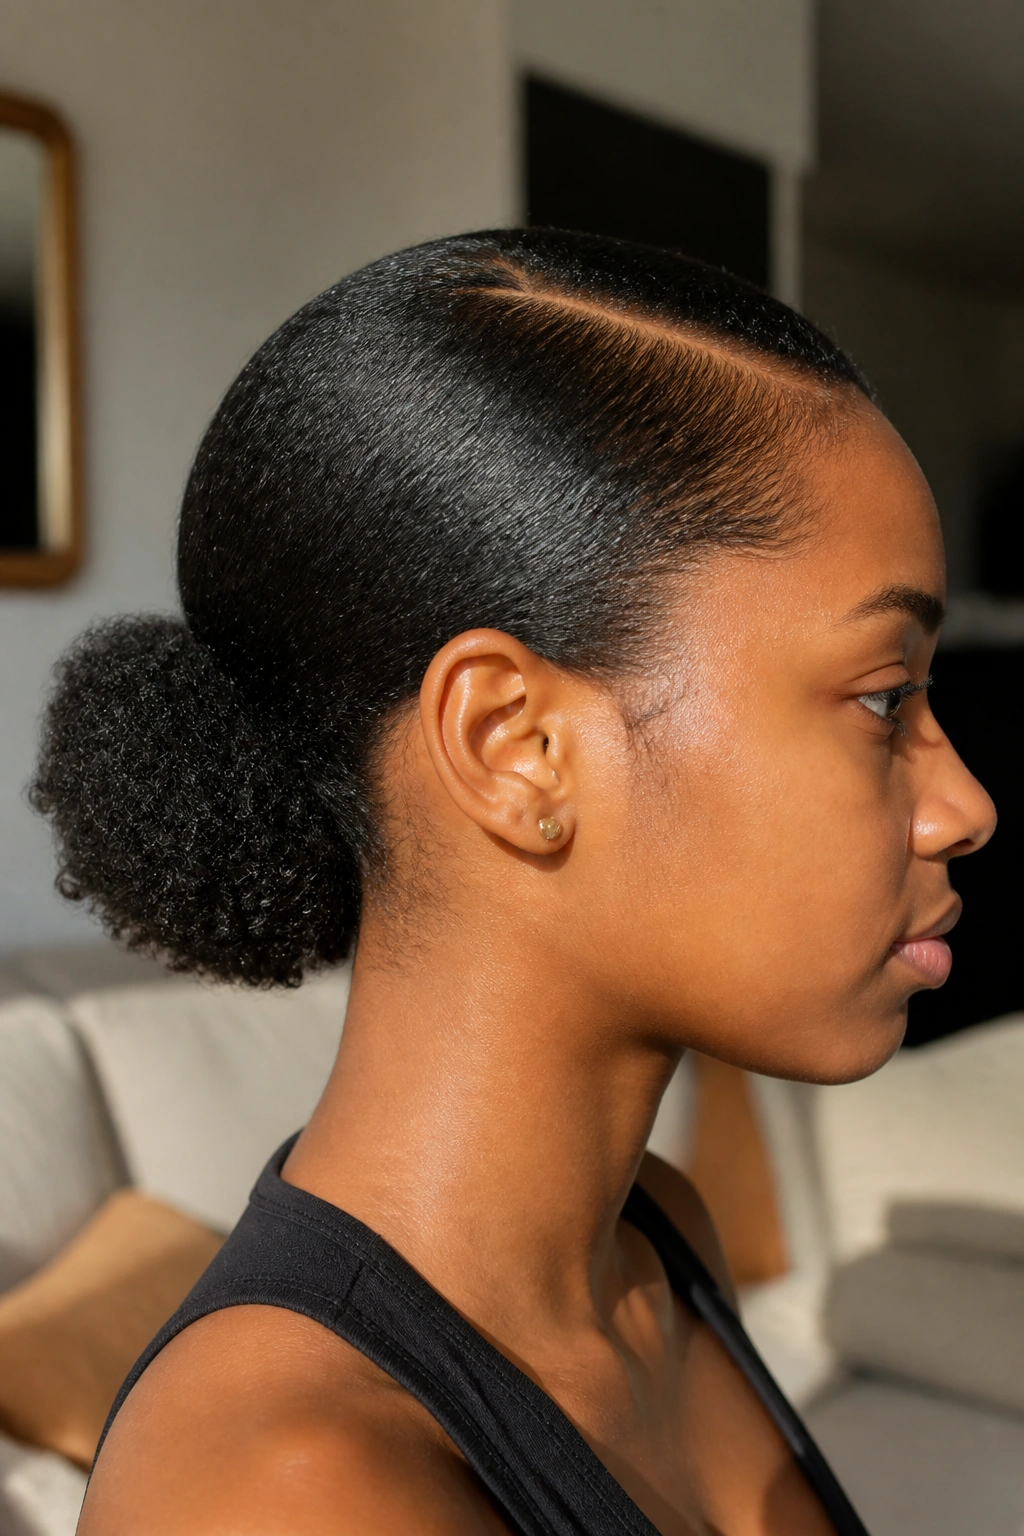
A low puff feels calmer than a high puff. Less drama. More polish.
That side part changes everything. It gives the style direction, and direction makes coily hair look groomed instead of random. Smooth the front with a brush or wide-tooth comb, part the hair cleanly, and gather the curls low at the nape. A satin scrunchie or drawstring puff maker keeps the base neat without crushing the curl pattern too hard.
Unlike a high puff, a low puff sits under hats better and works well when you want something that looks finished but still relaxed. It is also a good choice if your scalp gets tired from very high tension styles. Some mornings, that matters more than the look in the photo.
If your ends are dry, mist them lightly before gathering the puff. They’ll look softer and won’t puff out in weird directions by midday. A little shaping cream on the surface can help too, but keep it light. Heavy product just leaves the roots greasy.
6. Flat Twists Into a Low Bun
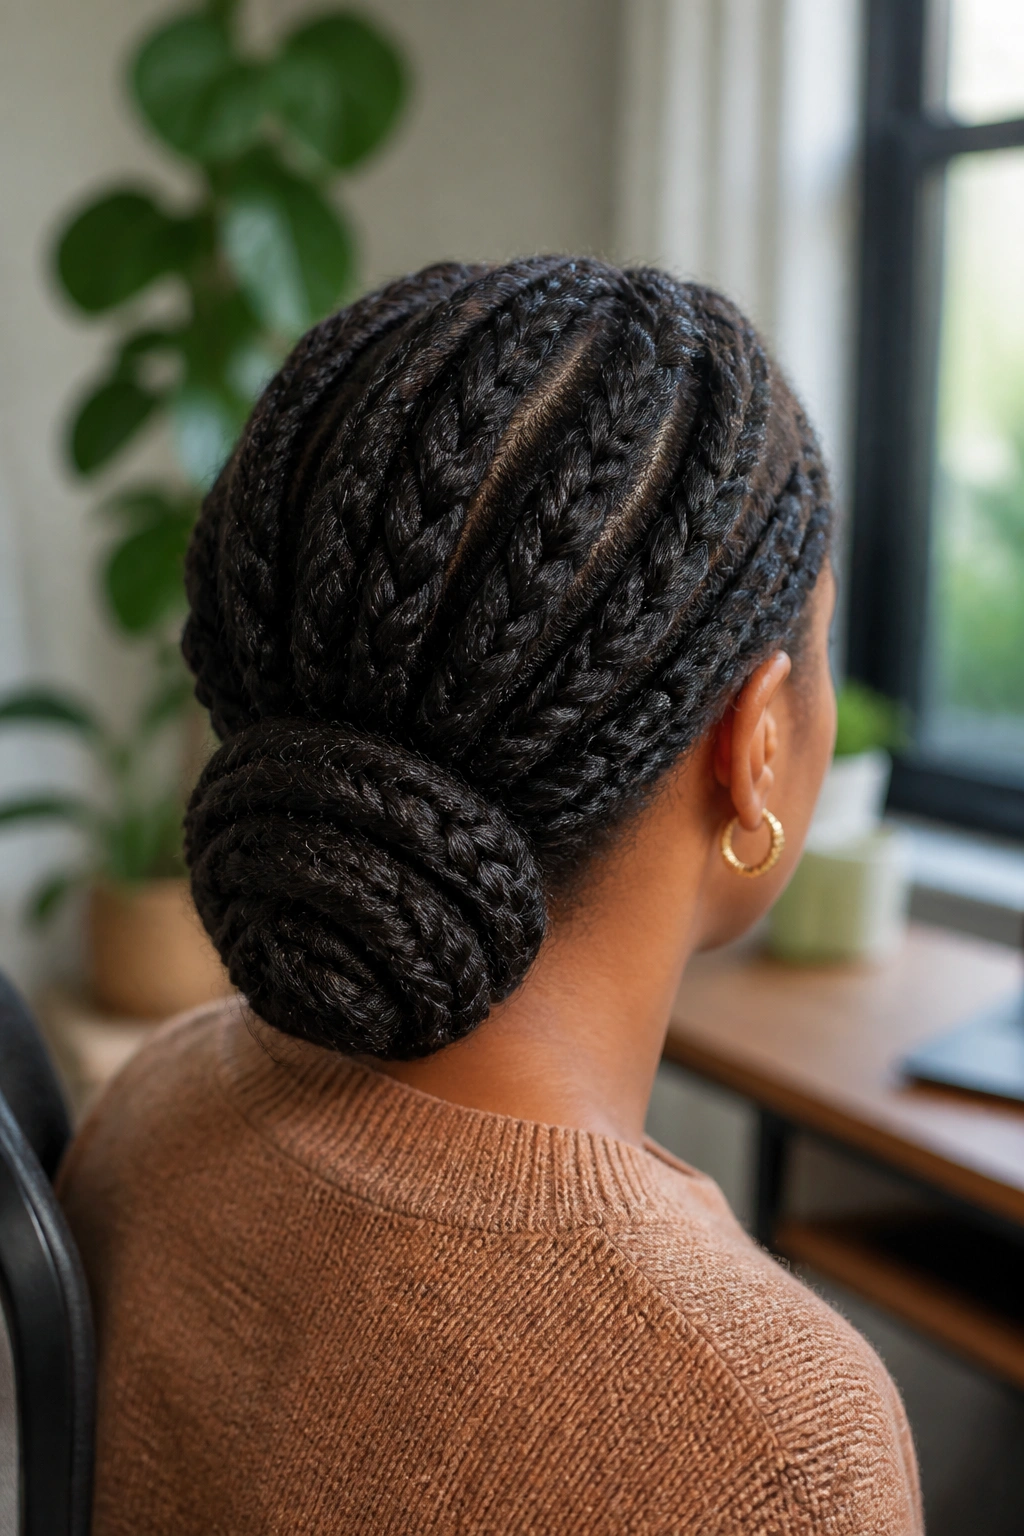
Flat twists into a low bun are the style I reach for when I want the hair to stay put and still look like someone cared.
A friend once described this kind of style as “office hair that can survive a nap,” and that feels right. The front stays smooth, the twists guide the eye back, and the bun at the nape gives the whole thing a finished shape. Start with stretched hair if you can. It makes the twists lie flatter and reduces the chance of the bun looking bulky in the back.
Best for a Neat Finish
- Medium to long coils that need to stay controlled for a few days.
- Hair that tangles easily and needs low manipulation.
- Days when you want your ends tucked away.
The one thing to watch is tension at the temples. Flat twists should lie snug, not tight enough to make your scalp complain. If the bun feels lumpy, pin the base before wrapping the ends. That tiny step saves the whole style.
7. Bantu Knots for Coily Hair
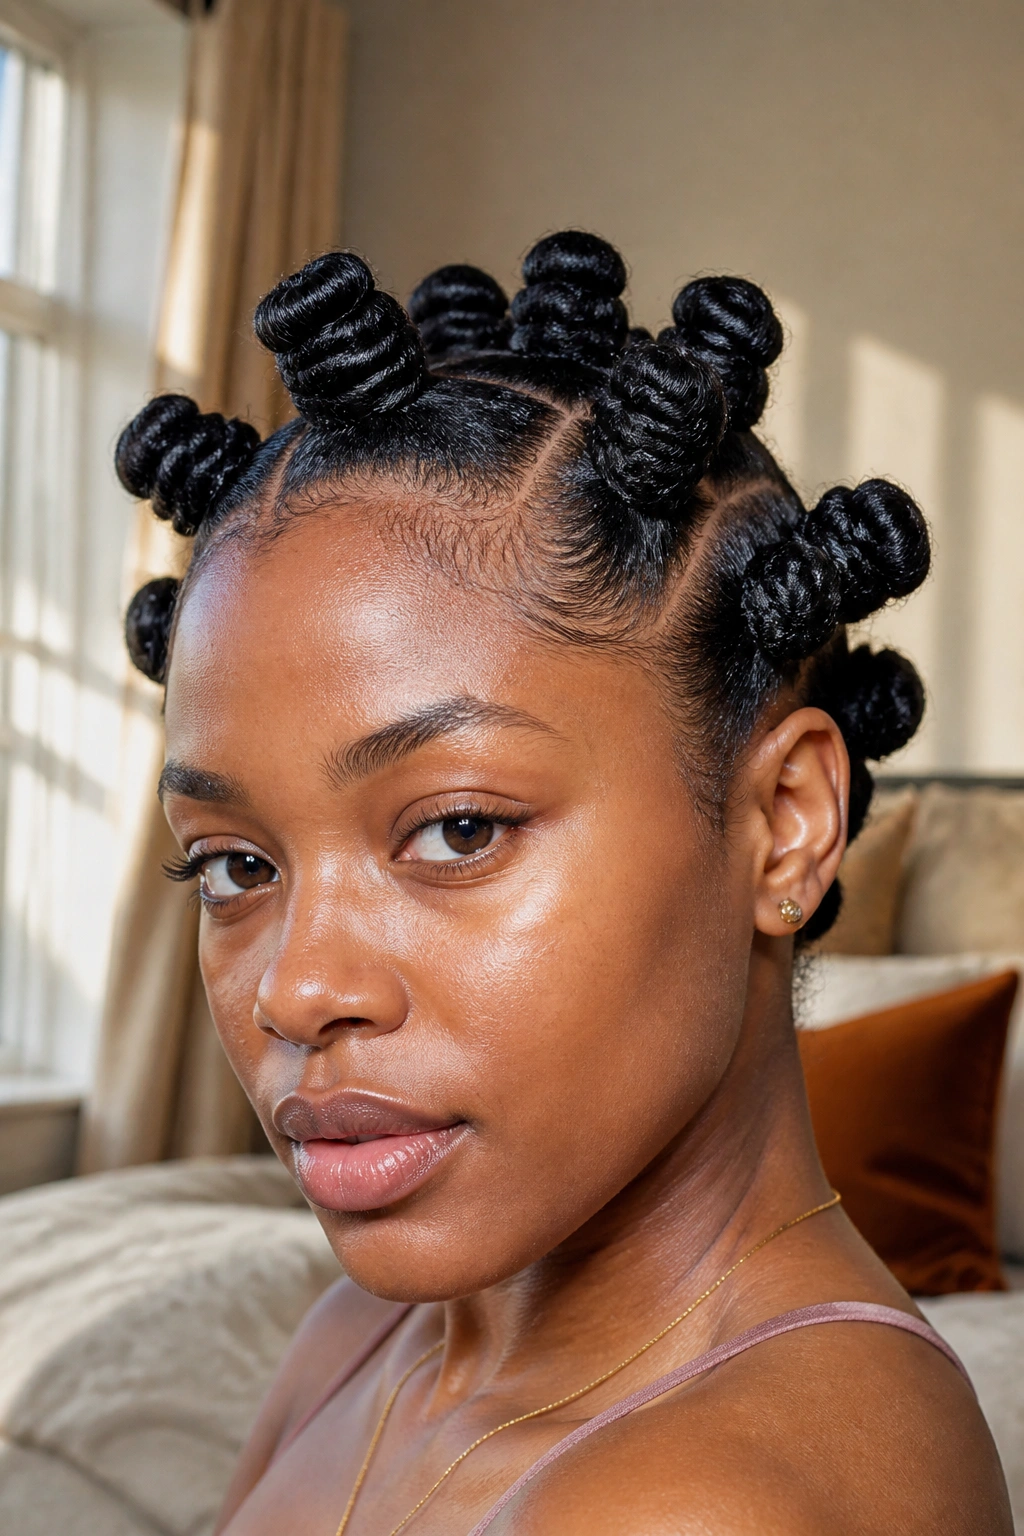
Bantu knots are sculptural, practical, and a little bold. They are also one of the few styles that can double as a set for a later curl-out if you want more than one look from the same install.
The size of each knot matters. Smaller knots create tighter curls when taken down; larger knots make a looser bend and read more like a statement style while they’re in place. Work on moisturized hair, then twist each section until it coils into a knot that sits flat against the scalp. Do not yank the base too hard. A knot that hurts will not become prettier an hour later.
What to Watch For
- Keep sections even so the knots sit at the same height.
- Use a cream with slip, not a greasy layer that slides apart.
- Pin stubborn knots with a small bobby pin if needed.
- Let the hair dry fully before taking them down for a knot-out.
I love Bantu knots because they look deliberate from every angle. No hiding. No pretending. They are the style equivalent of saying exactly what you mean.
8. Chunky Cornrows With Loose Ends
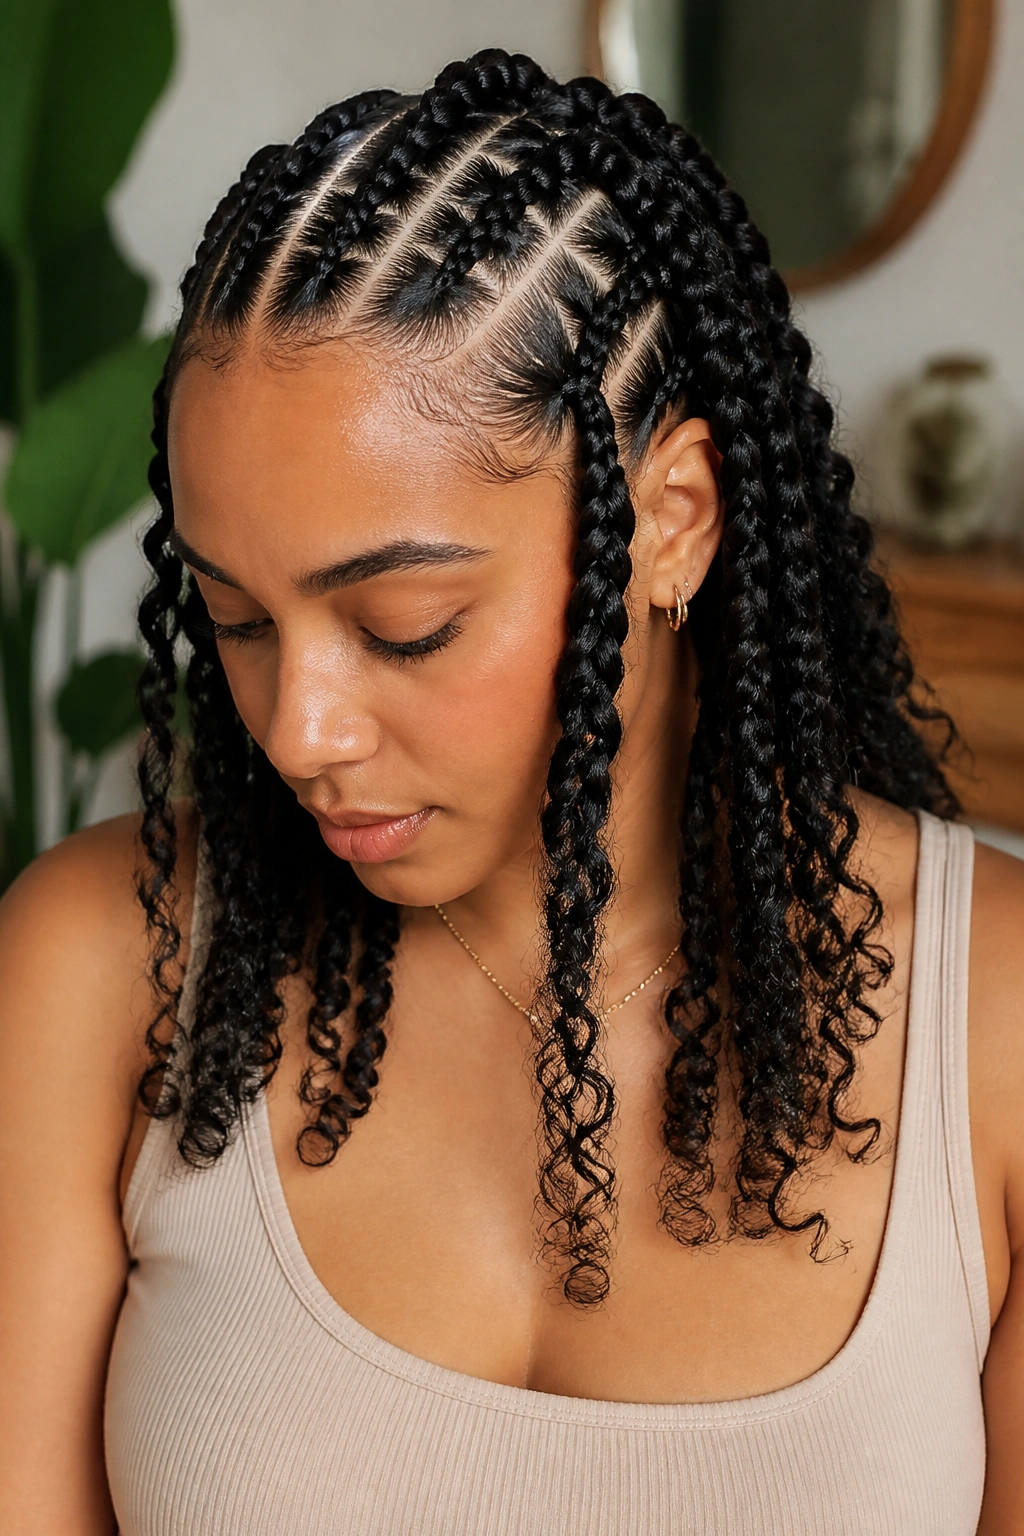
Chunky cornrows are strong, clean, and excellent when you want the front and sides to behave while the ends keep some texture and softness.
That combination is the whole point. The scalp gets a neat, low-manipulation base, and the loose ends keep the style from feeling too severe. You can wear the ends in their natural coil pattern, braid them for more stretch, or curl them with rods if you want a softer finish. The contrast is what makes the style interesting.
A clean part helps a lot here. So does starting on hair that has been lightly stretched, because cornrows sit flatter when the root area is easier to control. If your hair is very thick, do not make the rows too skinny. Bigger rows reduce install time and tend to hold better.
The style works for school, work, travel, and those weeks when you need your hair out of your face without spending every morning wrestling with it. It’s practical. That matters.
9. Halo Braid Around the Hairline
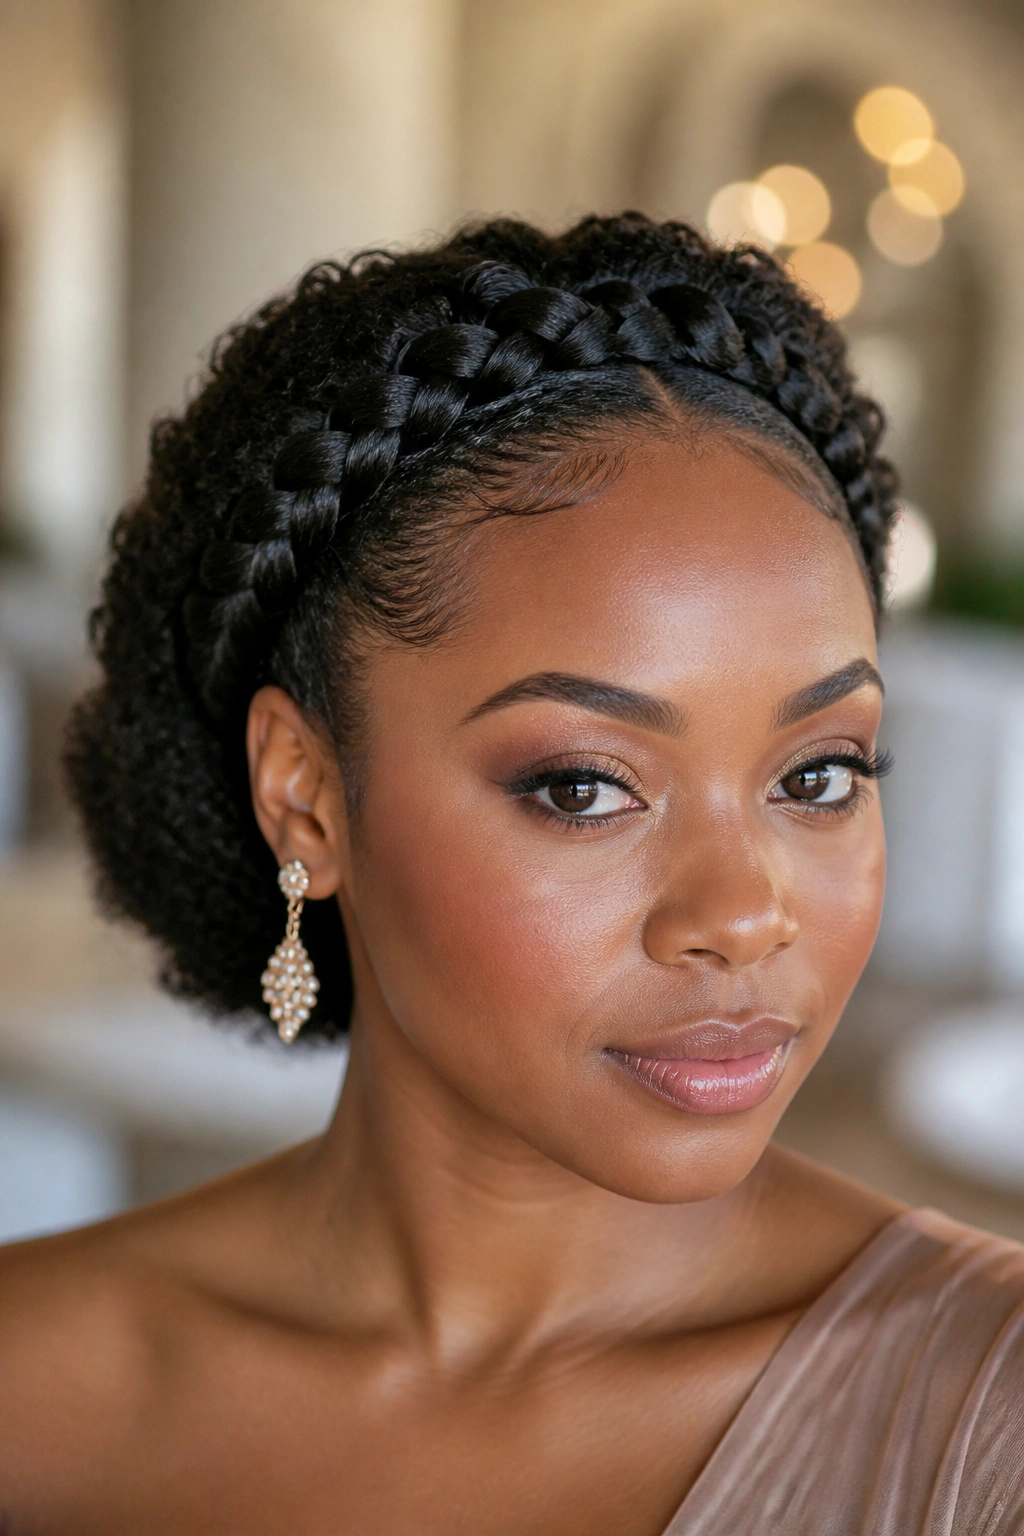
Why does a halo braid look harder than it is? Because the braid follows the head shape, and that always looks fancy, even when the actual technique is straightforward.
Start by parting the hair in a circle or by braiding from one temple around the crown and tucking the ends away. On tight curls and coily hair, a halo braid usually sits best when the hair is stretched a little first. Not bone straight. Just stretched enough that the braid can lie flat without puffing up in random spots.
How to Keep It Smooth
- Use a rat-tail comb for a clean part.
- Keep the braid close to the hairline without pulling the edges.
- Pin hidden sections underneath the braid so the shape stays anchored.
- Smooth the perimeter with a light cream or gel before braiding.
This style is a favorite for events because it frames the face and keeps the neckline clean. It also works when you want to show earrings, a bold collar, or a strong eyebrow shape. Yes, that counts.
10. Mini Twists for Tight Curls
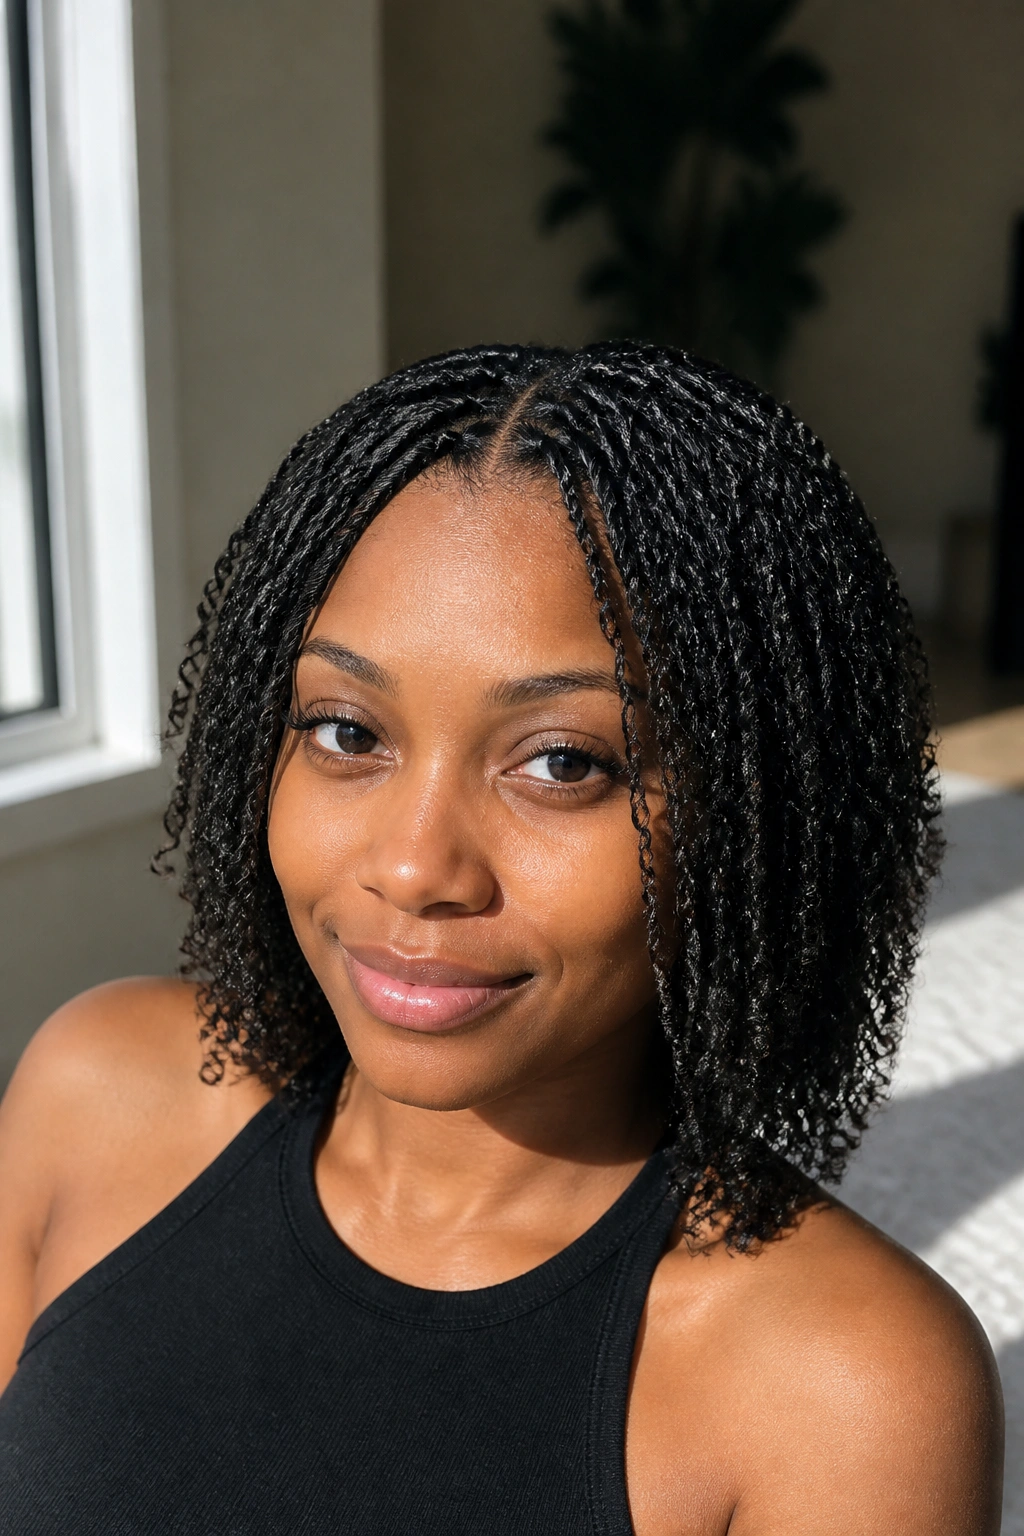
Mini twists are one of the most useful hairstyles for tight curls and coily hair because they stretch the hair, protect the ends, and still look neat after several sleeps.
The key detail is section size. Too large, and the twists unravel faster. Too tiny, and you spend half your evening at the mirror. Aim for small, even parts that let each twist hang without snapping back too hard at the root. A good leave-in and a little twisting cream help the hair stay smooth while you work.
The Part That Matters Most
Use enough product to give slip, but not so much that the twists feel coated and sticky. That sticky feeling usually means buildup later. Nobody needs that.
- Smaller twists last longer and give more separation.
- Medium twists install faster and create a fuller look.
- Stretched hair makes the style hang better.
- Satin at night keeps the parts neat and the ends from fuzzing up.
Mini twists are great when you want a style that can move between casual and tidy without much effort. They’re not flashy. They’re dependable. That’s a good thing.
11. Mini Braids
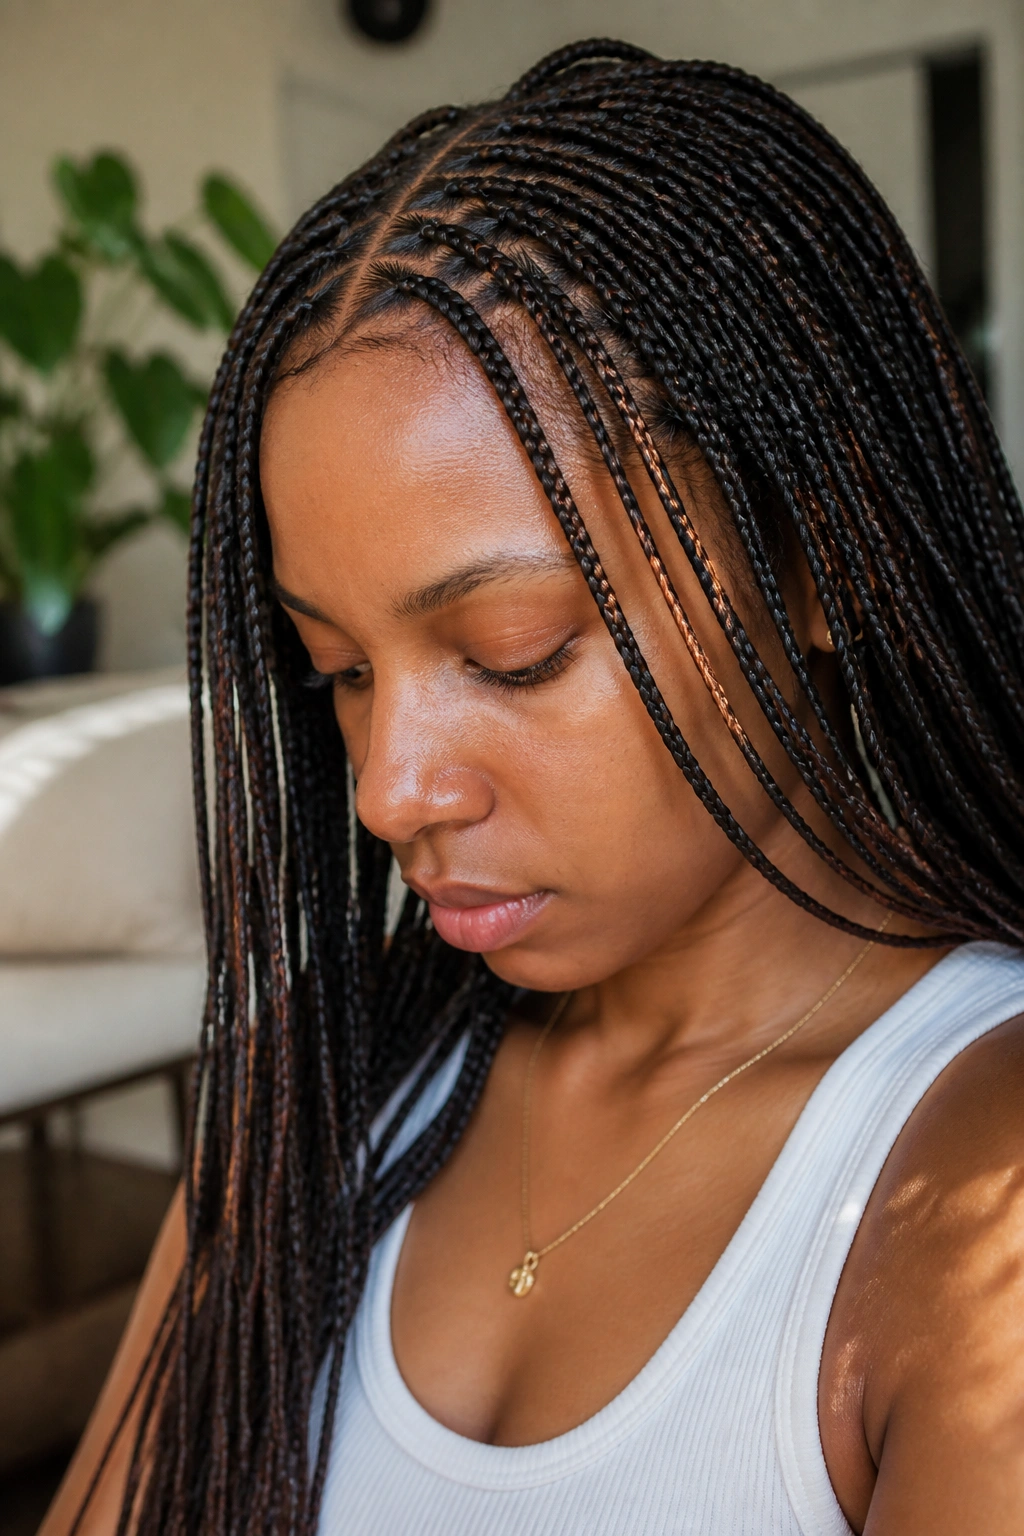
Mini braids are like mini twists’ more precise cousin. They create crisp parts, a tighter look at the root, and a slightly different fall through the lengths.
The difference shows up after a few days. Braids tend to keep their structure a bit longer, especially if your hair is prone to unraveling. They also look sharper on hair that has been stretched beforehand. If you want a more defined, almost woven look, mini braids do that better than twists.
This style takes patience. There’s no way around it. But the payoff is a tidy base that can be worn down, tucked into a bun, or pinned back with one side left loose. If your scalp gets tender easily, braid with a light hand and take your time. A style that starts too tight will not improve on day two.
Mini braids are one of those styles I recommend when someone wants longevity more than softness. They keep their shape.
12. Faux Hawk With Pinned Sides
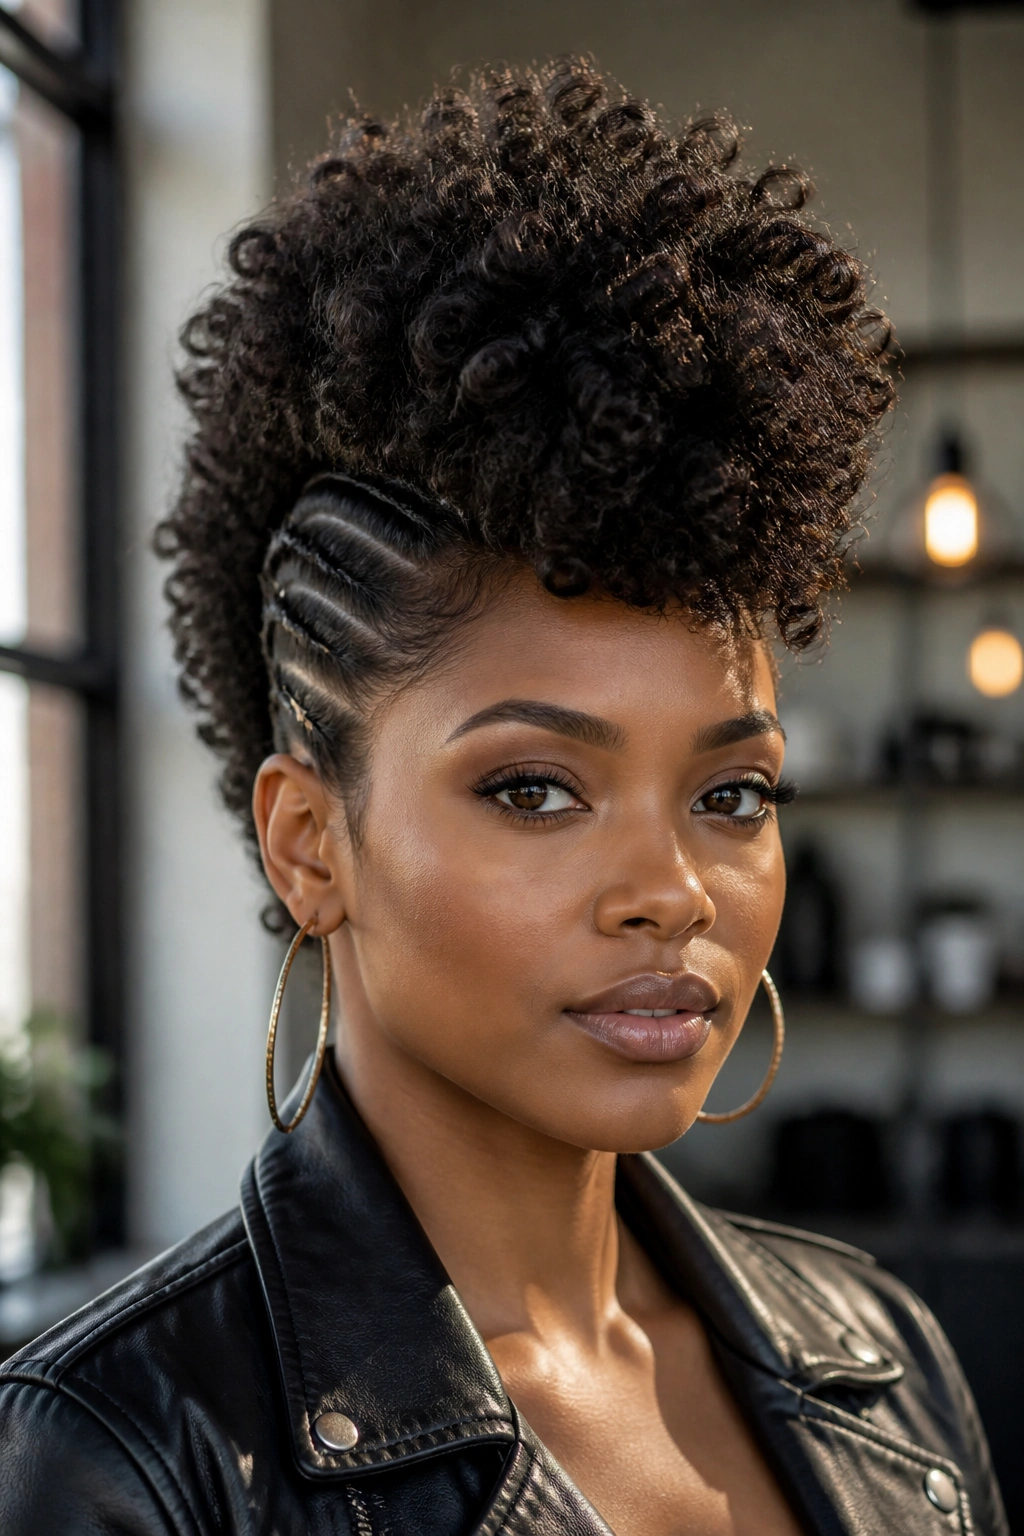
A faux hawk gives coily hair some attitude without forcing you into a drastic cut. The center section does the talking; the sides stay pinned, braided, or twisted back.
I like this one because it turns density into shape. Instead of flattening the hair, you build height through the middle and keep the edges clean. You can start with cornrows on the sides, flat twists, or simple pinning if your hair is stretched enough to stay put. The middle can be a puff, a set of twists, or loose curls with a bit of lift at the roots.
The style reads bold, but it does not have to be complicated. That’s the nice part. Keep the sides secure, make the center section the tallest point, and let the texture do the rest.
If your hair is longer, you can braid or twist the center back before pinning it up. If it’s shorter, fluff the top with a pick and shape it into a strip down the middle. Either way, the silhouette is what people notice first.
13. Space Buns
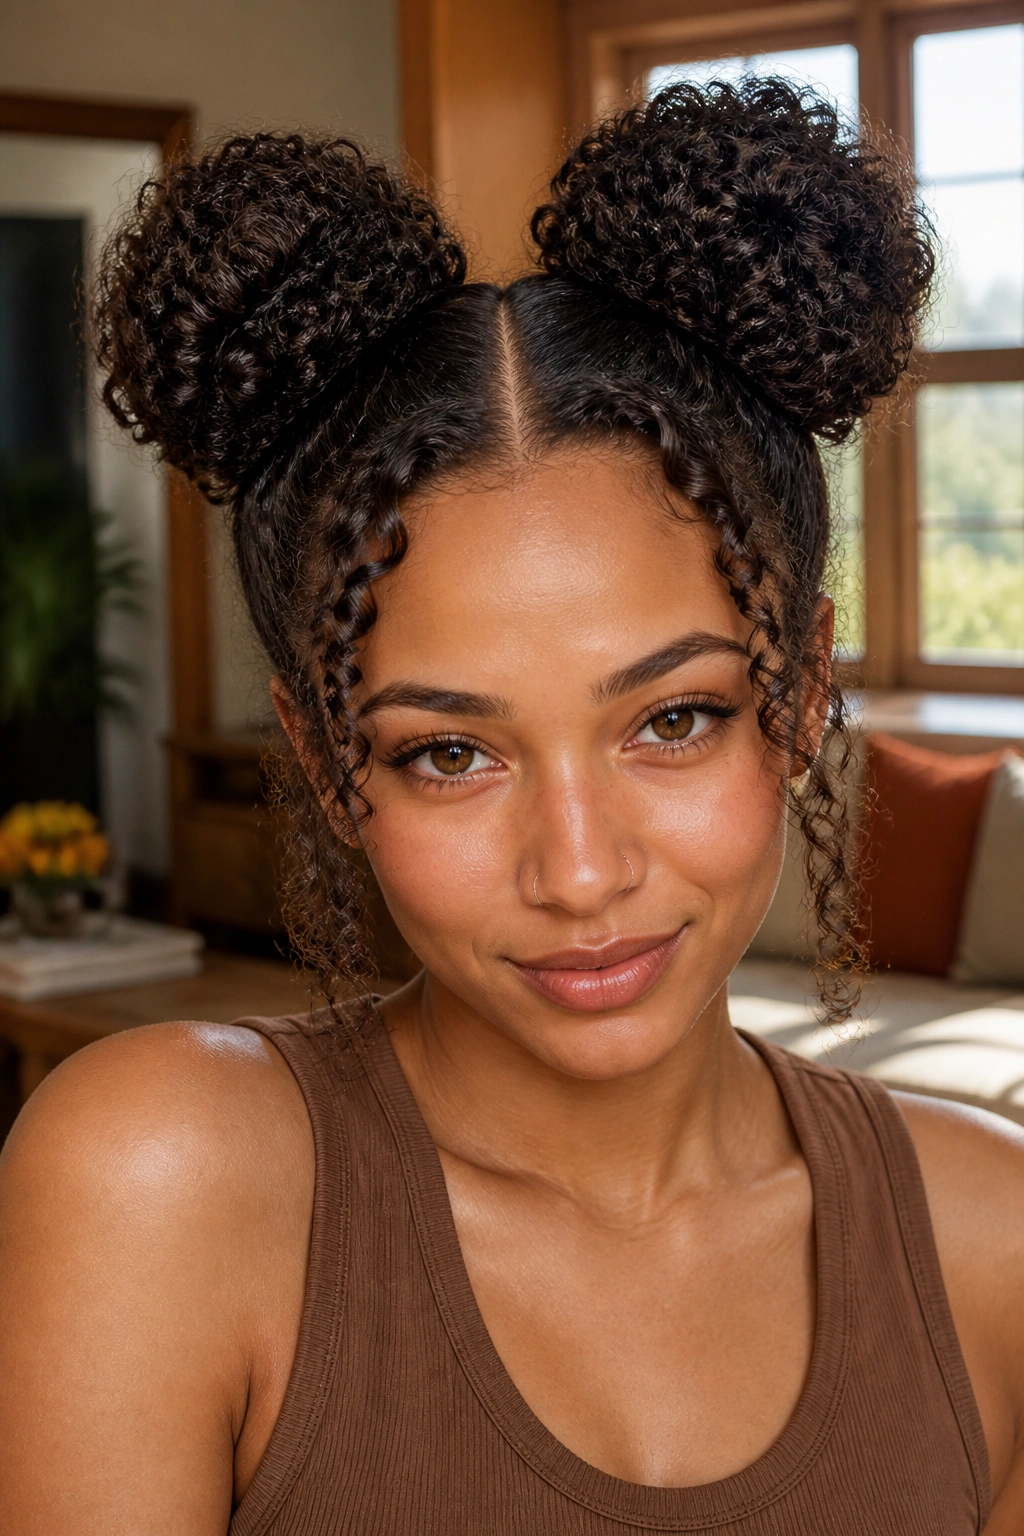
Space buns are playful, yes, but they also solve a real problem: what to do with thick curls when you want the hair up, neat, and not boring.
Start with a clean center part and decide whether you want the buns high, mid-level, or slightly back. Tight curls and coily hair make fuller buns naturally, so do not overthink volume. A little puffiness gives the style its shape. If the buns look too small, gently tug the sides after securing them to widen the form.
No, they do not have to look like costume hair. Keep the parts clean, leave a few curls out if you want softness around the face, and use pins to anchor any sections that feel loose. The style can swing casual or polished depending on how neat you make the parting.
Space buns work especially well when the hair is in a twist-out or braid-out first. The texture gives the buns more grip and a nicer finish than freshly flattened hair.
14. Side Tuck Roll
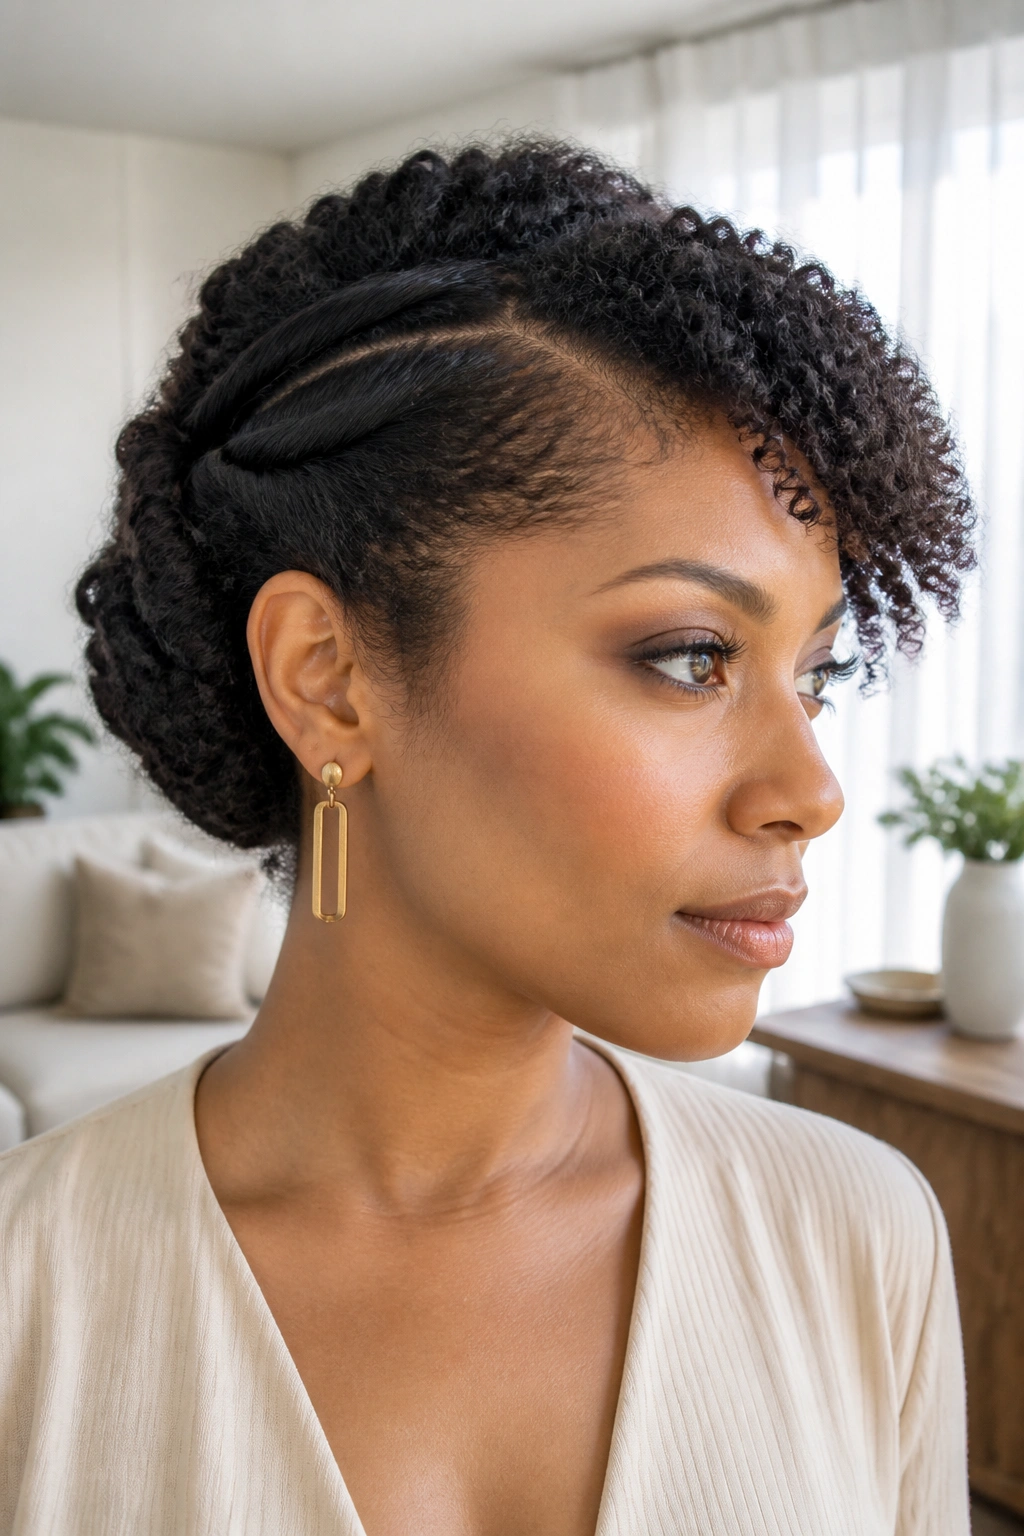
Can shorter coily hair do an updo without extensions? Absolutely. The side tuck roll proves it.
This style tucks the hair back and around itself, usually with pins and a bit of smoothing cream, until it creates a rolled shape along one side or the nape. It works especially well on chin-length to shoulder-length hair, where a full bun might look awkward but a tucked shape feels natural. The result is polished without being stiff.
What Helps the Most
- Use small sections so the roll lies flat.
- Pin as you go instead of waiting until the end.
- Keep the front slightly softer if you want a gentle frame around the face.
- Spray lightly with water only if the hair needs extra flexibility.
The side tuck roll is one of those styles that looks complicated from the outside and feels like a clever shortcut once you try it. It makes a good dress-up style, but it also works on ordinary days when you want your hair off your neck and still have a shape worth looking at.
15. Finger Coils for Defined Springs
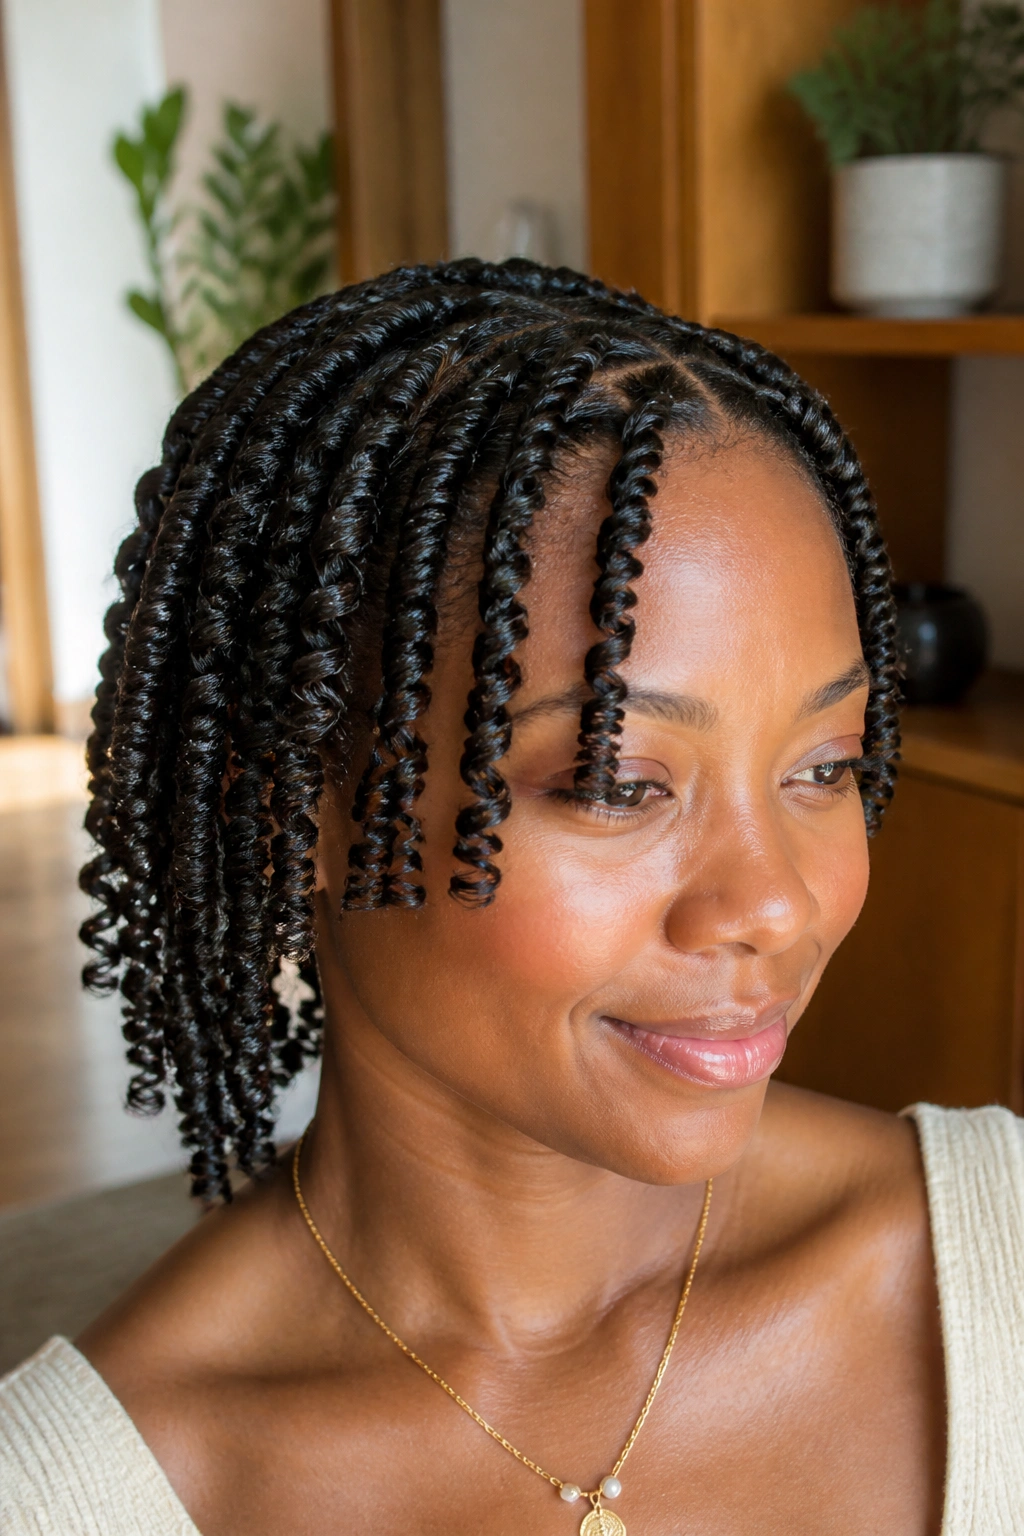
Finger coils are for the days when you want every curl to have a clear shape. They take time, sure, but the result is precise and worth it if your hair loves definition.
You coil small sections around your finger, usually with a little cream or gel for slip, until the strand holds its spiral. The smaller the section, the tighter the coil. The more even your parts, the cleaner the whole head looks. On very dense hair, finger coils can take patience, but they pay off in a neat, springy finish that holds its shape well.
How to Keep Them Separate
- Work on damp hair so the coil forms cleanly.
- Use a product with hold, not just moisture.
- Leave the coils alone while they dry.
- Separate only if you want a fuller look later.
Finger coils are not the fastest style on this list. They are, however, one of the best if you want definition that feels controlled instead of fluffy. On shorter coily hair, they can look especially sharp. On longer hair, they create a lot of movement.
16. Pineapple Updo
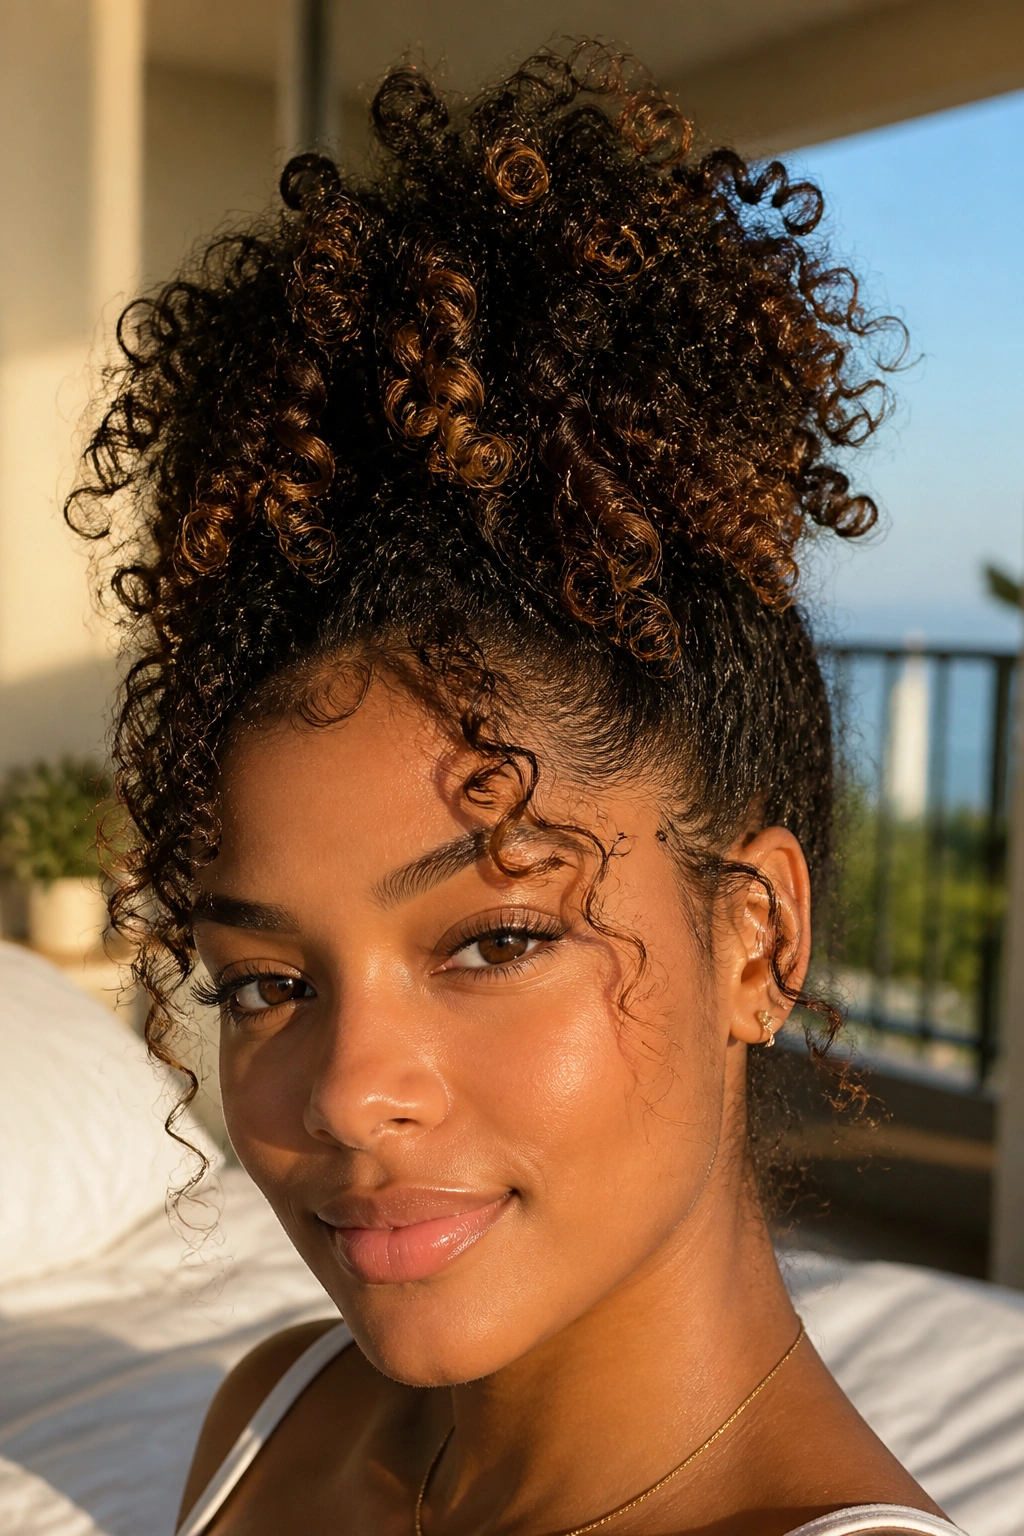
A pineapple is usually talked about like a bedtime trick, but it works as a daytime style too. And on tight curls, it can be a lifesaver.
The idea is simple: gather the curls high on the head, let the ends spill forward or outward, and secure the base gently so the style stays lifted. You get volume at the crown and fewer flattened spots through the back. For coils that lose definition when pressed, that high placement helps keep the shape alive.
What matters here is the tie. Use a soft scrunchie or a stretchy band that will not pull at the edges. If the base is too tight, the style starts to hurt by lunchtime. If the top is too loose, the puff collapses and you’re back where you started.
I like pineapples for curls that have already been set once and need a quick second life. They also save time on days when you are between styles and not ready to commit to a full restyle.
17. Tapered Afro for Tight Curls
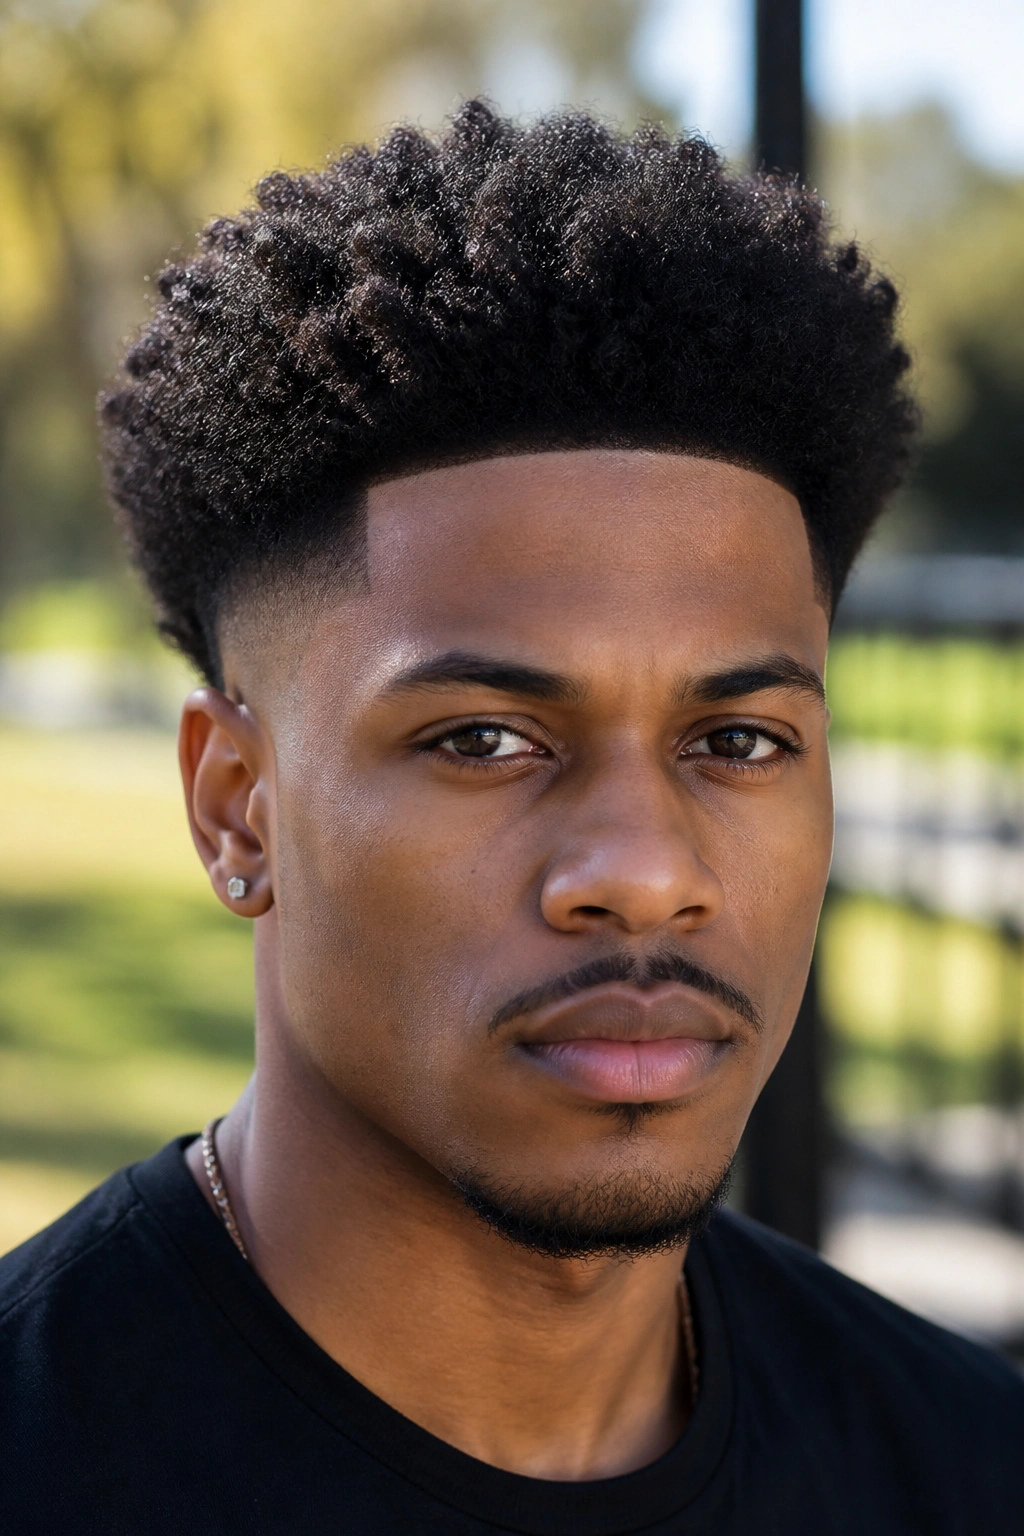
A tapered afro is one of the cleanest ways to show off tight curls and coily hair without asking the hair to lie down for anyone.
Shorter sides, fuller top, rounded shape. That’s the formula, and it works because it follows the head instead of trying to flatten it. The cut does the shaping for you, which means less daily fuss and a lot of visual payoff. A pick at the roots can add height, while a curl cream keeps the top soft instead of dry and dusty-looking.
What Makes the Shape Work
- The sides should stay close to the head.
- The top needs enough length to form a rounded cloud.
- Regular shaping keeps the outline crisp.
- A little moisture goes a long way on short coils.
This style suits people who like low-maintenance mornings and do not mind a cut with personality. It is not the most flexible look on the list, but it is one of the most satisfying when the shape is right. There’s nothing fussy about it. That’s the point.
18. Braided Bob With Curly Ends for Coily Hair
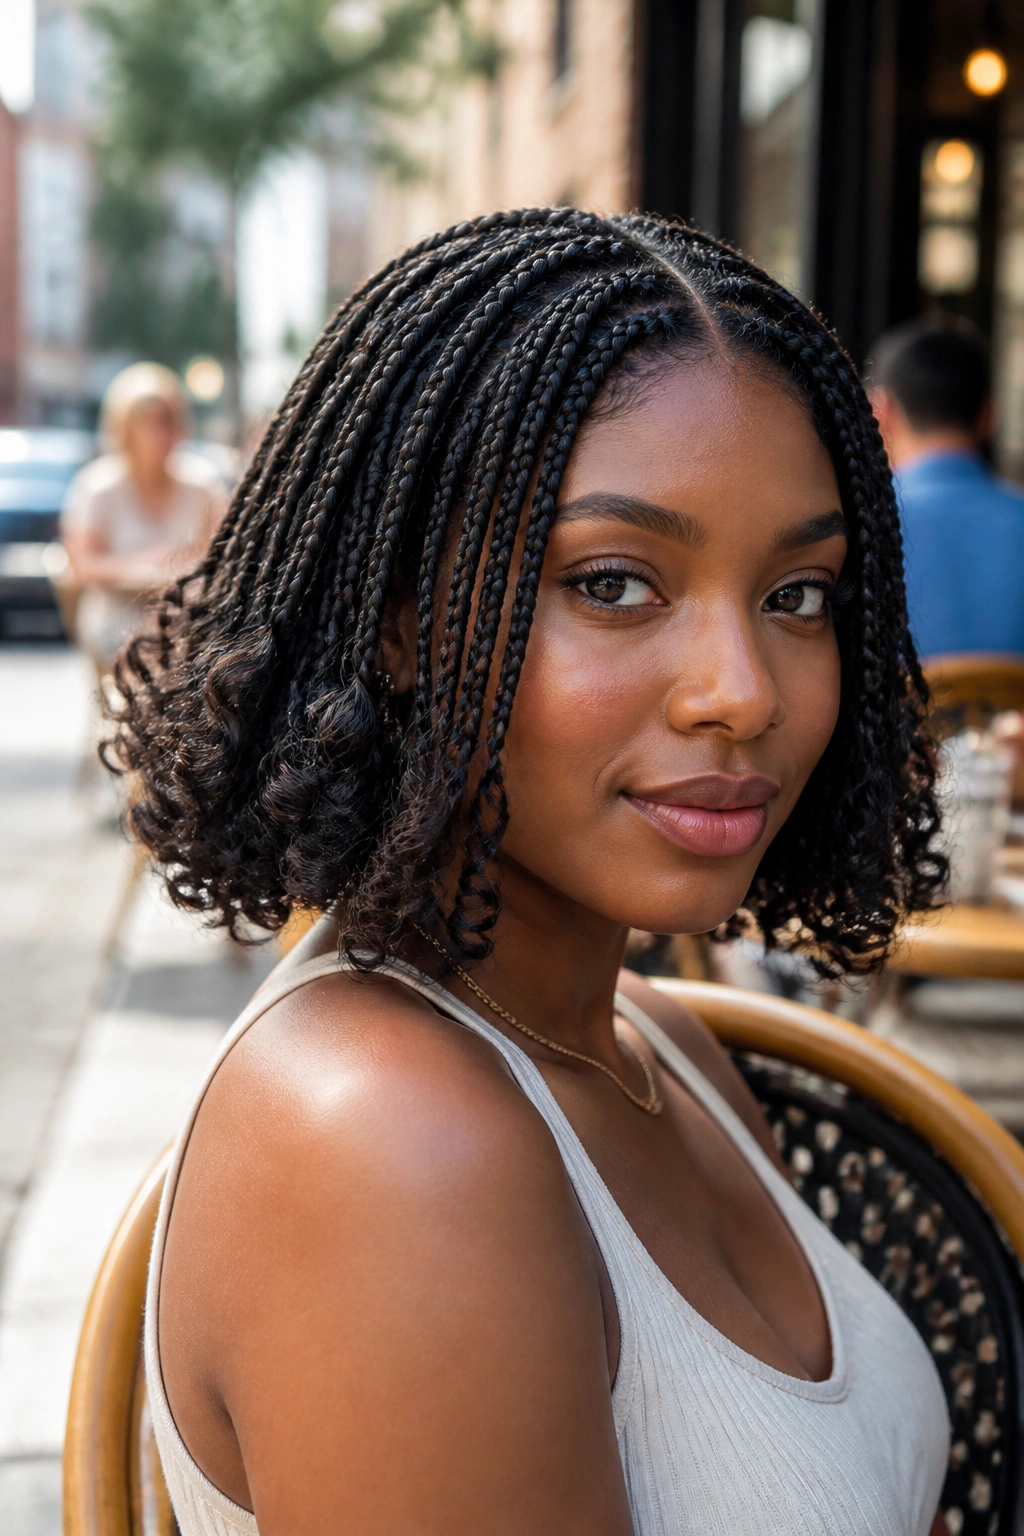
If you want length without daily styling, a braided bob with curly ends is hard to beat. It gives you the neatness of braids and the softness of loose curls at the bottom.
The bob length keeps the style from feeling heavy, which matters more than people think. Long braids can be a lot on the neck and shoulders. A shorter version sits lighter, swings better, and is easier to pin back if you need to. Curling the ends with rods or leaving them free adds a little movement so the style does not look stiff.
This is a strong choice when you want a protective style that still looks dressed up. It frames the face, holds up well, and can go from casual to polished without a full redo. If you wear it with a side part, the whole look gets a softer line. If you wear it straight back, it feels cleaner and more structured.
I’d call this one a smart compromise. You get shape, ease, and a finish that does not shout for attention.
Final Thoughts
The best styles for tight curls and coily hair are the ones that respect the texture instead of fighting it. Some days you want definition. Some days you want everything tucked away. Both are valid, and both can look sharp when the parting, tension, and finish are handled with care.
Pick the style that matches how much time you have and how much handling your hair can take that day. That sounds plain, but it saves a lot of bad mornings.
And if a style looks good but hurts your scalp, skip it. Your edges will remember.
