



Hair that reaches well past your shoulders gives you room to do something shorter hair can’t always pull off: let the braid live at the front and still have enough length left to matter. A good front braid style for long hair keeps flyaways down, opens up your face, and still leaves you with movement through the rest of the length. That balance is the whole trick.
And yes, there’s a difference between a braid that looks thoughtful and one that looks like you grabbed the same three front pieces every morning and hoped for the best. The styles that work best tend to respect your part line, your hair texture, and how much tension your hairline can handle. Long hair helps, but it also adds weight. That weight can make a front braid sag, puff out, or slip if you don’t place it well.
I’ve always thought the smartest front braids are the ones that solve a real problem first. Hair in your eyes. Layers that won’t sit still. A crown that needs a little polish. A style that has to survive a long day without turning into a mess by lunch. The good ones handle all of that and still look soft.
So let’s start with the styles that actually earn their keep.
1. Side-Swept Front Braid for Long Hair
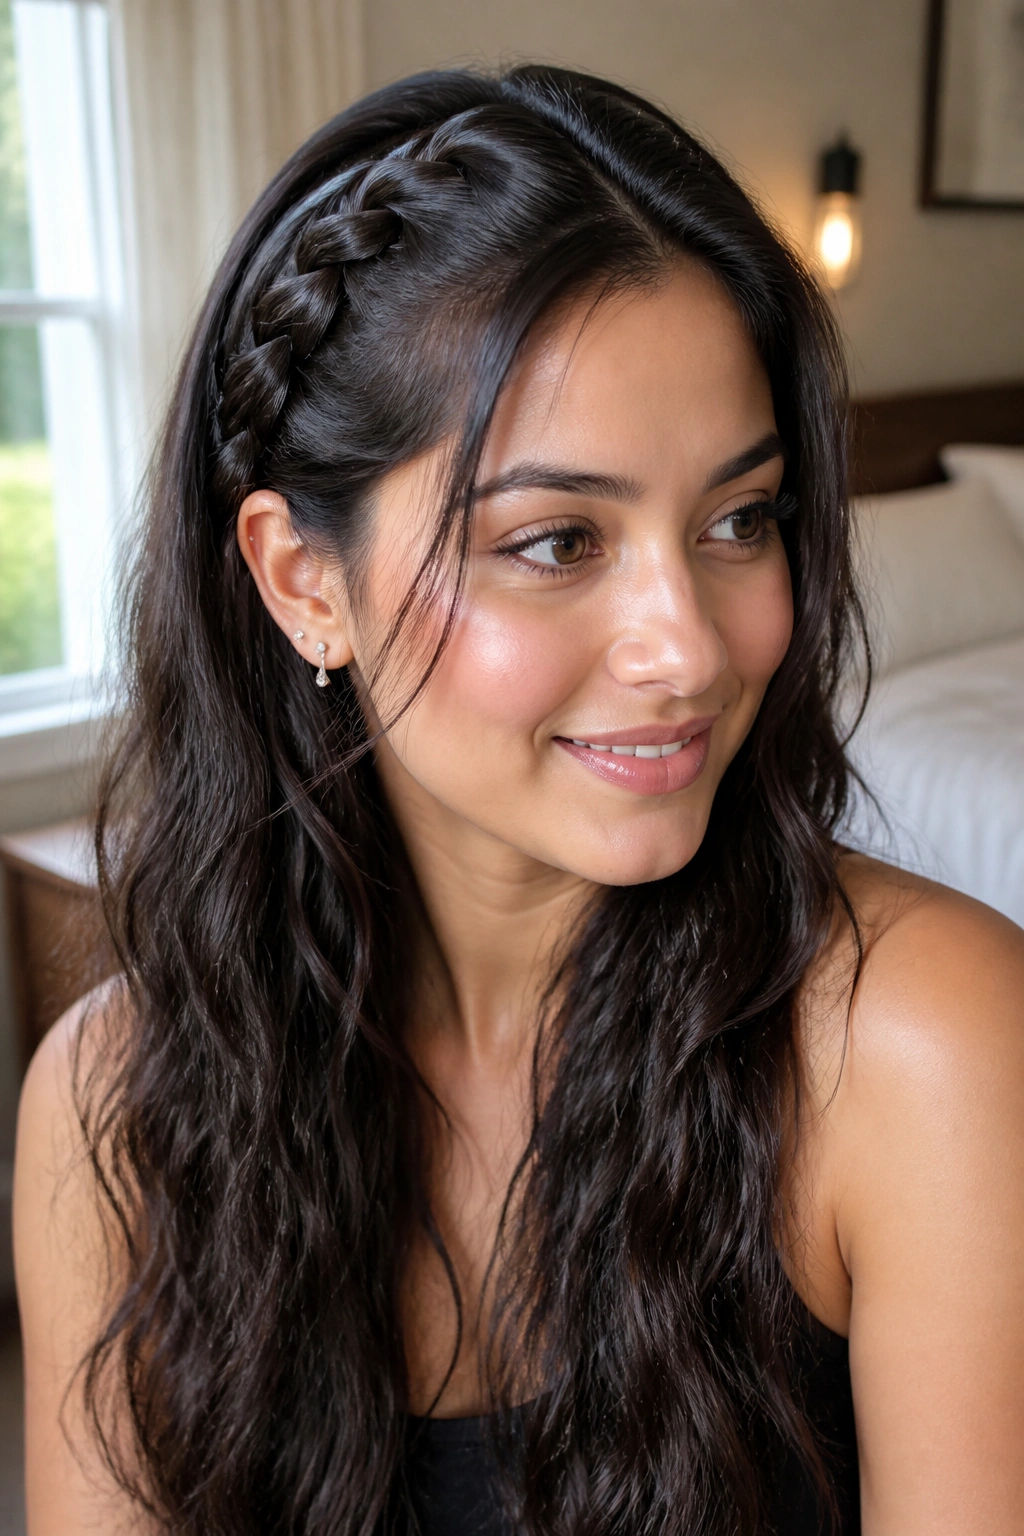
A side-swept front braid is the one I reach for when I want the front of my hair to look done without feeling stiff. It starts near one temple, crosses the forehead or hairline at a shallow angle, and tucks behind the opposite ear. On long hair, it has enough length to look deliberate instead of accidental, which is half the battle.
Why It Works So Well
The angle matters. A braid that moves sideways instead of straight back softens the face and keeps the style from looking too severe. If your hair is layered, this is one of the easiest ways to tame the shorter pieces near the front without pinning your whole head down.
A little texture helps here. Hair that’s too slippery tends to slide out of the braid, so a light mist of dry shampoo or texturizing spray at the roots gives the strands something to hold onto. You do not need a lot. A few sprays near the front section is enough.
- Best for: round, oval, and heart-shaped faces
- Works well with: loose waves, straight lengths, or a low ponytail
- Hold it in place with: 2 bobby pins tucked under the braid
- Finish with: a small mist of flexible hairspray
Best tip: braid only the front third of your hair, then let the rest fall loose. That keeps the style from getting heavy.
2. Double Front Braids From a Center Part
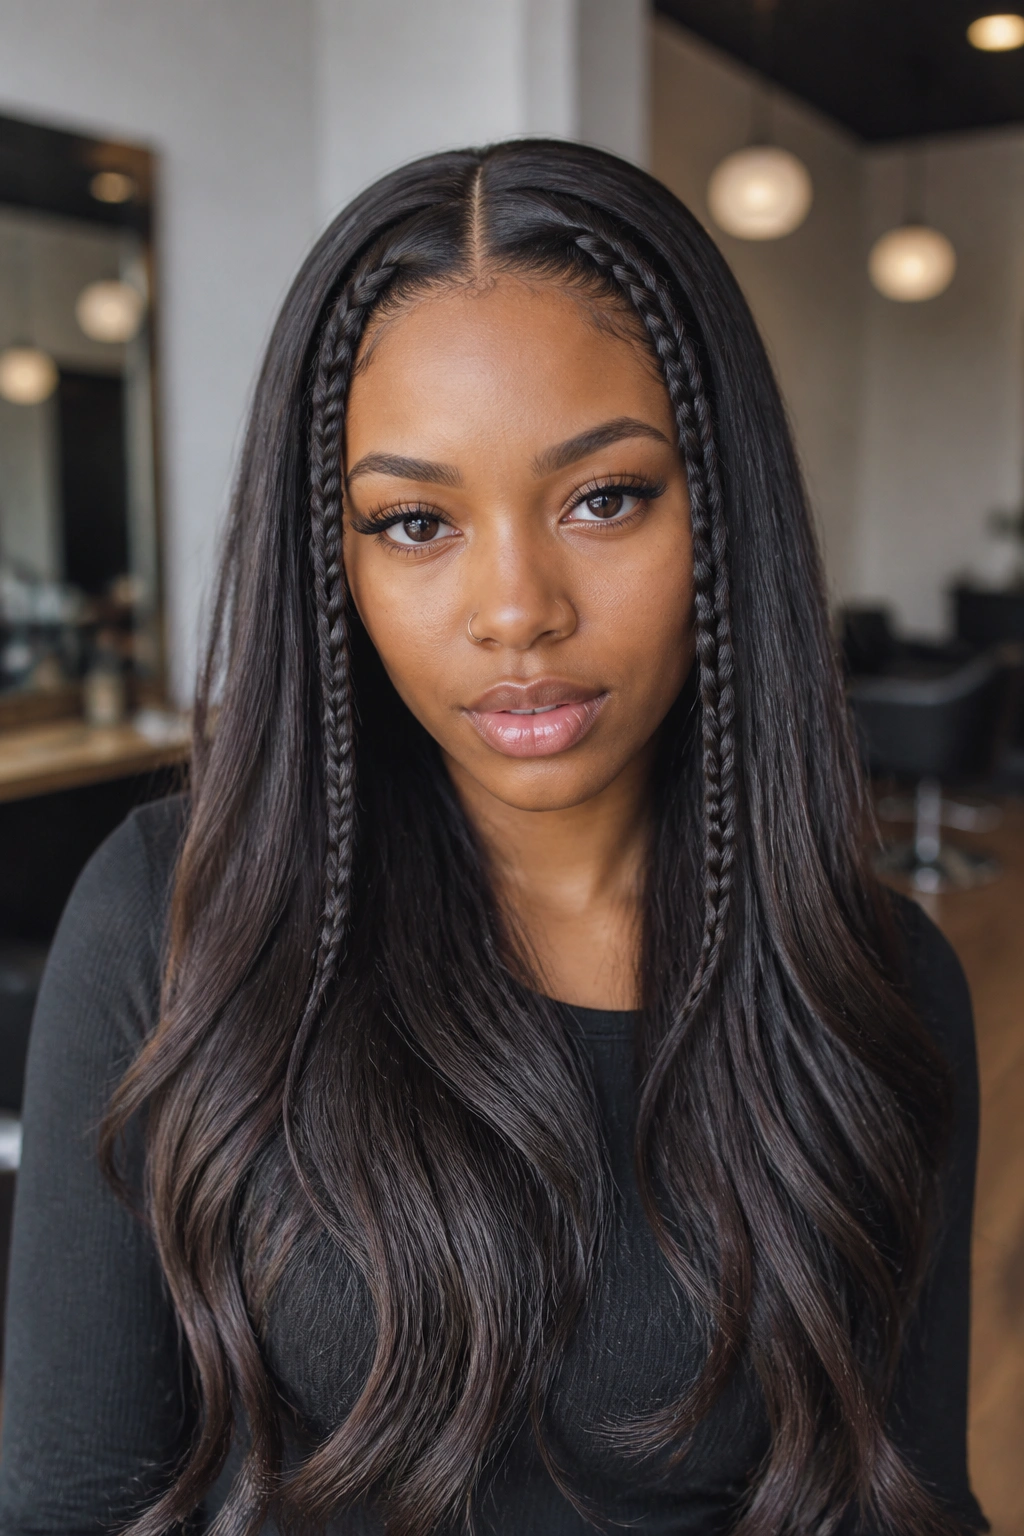
Two slim braids framing a center part can look sporty, neat, or a little romantic depending on how tightly you braid them. This style gives long hair structure fast. It also solves the annoying problem of front layers that keep slipping into your cheeks every ten minutes.
Start with a clean center part, then braid a narrow section on each side from the hairline back toward the ears. You can leave the rest of the hair straight, wavy, or in a low ponytail. I like this look because it does not need perfection. If one side is a touch thicker, nobody is going to call the braid police.
Long hair gives this style more impact, plain and simple. The braids have enough length to show the pattern clearly before they disappear into the rest of the style. If your hair is super thick, keep each braid small so the front doesn’t feel bulky. If your hair is fine, gently tug the braid edges a little to make them look fuller.
The clean part is what keeps this from reading as messy. That part line should be sharp. The braids can be soft.
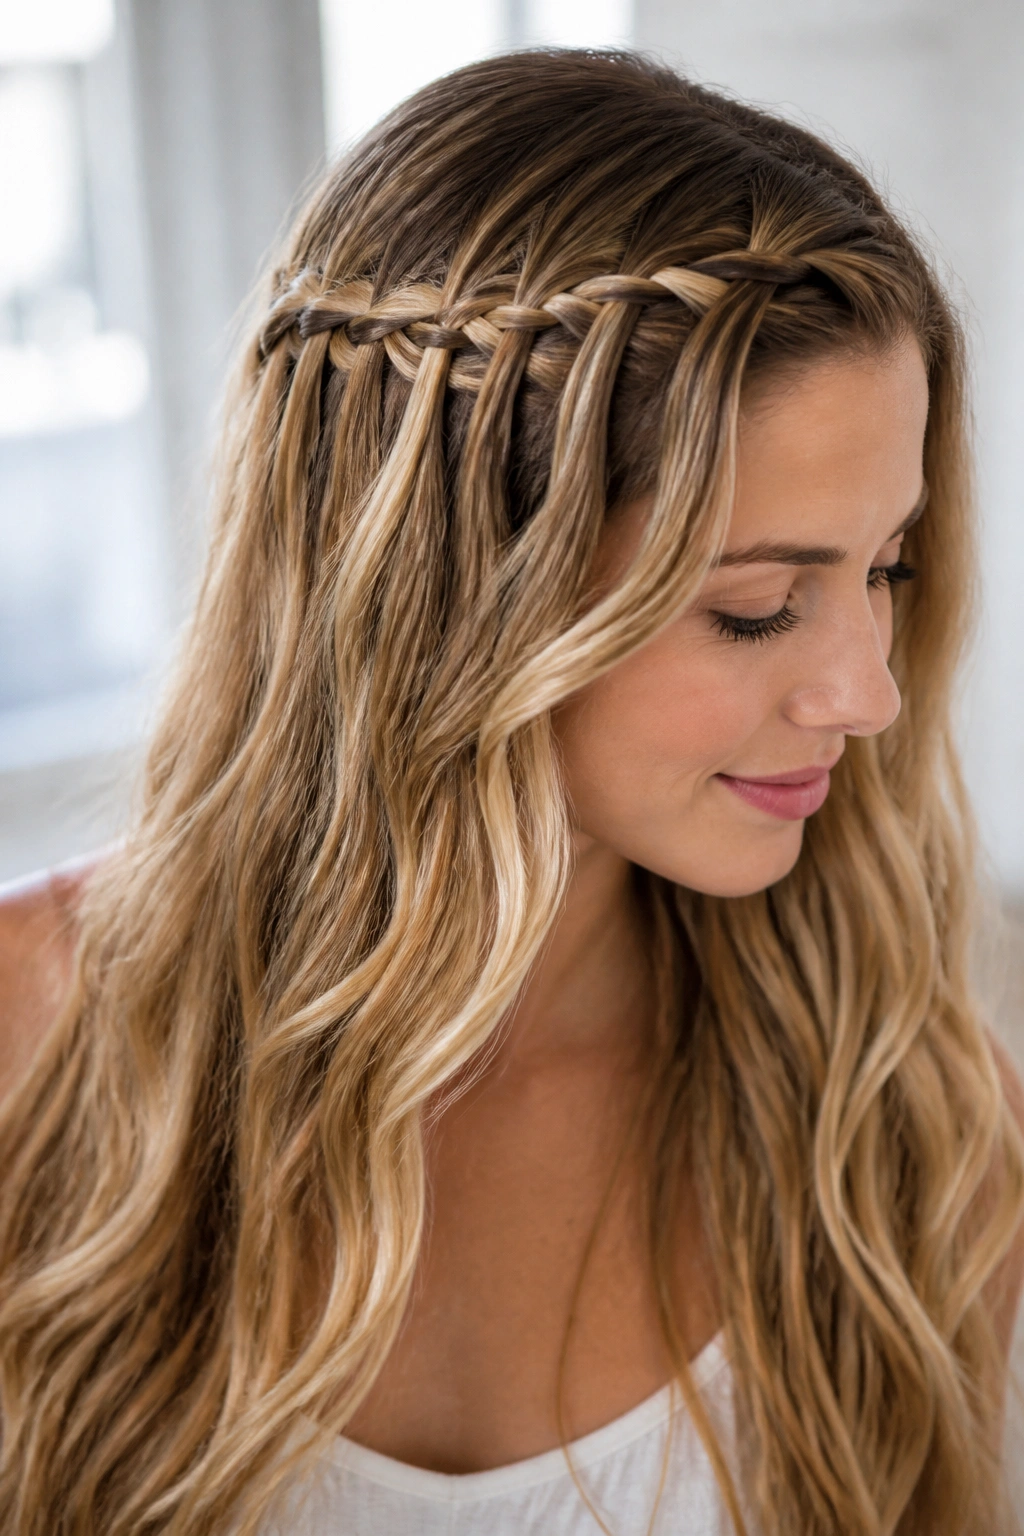
3. Waterfall Front Braid Across Long Hair
Why does the waterfall braid keep showing up in hair inspiration boards? Because it does one thing really well: it lets hair fall through the braid in a controlled way, so the front looks intricate while the rest stays loose. It’s a front braid style that works especially well on long hair because the dropped strands have enough length to blend instead of looking chopped off.
A waterfall braid is not the fastest option, and I’ll be honest about that. Your fingers need to stay organized, and the braid has to travel at a steady pace across the front section. But once you get the rhythm, it’s one of the prettiest ways to frame the face without pinning everything back. It also pairs nicely with curls or brushed-out waves because the loose pieces keep the whole style from looking rigid.
How to Wear It
Keep the braid close to the hairline, not halfway up your crown. That placement is what makes it feel like a front braid instead of a random side braid.
If your hair is very silky, prep with a tiny bit of mousse or a lightweight styling cream so the strands do not slip through your fingers. And don’t make the braid too tight. A waterfall braid looks better when it has a soft drape.
4. Halo Braid That Rests on the Hairline
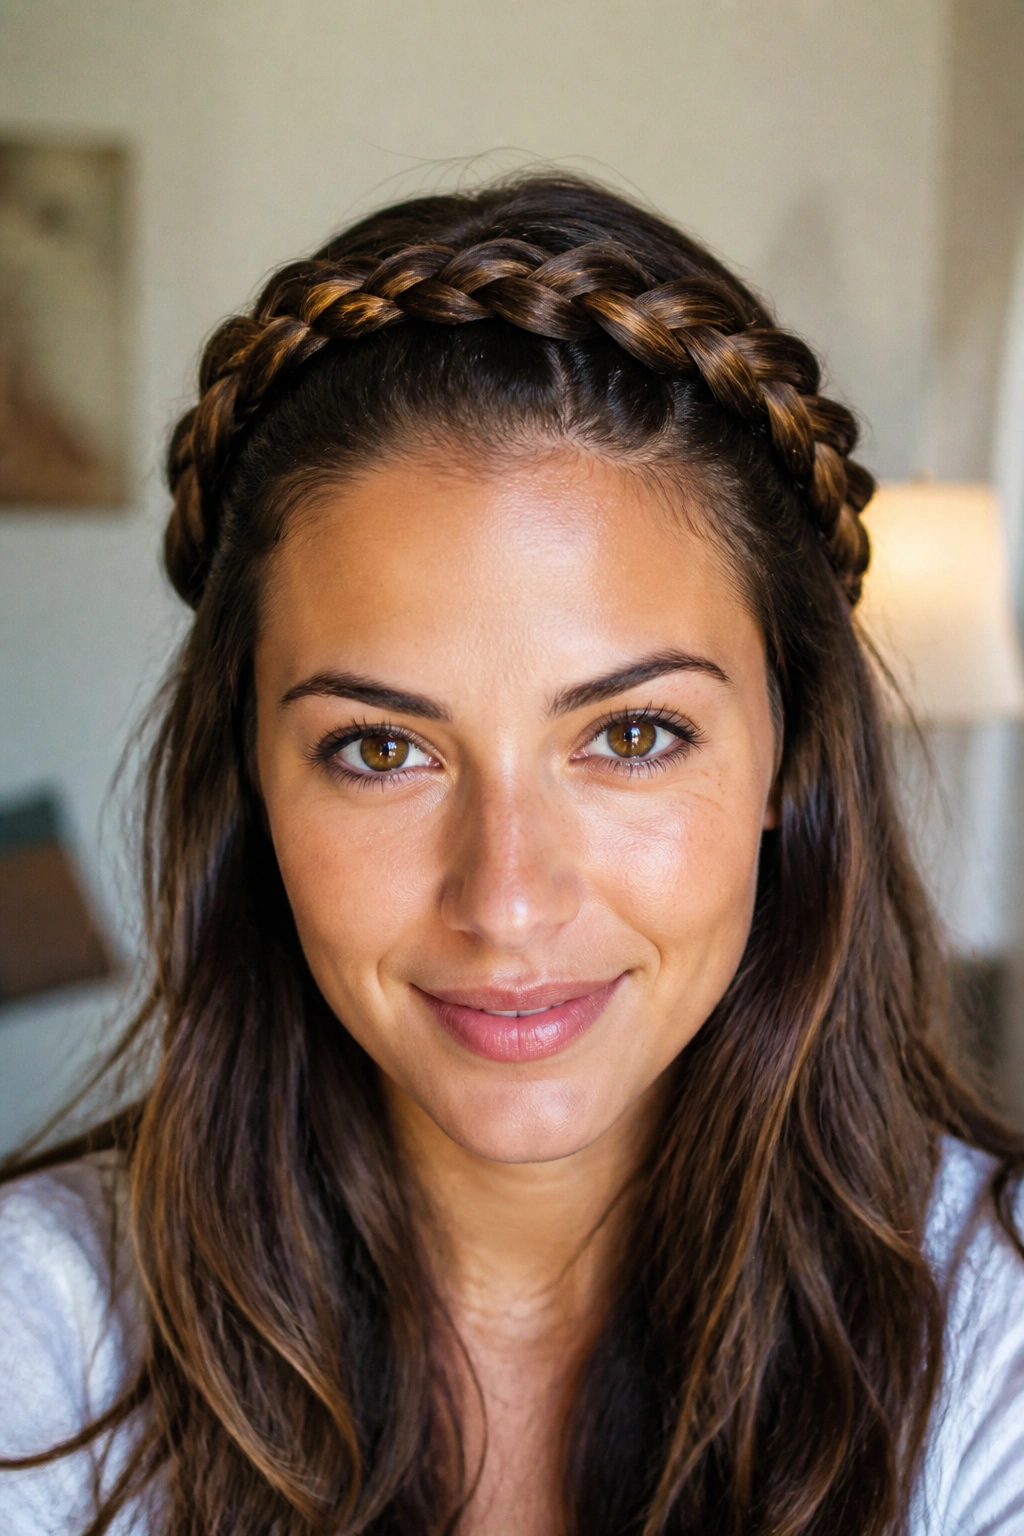
Picture this: your hair is long, the front pieces are getting in your face, and you want something that looks polished without feeling formal. A halo braid answers that problem fast. It wraps across the front hairline and around the head like a narrow crown, which makes it one of the best front braid styles for long hair when you want the face fully open.
The mechanism is simple. You braid along the perimeter instead of pulling everything back from the top. That means the front stays neat, but the braid still has room to breathe. On long hair, the ends usually have enough weight to tuck securely under the rest of the style, which helps the halo hold its shape.
- Best for: medium to thick hair
- Nice finish: smooth at the roots, slightly loosened through the braid
- Keeps best with: pins crossed in an X under the back section
- Looks strongest when: the braid follows the natural curve of the hairline
Tiny warning: if you braid too tightly at the temples, the whole look turns harsh. Let it sit. It should feel like it belongs there.
5. Dutch Front Braid That Lifts the Crown

A Dutch front braid looks like the braid is sitting on top of the hair instead of sinking into it, and that little bit of lift changes everything. It gives long hair more shape near the front, which is useful when the rest of your length is heavy and wants to drag the style down.
I like this one for people who want a front braid that reads a little stronger than a soft side braid. The reverse braid pattern creates a clear ridge, so even if the rest of your hair is loose, the front section has presence. If you’ve got long layers, this is also a good way to keep shorter pieces from slipping out and fuzzing up the face.
The braid works best when the roots are lightly gripped, not drenched in product. Too much oil or conditioner near the front makes the braid slide. A small amount of texture spray at the part is enough. You can wear the rest of the hair straight, curled, or pulled into a low bun.
What I like most is the shape. It adds height without teasing the hair into something stiff. That matters.
6. Rope-Twist Front Braid for Fast Styling

A rope twist is what I suggest when someone wants the look of a front braid but does not want to fight with three-strand braiding at 7 a.m. It uses two sections twisted around each other, so it’s faster, smoother, and easier to keep neat on long hair.
What Makes It Different
Compared with a classic braid, a rope twist looks shinier and tighter. That’s because the sections wrap around each other instead of crossing over in a woven pattern. On very long hair, that smooth finish can look elegant without trying too hard. It also holds up nicely if your hair has a little wave or bend already.
The downside? Rope twists can unwind if the hair is slippery. If your hair is fine, secure the end with a tiny clear elastic and pin it under a side section. Don’t skip that. A loose twist that falls out halfway through the day is annoying in the worst way.
Who It’s Best For
- Anyone who wants a quick front style
- Long hair that feels too thick for a tight braid
- Straight or lightly wavy textures
- Days when you want clean lines near the face
If you want a polished front detail with less effort, this one earns a place in the rotation.
7. French Braid Headband Along the Front
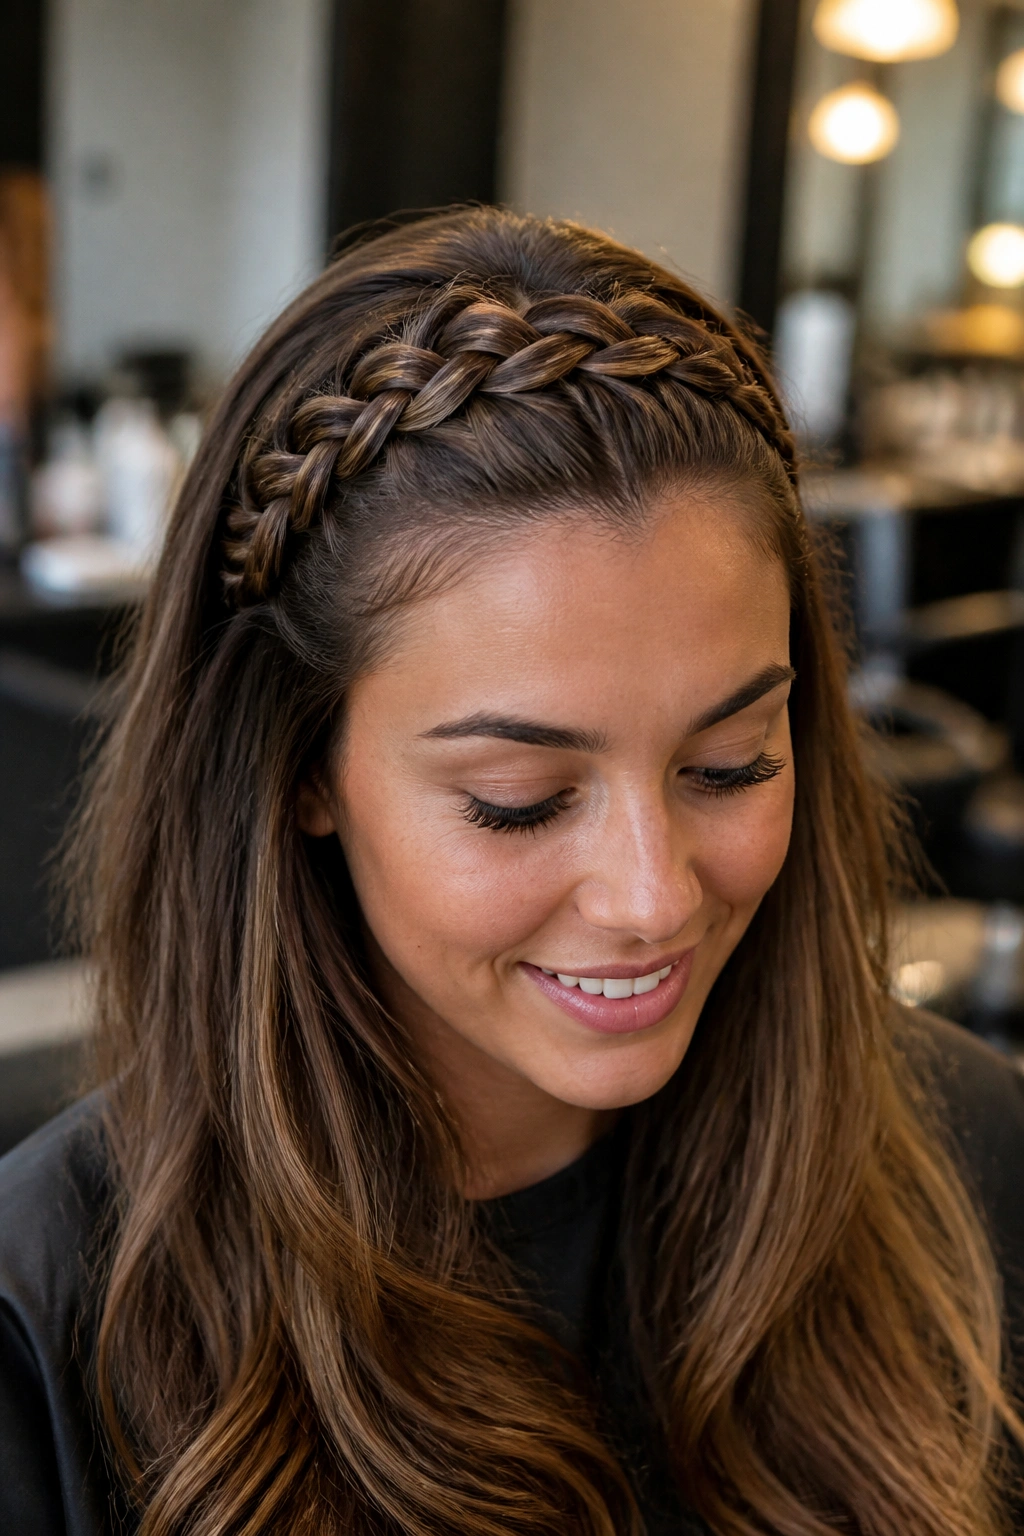
A French braid headband sits right where it sounds like it should: across the front section, curving from one side to the other like a built-in accessory. It’s one of those front braid styles for long hair that can look plain in photos and far better in person, because the braid keeps the front under control without stealing the whole show.
The braid starts with a small section near the temple, then adds hair as it travels. That makes it flatter and more secure than a loose braid draped across the forehead. Long hair gives the back section extra movement, so the front braid acts almost like a frame around a much bigger shape.
Getting It to Sit Flat
Use a fine-tooth comb for the parting. The braid needs a clean start or it will look lumpy by the second inch.
A small amount of pomade or styling cream near the hairline can tame frizz, but keep it light. Heavy product makes the braid feel greasy and can flatten the rest of the style.
This is one of my favorite choices for busy days because it looks finished from the front even if the back is just loose and brushed out.
8. Fishtail Front Braid With Soft Edges
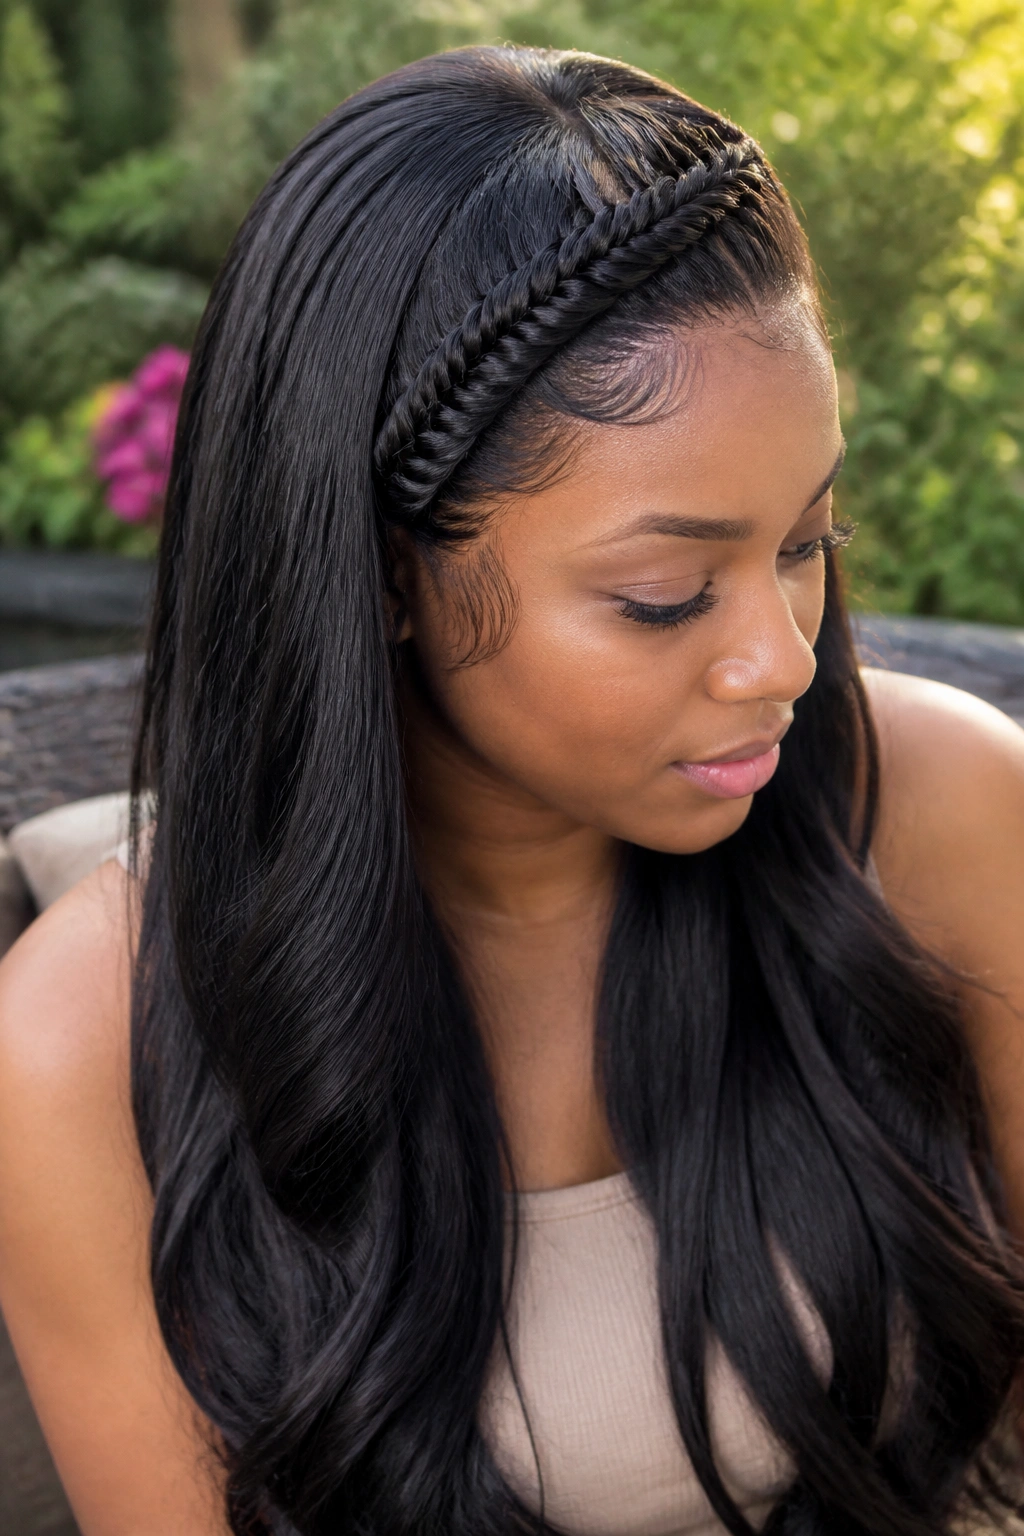
A fishtail braid has a different feel from the usual three-strand braid. It looks more detailed, a little more woven, and a bit more special, especially when you use it as a front braid across long hair. The pattern reads best when the hair has enough length for the sections to show, which is why long hair suits it so well.
The front section can be fishtailed from one side and swept across the forehead, or you can split the front in a deep side part and work it diagonally into the rest of the style. Either way, the braid has that slightly intricate look without needing extra accessories. If you want to make it softer, gently tug the edges after braiding. People call this “pancaking,” and it helps the braid look fuller.
A fishtail can take a little longer than a basic braid, but the result is worth it when you want the front to feel dressed up. It’s especially nice with long waves, because the texture in the loose hair mirrors the woven braid and makes the whole style feel connected.
9. Cornrow Front Accent Braids

Front cornrow accents are a strong choice when you want the hairline controlled and the rest of the hair left free. A few narrow braids along the front can keep shorter front pieces from falling loose, and they can also give long hair a sharper shape at the crown. Done well, they look clean and practical. Done too tight, they pull. Hard.
That last part matters. The braid should sit snug against the scalp, not yank it. If you feel tugging right at the roots, the style is too tight. Long hair can handle a lot, but your hairline should not have to pay for it.
- Use a tail comb to map your parts before you start
- Keep the sections narrow and even
- Braid along the natural curve of the hairline
- Finish with small elastics or tucked ends, depending on the look you want
These braids work best when you want a protective touch at the front and a looser length elsewhere. They also pair well with buns, ponytails, and half-up styles. Clean parting is what gives them their shape, so do the prep carefully. The actual braiding is the easy part.
10. Braided Bang Sweep Across the Forehead

A braided bang sweep is basically a fake fringe made from your own hair, and I love it for people who want the front of the hair to feel styled without cutting bangs. Long hair gives this look enough length to swoop across the forehead and disappear into the side of the head or a pin behind the ear.
The cool part is how it changes your face shape. A braid that angles just above the brow can soften a long face, break up a strong center part, or cover a grown-out bang area that feels awkward. It’s not meant to be symmetrical. In fact, a little asymmetry makes it look better.
If your hair is layered, leave the shortest front pieces out until the end, then tuck them into the braid or around it. That keeps the sweep from getting puffy. If you have no layers at all, the braid may look sleeker, which is fine too.
This is one of those styles that looks casual in the best way. Not messy. Just easy.
11. Half-Up Front Braids Pulled Into a Ponytail

Two front braids pulled back into a ponytail give long hair shape without sacrificing length. It’s a smart move when you want the face open but the rest of the hair to stay down in a full, obvious sheet of length. The braids create a clean lead-in to the ponytail, so the style feels intentional from the hairline to the ends.
Start with two braids at the front, one on each side, then gather them with the top section into a ponytail at the back of the crown. If you want more lift, place the ponytail slightly higher. If you want a softer look, keep it at mid-crown and let the braids relax a bit before tying them off.
This style is practical. It keeps the front from collapsing into your face, and it gives long hair some control on top where it usually needs it most. If your hair is very thick, use a sturdy elastic so the ponytail doesn’t slide.
A small wrap of hair around the base makes the whole thing look cleaner. Worth the extra minute.
12. Milkmaid Front Braids Wrapped Over the Crown
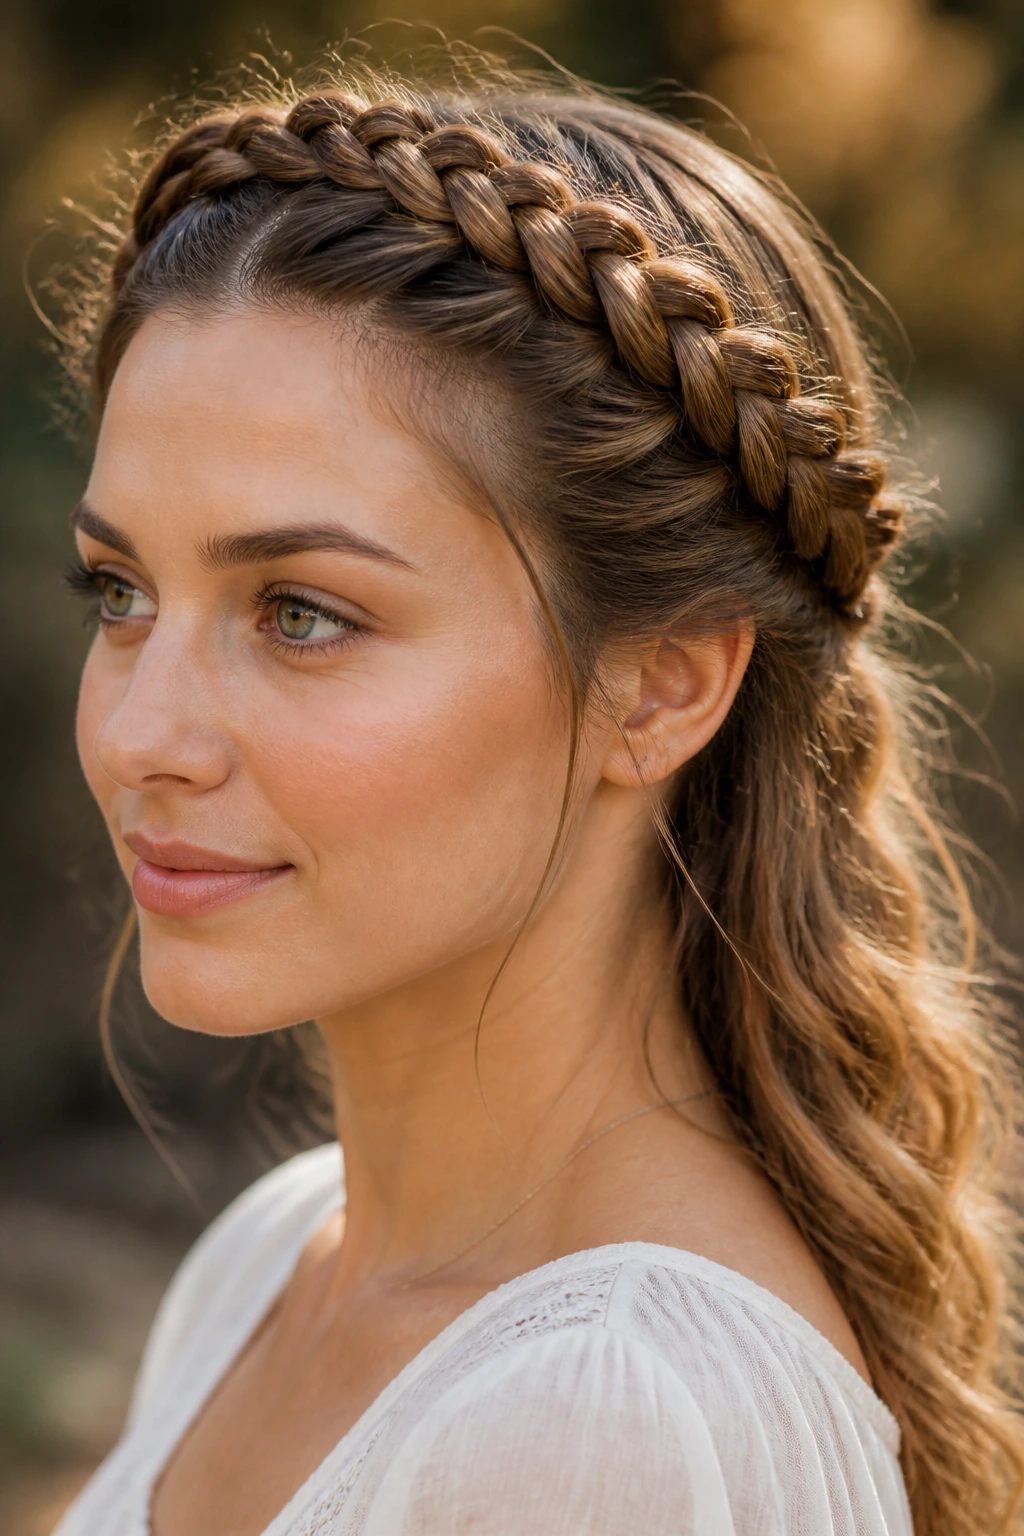
Milkmaid braids have a romantic feel, but the front-focused version is more useful than precious. Instead of braiding the whole head into a formal wrap, you bring two front braids up and over the crown so they meet at the top or slightly behind it. On long hair, that gives you a tidy front with plenty of softness left in the back.
I like this style for thick hair because it can hold the shape of the wrap better than finer hair. Still, it works on medium hair too if you keep the braids a little loose and secure them with pins that cross under the braid. A soft wave underneath keeps the look from feeling too tight or costume-like.
A Few Things That Help
- Braid each side with equal tension so the wrap sits evenly
- Leave a little volume at the roots for height
- Pin the ends where they disappear into the other braid
- Smooth the front with a light cream, not heavy gel
This style has presence. It looks like you planned ahead.
13. Micro Front Braids for a Boho Finish
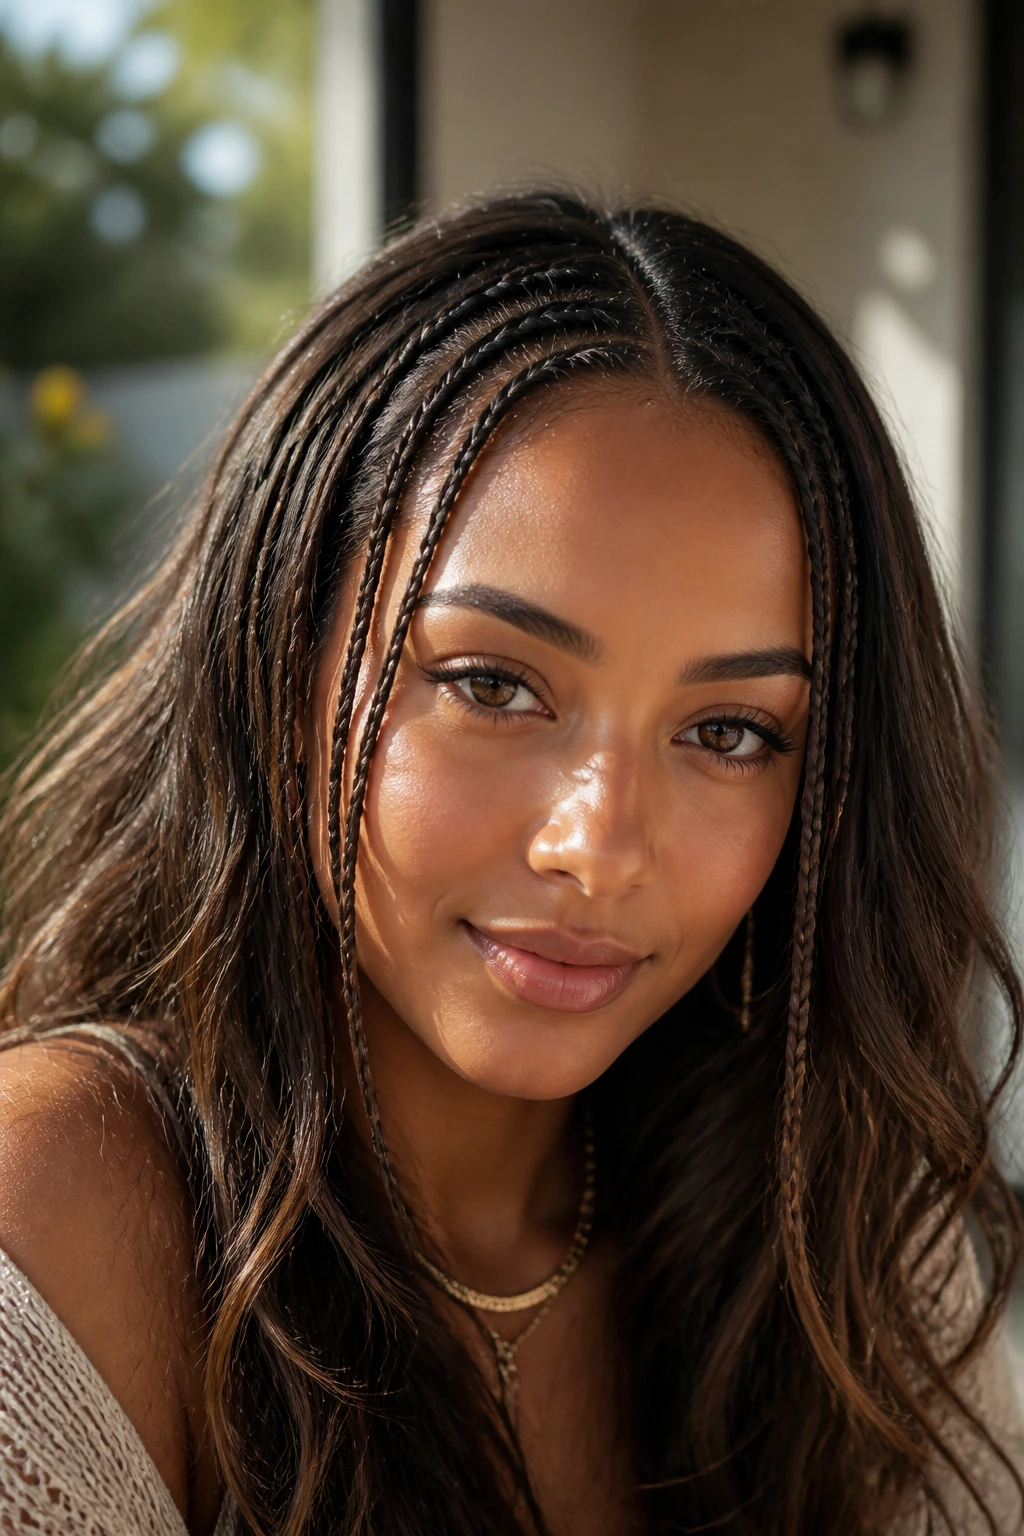
Tiny front braids are not flashy, and that’s exactly why they work. A few micro braids placed near the hairline can break up a curtain of long hair and give the front a lived-in feel. They’re especially good when you want movement, because the rest of the hair stays loose and the braids just sit there doing their small, useful job.
The trick is restraint. Two or three tiny braids around the face usually look better than a whole mess of them. More braids can tip the style into clutter, especially if your hair is already thick or curly. The goal is to add detail, not noise.
This style is forgiving with texture. You can wear it with waves, straight hair, or even a loose curl pattern. Just keep the braids narrow and even. If you make them too chunky, they stop looking delicate and start competing with the rest of the hair.
I’d call this a “little touch, big payoff” style. That sounds simple because it is.
14. Pull-Through Front Braid for Extra Volume
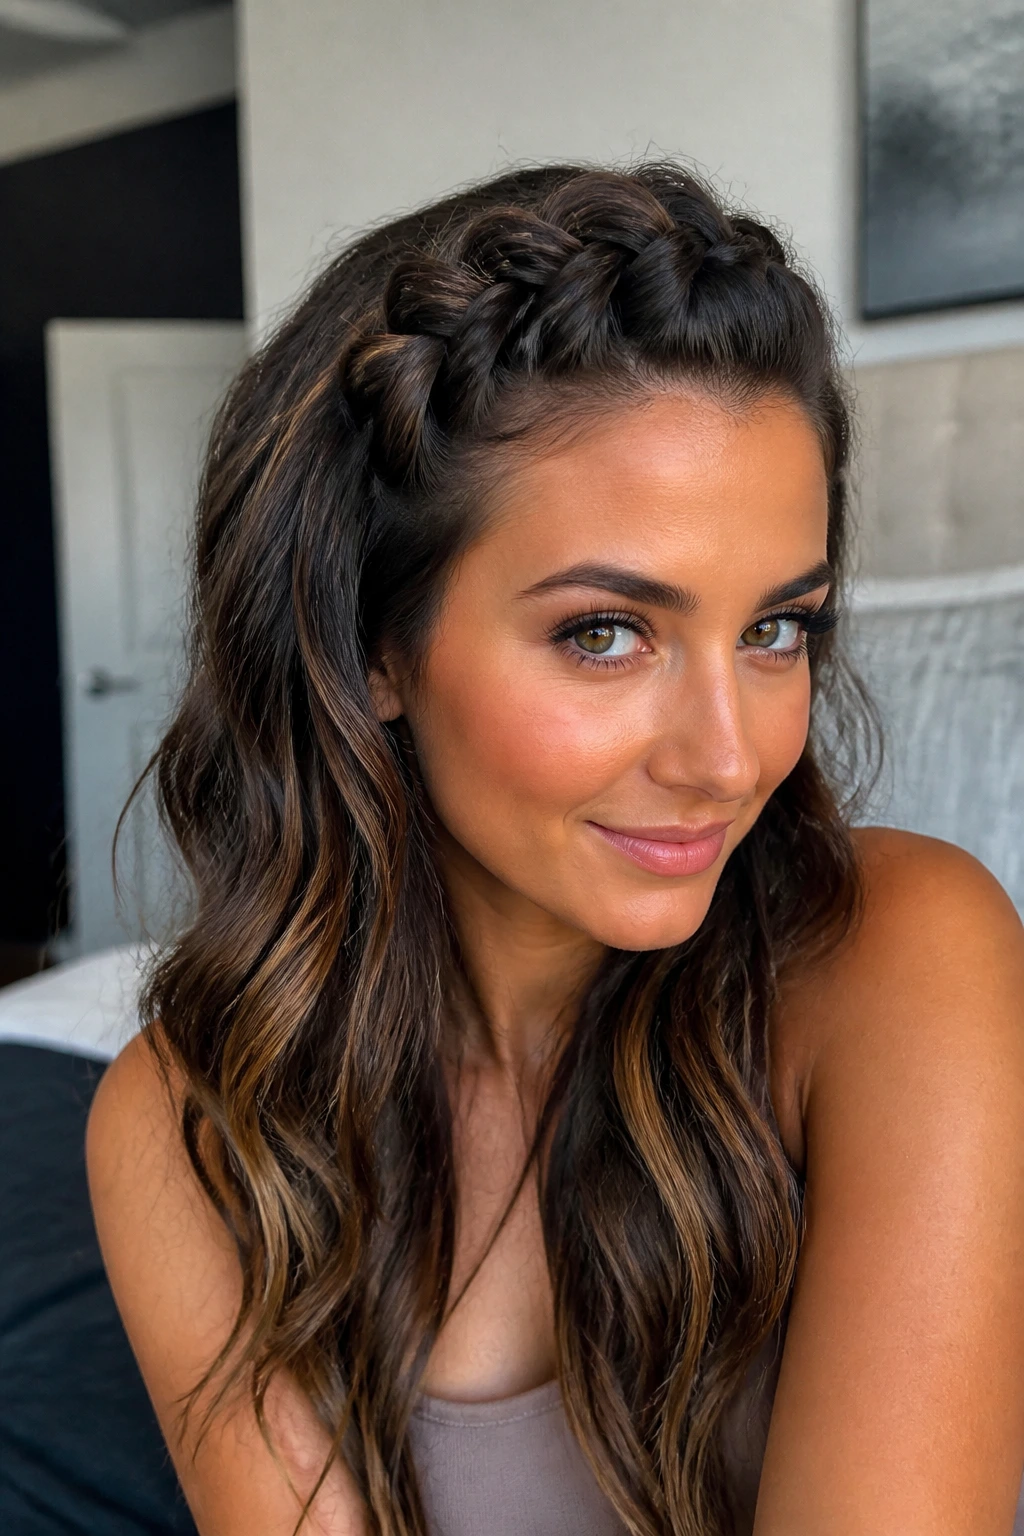
A pull-through braid is a smart stand-in when you want a front braid with more size than your hair naturally gives you. Instead of weaving three strands, you stack small ponytails or sections and pull each one through the next, which creates a chunky braid effect that looks fuller from the start. For long hair, that extra volume can be a relief.
The front version works well when you want a bold braid along the hairline or across one side that won’t disappear into the rest of the style. It also holds up better on thick hair than people expect, because the style is built from secure elastics rather than loose crossing strands. That makes it a good option for anyone who struggles with slippery hair.
You do need a few clear elastics and a little patience. Space the sections evenly, about 1 to 1.5 inches apart, so the braid pattern stays neat. If the sections are too far apart, the shape gets odd fast.
This one is useful. It’s not fussy, and it gives you a big front braid look without requiring braid wizardry.
15. Braided Bun With a Framed Front Braid

A braided bun with a framed front braid is the style I’d call the most complete of the bunch. The front braid softens the face, and the bun takes the weight of all that long hair off your neck. Together, they make a style that feels put together without looking overly dressed.
Start with a front braid on one side or both sides, then sweep the rest of the hair into a low or mid bun. The braid can wrap into the bun, sit above it, or tuck around the side as a visible detail. On very long hair, this is where the length actually helps instead of getting in the way. You can build a bigger bun, tuck the ends neatly, and still keep the front controlled.
This style is a good choice for events, workdays, or any time you need your hair to behave for hours. It also works if your ends are dry or not cooperating, because the bun hides a lot.
And yes, a loose front braid makes the whole thing look softer. Tight buns can feel severe. A small braid at the front fixes that fast.
Final Thoughts
Front braid styles for long hair work best when they solve the front-of-the-face problem first and look pretty second. That sounds blunt, but it’s true. If the braid keeps slipping, pulls at your temples, or fights your part, you won’t wear it for long.
The styles I keep coming back to are the ones that match the job. Side-swept for softness. Dutch or French when you need grip. Rope twists and pull-through braids when speed matters. A halo or milkmaid wrap when you want the front fully controlled. Long hair gives you room to choose, which is the nice part.
Start with one braid near the hairline and a few bobby pins. Then adjust from there. Usually, that’s enough.
