



There is a specific kind of frustration that comes with having long hair. You love the length, the way it catches the light, and the sheer volume, but there are days when it just needs to be up, off your neck, and out of your way. A standard ponytail or a basic messy bun often feels like a defeat—a signal that you have given up on styling for the day. That is exactly where the fishtail bun enters the picture. It provides that much-needed relief of having your hair secured, but it does so with a level of intentionality that suggests you spent much longer in front of the mirror than you actually did.
The fishtail braid is arguably the most elegant braiding technique because of its intricate, woven appearance. When you translate that complexity into a bun, you are essentially wearing a piece of sculpture on your head. Whether you are prepping for a wedding, a long day at the office, or just running errands where you need your hair to stay put, these styles are the answer. Long hair is the ultimate canvas for these looks because you need that extra length to create the tension and the volume that makes a fishtail braid pop. If you are ready to move beyond the basic ponytail and embrace something with a bit more structural integrity, you have come to the right place.
1. The Classic Sleek High Fishtail Bun

Start with a high ponytail, secured tightly with a hair tie that matches your hair color. This style thrives on precision. If you have flyaways, use a light-hold pomade to smooth them back before you start. The goal here is a polished, clean base that contrasts beautifully with the intricate texture of the braid.
Why This Style Works
A high, sleek base draws the eye upward, elongating the neck and providing a professional, sophisticated silhouette. By keeping the base tight, you create a foundation that can hold the weight of a long braid without sagging. It is the perfect blend of modern minimalism and classic braiding technique.
- Secure your high ponytail and divide it into two equal sections.
- Take a small, quarter-inch strand from the outer edge of the right section and cross it over to join the inner edge of the left section.
- Repeat the motion on the left side, pulling a small strand over to the right.
- Maintain constant tension; if you lose your grip, the braid will unravel or look uneven.
- Once you reach the ends, secure with a clear elastic and pancake the braid—gently tugging the outer edges—to add width and texture.
- Wrap the finished braid around the base of your ponytail and secure it with bobby pins.
Pro tip: If your hair is prone to slipping, apply a texture spray before you begin the braid. It adds the “grip” necessary to keep the fishtail defined.
2. The Messy Bohemian Side Fishtail Updo

There is something inherently romantic about hair swept to the side. This style is the antithesis of the sleek high bun. It is soft, slightly undone, and perfect for days when your hair has a bit of natural wave or second-day grit. You are looking for an aesthetic that feels lived-in rather than stiff.
Start by pulling all your hair to one side—either left or right, depending on which side you prefer. Do not worry about a perfect part. Finger-comb your hair to gather it, leaving a few tendrils around your face to frame your features. Secure with a loose hair tie, but keep the tension low.
The Technique for a Softer Look
When you braid, you want to vary the size of the strands you pull across. Using thicker pieces creates a chunkier, more bohemian aesthetic, while smaller pieces look more intricate. Do not worry about symmetry here; the beauty of this look is in the slight irregularities.
Once the braid is finished, gently pull it apart. This is the “pancaking” process that turns a tight, skinny braid into a wide, soft masterpiece. Wrap the braid into a loose bun behind your ear, allowing some of the braid to drape slightly. Use u-pins rather than bobby pins to keep the hold firm but flexible. This allows the bun to move naturally with you throughout the day.
3. The Half-Up Fishtail Crown Bun

This style is a hybrid. It offers the freedom of having your hair down while still incorporating the structure of a fishtail braid. It works incredibly well if you have layers that don’t always stay contained in a full updo. You get the best of both worlds—the length is showcased, but the hair is out of your eyes.
Section off the top half of your hair, starting from just above your ears. You want to gather enough volume to create a substantial braid, but leave enough down so that it doesn’t look like you’ve sectioned off too much. Secure this section with a small, clear elastic to keep it stable while you work.
Mastering the Crown Transition
The key to this style is the “crown” effect. You are essentially creating a half-up ponytail, braiding it, and then coiling it into a bun. Because the bun sits in the middle of your head, it acts as a focal point. Ensure your braid is long enough to wrap around itself at least once before pinning. If you have extra length, tuck the tail underneath the bun to hide the ends.
Avoid pulling the braid too tightly against your scalp. You want a bit of lift at the roots; this creates volume and prevents that slicked-back, severe appearance. If the crown feels too flat, use a tail comb to gently lift the hair at the roots before pinning the bun in place.
4. The Double Fishtail Wrapped Bun

If one fishtail braid is good, two are almost always better. This style involves creating two separate braids and then combining them into a single, complex-looking bun. It looks incredibly intricate, but once you master the basic fishtail, the technique is essentially the same as doing a single braid twice.
Divide your ponytail into two equal parts and create two standard fishtail braids. Secure both ends with small elastics. Now, you have two braids of equal length. This is where the styling begins.
Why Complexity Matters
By twisting these two braids together, you create a density that a single braid cannot achieve. It looks like you have spent an hour weaving your hair, even if you are just pinning two separate braids.
- Take the first braid and coil it into a circular bun shape at the nape of your neck, pinning as you go.
- Take the second braid and wrap it around the first one, following the path of the existing coil.
- Tuck the ends underneath the main structure.
- If you have shorter layers poking out, use a light mist of hairspray on a toothbrush to smooth them down.
This style provides a heavy, secure hold that is excellent for long, thick hair. It won’t budge, even if you are dancing or moving around all day.
5. The Low Fishtail Chignon for Weddings

Formal events demand a style that is secure and polished, but still elegant. The low fishtail chignon is a perennial favorite for weddings because it looks stunning from the back—especially if you have accessories like pearls or small floral pins to tuck into the braid.
Begin with a low ponytail at the nape of your neck. To ensure the base is smooth, use a boar bristle brush to gather the hair. If you have bangs or layers, leave them out so they can be curled later to frame your face.
The Art of the Chignon
A chignon, by definition, is a knot or twist worn at the nape of the neck. When you incorporate a fishtail braid into this, you are adding texture to a traditionally smooth style. Fishtail the entire length of the ponytail. Once you reach the bottom, pull the braid apart until it is significantly wider than it was when you started.
When you roll the braid into the chignon, don’t roll it too tightly. You want a loose, rounded shape. Pin it into the base of the ponytail. If the braid looks a bit “stiff,” use your fingers to tug at the loops of the braid after it is pinned. This softens the edges and gives it that voluminous, couture look.
6. The Reverse Fishtail Braided Bun

This is for the person who loves a challenge. The reverse fishtail—or “inside-out” fishtail—looks more three-dimensional. Instead of crossing the strands over each other, you cross them under. It makes the braid stand out from the head rather than lying flat against it.
Flip your head upside down to begin. Gather your hair at the crown of your head, but start the braid from the nape of your neck, moving upward. This requires a bit of arm strength and patience. Use a mirror to help you track your progress if you are doing this on yourself.
When to Use This Style
The reverse fishtail creates a “popping” effect. Because the braid is technically inverted, the woven strands appear to sit on top of the braid. When you coil this into a high bun at the top of your head, the texture is much more visible than a standard flat fishtail. It is a fantastic way to show off highlights or balayage, as the weave creates a beautiful mix of tones.
Once you reach the crown, gather the rest of your hair and incorporate it into a high bun. Secure the bun with several pins. Because the braid starts from the neck, the weight of the bun is supported by the braid itself, which helps keep the style secure for hours.
7. The Messy Fishtail Top Knot
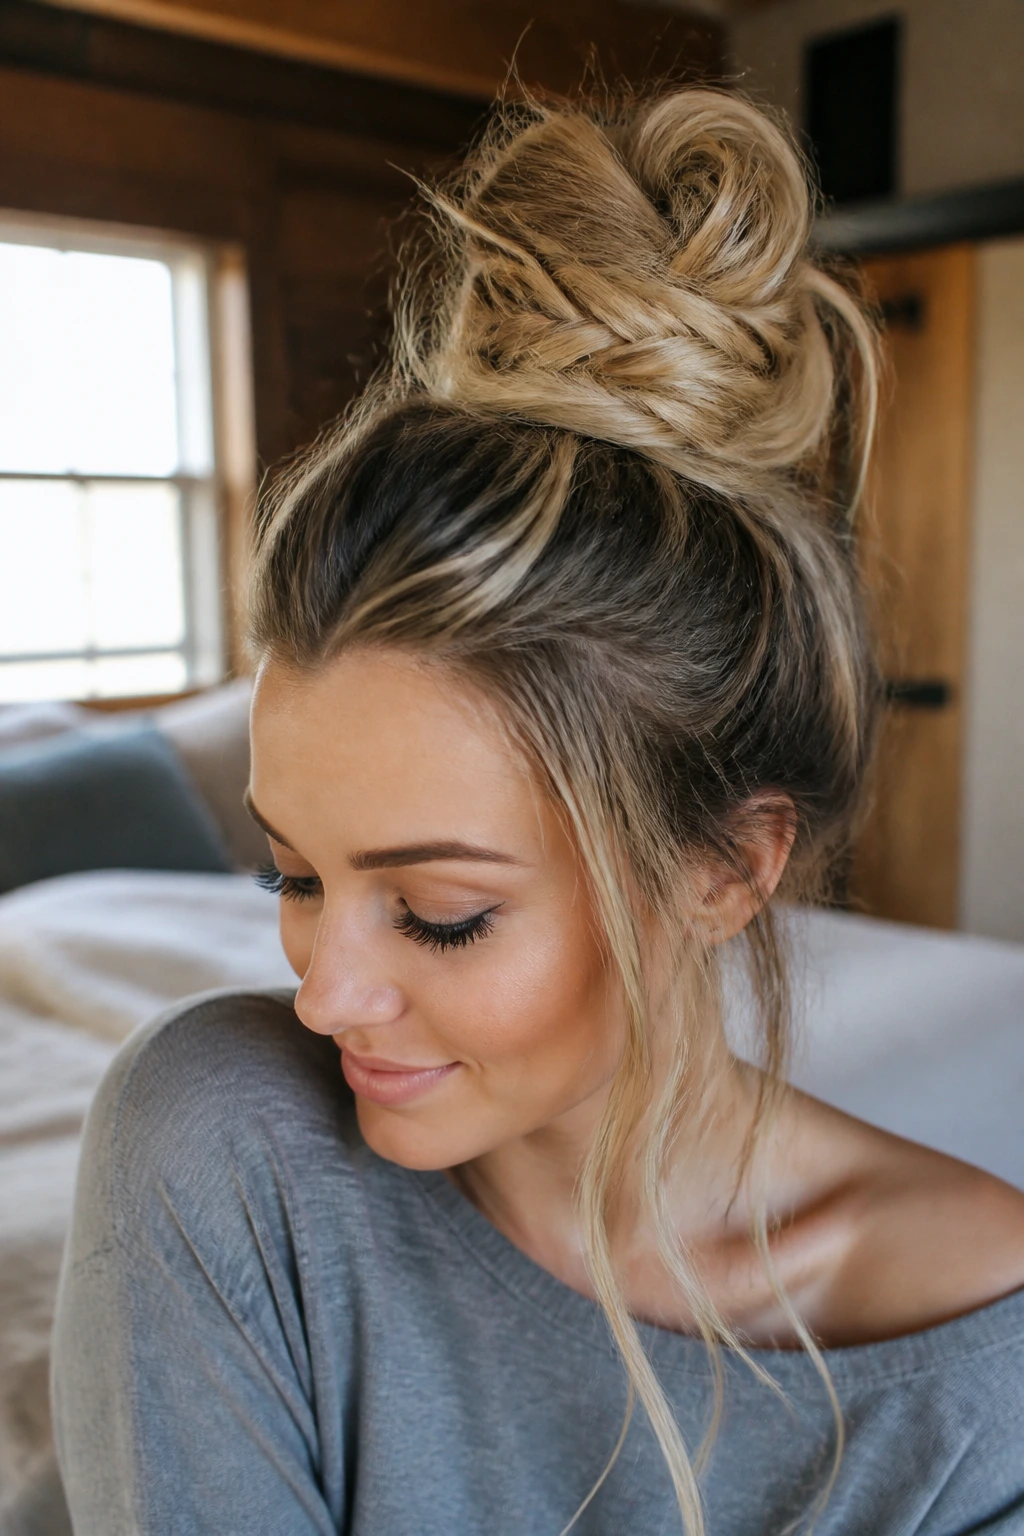
We have all had those mornings where you have five minutes to get ready. The messy top knot is the go-to savior of long hair, but it can look a bit boring. Adding a fishtail element transforms it from a “I’m rushing” look to a “I’m stylish” look.
Gather your hair into a high ponytail, but don’t pull it all the way through on the last loop. This creates the looped bun shape. Take the ends that are left out—usually a few inches of hair—and fishtail braid them. It doesn’t need to be perfect; a messy fishtail is often more charming than a precise one.
Making It Look Intentional
Once the ends are braided, wrap the braid around the base of your bun. Pin it in place. The key is to tug at the loops of the bun itself, not just the braid. You want the whole thing to feel loose and voluminous.
If you have layers, let them fall where they may. This style is meant to look effortless. If it’s too tight, it loses that relaxed, cool-girl energy. Don’t be afraid to pull some shorter pieces out around your temples to soften the look further.
8. The Fishtail-Accent Low Sock Bun
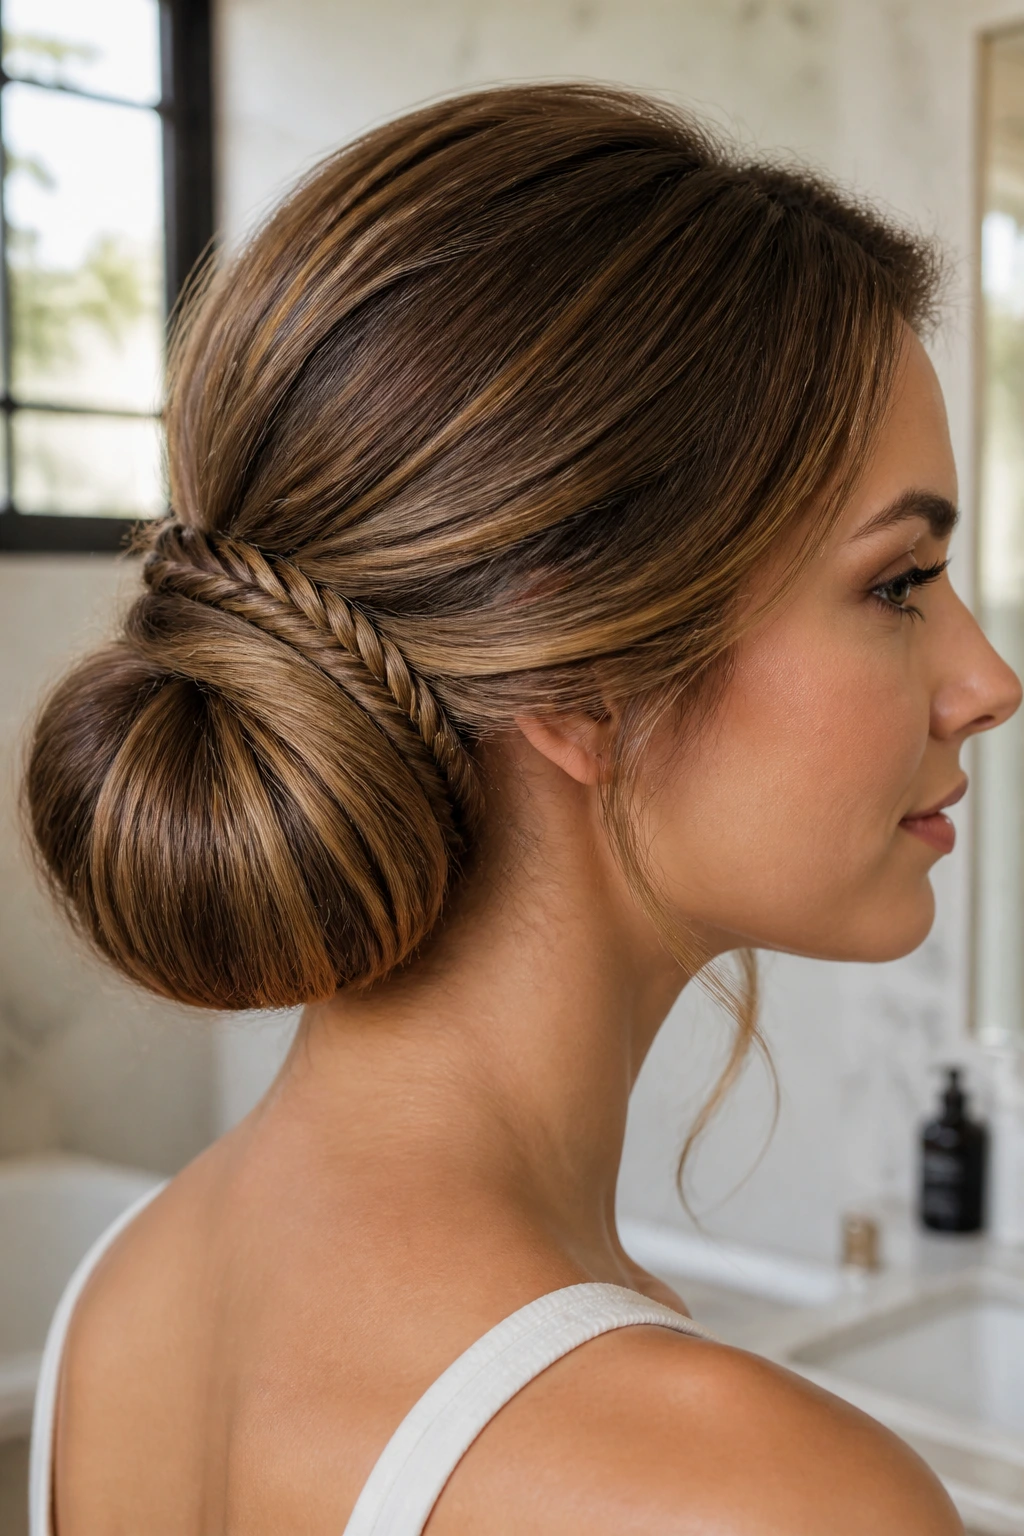
If you want the volume of a sock bun but find the standard smooth look a bit too “ballerina,” adding a fishtail accent is the perfect compromise. It breaks up the uniformity of the donut shape and adds visual interest.
Place a hair donut or a rolled-up sock around the base of your low ponytail. Spread your hair over the donut and secure it with a second elastic. You will have a large, round bun. Now, take a small section of hair from the underside—the part closest to your neck—and braid it into a fishtail.
The Balancing Act
Wrap the fishtail braid around the base of the bun and pin the end underneath. This creates a “collar” of texture around the bun. It’s subtle, but it adds that extra detail that makes people look twice.
This style is excellent for thin hair that needs a bit of padding. The donut provides the shape, while the fishtail braid hides the elastic and adds a professional, polished finish. It is a classic look that works just as well in a corporate setting as it does for a casual dinner.
9. The Braided Fishtail Side Sweep
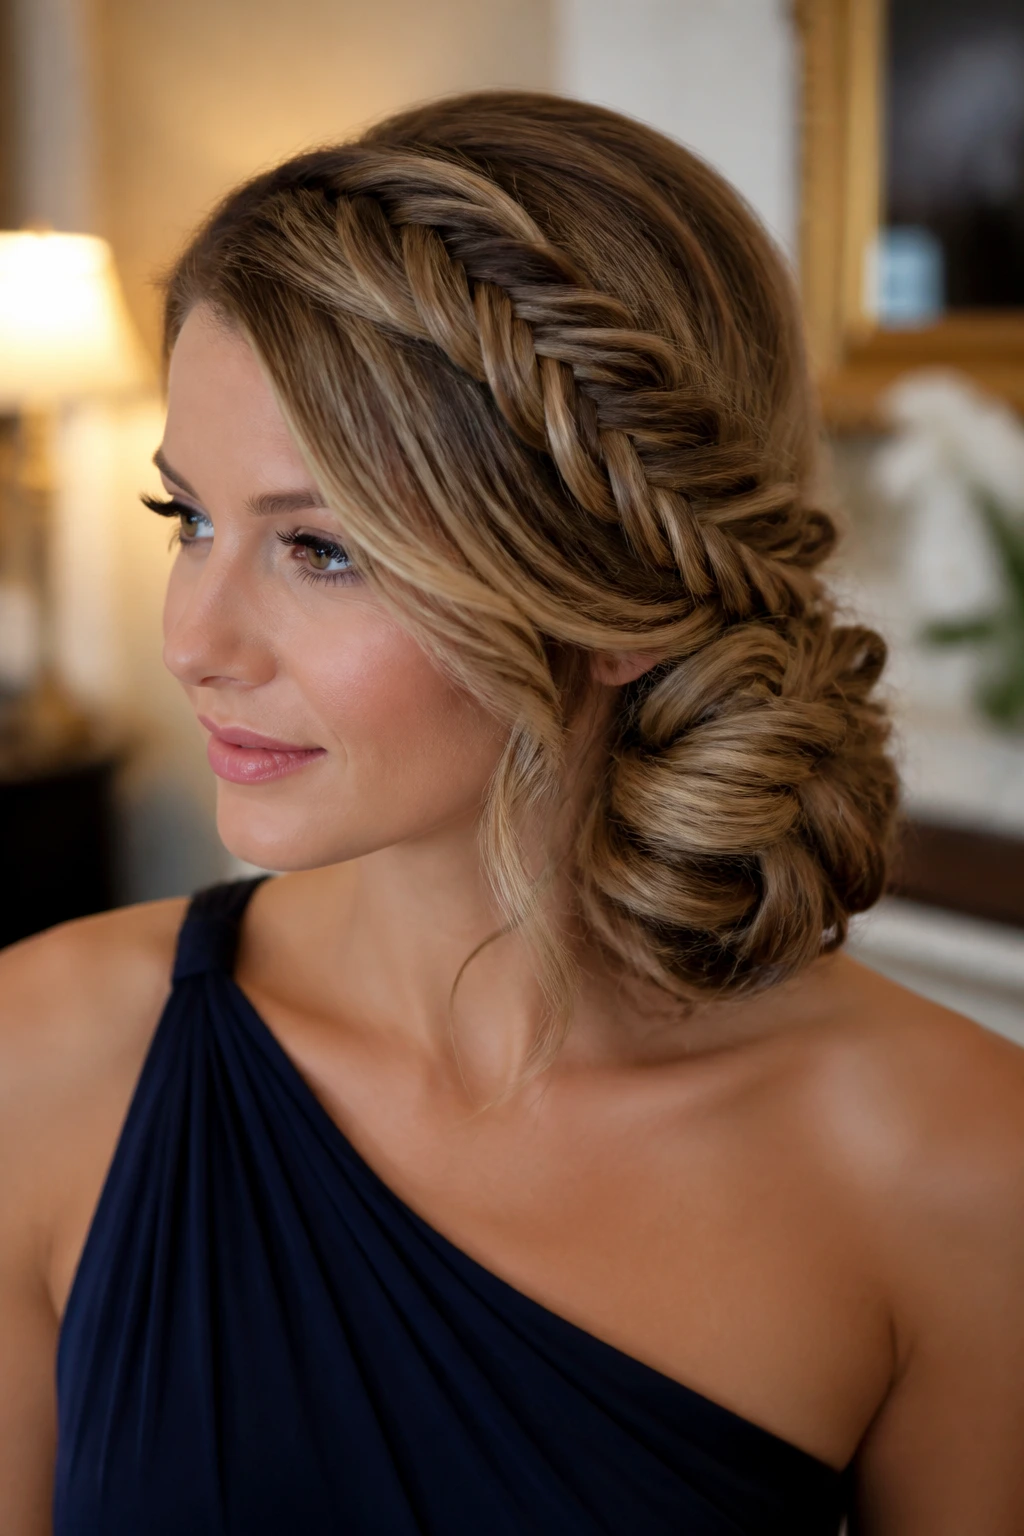
This is the ultimate formal style for people who want to showcase their hair length while still keeping it off the back of the neck. It combines a deep side part with a heavy fishtail sweep that culminates in a side bun. It is sophisticated, heavy on the drama, and absolutely beautiful.
Start with a deep side part. Sweep all your hair to the heavier side—the side with more hair. Start a fishtail braid at the temple and work your way down, incorporating the rest of your hair as you go. This is a French-braid style fishtail, where you add hair into the weave as you move down the side of your head.
Why This Style Commands Attention
The side sweep creates a face-framing effect that is universally flattering. By incorporating all the hair into one large, sweeping braid, you ensure that even the longest hair is contained and managed. The resulting bun sits on the shoulder, which is incredibly elegant when wearing a dress or a top with an interesting neckline.
Ensure the braid is loose. A tight braid on the side can look a bit severe. If you have natural texture, let it shine through. The slightly messy, undone nature of this braid makes it feel modern rather than dated.
10. The Fishtail Crown into Low Bun
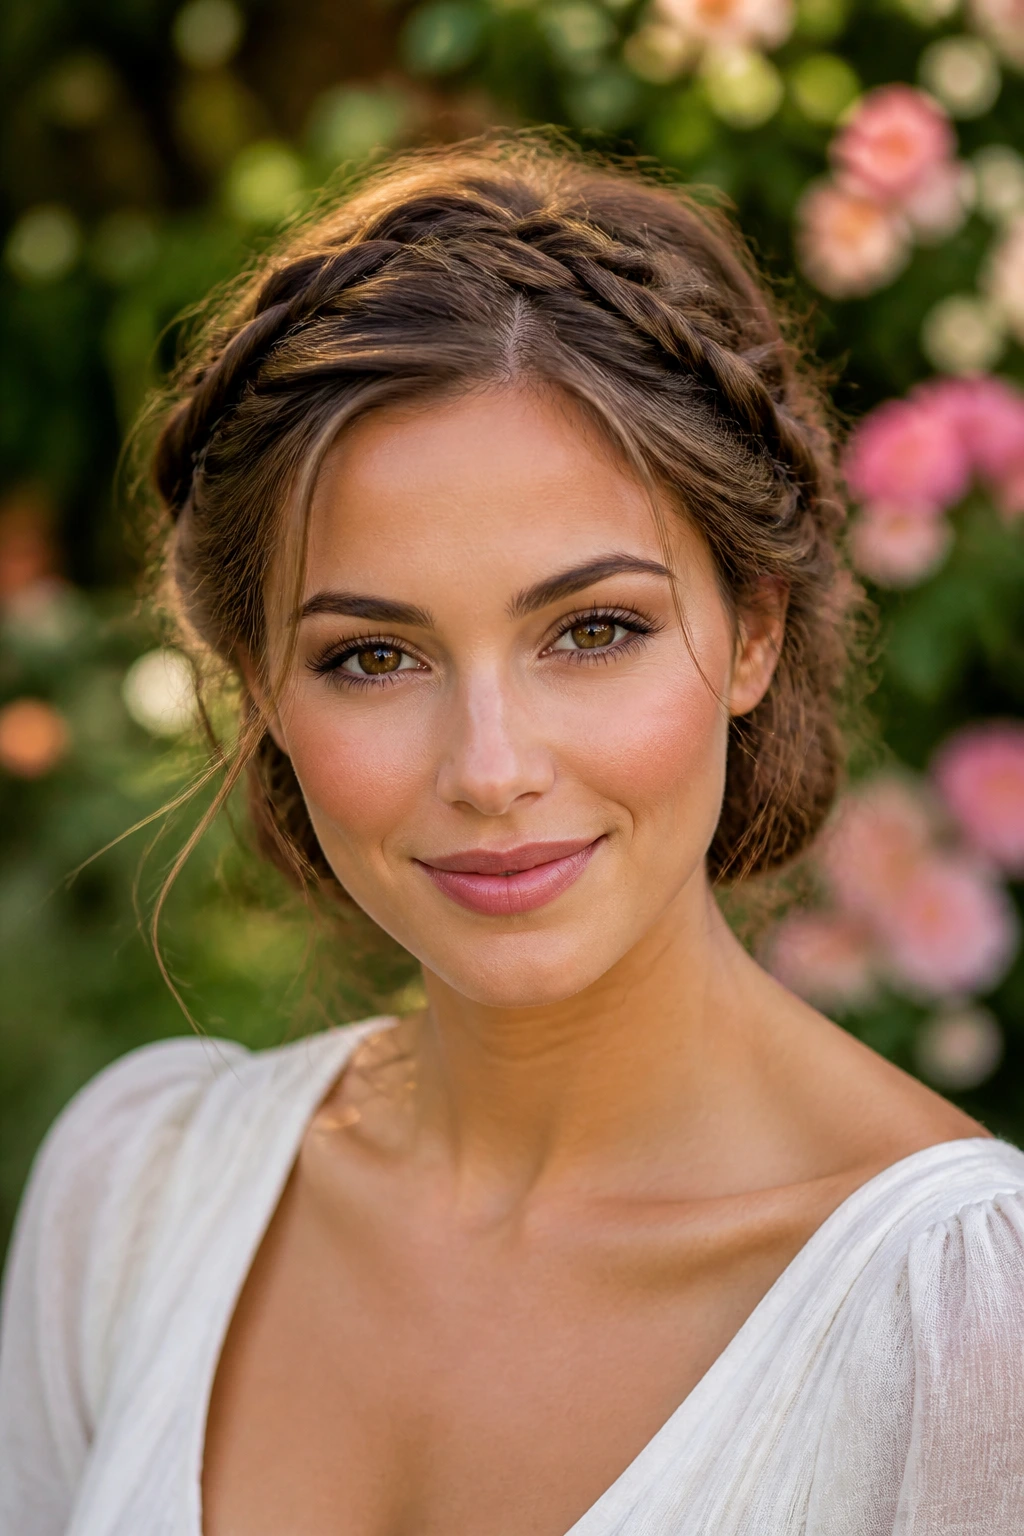
This style is essentially a halo braid that feeds into a bun. It creates a complete circle of texture around your head, drawing the eye in and then terminating in a neat, professional knot at the back. It requires a bit more technical skill, but the result is worth the effort.
Start by creating a Dutch fishtail braid along your hairline. Begin at one ear and work across your forehead to the other ear. Use the French technique of adding small sections of hair as you move. Once you reach the second ear, continue braiding normally down the side of your head, incorporating the remaining length.
The Transition to the Bun
Once you have the braid wrapped around your head, you will have a long tail of braided hair left over. Sweep this tail into a low bun at the nape of your neck. You are effectively connecting the crown to the base.
This is a very sturdy style. Because the braid is anchored into the scalp all the way around, it acts as a cage, keeping your hair secure. It is a fantastic choice for active days or windy weather when you cannot afford to have your hair coming undone.
11. The Fishtail-Wrapped Ballerina Bun

The traditional ballerina bun is sleek, smooth, and very tight. It is a classic for a reason, but it can feel a little one-dimensional. Wrapping a fishtail braid around the base is an easy way to elevate it.
Create a perfect, high, sleek donut bun. You want the surface of the bun to be as smooth as possible—use a smoothing cream or a light-hold gel to eliminate flyaways. Once the bun is pinned securely, take a small section of hair—or use a clip-in hair extension that matches your color—and create a tight fishtail braid.
The Finishing Touch
Wrap this braid around the base of your bun. Tuck the end of the braid underneath and pin it with a hair pin that matches your hair color. It looks like you have intricately woven the bun itself, but you have actually just utilized a simple accent.
This is a great trick for fine hair. If you don’t have enough hair to create a massive, intricate braided bun, using an extension for the wrap-around braid gives you the look without the need for excessive volume that your natural hair might lack. It’s an optical illusion of thickness and skill.
12. The Multi-Strand Fishtail Updo
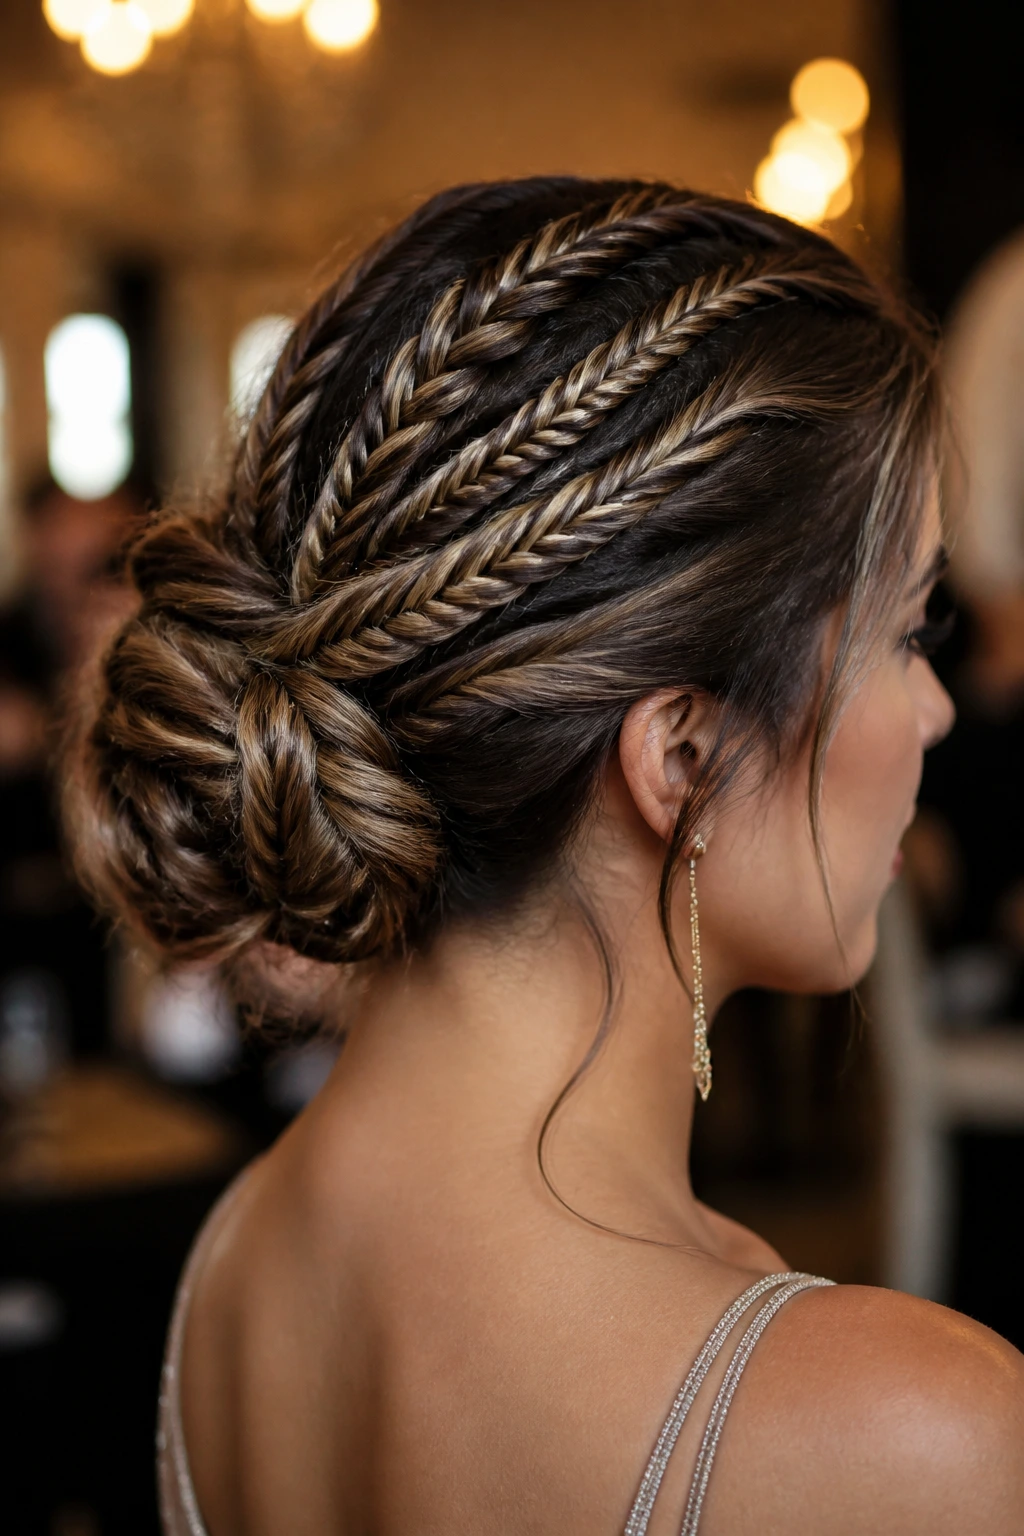
This is the “maximalist” option. Instead of just two sections for your fishtail, you are going to create multiple smaller fishtail braids and then pin them all together. It creates a “woven” effect that looks incredibly complex, almost like a basket-weave.
Divide your hair into four or five sections, depending on how thick your hair is. Braid each section into a tight, small fishtail. Secure each one with a small clear elastic. You should now have several distinct, thin braids hanging down.
Bringing It All Together
Gather these braids and twist them together into a loose, soft bun at the back of your head. Pin each braid individually to ensure it stays in place. The result is a bun that has incredible texture, as each individual braid is visible.
This style is perfect for events where you want your hair to be a conversation starter. It looks like you spent hours on it, even if you are just following a simple repetitive process. The key is to keep the braids tight so they don’t lose their shape when you pin them.
13. The Half-Fishtail Space Buns
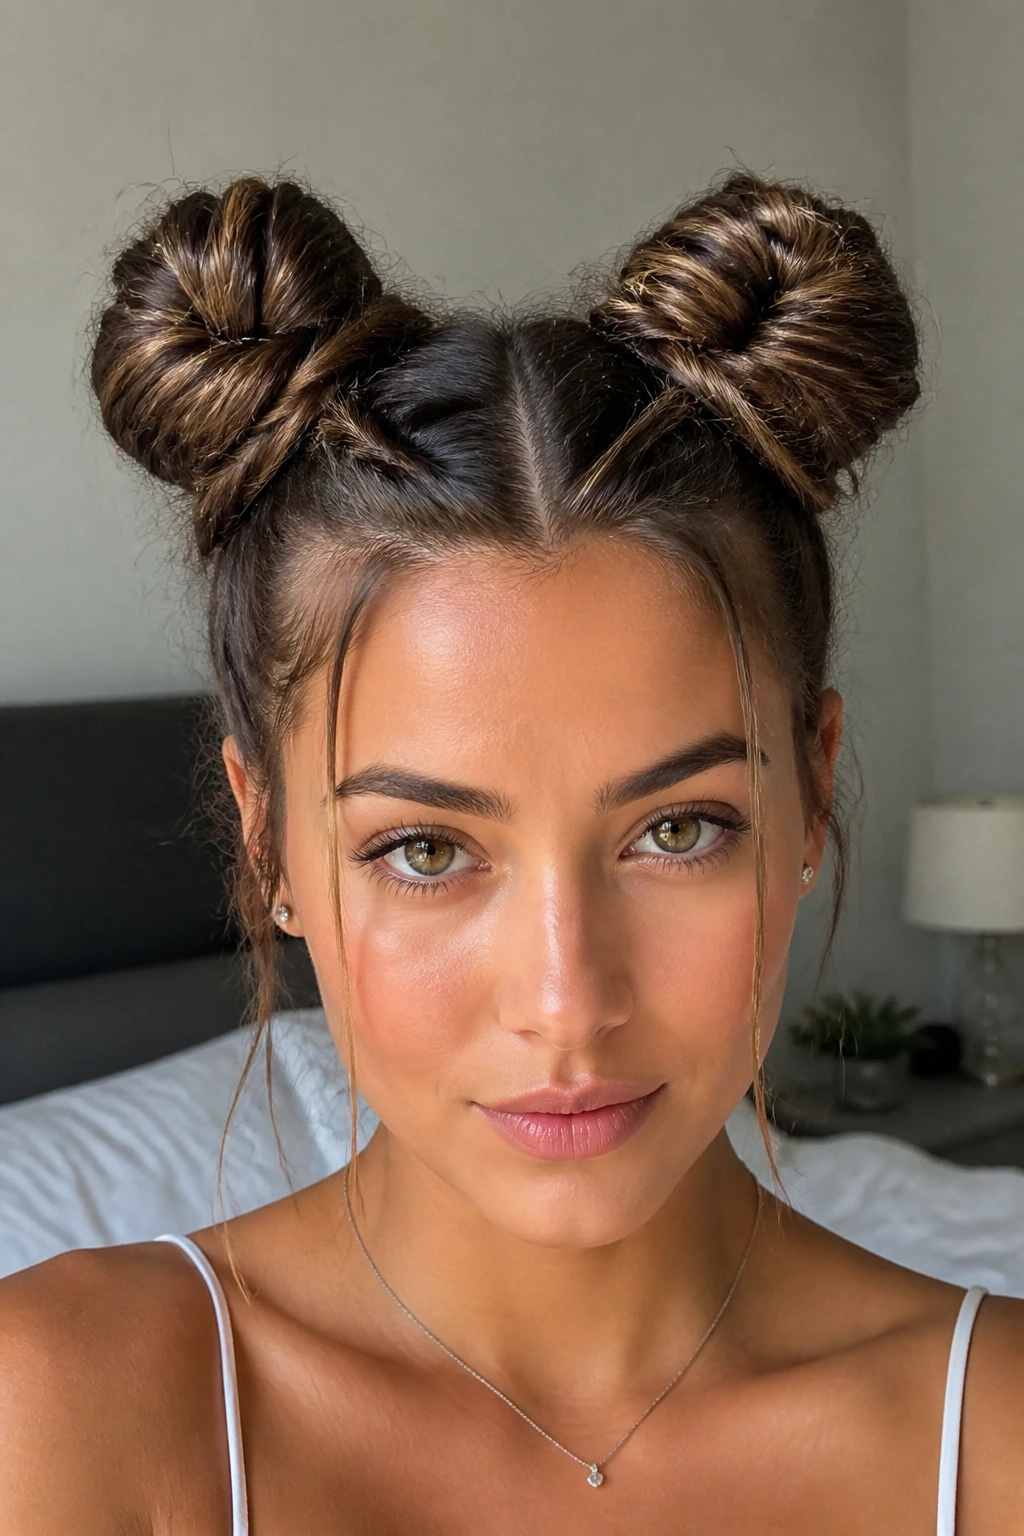
For a playful, youthful take, split your hair into two sections—one for each side of your head. Part your hair down the center, creating two high pigtails. Fishtail braid each pigtail until you reach the end, then secure with clear elastics.
Instead of leaving them as braids, wrap each braid into a bun at the top of your head. This creates two distinct “space buns” that are textured by the fishtail weave. It is a bold, fun look that is perfect for festivals, parties, or just a day when you want to feel a bit more energetic.
Tips for Balanced Buns
The trick here is symmetry. Make sure your pigtails are perfectly aligned, or the buns will sit at different heights. Use a comb to create a straight center part. If you have “baby hairs” at the front, let them fall naturally; it keeps the look from feeling too school-girl rigid.
If your fishtail braids are too long, you can wrap them around the base of the bun multiple times, or simply loop them through the center of the bun. Because the buns are small and high, they provide excellent volume and are very comfortable to wear for long periods.
14. The Intricate Fishtail Rose Bun

This style is sculptural. It involves taking a single, long fishtail braid and coiling it in a way that mimics the petals of a rose. It is a stunning choice for formal occasions, weddings, or dates.
Start with a low ponytail. Fishtail braid the entire length of your hair. The tighter the braid, the more “petals” you will have in your rose. Once you reach the end, secure it with a small elastic. Pancake the braid heavily on one side—the side that will be the “outside” of the rose.
Constructing the Rose
Start rolling the braid from the bottom up, keeping the “pancaked” side facing out. As you coil, the flat, pulled-out edges will fan out, resembling rose petals. Pin as you go to ensure the structure holds.
This style is all about patience. You aren’t just tying hair up; you are building a shape. If you have very long hair, the rose will be quite large. If you have medium length, it will be more compact. It is a beautiful, feminine style that looks much more difficult than it actually is.
15. The Loose Fishtail Messy Bun
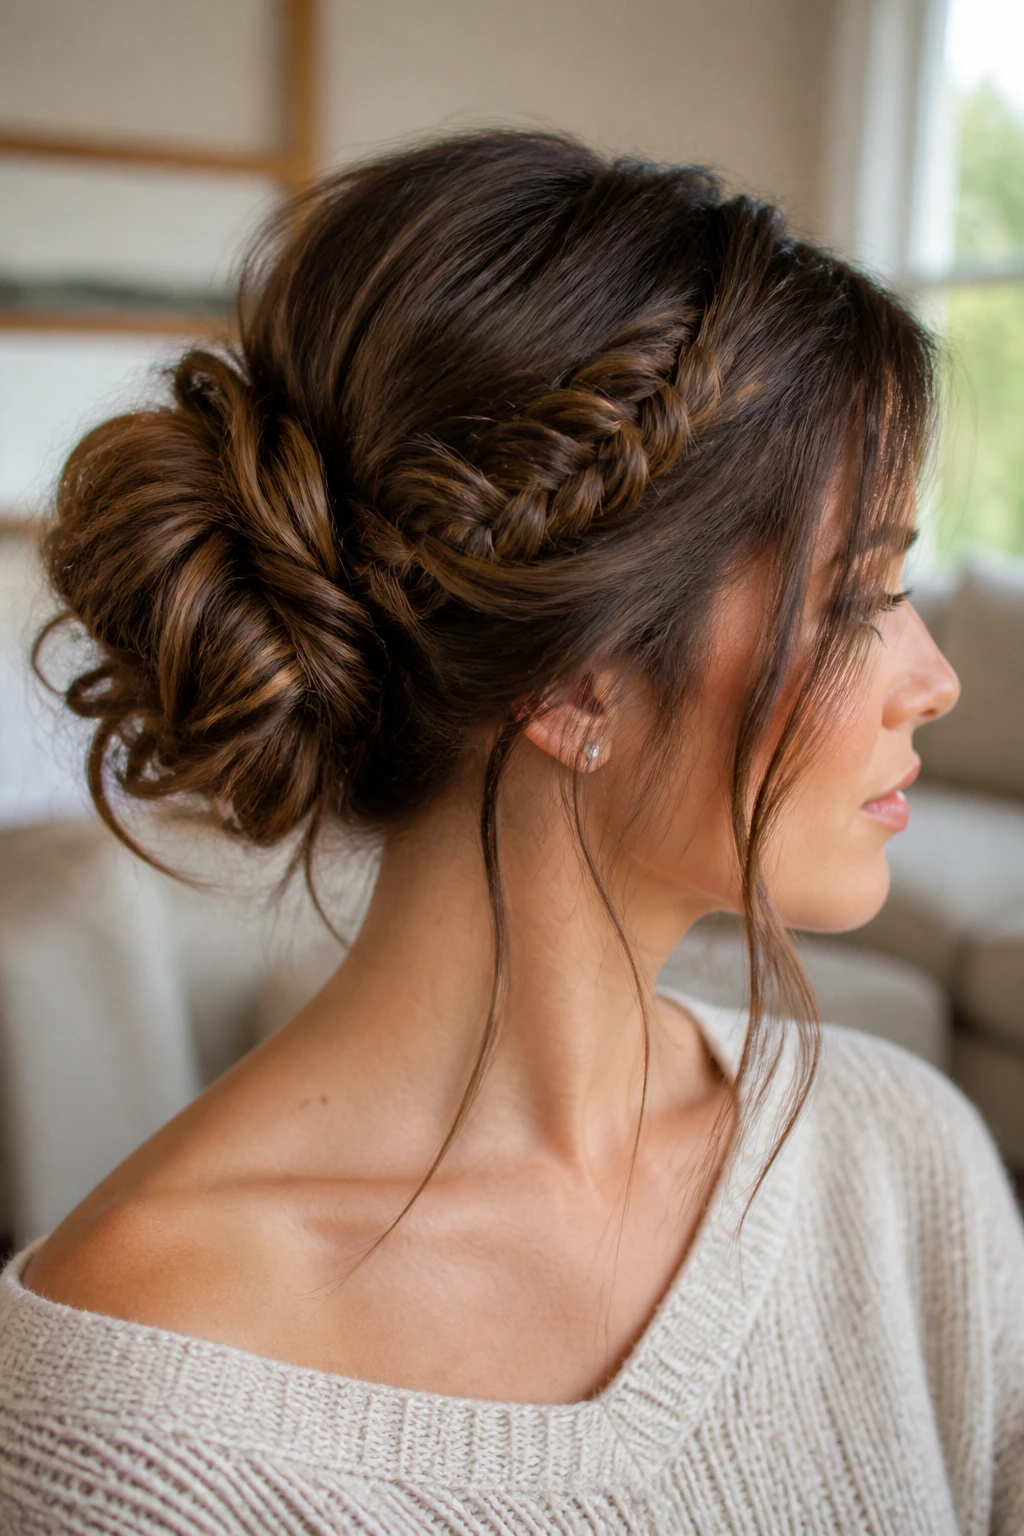
Finally, the style for when you want to look put-together but don’t want to try too hard. This is the “I just threw my hair up” look, but with a structural twist. It combines the ease of a messy bun with the unique texture of a fishtail braid.
Gather your hair into a ponytail, but braid a fishtail into the ponytail before you turn it into a bun. It doesn’t need to be tight. In fact, it should be loose and slightly falling apart. Secure the braid at the end.
Why It Works
Twist this loose braid around the base of your ponytail. Don’t worry about tucking in every stray piece. Let the texture of the braid do the heavy lifting. Pin it loosely, so it feels like it might fall out at any second—this is the aesthetic.
This is the ultimate low-maintenance long-hair style. It works because it embraces the natural texture of your hair. If you have layers, they will fall out and frame your face, which is exactly what you want. It is relaxed, chic, and completely wearable.
Final Thoughts
The beauty of the fishtail bun is that it is far more versatile than most people assume. It can be the most structured, polished look in the room, or it can be the messiest, most relaxed style for a weekend outing. The key to mastering any of these is not just the braiding technique itself—which, once you learn the over-under rhythm, becomes muscle memory—but the preparation.
Texture is your best friend when working with fishtail braids. If your hair is too silky or slippery, the braid will slide apart the moment you try to pin it. Do not hesitate to use dry shampoo, sea salt spray, or a light texturizing powder before you start. These products give the hair the grip it needs to hold the braid’s shape.
Finally, do not be discouraged if your first attempt is not perfect. Fishtail braids are notoriously unforgiving of uneven tension, but they are also incredibly forgiving of a little messiness. If a loop looks a bit wonky or a section feels too tight, just pull on it. That is the beauty of this braid—it is meant to be played with, pulled at, and adjusted until it looks exactly how you want it. Take your time, focus on the tension, and enjoy the process of turning your long hair into something a little more special.
