



Awkward-length 4C hair has a way of making even a good hair day feel slightly argumentative. The ends brush your neck one minute, then shrink back the next, and the middle stage between “too short to do much” and “long enough to behave” can be irritating in a very specific way.
Shrinkage is rude. It turns a shoulder-grazing length into what looks like a much shorter shape, and the result is usually a lot of half-finished ponytails, lumpy buns, and styles that collapse before lunchtime.
The sweet spot is to stop fighting the length and start working with it. A good style for awkward-length 4C hair does one of three things: it stretches the hair, tucks the ends, or builds shape in a way shrinkage can’t ruin.
That is the real trick here. Not perfection. Shape, hold, and comfort — and a little patience with your edges.
1. Mini Twists for Awkward Length 4C Hair

Mini twists are one of those styles that look modest at first and then quietly prove themselves for days. They work beautifully on awkward-length 4C hair because the smaller sections hold their shape better, and the twists keep shorter strands from puffing up in all the wrong places.
The parts matter. I like sections around 1/4 to 1/2 inch wide, depending on density, because that size gives the hair enough room to twist without creating a bulky, lumpy finish. If the hair is freshly washed, stretch it first with banding, plaits, or a gentle blow-dry on low heat. That little bit of stretch makes the twists neater and keeps the ends from curling back on themselves too fast.
What Makes Mini Twists Work Here
- Use a light leave-in plus a twist cream so the hair stays soft, not greasy.
- Twist in the same direction from root to tip, then let the ends coil naturally.
- Smooth the roots with your fingers, not a heavy brush, so the style stays full instead of flat.
- Sleep in a satin bonnet or scarf, then separate only the frizziest twists by hand.
Mini twists are not flashy. That’s why they’re useful. They can last 1 to 3 weeks with a tidy refresh at the hairline, and they give awkward-length hair a clean, finished look without asking the ends to do too much.
2. Flat Twists Into a Low Bun
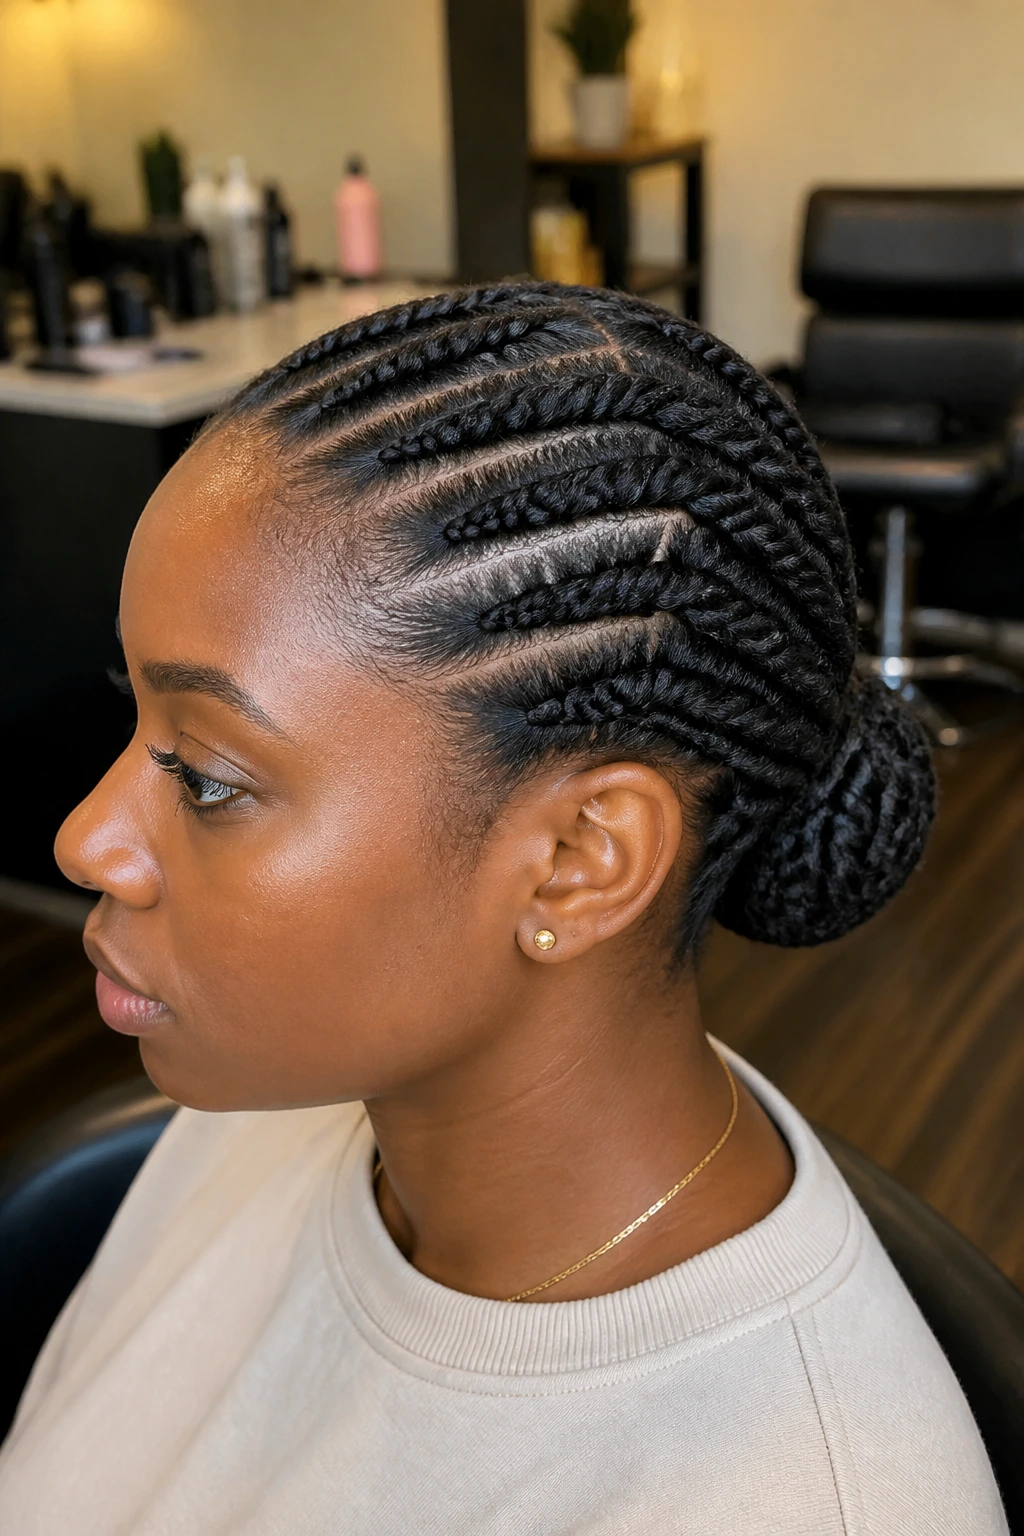
Flat twists are the style I reach for when the hair is acting short in the front and uneven in the back. They lie close to the scalp, which means you get control where you need it and a bun where your length can actually gather without a fight.
Start with moisturized, stretched hair and part it into 4 to 8 sections, depending on how dense the hair is. Flat twist each section toward the nape, then collect the ends into a low bun. If the hair is too short to coil into a full bun, tuck the ends under and pin them in place. A small bun that sits tight and neat always looks better than a big one that keeps slipping out.
A thin layer of gel along the part lines helps, but don’t drown the hair in it. That’s where the flakes come from. Press the roots smooth with your fingertips, tie it down for 10 to 15 minutes, and let the shape settle before you leave the house.
It’s tidy. It’s practical. And it makes awkward-length hair look on purpose.
3. Chunky Braid-Out With a Soft Bob Shape
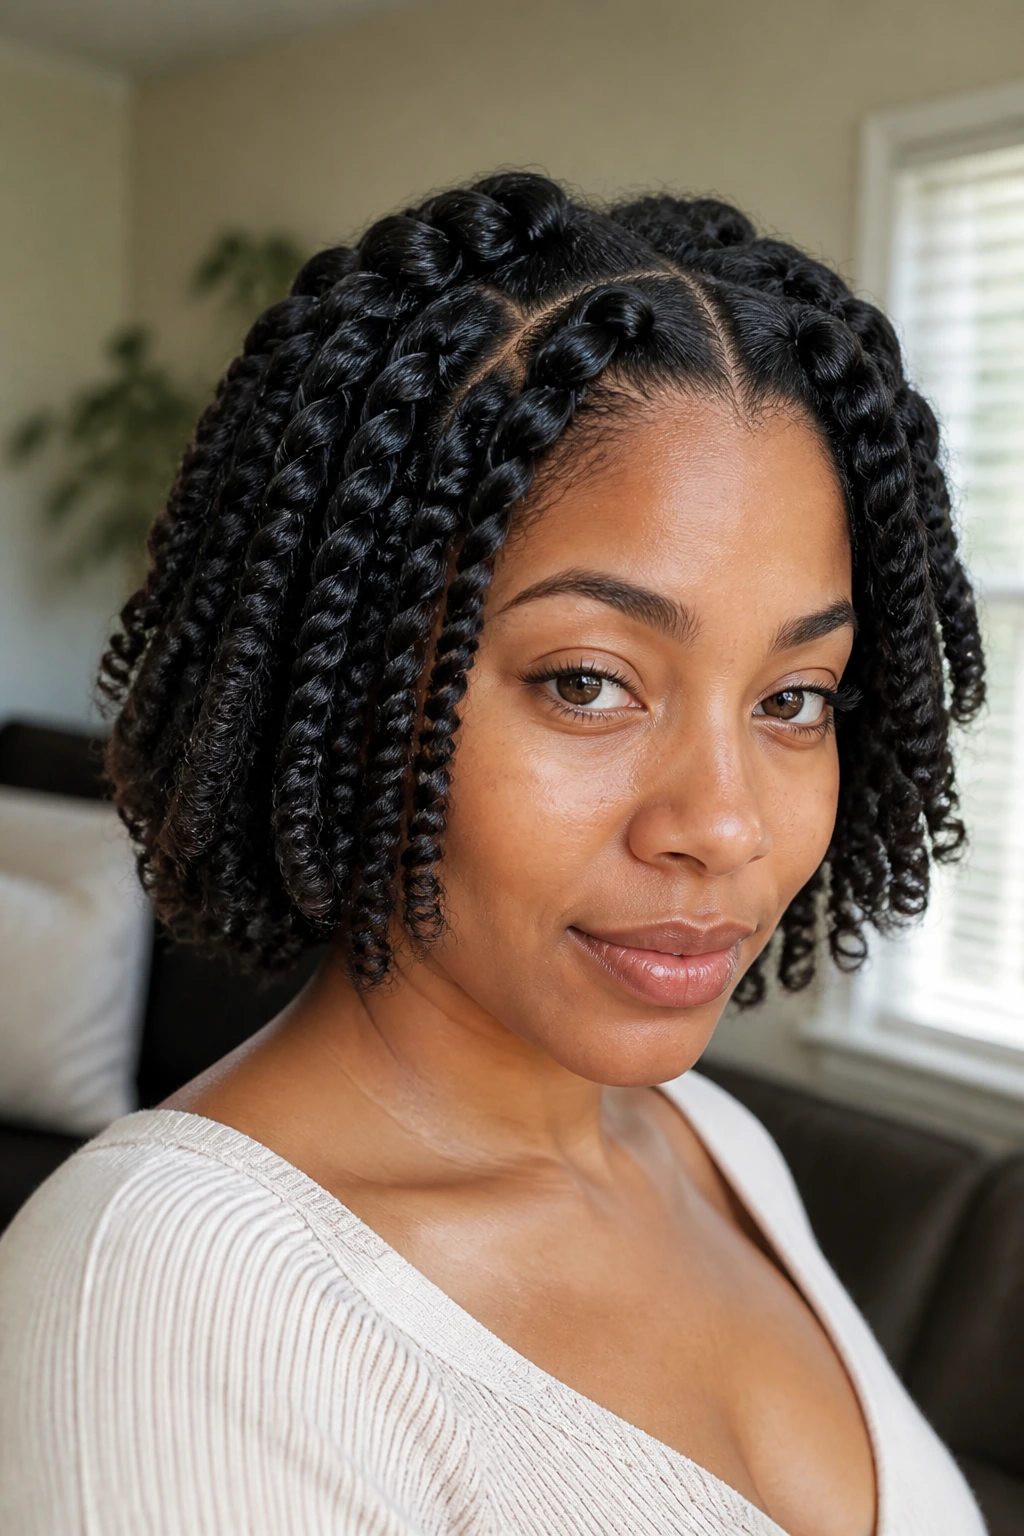
A chunky braid-out is the style I pull out when I want movement without letting the hair wander everywhere. It stretches awkward-length 4C hair just enough to show a shape, then gives it a soft, rounded bob effect once the braids come out.
The setup is simple, but the size changes everything. Use 6 to 10 braids on stretched, damp hair and keep the parts clean enough that the braid pattern doesn’t fight itself. Bigger braids give a fuller wave pattern, while smaller ones give more length. On awkward-length hair, I prefer the middle ground. Too small, and the style can look busy. Too large, and the definition disappears.
Let the braids dry completely. Completely. If the center is still cool or damp, the pattern will collapse the moment you separate it.
Once you take them down, use a little oil on your fingers and separate only once or twice. Over-fluffing makes the ends look frayed. A good braid-out should feel soft, not overworked.
4. Straight-Back Cornrows That Tuck Cleanly at the Nape
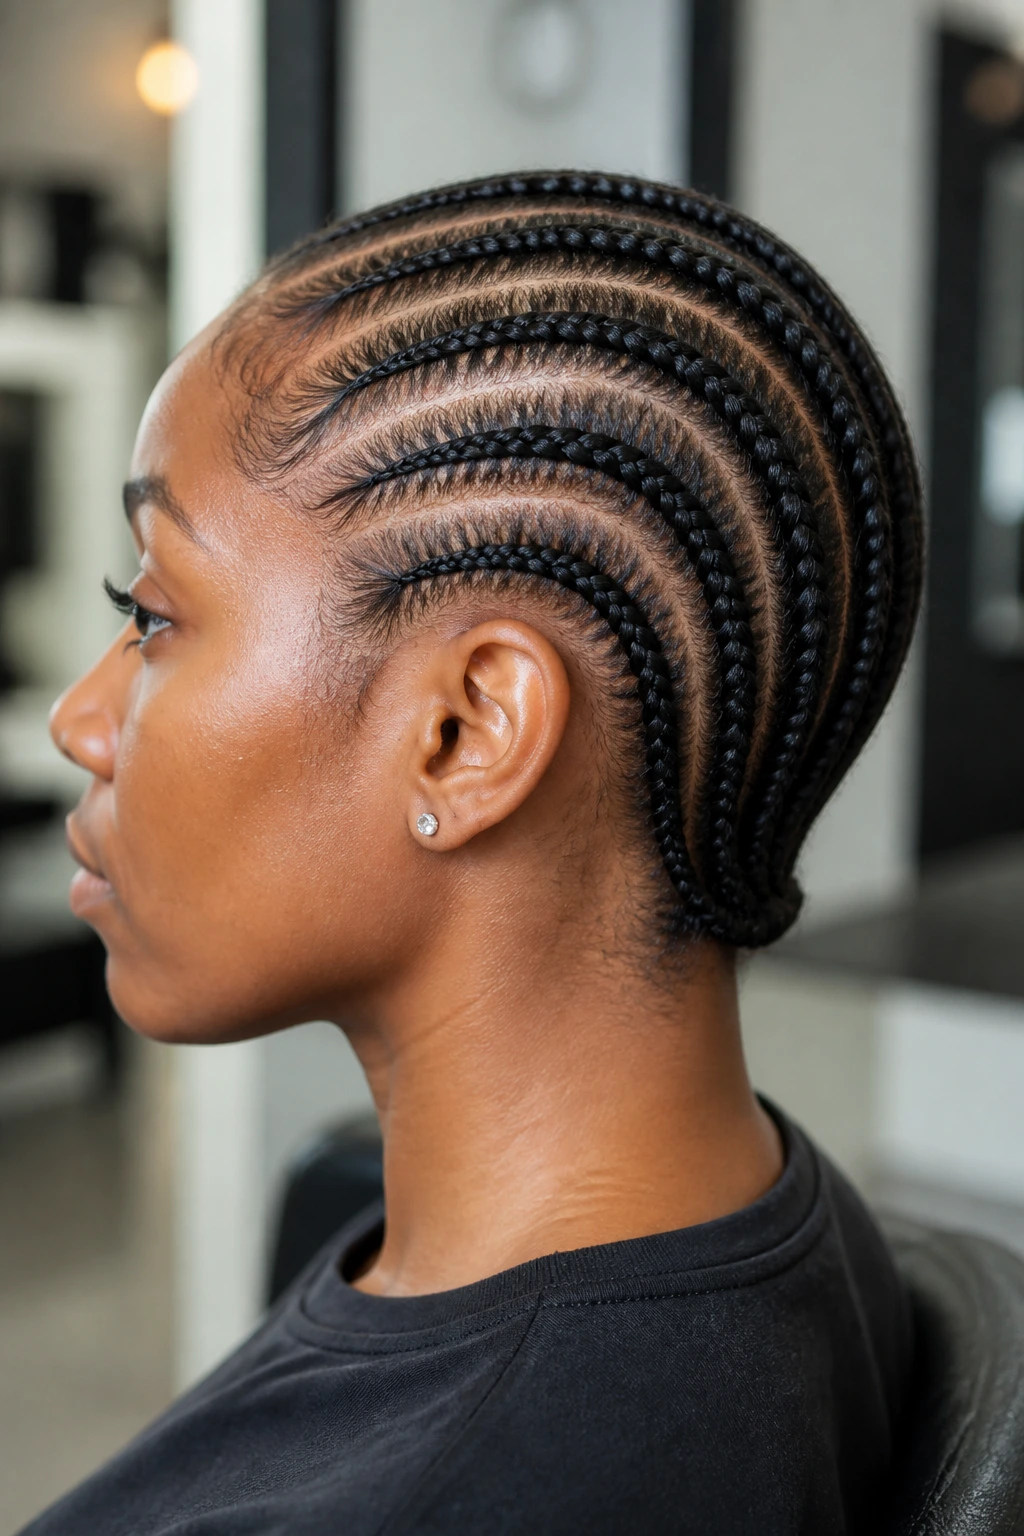
Need a style that stays put when scarves, collars, and wind all start acting up? Straight-back cornrows are hard to beat. They keep awkward-length 4C hair close to the scalp, and they buy you several days of low-fuss wear if the parts are neat and the tension is sensible.
The cleanest version usually uses 6 to 10 cornrows, depending on how much hair you have to work with. If the ends are too short for a full hanging braid, braid them down and tuck them under each row, or collect them into a tiny braided knot at the nape. That little tucked finish matters more than people think. It keeps the style from looking like it stopped halfway through.
What to Watch For
- Keep the first inch at the hairline gentle. Tight edges are not a prize.
- Use a rat-tail comb for parting, then a small amount of gel just on the roots.
- If the hair is extra soft, stretch it first so the rows do not pucker.
- Wrap it at night. Every single night.
Cornrows are plain in the best way. They let the hair rest, and on awkward length, rest is part of the point.
5. Halo Braid With the Ends Hidden Under
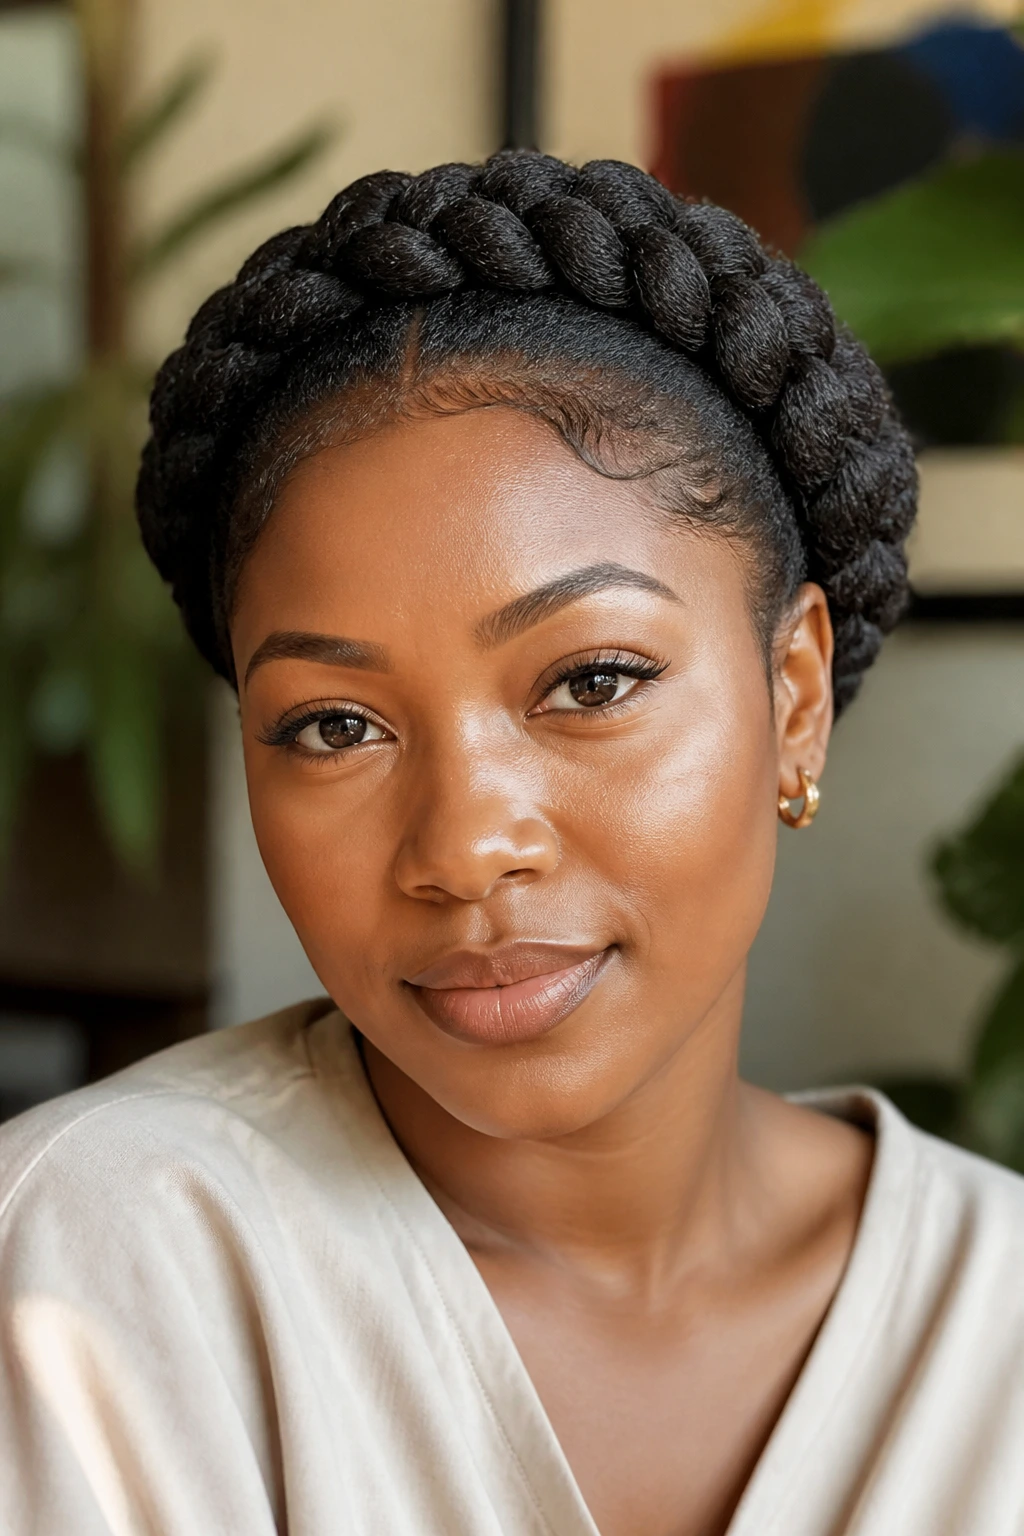
A halo braid gives awkward-length 4C hair a finished look that feels a little dressed up without being fussy. The braid sits around the head like a frame, and because the ends are tucked under, the shorter length at the back stops being a problem you have to explain.
This style works best on stretched hair, especially if the crown has enough length to grip cleanly. If your hair is uneven, start the braid where the hair is longest and move around the perimeter in small, even bites. Keep the braid snug enough to hold its shape, but not so tight that your scalp starts complaining halfway through the day.
A few pins at the nape will usually do the heavy lifting. Hidden pins. Not the shiny kind that wink at everybody.
The halo braid is one of those styles that looks like it took forever when, in practice, it mostly just takes patience and a steady hand. It’s a good option for meetings, events, or any day when you want your hair off your face and don’t want to spend an hour on it.
6. Bantu Knots That Still Look Intentional on Short Lengths
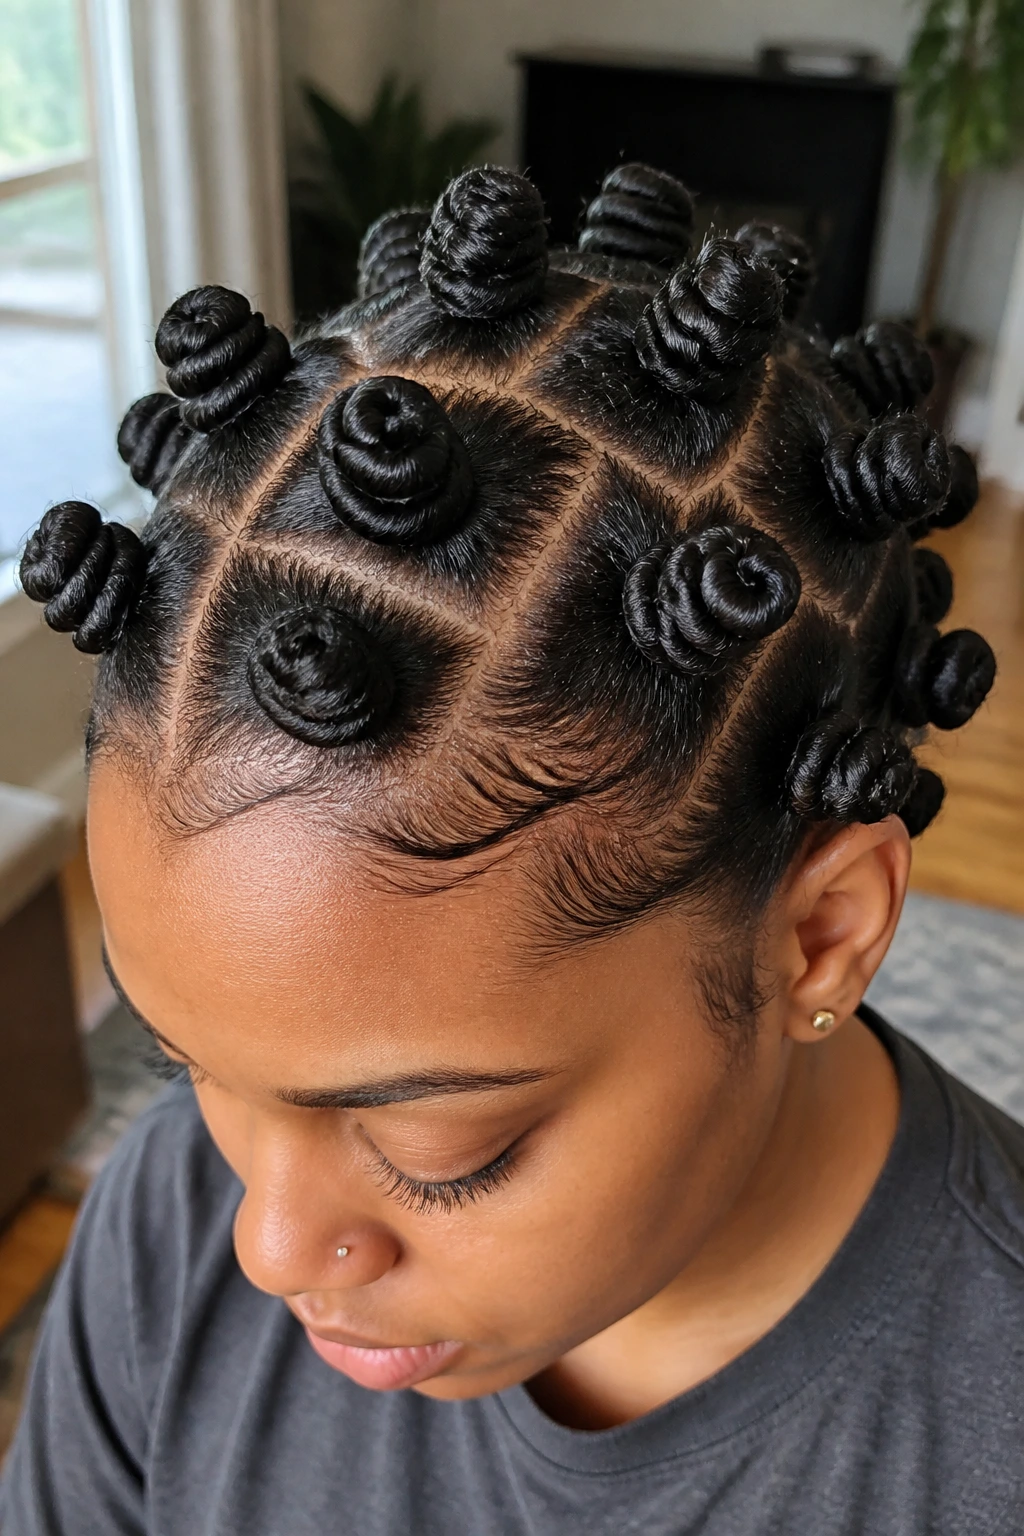
Bantu knots are blunt about length. They either work or they don’t. On awkward-length 4C hair, that honesty is useful, because the style doesn’t need long strands to look deliberate; it needs clean sections and a firm wrap.
Part the hair into 8 to 14 sections depending on density and how big you want the knots. Smaller knots give more definition if you plan to wear them out as a knot-out later. Bigger knots make a stronger statement on their own, but they can look uneven if the sections are rushed. Smooth each section with a little cream, then twist the hair down until it starts to coil on itself. Wrap the coil around its base and tuck the ends under.
What to Watch For
- Do not twist so hard that the scalp feels pulled.
- A dab of gel at the root helps the knot stay neat.
- Dry hair gives a cleaner knot pattern than soaked hair.
- If you want a knot-out, wait until the center is fully dry before taking them down.
Bantu knots are not subtle. That is part of the fun. They turn awkward length into a style with shape, texture, and a little attitude.
7. Half-Up, Half-Down Puff With a Clean Part
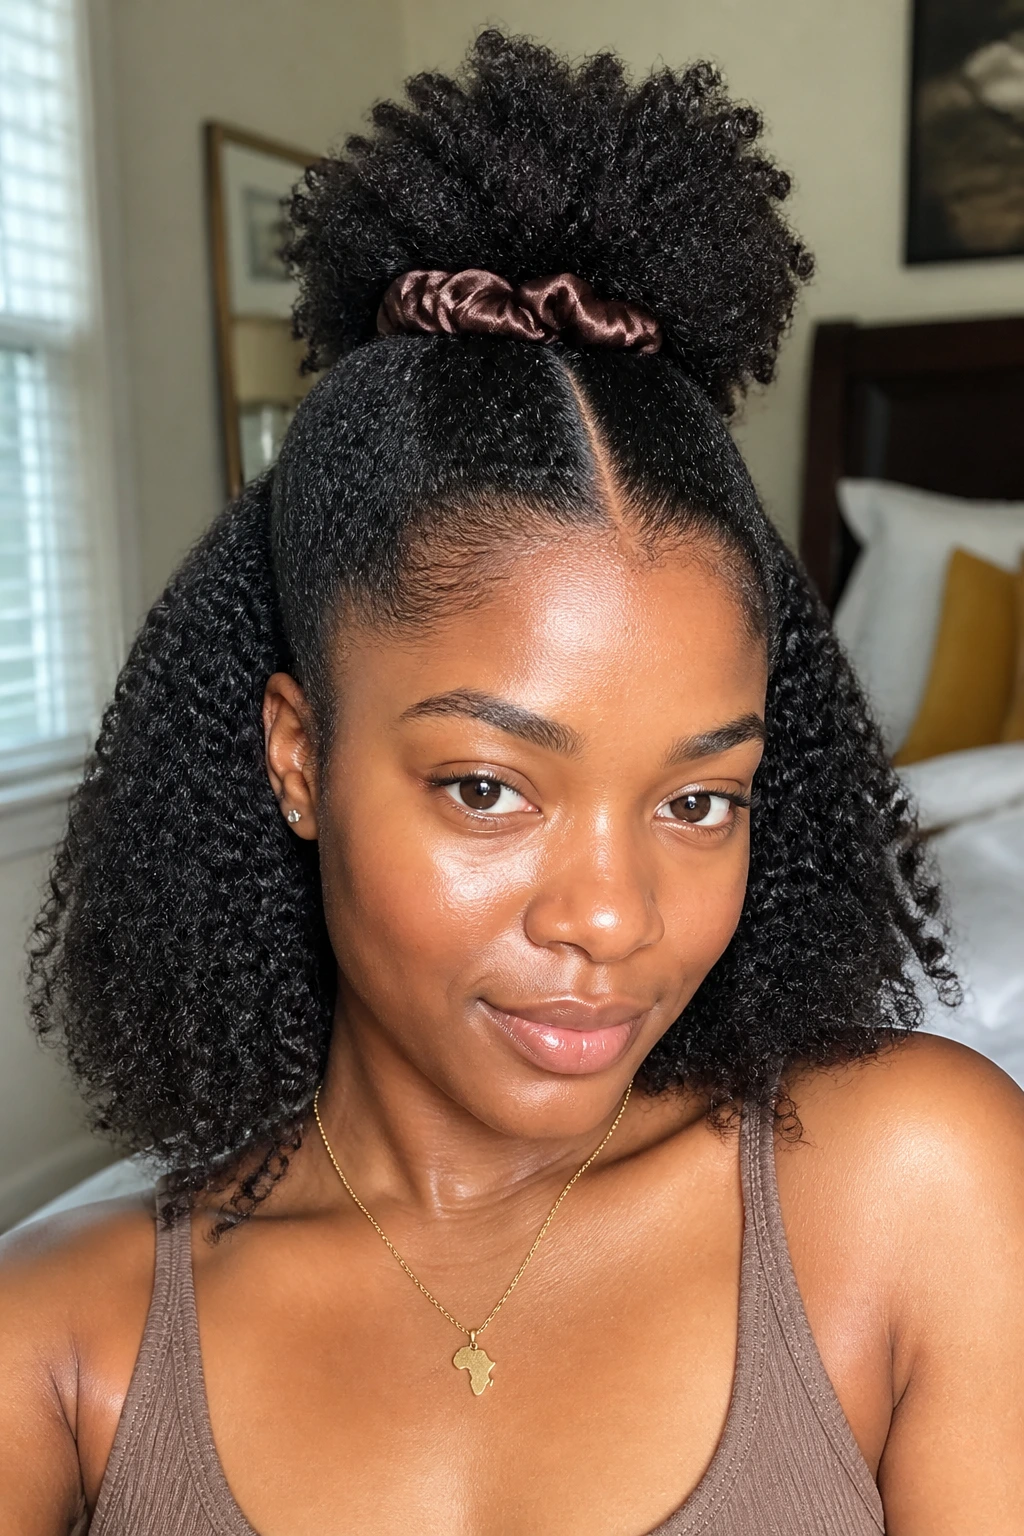
There’s something satisfying about a half-up, half-down puff on 4C hair. The top section gets lifted out of the way, the bottom keeps its texture, and awkward length suddenly looks planned instead of unfinished.
The best version starts with a clean center or side part and a small top section gathered into a puff with a soft elastic or satin scrunchie. Leave the lower section loose, or stretch it a bit first if you want a more rounded silhouette. The trick is balance. If the top puff is too tight and too tiny, it looks like an afterthought. If the bottom section is too swollen, the whole style starts to feel crowded.
I like this style when the hair has enough length at the crown to puff up but not enough to make a proper ponytail everywhere else. It gives you volume where you want it and freedom where you need it.
One tiny detail makes a big difference: smooth the front hairline first, then shape the puff. That order keeps the style from looking rushed.
8. Bob-Length Box Braids That Stop at the Collarbone
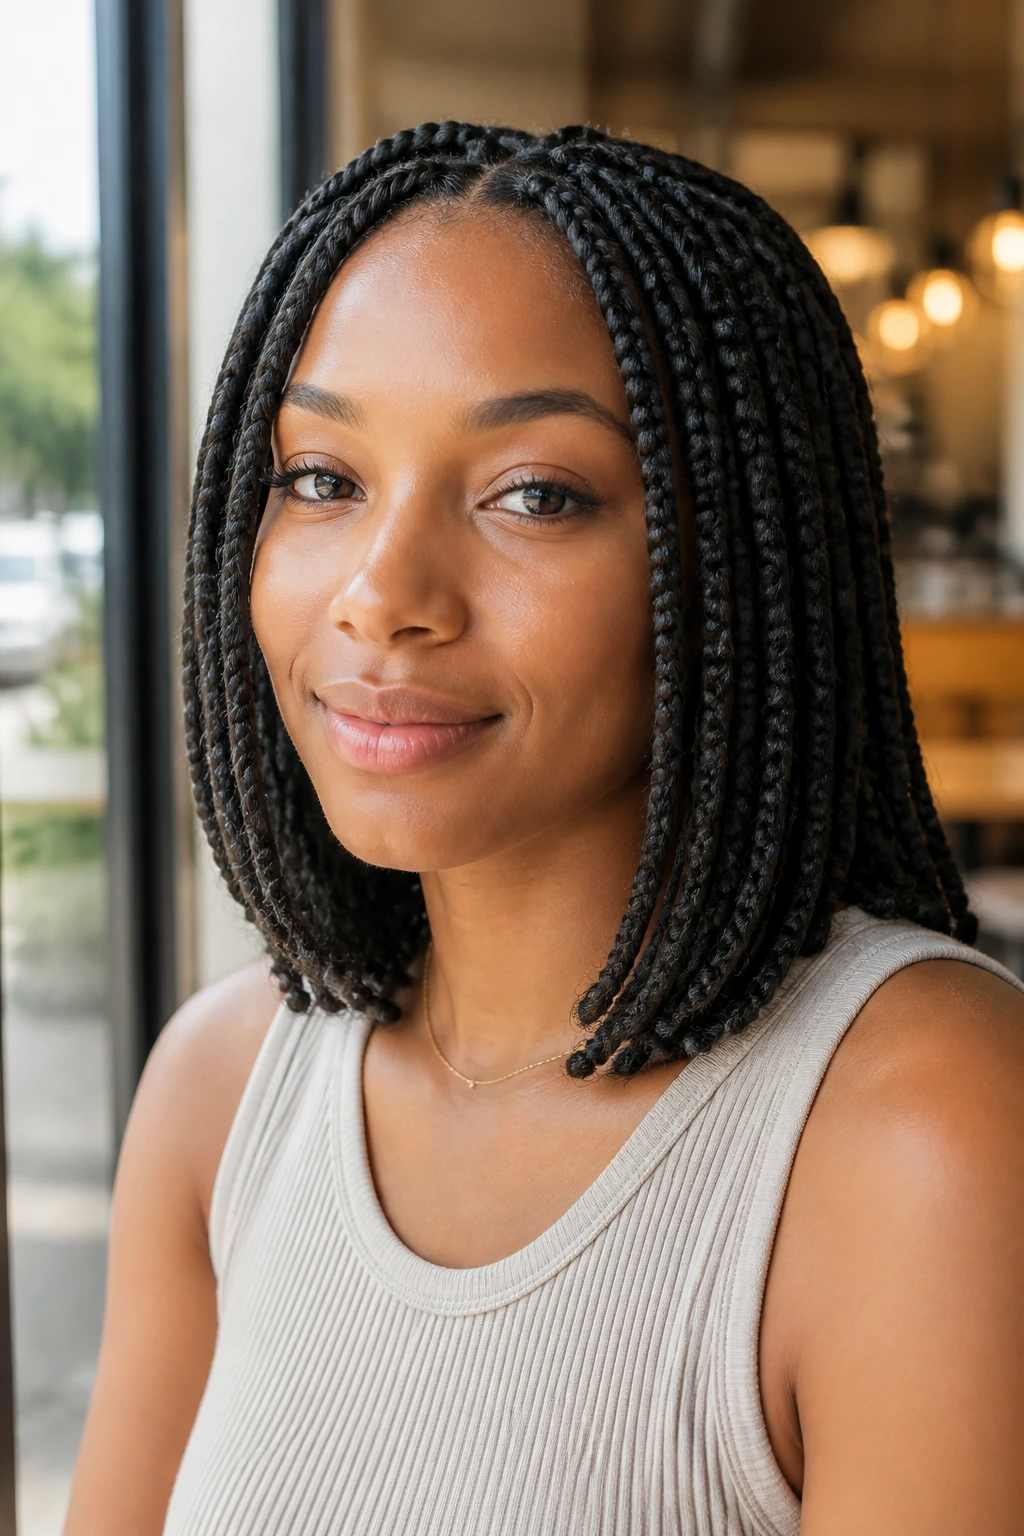
Short box braids are a smart answer when you want the look of braids without the weight of long ones hanging off awkward-length hair. A bob-length finish keeps the style light, frames the face, and avoids that heavy pull that can make the roots feel tired after a few days.
Ask for medium or small parts, depending on how full you want the finish. A shorter braid usually looks best when the braids are neat from root to tip and end somewhere between the jaw and the collarbone. That length gives shape without drowning the face. Add beads if you want, but I’d keep them light. Too much hardware on short braids can make the ends swing in a way that feels more noisy than polished.
A box braid bob also makes maintenance easier. The scalp is easier to reach, the ends are less likely to tangle on clothing, and the overall weight stays manageable. That matters more than people admit.
Short braids are underrated. They feel practical, but they still look like a choice.
9. Faux Hawk Rows With Twist Volume Down the Middle
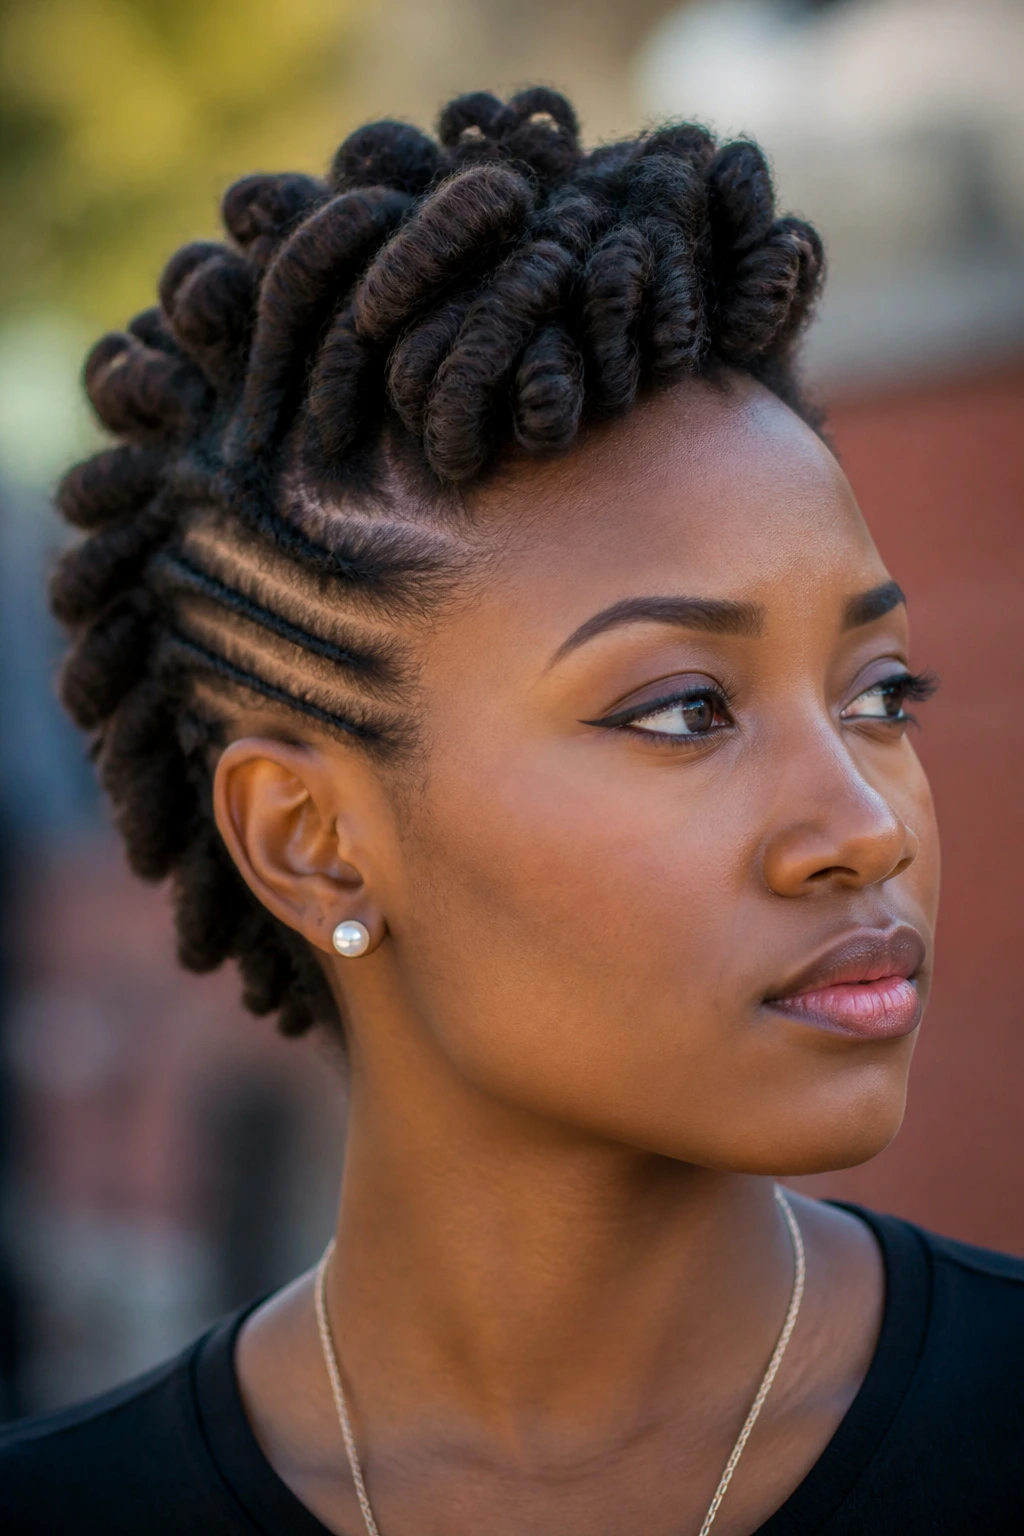
If your hair refuses to lie flat, make that the point. A faux hawk built from cornrows or flat twists gives awkward-length 4C hair height down the center and keeps the sides clean, which is a useful trick when the middle is the part with the most length.
This style usually starts with the sides braided tight toward the scalp, then the center left in a series of chunky twists, pinned puff sections, or rolled rows. You can make it sleek or soft depending on how much volume you leave in the middle. I prefer it a little messy. A too-perfect faux hawk can look stiff, and 4C hair looks better when it still looks like hair.
Use edge control sparingly around the temples. A thin layer is enough. Heavy product tends to crack once the hair moves, and then you get little white lines along the edges. No one wants that.
The faux hawk works especially well when the hair is uneven in length, because the lifted center distracts from the parts that are still growing into place.
10. Claw-Clip Tucks for Busy Days

A medium or large claw clip is the cheapest shortcut in the room, and on awkward-length 4C hair, it earns its keep fast. The style is simple: stretch the hair a little, gather it at the back or crown, fold the ends under, and clip it in place.
What makes this work is the tuck. If the ends hang out too far, the clip looks like it is losing a fight. If the hair is folded under cleanly, the whole style looks intentional, even when you had three minutes to do it. I like this most on second- or third-day hair, when the texture has settled and the strands are easier to gather without snagging.
Easy Ways to Make It Hold
- Use a light leave-in or cream first, then let it dry down a bit.
- Pick a clip with strong teeth, not a decorative one that slips.
- Leave the front loose if the crown is too short to gather.
- Pin the shorter nape pieces with two bobby pins before clipping.
It is not glamorous. It is practical. That matters on real mornings.
11. Low Puff for Awkward Length 4C Hair
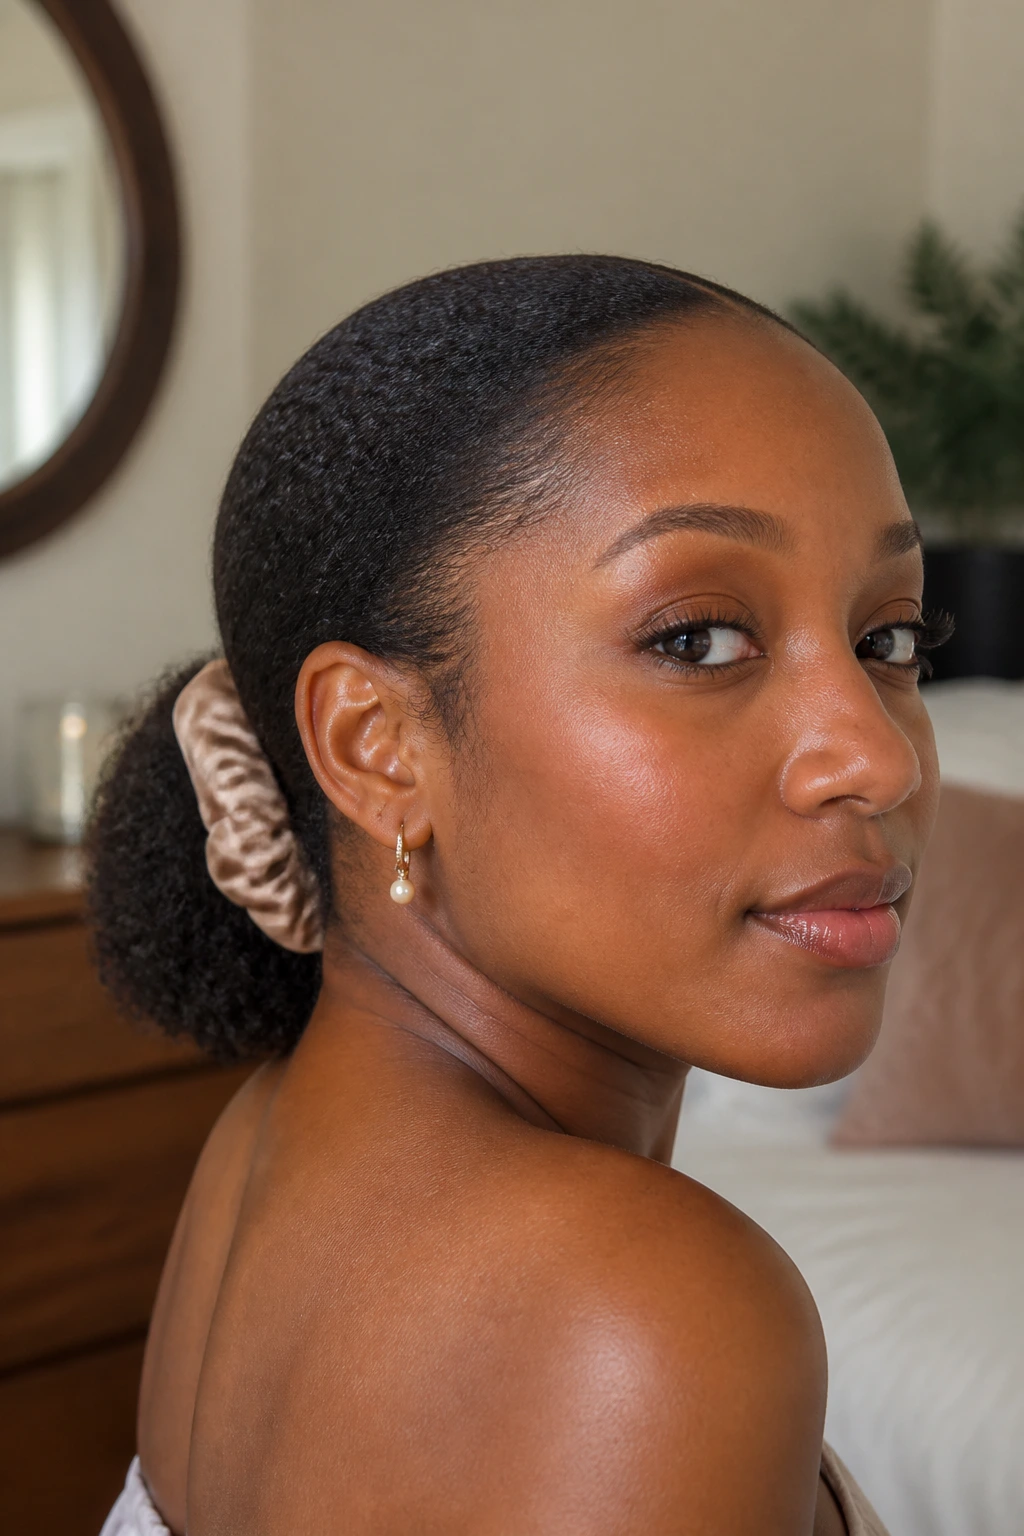
The low puff is one of the most forgiving styles for awkward-length 4C hair, and I say that with full respect. It does not ask the hair to stretch into a long ponytail it cannot sustain. It just gathers what is there and lets the texture do the talking.
The cleanest version starts with a moisturized base and a soft brush just around the perimeter. Keep the rest of the hair full. That part is easy to mess up. People flatten the whole head trying to make the puff look sleek, and then it ends up small, tight, and a little sad. Leave the body alone. Smooth the outline, gather the hair low, and let the puff sit where it wants to sit.
A satin scrunchie or wide elastic is kinder than a skinny band. Skinny elastics tug, and 4C hair remembers that tug. If the front pieces are shorter, a side part or a small flat twist at the temple can help hold them in place.
The low puff is plain in the best way. It gets out of the way and still looks finished.
12. Crown Twists That Wrap the Hairline
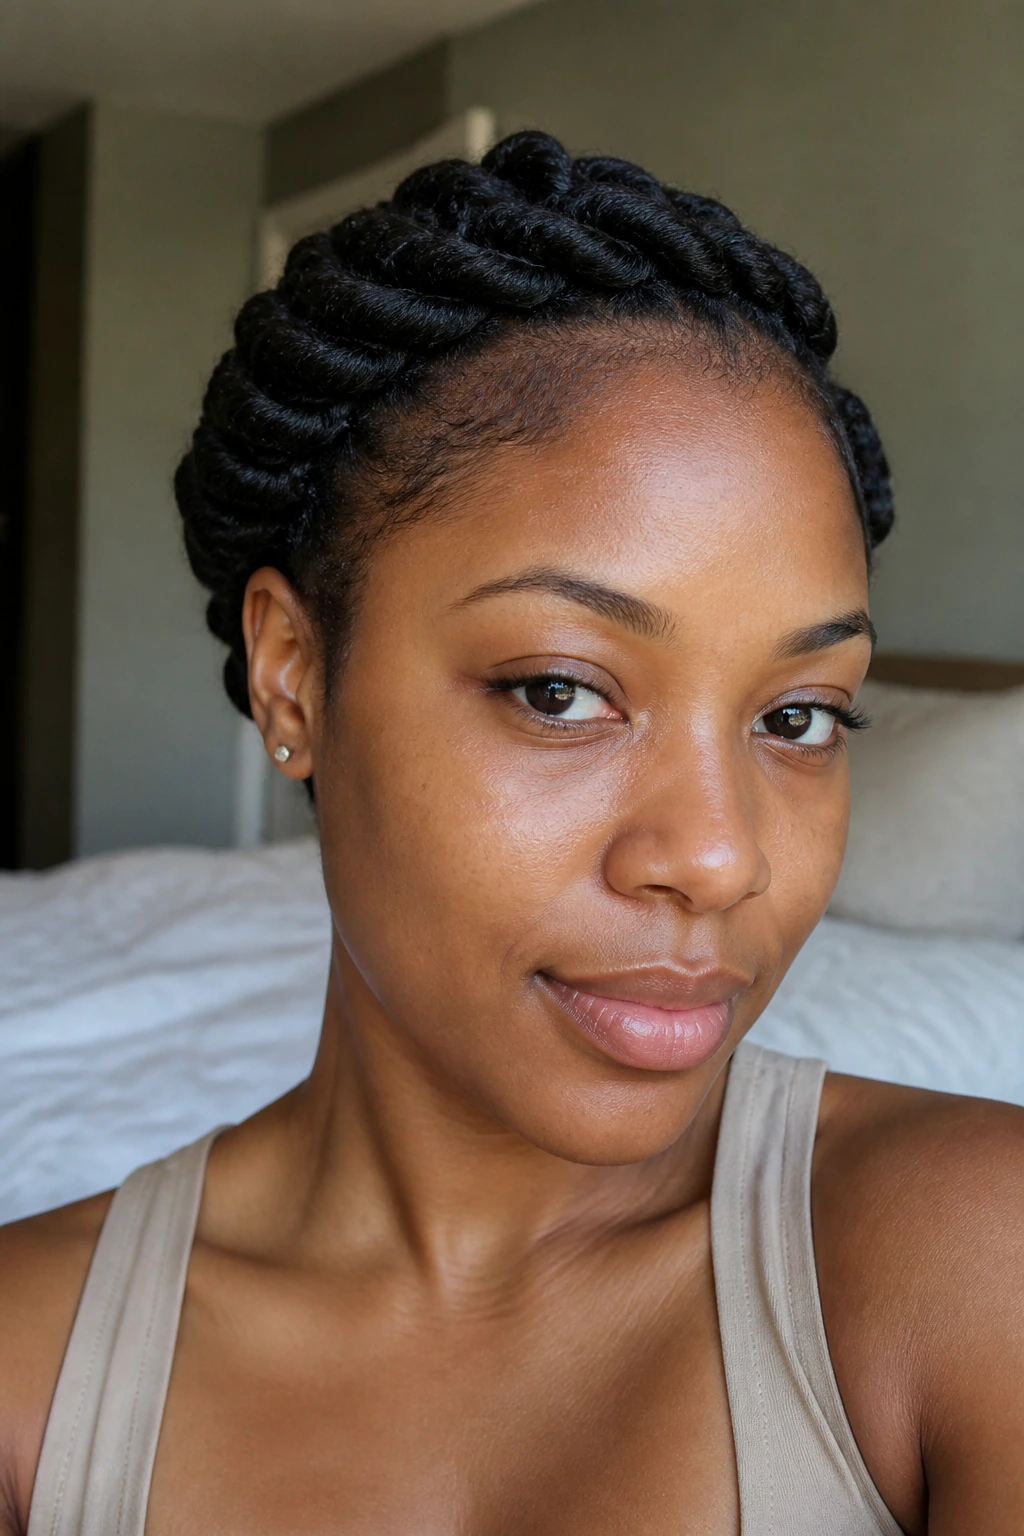
Crown twists are what I recommend when someone wants the face open but does not want loose ends brushing the neck all day. The style wraps flat twists or rope twists around the front and sides like a soft frame, then tucks the remaining hair near the back.
The shape matters more than the exact pattern. A neat arc around the hairline gives the style structure, and that structure helps shorter 4C hair look polished even when the lengths are uneven. This is one of the few styles where a slightly imperfect back can still look good, because the eye goes straight to the crown line.
Why It Lasts So Well
- The twists anchor the shortest front pieces.
- The back stays tucked instead of hanging loose.
- Scalp visibility is low, so the style holds up even when hair grows out a bit.
- A silk scarf at night keeps the front from fuzzing up.
I like this style for days when you need the hair to stay off your face without looking severe. It has shape. It has softness. And it handles awkward length without complaint.
13. Rope Twists With a Deep Side Part

Rope twists give awkward-length 4C hair a clean, rope-like finish that feels a touch sleeker than a regular two-strand twist. The twist pattern is tighter, the line is clearer, and the whole style tends to look more deliberate on hair that still has some unevenness at the ends.
A deep side part helps a lot here. It gives the style a clear direction and keeps the top from looking too symmetrical, which can be a problem when the hair is still settling into length. Twist medium-sized sections, not tiny ones, so the shape stays full and does not disappear into the scalp. If the hair is freshly stretched, the ropes will hang better and stay separated longer.
I like rope twists because they can be worn down, pinned back, or pulled into a low bun once they loosen. That flexibility is useful. A style that only looks good one way is less useful than people pretend.
There is a small catch: the ends should be sealed neatly. If they unravel too fast, the whole style starts looking fuzzy around the edges. A little cream on the tips solves that.
14. Feed-In Braids Pulled Into a Small Bun

Feed-in braids are a clever fix when you want the look of longer braids but your natural length is still in the awkward zone. The added hair helps the braid stay even, and the final bun gives the style a finished shape that shorter hair often cannot reach on its own.
The key is restraint. If the braids are too thick, the base can feel heavy and the scalp gets tense fast. Four to six feed-in braids gathered into a bun is enough for a polished look without weighing down the head. Use a little braid gel at the roots, feed in small amounts of hair as you go, and stop the braid once it reaches a length that can coil neatly.
How to Keep It Comfortable
- Ask for the braid base to stay soft at the hairline.
- Keep the bun small and centered, not jammed high on the crown.
- Use pins only where the bun needs support.
- Wrap the style at night so the feed-ins do not puff out.
This style is useful when you want longevity. It can stay neat for days, and awkward length disappears into the braid structure in the best possible way.
15. Tapered Tuck-and-Pin Updo

Some styles work because they pretend the hair is longer than it is. This one works because it doesn’t. The tapered tuck-and-pin updo leans into the length you have, then uses pins to fold the ends under so the shape looks clean and deliberate.
It is especially good for hair that is long enough to gather but not long enough to make a full bun without sagging. Stretch the hair first, gather it low or to one side, then roll or tuck each section inward and pin it flat against the head. Six to ten bobby pins can disappear surprisingly well if you place them along the curve of the tuck instead of jamming them in randomly.
I like a touch of pomade on the fingertips for this style. Not much. Just enough to smooth the surface and help the shorter pieces stay in place while you pin.
The result is a soft little updo that feels polished without trying too hard. It is one of the few awkward-length styles that actually looks better when it is slightly imperfect.
16. Mini Braids Shaped Into a Rounded Bob

Mini braids shaped into a bob are a sharp option when you want the length to stop at a visible point instead of hanging all over the place. On 4C hair, that rounded bob silhouette is flattering because it gives the face structure and keeps the ends from doing their own thing.
The parting has to be clean. Tiny braids show everything, so jagged parts will show up later when the hair starts settling. Aim for consistent sections and a length that sits around the jawline or just below it. That keeps the style light and makes the bob shape read clearly from the front and the side.
A Few Details That Matter
- Keep the braid size even across the head.
- Use a moisturizing base so the braids do not feel rough by day three.
- Curve the bottom row slightly inward when you install it.
- Add a cuff or bead to only a few braids if you want accent, not noise.
Mini braids are not fast. That’s the tradeoff. But they give awkward-length hair a neat, defined shape that holds up well once it is in place.
17. Pineapple Puff With a Satin Scarf
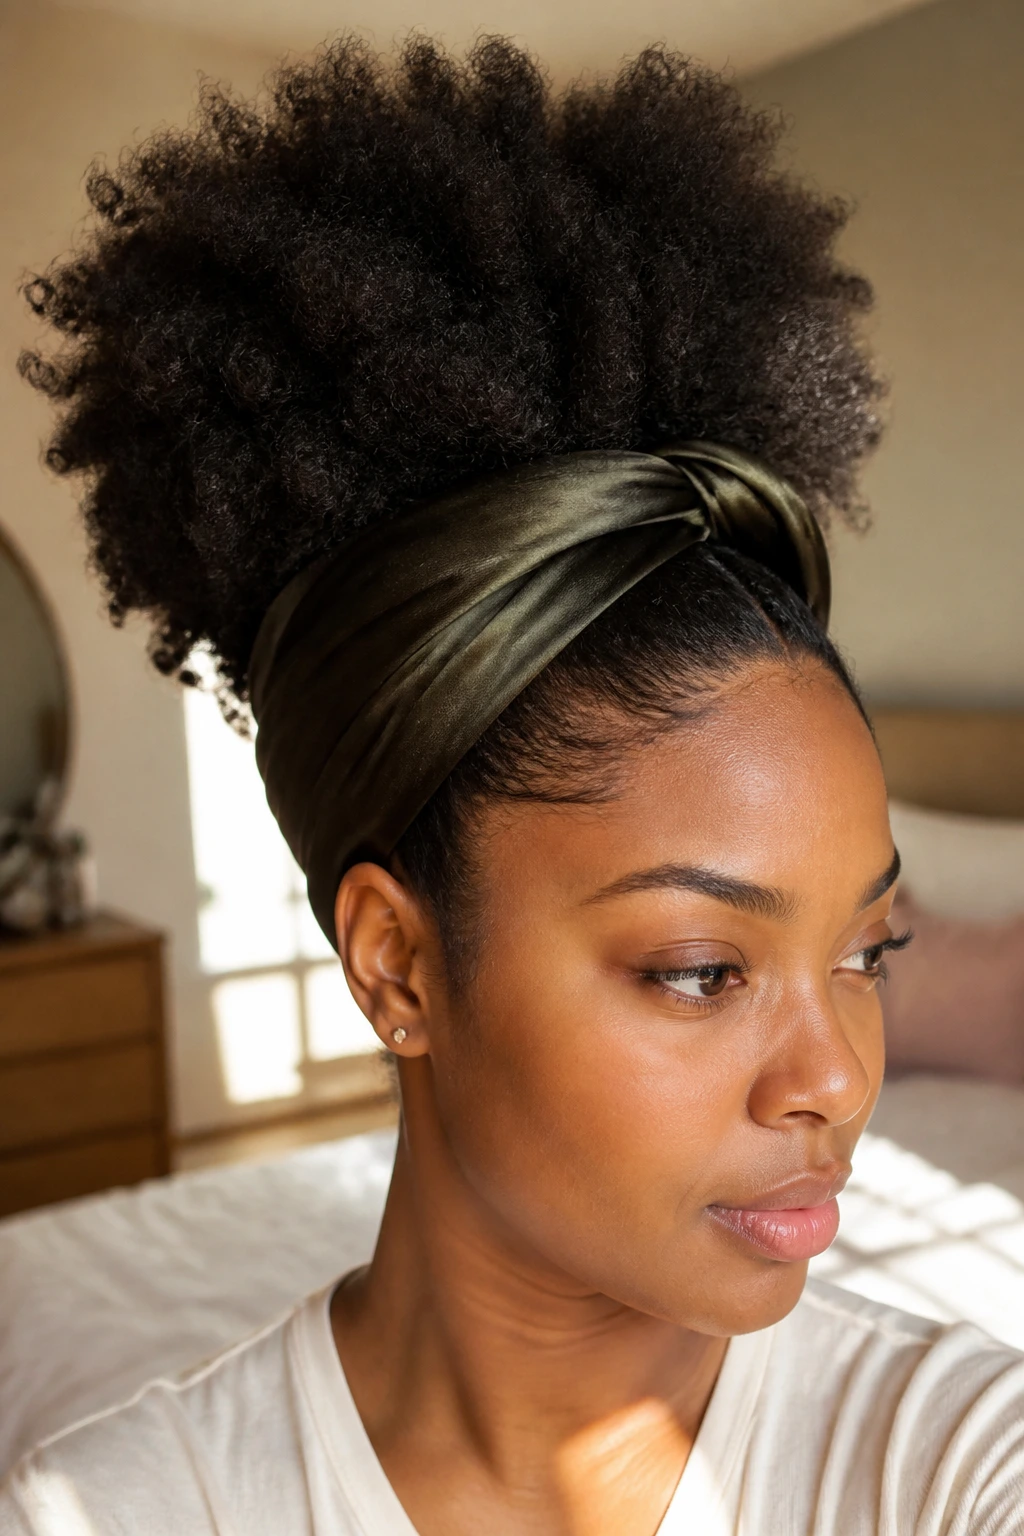
The pineapple puff is what happens when you stop asking every strand to stay down. Gather the hair high, leave the ends loose, and let the puff sit on top of the head like it belongs there. On awkward-length 4C hair, that high placement makes the length look more generous than it really is.
This works best when the hair has some stretch, either from a twist-out, braid-out, or a simple banding session. If the hair is too compressed, the puff can look like a knot instead of a shape. I like to smooth the sides lightly, then use a satin scarf to lay the front while the puff settles. Once the scarf comes off, the face-framing pieces usually fall in a nicer way.
One short note: the pineapple is not trying to be neat in the way a bun is neat. It is trying to be playful and easy. That’s the appeal.
If the hair is too short for a true high puff, make it a half-pineapple and stop there. No one needs a stretched hairline for the sake of a higher silhouette.
18. Flat-Twist Side Sweep Into a Low Chignon
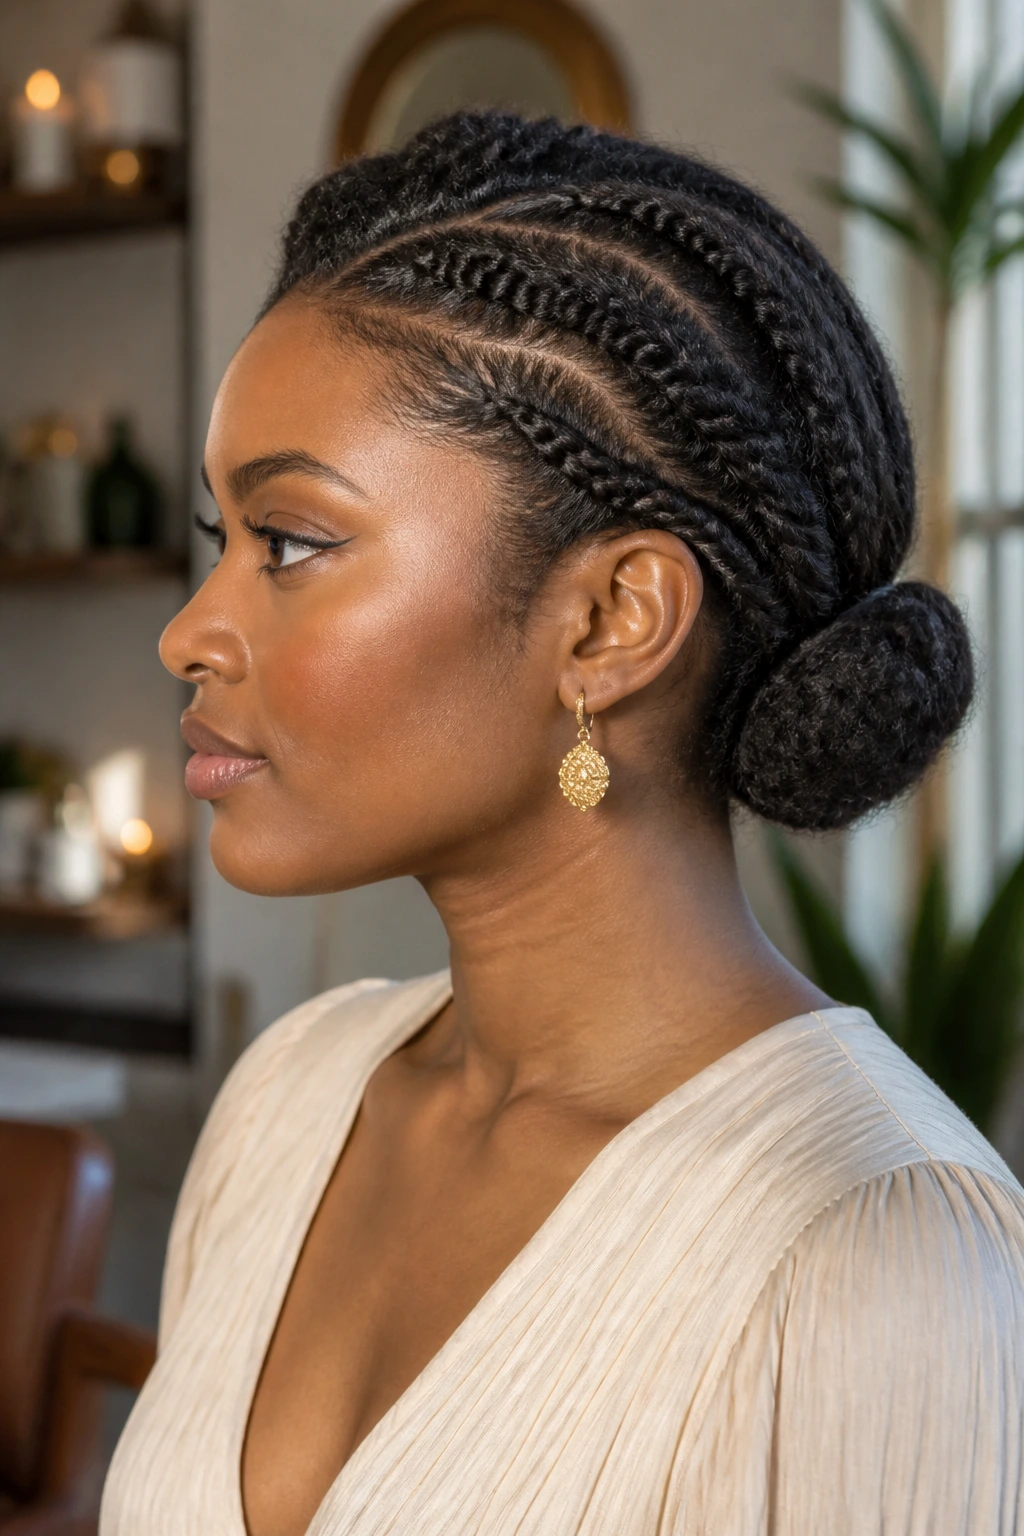
A flat-twist side sweep is one of the prettiest ways to handle awkward-length 4C hair when you want the style to feel soft but still structured. Start with two or three flat twists on one side, sweep them across the head, then gather the rest into a low chignon tucked near the nape.
The side sweep gives the face room. The chignon gives the hair a resting place. That combination solves a lot of the usual awkward-length problems, especially when the back is shorter than the crown or the ends refuse to stay hidden in a regular bun.
I like this style for days when the hair needs to look neat without looking severe. It has a little movement at the front, a calm shape at the base, and enough tuck to keep the ends from sticking out and ruining the mood.
And that is the real point with awkward-length 4C hair: you want styles that work with the length you have, not the length you are waiting for. Clean parts, gentle tension, smart tucks, and a shape that holds even when the hair shrinks back a little. That combination gets you much farther than forcing the hair into a style it never agreed to wear.
