



Long hair can look gorgeous and still feel oddly heavy around the face. That’s usually where the problem starts. Face framing layer cuts for long hair change the silhouette without chopping off the length people spent months growing, and that little bit of shape can make a huge difference in how the whole cut moves.
The part people miss is that “layers” are not one thing. A layer that starts at the cheekbones reads completely differently from one that starts at the jaw, and a soft face frame on straight hair behaves nothing like the same cut on curls. One snip can make the front feel airy. Another can make it look thin and stringy. Same haircut family. Very different result.
Long hair is unforgiving about bad placement. If the front pieces sit too high, you get a triangular look. Too low, and the hair can drag the face down. The sweet spot depends on density, curl pattern, parting, and how much styling you’re willing to do on a normal morning — which is why the smartest long-layered haircut is never just “add layers.” It’s shape first, length second.
Some of the cuts below are soft and barely there. Others are bolder and more obvious. A few are ideal if you live with a round brush; a few are better if you air-dry and want the front to cooperate without a fight. The first one is the classic move, and it still earns its place for a reason.
1. Curtain Layers That Start at the Cheekbones

Curtain layers are the easiest way to make long hair feel like it has a face, not just a length. When the shortest pieces start around the cheekbones, the eye goes straight to the center of the face, then follows the hair down in a soft line. It’s flattering without trying too hard, which is probably why people keep coming back to it.
Why It Works
The magic is in the angle. The front sections usually begin near the bridge of the nose or just below the cheekbone, then taper into longer layers through the sides. That gives you movement around the eyes and cheek area while the rest of the hair stays long and swingy. On a center part, it feels symmetrical. On a slight off-center part, it looks a little more relaxed.
This cut plays nicely with straight, wavy, and loose curly textures. It’s especially good if you want to tuck pieces behind your ears and still have something pretty left in front.
- Ask for the shortest front piece to land at or just below the cheekbone
- Keep the blend long enough that the sides do not puff out
- Blow-dry the front away from the face for a softer bend
- Use a 1 to 1.25-inch curling iron if your hair needs shape fast
Tip: If your face is already narrow, keep the front a little lower so the layers do not eat up too much width.
2. Jaw-Grazing Face Framing Layers
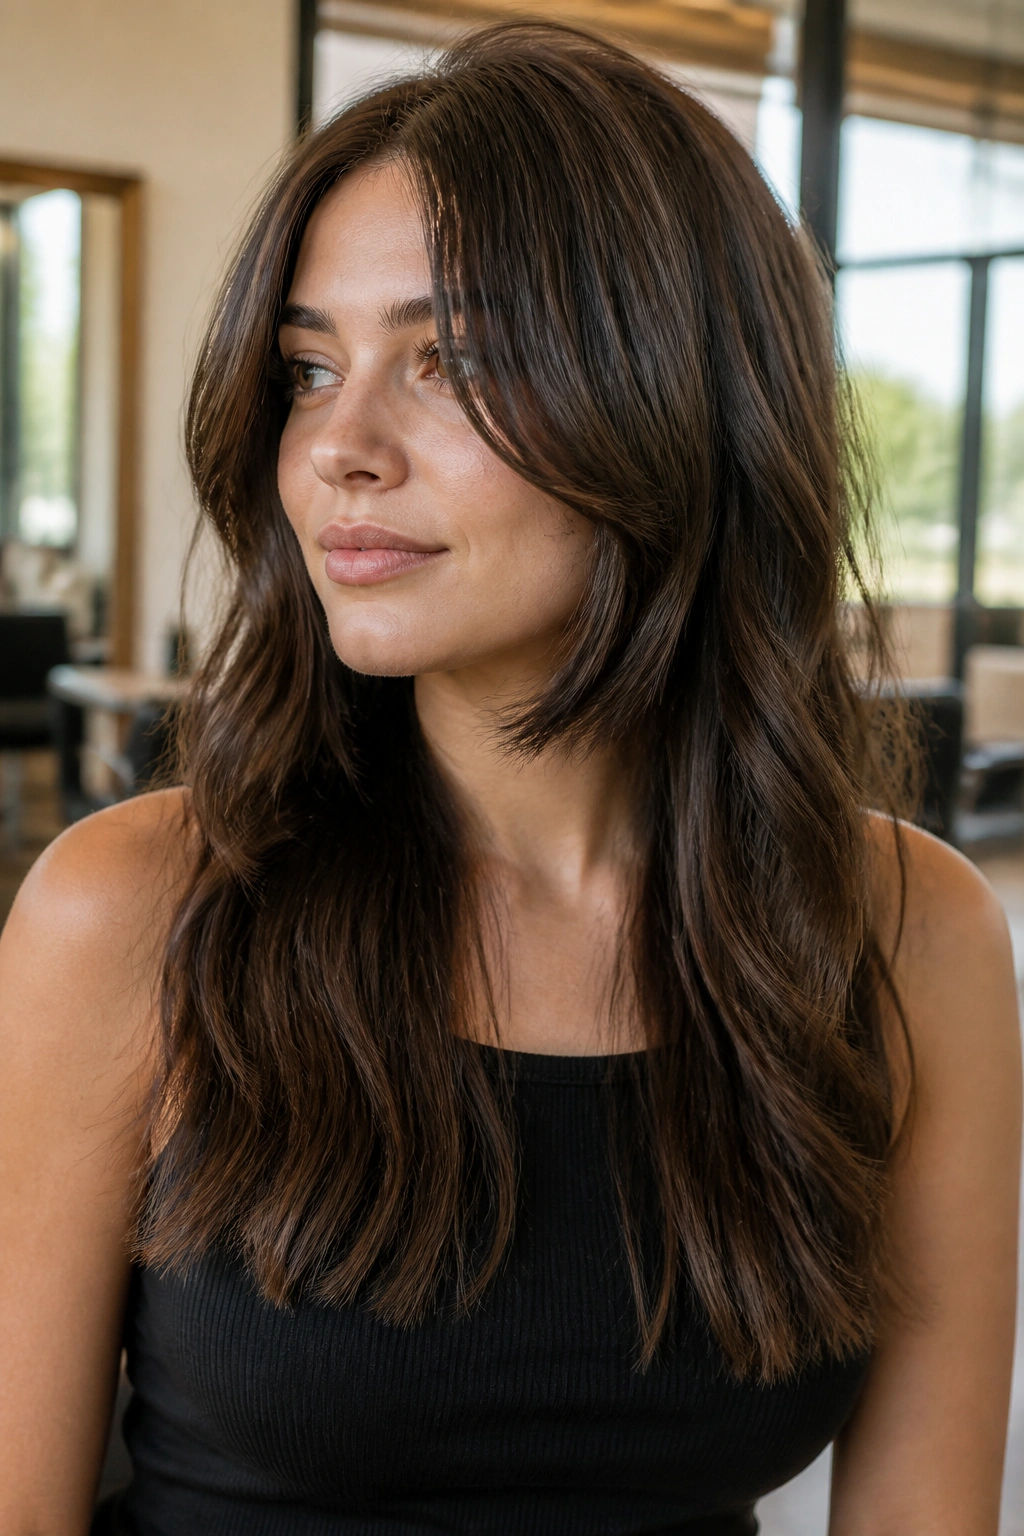
A jaw-grazing frame is blunt in the best way. It gives long hair a sharper outline, and that matters when the rest of the length is heavy or one-note. If you want the front to look carved instead of feathery, this is the cut that does it.
The jawline is a strong anchor point. Layers that land there can make the face look more defined, especially if the hair around the cheeks tends to collapse inward. They also work well when you want your long hair to look polished from the front but still keep a lot of density through the ends. I like this shape on thick straight hair and on loose waves that need a little structure.
It can feel a bit severe if the rest of the haircut is too blunt. That’s the catch. The front should have a clean line, but the blend behind it needs to be soft enough that you do not end up with a shelf. A good stylist will angle the pieces so they curve into the length instead of stopping dead at the jaw.
For daily styling, a round brush gives this cut its best life. A quick bend away from the face changes everything. Flat and center-parted can work too, but the shape gets sharper. Very sharp.
3. Collarbone Frame for Easy Grow-Out

Can a face frame still look good when you forget about it for a while? Yes. That’s the whole appeal of collarbone-length layers. They give long hair shape without landing so high that every inch of grow-out feels obvious.
The collarbone is a forgiving place to start because it sits below the jaw but above the chest. That means the haircut keeps movement near the face, yet the shortest pieces still have enough length to tuck, braid, pin, or ignore on a rushed morning. The front doesn’t scream “fresh haircut” for two weeks and then start misbehaving. It settles.
How to Ask for It at the Salon
Ask for the shortest face-framing pieces to hit the collarbone or just above it, then blend them into longer front sections without a hard step. That distinction matters. You want a sweep, not a cliff.
A few useful details:
- Keep the perimeter long and full
- Do not over-thin the front
- Let the layer angle fall gradually from collarbone to chest
- Style with a medium round brush or loose waves
This cut is one of my favorites for people who want movement but hate babysitting their hair. It looks deliberate when blown out, and it still behaves when air-dried. Not glamorous. Just smart.
4. Long Whisper Layers That Barely Skim the Face
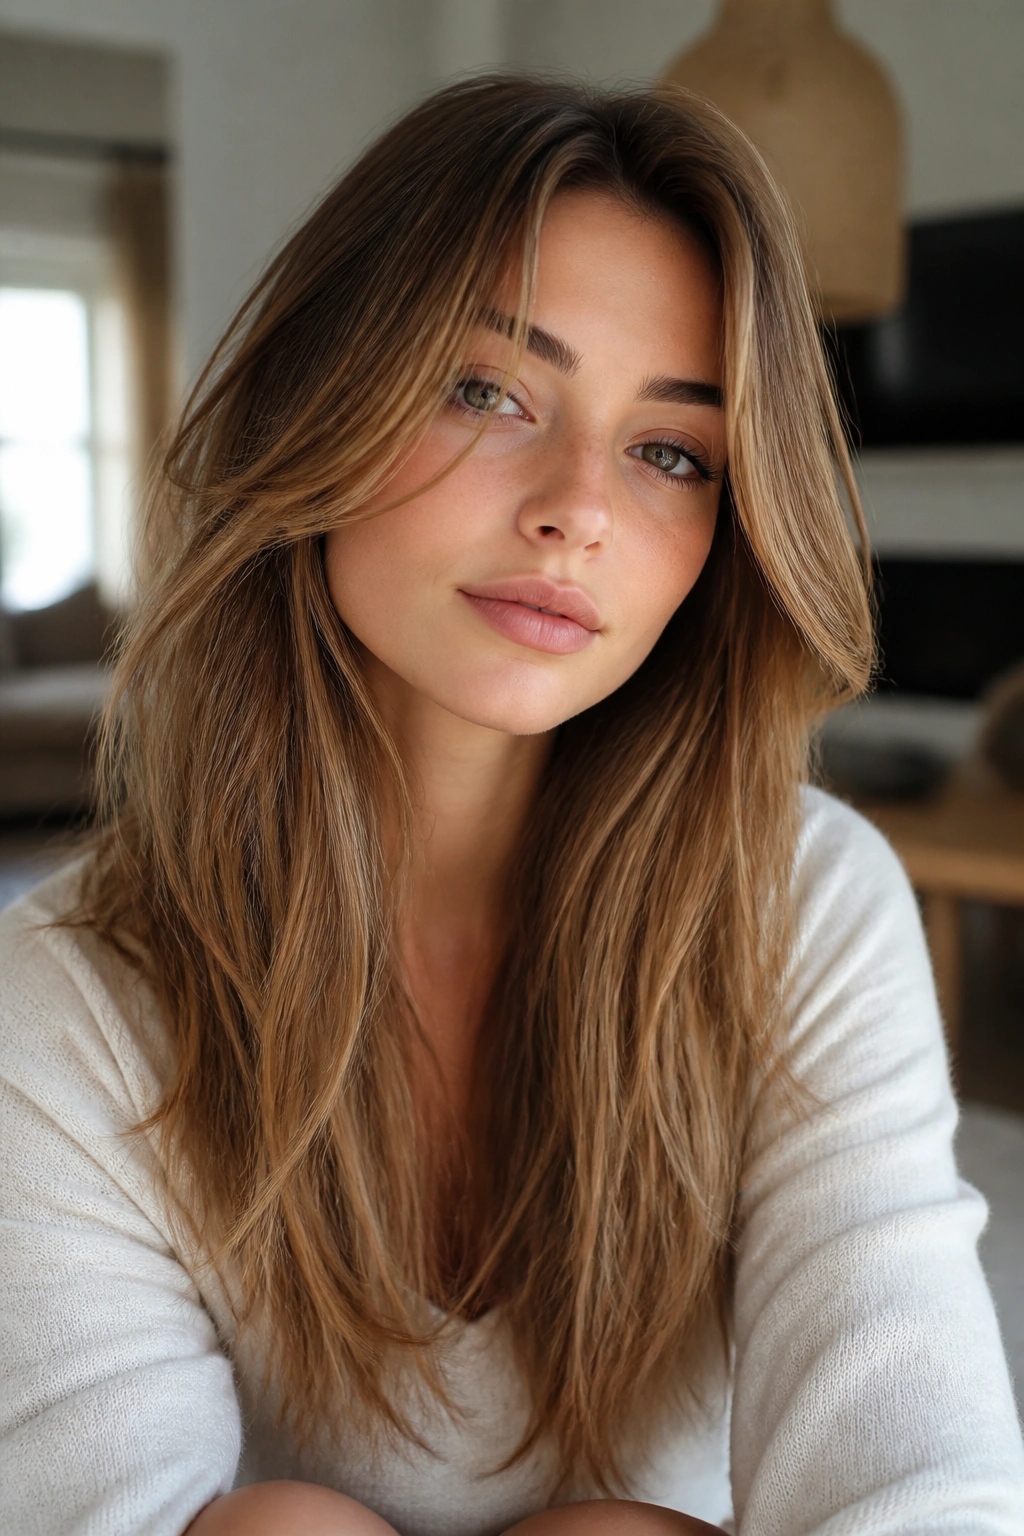
Sometimes the best face frame is the one nobody notices at first glance. Long whisper layers do exactly that. They take the heaviness off the front of the hair and leave the overall shape calm, smooth, and expensive-looking without a lot of obvious layering.
Picture someone with waist-length hair that keeps falling flat around the cheeks. A dramatic front cut would solve one problem and create another. Whisper layers fix the drag without stealing density from the front. The shortest pieces might sit only a little above the bust line, with the actual face frame just grazing the cheek or mouth. That is enough to soften the outline.
What to Watch For
- The front should move, not split
- The ends need to stay thick
- The shortest pieces should blend into the side lengths
- Works best when the hair already has some natural sway
A lot of people assume subtle means boring. It doesn’t. It means the haircut is doing quiet work in the background, which is exactly what you want if your long hair already has a nice texture or shine.
My blunt opinion: this is the version to choose when you want shape but hate obvious layers.
5. Butterfly Layers With a Front-Loaded Shape
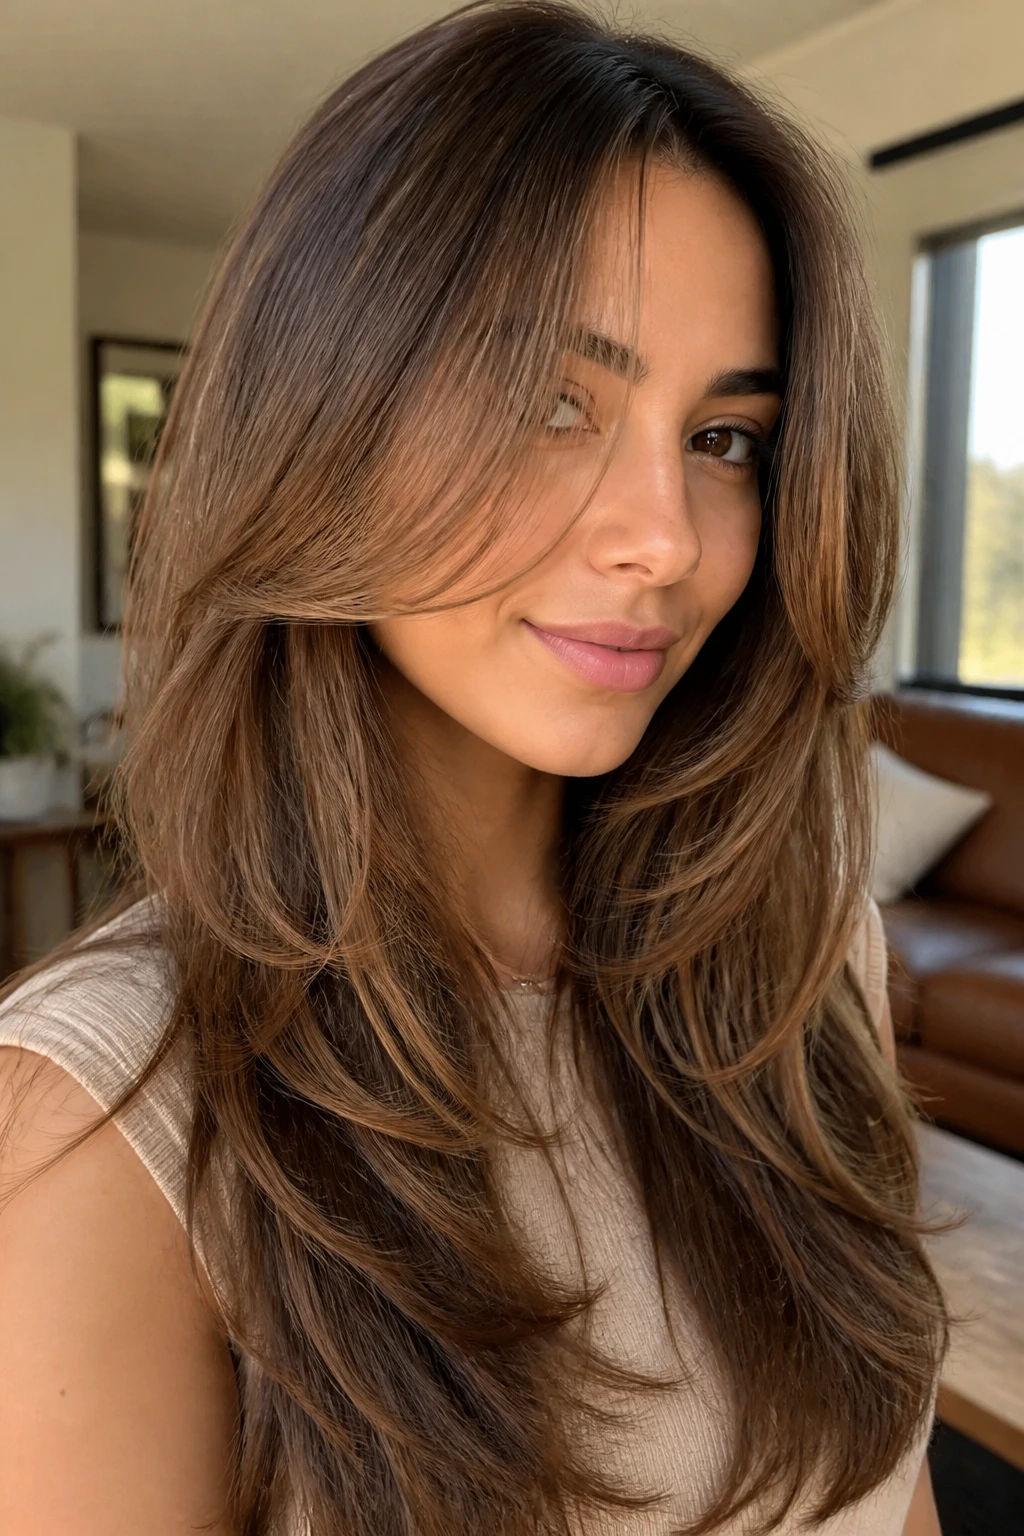
Butterfly layers have a bit of drama, and I mean that in a good way. The top sections are shorter and lighter, while the bottom keeps the length, so the whole head gets that floating, blown-out look without actually cutting the hair short. Around the face, the result is soft and airy, with enough separation to make the front feel lifted.
What makes this cut work is contrast. The shorter top layers create movement near the crown and face, and the longer underlayers keep the length looking full. On long hair, that balance matters. If the front is too short and the back too sparse, the cut falls apart fast. Butterfly layers avoid that by keeping the bottom strong.
I like this on hair that gets weighed down by its own thickness. It’s especially good if the front of your hair tends to disappear when you pull it into a half-up style. The shorter pieces pop out, the longer sections stay behind, and suddenly the hair has shape from every angle.
One thing: butterfly layers look best when they’re styled with some bend. A rough air-dry can work, but a round brush or big roller gives the cut its full payoff. Without that lift, the layers can read as merely “short in front.” With it, they look intentional and soft.
6. Choppy Face Framing Layers for Thick Hair
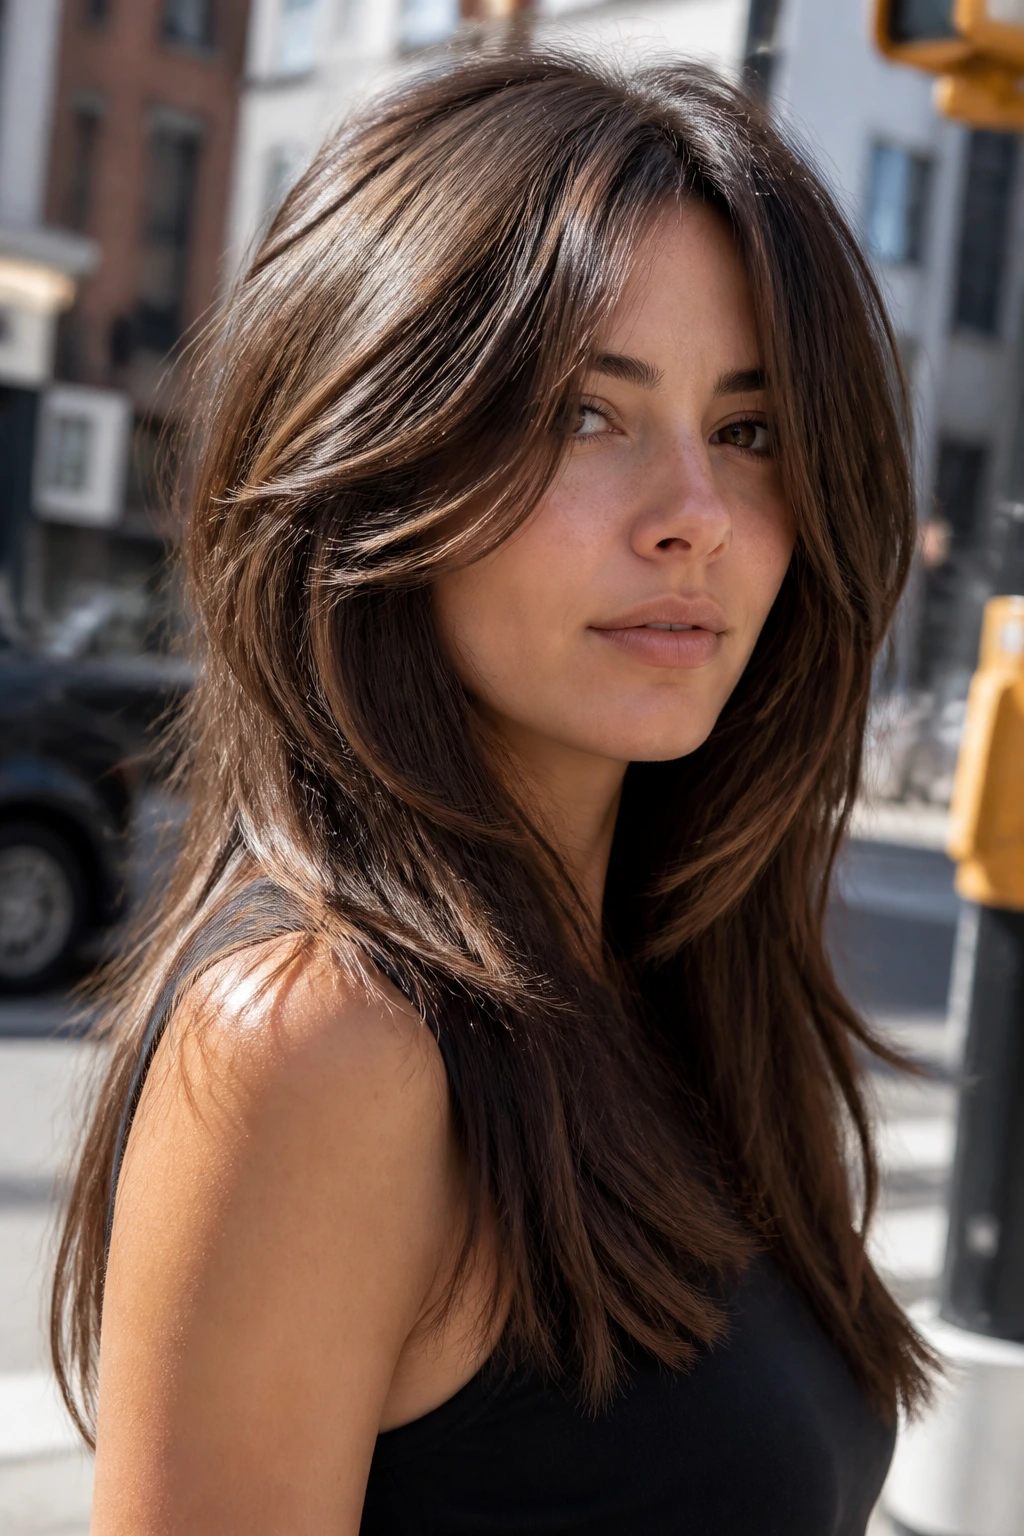
Thick hair can handle a little bite. In fact, it often needs it. Choppy face-framing layers cut through bulk in a way that softer layers sometimes can’t, especially when the front sections are dense enough to feel like curtains instead of framing pieces.
Unlike whisper layers, these are about visible separation. The edges are still blended, but they have texture and movement you can actually see. That makes them a strong choice for people with a lot of hair around the temples and jaw. The front stops feeling heavy, and the haircut gets a bit of edge.
This version works best when the shortest point hits somewhere between the cheekbone and mouth, then steps down in small increments. Think two or three distinct lengths near the face, not one endless slope. That stagger keeps thick hair from puffing into a triangle.
A razor can help here, but it has to be used with some restraint. Too much razoring on thick hair and the ends can fray. Too little, and the layers lose their shape. The sweet spot is clean, piece-y, and controlled.
If your hair is thick and poofy at the front, this is one of the few face-framing cuts that actually reduces the visual weight instead of just reshaping it.
7. Invisible Front Layers for Fine Hair
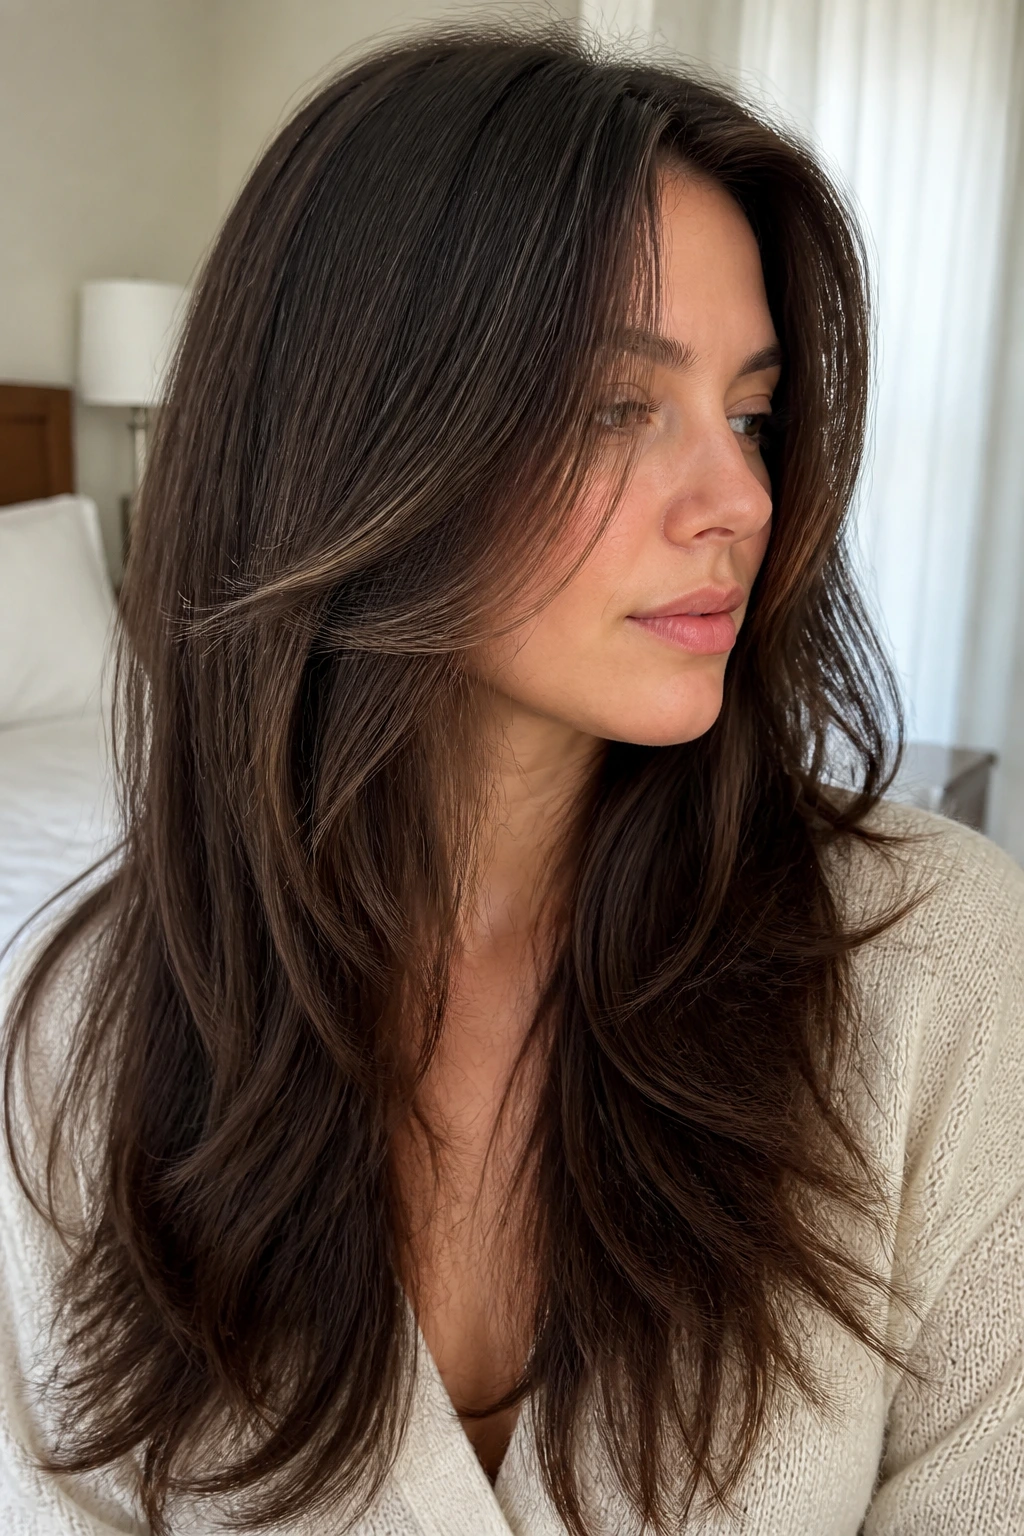
Fine hair and dramatic face framing do not always get along. Too much layering can make the front look see-through, and once that happens, the cut starts to feel fragile. Invisible front layers are the safer move. They give a little lift without exposing the ends.
Why It Still Looks Full
The trick is to keep the layers long enough that they blend into the rest of the hair instead of standing apart. The shortest pieces usually sit around the lower cheek or lip line, then taper gently through the side. That means you still get shape near the face, but the perimeter stays thick.
This cut is especially useful if your hair is straight or slightly wavy and tends to flatten at the roots. The layer pattern creates motion where you need it, yet the ends keep their density. That matters. Thin hair looks best when the cut pretends to be simple.
How to Get the Most From It
- Ask for soft internal layers, not chunky steps
- Keep the shortest front pieces below the cheekbones if density is low
- Use a lightweight mousse at the roots
- Blow-dry with a small round brush for a subtle lift
What to avoid: pushing the face frame too high. On fine hair, that usually exposes too much scalp and makes the cut feel expensive only for the first five minutes.
8. Rounded Face Framing Layers That Open the Eyes
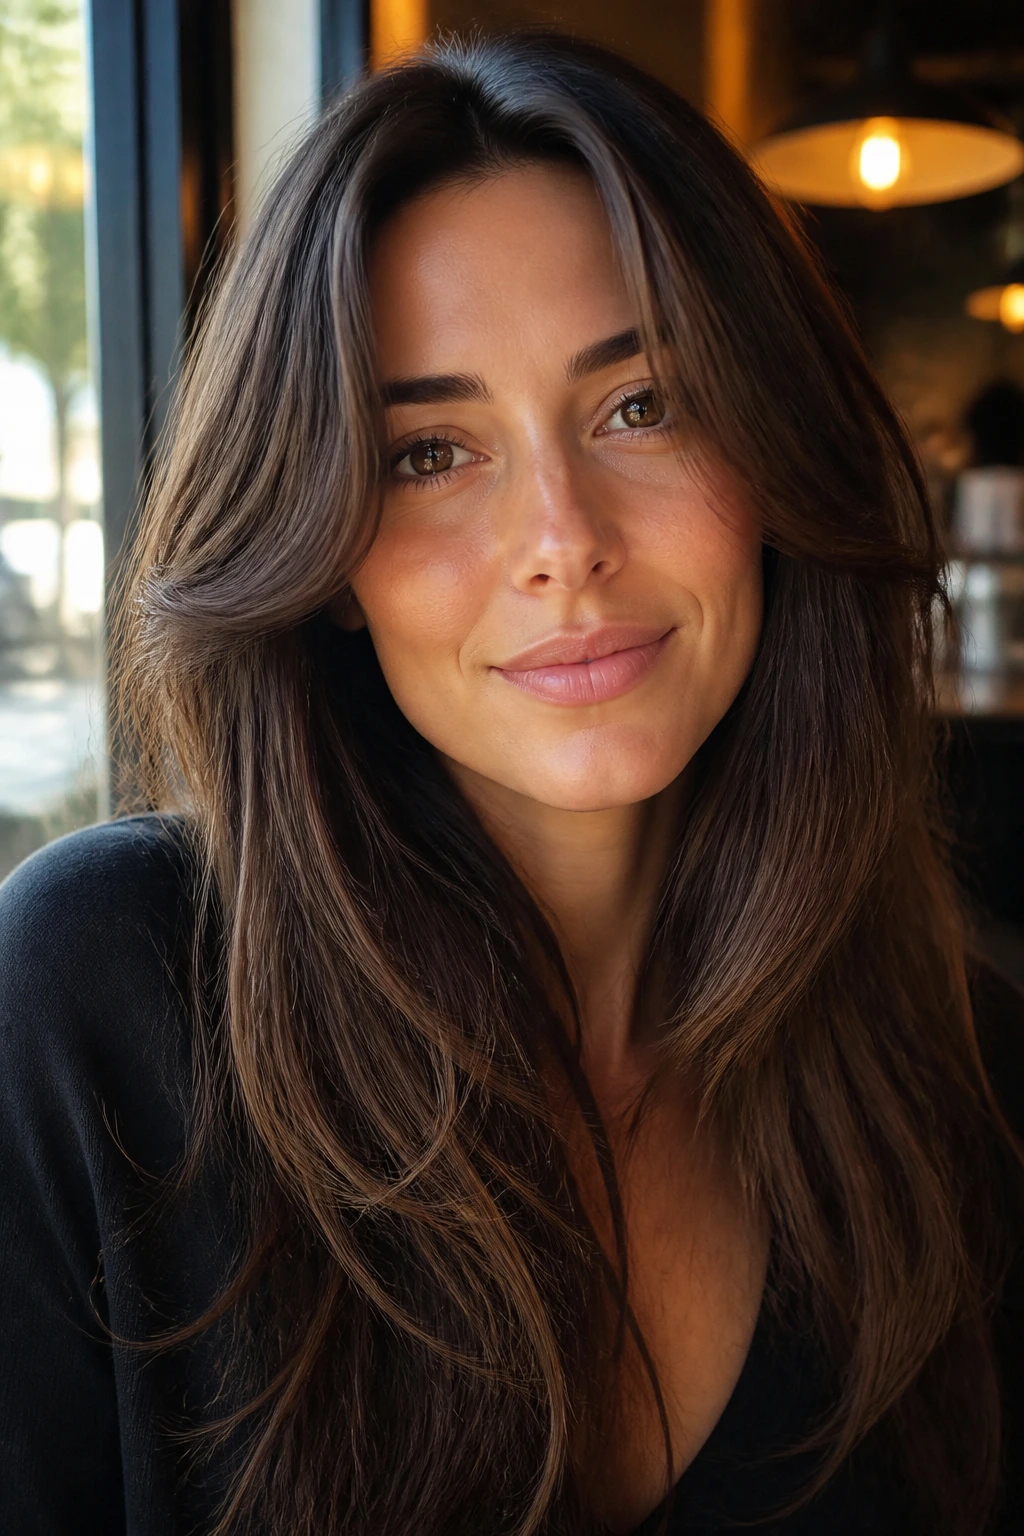
Sharp isn’t always better. A rounded face frame can be more flattering than a choppy one, especially if your features are soft or your hair falls in a naturally curved pattern. The shape arcs gently from the temples toward the jaw, which makes the whole haircut feel open and easy.
This style works because it follows the face instead of fighting it. Instead of dropping straight down in a hard angle, the front pieces curve inward just enough to draw attention to the eyes and cheekbones. On wavy hair, that softness looks almost automatic. On straighter textures, it reads as polished rather than stiff.
I particularly like this cut for people who wear their hair down more than up. It gives enough movement around the eyes that the hair doesn’t swallow the face, but it still keeps the long length looking full. If the layers are too round, though, the front can puff out. That’s the line to watch.
A good stylist will connect the rounded front pieces to longer side layers in a single smooth motion. No obvious staircase. No chopped-off corners. Just a curve that sits there and quietly does the job.
9. Bottleneck Bangs Paired With Long Layers

Bottleneck bangs are a clever compromise. They start narrow near the center of the forehead, then open wider toward the cheekbones, which lets them blend into long face-framing layers without making the whole front look heavy. If full bangs feel too committed, this is the softer doorway into fringe.
The shape matters. The center is shorter, but the outer pieces are longer, so the bangs spread out like a bottle neck opening into a wider base. That gives you a little forehead coverage and a lot of movement at the sides. On long hair, the effect is balanced rather than stark.
How to Wear the Grow-Out
The grow-out phase is part of the charm here. Bottleneck bangs don’t hit a wall the way blunt bangs do. They slide into the longer layers, which means you can pin them back, part them differently, or leave them loose without the front looking awkward.
A few practical details:
- Keep the center shorter, around brow level or just below
- Let the outer corners angle toward the cheekbones
- Dry the center first so the shape sets cleanly
- Use a light styling cream, not a heavy oil
This cut is ideal if you want face framing with a little attitude. It is not subtle. But it’s controlled, and that makes all the difference.
10. ’90s Blowout Layers With a Front Flip
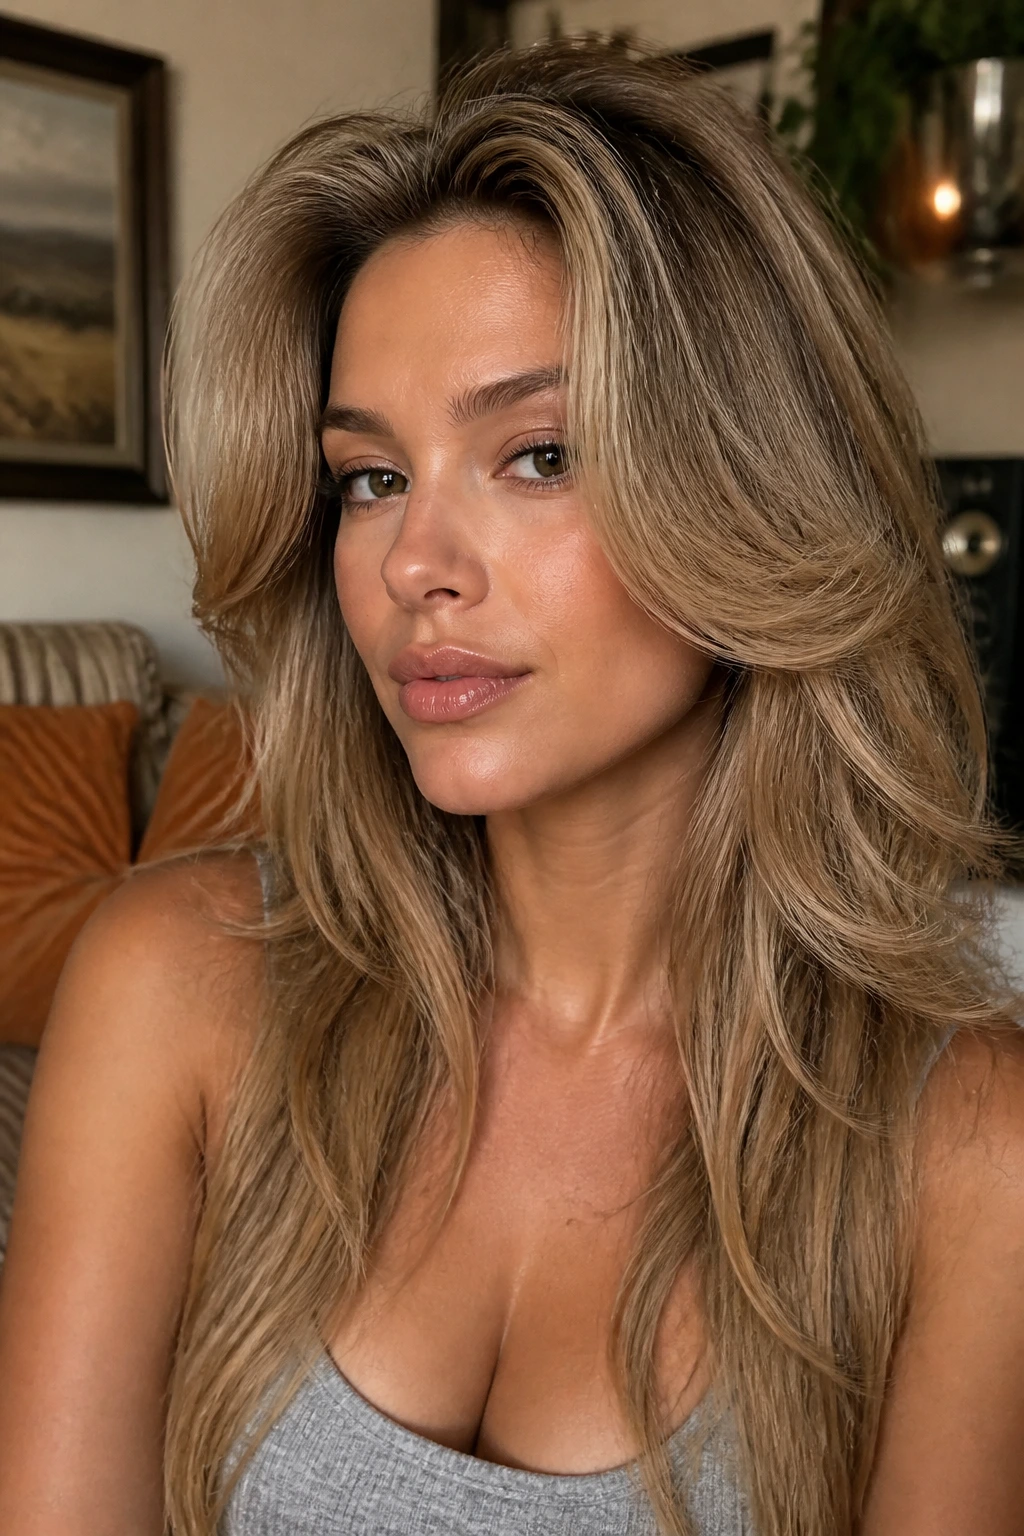
Some haircuts are built to air-dry. This one is not. ’90s blowout layers with a front flip want volume, bend, and a round brush, and they pay you back with that big, glossy movement that makes long hair look expensive in the old-school way.
The front flip is the signature. The layers start around the cheek or chin, then turn away from the face instead of hanging straight down. That little flip creates space around the cheeks and gives the whole style lift. On straight or slightly wavy hair, it looks clean and deliberate. On dense hair, it can look huge in the best possible sense.
This cut works best when the top layers connect smoothly into the face frame. If the front is too short and the rest too long, the flip looks disconnected. The better version has a clear flow: crown lift, cheekbone bend, then long length through the back.
Key Details That Make It Work
- Shortest front pieces usually land around the lip or chin
- Blow-dry with a round brush, directing the hair up and away from the face
- Set the front with a cool shot so the curve stays put
- Use a smoothing cream if your ends frizz
The blunt truth: this cut lives or dies by styling. If you love a little effort and a lot of movement, it’s a good one.
11. U-Shaped Layers That Keep the Ends Full
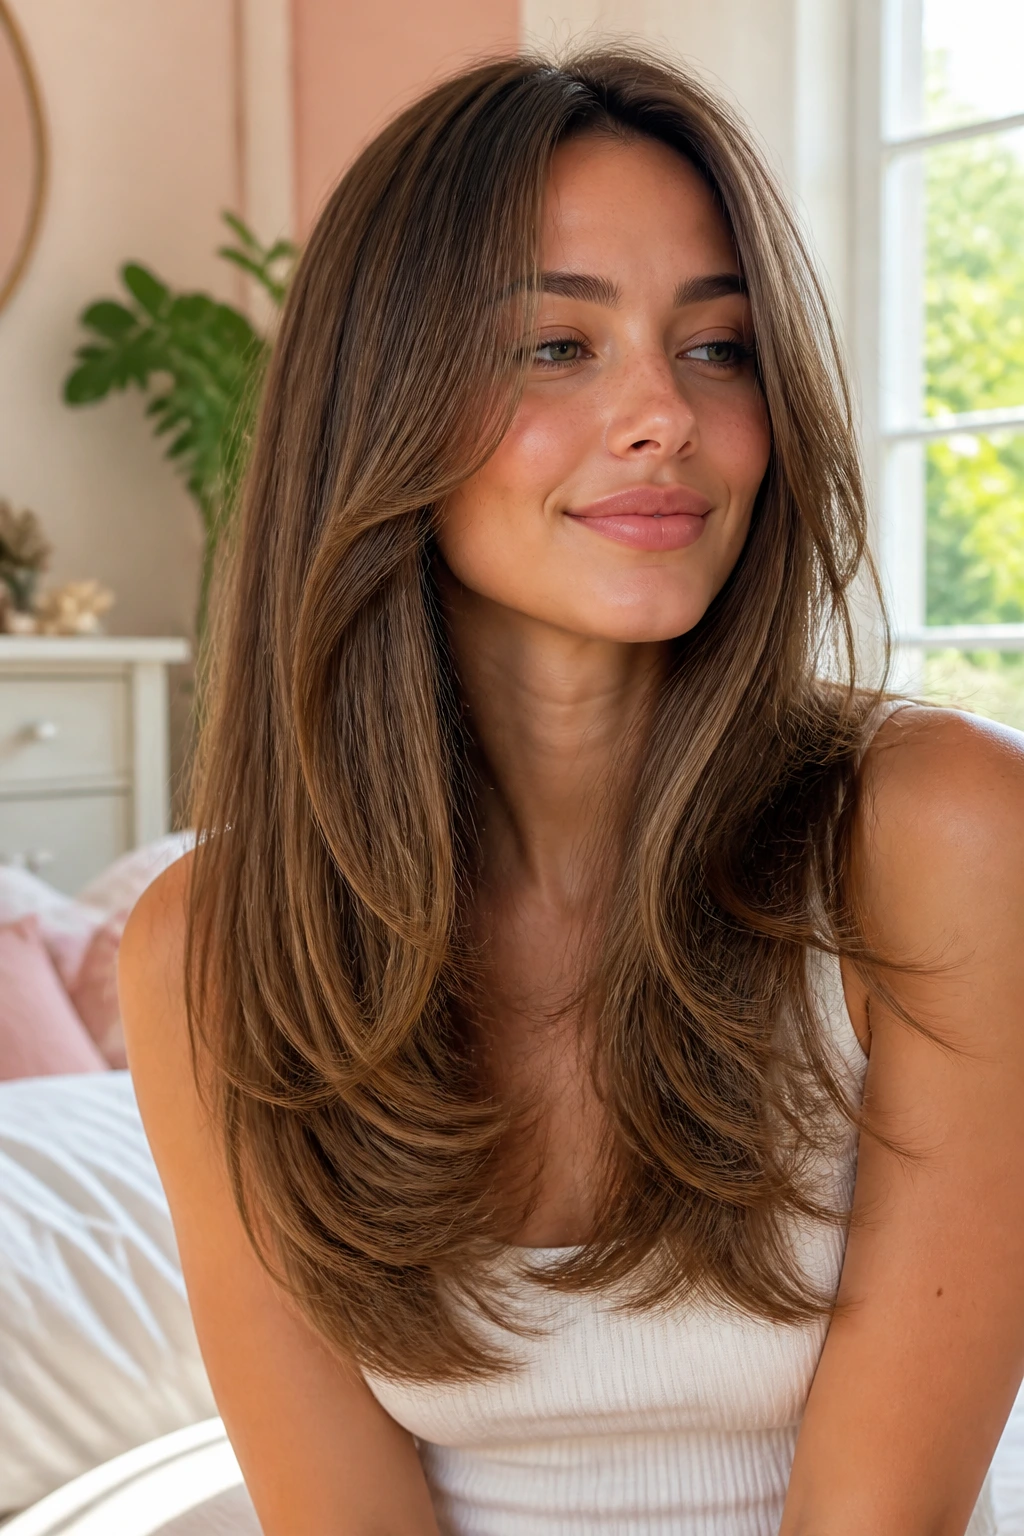
U-shaped layers are for people who want long hair to feel softer without losing that thick, rounded bottom edge. The perimeter keeps its fullness, but the front gets enough layering to avoid the heavy, curtain-like fall that long hair can develop.
The shape is exactly what it sounds like. The back curves gently into a U, and the face frame slides in from the sides rather than chopping across the front. That means the haircut looks polished from the back and front at the same time, which is harder to pull off than it sounds.
One sentence says it all: thin ends are the enemy here.
What I like about the U shape is that it doesn’t overcomplicate the hair. It gives movement where the eyes land first, but it keeps the lower half looking full and healthy. If your hair is fine, this matters a lot. If your hair is thick, it keeps the shape from turning boxy.
You can wear this cut straight, curled, or in braid waves. It stays readable even when you do almost nothing to it, and that’s a small luxury people don’t talk about enough.
12. V-Shaped Layers for a Slimmer Silhouette
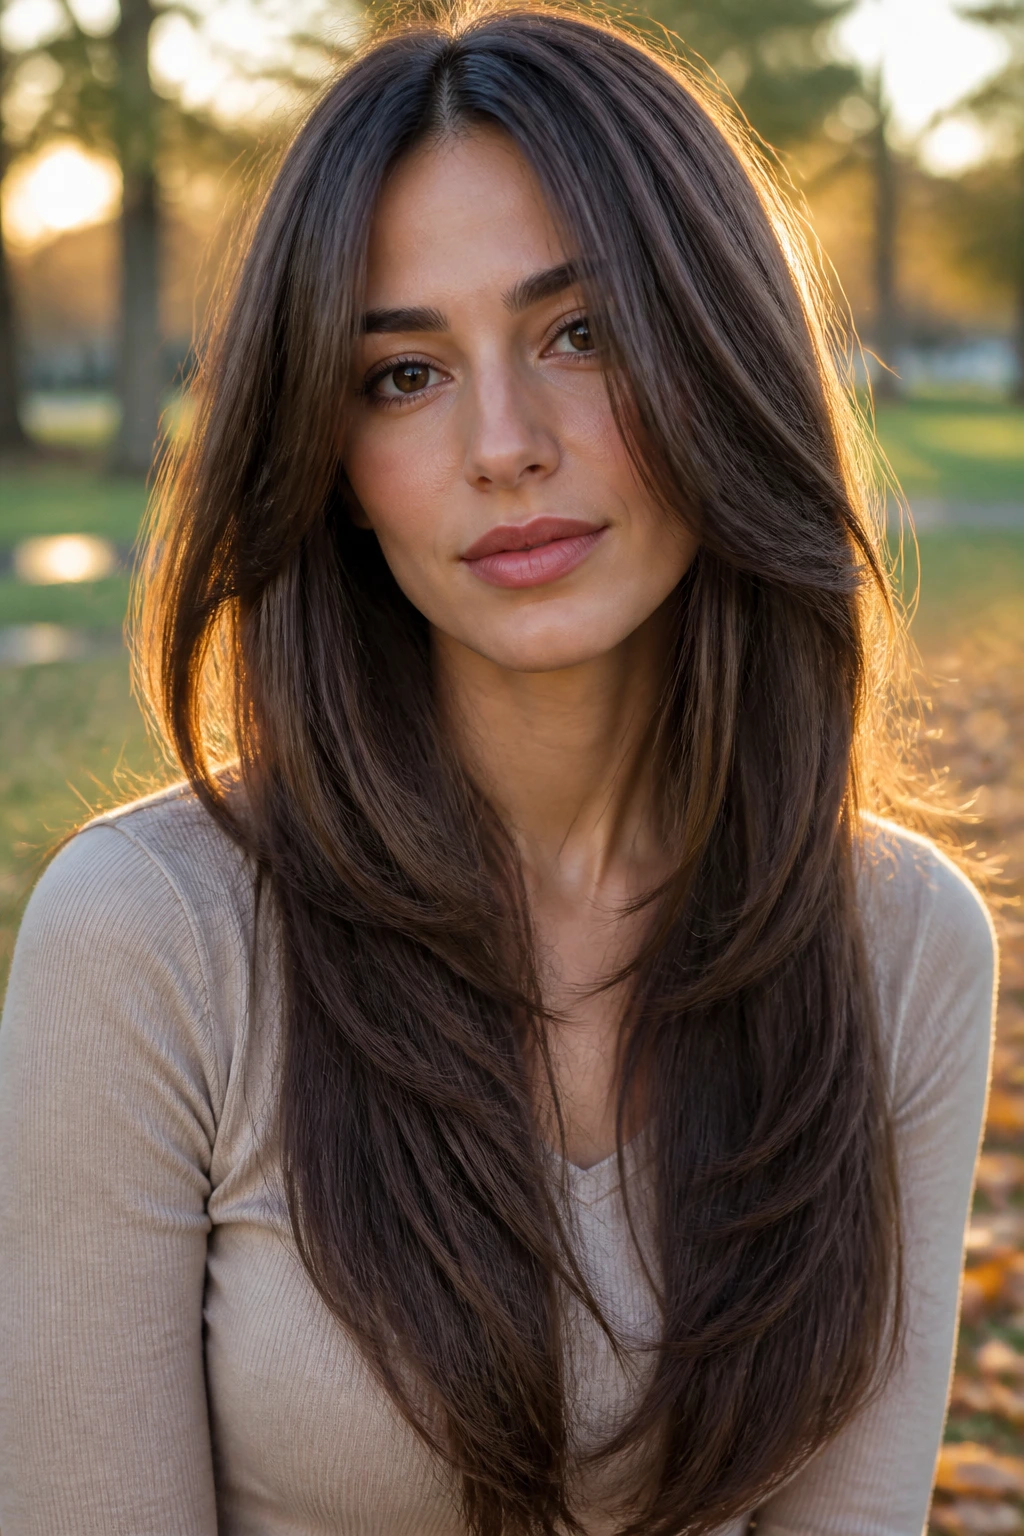
If the U shape feels soft and rounded, the V shape is the sharper cousin. It narrows toward the center back, which makes long hair look leaner and more tapered. Around the face, the front layers echo that angle and create a longer, sleeker line.
This cut works best when the hair is dense enough to support the pointy finish. On medium or thick hair, the V shape can make the whole head look lighter and more intentional. On thin hair, the point can start to look stringy if the ends are not full enough.
I prefer this on long straight hair or smooth blowouts. The shape is too crisp to hide in messy texture, and that’s fine. It does its best work when the line is clean.
Compared with a U cut, the V gives more drama and less softness. That makes it a good pick if your hair feels blunt and heavy at the bottom, or if you want the long length to look narrower through the back. The face framing pieces should still be blended, though. You do not want a pointy back with a choppy front. That mismatch ruins the balance fast.
If your goal is a sleeker silhouette, this is the one to show your stylist.
13. Razor-Cut Face Framing Layers for Wavy Hair
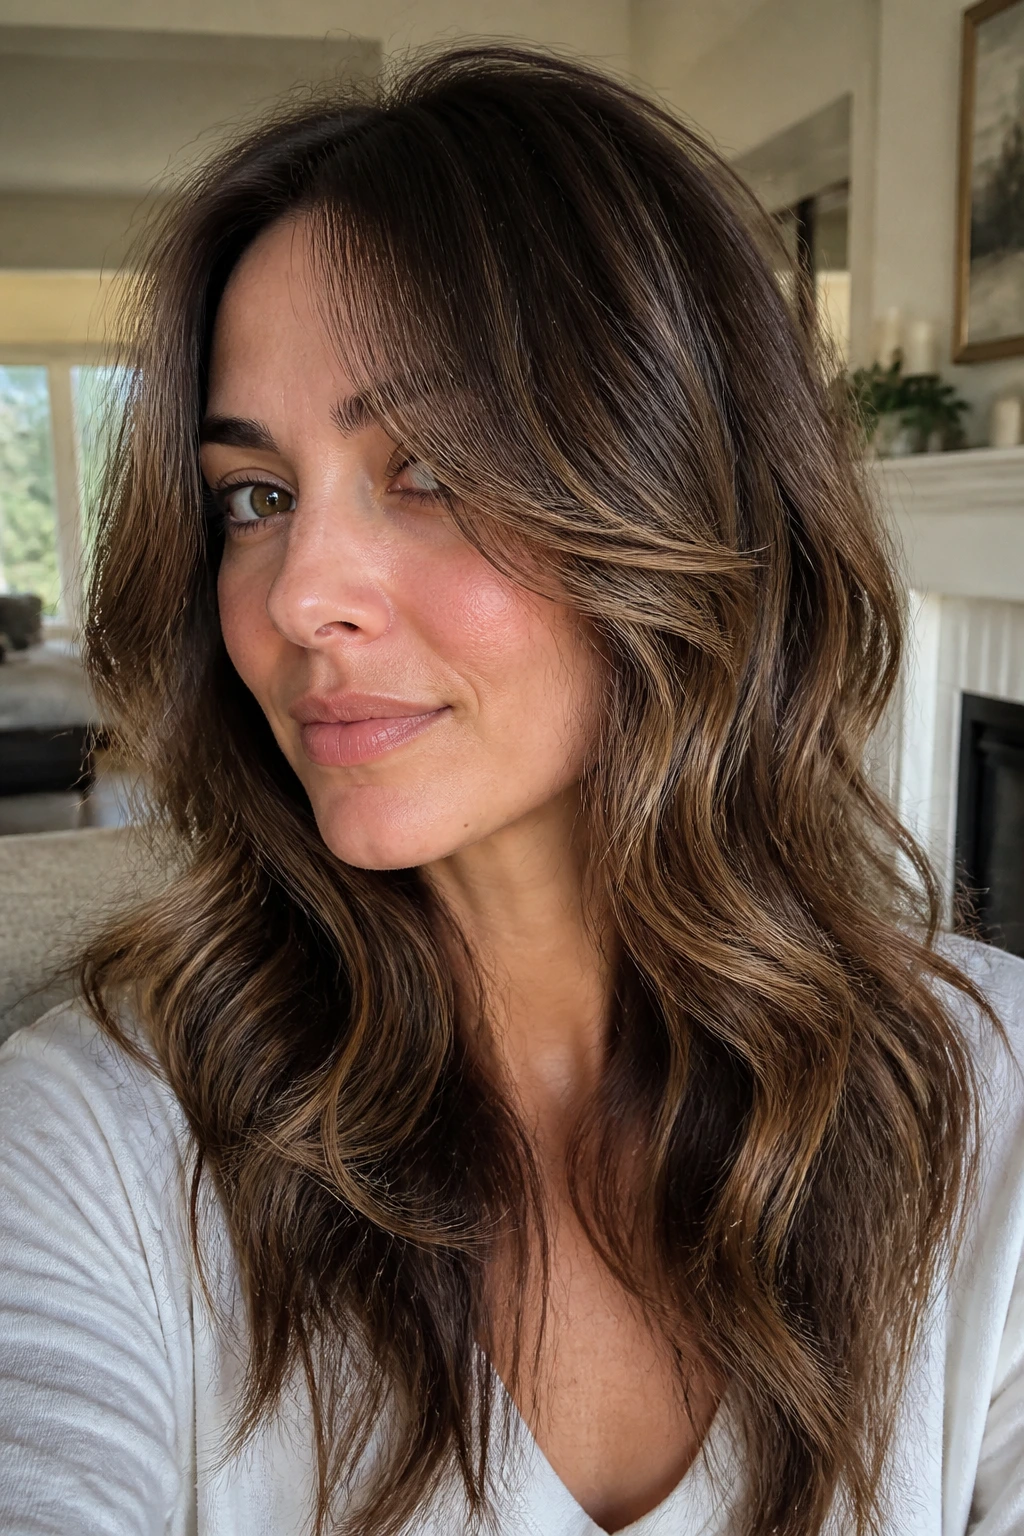
Scissors can feel a little too strict on wavy hair. A razor loosens the front pieces so the bend shows through instead of getting trapped in blunt ends. That’s why razor-cut face framing layers can look so good on medium to loose waves.
The movement is softer, but the shape is still there. The razor removes some weight at the ends, which helps the front pieces fall in a less bulky line. That can make the hair feel lighter around the cheekbones and jaw without turning the layers into fluff.
What to Watch For
- Best on hair that is healthy and not too fragile
- Can fray the ends if the hair is already dry or damaged
- Works well when the front is cut at cheekbone-to-mouth length
- Needs a stylist who knows where to stop the razor
This is not the cut I’d hand to someone with very porous, breakable ends. A razor on rough hair can turn pretty fast into fuzzy. But on wavy hair with some strength, it can be lovely. The front moves, the waves stack naturally, and the whole style feels a little looser.
Use a diffuser if you air-dry. Use a bendy blowout if you don’t. Either way, the razor only works if the hair has enough movement to begin with.
14. Side-Swept Front Layers for a Softer Part

A center part is not the law. If the front of your hair feels too even or too flat, side-swept layers can change the whole mood in one move. The asymmetry softens the face and gives the haircut a little swing without needing a dramatic fringe.
The longer side usually starts around the cheekbone or jaw, while the shorter side slips back more gently into the rest of the length. That unevenness is what makes it interesting. It creates motion without making the haircut look lopsided, which is a fine line to walk.
This shape is especially useful if one side of your face feels stronger than the other or if your cowlick makes a center part annoying. A side sweep gives the hair somewhere natural to go. It also plays well with soft waves, because the waves help disguise the transition between the shorter and longer front sections.
A round brush or a large velcro roller can set the front nicely, but you do not need a perfect salon blowout every time. Even a rough-dried side sweep looks intentional when the layers are cut with enough softness.
If a center part makes your hair feel too severe, this is the easiest course correction.
15. Minimal Face Framing for Straight Long Hair
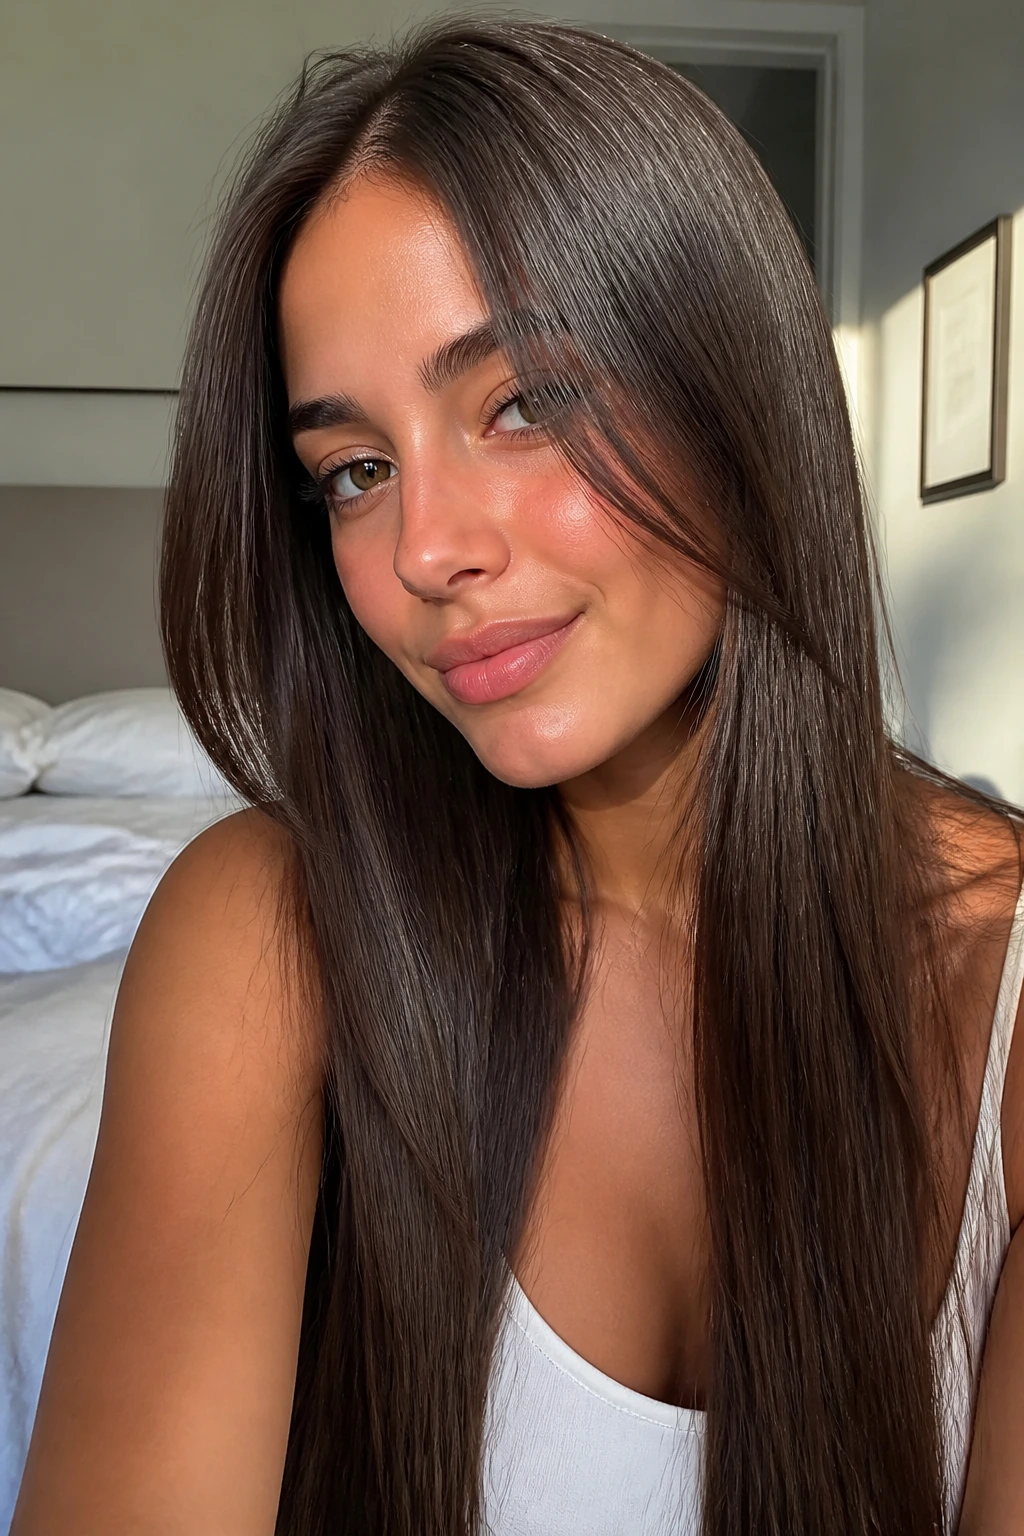
Straight long hair shows everything. Every layer line. Every uneven snip. Every awkward angle. That is why minimal face framing can be smarter than a dramatic cut if your hair falls in a smooth, straight sheet.
The goal here is not movement for its own sake. It’s shape. A few long layers near the front, usually starting below the cheekbones, can keep the hair from hanging flat around the face without creating those visible stair-step pieces that straight hair loves to betray. The result is clean and quiet.
I like this for long hair that already has shine. Too much layering can break up that glossy curtain effect and make the ends look thinner than they are. A softer front frame keeps the length intact while carving a little room around the cheeks and mouth.
This cut is one of the easiest to live with because it does not need a big styling routine. A quick pass with a flat iron or a bend from a round brush is enough. If the hair is naturally pin-straight, the front pieces should be kept even longer so they don’t pop out in awkward ways.
Subtle does the work here. No theatrics needed.
16. Bold Face Framing Layers for Curly Long Hair
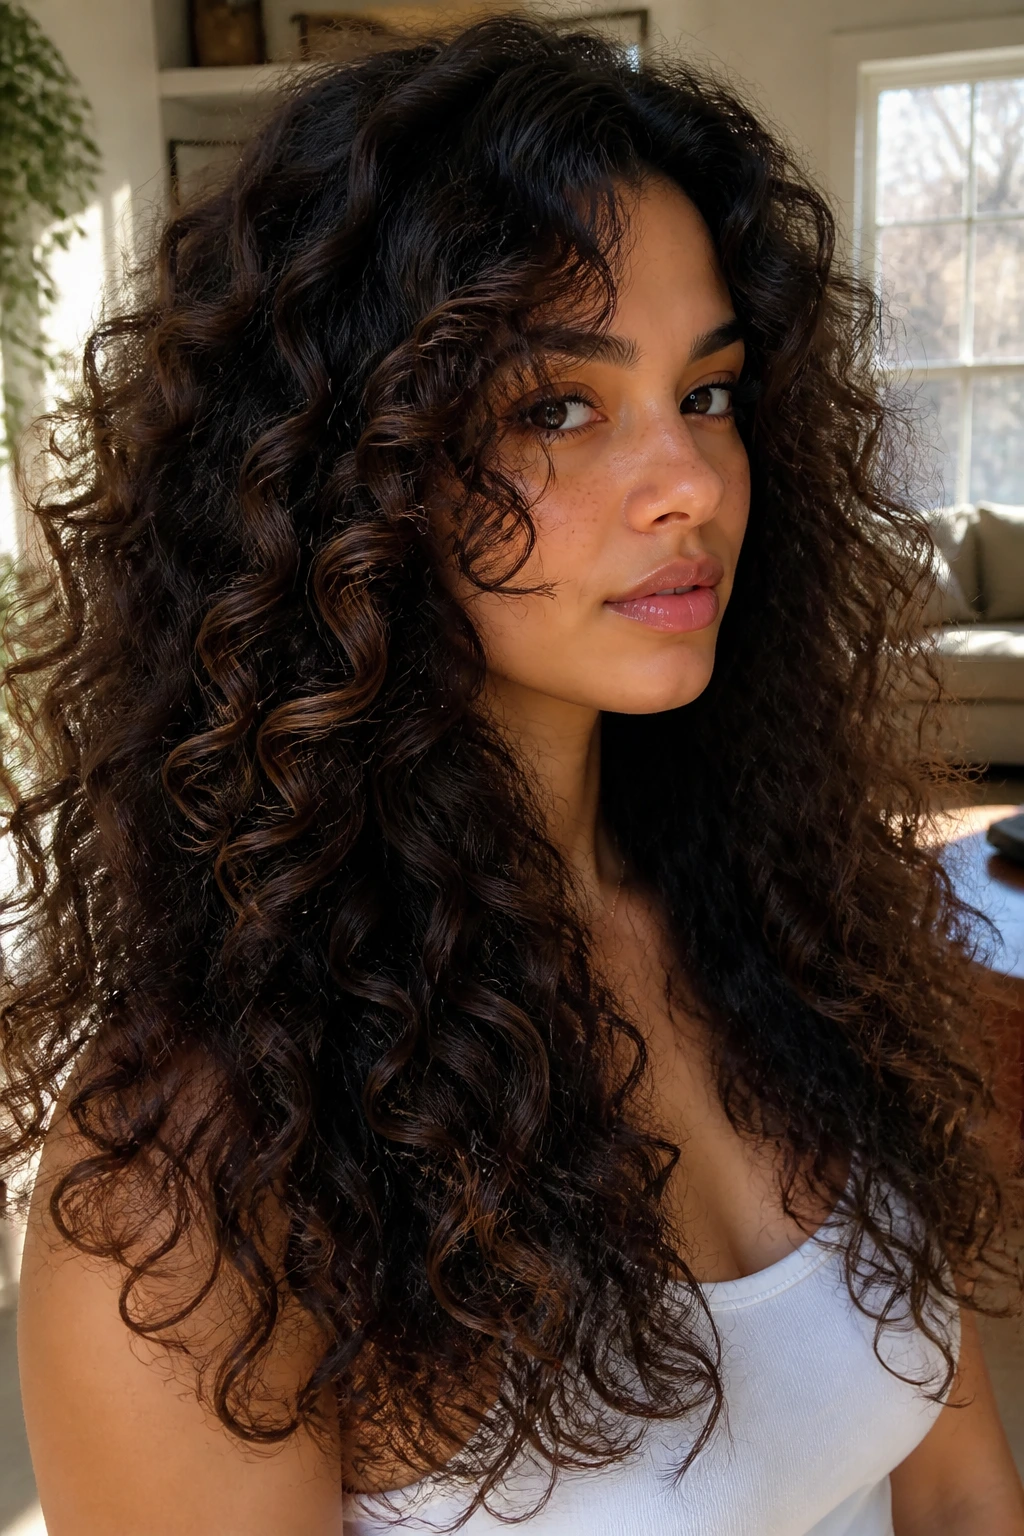
Curly hair shrinks. That is the first thing to remember, and it changes everything about face framing. What looks like a generous front layer when wet can land much higher once the curls dry, so bold framing on long curls needs space and patience.
The best version usually starts lower than people expect. Loose curls may want the front pieces around the chin or collarbone. Tighter curls often need the shortest section closer to the mouth or even lower, depending on shrinkage. If you cut curly hair too short in front, it can spring up and sit like a shelf.
A dry cut or curl-by-curl shaping usually gives the cleanest result. That sounds fussy, and it can be, but curly hair rewards precision. The front frame should follow the natural curl pattern, not fight it. When it’s done well, the hair opens around the face and the curls stack in a way that feels balanced.
This is not the cut for someone who wants the front to fall the same way every day. Curly hair has opinions. But if you work with that instead of against it, the face frame can be gorgeous.
17. Deep Center-Part Layers That Split the Frame

A deep center part changes the geometry of long hair in a way that people underestimate. It creates two long panels around the face instead of one obvious frame, which can make the haircut feel cleaner, longer, and a little more dramatic.
The front pieces on each side usually start around the cheekbone or jaw and cascade down in a mirrored line. That symmetry can be beautiful on oval, heart, and longer face shapes, especially when the hair has enough density to hold both sides without going limp. The cut feels intentional from the first inch.
One-sentence truth: this style needs balance more than anything else.
If the part is too wide or the layers too short, the front can split open too much and expose the forehead in a way that feels harsh. But when the lengths are right, the shape is elegant in a very practical way. You get face framing, yes, but you also get a long line that keeps the hair from looking chopped up.
I’d choose this on medium-to-thick hair that likes to hold a bend. It suits the kind of person who wants polish without bangs and doesn’t mind a bit of structure near the cheeks.
18. Grow-Out Friendly Face Framing Layers

The cuts that survive the longest are usually the smartest ones. Grow-out friendly face framing layers keep their shape after the salon freshness fades, which is a bigger deal than people admit. A haircut that looks good only on day one is not a good haircut.
This version usually starts around the collarbone, jaw, or cheekbone, depending on density and texture, but the key is softness. The front pieces should blend into the rest of the length so the line remains usable as it grows. You can tuck it behind the ears, curl it away from the face, or let it hang loose without the whole shape looking abandoned.
I like this option for anyone who does not want a maintenance-heavy haircut. It’s forgiving on lazy days, and it still looks deliberate when you style it. A few soft bends in the front can carry the whole look. So can nothing, which is even better.
If you want one long-hair frame that holds up through several weeks of grow-out, keep the shortest pieces low and the transitions soft. That’s the difference between a cut that ages well and one that turns into a weird half-layered situation by the third shampoo. And honestly, that’s where long hair gets expensive in the first place — not in the salon chair, but in how it behaves after the salon chair.
