



Relaxed hair is a unique beast. It offers a kind of styling versatility that other textures often struggle to achieve without significant heat intervention, but it also demands a level of vigilance that many overlook. When you process your hair, you are essentially altering its internal structure. This leaves your strands inherently more fragile than their virgin counterparts. The goal isn’t just to make it look good for an hour; it’s about finding styles that allow you to express yourself without sacrificing the integrity of your ends.
Many people fall into the trap of thinking relaxed hair has only one setting: straight and down. That is a myth that limits your wardrobe and your aesthetic. You have the ability to mold your hair, braid it, twist it, and pin it into shapes that hold remarkably well because of the relaxed texture. However, the secret lies in how you manipulate the hair. Everything—from the brush you use to the way you tie a silk scarf at night—determines whether you are actually caring for your hair or slowly breaking it off. Let’s look at twenty ways to wear your relaxed hair that prioritize both style and long-term health.
1. The Sleek High Ponytail
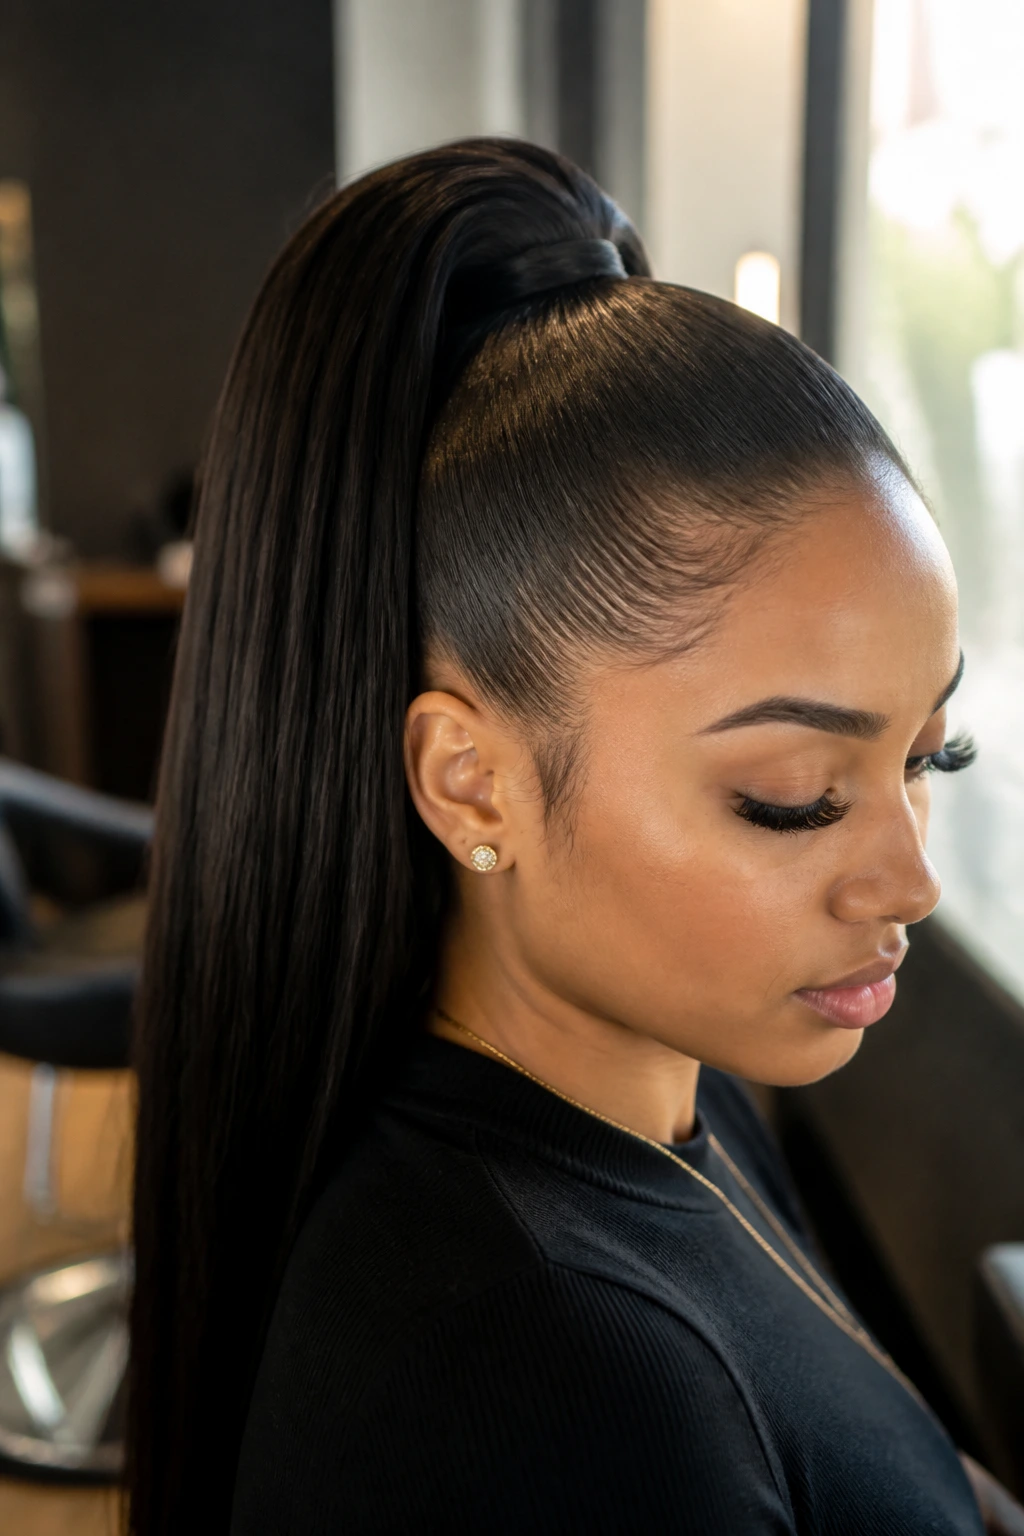
This is the gold standard for a reason. It is clean, sharp, and pulls everything away from your face, which can be incredibly flattering. To achieve the perfect high ponytail without causing breakage, you need to be strategic about your tension. Do not simply grab your hair and yank it into an elastic band. That is a recipe for a receding hairline.
Start by applying a small amount of a lightweight pomade or a moisturizing edge control to your roots. Use a soft-bristle brush to smooth the hair upward toward the crown of your head. Once you have the hair gathered, secure it with a snag-free hair tie. If your hair is on the thinner side, you can gently tug at the hair near the base of the ponytail to create more volume. To finish, take a small piece of hair from the underside of the ponytail, wrap it around the elastic, and pin it underneath. This hides the band and makes the style look much more professional.
2. Deep Side Part with Soft Waves

A deep side part has a way of adding drama to an otherwise simple look. It is an old-school technique that still works perfectly for relaxed textures because the hair lays flat so naturally. Part your hair using a rat-tail comb to ensure the line is crisp. A crisp part is the foundation here; if the line is messy, the whole style looks undone rather than intentional.
After parting, use a large-barrel curling iron or a set of heatless rollers to add some movement to the ends. You do not want tight curls here. You want a soft, flowing wave that frames the face. If you have been relaxing your hair for a while, you know that heat management is paramount. Use a heat protectant spray—not a serum—before you pick up any hot tool. A spray distributes better and does not weigh down the hair, ensuring your waves remain bouncy rather than greasy.
3. Half-Up, Half-Down Top Knot
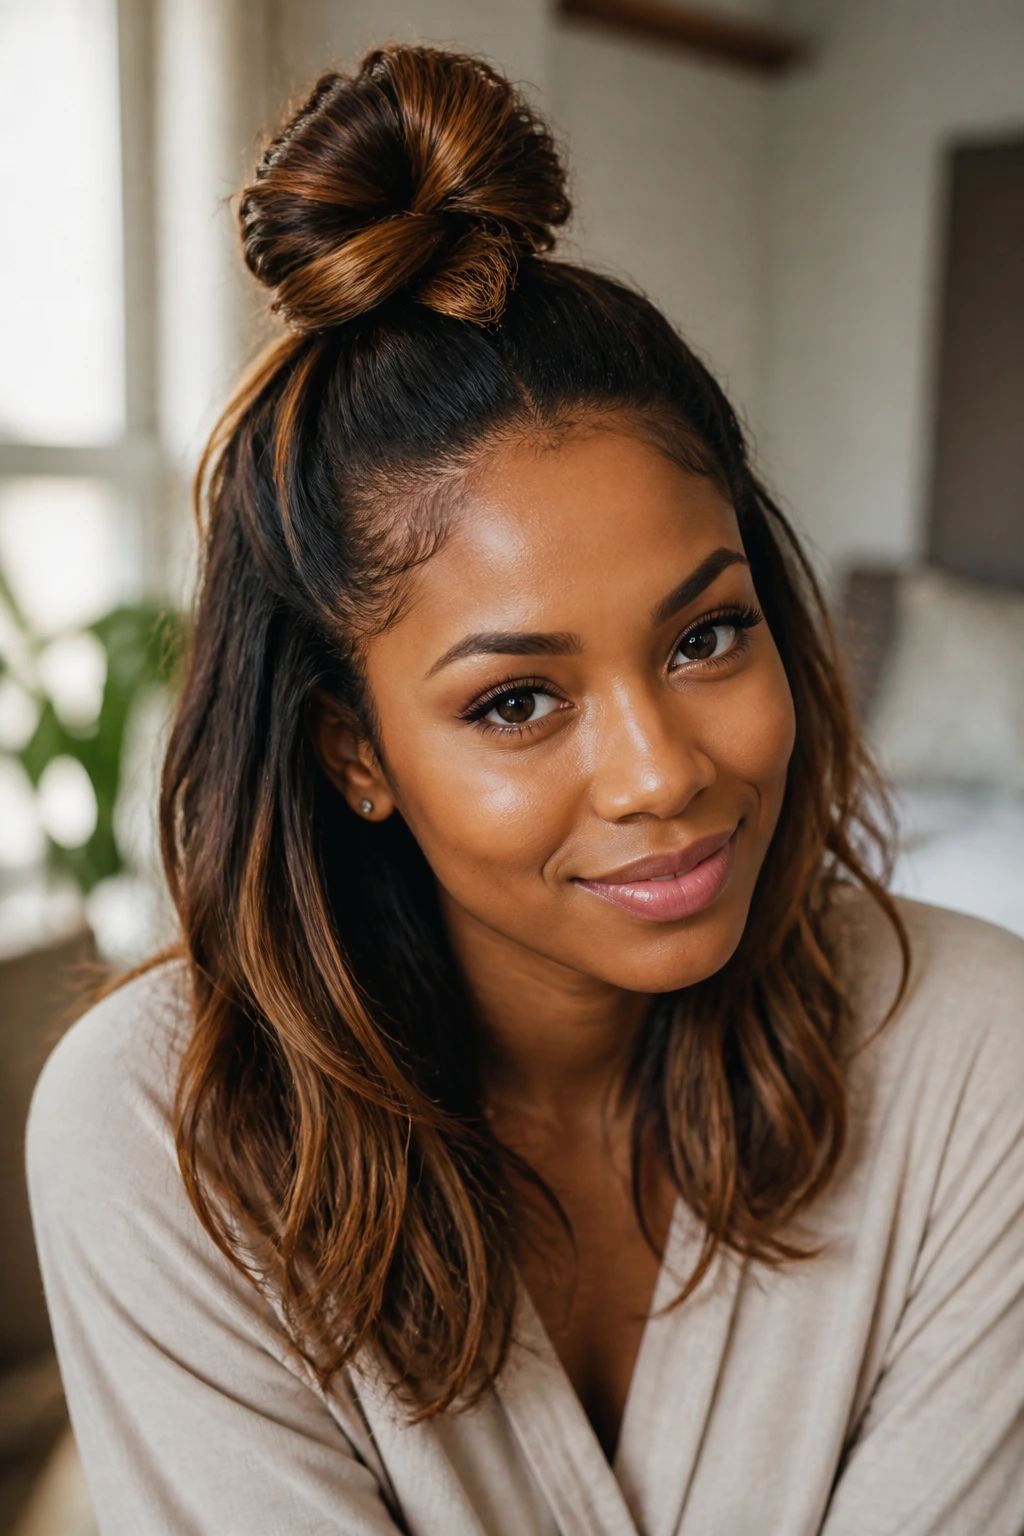
This style is excellent for those days when you want your hair out of your face but still want to show off your length. It is playful and balances the elegance of loose hair with the practicality of an updo. To get this right, you need to section the hair horizontally from ear to ear. Clip the bottom section out of the way so you can focus entirely on the top portion.
Gather the top section into a high, secure bun at the crown of your head. Do not pull the top section too tight. You want the bun to sit loosely on top, with a bit of “poof” at the roots. Let the rest of your hair fall naturally. If you have any stubborn flyaways around the hairline, just a tiny dab of styling cream will keep them in check. This style is also great because it allows you to showcase any highlights or color treatments you might have, as they will be distributed across both the bun and the loose hair.
4. Elegant Low Chignon

The chignon is sophisticated and, frankly, it is one of the safest styles for your hair. Because you are pinning the hair into a bun at the nape of your neck, you are effectively tucking your ends away. Tucking your ends is one of the most effective ways to prevent split ends and breakage, as it protects the oldest, most fragile part of your hair from rubbing against your clothes.
To create a clean chignon, pull your hair back into a low ponytail. Twist the length of the ponytail and wrap it around the base to form a bun. Secure it with bobby pins. The key here is to make sure your pins are inserted correctly—the opening side of the pin should face the center of the bun to lock it in place. If you find your hair is too slippery for pins to hold, a light mist of flexible-hold hairspray before you start twisting will provide just enough grip.
5. Faux-Bob with Curled Ends
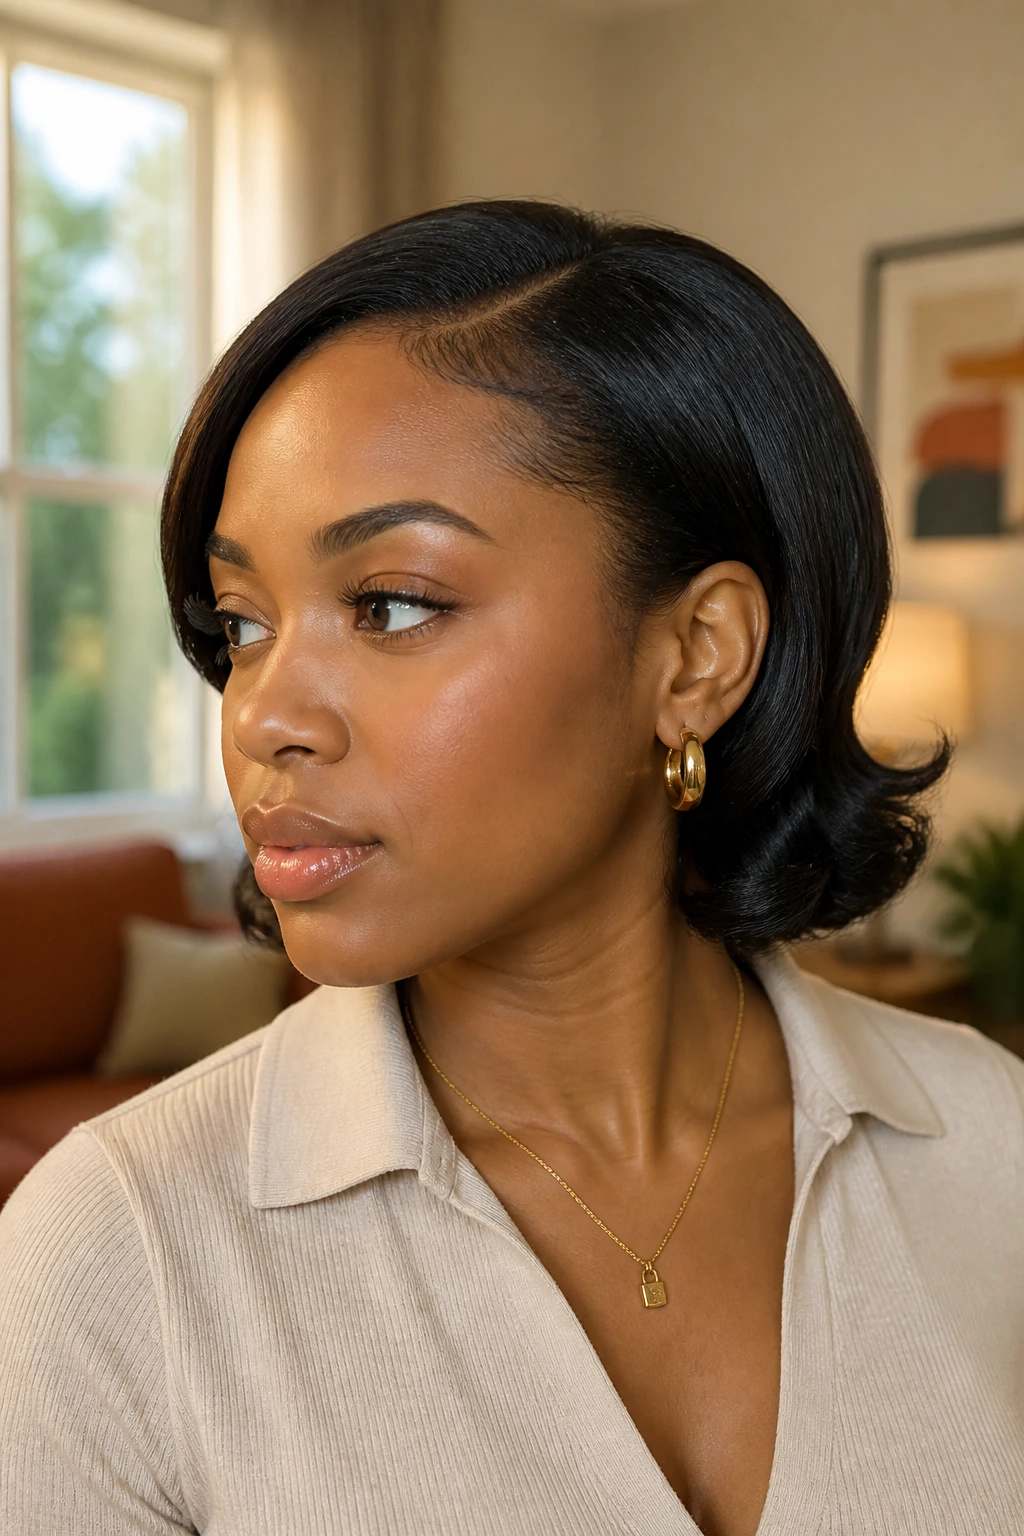
Sometimes you want a change of pace without taking the scissors to your hair. A faux-bob allows you to test the waters of a shorter cut without any permanent commitment. The trick to a convincing faux-bob lies in how you tuck the hair. You need to section your hair into three parts: the front left, the front right, and a large section in the back.
Take the back section and roll it underneath itself, pinning it against the nape of your neck to create the length you want for the bob. Then, take the two front sections, curl them under slightly, and pin them over the tucked back section. The result should look like a seamless, one-length bob. The secret ingredient is a mirror; you need to check the back and sides to ensure the pins aren’t visible. It’s a bit of work, but the result is a total transformation that you can undo in five minutes.
6. Flexi-Rod Voluminous Curls
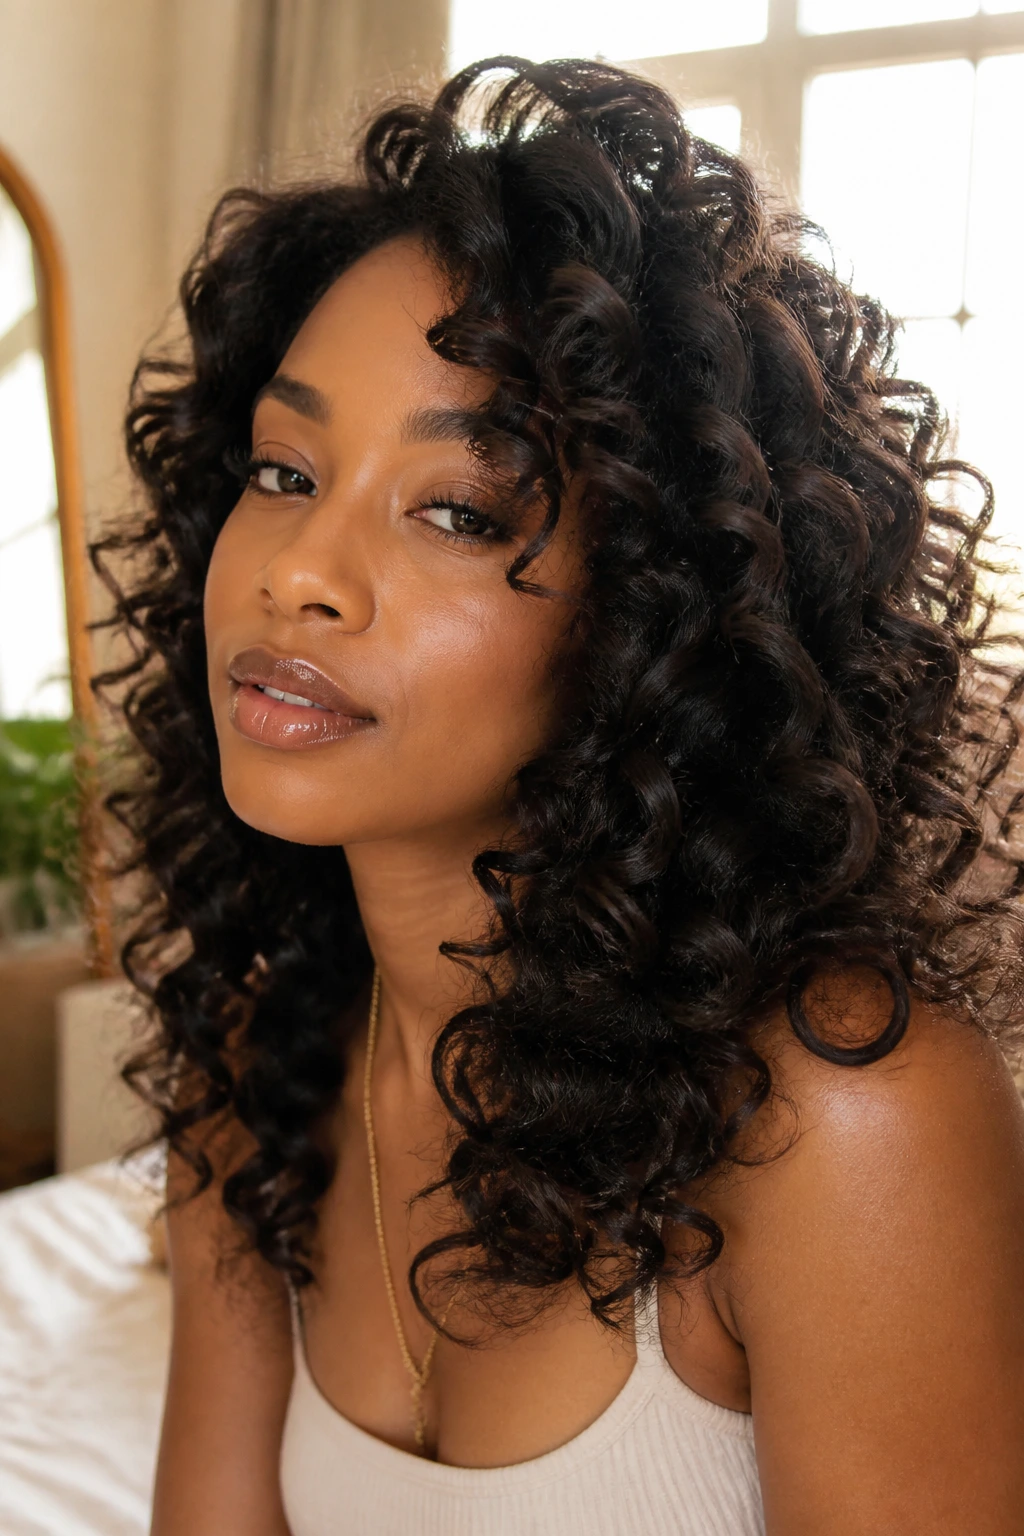
Relaxed hair can sometimes lack volume, especially if the hair is very fine. Flexi-rods are the best tools to inject body without using excessive heat. Because flexi-rods are made of flexible foam, you can sleep in them without the discomfort that hard plastic rollers cause.
Section your damp (not soaking wet) hair and apply a setting mousse. Wrap small sections of hair around the rods, rolling them toward the scalp. The smaller the section, the tighter the curl; the larger the section, the more of a wave you will get. Leave them in until your hair is 100% dry. This is non-negotiable. If you take them out while the hair is even slightly damp, the curls will frizz immediately. Once you take them down, use a wide-tooth comb—or even just your fingers—to separate the curls for maximum volume.
7. French Braided Halo
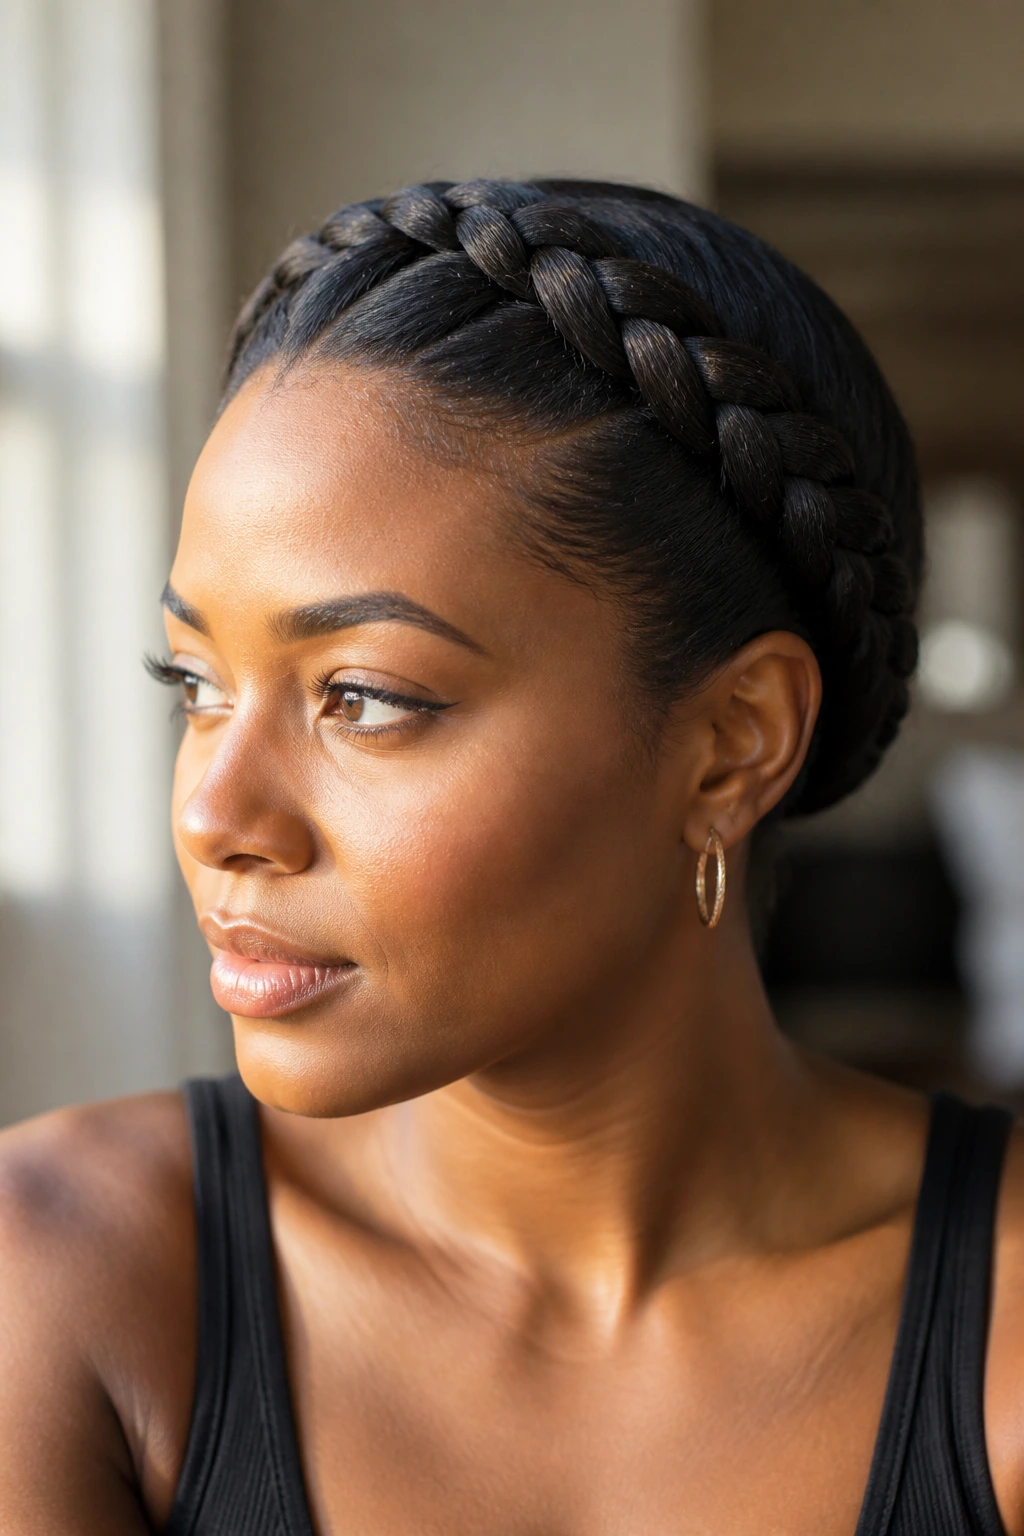
Braids on relaxed hair can be tricky because the texture is so silky that they can unravel easily. However, a French braid or a Dutch braid is a fantastic way to keep your hair secure and out of the way for a few days. The “halo” style involves braiding the hair around the perimeter of the head.
If you aren’t an expert braider, this might take some practice. Start by parting a section of hair near your ear and begin a three-strand braid, adding small amounts of hair as you move along the hairline. When you reach the back, continue the braid until you meet where you started, then pin the ends underneath the main braid. The result is a crown-like appearance. Because relaxed hair is sleek, this style looks very polished and formal. It is perfect for professional settings or events where you need your hair to stay put all day.
8. Blunt-Cut Sleek Straight

There is a specific kind of power in bone-straight hair. It looks sharp, intentional, and healthy. To achieve this without damaging your hair, you must focus on the blow-drying process. Never run a flat iron through damp or even slightly moist hair; you will effectively steam-fry the cuticle.
Use a paddle brush and a blow dryer to get the hair as smooth as possible before the flat iron even touches it. Work in very small sections. When you iron, use a single pass technique. If you have to go over the same section of hair four or five times, your iron isn’t hot enough, or your sections are too thick. A high-quality ceramic or tourmaline iron is essential here. The goal is a glassy, reflective finish that looks healthy, not brittle.
9. Messy High Bun
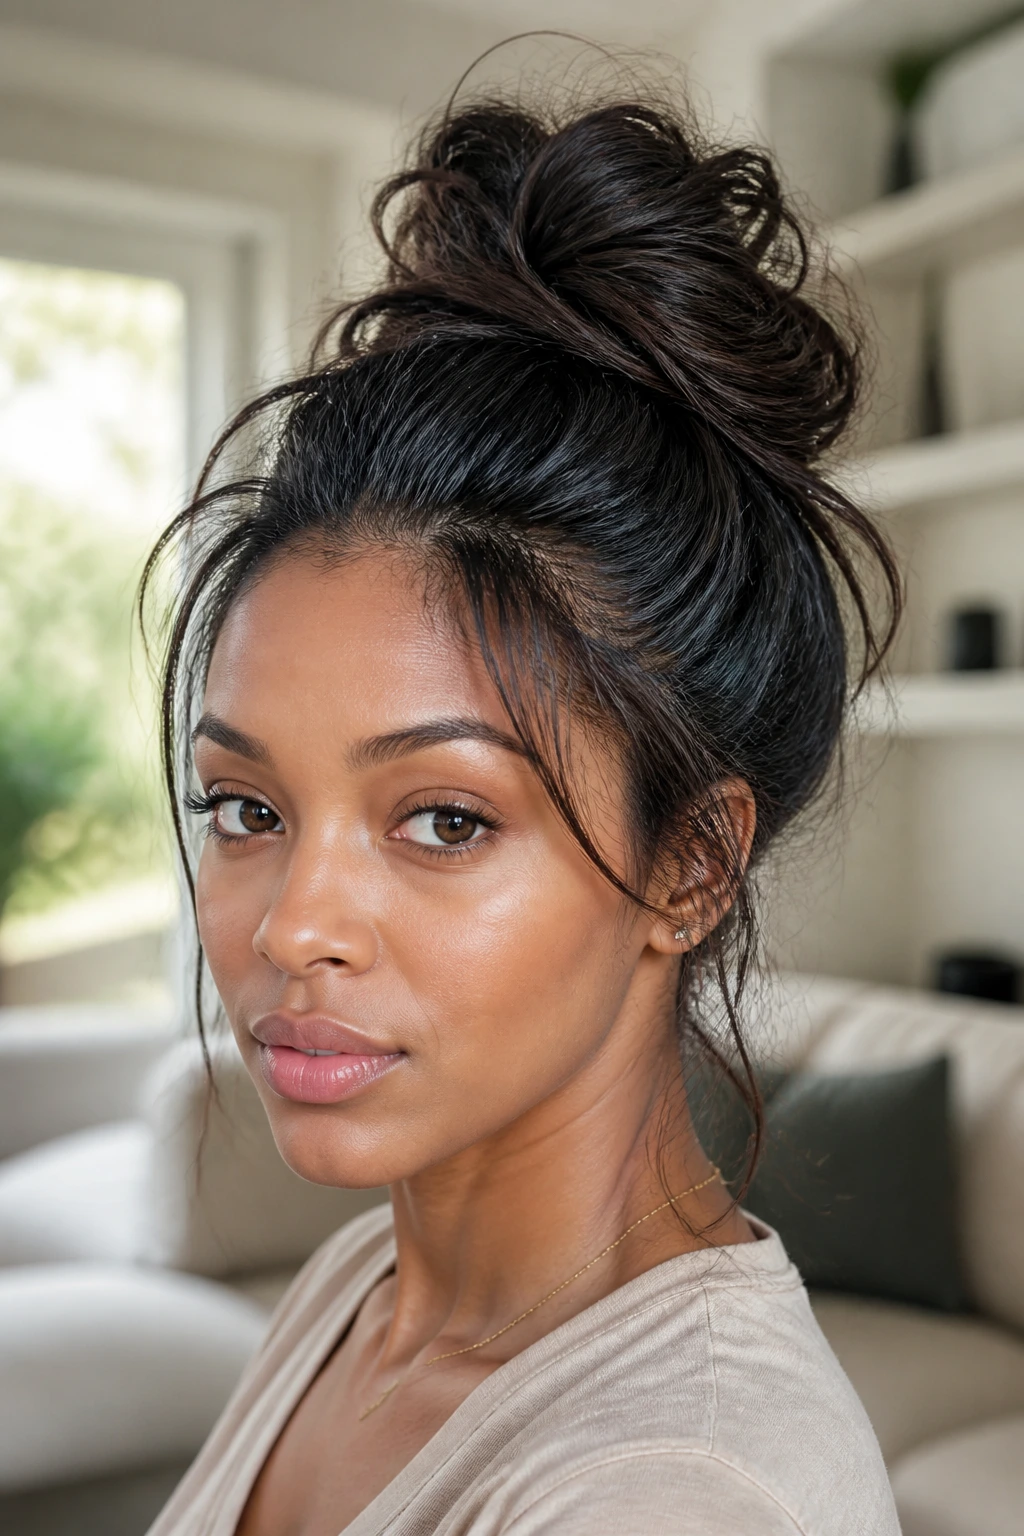
The “messy” bun is the ultimate casual style, but it is deceptively hard to pull off on relaxed hair because the texture is naturally so smooth. If you just pull your hair up, it can look a bit too deliberate. To get that effortless, lived-in look, you need to create texture first.
Try spraying a bit of texturizing spray or dry shampoo at the roots before you pull the hair up. Gather your hair into a high ponytail, but don’t pull it all the way through the elastic on the last loop. This creates a loop of hair at the crown. Take the ends that are left out and wrap them around the base of the loop, pinning them loosely. Don’t worry about perfection. The more uneven and loose it is, the better it looks. This style is fantastic for second-day hair when you want to hide roots or a need for a wash.
10. Retro Space Buns

Space buns are fun and playful, but they can be styled in a way that feels intentional and mature rather than childish. Part your hair down the center, from your forehead to the nape of your neck. Secure two high ponytails on either side of your head.
Instead of making perfect, smooth buns, twist the length of each ponytail into a rope and wrap it around the base. Secure with pins. If you want to elevate this look, leave two small pieces of hair out in the front to frame your face. You can use a curling iron to put a soft bend in those front pieces. This is a great way to add some personality to your look without spending hours in front of the mirror. It also keeps the weight of your hair distributed evenly, which can be more comfortable than a single heavy bun.
11. Waterfall Braid Headband
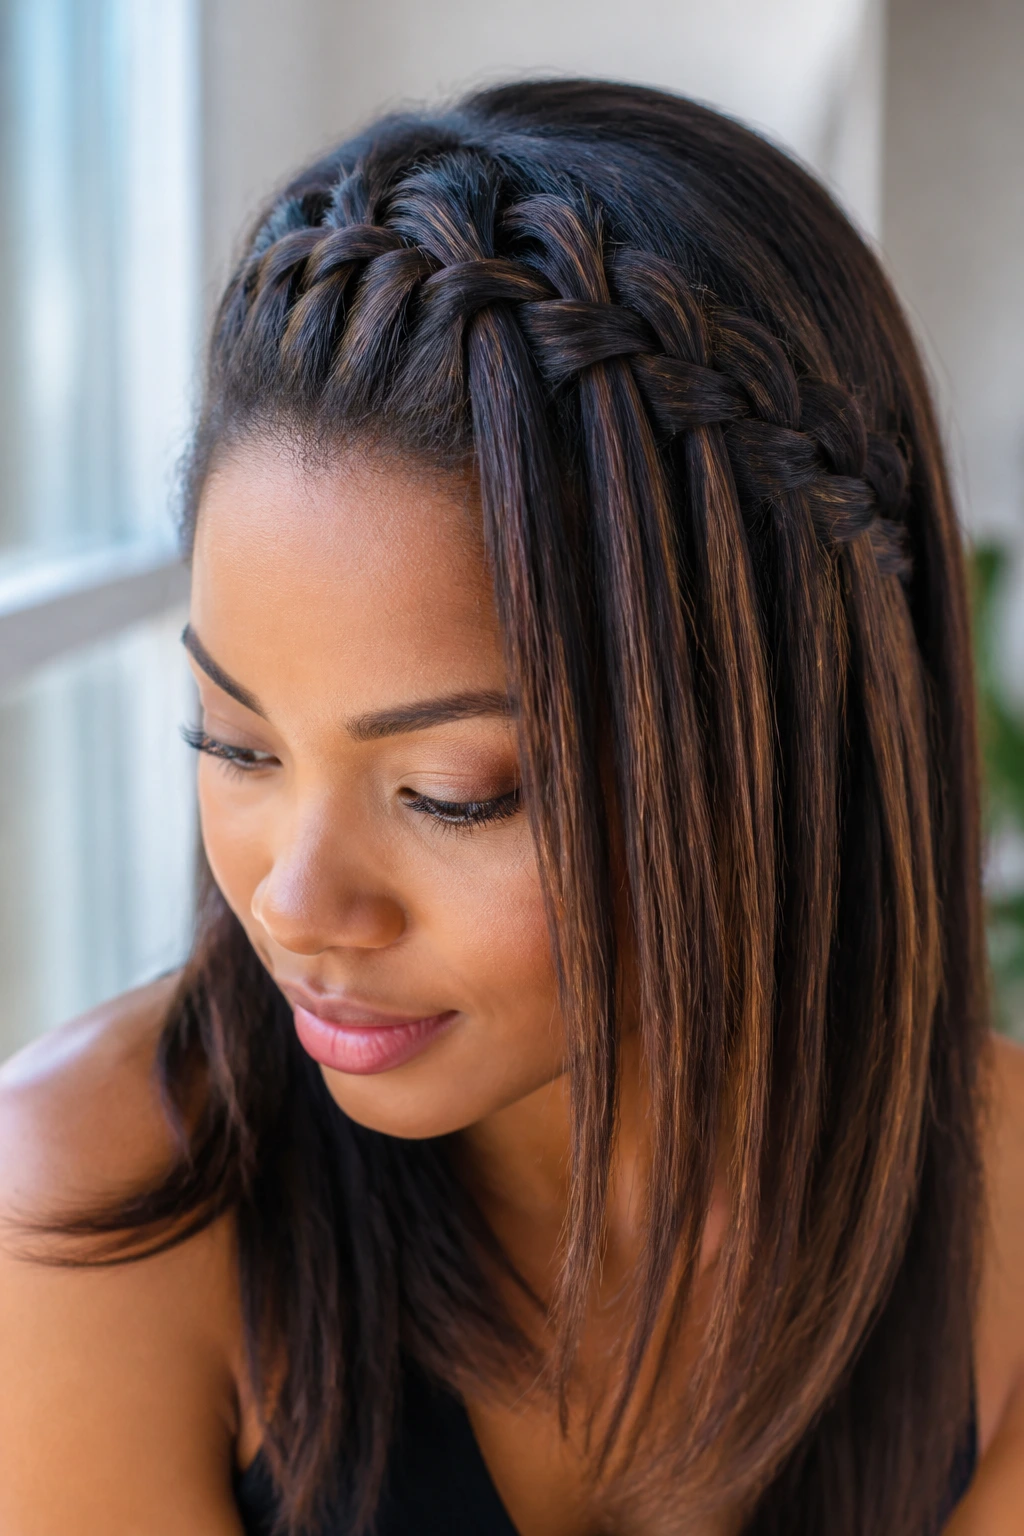
This style looks like you have spent hours on your hair, but it is actually quite simple once you understand the technique. A waterfall braid creates the illusion of hair flowing down from a headband. You start at the front hairline, near your part, and begin a basic braid.
As you work your way around the side of your head, you drop one strand of the braid down—this is the “waterfall” effect—and pick up a new piece of hair to continue the braid. You are essentially letting strands fall freely as you weave a horizontal braid across the top of your head. Secure it with a bobby pin behind your ear. It is a stunning, bohemian-inspired look that keeps your hair out of your eyes while still showing off your length.
12. Wrapped Ponytail with Extension Integration

If you feel like your ponytail is looking a little thin, you can use a small pack of hair extensions to create a fuller, longer look. The trick is to ensure the texture of the extensions matches your relaxed hair perfectly. Synthetic braiding hair often looks too coarse, so look for high-quality human hair or premium synthetic blends designed to mimic the luster of relaxed hair.
Put your hair into a tight, sleek ponytail first. Take a weft of extensions and wrap it around your natural ponytail, using a bobby pin to secure the start of the weft. Continue wrapping until the natural ponytail is completely covered and you have reached the desired length. Use a small piece of the extension hair to cover the base of the ponytail, pinning it securely. This style is a heavy-hitter for events where you want maximum impact.
13. Zig-Zag Part with Low Ponytail

Sometimes, the simplest change makes the biggest difference. A zig-zag part was popular in the past, but it is making a comeback as a way to add geometric interest to a basic low ponytail. You will need a rat-tail comb and a bit of patience.
Start at the front hairline and use the metal tail of your comb to draw a zig-zag line all the way back to the crown. It does not have to be perfectly symmetrical; in fact, a slightly irregular zig-zag looks more organic and modern. Once the part is set, pull the hair into a low, sleek ponytail at the nape. Use a bit of shine spray to make the part pop. This is a low-effort style that looks like you put a lot of thought into the details.
14. Crimped Mermaid Waves
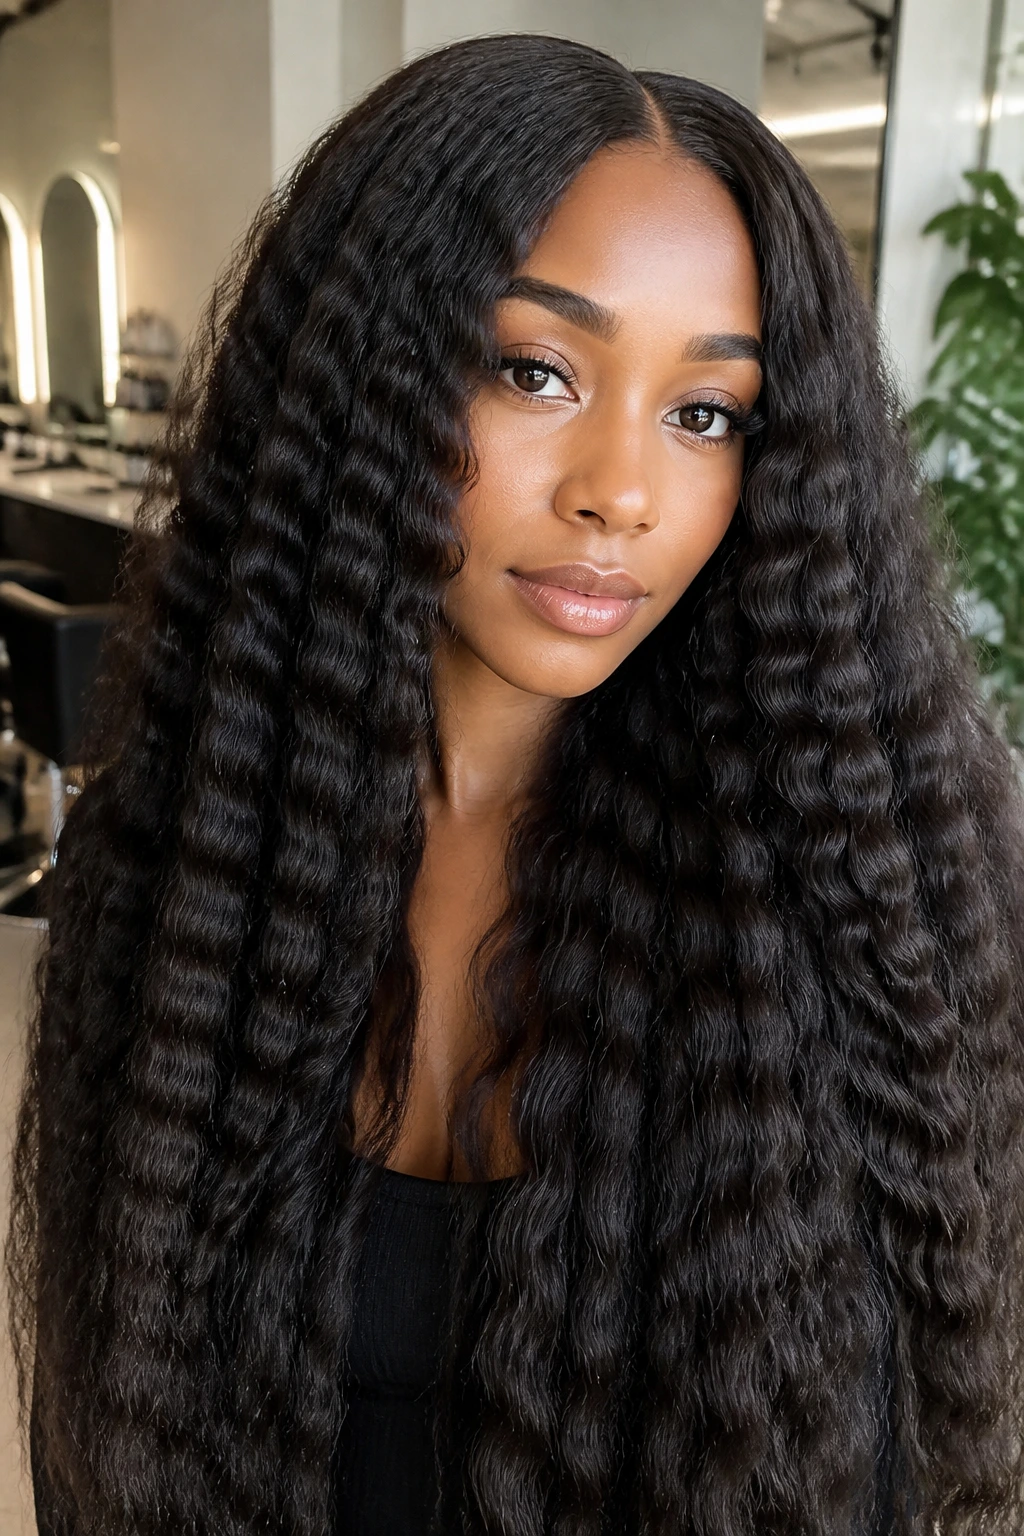
Crimped hair has moved far beyond the 1980s. When done on relaxed, long hair, it creates a voluminous, “mermaid” effect that is striking. You will need a three-barrel crimping iron for this. Because relaxed hair is already chemically straightened, it holds a crimp extremely well.
Working in thin sections is crucial. Start near the roots, clamp the iron for a few seconds, and then move down. The secret to a modern look is to leave about an inch of hair at the roots straight before you begin crimping, and leave the ends straight as well. This prevents the “poodle” effect. Once you have crimped the entire head, do not brush it out. Instead, run your fingers through it gently to break up the sections. The result is a massive, textured mane that feels completely different from your standard straight style.
15. Vintage Finger Waves
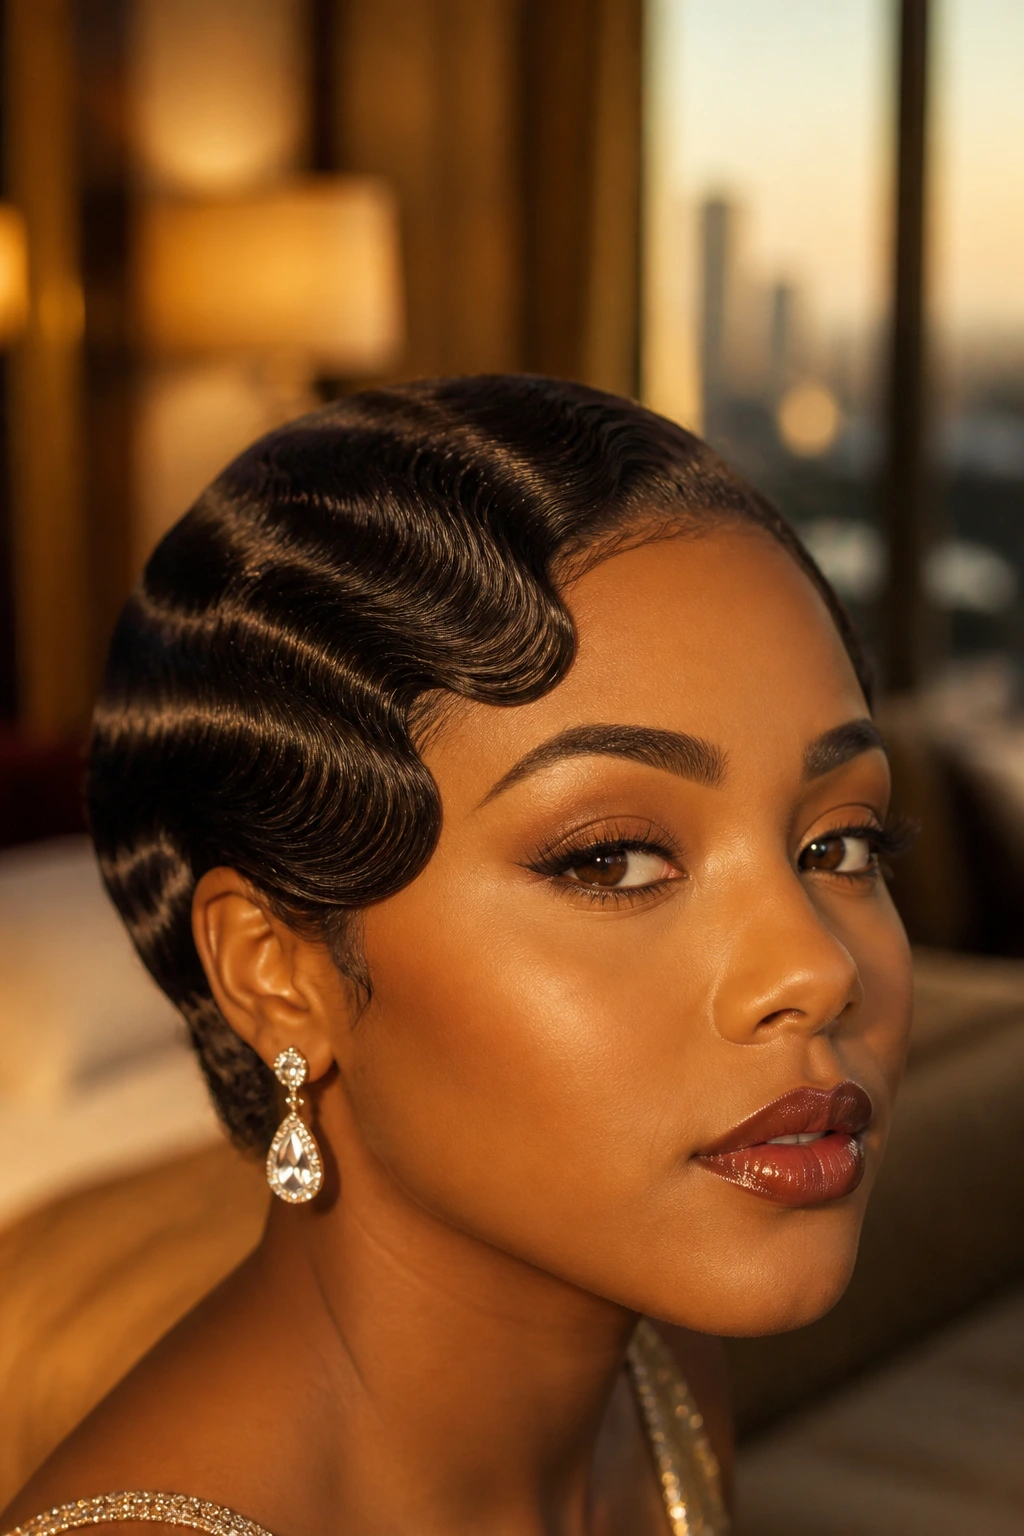
This is an advanced style, but it is incredibly rewarding. Finger waves are a staple of 1920s glamor, and on relaxed hair, they can look like liquid silk. You will need a setting lotion or a strong-hold gel and a fine-tooth comb.
The process involves creating “S” shapes with your damp hair, using your fingers to press the hair into a curve and the comb to define the ridge. This style requires a lot of product to set properly and stay in place. It is not a style for a windy day, but for a formal evening, it is unbeatable. Because it requires no heat if you let it air dry, it is also a fantastic way to style your hair without any risk of heat damage.
16. Accessorized Low Ponytail
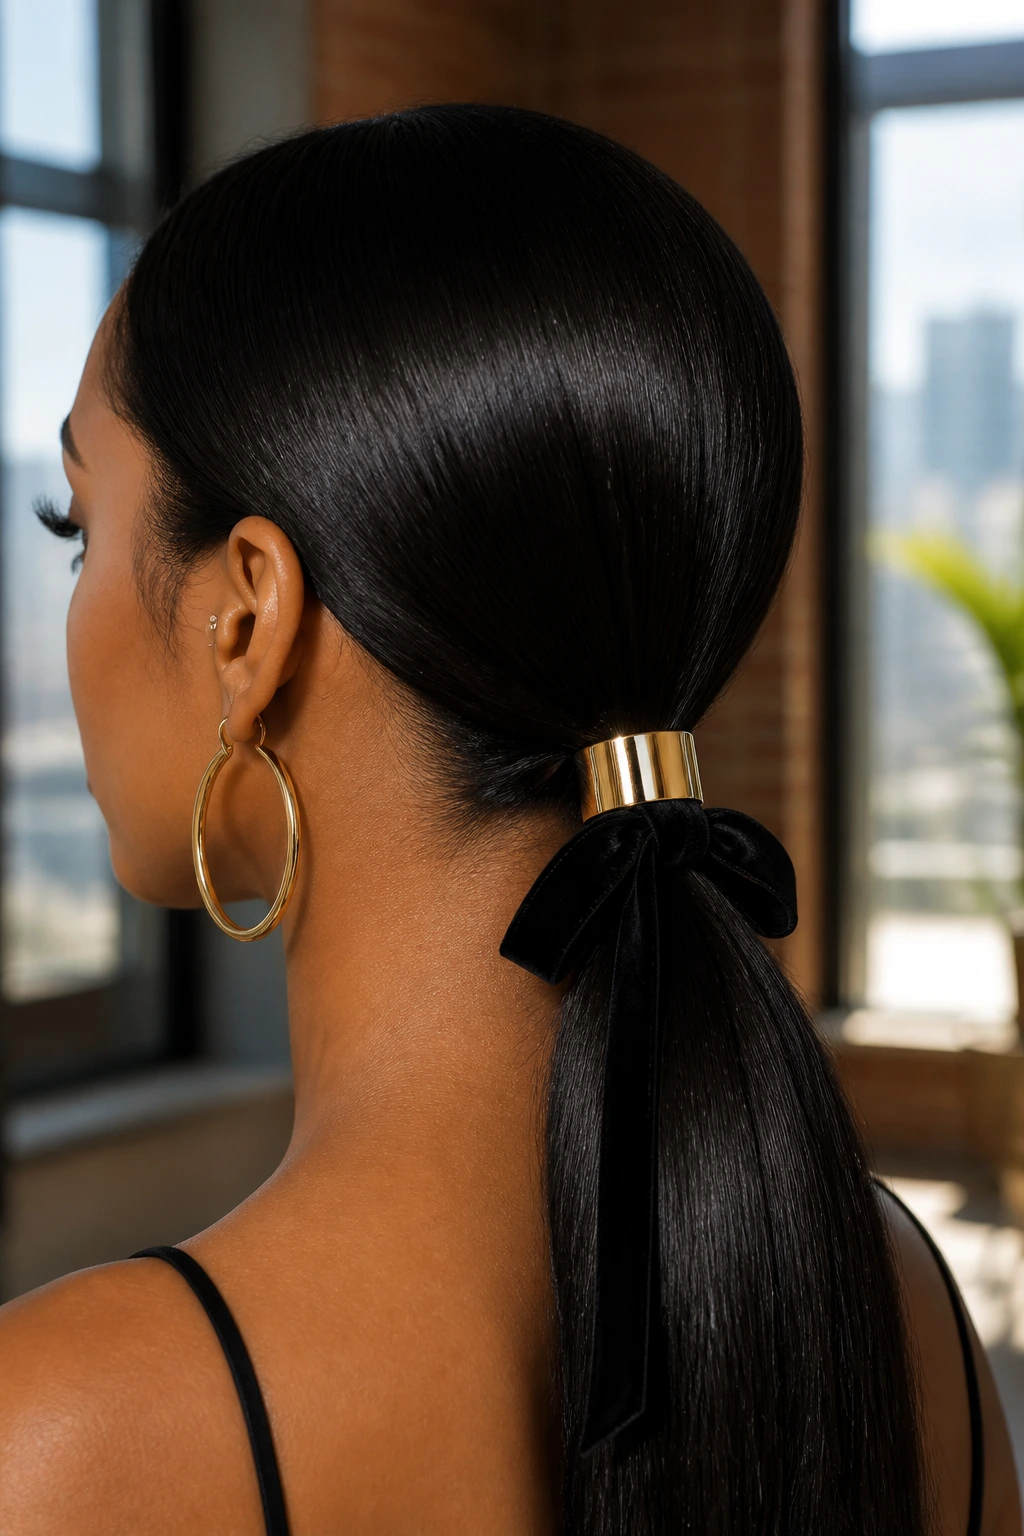
Never underestimate the power of accessories. A simple low ponytail can be transformed into a statement piece with the right hardware. Think gold cuffs, silk ribbons, or pearl-studded hair pins.
Start with a clean, low ponytail. Instead of using a basic elastic, use a ponytail cuff—these are rigid metal or plastic pieces that snap over the hair band. It instantly makes the look feel finished and “done.” Alternatively, tie a long piece of velvet or silk ribbon around the base and let the ends trail down the length of your ponytail. It adds softness and a touch of color that contrasts beautifully with the sleekness of relaxed hair.
17. Sleek Double Dutch Braids
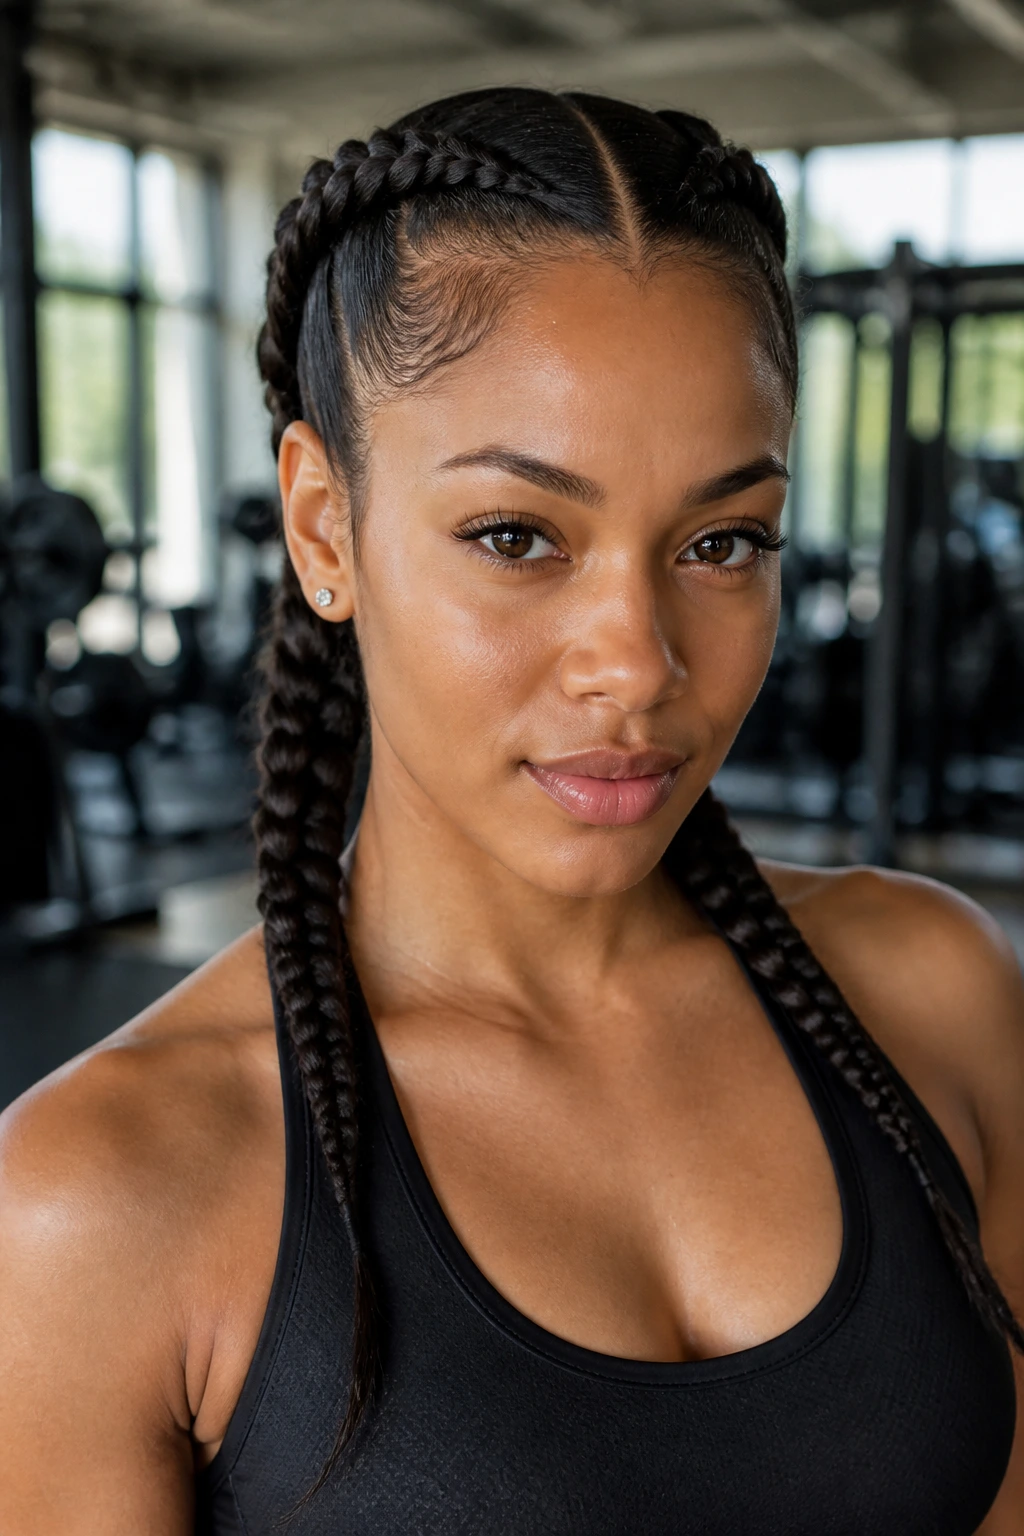
Dutch braids (or “inside-out” French braids) look especially good on relaxed hair because the smoothness of the hair highlights the definition of the braid. Part your hair down the center and create two separate braids starting at the front hairline.
As you braid, pull the hair under rather than over to create that raised, 3D effect. The tighter you braid, the sleeker the style will look. Once you reach the nape of the neck, you can either continue the braid to the ends or stop and secure them into two low ponytails. This is a very secure style that can last for several days if you wrap it at night. It is perfect for gym sessions or travel when you don’t want to worry about your hair.
18. Crown Braid with Loose Tendrils
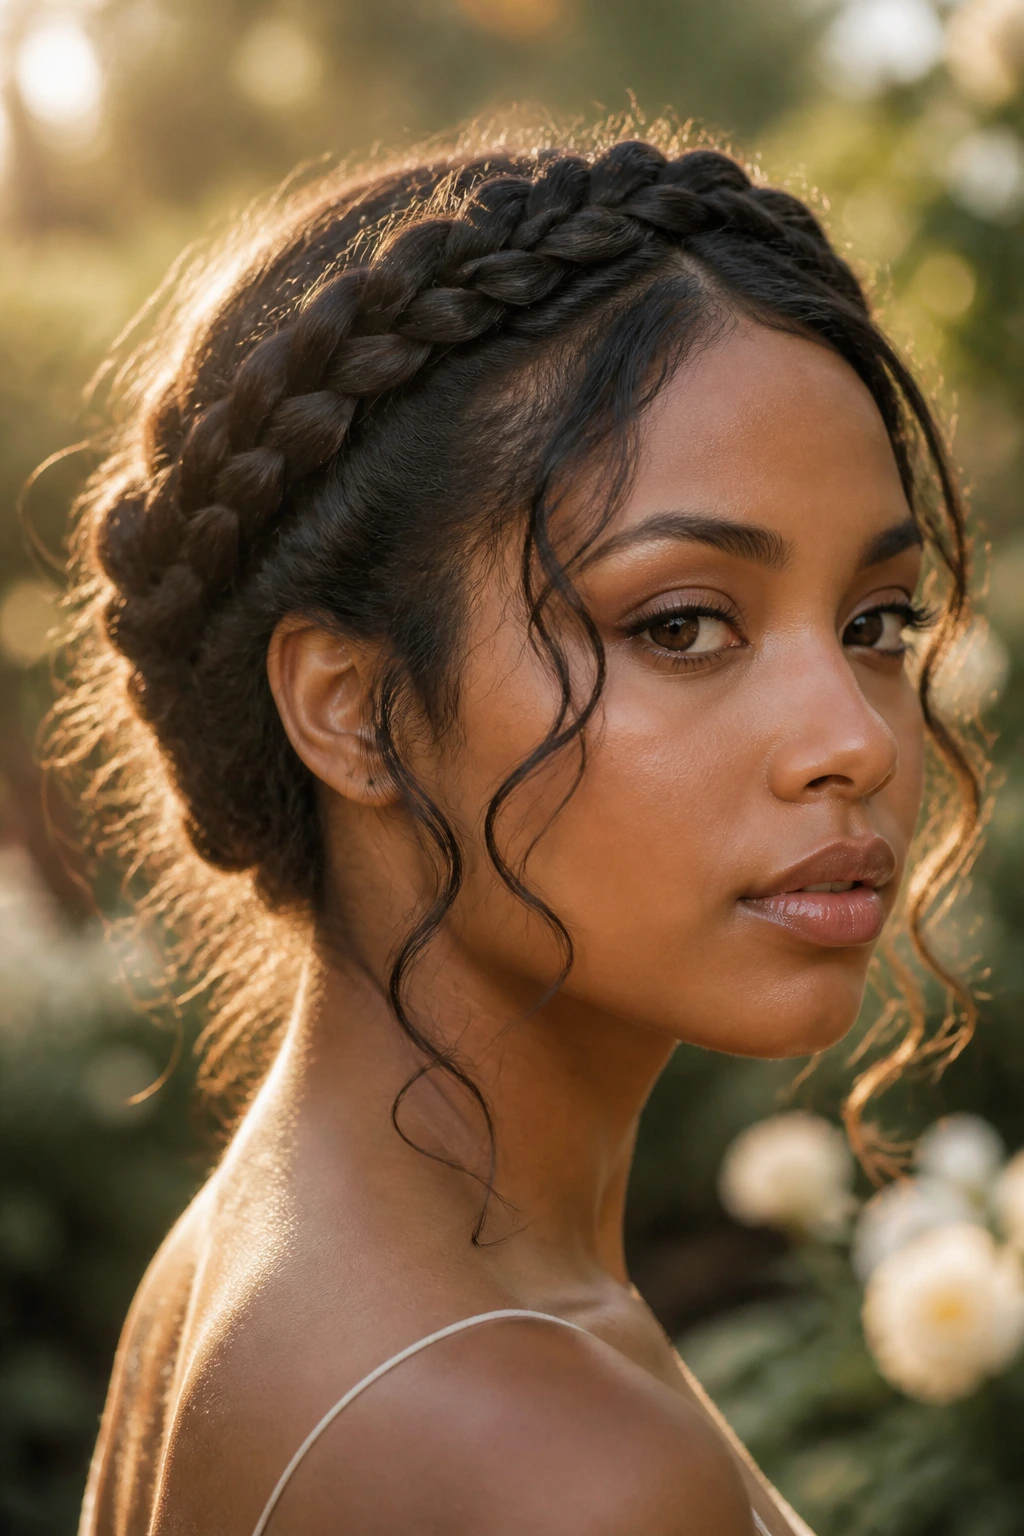
This is a softer take on the halo braid mentioned earlier. Instead of braiding all the hair tightly to the scalp, you are creating a looser crown braid and leaving soft, face-framing pieces out.
Gather a section of hair from the top and sides, leaving a few tendrils around your temples. Braid this gathered section loosely—you can even use a “pull-through” braid technique if you aren’t comfortable with traditional braiding. Wrap the braid around the crown of your head and pin it. Take your flat iron and add a slight curl to the loose tendrils you left out. This style feels romantic and effortless, almost like a Renaissance painting.
19. Classic Victory Rolls
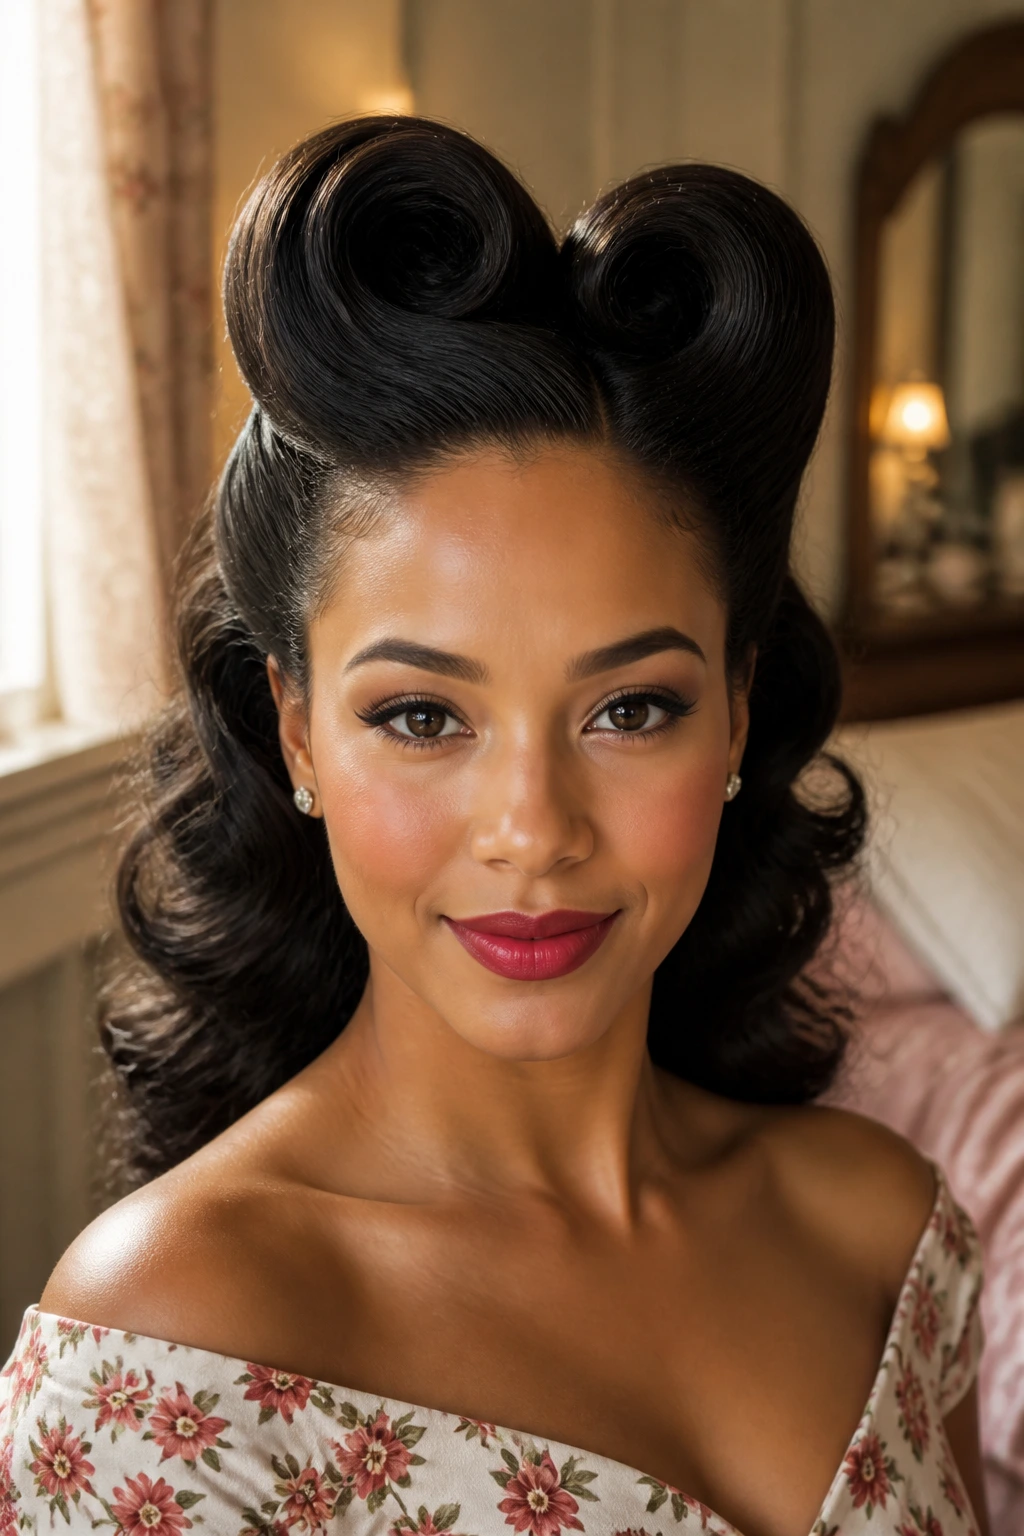
If you have medium-to-long relaxed hair, you have enough volume to create victory rolls. These are those iconic, voluminous curls that sit on top of the head or frame the face. You will need a curling iron, a teasing comb, and plenty of bobby pins.
Section off the front part of your hair that you want to use for the roll. Tease the underside of the hair section to create a cushion of volume. Then, curl the ends of the section around your fingers, tucking them into the center to create a hollow tube or “roll.” Pin it securely against your head. You can do one large roll or two smaller ones. It is a bold, vintage-inspired look that commands attention. It takes practice to balance the size of the rolls, but once you master it, it is a go-to look for when you want to stand out.
20. Heatless Bantu Knot Set
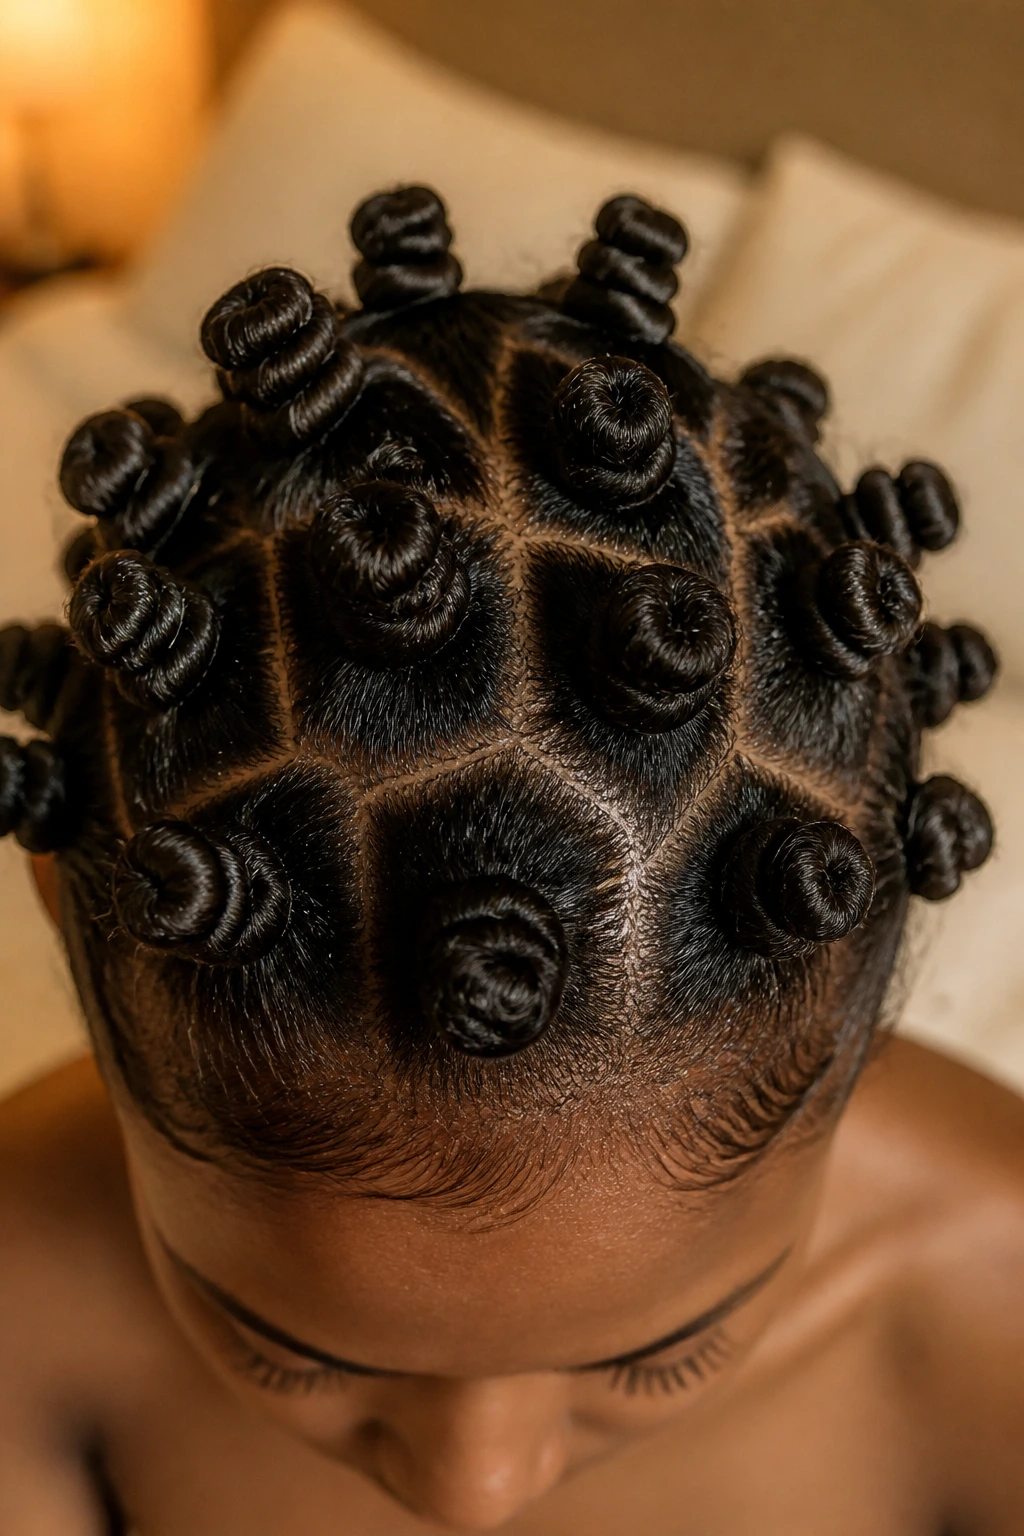
If you want to create heatless curls, Bantu knots are the way to go. This involves twisting your hair into small, tight buns all over your head. The tension and the twisting pattern create a very specific, defined, and bouncy curl once you take them down.
Start with damp hair and apply a light holding foam. Section your hair into small squares—the smaller the section, the tighter the curl. Twist each section tightly and then wrap it around its own base to create a “knot.” Secure it with a small elastic. Sleep in these knots (wear a silk bonnet to keep them from unraveling). In the morning, untwist them carefully. Do not brush the hair, as this will create a massive afro. Instead, use your fingers to arrange the curls. You get heatless texture that is both beautiful and healthy.
Maintaining the Health of Your Relaxed Style
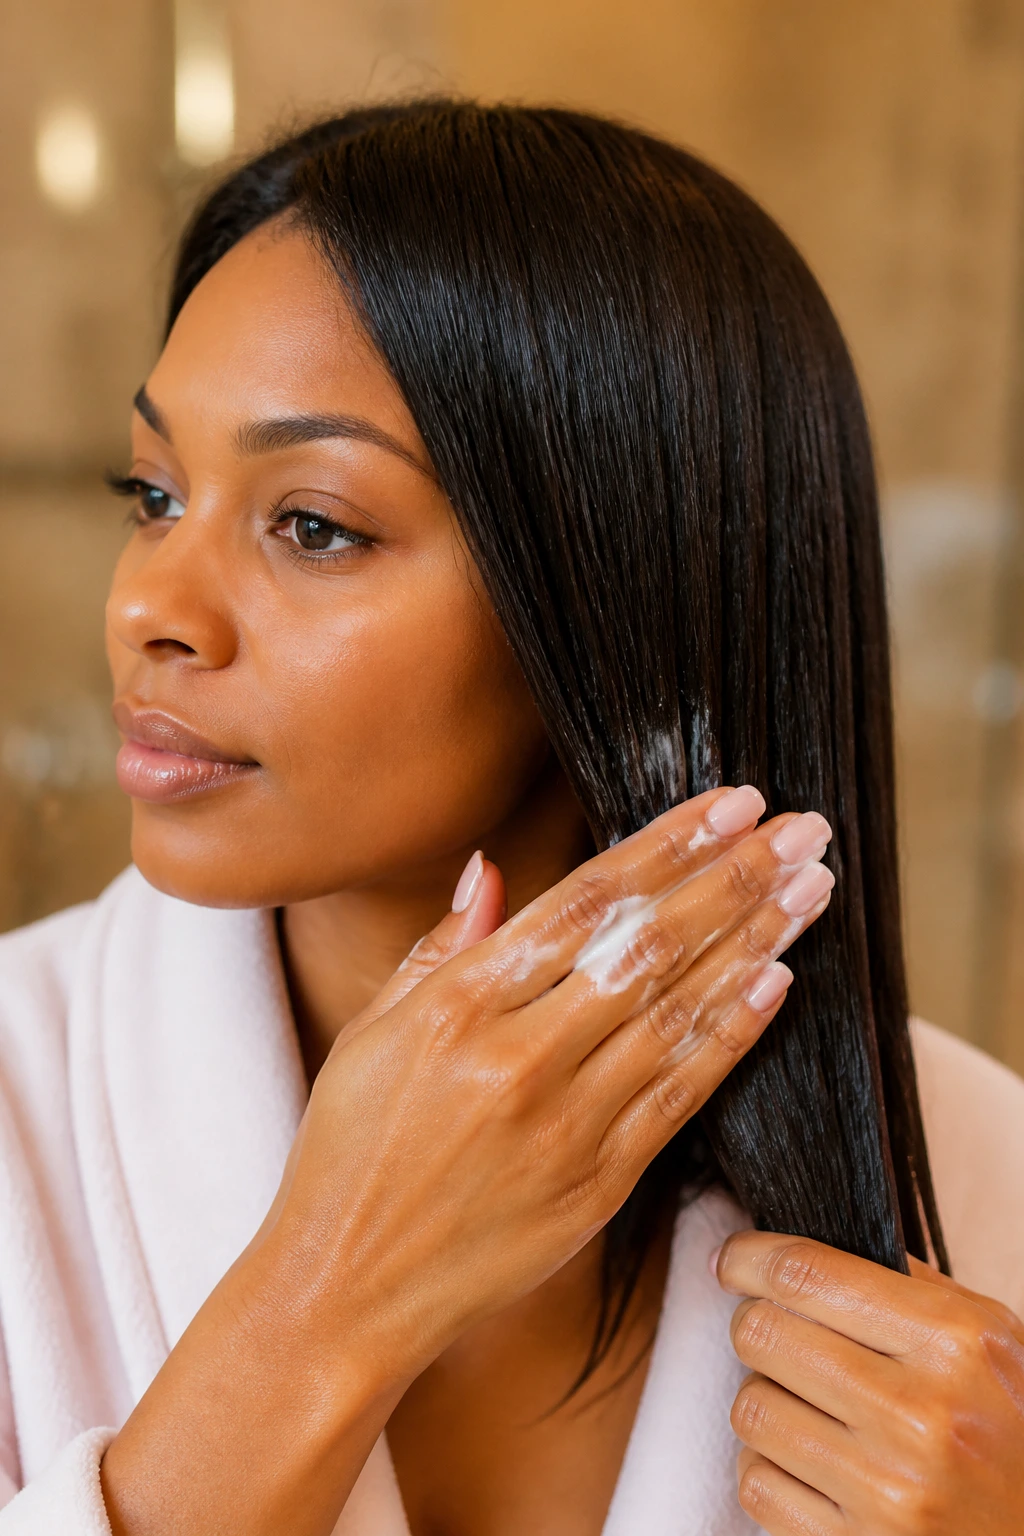
Having twenty hairstyles is great, but they are only useful if your hair remains healthy enough to support them. Relaxed hair requires a balance of moisture and protein that is more delicate than with natural textures. Because the hair is chemically straightened, it can become porous, meaning it loses moisture rapidly.
The first rule is hydration. If your hair feels dry, it will break. Use a leave-in conditioner every single time you wash your hair. Look for ingredients like shea butter, argan oil, or panthenol. Avoid products that list alcohol as one of the first few ingredients, as these will strip your hair of its natural oils.
The Importance of Protective Night Routines

How you treat your hair at night is just as important as how you style it during the day. If you are sleeping on a cotton pillowcase, you are essentially sandpapering your hair while you rest. Cotton absorbs moisture and creates friction.
Switch to a silk or satin pillowcase. This is not just a trend; it is a functional necessity for relaxed hair. It allows your hair to glide across the surface without snagging or losing moisture. If you don’t want to change your pillowcase, a high-quality silk bonnet or scarf is mandatory. Make sure it stays on through the night—if it falls off, you aren’t getting the benefits.
Understanding Heat Usage

Heat is the double-edged sword of relaxed hair. Used correctly, it gives you that polished, sleek look. Used incorrectly, it causes irreversible damage. If your hair feels brittle, straw-like, or is losing its bounce even when you aren’t using heat, you are likely suffering from heat damage.
Always, always use a heat protectant. There is no negotiation on this point. Furthermore, keep your iron temperature at a reasonable level. You do not need to set it to 450°F to get your hair straight. Most relaxed hair can be smoothed effectively at 300°F to 350°F. If you find yourself needing to crank the heat up, your iron is likely of poor quality, or your hair is overdue for a moisturizing treatment.
Final Thoughts
The secret to loving your relaxed hair is to stop viewing it as something that needs to be “tamed” or “fixed.” It is a canvas. It is smooth, it is responsive, and it is capable of holding complex styles that other hair types might struggle to grip. Whether you choose to wear it pin-straight, braided into a crown, or curled into vintage waves, the most important thing is that you treat your strands with the respect they deserve.
Take the time to learn what your specific hair needs. Maybe it craves more protein, or perhaps it needs a deep conditioning mask every single week. When you treat your hair as a priority rather than an afterthought, you will find that it rewards you with length, shine, and the ability to pull off any look you can dream up. Experiment, be gentle with your edges, and enjoy the process of finding what makes your hair feel its best.
