



Some mornings call for a bun that does more than pull hair off your neck. A fishtail bun hairstyle has that rare mix of polish and texture: the braid gives the updo shape, the bun gives it staying power, and the finished look doesn’t flatten out the way a basic twist often does.
The reason it works so well is simple. A fishtail braid has tiny, staggered sections, so even when the braid is loose, it still looks intentional. On day-two hair, that texture grabs better; on fresh hair, a little dry shampoo or texture spray keeps the braid from sliding apart. Fine.
Placement changes everything. Low buns feel quiet and clean, high buns sharpen the face, and side-swept versions soften heavy layers around the jaw. Messy versions can look romantic, but only if the braid still has shape — otherwise you just get a lopsided knot with no real detail.
The 15 fishtail bun hairstyles below lean into different moods: neat, loose, high, low, wrapped, pinned, and a few that hold up much better than they look like they should. If you want your hair to survive a long workday or an evening out, the first few are the safest bets. If you want a little drama, skip around. Some buns are meant to be modest. Others have a bit of attitude.
1. Low Nape Fishtail Bun

A low fishtail bun is the style I’d hand to most people first. It sits at the nape, keeps the braid detail visible, and feels finished without trying too hard. There’s a reason this shape shows up in offices, weddings, and dinner plans all the time.
Why it works
- The low placement keeps weight off the crown, so the style feels calmer and less stiff.
- A fishtail braid adds tiny woven lines that make the bun look fuller than it really is.
- Shorter layers disappear more easily at the nape, where pins can hide better.
If your hair slips, work in a small amount of styling cream from mid-lengths to ends before braiding. A loose braid is easier to wrap, and a little softness at the crown keeps the whole look from turning helmet-hard. That matters more than perfection.
Best for: straight hair, softly wavy hair, and anyone who wants an updo that won’t fight the shape of a collar or blazer.
A low nape fishtail bun is also one of the easiest styles to dress up with earrings. It frames the neck in a clean way, which sounds boring until you see how good it looks with a sharp neckline or a simple T-shirt. Honest to say, it’s one of those styles that does its job quietly and then keeps going.
2. High Crown Fishtail Bun

Want a bun that gives the face a lifted look without needing a lot of teasing or spray? This is the one. A high crown fishtail bun sits higher than a classic chignon, so it reads sharper, cleaner, and a little more deliberate from every angle.
The trick is to start the braid higher than you think. If the fishtail begins too low, the bun loses the effect and starts looking like a regular knot with extra steps. Keep the braid anchored close to the crown, then coil it just above the center point of the head.
It helps to rough up the roots slightly before you start. Not a lot. Just enough. A fine-tooth comb at the top can make the base too smooth, and then the bun slides around while you’re pinning it. A handful of crossed pins at the back does more work than one giant clip ever will.
It’s not shy. That’s the whole point.
This shape looks especially good when you want your eyes, cheekbones, and earrings to carry the rest of the outfit. It also gives long hair a little lift so the length doesn’t drag the whole style downward. If you like a clean neckline but still want some height, this is one of the strongest fishtail bun hairstyles to keep in rotation.
3. Side-Swept Fishtail Bun
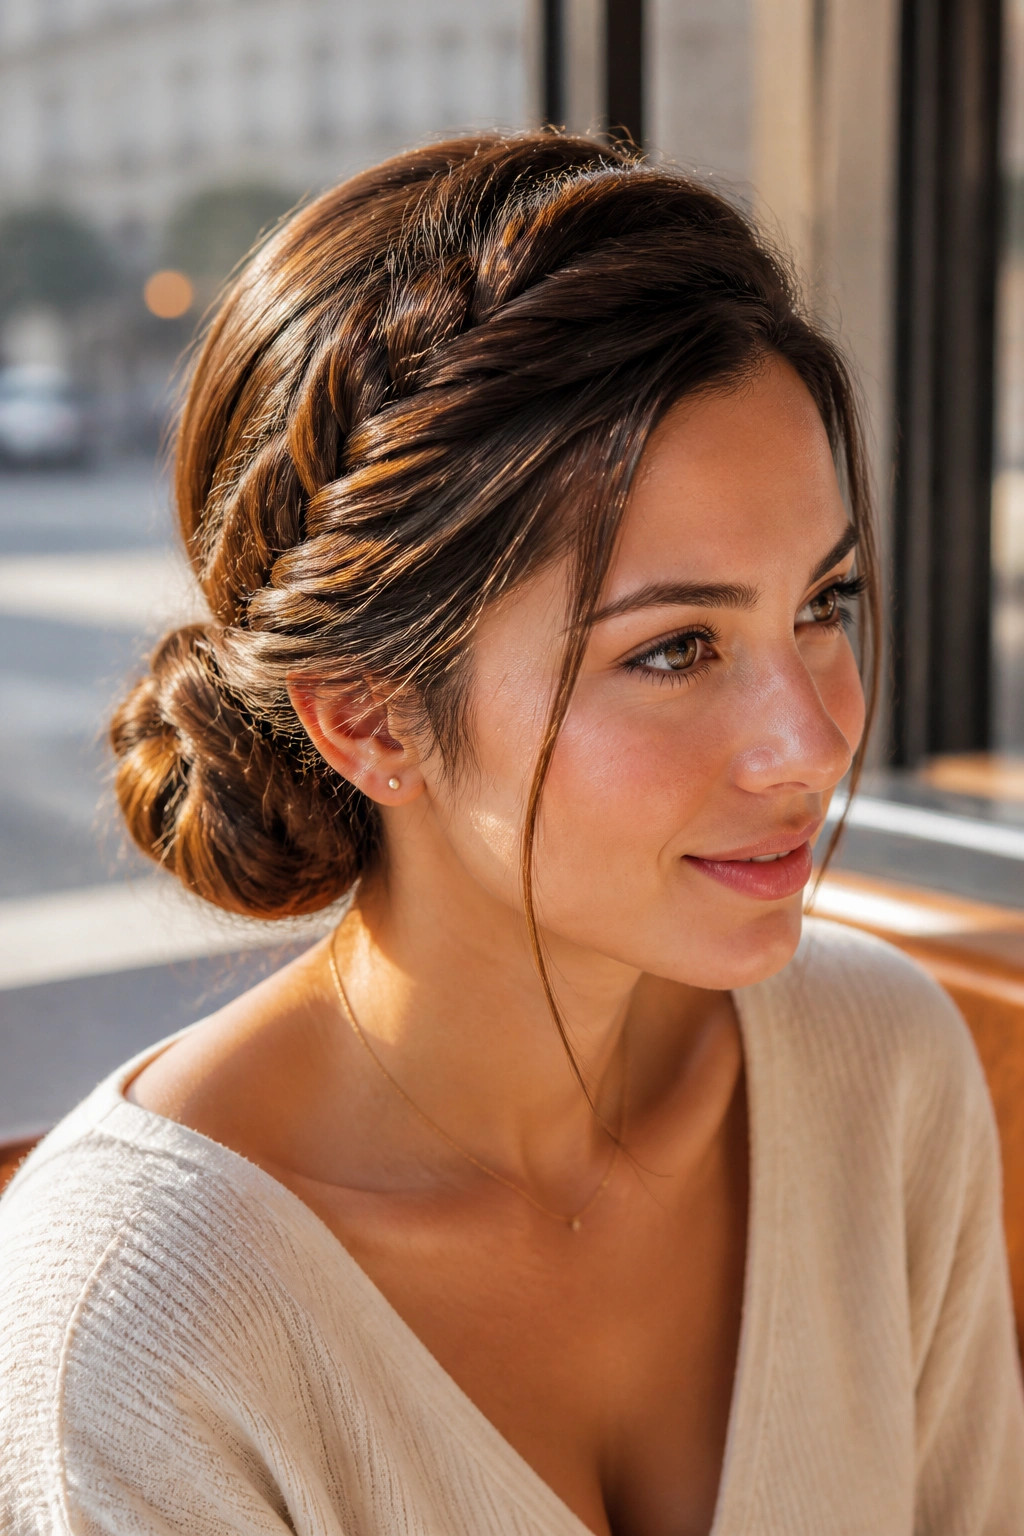
On hair that falls heavy on one side, the side-swept version solves the problem instead of fighting it. The braid starts slightly off-center, moves diagonally across the back, and lands in a bun that sits just behind one ear or a little lower toward the shoulder line. That tiny shift makes the whole style feel softer.
Where to place the bun
- Behind the stronger jawline if you want the face to look a touch slimmer.
- At ear level if you want the braid to show from the front.
- Lower and farther back if you’re wearing a wide neckline or off-shoulder top.
The side angle does a lot of visual work, so the braid itself does not need to be perfect. A fishtail that starts tight and loosens a little as it goes looks better here than a crisp, rigid braid. That little slope gives the bun movement.
One thing to watch: asymmetry can get messy fast if you pull one side too hard. Keep both sides of the head snug enough to hold the braid, then let the bun sit where gravity wants it. If you want one style that feels a bit more relaxed than the classic low version but still looks deliberate, this is a very good place to land.
4. Messy Fishtail Bun with Face-Framing Pieces

Messy does not mean lazy. It means you left room for the braid to breathe.
This version works because the bun itself can be loose while the fishtail still gives the eye something to follow. Pull out a few face-framing pieces around the temples, then curl them lightly or leave them wavy if your hair already bends that way. The little bits around the face do a lot of softening, especially if the bun sits low and the back is fairly full.
The key is restraint. Too many loose pieces and the style starts looking unfinished; too few and it loses the softness that makes this version worth doing. I usually like one piece on each side near the cheekbones and maybe a thinner section near the ears. That’s enough.
Pancake the braid a little. Not a lot.
That means gently pulling at the edges of the fishtail once it’s braided, just enough to widen the sections and make the braid look fuller. Do it after the braid is secure, or you’ll undo the whole thing. Once the bun is pinned, mist the ends with a flexible spray so the hair moves instead of turning crunchy.
This is the one I’d choose for brunch, a gallery opening, or any day you want the style to feel easy without losing structure. It has the best kind of looseness — the kind that still looks like you meant it.
5. Sleek Center-Part Fishtail Chignon
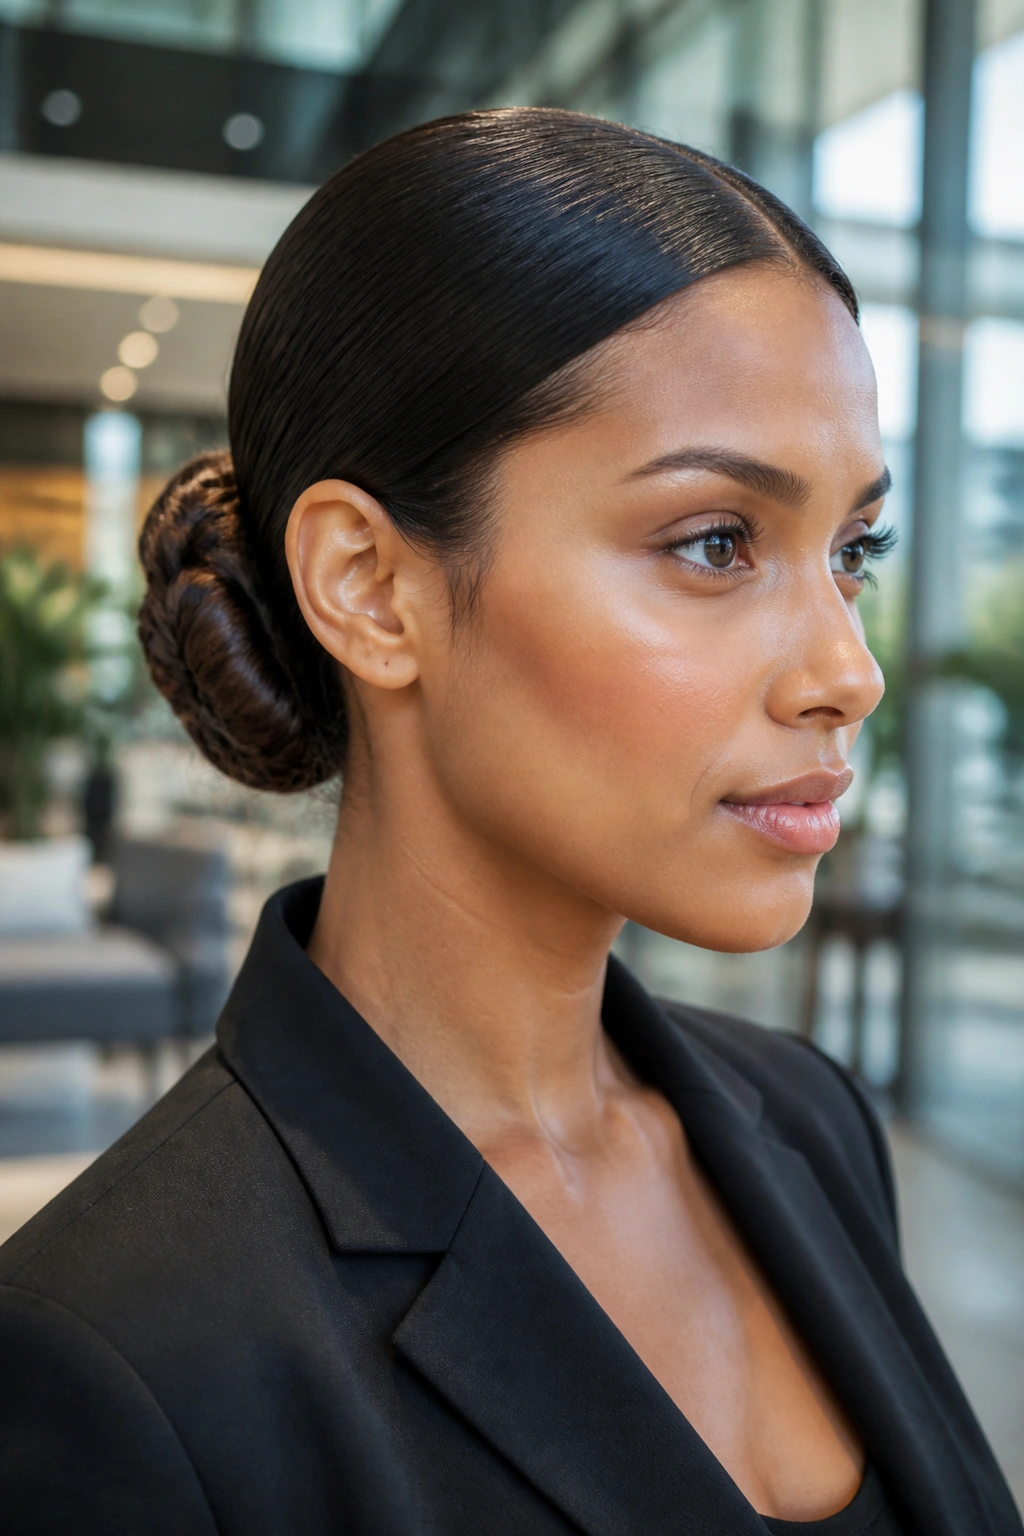
Slick roots, a clean center part, and a fishtail that folds into itself at the nape make this one feel precise. It’s the most tailored version in the group, and it leans hard into shine, symmetry, and a neat outline at the hairline.
The clean part matters more than the bun
A sharp center part gives the style its spine. If the part wobbles, the whole look softens immediately, and not in a flattering way. Use a rat-tail comb and take your time, because this is the piece people notice first when the bun is low and close to the head.
A few tools make life easier:
- Gel or styling cream for the hairline and part
- Boar-bristle brush to smooth the surface without puffing up flyaways
- 4 to 8 bobby pins, depending on thickness
- Light-hold hairspray to keep the finished braid from frizzing
The bun itself should feel compact, not bulky. Wrap the fishtail in a tight coil and tuck the ends carefully under the base. If your hair is very fine, a small hair donut hidden under the braid can give the bun a more solid shape, though I’d only use that when the hair is too slippery to hold its own.
This style is polished enough for formal clothes, but it also works with a white shirt and simple studs. That’s the appeal. It looks controlled without feeling severe.
6. Double Fishtail Buns
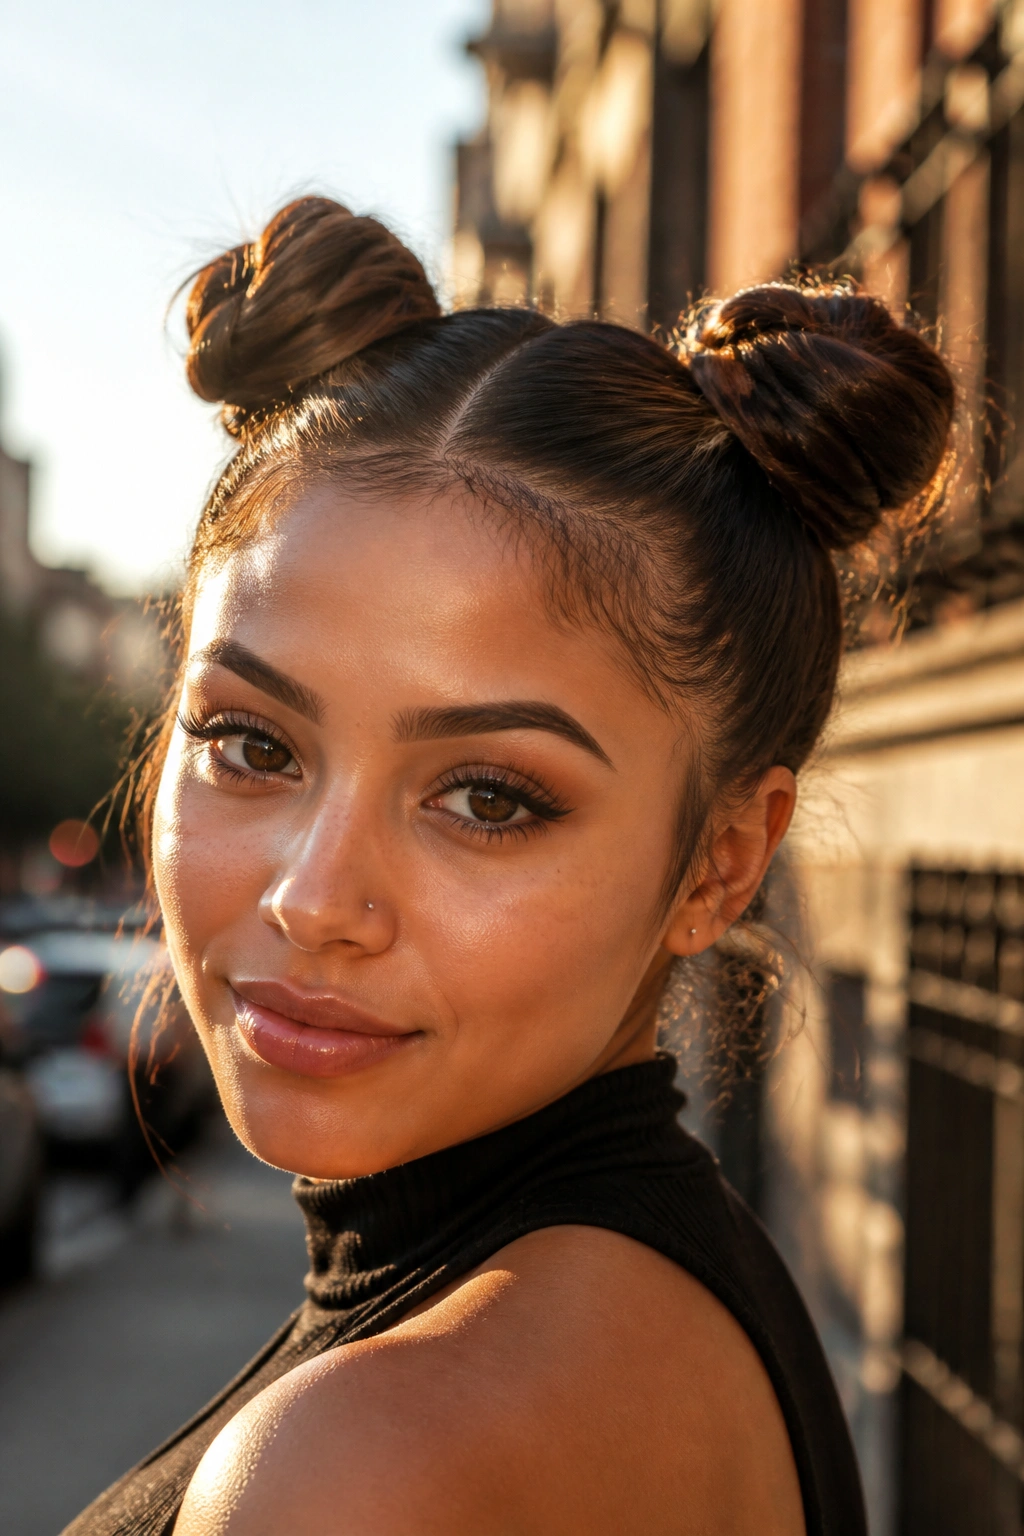
Two small fishtail buns can look sweeter and more balanced than one large knot. Think of them as the braided version of space buns, only a little more detailed and less playful if you keep the parts neat. You can wear them high, low, or just above the ears.
The best version depends on how much hair you have to work with. Thick hair makes two chunky buns; finer hair often looks best when the buns are smaller and the fishtails are lightly pulled apart for body. If your layers are short, this style helps because each bun only needs to hold half the hair, not the whole mass.
A few placement choices change the mood fast:
- High and even for a more youthful, playful feel
- Low and slightly apart for a calmer, softer finish
- Close together at the back if you want something less obvious from the front
Tiny buns lie less than one giant bun. That’s the joke, and it’s also true. When the hair is divided into two sections, the weight spreads out, so the style can feel easier to pin and more comfortable to wear for long stretches.
I like this version when the day asks for hair that stays off the neck but still has personality. It’s neat, but not stiff. That’s a useful line to walk.
7. Halo Fishtail Bun

If you want the most elaborate-looking fishtail bun without needing lace-braid skills, start here. The halo version wraps braid around the head, usually from one side toward the back, then gathers the remaining length into a bun that sits low or slightly off-center. It has that wrapped, almost crown-like shape that makes people look twice.
The braid path matters more than the bun here. Start close to the hairline, keep the tension even, and follow the curve of the head rather than forcing a straight line. If the braid sits too far from the scalp, the halo effect disappears and the style starts to float oddly.
Best on longer hair
Long hair gives you enough length to complete the wrap without fighting the ends. Thick hair also helps, because the braid can hold its shape while you move it around the head. On finer hair, a bit of texturizing spray at the roots keeps the section from slipping while you pin.
The pins should disappear into the braid, not sit on top of it. Slide them inward, toward the scalp, and lock them where the braid turns a corner. That is the spot that usually needs the most help.
This style has a ceremonial feel without becoming fussy. It suits formal dresses, yes, but it also works with a very plain top because the braid does all the talking. If you like a bun that feels a little special from every angle, the halo version earns its place.
8. Twisted Base Fishtail Bun

A fishtail braid does not have to be the first thing you build. Sometimes the smarter move is to start with a twist at the crown or along the sides, then feed that into the fishtail before wrapping everything into the bun. The twist gives the style grip, which is a gift if your hair is slippery or freshly washed.
That little bit of mixed texture changes the whole feel. A pure fishtail can look delicate; the twist makes the base look fuller and a bit more anchored. The braid then has something solid to rest on instead of floating on smooth hair. It’s a small detail, but it makes the style behave better.
This version is especially useful on layered cuts. The twist gathers the shorter sections, and the fishtail comes in to cover the seam. If you’ve ever had little pieces slip out around the hairline five minutes after pinning, this is the fix that actually helps.
It also gives the bun a handmade look that feels less expected than a standard braid-to-coil shape. Not messy. Just less obvious. I like it for people who want the braid detail but do not want the finished bun to look too neat or too formal.
9. Center-Part Low Fishtail Bun

Want symmetry without the stiffness of a ballerina bun? A center-part low fishtail bun gives you that balance, but with more texture and less polish overload. The middle part sets up the face nicely, and the braid keeps the back from looking flat.
The center part does half the styling work. Once it’s straight, the rest feels calmer. Take two slim front sections, smooth them back evenly, and start the fishtail low enough that the braid stays visible all the way into the bun. If you tuck the braid too early, you lose the part of the style that makes it interesting.
This version feels especially good with straight or softly wavy hair because the lines stay clean. On very curly hair, the part can be beautiful too, but you’ll want to smooth the top section carefully so the middle line doesn’t disappear under volume. A little edge control near the temples can help, though I’d keep it light.
The finished bun sits low and tidy, but not severe. It has a quiet sort of order to it. That makes it a good choice for interviews, presentations, or any day when you want your hair to stay out of the way while still looking like you made a decision.
10. Half-Up Fishtail Bun

A half-up fishtail bun is the answer when you want your hair off your face but not completely up. The top section gets braided and pinned into a bun, while the rest stays down, so the style keeps length and movement. It’s one of the easiest ways to make medium-length hair feel styled without working too hard.
The proportion matters. If you pull up too much hair, the bottom starts looking thin; too little, and the bun feels tiny and lost. A clean triangle section from temple to crown usually gives the best balance. The bun sits neatly at the back of the head, which leaves the lengths below it free to swing.
A few details make this version look better in real life:
- Curl the loose lengths if your hair is straight and you want softer shape.
- Leave a few face pieces out if the crown feels too severe.
- Use a tiny elastic and wrap a strand around it so the top doesn’t look tied off.
This is the style I’d hand to someone growing out a cut, because it uses the top section without demanding that the whole head be long enough for a full bun. It’s also a good one for windy days. The lower half moves, but the top stays put.
11. Curly-Texture Fishtail Bun
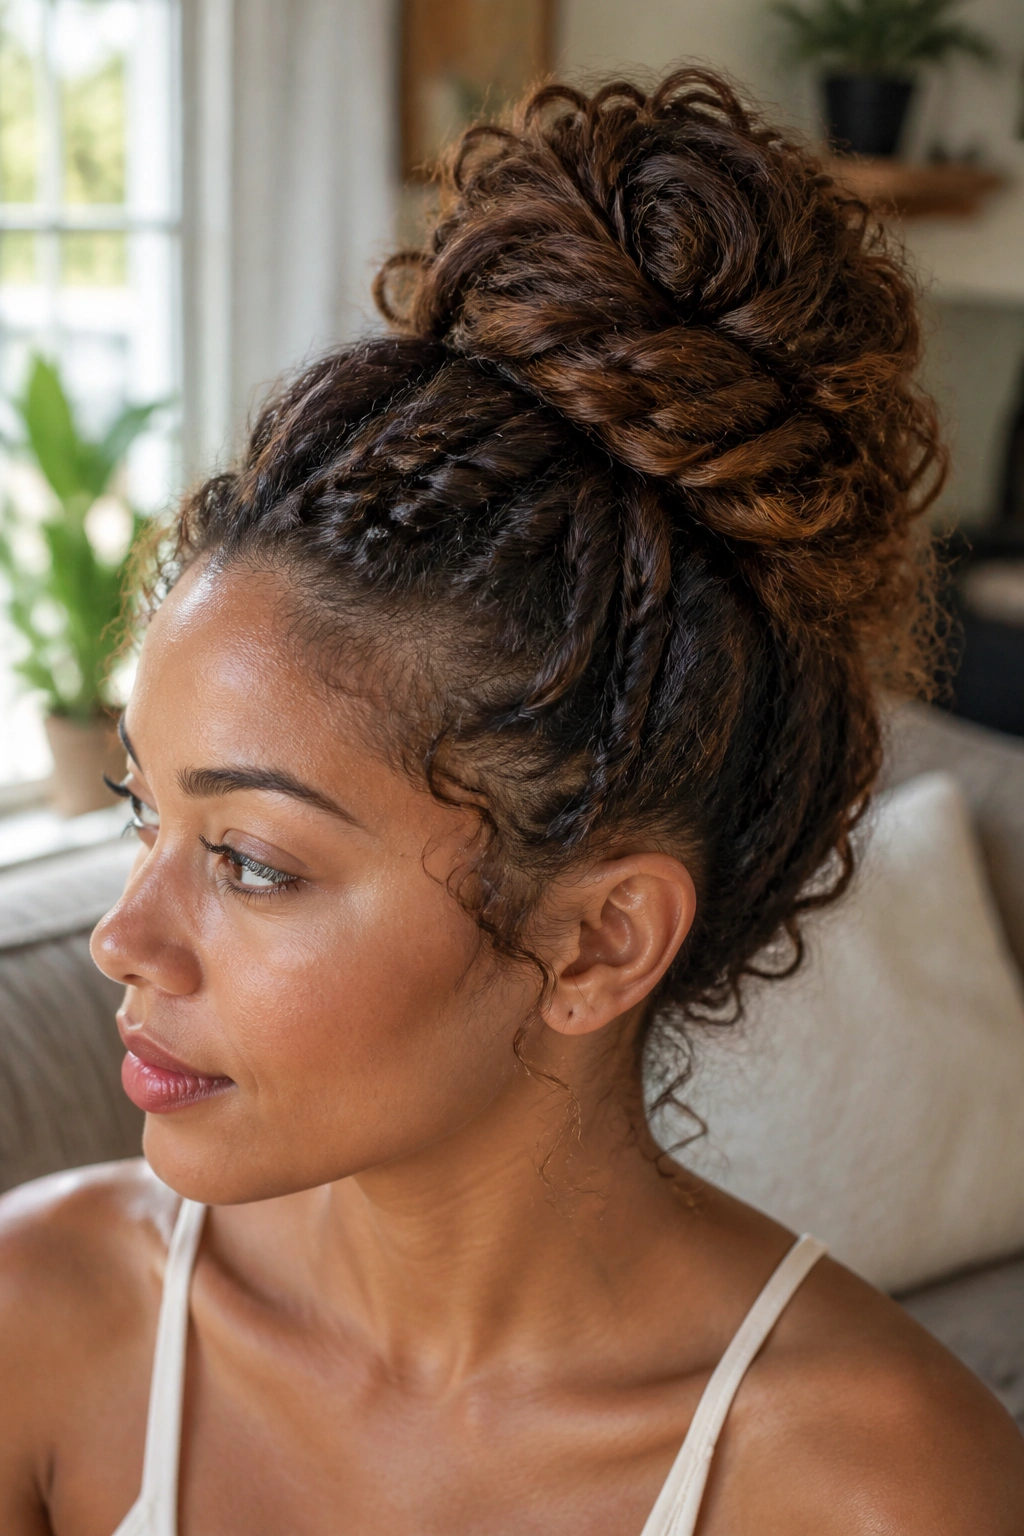
Curls bring their own architecture. You do not need to flatten them into submission to make a fishtail bun work, and honestly, the style is better when it keeps some of that natural shape visible. The braid sits more securely when the hair already has bend and grit to it, which means the bun often holds with less fuss than people expect.
Start by working on damp or stretched curls, not fully dry, puffed-out hair that tangles at the first touch. A leave-in conditioner or curl cream helps the sections stay soft enough to braid, and a little gel at the roots keeps frizz from spreading while you pin. Don’t brush the whole head into silence. That’s where the shape gets lost.
What to keep in mind
- Detangle with a wide-tooth comb, not a fine brush.
- Leave the ends tucked rather than trying to smooth every curl flat.
- Use pins that match your hair color so the texture stays the focus.
The bun itself can be loose and airy, with curls poking through in a controlled way. That is not a flaw. It gives the style life. On coily or curly hair, the fishtail sections often disappear into the pattern in a good way, so the braid and bun feel like one shape instead of two separate ideas.
This version is also kind to texture. Less stretching, less tugging, more shape left intact. That matters.
12. Ribbon-Wrapped Fishtail Bun

A narrow ribbon can change the whole mood of a fishtail bun in ten seconds. Satin, velvet, grosgrain, even a thin silk scarf tied close to the braid — each one shifts the style from plain to dressed up without adding much work. If you like hair accessories, this is the easiest place to use them.
The smartest move is to keep the ribbon narrow and let the braid stay visible. A wide bow can swallow the fishtail detail, which defeats the point. Weave the ribbon through the braid near the middle, or wrap it around the base of the bun so the ends trail softly. Either way, the accessory should feel like part of the style, not something clipped on at the end.
Good options to try:
- Black satin ribbon for a sharper, cleaner look
- Muted silk scarf when you want color without too much shine
- Velvet tie for colder-weather outfits and heavier fabrics
- Patterned narrow ribbon if the outfit needs a little movement
This version is useful when the hair itself is simple and you need one small detail to carry the style. It also buys you time on days when the braid is not perfect — the ribbon distracts the eye in a useful way. Not every hairstyle needs more hair. Sometimes it just needs one good piece of fabric.
13. Low Asymmetrical Fishtail Bun
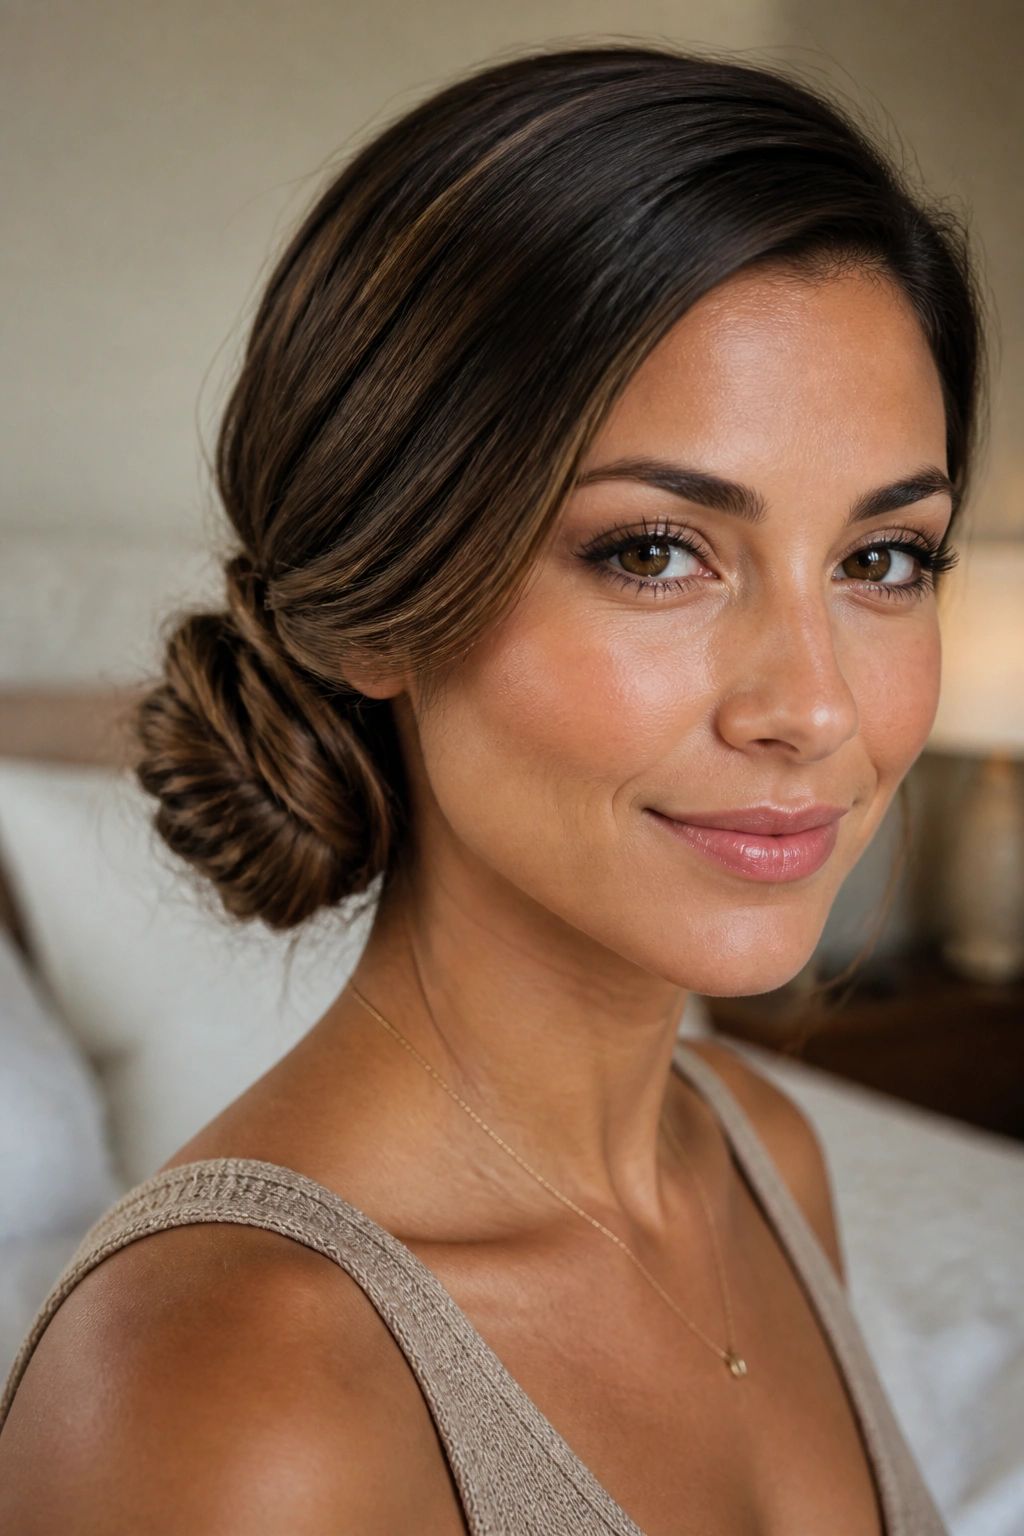
If your face shape feels better with one side open, asymmetry earns its keep. A low asymmetrical fishtail bun sits slightly off-center, usually behind one ear or a bit lower on one side, which makes the whole style feel less formal and a little more lived-in.
The best part is how forgiving it is. You don’t need both sides to match exactly, and that takes pressure off the braid. Let one side stay a touch smoother and bring the braid across the back on a soft diagonal. The final bun can be tighter on one side and looser on the other, which sounds odd until you see how good it looks with side-swept bangs or a deep part.
This is a smart choice with open necklines and structured tops. The bun gives you a clean line at the back, while the asymmetry keeps it from looking too square. It also works when one ear is doing the styling work — a big earring on the exposed side can balance the whole thing.
One small warning. Don’t make the off-center placement so dramatic that the style looks accidental. There should still be a clear plan. A few pins in the right place will keep the whole thing from drifting.
14. Rope-and-Fishtail Combo Bun

What if the braid needs more body than your hair naturally gives? Start with a rope twist, then move into a fishtail. That hybrid approach sounds fussy on paper and looks smart in person, because the twist creates thickness at the base while the fishtail handles the texture through the length.
Fine hair benefits from this the most. A rope twist uses larger sections, so it builds a stronger foundation before the smaller fishtail pieces take over. That means the bun can look fuller without needing a huge amount of teasing or stuffing. It also holds better on hair that slips cleanly through braid patterns.
How to get the most from it
- Twist the first 2 to 4 inches at the scalp.
- Switch to a fishtail once the braid has enough grip.
- Keep the bun compact so the two braid types do not fight each other.
The final shape feels a little more architectural than a plain fishtail bun. You can see the shift from twist to braid if you look closely, and that subtle change adds interest without making the style busy. This is the version I’d pick when the hair is fine, long, and a little too soft to hold volume on its own.
It also photographs nicely in real life, not because it’s flashy, but because the mixed braid pattern gives the bun some depth. The texture reads clearly from a distance. That matters more than people think.
15. Protective Tucked Fishtail Bun
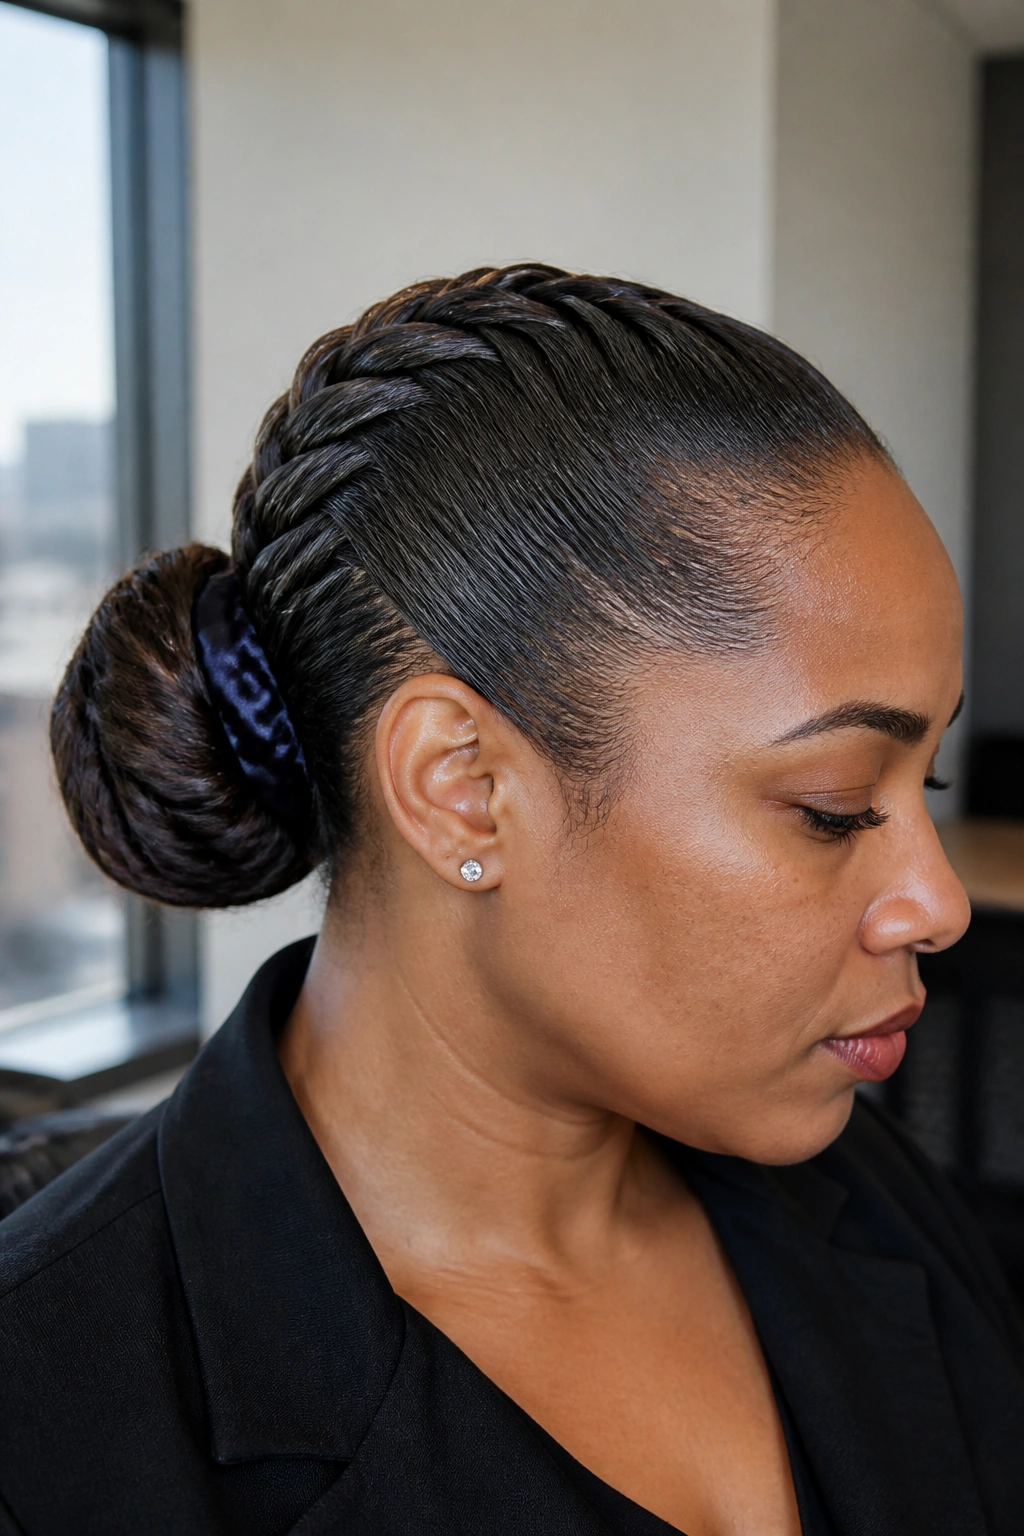
This is the one to choose when you want the style to stay put, protect the ends, and not nag your scalp by lunchtime. A protective tucked fishtail bun keeps the braid close, hides the fragile ends inside the coil, and uses tension in a controlled way instead of pulling the hairline too hard.
The setup matters. Start with moisturized hair, smooth the surface gently, and avoid dragging the braid too tight at the roots. The fishtail should feel secure, not painful. If the scalp feels tight while you’re braiding, that is your cue to loosen up and rework it before pinning. A style that looks good but hurts is not worth wearing for long.
A satin scrunchie or soft elastic at the base can help if your hair needs a little extra grip. After that, tuck the ends under the bun, pin them down where they disappear into the coil, and smooth the outer layer lightly with your hands instead of brushing it hard. That keeps the texture intact and avoids the puffiness that can show up when you over-handle the braid.
This style is a good pick for long workdays, travel, rainy weather, or any stretch when you need your hair to stay out of the way and keep its shape. It is practical first, pretty second — and the truth is, that balance is what makes a fishtail bun worth wearing again and again.
