



A braid out can look soft and defined, or it can turn into a fuzzy halo the second you separate the braids. The difference usually isn’t some mysterious curl secret. It comes down to section size, part placement, product control, and whether the hair was dry all the way through before the take-down.
The best braid out styles for defined curls all do the same basic job in different ways: they hold the hair in a shape long enough to set, then release it into a curl pattern that still has a little spring. If the braids are too loose, the ends go puffy. If they’re pulled too tight, the roots can look flat and the scalp starts complaining. There’s a sweet spot, and it changes with density, length, and how much lift you want at the crown.
I’ve always liked braid outs because they can be neat without looking stiff. One braid pattern can land as clean and polished, while another gives you a cloud of movement with a little edge around the face. That’s the part people underestimate. The braid pattern does half the styling before you even take the braids down.
So the real decision is not whether braid outs work. They do. The real decision is which shape you want before your fingers even touch the first braid.
1. Classic Center-Part Braid Out for Clean Definition
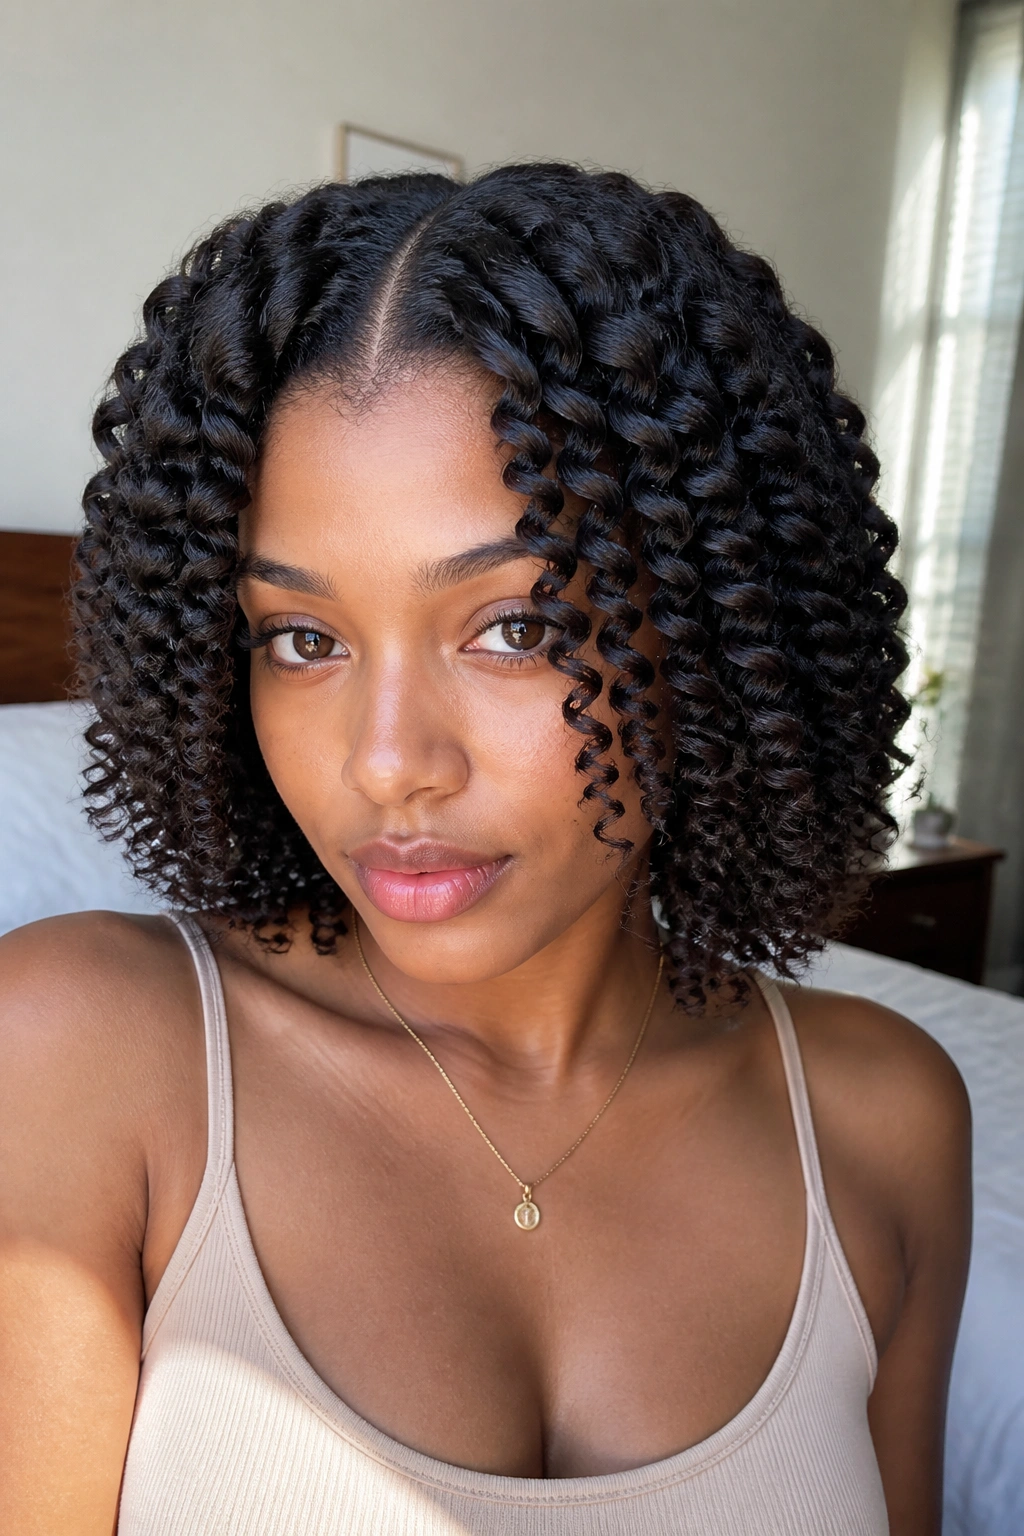
If you want a braid out that looks neat on day one and still holds its shape after a night of sleep, start here. The center part is the most forgiving setup for defined curls because it gives the hair balance on both sides, and balance matters more than people think.
I like this style with 6 to 10 medium braids, depending on density. Smaller sections give tighter definition. Bigger sections give more stretch. That middle ground is where the curl pattern looks intentional instead of overworked. Keep the parts clean, but don’t press them so hard that the scalp feels raw.
How to set the base
- Apply a light leave-in first, then a small amount of cream or milk-based styler.
- Seal each section with a few drops of oil on the ends, not the whole strand.
- Braid from root to tip with even tension. Firm. Not tight.
- Let the braids dry completely before separating them. Cool, dry, and slightly stiff is what you want, not damp at the center.
The take-down is where this style earns its reputation. Unravel each braid slowly, coat your fingertips with a tiny bit of oil, and separate only once or twice. If you keep fluffing it, the clean definition goes away fast. A tail comb can lift the roots a little, but I’d use it sparingly. This style looks best when the curl clumps stay intact.
Best for: medium to long natural hair, especially when you want a crisp shape without a lot of drama. And yes, it photographs well — but more important, it behaves well in real life.
2. Chunky Side-Part Braid Out with Big Shape
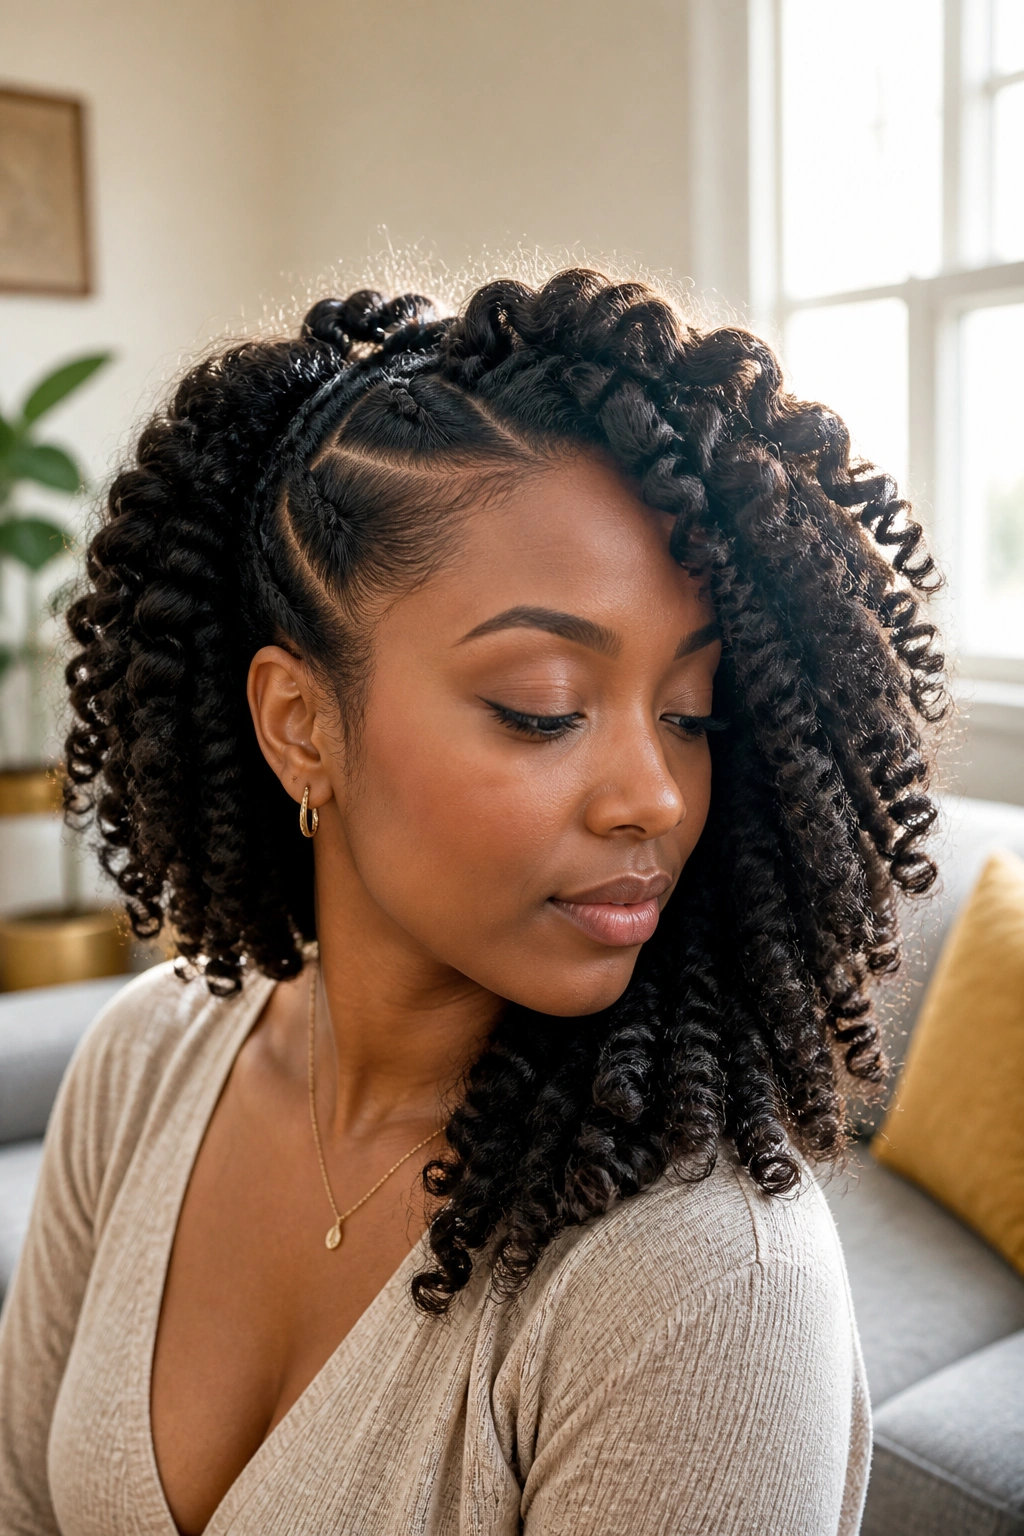
A side part changes the whole mood. It pushes the weight to one side, which makes the braid out look fuller and a little more relaxed without losing definition. Chunky braids are the reason this style feels generous instead of fussy.
Here’s what people get wrong: they think bigger braids mean sloppier curls. Not true. Bigger braids create larger curl ribbons, and those ribbons can look expensive in a very plain, practical way. The curls are fewer, yes, but the shape reads faster from across the room.
This style works especially well when the hair is dense or long enough to hold a broad bend. Use a side part that sits about 1 to 2 inches off center, then braid the larger side into three or four sections and the smaller side into two or three. The contrast gives the front a bit of lift. Nice and simple.
Wear it when you want the braid out to look a little grown-up. Not stiff. Just intentional. A satin scarf over the part overnight helps the shape stay neat, and a wide-tooth pick at the roots can keep the side from collapsing into the face. You want the curls to fall, not cling.
3. Micro Braid Out for Tiny, Uniform Curls
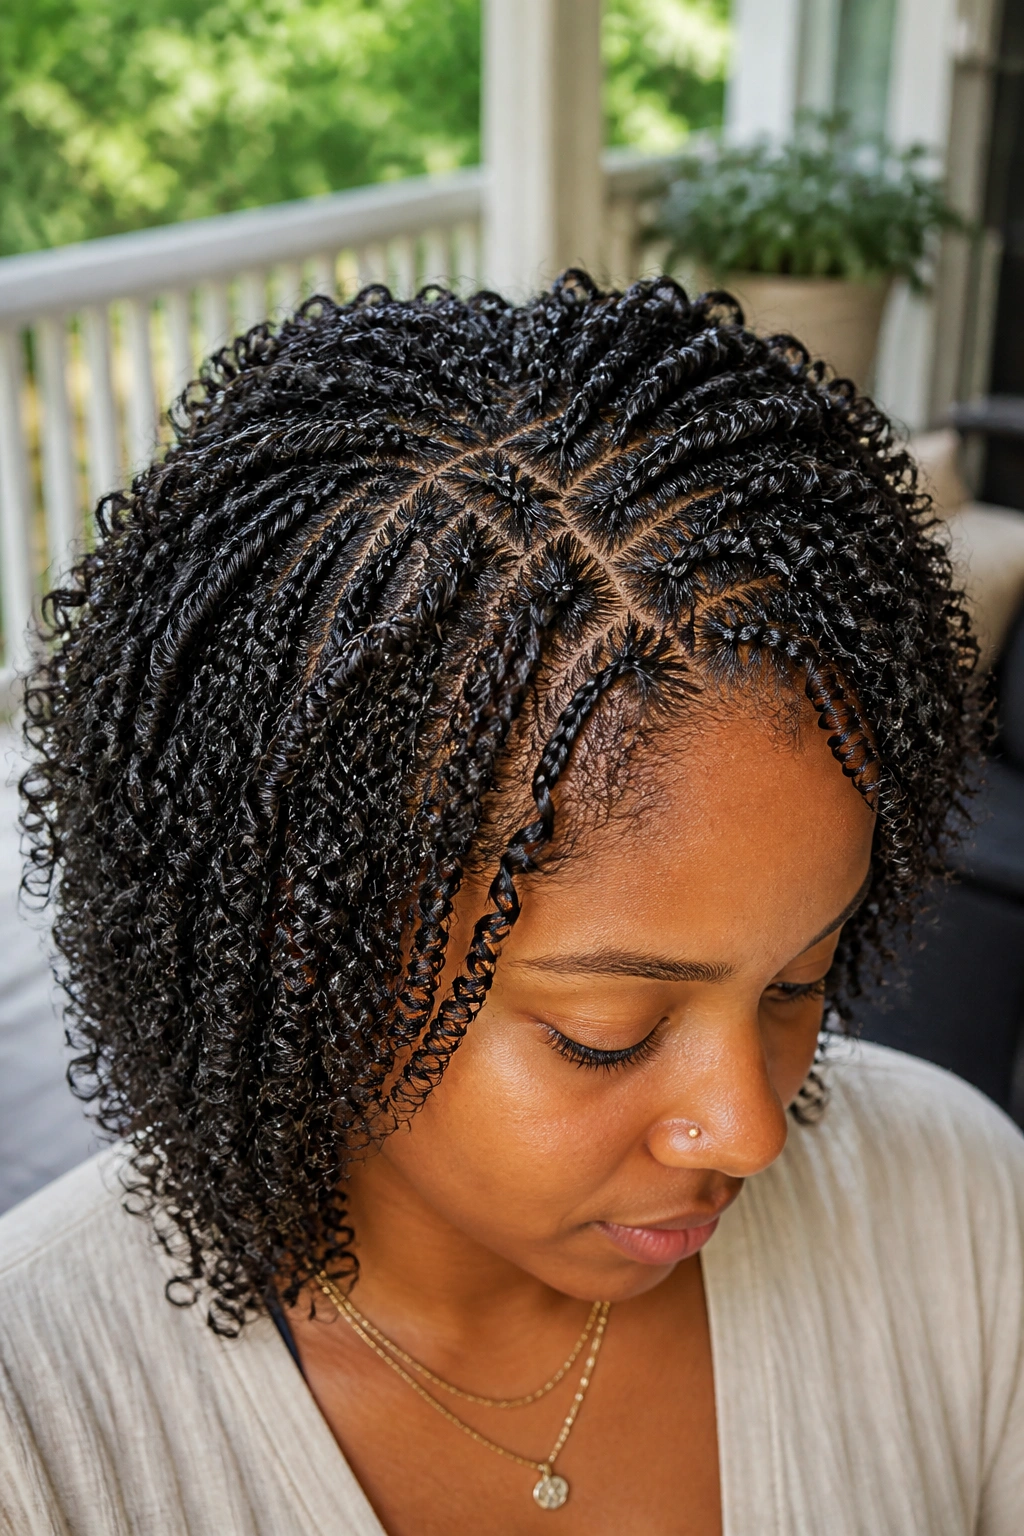
Why do tiny braids look so defined? Because they lock the strands into a tighter path while the hair dries. That smaller braid shape leaves less room for random puff at the ends, so the finished curl pattern comes out more compact and more uniform.
This is the style I’d hand to someone who loves detail. It does take more time. It also asks for patience during take-down, because micro braids tangle with themselves if you rush. But the payoff is a braid out that looks almost sculpted, especially on coily textures that like a little stretch.
How to get the most from it
- Use 12 to 20 small braids on shoulder-length hair, more if the hair is thick.
- Keep each section about half an inch to 1 inch wide.
- Dry fully under a hooded dryer or overnight in a scarf if the hair is dense.
- Separate each braid only after the finish feels dry and cool at the core.
Micro braids give the tightest definition, but they can also make the hair shrink less predictably. That’s not a flaw. It’s just the tradeoff. If you want a lot of curl texture and a denser silhouette, this is the move. If you want big softness and airy volume, skip to a larger braid pattern instead.
Pro tip: don’t overdo product here. A thin coat of styler works better than a heavy layer that sits on the surface and makes the take-down sticky.
4. Halo Braid Out with Crown Volume

The halo braid out is for the days when you want the front to look styled the moment you walk in. It gives the crown a lifted, rounded shape, which makes the face look framed instead of crowded. That matters more than people admit.
Picture the shape first: the braids sweep around the head so the finished curls fall in a soft ring. The crown gets height, the sides stay neat, and the whole style feels a little more finished than a regular down style. It’s a good choice when you want definition without losing that soft, airy shape around the hairline.
A few details make or break this one. Keep the front sections braids a touch flatter at the root so they don’t stick straight up after drying. Leave the back slightly fuller, because the back gives the style its body. Then fluff the crown with your fingers, not a comb, unless you like a puffier shape.
- Best on medium to long hair
- Works well with thicker textures
- Needs a smooth front section to avoid bumps
- Looks best when the crown is lifted, not pulled tight
I’m partial to this style because it has structure without looking pinned down. It’s one of those braid outs that still feels soft when you move.
5. Half-Up, Half-Down Braid Out for Easy Face Framing

The half-up, half-down braid out earns its place because it solves a real problem: sometimes you want defined curls, but you do not want hair living in your face all day. This style gives you both. The front stays lifted, and the back gets to do its full curly thing.
Start by parting off the top section from temple to temple. Braid that top section in smaller rows if you want more polish, or in two larger braids if you want a looser finish. Leave the back in medium braids so the curl pattern has room to expand. The contrast between the two zones is what makes the style look deliberate.
The front can be secured with a silk scrunchie, a flat clip, or a few bobby pins tucked low so they don’t snag the curls. That little lift at the top also helps if your roots tend to flatten overnight. It keeps the style looking fresh longer than a fully loose braid out.
I like this one for work days, errands, and any time you want your hair to look “done” without asking for much. It’s not fussy. It also doesn’t demand perfect symmetry, which is a relief.
If you want the curls to fall more softly near the cheeks, leave two small front pieces out before you braid the top section. That tiny move changes everything.
6. Braid Out Puff with a Stretched Ponytail Base
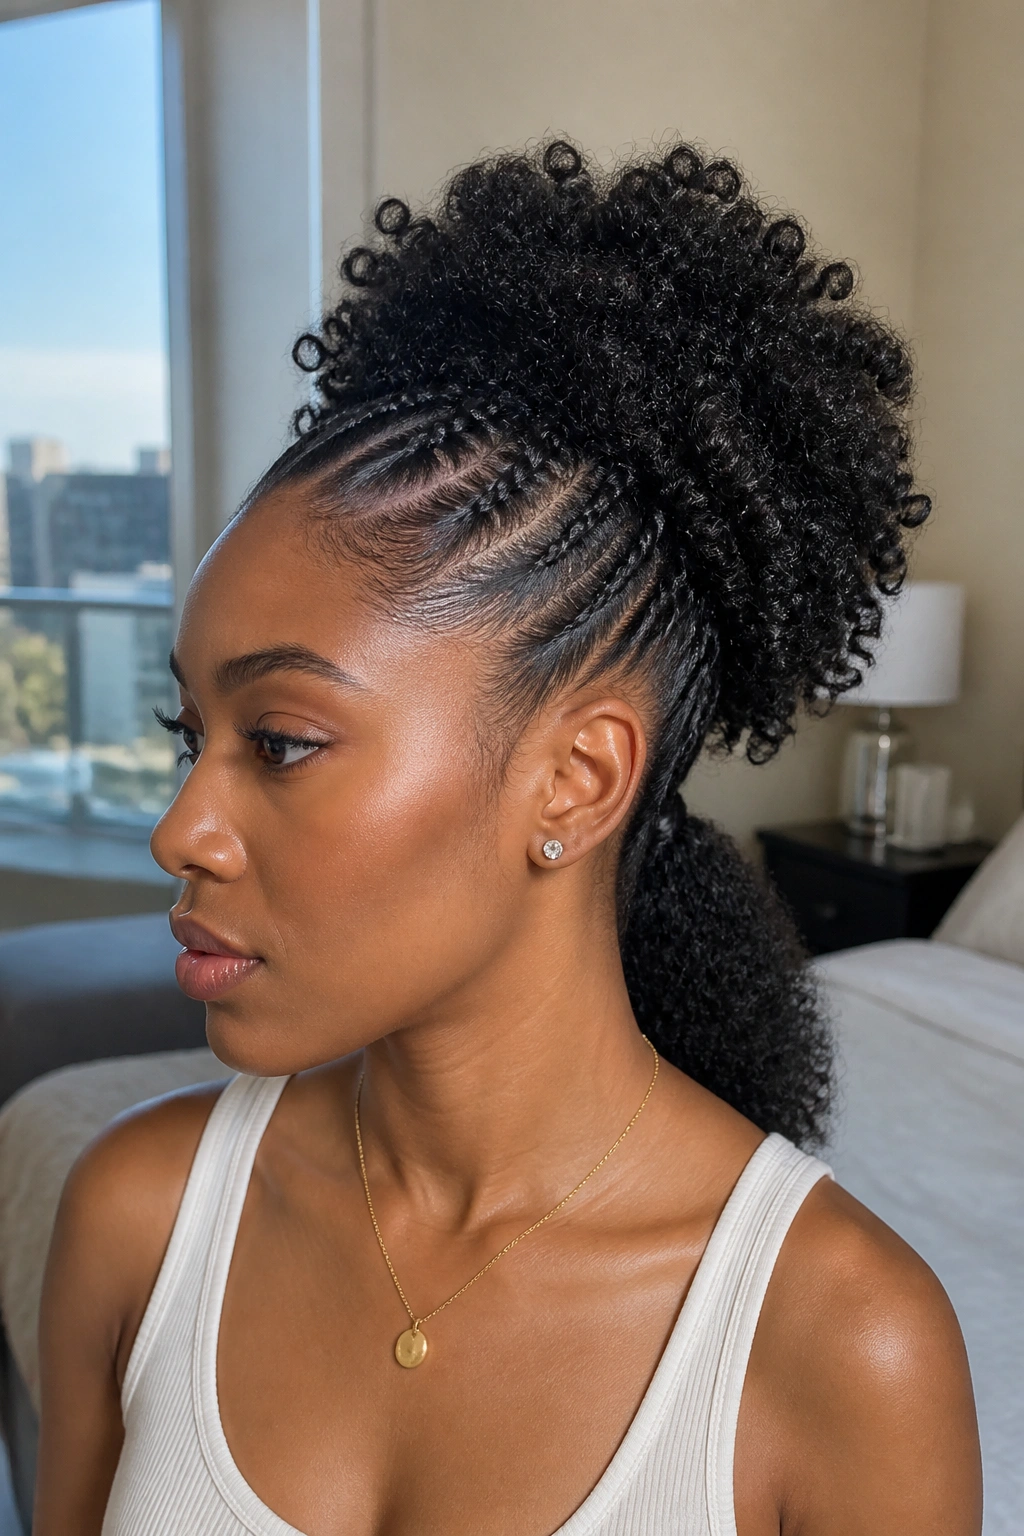
Unlike a full-down braid out, this one keeps the roots neat and the length controlled. That makes it a smart choice when you want the curl definition, but you don’t want a lot of hair brushing your neck or jacket collar all day.
The setup is simple. Gather the hair into a low or mid ponytail base, braid the lengths from there, and let the take-down create a puffed shape that sits away from the scalp. The result has a clean root zone and a fuller, rounded finish at the back. It’s a nice middle ground between a braid out and a puff.
This style is especially useful when the hair is a little stretched already. That’s the secret. If the base is smooth, the puff reads polished instead of messy. A bit of edge control at the part and a soft brush around the hairline help, but keep it light. Heavy product at the edges can make the front look hard.
Best for: thicker hair, warm days, and anyone who likes shape without the weight of a full cascade.
I think this style gets overlooked because people assume puffs are casual. They can be, sure. But a braid out puff with a clean base has a nice balance of tidy and loose that is hard to beat.
7. Tapered Braid Out for Short Sides and Full Length

A tapered cut can be tricky with braid outs, because the sides shrink differently from the top. The answer is to use the cut as part of the style instead of fighting it. That’s where the tapered braid out starts looking sharp.
Shape Tricks
Braid the top sections in the direction you want the hair to fall, usually upward or slightly back for lift. On the sides, keep the braids a little smaller and flatter so they don’t puff out like little wings when you separate them. The back can stay a touch fuller if you want the silhouette to feel rounded.
What to Avoid
- Don’t braid the faded sides too tightly. The scalp will let you know.
- Don’t overload the short sections with cream. It makes the braid out collapse.
- Don’t separate the curls too much near the temples. That’s where the shape gets fuzzy first.
This style shines when you want a clean shape around the neck and ears, with more body on top. It works on short natural hair, grown-out tapered cuts, and styles where the top needs to look taller than the sides. That contrast is the point. A tapered braid out should look like it was designed, not improvised.
One more thing: if the top is long enough, braid the front rows slightly forward before turning them back. That gives the hair a softer edge at the forehead. Small change. Big payoff.
8. Zig-Zag Part Braid Out for Extra Texture
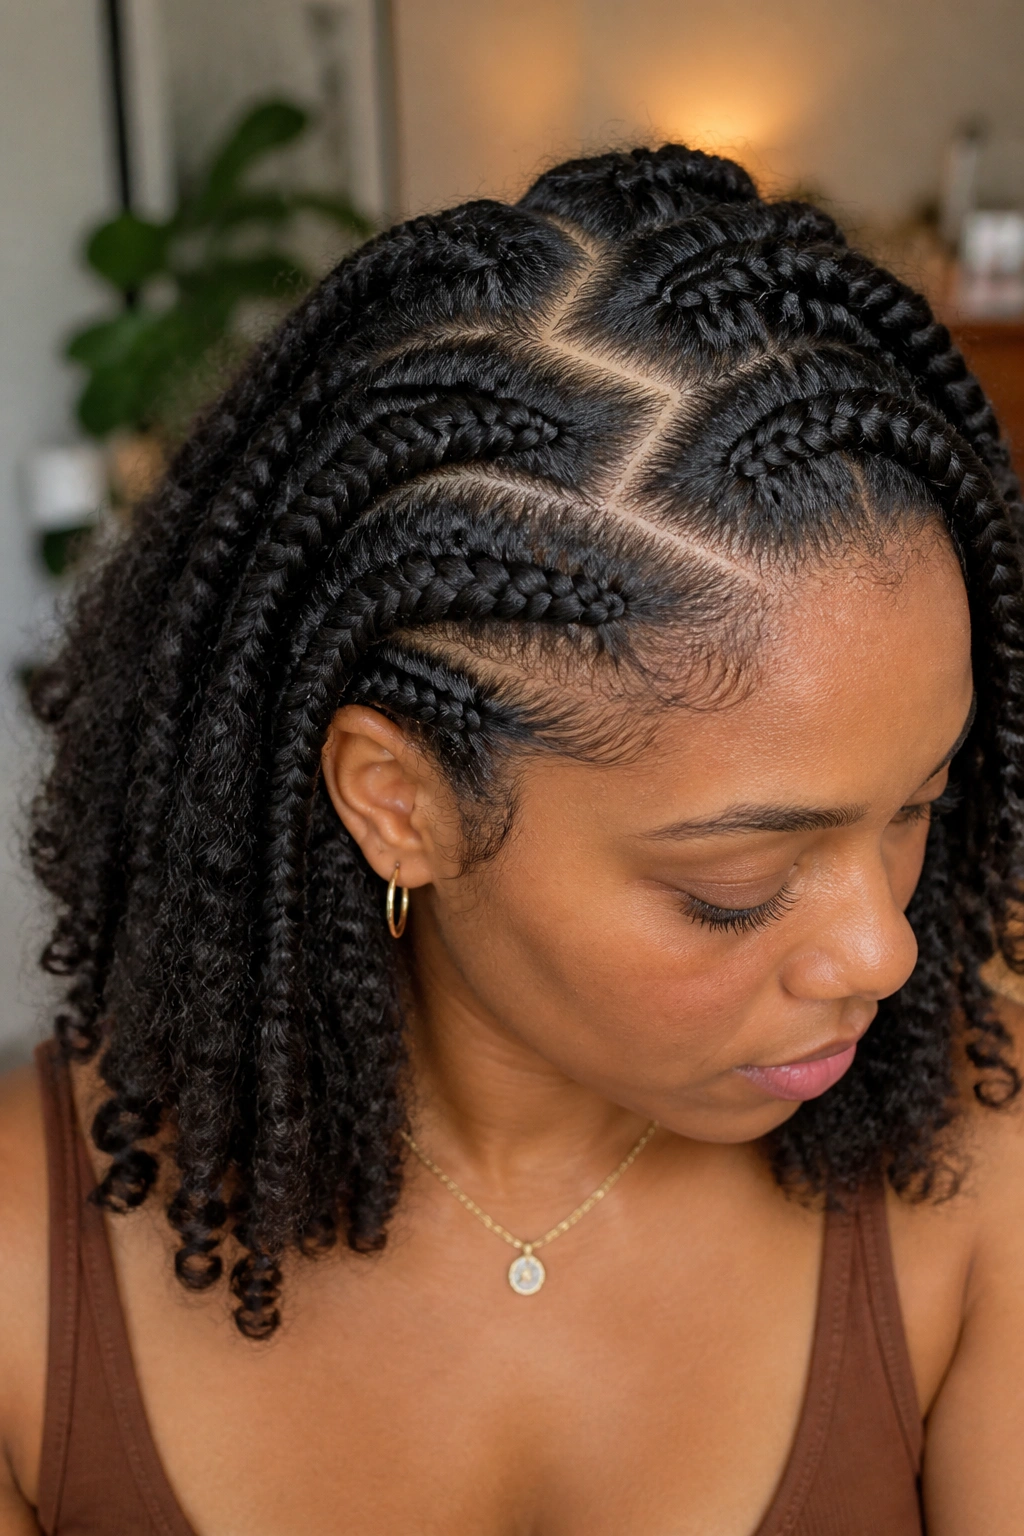
A straight part is tidy. A zig-zag part is more forgiving. It breaks up the scalp line, which means the braid out looks textured even before you touch the curls. That can be a very good thing if your hair shows parts easily or if you want the style to feel less formal.
Use the tip of a rat-tail comb to make shallow zig-zags, not sharp ones. Sharp parts can look busy and are harder to clean up later. A soft, repeating pattern is enough. The goal is to make the base interesting without stealing attention from the curls themselves.
This is a good option for dense hair, because the parting pattern helps distribute the braids in a way that keeps the roots from looking too plain. It also works for finer hair when you want a little camouflage at the scalp. You get texture before the take-down even starts.
- Keep the zig-zag shallow and consistent
- Use medium braids so the part pattern still shows
- Smooth each section before braiding so the lines stay visible
- Separate with fingertips first, then add a little root fluff if needed
The finished look has a little personality. Not loud. Just enough to feel different from the usual center part or side part. And sometimes that is all a braid out needs.
9. Flat Braid Out for Longer, Smoother Length
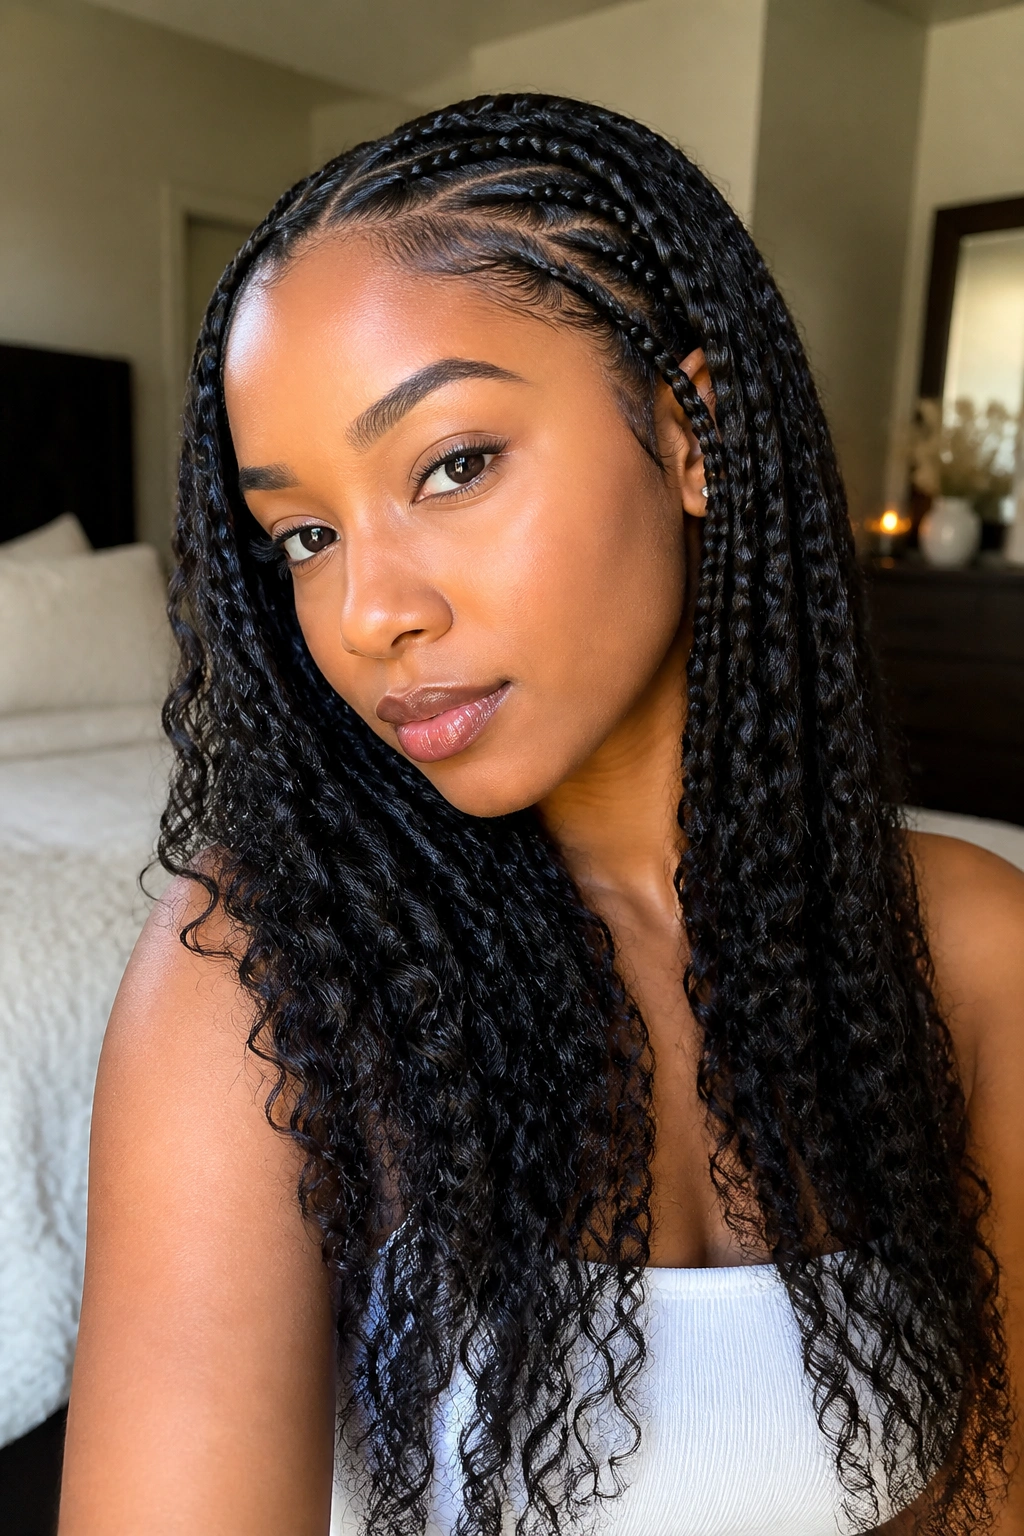
If your braid outs tend to lose length at the root, the flat braid version is worth a serious look. It lays the braids closer to the scalp, which helps the hair dry in a smoother shape and keeps the finished length from puffing too high at the crown.
Think of this as the calmer cousin of a big, fluffy braid out. The roots sit flatter. The curls still show, but the silhouette stretches downward instead of outward. That makes the style especially useful on medium to long hair where you want movement without a big halo around the head.
The mechanics are simple enough. Braid the first inch of each section snugly against the head, then keep the rest of the braid firm and even. Not tight. Firm. That difference matters. A tight braid can leave dents at the root, and those dents are annoying once the hair dries.
- Best when you want more visible length
- Good for the crown area if you hate root puff
- Works well with a light cream and a thin sealant
- Needs full drying time to avoid frizz at the base
I like this one for days when the ends should be the star, not the volume at the top. It’s clean, practical, and a little sleeker than the average braid out. That’s not boring. It’s useful.
10. Side-Swept Braid Out Over One Shoulder
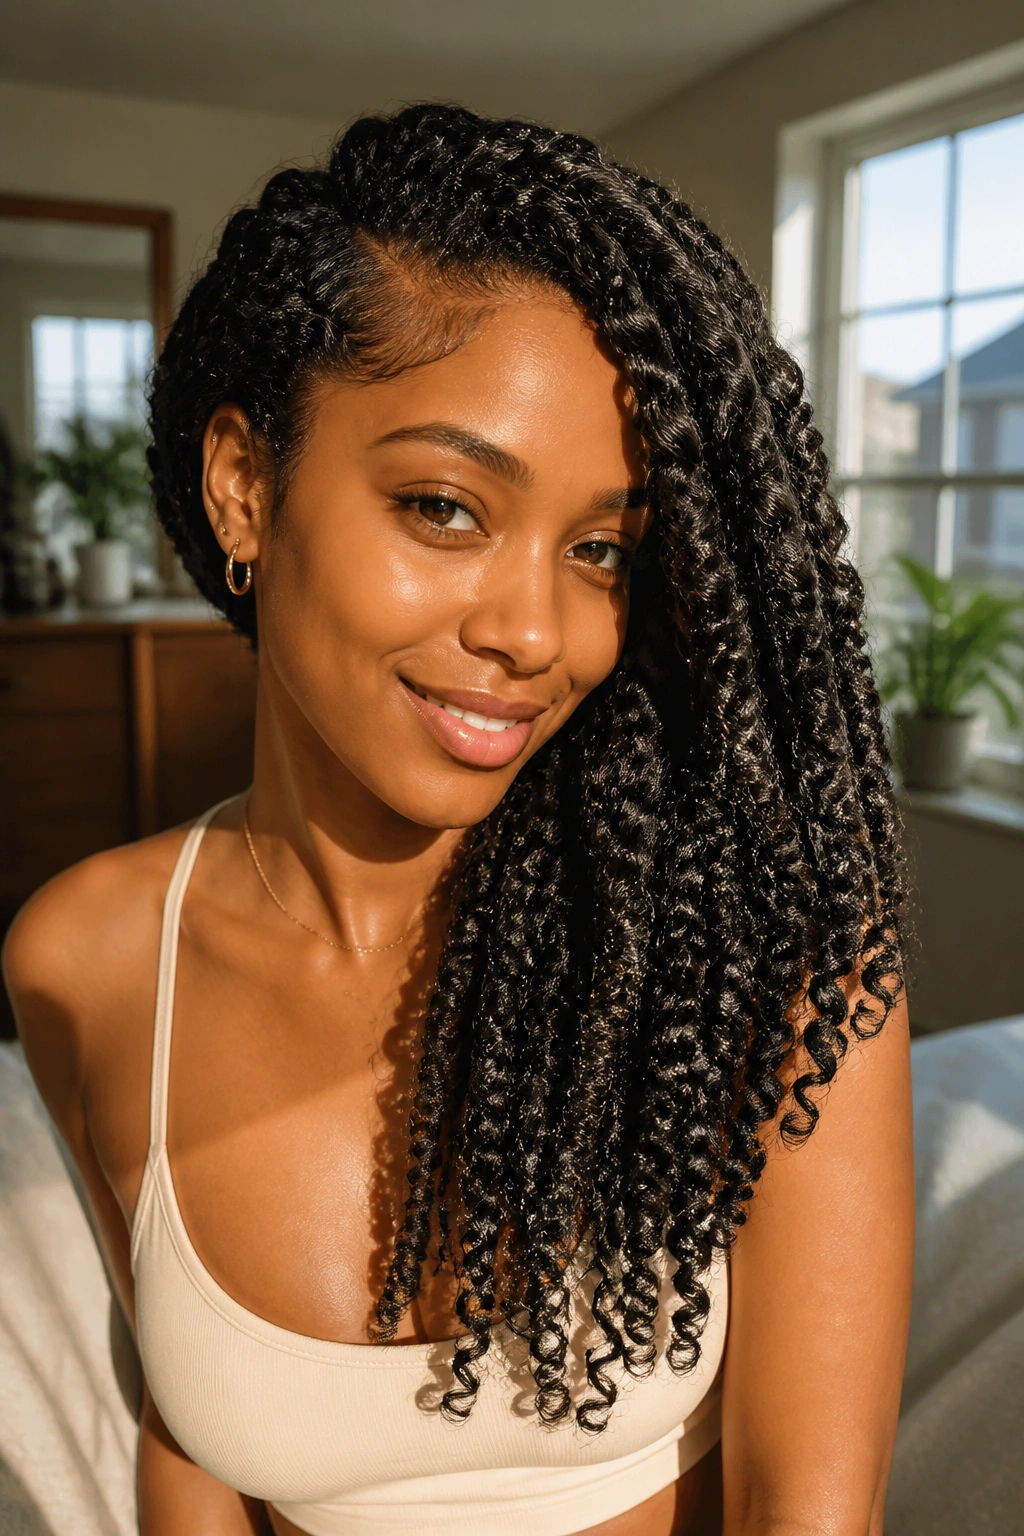
Some braid outs need symmetry. This one doesn’t. A side-swept braid out over one shoulder uses the hair’s weight to create movement, and that shift makes the curls look longer than they are. It also gives the style a more relaxed, dressed-up feel without adding any complicated steps.
The key is to set the part before braiding so the curls already know where to land. I’d braid the heavier side in medium sections and the lighter side in slightly smaller ones. That keeps the side with less hair from going flat while the fuller side brings the shape. Once the braids come down, sweep the length over one shoulder and let the curls stack naturally.
A good side-swept braid out has a soft front line and a little lift at the crown. Too much root volume can fight the drape. Too little makes the style look collapsed. You want enough movement to feel loose, but not so much that the shoulder side turns into a pile of tangles.
This is one of my favorite braid out styles for defined curls when the goal is ease. It’s the kind of style that looks good with earrings, a collar, or nothing at all. Simple works here. So does a little shine at the ends.
11. Bob-Length Braid Out with Rounded Ends
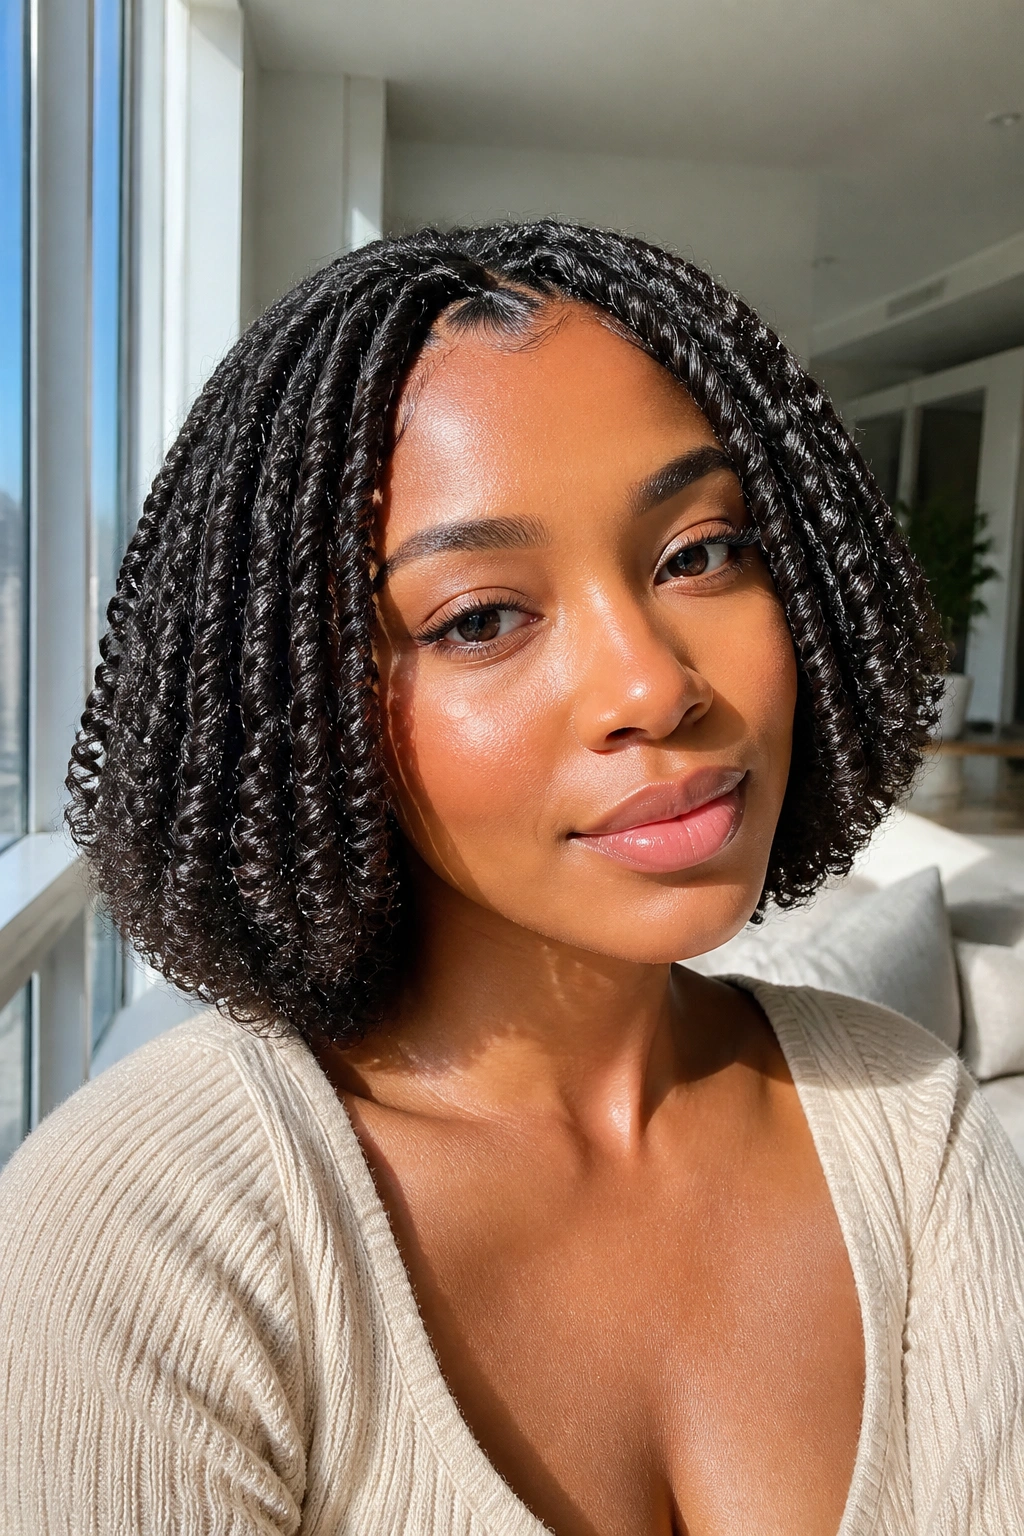
Shorter hair needs a different braid out strategy. A bob-length braid out is all about making the ends look full and rounded instead of thin and stringy. That shape matters more than length, honestly.
If the hair sits around chin to shoulder length, braid sizes should stay on the smaller side so the curl pattern can show clearly after the take-down. Bigger braids can leave the ends too stretched, and then the shape turns soft in a way that looks unfinished. Small to medium braids keep the bob outline intact.
This style looks best when the curls are allowed to curl under slightly at the ends. Don’t separate the last inch of each braid too aggressively. That’s where the rounded silhouette comes from. If the ends puff unevenly, a tiny touch of cream on dry fingertips can smooth them without flattening the whole style.
A bob-length braid out has a lot going for it. It frames the jaw, shows off curl definition, and feels neat without trying hard. There’s a reason people keep coming back to it. The cut gives the style structure, and the braid pattern gives it texture.
12. High-Volume Fluffed Braid Out

There’s a sweet spot between defined and fluffy, and this is it. A high-volume fluffed braid out keeps the curl clumps visible but gives them enough separation to look airy. The finish is bigger, looser, and a little more playful than a polished braid out.
I think the mistake people make here is over-separating. They keep pulling at the curls until the shape turns fuzzy. Don’t do that. Separate each braid once, maybe twice if the section is large, then stop. After that, use fingertips or a pick at the roots to lift the base. Leave the curl length alone.
What gives it that airy finish
- A slightly larger braid pattern at the set stage
- Dry hair that’s fully set, not damp in the middle
- Very gentle separation at the take-down
- Root lifting with a pick instead of finger-raking through the length
This style is great when the hair feels a little too neat and you want movement. It’s also a good fix for braid outs that come out flatter than expected. Fluffing the roots can wake them up fast. Just don’t confuse volume with chaos. They are not the same thing.
The best version of this style looks soft when still, then full when you move. That’s the whole charm.
13. Pinned-Back Braid Out with Face-Framing Pieces

Pins can make a braid out look finished in about 30 seconds. That’s not an exaggeration. A pinned-back braid out keeps the face open while letting the curls stay down everywhere else, which is handy when you want definition and shape without hair brushing your eyes all day.
How to Pin It
Take two small sections near the temples and tuck them back with 2 to 4 bobby pins or a flat clip. Leave the rest of the braid out loose. If you want a softer look, pull one thin curl forward on each side so the face still has movement. That little bit of contrast keeps the style from feeling severe.
What Makes It Work
The curl pattern needs enough separation to show, but not so much that the face pieces go frizzy the second they are pinned. That means the front sections should be braids with a smooth finish and not overly thin strands. If they’re too skinny, they spring loose fast.
This style works on a lot of lengths, which is one reason I keep liking it. Short hair can use small pins near the crown. Longer hair can get a more dramatic pull-back at the sides. Either way, the look stays clean and practical.
It also solves the “I love my braid out, but my face is tired of it” problem. That’s a real problem. This style handles it.
14. Faux-Hawk Braid Out for Lift and Edge
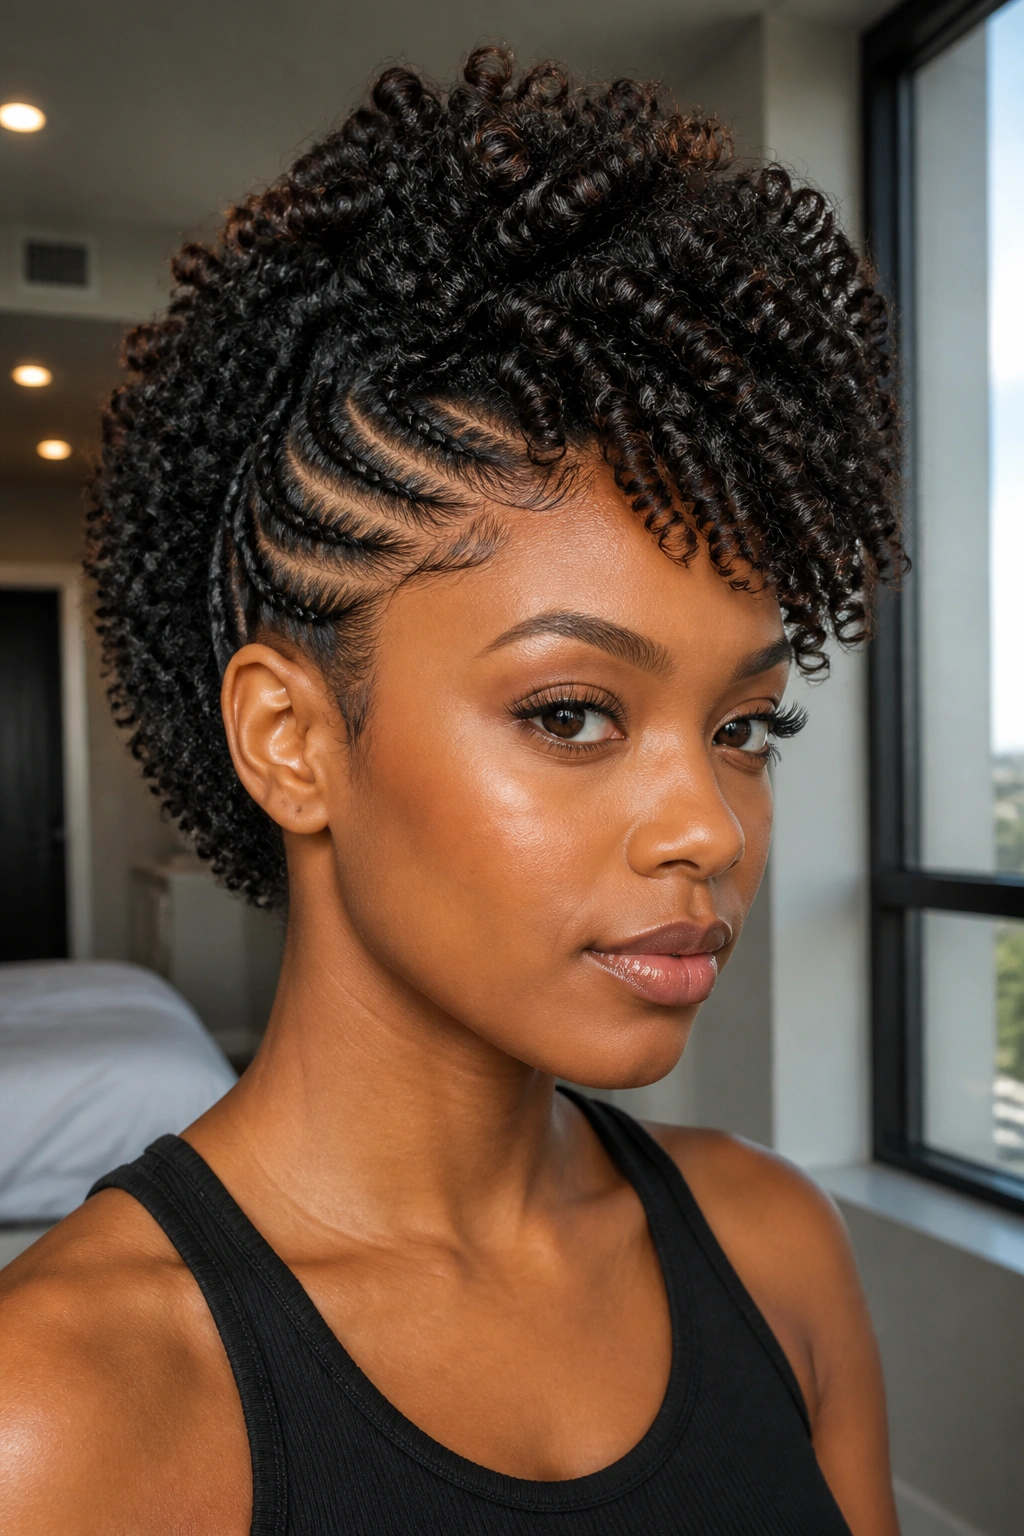
Why let all the volume sit evenly when you can build height right down the center? The faux-hawk braid out does exactly that, and it gives defined curls a sharper shape without asking for a full updo.
Start by braiding the sides flatter against the head so they can be pinned or tucked later. Leave the top and center sections fuller. When the braids come down, the middle naturally rises while the sides stay close to the scalp. That contrast creates the hawk shape. It looks intentional because it is intentional.
This style is good when you want a braid out that feels a little bolder. Not costume-y. Just stronger. The middle ridge catches the eye, and the flatter sides help the curls look cleaner. If the sides puff too much, use a few pins under the ear to keep them in line.
A faux-hawk braid out also works well for hair that refuses to stay flat at the sides. Instead of fighting the texture, you make the center the main event. Smart move. Less frustration, better shape.
If you want more softness, leave two or three curls loose at the temples. That keeps the style from looking too tight around the face.
15. Soft Second-Day Braid Out with Airy Texture

Sometimes the nicest braid out is not the fresh one. It’s the one that has settled overnight, loosened a little, and stopped trying so hard. A soft second-day braid out can look richer than day one because the curl clumps have relaxed into each other without losing definition.
The trick is restraint. Re-fluff the roots in the morning with your fingertips, smooth any rough spots with a tiny bit of oil, and leave the ends alone unless they’ve completely collapsed. If the hair slept under a satin bonnet or scarf, the style usually needs less work than people think. A lot less.
This is the braid out I’d choose when I want movement more than precision. It has a lived-in shape, but it still reads as styled. That balance is hard to fake with product alone. You need the time element, too. The curls settle, the part softens, and the whole head starts to look less rigid.
A braid out like this can be refreshed for another day with a quick mist of water on the hands, not the hair, plus a little oil on the fingertips. That’s enough for most textures. Too much water makes the definition swell and then frizz. Too much oil makes the roots limp. Tiny amounts. Always.
Leave a little shape in it. Seriously.
The best braid out styles for defined curls are the ones that match the shape you actually want, not the shape you feel like you should want. Clean center parts, big side parts, tiny braids, pinned-back faces, lifted crowns — they all start the same way, then go in different directions because the braids were planned with the finish in mind.
And that’s the part worth remembering. The braid pattern is not just the setup. It’s the style itself. Choose the silhouette first, braid with that shape in mind, and the take-down becomes much easier to trust.
