



Box braids can carry a whole look on their own. A single hair clip changes the mood fast — sleeker, softer, more polished, or a little playful, depending on where you pin it. The trick is not piling on accessories; it is placing one clip where the braid weight can actually support it.
A flimsy plastic clip slips. A tiny barrette can bite into the part and feel annoying by lunch. I like clips that sit on the braid body, not on the edge of the hairline, because box braids already have enough weight of their own. Your scalp will tell you when the tension is wrong.
Some of these styles take two minutes. Others need a few pins and a calm hand. None of them needs a huge kit — just the braid length you have, the clip shape you like, and a little sense of where you want the eye to go.
1. Sleek Low Ponytail With a Side Barrette
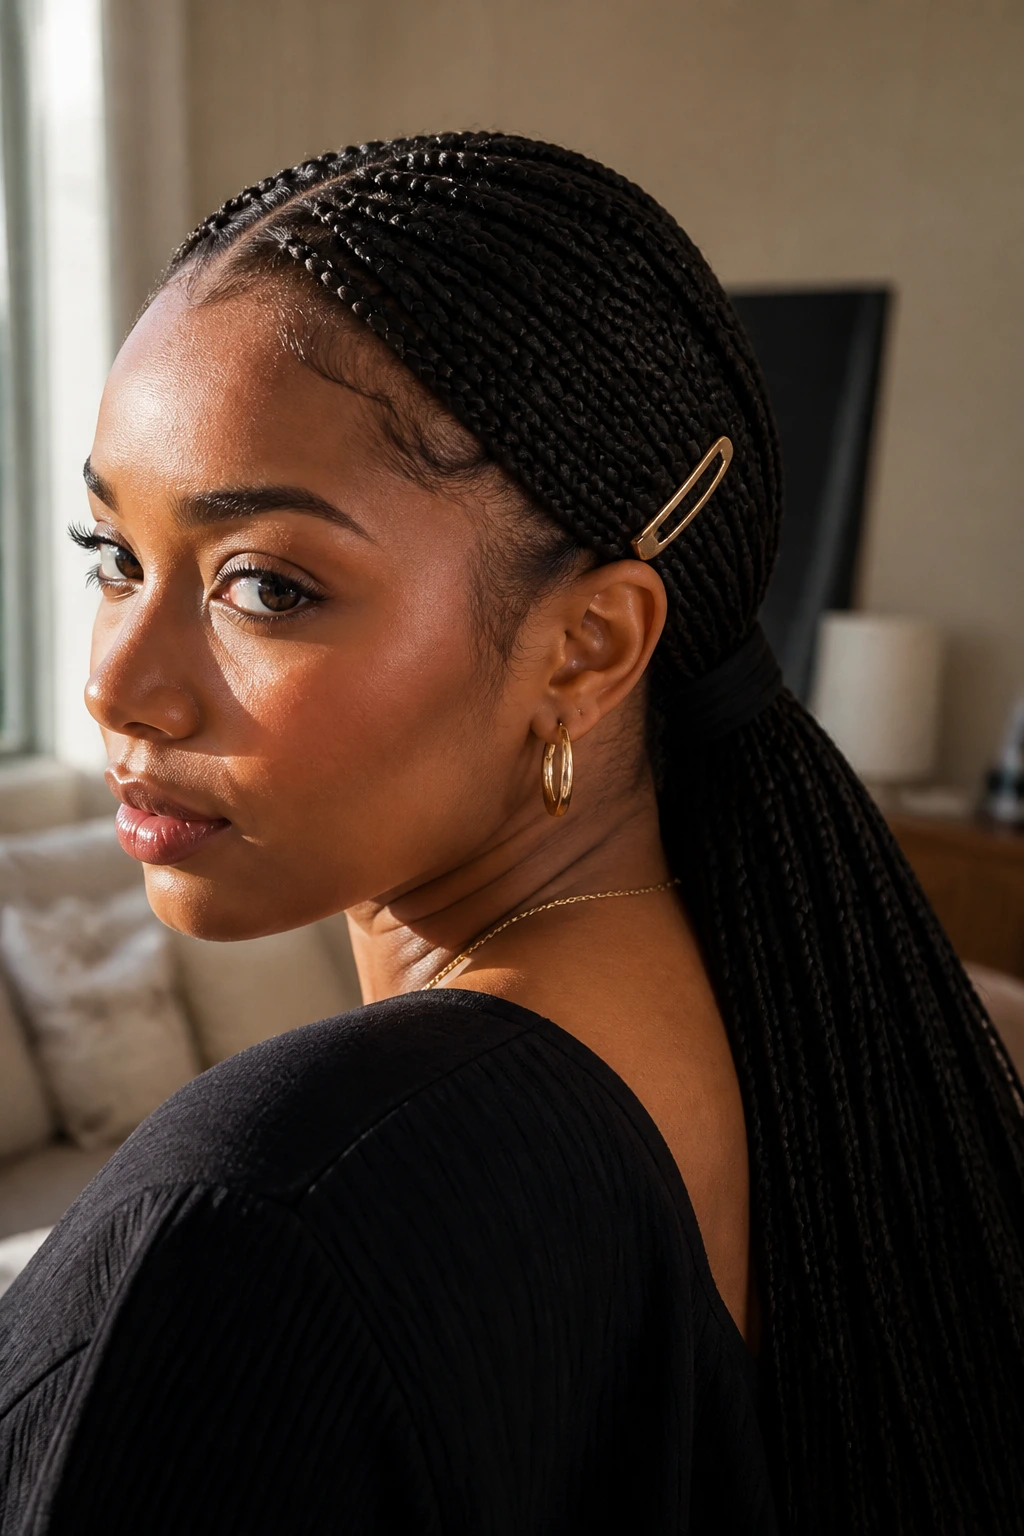
This is the fastest way to make box braids look deliberate. Pull the braids to the nape, smooth the crown with your hands or a light edge gel, and let the length fall straight down the back. Then add one strong barrette just above the elastic on the fuller side of the ponytail.
The shape matters here. A low ponytail reads clean because it keeps the bulk close to the neck, which makes the clip feel like a finish instead of a fix. I like a metal barrette or a sturdy snap clip for medium braids, and a wider clasp if the braids are jumbo. Tiny clips tend to disappear.
A few details make it work better:
- Keep the clip about 1 inch above the elastic so it doesn’t fight the tie.
- Use a 2 to 3 inch barrette for small or medium braids.
- Place it on the side with the most braid volume; it balances the shape.
The whole style suits busy days, dinner plans, and any moment when you want the braids off your face without turning them into a full updo. Simple. Clean. Done.
2. Half-Up Crown Clip

Want the length to stay visible while the front stays out of your eyes? A half-up crown clip handles that nicely. Gather the braids from temple to temple, lift them back in one smooth section, and fasten them with a medium claw clip or a wide French barrette.
How to Wear It
The best part of this style is that it does not need to be tight. Pull the top section back just enough to clear the forehead, then twist it once before clipping. That small twist keeps the braids from fanning out and gives the clip something to grip.
What Clip Size to Choose
A 2.5 to 3.5 inch clip usually works well for medium-length box braids. Smaller clips can hold the front, but they get overwhelmed fast if the braids are thick or waist-length. If your braids are heavy, choose a clip with teeth that bite a little deeper into the braid mass.
The look is good for school runs, errands, or any day when you want to keep the style relaxed but still finished. It also frames the face in a way that feels softer than a full ponytail. Not fussy. Just easy.
3. Side-Swept Front Braids With Two Tiny Clips
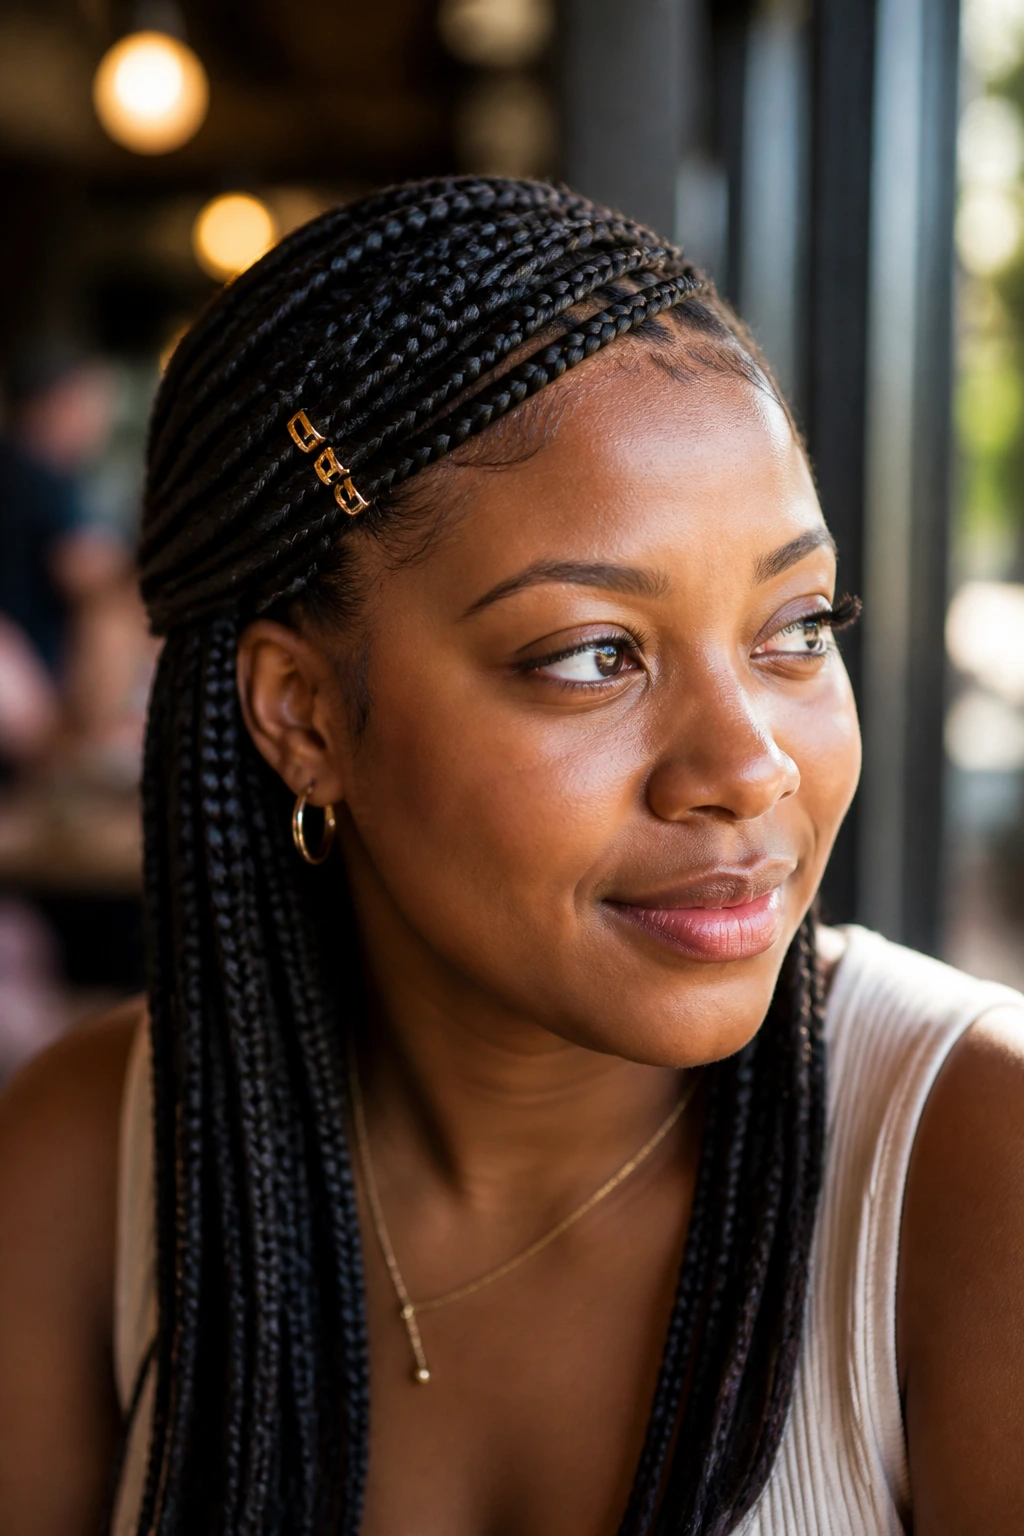
On days when you want the braids down but not in your eyes, two tiny clips do a lot of work. Sweep the front section across one side of the face and pin it in place with clips that sit about an inch apart. The rest of the braids can fall loose over the shoulders.
This style gives you movement without the constant brushing-back motion. I like it most with shoulder-length or mid-back braids, because the front sweep has enough length to drape cleanly. If you wear glasses, even better. The clips keep the front from bunching at the temples.
Small Details That Matter
- Place the clips above eyebrow level, not right at the temple.
- Use flat snap clips if you want the front to lie smooth.
- Pick pearl, metal, or matte black clips if you want the hardware to blend in rather than shout.
It’s a good look when you want something subtle but not boring. That’s the real appeal: a small change, a clear shape, and none of the scalp tug that comes with heavier updos.
4. Low Braided Bun With a Statement Clip

A plain bun can look a little heavy when the braids are thick. A statement clip fixes that by giving the bun a clean edge and a clear focal point. Sweep the braids into a low bun at the nape, tuck the ends under, then set a bold barrette or decorative clip across the outer curve.
Unlike a plain bun, this one has a bit of structure. The clip turns the bun into a shape rather than a pile of hair. If the braids are long, wrap them around the base in a flat coil before clipping. If they are shorter, pin the loose ends first so the bun does not bulge on one side.
Pearl clips, brushed gold, and simple tortoiseshell all work here. I’m not a fan of flimsy jeweled clips for this style; they tend to sag under braid weight and look tired by noon.
This is the one I’d pick for a wedding guest outfit, a blazer, or any time you want your braids to feel a little dressed up without losing the protective style part of the equation.
5. High Ponytail With a Wrapped Clip Base
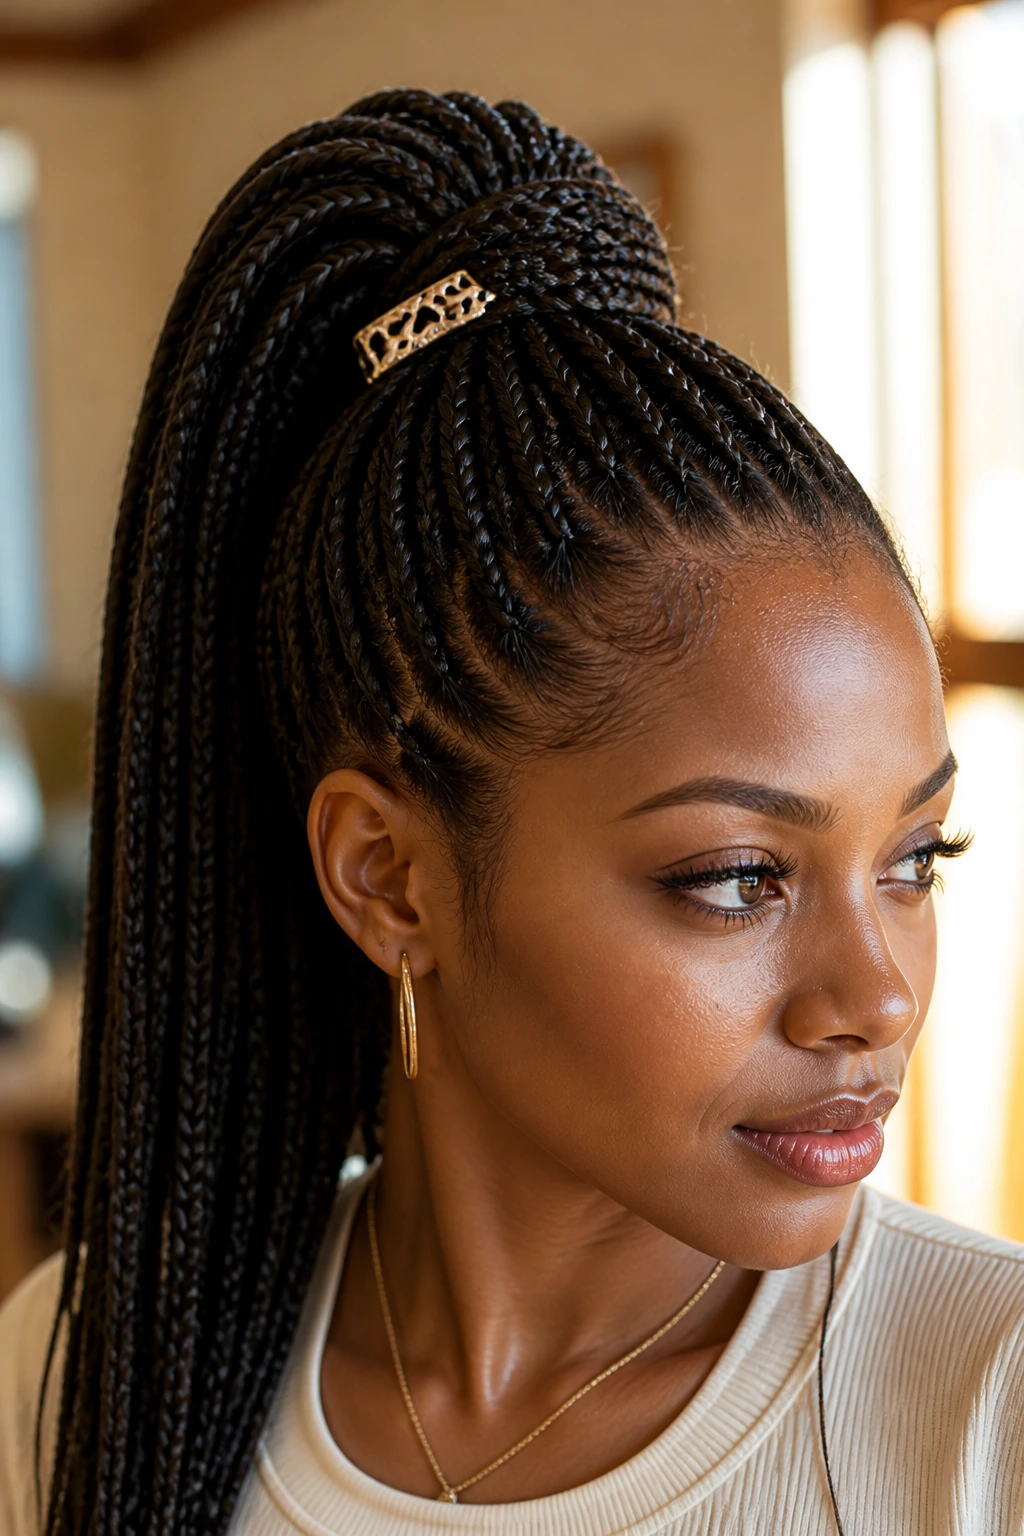
A high ponytail gives box braids a lift that changes the whole face. The crown looks sharper, the neck opens up, and the braid length falls with a little more swing. Start with a strong elastic, gather the braids at the crown, then wrap one braid around the base before clipping a barrette over the wrap.
That extra wrap matters. It hides the tie and gives the clip a flatter surface to sit on, which keeps the style from looking bulky. If your braids are very long, split the ponytail into two sections before lifting them up. That makes the weight easier on your scalp and keeps the base from sinking.
A high pony works especially well when you want a more energetic shape. It also shows off neat parting, which is half the pleasure of box braids anyway. Clean parts and a high lift — that combo has a lot of range.
The clip itself should sit slightly off-center or right at the front of the elastic. Centered clips can be fine, but a tiny offset usually looks more natural.
6. Shoulder-Swept Cascade With a Temple Clip
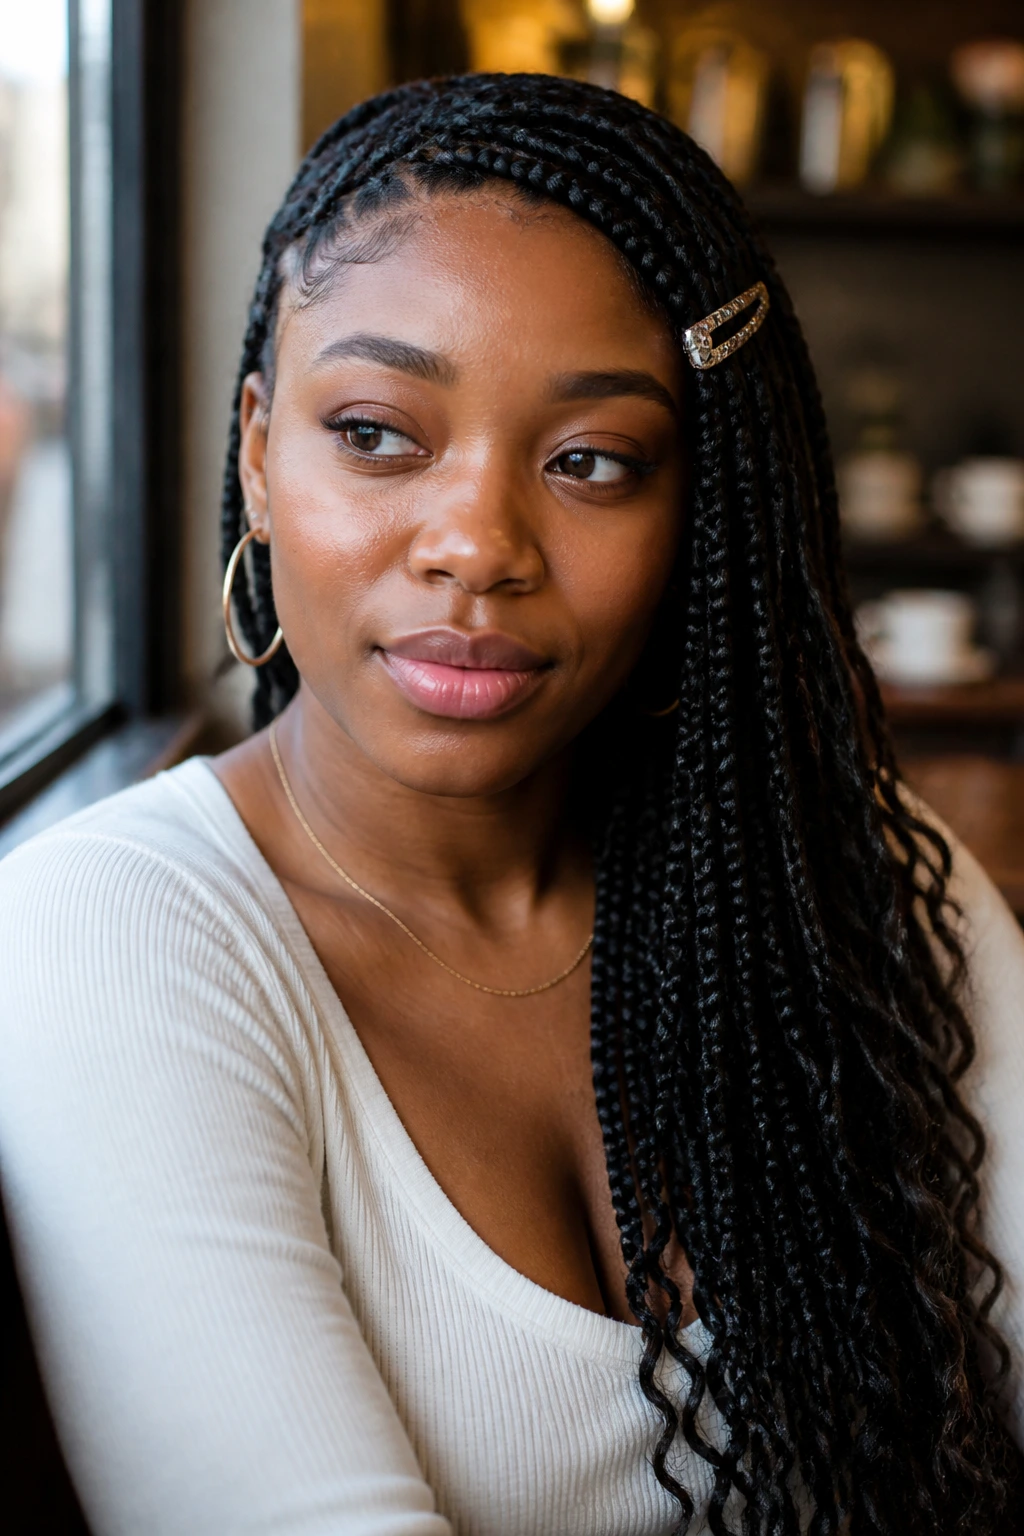
Sometimes the easiest thing is to move everything to one shoulder and let the clip do the quiet work. Sweep the braids across the chest, pin the front section back at the temple, and let the rest cascade over the same side. One good clip is enough if it’s sturdy.
This style has a softer line than a ponytail. It also plays well with hoop earrings, collarbones, and any neckline that deserves a little room. The clip keeps the front tidy while the back stays loose, which is a useful balance when you want the hair down but not wild.
A Few Placement Notes
- Set the clip 1 to 2 inches above the eyebrow, where the braid density is strongest.
- If you have layers or shorter braids around the face, tuck those under the pinned section.
- A curved barrette follows the sweep better than a flat one.
The cascade shape feels especially nice with medium box braids that have some swing but are not so long that they drag across your jacket. It is one of those styles that looks casual in a smart way. No effort theater. Just a good line.
7. Braided Space Buns With Matching Clips
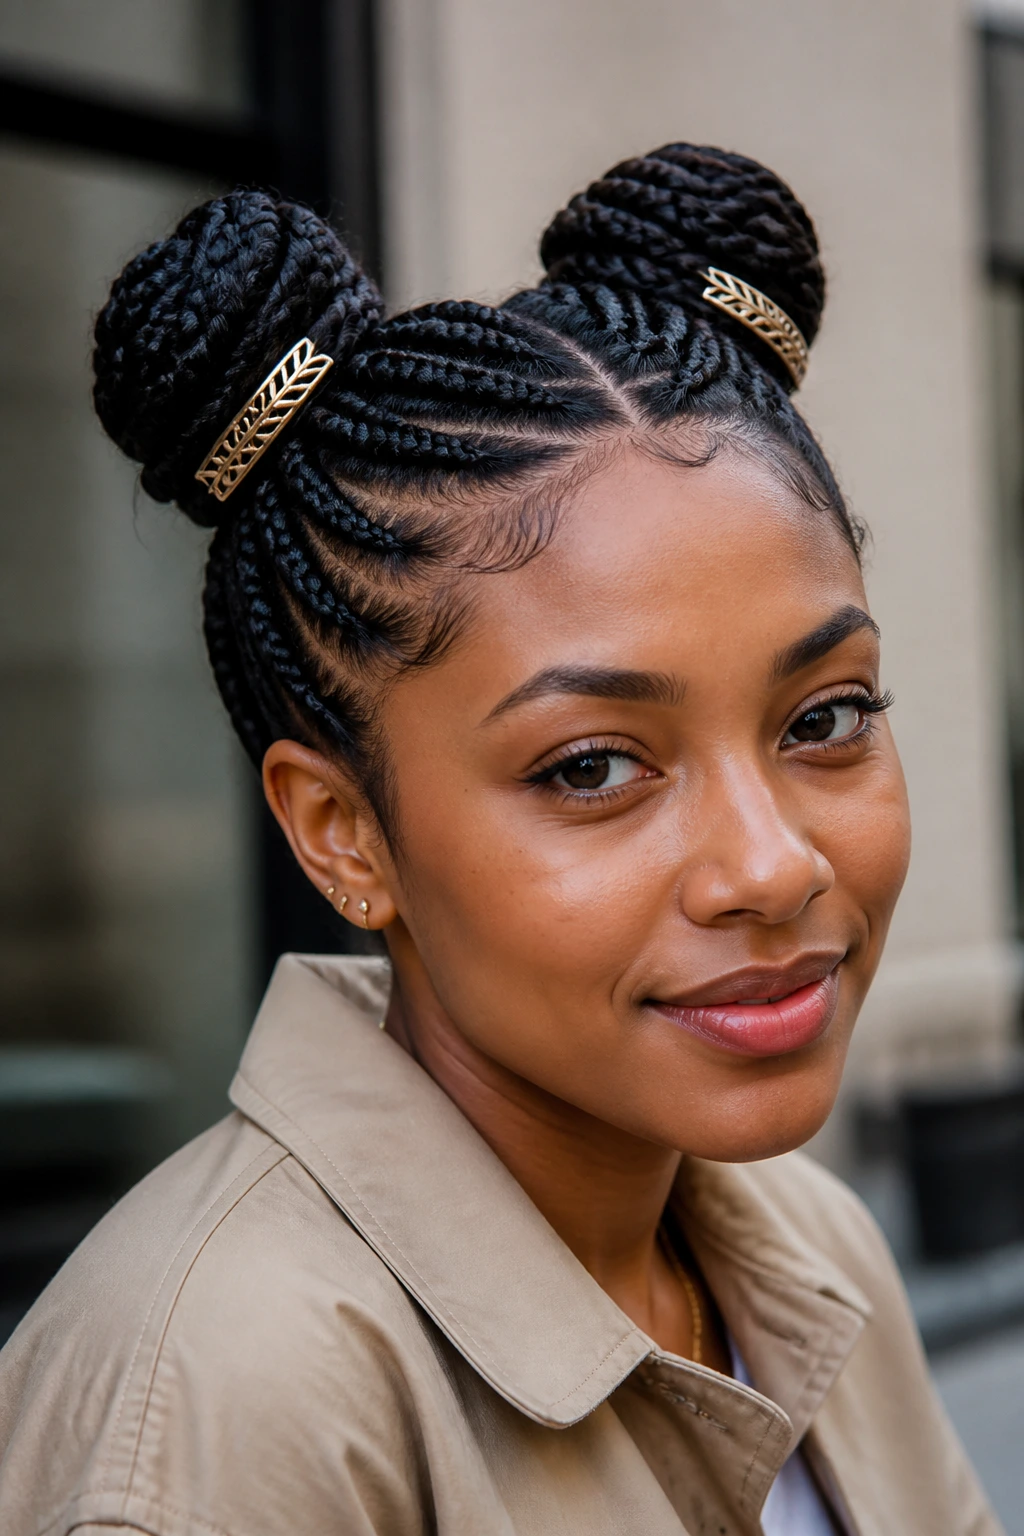
Clips make space buns feel less like a costume and more like an actual hairstyle. Part the braids down the middle, gather each side into a high bun, and secure each one with a small clip on the outer edge of the bun. The matching hardware ties the two sides together.
Clip Placement Matters
If the clips sit too close to the scalp, the style starts to feel tense. Better to let the bun carry the shape and use the clip as a finish. Small claw clips or mini barrettes work best here because they don’t add much weight. Bigger clips can pull the buns sideways, and that ruins the symmetry fast.
Space buns are a good choice for shorter box braids too. When the braids are not long enough for a single big bun, two smaller buns create shape without fighting the length. Add edge control if you want the part crisp, but keep it light. Too much product near the front tends to look heavy against the neat braids.
I like this one for concerts, casual weekends, or any day that could use a little energy. It is playful, sure. But it still reads as a protective style, not a messy shortcut.
8. Tucked-Under Faux Bob With a Hair Clip

Want the braids to sit shorter without cutting anything? Fold the ends under and pin them into a faux bob. Start by tucking the length inward at the nape, then shape the hair so it curves around the jaw and neck. A clip near one side keeps the outline from loosening.
Best Clip Size
A small snap clip or slim barrette works best here because the style is compact. Big claw clips usually sit too high and interrupt the line of the bob. If the braids are thick, use two clips instead of one and place them a few inches apart so the weight spreads out.
The whole trick is to make the ends disappear. That means keeping the tuck smooth and not overpacking the nape. If the braids are extra long, roll the ends under in two passes rather than one big fold. It sounds fussy, but it keeps the back from puffing out.
This style has a neat, polished feel without being rigid. It is also handy for nights when you want the braids off the shoulders. Small change. Big shape shift.
9. Half-Up Top Knot With a Hidden Clip
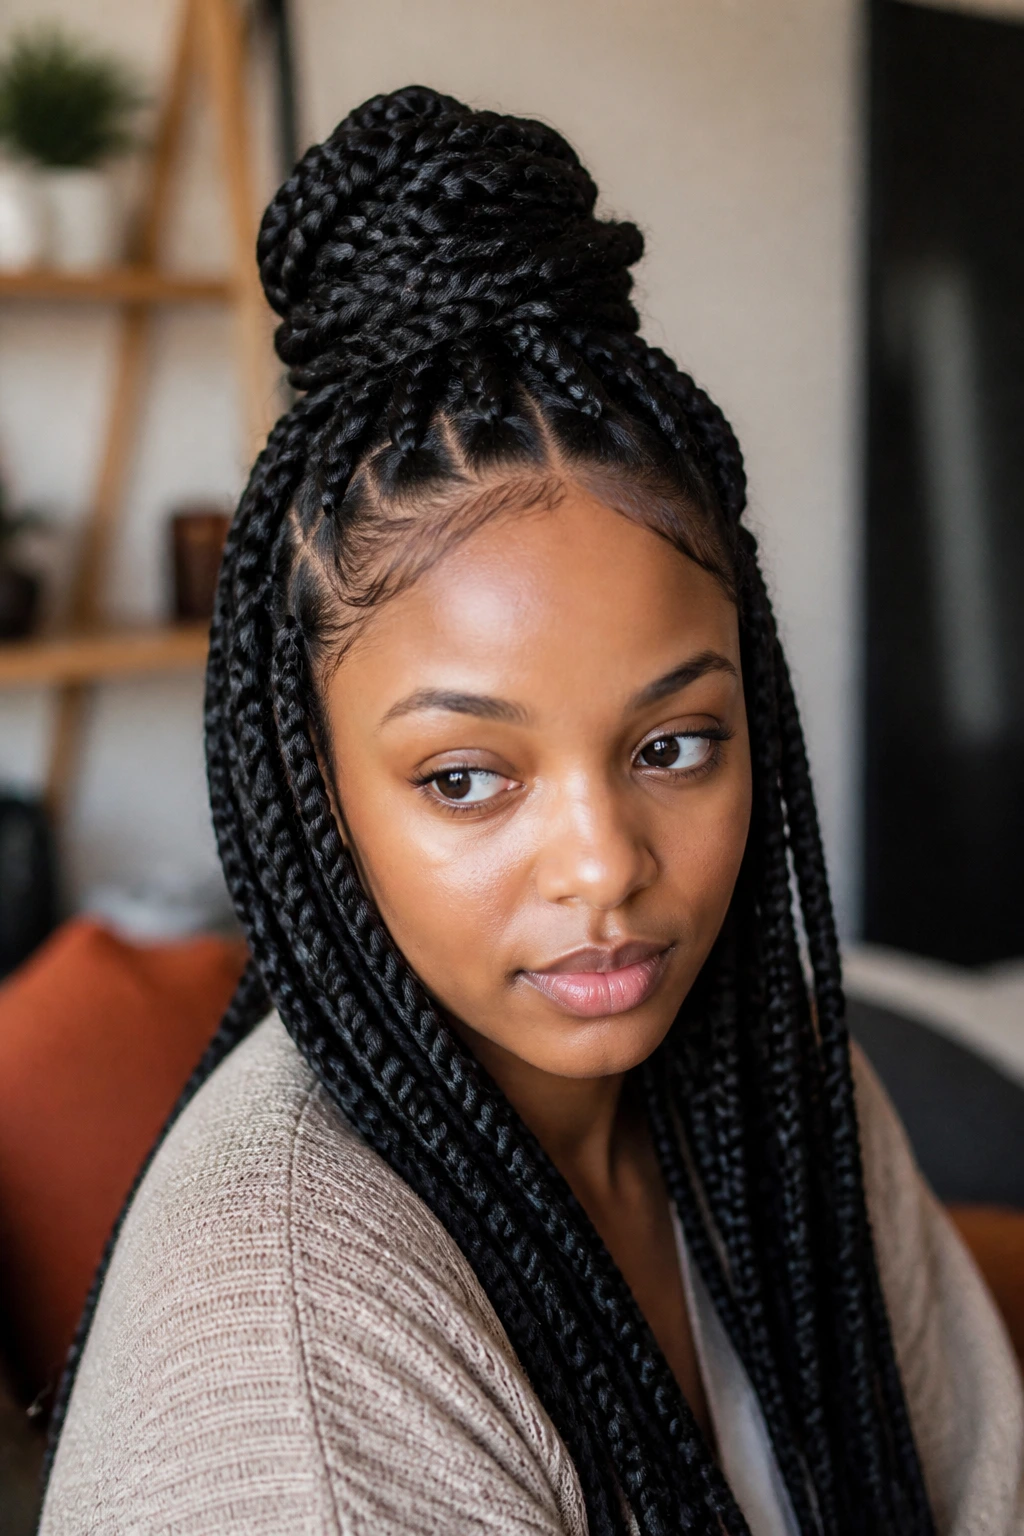
A half-up top knot is cleaner when the clip is hidden inside the knot rather than sitting on top of it. Pull the front and middle braids into a high section, twist them into a knot, and slide a flat clip under the outer layer to anchor the shape.
Unlike a bare top knot, this version looks finished from every angle. The clip does the quiet structural work, and the knot stays tighter because the braid weight is not hanging off one elastic alone. I prefer this style for long box braids, especially when the roots are fresh and the parting still looks crisp.
It helps to build the knot in stages. Twist, wrap, tuck, then clip. If you clip too early, the knot loosens as soon as you adjust the shape. If you wait until the last wrap, the clip can disappear almost completely.
This one is good when you want a raised shape but not a full updo. The top stays tidy, the length still shows, and the hidden clip keeps the whole thing from sagging by midday.
10. Halo Wrap With a Side Clip
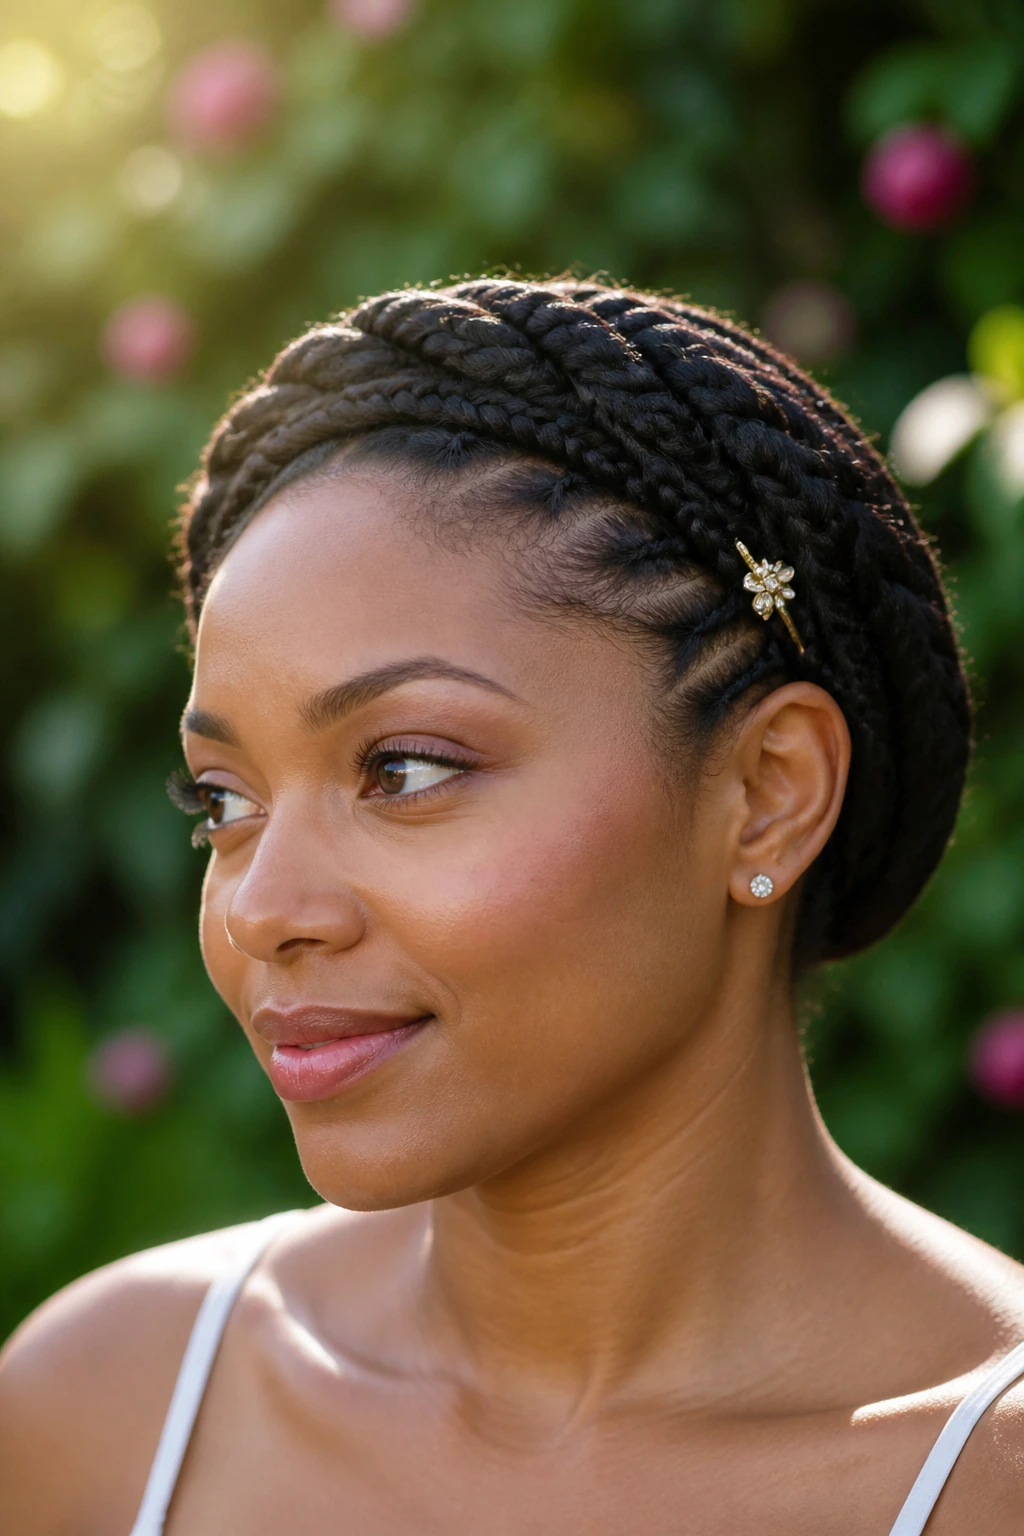
A halo wrap gives box braids a softer, more sculpted profile. Sweep the braids around the head like a crown, tuck the ends behind the ear or at the nape, and add a single side clip where the wrap meets itself. The result feels neat without looking stiff.
The texture is part of the appeal. Braids have that rope-like feel, so when they’re wrapped close to the head, the shape reads almost like a woven band. A metal clip can feel cool against the skin at first, then vanish into the style once the braids settle.
This one works well with lightweight beads or cuffs, but I’d keep the accessories modest. Too many shiny pieces start competing with the halo shape. One clip is enough when the braid line is already doing the talking.
If your braids are shoulder length or a little longer, the halo can sit snugly without needing a lot of pins. Longer braids may need a hidden pin or two under the wrap. No drama there. Just a little support where the eye can’t see it.
11. Bubble Ponytail With Clips Between the Ties

Bubble ponytails look great on box braids because the braid texture keeps each section full. Gather the braids into a high or mid ponytail, add small elastics every 3 to 4 inches, and place flat clips between the ties as little accents. The clips are decorative, but they also help the eye read the shape.
Here’s the part that matters: the bubbles should stay rounded, not cinched flat. Pull each section outward with your fingers after tying it off, then add the clip a little off-center so it does not crush the curve. If the braids are long, you can get four to six bubbles easily. Shorter lengths may only give you three. That is fine.
A few things make this style hold its shape better:
- Use elastics that match your braid color so the line stays clean.
- Keep the clip size small, around 1.5 to 2 inches.
- Leave enough space between ties for each bubble to puff out.
This style feels lively without being messy. The clips give it a bit of shine, and the braid pattern does the rest.
12. Low Twisted Chignon With a Metallic Clip

A low twisted chignon is one of the tidiest ways to wear box braids when you want the hair fully up. Sweep the braids to the nape, twist them clockwise into a compact coil, and tuck the ends underneath before clipping the seam with a metallic barrette.
Parting Details
A center part keeps the look balanced. A deep side part makes it feel softer and a little more dramatic. Either one works, but the part should be clean because the chignon itself is so tight and neat that any wobble at the front stands out fast.
Clip Choice
A medium French barrette or curved metal clip is the sweet spot here. It should grip the braid bundle without bowing outward. If the clip is too small, it skates. If it is too heavy, it flops. There is a narrow middle ground, and this style lives in it.
The chignon is one of the more polished box braid hairstyles with a hair clip because the accessory is not hidden and not loud. It sits in the exact place your eye wants to land. That balance is what makes it work for formal wear, but also for a plain white shirt when you want the outfit to look sharper.
13. Side Bun With an Oversized Claw Clip

Unlike the low chignon, the side bun has a looser shape and a little more attitude. Pull the braids to one side, coil them near the ear or just below it, and clamp an oversized claw clip over the thickest part of the bun.
The clip needs to be big enough to grab braid mass, not just skim the outside. For jumbo braids, I’d want at least a 4-inch claw clip. Smaller braids can use a 3-inch version, but the teeth should still have enough reach to hold the coil in place. If the clip feels like it is stretching to close, it is too small.
This style has a casual feel that still looks chosen. It’s handy for days when you want your neck free and your braids out of the way, but you do not want the severe line of a tight bun. The slight side placement softens the profile, too.
A side bun works best with medium or long box braids. Short braids can do it, but the bun may sit small and a little stiff. Long braids, though, give it a much better shape.
14. Front-Pinned Braid Crown With Two Barrettes
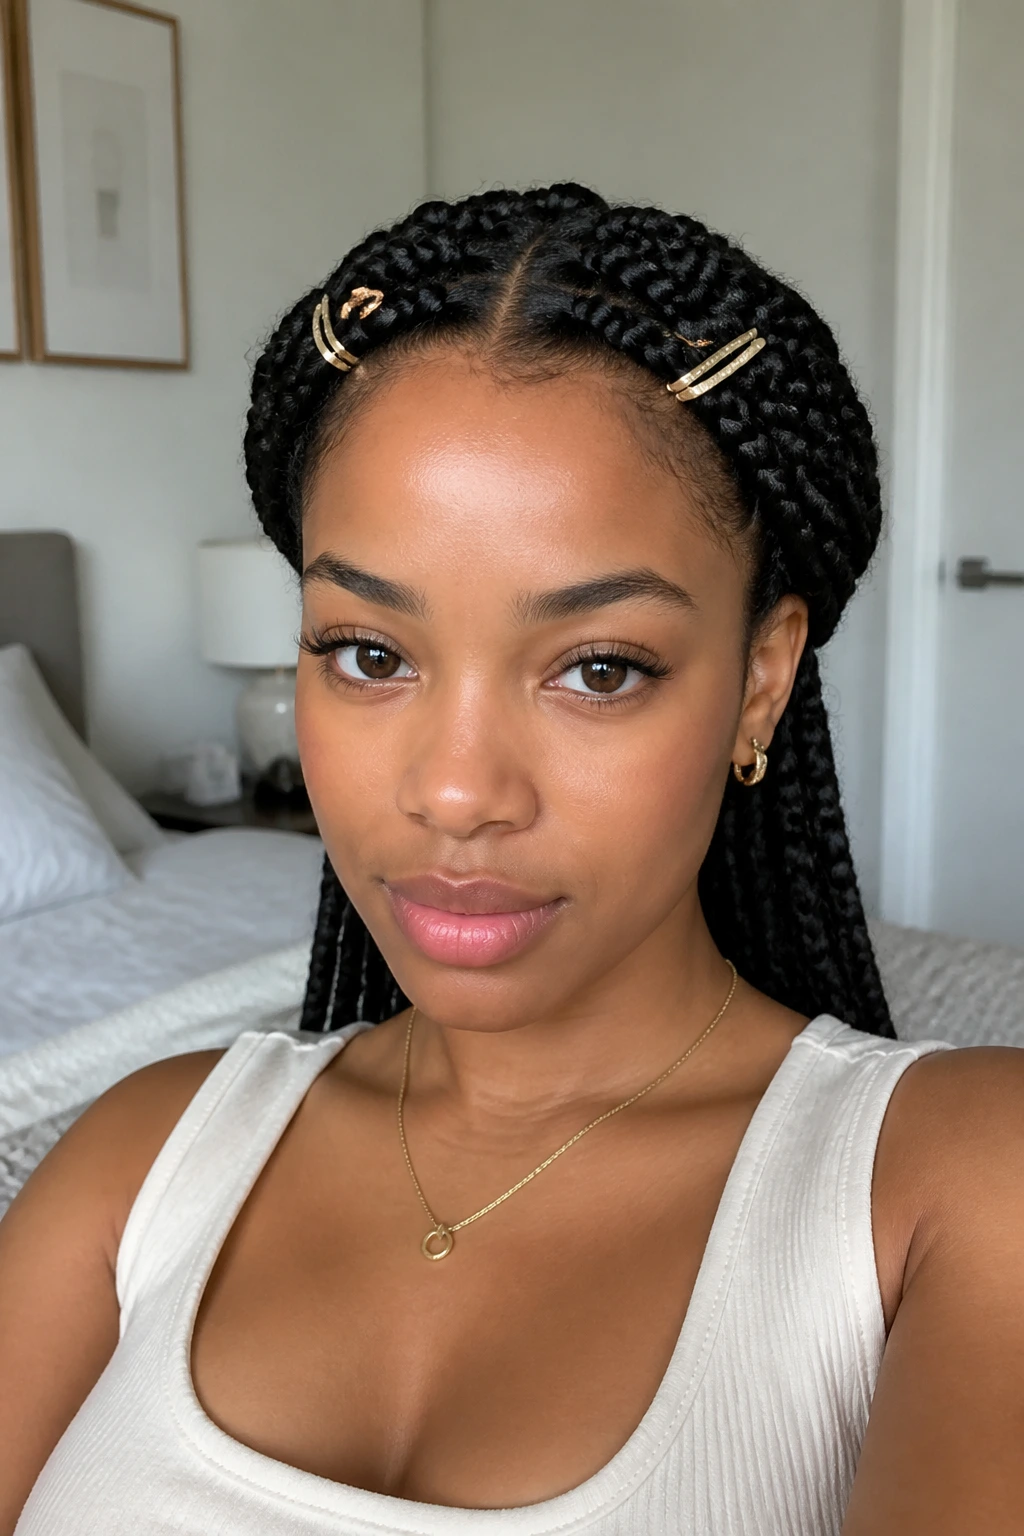
Pinned-front styles are underrated. Sweep just the braids at the hairline back from both temples and secure them with two barrettes, one on each side, while leaving the rest of the braids loose. The result is a crown effect that keeps the face open without forcing a full updo.
The advantage here is movement. Your lengths still swing, your part stays visible, and the clips act like little brackets holding the frame in place. I prefer a pair of barrettes over one big clip because the balance feels cleaner and the style sits flatter along the head.
It is a good option if you wear makeup and want the brows, cheekbones, or earrings to stay visible. It also helps when the front pieces are fresh and a little slippery, because the clips catch the hair before it starts slipping into your eyes.
Go for slim metal clips, pearl pins, or matte snaps depending on how dressy you want the style to feel. The lighter the clip, the less chance it has of pulling on the edges. That part matters more than people admit.
15. High Half-Up Pony With a Pearl Clip Stack

Why stop at one clip when two or three can turn a half-up pony into a finished style? Pull the top section of the braids into a high ponytail, then stack small pearl clips along one side of the elastic, almost like a little ladder of shine.
How to Keep It from Tipping
Keep the clip stack close to the base of the ponytail. If you place the clips too high, they drag the pony to one side and the shape starts to lean. A tight elastic under the braids helps, but the clips should still be decorative rather than load-bearing.
This look is nice when you want a dressier edge without a full bun. The pearl stack gives the top section some detail, and the length stays loose enough to swing. I would use it on medium to long box braids, since very short braids do not leave enough tail for the pony to feel full.
You can keep the rest of the outfit plain and let the hair do the work. A white tee, a button-down, a slip dress — all of it can take this style without much effort. The braids already carry the texture.
16. Braided Mohawk With a Row of Clips

A braided mohawk sounds bold, but the clip row keeps it grounded. Flatten the side braids back toward the scalp, secure them with a line of small clips running from the temple toward the nape, and lift the center section so it rises into a ridge. The side clips make the mohawk shape read cleanly.
Why It Stays Put
The clips hold the side panels close to the head, which keeps the center line from collapsing inward. That matters with box braids because the braid weight tends to spread outward unless you guide it. Three to five small clips on each side usually do the trick, depending on braid length and thickness.
How to Set It
Start with the center strip first. Once that ridge is where you want it, pin the sides down one clip at a time, moving back from the temple. Do not rush the side sections; if they are uneven, the whole style starts to look lopsided.
This one has edge, but it is still practical. The hair is off the face, the clips are doing visible work, and the profile looks deliberate from the front and side. It is one of the more expressive box braid hairstyles with a hair clip, and it does not need any extra decoration beyond the clips themselves.
17. Low Rolled Nape Style With a Snap Clip

A low rolled nape style is compact, tidy, and easier to wear than it looks. Roll the braids under at the back of the neck, tuck the ends into the fold, and slide a snap clip diagonally into the roll to lock it in place. That diagonal placement is the trick.
The style is useful under coats, scarves, and collars because it keeps bulk low. A smooth nape also feels nice on days when you do not want hair bouncing around your shoulders. I like it best with short to medium box braids, though longer braids can be folded in sections if you’re patient.
A snap clip works because it sits flat against the head. A claw clip usually adds too much height here, which defeats the whole purpose of the rolled shape. If the roll feels loose, add a hidden bobby pin underneath before placing the clip.
This is a low-key style, not a loud one. That is the point. It lets the braids stay protected while looking neat from every angle that matters.
18. Asymmetrical Side Sweep With a Decorative Clip
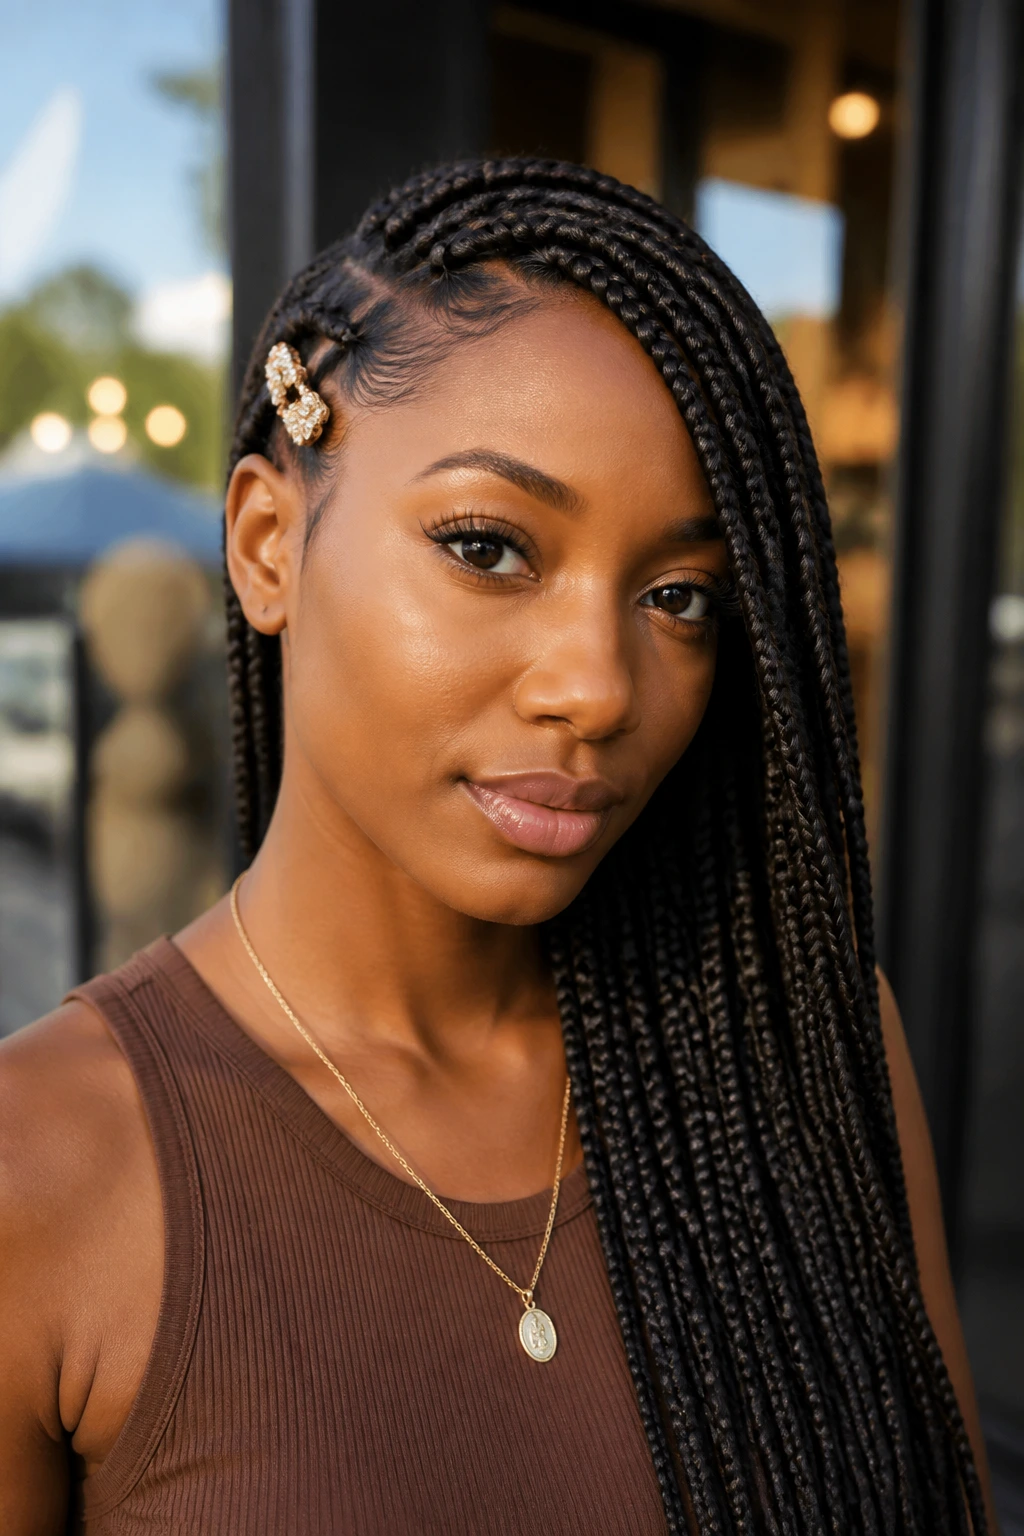
Unlike symmetrical styles, this one leans all the braids to one side and uses a decorative clip to hold the front away from the face. Sweep the lengths over one shoulder, tuck the front section back on the opposite side, and place the clip just above the ear to anchor the line.
The asymmetry gives the braids a little motion even when they are still. It also shows off earrings, collar shapes, and the braid parting in a way that feels more intentional than a straight-down style. If you want the look to feel softer, use a curved barrette. If you want sharper edges, use a geometric metal clip.
This shape suits medium and long box braids especially well, since the weight of the hair naturally wants to fall to one side anyway. A short braid length can still work, but the sweep will read smaller and more tucked.
I’d choose this style on days when I want the hair to have personality without taking over the whole outfit. A good clip does that. It lets the braids lean, but not collapse.
Final Thoughts

A good clip can change box braids without changing the braids themselves. That is why these styles work: they respect the weight, the parting, and the shape already built into the hair.
The real difference comes from placement. Too high, and the clip fights the roots. Too small, and it slips. Too decorative, and the braid pattern gets lost. The sweet spot sits somewhere simpler — a clip that holds where the hair is already strong and leaves the line clean.
I’d start with one style that matches your braid length and clip size, then use that as the base for the rest. Once you know where your braids sit best — low, high, swept, rolled, pinned back — the styling gets easier fast. And yes, one good clip can carry a lot more than people think.
