



Some mornings, a full braid set feels like too much work, but a plain ponytail feels like an apology. A twist ponytail sits in the middle: neat, textured, and fast enough for real life. That is why twist ponytail ideas keep getting saved, pinned, and copied — they give you shape without demanding a full salon-level setup.
A good twist ponytail also plays nicer with protective styling than a hard-pulled slick-back ever will. The American Academy of Dermatology has long warned that styles that tug at the roots can lead to traction alopecia, so the win here is not just looks. It’s the balance of tension, moisture, and hold. Light hands. Soft elastics. Enough control to look finished, not enough pull to make your scalp complain by lunchtime.
And the best part? You do not need a drawer full of products to make these work. A rat-tail comb, a leave-in conditioner, a little gel or mousse, a few snag-free bands, and maybe a satin scarf are often enough. Hair length matters, sure. Texture matters too. But the real magic is in the way you place the twists, where you anchor the ponytail, and whether you let the style breathe a little instead of forcing it into submission.
1. High Two-Strand Twist Ponytail
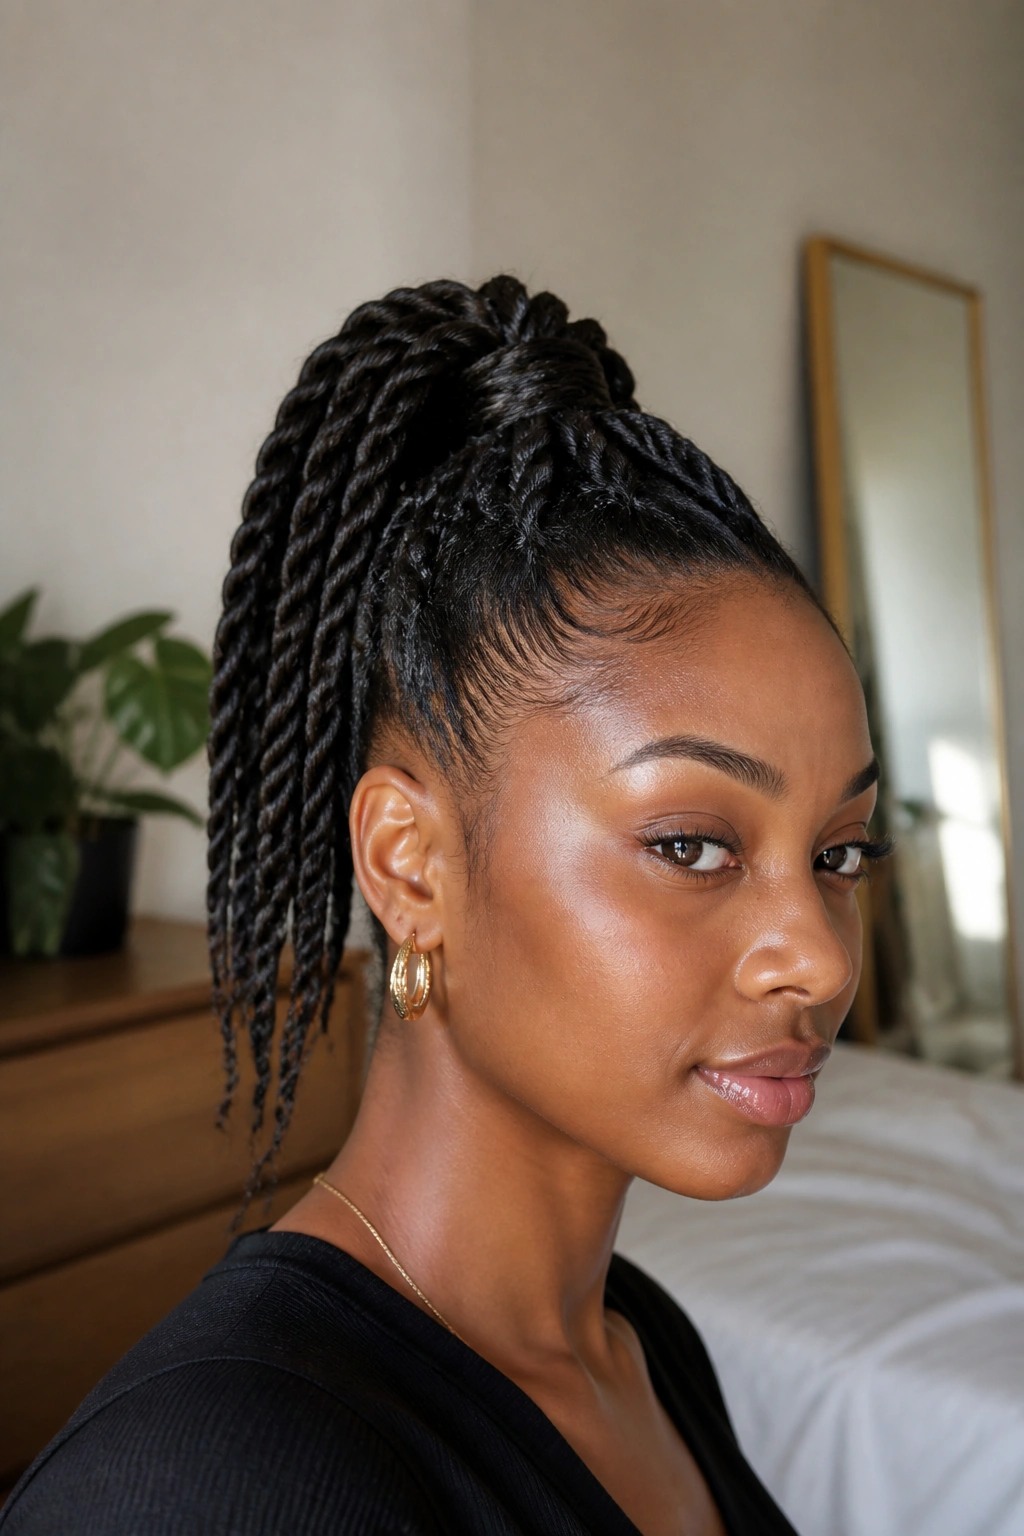
A high two-strand twist ponytail is the one I reach for when I want energy. It lifts the face, shows off the neck, and gives even a simple outfit some shape. The look works especially well when the twists are medium-sized — think 6 to 10 twists, depending on density — because the ponytail stays full without turning heavy.
Why It Flatters So Fast
A high placement pulls the eye upward, which makes the whole style feel sharper. That’s useful on wash day hair, stretched hair, or even blown-out natural hair that needs one more day of life. If your crown tends to puff up by noon, this style hides that problem instead of fighting it.
Keep the base about 1 inch above the ears and use a satin scrunchie or covered elastic. A bare rubber band is not your friend here. It snaps, snags, and makes removal annoying later.
- Twist the hair in 2-inch to 3-inch sections for a fuller finish.
- Aim the ponytail slightly forward before securing it, then lift and adjust.
- Smooth the front with a pea-sized amount of gel, not a heavy layer.
- Let the ends stay soft or curl them with perm rods for extra bounce.
Best part: it looks polished even when the rest of your outfit is doing the bare minimum.
2. Low Sleek Twist Ponytail

Want something that looks clean without looking severe? Go low. A sleek low twist ponytail sits at the nape and gives you that calm, pulled-together look that works in a meeting, at dinner, or on a day when your hair simply needs to behave.
The trick is not to flatten everything into a hard shell. Start with a precise center part or a deep side part, then twist the hair back in even sections. The base should sit snug, not tight. If you can feel your scalp throbbing after five minutes, the style is too secure.
How to Keep the Base Clean
Use a light gel on the part and hairline, then smooth with a soft brush or toothbrush. Wrap a satin scarf around the perimeter for 10 to 15 minutes while the base sets. That small pause makes a bigger difference than adding more product.
This style works well on stretched natural hair, relaxed hair, and straightened hair. It also lets your twists hang neatly instead of fanning out too much. If you want the ponytail to look longer, split the tail into two large twists and let them fall together.
One quiet detail matters here: keep the ends trimmed or tucked. A low sleek style loses its polish fast if the finish looks dry and frayed.
3. Side-Swept Twist Ponytail

If your part always leans a little crooked, use it on purpose. A side-swept twist ponytail turns that asymmetry into the point of the style, and it gives off a softer, more styled feel than a straight-back ponytail ever will.
I like this one when the hair has grown out a bit and needs direction. Sweep the front section over one shoulder, then anchor the twists so the ponytail lands just behind the ear or at the upper side of the neck. It feels casual, but not lazy. There’s a difference.
What Makes It Work
The side placement breaks up the silhouette, which is useful if your face is round, heart-shaped, or you simply want less height at the crown. A diagonal part also helps if your roots have a little puff and you do not want to flatten them into a perfect line.
- Part the hair 1 to 2 inches off center.
- Create 4 to 8 twists, depending on thickness.
- Pull the ponytail toward the heavier side before tying it off.
- Leave one slim twist or curled piece near the cheek for movement.
That last detail matters more than people think. A single face-framing twist can make the whole look feel intentional instead of accidental.
4. Bubble Twist Ponytail
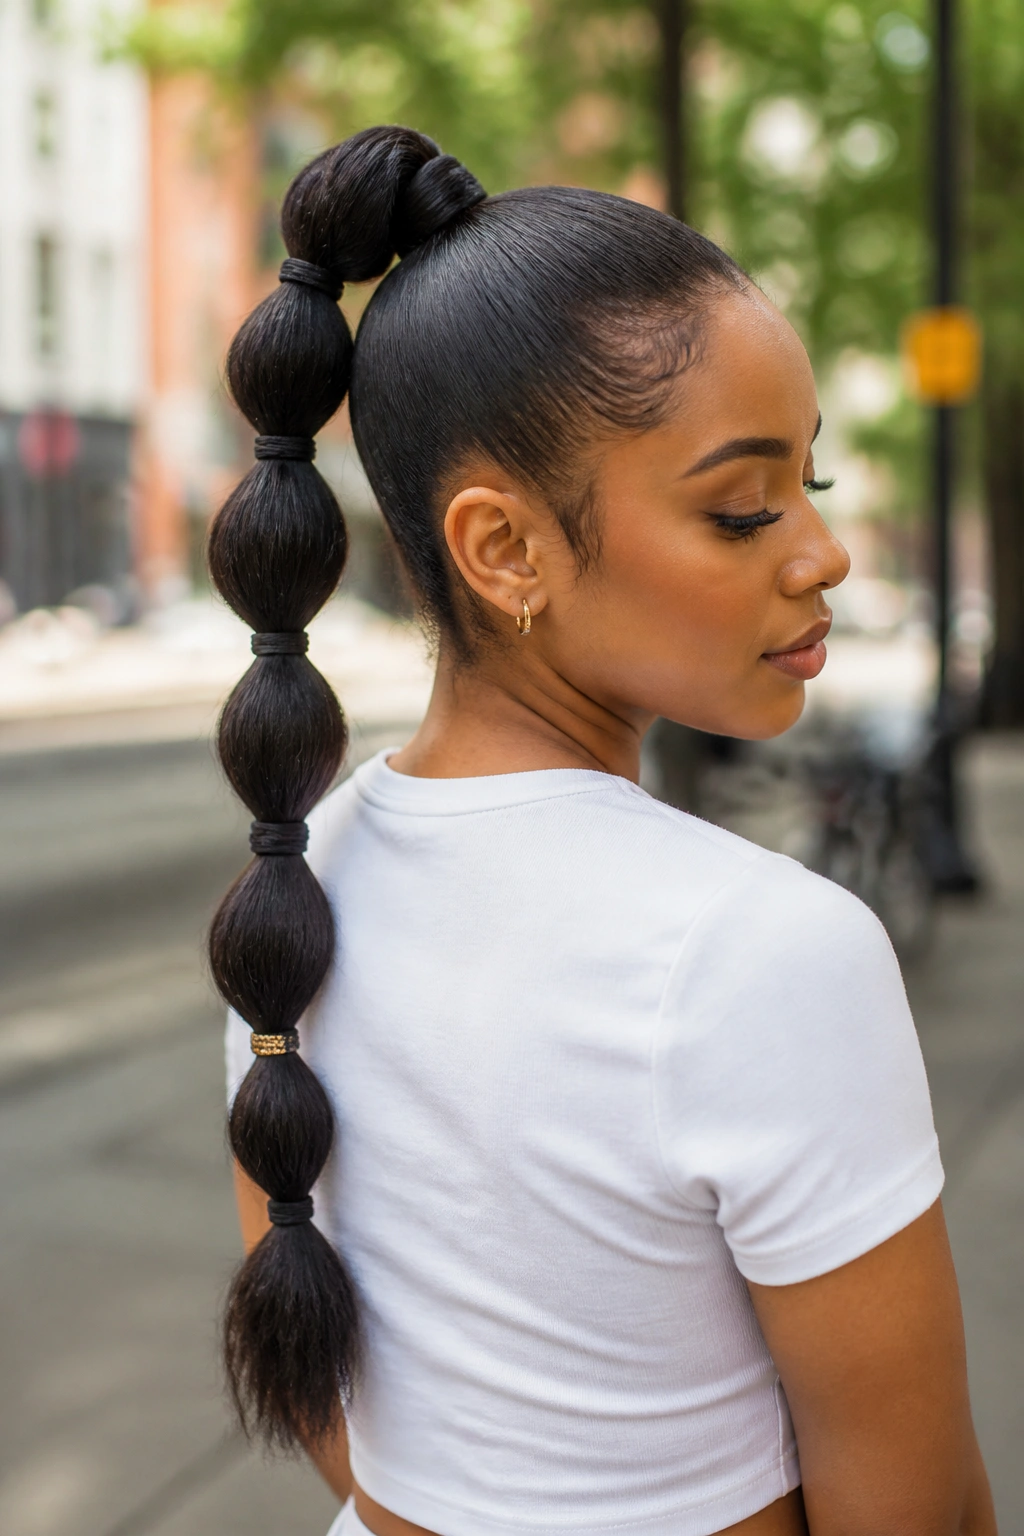
The bubble twist ponytail is pure fun, but it is not childish if you keep the spacing clean. It works because the twists give you structure, then the bubbles add shape. The result looks playful in motion and unexpectedly tidy when it’s standing still.
Start with a regular twist ponytail, high or low, then place clear elastics every 2 to 3 inches down the length. Gently puff each section outward with your fingers until it forms a rounded bubble. Don’t overdo the pulling. The goal is volume, not mess.
What I like about this style is that it hides a lot. Thin ends? Hidden. Slight length differences? Hidden. A ponytail that refuses to look full? Hidden too. The bubbles create visual stops, so the eye reads the style as more deliberate than it really was.
It also works well on hair that’s been stretched but not bone-straight. If your texture still has a little grip, the bubbles hold better and the ponytail feels less slippery. Add a small gold cuff to one bubble if you want a sharper finish. One cuff. Not four. Four is too much.
5. Wrapped-Base Twist Ponytail

A wrapped base changes everything. A regular elastic is fine, but once you wrap a twist around the anchor point, the whole ponytail looks more finished and a little more expensive — for lack of a better word — without actually being hard to do.
This is the style I use when I want the ponytail itself to stay the star. The wrap hides the band, softens the transition from scalp to length, and protects the base from looking bulky. Use one thin twist or a 1-inch strand from underneath the ponytail, then wind it around the elastic two or three times.
Why It Feels More Polished
The wrapped base removes that obvious “hair tied up” look. Instead, the ponytail seems to grow from the head in one smooth line. That matters more on medium-length hair, where the elastic can otherwise sit there like a little afterthought.
This style plays nicely with twist-outs, blown-out hair, and stretched curls. It also keeps the ponytail neat if you have layered hair that likes to escape. I’d skip very chunky wraps on fine hair, though. They can make the base look thicker than the ponytail itself.
A tiny bobby pin tucked under the wrap keeps it from unraveling. Hidden. Quiet. Done.
6. Half-Up Twist Ponytail
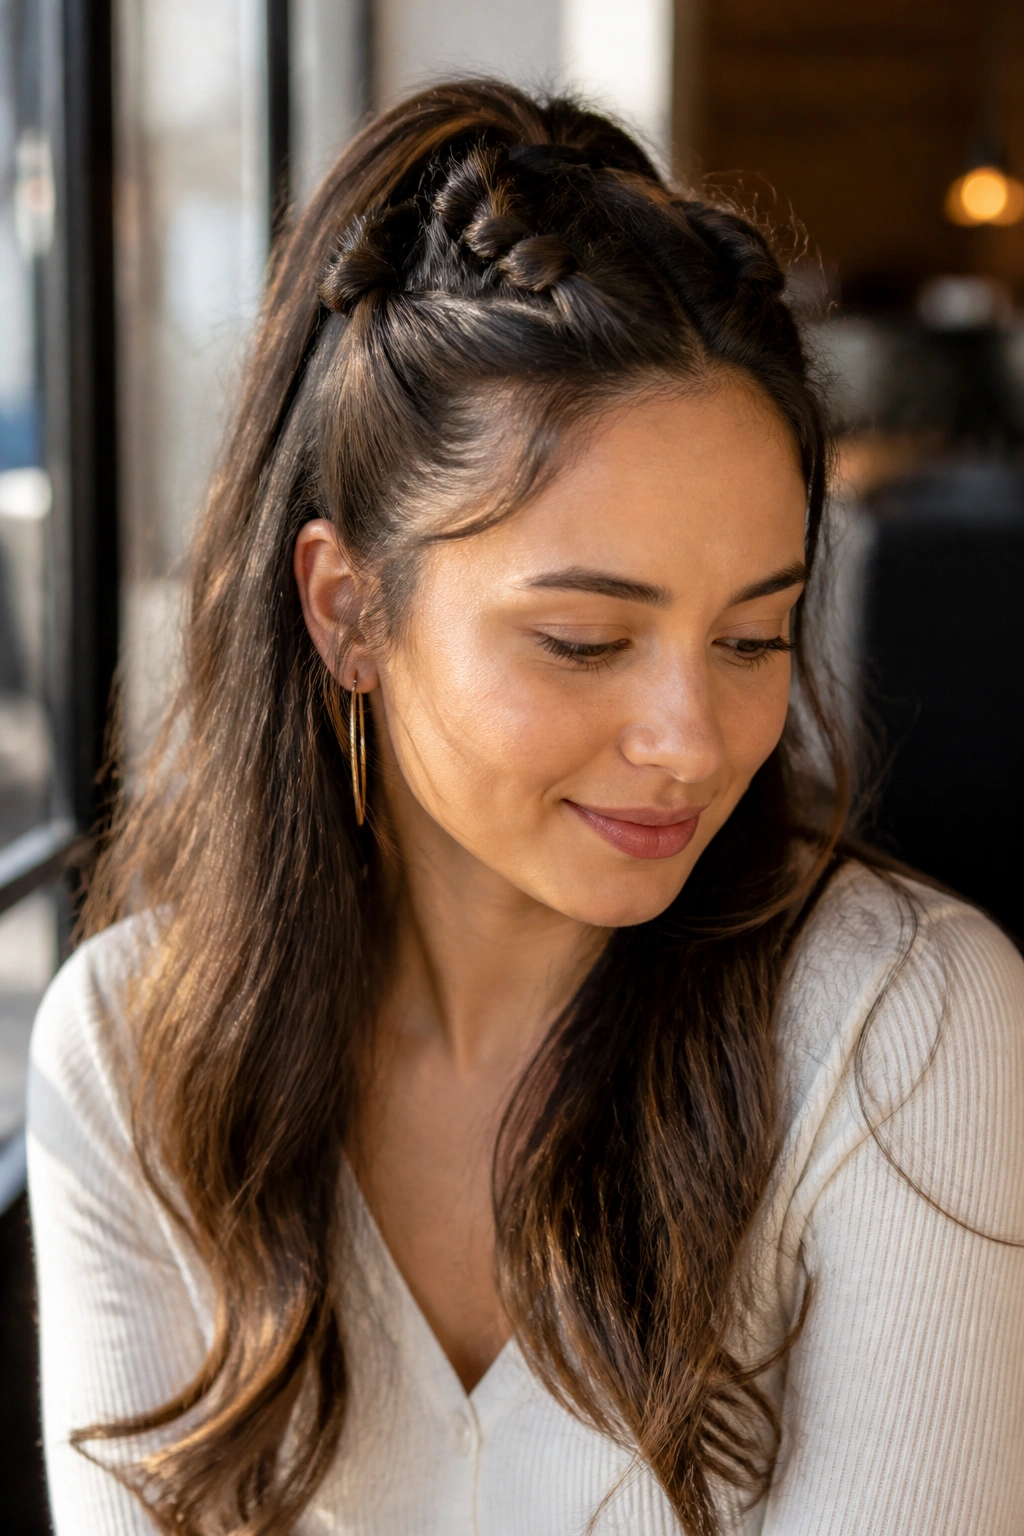
Need your hair off your face without giving up your length? The half-up twist ponytail solves that fast. It keeps the front tidy, leaves the back loose, and gives you movement without a full commitment to a high ponytail.
What to Leave Out
Leave the bottom section loose enough to show texture, not so much that the style loses shape. Usually, the top half stops around the temples or just above the ears. If you have dense hair, you may need to split the top into two small twist sections before gathering it; otherwise the ponytail can feel like it’s dragging backward.
This style is a good fit for days when you want a little lift at the crown but don’t want tension on the neckline. It also helps if your ends are not all on the same level. The loose back section makes uneven length look deliberate.
A half-up twist ponytail gets even better with one small detail: curl the ends of the top ponytail with a flexi-rod or let them hang in a soft coil. That tiny finish makes the top section read as styled, not rushed.
How to Wear It
- Keep the top section smooth and the bottom section soft.
- Use a small satin band instead of a chunky elastic.
- Pull the top ponytail slightly forward to keep it from sitting flat.
- Add edge control only where the part needs it.
7. Twisted Crown Ponytail
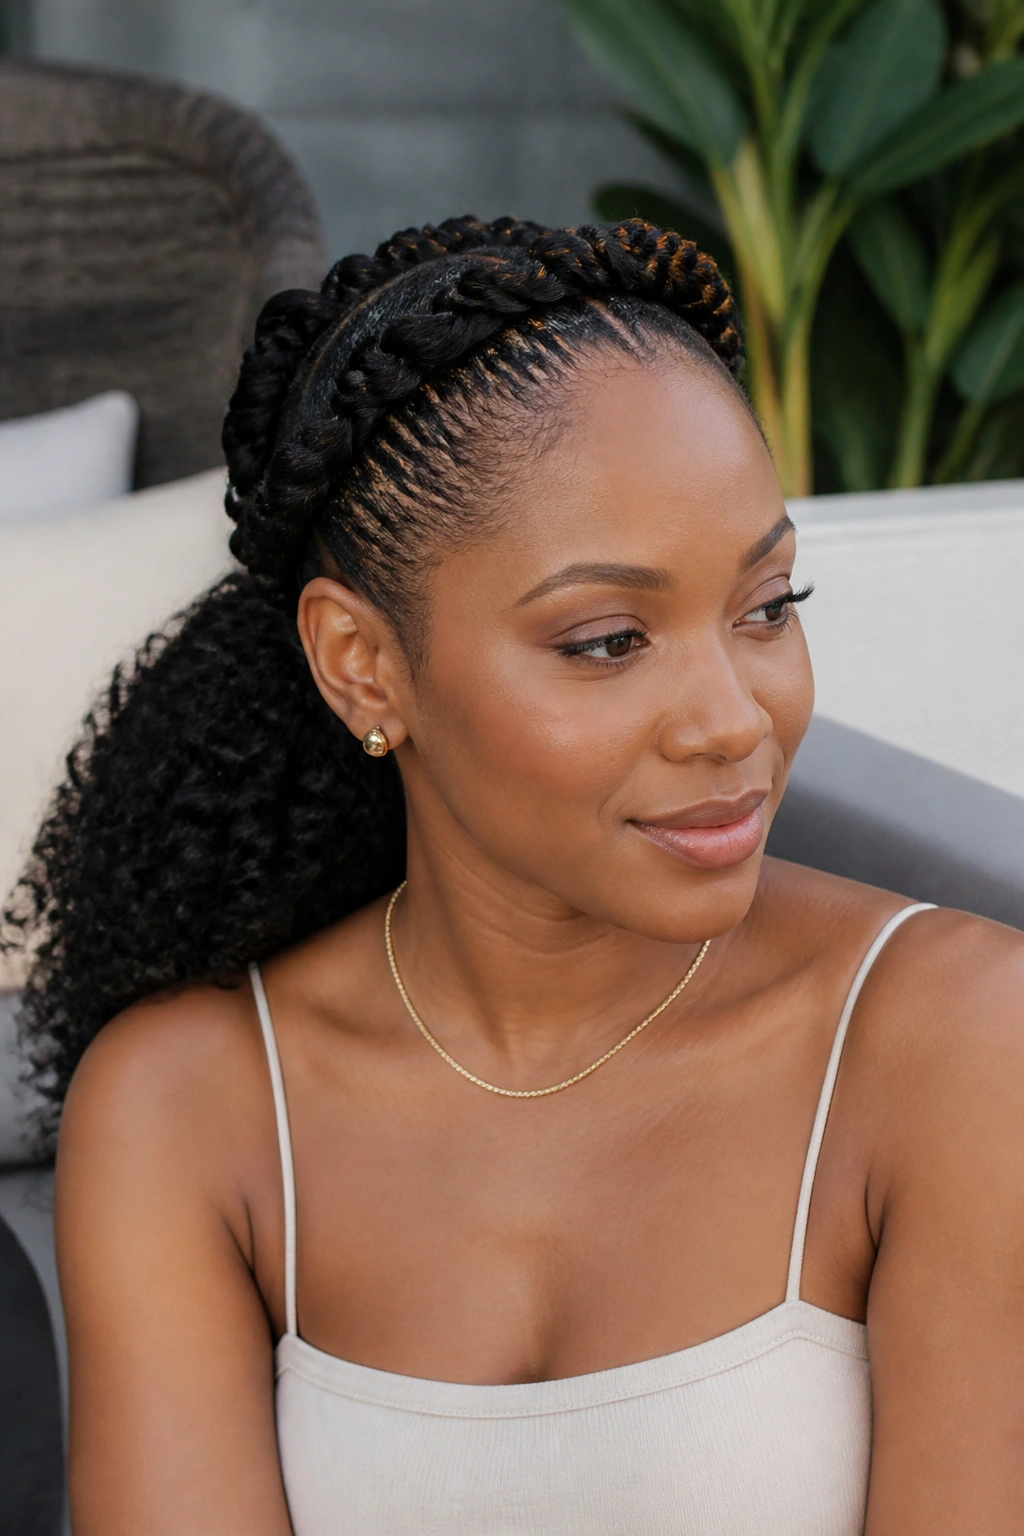
This one looks more complicated than it is. A twisted crown ponytail starts with twists placed along the front hairline and curves them back like a crown before gathering everything into one ponytail. It gives you that lifted, wrapped look without needing a full braided base.
The style is especially good when you want the front to feel protected. Hair around the temples can be fragile, and a crown path keeps those strands included instead of yanked into a blunt line. If you have a tender hairline, this is one of the kinder options on the list.
You can make the crown section with four medium twists or six small ones. Either way, keep them even. Uneven twists show fast here because the eye follows the arc across the head. Once the crown reaches the back, gather the rest into a low or mid ponytail and let the length fall.
This is one of those styles that reads as dressy even when the rest of your hair is plain. Good earrings help. So does a clean part. That part matters more than people admit.
8. Jumbo Extension Twist Ponytail

A jumbo extension twist ponytail is the style you choose when you want length and impact without spending all afternoon on individual twists. It uses pre-stretched braiding hair or similar extension hair to build one or two big twists that land in a thick ponytail.
This is not the style for a scalp that already feels sore. The weight can creep up on you, especially if you overpack the base. Keep the ponytail lighter than you think you need. Two jumbo twists often look better than four heavy ones because the hair has room to move.
Key Details That Save the Look
- Use pre-stretched braiding hair so the ends look clean.
- Blend the natural hair into the extension at the base before twisting.
- Tie the ponytail with a strong elastic, then cover it with hair or a wrap.
- Keep the attachment point close to the nape or mid-crown, not too high.
The best version of this style feels full, not bulky. If the ponytail swings and still sits comfortably after an hour, you got the balance right. If you’re adjusting it every ten minutes, it’s too much hair.
This one shines on special occasions, but it also works when you want a regular outfit to look more deliberate. Big hair. Simple clothes. Easy win.
9. Flat Twist Feed-In Ponytail

Flat twists leading into a ponytail are one of the cleanest protective looks you can wear without going all the way into braids. The style starts flat against the scalp, then feeds into a gathered ponytail at the back. It feels neat, secure, and practical in a way that never looks boring to me.
Why Flat Twists Help
Flat twists keep the roots smooth because the hair is anchored as it moves back. That’s useful if you want the scalp to stay tidy for more than one day. They also work well when your hair has a mix of textures or lengths, since the twist pattern makes the differences less obvious.
Part the hair into 4 to 8 sections. Use a little gel only at the roots, not all the way down the strand. Too much product on the twist itself makes it soft and fuzzy by the next morning. Gather the ends into one ponytail and tie them with a snag-free band.
A feed-in ponytail is a smart choice for natural hair that needs protection but still wants a little shape at the top. It’s not as dramatic as jumbo twists, and that’s part of the appeal. Clean lines. Less fuss. Still pretty.
If you want more shine, smooth a drop of lightweight oil over the finished twists — not the scalp, just the surface.
10. Curly-Ended Twist Ponytail
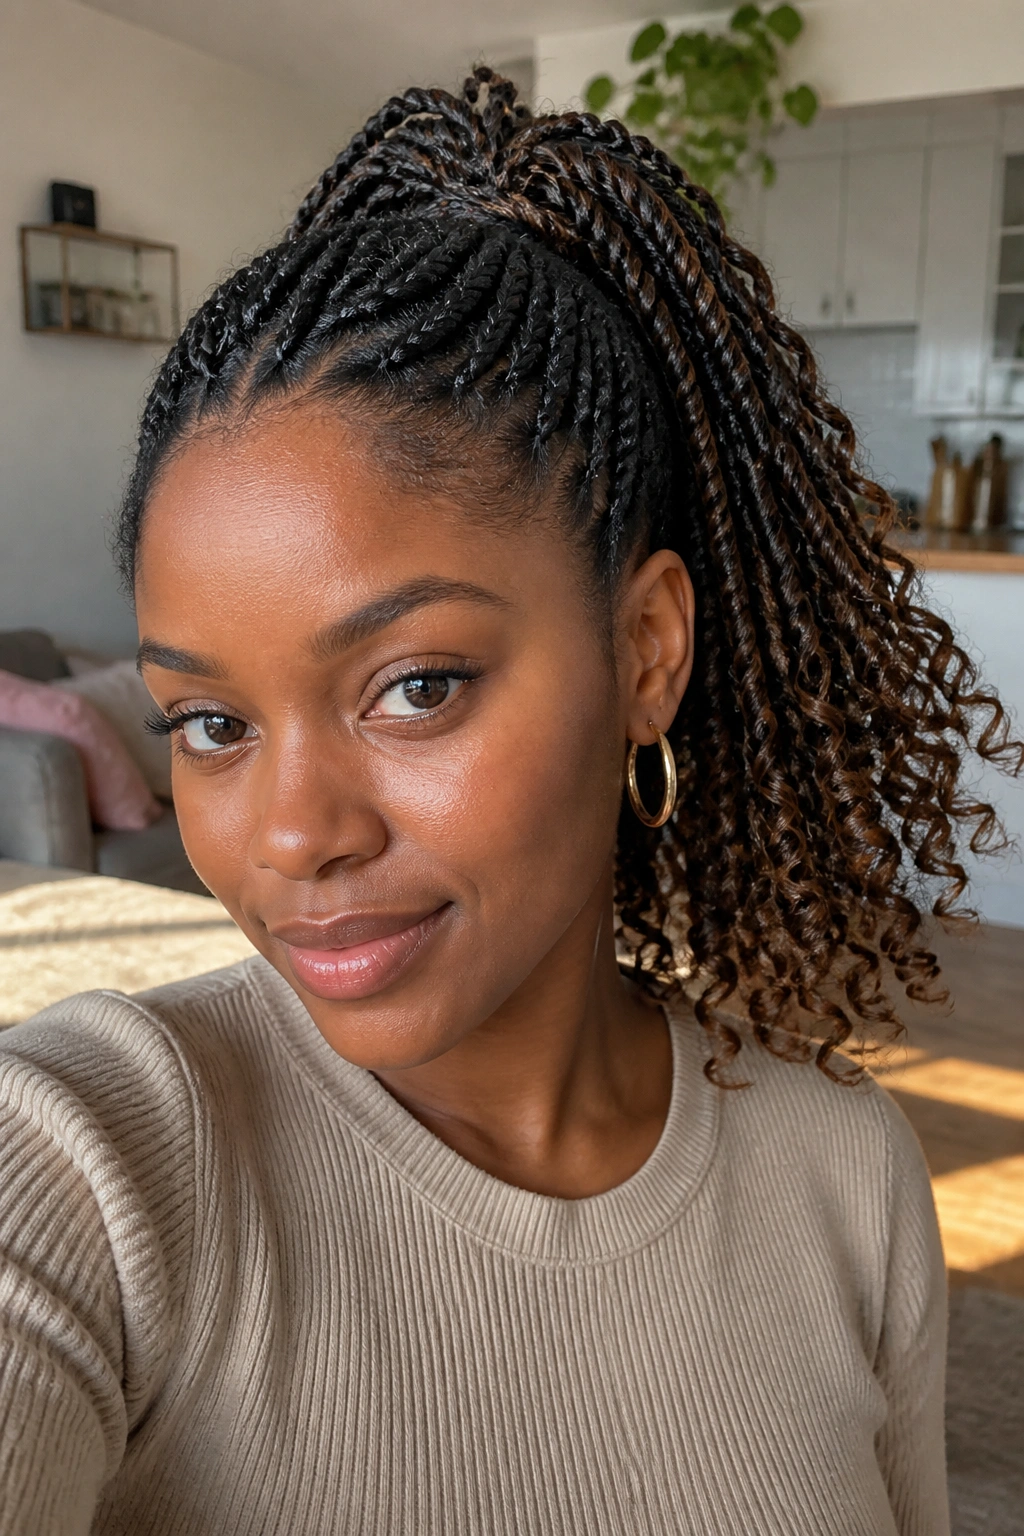
Curly-ended twists are for people who like structure at the top and softness at the bottom. The twist gives the ponytail shape, but the ends curl out and keep the style from feeling stiff or too tidy.
The easiest way to get this look is to twist the hair down most of the way, then set the ends on flexi-rods, perm rods, or even small bantu knots if your hair length allows it. Once the ends dry, take them down carefully. Don’t rush that part. The curl pattern needs time to set, or you’ll end up with a half-formed bend instead of an actual curl.
Best Uses for This Finish
This version works especially well on shoulder-length hair and medium stretched hair. The curls add visual length, which helps the ponytail look fuller. They also soften a strong part or a severe base, which is useful if you’re trying to balance sharp roots with a gentler finish.
A light mousse on the ends before setting them helps the curls hold without getting crunchy. And if you’re in a hurry, a hooded dryer on low heat can cut the dry time a lot. Air-dried curls are fine too. They just require patience, which is not my best trait on a busy morning.
The nice thing here is movement. The curls bounce. They don’t sit there like a rigid bundle.
11. Workout-Proof Low Twist Ponytail

Need a style that can survive a gym session, a long walk, or a day that just keeps going? A workout-proof low twist ponytail keeps the hair down at the nape, where it moves less and stays out of the way.
The low placement is the whole point. High ponytails tend to shift, swing, and loosen when you move a lot. Low ones stay calmer. If you add two anchor points — one elastic at the base and a second one a little lower — the style holds even better without needing to be painfully tight.
The Small Details That Matter
- Use a microfiber towel or tee to blot sweat before tying the style.
- Keep the twists compact so they don’t flap around.
- Choose a strong snag-free elastic and skip hard clips.
- Smooth only the front and the nape, not the entire head.
This is one of the few times I’ll say less is better. Fewer products mean less slip when you start sweating. A tiny bit of gel at the front is enough. You do not need to shellack the whole hairline.
A workout-ready twist ponytail also makes a good travel style because it’s easy to refresh. A little water, a little leave-in, a quick re-twist on the top layer, and you’re back in business. Fast. No drama.
12. Silk-Scarf Twist Ponytail

A silk-scarf twist ponytail takes a simple style and makes it look intentional in about thirty seconds. The scarf adds color, covers a rough elastic, and helps the style hold its shape longer because the fabric cuts down on friction.
I like this one on days when the hair is not brand-new but still has enough life left to be worn out. Tie a narrow silk scarf, about 2 to 3 inches wide once folded, around the base of the ponytail. Or wrap it around the hairline like a band if you want more face framing. Both work.
How to Tie It Without Constant Slipping
Start with a secure base. If the ponytail is loose before the scarf goes on, the scarf won’t save it. Knot it once, then tuck the ends under the wrap or let them trail down if the rest of the look is casual.
The scarf does more than decorate. It can hide shrinkage at the base, tame flyaways, and make old twists look styled again. That’s the real benefit. Not the color. Not the drama. The fact that it buys you another day without forcing a full redo.
Stick with silk or satin if you can. Cotton scarves grab too much and can rough up the hairline. A smooth scarf slides better and feels kinder by the end of the day.
13. Office-Ready Polished Twist Ponytail

There’s something about a polished twist ponytail that makes even a plain blazer look better. The style sits in that sweet spot between formal and relaxed, which is why it works for interviews, client days, presentations, and all the situations where you want your hair to look deliberate without being severe.
What makes it office-ready is consistency. The parts should be even. The twists should be similar in size. The ponytail should sit low or mid-height, not bouncing around at the crown. That symmetry matters. Messy can be cute. Uneven can look unfinished.
I’d keep the shine controlled rather than glossy. A light serum on the palms, then smoothed over the finished twists, gives enough sheen without turning the hair greasy. If your roots puff up by lunch, a satin scarf for 10 minutes before you leave the house helps the look hold together much longer.
This is also a good style if you wear glasses. A high, bulky ponytail can compete with frames. A clean low or mid twist ponytail stays out of the way and lets your face do the work. Which, honestly, is the point on a workday.
14. Short-Hair Mini Twist Ponytail

If your hair is short, don’t let anybody talk you out of a ponytail idea. A mini twist ponytail can work on a TWA, a grown-out tapered cut, or any short natural style that has enough length to gather at the back. It just asks for smaller sections and a little more patience.
Why Small Twists Help Short Hair
Tiny twists grip better on shorter lengths because they let you control each section instead of fighting bulk. Usually, 10 to 16 mini twists are enough to create a gathered back section, depending on density. If the hair is very short, you may need to anchor them with small elastic bands before collecting everything into one ponytail.
The look is clean, compact, and surprisingly versatile. You can keep the ponytail low for a soft finish or place it higher for a little lift. Short hair also means the style dries faster after washing, which is a quiet bonus nobody celebrates enough.
- Use a bit more moisture at the ends than at the roots.
- Keep parting neat so the mini twists don’t disappear into the shape.
- Choose a tiny satin band that won’t swallow the ponytail.
- Pin any loose back pieces instead of forcing them into the elastic.
This style is proof that “ponytail” does not have to mean long.
15. Five-Minute Second-Day Twist Ponytail
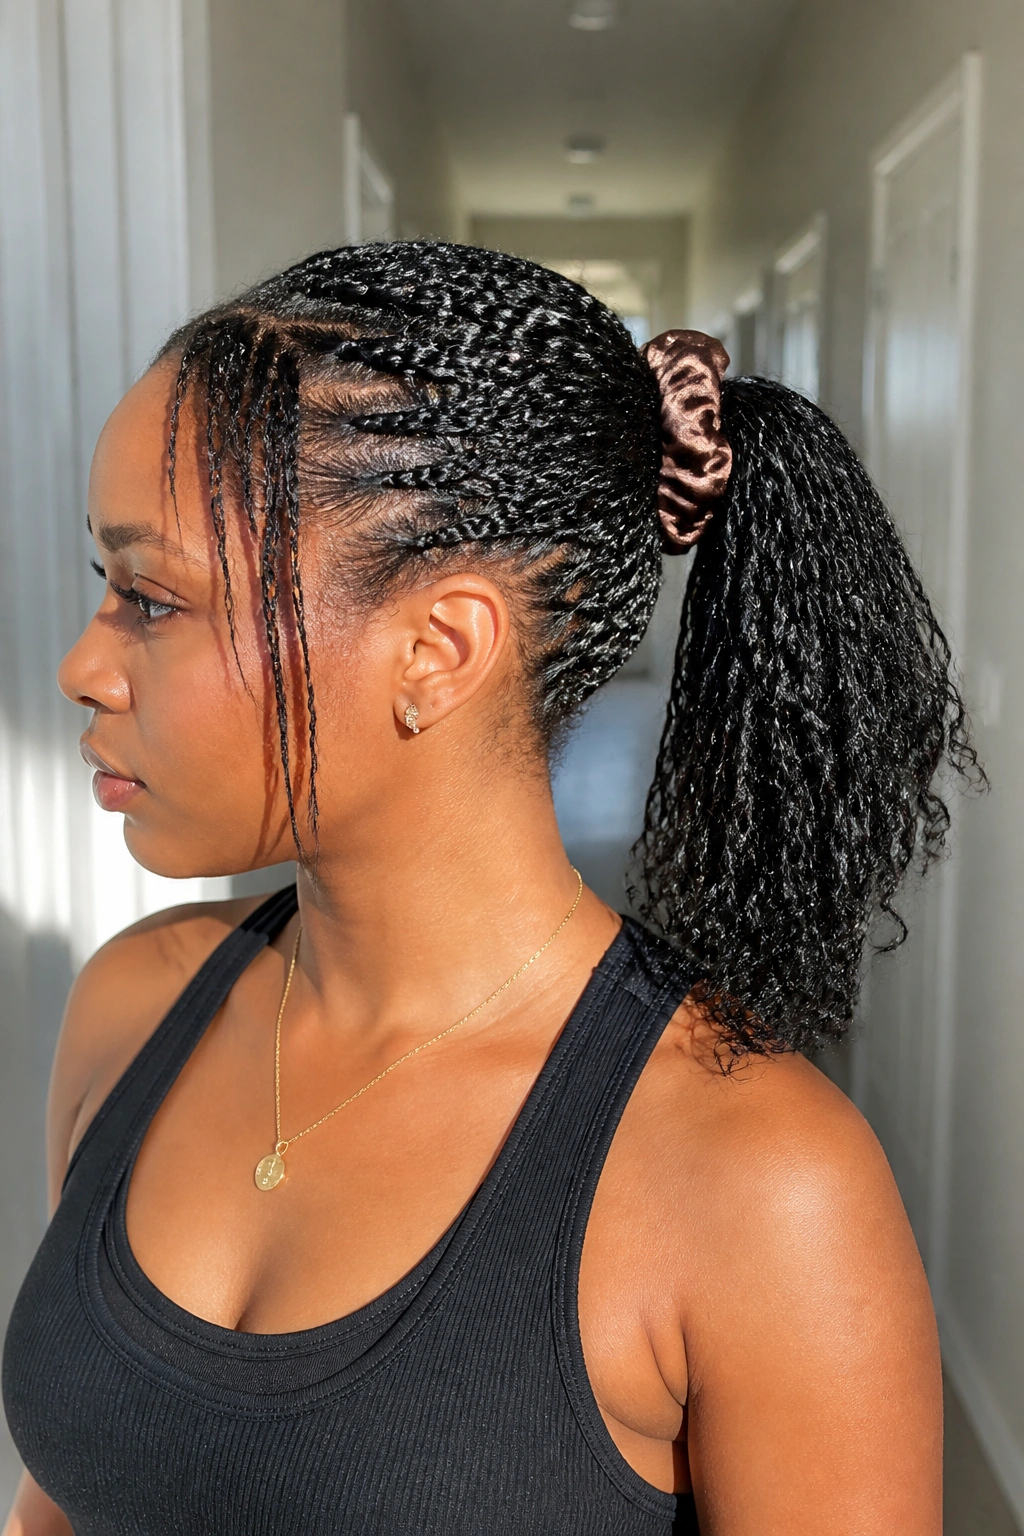
Some of the best twist ponytail ideas are the ones you can do when your patience is low and your hair is not fresh anymore. A five-minute second-day twist ponytail is built for that exact moment. The hair already has a little grip, which means it often behaves better than clean hair that wants to slip everywhere.
Start by misting the roots with water and a small amount of leave-in. Not soaking wet. Just damp enough to soften the top layer. Smooth the front with your hands, gather the twists into a low or mid ponytail, and secure it with a satin scrunchie. If one or two twists look frayed, wrap them around the base instead of pretending they don’t exist.
That little trick saves the whole style. A messy end tucked into the base looks intentional. A loose frizzy end hanging out looks like you ran out of time, which may or may not be true, but there’s no need to broadcast it.
This is the ponytail I’d wear when I want easy style without redoing the full head. Quick. Soft. No drama. And if the front still feels a little puffy, leave it. A bit of texture is better than flattening everything into a helmet.
