



A twist out can look soft and airy, or it can look crisp enough that every curl clump seems placed on purpose. The gap between those two results is usually not luck. It’s moisture, section size, drying time, and the kind of takedown that happens slowly instead of in a frantic rush.
Twist out styles for defined curls are so useful because they sit in that sweet spot between protective styling and visible curl definition. You get shape. You get movement. You also get a lot of room to play, which is the part I like most. A twist out can be neat for work, wide and fluffy for a night out, pinned up when the roots need a break, or stretched into a longer shape when shrinkage is doing the most.
Dry hair will betray you.
That’s the part people learn the hard way. If the twists are still damp in the middle, the shape falls apart faster, frizz shows up at the roots, and the curls separate unevenly. Once you start paying attention to how the hair feels before untwisting — cool, dry, springy, not clammy — the whole thing gets easier. The styles below work because they respect that basic truth.
1. Classic Two-Strand Twist Out

If you only learn one twist out, make it this one. The classic two-strand version is the baseline for defined curls because it gives you a clean curl pattern without asking your hair to do anything fancy. Two even strands, a smooth twist, and a patient takedown usually produce the kind of shape people actually mean when they say “defined.”
Why it stays the standard
The best thing about this style is the balance. It gives you visible separation at the ends, but it still holds enough clump to keep the look from turning into a halo of fluff by lunchtime. On medium-length hair, the result usually lands somewhere between a soft curl and a coil with stretch.
Keep the sections consistent. That matters more than people think. If one twist is a full inch and the next is half that size, the final shape will look uneven, even if the products are fine.
What to watch for
- Use slightly damp hair, not soaking wet hair.
- Keep each section smooth from root to tip before twisting.
- Let the hair dry all the way through before untwisting.
- Separate each twist only after a light oil has been rubbed across the fingers.
Best tip: twist in the same direction on each side of the head so the curl pattern looks deliberate instead of scattered.
2. Deep Side-Part Twist Out

Want your twist out to look cleaner in about five seconds? Put the part off-center. A deep side part instantly changes the mood of the style. It gives the curls a stronger frame, and it can make a regular twist out feel more polished without adding any extra work.
The side part is especially good when your hair tends to puff at the crown. The bigger sweep across the forehead shifts attention away from the root area and toward the curl pattern itself. That helps when the front twists are a little stubborn or when the first row near the hairline dries flatter than the rest.
There’s also a nice face-shaping effect here. The part creates asymmetry, which softens rounder faces and gives more structure to softer curl patterns. A deep side part can look dramatic. A mild side part looks easier to wear every day. Both work.
How to wear it
- Make the part while the hair is still damp so it stays clean.
- Use a rat-tail comb for a sharp line, then smooth the root with your fingers.
- Twist the front section slightly backward so the curls fall across the forehead instead of straight down.
- Pin one side behind the ear if you want more lift at the top.
3. Chunky Twist Out for Big Volume

If your hair is thick and you’re tired of spending forever at the mirror, chunky twists are the answer. Bigger sections mean fewer twists, and fewer twists mean a faster set with a looser, fuller finish. This style is not shy. It gives volume first and definition second, which is exactly why it works so well on dense hair.
Chunky twist outs tend to hold a softer curl than tiny ones. That’s the tradeoff. You lose a little tightness, but you gain shape, stretch, and a fuller silhouette that looks good from every angle. On long hair, the ends usually settle into a large spiral. On shoulder-length hair, the whole style can look almost cloudlike.
The part that makes or breaks it
The roots need to stay neat even if the twists are large. That sounds obvious, but it’s where a lot of people get lazy. If the base is sloppy, the whole style reads that way.
A few solid habits
- Use sections about 1 to 1.5 inches wide.
- Smooth a small amount of styling cream at the root, then a lighter layer on the shaft.
- Keep the twist firm, not tight.
- Sleep in a satin bonnet or on a satin pillowcase so the volume doesn’t turn rough overnight.
4. Mini Twist Out for Tight Definition
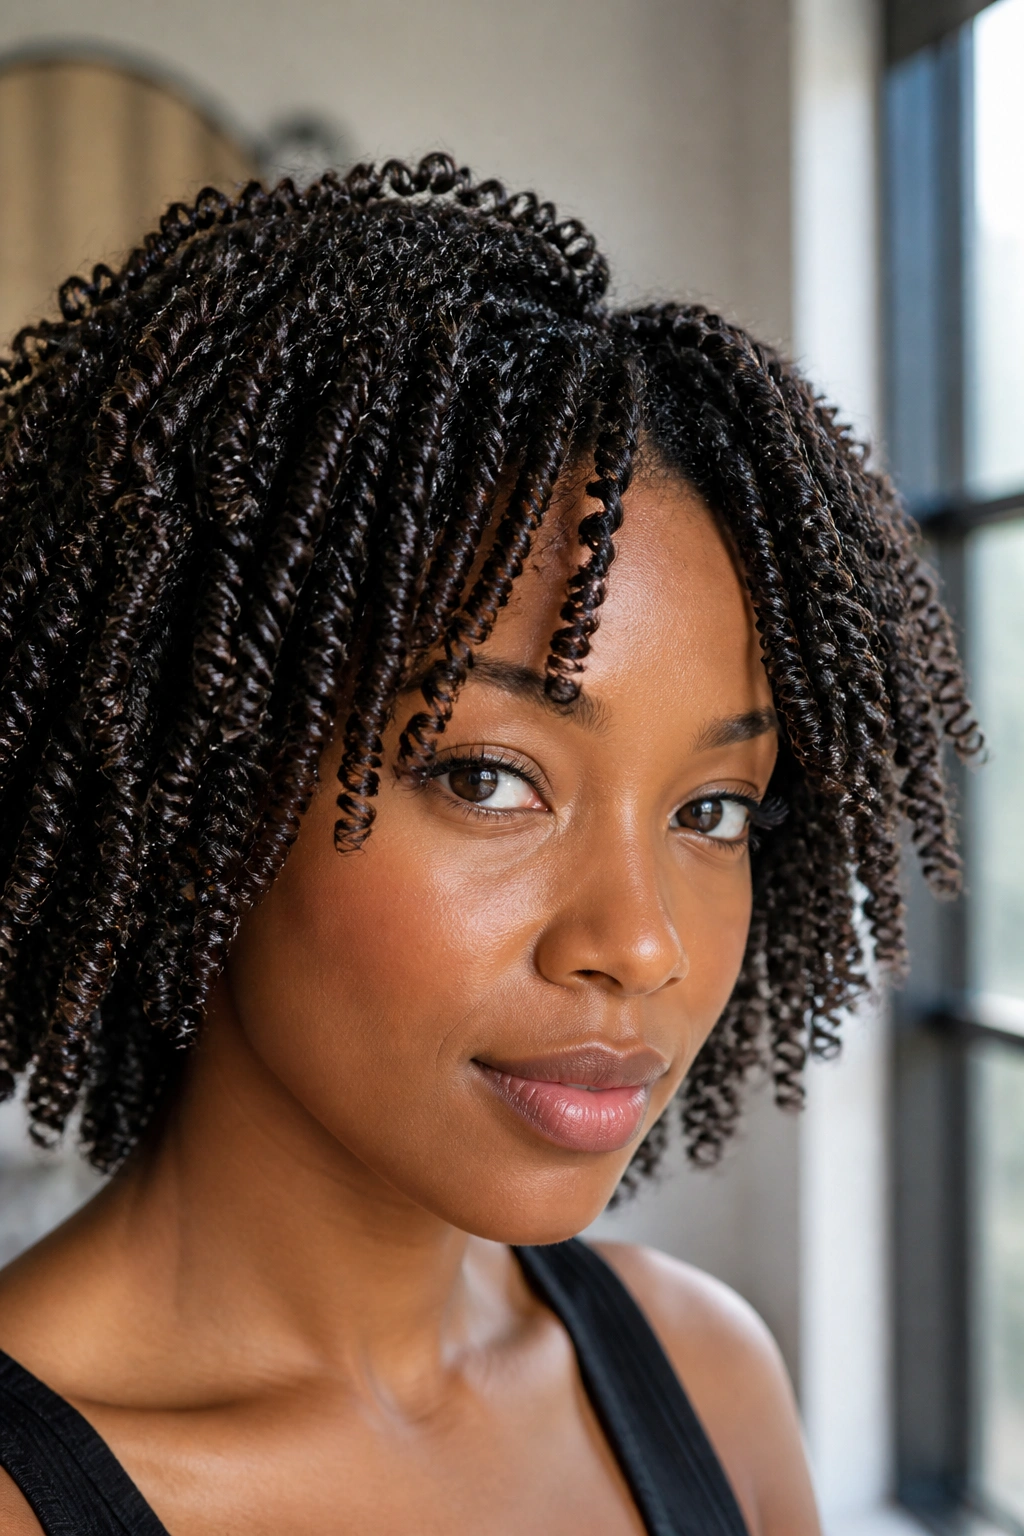
Smaller is not always fussier. Sometimes it’s smarter. Mini twists give you a twist out with tighter curl clumps, more visible definition, and a longer-wearing shape than chunky sections usually can manage. The look feels neat, almost carved, and it tends to stay that way for more than one wear.
This style is the one I reach for when the hair needs help staying organized. Fine hair especially benefits from smaller sections because the curl pattern has more support. The result can look like a controlled set of springs instead of one big cloud. That may sound less glamorous than volume, but it photographs well and holds up better when the weather is humid.
The downside is simple: it takes time. A lot of it. Tiny sections mean more twisting and more takedown patience. Still, if you like crisp curls, this is worth the effort.
What makes it work
- Keep the twists uniform in size from front to back.
- Use a product with enough hold to keep the strands together.
- Don’t over-separate at the end.
- Let the roots dry completely, since tiny twists can trap moisture longer than expected.
5. Flat-Twist Crown Style
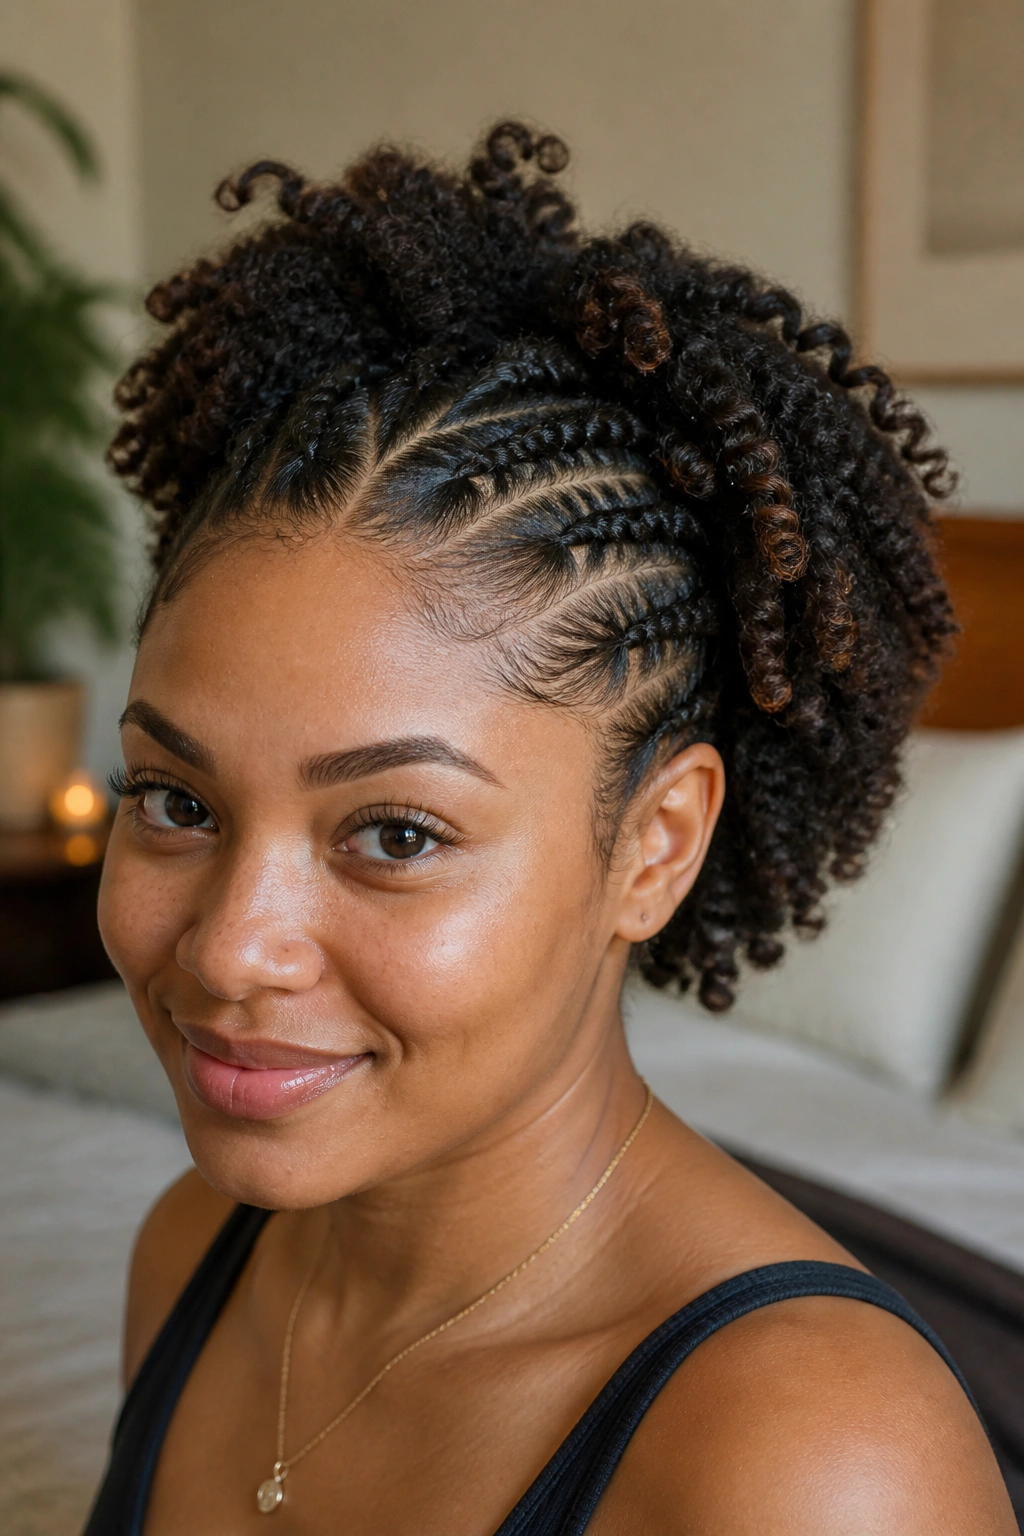
The scalp feels close and tidy with this one. Flat twists hug the head, then release into a twist out at the ends, which gives you a style that looks part protective, part defined curl set. It’s a nice choice when you want the top to look controlled and the ends to do something more playful.
Flat-twist crown styles are especially useful for days when the hair needs direction. The roots stay smooth, the outline looks clean, and the curls at the ends give the style some movement. It’s a good middle ground for someone who likes structure but doesn’t want a tight updo.
The shape is a little more elegant than a regular twist out, though I dislike that word because it sounds stiff. Better to say this: it looks intentional. The hair sits where it should, and the curls at the ends keep it from feeling too formal.
Best place to use it
- At the front hairline, where frizz tends to show first.
- Across the crown, if you want a lifted shape.
- As a base for a halo style that still leaves the ends loose.
- On medium to long hair, where the release at the ends shows up best.
6. Stretched Twist Out With Long Shape
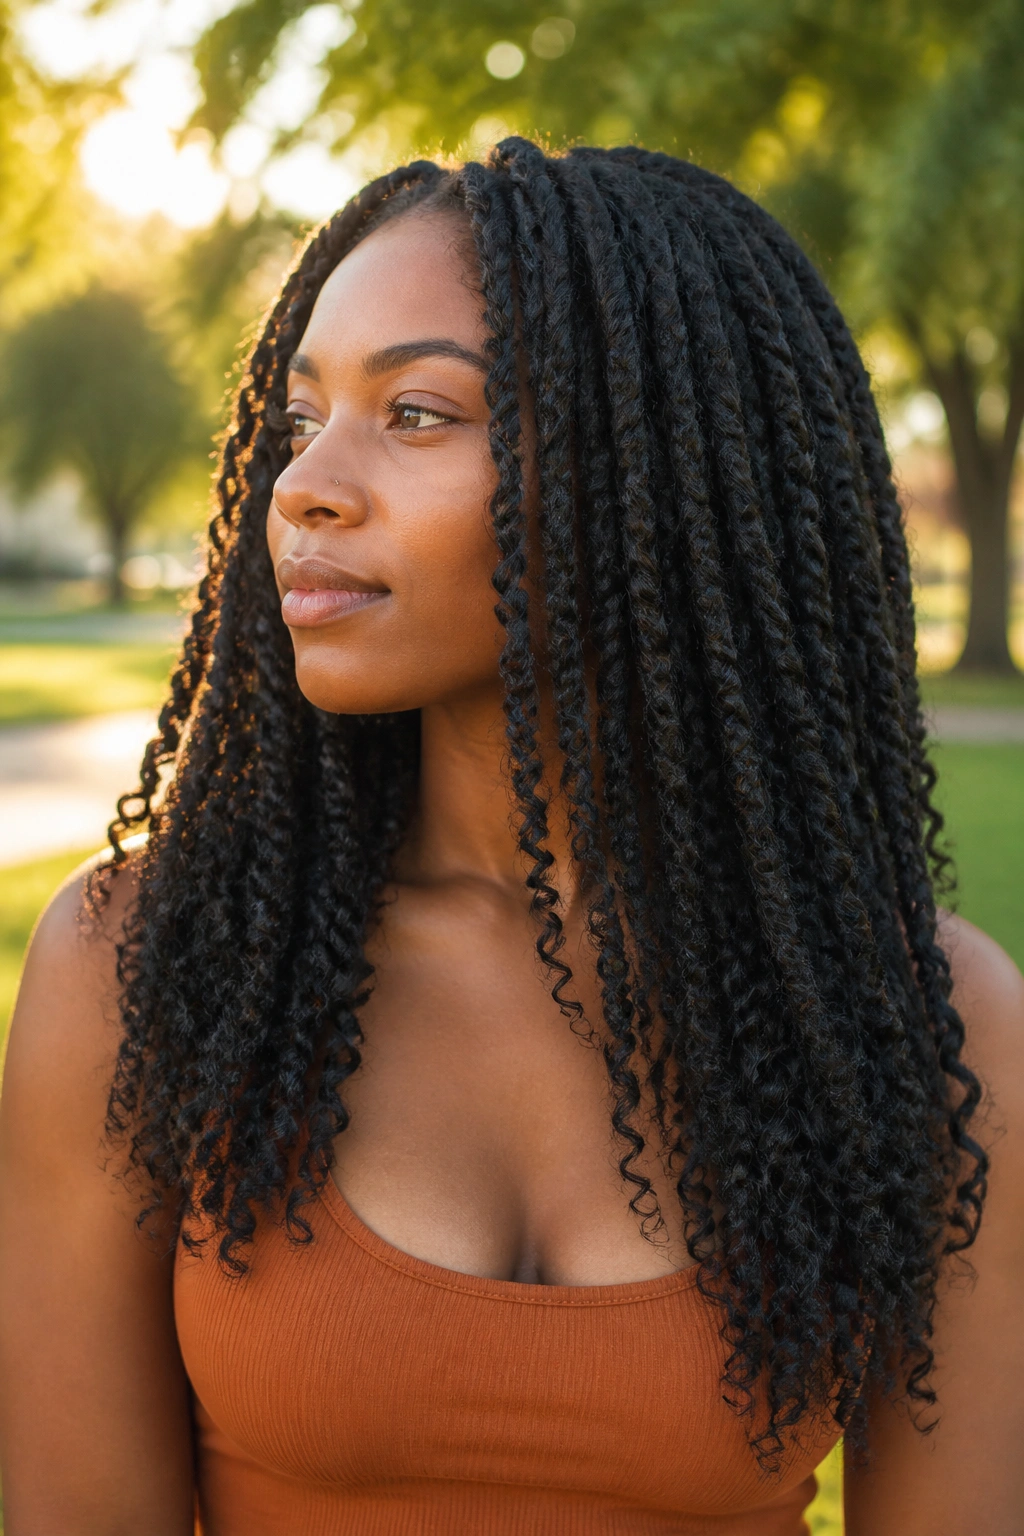
Less shrinkage. More length. That’s the whole appeal here. A stretched twist out starts with hair that has already been blown out on cool air, banded, or otherwise lengthened before twisting. The final result is softer, longer-looking curls that hang instead of bouncing straight up.
This style is a good choice when you want definition without losing all your length to shrinkage. It also helps when the hair is dense and the usual twist out turns into a rounded puff before you’ve even left the house. The stretch gives the curls more room to fall.
You do have to handle the hair gently. Overstretching can make it look thin at the ends, and too much heat will dry it out. Cool drying or a low-manipulation stretch method usually gives the best balance.
Small things that help
- Stretch the hair first with banding, African threading, or a cool blow-dry.
- Twist while the hair is still pliable, not brittle.
- Use a light hand near the ends so they stay smooth.
- Separate with fingers only after the hair is dry and cool.
7. Short-Hair Twist Out

Three inches can be enough. Short hair twist outs have a different energy because the curls sit closer to the head and the shape is more about texture than length. The result can look sharp, clean, and full of character, especially on a tapered cut or a short natural style with strong density.
The trick with short hair is sizing the twists to the length you actually have. Too large, and the definition disappears. Too tiny, and you can end up with a very tight look that reads more like coils than a twist out. A middle size usually gives the best balance.
This style also rewards neat parting. On short hair, there’s less length to hide messy lines, so every row matters more. That sounds fussy because it is. Short hair is honest.
Quick points worth remembering
- Twist from the scalp with a clean part.
- Use a small amount of cream so the hair does not look weighed down.
- Twist the ends tightly enough that they hold their shape.
- Pick the curls apart carefully, because short hair frizzes fast if you rush it.
8. Rod-Ended Twist Out

I like this one when the ends need help. A rod-ended twist out uses small perm rods or flexi rods on the last inch or two of the twist so the ends curl into a cleaner spiral. The root and mid-lengths stay in the twist pattern, while the ends get extra polish.
It’s a smart move for hair that refuses to curl neatly at the tips. Some textures just need a little more encouragement there. If the ends usually come out frayed or straight, the rod gives them a shape to follow. That can make the whole style look more finished.
The rod size matters. A tiny rod makes a tighter curl. A larger flexi rod gives a softer bend. Choose based on what the rest of the twist is doing, not on habit.
Who this flatters
- Hair with loose or straight ends.
- Longer lengths that need a more visible curl finish.
- Styles you want to wear out, not tucked away.
- Anyone who likes a twist out with a little more structure at the bottom.
9. Half-Up Half-Down Twist Out

This is the easiest way to get shape without losing volume. A half-up half-down twist out keeps the top section pinned or tied back while the rest hangs loose, so you get lift at the crown and movement through the lengths. It’s practical, but it doesn’t look plain.
The top section can hide a lot. If the front twists came out a little flatter than you wanted, or if the roots need a reset on day two, pulling part of the hair back gives the whole style a cleaner read. The loose curls below still do the heavy lifting.
This one works on almost any density. Fine hair gets a fuller-looking crown. Thick hair gets control without losing the personality of the curl pattern. And if your parting is slightly uneven, the top section smooths over the rough edges.
A claw clip, satin scrunchie, or flat pin works well here. Avoid metal pieces that catch or snag the curls. That mistake is annoying to fix.
10. High Puff Twist Out
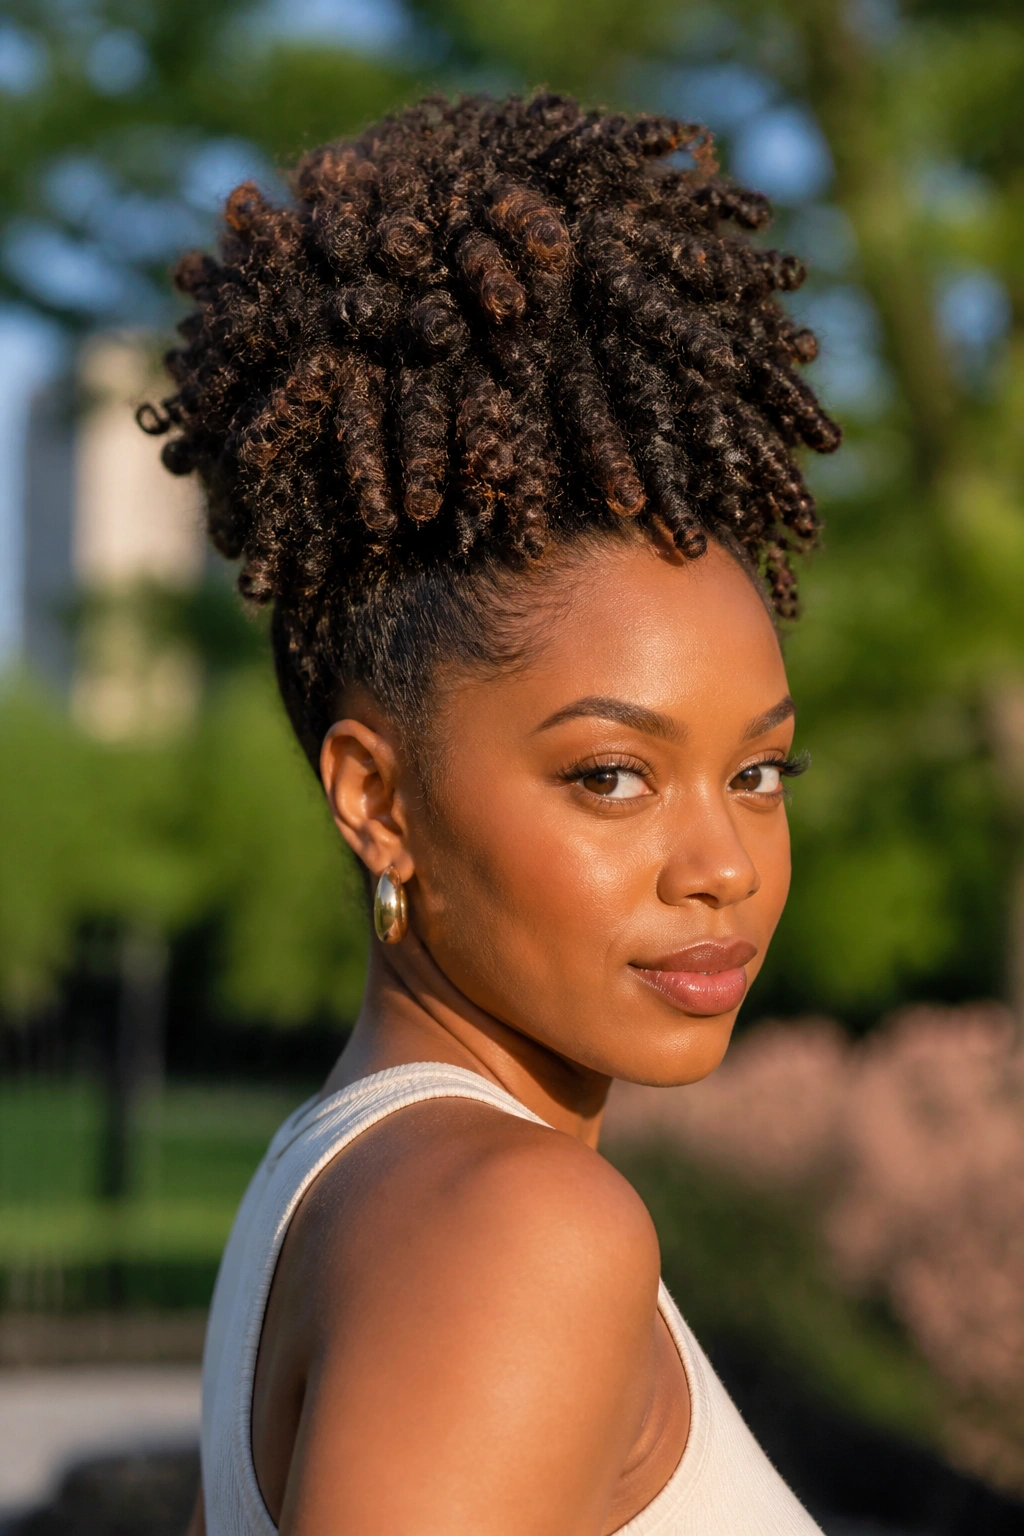
On the third day, when the roots have puffed and the lengths still look good, the high puff is the move. It takes the twist out and lifts it upward, which keeps the curls visible while giving your face a clean frame. This is one of those styles that feels casual in the best way.
The key is not to pull the hair too tight at the base. A high puff should gather the curls, not flatten them into submission. If you over-secure it, the root loses its shape and the whole style starts to look strained. Keep the band snug enough to hold, loose enough to protect the edges.
A twist out high puff works best when the curls have enough length to fan out at the top. If the hair is short, you may get more height than puff, which can still look good. Different result, same spirit.
What helps the most
- Brush only the outer perimeter if you want a smoother edge.
- Leave the top curls alone so the puff stays full.
- Wrap a satin scarf around the base for ten minutes if you want the outline to settle.
- Use a soft elastic that won’t snag.
11. Side-Swept Twist Out
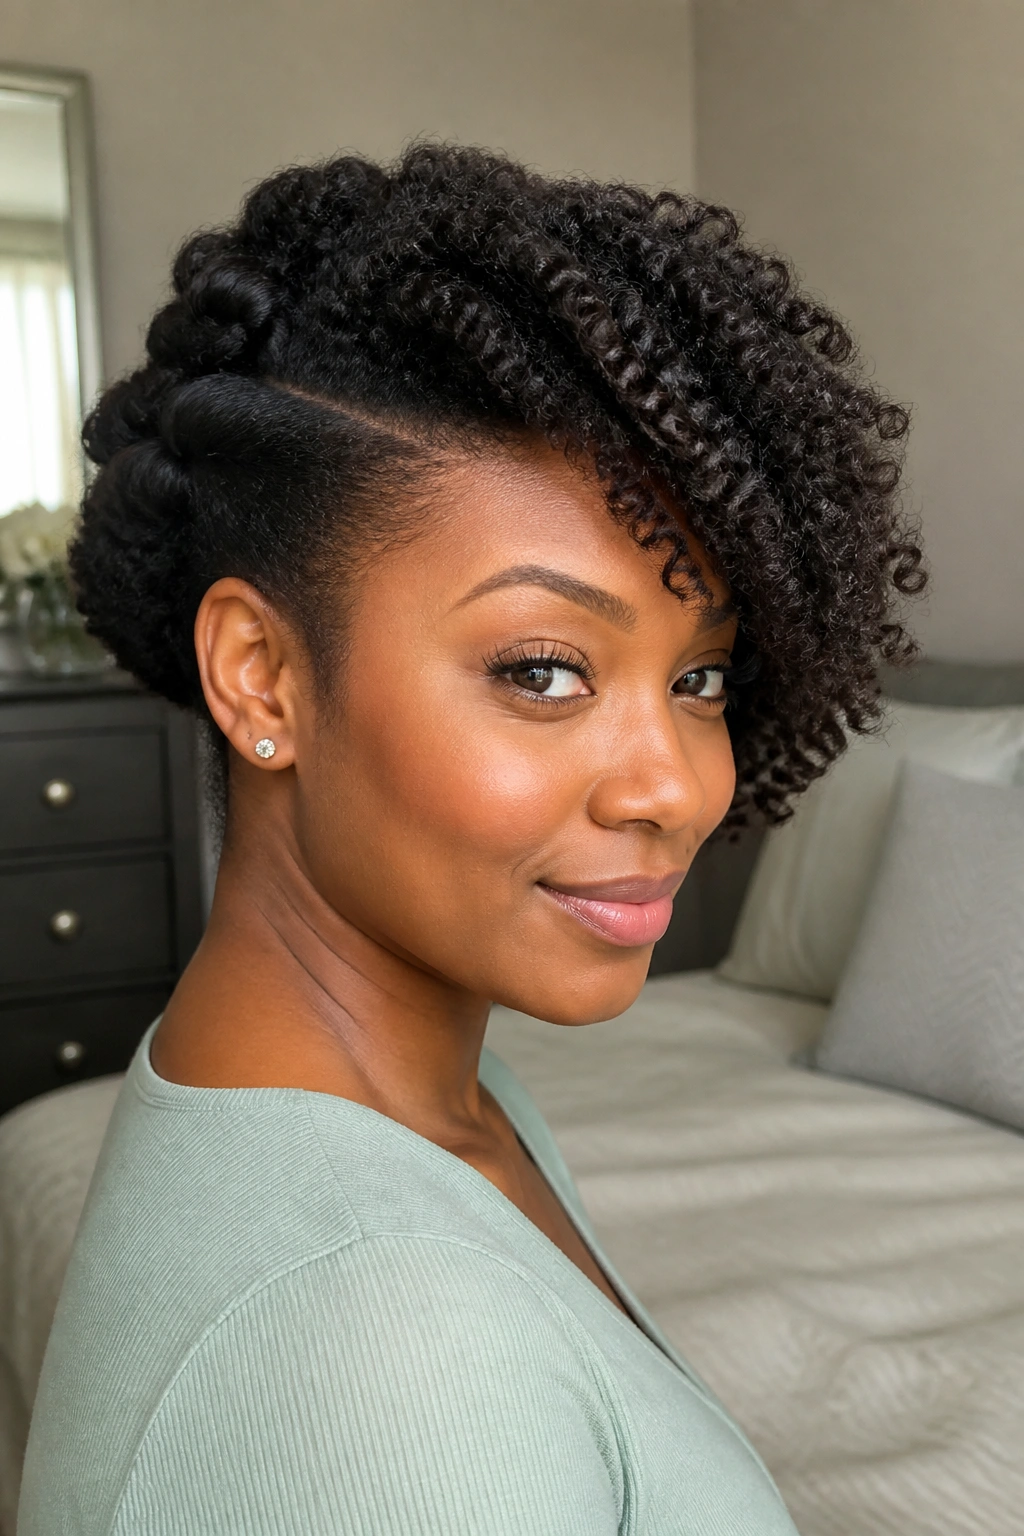
A side-swept style can look formal, but it is easier than a perfect middle part. That’s why I like it. You can sweep the curls across the forehead and pin one side back, and the whole twist out suddenly feels softer and a little more romantic without becoming fussy.
The side sweep works especially well when the front curls are the star of the show. You get more visual focus on one side, which is useful if one half of the hair is more defined than the other. It also helps when the hairline needs a break from too much manipulation, because one side can stay looser and less handled.
This style looks good with medium to long lengths, but short hair can pull it off too. The trick is making the sweep look smooth at the root and airy through the ends. Too much product at the front and the hair clumps in a heavy line. Not enough, and the side keeps slipping.
12. Twist Out Bob

The ends brush the jawline, and the whole shape feels tidy. That is the appeal of a twist out bob. Whether the cut is real or faked with pinning and careful shaping, the silhouette gives the curls a clear edge. It’s one of the neatest-looking ways to wear defined curls without losing softness.
A bob-shaped twist out works well when the hair is blunt or lightly layered. The curls fall into a frame around the face, which makes the style look deliberate even if the actual twist pattern is simple. If your hair is longer, you can still fake the effect by tucking the back under with pins.
How to fake the shape without cutting anything
- Twist the back sections a little tighter so they sit closer to the neck.
- Leave the front curls slightly looser for movement.
- Pin the bottom layers inward with bobby pins that match your hair color.
- Separate the front more than the back to create the rounded outline.
13. Frohawk Twist Out
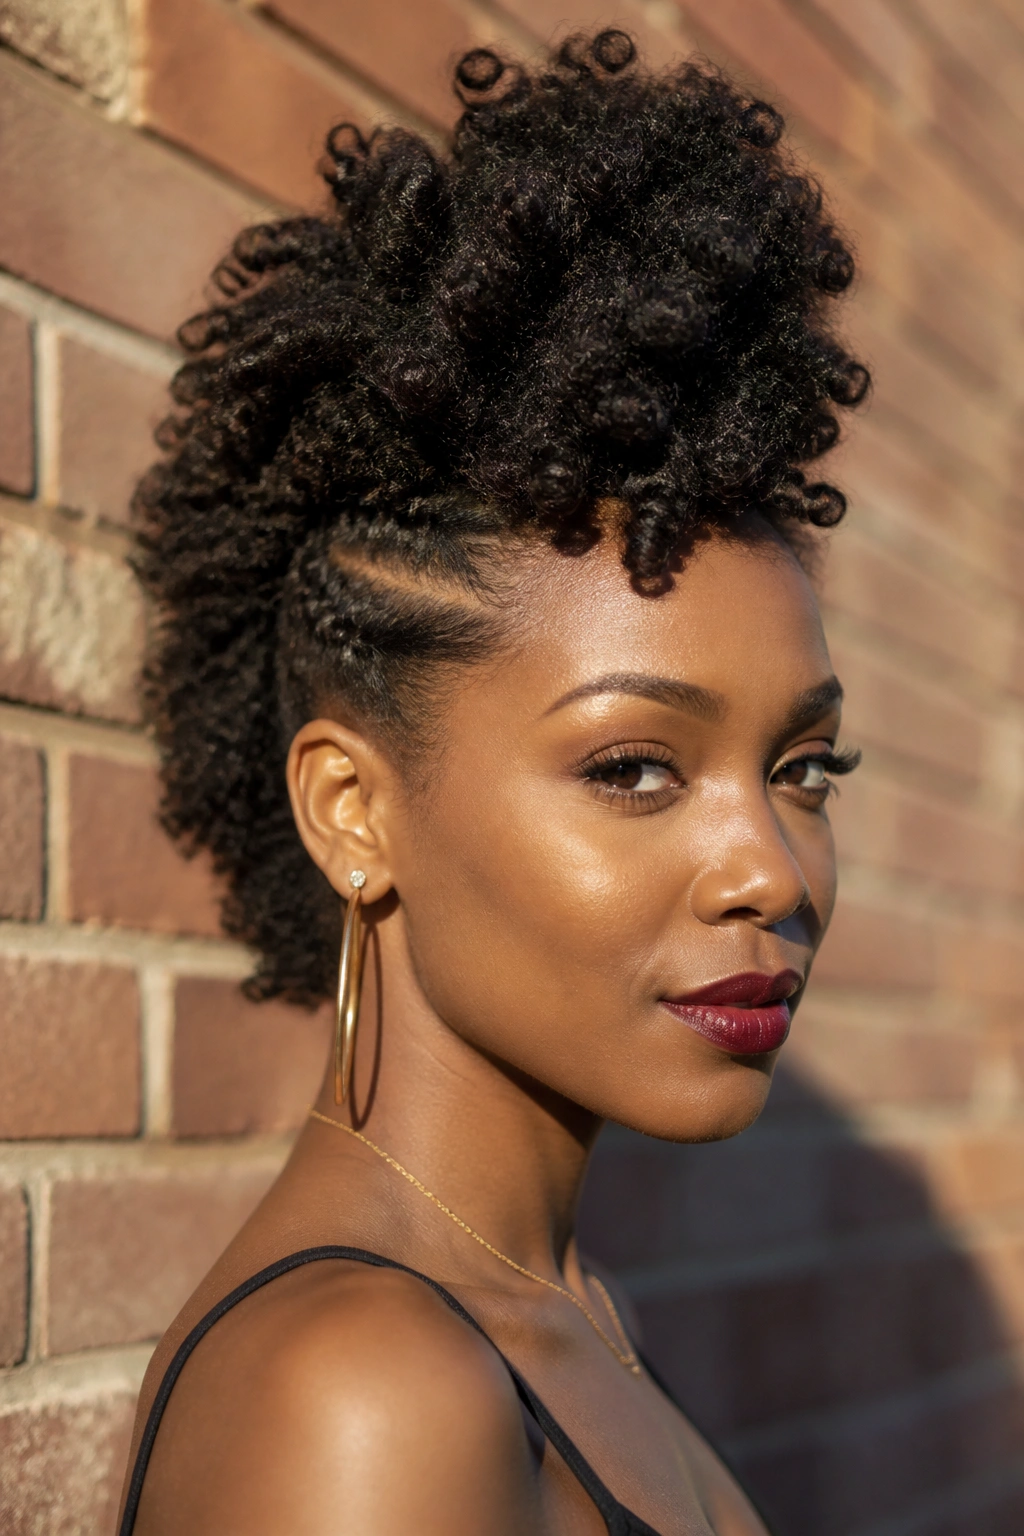
Bold. A little dramatic. Very useful.
A frohawk twist out takes the curls up the center of the head and pulls the sides back, which gives you a sharper shape with lots of vertical height. It’s a good fix when the sides are having a rough day or when you want the style to feel less soft and more structured.
This is one of the best options for thick hair because density gives the mohawk shape more presence. Fine hair can wear it too, but the center section needs enough fullness to carry the look. If the hair is too sparse at the crown, the style can read a little thin from the side.
Pins matter here. So does balance. Don’t clamp the sides so tightly that the whole head feels pulled. The shape should look lifted, not strained.
Keep an eye on these details
- Leave the center section wide enough to show curl volume.
- Pin the sides in small, hidden sections.
- Fluff the top with fingers after pinning.
- Add a light edge finish only if needed; too much product makes the style stiff.
14. Accessorized Twist Out
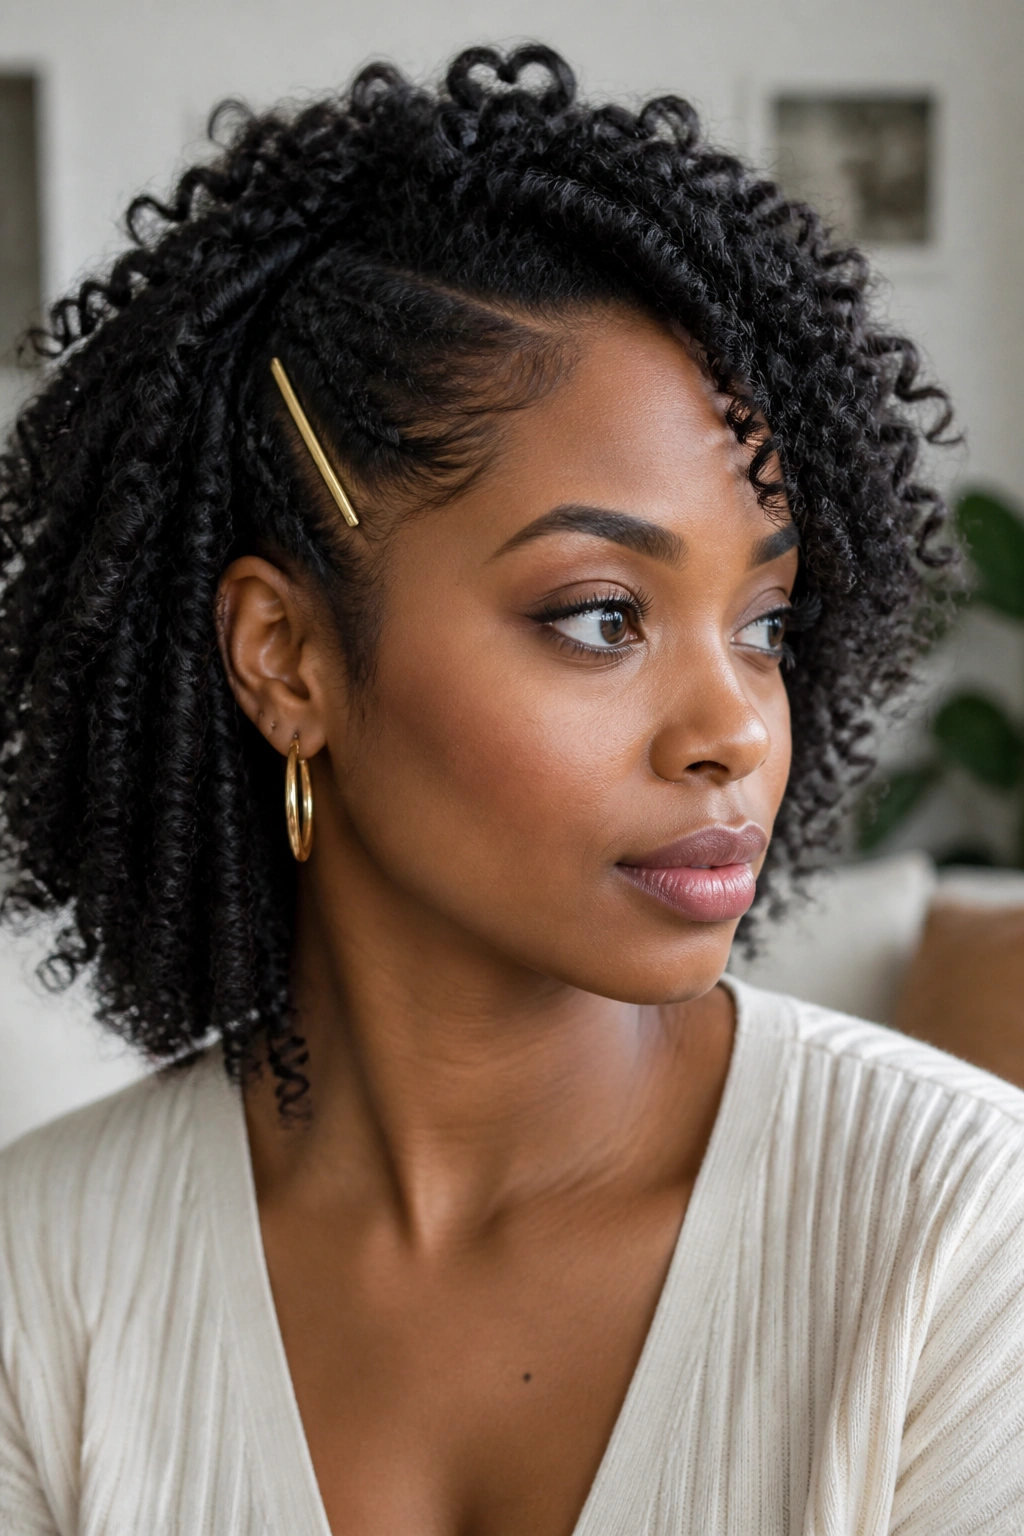
Need the style to look finished with almost no extra work? Add an accessory. Clips, cuffs, scarves, and pins can turn a basic twist out into something sharper in seconds. The hair does most of the work. The accessory gives it a point of view.
This style is useful when the curls are good but not quite special enough on their own. A gold clip near the temple, a patterned scarf at the base, or a few tiny cuffs through the twists can change the mood fast. It also helps when you want to dress up second- or third-day hair without redoing the whole head.
The main rule is simple: don’t overload the style. One strong piece usually looks better than four small ones fighting each other. And if the hair is still damp, skip heavy metal accessories. Wet hair and trapped tension do not get along.
A few easy choices
- A slim barrette for one side.
- A satin scarf tied low at the nape.
- Two or three cuffs placed in the front twists.
- A decorative pin at the deepest point of the part.
15. Low Twist Out Ponytail
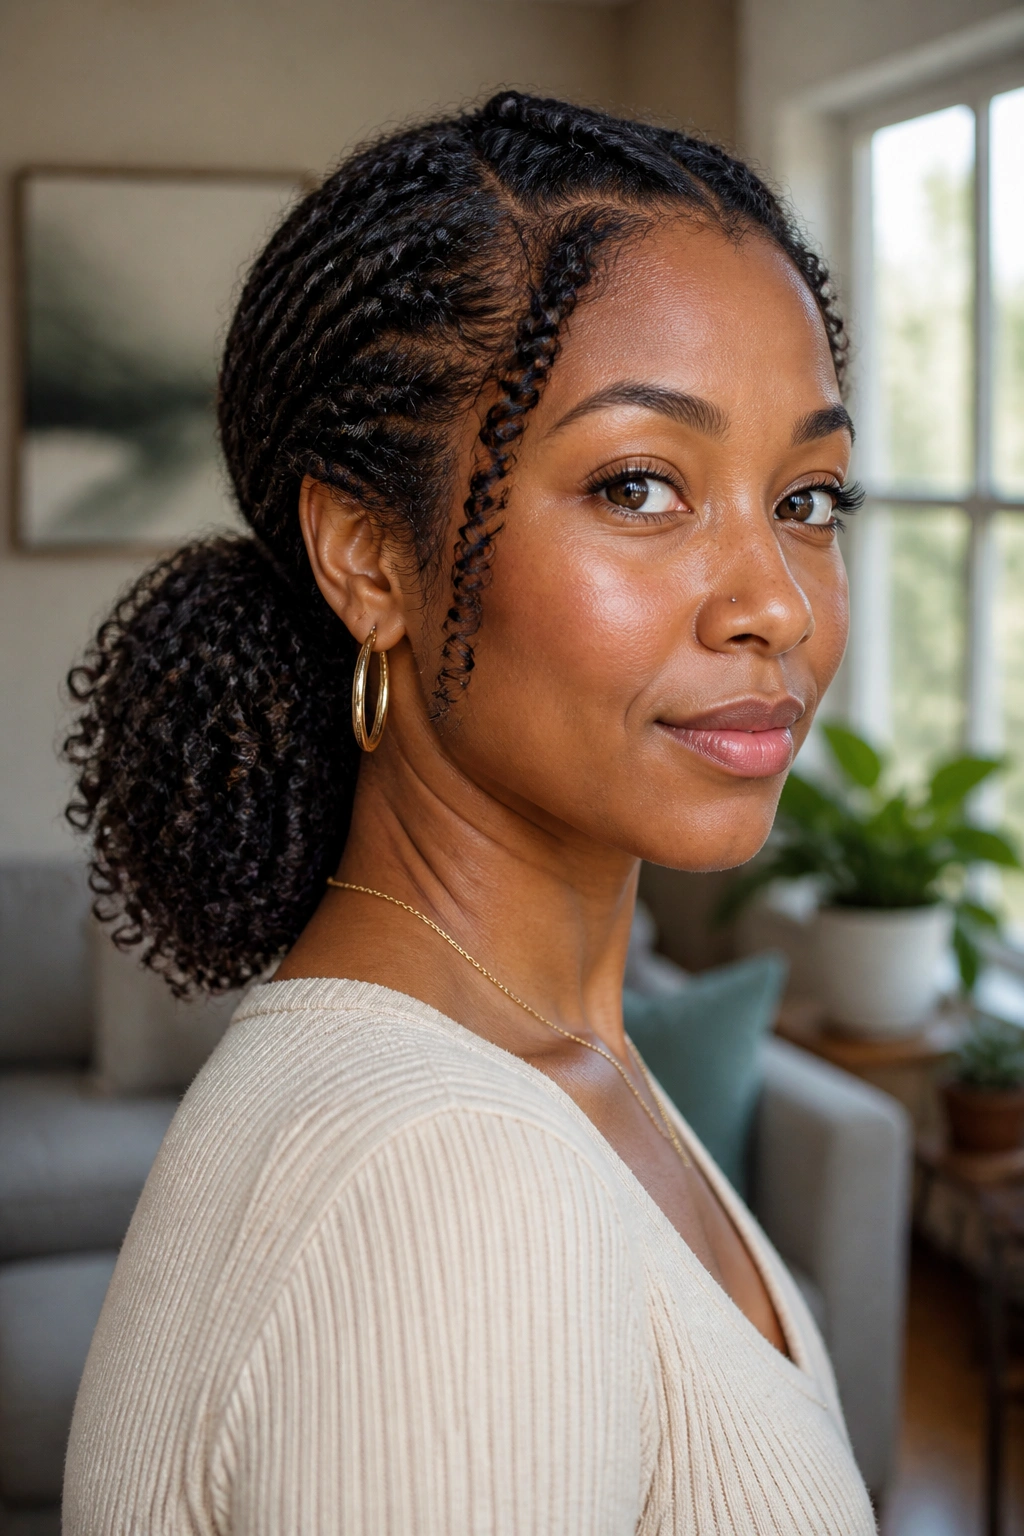
A low ponytail keeps the curl definition visible while giving the style a cleaner, more practical shape. It’s one of the easiest ways to pull a twist out together without flattening all the texture. The curls stay loose below the band, and the nape area gets a break from being fully exposed.
This works especially well when the roots are slightly fluffy but the lengths still look good. Instead of redoing the whole style, you gather the hair low, smooth the surface just enough to keep it tidy, and let the ends fall where they want. That makes it a good office style, a dinner style, or a quick fix for hair that’s been worn out for a couple of days.
The ponytail should sit at the nape or just above it. Higher than that and you start losing the shape of the twist out. Lower keeps the curls in view and makes the profile look softer.
A silk scrunchie is better than a tight elastic. Always. It holds without scraping the curl pattern, and that matters when the whole point is to keep the definition alive.
A small final thought: the best twist out styles are the ones that match your hair’s mood, not some imaginary perfect photo. If your twists hold cleanly, wear them loose. If the roots are behaving badly, pin them up. If the ends need help, use rods. That flexibility is the real reason twist outs keep earning a place in natural hair routines.
