



Grey hair does not need hiding. The better move is to make it look intentional, and white highlights for grey hair are one of the cleanest ways to do that when they’re placed with some thought. Get the placement wrong and you end up with pale stripes sitting on top of the hair. Get it right and the whole head looks brighter, softer, and a little more expensive-looking without shouting for attention.
The tricky part is that grey hair has its own rules. Coarse silver strands can grab toner differently from the softer pieces around the hairline, and porous ends can go icy long before the roots catch up. That’s why one set of white highlights can look elegant on one person and chalky on another, even if both started with the same base color.
Some people want a whisper-soft blend that grows out quietly. Others want a sharper frame around the face, or a cooler finish that leans more snow white than silver. Both are valid. The real question is where the light should sit, how much contrast you want, and how much maintenance you’re willing to live with.
These 15 white highlight ideas for grey hair cover the softest babylights, the boldest money pieces, and a few placements in between that tend to get overlooked. There’s a good chance one of them will fit your haircut better than the usual “make everything lighter” advice.
1. Ultra-Fine Babylights Along the Part
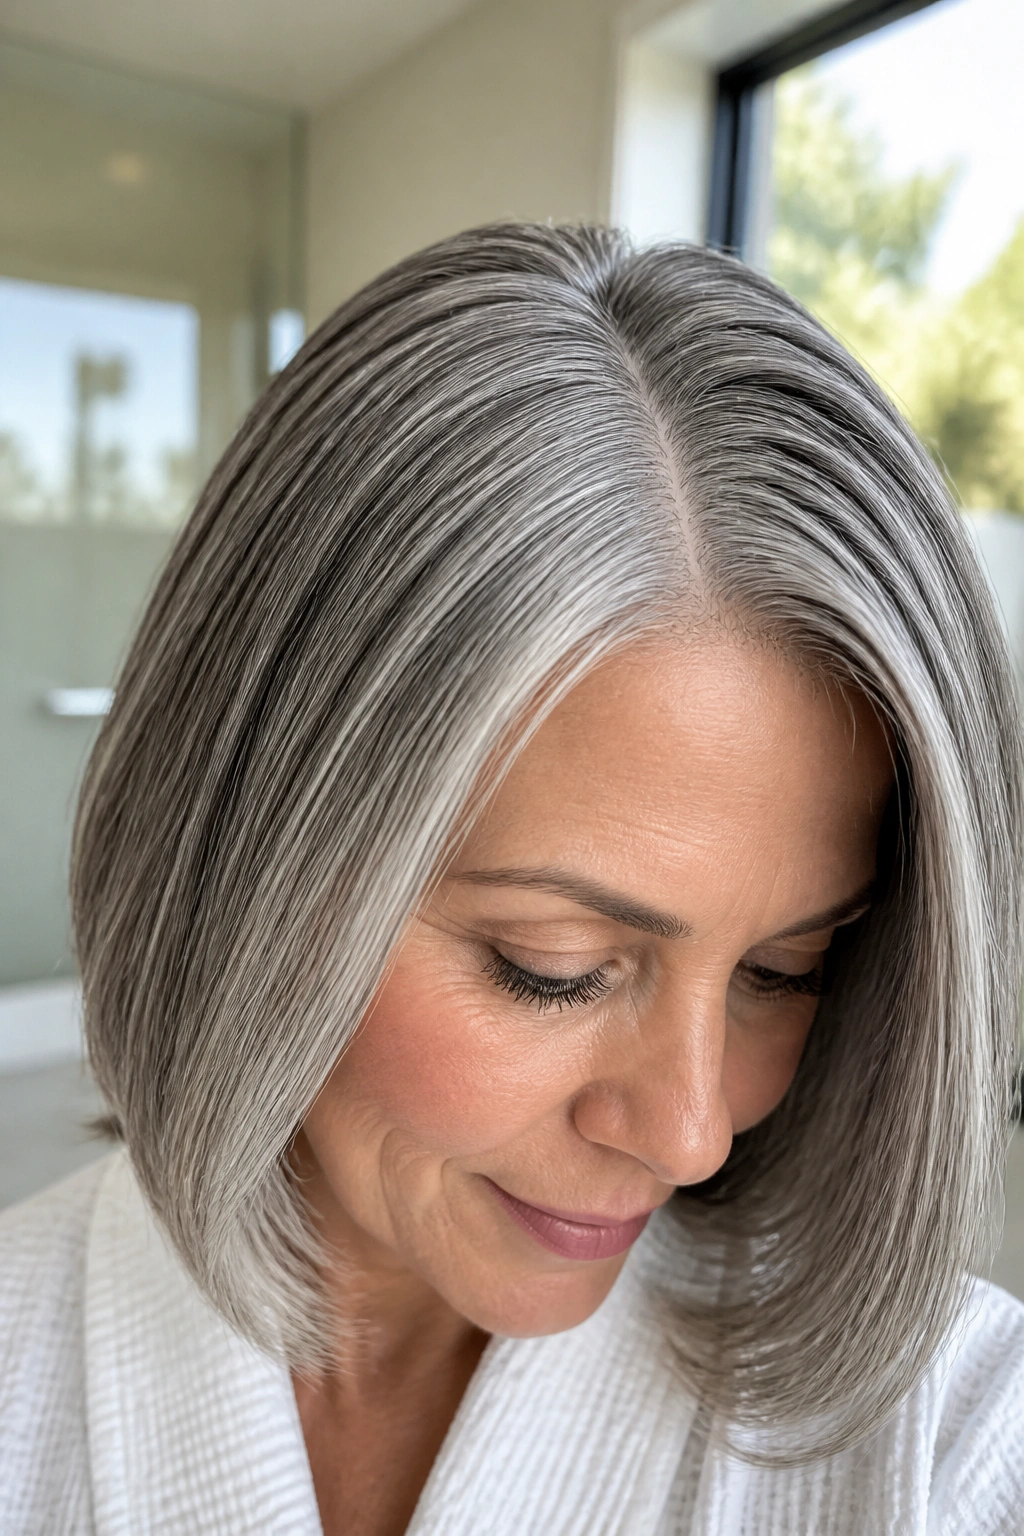
Babylights are the quietest way to brighten grey hair, and that’s exactly why they work so well. Instead of painting in obvious streaks, the colorist uses very fine slices so the white sits inside the hair rather than on top of it. The result looks soft in daylight and even softer when the hair moves.
Why It Flatters Grey Hair
Grey hair often already has a silver cast, so the goal is not to force a big color change. It’s to make the silver look cleaner and more even. Fine babylights do that without stealing the whole show, which is handy if you want your hair to still look like your hair.
This placement is also forgiving as it grows out. The part line brightens first, then the lighter pieces melt back into the grey instead of leaving a hard stripe. That makes it a smart choice if you part your hair the same way every day.
- Ask for foils no wider than 1/8 to 1/4 inch.
- Keep the brightest pieces near the part, temples, and crown.
- Tone toward pearl, icy beige, or soft silver rather than stark blue-white.
- Leave a few natural grey strands between foils so the finish keeps depth.
Tip: If your hair tends to look flat indoors, babylights with a cool pearl toner usually read cleaner than a heavy white glaze.
2. Bright Money Piece at the Hairline

A bright money piece does more for grey hair than a whole head of subtle highlights when you want instant lift. It frames the face, wakes up the eyes, and makes a haircut look deliberate even if the rest of the color stays soft and blended.
The trick is keeping it thin enough to feel polished. A money piece that’s too thick can look like a stripe. A cleaner version starts at the hairline, sweeps through the temple area, and lands around cheekbone level so the bright piece moves with the face instead of sitting like a badge.
This is one of those placements that looks especially good with glasses, blunt bobs, and layered cuts with movement around the front. It also helps if your grey comes in beautifully at the temples but feels a little dull everywhere else. You don’t need to brighten the whole head to get a fresh result. You need the light in the right place.
I like this option for people who want visible change without a full-color commitment. Pair it with a soft root shadow if you want the grow-out to stay easy. Keep the back quieter, and let the front do the talking.
3. Micro-Weave Highlights Through Salt-and-Pepper Hair

Why do micro-weave highlights look softer than chunky foils? Because the light is broken up in tiny sections instead of one bold band. On salt-and-pepper hair, that tiny weaving pattern matters a lot. It keeps the white from reading as a block of bleach and lets the natural grey do some of the visual work.
Micro-weaves are especially useful when the hair is coarse, dense, or a little stubborn about taking color evenly. The weave spreads brightness through the head in a way that feels misty rather than striped. If your grey hair has patchy areas or a few darker strands still hanging on, this placement blends the whole thing better than a big, obvious slice of white.
How to Ask for It
Tell your colorist you want fine woven slices, not chunky ribbons. If you can picture it, say the brightest pieces should be scattered through the crown, side panels, and around the face, with the lower layers kept a touch softer.
A few details help:
- Woven sections should be very narrow, almost threadlike.
- The brightest pieces can be placed every other foil near the crown.
- Ask for a toner that keeps the finish cool but not flat.
- This works well on medium, coarse, or naturally dense hair.
Skip this if you want bold contrast. Micro-weaves are about quiet brightness, not drama.
4. Frosted Ends on Longer Grey Lengths
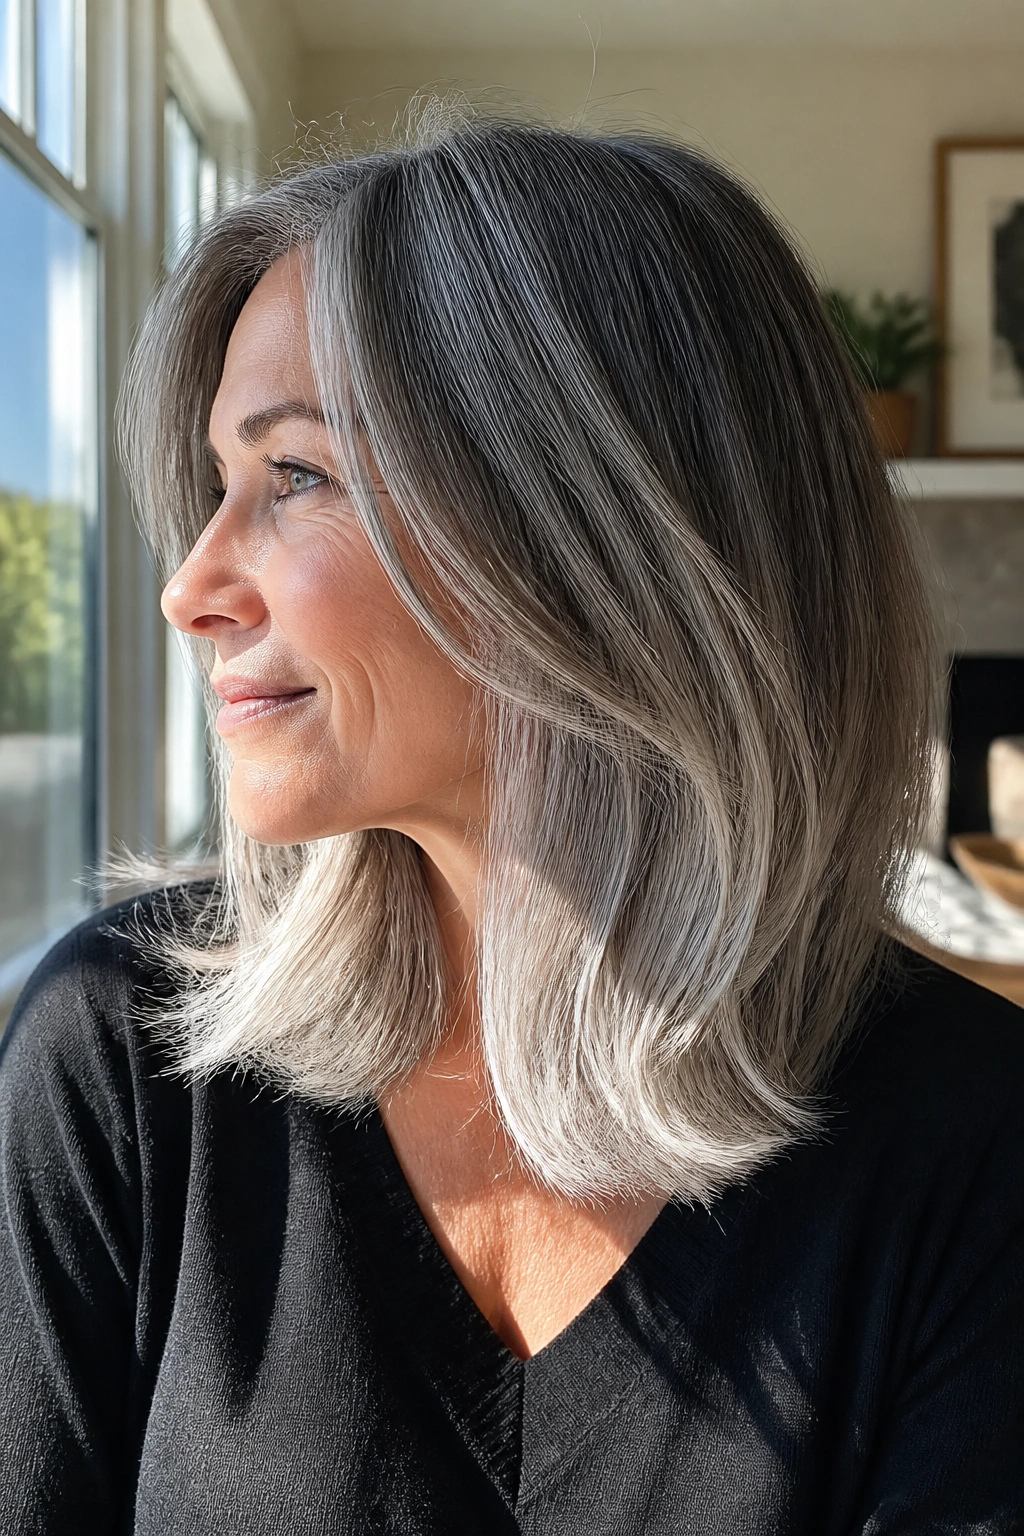
Picture shoulder-length grey hair that looks lovely near the roots but goes a little sleepy at the ends. Frosted ends fix that fast. Instead of lightening the whole head, the white is concentrated through the last two or three inches, where the hair catches the most movement and the light can bounce around.
This placement suits longer layers, soft waves, and cuts that already have movement in the ends. It is less useful on a blunt cut, where frosted tips can look dated if they’re too even. The key is keeping the application irregular so the ends feel kissed by light, not dipped in paint.
Grey hair often loses its sparkle at the bottom because the ends are older, drier, and more porous. Frosted ends make sense there. They also let you keep the root area calmer, which is a relief if you hate touching up every few weeks.
- Best on shoulder-length hair and longer.
- Works well when the cut has layers or a soft bend.
- Looks clean with a cool silver toner instead of a bright white that goes flat.
- Needs less upkeep near the scalp, which is the whole point.
A little frost goes a long way here. Too much, and the style starts to feel stiff.
5. White Balayage Over a Grey Base

White balayage is the one I like when someone wants grey hair to look softer, not louder. Hand-painted pieces are swept through the mid-lengths and ends so the lightness falls in natural-looking bands instead of a strict foil pattern. On a grey base, that gives you brightness with movement, and it avoids the “helmet” effect that can happen when highlights sit too evenly.
The real charm is in the grow-out. Because balayage is painted in, the transition from grey root to white piece tends to look gentler for longer. That makes it a good choice if you want a style that doesn’t need constant rescue. It also plays nicely with wavy or curly hair, where the bends break up the lighter pieces and keep them from reading as one solid block.
If the hair is straight, I still like balayage, but the placement needs more care. The colorist should feather the lightest bits through the surface and leave some deeper grey in between so the result has shape. Otherwise, the whole thing can look washed out.
I’m a fan of this one for people who want a cooler finish without a rigid pattern. It feels calm. Not boring. Just calm.
6. Ribbon Highlights on Waves and Curls
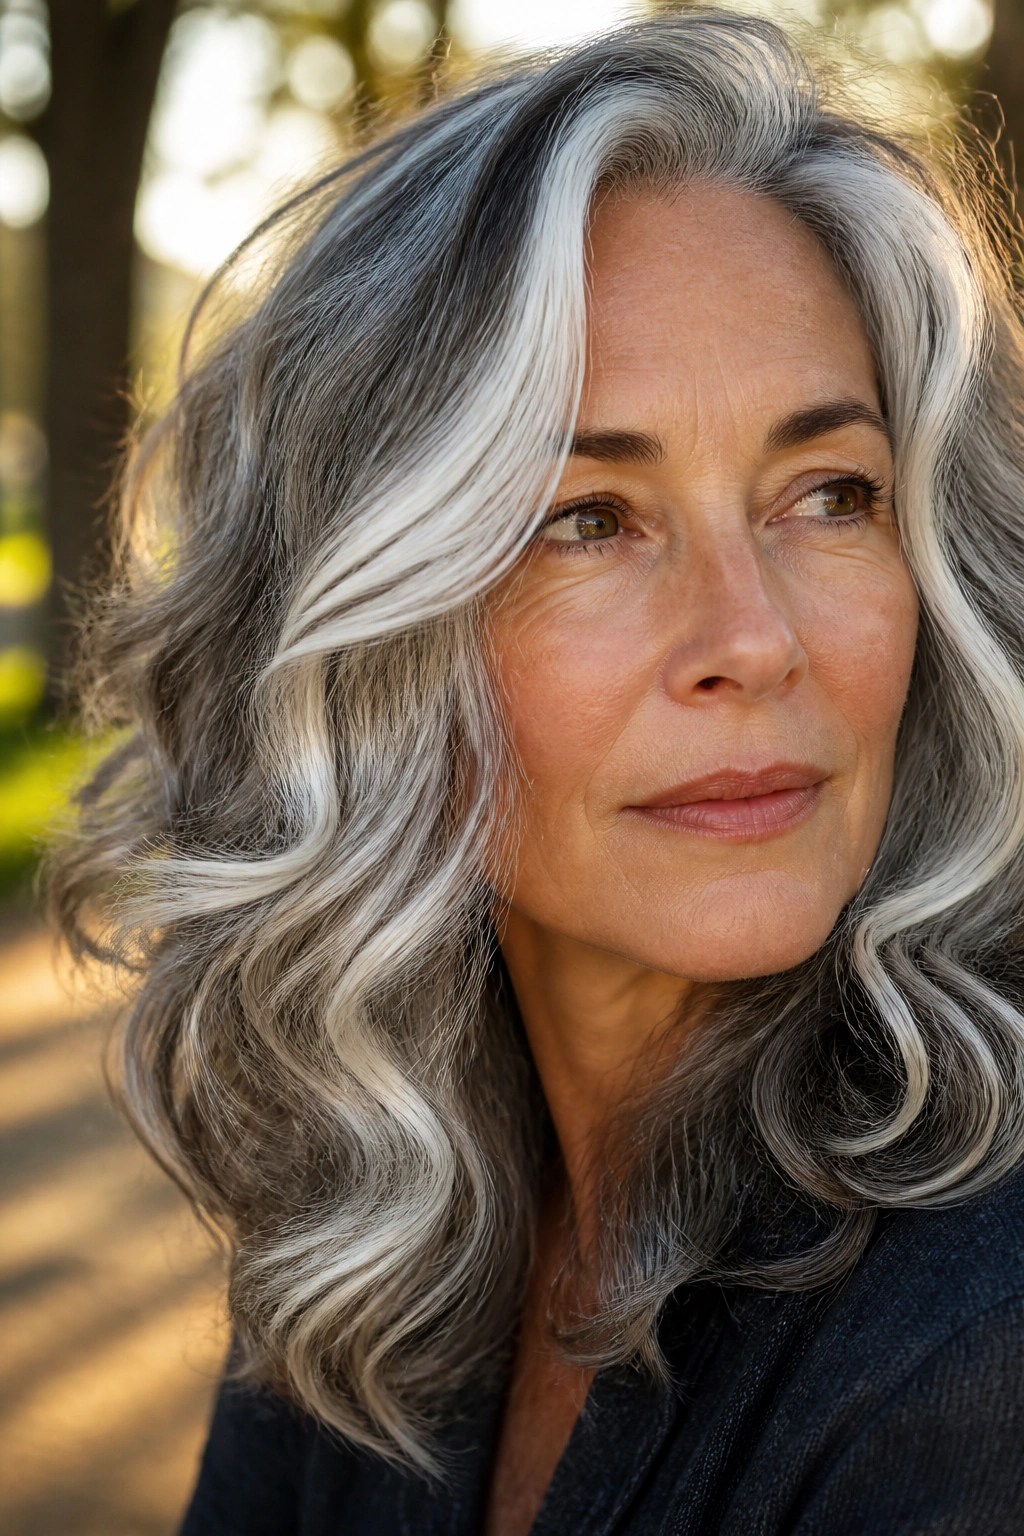
Unlike babylights, ribbon highlights do not whisper. They move. On wavy or curly grey hair, a white ribbon catches each bend in the curl pattern and makes the whole shape look more alive, especially when the cut has layers that bounce.
This is one of the few highlight ideas that really benefits from being seen in motion. A curl with a white ribbon through the outer surface looks different from one buried underneath. So the placement matters: the brightest ribbons should sit on the visible ridges of the wave, not hidden in the underside where they disappear.
A lot of people confuse this with balayage, but the feel is different. Balayage is softer and broader. Ribbon highlights are more deliberate. You can see them, which is the point, but they still bend and shift with the texture instead of sitting like blocks.
Best Cut Pairings
- Layered shags that need definition.
- Long curls that can hold a light-catching surface.
- Wavy lobs where movement is the whole haircut.
- Grey hair with scattered darker strands, because the ribbons help those strands read as depth.
If your curls already frizz easily, keep the toner cool and the lift controlled. Too much brightness on porous curls can go dry in a hurry.
7. T-Section White Highlights for Easy Grow-Out

If you wear a middle part, a T-section can do more than half a head of foils. It concentrates white highlights along the parting and across the top section, which is exactly where most people see the hair first. The sides and back stay quieter, so the whole look feels brighter without becoming high-maintenance.
This is a smart move for anyone who wants a visible refresh but does not want to sit in the salon chair for a full foil every time. It’s also a sneaky good option if your grey grows in fast at the crown but you’re not bothered by the rest. The eye goes straight to the top, and that’s enough.
What I like about this placement is that it works with your usual styling habits. If you change your part, the highlights shift. If you wear the hair up, the brighter top section still shows. If you leave it down, the crown gets that little hit of light that keeps the style from falling flat.
A T-section is not dramatic. That’s the appeal. It gives you a cleaner top line, a brighter part, and a softer grow-out than a full-head job.
8. Peekaboo White Panels Under the Top Layer
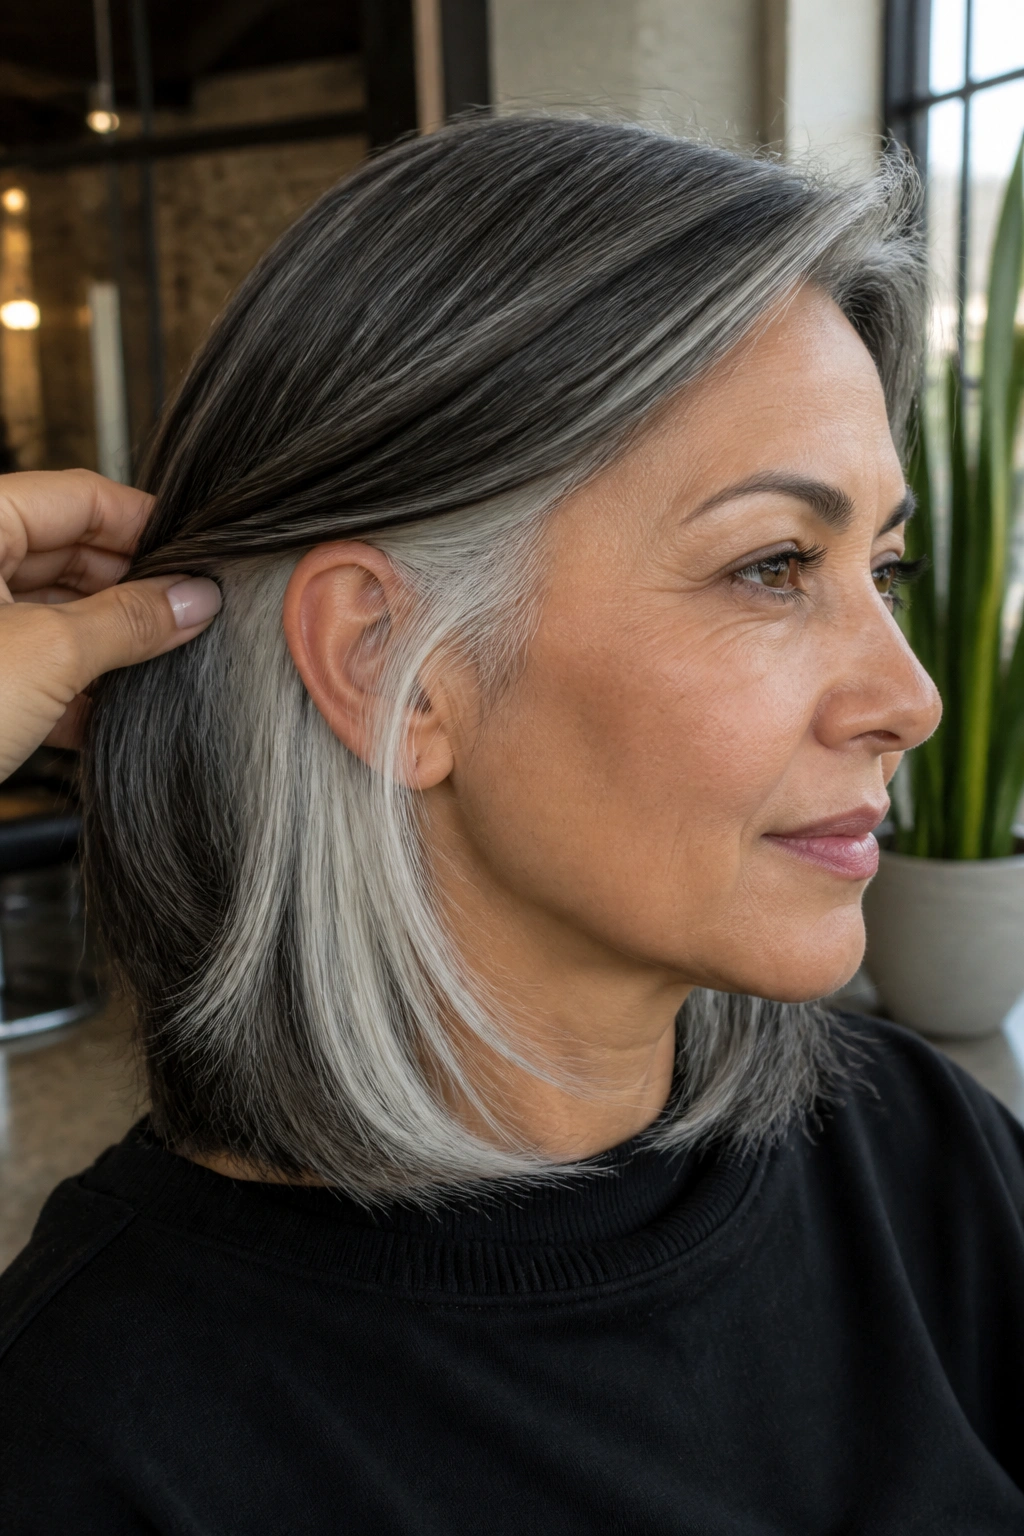
Hidden white panels are for people who want a quiet front and a surprise when the hair moves. The top layer stays mostly grey, while brighter white pieces sit underneath, usually around the nape, behind the ears, or just below the crown. When the hair swings or gets tucked back, the light flashes through.
This placement is underrated. It gives you brightness without making the whole head look processed, and it lets you keep a more professional or low-key appearance from the front. Then you turn your head, or tie your hair half up, and there’s the contrast. It feels a little sharper than a soft blend, but not loud.
It also works well if your haircut has layers or an undercut, because the hidden sections can be shown off on purpose. A bob with peekaboo white panels looks different every time it’s tucked behind the ear. A longer cut gets the same trick near the nape, where the movement is subtle but noticeable.
If you like a little surprise in your color, this is a good one. If you want everyone to notice it immediately, it probably is not.
9. Champagne-White Gloss With Bright Accents
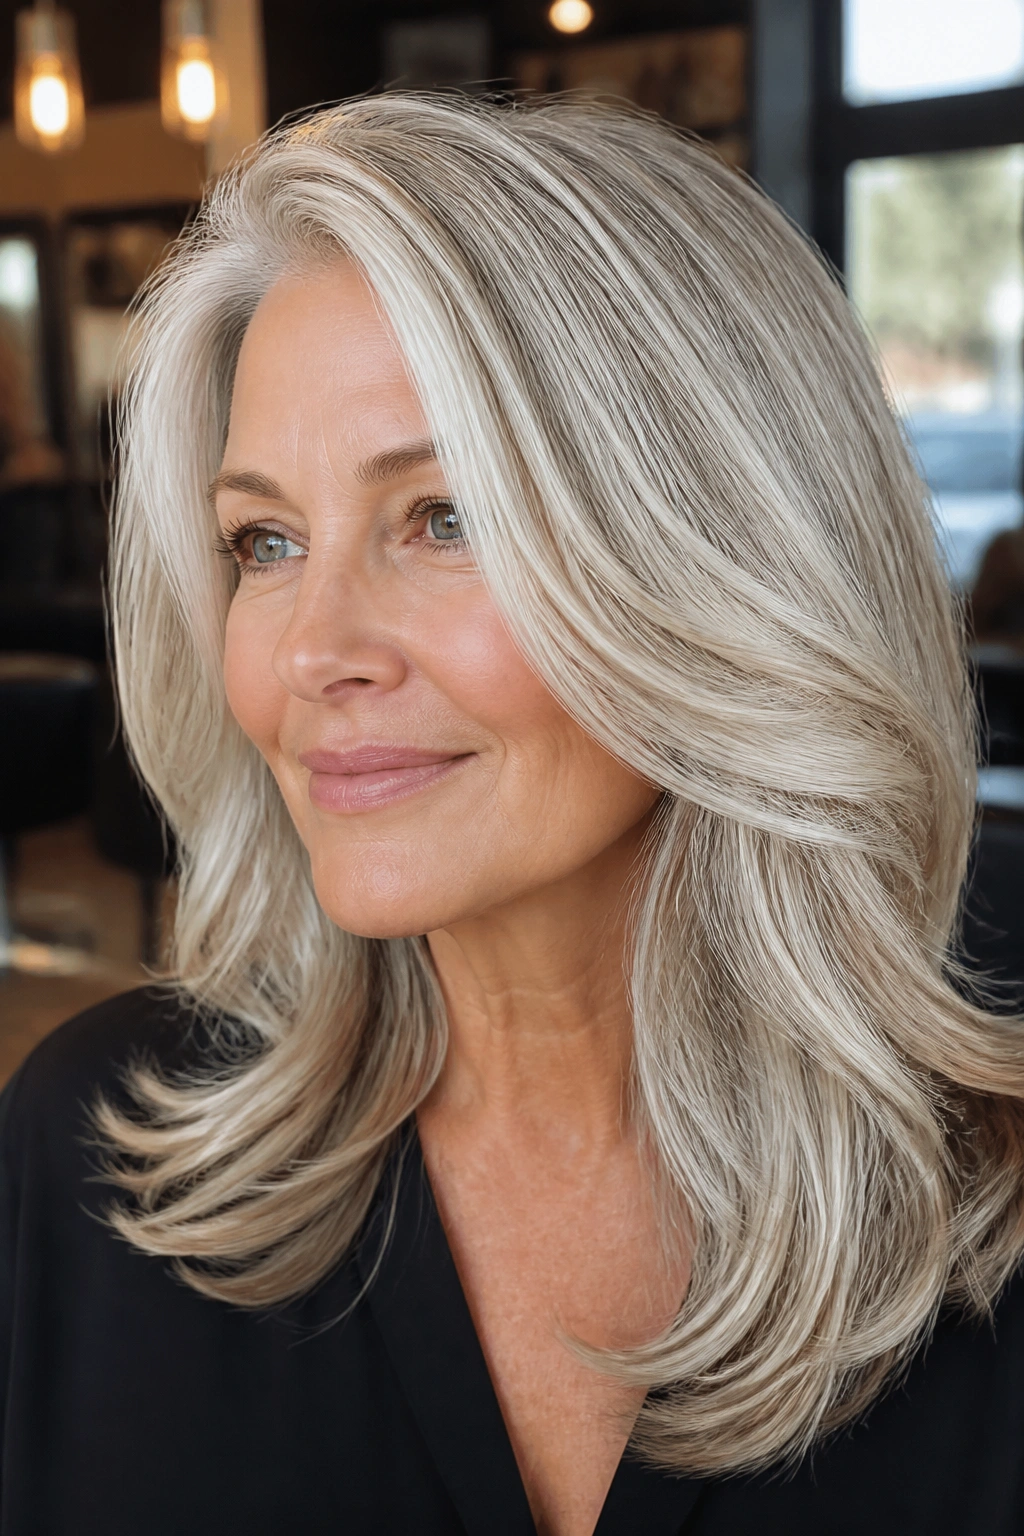
What if pure white feels too sharp? Then champagne-white is worth a close look. It keeps the overall finish pale and cool, but the tone is a touch softer, with enough beige or pearl warmth to stop the hair from looking chalky. On grey hair, that tiny shift can make the difference between “icy” and “flat.”
This style usually works best when white highlights are paired with a gloss rather than left raw. The gloss smooths the surface, calms any leftover yellow, and gives the color a more expensive shine. That shine matters on grey hair, because grey can reflect light beautifully when the cuticle is smoothed down and the tone is balanced.
How to Keep It From Going Dull
- Ask for a pearl, champagne, or soft beige toner.
- Use a purple shampoo only when the hair starts to look yellow, not every wash.
- Keep heavy oils off the roots so the surface stays bright.
- Refresh the gloss when the shine starts to fade, not when the color has already gone muddy.
This is a good fit for warmer skin tones too, because the tone doesn’t fight the face. It softens the white just enough.
10. Silver-White Ombré From Root to Tip
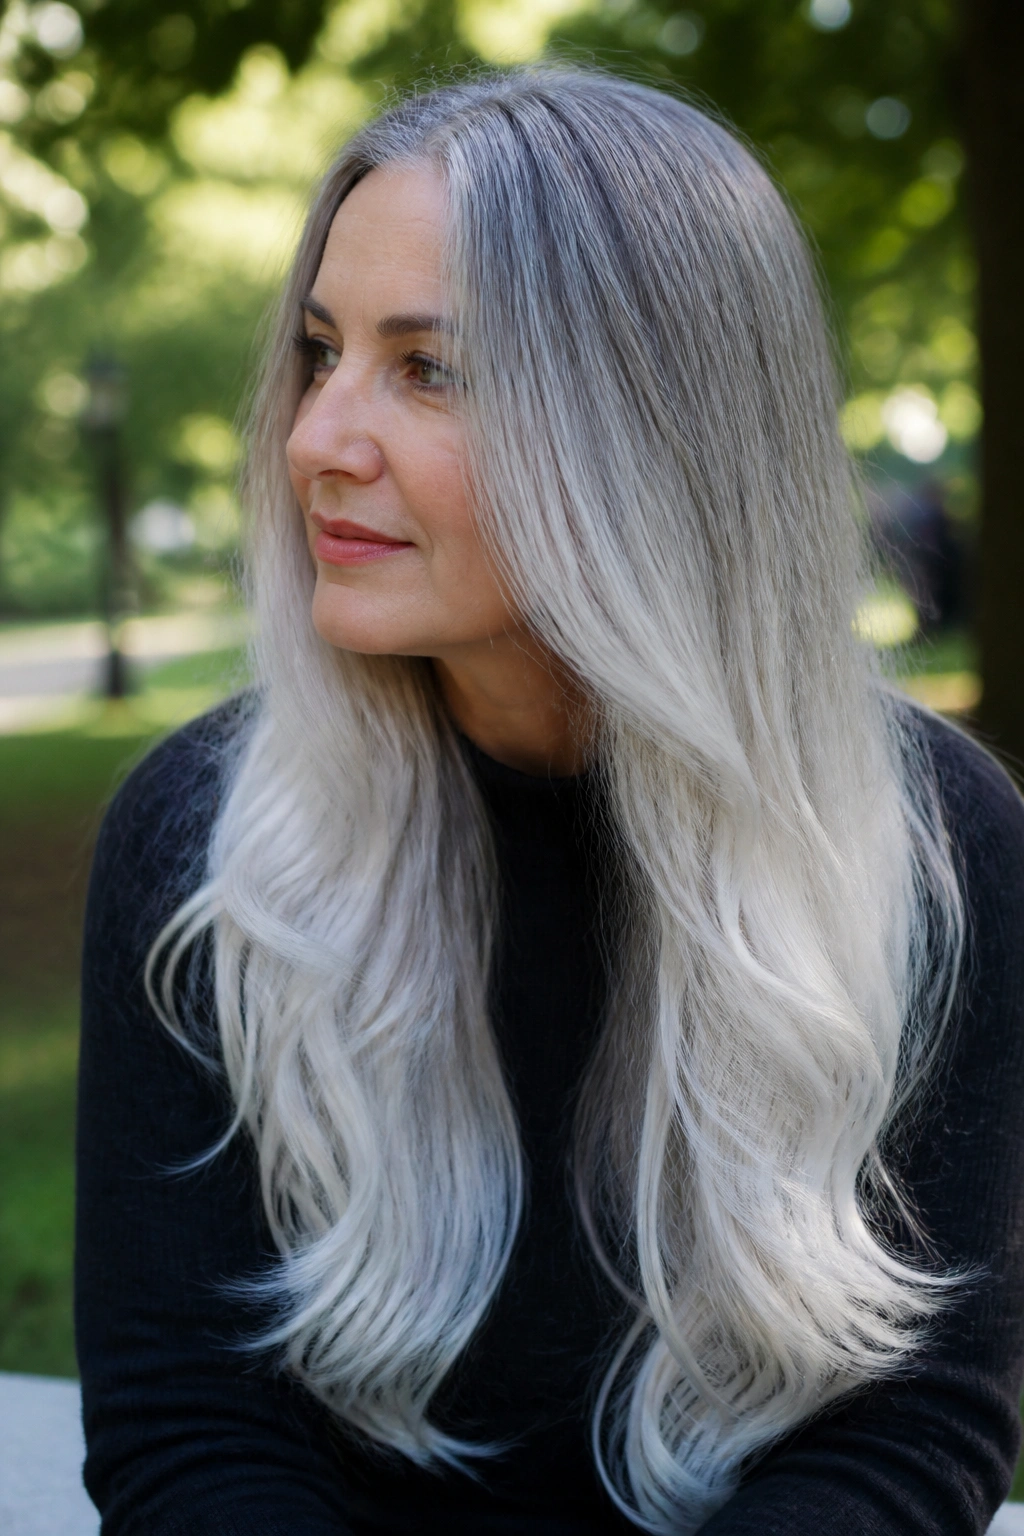
A silver-white ombré gives you a darker grey root and a much lighter end, with a smooth fade between the two. It’s a strong choice for longer hair because the length gives the transition room to breathe. On short hair, the fade can look abrupt. On long hair, it feels more natural.
This placement is helpful if your natural grey grows in at different speeds across the head. Some people have silver at the temples and darker pieces underneath; others have a patchier mix. Ombré lets the root area stay calm while the ends carry the brightest white. That keeps the color from looking top-heavy.
It also buys you time between appointments. Because the root is intentionally deeper, the grow-out is part of the design. That does not mean no maintenance. It means the fade itself is doing some of the work for you.
- Start the lighter section below the chin or collarbone, depending on length.
- Keep the transition soft, not banded.
- Ask for the ends to be lighter than the mid-lengths, not all one shade.
- This looks especially good in braids, ponytails, and loose waves.
If you want white highlights for grey hair but hate obvious root lines, this is one of the better answers.
11. Crown Lights That Add Lift at the Top

Fine hair does not need more color everywhere. It needs brightness where the eye stops. Crown lights put white highlights across the top quarter of the head, around the part, and just behind it, so the hair looks fuller and a little more lifted at the roots.
That simple shift can change the whole shape. Grey hair on fine textures can sometimes read as limp because the color is too even from root to tip. A brighter crown breaks that up. It gives the top area a little more presence and lets the sides stay softer, which keeps the style from looking overworked.
I like this placement on straight bobs, layered shags, and medium cuts that need help at the scalp area. The trick is not to over-lighten the lower layers. Keep them quieter. The top should carry the brightness, while the underneath stays a touch deeper so the head shape still has depth.
One good sign that crown lights are the right call: your hair looks fine in the mirror, but it disappears in photos. A little white near the part fixes that fast.
12. Platinized Pieces in a Short Grey Bob

Short hair can take more edge, and a grey bob is one of the few cuts where platinized pieces can look clean rather than heavy. Because the shape is compact, a few brighter white strands around the temples, side panels, and top layers can sharpen the whole cut without needing much else.
This works especially well on blunt bobs, bixies, and pixies. The short length keeps the white pieces from wandering too far, which means the contrast stays controlled. A bob with a clean jaw line and a few bright white streaks around the front can look deliberate in a way long hair sometimes can’t manage.
The big advantage here is shape. Short cuts already have a clear outline, so the highlights can follow that outline instead of trying to create it from scratch. If you want the hair to look sleek, a few stronger white sections can do more than a hundred tiny ones.
What to Ask For
- 2 to 4 brighter pieces around the front and temple area.
- A few lighter slices at the crown to keep the top from looking dense.
- Ends that are toned cool but not paper-white, which can look harsh on a short cut.
- A sharp finish if the bob is blunt, or a softer finish if the cut has texture.
This is not the softest option on the list. That’s why it works.
13. White Highlights With Smoky Lowlights
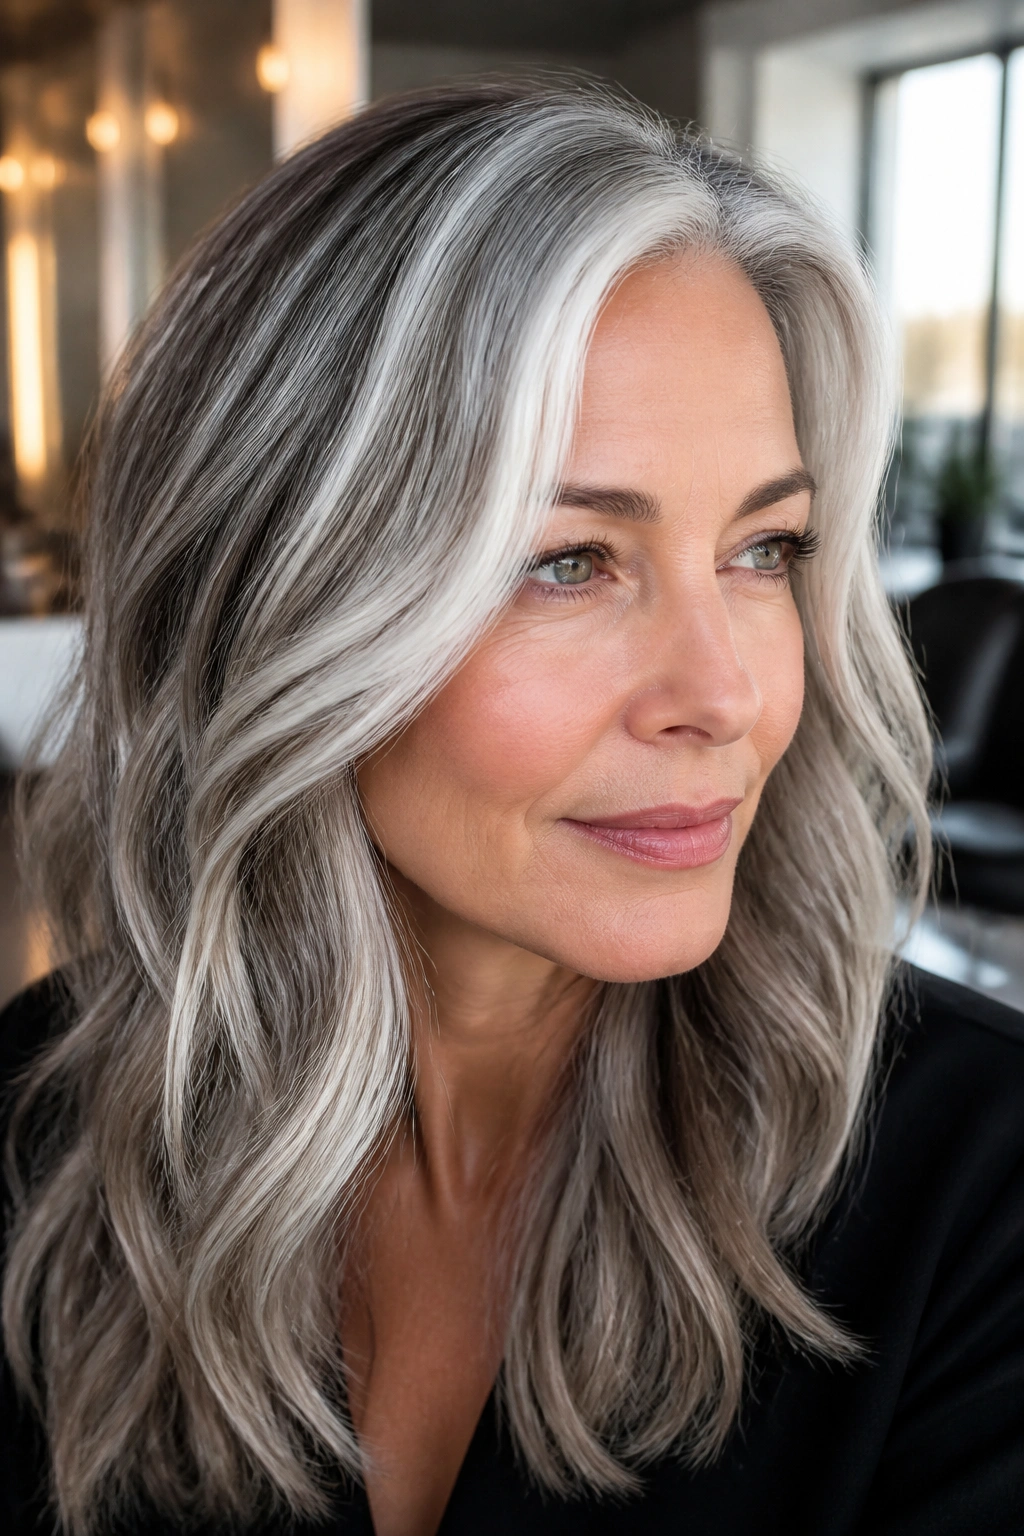
Pure white can wash out very light grey hair faster than people expect. Smoky lowlights fix that by slipping in cooler, deeper pieces between the bright ones so the whole head keeps shape. Think slate, mushroom brown, cool taupe, or a muted charcoal-beige blend rather than anything warm or chestnut.
Why the Contrast Matters
The eye needs somewhere to rest. If every strand is equally pale, the color can feel thin, even when the hair is healthy. Smoky lowlights give the white highlights a frame. They also make the bright pieces look cleaner because the contrast has somewhere to go.
This is one of my favorite choices for very light grey hair that risks looking washed out, especially on pale skin or on long straight hair. The lowlights keep the style from floating away into one flat tone. They can also help older highlights that have turned too light regain some depth without starting over.
- Use lowlights in cool taupe, slate, or mushroom tones.
- Place them between the white ribbons, not all underneath.
- Keep the brightest white around the face and top surface.
- Tone the lighter pieces so the contrast feels crisp, not muddy.
Tip: If your hair already feels fragile, ask for lowlights that deposit color gently rather than heavy pigment that can make the hair look dull.
14. Soft Halo Highlights Around the Hairline

If you tie your hair up a lot, this is the placement that earns its keep. A soft halo of white highlights around the hairline, temples, and ears makes ponytails, buns, and clips look finished without needing a full head of brightness. The front reads soft. The back gets the surprise.
This look is gentler than a money piece. The bright pieces are thinner, spread farther apart, and often extend just enough to frame the face before fading into the rest of the grey. That makes it a strong option for people who want movement near the skin but do not want obvious face-framing streaks.
It also suits growing-out hair. If you are between highlight appointments or recovering from a color that felt too strong, a halo placement can bring the style back to life without pushing it into a big transformation. That’s useful. Not glamorous, maybe, but useful beats annoying.
How It Wears in Real Life
- Tucked behind the ears, the light catches fast.
- Pulled into a low ponytail, the front still looks done.
- With glasses, the softer halo keeps the frame from fighting the hair.
- On longer grey hair, it helps the sides look less heavy than the back.
There is a quiet charm to this one. It doesn’t try too hard.
15. All-Over Snowfall Babylights

All-over snowfall babylights are for people who want the softest possible white highlight effect on grey hair. Instead of strong ribbons or obvious panels, the light is scattered everywhere in very fine pieces, so the whole head looks frosted from the inside out. It is the closest thing to a full silver finish without going flat.
This style takes patience. If your natural base is darker than a medium brown, the lift may need more than one appointment to reach a clean white. That is not a flaw. It’s the cost of going pale without wrecking the hair. On already-grey hair, though, the finish can be gorgeous because the new light pieces blend into the silver you already have instead of fighting it.
The payoff is a look that feels luminous from every angle. There is no single stripe doing all the work. The brightness sits in the whole head, and that creates a softer, more expensive-looking result than a harsh contrast ever will.
If you want the cleanest version of white highlights for grey hair, this is the one I’d point to first. Bring photos that show the amount of brightness you want, not just the placement, because the difference between “snowfall” and “chalky” can be tiny in a salon chair and huge in daylight.
