



Grey hair color reveals work best when the before photo looks ordinary. Not disastrous. Just a little tired at the roots, a little flat through the mids, and maybe a touch too honest around the temple line.
That is where the good transformations happen. Grey hair is rarely the problem by itself. The problem is a color choice that fights it: too dark, too warm, too stripey, too flat, or too eager to cover every silver thread like it never existed.
A smart reveal treats grey hair like texture and light, not damage. Sometimes that means full coverage. Sometimes it means babylights, lowlights, a root shadow, or a gloss that softens the whole thing without turning it into a helmet. Grey hair also behaves differently from pigmented hair; it can feel wirier, resist color at the front hairline, and show a hard line if the formula is too blunt. That is why the best before-and-after grey hair color photos usually look calm, not dramatic.
Start with the strongest coverage case, because that is where most grey hair decisions begin.
1. Full Brunette Coverage With a Clean Root Line
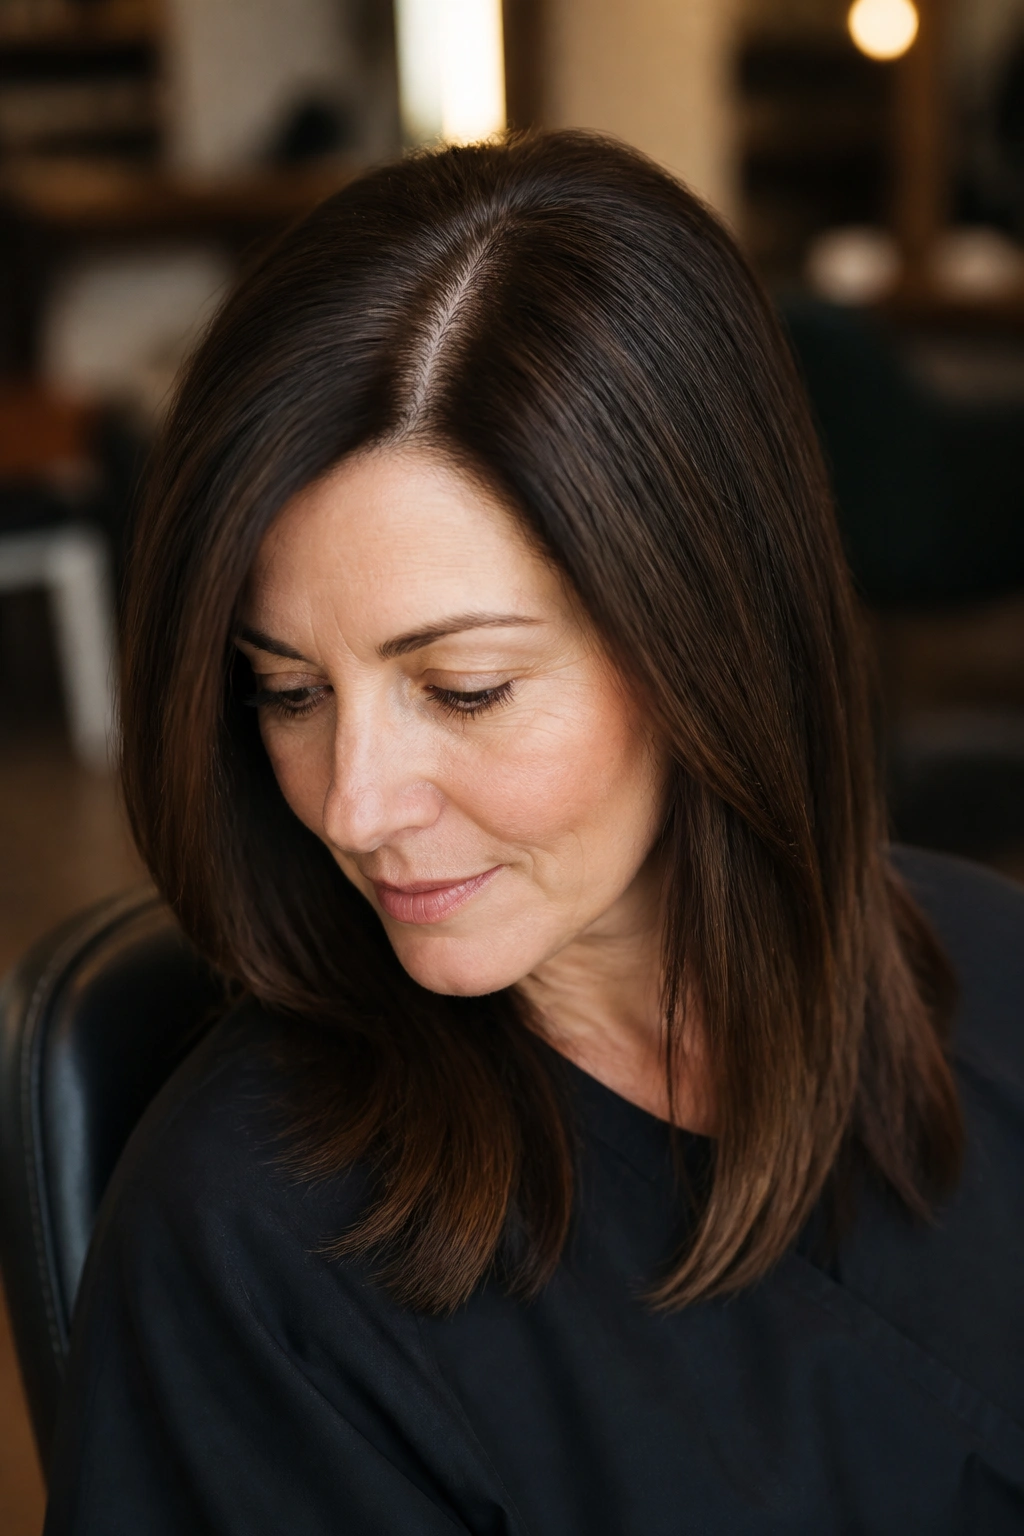
A full brunette cover-up is still the clearest before-and-after reveal when the goal is to make grey disappear fast. There is a reason people keep coming back to it: when the roots are evenly covered, the whole face looks smoother and more rested.
Why It Looks So Polished
The trick is not to go too dark. A level 4 or 5 brunette usually looks richer than a near-black formula, which can make the skin look harder and the regrowth line scream for attention. Grey hair at the temples often needs a separate approach from the back of the head, because that front section tends to be stubborn and slightly wiry.
A good colorist will usually work with a permanent base at the root, then soften the mids with a gloss or demi-permanent toner so the finish does not look like one flat block. That little bit of movement matters.
- Ask for a neutral brunette base with a touch of warmth, not a dense black-brown.
- Keep the root application precise at the hairline so the line does not get muddy.
- Plan on 4 to 6 weeks between root touch-ups if you want the reveal to stay clean.
- If your grey is resistant, a strand test behind the ear can save you from a patchy surprise.
Best tip: leave a tiny bit of sheen in the formula. Flat brown looks older than grey sometimes does.
2. Soft Silver Blending at the Temples
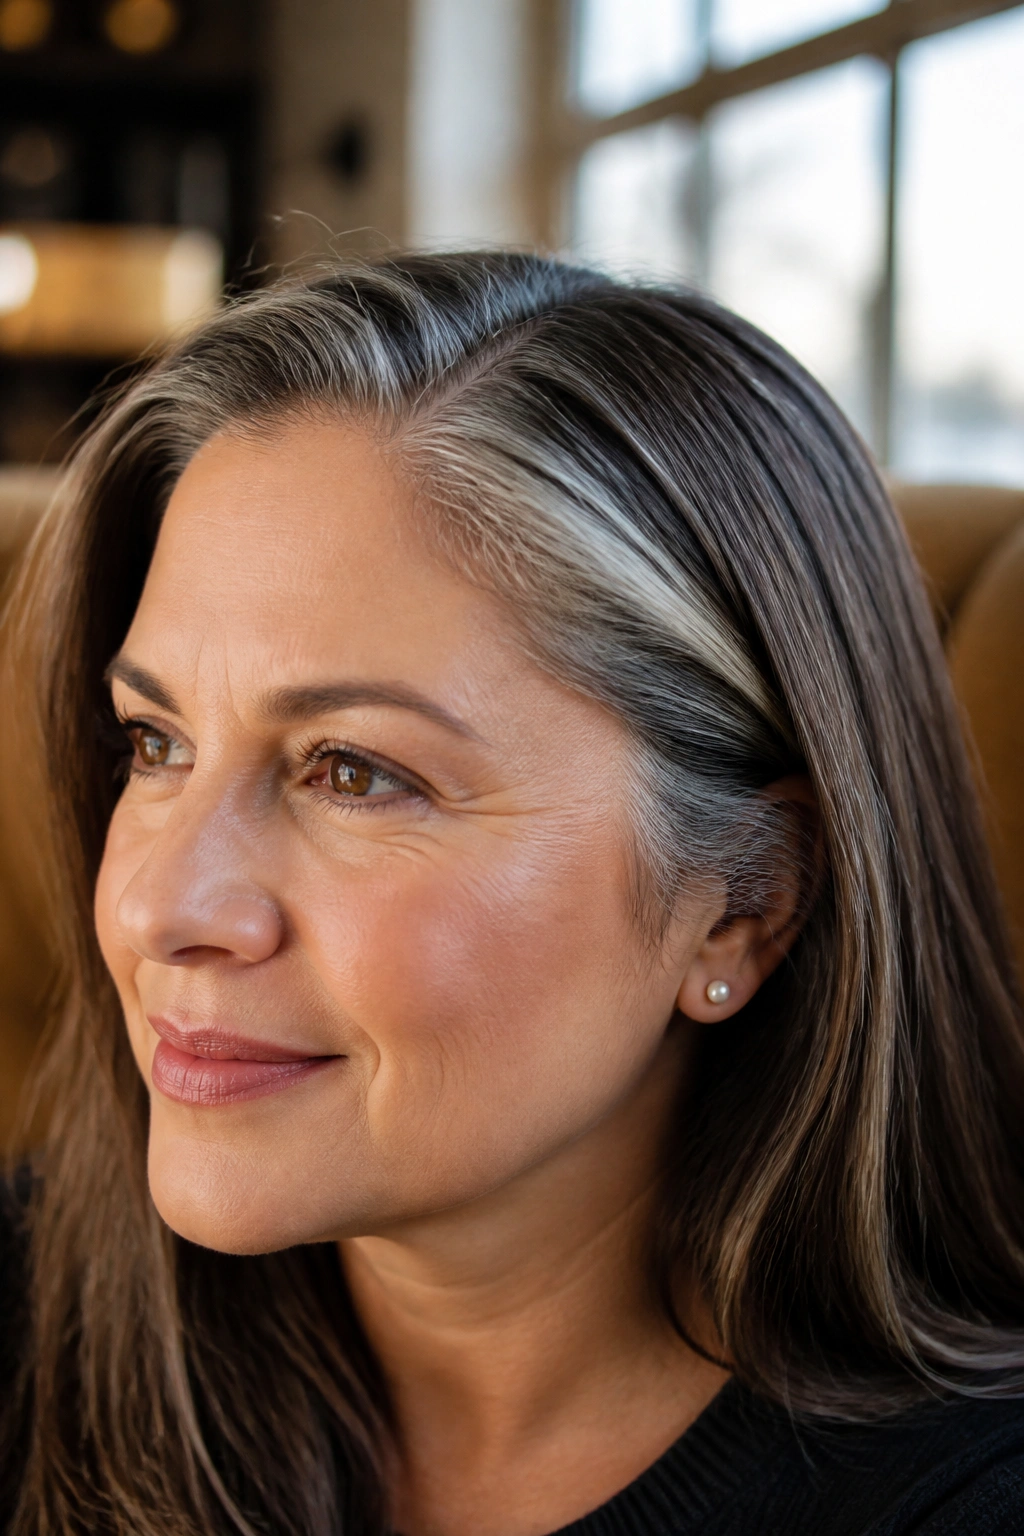
Why do some silver blends look soft and expensive while others look streaky? Placement. That is the whole answer, and it matters more than the tone chart.
When the grey is strongest at the temples and hairline, the reveal works best if the silver is blended instead of buried. A few fine babylights, a translucent ash gloss, and a couple of lowlights near the part line can make the grey look intentional instead of accidental. The result is lighter around the face and calmer everywhere else.
How to Ask for It
Tell the colorist you want the grey to stay visible but softened. That wording matters. If you ask for “coverage” when you really want “blend,” you may end up with opaque color and a hard grow-out line two weeks later.
The best silver blends are usually built in thin layers.
- Babylights near the part and hairline keep the grey from looking stripey.
- A cool demi-permanent gloss keeps silver from turning yellow.
- A few soft lowlights in the crown stop the roots from floating away from the rest of the hair.
- This look works especially well if your natural grey is already bright and reflective.
It is a gentle reveal. No drama. That is the point.
3. Ash Blonde Babylights Over Early Grey
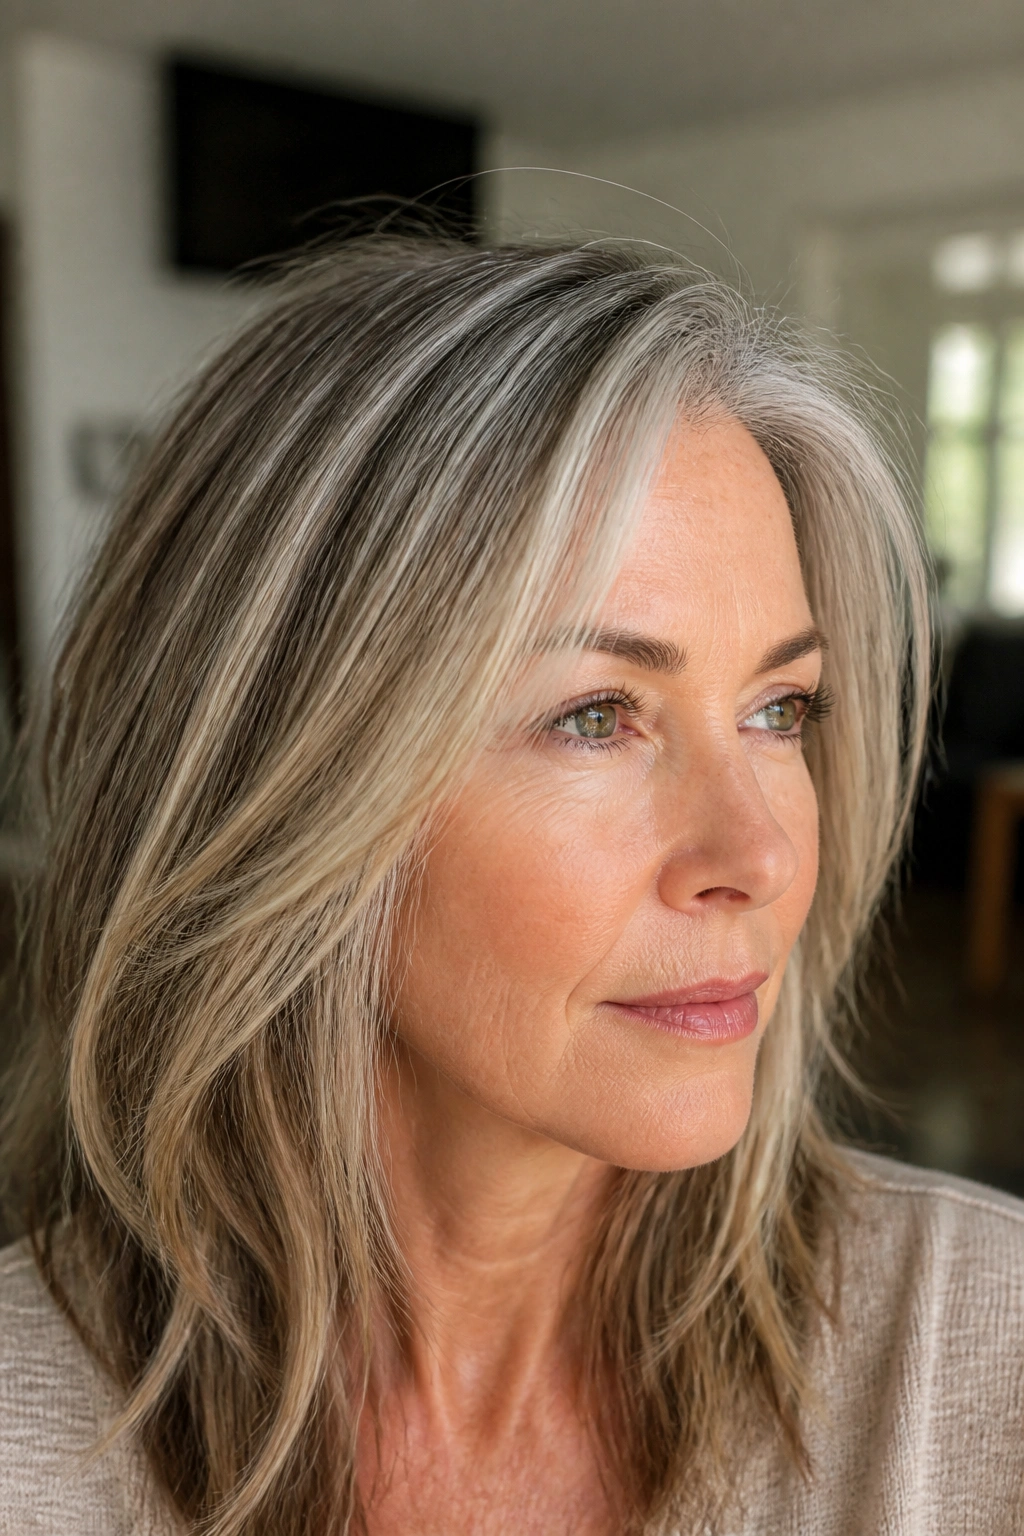
Picture this: the before shot is about 20% grey, mostly at the front, and the rest of the hair is a flat light brown that looks a little sleepy. The after photo? Tiny ash blonde ribbons that make the grey look like part of the plan.
This is one of my favorite grey hair color reveals because it does not try to fight the silver strands. It folds them in. Fine foils, placed close together, create the illusion of depth without drawing obvious stripes across the head.
What Makes It Work
Ash blonde babylights are especially good when the grey is still scattered. They create a soft, sunlit effect without pushing the hair into warm gold, which can make grey read dull or yellow. The key is thin sectioning. Thick highlights will not do it.
- Use micro-foils around the part and hairline.
- Keep the blonde at a cool level 8 or 9 so the grey doesn’t look brassy beside it.
- Leave some natural depth underneath; the contrast is what makes the reveal believable.
- A violet shampoo once every 1 to 2 washes helps keep the blonde clean.
This look is for someone who wants to look lighter, not obviously highlighted. Big difference.
4. Root Shadow With Lighter Ends
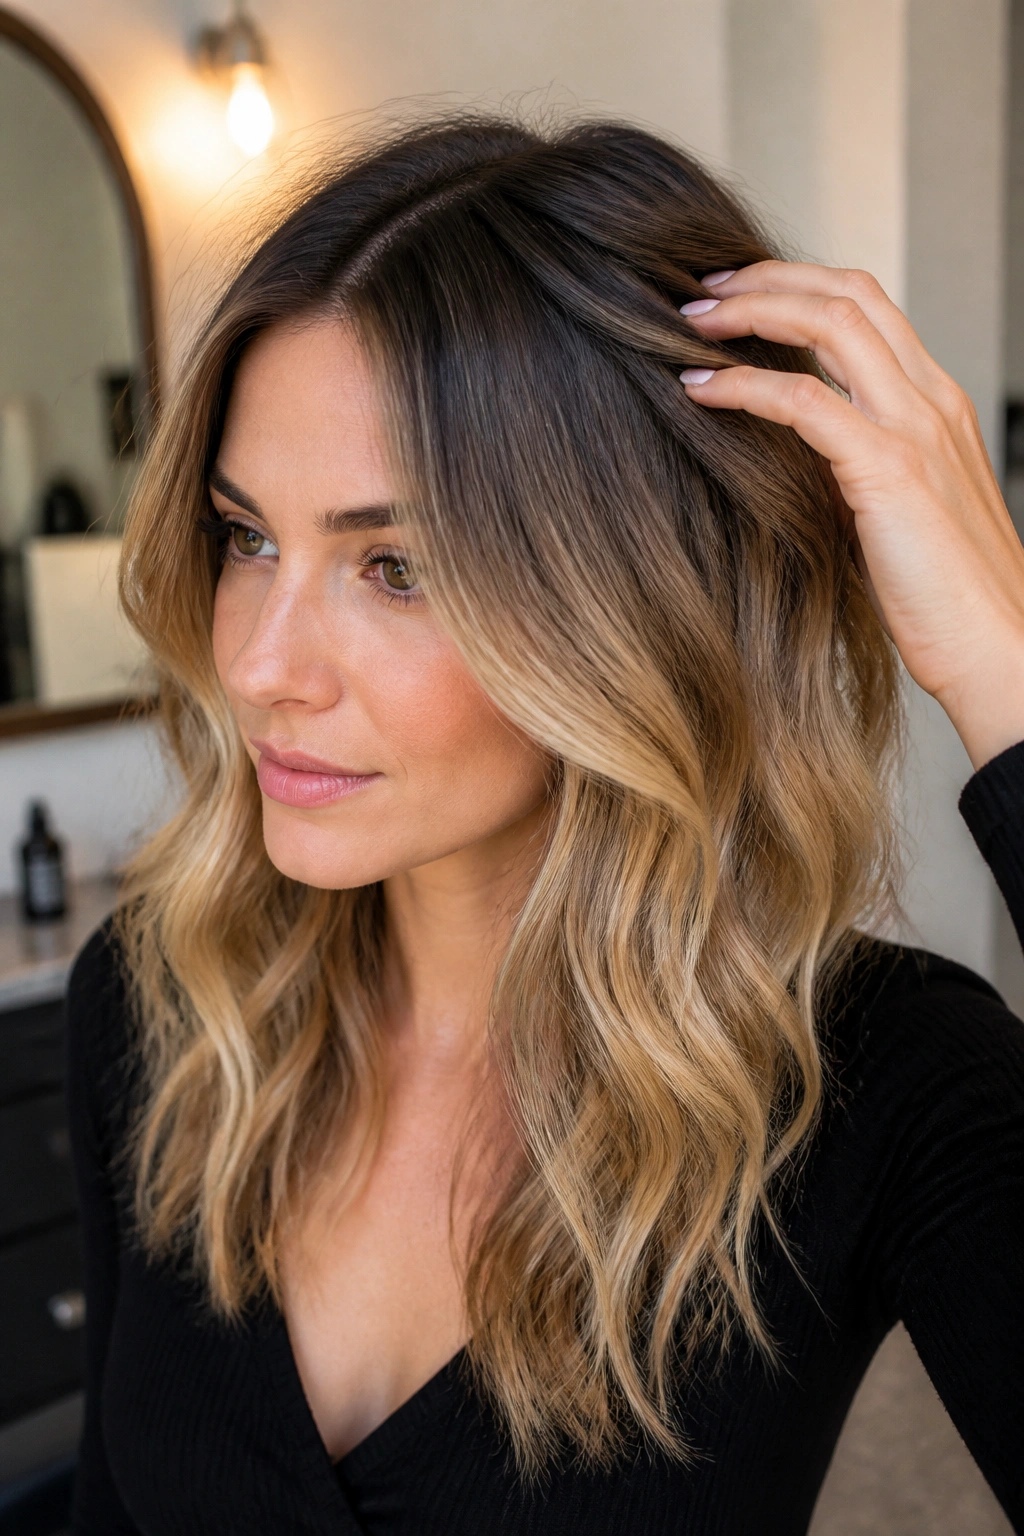
A harsh root line can make grey hair color look like it was done in a hurry. A root shadow fixes that, and it does so quietly.
The before shot usually shows a bright root band sitting on top of lighter lengths, or a color job that has grown out just enough to look awkward. The after photo softens that line with a shaded root area that melts into the rest of the hair. It is one of the easiest ways to make a grey blend look expensive without overprocessing the whole head.
The Shape of the Change
A root shadow is not the same thing as simply painting the top darker. It usually means dropping the root one to two shades, then feathering the color down about half an inch to an inch. That small shift matters. Too much darkness and the hair looks heavy. Too little and the grey still steals the show.
You want the transition to disappear when the hair moves.
- Keep the root shadow slightly deeper than the mids, not much darker.
- Blend with a wide brush or comb so there is no painted-on stripe.
- This works especially well on wavy and layered hair, where movement helps the fade.
- If your hair is porous on the ends, ask for a gloss after the shadow so the finish stays even.
Soft roots, lighter ends. Simple idea. Good results.
5. Salt-and-Pepper Hair That Looks Deliberate
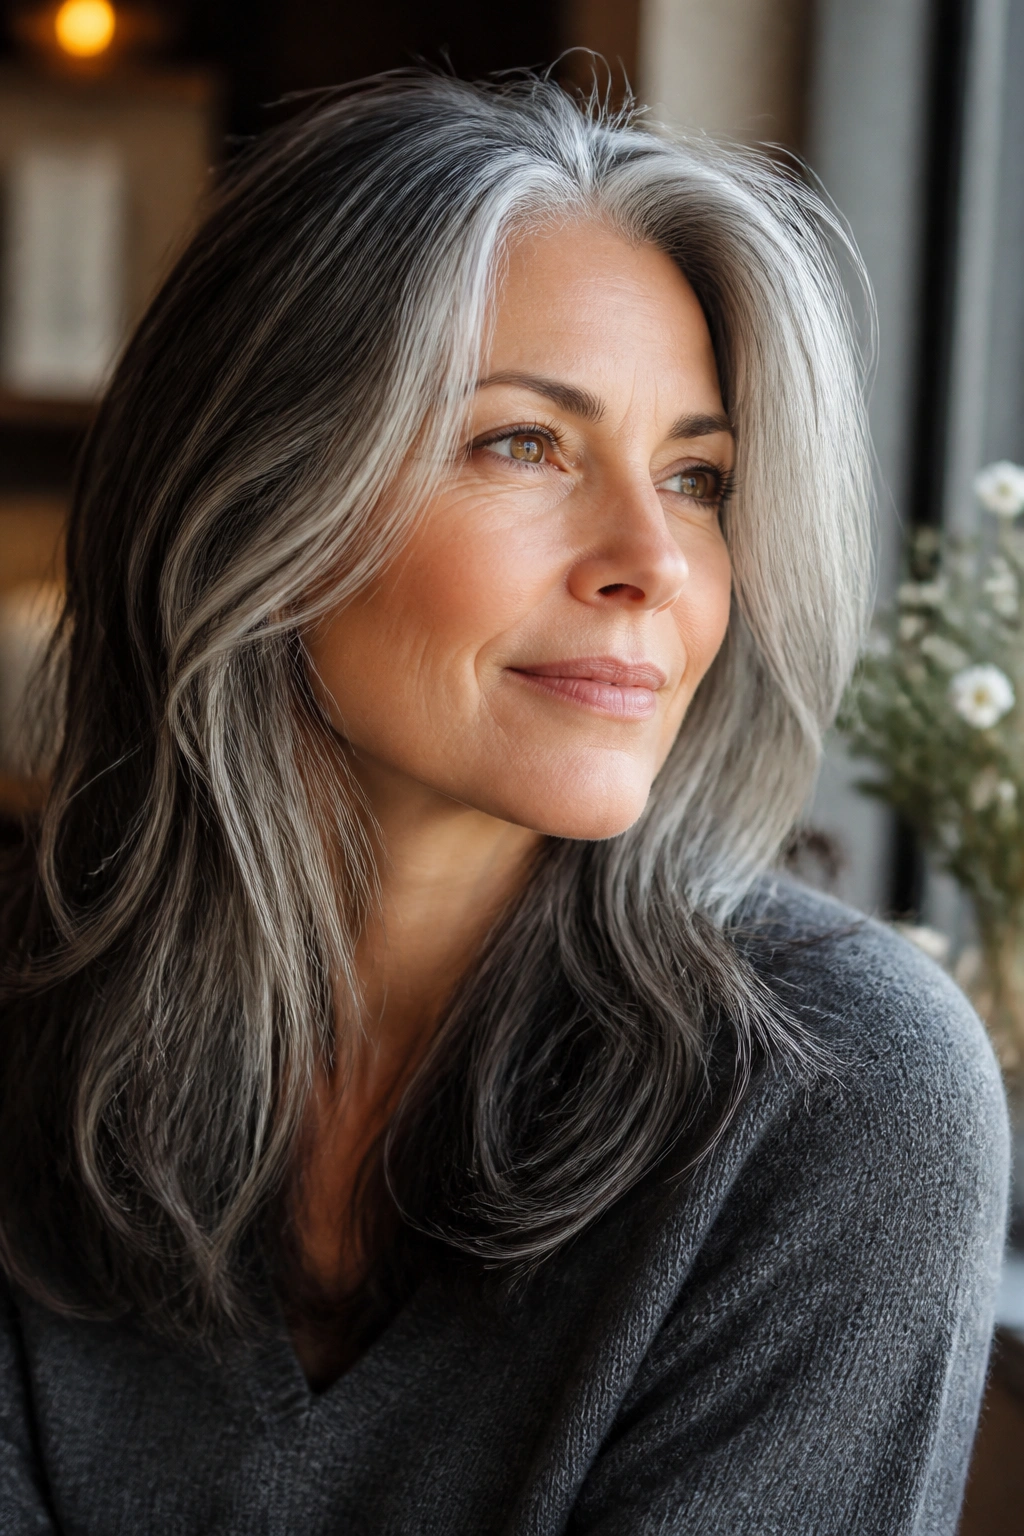
Some people are not trying to hide grey, and the best color work respects that. Salt-and-pepper hair can look polished, modern, and a little bit cooler than full coverage ever could.
The mistake I see most often is over-toning. Someone with a gorgeous mix of silver and dark strands gets pushed into one flat shade, and suddenly the hair loses all that natural movement. The better before-and-after reveal keeps the contrast but smooths the rough edges. That means a clear gloss, a few strategic lowlights, and a trim that makes the ends look tidy.
Grey hair does not need to be uniform to look finished.
A salt-and-pepper reveal usually works best when the silver is brightest near the face and the deeper pieces sit underneath and through the back. That gives the hair lift without pretending it is one color. A soft beige or pearl glaze can help the silver shine without turning it icy. I like this look on short bobs, soft shags, and longer layers that already have a bit of bend.
It is honest hair. That is why it looks good.
6. Mushroom Brown for Cool Grey Blending
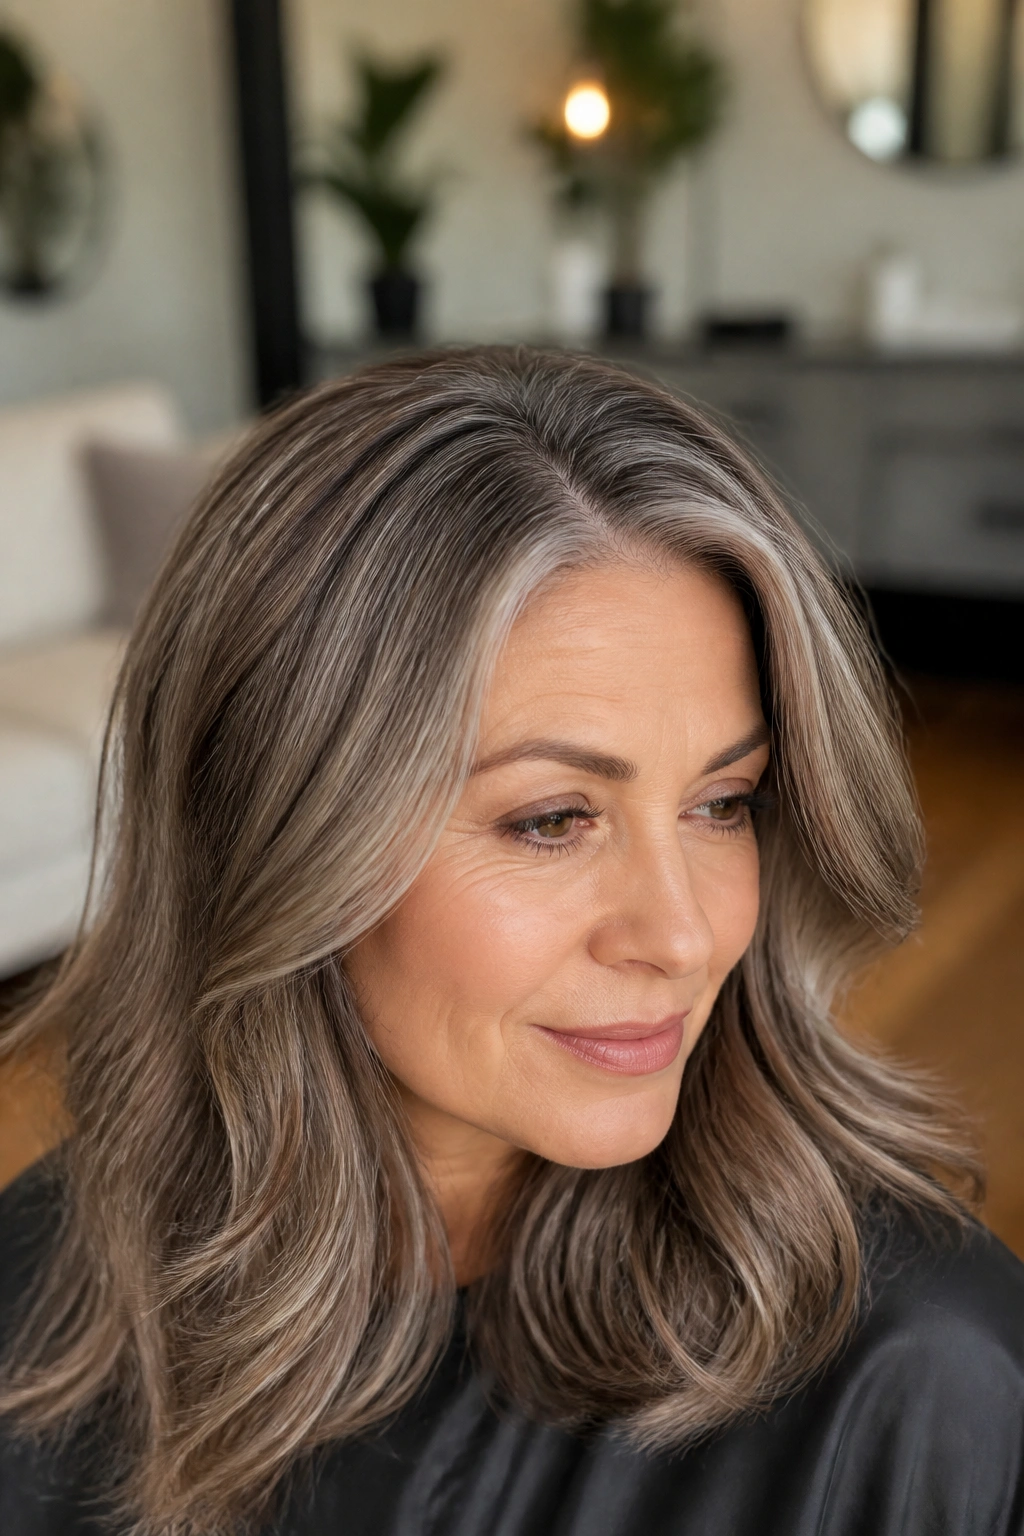
Mushroom brown sits in that sweet spot between brunette and blonde, and it makes grey hair color look calmer than most warm browns do. It is cool, taupe, and a little smoky. No brass, no orange, no fake shine.
Unlike chestnut or golden brown, mushroom brown does not fight silver strands. It lets them sit inside the color story. That makes it a strong choice if your natural grey is mixed through the crown and around the temples, because the cool beige base keeps the transition quiet.
What Makes It Different
The shade usually combines a neutral brown base with ash lowlights and a soft beige gloss. You do not want it to look muddy. That is the trap. The finish should read as cool and dimensional, not flat and dusty.
- Best for cool or neutral skin tones.
- Works well when the grey is scattered rather than fully grown out.
- Looks especially good on medium-length cuts with a little movement.
- Needs a toning refresh every 6 to 8 weeks if you want the cool cast to stay crisp.
If you like hair color that feels quiet but expensive, mushroom brown is one of the smarter choices. It photographs well because it has depth without looking busy.
7. Caramel Ribbons That Soften Grey Without Hiding It
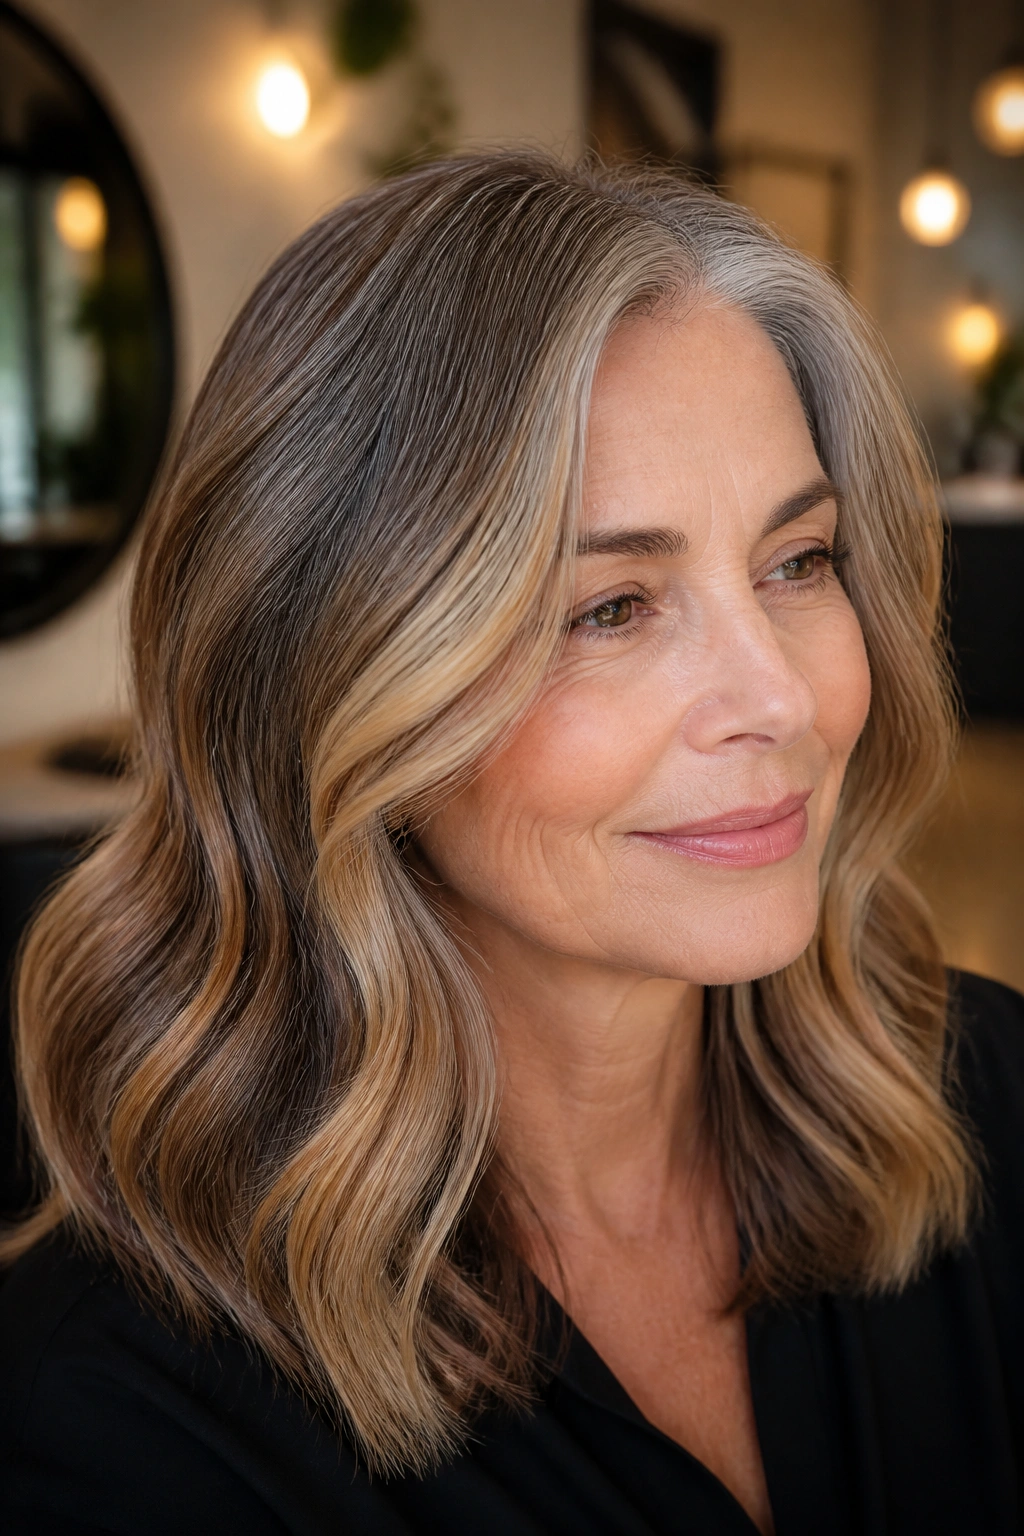
Caramel ribbons are a smart move when dark hair has picked up enough grey to look dull but not enough to need full coverage. The before shot often looks tired. The after shot looks warmer, brighter, and less stern.
The trick is placement. If the caramel is too chunky, it will scream. If it is too fine and too warm, it can turn brassy against grey hair. The sweet spot is soft ribbons woven through the mids and around the face, with a few lighter touches in the top layer so the hair moves.
Where the Colorist Puts It
The best caramel reveal usually keeps most of the depth underneath and lets the lighter pieces sit on top. That means the hair still has a brunette base, but the grey no longer dominates the overall look.
- Put the brightest ribbons around the cheekbones and part line.
- Keep the tone golden-beige rather than orange.
- Leave the nape and underlayers darker so the color has depth.
- This works well on thicker hair, where a few lighter pieces can be enough.
It is not a dramatic change. It is a better one. The hair looks warmer, and the grey becomes part of the texture instead of the whole story.
8. Ice Blonde Gloss That Turns Grey Into a Feature
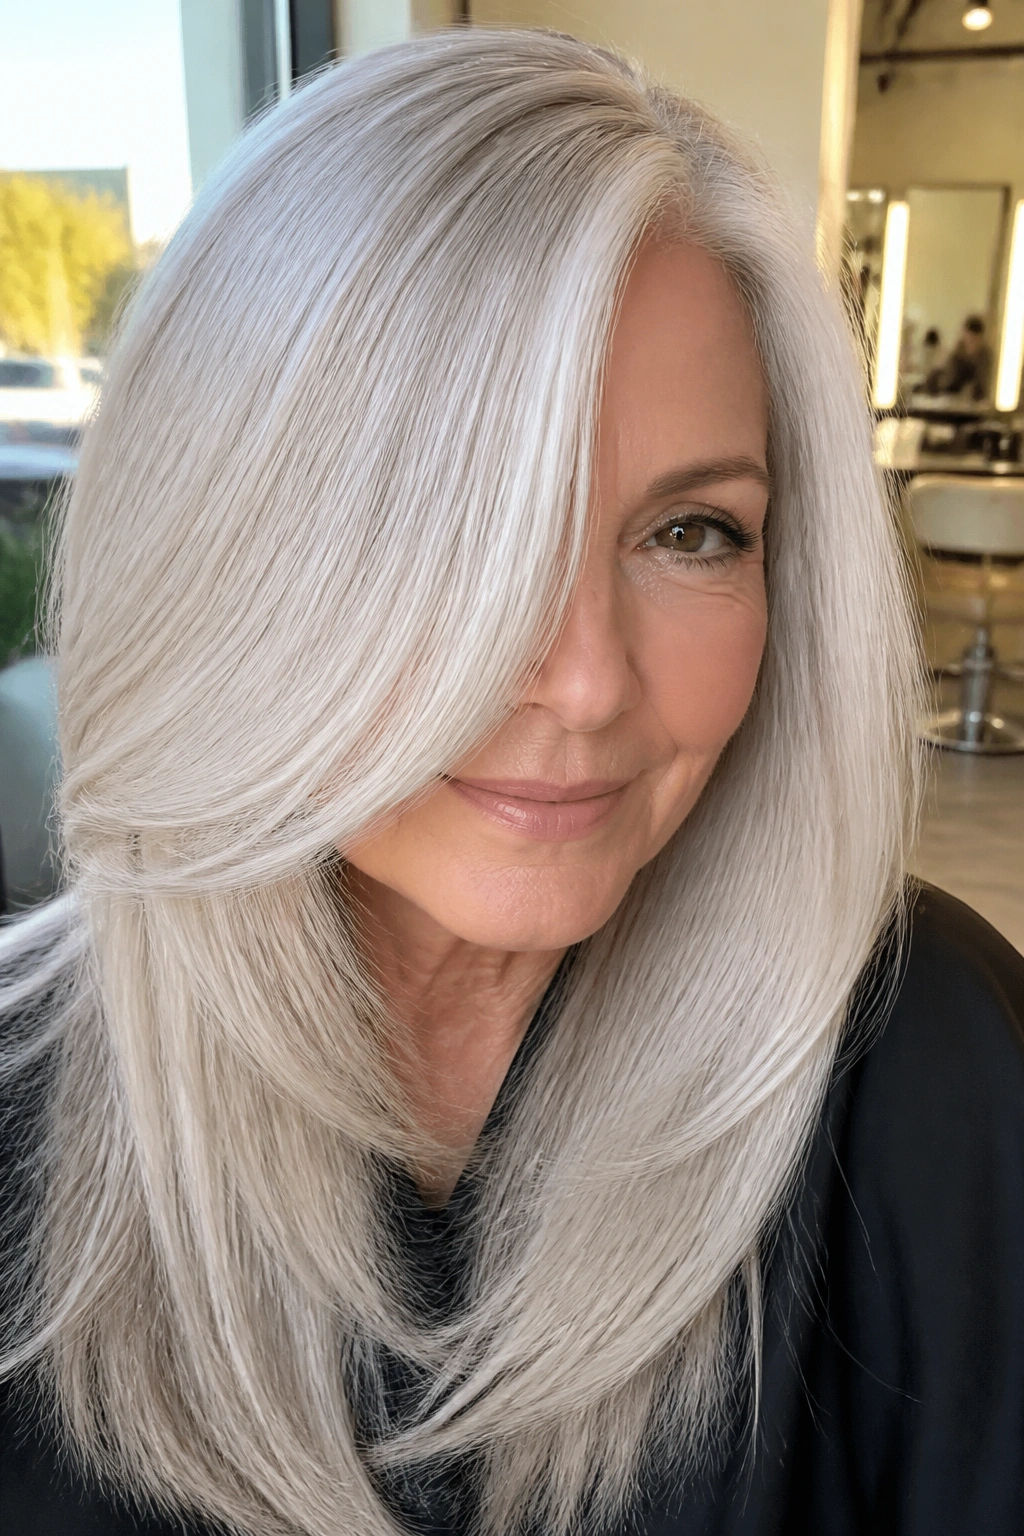
Ice blonde can look unbelievably clean on grey hair, but only when the lift is even. If the base is patchy, the result turns cloudy fast. If the lift is smooth, the reveal looks sharp and deliberate.
This is a bolder choice than silver blending. The hair is lifted light enough that the grey reads as a pale pearl tone instead of a stubborn root. A cool gloss at the end pulls the whole look together and gives the blonde that frosty finish people chase but rarely nail.
The practical part matters. Hair usually needs to be pre-lightened to a pale yellow before the cool toner goes on. If the yellow is still too strong, the result will feel beige rather than icy. If the hair is over-lightened, it can go hollow and weak. So yes, the balance is fussy. That is the price of this look.
I like ice blonde on shorter cuts and lighter skin tones, but it can work on many people if the toner is chosen carefully. The upkeep is not tiny. Expect purple or blue shampoo to play a supporting role, not a miracle role, and use a bond-building mask when the ends start to feel dry.
Frosty, not flat. That is the line.
9. Smoky Brunette Lowlights for Dense Grey Patterns
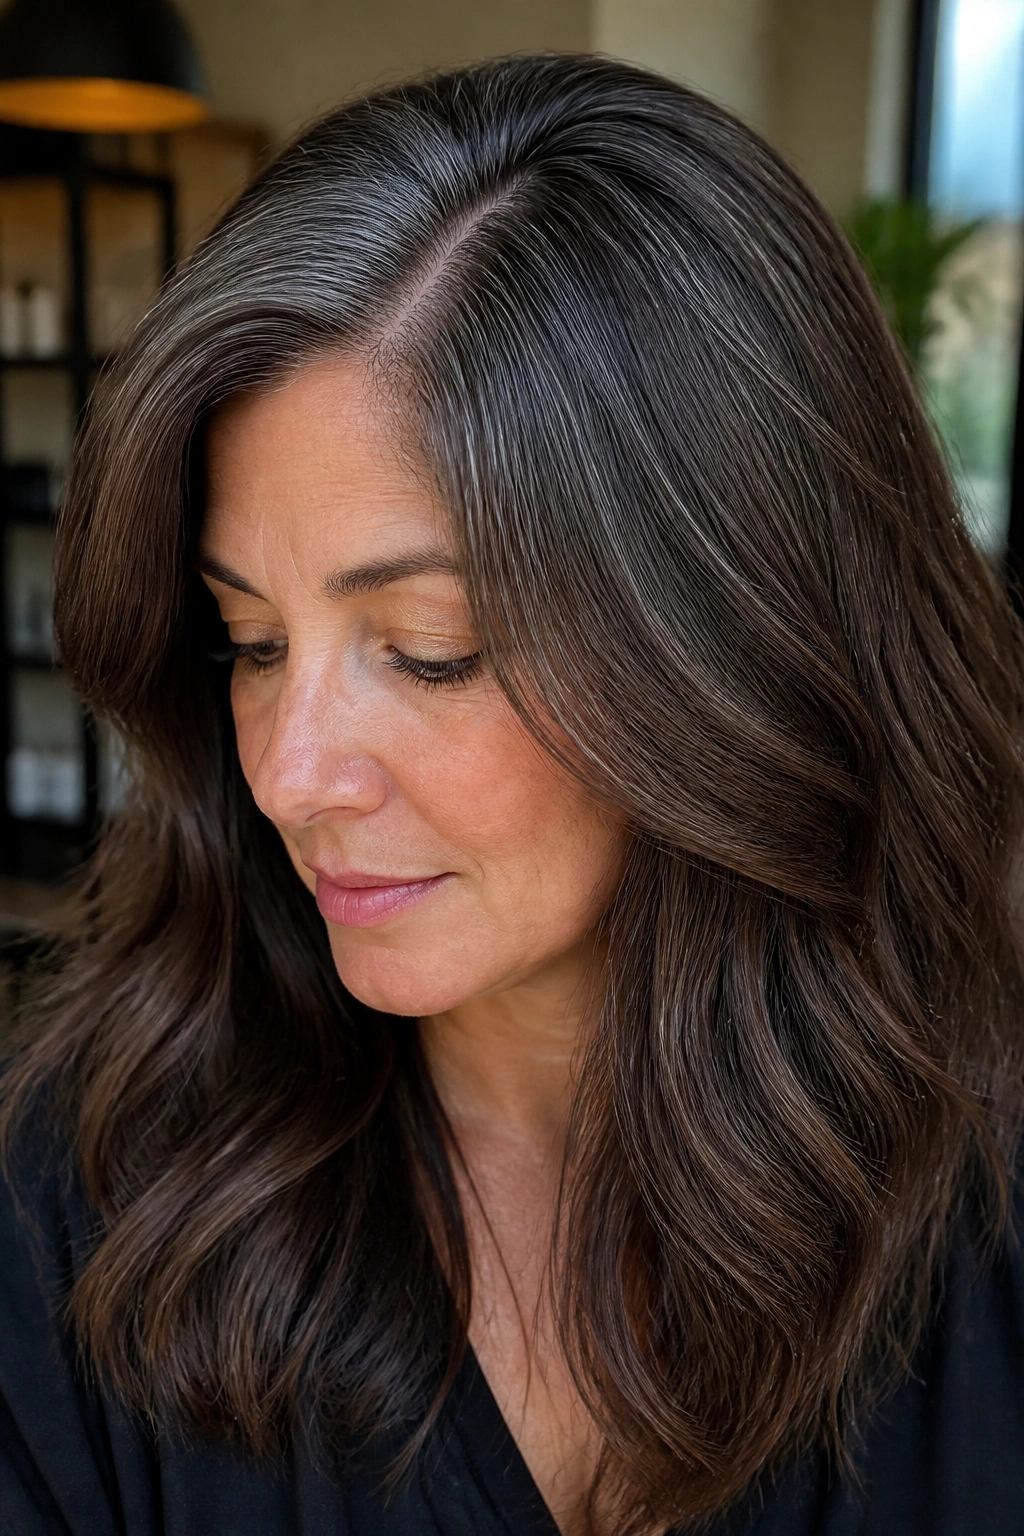
Why do lowlights help so much when grey is dense? Because they give the eye something to rest on. Without them, a lot of grey reads as a bright sheet, especially under strong light.
A smoky brunette reveal is perfect for people who still want depth but do not want their color to look painted. The before image usually shows heavy grey around the crown or part line, with the rest of the hair feeling washed out. The after version drops in a few darker strands and often a cool gloss so the whole head looks thicker.
How to Wear It
This style is not about making the hair dark. It is about putting structure back in.
- Place the lowlights under the top layer and near the part.
- Keep them one or two shades deeper than the natural base.
- Add a neutral-cool gloss to prevent warmth from fighting the grey.
- It works well on medium to coarse textures, where lowlights can mimic natural depth.
A smoky brunette reveal is one of the most forgiving options if your grey grows fast. The regrowth blends into the darker pieces better than it would into a flat all-over color, and that makes the whole style easier to live with.
10. Face-Framing Money Pieces That Pull Focus Forward
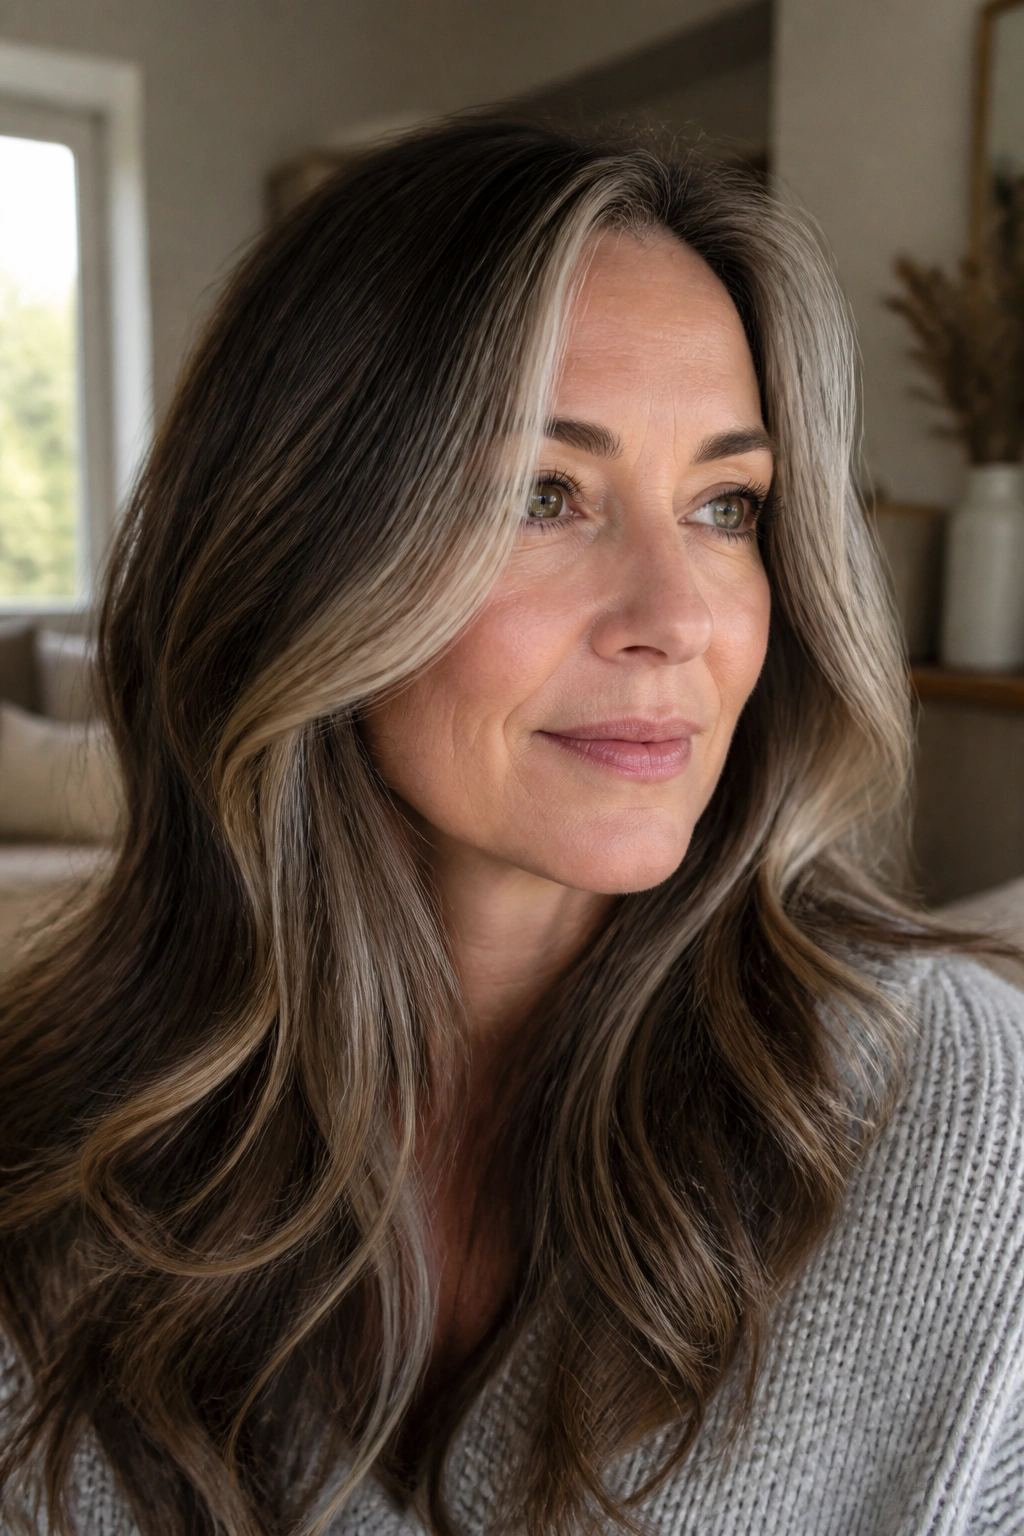
A woman looks in the mirror and hates the grey at her temples. The rest of the hair is fine. That is the classic money-piece scenario, and honestly, it is one of the smartest places to spend your color budget.
Instead of coloring the entire head, the reveal brightens only the front panels. Those face-framing pieces can be lighter blonde, soft beige, or even a pale ash ribbon depending on the base color. The point is to pull the eye toward the face and away from the most stubborn regrowth.
What to Tell Your Colorist
A good money piece should be specific, not vague.
- Ask for 2 to 4 foils on each side if you want a subtle front frame.
- Keep the front pieces one level lighter than the rest if you want softness.
- Blend the roots with a micro-shadow so the regrowth does not look stark.
- Ask for a gloss through the mids and ends if the rest of the hair has gone dull.
The reveal feels easy because it is. And it is cheaper than a full head of highlights, which helps. When the grey is concentrated around the temples, a bright frame can do more visual work than a full-color overhaul ever will.
11. Bright White-Silver Crop for a Sharp, Chic Finish
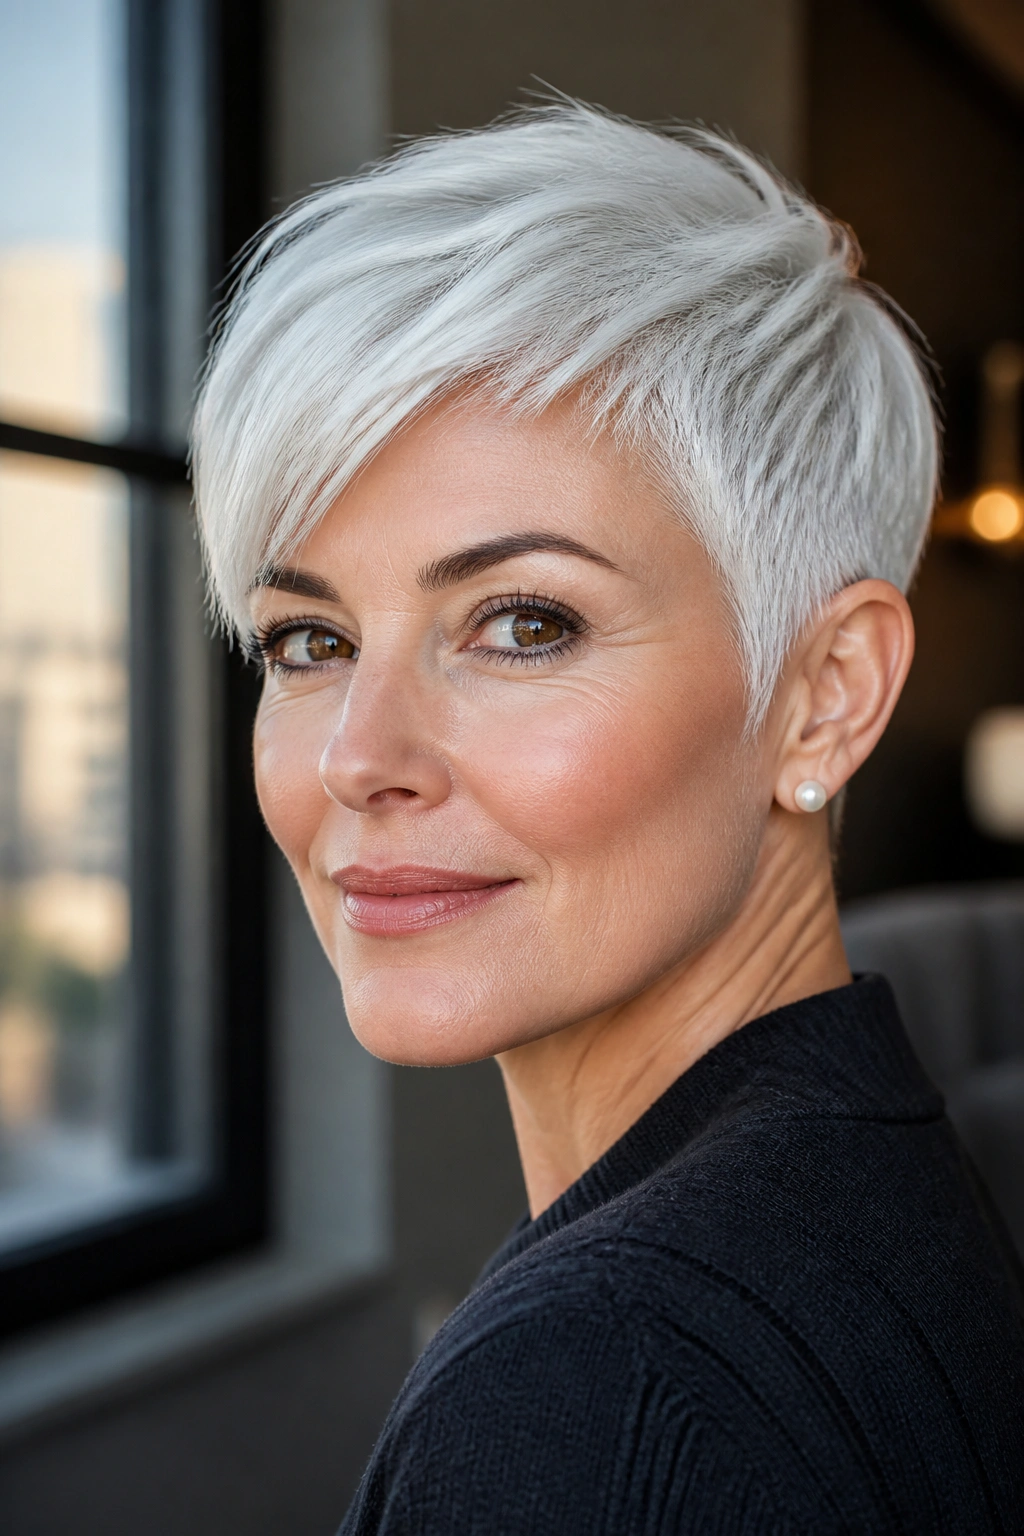
A short crop changes the whole grey hair color conversation. The cut does half the work, maybe more. Once the hair is shorter, the silver reads cleaner and the color has less length to fight through.
The before picture here often shows a grown-out brunette or blonde that feels mushy at the ends. The after is a bright white-silver crop with crisp edges and a gloss that makes the hair look deliberate. It is a strong look. Not subtle. Not shy.
Short grey styles are easier to keep balanced because the color is close to the scalp and the silhouette does most of the talking. If the toner is too violet, though, the hair can go dull lavender in certain light. If it is too warm, the silver loses its edge. That is why a clean pearl or platinum toner usually works better than a heavy purple cast.
I love this reveal on pixies, cropped bobs, and narrow layered cuts. It makes the grey look fresh instead of accidental, and the upkeep is simpler than people expect because there is less length to manage. A sharp neckline helps too. Shaggy ends make silver look messy. Clean lines make it look considered.
12. Beige Blonde Reverse Balayage for Lived-In Grey Blends
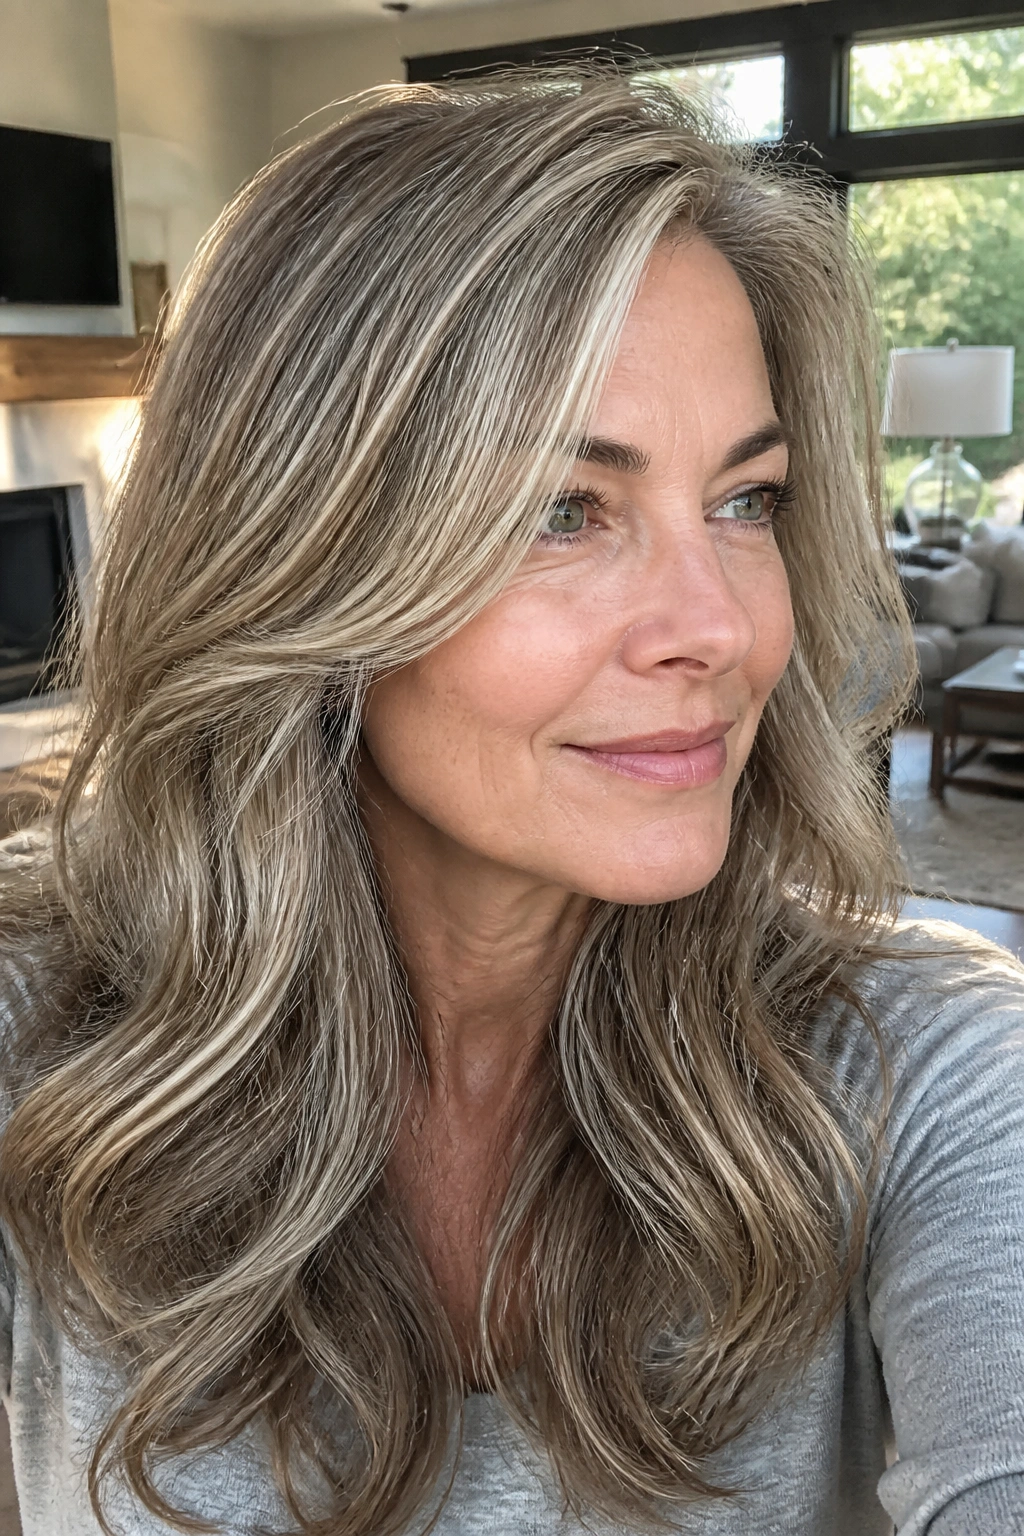
Reverse balayage is the move people forget about, mostly because it sounds like a technical term and not a beauty trick. But when blonde has gone too light and grey starts showing through in awkward patches, it is one of the best fixes.
Instead of lightening the hair, the colorist adds darker beige pieces back in. That sounds backward until you see the result. The after photo looks softer, deeper, and more connected, because the grey has somewhere to land. It is especially useful when highlights have become too bright or the grow-out has lost shape.
Unlike regular balayage, reverse balayage is about restoring depth. The hair does not need more light; it needs shadow. A beige-brown lowlight, placed through the mid-lengths and underlayers, gives the blonde dimension and makes grey look blended rather than isolated.
This is the right choice if you want a lived-in result and you are tired of fighting a glaring root line. It also helps the hair look thicker, which is a quiet bonus. Thin-looking blonde can sometimes expose every silver thread. Beige depth softens that fast.
13. Gloss-and-Tone Refreshes for Faded Colour
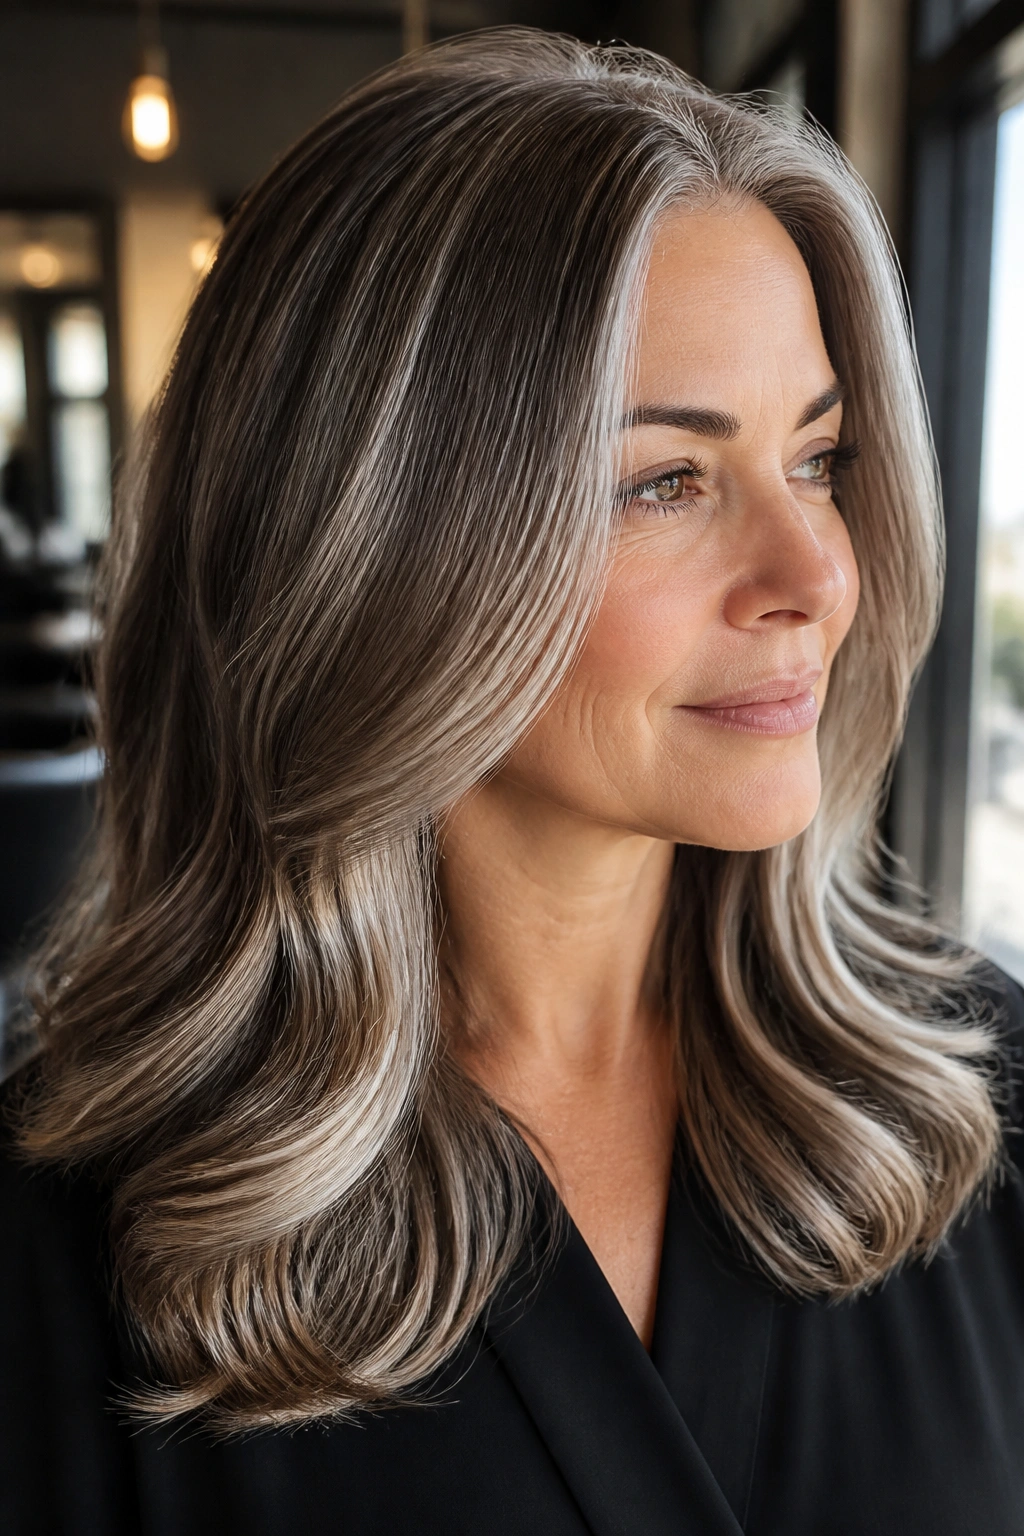
A gloss is not a boring fix. It is the difference between hair that looks dyed and hair that looks finished.
The before shot here is usually one of those annoying in-between moments. The color is still there, but the shine has gone. Grey roots may be peeking through, or the old toner has turned a little muddy. The after photo is clean, reflective, and calmer. No major change in level. Just a much better surface.
What a Gloss Actually Does
A demi-permanent gloss deposits tone without the hard edge of permanent color. That makes it ideal for grey hair that has already been colored once and just needs a reset. It can soften brass, blend a little regrowth, and make the ends look less thirsty.
- Use a beige or pearl gloss if the hair has turned too yellow.
- Choose a cool brunette gloss if the warmth has drifted too red.
- Apply it through the mids and ends first if the hair is porous.
- Expect the finish to last about 4 to 8 washes, depending on porosity and shampoo habits.
The best part is that a gloss can make a simple cut look better. Sometimes that is all the reveal needs.
14. Copper and Strawberry Brown for Warm Grey Coverage
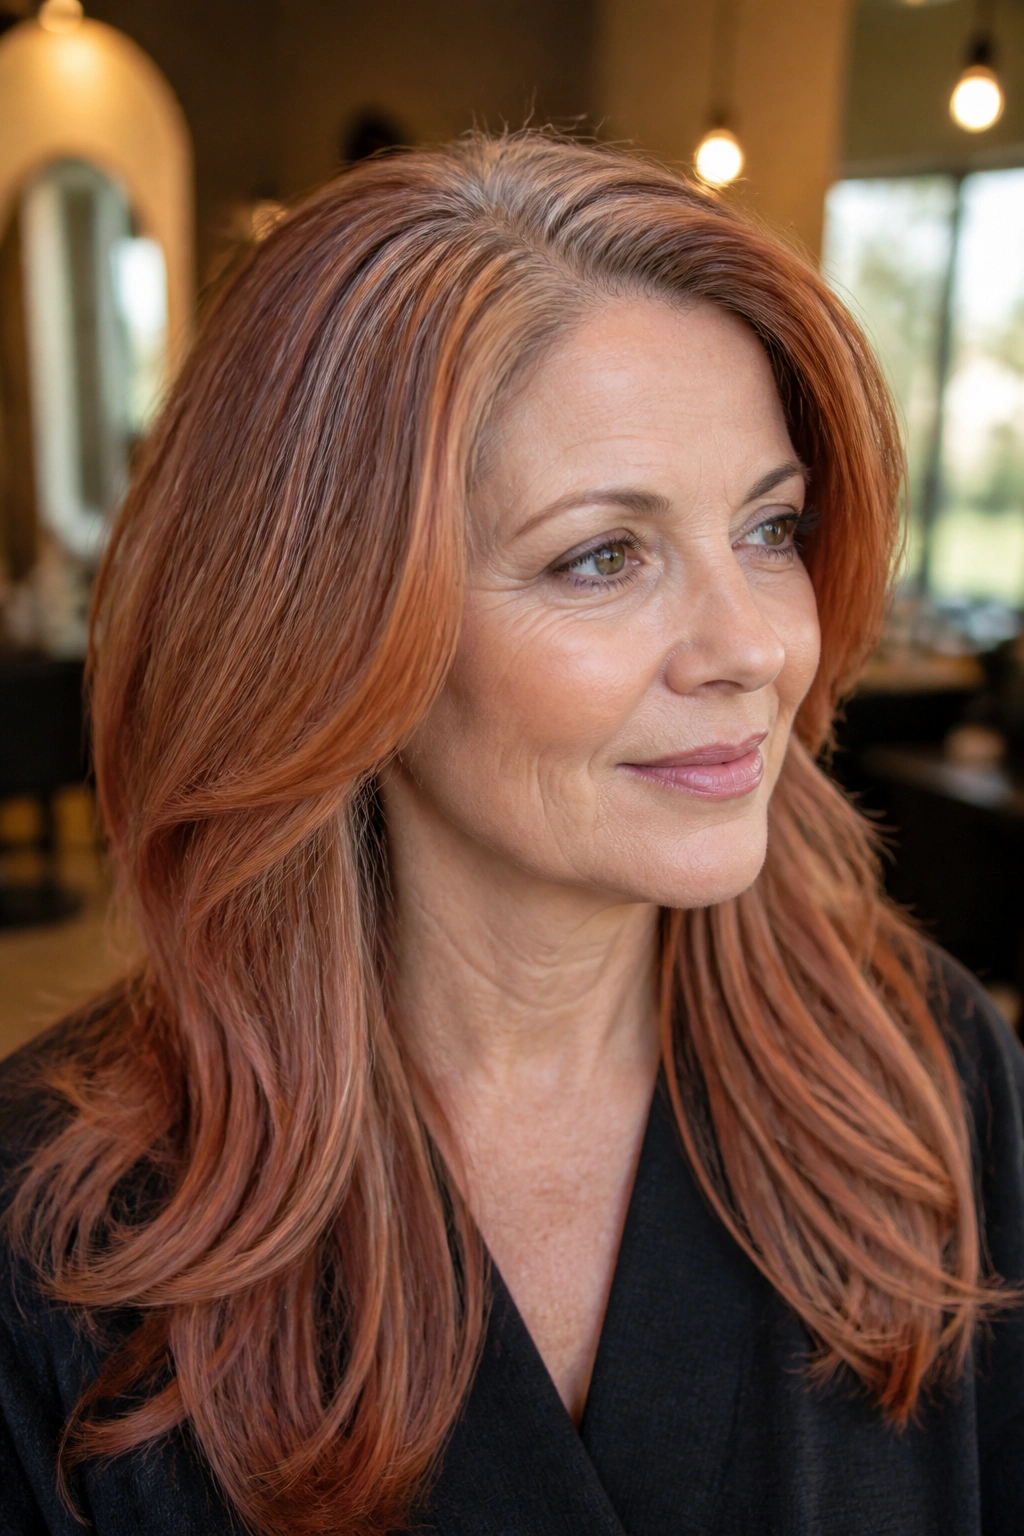
Copper on grey hair is not a bad idea. It is a badly executed idea that gets blamed on the shade.
When it works, the result is warm, reflective, and lively. Grey strands take on a luminous quality under copper and strawberry brown formulas, especially if the hair is medium brown or light brown to begin with. The before photo can look flat and washed out. The after photo feels warmer right away.
The catch is maintenance. Grey hair can grab red tones quickly, and copper fades faster than brunette or ash shades. So this is not the low-fuss option. It is the option for someone who likes color with a little personality and does not mind coming back for refreshes.
A soft copper-brown formula usually works better than a bright orange-red. If the skin has warmth, the result can look beautiful. If the undertone is cool and the copper is too heavy, the whole thing can read like costume hair. Keep it sheer at the first appointment and build from there.
Warm, reflective, and a little playful. That is the version worth wearing.
15. Dimensional Mocha With Cool and Warm Panels
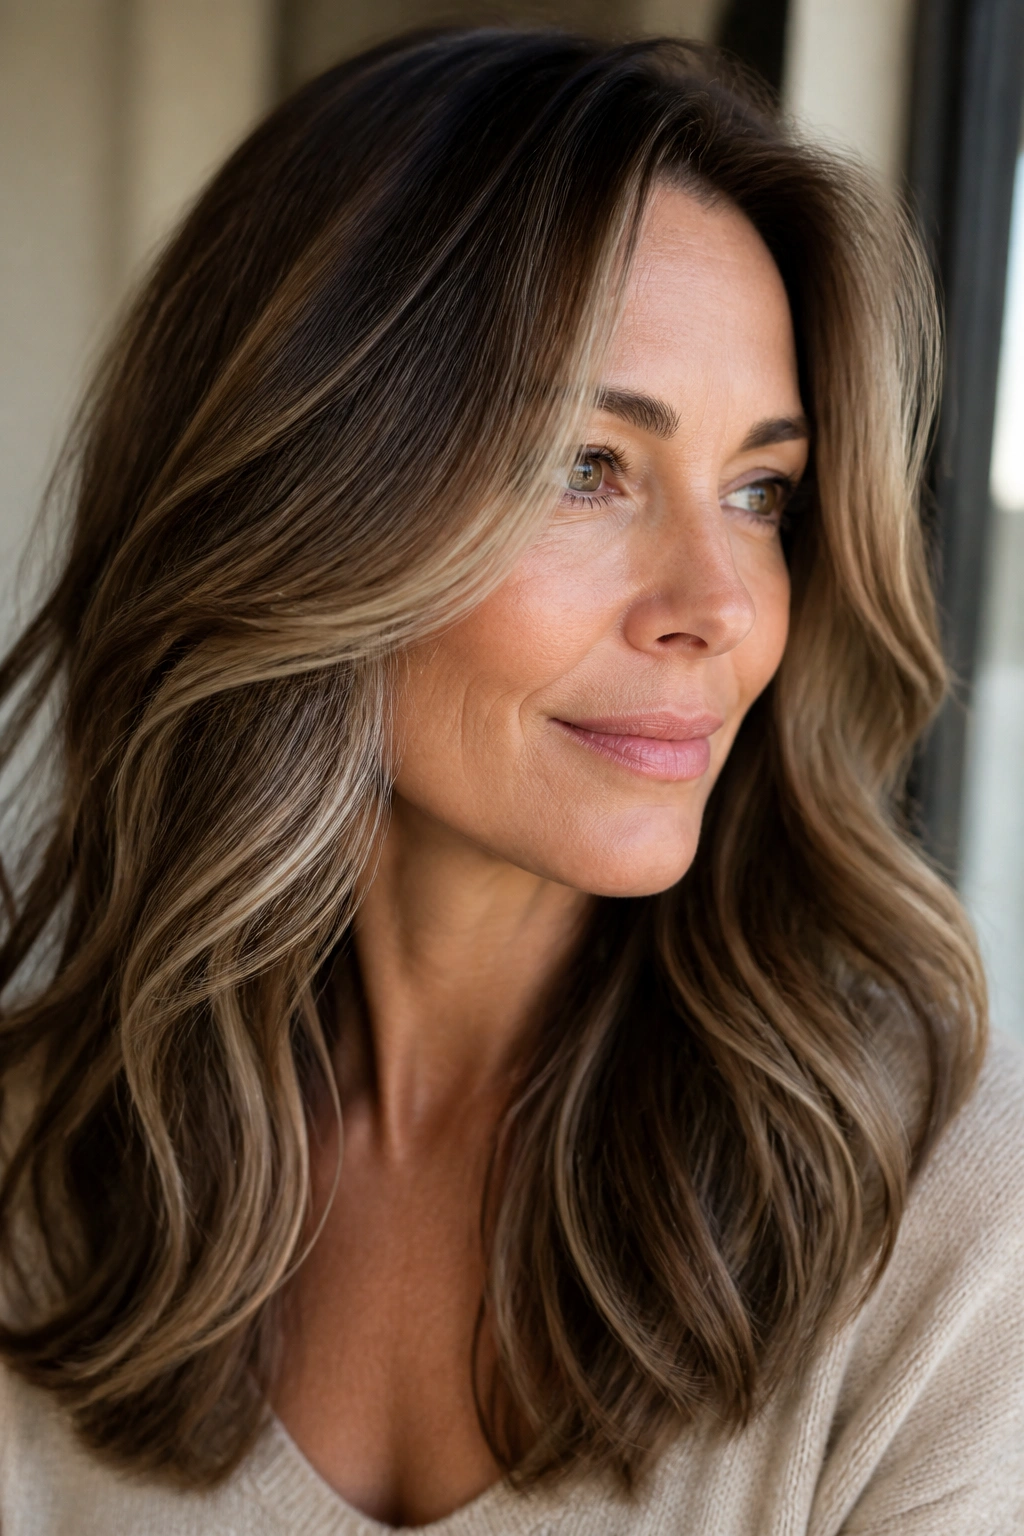
Why does mocha hair color look richer than one-note brown? Because it gives grey places to disappear and places to shine.
A dimensional mocha reveal mixes cool brunette lowlights with a few warm beige-brown ribbons, which stops the color from collapsing into one flat shade. That matters on hair with a lot of grey, because a single brown formula can look blocky against scattered silver. Mocha feels softer. More expensive, if I’m being blunt.
Where the Dimension Goes
The best placement usually keeps the darkest pieces underneath and lets the lighter mocha tones sit through the top layer and around the face. That means the eye sees movement, not a helmet.
- Ask for two to three tones rather than one all-over brown.
- Keep the brightest bits around the cheek line and part.
- Use a cool lowlight underlayer if the grey is thick at the crown.
- Finish with a neutral gloss so the panels read as one family.
This is a smart choice for medium to thick hair, because the contrast gives the shape more life. On fine hair, too many tones can look busy. On fuller hair, it looks rich and grounded.
16. Pixie Cuts That Make Grey Look Intentional

A pixie can change the way grey hair behaves in an instant. The before picture is often a longer style with heavy regrowth and tired ends. The after is a neat, cropped shape where the grey looks like texture instead of neglect.
Short hair is forgiving in a way long hair is not. Grey pieces blend faster because there is less surface area, and the style itself has a crispness that suits silver. If the cut is tapered at the sides and slightly longer on top, the color can move between silver, white, and soft brown without feeling messy.
What Helps This Look Land
A pixie reveal depends on clean shape and clean tone.
- Keep the sides tight but not shaved if you want softness.
- Add a light gloss at the top so the silver catches on the surface.
- Use tiny lowlights if the grey is bright but the hair needs depth.
- Book trims every 4 to 6 weeks so the silhouette stays sharp.
This is not the choice for someone who wants to hide every silver strand. It is for someone who wants the grey to look deliberate and neat. Short hair does not forgive sloppy color, but when it is done well, it looks strong.
17. Long Layers and Soft Waves for Multi-Tonal Grey Blends
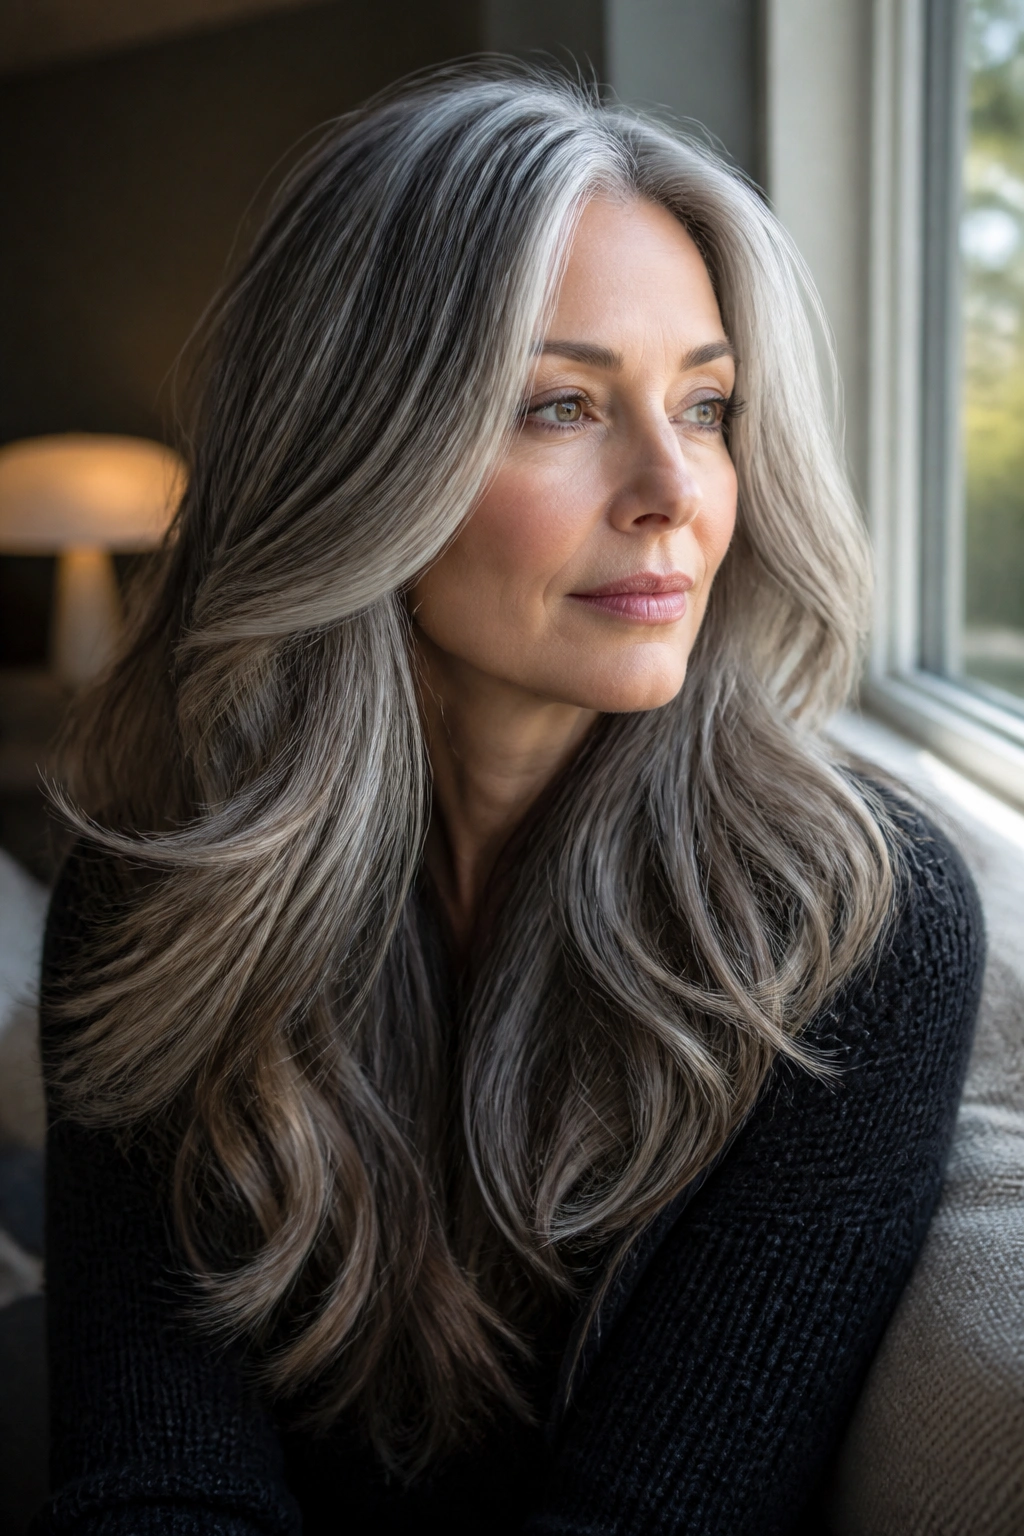
Long hair can carry grey beautifully, but only if the color has movement. Flat, one-length color tends to expose every regrowth line. Layers and soft waves break that up.
The before shot on long hair often shows a dark base with grey starting to spread through the front, the part, and the ends. The after photo looks softer because the color is distributed across the length instead of sitting in one heavy stripe. Balayage, lowlights, and a gloss can all work here, but the cut matters as much as the formula.
Soft waves help because they let the color shift as the hair moves. Grey does not look like one rigid block when the hair bends. It looks woven in. That is a much better result.
I like this style for people who want to keep length but dislike harsh root lines. A few brighter ribbons around the face, a slightly deeper base underneath, and a toning gloss on the ends can make the whole thing feel lived-in rather than overdone. It is one of those reveals that gets better in motion, which is probably why it looks so good in real life and not only in a still photo.
18. The Softest Grow-Out of All
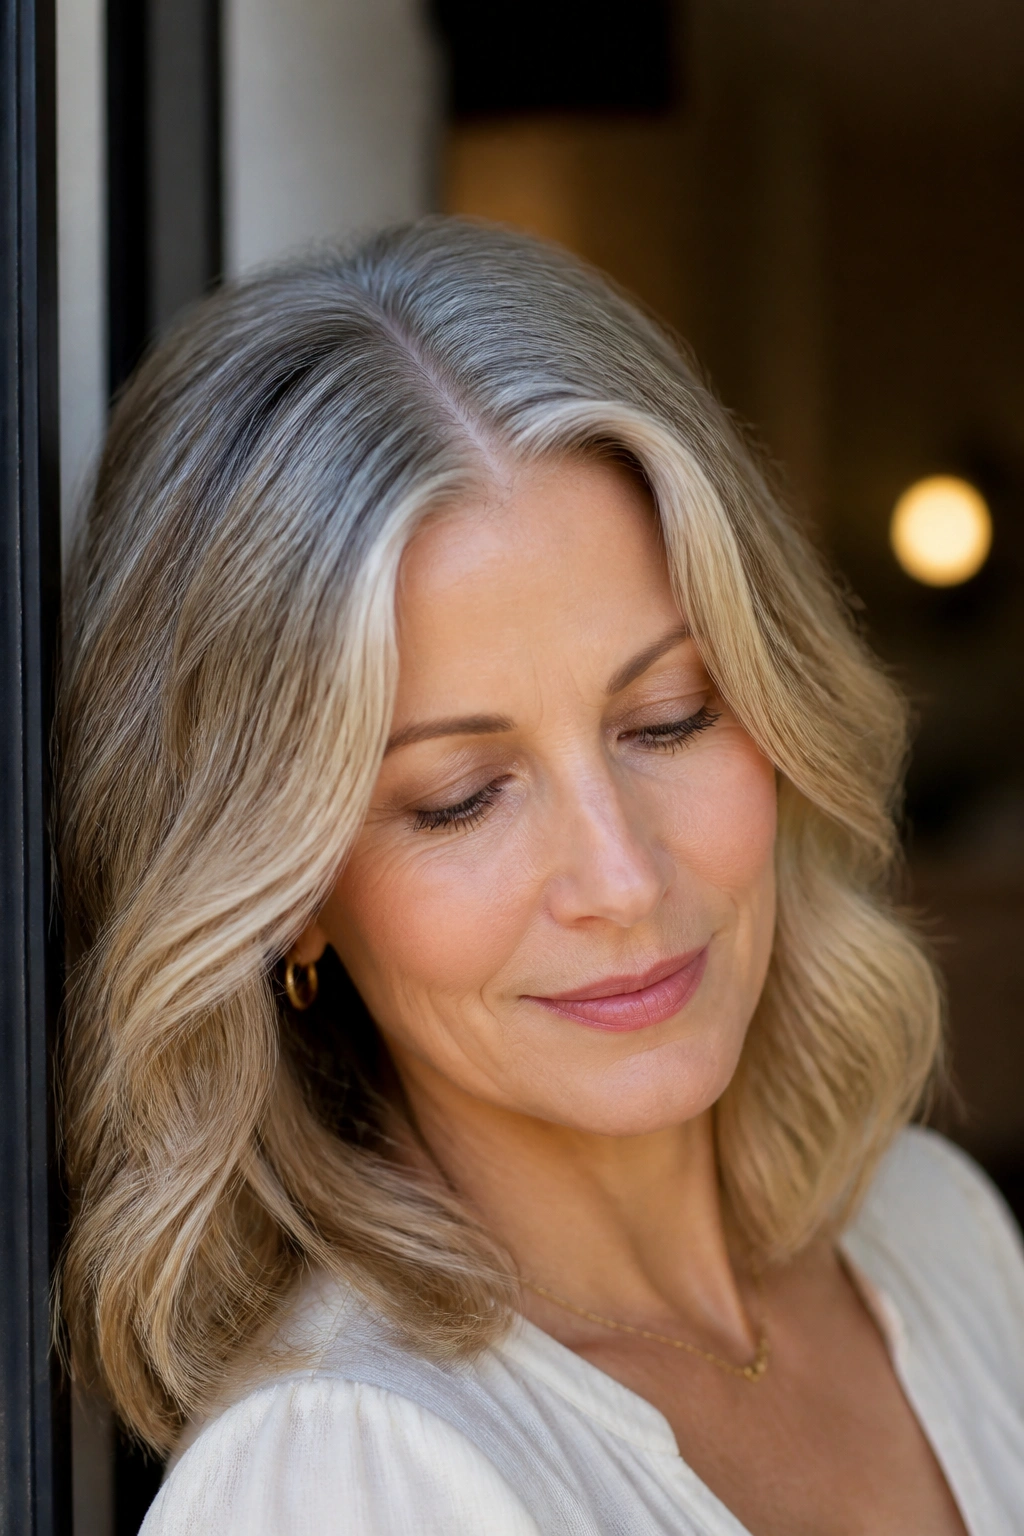
The smartest grey hair color reveal is not always the most dramatic one. Sometimes it is the one that still looks good eight weeks later.
That is why soft grow-out matters so much. A color that blends into the natural grey pattern, instead of fighting it, buys you time. Root smudges, beige lowlights, silver-friendly glosses, and carefully placed bright pieces can all make the next appointment less urgent. The hair grows. The line stays calm. That is a win.
This approach is best for anyone who is tired of white-knuckling the salon calendar. It works on bobs, shoulder-length cuts, and even longer hair if the placement is thoughtful. I like it because it respects the way grey actually comes in: unevenly, around the face first, then through the crown, and sometimes in streaks that make no sense at all.
If you want one practical rule, make it this: choose the reveal that still looks finished when the roots are half an inch longer. That is the real test. Not day one. Not the flashiest before-and-after. The version you can live with, wash after wash, until it grows into the next thing.
