



Wavy hair style ideas women keep reaching for have one thing in common: they make the hair look like it has a plan. Not a rigid, helmet-like plan. A soft one. The kind that lets a few pieces fall where they want, but still looks polished enough to leave the house without second-guessing every mirror you pass.
Wavy hair can be oddly fussy. Too much brushing and it puffs. Too much cream and it goes limp. A curling iron held too long turns loose bends into ringlets you never asked for. And when the wave pattern is uneven — which it often is — one side can look finished while the other side looks like it got into a fight with the pillow.
The styles that work best are usually the ones that respect the bend instead of flattening it. That’s why the strongest looks for wavy hair are rarely the most complicated ones. They use a clean part, a little structure at the crown, or a shape that lets the texture move on its own. Small choices. Big difference.
1. Soft Center-Part Waves
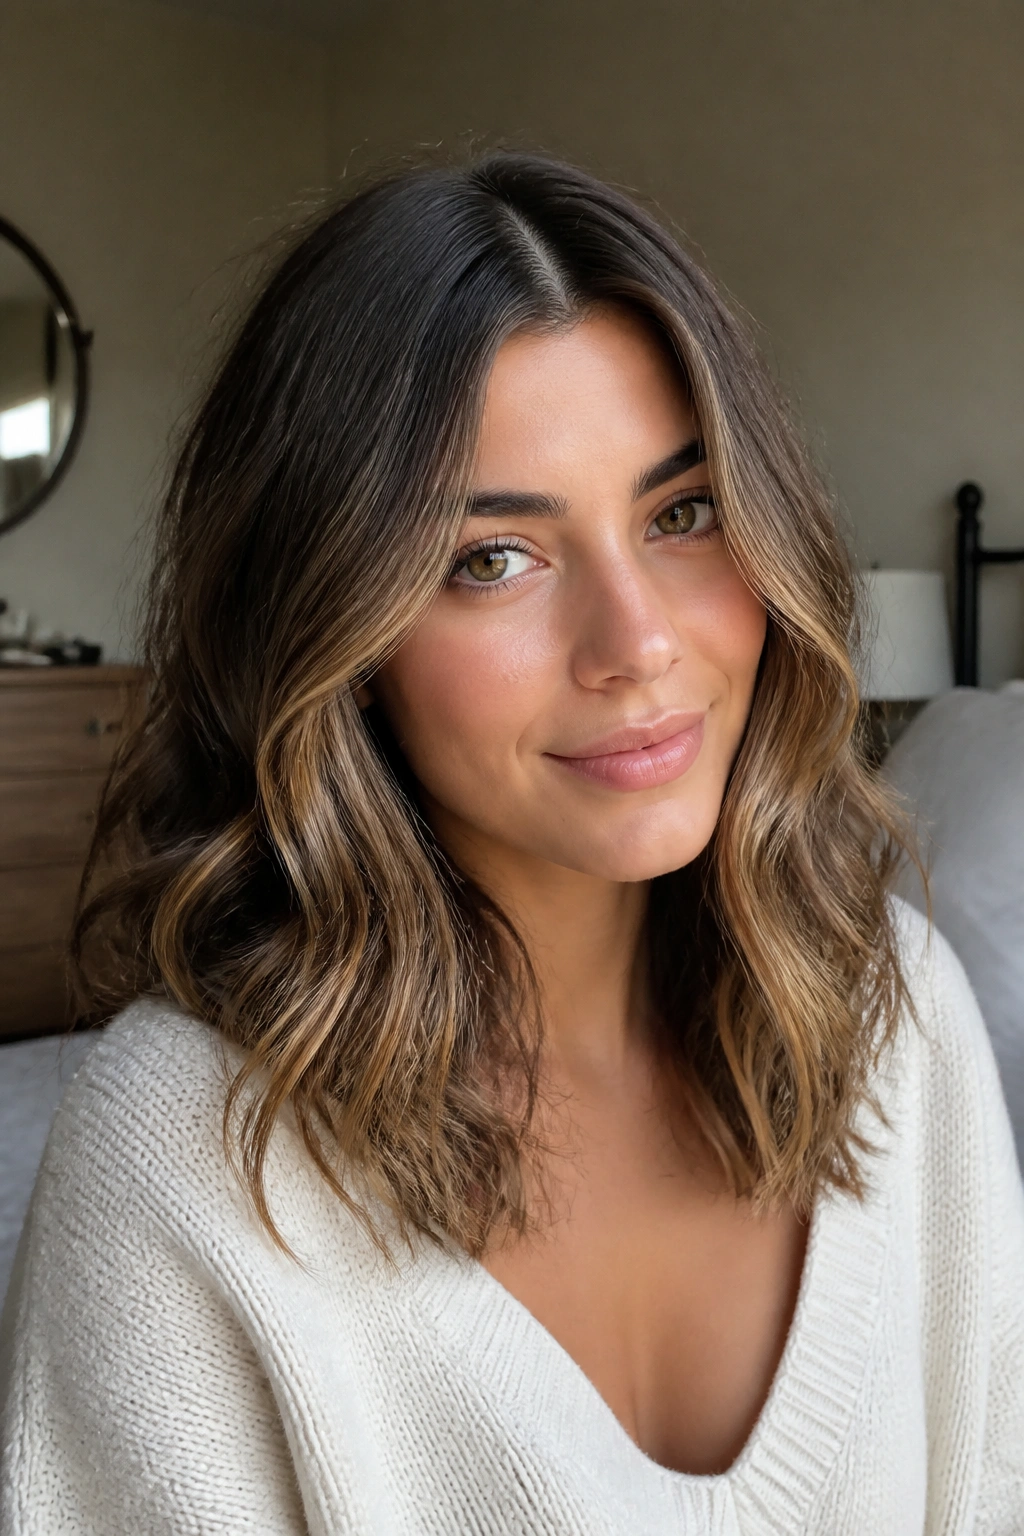
A soft center part is the fastest way to make wavy hair look calm without making it stiff. It gives the whole head a quiet balance, and that balance matters more than people think. When the part sits cleanly down the middle and the waves fall with a little slack through the lengths, the style reads as deliberate right away.
This is the look I reach for when the hair already has a nice natural bend and just needs help behaving. It works especially well on medium-length hair, shoulder-length cuts, and longer layers that can swing a little at the ends. The center line also gives the face a clear frame, which is useful if your wave pattern tends to eat up your forehead area and make everything look wider than it is.
Keep the roots loose. That’s the trick.
A light mist of root spray at the crown, followed by a quick blow-dry with your fingers lifting at the scalp, keeps the top from collapsing. Then wrap only the front sections around a 1-inch curling iron, away from the face, and leave the last inch or so straighter if your ends are already waving. That tiny bit of contrast makes the style look modern instead of overworked.
It doesn’t need much else. Honestly, that’s the charm.
2. Deep Side-Part Waves
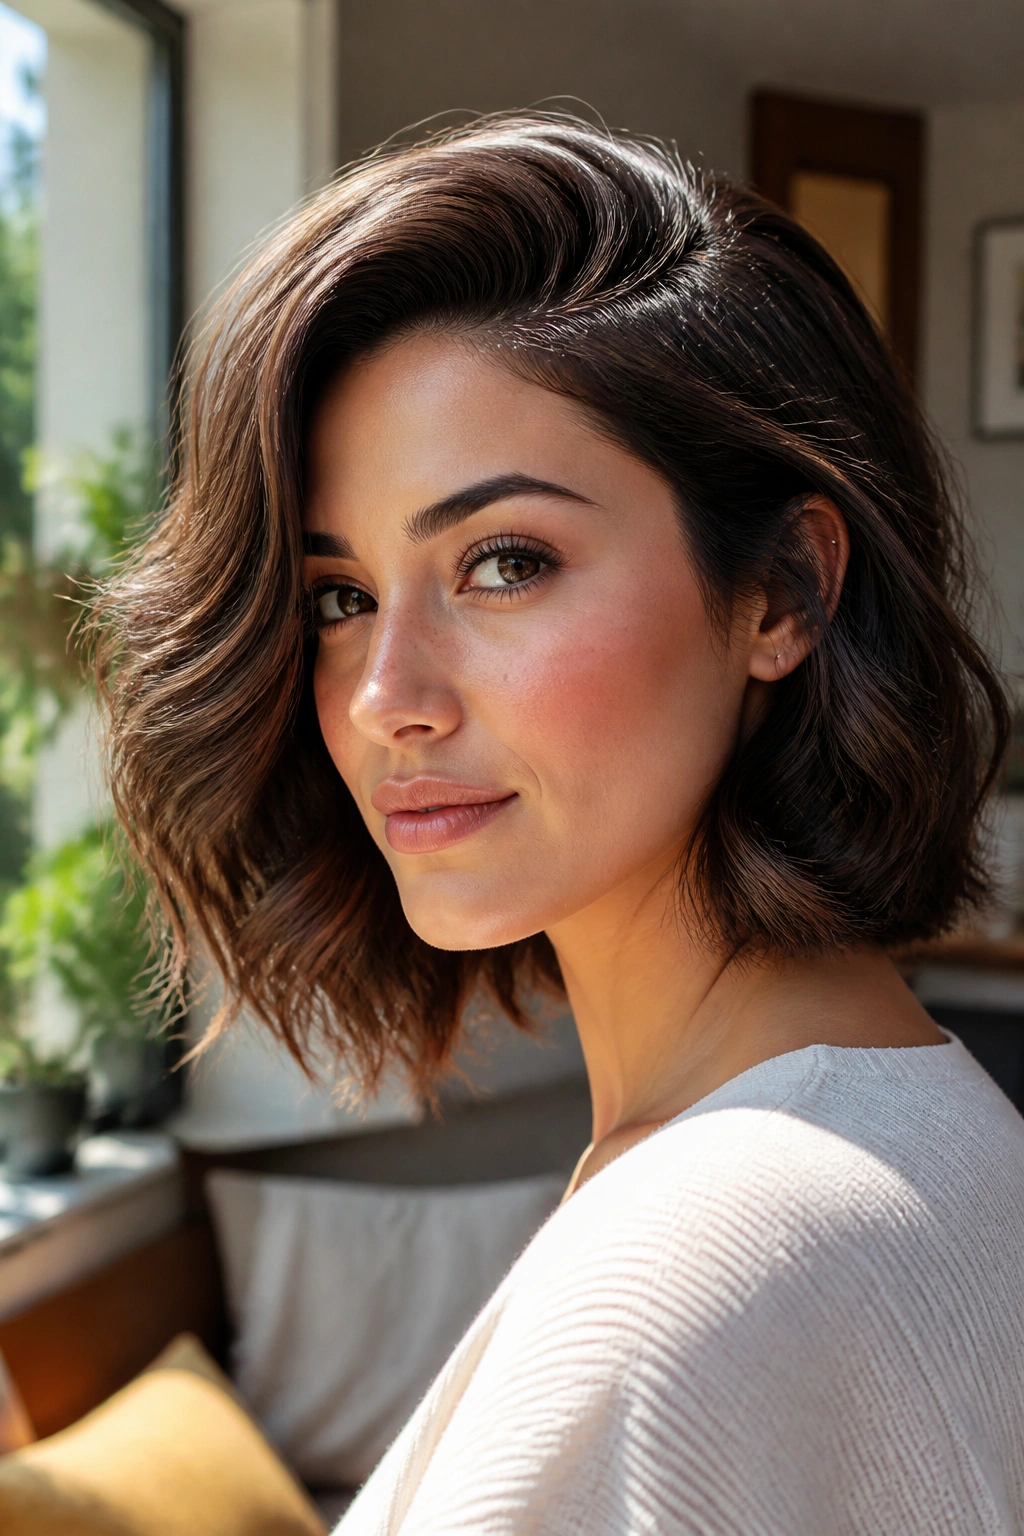
If your roots go flat by lunchtime, a deep side part buys you height before you even pick up a hot tool. It changes the whole shape of wavy hair in a way that feels almost unfair. More lift on one side, more sweep across the forehead, more movement through the lengths. The style does half the work for you.
Why It Works
A side part creates a built-in diagonal line, and diagonals are your friend when hair feels heavy or too symmetrical. The eye follows the line upward, which makes the crown look fuller and gives the wave pattern somewhere to fall. That matters most on fine-to-medium hair, where a middle part can sometimes make the top look a little too honest.
Use a tail comb to place the part from the arch of one eyebrow back toward the crown. Then set the heavier side first so it has somewhere to land. I like a 1.25-inch curling iron here because it makes a looser bend that still has enough shape to hold. You want sweep, not corkscrews.
- Best on hair that falls below the jawline.
- Good for rounder faces that want a little vertical lift.
- Easier to keep soft on second-day hair than on freshly washed, slippery hair.
- Works well with a light dry shampoo dusted at the roots.
Pro tip: tuck the smaller side behind one ear and leave it there for a few minutes while the hair cools. It creates a bend that stays put long after the clip comes out.
3. Half-Up Waves Secured With a Claw Clip

A half-up claw clip style is one of those looks that sounds casual and ends up looking smarter than expected. It keeps the front clean, which is helpful when waves start frizzing around the temples, but it still leaves enough hair down to show off the texture. That balance is why so many people keep coming back to it.
Why It Works
The style gives wavy hair two jobs instead of one. The top section handles the structure, while the loose bottom section handles the movement. That split is especially useful if the crown gets flat fast or if the ends look prettier than the roots. It also buys you a little time between washes, which I appreciate more than I should admit.
How to Wear It
Take the hair from the temples up to the crown, twist it once or twice, and secure it with a medium claw clip that can actually hold the weight. A flimsy clip that slides at lunch is a waste of time. Leave a few face-framing pieces out if you want the shape to feel softer, and keep the twist loose enough that it doesn’t pull the wave pattern straight.
- Use a clip with teeth, not a smooth decorative one.
- Keep the twist low and relaxed for an easier finish.
- Pull out one or two front pieces if your face needs softness around the jaw.
- Mist the loose hair with flexible-hold spray, not anything crunchy.
The best versions look slightly undone. Tight half-up styles usually miss the point.
4. Brushed-Out Hollywood Waves
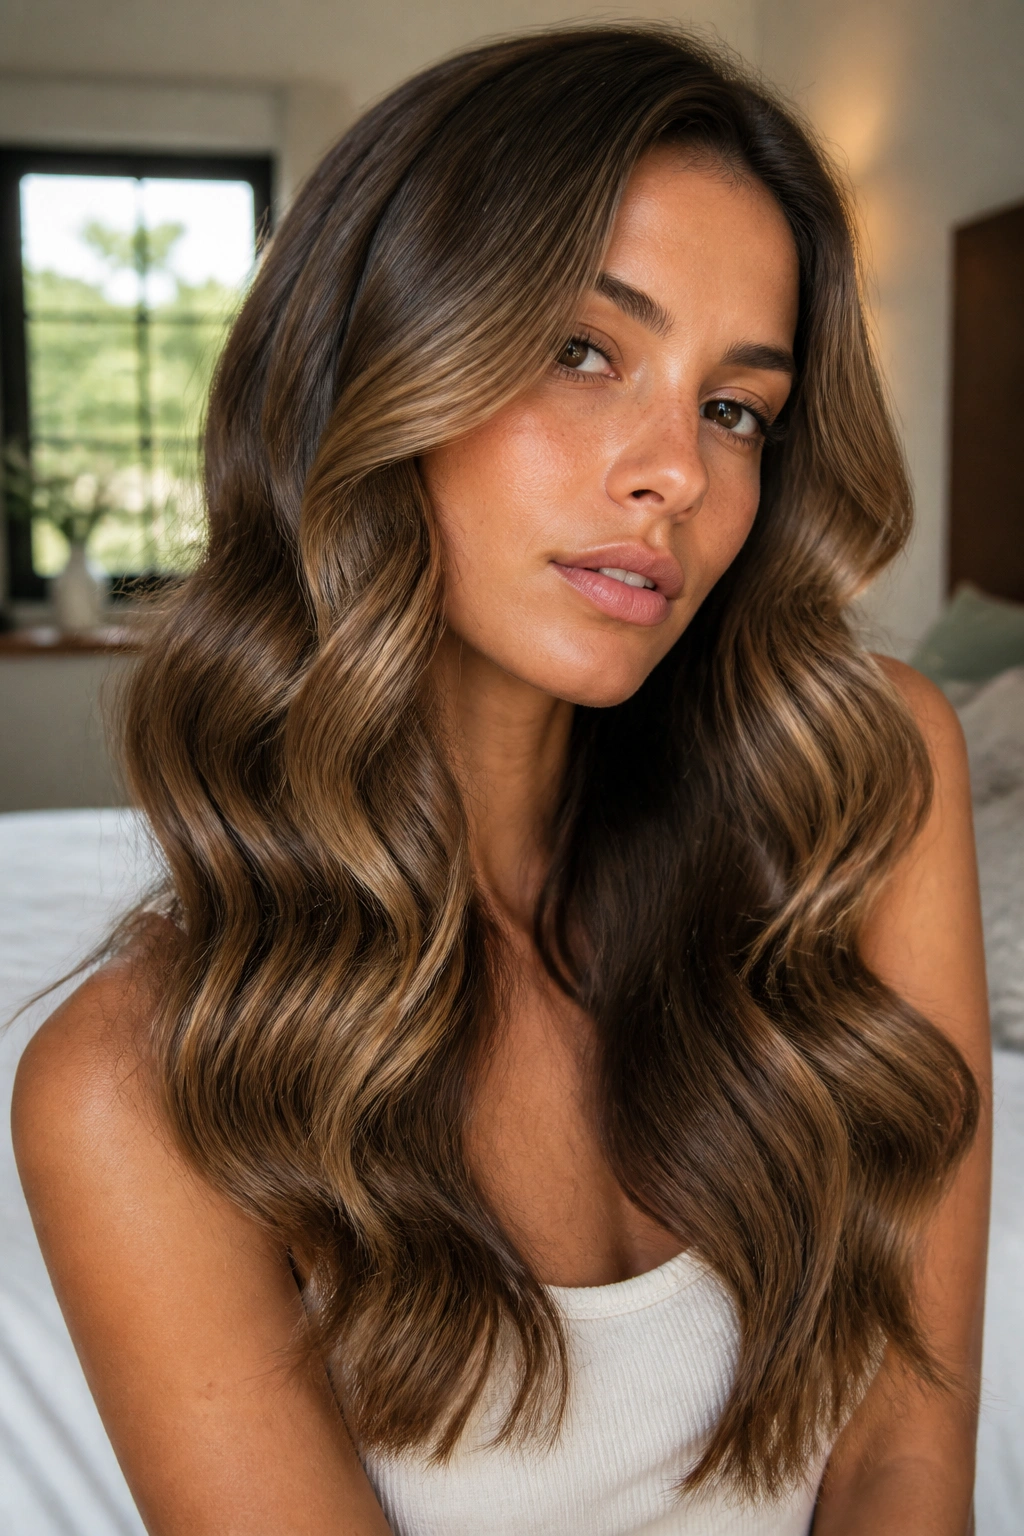
Brushed-out waves are not curls, and that difference matters. Curl your hair, let it cool, then brush it out with purpose. What you get is smoother, wider movement that falls in soft S-shapes instead of tight spirals. On long hair, the effect can be gorgeous. On shorter layers, it can look awkward fast if the sections are too small.
Start with a 1.25-inch or 1.5-inch curling iron and take broad sections, around 1.5 inches wide. Alternate the direction of the curls as you go, and let every section cool fully before you touch it. That cooling time is not optional. Warm hair changes shape too easily, and if you brush too soon, the whole pattern can collapse into fluff.
Once the curls are cool, use a boar bristle brush or a wide paddle brush and move through the lengths slowly. The shape should soften into one continuous wave, not separate little lumps. If the brush starts to snag, stop and finger-comb first. That usually means one section was still warm or had too much product.
Finish with a shine spray or one drop of serum at the ends. Do not overload the roots. Brushed-out waves need movement more than they need slickness, and roots that look oily will drag the whole style down. This is one of those looks that can read formal or relaxed depending on the outfit, which is probably why it keeps showing up again and again.
5. The Wavy Lob With Blunt Ends
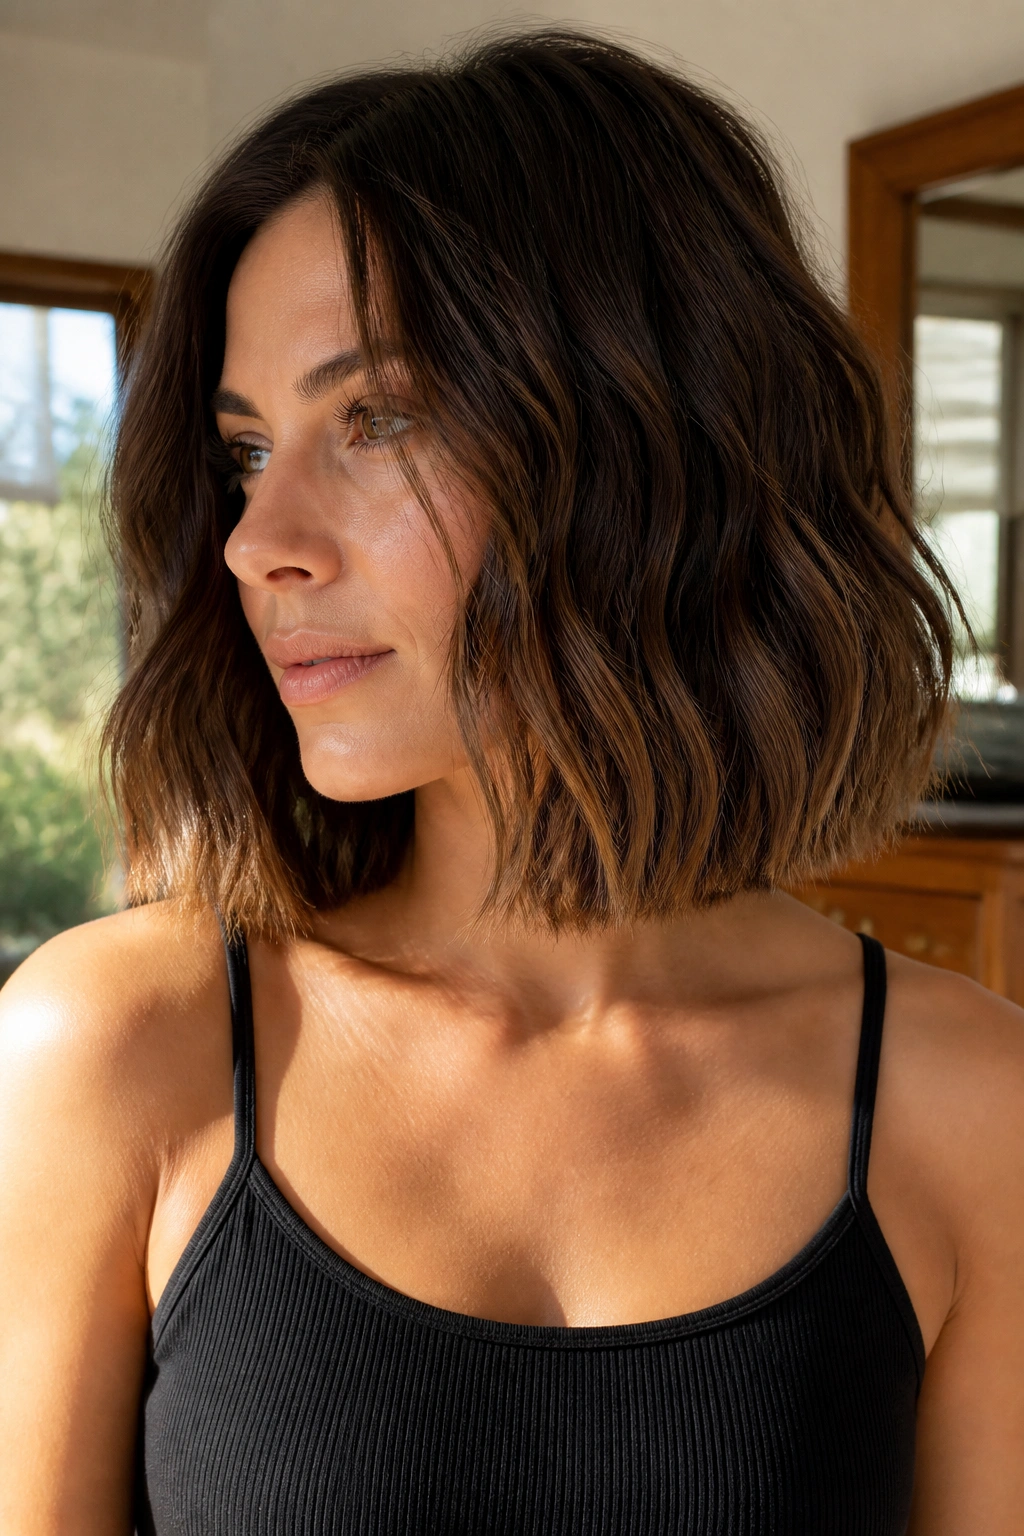
A blunt lob gives wavy hair a thicker edge than layers do. That’s the whole appeal. Instead of breaking the silhouette into pieces, the cut creates one clean line at the bottom, and the waves sit on top of it like soft fabric. If your hair tends to look thin at the ends, this shape can be a small miracle.
Unlike heavily layered cuts, the blunt lob keeps the bottom weight in place, which makes the wave pattern look denser. It’s especially good for fine hair that needs the illusion of bulk, and for anyone who wants something neat enough for work but not so polished that it feels stiff. A length that hits between the chin and collarbone usually gives the best swing.
I like this cut when the wave pattern is a little uneven from root to tip. The clean ends pull attention downward and make the texture look more intentional. If you’ve got thick hair, ask for a blunt outline with some hidden internal weight removed underneath so it doesn’t balloon out at the sides. That part matters.
A shag can give you more movement, sure. A lob gives you more structure. If you want one style that behaves on straight days and wavy days, the lob is the safer bet.
6. Curtain Bangs With Face-Framing Waves
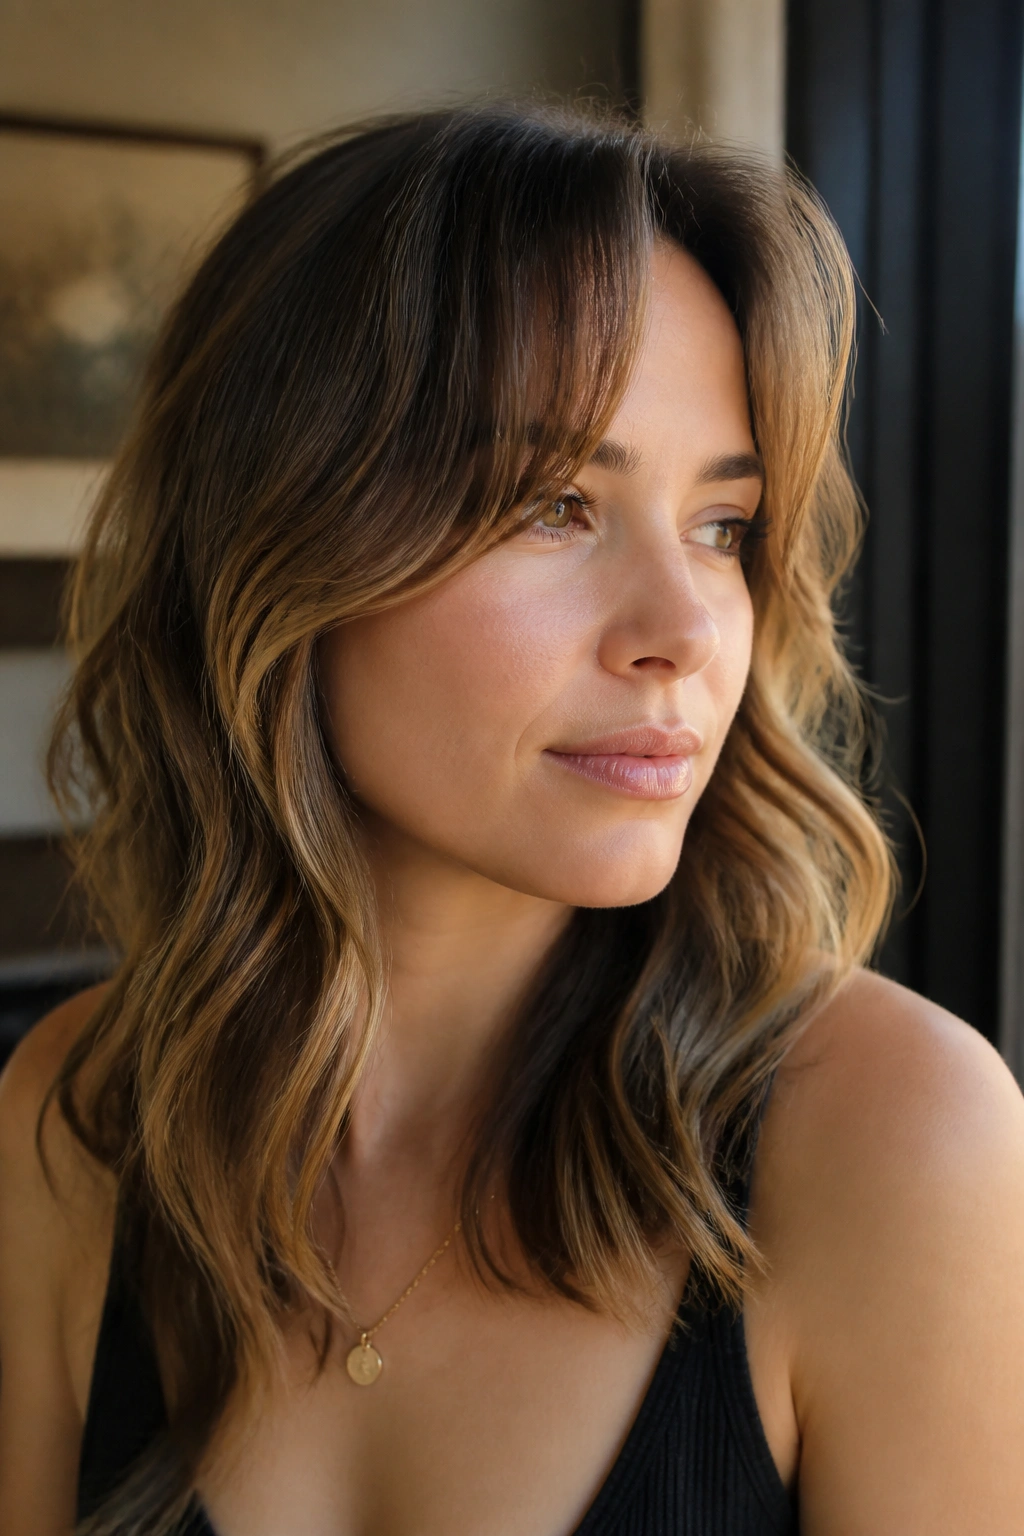
Why do curtain bangs and waves work so well together? Because both of them want to move. Neither one likes to stay pinned into a stiff line, and that shared looseness makes the whole style feel easy on the eye. The bangs soften the forehead, the waves soften the jaw, and the face ends up framed without looking boxed in.
The cut needs the right length to work. Too short, and the bangs spring up in a way that can feel choppy. Better to start them around the cheekbone or just below it, where they can bend away from the face instead of sticking straight out. That gives the front of the hair a little breathing room, which is half the battle with wavy texture.
How to Style It
Dry the bangs with a small round brush or a medium Velcro roller, rolling them away from the face. Keep the rest of the wave pattern loose and soft through the sides. If you use a curling iron, wrap the front sections from eye level down and leave the very tips a little straighter so the frame doesn’t get too busy.
- Aim the bang curve toward the cheekbone, not the chin.
- Use a low setting on the dryer so the fringe doesn’t puff.
- Trim every few weeks if the bangs start swallowing your eyes.
- Keep the side pieces a touch longer than the bangs so the front blends cleanly.
This style is charming when it looks slightly unforced. The moment the bangs become too perfect, the whole thing loses its ease.
7. Heatless Overnight Waves
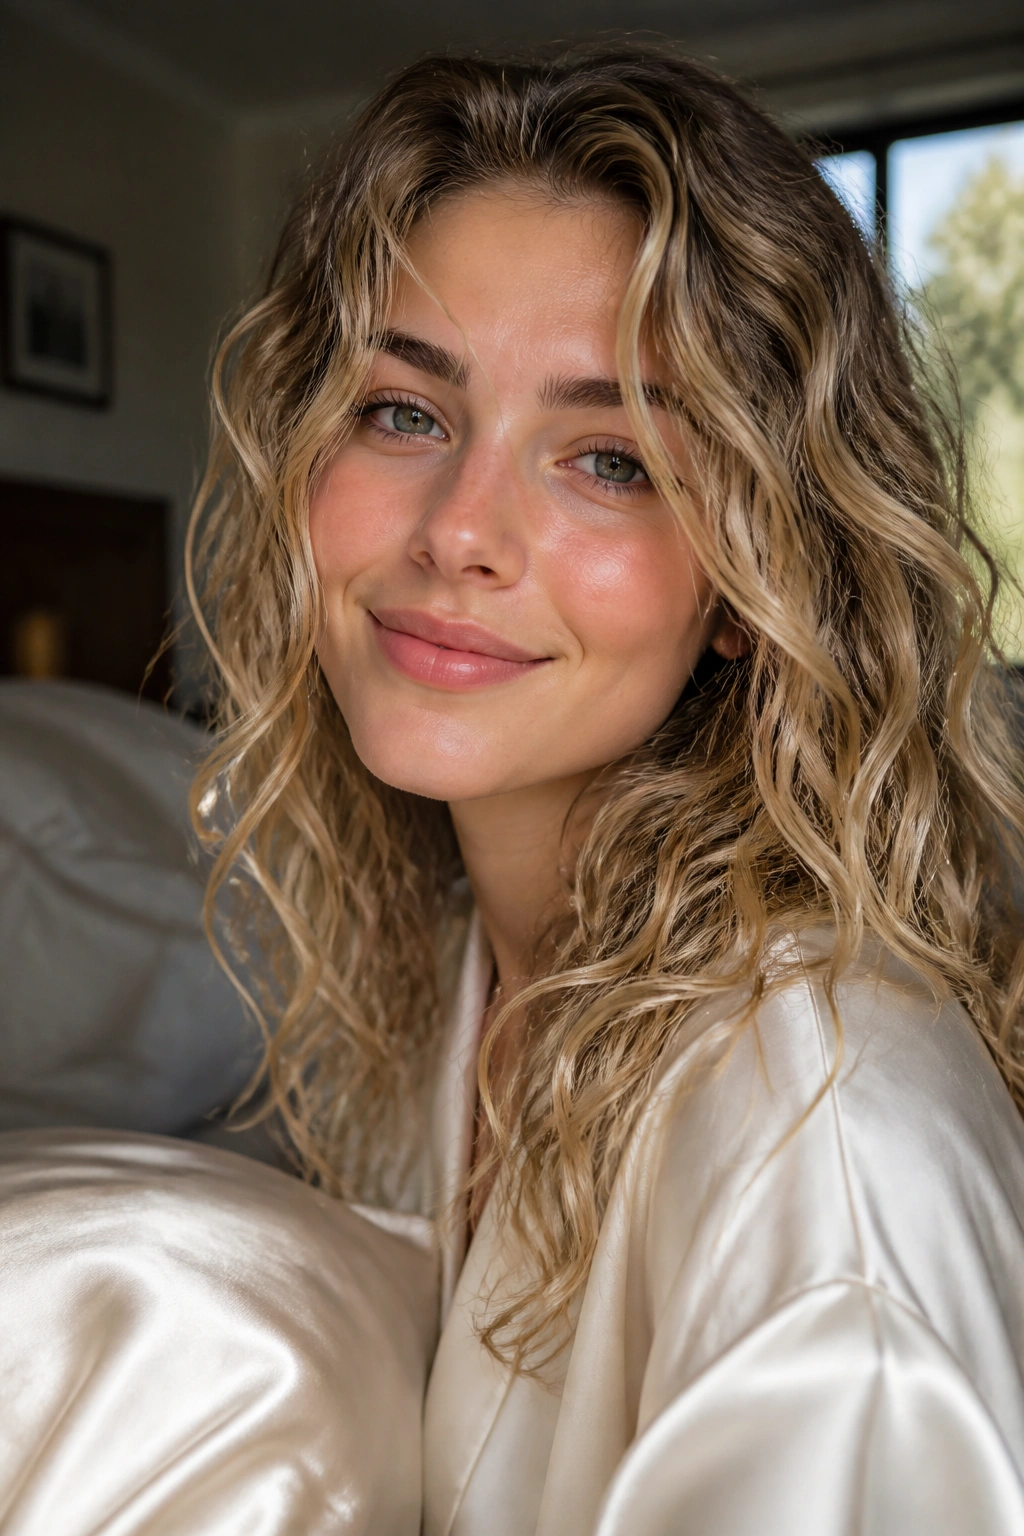
Some mornings, heat is the problem, not the answer. Heatless overnight waves are for the days when you want movement without standing in front of a mirror holding a hot tool for twenty minutes. They also work well when your hair gets dry fast or hates repeated styling. That alone makes them worth trying.
The real key is starting with hair that is damp, not soaking. Wet hair takes too long to dry and can wake up with dents in all the wrong places. A little leave-in conditioner on the mid-lengths, followed by a foam or light cream, gives the waves something to hold onto. Then you set the shape with braids, a robe belt, flexi rods, or even a loose bun depending on how loose you want the finish.
Three Setups That Hold
- Two loose braids: best for a soft, beachy bend.
- A robe belt wrap: gives a smoother, wider wave pattern.
- Flexi rods or foam rollers: best when you want more definition and less frizz.
Sleep on a satin pillowcase if you can. Cotton roughs up the pattern fast, and heatless waves lose their point if you wake up looking like you fought your bedding all night. In the morning, separate the strands with dry fingers first, then shake the roots out gently. Brush only if you want the wave to soften into something bigger and less defined.
It’s not the fanciest style on the list. It might be the most practical one, though.
8. Tousled Shag Waves
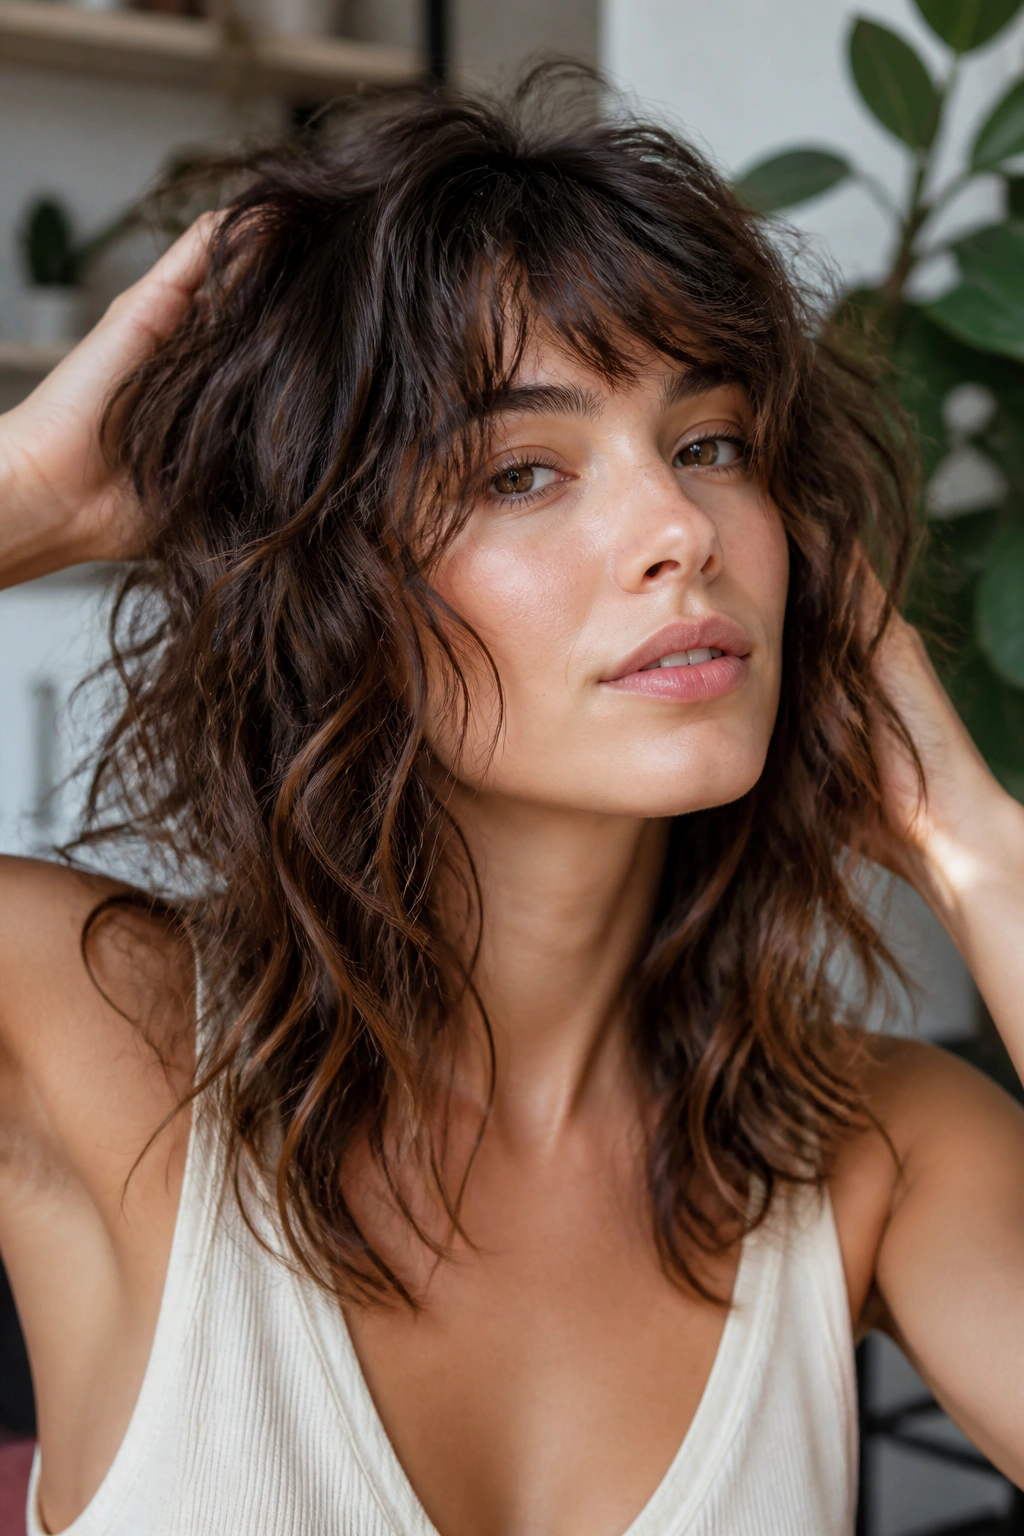
A shag only works if you let it look a little unruly. That’s the charm. The cut is built with layers around the crown, through the sides, and often around the face, so the wave pattern gets a place to bounce instead of hanging in one heavy sheet. On the right hair, it looks alive in a way that flatter cuts often do not.
What Makes It Different
The shag is less about smoothness and more about motion. If your hair is thick, heavy, or tends to hide its own texture, those shorter layers can wake it up. Add curtain bangs or a broken fringe and the whole shape starts to feel airy without losing body. That is a hard balance to get with one-length hair.
This is not the cut for people who want every piece perfectly in place. It gets better when you leave a little grit in it. Use a mousse or light foam at the roots, scrunch with your hands, and let the ends fall where they want. A diffuser on low can help if the crown takes forever to dry, but I wouldn’t overdo the smoothing products. The shape needs friction.
If you like styles that look better after a slightly messy day, this one is worth a serious look. If you want neatness, keep walking.
9. The Low Twisted Bun With Loose Wavy Ends
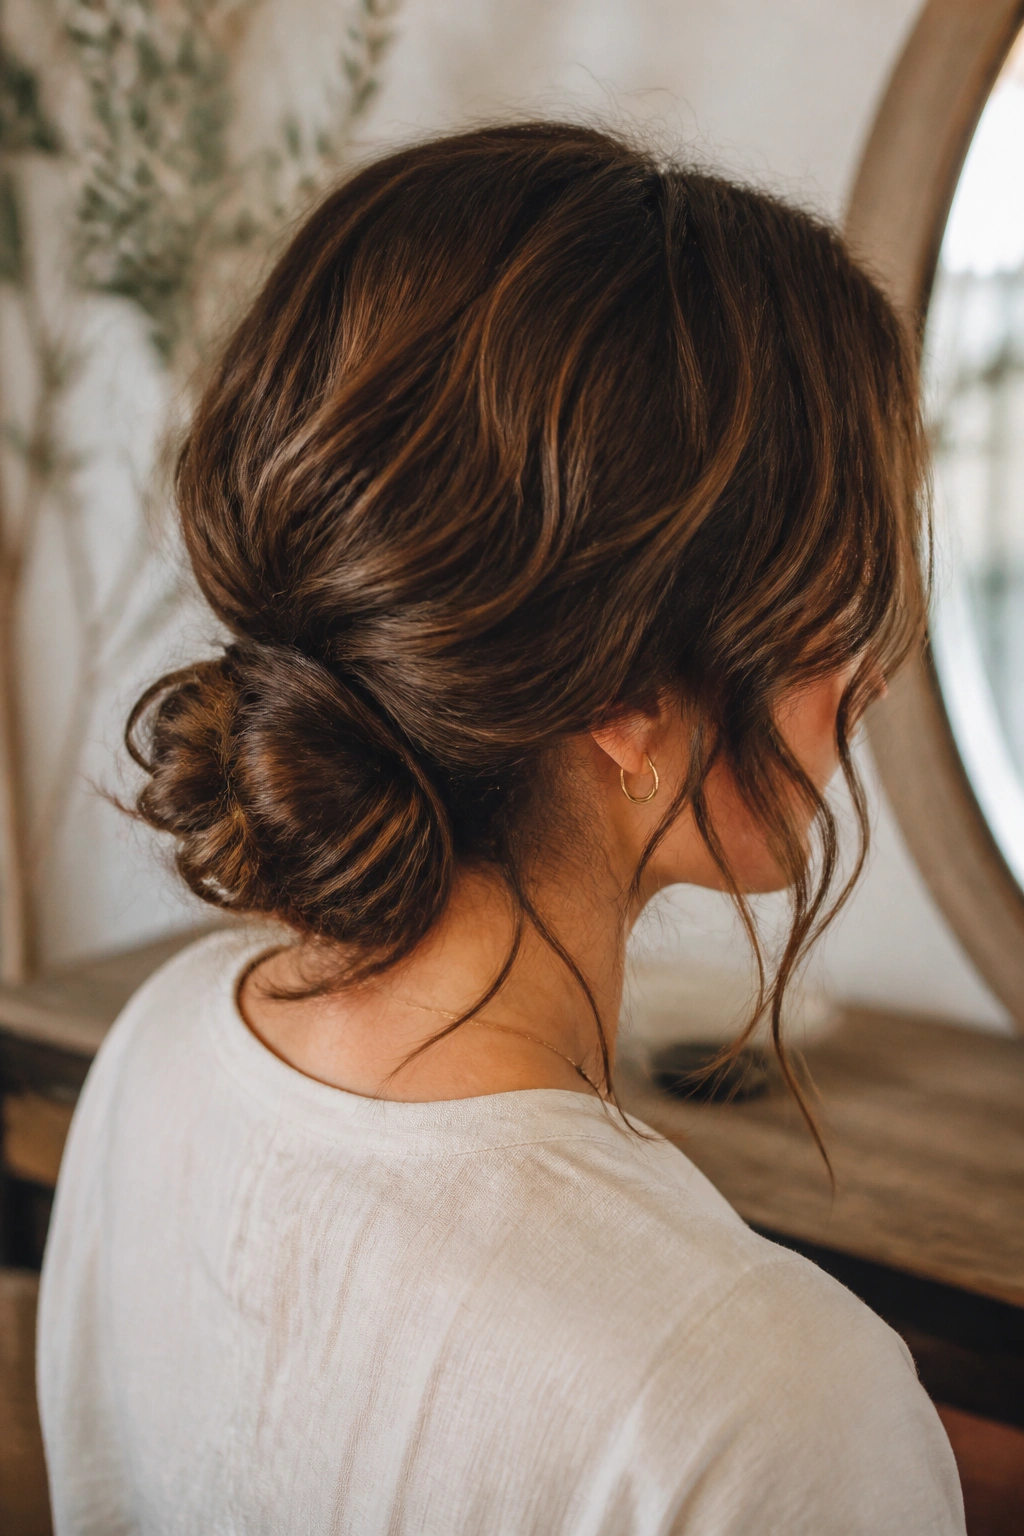
Need something that stays put but still looks soft? A low twisted bun with loose wavy ends is the easy answer. It keeps the hair off the neck, which is handy when you want polish without pulling everything into a severe knot. The loose ends keep it from feeling too bridal or too tight.
Pull the hair back to the nape of the neck and twist it once or twice before pinning it into a low bun or tucked fold. Leave the last few inches of the lengths out if you want the wave pattern to show, or let a couple of curled pieces spill at the sides if you need the style to feel gentler around the face. A little texture spray at the roots gives the bun grip, which helps more than a lot of people realize.
This style is especially kind to hair that’s in-between wash days. The texture gives the bun something to hold, and the bun gives the waves a more finished shape. If your hair is very silky, you may need a few extra pins and a little dry shampoo on the crown so the style doesn’t slide.
It’s a dependable look. Not flashy. Just smart.
10. Braided Crown Waves
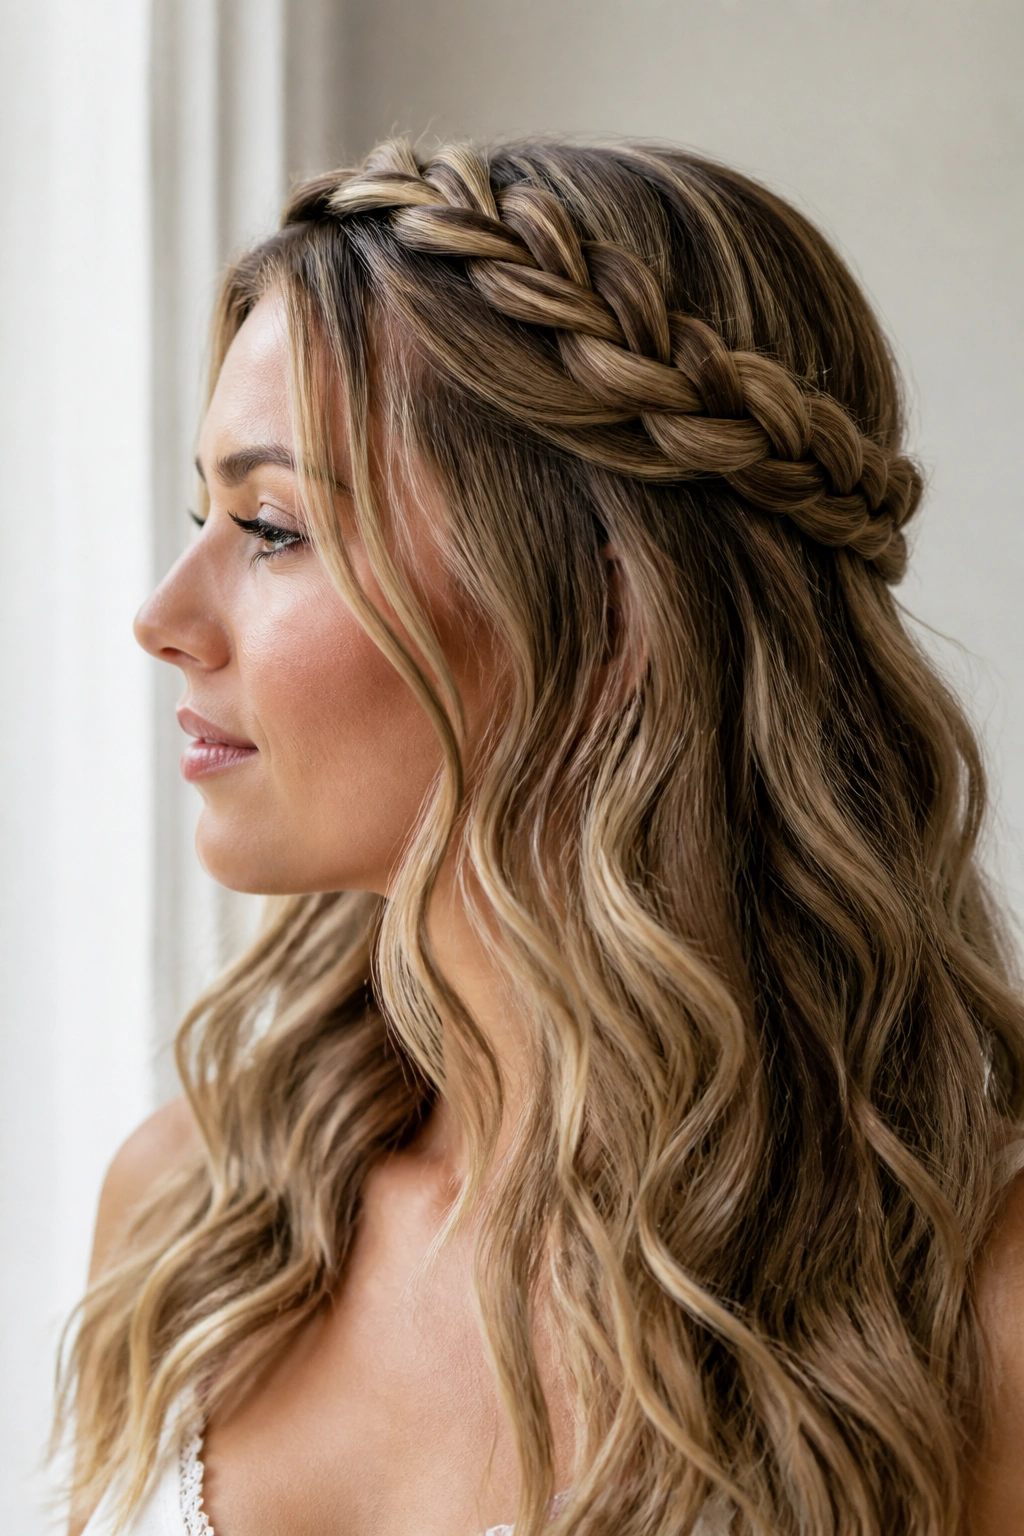
A braid across the hairline changes the whole mood of wavy hair. Suddenly the texture feels more intentional, almost like it was meant to be that way from the start. The crown braid also gives you a nice solution on days when the roots need control but the lengths still look good enough to show off.
What I like most here is the softness. A tight braid can feel school-uniform plain, but a loose braid laid across the top of the head gives you shape and movement at the same time. It works beautifully on second-day hair because the natural grit helps the braid stay in place. If the waves are already a little stretched out, the braid hides the less-perfect bits near the crown.
You can do one braid starting at the temple and wrapping around, or two smaller braids joined at the back. Both work. The important part is loosening the braid once it’s in place so the edges don’t look sharp. Tug each loop just enough to widen it a little, and let a few shorter face-framing pieces fall free. A soft bend near the temples keeps the whole thing from looking too strict.
This is one of those styles that saves you when your hair is behaving but not cooperating. There’s a difference.
11. The High Ponytail With Wavy Length
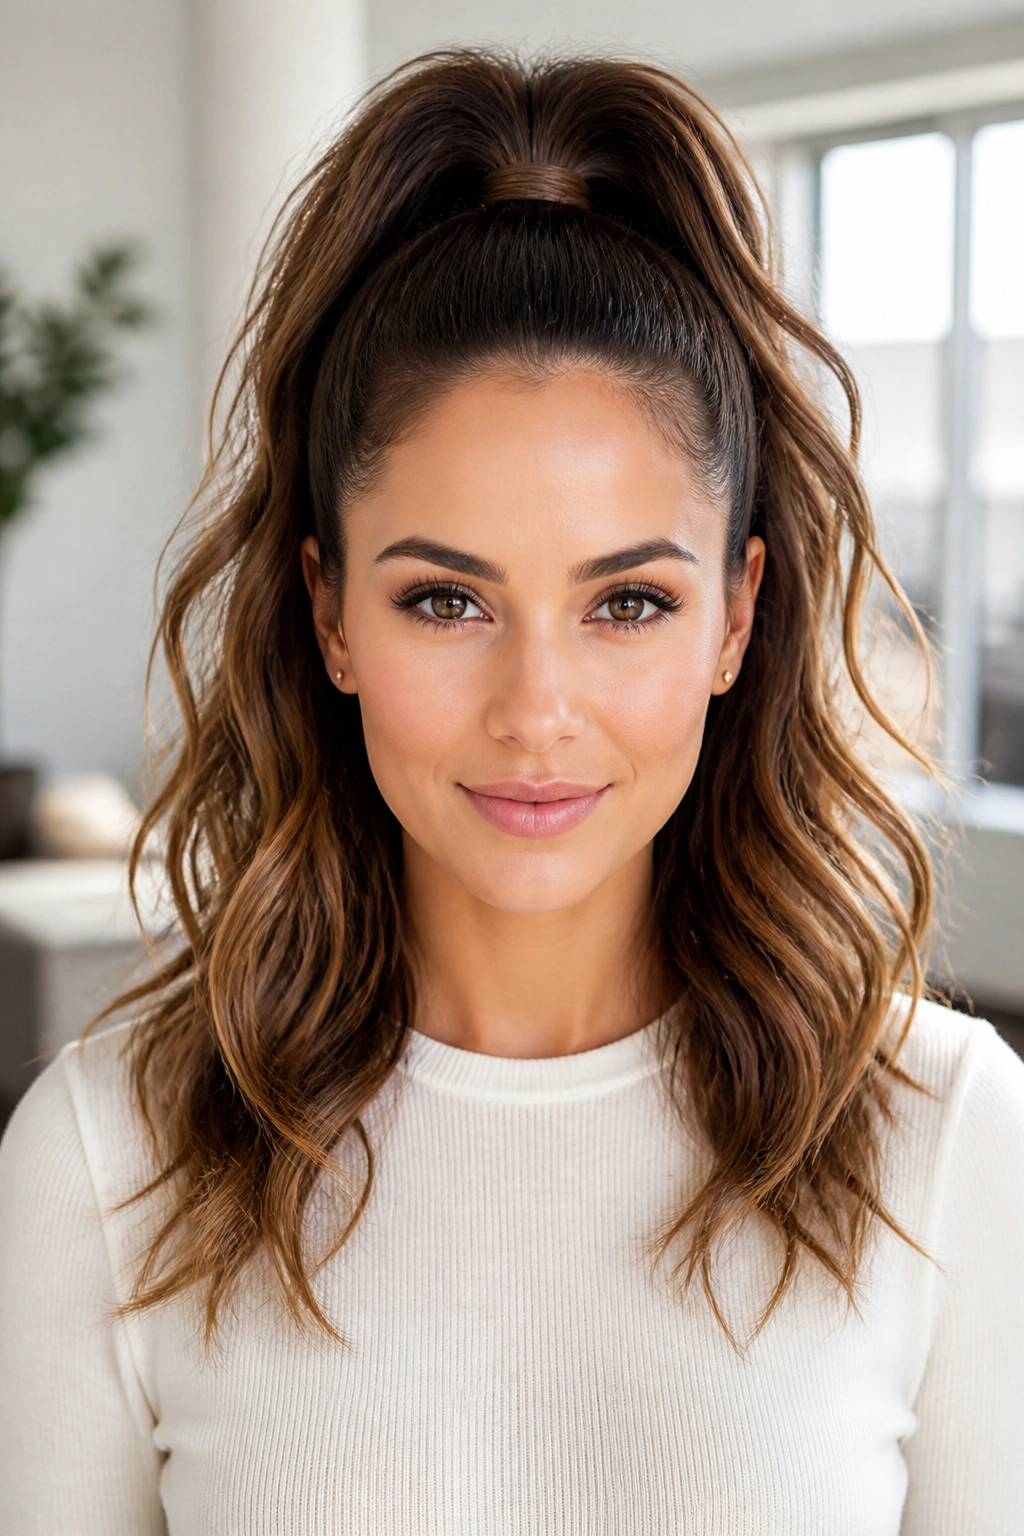
A high ponytail on wavy hair feels different from a straight one — the movement stays in the tail, which keeps it from looking severe. That movement is the reason I like it so much. The crown can be clean and lifted while the lengths stay loose enough to look like hair, not rope.
The best version starts with a brushed-smooth top and a ponytail placed high enough to lift the face, usually around the upper back of the head. If the front pieces are stubborn, smooth them with a tiny bit of gel or pomade on a toothbrush-sized brush, then pin the tail with a wrapped section of hair so the elastic disappears. The lengths can stay wavy, or you can touch them with a 1.5-inch iron if the pattern has gone flat from the ponytail itself.
Unlike a low ponytail, this one has energy. It’s good for days when you want your hair off your shoulders but still want some swing. It’s also forgiving on long layers, because the shorter pieces around the face can be controlled without making the ponytail feel thin.
If your hair is very fine, tease the underside of the crown just a little before securing it. Not a giant rat’s nest. Just enough to stop the ponytail from drooping by noon.
12. Bubble Ponytail on Wavy Hair
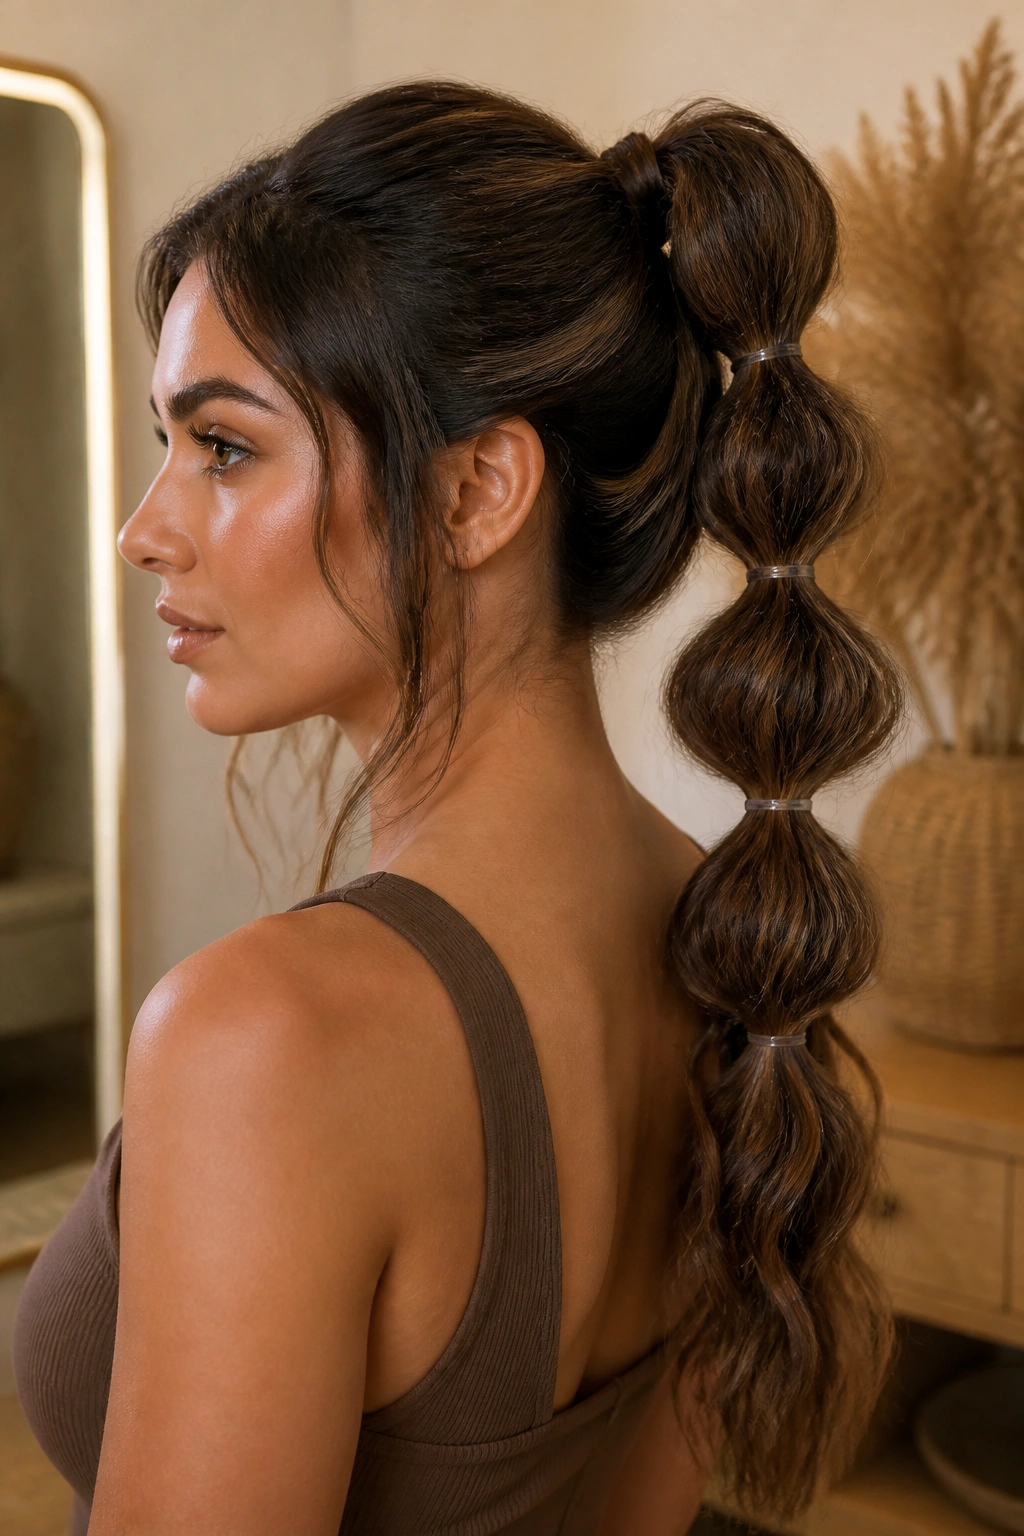
Why does the bubble ponytail look so good on waves? Because the texture keeps each section from turning into a hard, perfect ball. On very straight hair, bubble ponytails can look a little stiff unless you spend time shaping them. Wavy hair gives the style some softness right away, which makes the whole thing feel less costume-y.
How to Keep the Bubbles Even
Start with a ponytail or half-up tail secured at the crown or mid-head. Then add clear elastics every 2 to 3 inches down the length, puffing each section gently with your fingers after each tie. The “bubble” doesn’t need to be round like a sphere. It just needs to look full and separate from the next section.
- Use elastics that match your hair color if you want the sections to look cleaner.
- Pull each bubble out from the sides, not the middle, so it stays smooth.
- Mist the tail with flexible-hold spray if the ends are slipping.
- Add a touch of dry shampoo if the hair is too sleek to hold shape.
This style is especially good on medium to long hair with a little density. Thin hair can do it too, but the bubbles will be smaller and a bit less dramatic. That’s fine. Smaller bubbles can look neat and sharp when the sectioning is even.
The best part is how easy it is to dress up. A bubble ponytail can go from gym-friendly to dinner-ready in about three minutes, which is a decent return on effort.
13. Air-Dried Defined Waves With Curl Cream
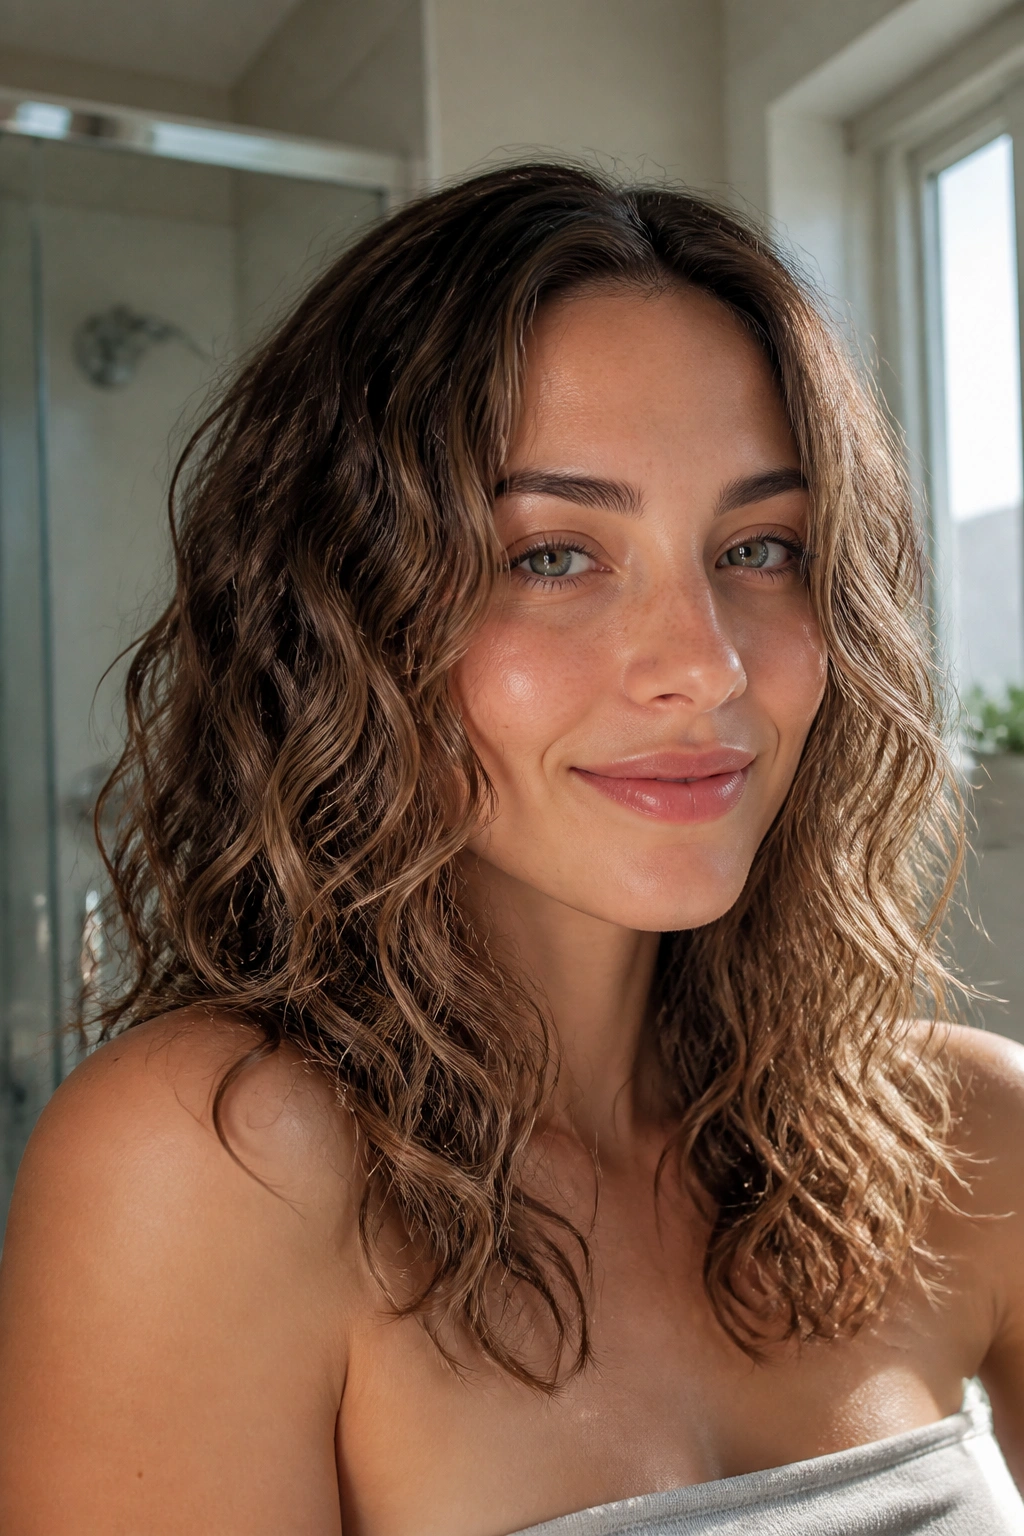
When waves dry with a soft, slightly damp-looking finish, they often read cleaner than anything heat-styled. Air-dried defined waves live in that sweet spot. The texture is visible, the shape is soft, and the hair still feels like hair instead of a styling project gone sideways.
Start on soaking-wet or very damp hair with a curl cream or light leave-in, then add a small amount of gel if your wave pattern needs more hold. Scrunch upward from the ends to the roots, not the other way around. That sounds obvious, but a lot of people rub product around too much and break up the pattern before it even has a chance to set.
What to Use and What to Skip
- Use: lightweight curl cream, foam, or soft-hold gel.
- Use: a microfiber towel or cotton T-shirt for scrunching.
- Skip: heavy oils at the roots.
- Skip: touching the hair until it is fully dry.
If your hair takes forever to dry, hover-diffuse the roots for 5 to 10 minutes on low, then let the rest air-dry. The point is to build a little structure without blasting the wave pattern apart. Once the hair is dry, break the cast with dry hands so the curls soften into waves instead of staying crunchy.
This style works best when you trust the hair to finish the job. That part is hard for some people. I get it. But the less you fuss with it, the better it usually looks.
14. Mermaid Waves With a Glossy Finish
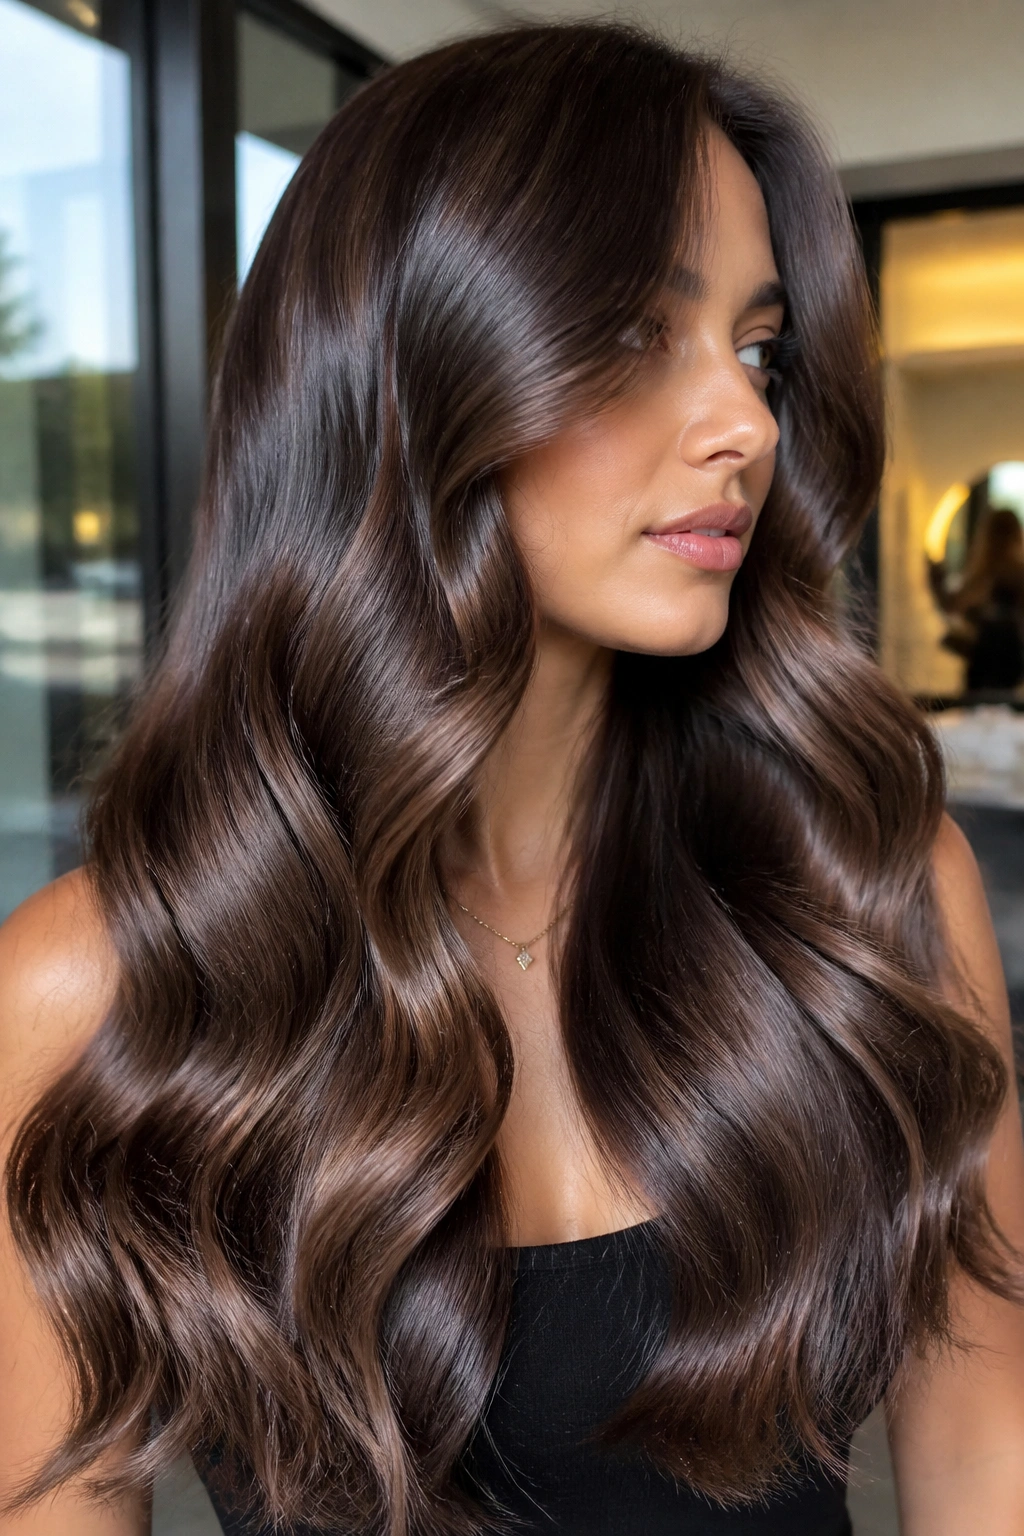
Long mermaid waves live or die on shine. If the hair looks dry, the whole thing starts to feel like leftover pageant hair. If the finish is smooth and the waves are broad, the style has that long, flowing shape people keep saving to their phones. It’s a strong look, and it needs a little restraint to stay classy.
The shape matters more than the curl. Use wider sections, around 1.5 to 2 inches, and bend them with a large iron or a flat iron rather than making tight curls. Alternate directions as you move down the head so the wave pattern feels fluid instead of stacked. Then brush lightly once the hair cools and run a tiny amount of shine serum through the mid-lengths and ends. One or two drops is enough. Too much and the style goes slick in a hurry.
What Gives It That Long, Flowing Shape
A mermaid wave should skim, not cling. That means the roots need a little lift, the mid-lengths need soft curves, and the ends need enough polish to avoid looking dry or bent. It helps if the haircut has some length past the shoulders, because the wave pattern has room to fall. On shorter hair, the style can start to look crowded.
This is one of the easiest ways to make simple clothes look more finished. A plain knit, a satin top, a clean tee — all of them get a little more presence when the hair has that long, shiny bend through it.
15. The Short Wavy Bob With Tucked Ends

A short wavy bob is the one I keep recommending when someone wants movement without length getting in the way. It sits in that sweet spot between neat and relaxed, and the wave pattern usually looks sharper because there’s less hair dragging it down. If the ends are tucked slightly under one side or flipped softly at the jaw, the whole cut feels deliberate fast.
The bob works because it gives wavy hair a clear shape to live inside. That matters more than people expect. Long waves can be pretty, but they also carry every bit of damage, every uneven layer, and every lazy part line. A bob removes some of that visual clutter and leaves you with a cleaner outline. You can air-dry it, twist it with fingers while it dries, or add a few bends with a 1-inch iron to sharpen the front sections.
This cut is especially useful if your hair is fine and you want the wave to read fuller at the bottom. It also works well if you tuck one side behind the ear and let the other side hang loose, because the asymmetry gives the style a bit of attitude without looking harsh. A touch of lightweight serum at the ends keeps the line soft.
If your hair has been feeling too long, too heavy, or too much like a maintenance job, this is the reset I’d try first. It does not try to do everything. That’s why it works.
