



Flat roots on curly hair are rarely a curl problem. They’re usually a shape problem.
That’s the part people miss. A curl pattern can be gorgeous and still look sleepy if the cut carries too much weight, the product load is too heavy, or the roots dry pressed against the scalp. The best textured curly hair ideas for volume do not start with teasing or a cloud of hairspray. They start with where the hair sits, how it’s sectioned, and how much room the curls get to move.
Curly and wavy hair also has a funny habit of changing the whole vibe with one small tweak. Shift the part. Shorten the crown. Remove a little bulk from the bottom. Suddenly the same head of hair looks fuller, lighter, and more intentional. That’s why some volume tricks feel like magic and others feel like work with no payoff.
The styles below all build height in different ways. Some lean on the cut. Some use parting. Some are pure styling tricks you can do on a tired wash day. And a few are sneaky — the kind of styles that look like you woke up with big hair, when really you just made one smart decision and let the shape do the rest.
1. Rounded Layered Afro

A rounded layered afro is one of the cleanest ways to get volume that looks natural instead of forced. The shape does half the work for you. When the layers are cut so the hair expands outward instead of dragging down at the sides, the whole silhouette lifts.
Why the Shape Works
The round shape gives the hair a built-in halo. That matters more than people think. Dense curls can easily turn into a triangle if the bottom gets too heavy, but a well-shaped afro keeps the perimeter full while letting the top and sides breathe.
Ask for soft internal layers rather than razor-thin ends. Too much thinning can leave the shape airy in a bad way, where the body disappears and the curls frizz apart. What you want is lift, not gaps.
- Best on dense 3c to 4c textures
- Works especially well at chin to shoulder length
- Looks fuller when dried with a diffuser or picked out at the roots
- Pairs nicely with a light foam at the crown and a richer cream only on the ends
Pro tip: if your hair puffs outward too much at the sides, ask for a rounder outline that sits slightly higher on the cheekbone line.
2. Curly Shag with Cheekbone Layers

This is the cut I reach for when somebody wants movement without babysitting every curl. A curly shag builds lift by stacking shorter layers through the crown and cheekbone area, then leaving enough length around the rest of the head so the style still feels full.
It gives volume where you actually see it. Not just at the ends. Not just in one dramatic puff at the top. Right at the face and crown, where the eye reads fullness fastest.
The shag works because it breaks up weight. A one-length cut can look tidy, sure, but it often sits flat at the root and turns wide near the bottom. Cheekbone layers stop that from happening. They let the curls spring up instead of hanging all in one heavy sheet.
I like this style on hair that has a bit of personality and doesn’t need perfect symmetry. It’s a little messy. That’s the point. If your curls are fine or easily flattened, keep the layers soft and avoid over-cleaving the crown. You want bounce, not a frayed top layer that looks overworked by lunch.
3. Pineapple Half-Up Crown

Why does a pineapple half-up style make curls look fuller instead of smaller? Because it gathers the top section high enough to put the volume where the eye lands first.
The trick is not pulling the whole head tight. Leave the lower curls loose so they keep their weight and shape. Then lift the crown into a loose, soft bundle with a satin scrunchie or a coil-friendly clip. That height at the top changes everything.
How to Wear It
- Gather only the top third of your hair
- Keep the hold loose enough that the roots don’t dent
- Leave a few curls out around the hairline if you want softness
- Fluff the crown with your fingers after the tie is secure
This style is especially handy on second-day curls that have started to collapse at the roots. It gives the illusion of fuller hair without asking you to restyle the whole head. If your ends are dry or stretched, the lifted crown balances them out.
Tiny detail, big payoff: position the tie slightly forward, not dead center. That small shift adds height instead of flattening the top.
4. Diffused Side-Part Bob
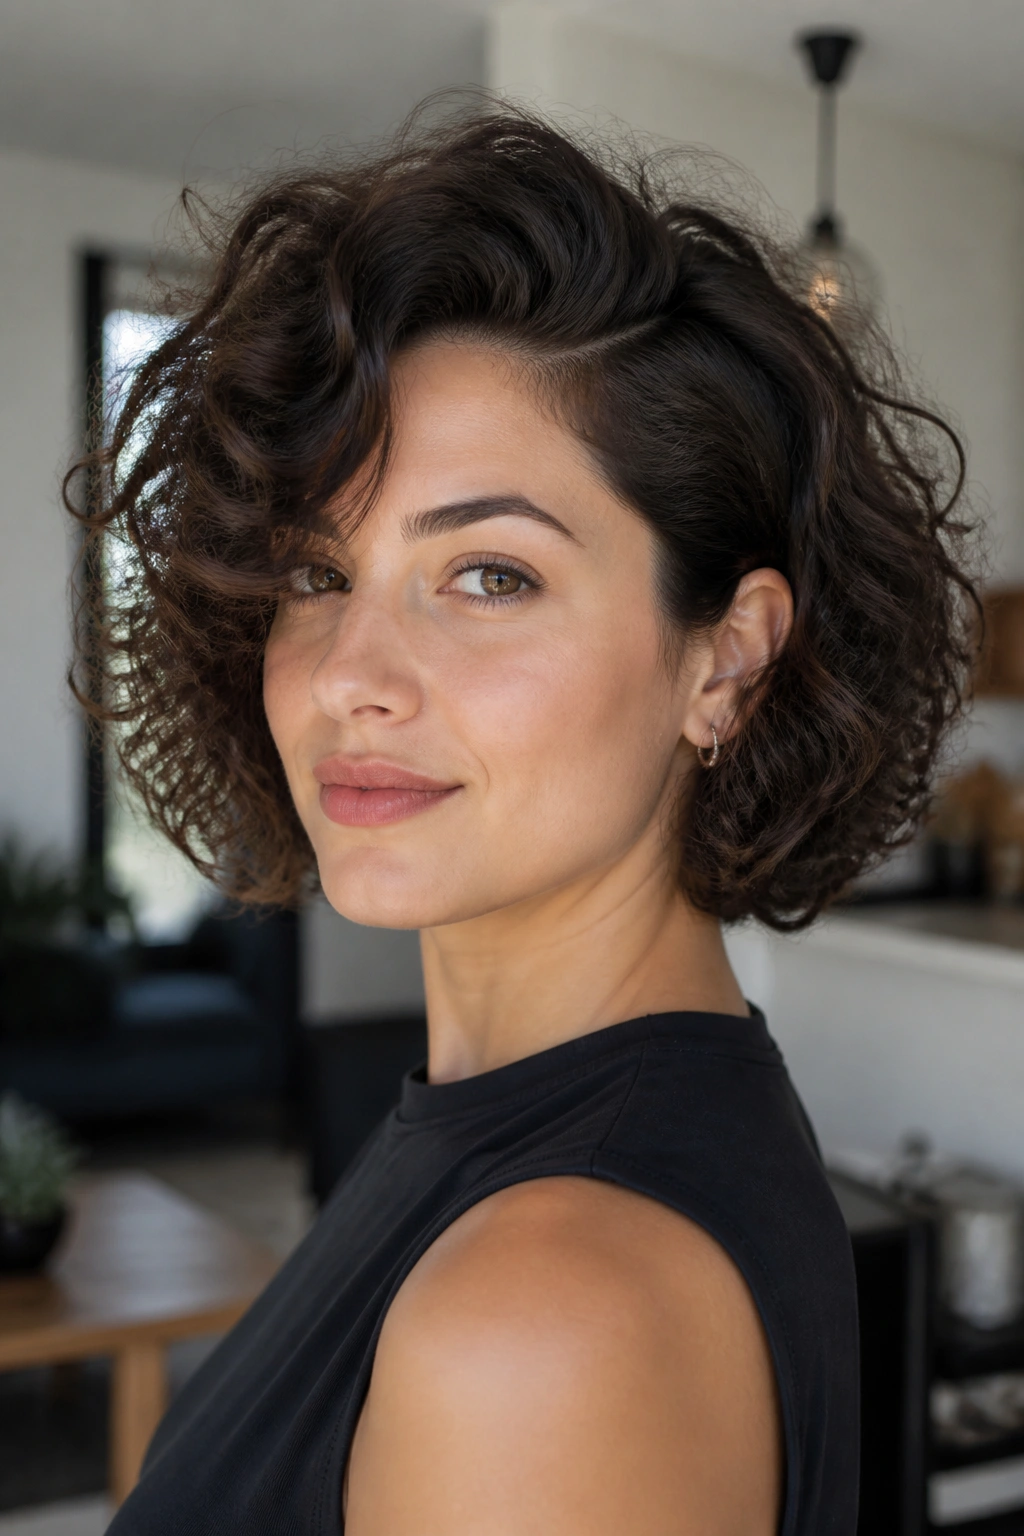
Picture a bob that hits around the jaw and is flipped hard to one side. It sounds simple. It changes the whole head shape.
A side-part bob works because shorter hair has less weight pulling it down, and the deep part creates a natural lift line at the roots. The side with less hair looks airy. The fuller side looks plush. Together, they make the cut feel bigger than it is.
If your curls or waves tend to lie flat on top, this is one of the easiest styles to fake a fuller shape. Dry the roots with the part flipped opposite to where you normally wear it, then move the part back once the hair is about 80 percent dry. That little bit of root memory can make the crown stand up better.
- Best for loose curls, waves, and short curly cuts
- Use a light mousse near the root instead of a heavy cream
- Diffuse with your head tilted to the side for lift
- Tuck the smaller side behind the ear if you want more height at the crown
The bob does not need to be huge to look full. It only needs the right part and the right drying direction.
5. High-Root Puff with Defined Ends
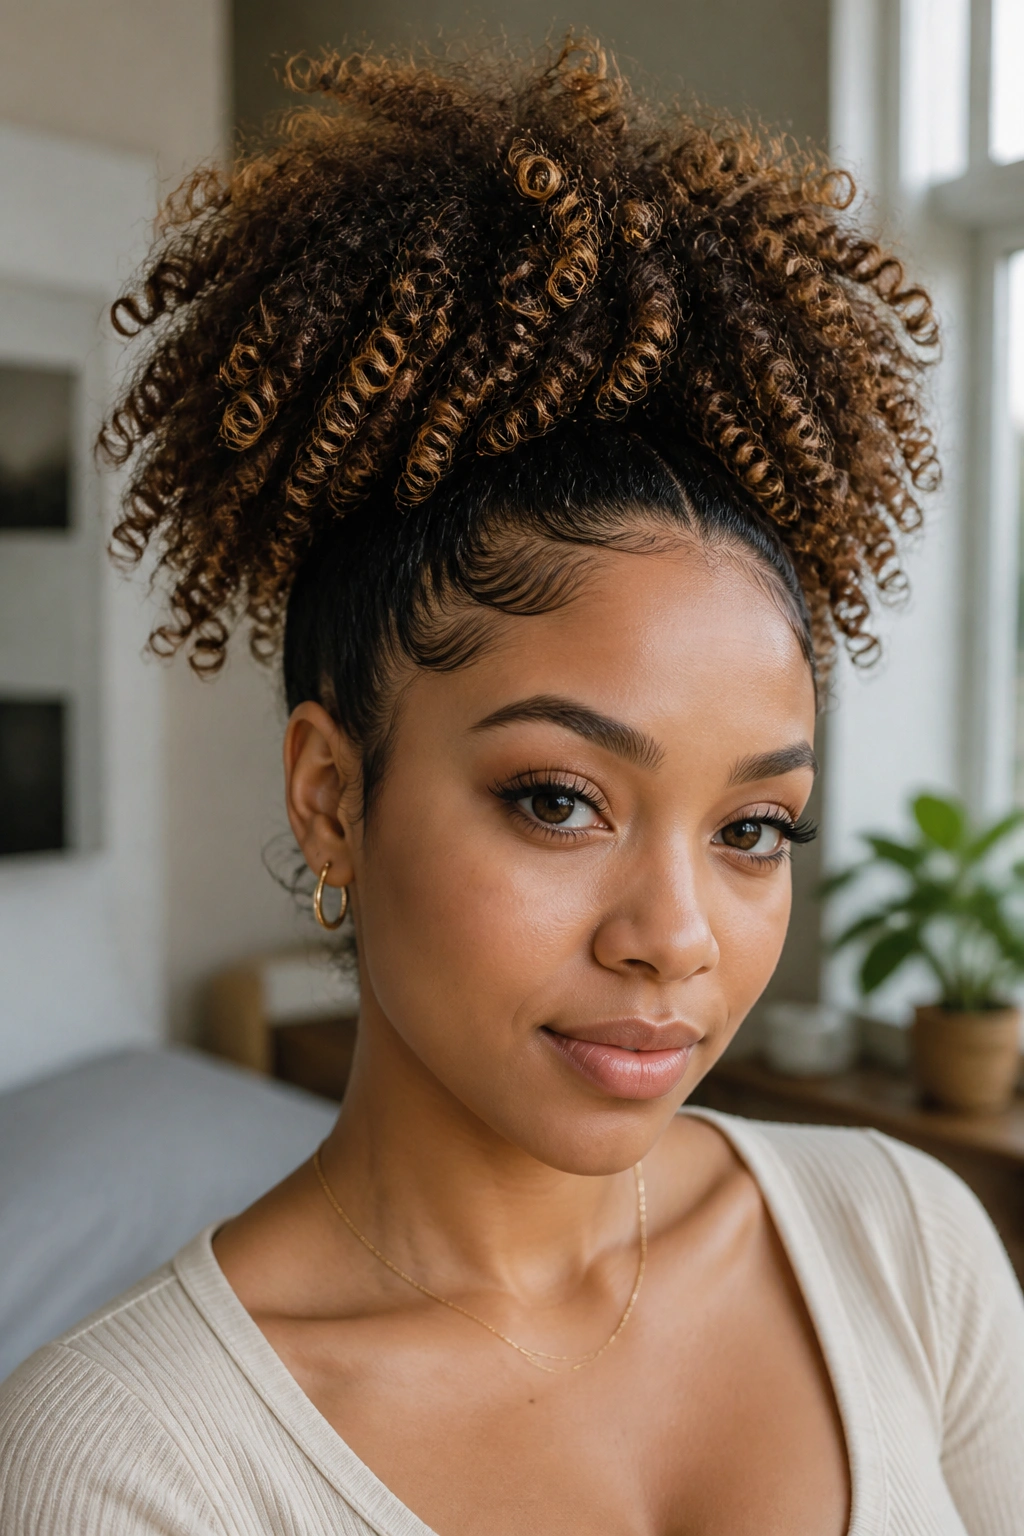
A high-root puff works because it lifts the hair away from the scalp before gravity has a chance to flatten it. The beauty of it is that the shape can stay clean at the ends while the crown gets all the height you want.
I like this on hair that’s a little stretched out from sleeping, because it turns a flat morning into something deliberate fast. Pull the top section up gently, secure it with a puff cuff or a soft band, and leave the ends defined instead of crunching them into oblivion. That contrast is what keeps the style from looking bulky.
The best version of this style never feels tight. That matters. If the front hairline is being yanked backward, the puff ends up looking harsh instead of full. Keep the tension low, smooth only the perimeter if you need it, and let the puff sit a bit forward so the top reads taller.
A light gel at the edges plus a little oil on the fingertips makes the finished shape look polished without killing the volume. And if you have a habit of losing lift by midday, flip the head over for ten seconds and shake the roots loose. Small fix. Big difference.
6. Curtain Bangs on Shoulder-Length Curls

Curtain bangs are a volume cheat that doesn’t get enough credit. They break up the weight around the front of the face, which makes the whole cut feel lighter and more lifted.
Unlike blunt bangs, curtain bangs blend into the rest of the curl pattern. That means they don’t sit there as one heavy block. They open out from the center or slightly off-center and frame the face in a way that pulls attention upward, toward the eyes and crown.
This style works especially well on shoulder-length curls, where the length has enough swing to move but isn’t so long that it drags everything down. The bangs also soften a wide forehead or a heavy front line without eating too much density. That’s the sweet spot.
If you want them to read full, dry the bang section separately. Pin the rest back, twist the fringe lightly with your fingers, and let it fall into place after the main curls are dry. Cutting them too short is where people get into trouble. Curly bangs spring up. Always leave more length than you think you need.
7. Tapered Cut with Full Top

If you like height, a tapered cut is the bluntest answer. The sides and nape are kept shorter, while the crown stays fuller, so the eye sees lift right away.
What to Ask for at the Salon
- Keep the sides close enough to remove side bulk
- Leave the top long enough for curl spring
- Keep the silhouette rounded, not pointy
- Avoid aggressive thinning that makes the top look see-through
That shape is doing volume work before you even style it. It lifts the center of the head and gives the curls room to expand upward instead of fanning out sideways. On tight textures, it can look crisp and strong. On softer curls, it reads more airy and modern.
Styling is fast, which I like. A little mousse at the roots, a diffuser on low heat, and a pick only where you want extra height. That’s usually enough. If you’re heavy-handed with cream on this cut, the top collapses and the whole point disappears, so keep the root area lighter than the lengths.
A tapered shape is not subtle. That’s the appeal. It makes volume the main event.
8. Wash-and-Go with Root Lift

A wash-and-go can look full if you treat the roots like their own project. Most people don’t, and that’s why their curls end up defined but flat at the scalp.
Start with dripping-wet hair if your pattern likes a lot of slip, or damp hair if your curls are finer and collapse under water weight. Apply a light foam or mousse near the roots first, then work your gel or curl cream through the lengths. That split is useful. The roots need lift. The ends need shape.
Do not pile the hair on top of your head while it dries. That’s a fast route to a squashed crown. Use small clips at the roots or gently lift the top section with your fingers while diffusing. A low to medium heat setting helps set the root angle without blasting the curl pattern apart.
Here’s the part people skip: once the cast forms, leave it alone. Tugging at it before it dries can flatten the whole head again. Let the hair harden, then break the cast with dry hands or a tiny bit of oil.
A good wash-and-go should look springy, not stiff. If it feels soft at the root and holds shape through the middle, you’ve got the balance right.
9. Half-Up Clip Twist

On a day when the top looks tired by noon, I’d rather twist two inches of hair and clip it than start from zero. It’s faster, and it gives the crown a little lift without disturbing the rest of the style.
The half-up clip twist works because the twist creates tension at the crown while leaving the lower curls free. That tension pulls the roots upward just enough to make the whole head look fuller. You also get a bit of lift from the clip itself, which sits like a small anchor at the highest point.
- Use a medium claw clip or two small pins
- Twist only the top section, not the whole head
- Keep a few curls loose around the temples
- Slide the clip in vertically if you want more height
This style is especially good for second- or third-day curls that have lost their bounce. It refreshes the shape in under a minute. And if your hair is dense, the twist can control the top without pressing it flat the way a tight ponytail often does.
Watch the tension. If the twist feels tight at the scalp, loosen it. Volume should feel supported, not squeezed.
10. Deep Side Part with Flipped Volume

Sometimes the smallest change beats a whole new cut. A deep side part can make curls look fuller in seconds because it changes the way the hair falls across the head.
When you move the part far off center, one side gets more lift at the root and the other side gets a soft sweep. That asymmetry reads as body. It also stops the curls from lying in the same direction every day, which is one of the main reasons crowns go flat.
The Trick
Dry the hair in the opposite direction of the part you want, at least until the roots are mostly set. Then flip it back and let the curls fall into place. That little root bend can hold all day. A tail comb helps if you need a cleaner line, but your fingers work fine for a softer look.
This style is especially kind to wavy hair that needs a bit of visual density. It also works on looser curls that collapse when they’re always parted in the same place. Keep the product light at the top, though. A heavy cream on a deep side part turns into a greasy-looking shelf fast.
The shape is the point here. The part is not a detail. It’s the whole move.
11. Long Layers with Scrunched Ends
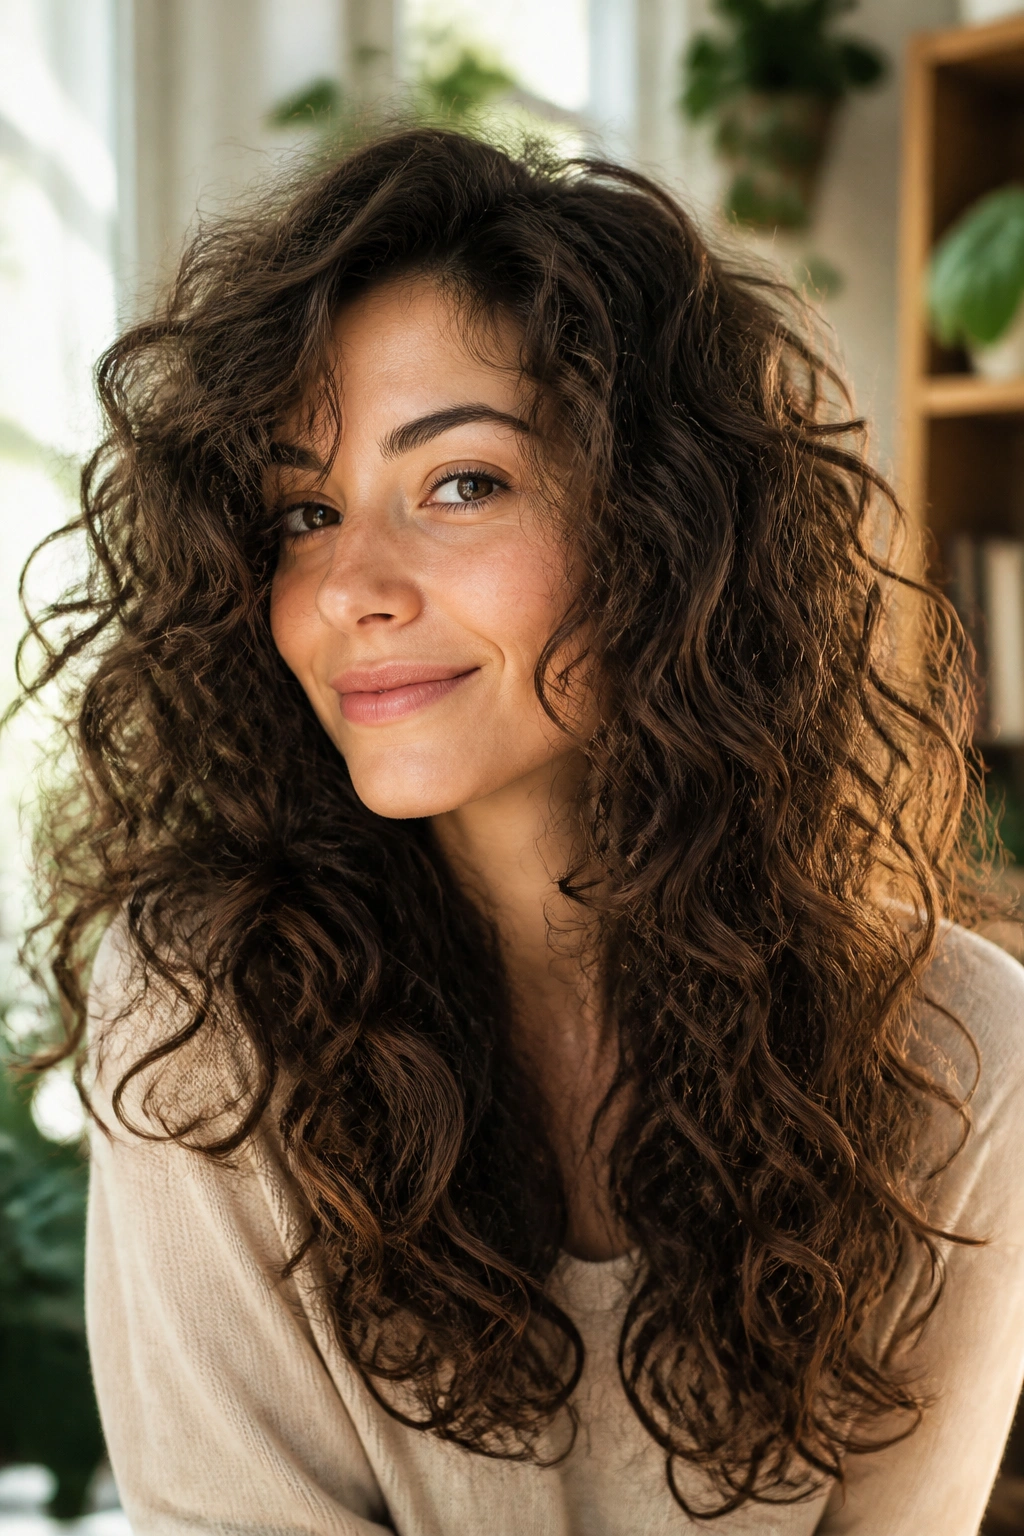
Long layers are the quiet answer for people who want to keep length but lose the flat curtain effect. One-length curls can look heavy at the bottom, especially when the hair is thick or grows in a looser pattern. Layers solve that by removing weight in the right places.
The catch is that the layers need to be used carefully. Too much chopping near the crown can make the top frizzy and the ends wispy. You want enough layering to let the curls stack, but not so much that the shape starts breaking apart. Invisible layers, face-framing layers, and soft internal layers all work here because they keep the hair looking full from every angle.
Scrunching the ends helps seal the shape once the hair is dry. I mean a real scrunch, not a frantic squeeze. Use a microfiber towel or a soft T-shirt, lift the ends into your palm, and press gently upward a few times to encourage spring. Then stop. Too much handling will stretch the curl pattern out and flatten the roots you were trying to protect.
A long layered cut is a good fit if you like hair that moves but still feels grown-out and strong. It’s less dramatic than a shag. More forgiving, too.
12. Curly Wolf Cut

Why does the wolf cut keep showing up on curly heads? Because it likes texture instead of fighting it.
A wolf cut lives somewhere between a shag and a mullet, which sounds odd until you see what it does for volume. The crown stays fuller, the mid-lengths stay airy, and the ends don’t pile up into one heavy block. That unevenness is the whole reason it works on curls. The hair can rise where you want height and fall away where you want movement.
What Makes It Different
- The crown is shorter and lighter
- The front pieces usually sit around the cheekbone or jaw
- The back keeps more length, which gives the style swing
- The finish looks casual rather than polished
It’s a strong choice if you like shape that feels a little wild but not sloppy. And yes, it can be styled neatly. You just need to decide whether you want the volume to be fluffy, sculpted, or somewhere in between. A diffuser gives the top lift. Fingers give you a messier finish. Both are valid.
If you hate hair that looks too tidy, the wolf cut might be your favorite cut in the bunch. It never pretends to be flat.
13. Face-Framing Layered Lob

A layered lob that hits around the collarbone is one of the easiest ways to keep fullness without dragging the hair down. The length is long enough to feel versatile, but short enough that the curls still bounce.
Where the Volume Lands
The real trick is in the front. Face-framing layers open up the cheeks and keep the top from looking too boxy. If the pieces around the face are a little shorter than the rest, the hair bends away from the head more easily, and that creates an instant lift line.
- Collarbone length keeps the ends from looking heavy
- Layering around the face softens the silhouette
- A deep part adds lift at the crown
- A diffuser gives the front pieces enough spring to stay away from the jaw
This is a smart style if you want something polished enough for work but not so shaped that it loses texture. It also plays well with wavy patterns that need a small amount of structure to look full. Keep the layers soft if your hair is fine. Heavy slicing can leave the bottom thin, and that defeats the point.
The lob is one of those cuts that does not scream for attention. It just makes the hair look expensive in the practical sense — healthy, balanced, and fuller than it has any right to be.
14. Twist-Out with Fluffed Crown

A twist-out is sneaky-good for volume because the set creates separation before the hair even dries. Each twist gives the curl pattern a bit of lift and keeps the strands from clinging together too tightly.
The real volume shows up when you take the twists down. Separate them with oiled fingertips, not rough hands, and stop once the curl clumps have enough room to breathe. Then go back in at the roots with a pick and lift only the crown and top sides. Don’t drag the pick through the ends. That’s how you get puff without shape.
Patience matters here.
If you unravel the twists while the hair is still damp, the volume collapses and the curls can turn fuzzy. Dryness first. Always. Medium-sized twists usually give the best balance of definition and fullness, while tiny twists can look too tight and take forever to dry.
A twist-out is a strong option when you want hair that feels big but controlled. It’s not fussy once you know your set size. And if you want even more height, twist the front sections away from your face before setting them. That little directional choice makes the crown look taller when everything comes down.
15. Voluminous Mini Puffs

A row of mini puffs can make a head of textured hair read fuller than one big puff ever will. Each section creates its own lift point, so the whole style looks layered and dimensional instead of condensed into a single lump.
This style works well on short to medium curls and coils, especially when you want shape without fighting shrinkage. The sections can be neat or slightly uneven. I prefer slightly uneven, actually, because perfect symmetry can make the style look stiff. A little irregularity gives it life.
What to Keep in Mind
- Use snag-free elastics so the sections don’t break up
- Put a tiny bit of gel only at the part lines
- Keep each puff loose enough to puff outward
- Leave the ends soft rather than scrunched tight
Mini puffs are also useful when you want to protect the crown from flattening. Because the hair is divided into small sections, the root tension stays spread out. That can make the style feel lighter on the scalp than a single ponytail or bun.
The best part is how adaptable it is. You can wear four puffs, six puffs, or a whole row, depending on your hair density and length. It’s playful, but it’s not childish. And on the right texture, it gives exactly the kind of height people spend hours trying to fake.
Final Thoughts
Volume on curly hair usually comes from where the weight sits, not from piling on more product. If your roots keep collapsing, the fix is often a cut with better layers, a part that changes the silhouette, or a styling choice that lifts the crown before the hair dries.
I’d start with the easiest change first. Try a deeper side part, a lighter root product, or a quick clip at the crown before you reach for a brand-new routine. Those small shifts tell you a lot about what your hair wants.
And once the shape is right, the curls stop fighting gravity quite so hard. That’s when textured hair starts looking full in the way you probably wanted all along.
