



Defined curl looks can save a style the second the air turns sticky or the shape starts blooming out in every direction. The trick is not more product. It’s smarter structure: smaller sections, cleaner parting, and enough hold to let the curl dry in the shape you actually want.
Loose waves, springy spirals, and tight coils all behave a little differently, but they all respond to the same rule — shape them while they’re wet, then leave them alone. That part is boring. It also matters more than most people want to admit.
A good curl look doesn’t have to feel crunchy or stiff. In fact, the sharpest definition usually comes from hair that was set carefully, dried fully, and separated with a light hand instead of a full-on fluff session. The curl pattern stays visible. The silhouette stays clean. The whole style reads as deliberate, not accidental.
Some of these looks are soft and polished. Others are bolder, with crisp parting or a tighter coil pattern. All of them can work when you want curls or waves that look shaped on purpose, not just air-dried and hoped for.
1. Center-Part Wash-and-Go for Defined Curl Looks
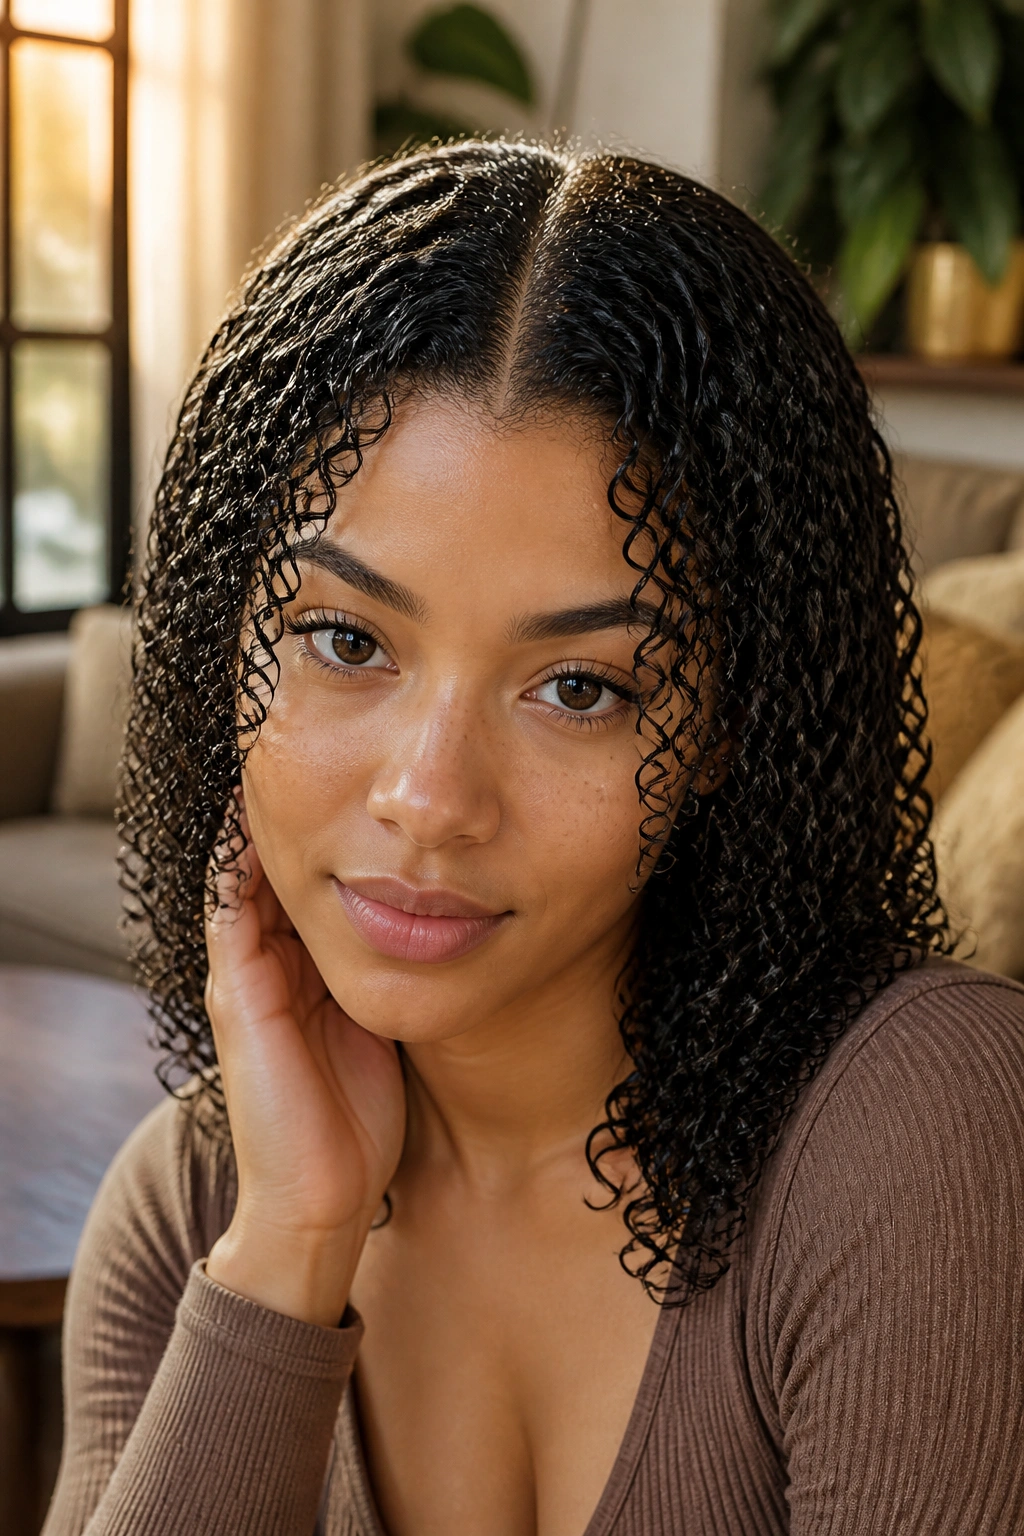
A center part is the fastest way to make a wash-and-go look intentional. It gives both sides of the head the same visual weight, which makes curl clumps read cleaner and usually keeps the whole shape from drifting too far to one side.
Why the Part Line Matters
The part is doing more work than people think. When the line is clean, the curl pattern around it has a clear path to fall, and that alone can make the style look sharper. On medium and long curls, a center part also gives you a built-in frame for the face, especially if the front pieces are a touch longer than the rest.
Work on soaking-wet hair. That part matters. Use a leave-in first, then smooth a strong-hold gel over 1-inch sections with your fingers or a rake comb. If the front tends to flatten, clip the roots at the crown for 10 to 15 minutes while it starts drying.
- Keep section sizes small, about ½ to 1 inch.
- Use enough gel to form a light cast, not a thick shell.
- Dry with a diffuser on low heat if you need speed.
- Avoid touching the curls until they feel fully set.
Pro tip: if your part keeps wandering, draw it with the tail of a rat-tail comb while the hair is still wet, then clip both sides away from it for a few minutes. That tiny pause keeps the line much cleaner.
2. Side-Part Coil Clump Bob
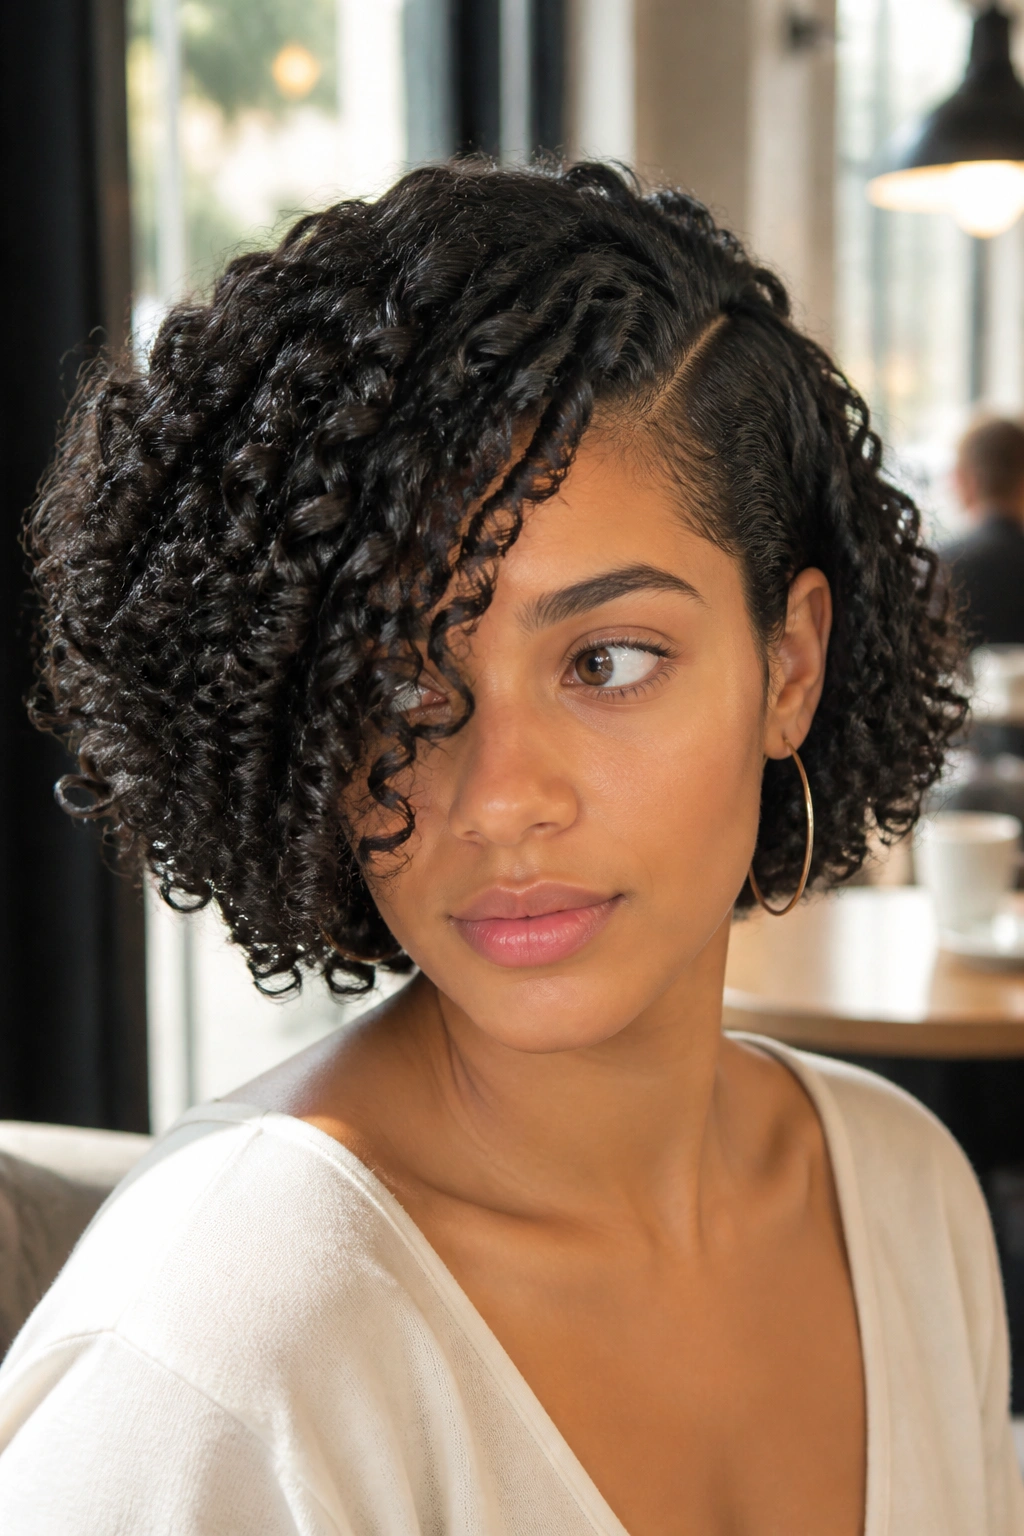
Short curls look denser with a side part. That’s the whole appeal. The asymmetry makes the bob feel fuller on one side, and it gives the curl clumps a stronger shape because your eye follows the sweep instead of the width.
This works especially well on chin-length or collarbone bobs. A deep side part creates a little lift at the crown and lets the heavier side fall in a softer curve. I like this when the haircut needs help looking sharp after a few days of wear, because the part does half the styling for you.
Keep the product light and focused. A cream that is too slippery can make the curls collapse, which is annoying because bobs need structure more than shine. Smooth the product through damp hair, then shape the front with your fingers so the curls sit where you want them before they dry.
Tuck the smaller side behind the ear if you want the shape to look cleaner. It sounds simple, and it is, but that one move can make a bob read far more polished than letting both sides hang loose.
3. Finger Coils on Short Curls
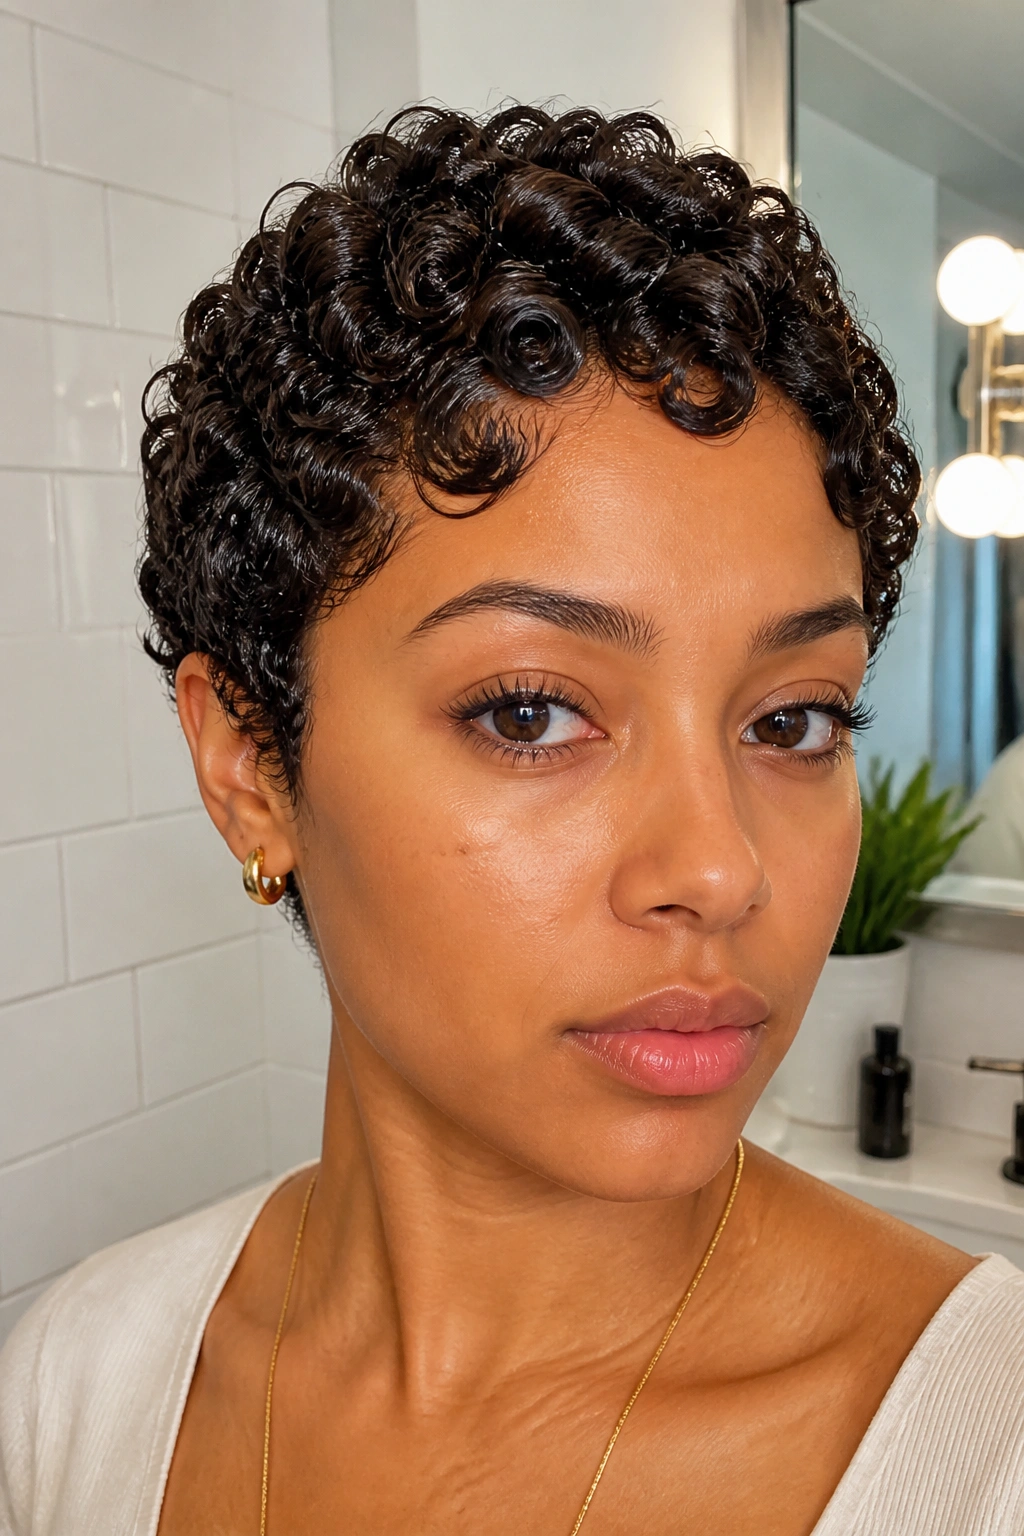
Why do finger coils look so crisp on short hair? Because the curl is being taught exactly where to go, strand by strand. On hair that sits anywhere from a cropped cut to a few inches long, finger coils can make texture look neat instead of fuzzy.
How to Style It
Start with damp hair and a light layer of gel or custard. Take ¼-inch sections if you want tighter spirals, or slightly larger ones if you want a softer coil. Wrap each section around your index finger from root to tip, then release it without pulling. The hair should keep the spiral shape on its own.
A lot of people rush the drying stage and regret it later. Don’t. If the coils are touched too early, they frizz at the ends and lose the clean line that makes this style work. Air-drying is fine if you’ve got time. A hooded dryer on low heat can help if you don’t.
- Use more control at the front than the back.
- Twist in the same direction across each side of the head.
- Let the roots dry fully before separating anything.
- Lift the curls at the root with a pick only after they’re dry.
The nice thing about finger coils is that they don’t pretend to be casual. They look set. That’s why they’re so good when you want definition that reads from across the room.
4. Twist-Out with Clean Root Stretch
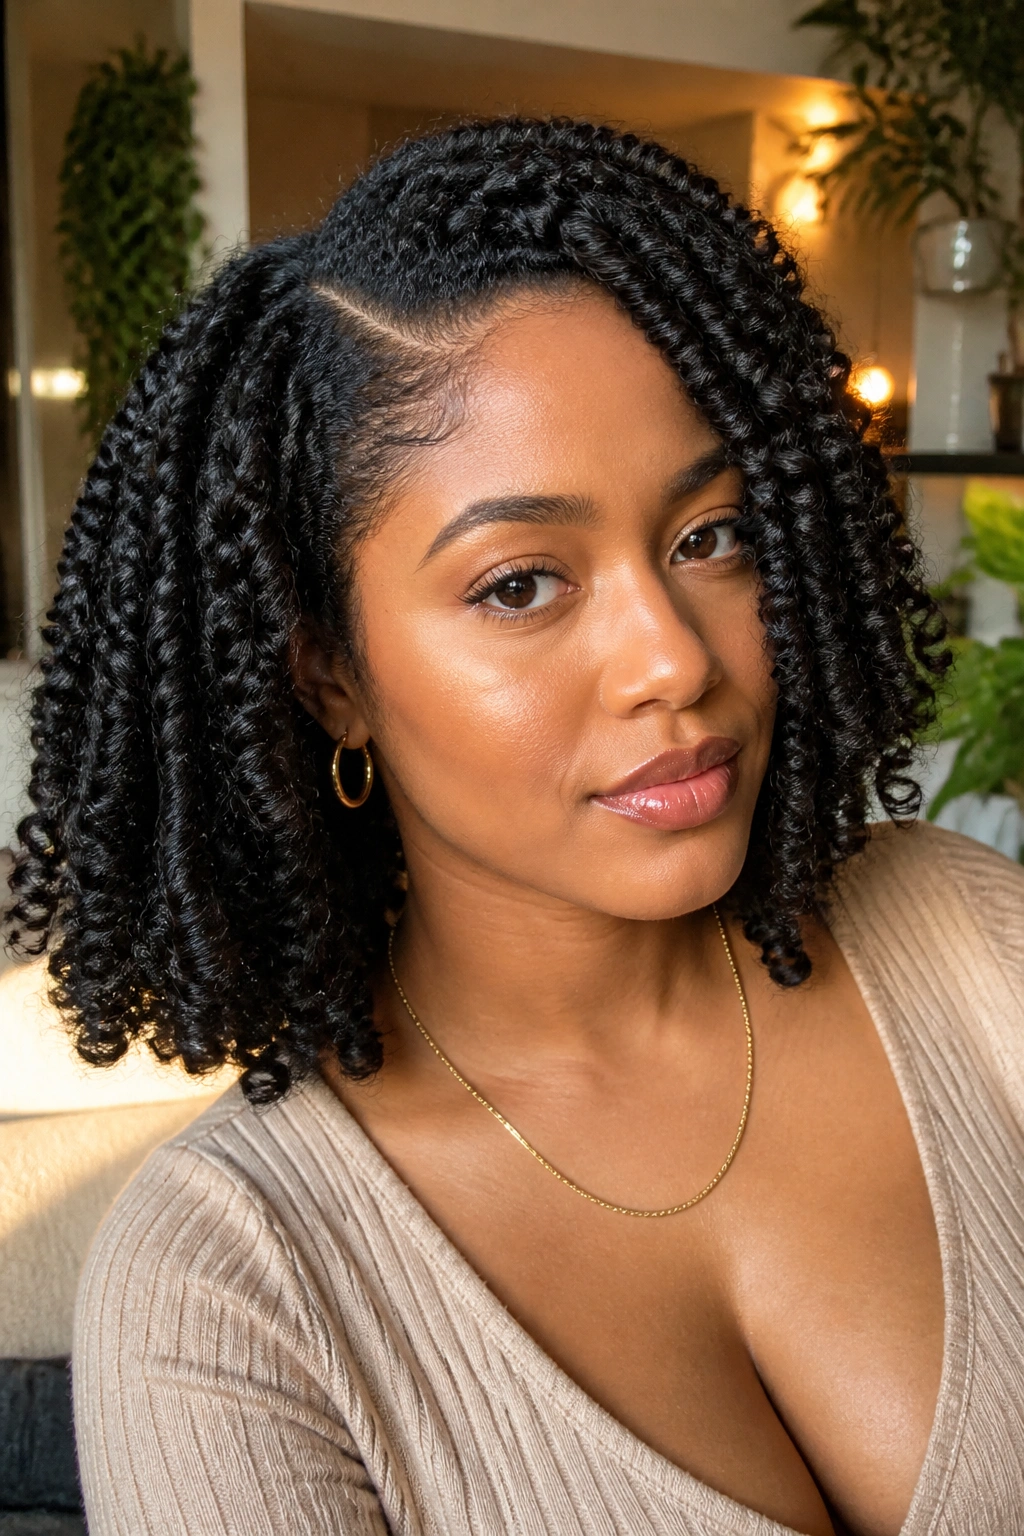
The first time I saw a good twist-out on shoulder-length curls, the roots were still neat even after the twists came out. That’s what made the style work. The texture wasn’t trying to be perfect everywhere, just controlled enough to keep the pattern readable.
Twists give you that slightly stretched look at the root and a softer spiral through the ends. For a sharper finish, use two-strand twists that are about ½ inch to 1 inch wide. Smaller twists give more definition. Bigger ones give more volume, but they can blur faster if the hair is layered heavily.
Let the twists dry all the way. Fully. If they come out even a little damp in the center, the result turns frizzy by noon, and nobody wants that. When you unravel, coat your fingertips with a tiny bit of oil or serum so the strands separate cleanly instead of sticking together.
Use this look when you want: more shape than a wash-and-go, but less uniformity than a rod set.
5. Braid-Out with Sharp Ends
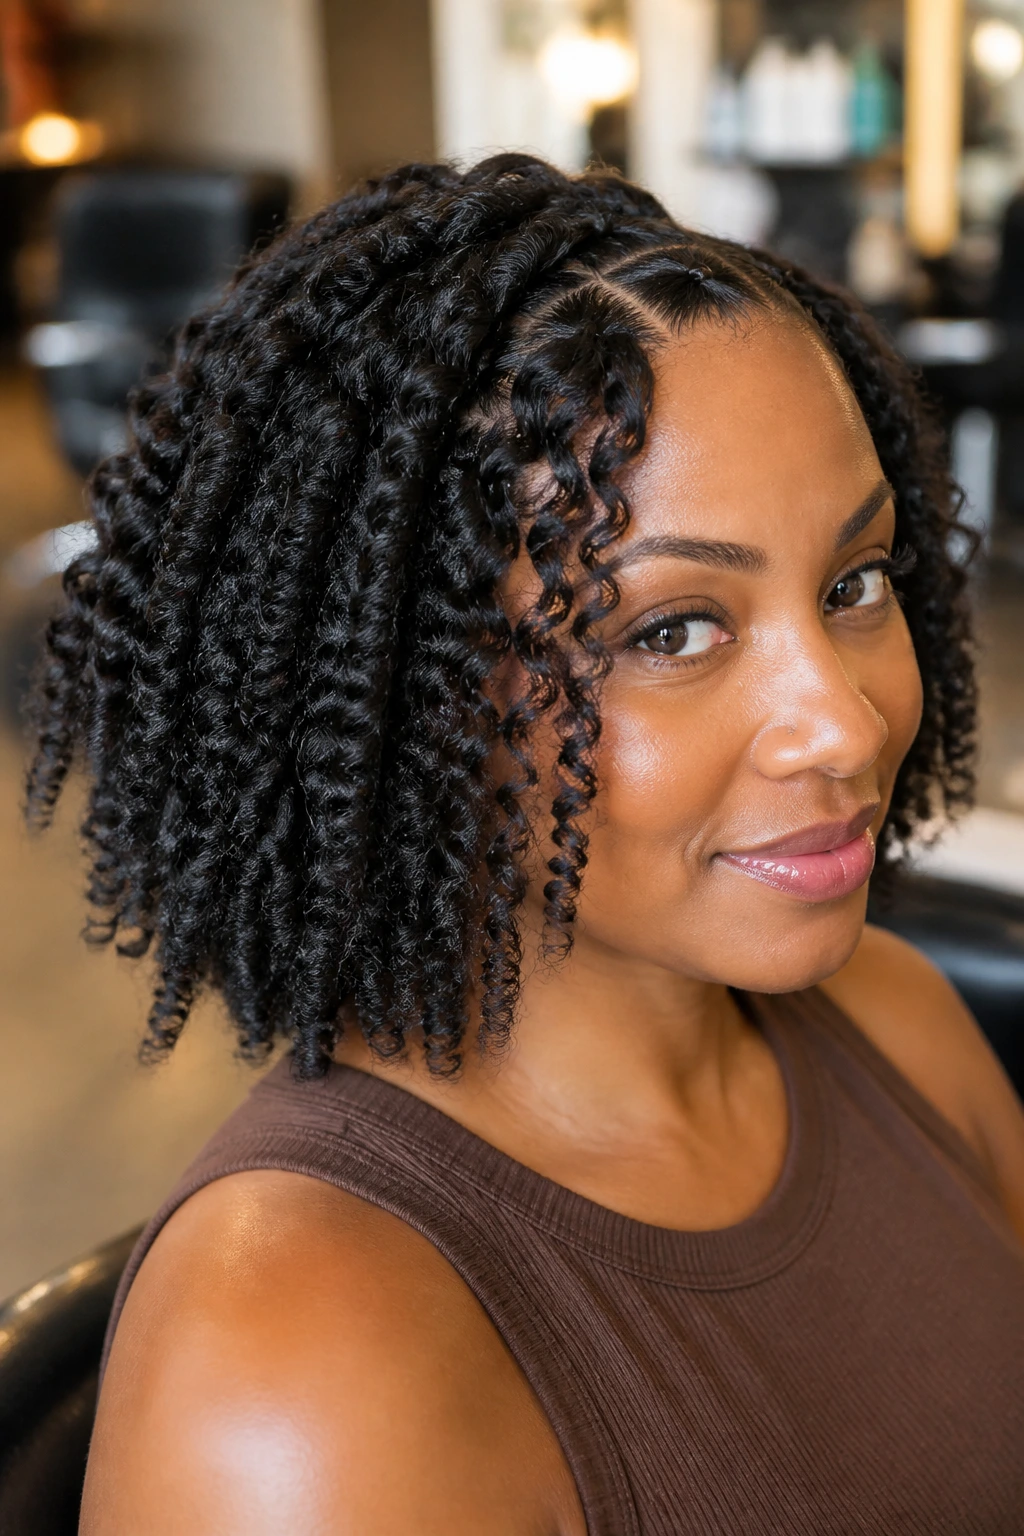
A braid-out gives you a different kind of definition. The pattern is less circular than a twist-out, and that crinkled finish can make curls look longer and more controlled at the same time. It’s one of those styles that looks fussy to set up and worth it once you take the braids down.
Keep the braids tight enough to show structure, but not so tight that the scalp feels pulled. Six braids can give a chunky look on medium hair. Ten or twelve braids will look finer and more detailed. The end result depends a lot on how neatly you braid near the roots, because that’s where the shape starts.
Wet braids are a trap. They always look promising when they’re still damp, then they swell and frizz in the middle after they’ve been unraveled. Give them a full drying window, whether that means overnight on satin or a few hours under a dryer. The more layered the haircut, the more important that is.
If you want the ends to look sharp instead of fluffy, add a little mousse to the final inch before braiding. It helps the tail of the braid hold its line.
6. Flexi Rod Set on Mid-Length Layers
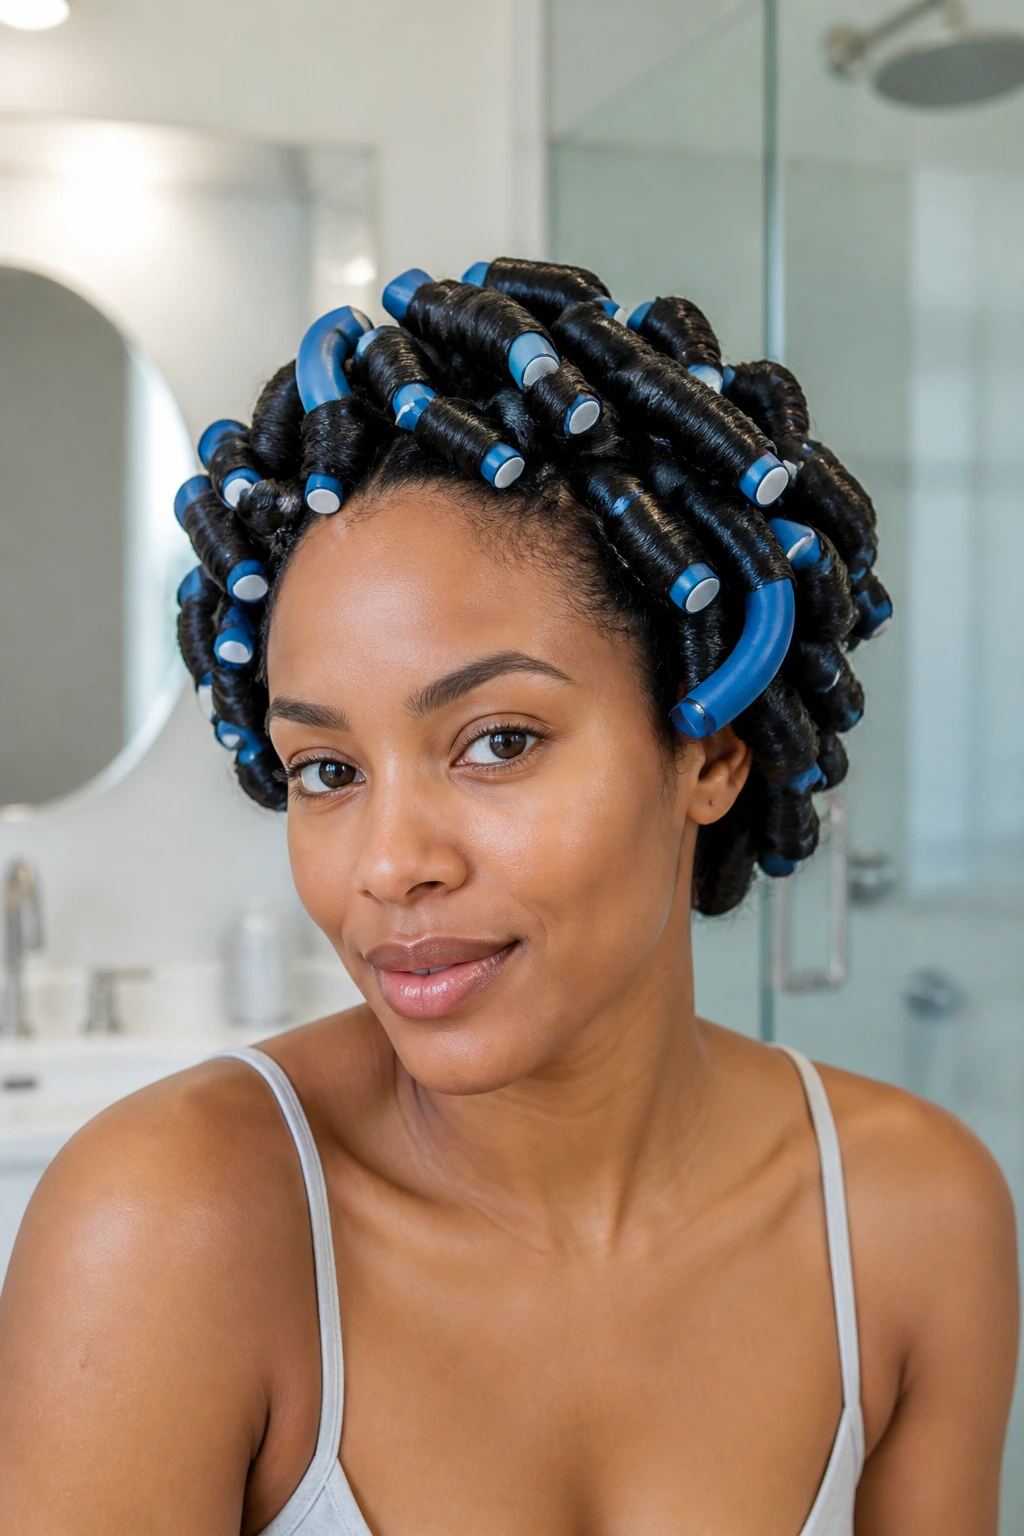
Unlike a curling wand, flexi rods give you a cleaner bend without hot spots or weird flat patches. That’s why they’re so good for mid-length layers, where you want the curls to look uniform but not stiff.
The rod size changes the whole mood. A 5/8-inch rod gives a tighter spiral. A ¾-inch or 1-inch rod makes a looser coil that still reads as defined. If the haircut has lots of layers, I’d keep the sections similar in size so one side doesn’t end up with tiny spirals and the other with bigger bends.
This style also holds up well because the rod shape keeps the strand in a consistent curve while it dries. That means fewer crooked pieces and less of that half-bent, half-flat look you sometimes get from loose styling. It’s a tidy finish, which may sound boring, but tidy hair photographs well in real life too.
Best for: people who want polished definition without using hot tools all over the head.
7. Mini Twist-Out on a Tapered Cut
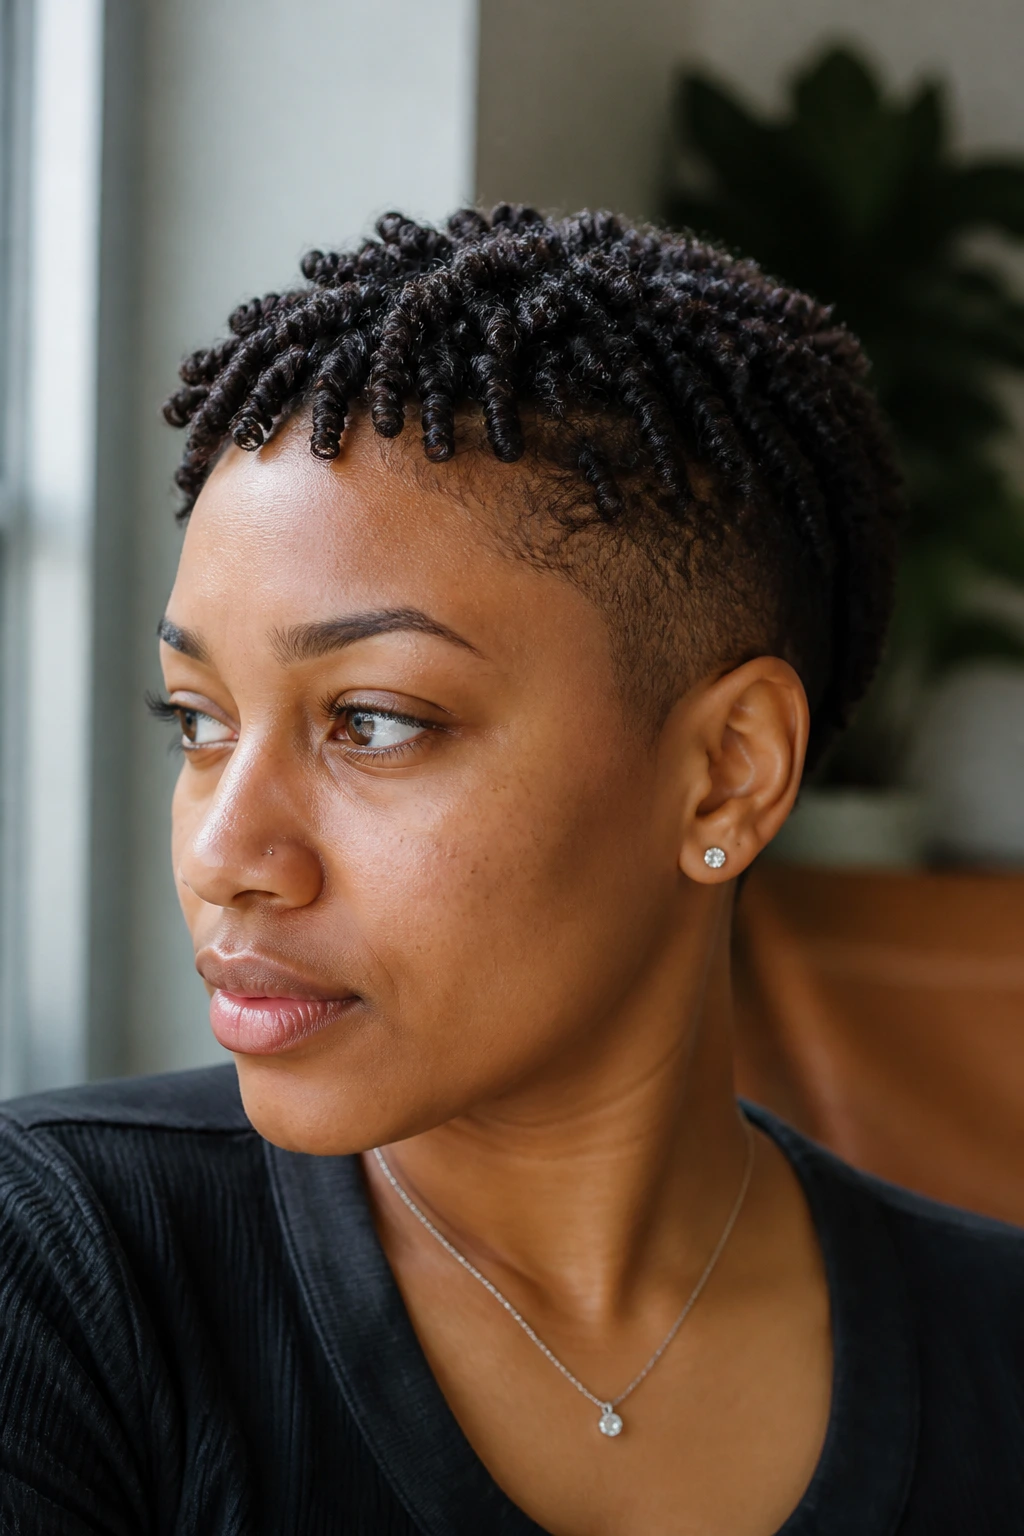
A tapered cut thrives on tiny twists because the shape gets locked in at the sides and lifted at the crown. The haircut already has movement built into it, so the styling job is to sharpen the edges, not fight them.
What to Watch For
Use ¼-inch to ½-inch sections for the shorter sides and a little more length on top if you want height. The twists should lie close enough to the scalp to show the shape of the cut, but not so tight that they leave dents. A cream-gel combo works well here because the hair on a tapered cut often needs both slip and hold.
- Dry the twists all the way before separating.
- Use a scarf at night to keep the side shape clean.
- Break up only the topmost pieces if you want more lift.
- Keep edge gel limited to the hairline, not the whole head.
A tapered style can go flat fast if the crown is overloaded with product. I’d rather see a little less shine and a clearer silhouette. That’s the part people notice first anyway.
8. Shingled Curls for Defined Curl Looks
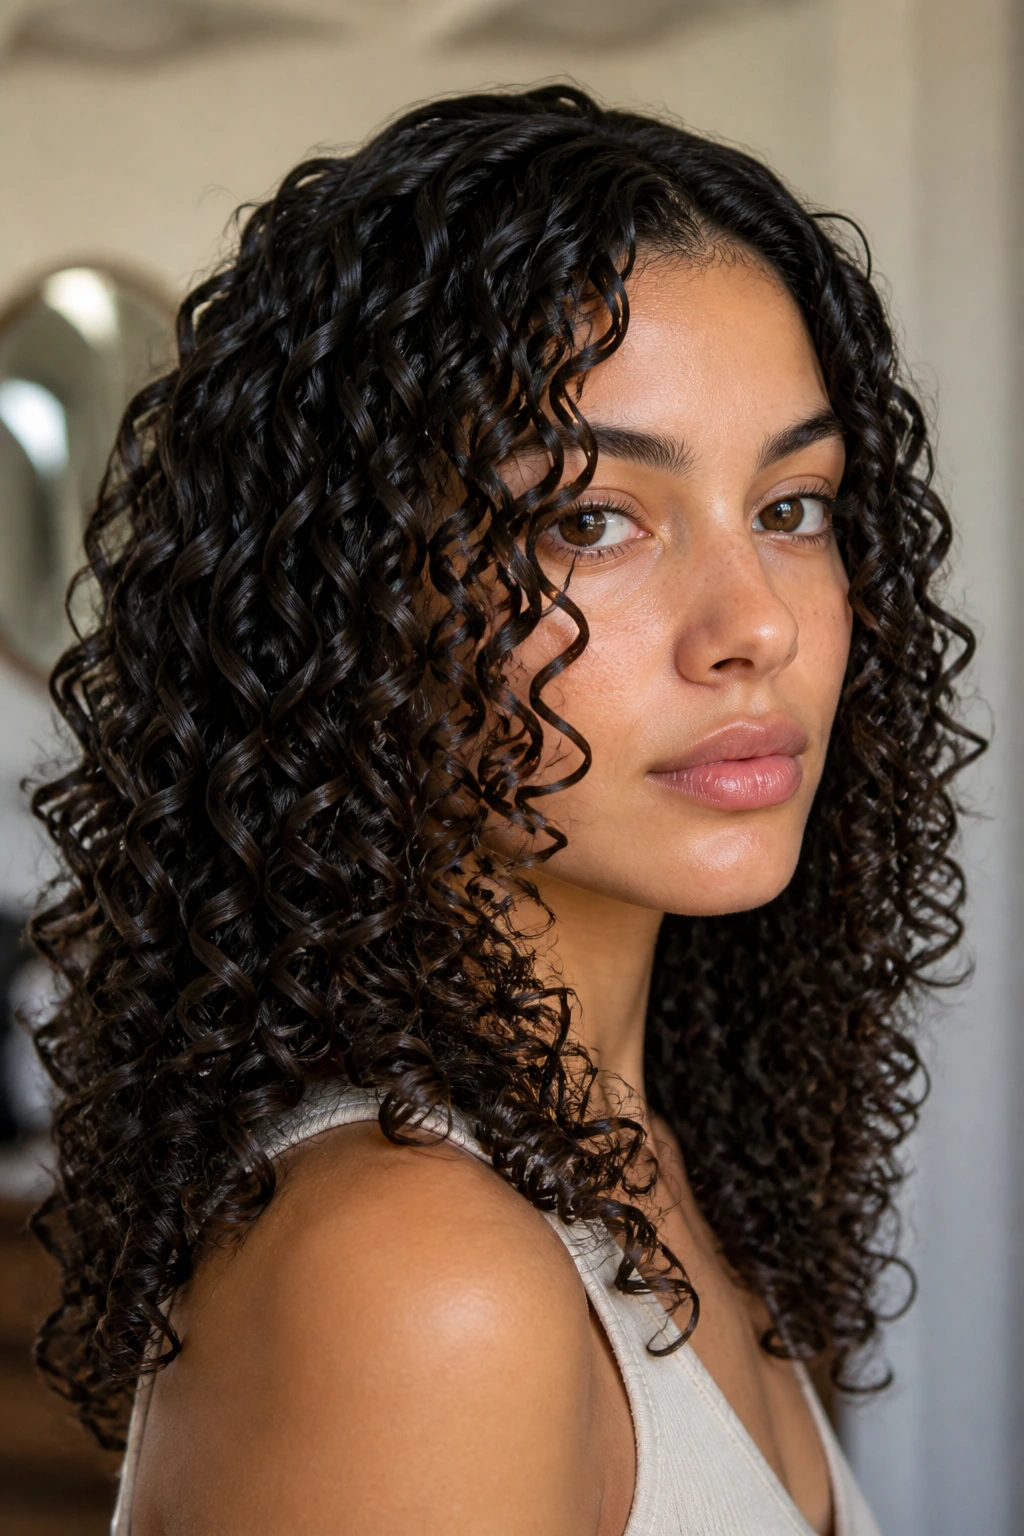
Shingling gives the cleanest curl clumps of the bunch. It takes longer, and yes, it can feel fussy, but the payoff is a head full of curls that sit in their own lanes instead of merging into one fluffy cloud.
The method is simple enough. Work through soaking-wet hair in small sections, then smooth product onto each section from root to tip with your fingers. Instead of raking everything apart, you let the curls clump naturally and encourage them to form one defined ribbon at a time. That’s why this look often shines on type 3 and type 4 hair that likes to clump.
How to Get the Most From It
Use a medium or strong-hold styler. Too light, and the curls separate before they set. Too heavy, and they droop. The sweet spot is usually a gel or cream-gel that keeps its shape without leaving the hair greasy.
- Work in 1-inch sections or smaller.
- Apply product evenly from root to tip.
- Let the hair dry untouched.
- Separate only after the cast is fully hard.
If you want maximum definition, don’t fluff the roots while the hair is still warm from the diffuser. That’s the moment when the curl pattern is easiest to disturb.
9. Wet-Look Curly Pixie with Edge Control
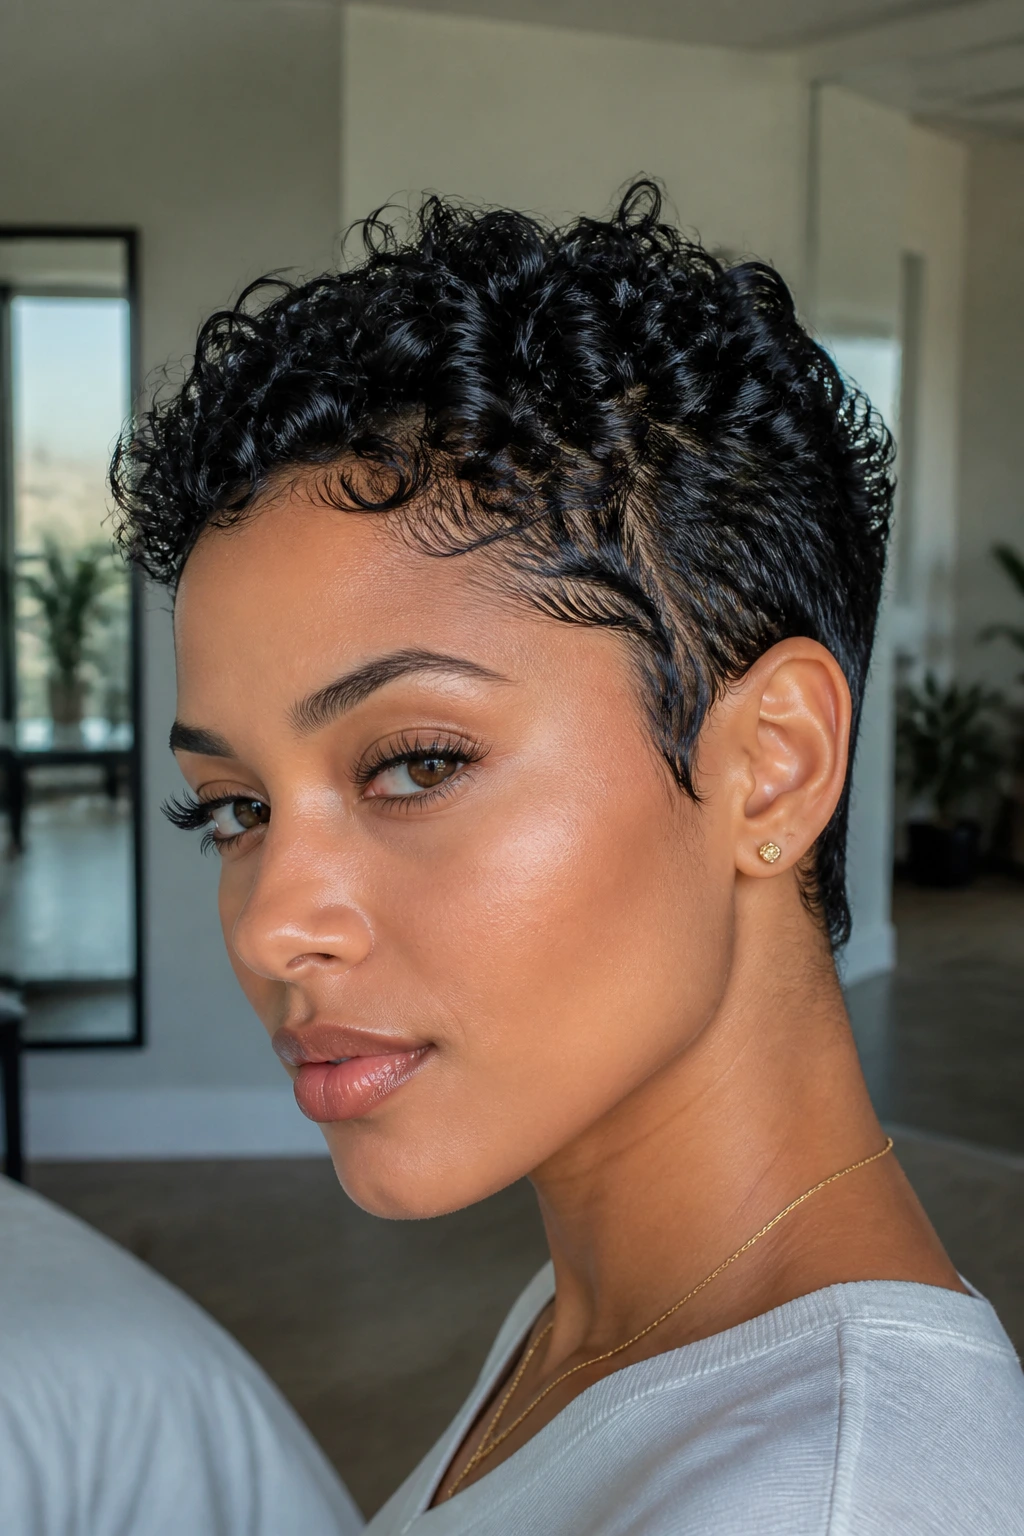
A curly pixie can look sharper than a longer cut because there’s less length competing for attention. The wet-look finish makes the shape feel deliberate, and it keeps the curl pattern near the scalp visible instead of turning it into a soft halo.
This style works best when the hair is short enough to hold the curve without collapsing. Use a curl cream first, then layer a firm gel over the top while the hair is damp. Smooth the sides toward the head with your hands, and let the top keep a little height so the pixie doesn’t go flat.
Cheap brushes show on this cut. So do heavy products. A clean toothbrush or small styling brush is enough for the hairline and nape. Keep the edges neat, but don’t overdo them. A hard shell around the whole perimeter can make the cut look dated fast.
A satin scarf for ten minutes after styling helps set the shape. That small step is often the difference between “wet and shapeless” and “sleek on purpose.”
10. Diffused Layered Lob with Curl Clumps
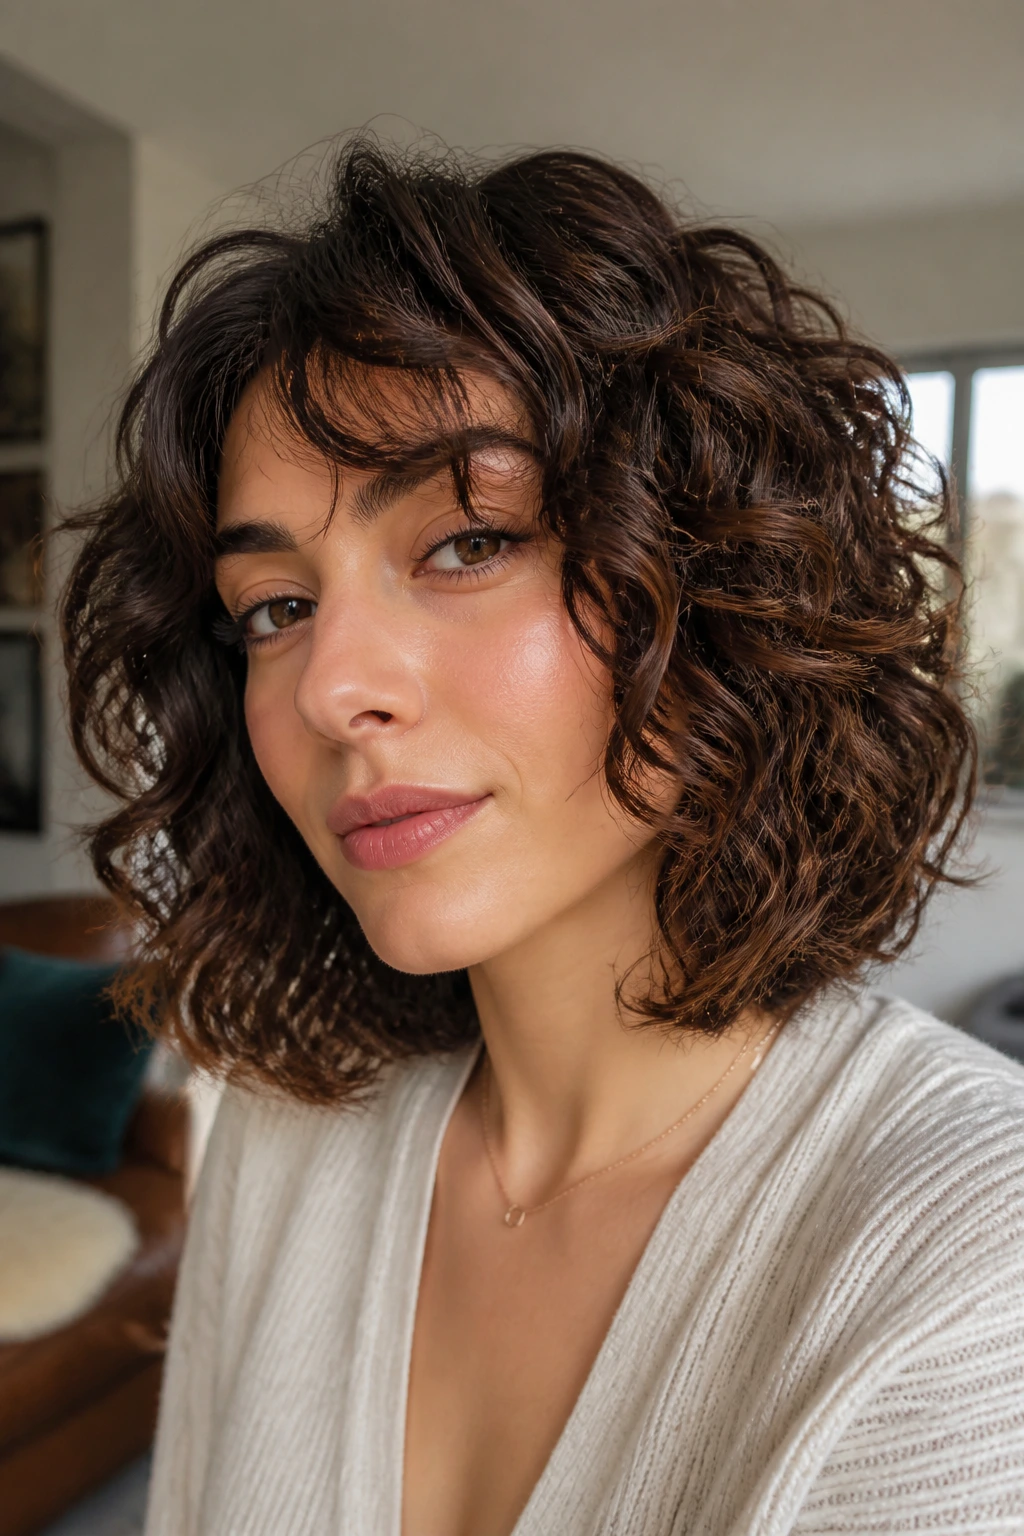
A layered lob has one job here: give the curls somewhere to sit without smashing them into the shoulders. The length lands between chin and collarbone, which is a nice sweet spot for definition because the curls can hang without getting too heavy.
Diffusing is where the shape gets decided. Use low heat and a gentle airflow, and don’t keep the diffuser parked in one spot for too long. Cup the curls for a few seconds, lift, move on. If you keep scrunching and shaking too much, the clumps start to break apart, and the whole style gets fuzzy at the ends.
I like root clipping on this shape. A couple of small clips at the crown while the hair starts to dry gives the top a little lift without making the lob puffy all over. That’s the part people often miss. They chase definition in the lengths and forget that the roots set the mood.
A layered lob works especially well when you want movement but not mess. It’s tidy, soft, and still has enough bend to feel alive.
11. Perm Rod Set with Rounded Volume
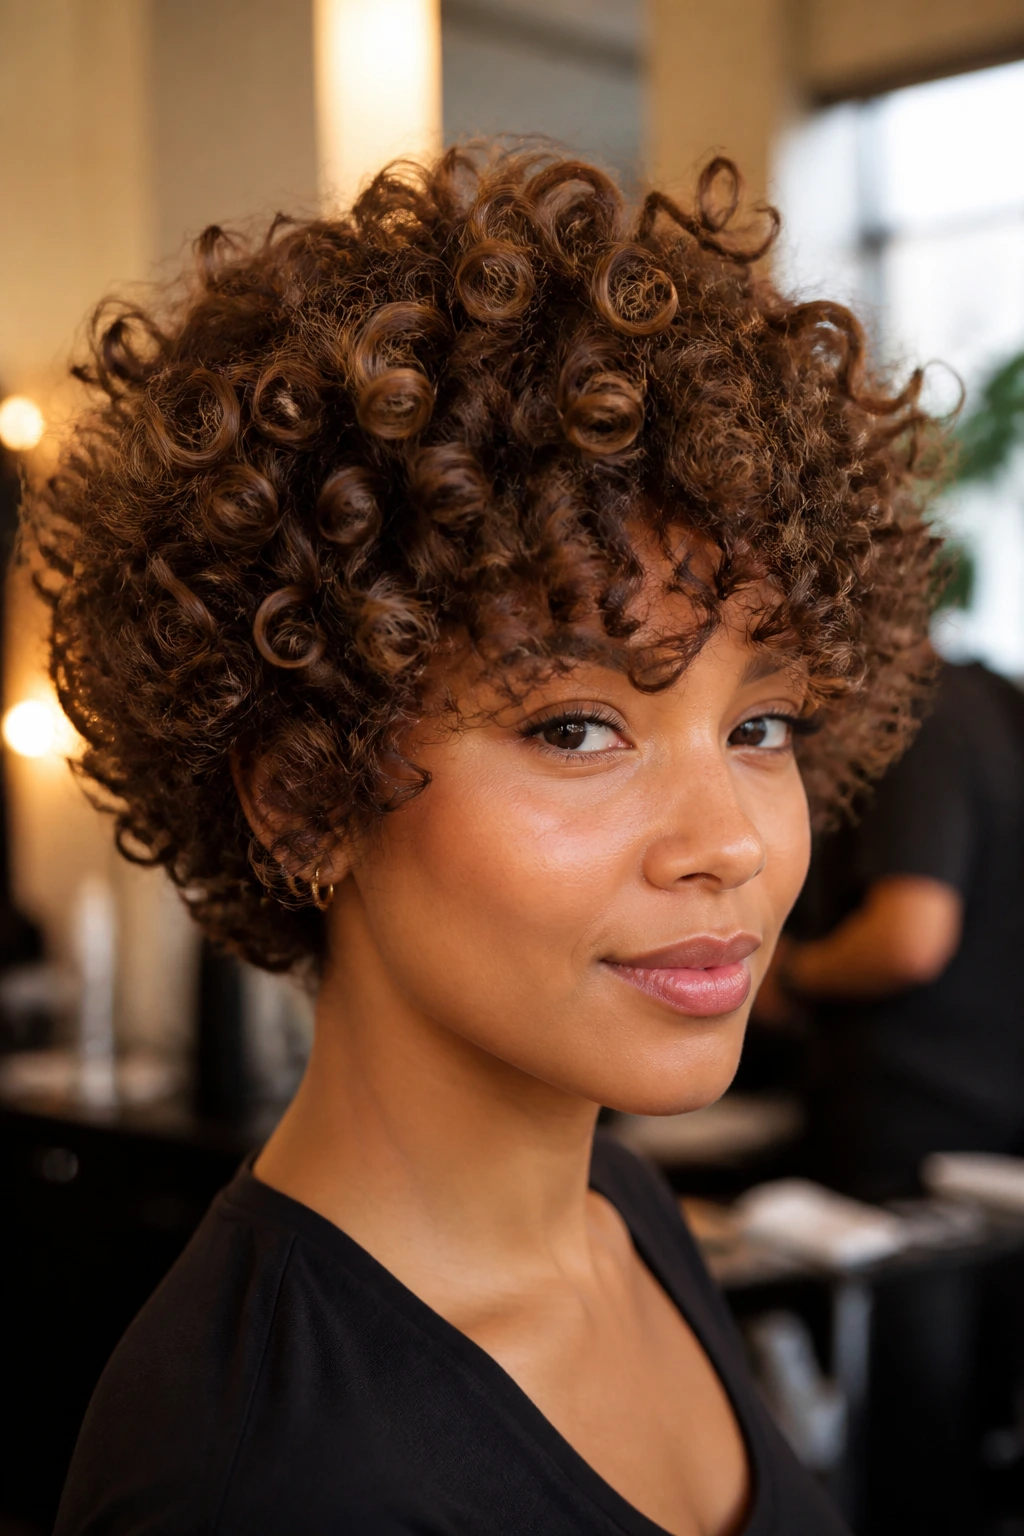
Perm rods make tighter, springier coils than flexi rods, and they do it with less guesswork. If you want a more uniform curl pattern — the kind where every curl seems to land in the same family — this is the cleaner option.
Rod size matters here. Smaller rods give a tighter spiral and more lift. Bigger ones soften the pattern and can make the hair look like polished waves instead of corkscrews. Pick the size based on how much bounce you want, not just how long the hair is. A medium rod on a short cut can look sharp. A tiny rod on long hair can look dense in a way that feels too busy.
The hair has to dry completely. That’s not negotiable. Perm rods hold moisture in the center longer than people expect, and if you rush the take-down, the inner section frizzes fast. I’ve seen it happen more times than I can count.
Best for: anyone who wants round, springy definition without separate styling on every strand.
12. Halo Parted Curls with Face-Framing Pieces
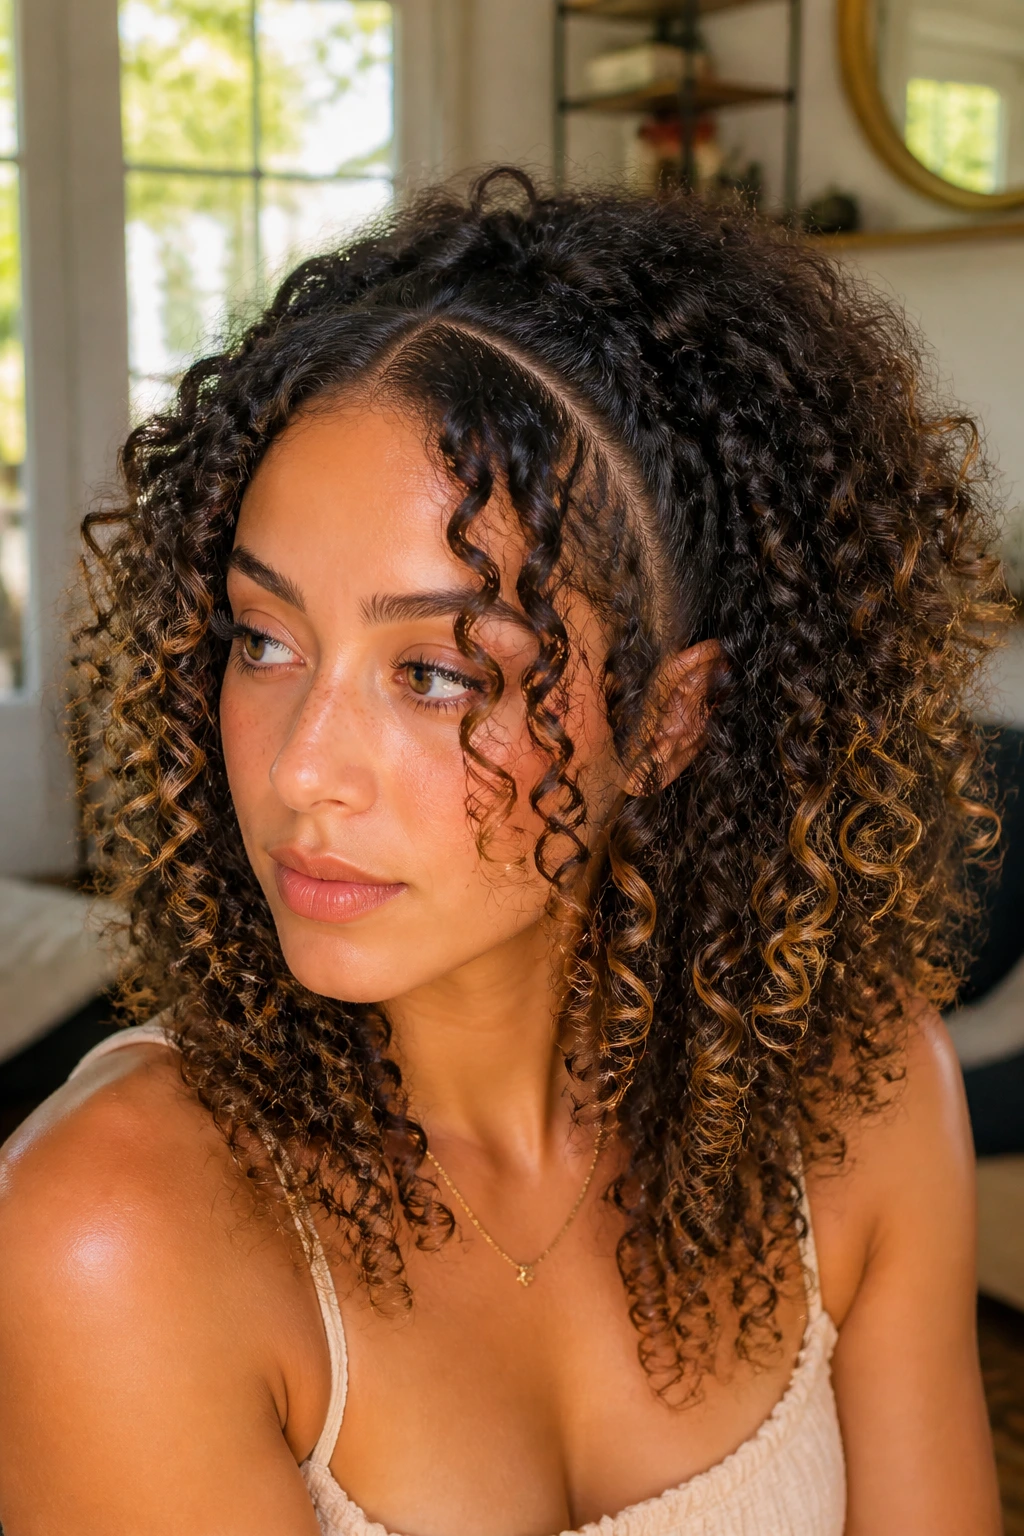
What happens when you carve a halo part through curls? The shape opens up around the face and the crown gets a little lift, which makes the whole style feel lighter and more sculpted.
A halo part is a curved parting that sits around the crown instead of running straight down the middle. It leaves the outer sections free to fall naturally, while the top gets a clearer shape. On long curls, that can keep the hair from swallowing the face. On shorter curls, it helps the shape look fuller without turning puffy.
How to Place the Part
Use the tail of a comb and follow a gentle curve from one temple, across the top, to the other side. Then let a few face-framing pieces fall forward on purpose. Those pieces should be left a little longer — enough to brush the cheekbone, not hang into the mouth.
A light gel or mousse is enough here. The point is shape, not stiffness. Keep the part line clean and the crown smooth, and the look stays elegant without feeling fussy.
13. Half-Up Curly Puff with Defined Ends
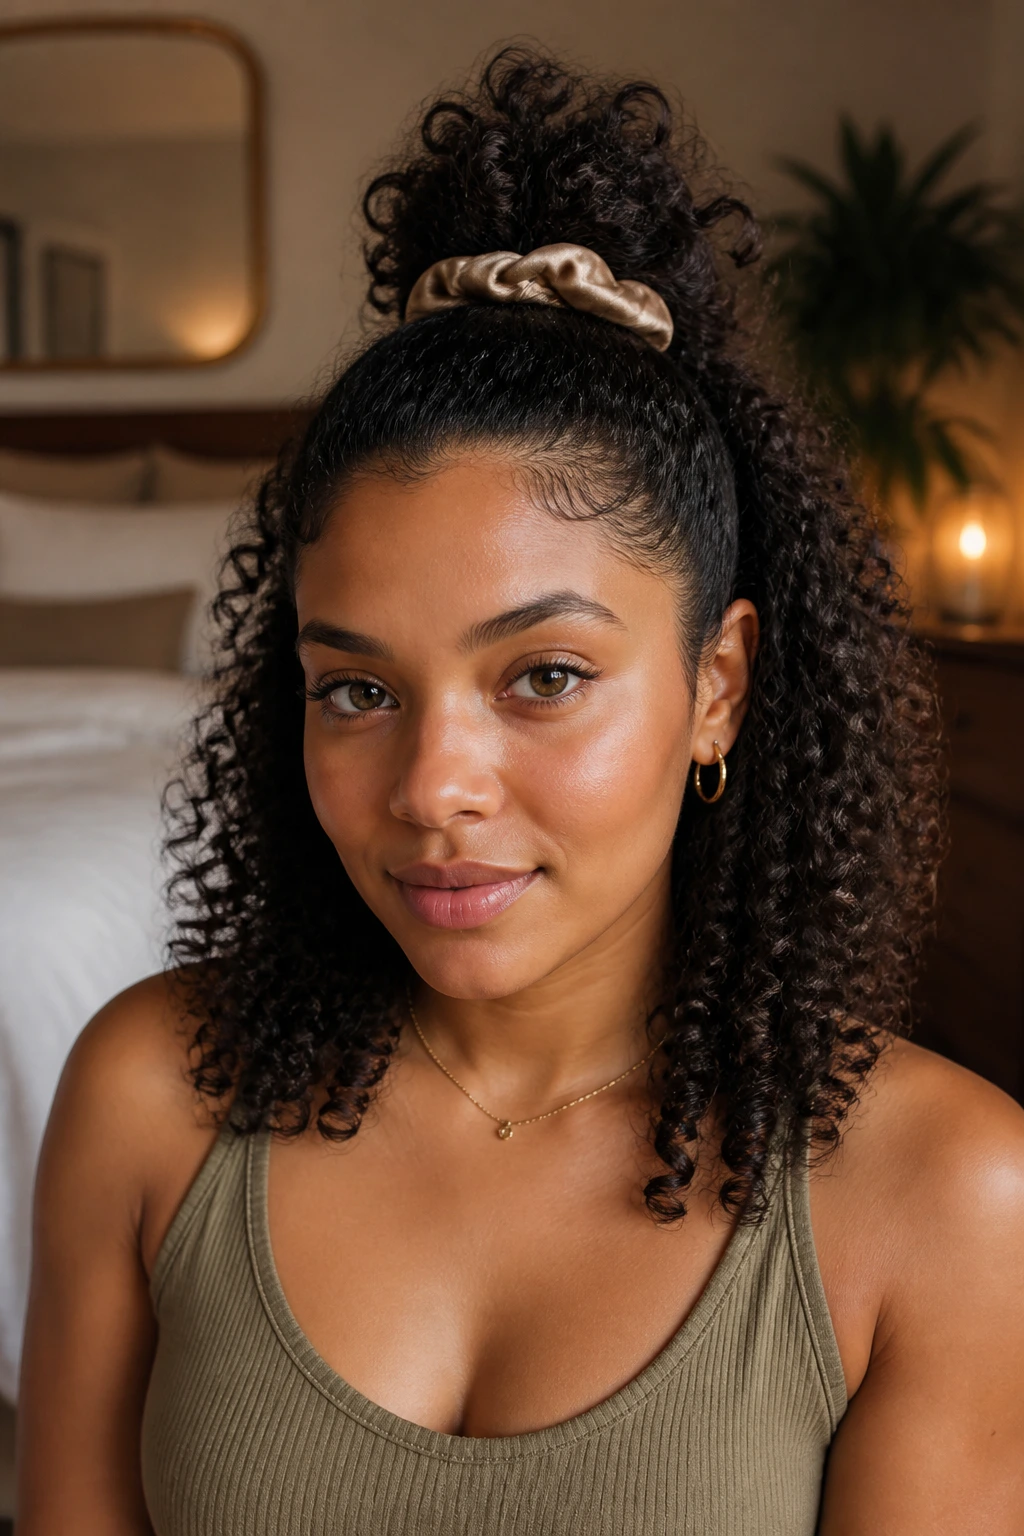
Half-up styles are the answer when day-two curls need a reset but the ends still have life. The top gets lifted away from the face, the bottom keeps its texture, and the whole thing looks put together without asking for a full redo.
Use a satin scrunchie or a soft coil tie at the crown. That detail matters more than people think, because a tight elastic can leave a hard dent right where you want the shape to stay smooth. Pull the top section up just enough to create height, then smooth the hair at the sides with a little mousse on your fingertips.
The ends should stay defined. If they’ve gone a little fuzzy, mist them lightly with water and scrunch in a tiny bit of cream. Don’t soak them. That’s how you lose the curl pattern you were trying to keep.
This style is especially handy for thick hair that starts to swell during the day. It controls the top and lets the bottom do its own thing.
14. Tucked One-Side Curl Style for Special Events
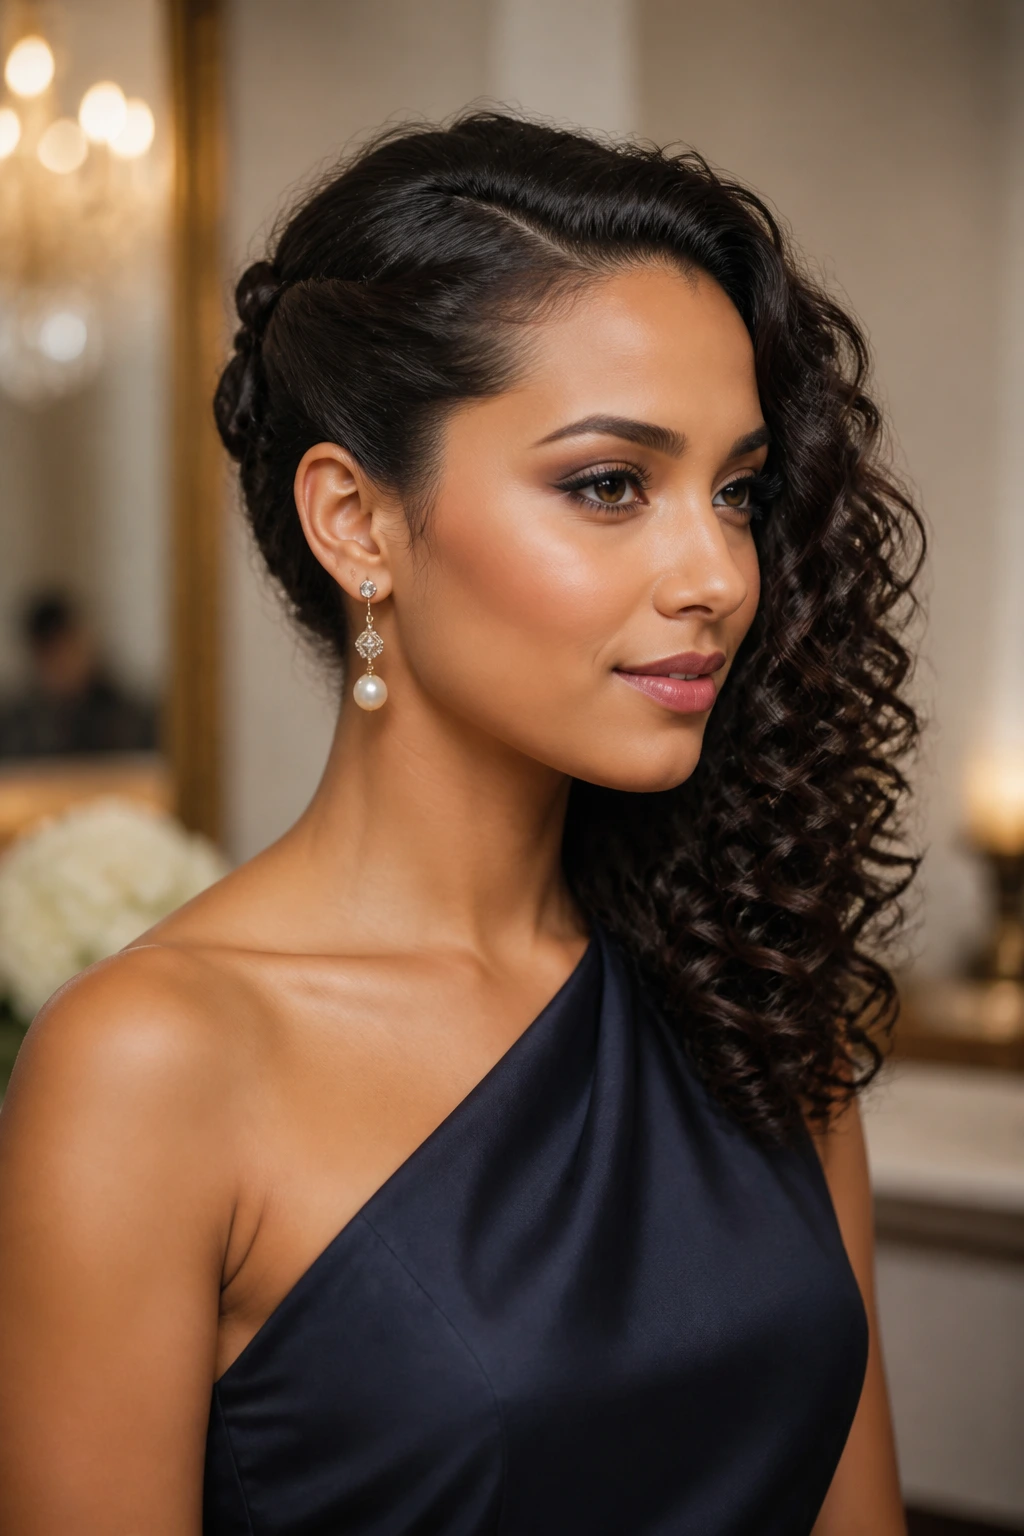
A deep side tuck gives curls a cleaner outline than most people expect. One side stays open and full, the other side gets pinned back close to the head, and that contrast makes the curl shape look sharper right away.
Cheap pins show. Use bobby pins that match the hair color and hide them under a curl clump instead of jamming them right on top of the hair. The whole point is to make the tuck look like the style decided to behave, not like the hair was fought into submission.
This works well with medium and long curls because there’s enough length to drape over the tucked side. A little shine spray on the ends can help the curl pattern stand out, but keep it light. Too much, and the style starts to look wet in a bad way.
If you want the front to feel softer, leave one front curl free near the cheekbone. That single piece breaks up the structure just enough.
15. Spiral Bangs with a Soft Fringe
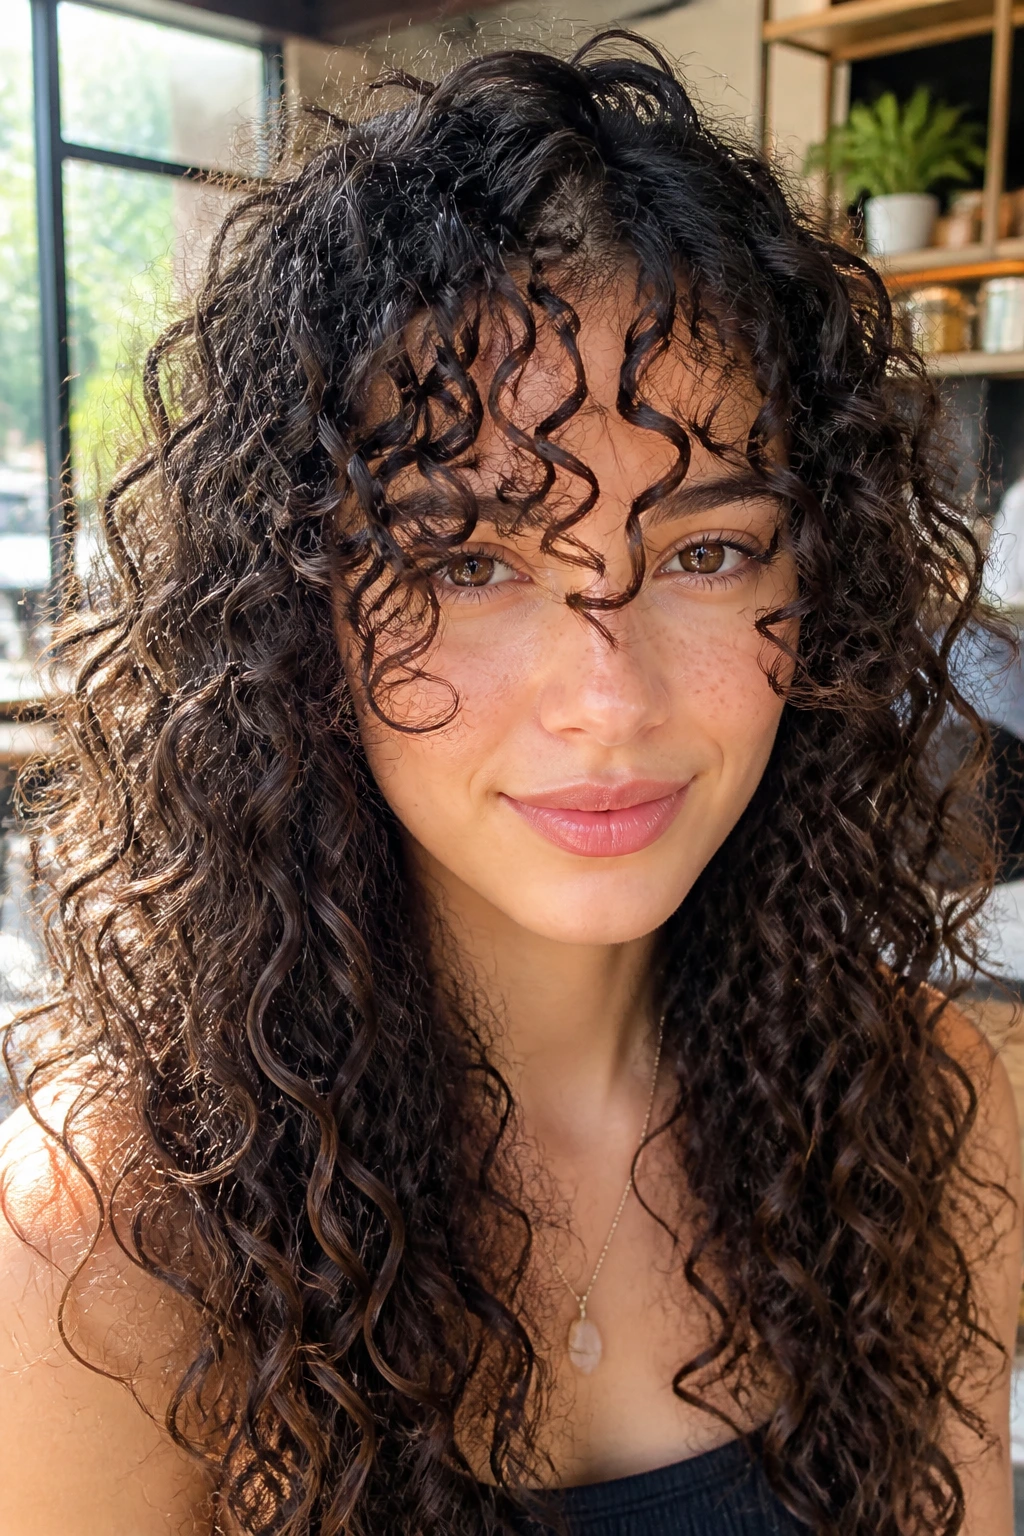
Bangs can look sharp on curls when they’re left longer than you think. Short curly bangs tend to spring up and split. A soft fringe gives the curl room to settle into a neat spiral instead of bouncing halfway up the forehead.
Use narrow sections, about ¼ inch wide, and style each piece in the direction you want it to land. A small rod or a finger coil works here. The trick is to keep the front pieces separated while they dry so they don’t merge into a blob. Once they’re dry, a tiny trim can make the shape sit right at brow level or just below it.
This style asks for a little maintenance. It’s worth it if you like a face frame that feels intentional and a bit dramatic without needing a full set all over the head.
The fringe looks best when the rest of the curls stay slightly softer. That contrast keeps the bangs from feeling heavy.
16. Rod-Set Bangs and Shoulder-Length Ringlets
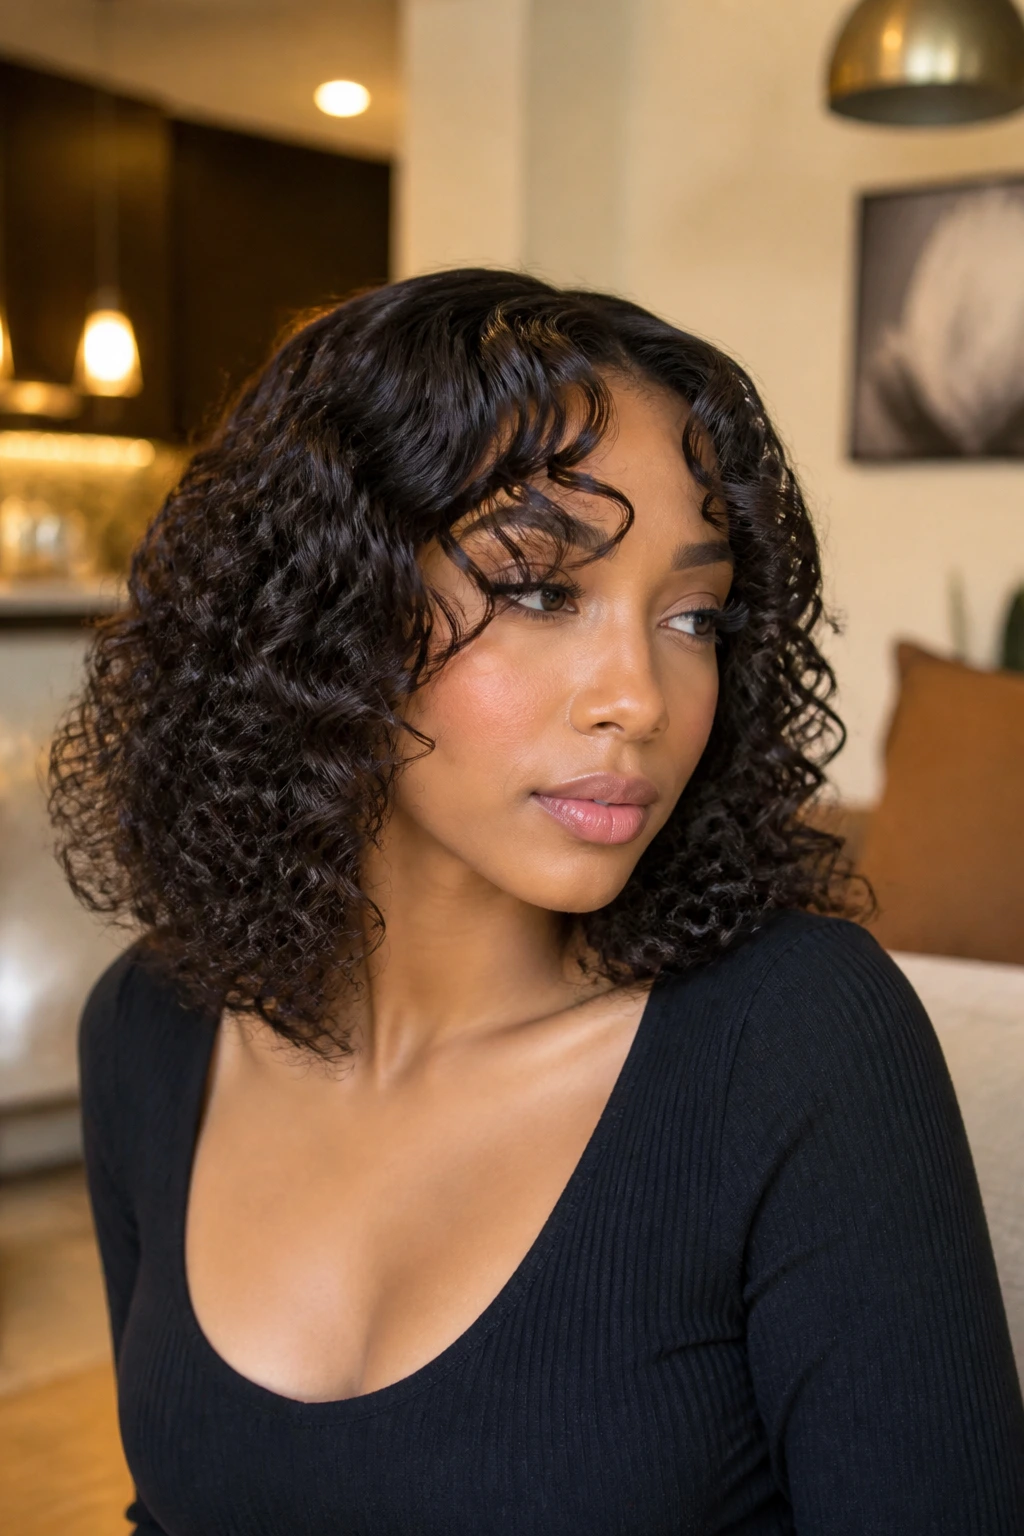
If spiral bangs feel like too much upkeep, rod-setting only the front pieces gives you the same polished frame with less effort. The rest of the hair can stay in loose ringlets, which keeps the overall style from looking too perfect.
Shoulder-length hair is a good match because the curls have enough weight to fall neatly but not so much that they drag the front pieces flat. Use a rod around 7/8 inch on the front sections if you want a smooth bend, or go smaller if you want a tighter frame around the face. The back can be styled more loosely, which keeps the shape from looking too uniform.
I like this look for days when the front needs help but the rest of the head still has a decent curl pattern. It saves time. It also keeps the style from feeling overworked.
The contrast between the front and the body of the hair is what makes it interesting. One part is clean and sculpted. The rest stays soft.
17. Defined Curl Looks for Wavy Hair with Mousse and Clips
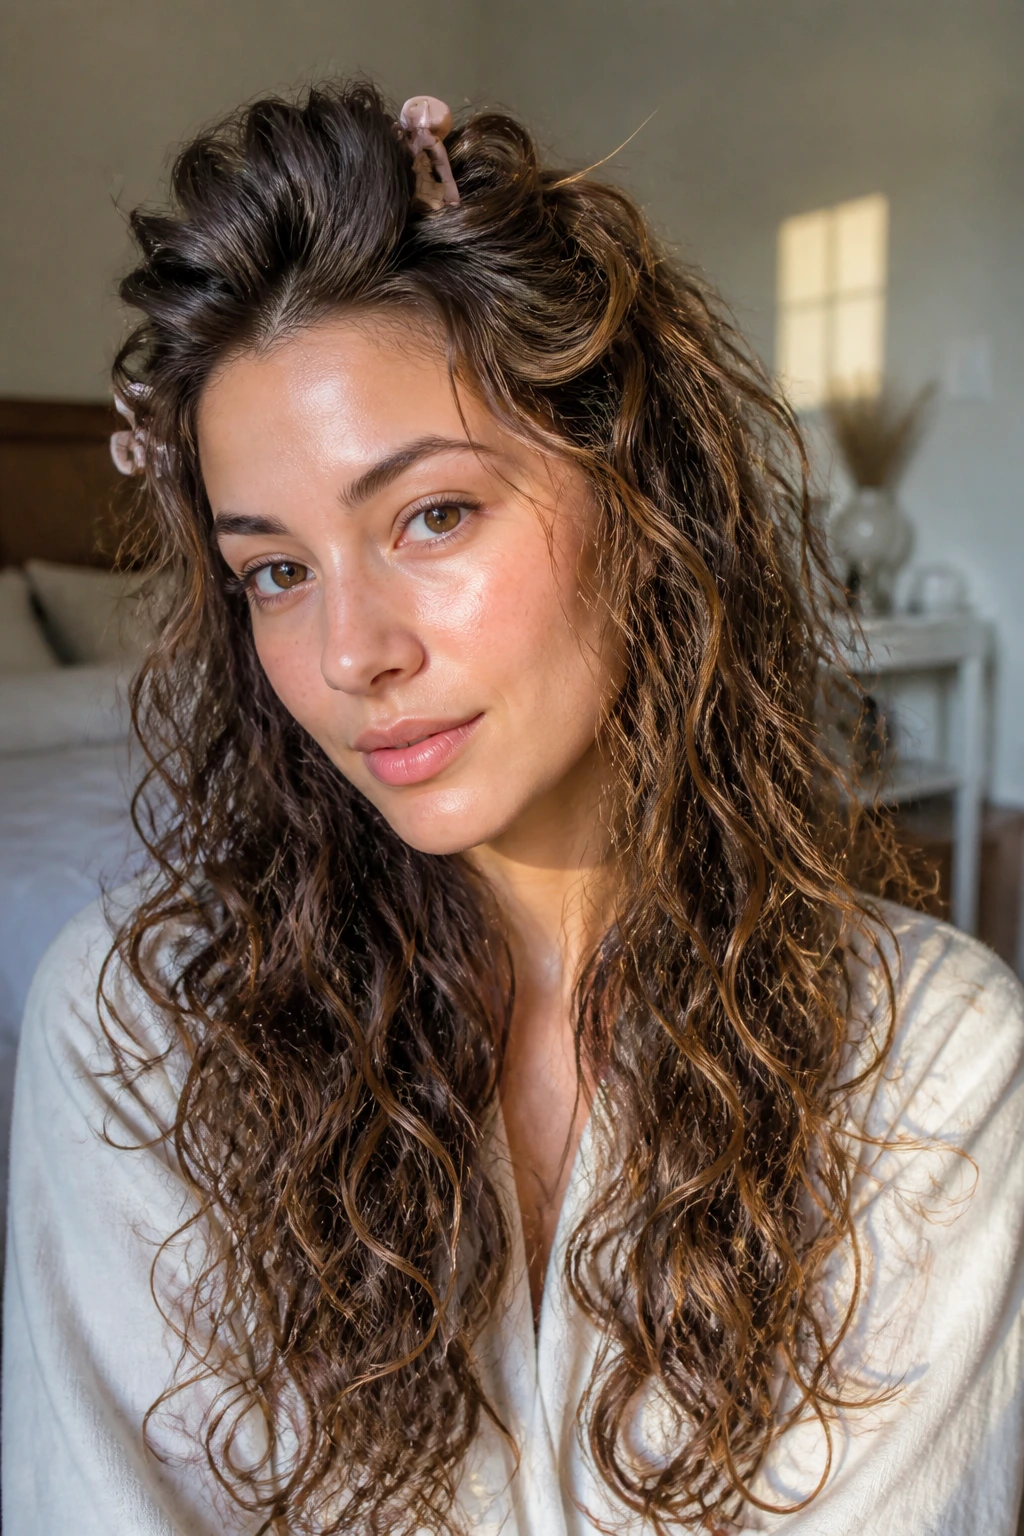
Can wavy hair get sharp definition without turning into ringlets? Yes. It just wants a lighter hand and a different target. You’re aiming for clean S-waves, not tight spirals, and that changes the whole process.
Use mousse on damp hair, not soaking-wet hair. Scrunch the lengths upward, then clip the roots at the crown and around the front so the wave pattern sets with a little lift. Wavy hair usually loses definition when it gets too much cream, so keep the product airy and avoid piling it on.
How to Keep the Waves Clean
Let the hair dry undisturbed for as long as you can. If you need a touch more shape, twist a few stubborn front pieces around your finger and leave the rest alone. That small bit of control goes a long way.
- Work in 4 to 6 sections.
- Use a diffuser on low if you’re short on time.
- Break the cast with one drop of serum, not a handful.
- Don’t brush after the mousse goes on.
This is one of those styles that rewards restraint. Too much handling turns waves into fluff. A light touch keeps the bend visible.
18. Pineapple Crown with Polished Edges
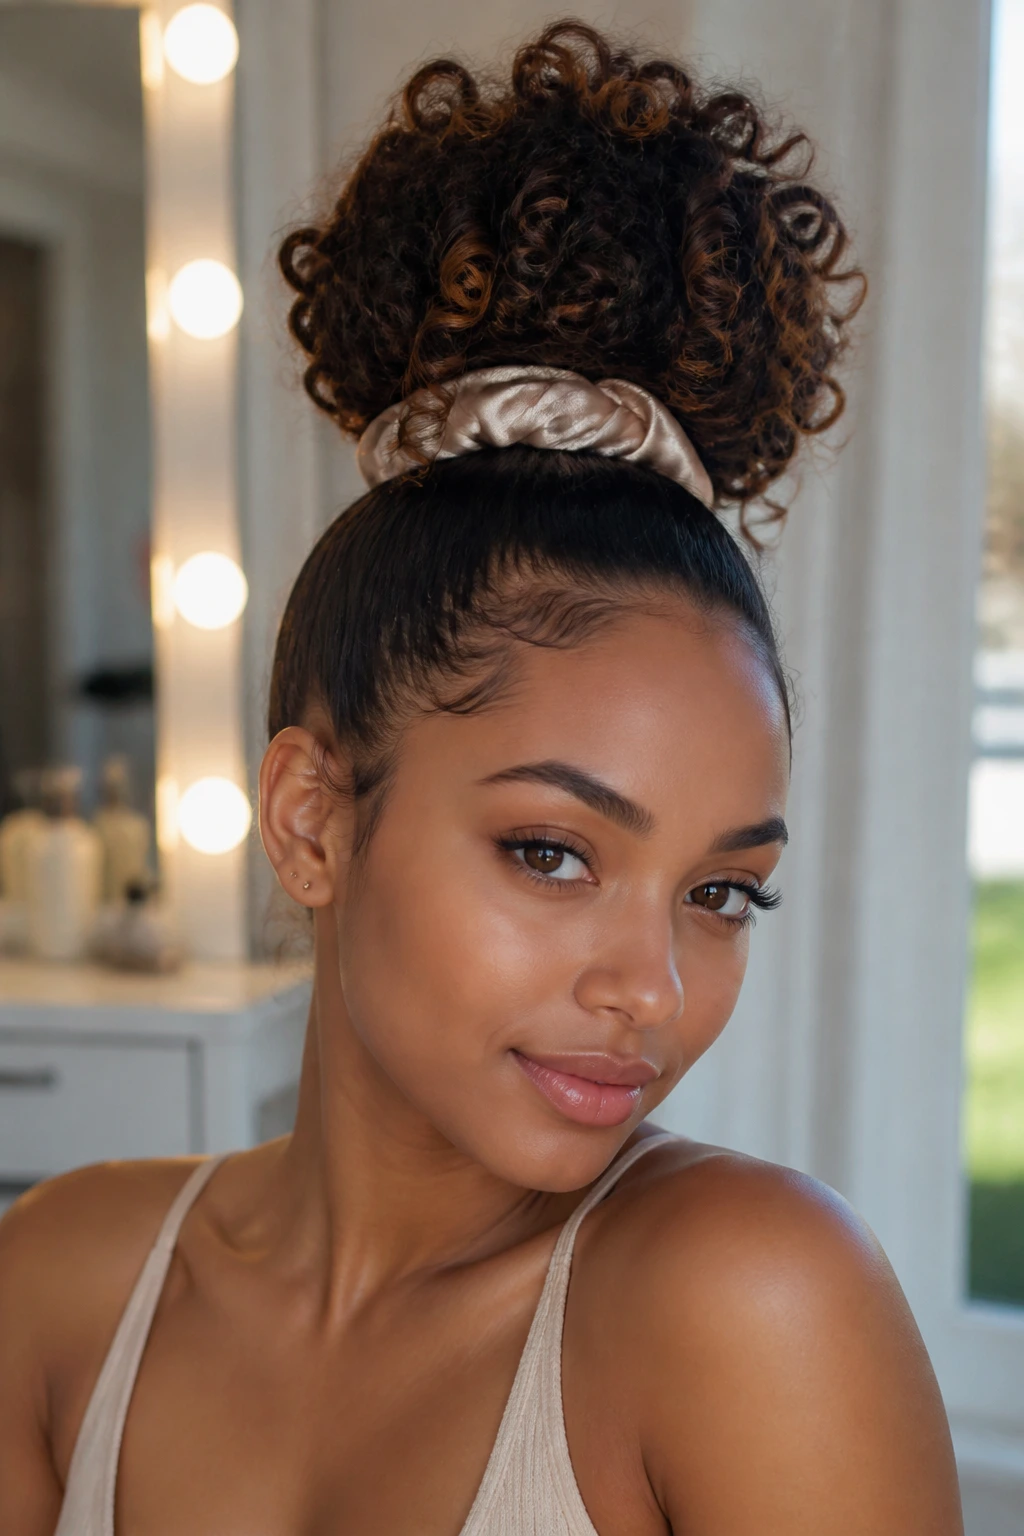
The pineapple is usually treated like a lazy off-duty style, but with clean edges and a few face-framing curls left out, it reads polished. The height at the crown gives the curls a clear shape, and the loose ends keep it from feeling too buttoned-up.
Pull the hair up high, but not so high that the ponytail dents the curls. A satin scrunchie is kinder than a tight elastic, and it lets the base stay round. Smooth the hairline with a little gel and a soft brush, then leave one or two front pieces out if you want the style to feel less severe.
This works especially well for refresh days. You can keep the shape of day-old curls without pretending the entire head is freshly styled. That honesty is part of the charm.
A pineapple can look sloppy fast if the crown gets rough. Keep the top neat and the ends defined, and it suddenly looks like a deliberate style instead of a bedtime workaround.
19. Brushed-Out Curly Fro with Strategic Definition
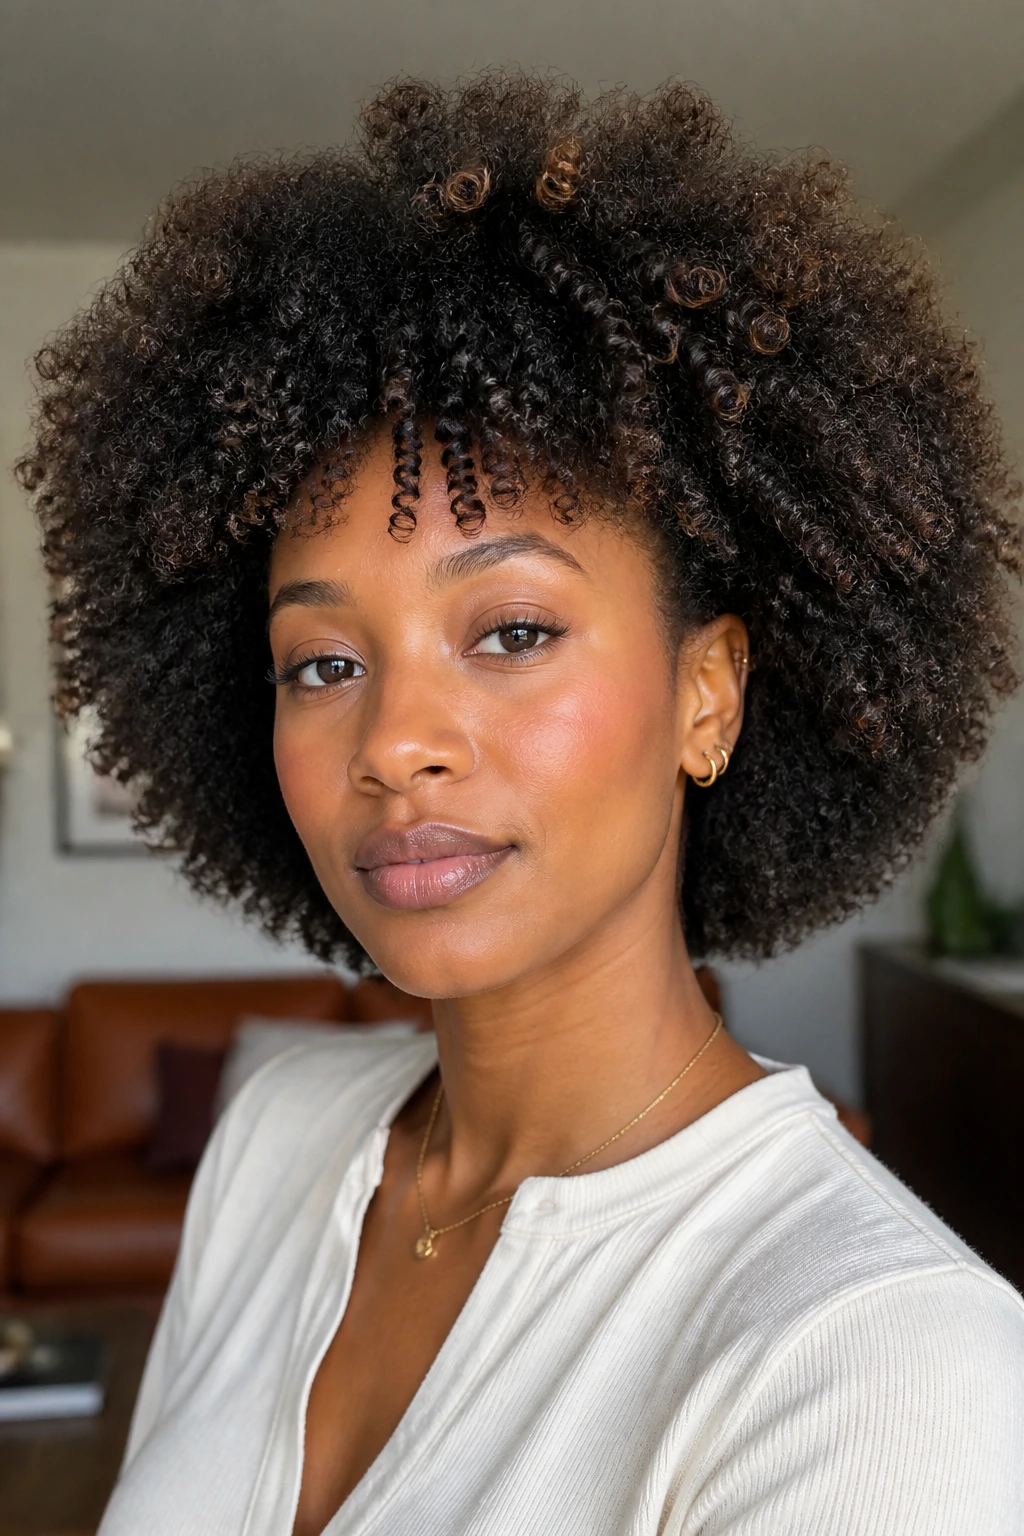
Not every defined curl look needs to stay tightly clumped. A brushed-out curly fro gives you definition at the roots and a softer halo through the lengths, which can look fuller and more sculpted than a tight set on very dense hair.
The trick is to define first, then separate with control. Set the curls with cream or gel, let them dry fully, and only then use a pick at the roots or fingertips to lift the shape. Leave the ends alone as much as possible. That’s where the curl pattern lives, and if you brush through there too hard, the whole style can go from full to frizzy in ten minutes.
This look suits hair with real density. It gives the shape room to breathe without swallowing the face. A side part or a slightly off-center lift at the front can keep it from becoming a perfect sphere, which is usually not the goal.
It feels bold, but not careless. That’s the line.
20. Sculpted Side-Sweep
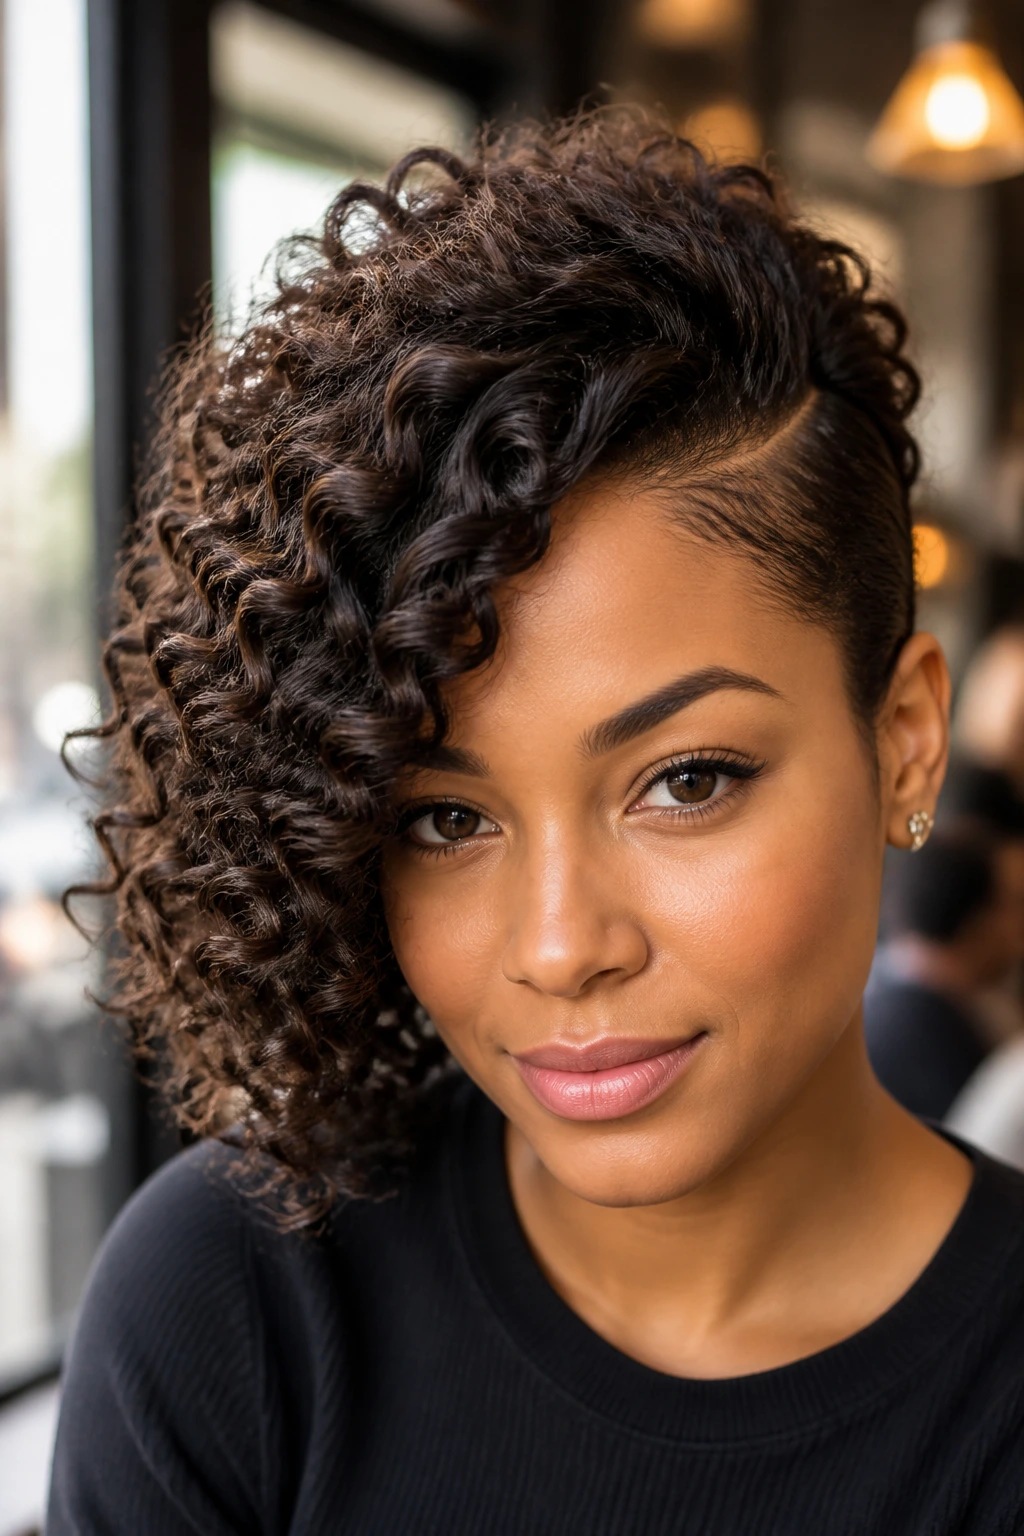
A sculpted side-sweep is one of the cleanest ways to finish a curl style because it gives the hair direction. The part is deep, the roots are lifted with a few hidden clips, and the curls sweep across the forehead in one smooth line instead of sitting straight out from the scalp.
This works on long curls, lob lengths, and even dense wavy hair that needs a clearer shape. Set the part while the hair is still damp, then clip the top section upward at the roots so it dries with height. Once the hair is dry, let it fall over to one side and pin only the pieces that refuse to stay put. Tiny clips hidden under the outer curl layer do the job better than a heavy hand with product.
The appeal here is contrast. The roots stay controlled. The curl pattern stays visible. The overall look feels sharp without turning stiff, and that balance is what keeps defined curls interesting instead of overdone.
Sharp definition is never only about hold. It’s about shape, spacing, and knowing when to stop touching the hair.
