



Textured wave hair ideas have a sneaky advantage: they make hair look styled even when the finish is a little imperfect. That rougher surface gives waves grip, movement, and a shape that survives wind, sweat, and a long day in a way shiny ringlets often don’t.
Anyone with wavy hair knows the trap. Too much heat and the pattern goes flat; too little product and the bend disappears by lunch. The sweet spot sits somewhere between controlled and loose, and the best wave looks usually leave a few ends straighter on purpose.
That’s why textured wave hair ideas work so well across curly and wavy hairstyles. Some lean polished, some are messy in a good way, and some are almost no-effort tricks that depend on smart product placement more than skill. The details matter: barrel size, section width, how long you let the wave cool, and whether you touch it too soon.
Hair that wants to frizz will frizz if you rush it. Hair that wants to collapse will collapse if you pile on cream before the shape is set. The ideas below keep all of that in check, without turning every head of hair into the same soft-curl clone.
1. Soft Beach Waves With a Center Part
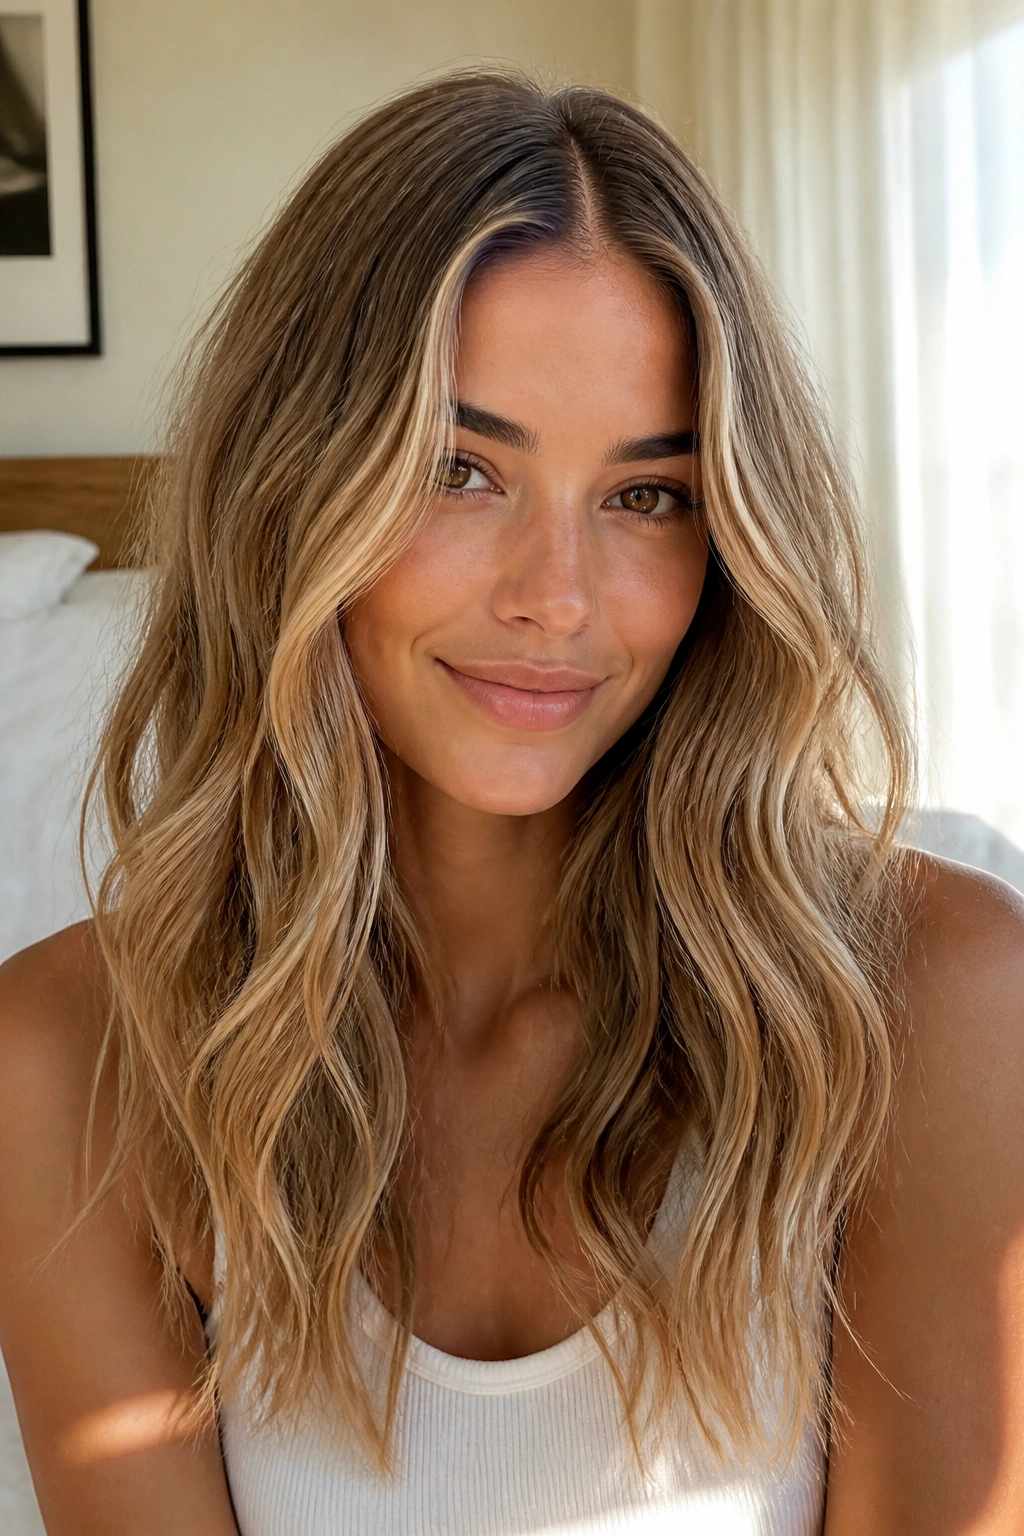
Soft beach waves are the easiest place to start because they don’t fight natural movement. The center part keeps the shape clean, while the waves themselves stay loose enough to look casual instead of overly done. If your hair has a little bend already, this style usually takes less effort than people expect.
Why It Works on Wavy Hair
The trick is to leave the roots calmer than the ends. A 1.25-inch curling wand or iron gives enough bend without making the wave too tight, and alternating direction keeps the texture from looking like one long curl pattern. That tiny mismatch is what gives the hair a lived-in finish.
How to Style It
- Work with 1- to 1.5-inch sections.
- Start the wave mid-shaft, not at the scalp.
- Leave the last 1 to 2 inches out for a softer end.
- Shake the hair out with your fingers once it cools.
- Finish with a dry texture spray from about 10 inches away.
Best tip: clamp less, touch less. That’s usually the difference between soft movement and crunchy wave helmet hair.
2. Bent Waves With a Flat Iron
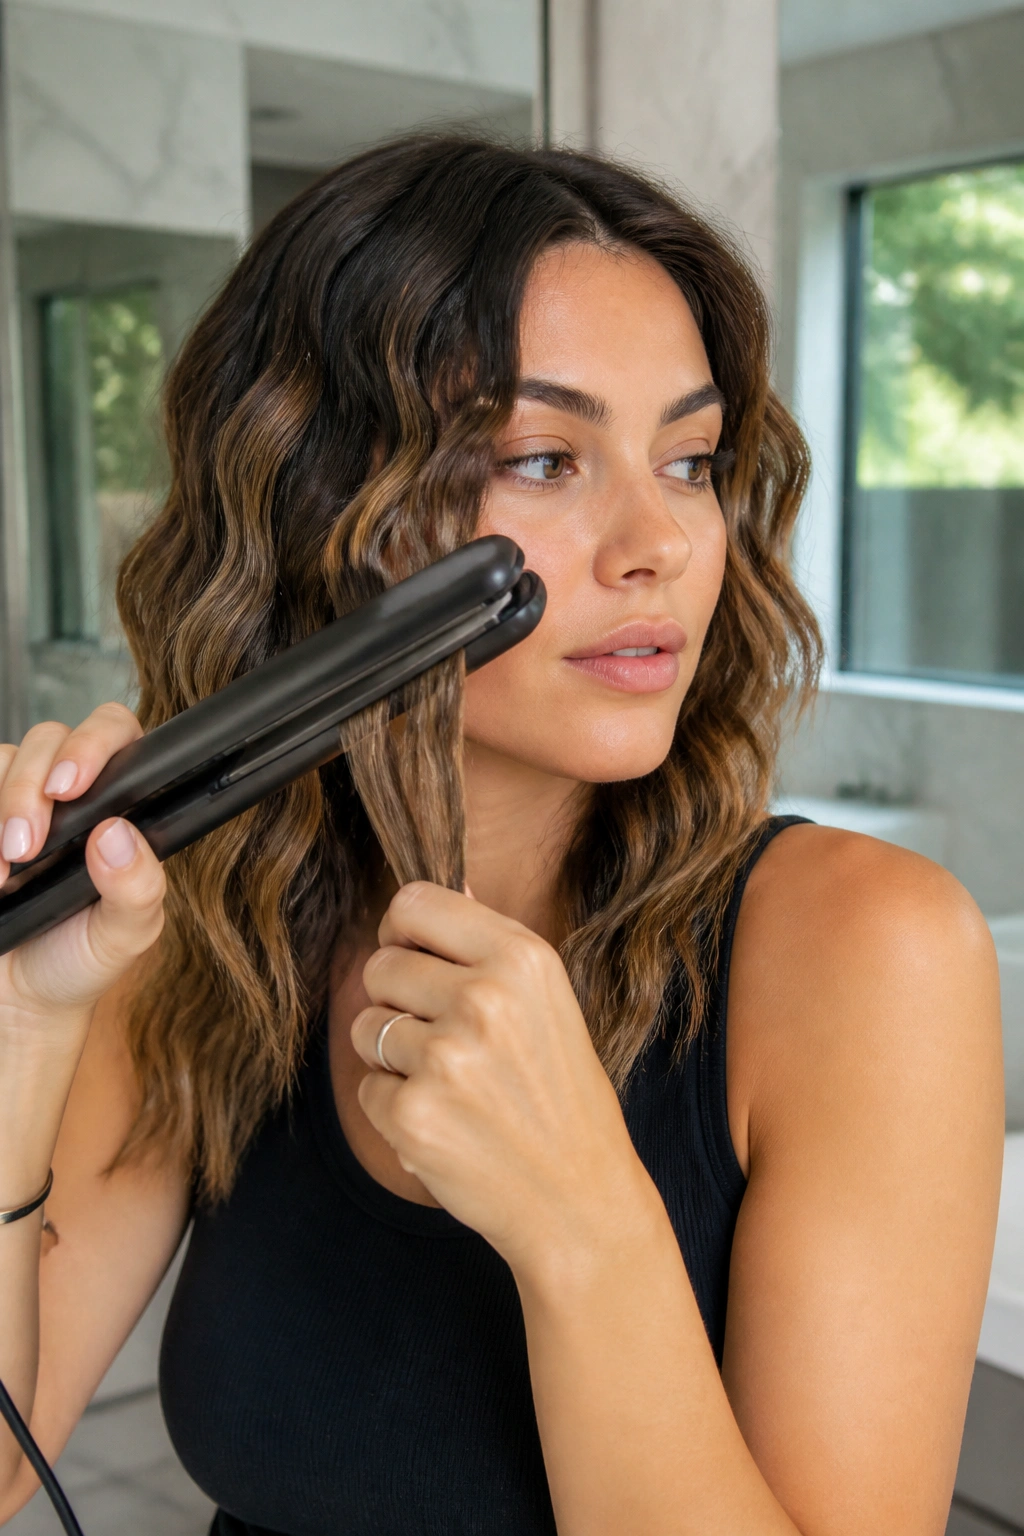
Flat iron bends look cleaner than barrel curls. There, I said it. If you want a wave pattern with a little edge, a straightener gives you that broken, modern shape that sits somewhere between polished and undone.
The move is simple, but the hand position matters. Clamp a 1-inch section about an inch from the scalp, rotate the iron a half turn, pull down a few inches, then switch the angle and create the next bend in the opposite direction. You’re building little joints in the hair rather than one continuous curl.
This style makes sense on blunt cuts, lobs, and shorter layers because a curling wand can feel too round on those shapes. Bent waves leave the ends a little straighter, which keeps the cut from puffing out. A heat protectant is non-negotiable here, and 320°F to 350°F is plenty for most hair that isn’t super coarse.
The result feels sharper than beach waves. Less mermaid, more downtown. Good hair, not fussy hair.
3. S-Waves That Skim the Cheekbones

Why do S-waves look more put-together than loose curls? Because the pattern follows the face instead of just sitting on top of it. The curve bends in and out like a soft ribbon, which gives the hair a smoother line through the cheeks and jaw.
This is one of those styles that looks fancy even when the technique isn’t complicated. You can make the shape with a flat iron, a Marcel iron, or even your fingers and clips if the hair already has some bend. The point is to set the wave into an actual S, then pin it flat while it cools so the shape stays defined.
How to Use It
- Take small, even sections around the front hairline.
- Guide the iron so the hair folds in alternating curves.
- Pin the S-shape flat until it cools fully.
- Brush only the ends if you want it softer.
- Keep the crown smooth so the face framing does the work.
Best on medium to long hair. Shorter cuts can do it too, but the wave has less room to show off.
4. Brushed-Out Glam Waves
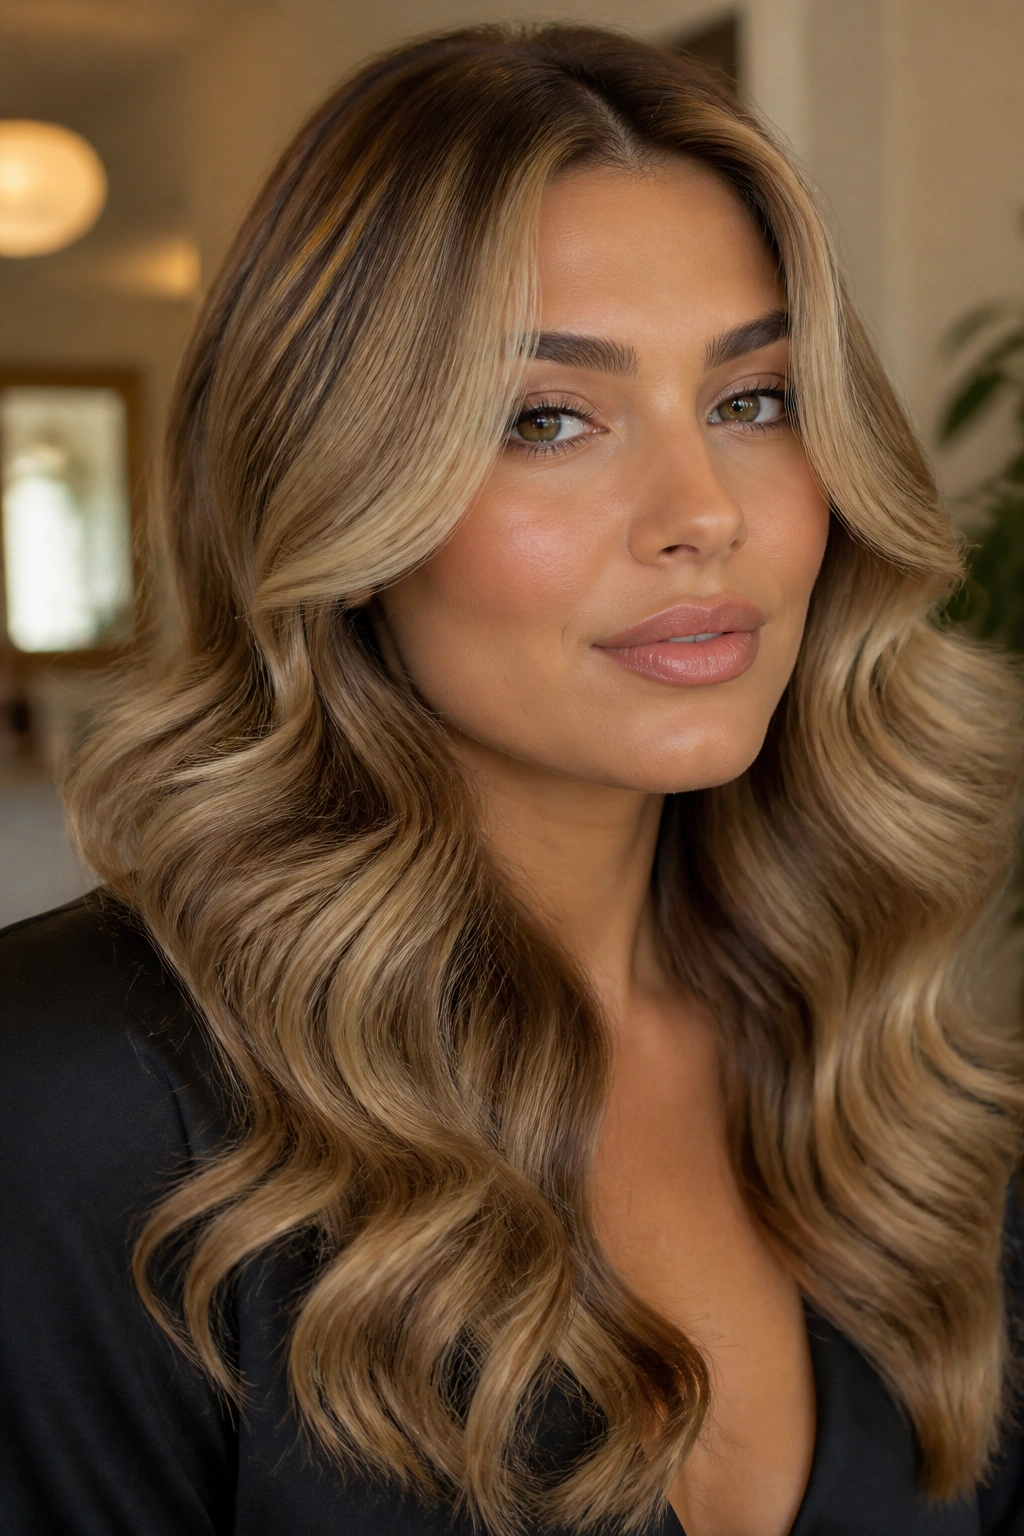
There’s a very specific moment when curls stop looking too tight and start looking expensive: the brushing stage. Brush-out glam waves give you that soft, ribbon-like finish that sits between old Hollywood polish and a looser modern blowout.
The setup matters more than the brush. Create the wave first with a 1.25- to 1.5-inch iron, let every section cool, then mist a light-hold spray before brushing. A boar-bristle brush works well because it smooths the outer layer without tearing the shape apart. If you rush this and brush while the hair is warm, the whole pattern can fall in a sad, fluffy way. Been there. Not cute.
- Use minimal serum only on the ends.
- Brush in long, slow strokes, not tiny choppy ones.
- Keep the top smooth and the body full.
- Finish with a flexible spray, not a stiff shell.
This look is especially good on thick hair and long layers. The weight helps the waves settle into those soft bends instead of floating away.
5. Rope-Twist Heatless Waves

Rope-twist waves are the style you reach for when your hair needs shape but your scalp does not want heat. They’re quieter than braids, a little neater in the morning, and usually leave a more defined wave through the middle of the hair.
Start with hair that’s about 70 to 80 percent dry. Too wet, and the twist dries puffy; too dry, and it won’t hold the bend. Split the hair into two, four, or even six sections depending on thickness, then twist each section tightly in one direction before wrapping it into a bun or securing it with a satin scrunchie. Sleep on it, or leave it in for several hours if you’re doing this during the day.
The finish depends on how tight you twist. Loose rope twists give you a soft wave. Tight ones give more of an S-pattern. I like this method on medium-length hair because it keeps the wave pattern cleaner than a standard braid-out. It also makes second-day hair look deliberate instead of forgotten.
A little mousse or lightweight leave-in helps. Not much. Just enough.
6. Choppy Lob Waves With Piecey Ends

Choppy lob waves are the opposite of polished curls. They lean into texture, not symmetry, which is exactly why they look so good on shoulder-length hair. The ends stay piecey, the body stays loose, and the whole cut gets this slightly cool, slightly lazy shape that feels modern without trying hard.
Unlike soft beach waves, this version wants a little roughness. You don’t want every section to fold the same way. Use a 1-inch wand, leave the final half-inch out, and keep the direction a little random so the finish doesn’t read as one repeated curl. A dry texture spray on the mid-lengths helps the cut look lived in rather than flat.
Who does this suit? People with lobs, blunt bobs that are growing out, and straight hair that needs some body. It’s also a nice fix when a cut looks too “done” after a fresh trim. The broken ends help the wave look less shiny and more natural.
If you want one specific rule here, use this: the more blunt the cut, the messier the wave can be. That contrast is the whole point.
7. Air-Dried Mousse Waves
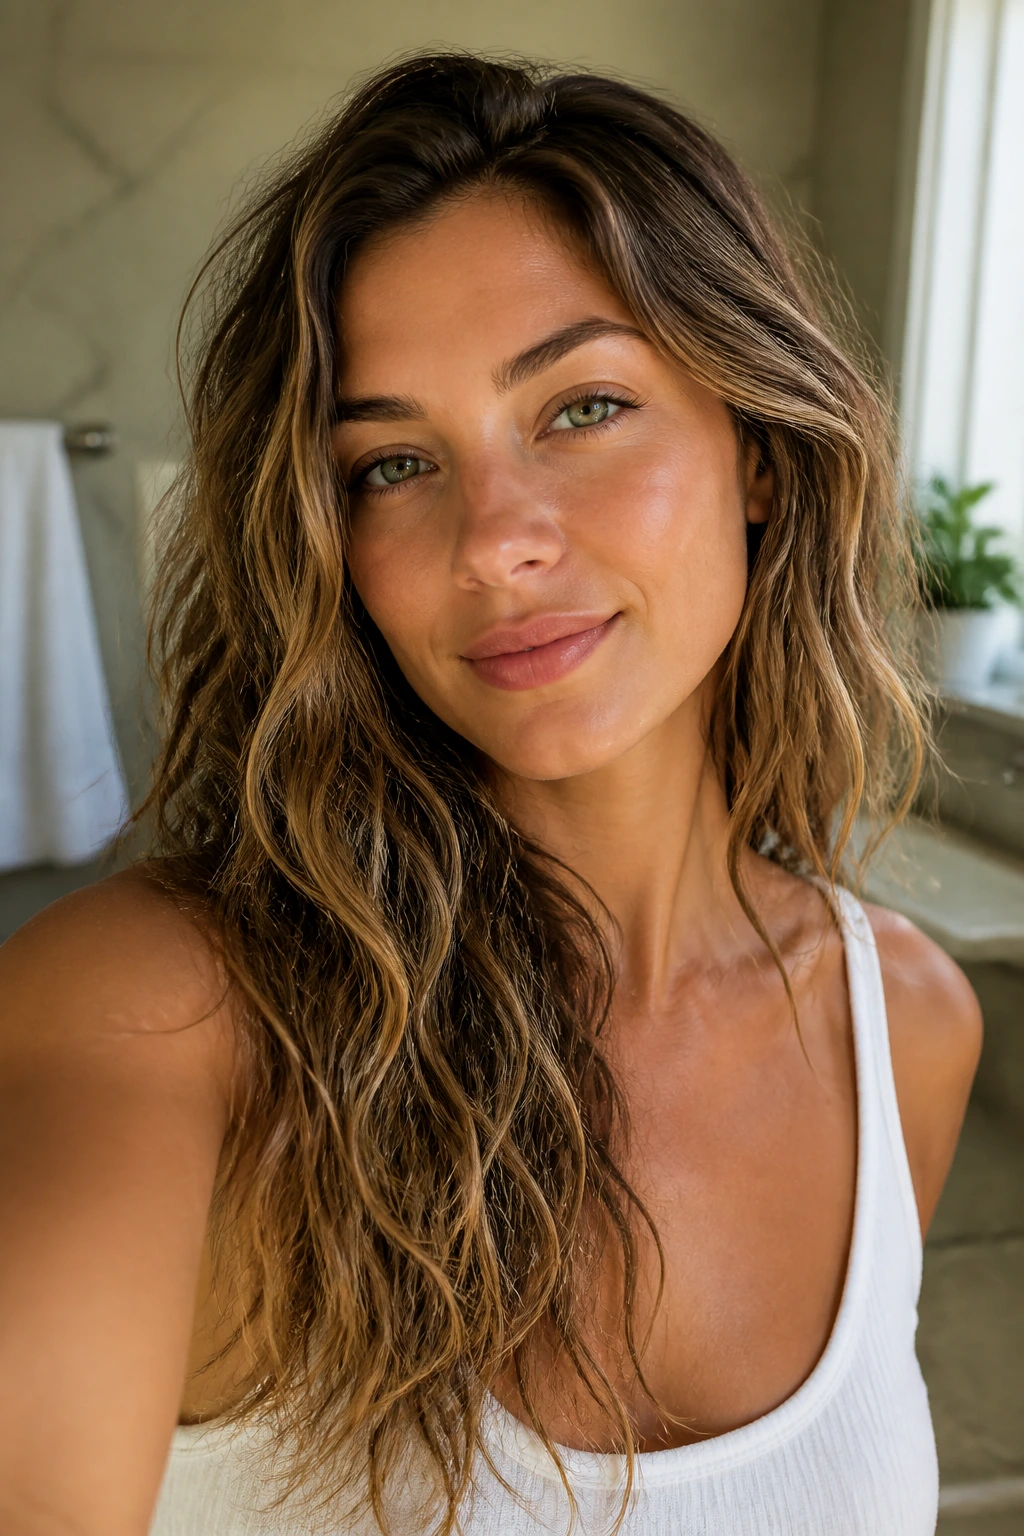
There’s a special kind of wave that happens when you stop fighting your hair and give it just enough help to behave. Air-dried mousse waves are built for that. They keep the natural bend, add a little structure, and avoid the stiff, over-brushed finish that some styling creams leave behind.
Work the mousse through soaking wet hair, not damp hair, so it spreads evenly. A golf-ball-sized amount is enough for fine hair; thick hair may need a bit more, but build slowly. Scrunch upward from the ends, then blot with a microfiber towel instead of rubbing. If the roots need help, lift them with your fingers while the hair dries. Don’t keep touching it. That’s the fastest way to turn waves into frizz.
What to Put In While It’s Wet
- Light mousse for hold.
- A small amount of leave-in conditioner if the hair feels dry.
- A few drops of gel only if you want more definition.
- No heavy cream near the roots.
This one is a good fit for naturally wavy and curly hair that dries unevenly. It also works when you want the hair to look soft, not sculpted. If your waves tend to collapse, a quick 5-minute diffuse at the roots can help without ruining the air-dried feel.
8. Side-Swept Waves for Softer Face Framing
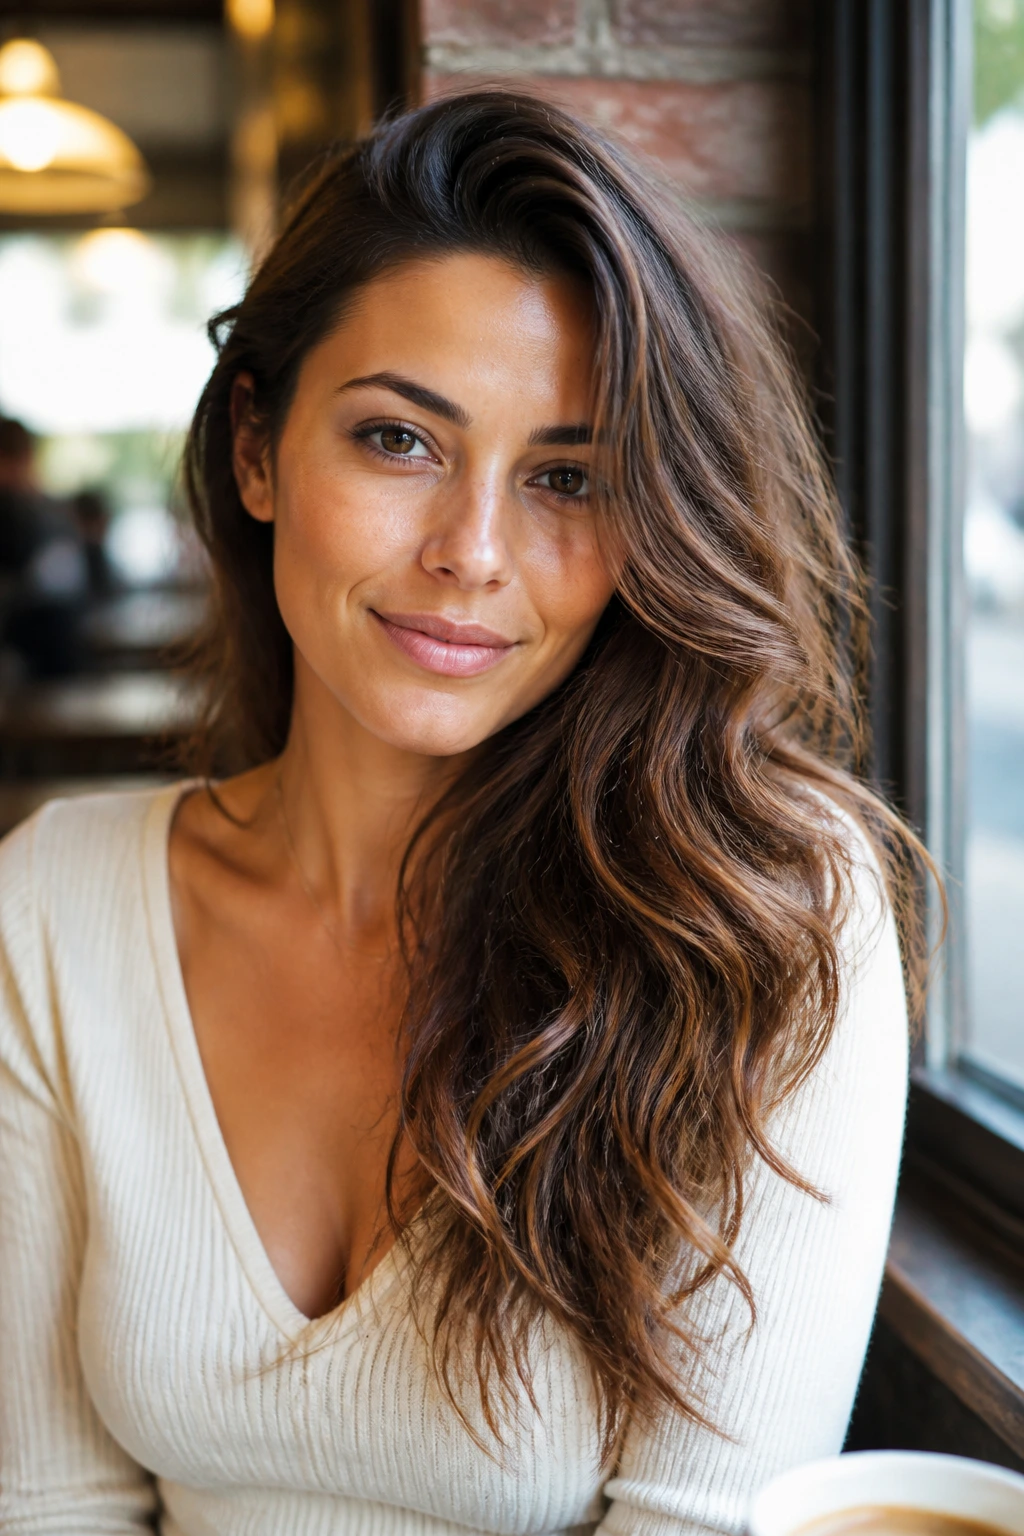
A deep side part changes the whole mood of textured hair. It gives the crown a little lift, pulls the waves over one shoulder, and makes the face framing look softer without needing more curl.
This style is a quiet fix for flat roots. Shift the part while the hair is still warm or slightly damp, then clip the heavy side up for a few minutes so it remembers where it should fall. Waves created with a large wand or a blowout brush usually look best here because the shape needs enough length to drape instead of springing upward.
The face-framing section matters. Keep the front pieces a little looser than the rest so they skim the cheekbones rather than curling away from the face. If your hair is thick, tuck one side behind the ear and leave the other side fuller. That asymmetry gives the style some bite.
It’s a good move for round or heart-shaped faces, but honestly, it’s useful on almost anyone who wants more lift without going full volume queen.
9. Wet-Look Textured Waves
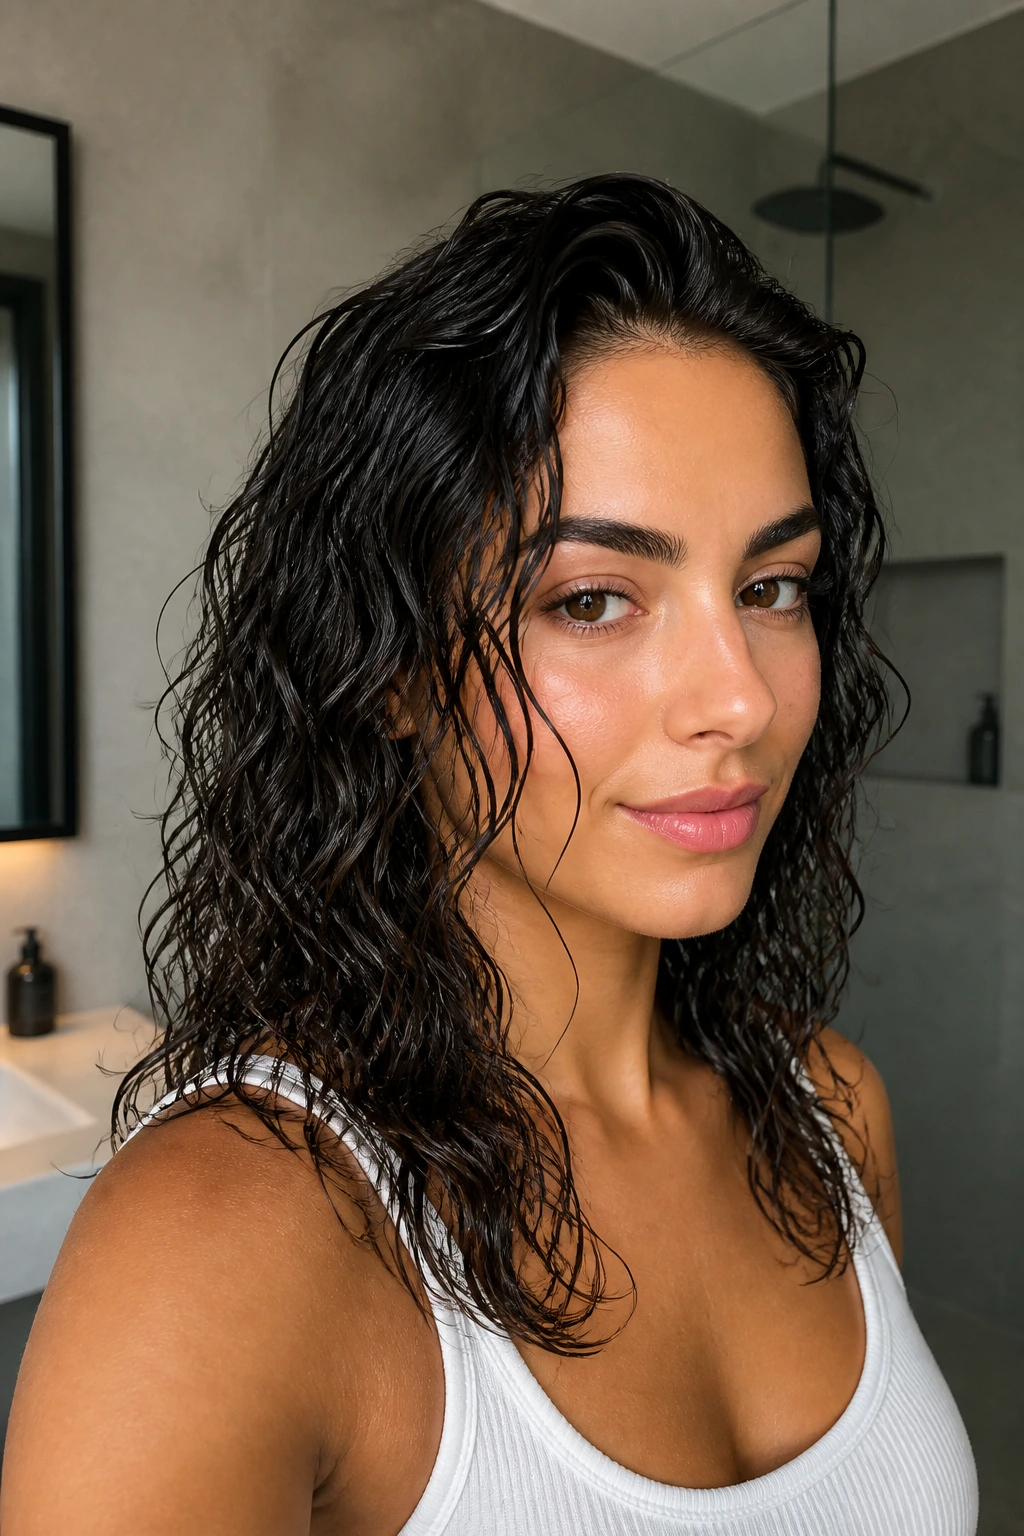
Can waves look sleek and undone at the same time? Yes, if you use gel with a light hand. Wet-look textured waves are controlled at the roots, shiny through the mid-lengths, and still visibly shaped instead of coated into one heavy sheet.
Start on damp hair with a light gel or strong mousse worked through with your fingers or a wide-tooth comb. The goal is separation, not smooth helmet hair. Then either diffuse on low heat or let the hair air-dry halfway before scrunching the ends. If the hair is curly, this method can preserve the pattern while giving it that glossy finish that sits nicely for evening plans.
How to Keep It Sleek, Not Greasy
- Use gel from mid-length to ends, not all over the scalp.
- Comb once, then stop.
- Scrunch only after the hair starts to set.
- Finish with a drop of serum on the very ends.
This look has a strong line, which is why it works so well on short waves and chin-length cuts. It also survives humidity better than a fluffier finish. That alone makes it worth knowing.
10. Wolf Cut Waves With Built-In Texture
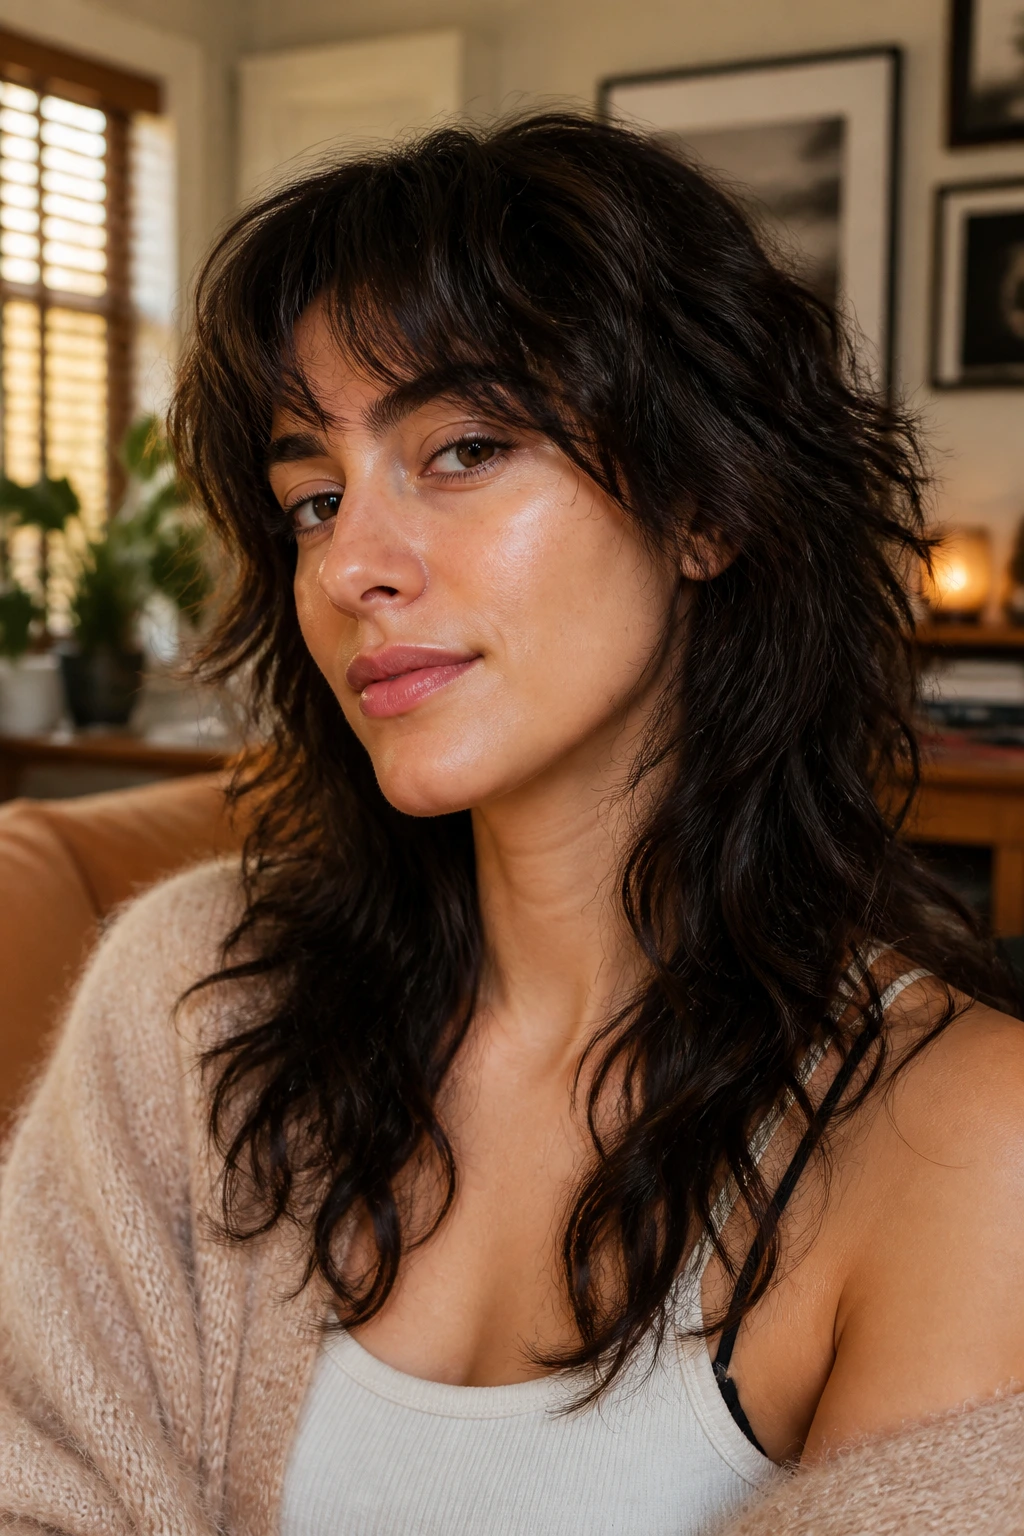
Wolf cut waves almost style themselves, which is part of the appeal. The layers do a lot of the work, and the wave pattern only needs a little help to look intentional. When the cut is choppy around the crown and longer through the back, the texture lands in the right places without much persuasion.
Use a diffuser or air-dry with a lightweight cream, but keep the product light at the roots. Heavy oils weigh this cut down fast, and then the shaggy shape disappears. A mist of salt spray can help the ends look separated, though too much will make the hair feel dry and rough. There’s a fine line here.
The best version of this style has piecey fringe, a bit of lift at the crown, and ends that move when you turn your head. That’s the whole point. It should not look slick. It should look like the cut had a personality before you ever styled it.
If you have straight hair, the wolf cut will need more help. If you already have waves, it’s one of the easiest cuts to live with.
11. Half-Up Textured Waves

Half-up waves are the answer when you want the hair off your face but you still want the shape to show. Pulling up only the top section lets the wave pattern stay visible through the length, which keeps the style from feeling too rigid or school-dance simple.
A mini claw clip, a soft knot, or a few hidden bobby pins all work. The key is not to pull the crown tight. Leave a little lift at the top and loosen a few face pieces so the front doesn’t look severe. If the hair is wavy underneath, that natural bend is what makes the style feel balanced instead of half-finished.
This one is especially useful on second-day hair. The roots can be a little oily, the lengths can still hold movement, and the whole style suddenly makes sense. That’s not a flaw. It’s the charm.
I’d wear this one when I want structure without commitment. It has enough shape to look considered, but not so much that it asks for a mirror every ten minutes.
12. Curtain Bang Waves

Curtain bangs and textured waves get along because they solve each other’s problems. The bangs break up the forehead area, while the waves keep the whole look soft enough that the fringe doesn’t take over. The result feels balanced instead of heavy.
Unlike a full fringe, curtain bangs are forgiving. You can blow-dry them away from the face with a round brush, bend them with a large roller, or give them a quick pass with a flat iron and a soft curve at the ends. The rest of the hair can stay loose and wavy, which helps the bang blend instead of sitting like a separate haircut.
What to Watch For
- Don’t curl the bangs too tight.
- Keep the ends of the fringe a little airy.
- Use a small amount of styling cream only at the tips.
- If the bangs split, reshape them with a low-heat blow-dry.
This style works especially well with long layers. The layers give the waves room to move, and the bangs keep the shape from feeling too plain. It’s one of the easiest ways to make textured hair look like it was cut on purpose, not just grown out.
13. Short Bob Waves With Extra Lift
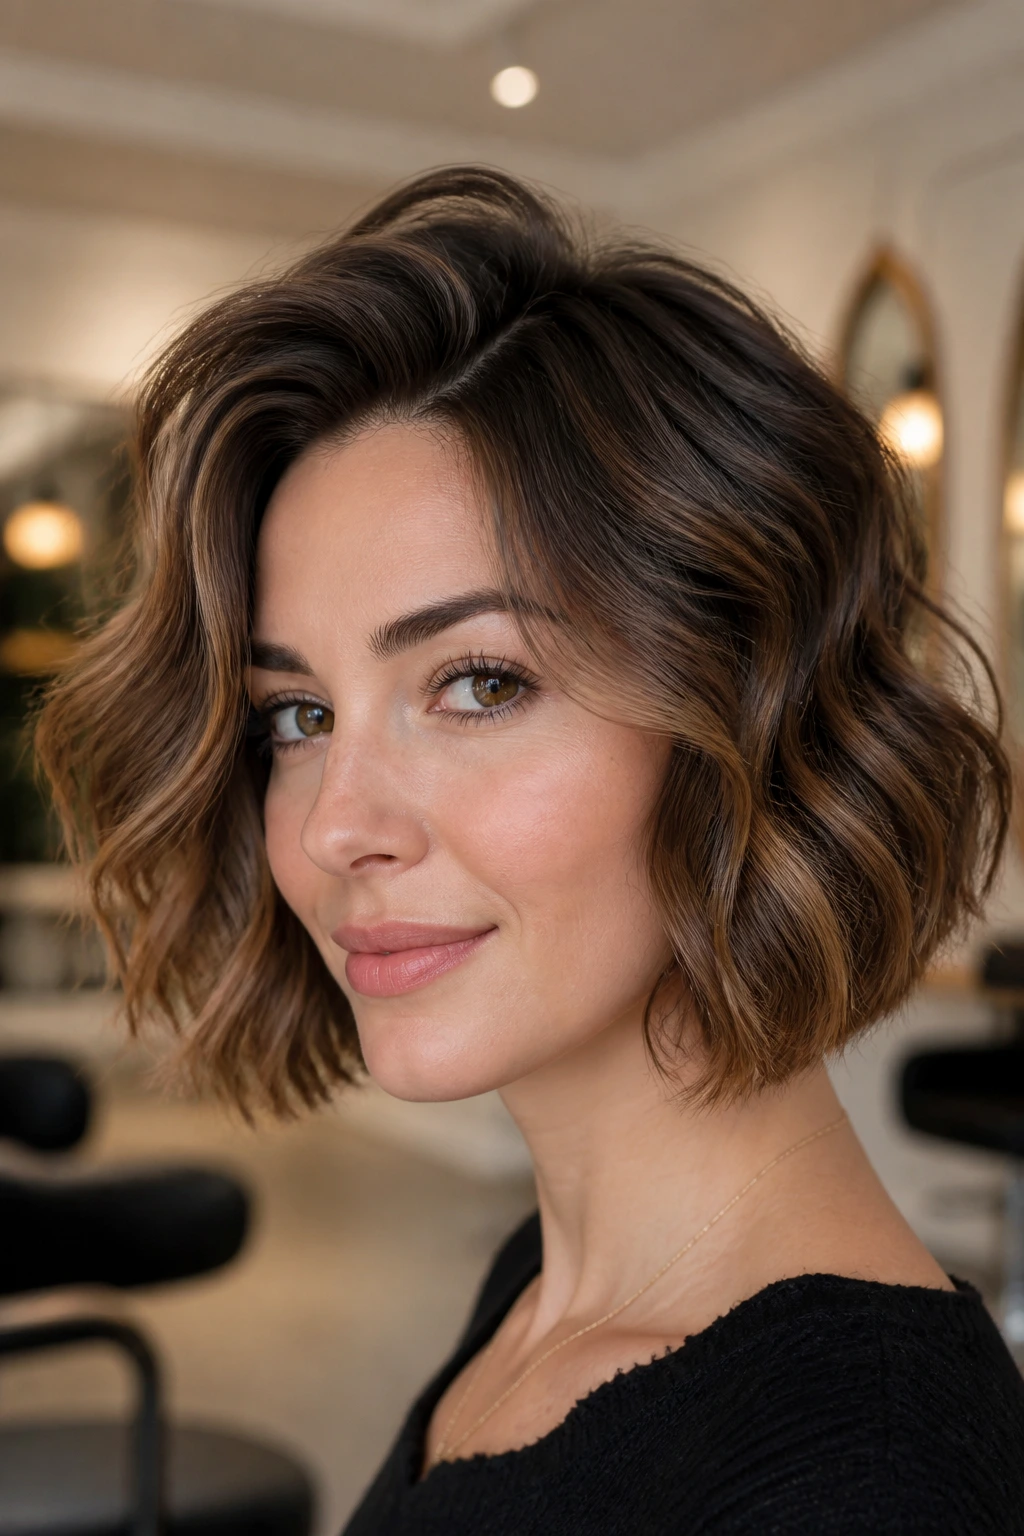
Short hair can hold waves, but it can also collapse if you go too heavy on product. That’s why bob waves need lift at the root and a lighter hand through the ends. The shape should feel bouncy, not helmet-like.
A 0.75- to 1-inch iron usually works better than a big barrel because short sections need a tighter bend to show up. Start the wave just below the root, then clip the top layer up while it cools. Root spray or a tiny bit of mousse at the crown helps keep the bob from flattening by noon. If the ends start flipping out too much, leave them straighter on purpose. It looks cleaner.
How to Keep the Lift
- Dry the roots first.
- Set the top section with clips while it cools.
- Use small sections, about half an inch to 1 inch wide.
- Finish with texture spray, not heavy oil.
This style is a good match for chin-length cuts, French bobs, and anything with blunt ends. It gives short hair movement without making it look too round, which is the mistake I see most often.
14. Deep Side Part Waves for Night-Out Hair
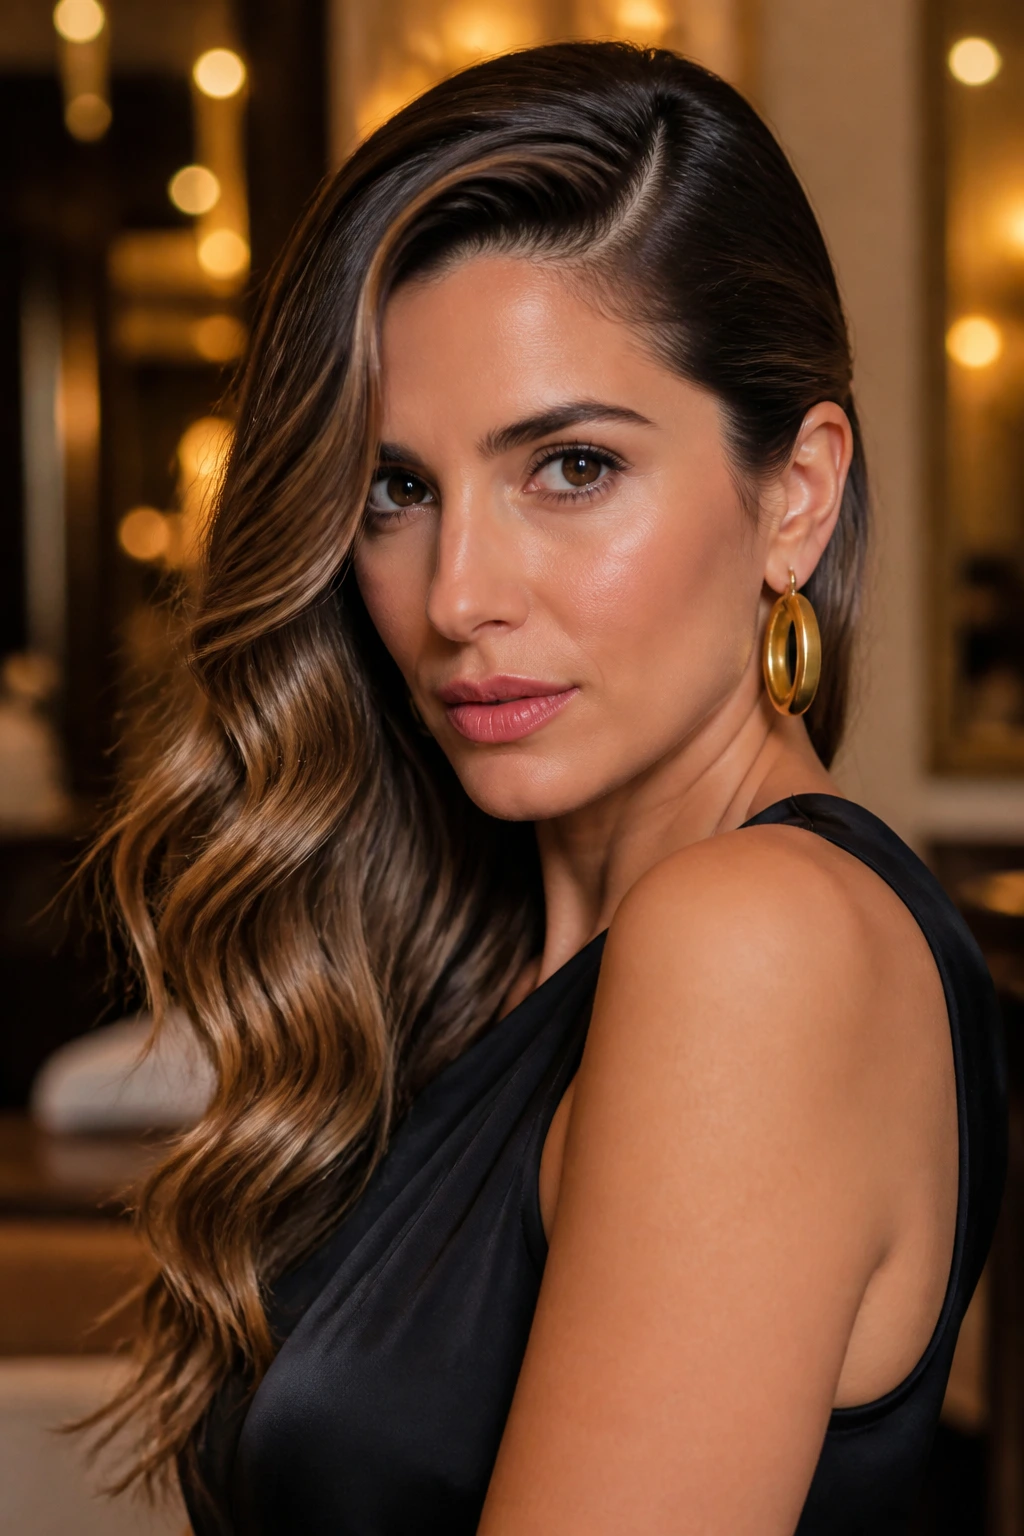
A deep side part can do more for waves than another pass of the curling iron. It shifts the weight, creates volume at the crown, and gives the whole style a more dramatic line. The waves don’t need to be tighter. They just need to fall somewhere more interesting.
This version looks especially good when one side is tucked behind the ear and the other side stays full around the jaw. A little styling cream at the hairline keeps flyaways down, but don’t slick the whole look flat. You want control, not stiffness. If the hair is long, a hidden bobby pin under the heavy side can help keep the part from drifting back.
The nice part is that this style plays well with almost any wave pattern. Soft waves, brushed-out waves, even air-dried bends can all handle a deep part. It’s more about arrangement than technique.
If you need hair that looks a little more intentional for dinner, a party, or a photo-heavy night, this is one of the fastest ways to get there.
15. Mermaid Waves With a Three-Barrel Iron
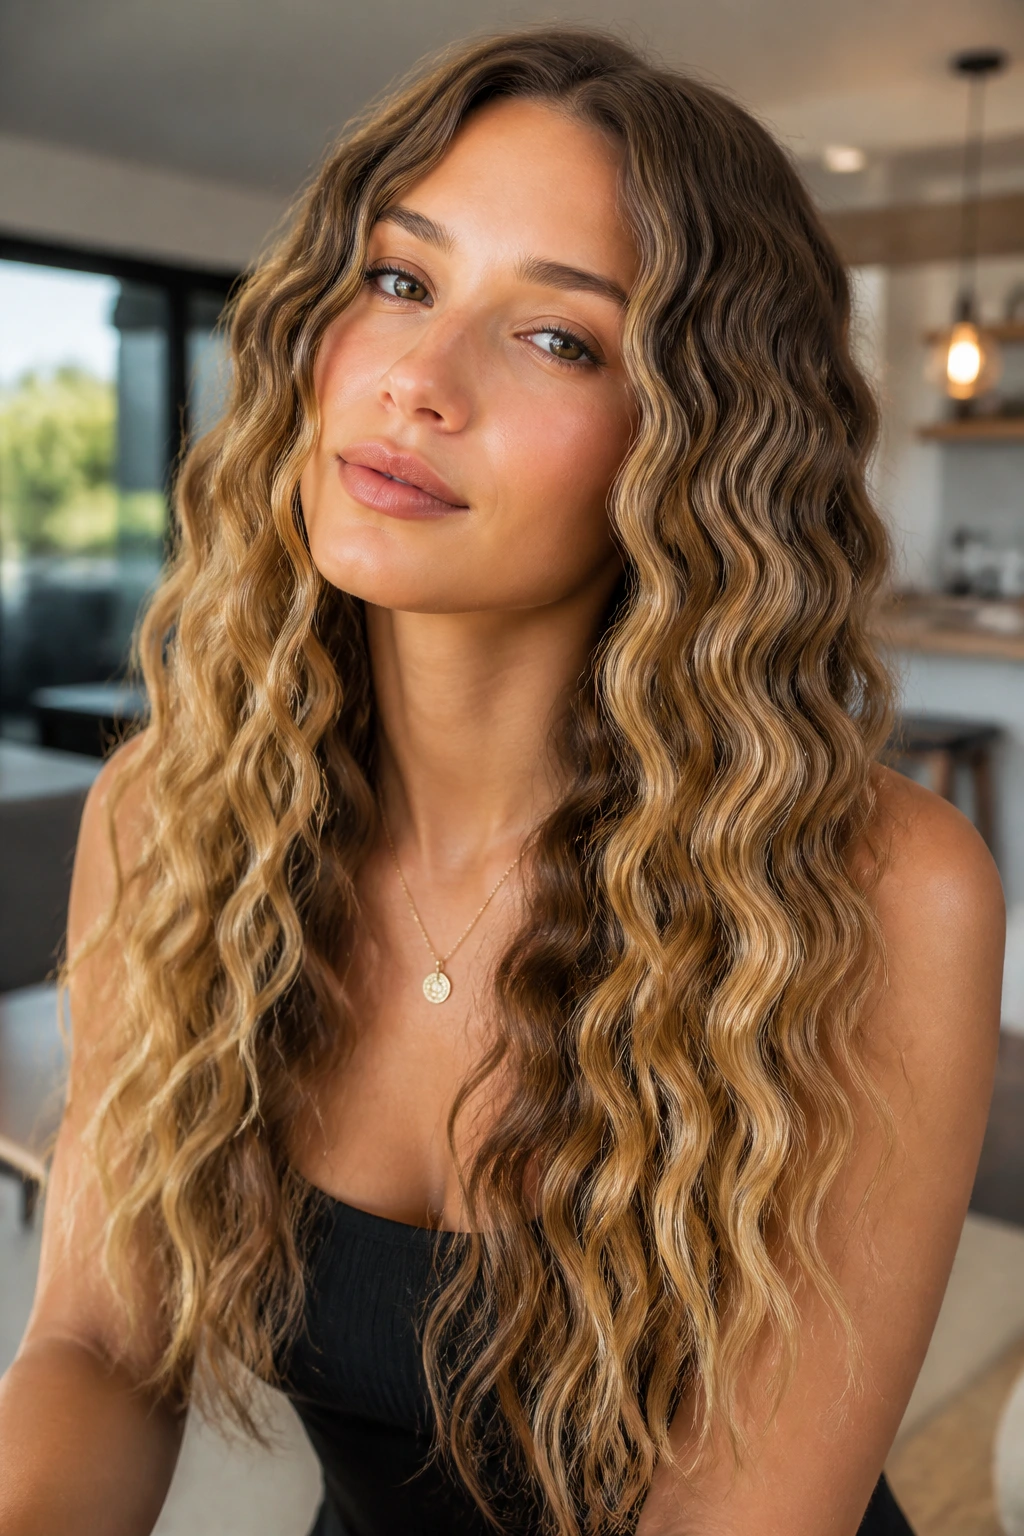
Want a wave pattern that looks like it was pressed into the hair in one clean motion? A three-barrel iron does exactly that. Mermaid waves have a repeating bend that reads more graphic than beachy, which makes them a strong choice when you want texture with some structure.
Use heat protectant first, then work on fully dry hair. Clamp the iron a few inches from the roots, press for a few seconds, move down, and repeat. The key is alignment; if the tool shifts too much, the pattern gets messy in a bad way. Long hair shows this style best because the repeated wave has room to stretch out. On shorter cuts, it can look crowded.
What Makes It Different
- The wave pattern is even and repeated.
- The finish looks fuller than a wand curl.
- It works best when the hair is already smooth.
- It can flatten fine hair if you use too much product.
I like this look when the hair needs more presence, not more softness. It’s bolder than a loose wave and more directional than a curl. If the cut is simple, this style gives it a lot of personality fast.
Final Take
Textured waves work because they let the hair keep some of its own shape. That sounds small, but it changes everything. Hair looks more believable when it has a few rough edges, a little bend at the ends, and a finish that isn’t trying to act perfect.
The easiest way to choose among these ideas is to match the style to the cut, not the other way around. Short hair usually needs lift. Long hair can handle brushed-out softness or repeating wave patterns. And if your natural texture already leans wavy or curly, half the job is done before the iron comes out.
One last thing. Let the hair cool before you touch it. That’s where a lot of wave styles fall apart, and it’s such a simple fix that I almost hate how often it matters.
