



A curling wand can make hair look expensive in ten minutes—or make it look like you lost a fight with humidity.
The gap between those two outcomes is smaller than people think. Section size, barrel width, curl direction, and cooling time do most of the work, not the wand itself. If you want polished waves, you need a style that keeps movement soft at the root, controlled through the mid-lengths, and clean at the ends.
That’s why wand curl styles matter so much. A tight spiral reads one way. A brushed-out Hollywood wave reads another. A bend that starts below the cheekbone can make blunt hair look longer, while a side-swept shape can give fine hair the kind of lift that mousse alone never seems to deliver.
Tiny choices matter here. A 1-inch wand on 1-inch sections gives a different finish from a 1.25-inch wand on larger panels, and the difference shows up fast once the curls cool and you brush them through.
1. Soft Hollywood Wand Curls
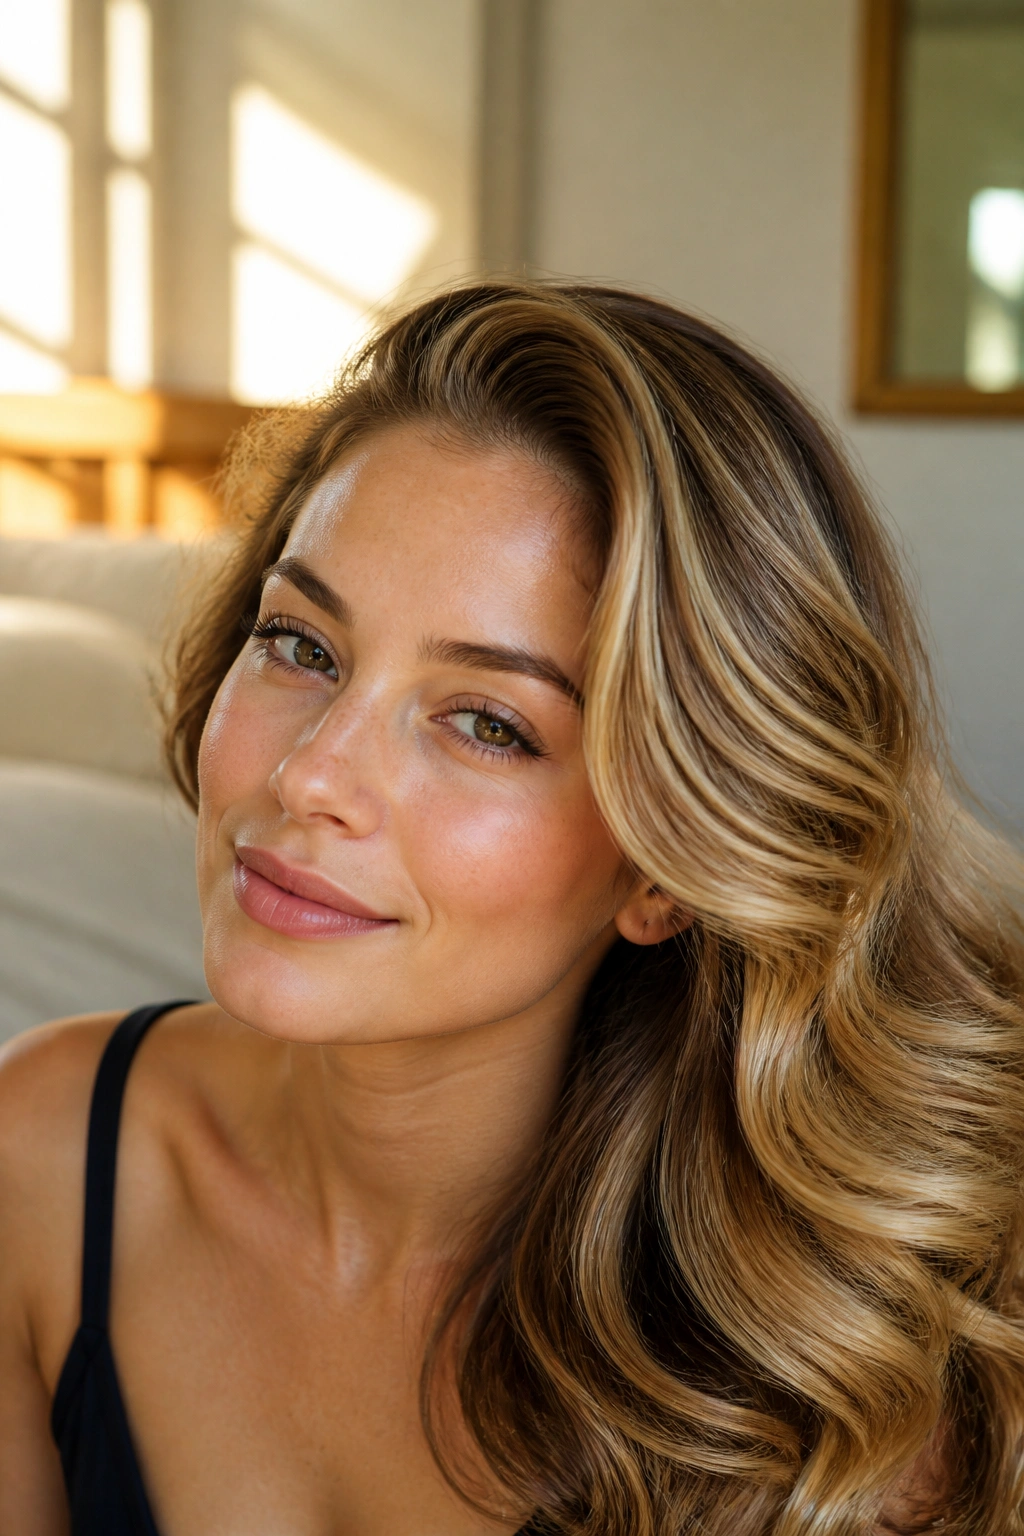
This is the style I reach for when hair needs to look finished fast. Soft Hollywood wand curls sit in that sweet spot between formal and wearable, with smooth waves that curve away from the face and fall in one clear direction.
The trick is a bigger barrel. A 1.25-inch or 1.5-inch wand works best if your hair is medium to long, because it leaves enough bend to brush out later without turning into fuzz. Wrap sections that are about 1 to 1.5 inches wide, keep the tension even, and let the ends stay neat instead of flipping in random directions.
A clean brush-out is where this style earns its name. Wait until each curl is fully cool, then use a wide-tooth comb or a soft boar-bristle brush to loosen the shape into a wave. If you touch the hair while it’s warm, the style collapses early and gets a little tired-looking. Cool first, brush second. That rule saves the whole finish.
This style loves a side part, a satin dress, and any haircut with enough length to show movement. It also holds up well for dinner, photos, or any day you want your hair to look like you spent more time on it than you did.
2. Alternating Direction Wand Waves

These waves look fuller because they do not all lean the same way. Alternating direction wand waves break up the pattern, so the hair lands with more lift and less of that uniform “curtain” effect that can make long hair go flat.
Why the pattern matters
Curl one section away from your face, then the next toward your face, and keep alternating down the head. That mix keeps the wave from clumping into one heavy line. It’s especially useful on straight, fine hair, because the pattern gives the illusion of density without needing a ton of product.
A 1-inch wand is the safest bet here. Smaller sections hold the shape better, and the finish looks deliberate instead of messy. If your ends are dry or porous, leave the last half-inch out on every other section so the wave looks clean at the bottom.
A few things that help
- Use 1-inch sections for more control.
- Pin the curls up while they cool if your hair drops fast.
- Finish with a light mist of flexible hairspray, not a stiff helmet.
- Keep your brush-out minimal; finger-separating is often enough.
Best for: fine hair, blunt cuts, and anyone who wants body without a lot of teasing.
3. Face-Framing Wand Curls
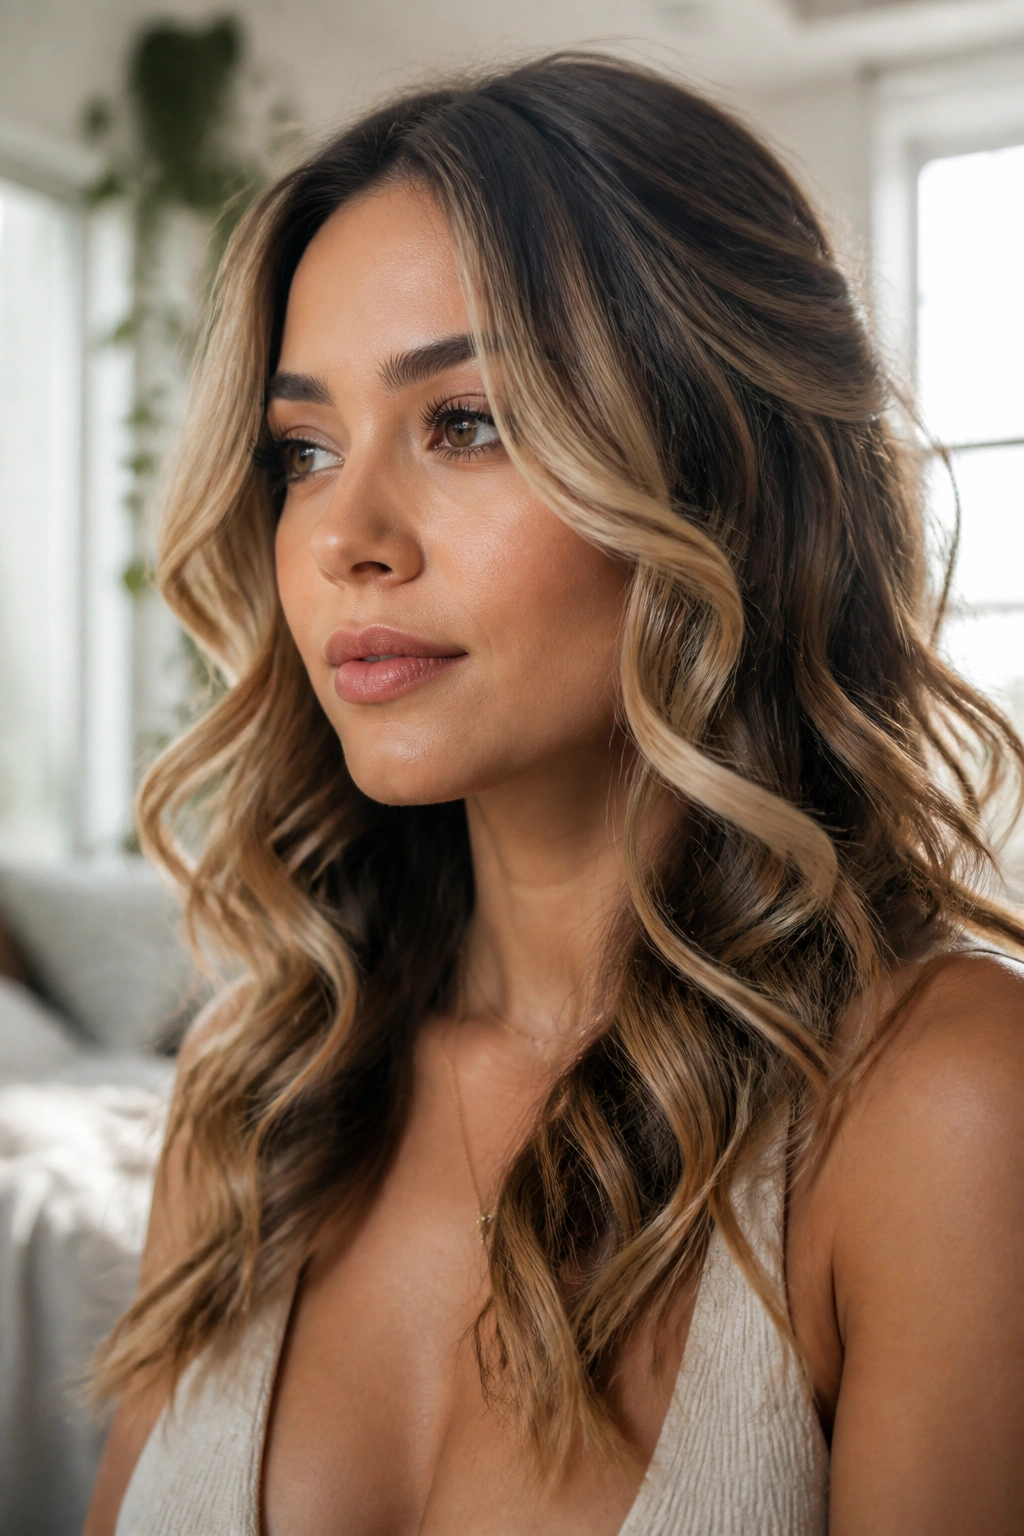
Why does the front matter so much? Because people notice it first. Face-framing wand curls are the pieces that change the mood of the whole style, especially when you want polished waves but do not want the hair to feel too dressed up.
Start by taking the front sections a little wider than the rest, then wrap them away from the face so they open the features instead of closing them in. The curl should begin around the cheekbone or jaw, not right at the roots. That keeps the front soft and flattering, which matters a lot if you wear glasses or have a strong fringe.
How to place the money pieces
The best front pieces are never identical. One side can sit slightly tighter, while the other gets a looser bend that falls across the cheek. That small imbalance makes the style feel natural. If both sides are mirror images, the look can turn stiff fast.
A drop of shine serum on the front pieces only—half a pump, maybe less—adds polish without flattening the whole head. Keep it off the roots. The goal is sleek movement near the face, not slippery roots.
This is the style I’d pick for portraits, interviews, or any event where you want your hair to open the face without shouting for attention.
4. Deep Side-Part Glam Waves
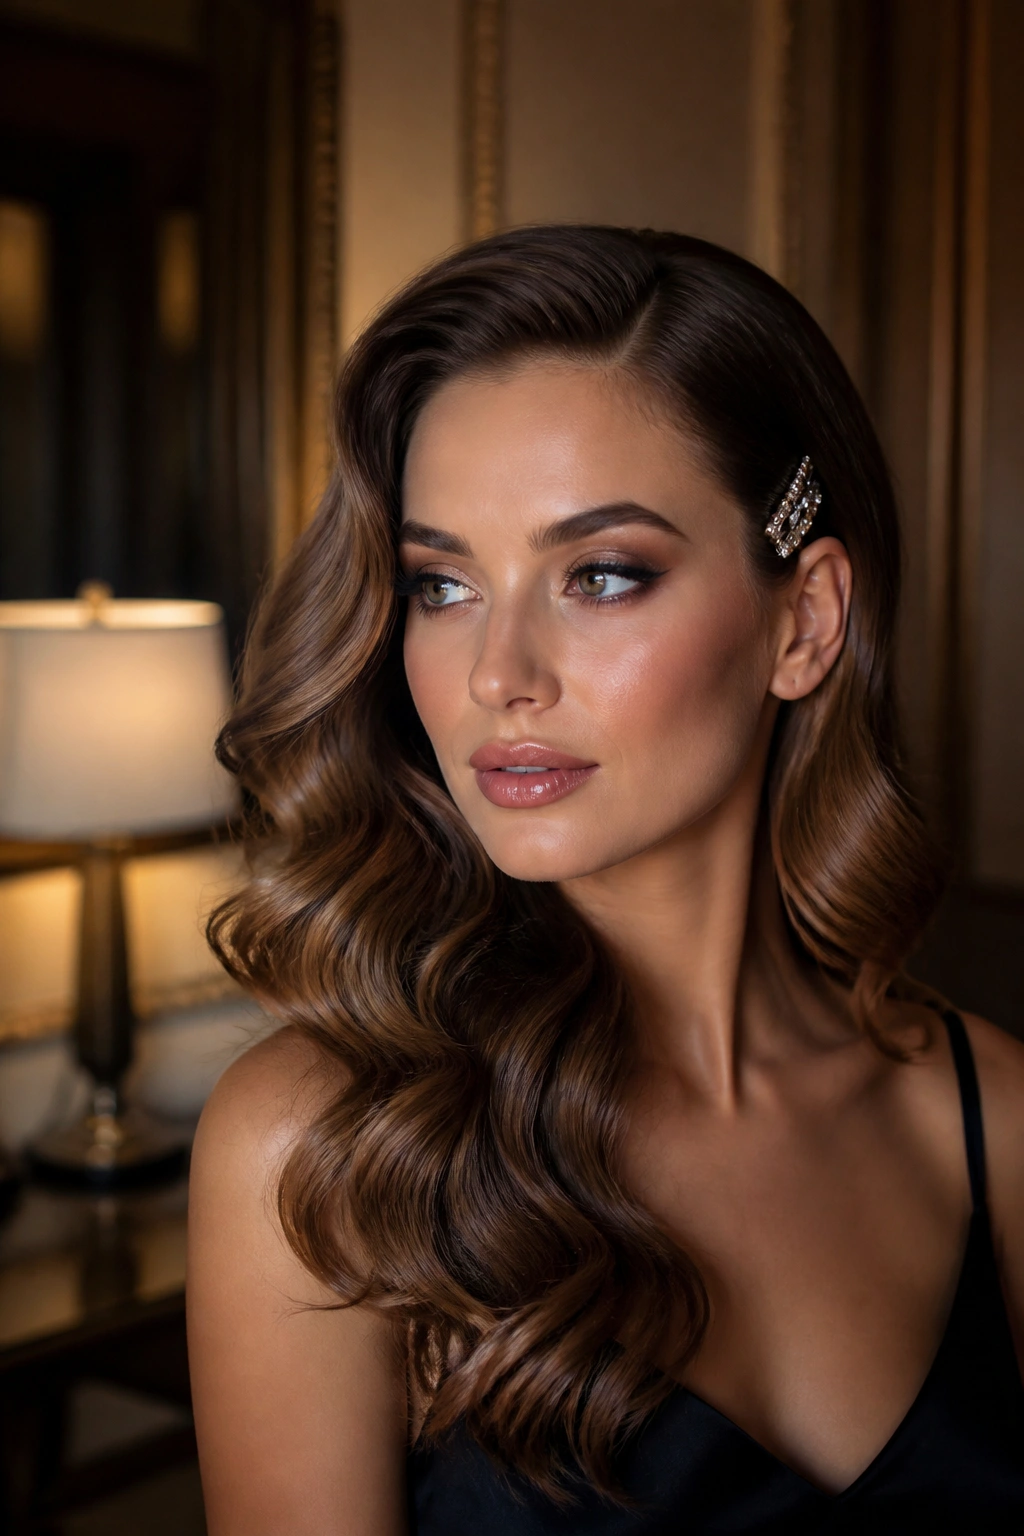
A deep side part changes everything. Deep side-part glam waves pull volume to one side, build a little drama at the crown, and make even simple wand curls look more deliberate.
The shape works because the part creates a heavier side and a lighter side. That imbalance gives the style lift at the top and swing through the lengths. If your hair tends to fall flat at the roots, this is one of the easiest fixes I know. A tail comb can carve the part cleanly, and a touch of root spray near the heavier side helps it stay put.
You can curl all the hair away from the face for a smoother finish, or keep the back sections alternating and reserve the away-from-face direction for the front. I prefer the first option when the goal is polished waves. It reads cleaner, especially with one-shoulder tops or necklines that already have shape.
A small clip at the temple can help set the front curve while the hair cools. Remove it only after the wave has fully settled. If you take it out too soon, the front piece tends to collapse into a bend that looks accidental rather than styled.
5. Ribbon Curl Waves
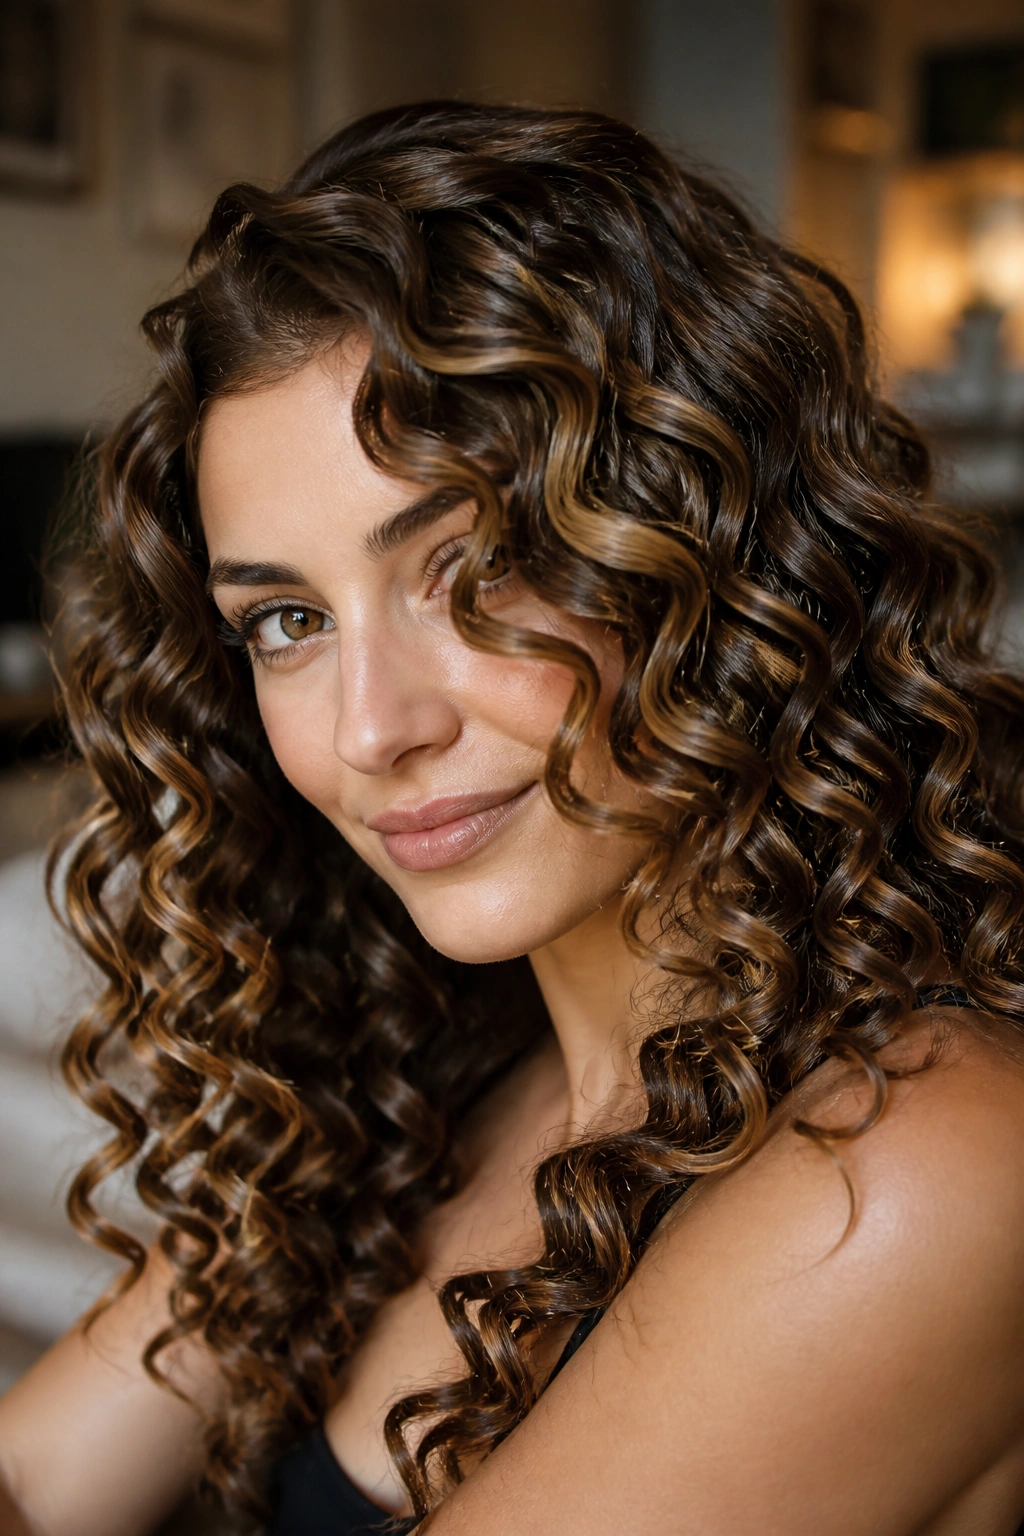
Ribbon curls look sleek when they first come off the wand and soft when they cool. That mix is what makes ribbon curl waves such a nice choice for polished hair that still moves when you turn your head.
The key is tension. You want the strand to wrap evenly around the barrel so it forms a smooth spiral, almost like a ribbon curling around the edge of a present. A 0.75-inch or 1-inch wand is usually enough, depending on your length and thickness. Smaller sections give the cleanest shape, and they matter more here than they do with looser styles.
Do not comb these out right away. Let the curls cool in your hand or clip them up for a few minutes, then separate them with your fingers only once the heat is gone. If you brush ribbon curls too hard, they lose their definition and start looking puffy at the ends.
This style works especially well on medium-textured hair that holds a bend but still wants shine. It also looks good with gloss sprays, because the smooth spiral catches light in a way that looser waves do not. Not every style needs to be soft-focus. Sometimes a little structure is the point.
6. Shoulder-Grazing Lob Waves
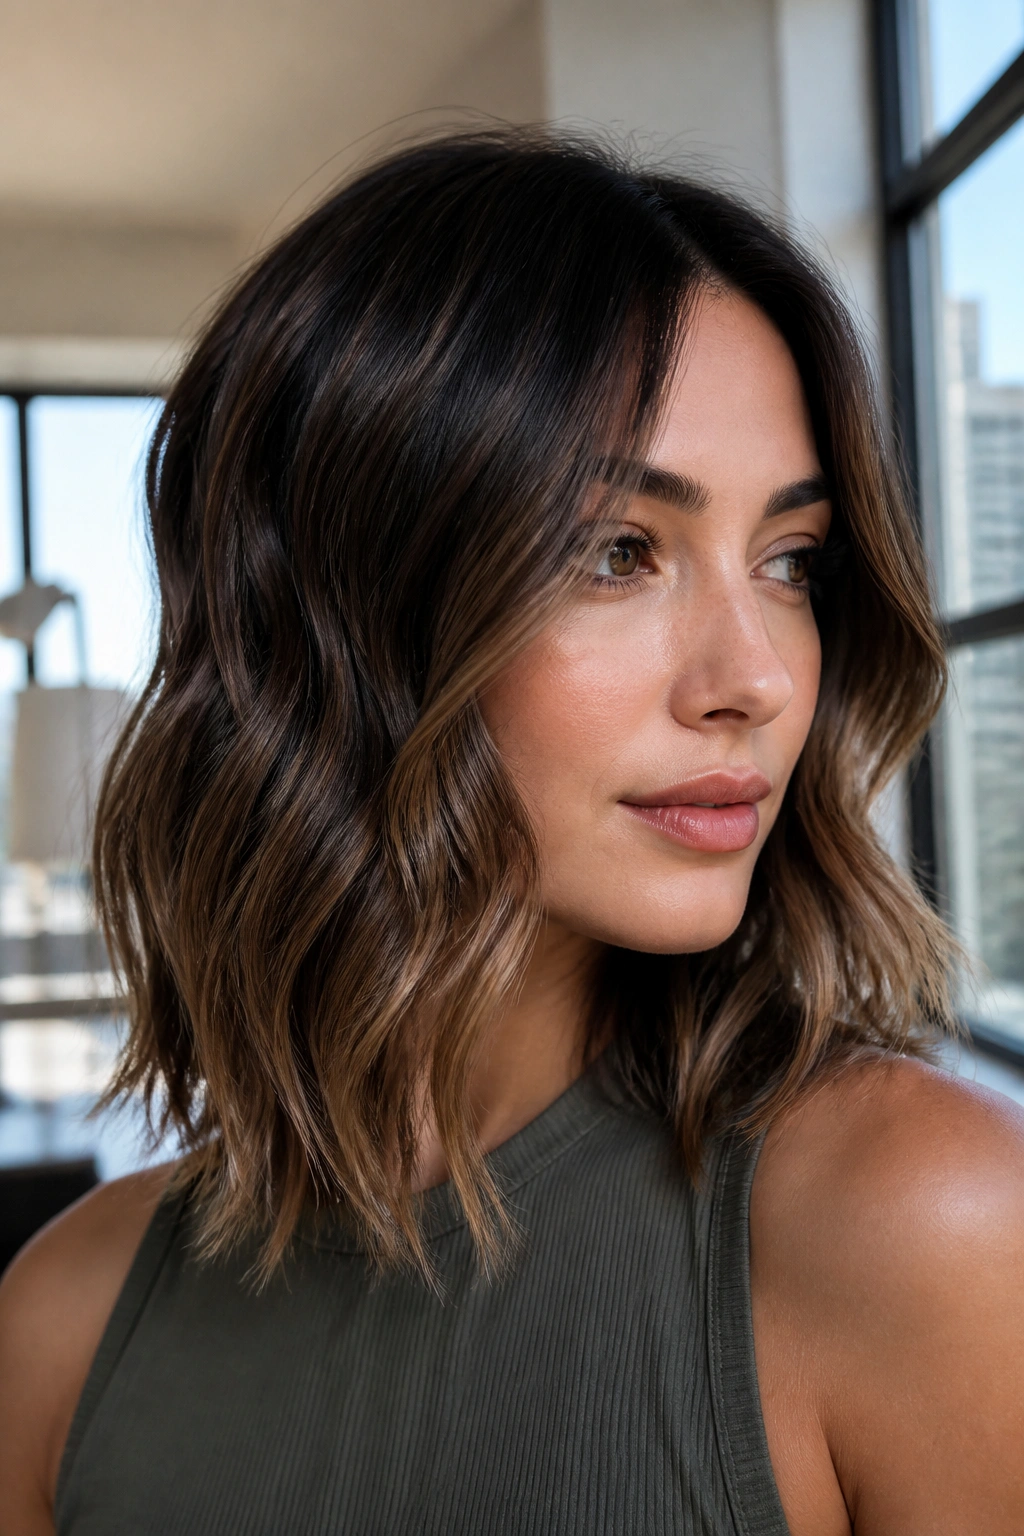
A lob can be hard to style because there is not always enough length for a long wave to form, but there is too much hair to let it sit flat. Shoulder-grazing lob waves solve that problem by keeping the bend loose and the ends clean.
Best on blunt, collarbone, and mid-neck cuts
If your hair hits around the shoulders, use a 1-inch or 1.25-inch wand and keep the sections modest, about an inch wide. Wrap the hair from mid-length down, then leave the ends a little straighter so the cut still looks crisp. That small detail keeps the lob from turning into a triangle.
A lob looks better when the wave starts lower than people expect. Mid-shaft to end is usually enough. If you curl too high, the hair can puff out at the sides and lose that neat, tailored line that makes a shoulder-length cut look expensive.
What makes it work
- Curl in the same direction on both sides for a sleeker finish.
- Use a heat protectant that dries without residue.
- Break the wave with fingers, not a heavy brush.
- Tuck one side behind the ear if you want the cut to show.
The result is polished but not precious. That matters. A good lob should move, not wobble around like it’s trying too hard.
7. Flip-Over Volume Waves
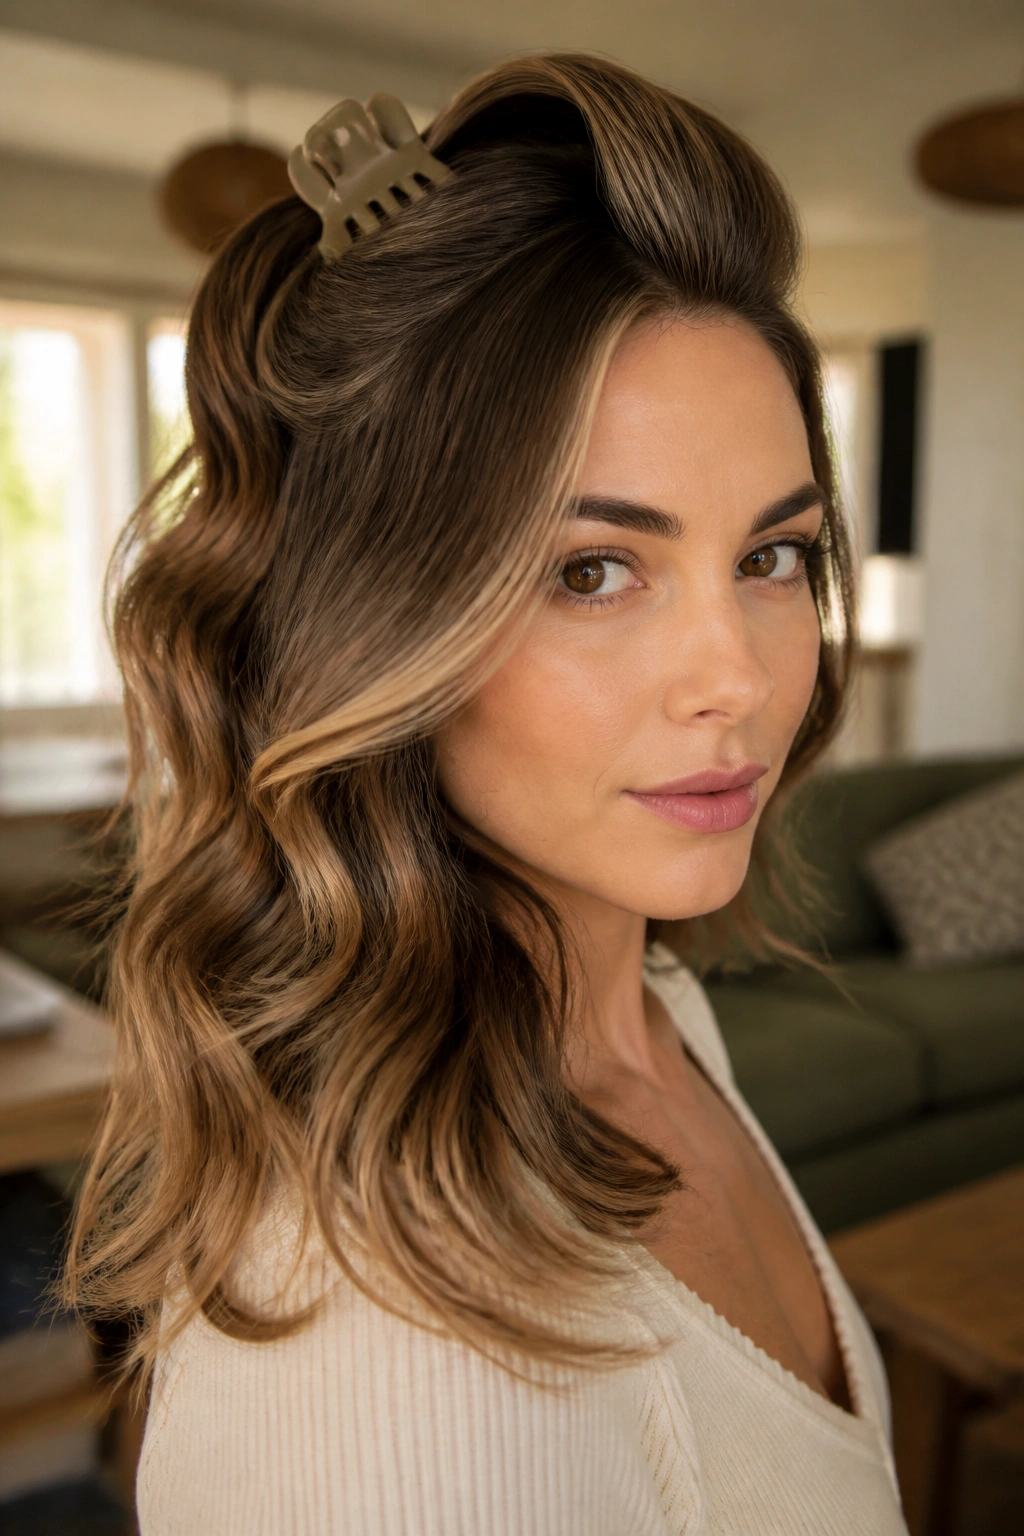
Flip-over volume waves are the style I recommend when hair needs more lift than length. They start with a side part or even a slightly off-center part, then the hair gets flipped over once the curls cool, which creates a soft cloud of volume at the crown.
Getting the lift right
Prep matters here. A bit of mousse or root spray on damp hair gives the style some grip before the wand even comes out. Once the hair is dry, curl sections away from the face, clip them while they cool, and then flip the hair to the opposite side with your fingers instead of a brush. That last step matters more than people expect.
If the roots still lie too flat, lift a few small pieces at the crown and mist underneath with dry texture spray. Don’t soak the area. A little goes a long way, and too much product makes the hair feel dusty instead of airy.
This style is especially good for fine hair that falls flat by lunch. It also saves straight hair from looking too neat. There’s a nice balance in that — the top stays lively, but the lengths still read as controlled.
And yes, you can wear it to something polished. The flip gives volume, not mess.
8. Old-Hollywood Side Sweep

A swept front section changes the whole mood of curled hair. Old-Hollywood side sweep waves are all about smoothness, shine, and one clean direction that makes the style feel intentional from root to end.
I like this look best when the curls are set first and styled second. Curl the hair with a 1.25-inch wand, let every section cool, then brush the waves together until they merge into one flowing pattern. After that, sweep the front over one shoulder and pin the heavier side discreetly near the nape or behind the ear. If you skip the pin, the shape can slip around all night.
A shine spray helps here, but only a little. Spray from 10 inches away, then pat the hair once with your palms so the surface gleams without looking wet. That glossy finish is half the appeal.
- Best with medium to long hair.
- Works well with formal makeup and structured necklines.
- Needs a calm root area so the side sweep does not collapse.
- Looks strongest when the wave pattern is brushed into a single line.
I’ve always thought this is the style for when you want the hair to do the talking, and not in a loud way.
9. Loose Spiral Wand Curls

What if you want movement without brushing the curl away? Loose spiral wand curls sit right there, between defined ringlets and relaxed waves, and they can be surprisingly polished when the sections are even.
A 1-inch wand usually gives the best shape. Take medium sections, wrap them smoothly, and let the curl fall from the barrel without pulling it apart too early. The end result should look like a loose spiral with a little air in it, not a tight corkscrew. If the hair is thick, clip each curl while it cools. Thick hair holds heat longer, and that extra cool-down time keeps the shape cleaner.
Best barrel size and finish
The right barrel depends on length, but a 1-inch tool gives the widest range. A smaller barrel makes the spiral too tight for polished waves, while a bigger one can leave you with bends that disappear by the end of the day. You want the curl to keep its shape after separation, not disappear into softness before you’ve left the house.
A pea-sized amount of cream on the mid-lengths can stop the curls from fraying. Use it sparingly. Too much and you lose the shine. Too little and the ends go fuzzy.
This style is good when you want a little more texture than a classic wave, especially on layered hair that needs help showing off the cut.
10. Root-Straight, End-Bent Waves

I like this style because it’s practical. Root-straight, end-bent waves keep the hair calm at the top and shaped through the lower half, which makes the look neat enough for work but still soft enough for dinner after.
Why the root stays straight
The root area is where a lot of wand curls go wrong. If you wrap hair too close to the scalp, the lift can puff out and the style starts looking heavy. Instead, leave the first 2 to 3 inches alone and begin the wave around the cheekbone or chin, depending on length. That keeps the head shape cleaner and makes the cut look sharper.
A paddle brush helps before you curl, because it smooths the top without flattening the ends. Then, once the waves cool, use your fingers to bend the lower half together. You do not need a lot of manipulation here.
- Great for straight, layered hair.
- Good choice if you want your part to stay visible.
- Easier to refresh the next day with a quick re-wand on the ends only.
- Works best when the finish is soft, not crunchy.
This is one of those styles that looks more polished the less you fuss with it. Strange, but true.
11. Half-Up Wand Curl Style
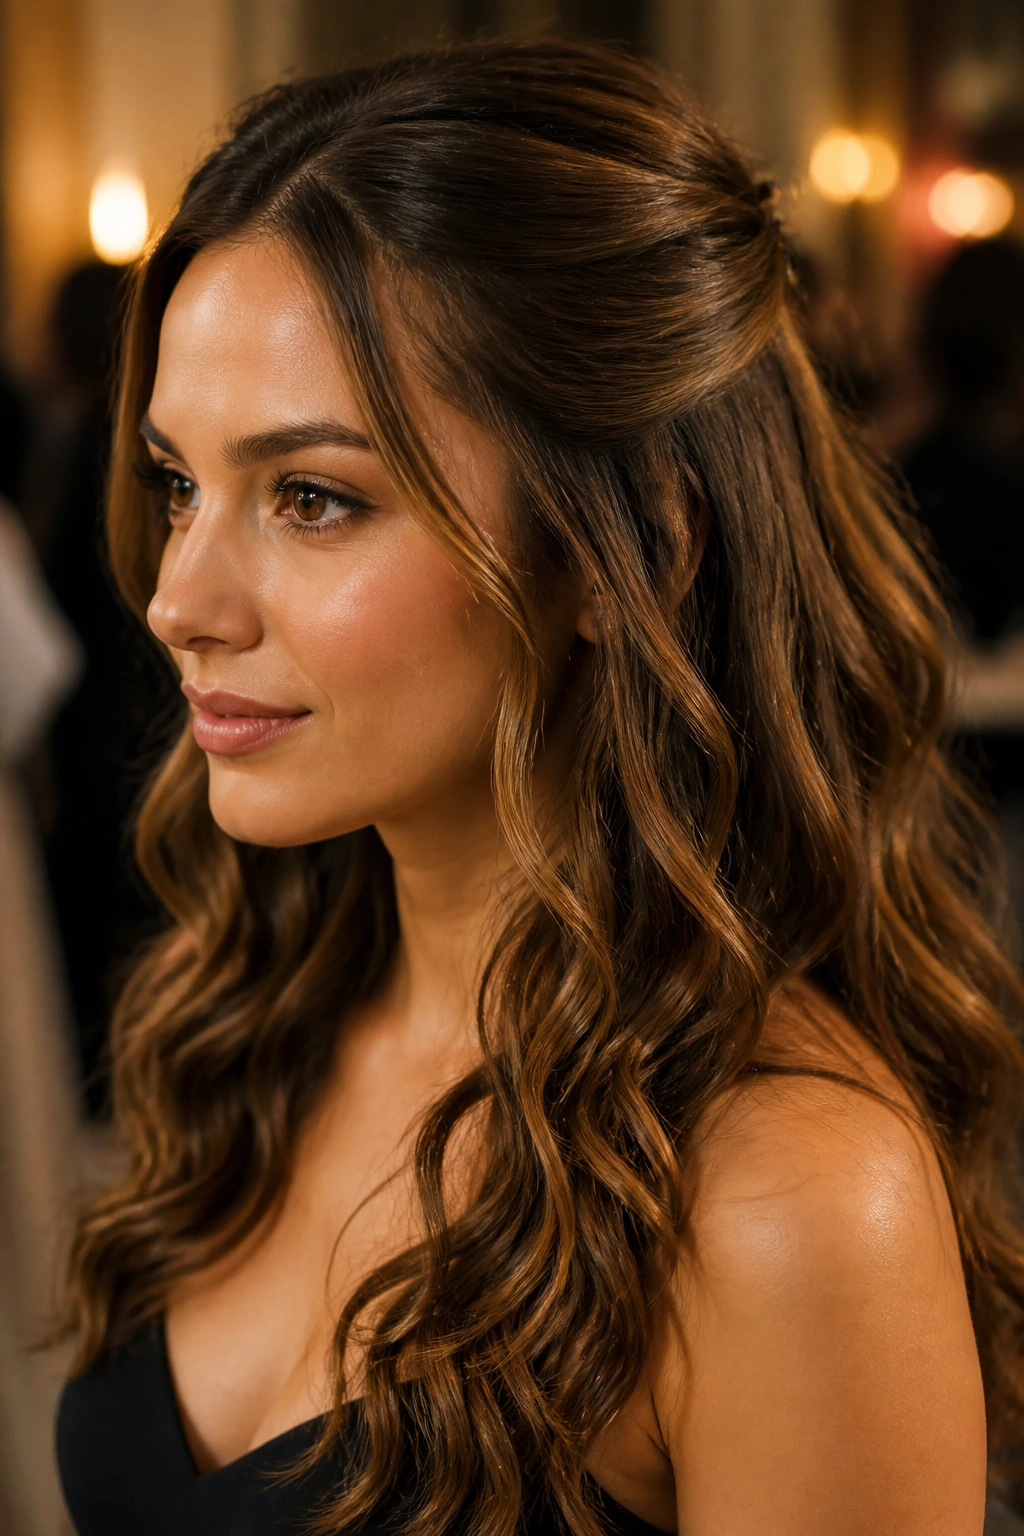
A half-up style solves a problem that full-down waves sometimes create: too much hair around the face. Half-up wand curl styles pull the top section away while still showing off the wave pattern underneath.
The nicest version keeps the crown smooth and the lower half loose. Curl the whole head first, then separate the top section from ear to ear and secure it with a barrette, clip, or wrapped elastic. Hide the elastic with a small piece of hair if you want the finish to look cleaner. That single detail makes the style feel finished instead of rushed.
This is the shape I’d pick for medium-length hair that gets heavy when it’s all down. It also works well if your front layers are shorter and tend to fall into your eyes. Pulling the top back opens the face without making the style severe.
A little volume at the crown helps. Tease a tiny section under the top layer with a fine-tooth comb, then smooth the surface gently. Not a lot. You want lift, not a bump.
It’s one of the most forgiving wand curl looks, which is probably why it keeps showing up at weddings, lunches, and any event where people want hair that stays in place.
12. Crown-Volume Tousled Waves
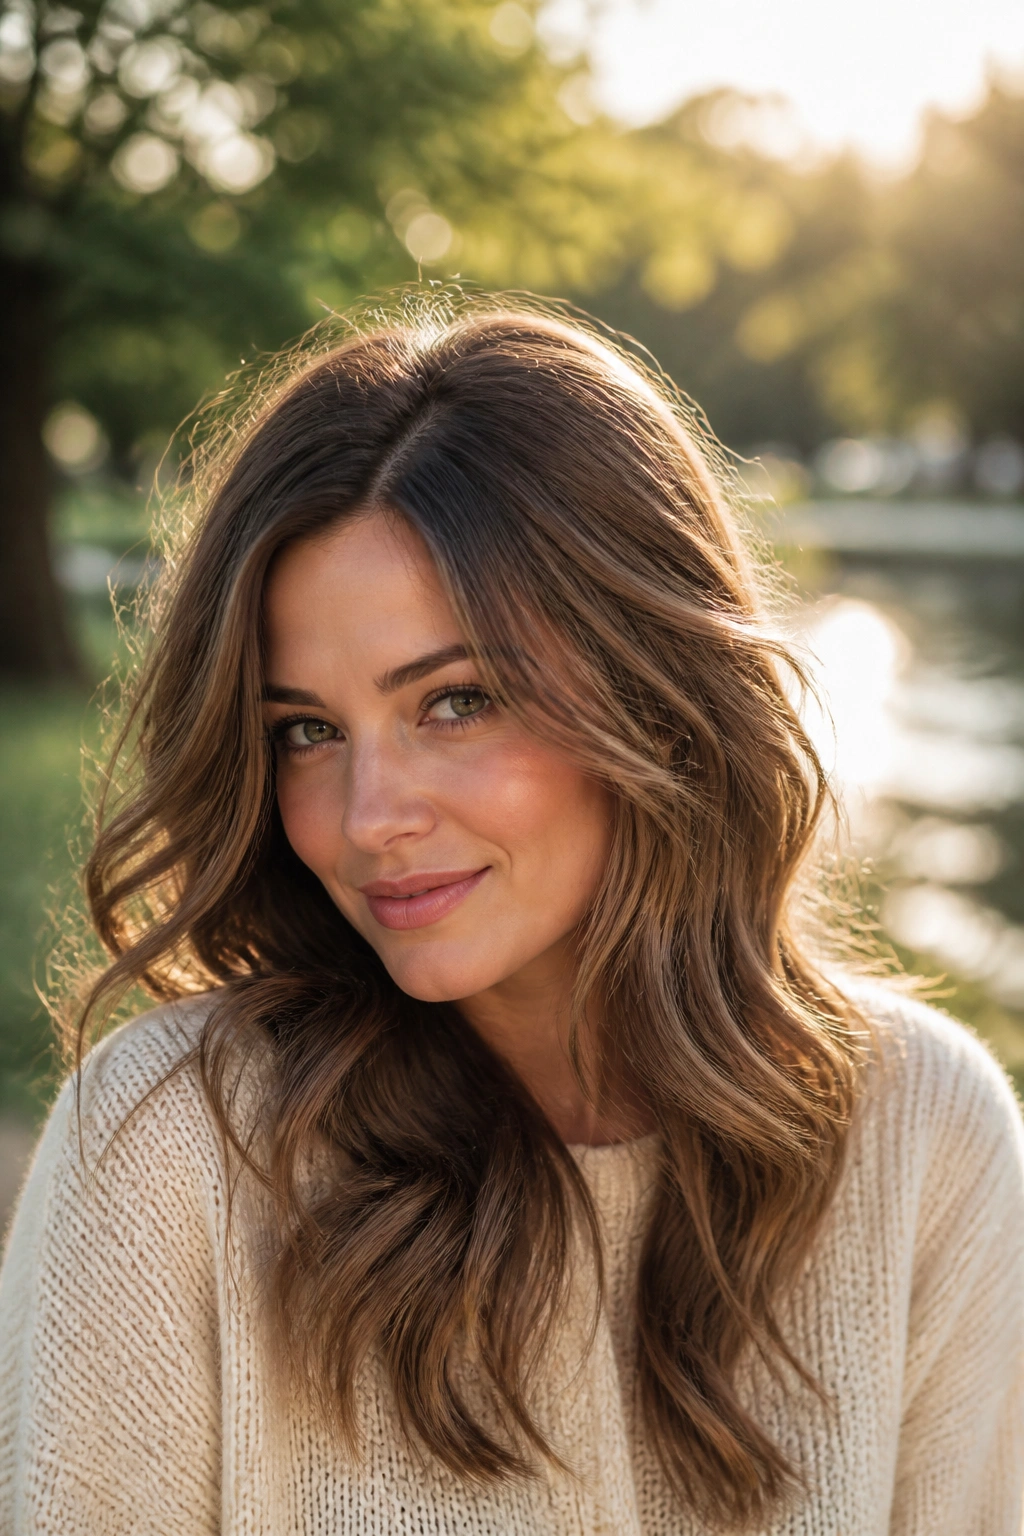
Flat roots can ruin an otherwise good curl pattern. Crown-volume tousled waves fix that by building height at the top and letting the lengths stay loose and airy.
Start with dry shampoo or texture spray at the crown, even if the hair is clean. That gives the roots some grit. Then curl the mid-lengths and ends with a 1.25-inch wand, keeping the sections large enough to stay soft once brushed out. After the curls cool, lift small panels at the crown and backcomb a few strokes underneath. You do not need much. Two or three passes is plenty.
The finish should feel full but not bulky. If the crown starts to look round in a bad way, smooth the top layer with a soft brush and leave the lift underneath where it belongs. That keeps the hair from looking overworked.
- Best for medium to thick hair.
- Good on layered cuts that need help at the roots.
- Works well with off-center parts.
- Holds up better when you avoid heavy oils at the top.
This style is the one I choose when the hair needs life at the scalp and softness through the ends. It gives both.
13. Wand-Curled Low Bun

Not every polished wave has to stay loose. Wand-curled low buns keep the softness of curled hair while pulling it into a neat shape that feels dressed up without being stiff.
Curl the hair first, but do not brush it all the way out. Leave enough texture for the bun to look soft. Gather the hair at the nape, twist it into a low bun, and let a few curled pieces sit around the face. If your hair is fine, a light mist of texturizing spray before pinning can stop the bun from slipping. If it’s thick, use pins in a crisscross shape so the weight sits evenly.
Where it shines
This style works for formal dinners, office events, and those days when your hair needs to look polished but stay off your neck. A low bun can feel plain on its own. Add wand curls first, and it gains movement, shape, and a bit of softness around the edges.
The curls hidden inside the bun do useful work too. They give the knot some body, which keeps it from collapsing into a flat twist by the end of the day. That’s the part people miss.
A few tendrils at the temples help, but keep them subtle. Too many loose pieces and the bun loses its clean line.
14. Wand-Curled Ponytail
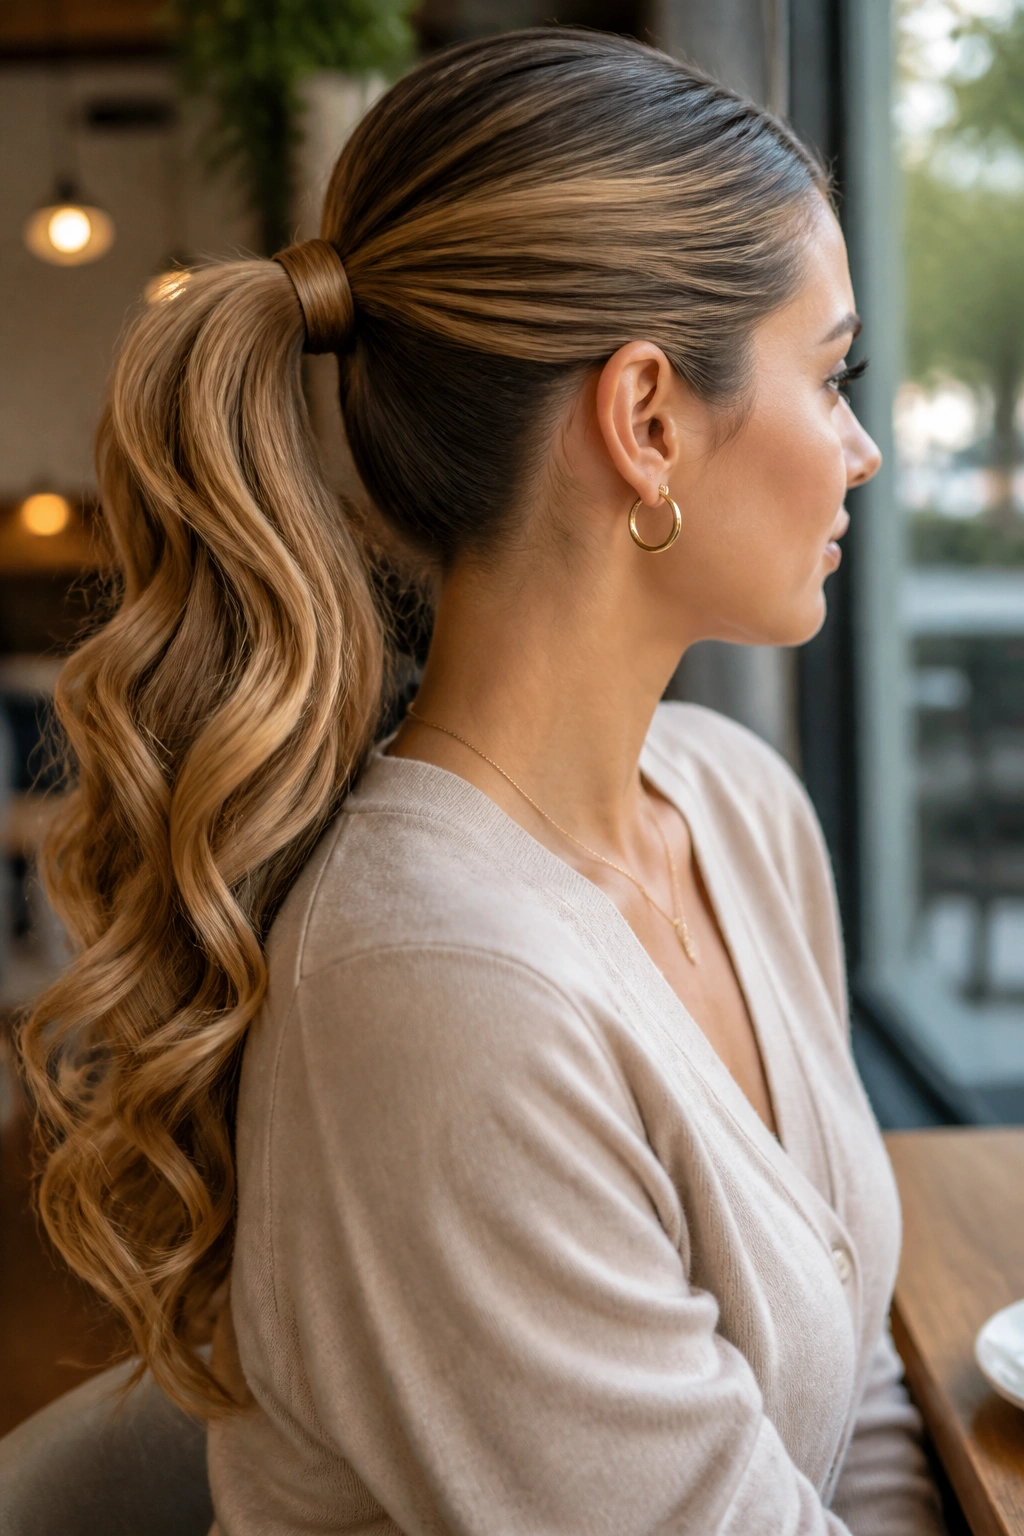
Why should ponytails get all the easy styling and none of the polish? Wand-curled ponytails turn a basic tie-back into something far more finished, especially when the ends are curled first and the elastic is hidden with a wrapped strand.
Start by curling the loose hair in medium sections. Then smooth the top with a brush and secure the ponytail at your chosen height. High ponytails feel energetic. Low ponytails read softer and more elegant. Either one works, but the low version tends to look more polished if the hair texture is very thick.
A good ponytail depends on contrast. The top should be sleek, the lengths should move, and the ends should not look chopped off. If the hair is shoulder length, use a smaller wand so the curve shows. If it’s long, a 1.25-inch wand gives a softer bend that falls nicely over the shoulder.
- Wrap a 1-inch strand around the elastic to hide it.
- Curl the tail in the same direction for a smoother finish.
- Mist the ends lightly with flexible spray.
- Leave one thin face-framing piece out if you want a softer line.
This is the style for people who want neatness without losing personality. A ponytail can do both.
15. Soft S-Pattern Waves
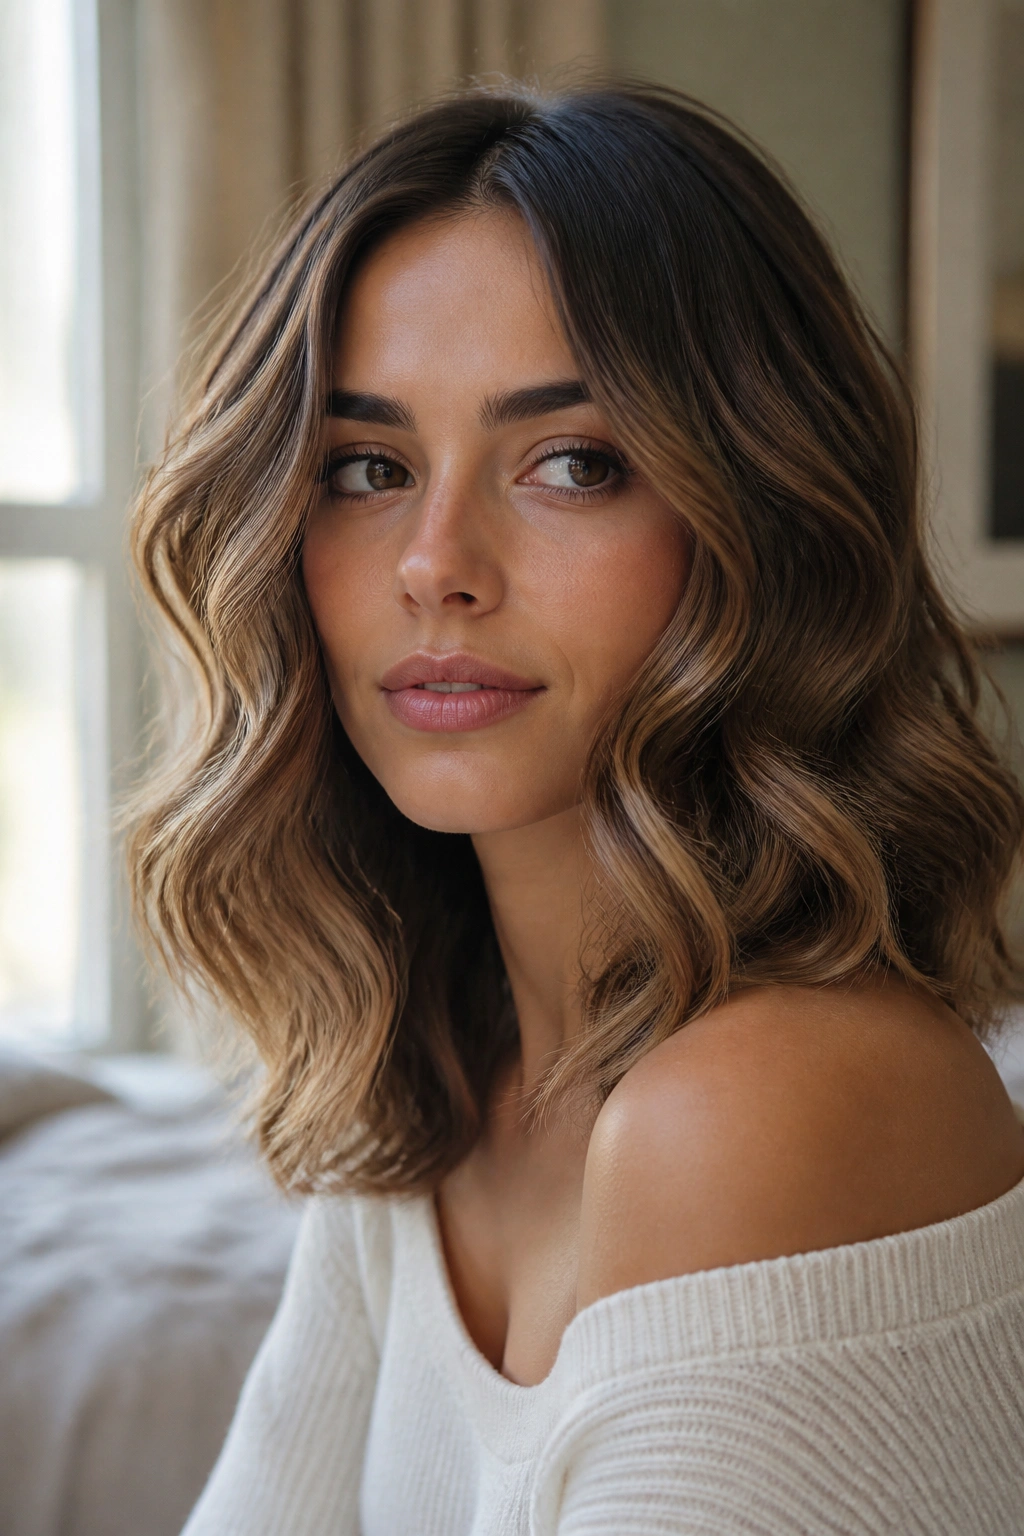
Soft S-pattern waves are the quiet version of glamour. The movement is controlled, the line is smooth, and the wave bends gently instead of spiraling hard around the barrel.
That makes this style a smart choice for short-to-medium lengths, blunt cuts, and hair that looks better with shape than with volume. Wrap each section loosely around the wand, then ease it off and pinch the wave into an S while it cools in your hand. The motion should feel almost lazy. If you force the bends, the wave turns sharp and loses its polish.
The quiet version of glamour
The S-pattern is also kind to layered hair, because it blends different lengths without showing every end. That can be a relief if your cut has grown out a bit or if the layers near the front refuse to behave. A tiny bit of cream on damp hair before drying can make the final pattern smoother, but keep the amount small. Heavy product will flatten the movement.
This look pairs well with tucked-behind-the-ear styling, clean necklines, and makeup that already has some shape to it. It does not need much else. That’s part of its charm.
If you want polished waves that feel controlled but not fussy, this is a good place to land. Not fussy. That matters more than people admit.
Final Thoughts
The best wand curl styles are the ones that match the haircut, not the fantasy version of it. A long, brushed-out wave can look stunning on thick hair and go limp on fine hair. A root-flat style can make a blunt cut look cleaner than a big barrel ever will. The right choice usually comes down to shape, not trend.
One detail keeps showing up across all of these looks: cool the curl before you touch it. That step sounds boring. It is. It also makes the difference between a wave that lasts and one that disappears after twenty minutes.
If you only remember one thing, make it this: choose the barrel for the finish you want, then let the hair settle before you brush, pin, or flip anything around. The style will look calmer, shinier, and a lot more expensive-looking for it.
