



The easiest loose waves are rarely the prettiest ones.
A lot of loose wave hair ideas look the same in photos and fall apart the second you step outside, bend down, or run your fingers through them once. The difference usually comes down to three things: where the part sits, how high the wave starts, and whether the ends are left soft or flattened to death by a brush. A 1-inch iron gives a different mood than a 1.25-inch barrel, and that tiny gap matters more than people admit.
I like loose waves because they sit in that sweet spot between polished and relaxed. They work on long hair, shoulder-length cuts, layered lobs, and even shorter bobs if the wave is kept big and soft. They also forgive second-day hair, which is one reason so many stylists keep coming back to them. Clean hair can look slippery. Hair with a little grip holds a better bend.
So the trick is not just “make waves.” It is choosing the right wave shape for the haircut sitting in front of you. Some versions need volume at the crown, some need a side sweep, and some need a brushed-out finish that feels softer than a beach wave. The 15 looks below cover the versions I reach for most often, because the details are what make loose waves look intentional instead of accidental.
1. Center-Part Loose Waves With Face-Framing Pieces

A center part gives loose waves a clean line, and that line matters more than people think. Once a few front pieces are softened around the cheekbones, the whole style stops feeling flat and starts looking balanced.
Why It Works
The middle part puts the eye right down the center, which is great if the rest of the hair has enough movement to keep things from feeling too strict. On long hair, the wave pattern can fall in a slow S-shape. On medium hair, the same idea reads a little bouncier and a little younger, which is not a bad thing at all.
The key is to leave the pieces closest to the face a touch looser than the rest. That tiny difference keeps the front from looking like one solid curl ribbon. Soft bends around the jawline do more for this style than heavy waves through every section.
- Best for long layers, lobs, and oval or heart-shaped faces.
- Use a 1-inch or 1.25-inch barrel depending on hair density.
- Leave the front two pieces slightly straighter at the ends.
- Finish with a light mist of flexible-hold spray, not crunchy hairspray.
Pro tip: tuck one side behind the ear for five minutes while the hair cools. It sets the bend in a way that looks casual, not forced.
2. Deep Side-Part Loose Waves for Extra Volume

A deep side part changes the whole mood in about five seconds. It pushes more hair to one side, gives the roots a lift, and makes fine hair look fuller without piling on product.
The style works because the wave pattern does not have to fight for attention at the crown. Hair naturally falls over the heavier side, which makes the top look thicker and the face look a little more defined. If your hair collapses at the roots by lunchtime, this is one of the easiest fixes that does not require a fresh haircut.
I especially like this with shoulder-length hair, where the side sweep can brush the cheekbone and then drop into soft bends below the chin. Thick hair gets a little drama here. Fine hair gets body. That is a rare combination.
Try clipping the heavier side at the crown while the hair cools. It sounds fussy. It works. A small root lift at the part line keeps the style from going limp after an hour, and a dab of mousse at the roots does more than a pile of oil ever will.
3. Brushed-Out Curl Waves That Feel Soft, Not Stiff
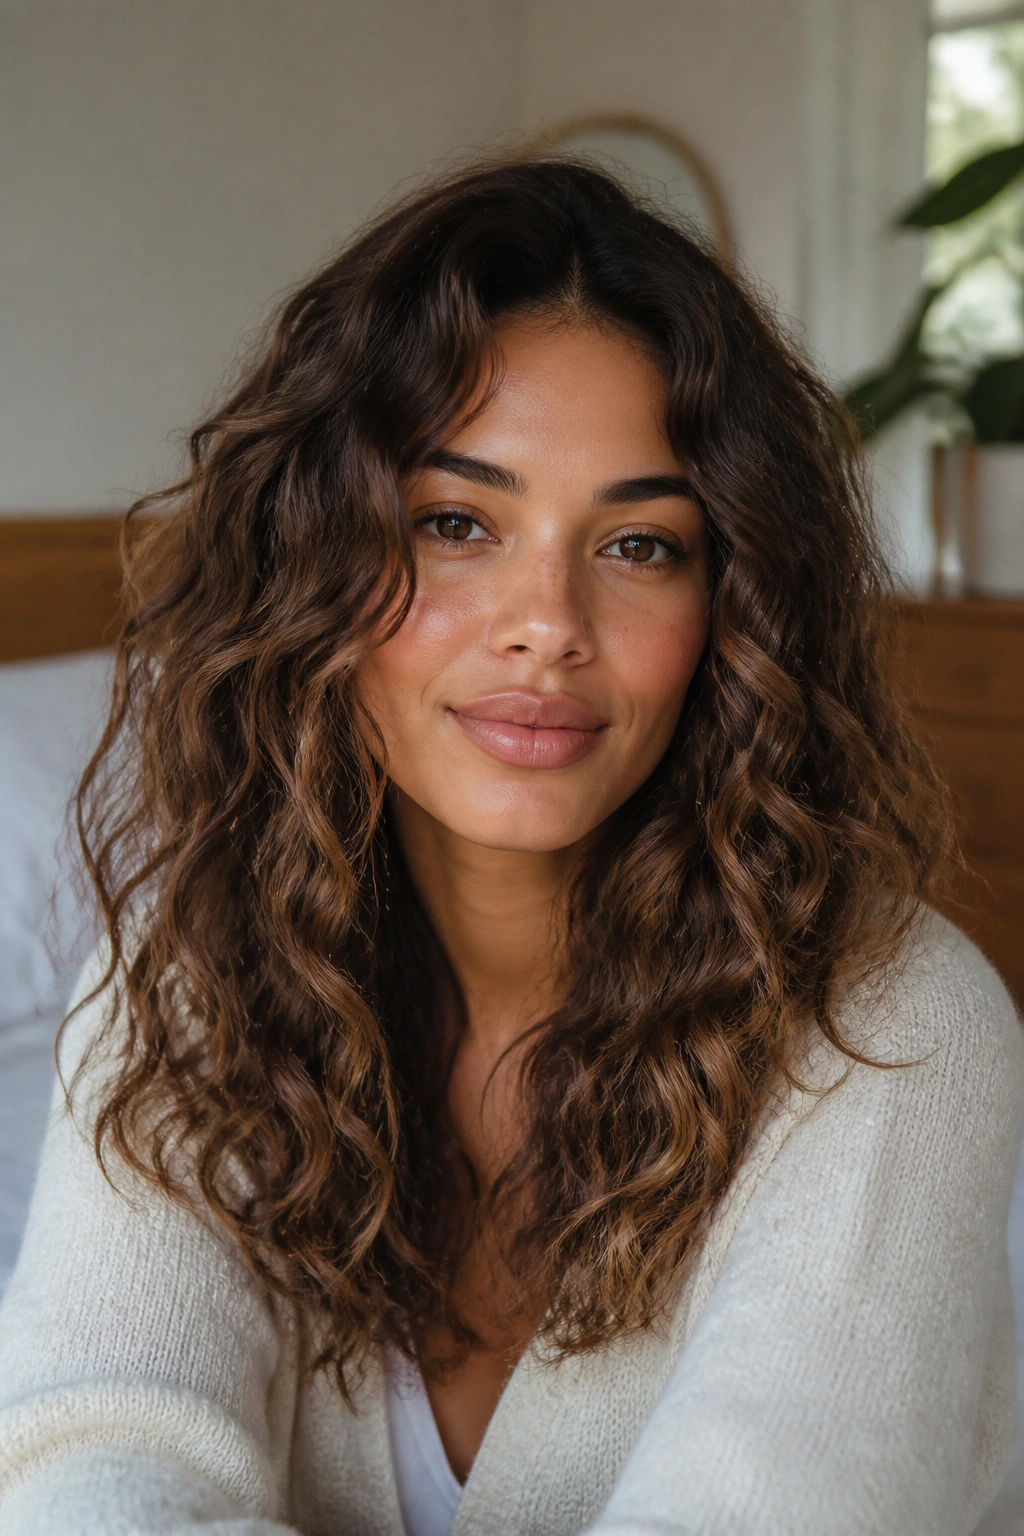
Why do some waves look airy while others look like they were left half-finished? Because the finish matters as much as the curl pattern itself.
This style starts with curls that are formed more tightly than the final look. After they cool completely, they get brushed out with a paddle brush or a wide boar-bristle brush until the sections melt together. The result is softer and smoother than a beach wave, with more polish around the mid-lengths.
How to Get the Soft Sweep
- Curl hair in medium sections, then let each one cool flat in your hand or pinned to the head.
- Brush only after the hair is fully cool.
- Add one or two drops of serum to the ends, not the roots.
- Spray from arm’s length with flexible-hold hairspray so the style still moves.
The biggest mistake is brushing too soon. Warm hair loses shape fast, and then you end up with a fuzzy, half-deflated wave that needs more heat to fix it. That cycle is annoying and unnecessary.
What I like here is the softness near the ends. It makes the hair look expensive without screaming for attention. Not loud. Not stiff. Just clean, easy movement.
4. Collarbone Lob With Loose Waves
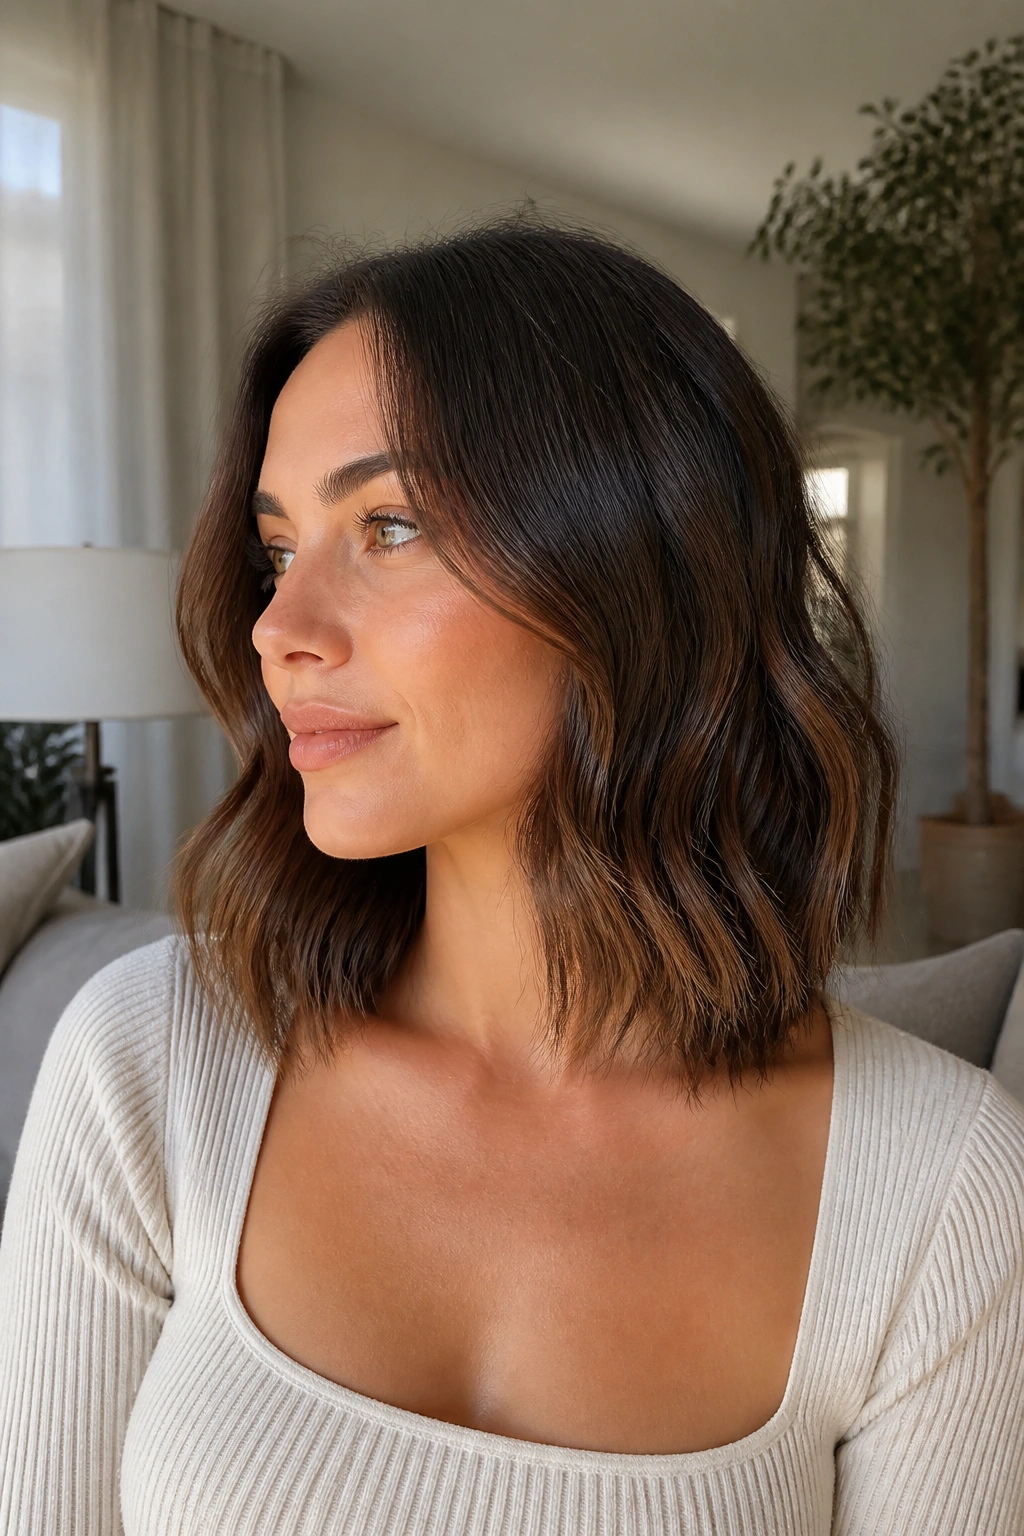
A collarbone-length lob is where loose waves start looking modern instead of merely pretty. The length hits that exact spot where the wave can bend without dragging the whole style down.
Hair at this length usually benefits from alternating the direction of each wave. One section away from the face, the next toward it, then away again. That pattern breaks up the curl line so the hair does not clump into one heavy shape, which is the problem with a lot of one-direction styling on lobs.
A lob also gives the ends somewhere to land. They brush the shoulders, skim the collarbone, and show off texture without getting lost in the rest of the hair. If the haircut has a little internal layering, even better.
This is the cut I’d pick for someone who wants loose waves but hates spending 40 minutes making them. The shape does a lot of the work. A little dry texture spray at the roots, a light bend through the mid-lengths, and the whole thing reads finished.
Worth remembering: keep the ends from curling too tightly. A soft bend at the bottom is what makes the lob look clean rather than dated.
5. Half-Up Twist With Loose Waves
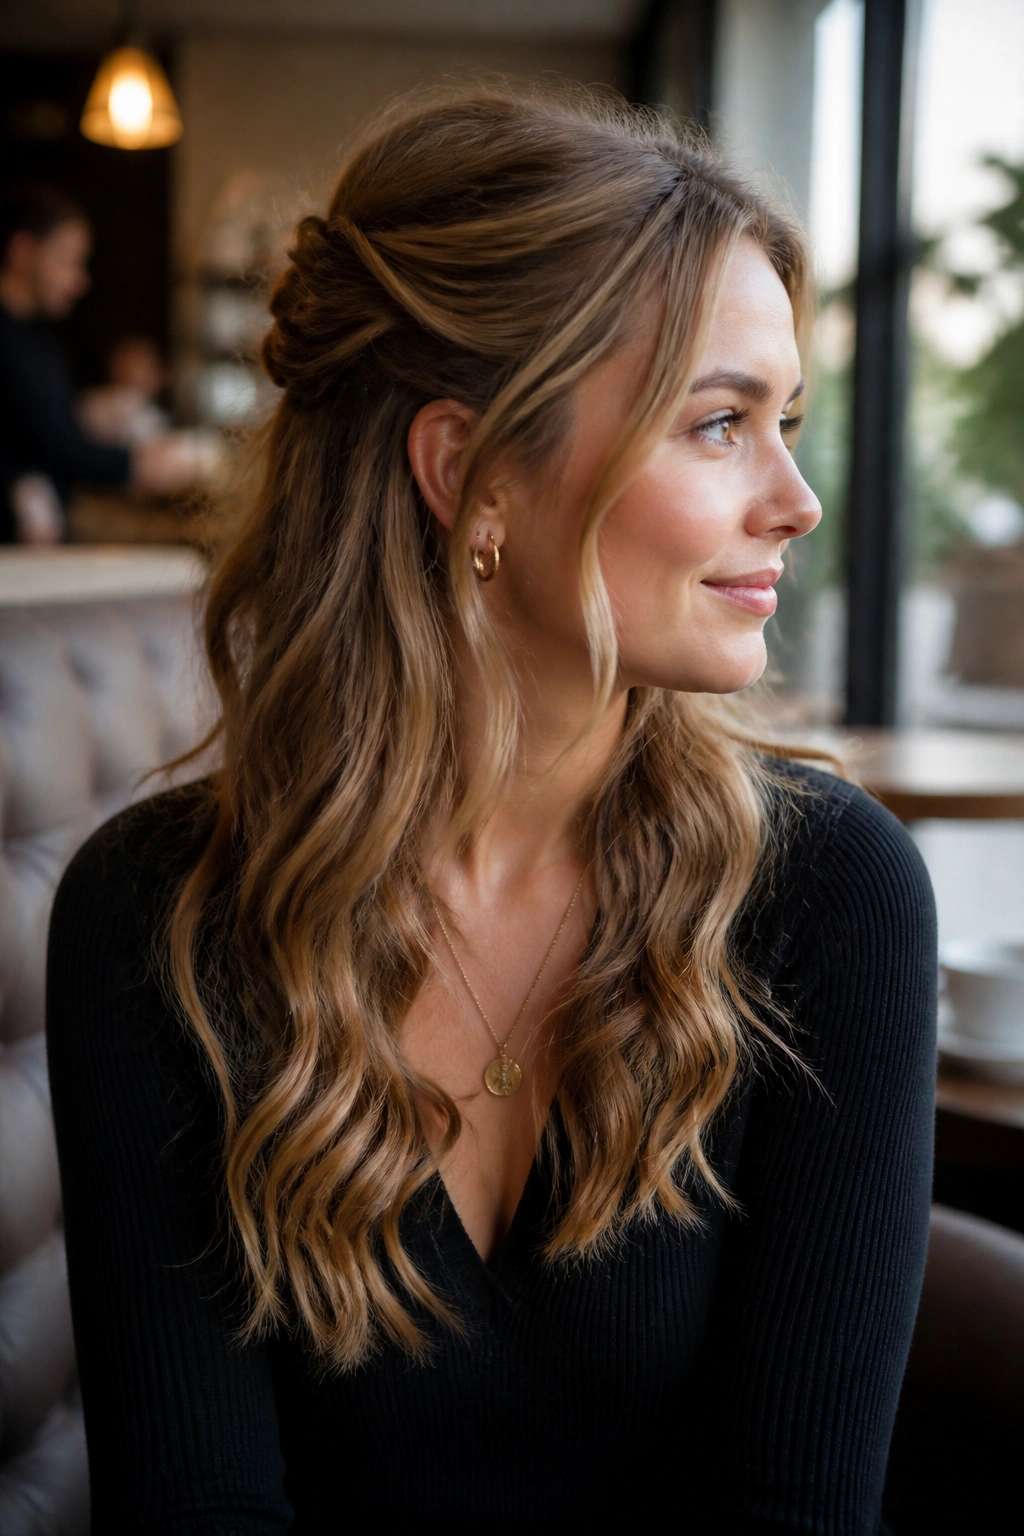
Half-up styles rescue loose waves on days when the front pieces keep falling into your face. They also make the hair look styled without hiding the wave pattern you worked for in the first place.
A small twist from each temple, pinned at the back of the head, gives the top some shape and leaves the rest down. That balance is the whole appeal. You get lift at the crown, movement at the ends, and no giant clip or heavy braid stealing the scene.
Messy is the point. Random is not.
The nicest version keeps the twist low and soft, with a couple of pieces left out around the ears. If you pull everything too tightly, the waves below start to look disconnected from the top. That’s the part people often miss. The half-up section should feel like it belongs to the same haircut, not like it came from a different head.
A small clear elastic works, but two crossed bobby pins often sit flatter. A little texture spray at the roots helps the twist stay put. I’d skip this on very freshly washed hair unless you want to spend the whole day fixing slips.
6. Old Hollywood Loose Waves With a Side Sweep
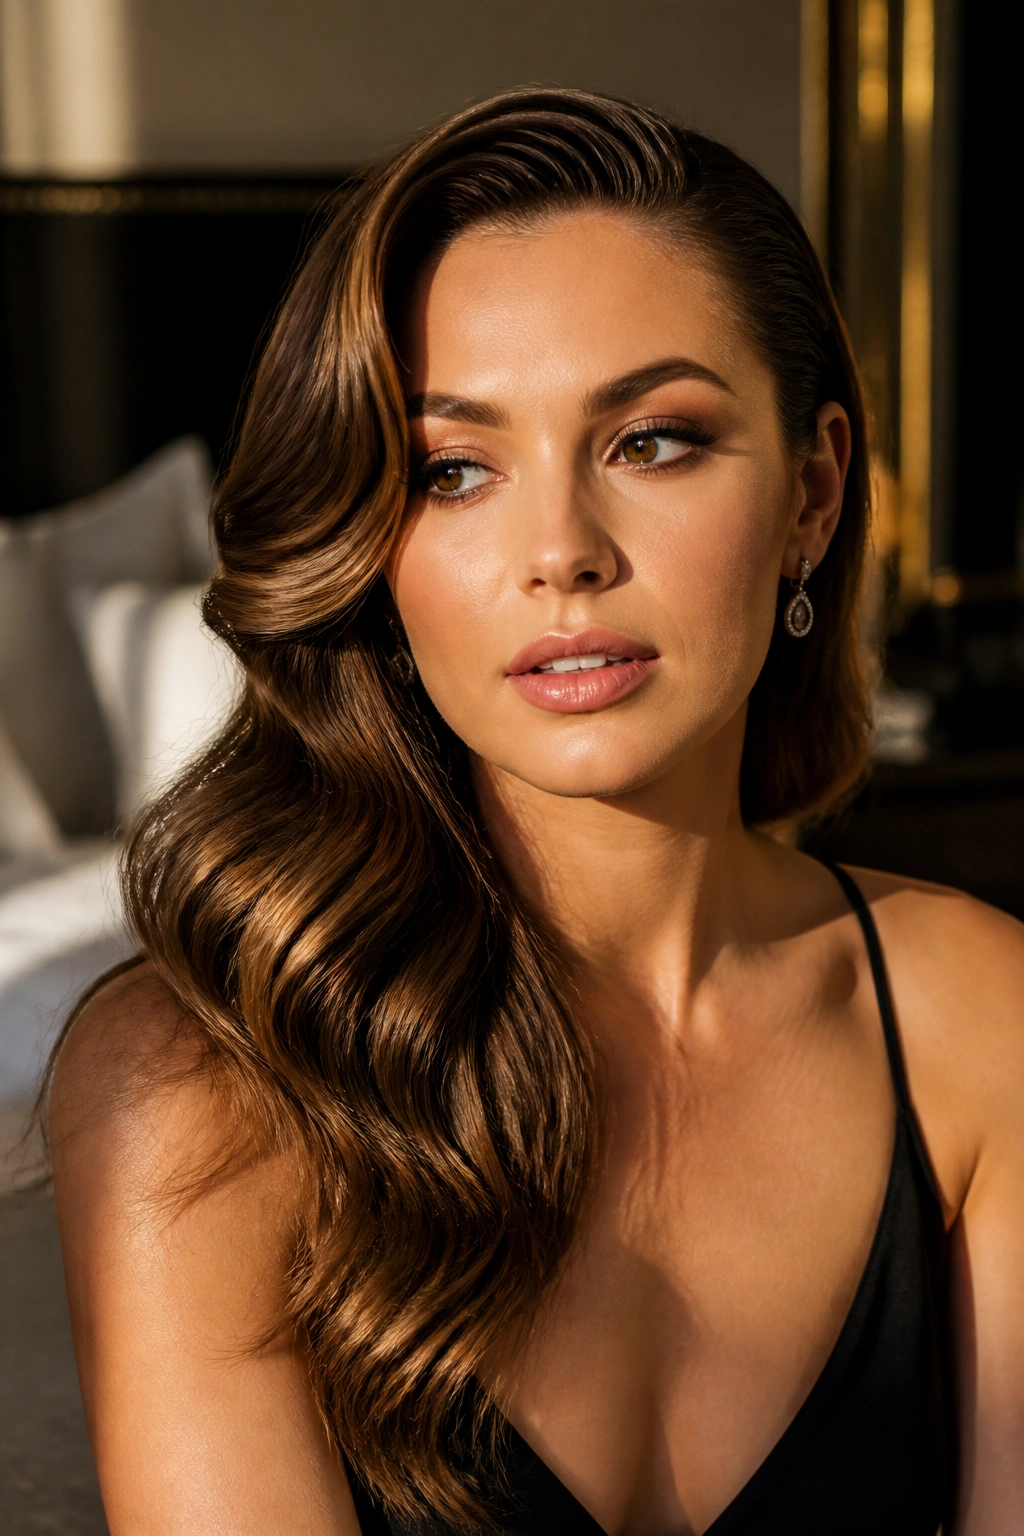
Unlike beachy waves, this version is smoother, shinier, and more deliberate. The shape is still loose, but the wave is more even from top to bottom, and the whole style leans into one side with a proper sweep.
That side sweep changes everything. It creates a strong line through the front, then lets the rest of the hair drop in even, glossy bends. Think less “I slept in braids” and more “the hair had a plan.” The wave itself should be broad and calm, not tight and springy.
This is a good pick for thicker hair because the weight helps the style stay elegant. Fine hair can wear it too, but the prep has to be smart: root lift at the crown, a heat protectant that does not leave a sticky film, and a large-barrel iron that does not overcook the sections. Too much texture ruins the look.
Pin one side behind the ear or tuck it with a couple of hidden pins. Then brush only lightly. If the hair starts to look too fluffy, stop brushing. That glossy bend is the point.
7. Boho Loose Waves With a Tiny Braid Accent
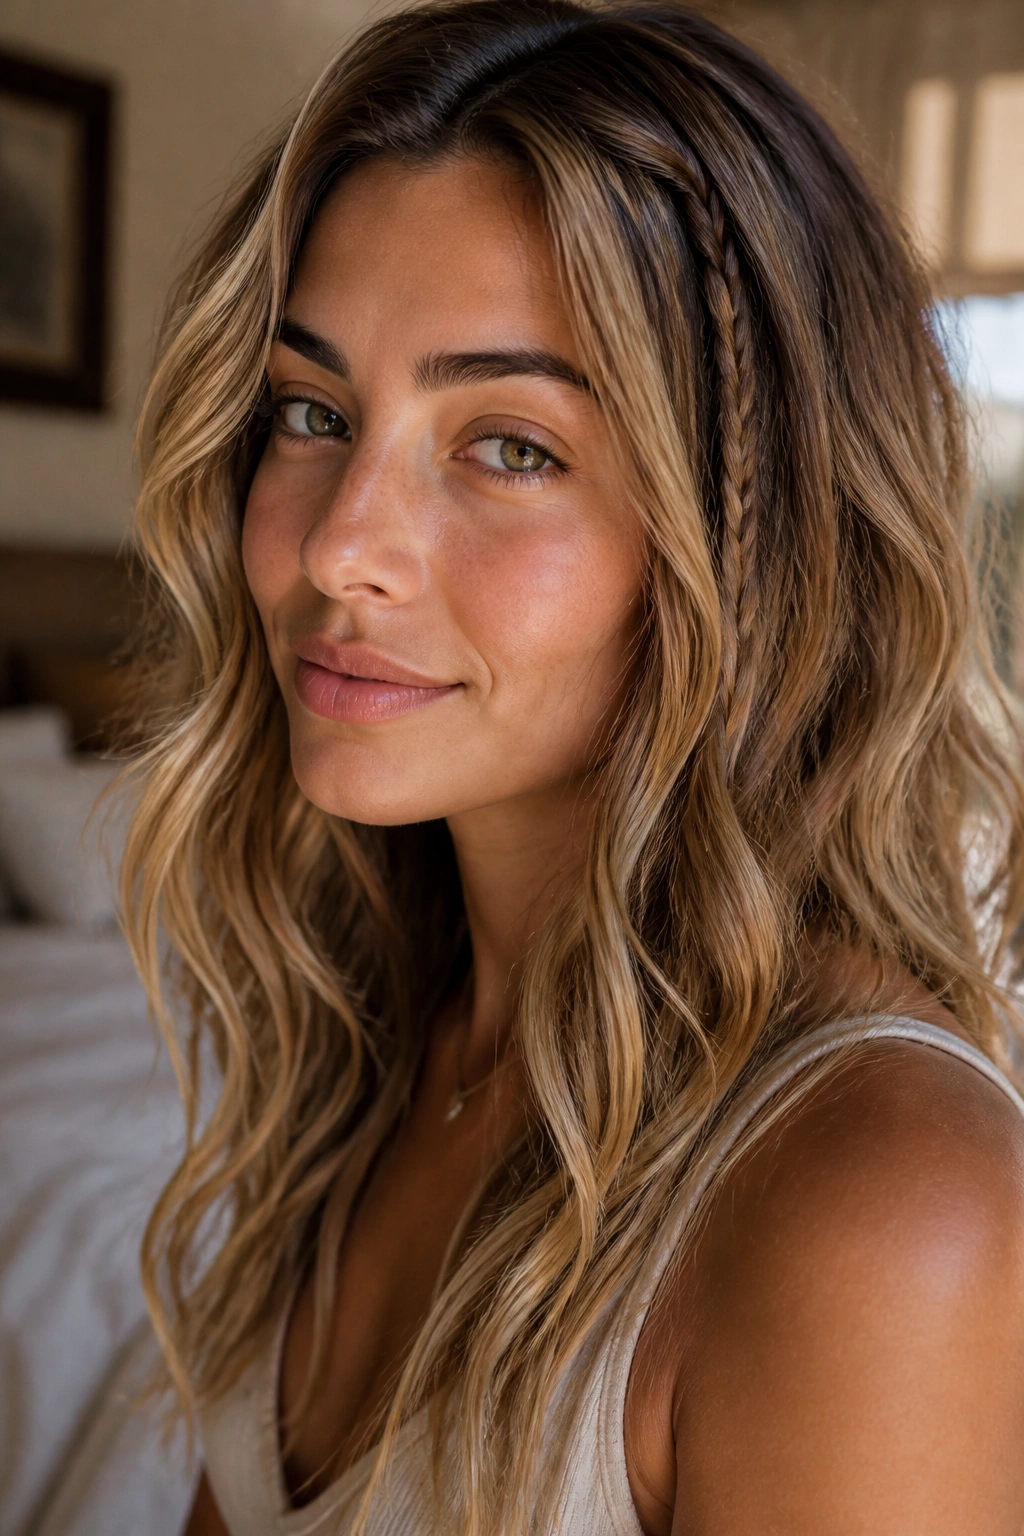
Why bother with one small braid when the hair already has movement? Because that little accent gives the wave pattern a place to start, and it keeps the style from looking too plain.
A thin braid near the temple or tucked just behind one ear is enough. You do not need a full crown braid or a festival pile-on. In fact, too much braiding steals the softness that makes loose waves so easy to wear. One braid. That’s plenty.
Best Places to Put It
- At the temple, woven backward into the side layers.
- Behind one ear, then pinned flat under the top section.
- Across a small section of the crown if the hair is long and layered.
The braid should be loose enough that it looks like a detail, not a decision. Pull it too tight and the whole style starts to feel formal in the wrong way. A little texture spray before braiding helps the strand hold without getting slippery.
This look works well on second-day hair, which is usually a little drier and easier to shape. The braid takes advantage of that texture instead of fighting it. Nice little trick. No drama.
8. Air-Dried Natural Waves With Curl Cream
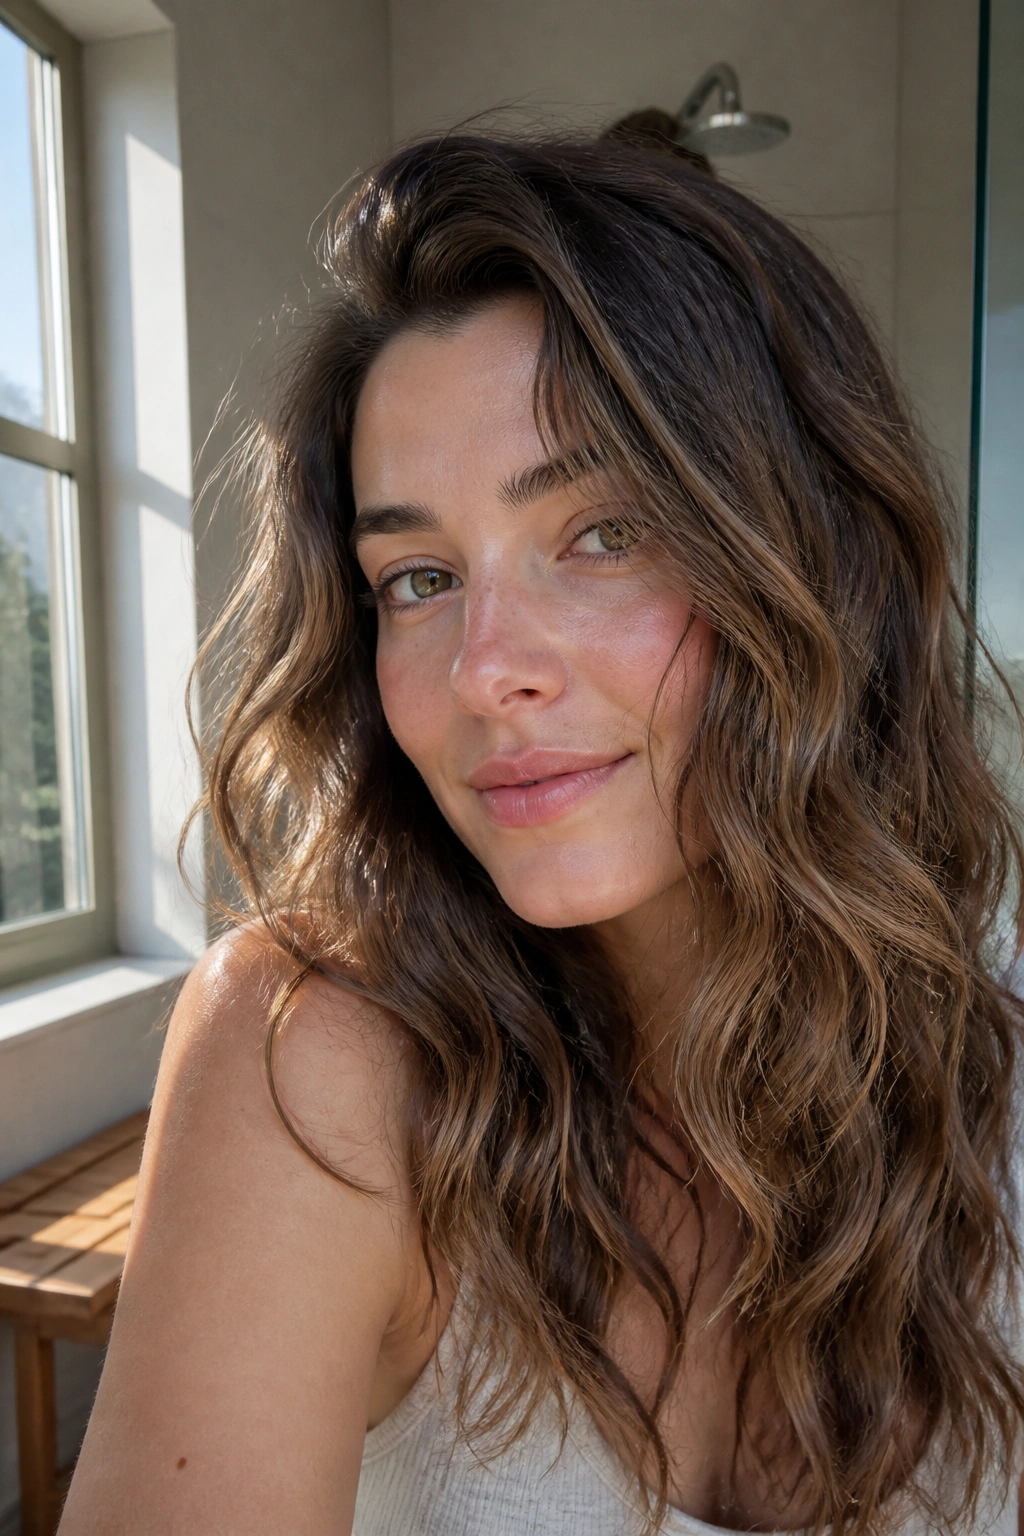
Some hair bends on its own if you stop wrestling it. Air-dried loose waves are the proof.
The AAD has long pointed out that repeated heat styling can dry hair out, and this is where that advice starts to matter in a very practical way. A few smart products can shape the hair without blasting it into submission. Curl cream, a light mousse, and a microfiber towel are usually enough for hair that already wants to wave.
What Helps Most
- A leave-in conditioner for slip.
- A pea-sized amount of curl cream for softer ends.
- Mousse at the roots if the crown falls flat.
- A microfiber towel or cotton T-shirt instead of a rough bath towel.
Scrunch from the ends upward, then leave the hair alone for a while. That sounds obvious. It still gets ignored. The more you touch damp hair, the frizzier the finish gets, and the less defined the waves will be. If you need to diffuse, keep the dryer on low and stop when the hair is about 90 percent dry.
This look is not about perfection. It is about coaxing out what is already there. And when it works, it looks calm in a way hot tools never quite manage.
9. Low Ponytail With Loose Wave Ends
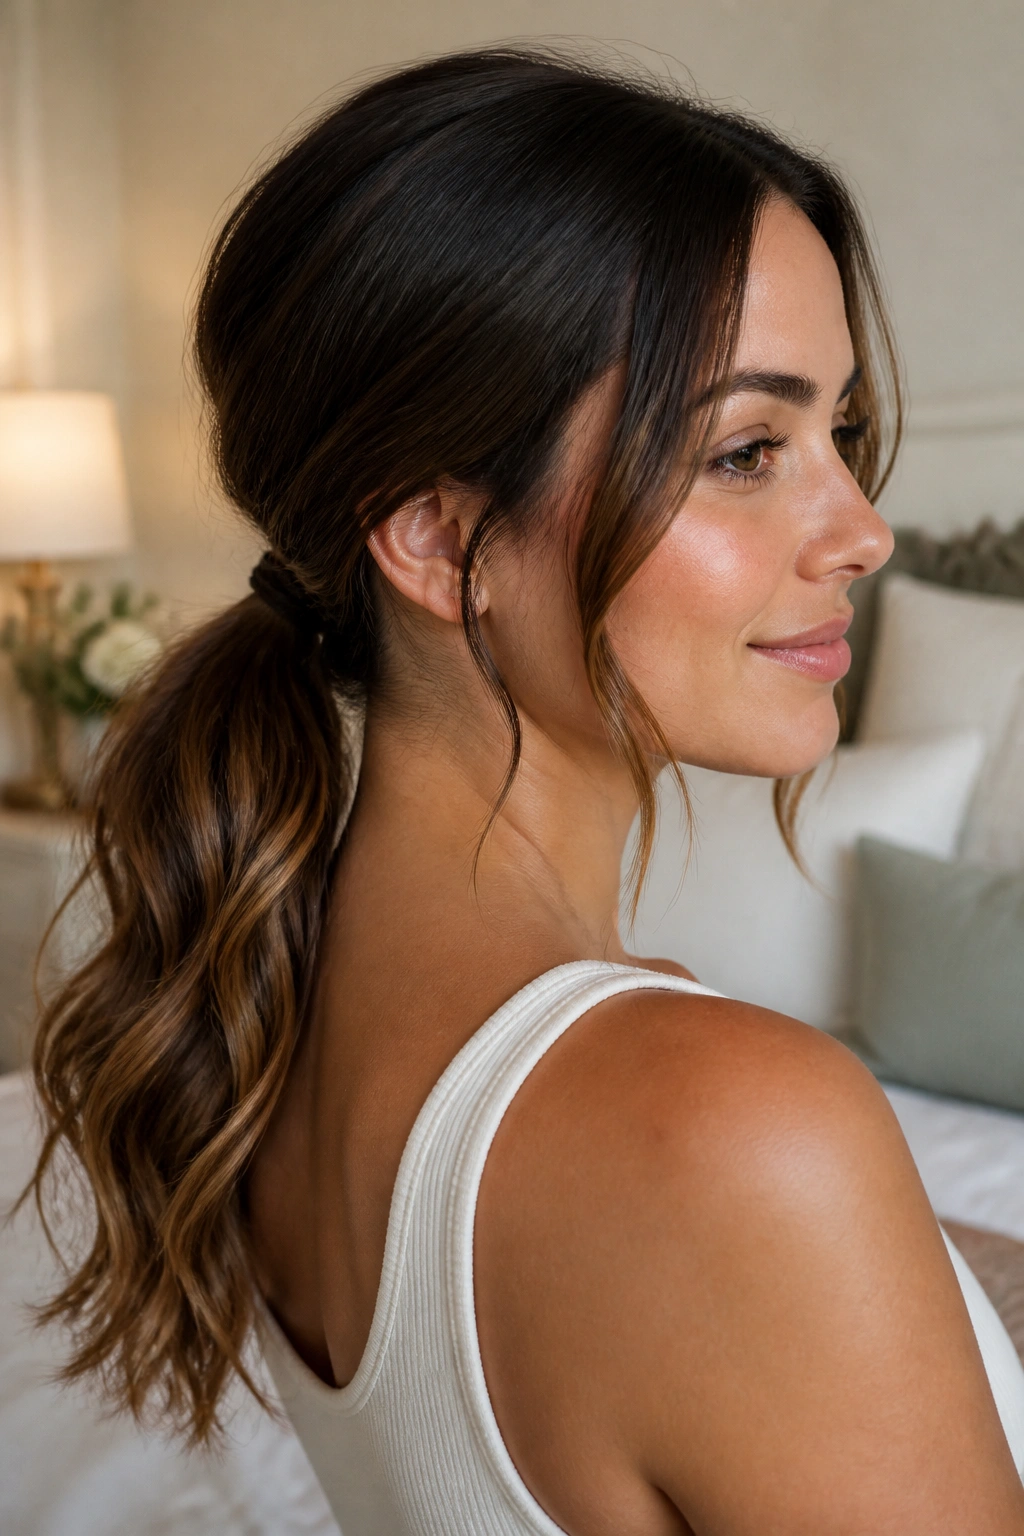
A low ponytail can look plain on straight hair, but with loose waves it suddenly feels softer and far more put together. The bend through the lengths keeps the ponytail from dropping into a heavy rope.
I like this on days when hair feels too thick to wear down and too pretty to pin away completely. Gather the hair low at the nape, leave the wave pattern intact through the tail, and wrap a small strand around the elastic if you want a cleaner finish. That small detail matters. Cheap-looking elastics do no one any favors.
A few face pieces left loose keep the ponytail from feeling severe. If the hair is very layered, let the shortest front pieces fall naturally instead of trying to force them in. Those pieces soften the line around the jaw and stop the style from looking too tidy.
This one is better with movement than with shine. A light mist of texture spray at the crown can help the style sit without slipping, especially if the hair is silky. Not stiff. Just anchored.
10. Claw Clip Half-Up Loose Waves

Claw clips are not just for lazy hair days. Used well, they create lift at the crown and leave enough hair down for the wave pattern to matter.
The trick is size. A clip that is too small crushes the hair and flattens the bend underneath. One that is too big can slide around and pull the section apart. A medium clip usually gives the best hold for shoulder-length and longer hair. Thick hair may need a stronger spring. Fine hair tends to do better with a matte clip that grabs without slipping.
Pull back only the top third of the hair, twist once, and clip it so the ends fan downward. That leaves the lower half of the hair visible, which is what keeps the look soft. If you gather too much, the style turns into a basic twist and the waves disappear into the clip.
This is a clean solution for humid days, long workdays, or those moments when the front pieces are doing their own thing. A little undone. Still deliberate. That’s the sweet spot.
11. Glossy Loose Waves for Dressier Nights

Glossy loose waves are the polished cousin of beach hair. Same bend, different finish.
The roots stay smoother, the mid-lengths stay soft, and the shine gets a little more attention. A lightweight blow-dry cream at the start, a large curling iron or wand through the lengths, and a drop of serum on the ends usually do the job. If the hair is fine, keep the serum to the last two inches only. Fine hair gets greasy faster than people expect.
What makes this version stand out is the sheen. Not grease. Shine. There is a difference, and it shows most on dark hair, where dullness can make even nice waves look tired. A fine mist of gloss spray after styling helps, but a heavy hand can turn the whole thing limp.
I like this look when the rest of the outfit is simple. A black top, a clean neckline, and waves with a little gloss do more than a pile of accessories ever will. The hair gets to be the detail.
12. Layered Waves That Show Off Long Hair

Layered hair and loose waves are a good match because layers stop the style from hanging like one heavy sheet. That is the real issue with long hair. Weight pulls the wave out of it.
Long layers give the bend somewhere to live. Face-framing layers soften the front. Shorter interior layers create movement inside the mass of hair so the style still moves when you turn your head. Without them, loose waves on long hair can look flat at the top and stringy at the bottom. Not cute. Just heavy.
If a cut is already layered, keep the wave sections random rather than perfectly uniform. Different section sizes help the layers show. A slightly larger section at the back and a slightly smaller one at the front can keep the style from collapsing into the same curve over and over.
- Ask for long layers that start around the collarbone.
- Keep the front shorter pieces angled, not chopped straight across.
- Use a 1.25-inch barrel if the hair is long and dense.
- Finish with a light texturizing mist at mid-length only.
The whole point is movement. When the cut and the wave work together, the hair looks light even when it is not.
13. Short Bob With Soft S-Bends

Can short hair handle loose waves? Absolutely. It just needs a different shape.
A bob looks best with S-bends instead of tight curls. Those bends bend around the head in a soft line and keep the ends from flipping out in a way that feels dated. A 1-inch curling iron or a flat iron used with a gentle hand can create the shape, but the sections need to stay wide and the heat needs to stay controlled.
What to Watch For
- Keep the curl away from the roots so the bob does not puff up.
- Leave the ends straighter for a cleaner edge.
- Use light product only; a heavy cream can collapse the shape.
- Turn a few face-framing pieces away from the face to open the cut.
A bob with loose waves is one of those styles that looks simple and is not. The balance between movement and shape is delicate. Too much wave, and it looks like a round halo. Too little, and the cut loses its softness.
I like this look most on chin-length to jaw-skimming bobs. Anything shorter needs a steadier hand and less bend. The smaller the cut, the more each section matters.
14. Heatless Overnight Waves
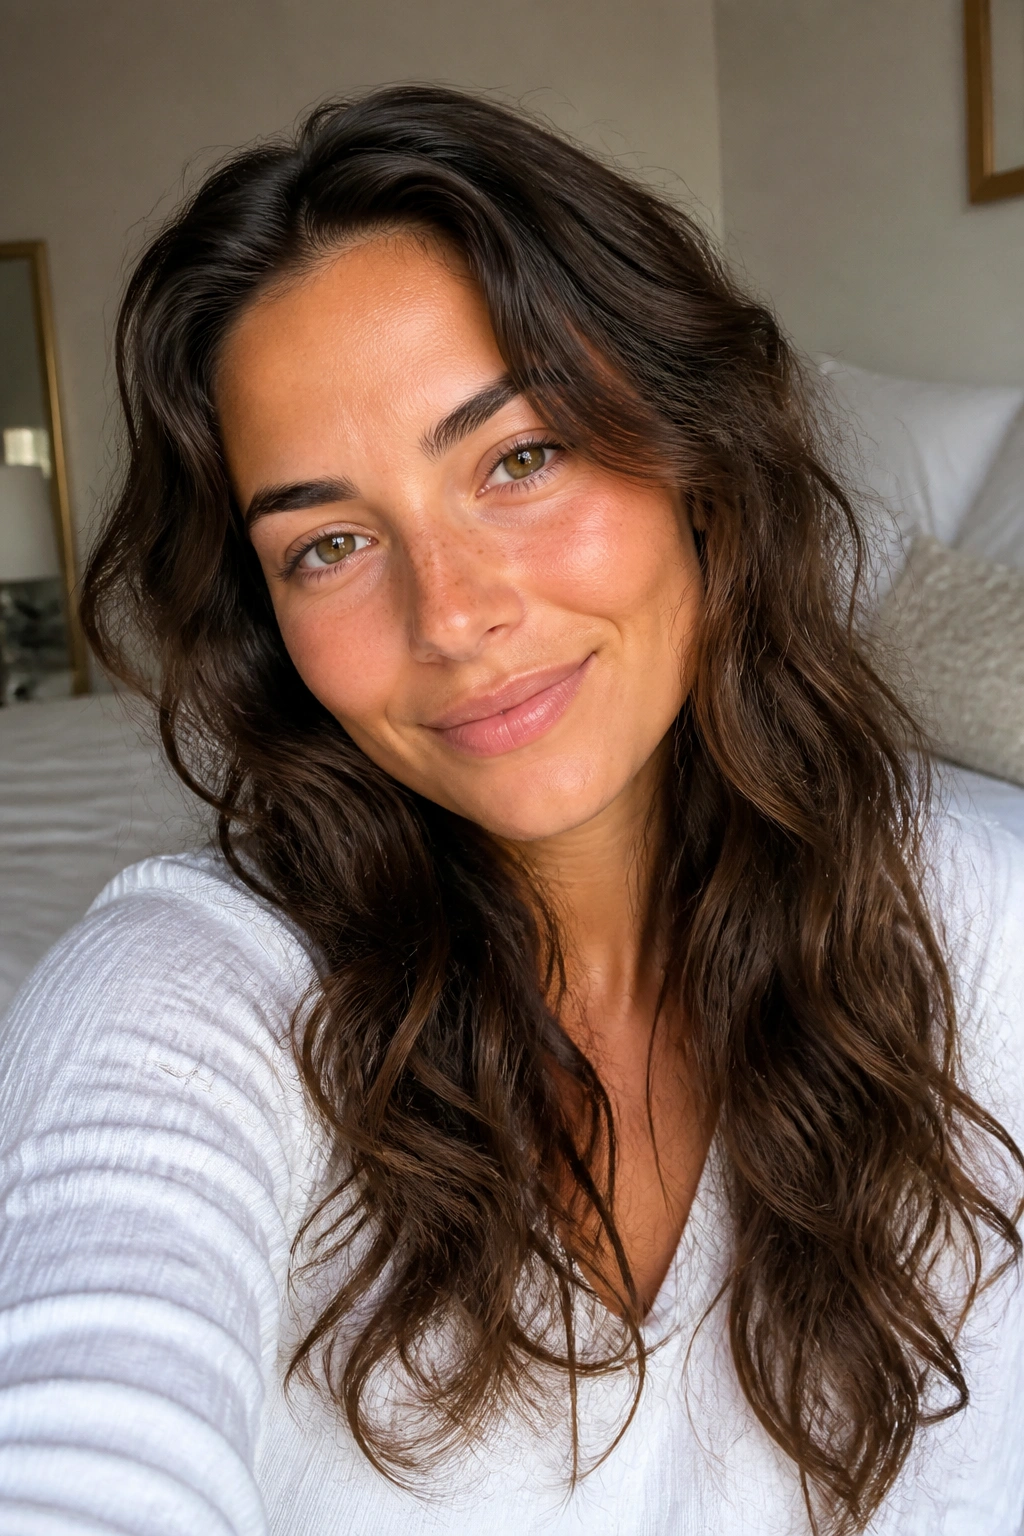
Braids are the obvious choice, but they’re not the only one. Heatless waves can come from braids, twists, rollers, or even a robe belt wrapped around damp hair if you want a looser bend.
The appeal is simple: no hot tools, less dryness, and a softer finish that often looks better the next morning than it did halfway through the night. I’d keep the hair slightly damp, not wet. Wet hair takes forever to dry and can smell odd by morning, which nobody mentions enough. Damp hair sets faster and usually holds the wave better.
Easy Heatless Options
- Two loose braids for a soft, even wave.
- One rope twist down the back for a smoother finish.
- Large foam rollers if you want a more uniform bend.
- A robe belt wrap for a loose, old-school wave pattern.
The braid size changes the wave size. Small braids make tighter bends. Bigger braids make looser ones. That part is not complicated, but it is easy to miss when you are rushing at night.
This style is especially useful for hair that gets fried easily or for anyone who wants a wave pattern without going near a hot tool on a weekday evening.
15. Loose Waves With Curtain Bangs
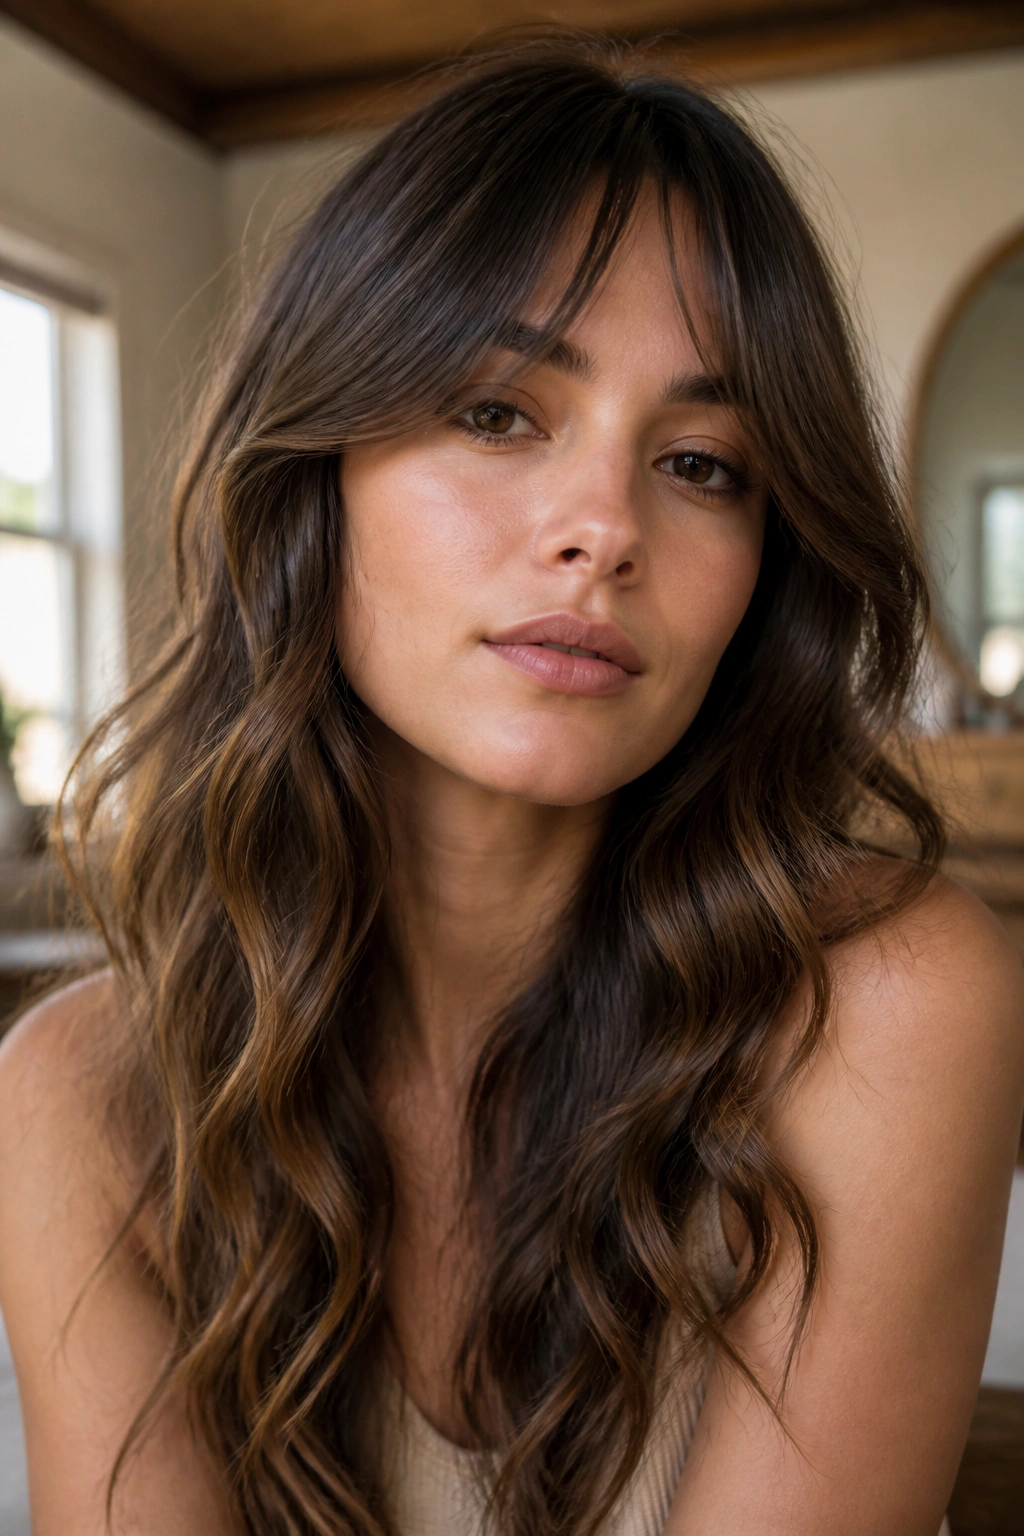
Curtain bangs make loose waves look finished fast. They frame the face, split softly at the center, and blend into the longer pieces in a way that feels easy instead of overdone.
The best part is the movement. Curtain bangs soften the front without swallowing the rest of the hair, which is a problem with heavier fringe. A round brush or a medium velcro roller can help the bangs curve away from the face, while the rest of the hair stays in that relaxed wave pattern. If the bangs curl too much, they start to fight the style. Keep them airy.
This look works especially well on medium and long lengths because the bangs connect to the wave line. The eye moves from fringe to cheekbone to length without hitting a hard stop. That is why it feels so wearable. The cut does half the styling for you.
A small amount of dry shampoo at the roots helps the bangs stay light instead of stringy. Nothing fancy. Just enough grip to keep them from separating into pieces by midday. And when the rest of the hair is soft and loose, the bangs become the quiet detail that pulls the whole thing together.
