



Shoulder-length curls are tricky in the best way. They can look airy and fresh, or they can puff out, flip weird at the ends, and sit flat where you wanted lift. Medium curl styles for shoulder hair live right in that middle zone where shape matters more than length, and that’s exactly why they’re worth getting right.
A 1-inch barrel gives a tighter bend. A 1.25-inch iron lands in soft curl territory. A 1.5-inch barrel leans more wave than ringlet. That tiny difference changes everything on shoulder-length hair, because the ends don’t have much extra weight to hide a bad pattern. So yes, placement matters. So does section size. So does whether you brush, scrunch, or leave the curl alone.
The good part is that shoulder-length hair is flexible. It can do polished waves for dinner, loose bends for work, or bouncy spirals that look lively without turning into a halo. You do not need waist-length hair to get movement. You need the right curl shape, the right balance, and a little patience with the finish.
1. Loose S-Waves for Shoulder-Length Hair

If you want the easiest curl that still looks styled, this is the one. Loose S-waves sit right on shoulder hair without fighting it. They move when you turn your head, but they do not crowd the face or make the cut feel heavy.
The trick is keeping the bend soft from root to tip. Wrap 1.5- to 2-inch sections around a 1.25-inch curling iron, then release them before they get too tight. Once the hair cools, run your fingers through it gently and stop there. A brush can work, but only if you want the waves to look softer and a little wider.
How to Make the Wave Hold
- Use a light heat protectant spray before you style.
- Curl sections away from the face on both sides for a balanced shape.
- Let each curl cool in your hand or clip it up for 30 seconds.
- Finish with a flexible-hold spray, not a stiff helmet of lacquer.
This style is great when your ends are blunt or slightly layered, because the wave keeps the line from feeling boxy. And that blunt line? It can be flattering. It makes the curl look more expensive than it has any right to look.
One small warning: if your hair is fine, use less oil than you think. Too much shine product makes loose waves fall apart fast.
2. Soft Barrel Curls with Blunt Ends
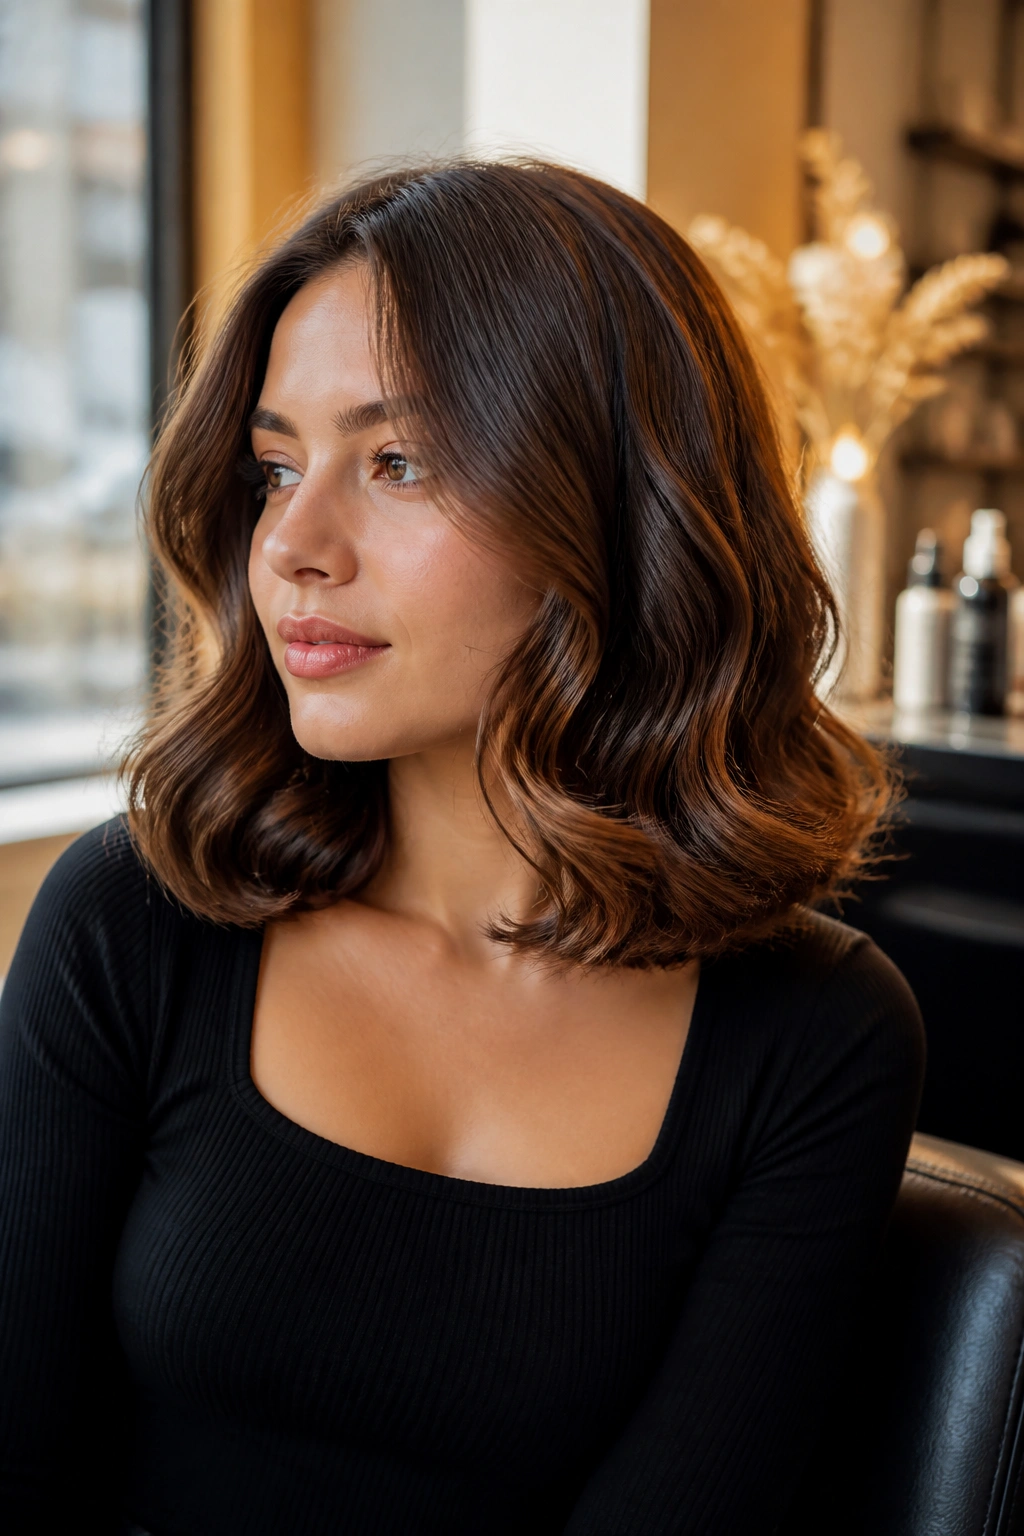
Fresh shoulder-length cuts often look a little severe on day one. Soft barrel curls fix that without hiding the shape of the haircut. The curl creates curve, but the blunt ends keep the style clean. It’s a good mix.
A 1-inch to 1.25-inch barrel works well here, depending on how much movement you want. Wrap the hair vertically for a more polished curl, or slightly diagonally if you want the ends to bend under instead of flipping out. That small shift changes the whole mood.
The finish should feel touchable, not crunchy. If you’re styling for a haircut with one-length ends, this is one of the few curl patterns that can actually make the cut look fuller instead of shorter. Weird, but true.
Why It Works on Shoulder Hair
- The curl sits above the collarbone, so it doesn’t get flattened as fast.
- Blunt ends give the hair a thicker look at the bottom edge.
- The rounded shape keeps the style from looking top-heavy.
- It photographs well from the side because the curve follows the jawline.
I like this style most when the hair is just past the shoulders. Too short, and the curl can spring up too much. A little length makes the barrel shape settle.
3. Face-Framing Curls with Curtain Bangs

Do curtain bangs and shoulder-length curls get along? Yes, if you keep the front pieces slightly looser than the rest. That’s the whole trick. Tight front curls can swallow the face. Softer face-framing bends open everything up.
Ask for layers that start around the jaw or cheekbone, then curl those front pieces away from the face. Leave the very ends slightly straighter if your hair tends to shrink when it dries. That tiny bit of straightness keeps the front from looking overdone. It also helps curtain bangs sit instead of puffing out like a curtain in a wind tunnel.
What to Ask Your Stylist
- Front layers that graze the cheekbone or jawline
- A curtain fringe that can be split cleanly in the middle
- Slightly longer pieces near the chin for balance
- Internal layering only if your hair is thick enough to need it
This style works because it gives the face a frame without making the whole head look wide. That matters on shoulder hair, where every inch of curl can change the silhouette.
If you wear glasses, this one is a nice pick. The curls tuck around the frames instead of fighting them. Easy. Clean. No drama.
4. Old Hollywood Brushed-Out Waves
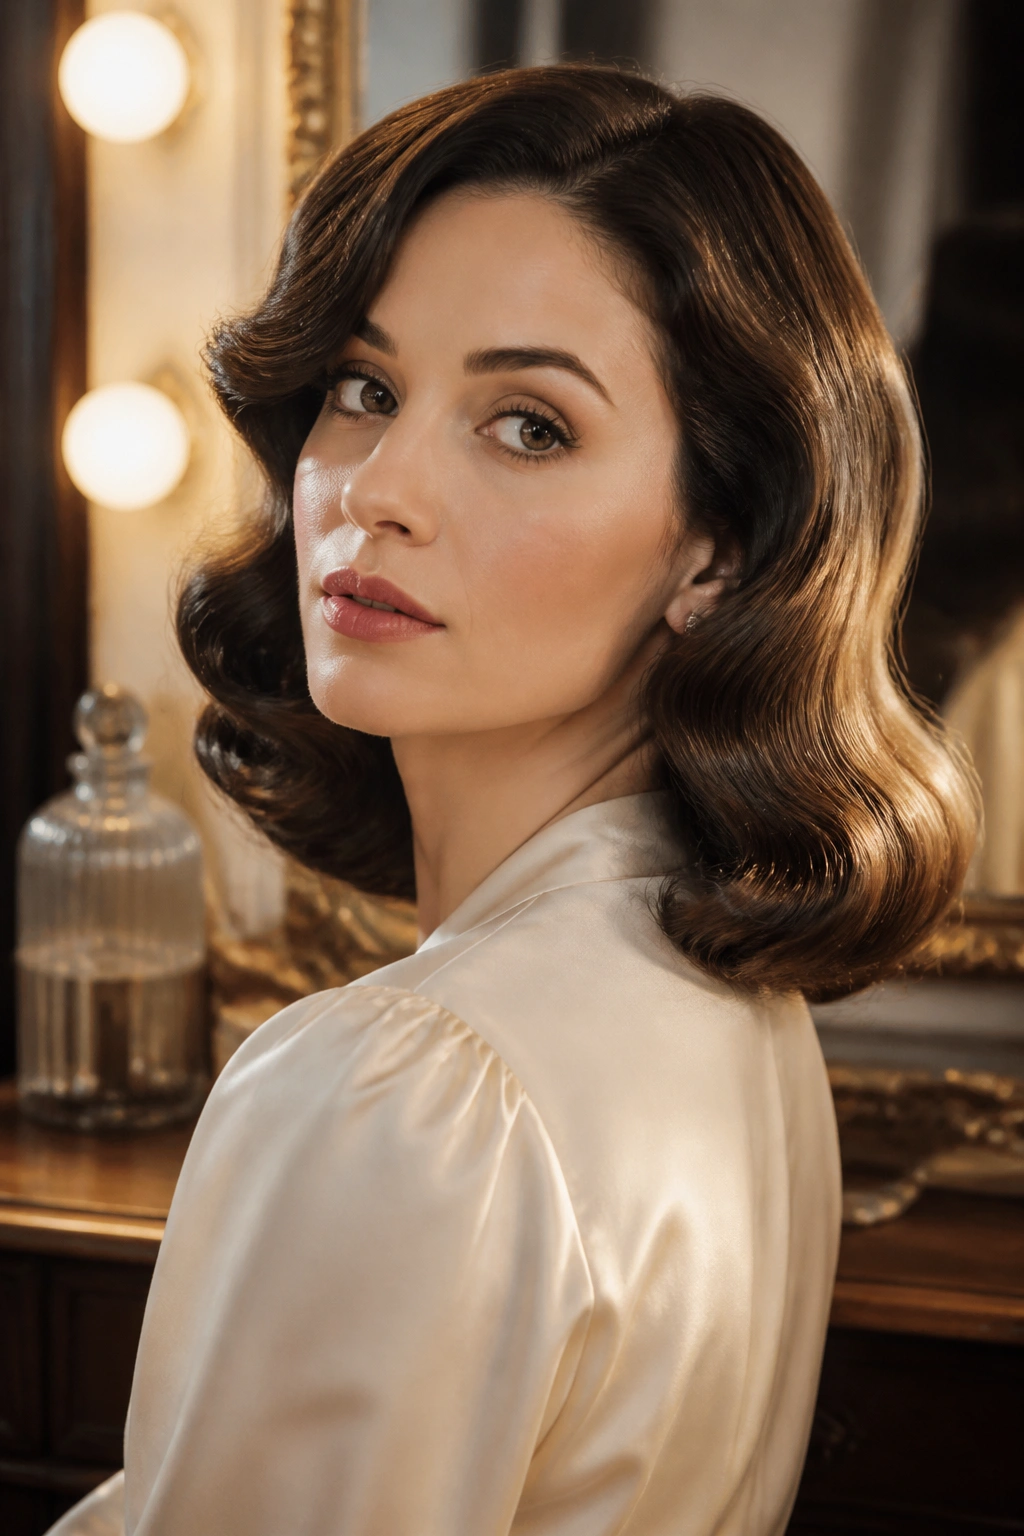
This is the style that turns shoulder hair into something sleek and grown-up without making it stiff. Old Hollywood waves are all about structure first, softness second. You curl the hair, let it cool, then brush it into one smooth pattern. It takes a little more time, but the result has real presence.
Start with a 1.5-inch curling iron if your hair is medium density, or a 1.25-inch iron if it’s finer and needs more bend. Curl all sections in the same direction on each side of the part, clip them while they cool, and then brush them out with a boar-bristle brush or a very soft paddle brush. The waves should merge into one polished shape, not separate into little curls.
A shine spray helps here, but keep it light. You want gloss, not grease. One mist over the surface is enough.
The thing people miss with this style is the finish line. Don’t over-pull the hair when you brush it. Let the wave stay round near the cheek and jaw. That’s what gives it the old-film look instead of a flat, salon-blown one.
It’s a little more formal than the other styles in this list. That’s fine. Not every curl needs to pretend it just rolled out of bed.
5. Messy Beach Curls with Texture Spray
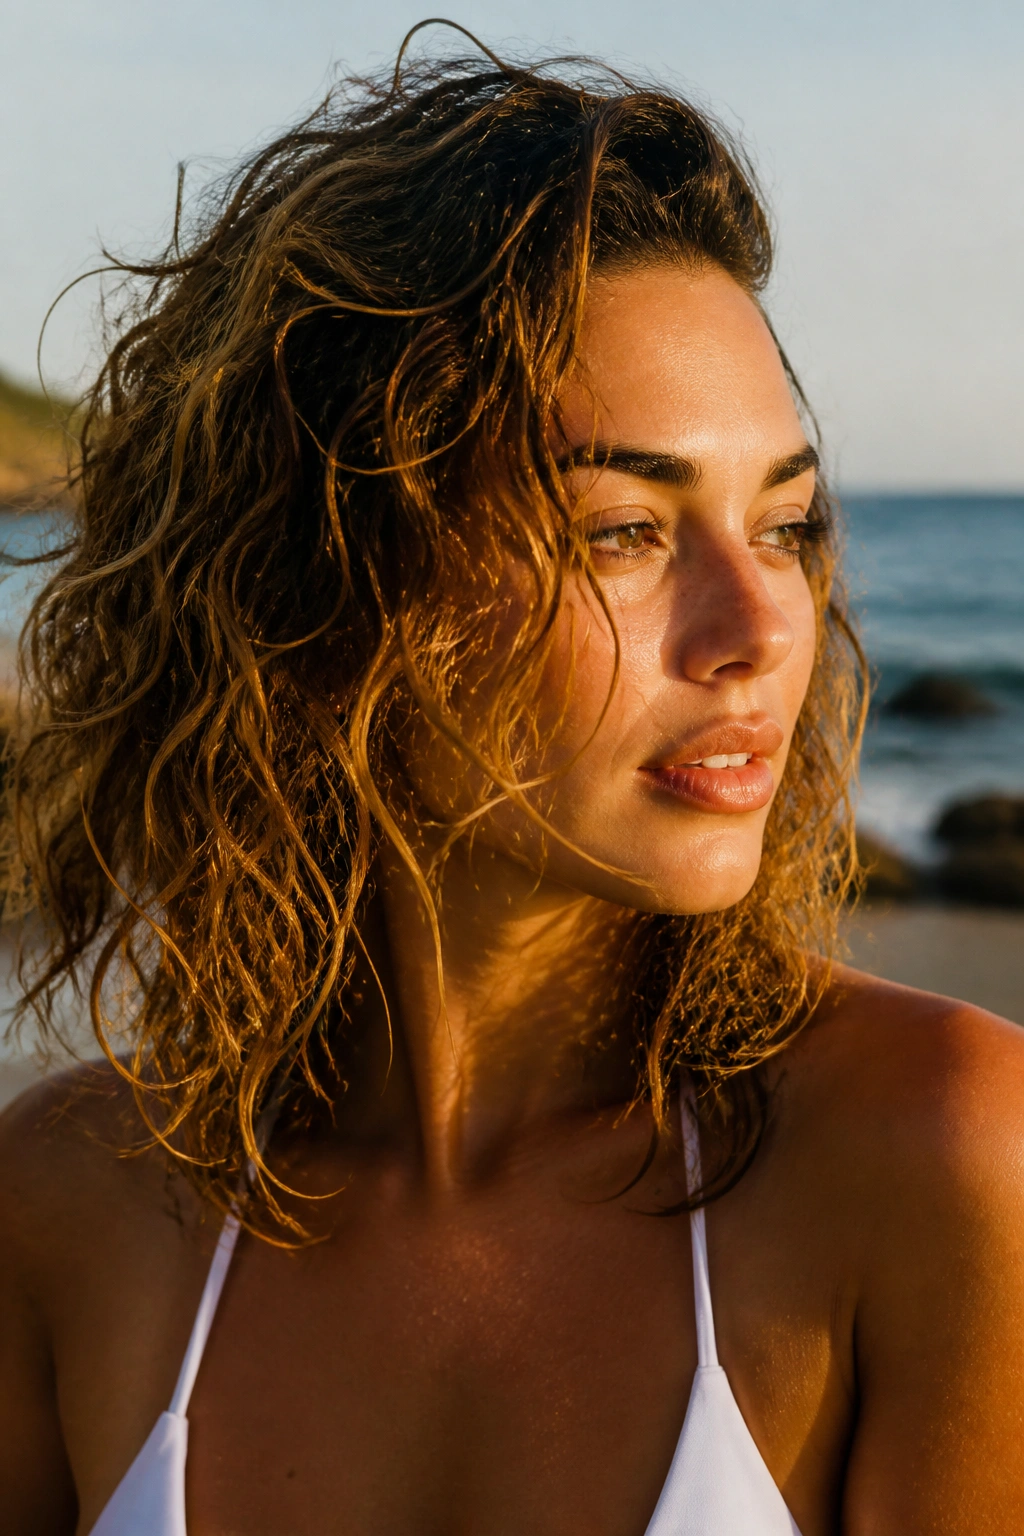
Some shoulder-length hair needs a style that can survive a long day without looking too neat. Messy beach curls do that job. They look casual, but there’s still enough shape to keep them from turning into frizz.
Use a texturizing spray or a light sea-salt spray on damp hair, then rough-dry the roots first. Once the hair is mostly dry, wrap random sections around a curling wand and leave the ends out on a few pieces. That mixed finish makes the curl pattern look natural instead of copied and pasted.
What Makes Them Work
- The root gets a little lift from the rough dry.
- The mid-lengths pick up bend without becoming too uniform.
- The ends stay a touch straighter, which keeps shoulder hair from looking too short.
- Texture spray gives the style grip, so it doesn’t collapse after an hour.
This is the one I’d choose for hair that tends to go flat at the crown. It gives the top half a bit of lift without teasing the life out of it. Teasing still works, sure, but it’s messy in the wrong way if you go too far.
A one-sentence truth: messy does not mean careless. A good beach curl still has a plan.
6. Defined Ringlets with Layered Shoulder Hair

Why do some curls pop while others sag? Usually, it comes down to layering and section size. Defined ringlets need enough movement in the cut to spring upward, but not so much weight that the curl is dragged straight as it dries.
This style looks especially good on shoulder hair with soft layers around the bottom third of the head. Use a smaller barrel — around 3/4-inch to 1-inch — and take clean sections about the width of your finger. If the section is too wide, the curl won’t set evenly. If it’s too tiny, the style can look overworked. Small, clean sections are the sweet spot.
How to Keep the Ringlet Shape
- Apply curl cream to damp hair, then comb it through.
- Twist each section in the same direction if you want a neat pattern.
- Diffuse on low heat and low speed.
- Stop drying when the curls feel springy, not crispy.
This style has a little more personality than loose waves. It also takes more discipline. Don’t rake your fingers through it too soon. Let it set first. If you don’t, the ringlets spread out and lose the bounce you wanted in the first place.
It’s a strong look for thick hair, especially when the layers keep the shape from getting heavy around the shoulders.
7. Half-Up Curled Crown

Half-up curls are the rescue plan for shoulder hair that keeps falling into your face. They also solve a smaller problem people don’t talk about enough: curls at shoulder length can get flattened at the back when you lean on them, tuck them behind your ears, or wear a coat.
Pull the top section back with a small clip, a clear elastic, or a narrow barrette. Leave the curl pattern loose through the lengths so the style still feels soft. You want the crown to look intentional, not like you forgot to finish your hair. That means taking a clean section from temple to temple and smoothing the roots before you pin.
This style works in a few different ways. It opens up the face. It keeps the front pieces from turning frizzy first. And it lets the lower half of the hair keep the movement that makes curls fun to begin with.
A tiny detail matters here: if the top section is too tight, the whole style loses balance. Keep a little lift at the crown. Just a little. Enough to make the shape breathe.
This one is a smart pick for second-day curls, which often look better half-up than fully down.
8. Deep Side-Part Glam Curls

A deep side part can change shoulder-length curls faster than a new haircut. It shifts the weight, adds lift on one side, and makes even simple curls look styled. If the crown tends to lie flat, a side part is the fastest fix I know.
Curl the hair in the direction that supports the part, then tuck one side slightly behind the ear and let the other side fall forward. The contrast is what gives the style its shape. You can keep the curls soft or polish them up more, but the part does most of the visual work.
This style is especially kind to shoulder hair that sits somewhere between wavy and curly. It gives the hair a stronger shape without demanding perfect curls everywhere. And no, the part does not have to be extreme. A subtle deep part already changes the profile a lot.
A few things make the style hold better:
- Root spray at the crown before drying
- A round brush lift at the part line
- Curling the heavier side away from the face
- A touch of spray at the roots, not just the ends
If you want volume without teasing, start here. It’s one of the few tricks that actually earns its reputation.
9. Spiral Curls with a Layered Lob
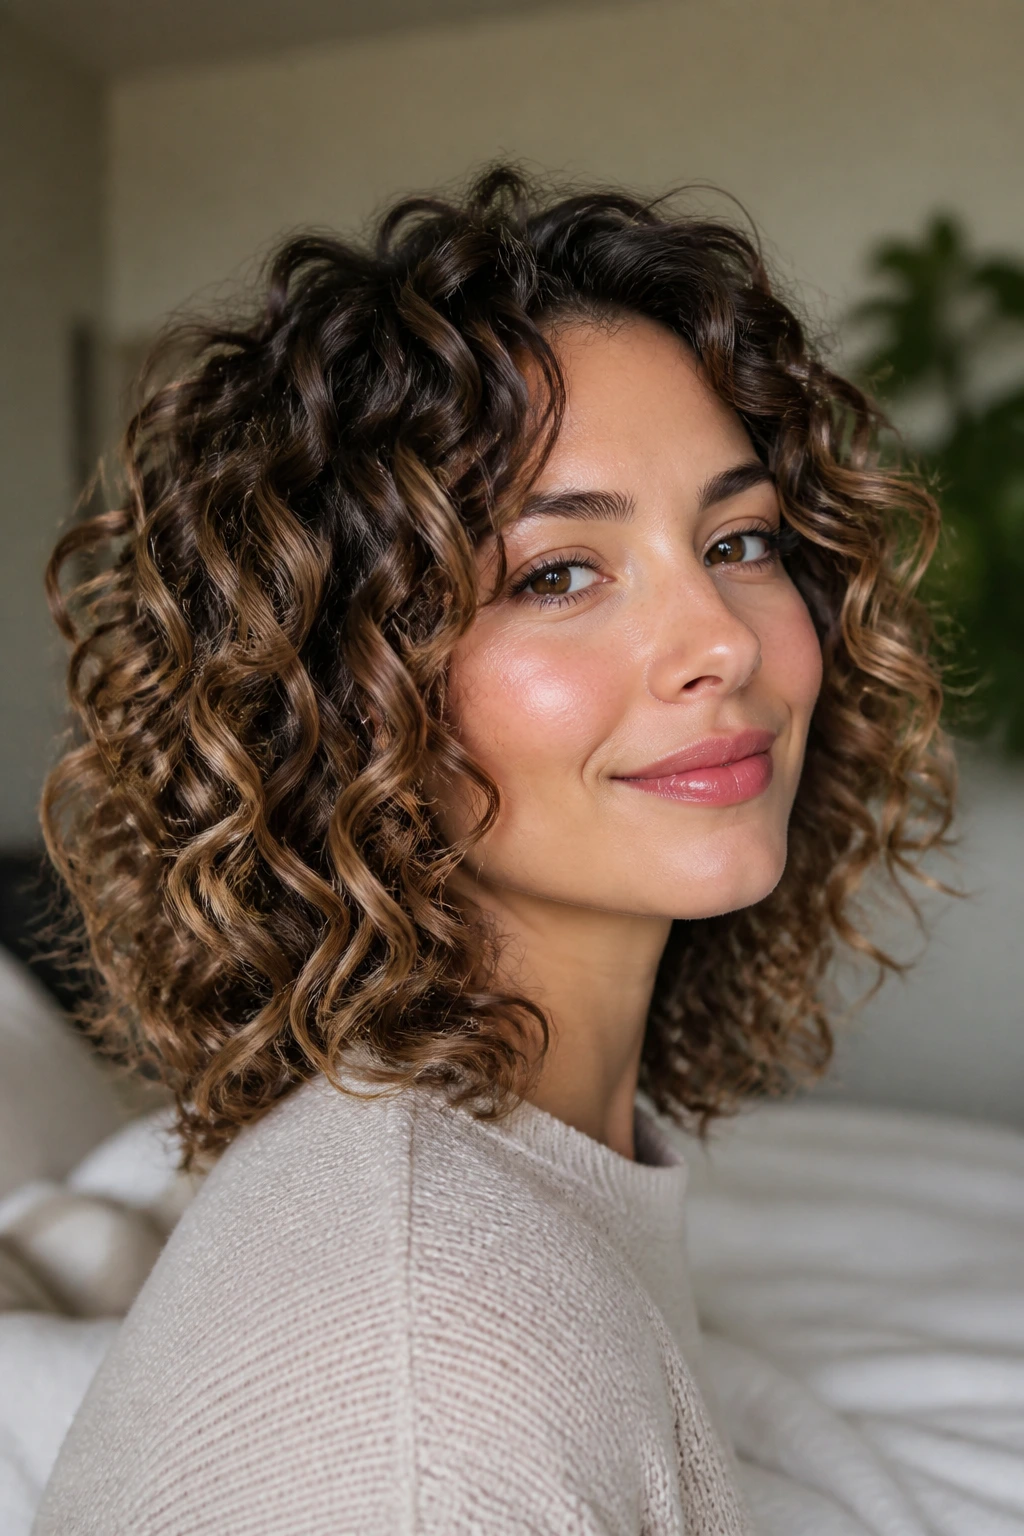
Spiral curls are a little more structured than waves, and shoulder hair can wear them beautifully when the cut has layers. The layers stop the curl from bunching up into one thick block. Without them, the shape can look round in a way that feels heavy. With them, each curl has room to move.
Use a small curling wand, about 3/4-inch, and wrap clean sections around it from mid-shaft to ends. Hold each piece for 8 to 12 seconds if your hair takes heat well, or less if it heats up fast. The spiral should look neat before you touch it. That’s the sign you’ve done it right.
A wand gives this style a softer grip at the ends than a clip iron does. That’s useful on shoulder hair, where ends can flare out if they’re overworked. The best finish is springy, not hard.
What I like most here is the way the curl pattern shows off layers. You can actually see the haircut doing its job. That’s rare enough to deserve attention.
If your hair is thick, use fewer sections and let each spiral cool before you separate it. If it’s finer, a light mousse at the roots helps the style stay lifted without turning stiff.
10. Heatless Set Waves with Rollers
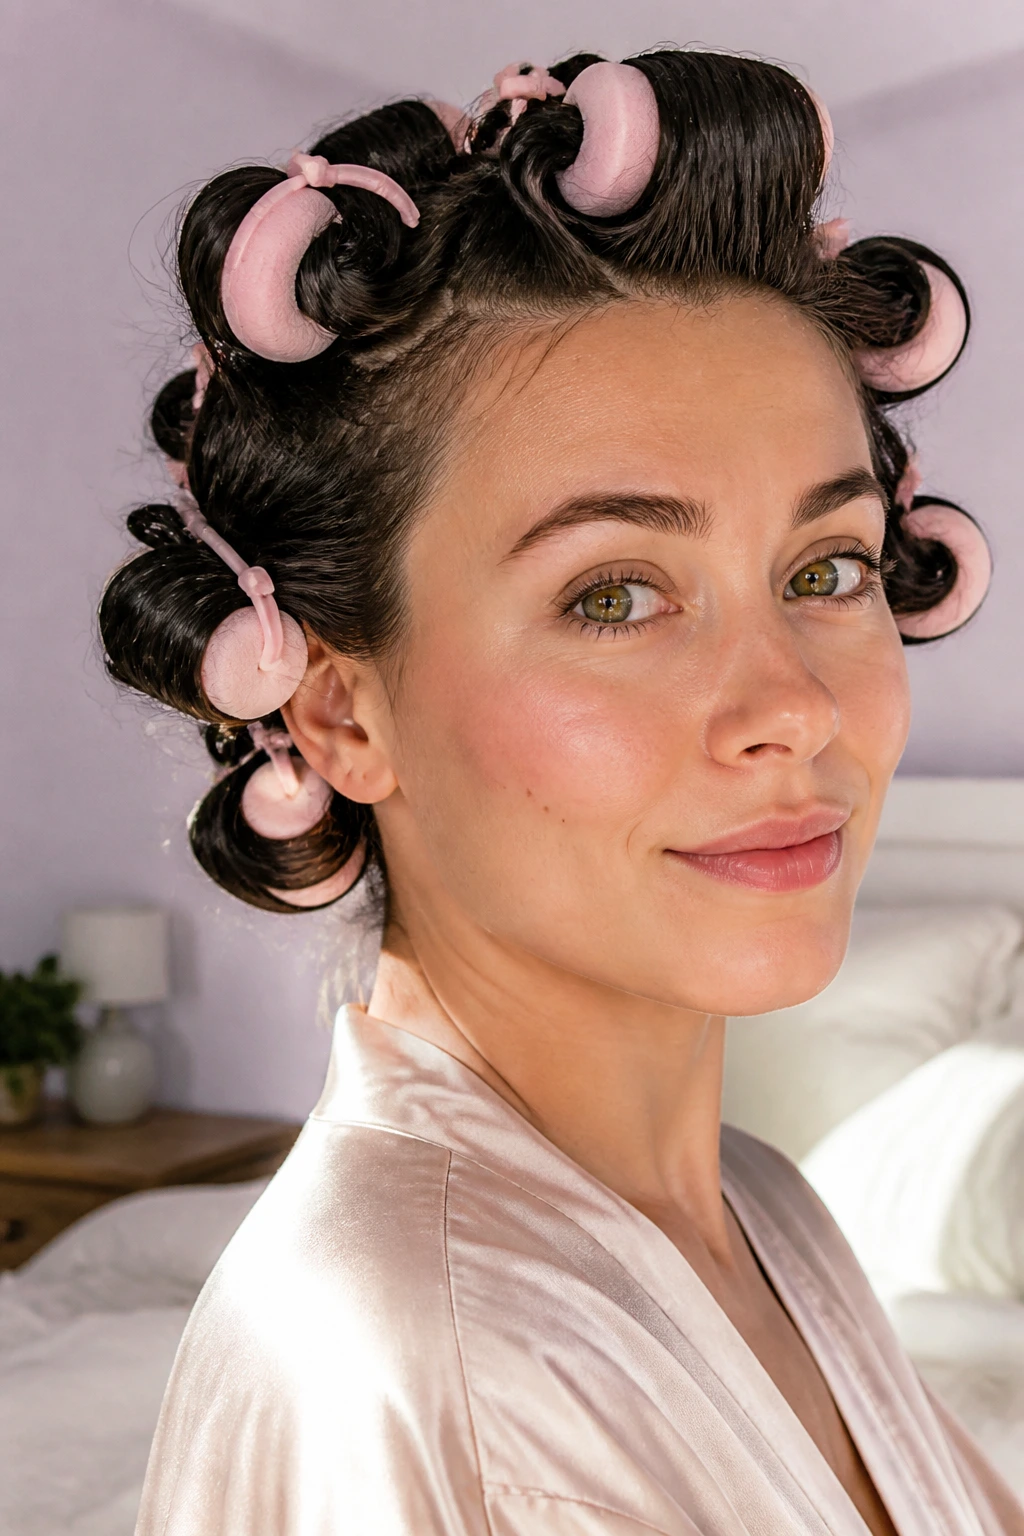
Do you need heat for shoulder-length curls? Not always. Heatless set waves can give you a softer pattern, and they’re easier on hair that’s already dry at the ends. The style is especially useful if you want movement but don’t want to hear your curling iron sizzling every morning.
Use foam rollers, Velcro rollers, or flexi rods on hair that is damp, not soaking wet. If the hair is too wet, the roots stay flat and the set takes forever to dry. If it’s too dry, the hair won’t mold well. Damp is the sweet spot. Work in sections, roll them in the direction you want the curl to fall, and leave the set alone until the hair is fully dry.
How to Get a Clean Heatless Set
- Mist hair lightly with water if it starts drying too fast.
- Set the crown in the direction of the part for lift.
- Roll the ends smoothly so they don’t kink.
- Unroll only when the hair feels dry all the way through.
This style can look old-school in a good way, especially on shoulder hair with a little layer around the face. The wave tends to be smoother than heat-styled curls. Softer, too.
One warning: if you rush the dry time, the set falls apart. That is the whole game here.
11. Flipped-Out Shoulder Curls

Flipped-out ends give shoulder hair a little attitude. They’re not as formal as barrel curls and not as laid-back as beach waves. That middle ground is exactly why they work.
You can make the flip with a round brush and blow-dryer, or with a flat iron if you prefer more control. The key is bending the ends outward at about a 45-degree angle instead of curling them under. On shoulder-length hair, that outward turn keeps the cut from feeling boxy. It also draws attention to the line of the haircut in a good way.
This style is especially useful when you’ve got slightly layered ends that tend to snag inward or puff outward on their own. A deliberate flip puts the shape back where you want it.
There’s a clean, sharp look to it that I’ve always liked. Not harsh. Just neat.
A few practical notes:
- Use a small round brush if you want a softer flip.
- Hold the iron only at the last inch or so of hair.
- Set the bend with a light spray while the ends are still warm.
- Keep the rest of the curl pattern loose so the ends stand out.
It’s a nice option for workwear, blazers, and plain tops that need a little lift.
12. Curly Shag with Choppy Layers
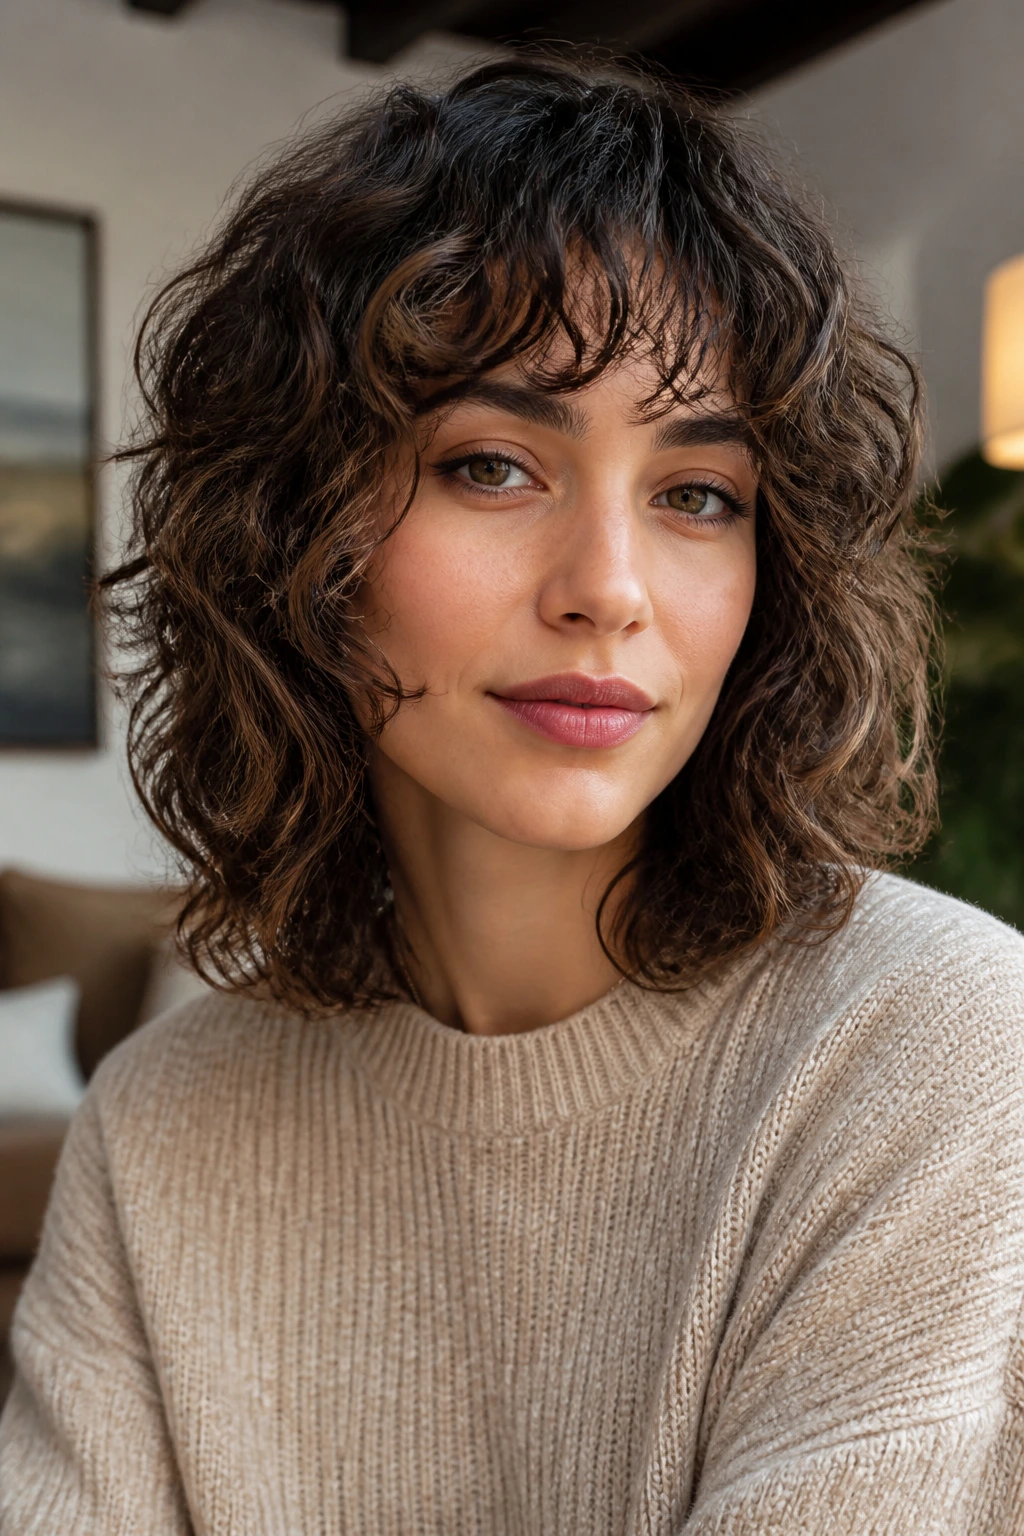
Not every shoulder-length style needs to be polished. Some hair looks better with edge. The curly shag leans into that, and on the right head of hair it can look almost easy in the best possible way.
Choppy layers remove bulk and let curls stack in a more uneven, lively shape. That matters if your hair sits heavy at the bottom or puffs only at the crown. A shag spreads the energy around. The result feels less like one solid block of curls and more like a moving shape with some air in it.
This cut usually likes a diffuser, a curl cream, and a hands-off drying routine. Scrunch the product in, flip your part where it naturally wants to sit, and let the texture do its thing. Touching it too much can flatten the pieces that make the shag work.
I’d especially recommend this for dense hair. Shoulder length can turn bulky fast, and choppy layers stop that from happening. They also make the curl pattern easier to read, which is useful if your texture is mixed — wavy in some sections, curlier in others.
A shag is not neat. That’s the point. It’s the rare style where a little mess is part of the finish.
13. Polished Curly Ponytail

Need the curls off your neck but still want them to look like a style, not a fallback? A polished curly ponytail handles that better than most people expect. On shoulder-length hair, the ponytail sits high enough to show off the curl pattern and low enough to keep the shape soft.
Leave a few face-framing pieces out, smooth the top with a brush or your hands, and gather the curls without pulling too hard. A tight ponytail can crush the curl pattern near the base. A looser hold keeps the texture alive. If your hair is layered, use a small amount of styling cream on the top section first so the shorter pieces stay down.
What Makes It Look Intentional
- Wrap a small strand around the elastic.
- Keep the crown smooth, not slicked flat.
- Curl the tail again if the ends lose shape.
- Use a clip or pin if you want height at the base.
This style is a practical one, but not boring. It works for errands, dinners, and those days when you’re done dealing with your hair but still want to look like you made a choice. Because you did.
If your shoulder curls are frizzing at the ends, a ponytail is also a decent way to hide the damage without pretending it isn’t there.
14. Air-Dried Natural Waves with Curl Cream
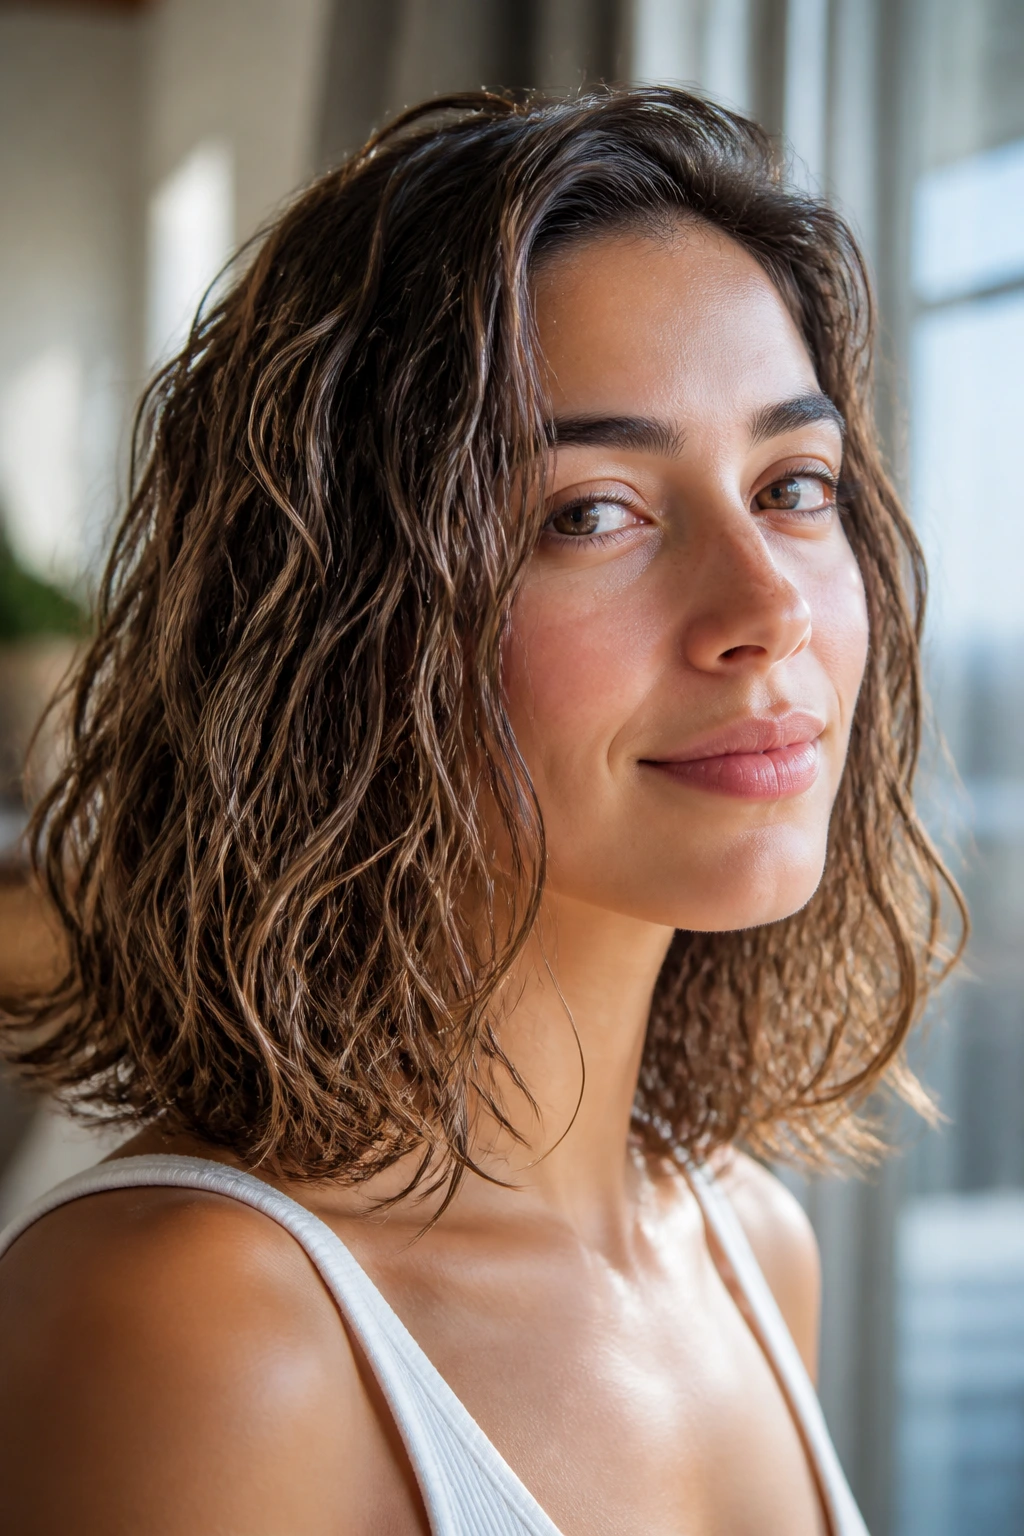
Air-dried waves are often the most honest style in the room. They show what your hair actually does, which can be a relief after heat styling. On shoulder-length hair, that natural pattern can look relaxed and full, especially if you give it a little structure with product.
Start with damp hair and work in a small amount of curl cream or leave-in conditioner from mid-length to ends. Don’t pile it on at the roots unless your hair is dry there and needs help. Then scrunch the hair upward with your hands or a microfiber towel. A cotton T-shirt works in a pinch, though it doesn’t grab as much water.
The real trick is resisting the urge to touch it while it dries. That’s hard. I know. But touching sets you back because it breaks up the clumps before they finish forming.
This style is one of the few that gets better when the hair has a little natural irregularity. The wave doesn’t need to be even from side to side. In fact, a slightly uneven finish often looks more natural on shoulder hair than a perfect pattern does.
If your hair likes to go flat at the crown, clip the roots up for a bit while it dries. Small detail. Big payoff.
15. Shoulder-Grazing Curly Lob
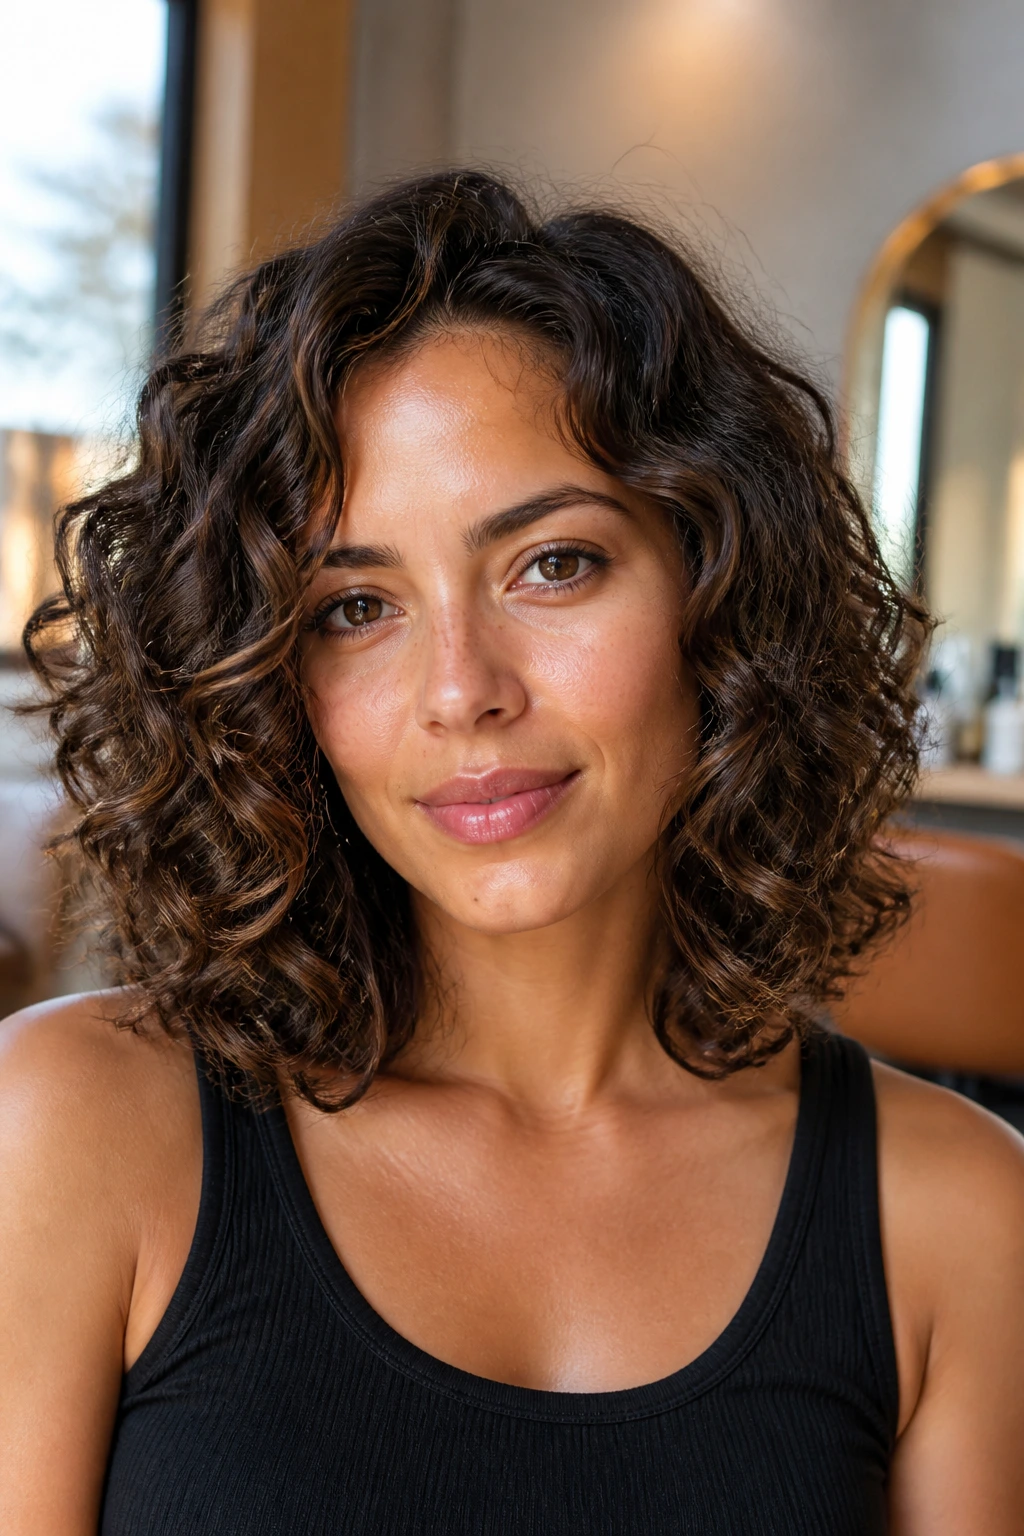
The shoulder-grazing curly lob is the style that quietly does almost everything well. It has enough length to show off a curl pattern, enough shape to look neat, and enough movement to keep the hair from feeling heavy. That balance is rare.
A lob that sits just on or below the shoulders gives curls room to stack without puffing out too wide. Add soft layers through the mid-lengths, and the whole cut starts moving instead of sitting there. You can wear it center-parted, side-parted, brushed out, or left in tighter spirals. It handles all of that without losing its identity.
This is the style I’d point someone toward if they want a medium curl look that does not box them into one styling routine. It works with a curling iron, with rollers, with air-drying, and with second-day texture. That kind of flexibility matters more than people admit.
A few things make it look especially good:
- Ends trimmed every 8 to 12 weeks to keep the line clean
- Layers that remove weight without creating holes
- A light curl refresher mist on the second day
- Minimal product at the root so the shape stays lifted
If you want one shoulder-length curl style that can handle work, weekends, and the odd formal event, this is probably the one I’d reach for first. Not flashy. Just solid, and that counts for a lot.
A good shoulder-length curl doesn’t need to shout. It needs shape, a little control, and an end finish that feels deliberate instead of accidental. Get those three things in place, and the rest gets easier fast.
