



Naturally wavy hair has a funny way of looking its best right after you stop fighting it. The trouble starts when a cut is too blunt, the part sits in the wrong place, or the style asks your waves to behave like straight hair. Then you get puff at the sides, flat roots, and ends that stick out like they missed the memo.
The best hairstyles for naturally wavy hair work with the bend you already have. They give the wave room to move, but they also keep it from swallowing your face or turning into a frizzy cloud by lunchtime. A 2A wave usually needs a lighter hand than a thick 2C bend. Fine hair and coarse hair tell different stories too, even when the pattern looks similar on paper.
That’s why so many wavy-haired people end up cycling through the same half-dozen styles. Some need something fast for a rushed morning. Some want polish without a blowout. Some want a cut that looks good even when they only diffuse the top layer and let the rest air-dry. Different moods. Different fixes.
The styles below lean into movement instead of wrestling it flat. Some are easy, some are a little more dressed up, and a few are the kind of thing you throw together when your hair has decided to do its own thing and you’d like to look intentional anyway.
1. The Center-Part Air-Dry
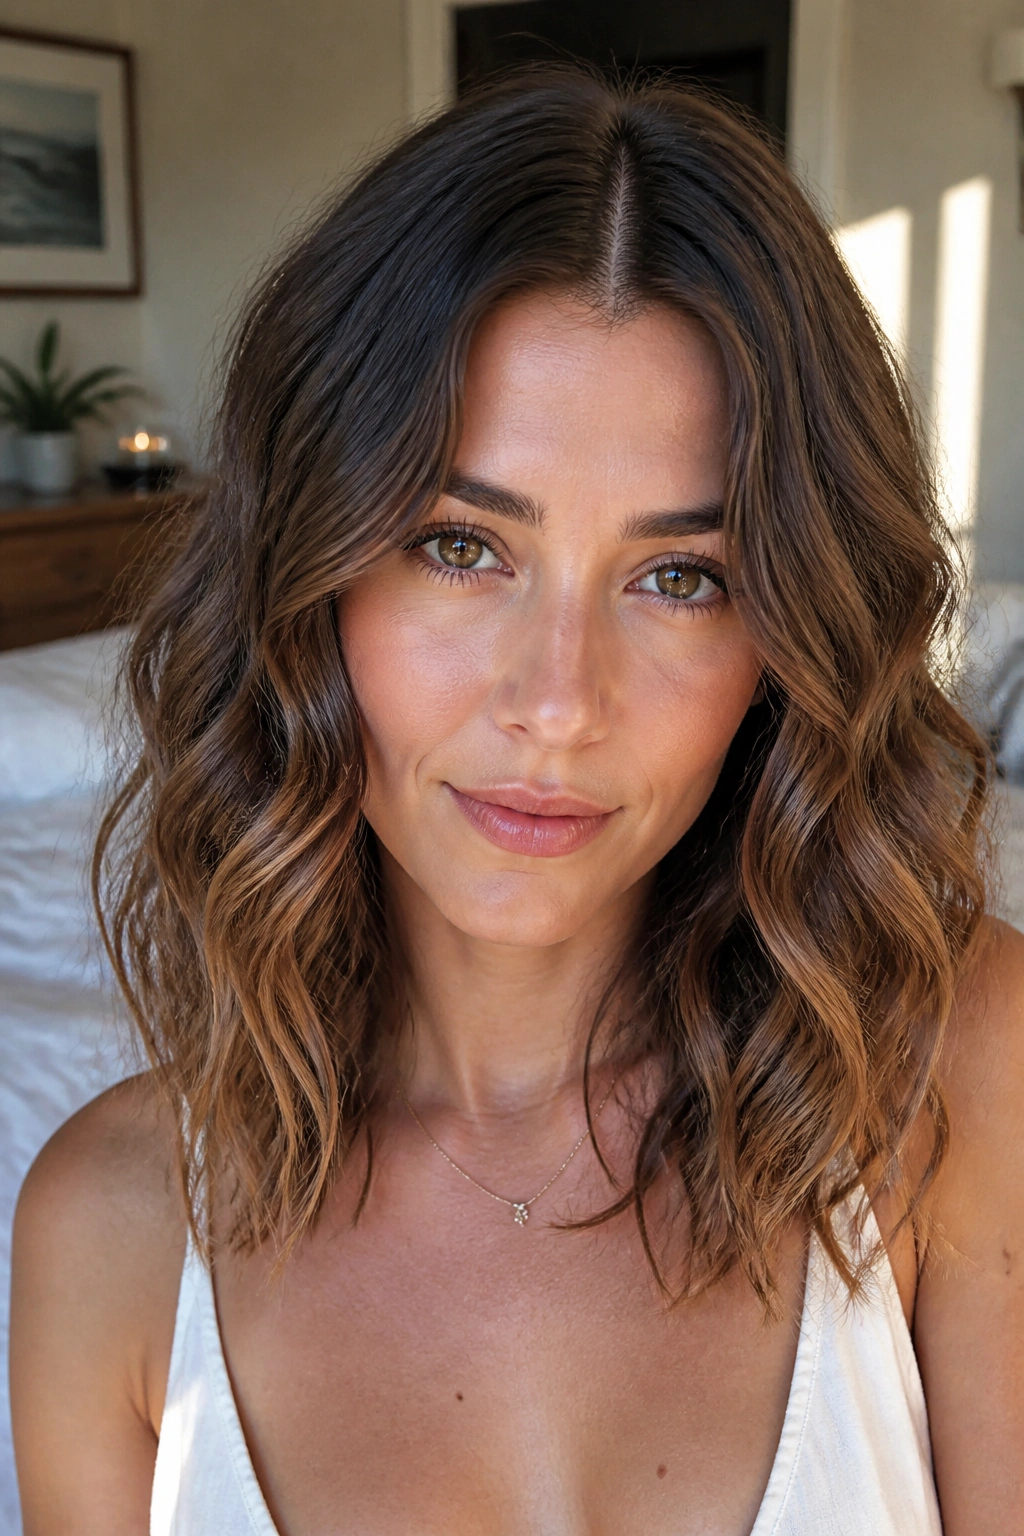
A clean center part can make wavy hair look sharper without making it stiff. It gives the wave a simple frame, which is often enough when your texture already has good body. I like this style most on shoulder-length and longer hair, because the shape falls in a natural line and the ends don’t puff out as easily.
Why It Works
The center part creates balance. On wavy hair, balance matters more than perfection, because the hair is already doing some of the work for you. If you rough-dry the roots a little and then leave the lengths alone, the bend usually settles into soft S-shapes instead of frizz.
A little product goes a long way here. Use a quarter-size amount of lightweight mousse or curl cream on damp hair, then scrunch with a microfiber towel or an old T-shirt. That’s enough for most medium-density waves.
- Best for hair that air-dries with a visible bend
- Works especially well on day-two or day-three texture
- Needs only a small amount of product at the roots
- Looks best when you avoid brushing after drying
Tip: If the center part makes your face look too long or your roots fall flat, shift it off-center by half an inch. Tiny move. Big difference.
2. Long Layers for Naturally Wavy Hair

Long layers are the fastest way to keep wavy hair from feeling heavy. A blunt one-length cut can drag the wave downward, especially if your hair is medium to thick. Layers give the bends room to stack instead of hanging in one flat sheet.
Ask for soft, internal layers that start around the chin or collarbone, not a bunch of short choppy pieces all over your head. That distinction matters. Too many short layers can make the top half puff while the ends look thin, and that’s a mess nobody wants to spend 20 minutes fixing.
What I like here is the movement around the face. A few longer pieces that hit the cheekbones can soften the whole cut without turning it into obvious “layers for layers’ sake” hair. It feels easier to wear down, and it still goes into a ponytail without little broken bits sticking out everywhere.
If you air-dry, flip your part from side to side for the first ten minutes. It helps the roots lift without heat, and it keeps the layers from drying in one stiff direction. Weight is the enemy here. Keep the ends light.
3. The Textured Lob for Naturally Wavy Hair

Why does the lob keep showing up on wavy hair? Because it’s one of the few cuts that can look polished, casual, and slightly undone without asking your wave pattern to perform tricks. A lob that lands somewhere between the jaw and collarbone gives waves enough length to show their shape, but not so much length that they collapse under their own weight.
The sweet spot is usually a little below the chin and a little above the shoulders. Too short and the wave can flare out. Too long and the style starts to lose the sharp outline that makes a lob feel fresh in the first place.
How to Style It
A side part often works better than a strict center part here, especially if your waves are loose. After washing, work a small amount of wave cream through damp hair, then rough-dry the roots until they’re about 70 percent dry. Let the lengths finish on their own.
If one side turns flat, tuck it behind the ear for an hour. Sounds too simple, I know. It works.
A textured lob is also a good place to use a 1-inch curling iron only where needed. I’d touch up the front pieces and ignore the rest. That keeps the style from looking overdone, which is the whole point.
4. Curtain Bangs with Loose Waves

Curtain bangs are a sneaky fix for wavy hair that feels a little too bottom-heavy. They shift attention upward and break up the shape around the face, which helps if your waves are strong in the lengths but limp at the roots. Done right, they blend into the rest of the hair instead of sitting on top like a separate haircut.
The best version usually starts with bangs that hit somewhere between the eyebrows and the cheekbones when dry. Wavy hair shrinks and bends, so cutting them too short is how you end up with a fringe that lives nowhere near your face. Been there. Not cute.
What to Tell Your Stylist
- Ask for bangs that open in the middle and get longer at the sides
- Keep the shortest point soft, not blunt
- Blend the side pieces into the front layers
- Leave enough length to tuck them back on bad days
Curtain bangs also buy you more styling options. Blow-dry just the front section with a round brush or a large roller, then let the rest of the hair stay wavy and loose. That contrast is what makes the style work. A soft bend at the front, a looser wave everywhere else, and suddenly the whole thing looks finished.
5. Soft Shag with Feathered Ends

The shag has a bad reputation in some circles because people remember the choppy versions that looked like they were attacked by thinning shears. A softer shag is a different animal. It uses layers to bring out the wave pattern, but it keeps the edges feathered and the shape wearable.
This is a good cut when your waves need lift at the crown and a little less bulk at the bottom. Fine to medium hair gets a nice boost from it, though thicker hair can wear it well too if the layers are kept controlled. The key is not shaving the whole shape down into a mess of short pieces.
Choppy is not the same as messy.
A soft shag loves a little styling cream and a little patience. Scrunch in a lightweight mousse, clip the crown for root lift while your hair dries, and avoid brushing it once the wave starts to set. If you need to refresh it on day two, mist the ends with water and squeeze them back into shape with your hands.
This cut does best when you keep up with trims. Not every month, but often enough that the feathered layers stay airy instead of stringy. If the ends start to feel frayed, the whole style loses its charm fast.
6. The Half-Up Twist Crown
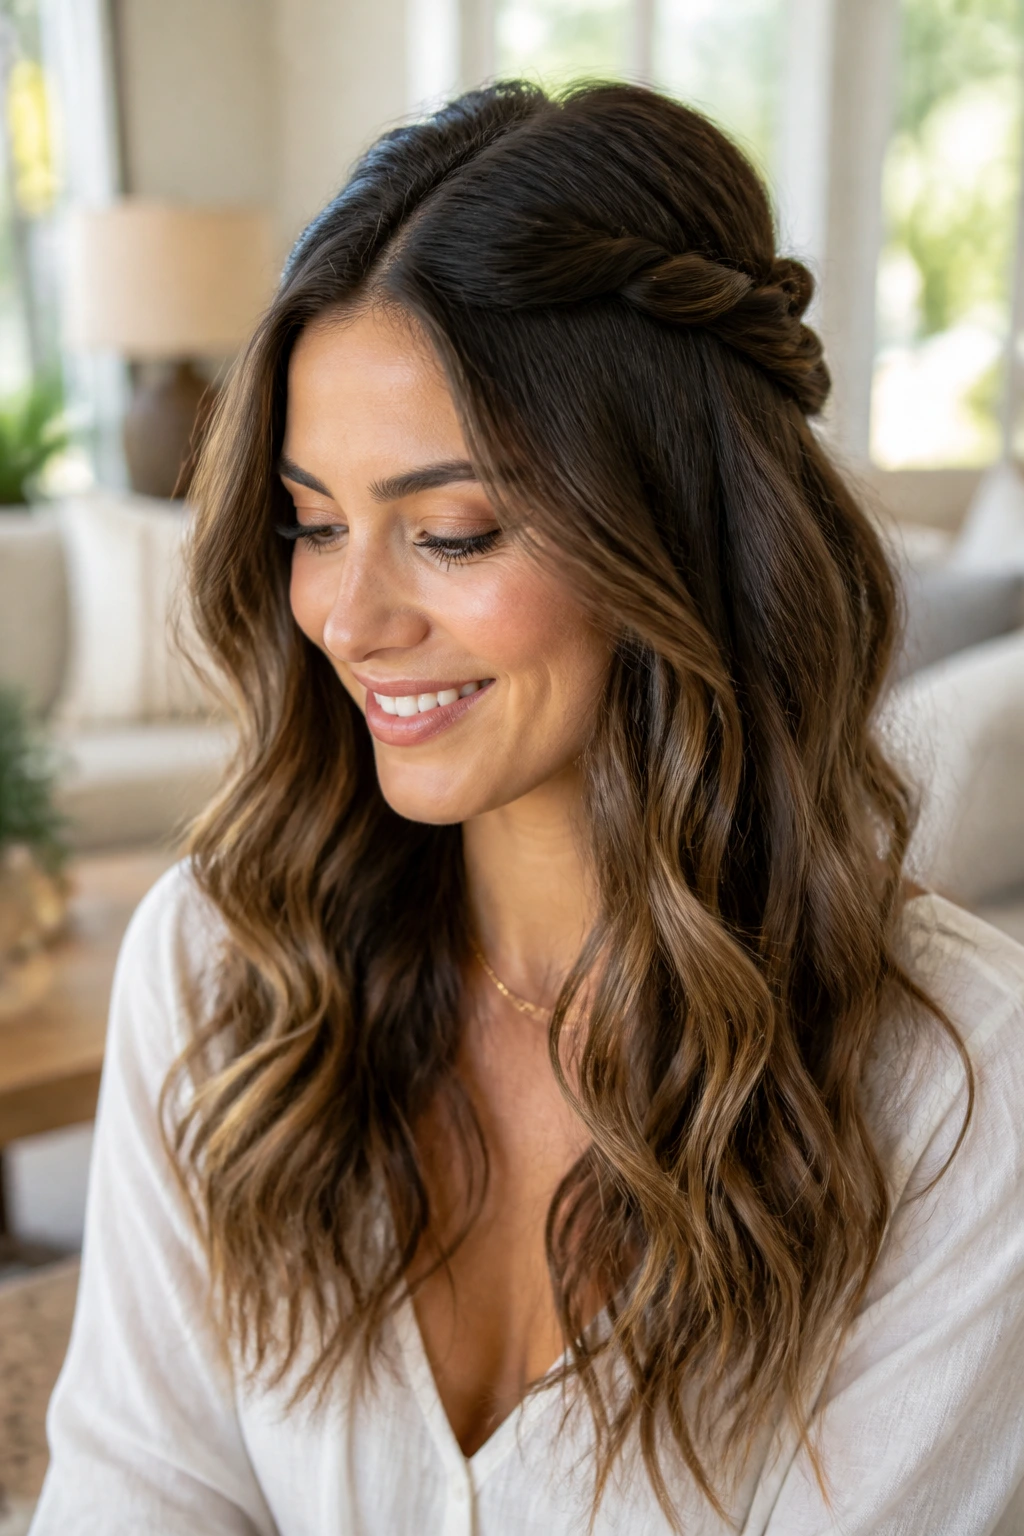
Unlike a full braid, a twist crown gives you shape without demanding perfect sections. That’s why it’s one of my favorite easy hairstyles for naturally wavy hair when you want the top half controlled but still want the texture to show through. It looks planned, not fussy.
Start by taking two sections from either side of your temples, each about 2 inches wide. Twist them back toward the crown, cross them, and pin them underneath a small top layer so the pins disappear. Leave the rest of the hair loose and let the waves do the rest.
This works especially well on second-day hair, when the front pieces have gone a little flat but the lengths still have life. A tiny mist of flexible-hold spray helps, but don’t soak the twist. You want grip, not crunch.
The beauty of this style is the balance. The front stays out of your face, the crown gets a little lift, and the back still moves when you walk. That’s a rare combination. Use it.
7. The Claw-Clip French Twist
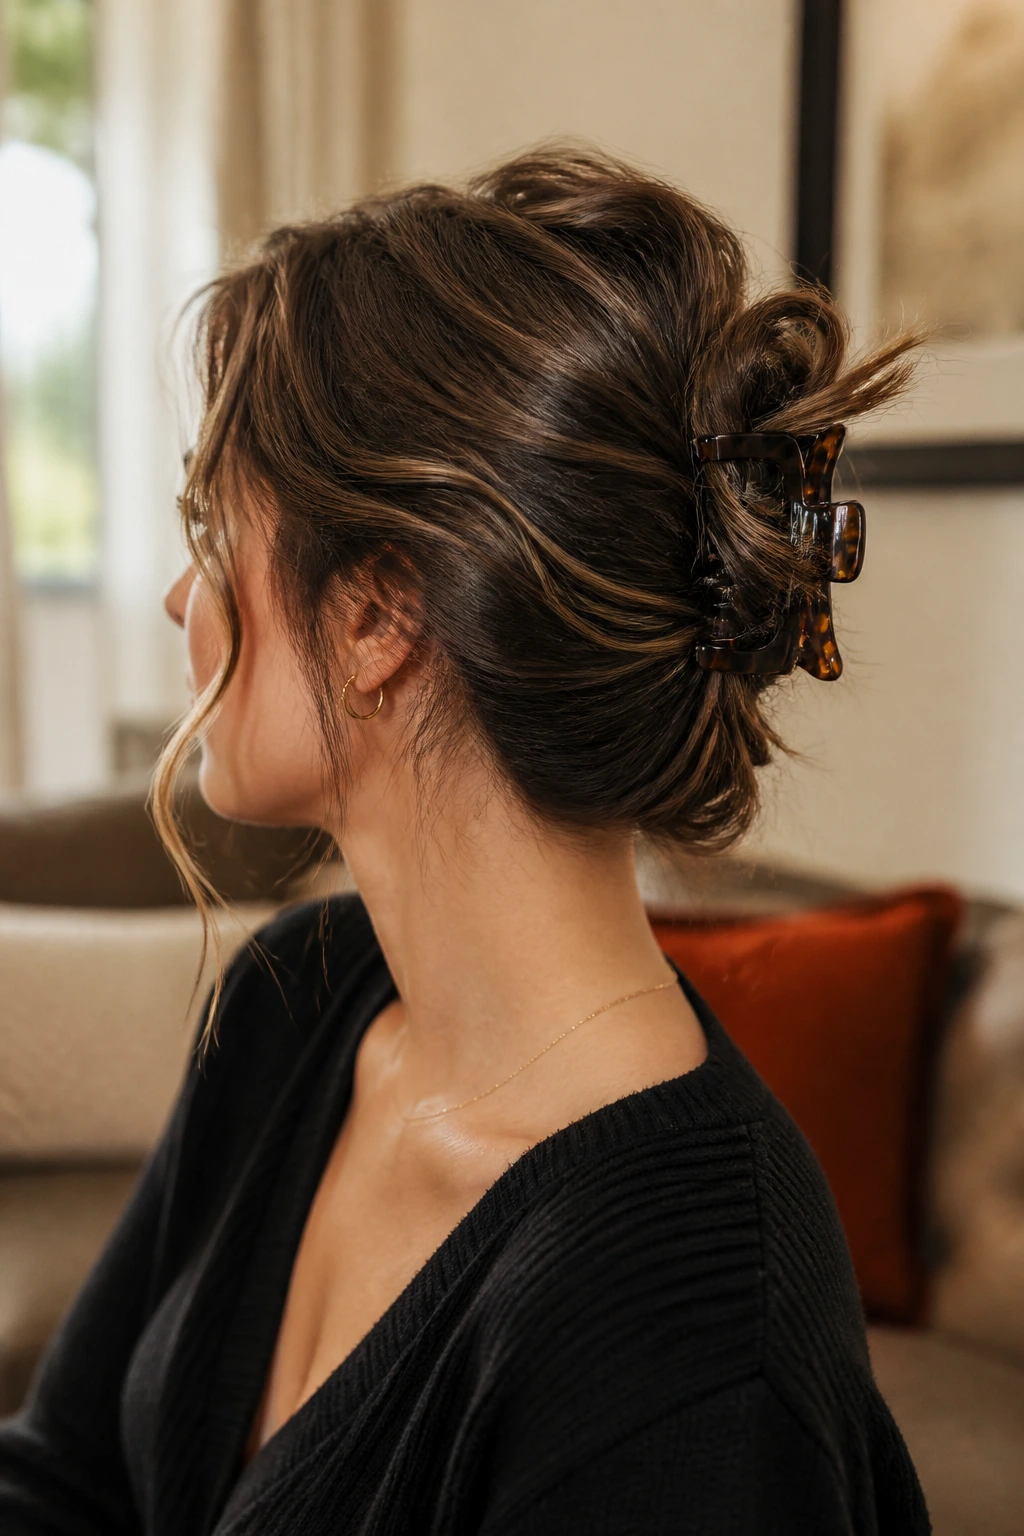
If your hair is medium to long and slightly undone by nature, a claw-clip French twist can look better than a polished updo. Wavy hair has enough texture to hold the shape, so you don’t need to smooth every strand into submission. In fact, the style looks better when a few ends peek out.
What Makes It Easy
You only need one large claw clip and maybe two bobby pins if your hair is thick. Gather the hair at the back, twist it upward, and tuck the ends into the shell of the twist before clipping it in place. The clip should sit snugly, not pinch your scalp.
- Use a large clip with strong teeth
- Keep the twist slightly loose at the top
- Leave a few face-framing pieces out
- Add dry shampoo at the roots if the hair is slippery
This is a strong choice for errands, work, or dinner when you do not feel like doing much. It also holds well on day-two waves because the texture gives the clip something to grab. Sleek hair can slide out. Wavy hair usually behaves better.
8. The Low Wavy Ponytail with a Wrapped Base
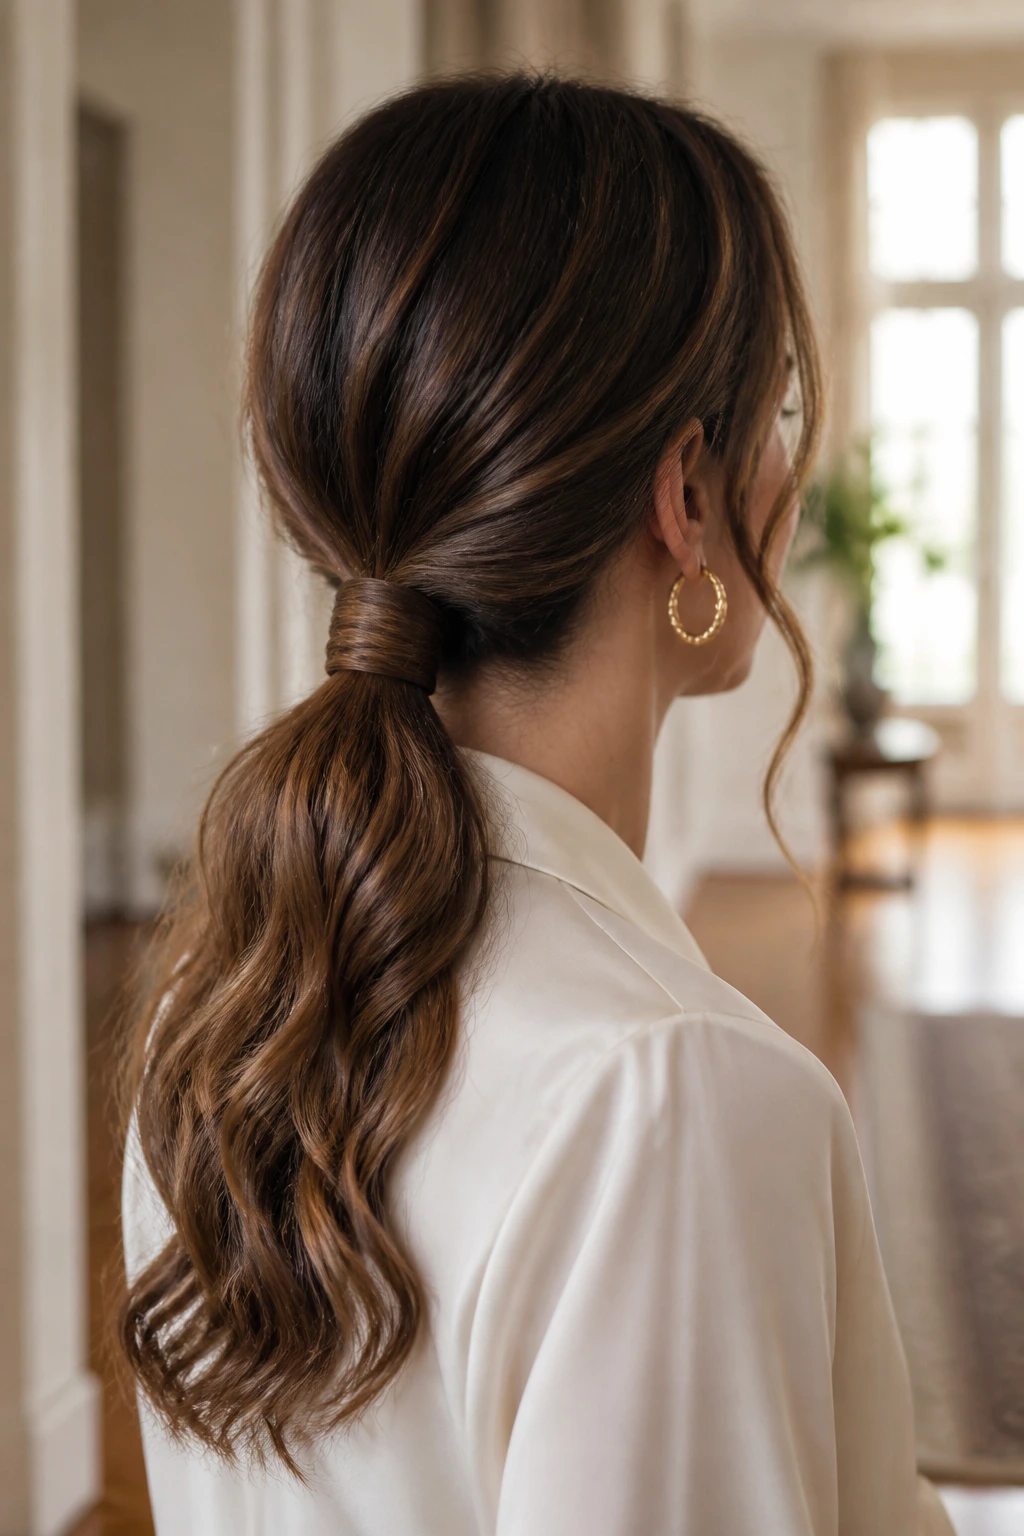
A low ponytail can look more polished than a bun when the texture is right. The trick is to keep the top smooth, leave the waves in the tail, and hide the elastic with a small wrapped strand of hair. That little wrap does a lot of work for something that takes maybe 30 seconds.
Start at the nape, not the crown. Pull the hair back loosely so the top stays soft, then secure it with a clear elastic or a thin band that matches your color. Separate a one-inch strand from underneath, wrap it around the base, and pin the end out of sight.
This style is useful because it lets the wave pattern stay visible. You get a clean shape without crushing the texture. If your layers are short around the face, leave a few pieces out and tuck the rest behind the ears for a softer line.
Small detail. Big payoff.
It’s also one of the easiest styles to move from casual to dressed up. Add a little shine spray to the tail, and it suddenly looks intentional enough for a dinner out. Not precious. Just neat.
9. Side-Swept Glam Waves

Want the quickest way to make wavy hair look dressed up? Sweep it to one side and give the crown a little lift. A deep side part changes the whole mood of the hair, especially if your natural wave is loose and tends to sit close to the head.
How to Use It
The part should sit several inches off center, not just slightly skewed. That exaggerated line creates height on one side and softness on the other. Tuck the heavier side behind one ear or pin it low near the nape so the wave pattern stays visible.
A side-swept shape works well with longer hair, but shoulder-length hair can wear it too. If the front pieces are flat, wrap just those sections around a 1.25-inch iron for a bend, then brush them out with your fingers. You’re shaping, not curling.
I’d use a light shine spray on the surface and leave the roots alone. Too much shine product near the scalp can make waves collapse, and that ruins the clean sweep. The style should look soft and a little dramatic, not greasy.
10. The Wavy Pixie with Longer Top
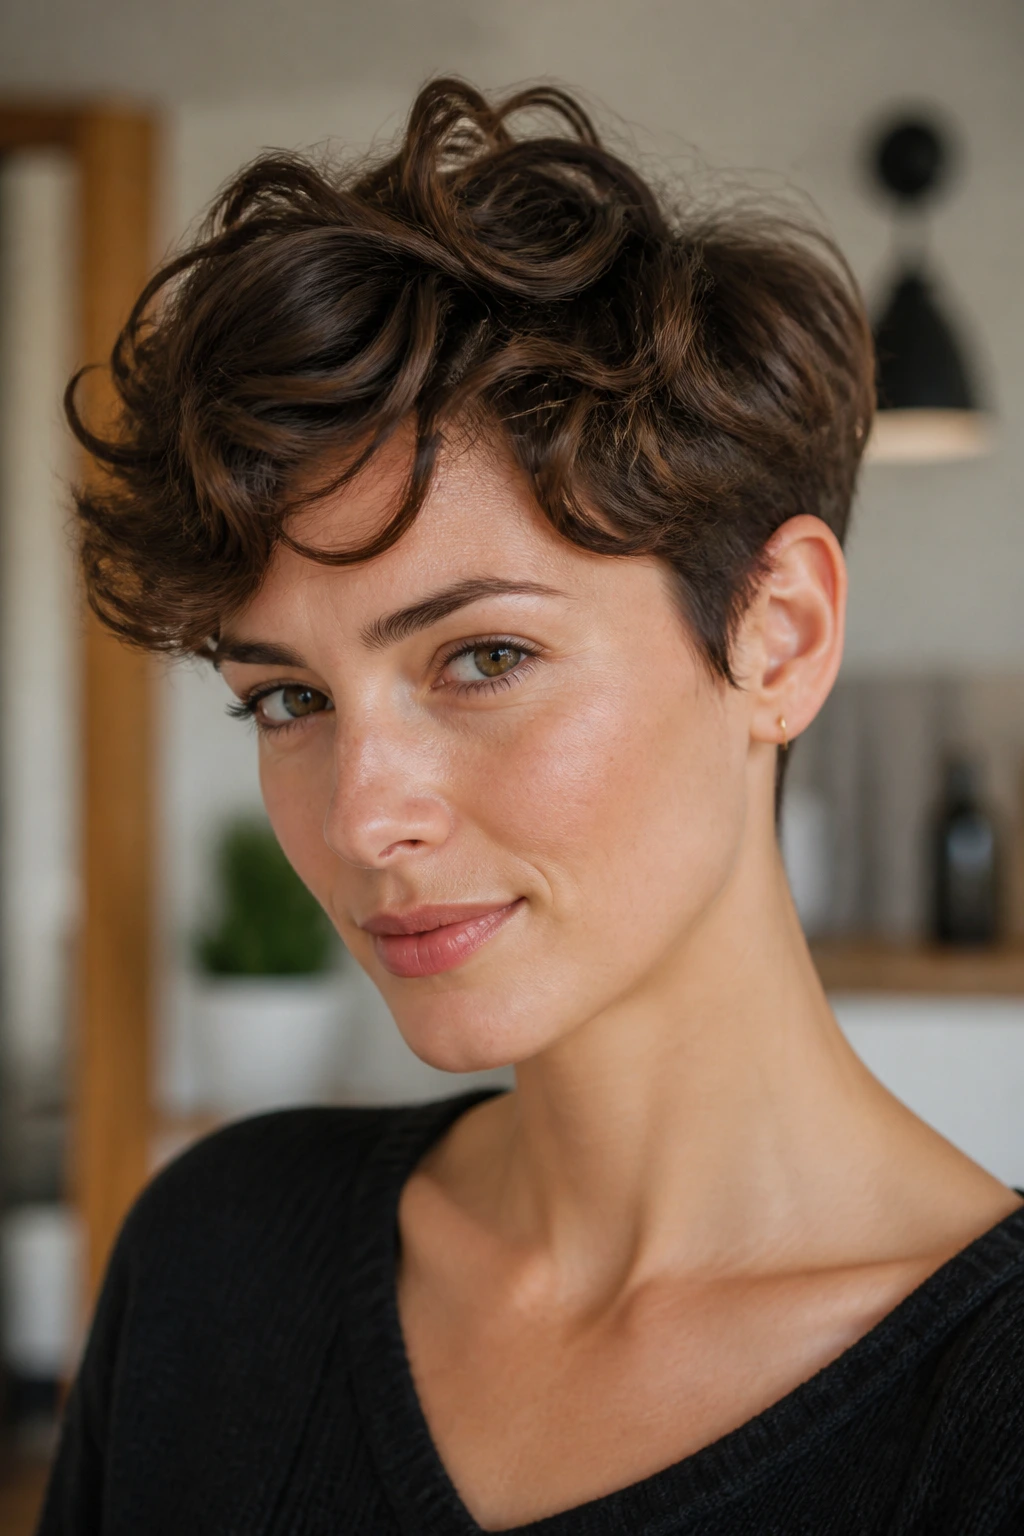
Short hair can still keep its wave personality. A wavy pixie with a longer top gives you the ease of a cropped cut without flattening the bend that makes your hair interesting in the first place. It’s a good answer for anyone who wants less length but doesn’t want to lose texture.
The top usually needs to stay around 1.5 to 3 inches long, depending on how tight your wave is. The sides and back can be tapered closer, but the crown should keep enough length to show movement. If the top is cut too short, the wave can spring up in a way that looks wiry instead of soft.
What to Ask For
- Keep the top long enough to pinch into pieces
- Leave a little weight at the crown
- Taper the sides, but not to the point of exposing every scalp line
- Avoid over-thinning the ends
Styling is fast. Work a pea-size dab of cream or paste through damp hair, then scrunch and let it air-dry or diffuse for five minutes. The goal is piecey separation, not a helmet of product. And yes, that distinction matters.
11. The Braided Front Accent

A small braid across the front of wavy hair solves a problem a lot of people know well: the front pieces get annoying before the rest of the hair does. They fall into your eyes, puff up in humidity, or just refuse to stay where you put them. One braid can solve that without making the whole style feel young or fussy.
You can braid one temple piece back into the hair, or add two tiny braids near the part and let the rest stay loose. Either version keeps the front controlled while the waves in the lengths remain visible. That mix is the sweet spot.
Loose is prettier.
If your hair is slippery, start the braid on slightly rough hair or add a bit of texture spray first. Keep the braid soft and a little imperfect so it blends into the wave pattern instead of looking like it belongs to another hairstyle entirely. A clear elastic works, but a small bobby pin hidden under a top layer is often cleaner.
This is one of those styles that looks better when you don’t obsess over symmetry. If one side sits a little differently, fine. Wavy hair rarely behaves in mirror images anyway.
12. The Messy Bun with Loose Tendrils

A messy bun on wavy hair should never look like you panicked and twisted your hair into the first knot available. The texture is what gives it shape, so the bun needs to stay soft enough that the wave can peek through. A tight ballerina bun would flatten all the good parts.
The best placement depends on your face and your length, but a high-mid bun tends to work on most wavy textures. Gather the hair loosely, twist it into a coil, and pin it in place with three to five bobby pins instead of one thick elastic. That lets the bun sit with a little air in it.
Then pull out a few face-framing pieces. Four tendrils is usually enough. You do not need to create a halo of baby hairs unless that is your thing. A couple of pieces near the temples and one near the nape often do more for the shape than a bunch of random escapes.
This style is best when the waves are second-day and a little bit lived in. Freshly washed hair can feel too soft and slide out, while slightly worn texture gives the bun some grip. A small mist of flexible spray can keep it from collapsing later.
13. The Deep Side Part with a Tucked-Behind-Ear Finish

A deep side part can rescue flat roots faster than almost anything else. Shift the hair a good 2 to 3 inches from where it normally lives, and the whole silhouette changes. One side gets lift. The other gets a soft sweep. That alone can make wavy hair look twice as deliberate.
A Tiny Move That Changes the Shape
The tucked-behind-ear finish keeps the heavy side from swallowing your face. It also shows off the wave on the opposite side, which helps the style feel open instead of bulky. If the tucked side keeps slipping forward, pin it with a hidden bobby pin behind the ear and let the rest stay loose.
- Move the part while the hair is still slightly damp
- Smooth the front with a small amount of serum
- Tuck the fuller side behind one ear
- Pin the tucked side if the wave is heavy
This style is useful on days when the roots look sleepy but the ends still have life. It’s also one of the simplest ways to change a look without cutting anything. A lot of people overlook that. They should not.
14. The Waterfall Braid Half-Up
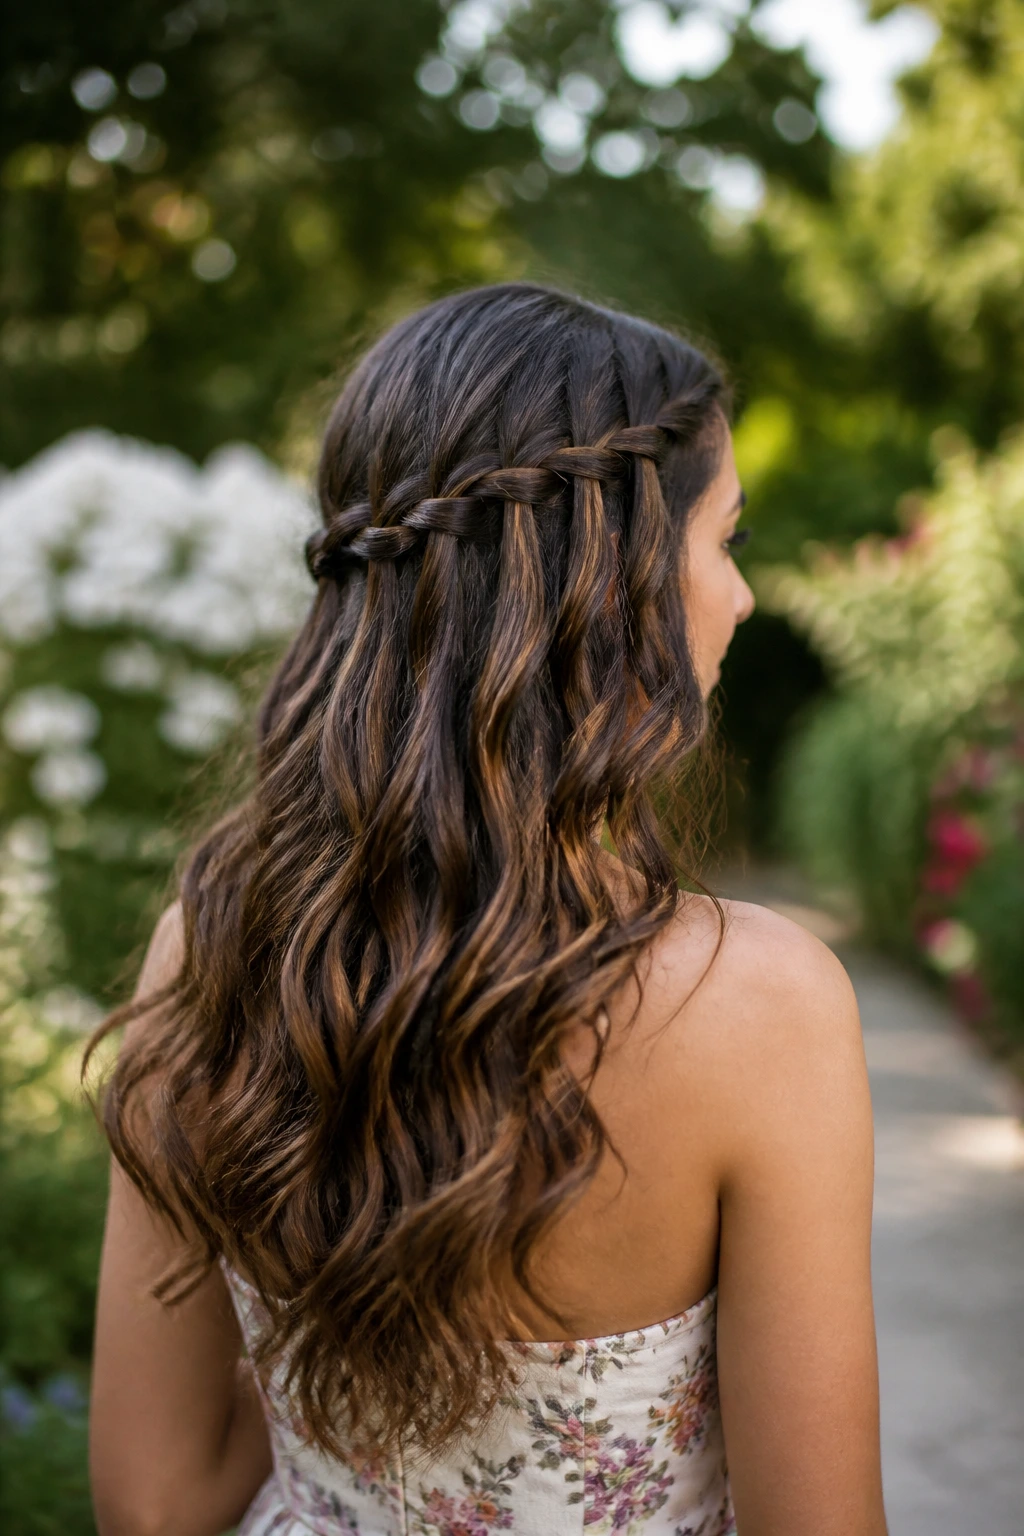
If you want something romantic without committing to a full updo, a waterfall braid is a safe bet. The braid threads across the back while sections of hair drop through it, which lets the wavy lengths stay visible. It looks more intricate than it is, and that’s part of the appeal.
This style works especially well on hair with some texture already in it, because the braid needs grip. Freshly washed, very silky hair can slip apart. If that’s your hair, mist the top layer with texture spray or dry shampoo first and let it sit for a minute.
What to Watch For
- Keep the braid close to the head so it doesn’t sag
- Drop the hanging sections evenly
- Secure the end with a hidden pin instead of a bulky elastic
- Leave the lengths loose and soft
The braid doesn’t need to be perfect. A slightly uneven waterfall looks better than a tight, over-controlled one, especially on wavy hair. That soft looseness is what makes the whole style feel easy rather than formal in a stiff way.
15. Sleek Crown with Wavy Lengths

Why smooth the whole head when only the top needs help? A sleek crown with wavy lengths gives you a polished front and natural movement below it, which is a smart mix for work, events, or any day when you want the hair to look cleaner than it usually does.
The idea is simple: tame the hair from the hairline to the mid-lengths, then leave the ends alone. Use a small amount of gel or styling cream only at the crown and temples, brush it back with a fine-tooth comb, and stop before the product reaches the wavy body of the hair. If you coat the lengths, the style loses its contrast.
How to Keep It From Looking Greasy
Work in thin layers. A dime-size amount often covers more than you think, and adding more only makes the roots clump. If your hairline has little flyaways, smooth them with the palms of your hands instead of loading on more product.
The best part is the contrast. The top looks sleek and deliberate, while the waves below keep their shape and feel. That mix is cleaner than a full blowout, and it usually takes less time too.
16. The Wolf Cut for Naturally Wavy Hair
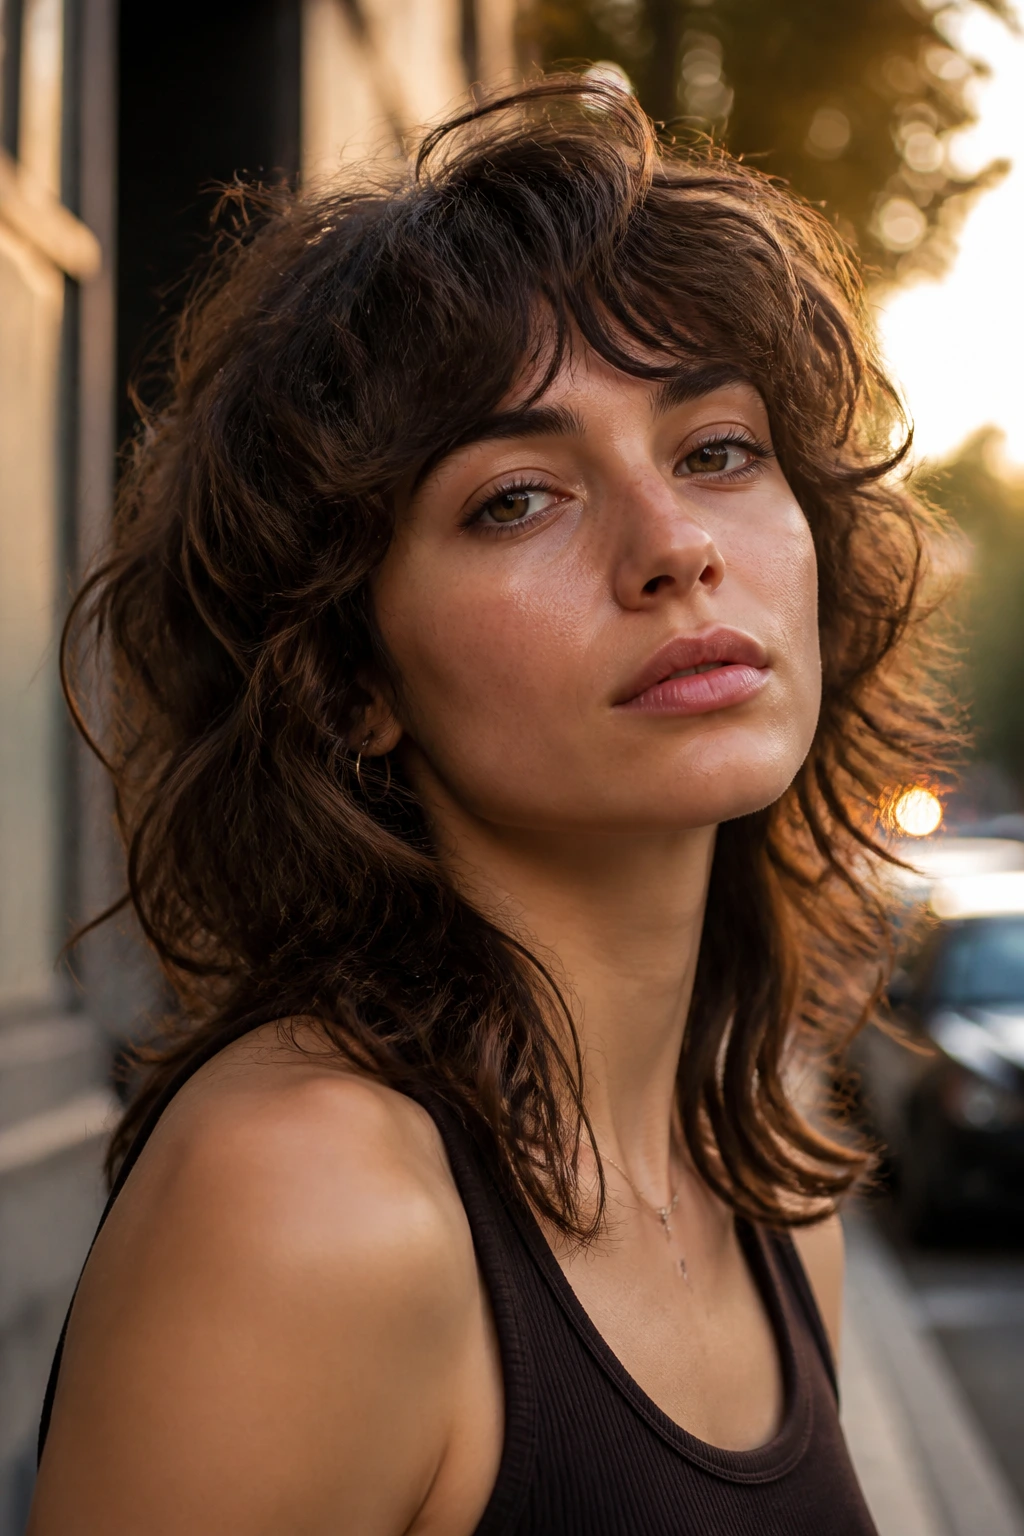
If your waves tend to balloon at the sides, the wolf cut can be a serious help. It takes the shag idea and pushes it further, with shorter layers through the crown and a longer tail at the bottom. The result has more edge, more lift, and a lot less heaviness around the jaw.
The wolf cut is not for someone who wants subtle. It has a bit of attitude, and on wavy hair that can be a good thing. The shorter crown layers let the top lift instead of lying flat, while the longer back keeps the shape from turning into a triangle.
Key Details to Ask For
- Shorter layers through the top and crown
- A longer outline at the bottom
- Soft face-framing pieces, not blunt chunks
- A shape that still sits well when air-dried
This cut is best when you’re willing to lean into your natural bend. It usually looks strongest with a little scrunching mousse and an air-dry, because the wave pattern helps define the layers. If you like hair with a bit of bite and movement, this one earns its keep.
17. The Bubble Ponytail on Soft Waves
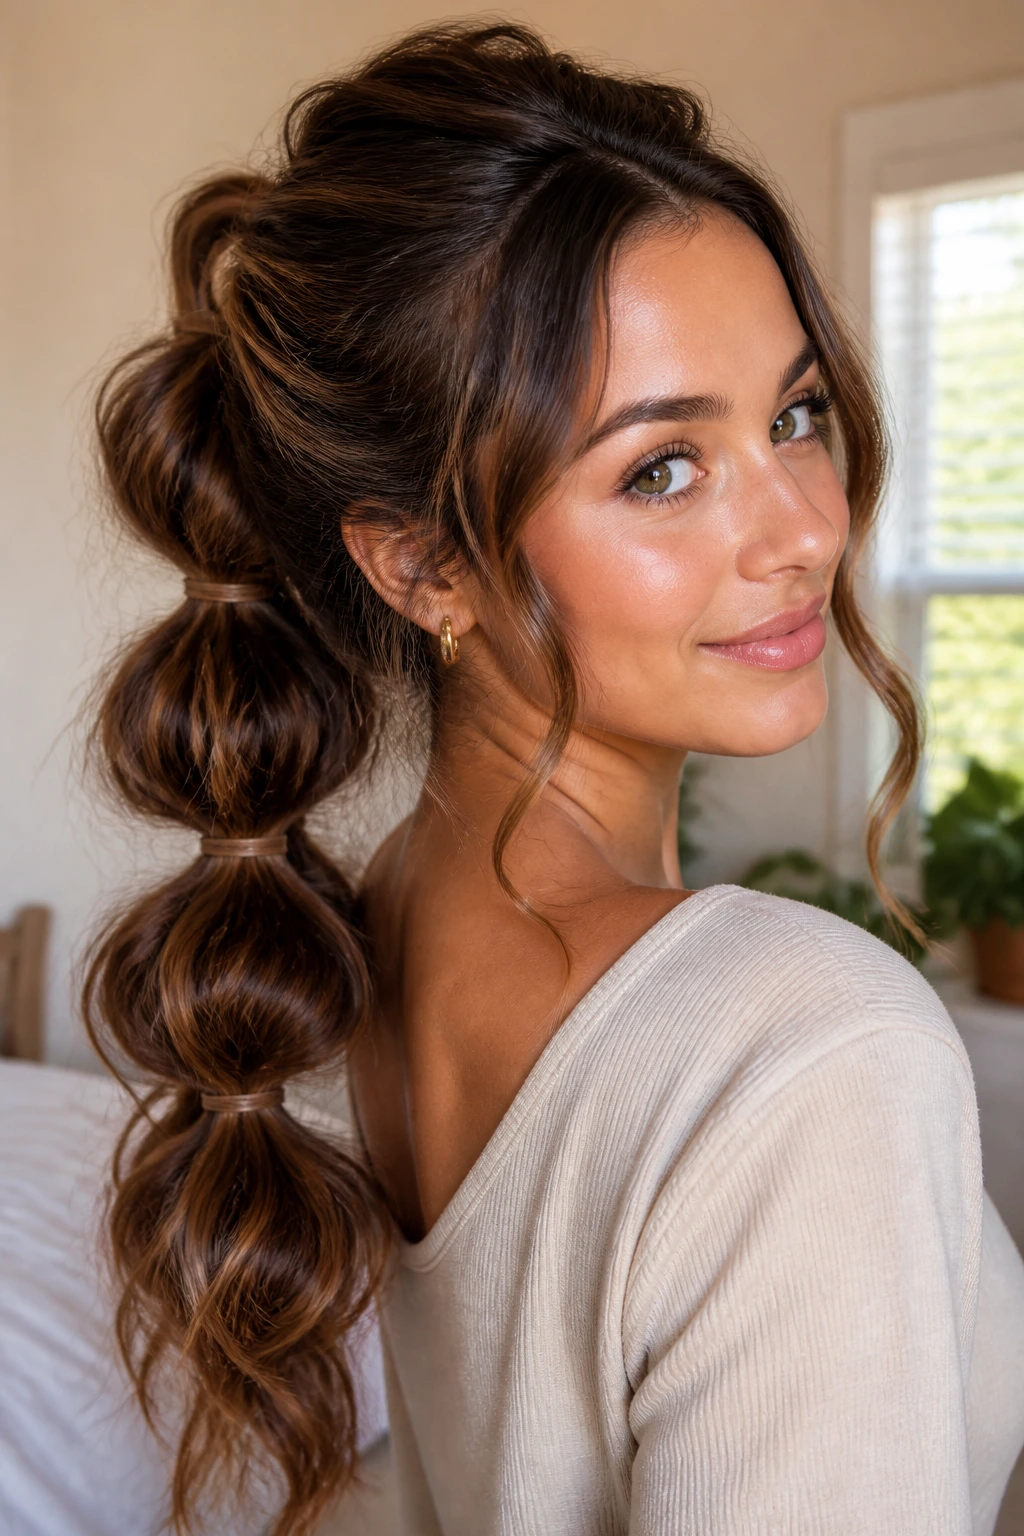
A bubble ponytail sounds playful because it is. On wavy hair, it also happens to be practical. The texture gives the “bubbles” more shape, so the whole style looks fuller than it would on straight hair.
Start with a low or mid ponytail and secure it with a simple elastic. Add more elastics every 2 to 3 inches down the length, then tug each section gently to puff it out. That’s the whole trick. The waves fill the spaces and make the bubbles look rounded instead of stubby.
Spacing matters.
If your hair is fine, use smaller elastics and tug with a light hand so you don’t stretch the sections too far. Thick hair can handle larger gaps and a little more volume. A few face-framing pieces around the front can soften the look if the ponytail feels too sporty.
This is a nice option when you want something that feels different but not high-effort. It also holds better than you’d expect, which matters if you have a long day ahead and no interest in redoing your hair halfway through it.
18. The Rope-Braid Low Bun

A rope-braid low bun is easier than a three-strand braid when your hair has wave and texture already in it. The sections don’t need to lie perfectly flat, so the braid holds shape even if your hands are a little clumsy. That’s a relief. We all have those mornings.
Split the ponytail into two sections, twist each section away from your face, then wrap them around each other and coil the result into a bun at the nape. Pin it well, because rope twists can loosen if you skimp on the bobby pins. Two pins rarely cut it; four is safer.
This style works well for weddings, dinners, or office days when you want the hair off your neck but still want a clean shape. The waves in the hair help the bun look fuller, which means you don’t need a huge amount of length to pull it off.
I’d recommend this most for medium to long hair with some natural grip. Very slippery hair can still do it, but it may need dry shampoo first. If your ends are a little dry, even better. They tuck neatly.
19. The Diffused Wash-and-Go with Defined Ends
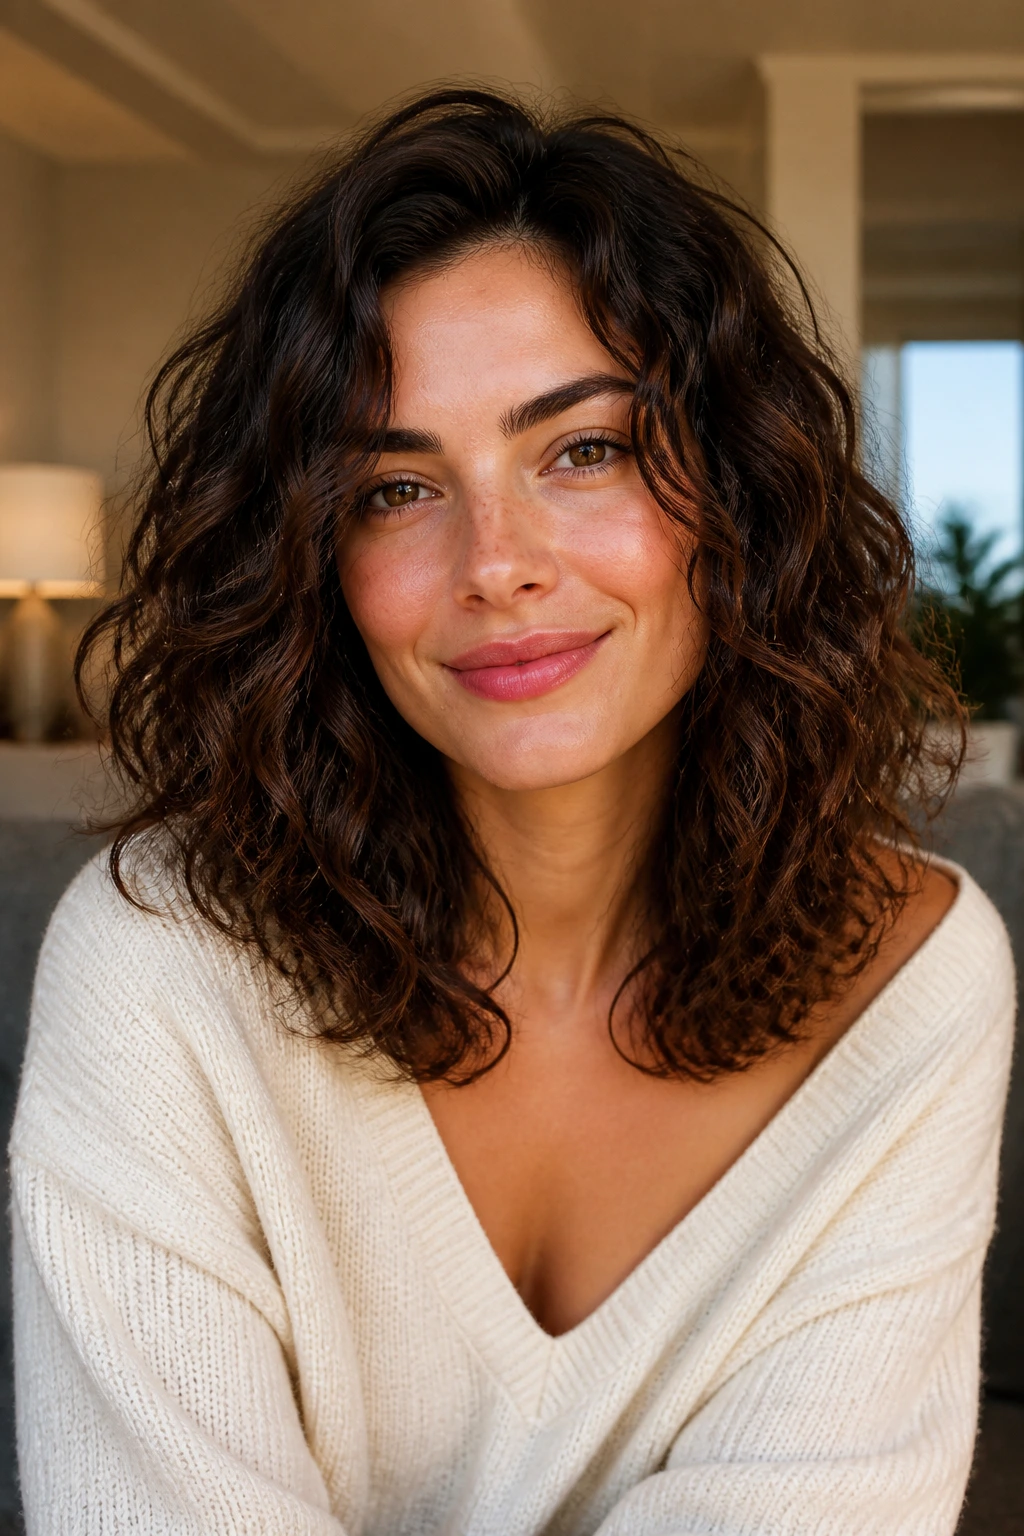
The best wash-and-go on wavy hair is the one that stops you from touching it too much. A diffused finish keeps the wave definition while giving the roots enough lift to avoid that sad, air-dried collapse that can happen when the hair is left alone for too long.
Why It Works
Start on soaking-wet hair. Work in a lightweight leave-in, then glaze a gel or foam over the top layer and scrunch upward with your hands. You want the strands to clump into loose ribbons. If they stay stringy at this stage, add a touch more water, not more product.
- Apply leave-in from the ears down
- Use a nickel-size amount of gel or foam at first
- Plop with a T-shirt for 10 to 15 minutes
- Diffuse on low heat until a soft cast forms
- Scrunch out the crunch only when the hair is fully dry
That soft cast matters. It keeps the wave in place while the hair dries, and then you break it up once the style is set. If you touch it too soon, you lose definition and invite frizz. That part is annoyingly simple, and still worth following.
This is a good option when you want your waves to look like waves, not like a brushed-out compromise. It’s tidy without being stiff.
20. The Collarbone Cut with Invisible Layers
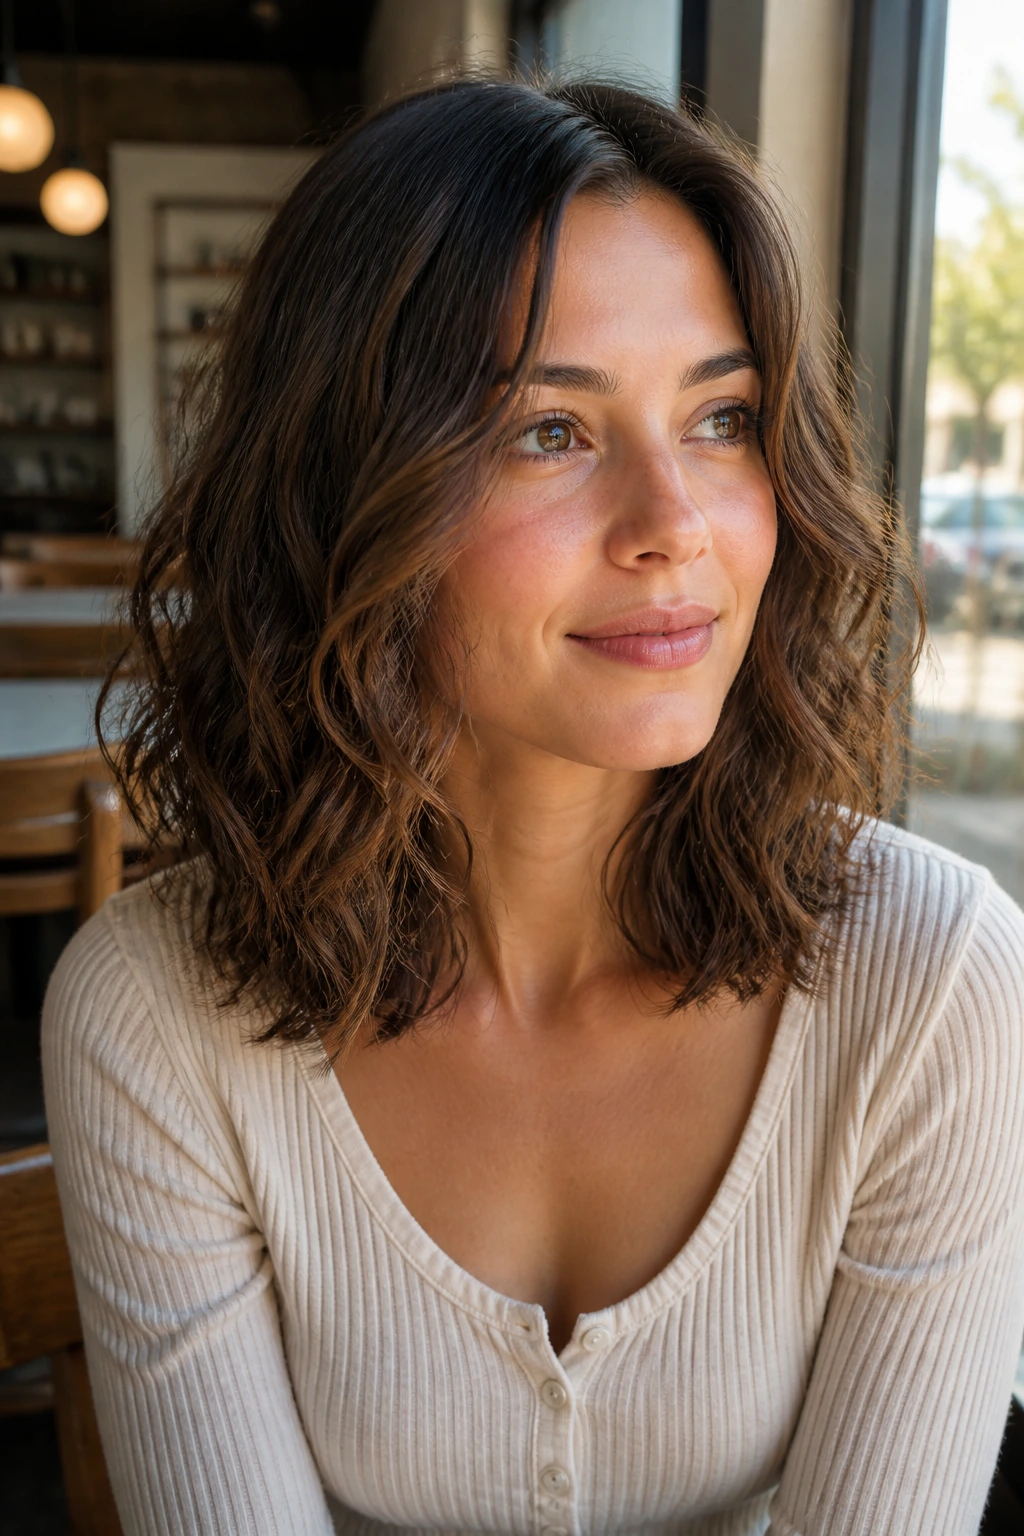
A collarbone cut is one of the easiest places to let naturally wavy hair breathe. The length is long enough to pull back, twist, or tuck, but short enough that the wave still has shape and doesn’t collapse under its own weight. Add invisible layers, and the whole thing moves without looking chopped up.
That “invisible” part matters more than people think. You want the layers to live inside the shape, not scream from the ends. Ask for soft internal layers that start low and blend out quietly. The goal is movement, not an obvious staircase of pieces.
This cut is especially good if you want a style that works five different ways: down and loose, half-up, clipped back, braided, or tossed into a low ponytail on a rushed morning. It’s a good compromise for anyone who wants less bulk than long hair but more options than a short crop.
I keep coming back to this length because it behaves. It plays nicely with clips, braids, and ponytails, and it still looks like hair when you let it down — not a shape that only works on day one. For naturally wavy hair, that kind of reliability is worth a lot.
