



The morning of a wedding is a strange, heightened reality. Time seems to stretch and compress simultaneously. You have hairspray fumes in the air, the hum of a steamer in the corner, and the looming reality that whatever hairstyle you choose needs to survive everything from the walk down the aisle to the final song on the dance floor. Most people instinctively reach for a classic bun or a set of loose, flowing waves. But there is an unsung hero of bridal styling that rarely gets the attention it deserves: the twist.
Twisted updos are the Goldilocks of wedding hair. They are rarely as stiff or overly engineered as a tightly braided crown, yet they hold up significantly better than soft curls that tend to drop within an hour of humidity exposure. A well-constructed twist creates structure and volume, turning even fine or slippery hair into something that looks dense, intentional, and expensive. You don’t need a license in cosmetology to achieve these looks; you just need to understand how to manipulate hair tension and where to place your pins.
Mastering the twist comes down to two variables: texture and tension. If your hair is freshly washed and silken, it will slide right out of any pin you place. You need grit. Texturizing sprays, dry shampoo, or even a light dusting of root powder can change the friction coefficient of your hair strands, making them cling to each other instead of slipping apart. Once you have that foundation, the actual twisting is just a game of geometry. Let’s look at fifteen variations that offer elegance, security, and a touch of effortless sophistication.
1. The Modern French Twist
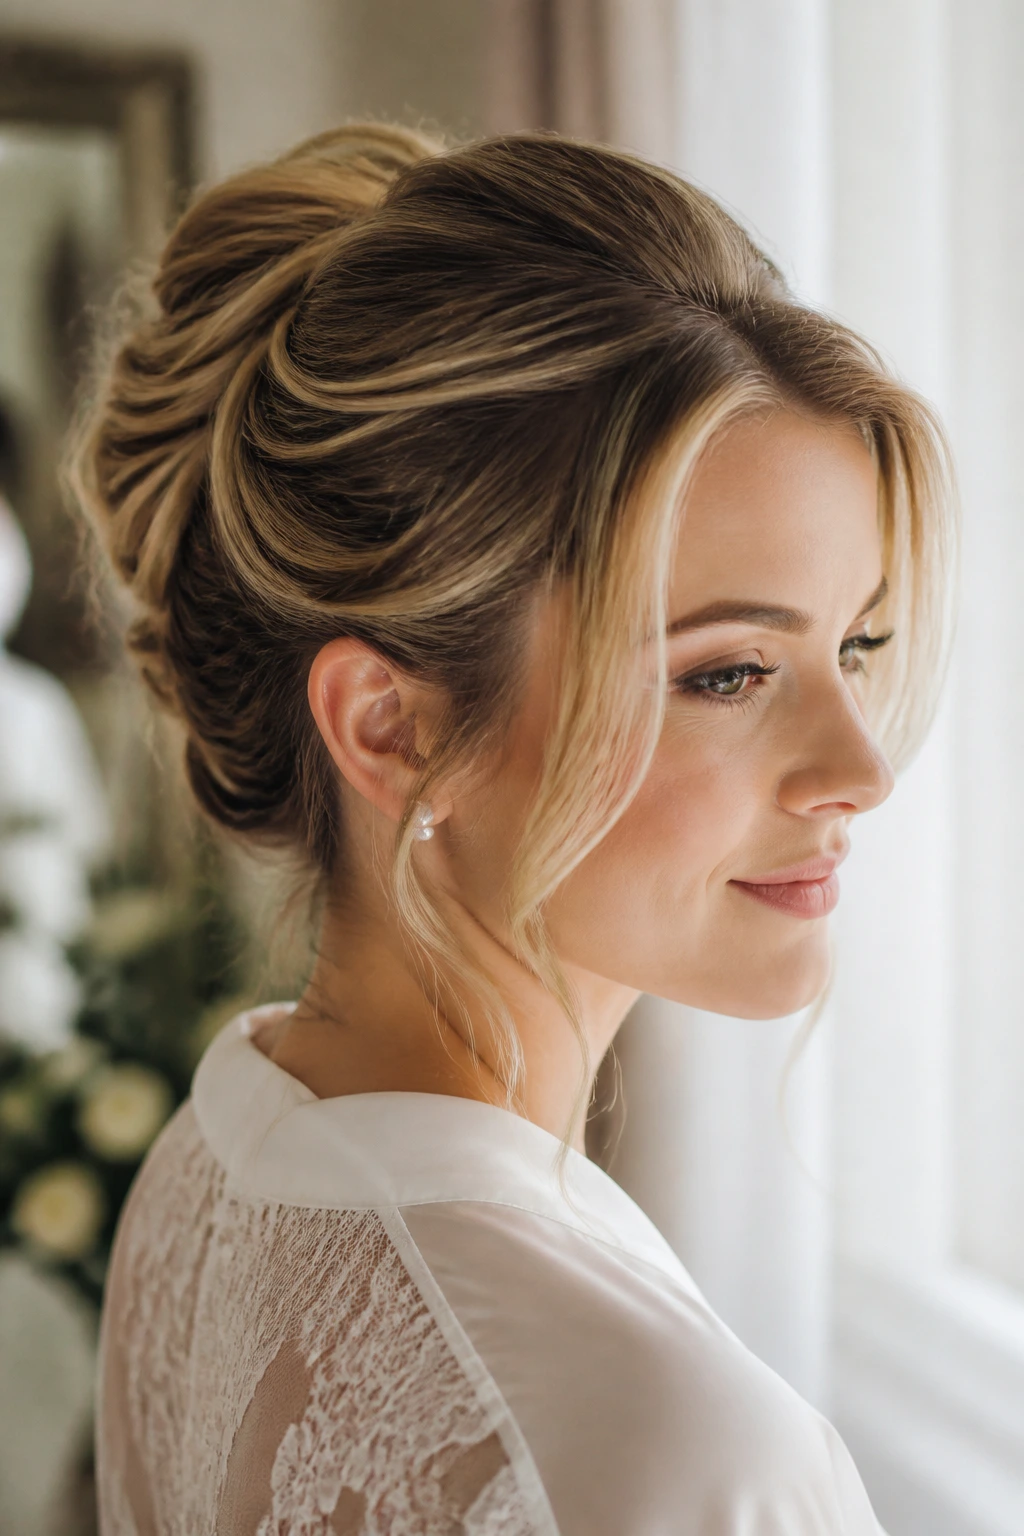
The traditional French twist can sometimes look like something pulled from a 1950s yearbook—a little too severe, a little too tight. The modern version breathes new life into this silhouette by prioritizing softness. Instead of pulling every strand taut, you leave the front sections loose and focus on a multidimensional coil at the back.
Why This Style Works for Weddings
This is the ultimate choice for a veil. The structure of the twist provides a sturdy anchor point for a hair comb or the heavy pins required to secure a cathedral-length veil. It keeps the hair off your neck, which is a massive benefit if you are getting married in a warmer climate or planning on dancing for six hours straight.
Styling the Foundation
Start by backcombing the hair at the crown aggressively. You want a pillow of volume before you even begin the twist. Gather your hair at the nape of the neck as if you were making a low ponytail, but instead of using a band, start rolling the hair inward toward the center of your head. Secure it by pinning through the edge of the twist into the vertical base of hair you created. Always pin horizontally, catching the heavy part of the twist first, then weaving the pin back into the center of the roll to lock it in.
2. The Low Twisted Chignon

There is a distinct difference between a bun and a chignon. A bun is often rounded and prominent; a chignon is soft, nestled at the nape of the neck, and speaks to a lower, more understated elegance. By incorporating twists into the sides of a chignon, you add a layer of visual interest that makes a simple style look like it took an hour to construct.
Achieving the Softness
The key here is to section your hair into three parts before you start. Leave two framing pieces out at the front—don’t tuck these away yet. Take the large back section and tie it into a low ponytail, then loop it through itself to create a “topsy tail” effect. This gives you a messy, twisted base. From there, take the remaining two side sections, twist them loosely, and wrap them around that base.
Pro Tip for Volume
If your hair is on the thinner side, do not panic about the size of the chignon. Use a foam donut or a hair padding insert underneath the twists. It provides the shape without requiring you to have an immense amount of hair to work with. Spray the finished look with a medium-hold hairspray—never a “freezing” spray, as you want the hair to move naturally if the wind catches it.
3. Twisted Rope Braid Crown
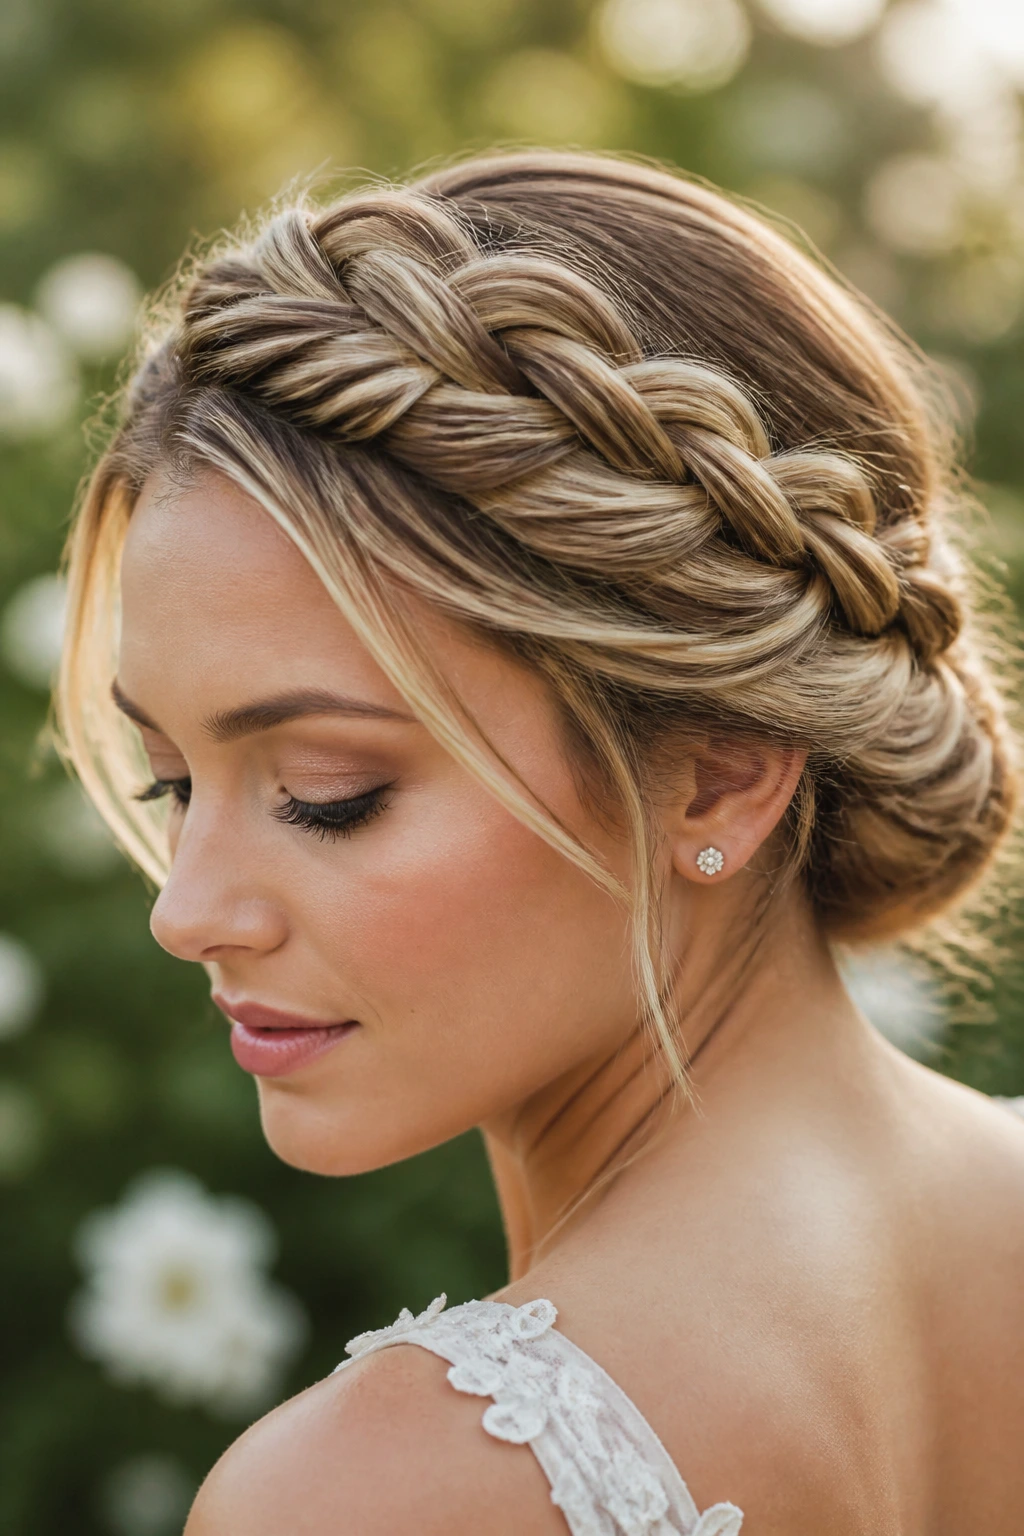
A rope braid is technically a “twist” on steroids. You take two sections of hair and twist them individually in one direction, then twist them around each other in the opposite direction. Doing this all the way around the head creates a crown effect that looks remarkably intricate but is actually quite simple once you get the rhythm down.
When to Use This Look
This style shines when you have highlights or balayage. The twisting motion reveals the different dimensions of color in your hair, making the braid look much more complex than a standard three-strand plait. It is a fantastic choice for an outdoor wedding where you want something that feels organic and ethereal rather than structured and rigid.
The Construction Process
Start at your hairline, taking two small sections. Twist them and add more hair as you move around the head, similar to a French braid. When you reach the back, you will have two rope braids meeting. Pin them together at the nape, tucking the ends under one another to hide the elastic bands. Use tiny clear elastics to hold the ends, then camouflage them with a strategically placed hair accessory or a small bunch of baby’s breath.
4. The Romantic Side-Swept Twist
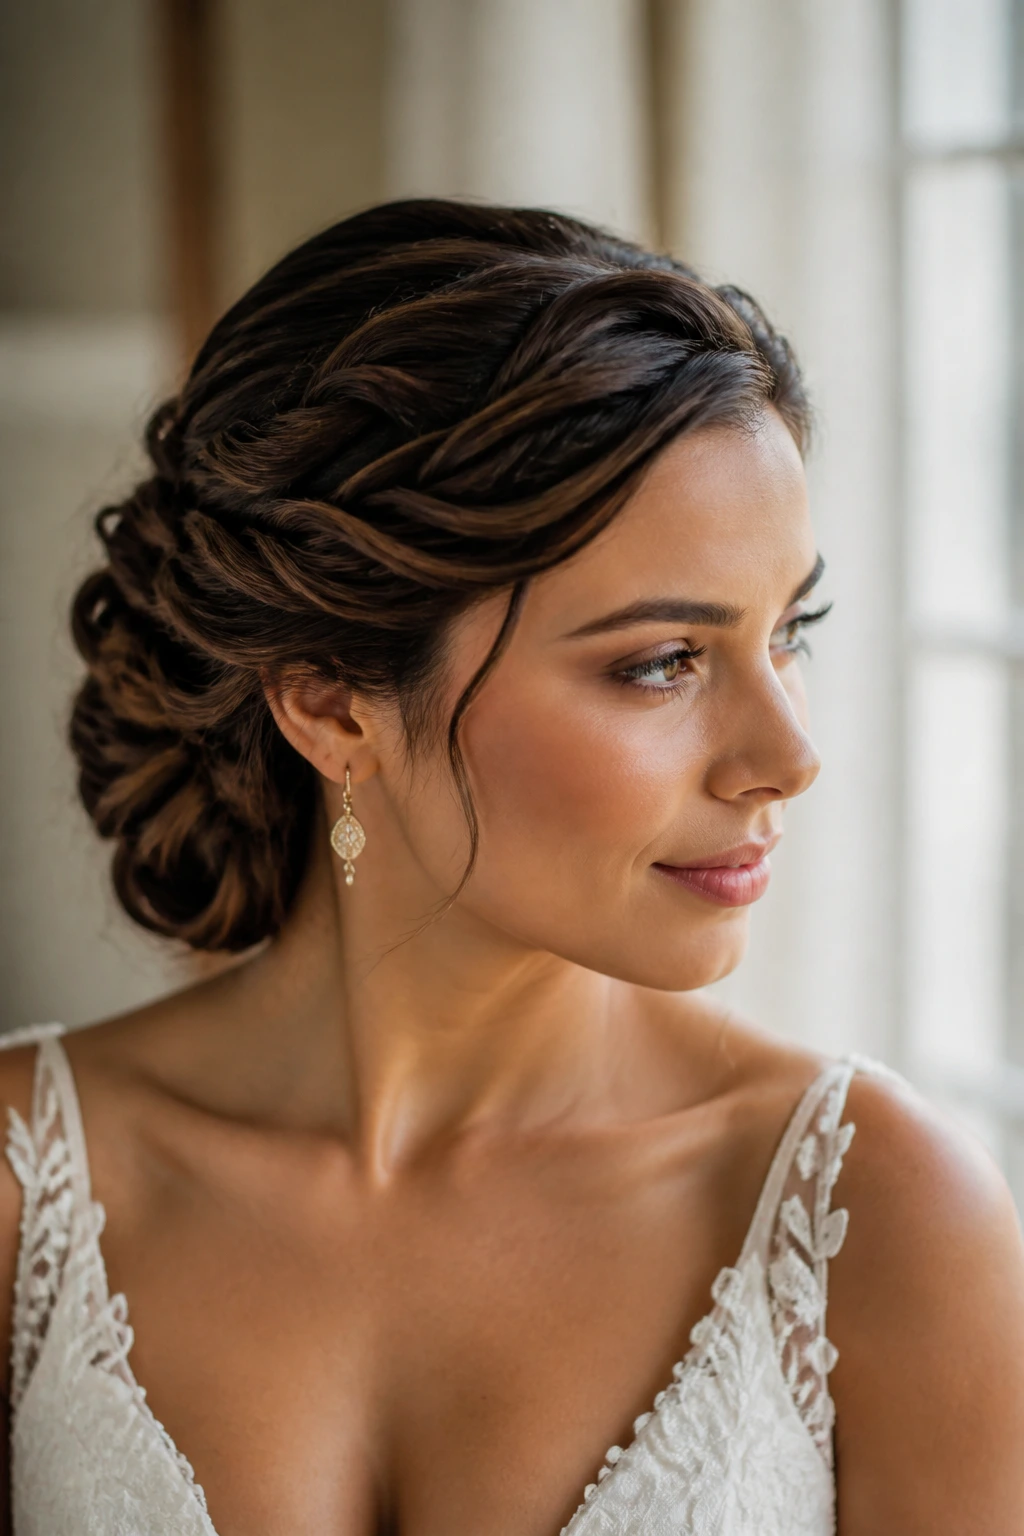
If you are wearing a gown with an asymmetrical neckline—one-shoulder dresses being a prime example—you need a hairstyle that balances that visual weight. A side-swept twist keeps the hair mass to one side, preventing the look from feeling lopsided or overwhelmed by fabric.
The Mechanics of the Sweep
You are essentially doing a series of small, loose twists that feed into a large, singular focal point on one side of your neck. Start on the opposite side of where you want the hair to rest. Take a small piece, twist it, and pin it towards the center back. Repeat this, working your way down and across until all the hair is gathered on one side.
Softening the Edges
The danger with side-swept styles is that they can look a bit “prom hair” if they are too perfect. Embrace the flyaways. Use a small curling iron to create soft, bendy waves in the front framing pieces after the twist is pinned. This softens the transition between the scalp and the twist, giving the whole look a lived-in, romantic quality that photographs beautifully.
5. Twisted Waterfall Updo
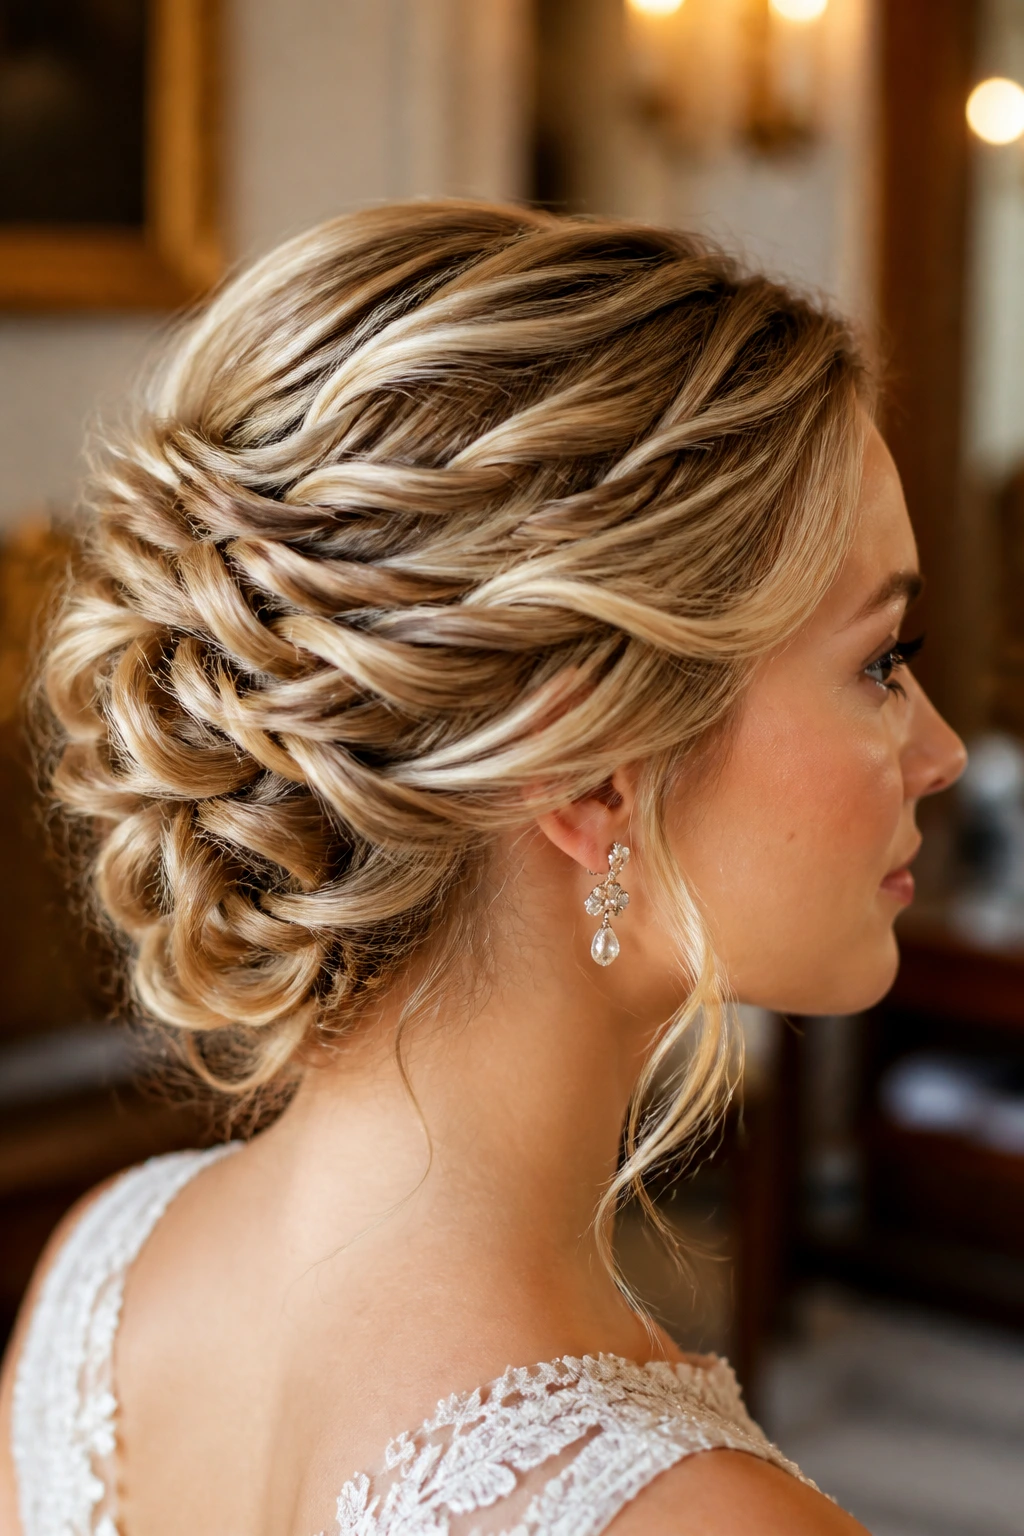
A waterfall braid is lovely, but it leaves hair hanging down. A twisted waterfall updo takes those same loose ends and tucks them back into the updo, creating a cascading effect of twists that feels like a waterfall captured in glass. It is incredibly delicate and works well with hair accessories like pearl pins or thin gold wire.
How to Build the Cascade
This is a layering game. You aren’t doing one big twist; you are doing several small ones. Create a small twist near your temple, pin it, and leave the end dangling. Then, take another section right next to it, incorporate the end of the previous twist, and twist again. You are essentially creating a chain reaction.
Important Note on Weight
Because you are using so many pins to secure these small, interlocking twists, the style can become heavy. Use lightweight U-pins—also called hairpins—rather than standard bobby pins. U-pins are better for nestling into a finished style because they don’t flatten the hair as much, and they are much easier to adjust throughout the day if a section starts to feel loose.
6. The Sleek Twisted Ballerina Bun

Sometimes, you want zero fuss. You want a style that will stay exactly where you put it from the first look to the final dance. The sleek twisted bun is about clean lines, high shine, and absolute structural integrity.
The Prep Work
This style relies heavily on product. Use a pomade or a light smoothing cream to tame any frizz before you start brushing your hair into a high ponytail. Once the ponytail is secured, divide it into two equal sections. Twist each section tightly from root to tip. Then, take these two twisted ropes and wrap them around each other, then around the base of the ponytail.
The Finishing Touch
Secure the ends with a clear elastic and tuck them under the bun. This is where you might need a bit of backcombing on the interior of the bun to make it look full. If you feel like the bun is too small, gently pull at the twists—a technique called “pancaking”—to stretch the hair and make the bun appear wider and more voluminous.
7. Twisted Half-Up, Half-Down Updo
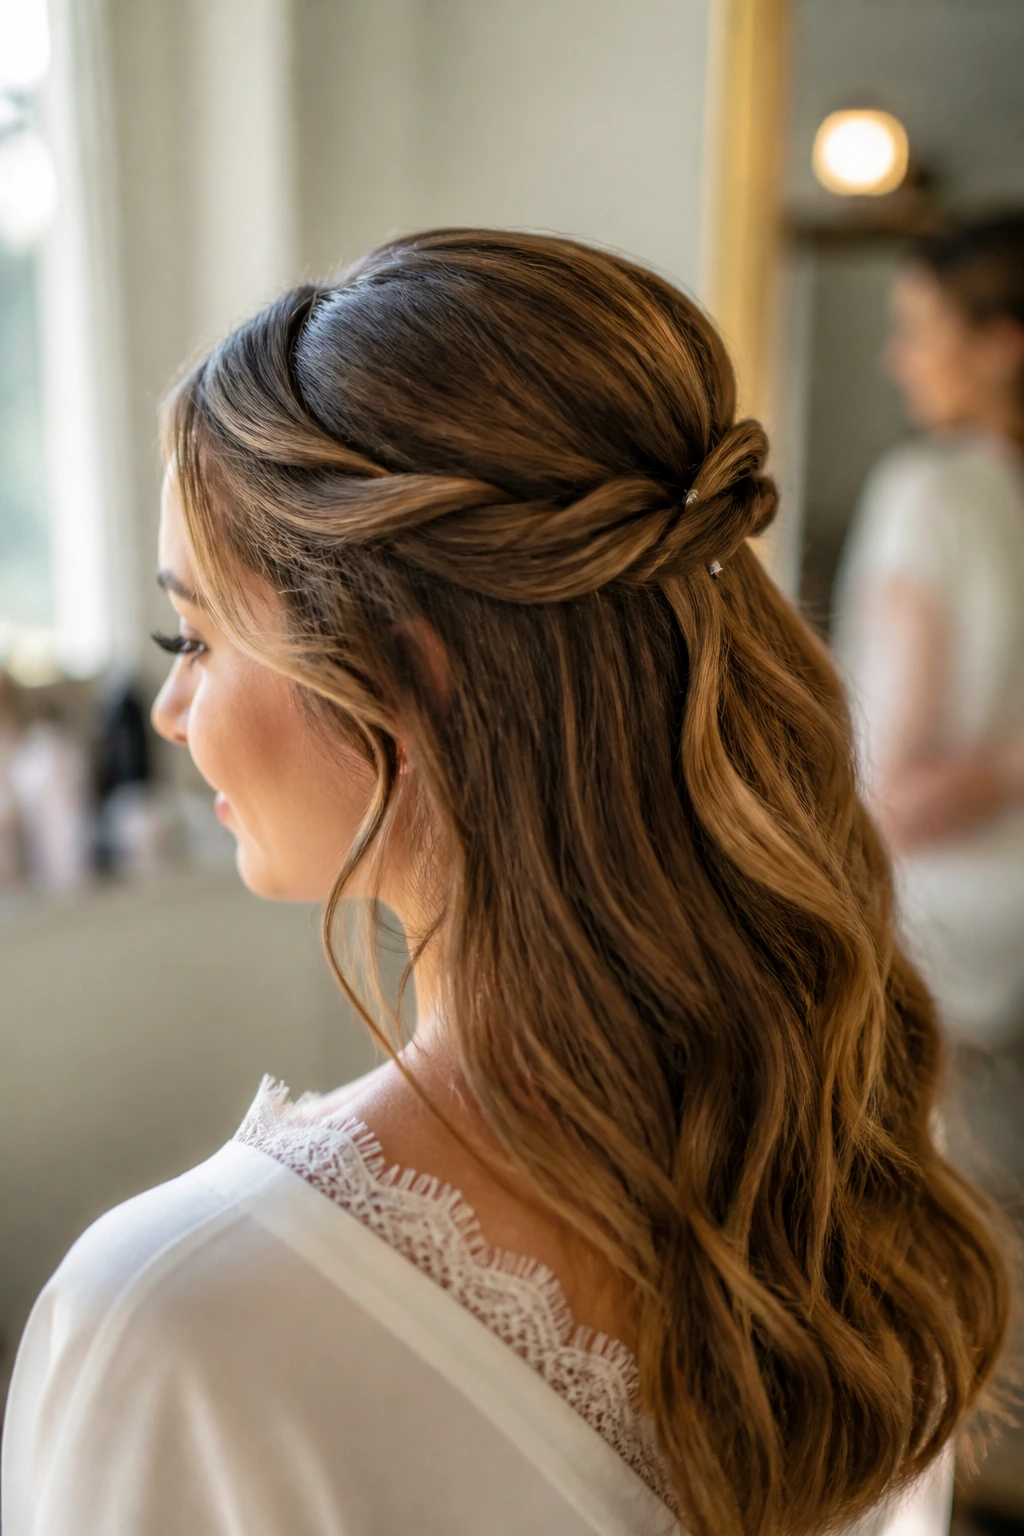
You might want your hair down but need the front out of your face. A twisted half-up style gives you the best of both worlds. It feels less formal than a full updo but more deliberate than just wearing your hair down.
Structuring the Front
Take a section of hair from above your temple on both sides. Twist them backward toward the center of your head. Instead of just pinning them, tie them together with a small, clear elastic band. Then, flip the gathered ponytail up and over through the gap between your head and the elastic—the “topsy tail” trick again. This creates a beautifully polished, twisted loop that hides the elastic perfectly.
Dealing with the Remaining Hair
You can leave the rest of your hair in loose waves or pin the remaining lengths up in smaller, messy twists to create a fuller, more complex look. If you go for the latter, ensure you aren’t pulling the top section too tight, as that can make the style look severe. Keep it soft.
8. The Bohemian Messy Twisted Updo

“Messy” is a relative term in bridal hair. It never actually means messy; it means “highly curated imperfection.” This style is all about creating a textured base that looks like you woke up with perfect hair and just pinned it up.
Creating the Texture
You need to crimp or curl your hair before you start. Do not skip this step. Straight hair, even when twisted, will look stringy rather than voluminous. Use a crimper on the roots or a wide-barrel curling iron on the lengths. Once you have that texture, you can twist sections randomly and pin them in place.
The Art of Randomness
Do not follow a pattern. Take a section from the left, twist it, and pin it to the right. Take a section from the crown, twist it, and pin it to the nape. By crossing your twists over one another, you build a foundation that is self-supporting. The more you cross them, the more stable the style becomes, effectively creating a cage of hair that stays up on its own.
9. Twisted Halo for Shorter Hair
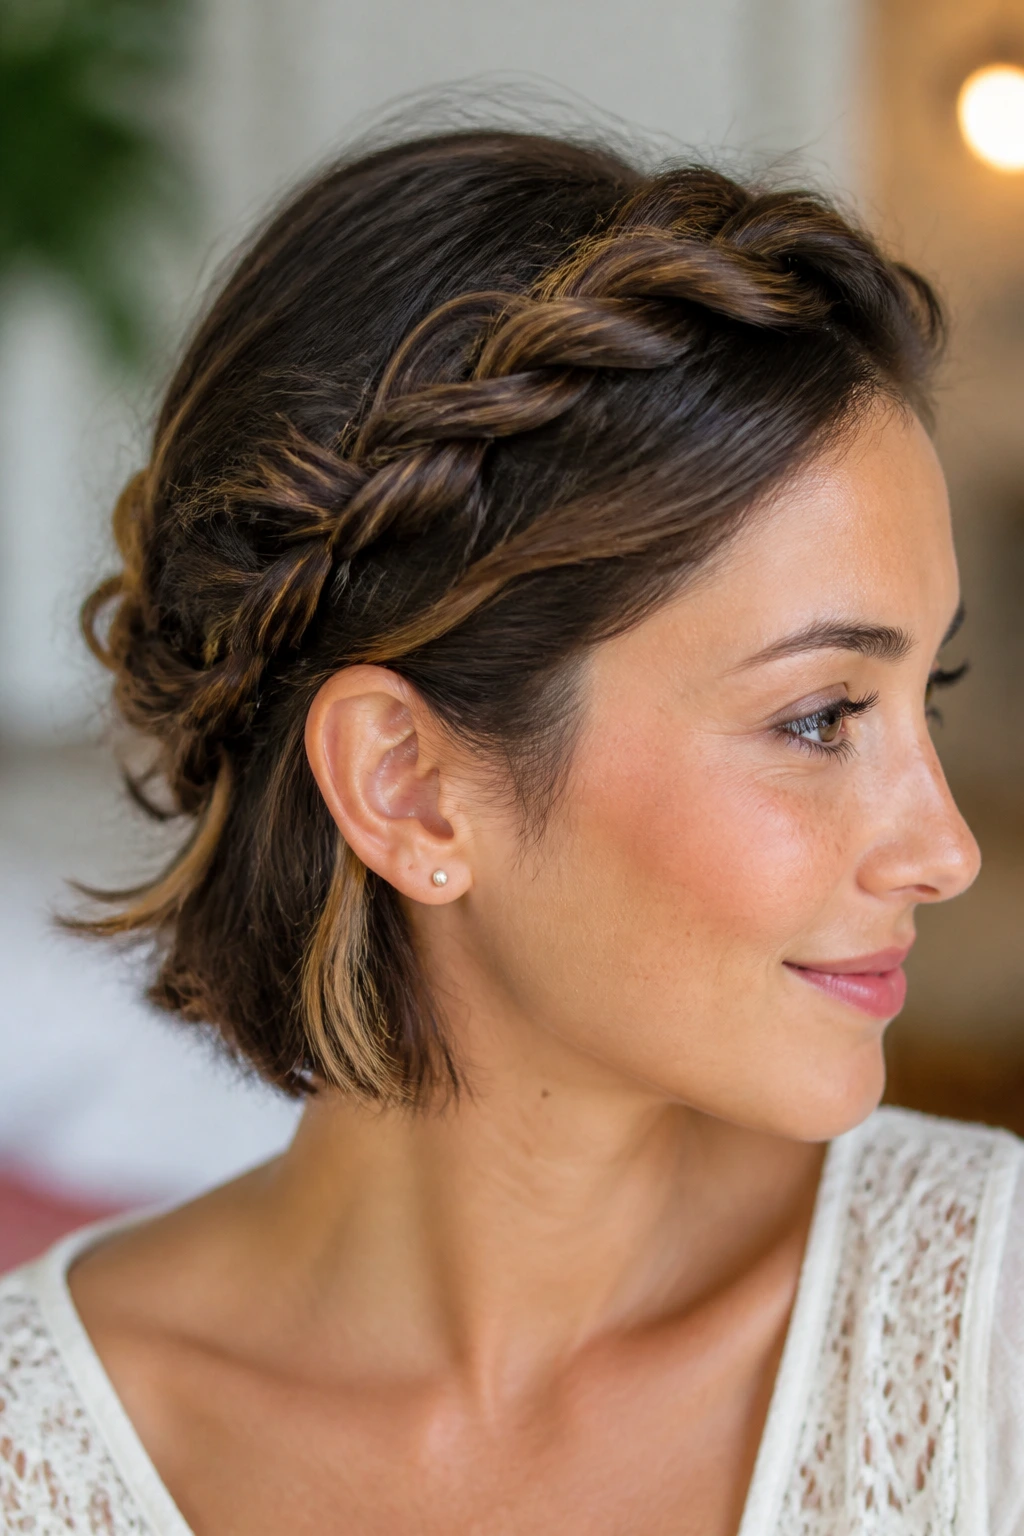
If you have a bob or lob, a full chignon might not be possible, but a twisted halo is perfectly achievable. This style creates the illusion of longer hair and provides a sophisticated, Grecian-goddess vibe that looks incredible with headbands or floral crowns.
Handling Shorter Lengths
You will need more pins for this style than for others. Start by taking small, one-inch sections of hair around the front and twisting them away from your face. Pin them down. As you move toward the back, incorporate the ends of the previous twists into the next one. It is essentially a loose, twisted roll that circles the head.
The Value of Texture Spray
Since you have less hair to work with, volume is your best friend. A texturizing spray or dry shampoo is vital here. It gives the hair the grip it needs to stay twisted. If your hair is too slippery, the twists will unravel and fall out of the pins within minutes. Do not be afraid to use a generous amount of product here; it is the glue that holds the style together.
10. The Vintage Victory Roll Twist

Victory rolls are an iconic vintage style, usually associated with the 1940s. When you combine them with a modern twisted updo, you get a hybrid that feels classic, daring, and incredibly high-fashion.
Constructing the Roll
Section off the front part of your hair—the “bangs” area. Roll this hair over your fingers to create a cylinder shape, then pin it securely. The key to the “twisted” version is to incorporate a twist within the roll. As you are coiling the hair, twist it slightly so that the hair strands spiral rather than lay flat.
Integrating the Back
Once the victory roll is set at the front, take the remainder of your hair and twist it back into a low, structured bun. The contrast between the tight, structured roll at the front and the relaxed, twisted bun at the back creates a beautiful balance. It is an editorial look that pairs particularly well with bold, red-lip makeup and simpler, streamlined wedding dresses.
11. Twisted Fishtail Chignon
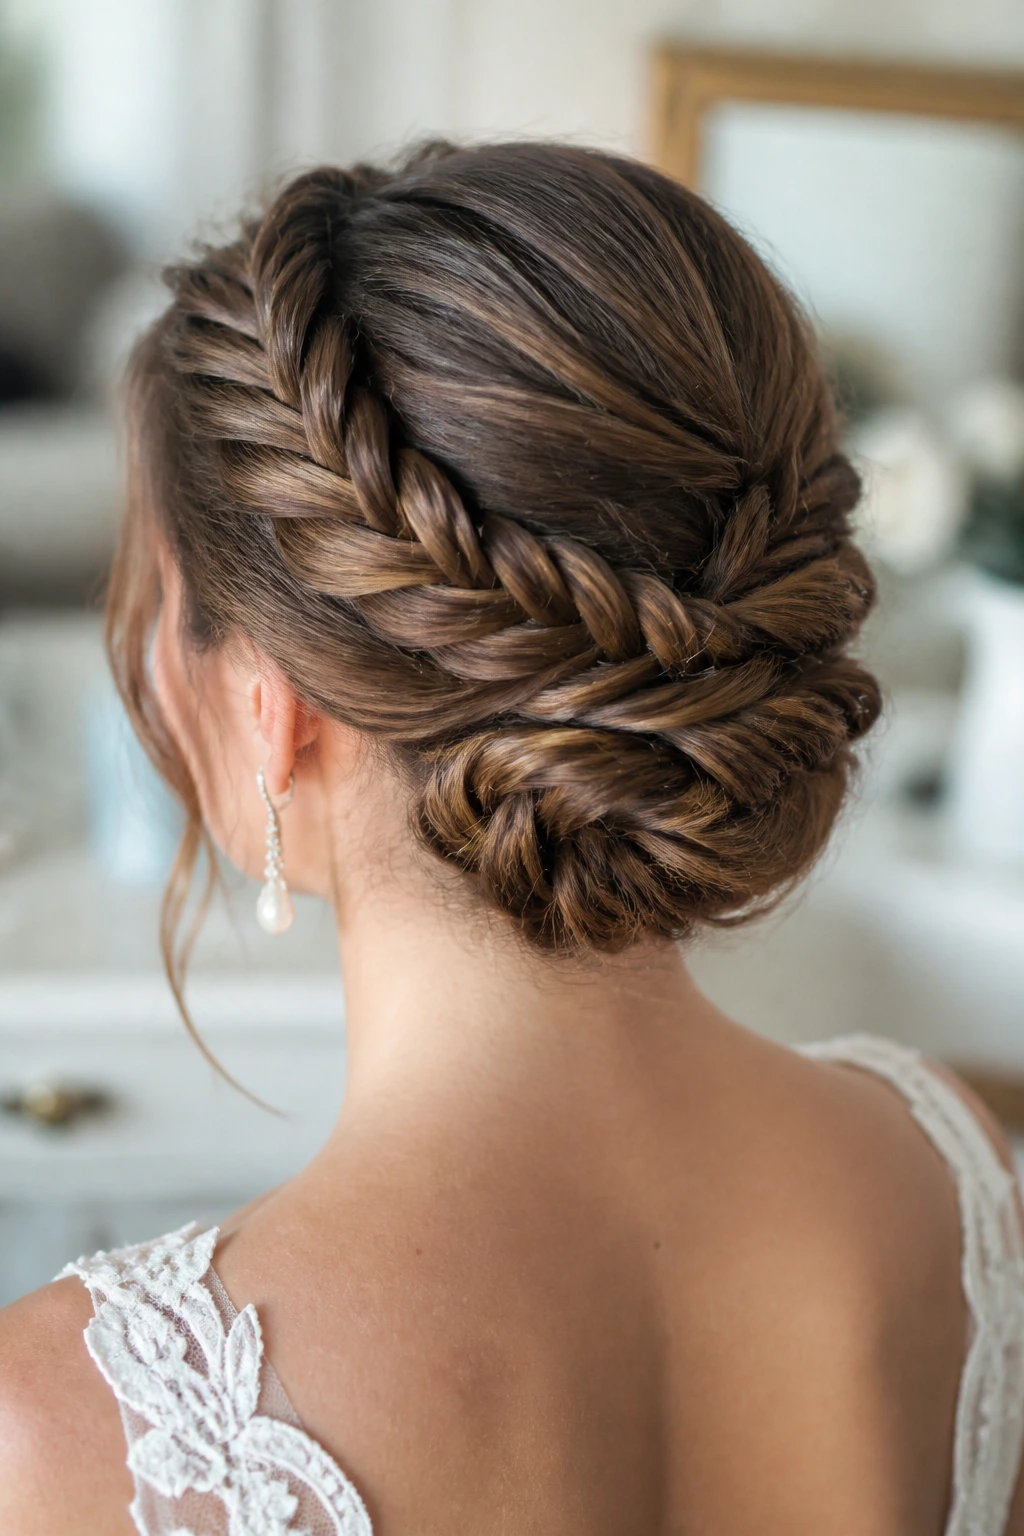
A fishtail braid is inherently woven, but a twisted fishtail is something entirely different. It involves taking two sections, twisting them, and then crossing them over while adding small pieces from the outside, creating a look that mimics the density of a fishtail braid without the time-consuming weaving process.
Why This Takes Patience
This style is not for the morning-of rush. It requires precision. You have to ensure that your tension remains consistent throughout the entire process. If you pull one twist tighter than the others, the whole structure will look uneven. Keep your fingers close to the scalp as you work, pinning as you go to lock in the progress.
Securing the Style
Because this style involves so many small, overlapping pieces, it is prone to unraveling. Use strong-hold hairpins, not just standard bobby pins. Always slide the pins in toward the center of the braid. This creates a “criss-cross” locking mechanism that keeps the style tight against your head, preventing it from drooping or loosening as the day progresses.
12. The Knotted Twisted Updo
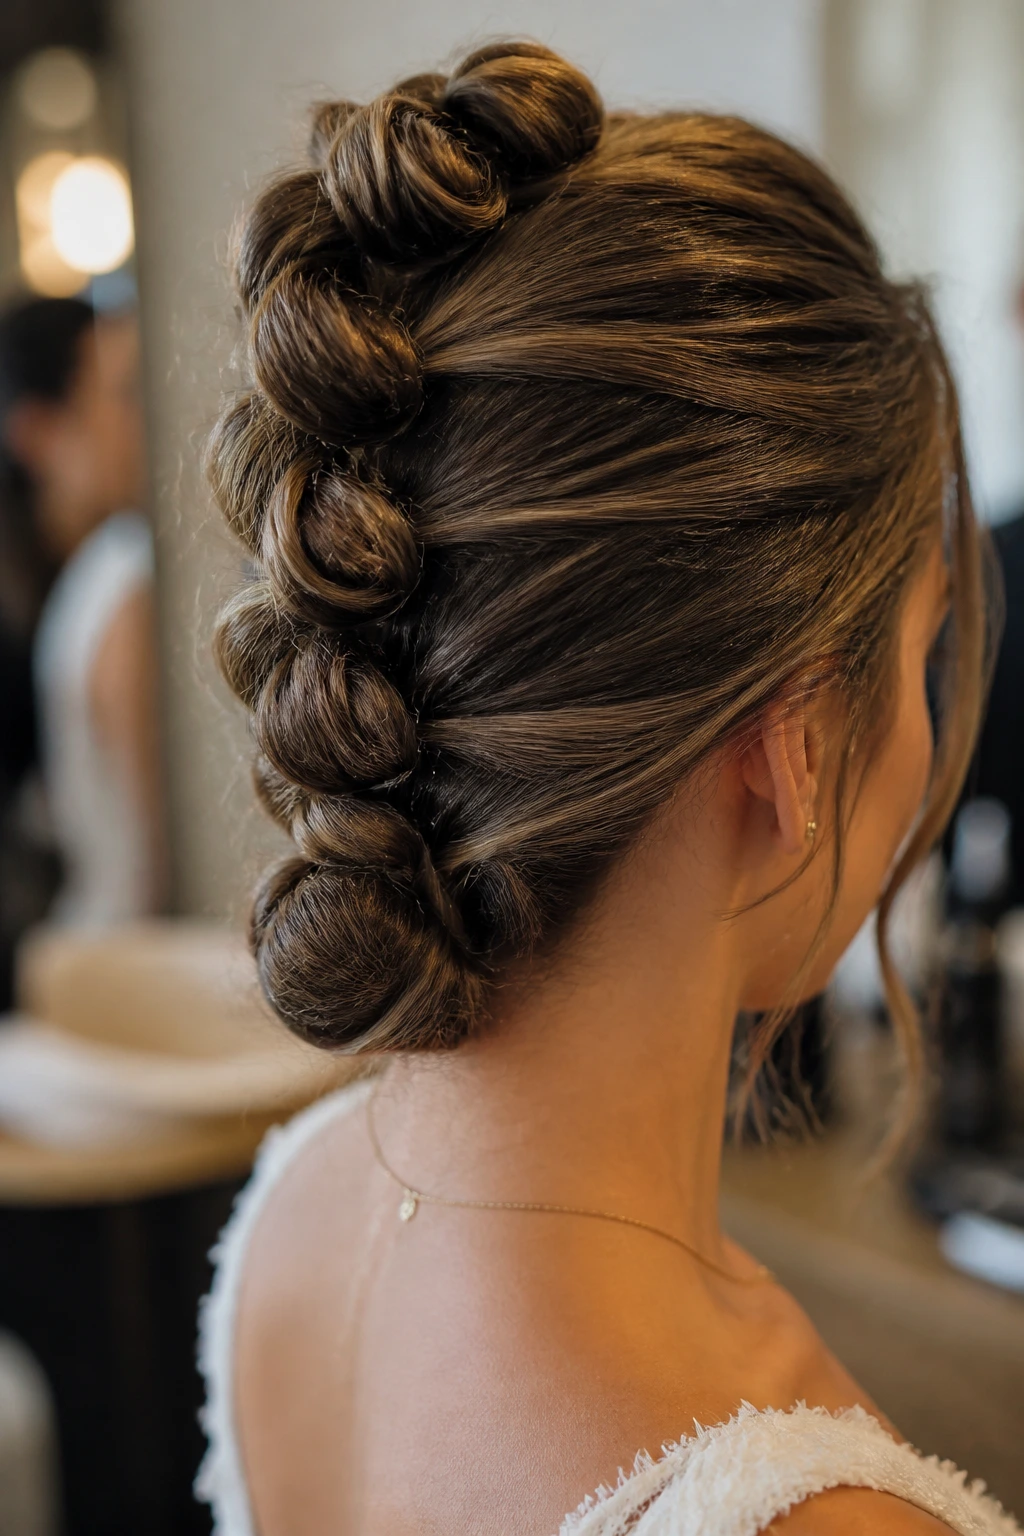
Knots create a different visual texture than standard twists. They are chunkier, more architectural, and look fantastic when you have thicker hair. A knotted twist is created by taking two sections, tying them into a simple knot, and then pinning the ends into the surrounding hair.
Building the Architecture
You are essentially making a chain of knots that runs from the crown of your head down to the nape of the neck. It is a linear, vertical style that adds height and elongates the face. It is a very flattering choice for rounder face shapes because of this vertical pull.
Finishing the Ends
When you get to the bottom, you will have a tail of hair left over. Do not leave it hanging. Twist it, coil it into a small bun, and tuck it behind the final knot. It keeps the neckline clean and allows you to wear jewelry—like statement earrings—without the hair competing for attention.
13. Twisted Pompadour with Soft Curls

A pompadour adds incredible drama. By twisting the pompadour section, you modernize it, making it look softer and more approachable. This is a great way to add height if you want to look taller or if your dress has a dramatic back that you want to showcase by keeping the hair lifted.
The Lift
Take the section of hair at your front hairline and backcomb the underside heavily. Twist it loosely and push it forward slightly before pinning to create that iconic “poof.” Then, gather the sides and back, twisting them inward toward the center to create a semi-updo. Leave some loose, curled tendrils around the face to prevent the pompadour from feeling too masculine or stiff.
Balancing the Drama
If you go for a high, dramatic pompadour, keep the rest of the style relatively simple. Avoid elaborate braids or excessive accessories. Let the shape of the twist and the volume of the pompadour be the main event. A pair of classic pearl or diamond stud earrings is often the perfect accompaniment to this look.
14. The Intricate Basket Weave Twist

This style looks like a work of art, and it is appropriately named. You are twisting and weaving sections over and under each other to create a pattern that mimics a wicker basket. It is incredibly secure because every piece of hair is locked in by another.
Planning the Sections
You must divide your hair into four distinct quadrants before you start. This is the only way to keep the “weave” pattern consistent. Work one quadrant at a time, twisting the sections and pinning them into the next quadrant. By the time you reach the final section, you will have locked all four corners together.
The Visual Payoff
This style is essentially a series of tension points. It is nearly impossible for this updo to fall out because the sections are physically woven together. It is an excellent choice for a long day where you know you will be hugging people, dancing, and moving around—the physical integrity of this style is unmatched.
15. The Minimalist Twisted Top Knot
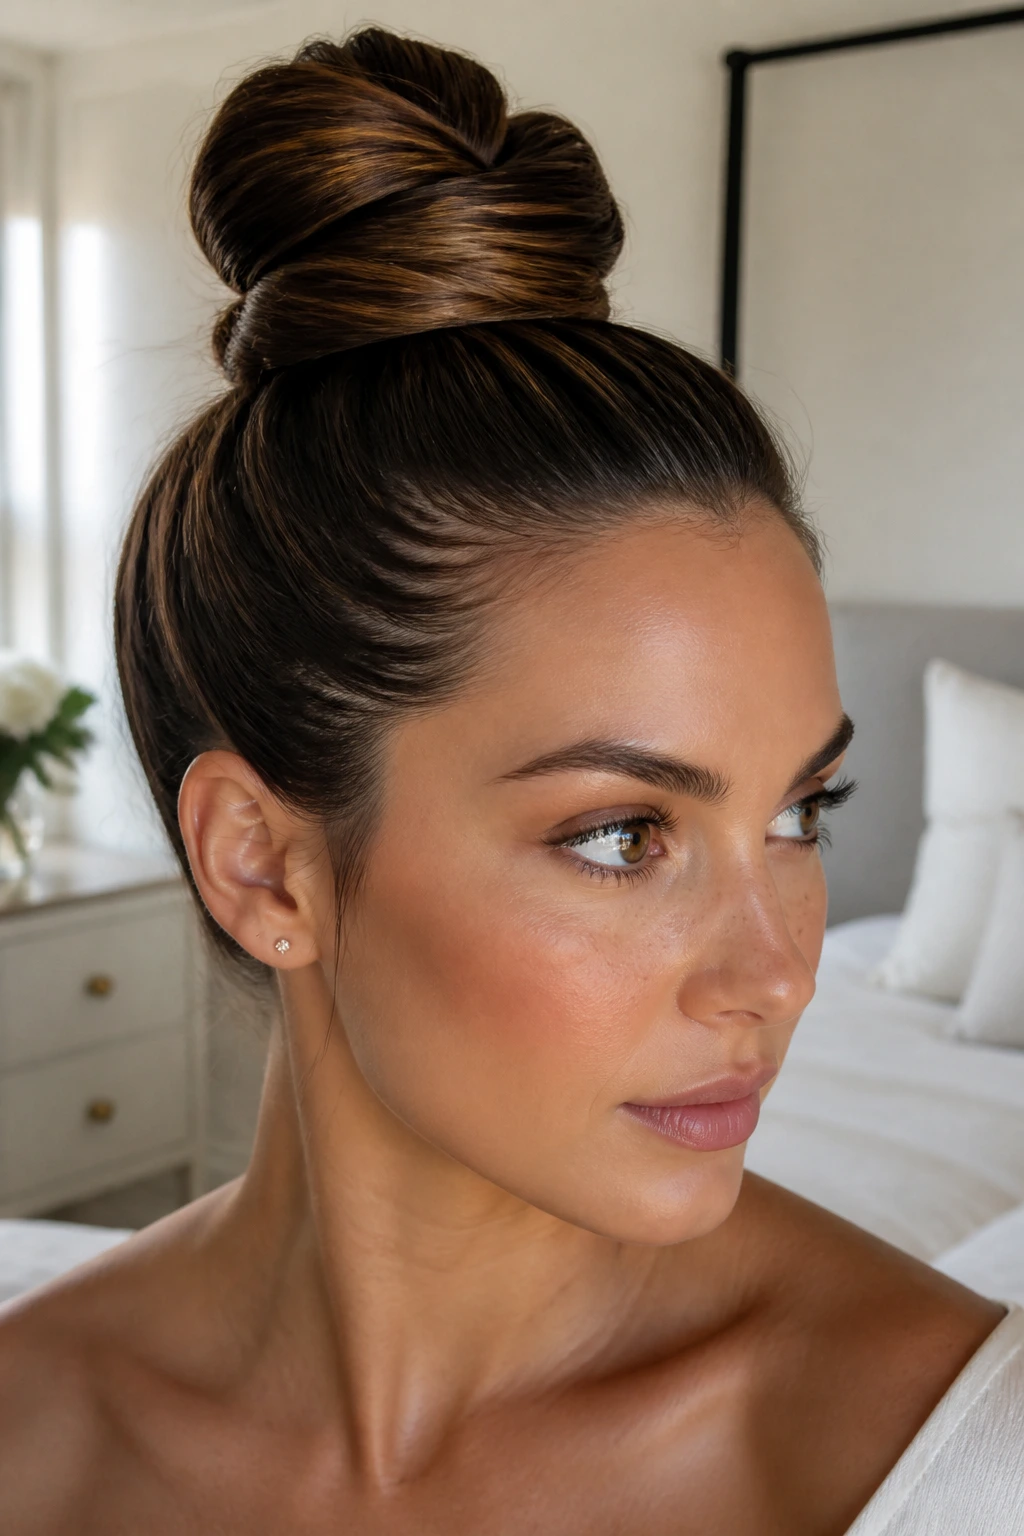
Sometimes, the best wedding hair is the kind that doesn’t look like wedding hair at all. A minimalist twisted top knot is chic, modern, and high-fashion. It works with almost any dress style and allows the neckline and accessories to take center stage.
Achieving the “Clean” Look
This is about finding the perfect placement. Too low, and it’s a bun; too high, and it’s a messy top knot. Aim for the “sweet spot”—the crown of the head. Gather the hair into a high, taut ponytail. Split it into two sections, twist each, and wrap them around each other. Coil this rope into a bun shape at the very top.
The Final Detail
The magic is in the finish. Use a small amount of shine serum on your palms and run them over the surface of the hair to catch any flyaways. You want this style to look like glass. It is sharp, clean, and intentional. It’s the perfect choice for a bride who wants to look like the best version of herself without any “princess hair” tropes.
Final Thoughts
Choosing a twisted updo for your wedding day isn’t just about picking a pretty picture from a magazine; it is a tactical decision about how your hair will behave under pressure. Twists provide internal structure, they handle humidity better than loose curls, and they offer a level of security that allows you to stop worrying about your reflection and start enjoying the moment.
Whether you opt for the architectural boldness of a knotted twist or the soft, romantic appeal of a side-swept chignon, the secret remains the same: preparation is everything. Invest the time in finding a texture that works for your specific hair type—be it grit, spray, or backcombing—and your style will hold. Once you have that foundation, the twist itself is just a simple way to create something timeless. Focus on the tension, secure the pins where they matter, and the rest will fall into place, leaving you with a look that is as sturdy as it is stunning.
