



Long hair can be a dream and a nuisance in the same breath. It falls heavy, slips pins, and somehow finds the one loose strand that ruins the whole look. That is exactly why braided updo styles for long hair keep coming back: the braid gives the hair something to grip, the updo gets the weight off your neck, and the finished shape usually lasts longer than a simple twist or bun.
My own bias is pretty plain. I trust a braid more than I trust a pile of pins. A braid gives structure first, style second. Once that base is locked in, the rest of the updo has a fighting chance, whether you’re heading to a wedding, a workday, or just trying to survive a windy afternoon without hair in your mouth.
Long hair also gives you more to work with, which sounds nice until you’re fighting tangles and bulk. The trick is not to cram every strand into one tight knot. Better to build in sections, use a little texture when the hair is slippery, and let the braid do some of the heavy lifting. That’s where the best braided updos start to earn their keep.
1. Crown Braid Bun for Long Hair
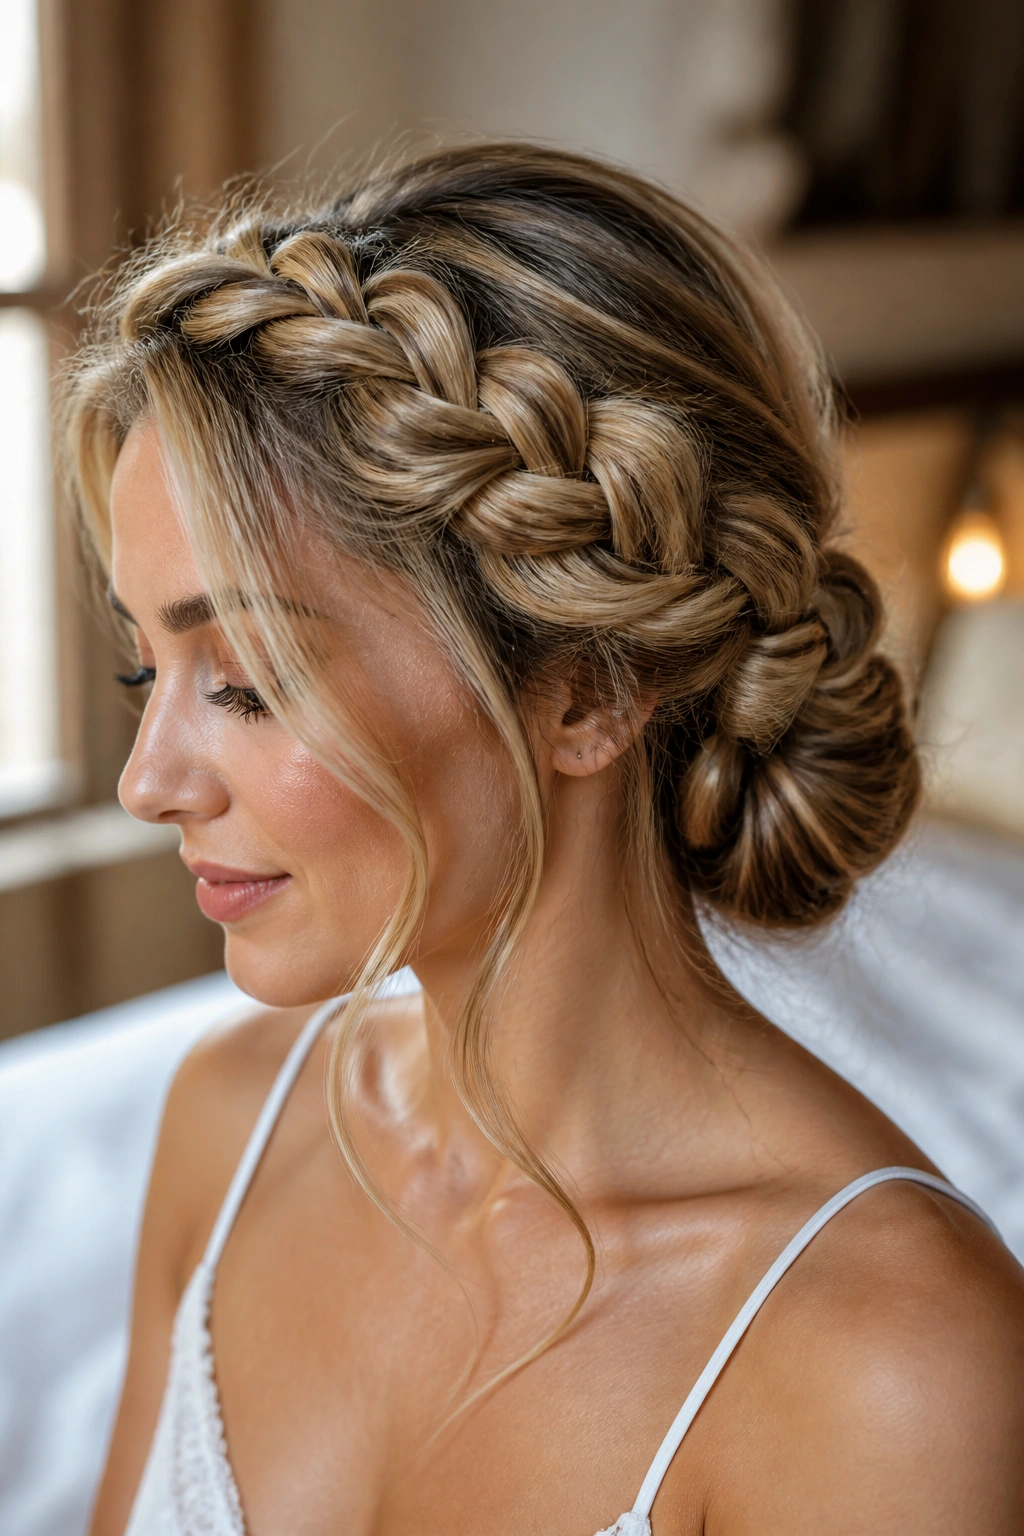
A crown braid bun is one of those styles that looks more complicated than it is. The braid wraps around the head like a soft frame, then disappears into a low bun or tucked knot at the back. On long hair, the extra length gives the braid more body, so the crown doesn’t look thin or skimpy.
Why It Stays Put
The braid acts like a rail. Once it’s pinned along the hairline, the rest of the style has a solid anchor, and that matters when your hair is heavy or layered. If your ends are dry or slippery, a little texturizing spray at the mid-lengths helps the braid keep its shape instead of sliding flat by lunchtime.
- Best for: thick hair, second-day hair, formal events
- Good grip helpers: mousse, dry shampoo, or a tiny bit of styling cream
- Pin trick: cross two bobby pins in an X at the bun base for extra hold
My favorite part: it keeps the face open without looking severe. That’s rare.
2. Dutch Braid Low Chignon

If you want a style that reads polished without acting fussy, this is the one. A Dutch braid sits raised from the scalp, so even a simple single braid has that carved, almost rope-like look. Wrapped into a low chignon, it feels tidy, clean, and a little more expensive than a basic bun.
The nice thing about long hair is that the braid has enough length to travel before it disappears into the chignon. That creates a clean line down the back or across one side, which looks especially good with a blazer, a square neckline, or a dress with a bare shoulder. Straight hair tends to slip, so I’d rough up the roots first.
Wavy hair takes this style fast. Curly hair can do it too, though you may want to stretch the braid a bit as you go so the bun doesn’t turn into a dense ball at the nape. The chignon itself should feel tucked, not packed. If it feels like a small helmet, it’s too tight.
One more thing: leave the braid slightly soft at the edges. A too-perfect Dutch braid can look stiff. A little looseness makes the bun read as intentional instead of overworked.
3. Halo Braid Updo
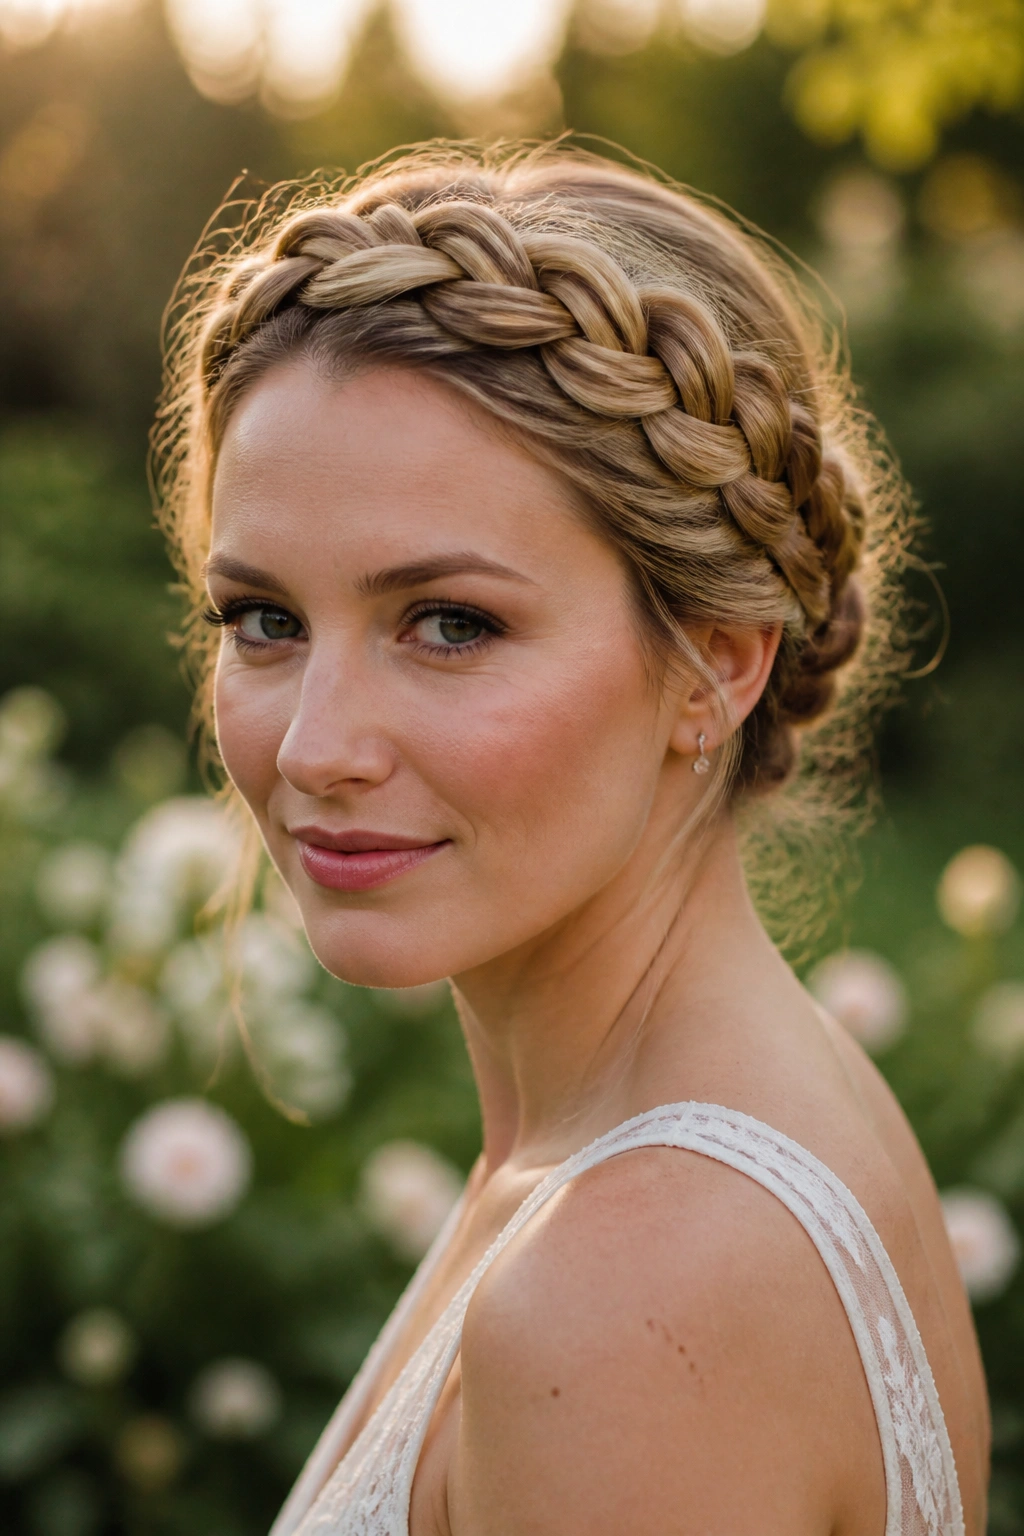
Why does the halo braid work so well on long hair? Because long length gives the braid enough heft to travel all the way around the head without looking skinny near the ends. You get that wrapped, almost circular frame, and the hair sits off the neck with a softness that a plain bun can’t match.
The style is especially good when you want something romantic but not sugary. It frames the face, keeps the bulk controlled, and can be pinned into a tucked finish at the back so the ends disappear. If your hair is layered, braid a touch tighter near the temples and a touch looser behind the ears. That keeps the halo from fraying into little flyaway pieces.
How to Shape the Halo
Start the braid low and follow the hairline rather than trying to arch it too high. High halos can look like a headband sitting on top of the hair. Low ones feel more natural and usually stay cleaner around the ears.
- Use: light hold spray on the braid only
- Avoid: heavy oils at the roots; they make the braid slip
- Works best with: medium to thick lengths that can support their own weight
Soft. Secure. Not fussy.
4. Double French Braid Roll
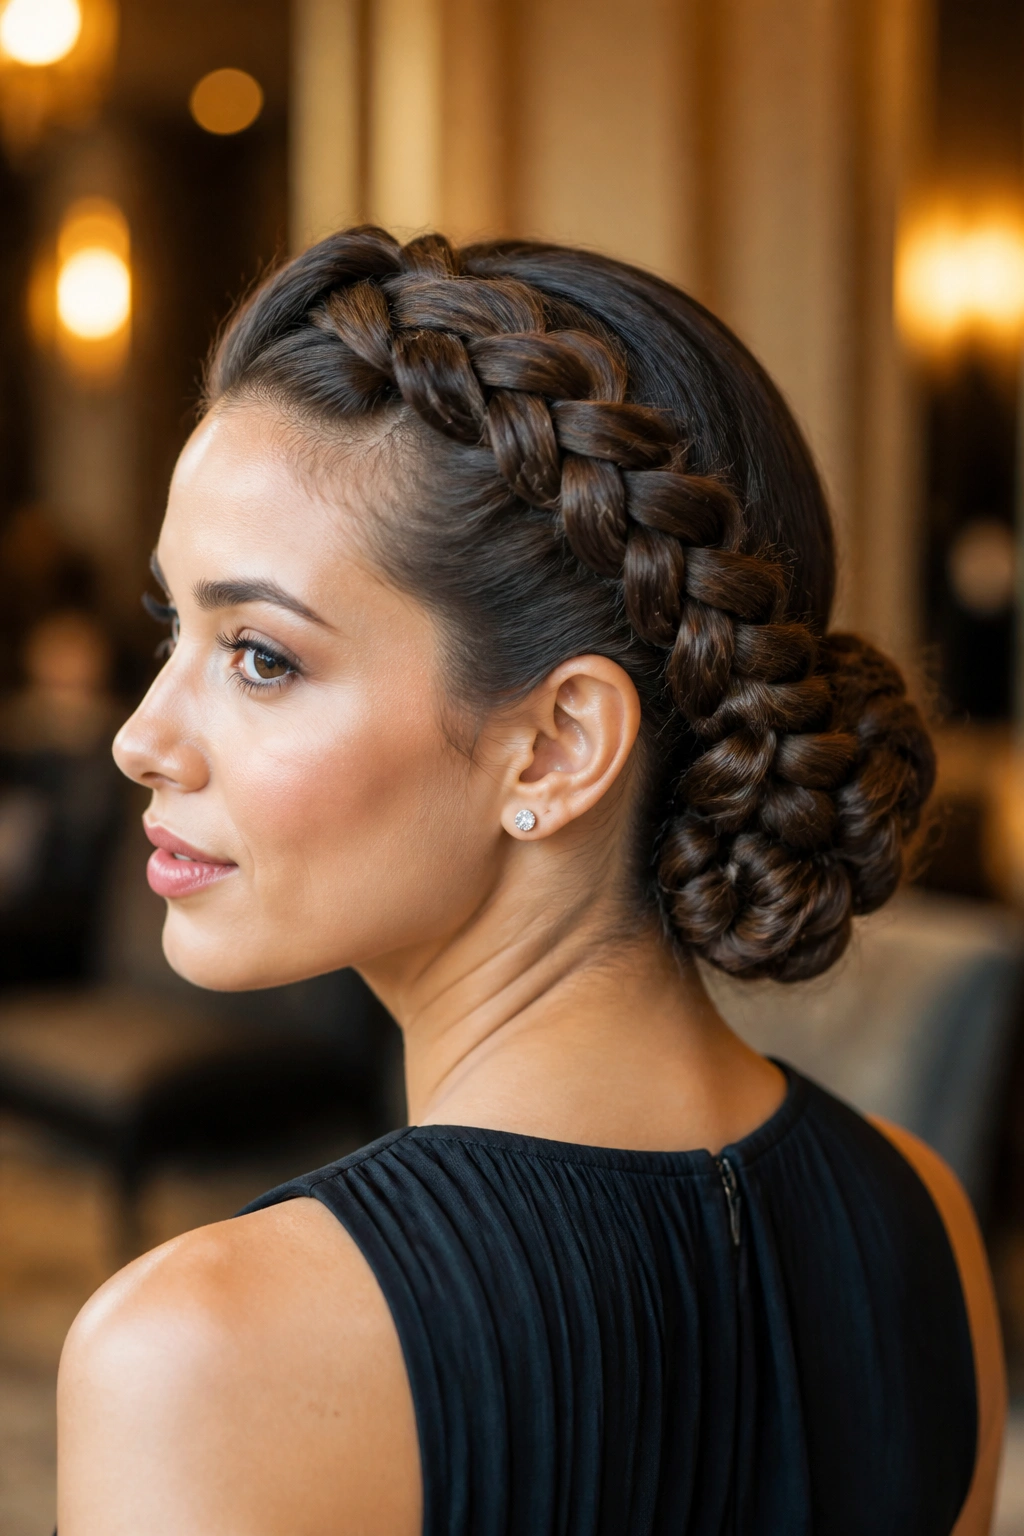
Picture two French braids coming from the front hairline and moving straight back, then meeting at the nape and rolling into a low tucked shape. It sounds gym-class practical, and yes, it can handle a sweaty day, but it also looks polished enough for dinner or a long event where your hair has to behave for hours.
The split braid pattern does something smart on long hair: it distributes the weight. Instead of one heavy section pulling from the crown, two braids share the load. That usually means less scalp tension and fewer little bumps at the back. It also gives the style a neat center line that looks clean even if the braid itself gets a little fuzzy.
I like this one for hair that won’t sit still. Very layered lengths, thick waves, and dense curls all benefit from the dual-braid structure. If you have fine hair, you can still pull it off, but the braids may look better if you gently pancake them after pinning — just don’t yank them apart. That’s how good shapes go limp.
The roll at the base should feel cushioned, not stuffed. A few hidden pins are enough. More is not always better.
5. Braided Top Knot
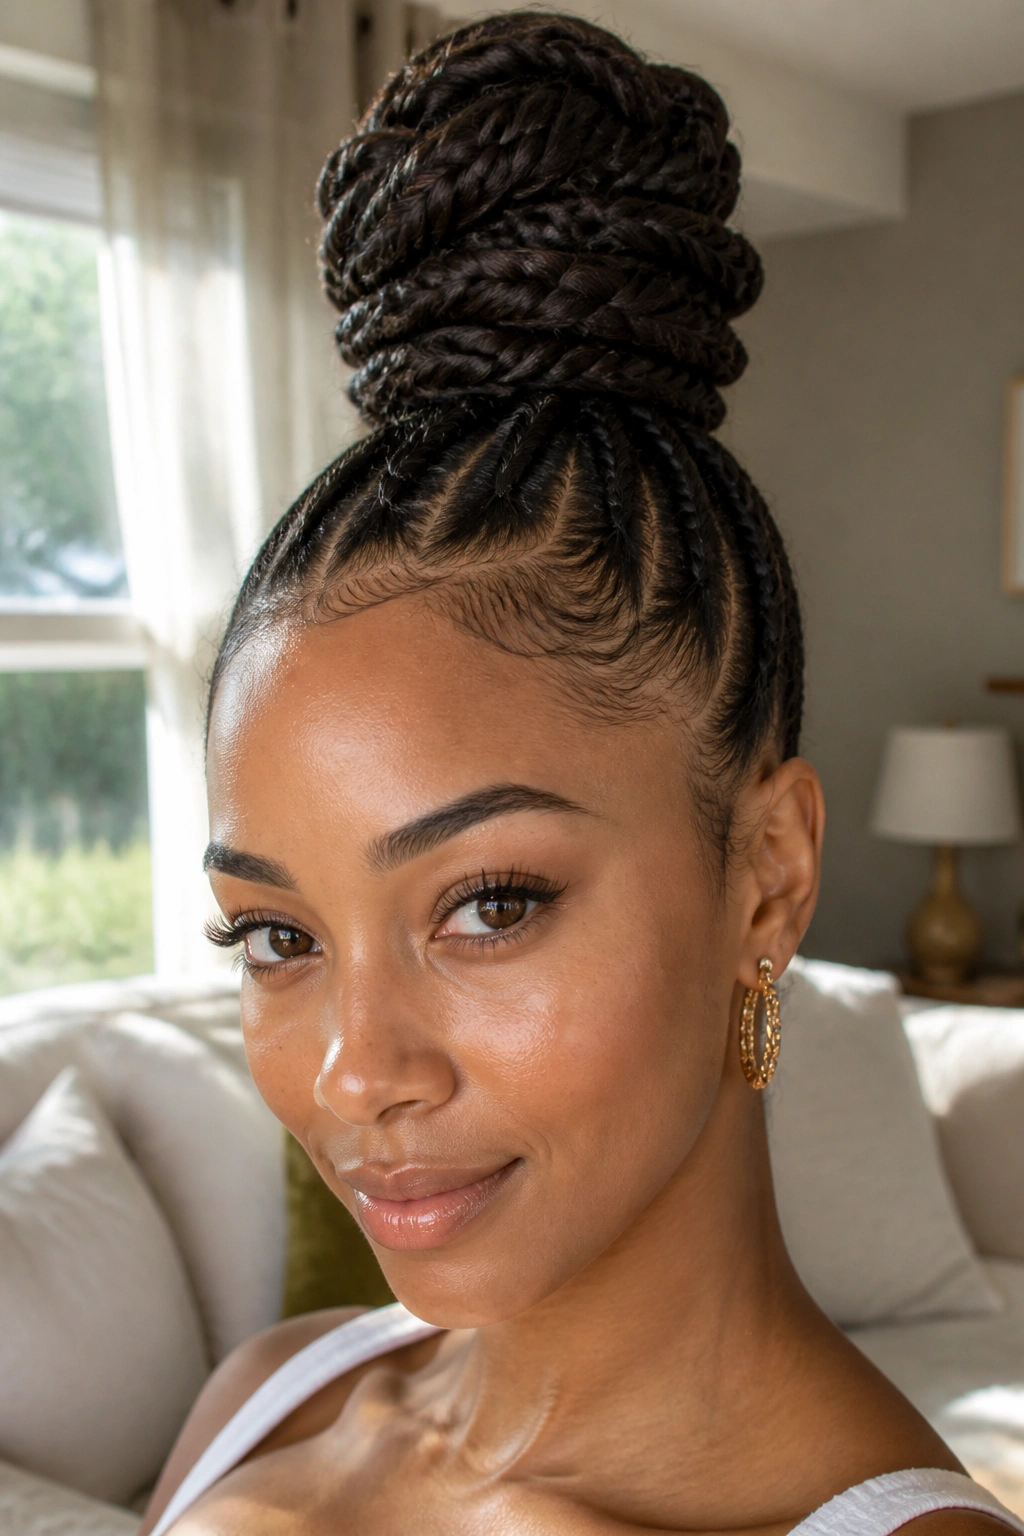
A braided top knot is what I reach for when I want long hair off my shoulders without looking like I gave up. The braid gives the knot some texture, and the knot itself keeps the bulk up high, where it reads casual but still finished. On very long hair, this is one of the few high styles that can actually hold all that length without sagging by noon.
The key is to braid the ponytail before you wrap it. A plain top knot on long hair can turn into a soft lump, which is fine if that’s the mood, but a braid keeps the knot from collapsing. It also helps the ends stay tucked in instead of poking out from the center like little wires.
What Makes It Work
You want enough tension to secure the base, but not enough to give yourself a headache. That line matters. Tight roots make the style look clean for about an hour and miserable for the rest of the day.
A few blunt truths:
- If your hair is silky, add texture spray before the ponytail goes up.
- If your hair is thick, use a heavy-duty coil elastic.
- If you want a softer finish, pull a few face-framing strands loose after the knot is pinned.
Good style. Bad headache. Pick the first.
6. Fishtail Bun
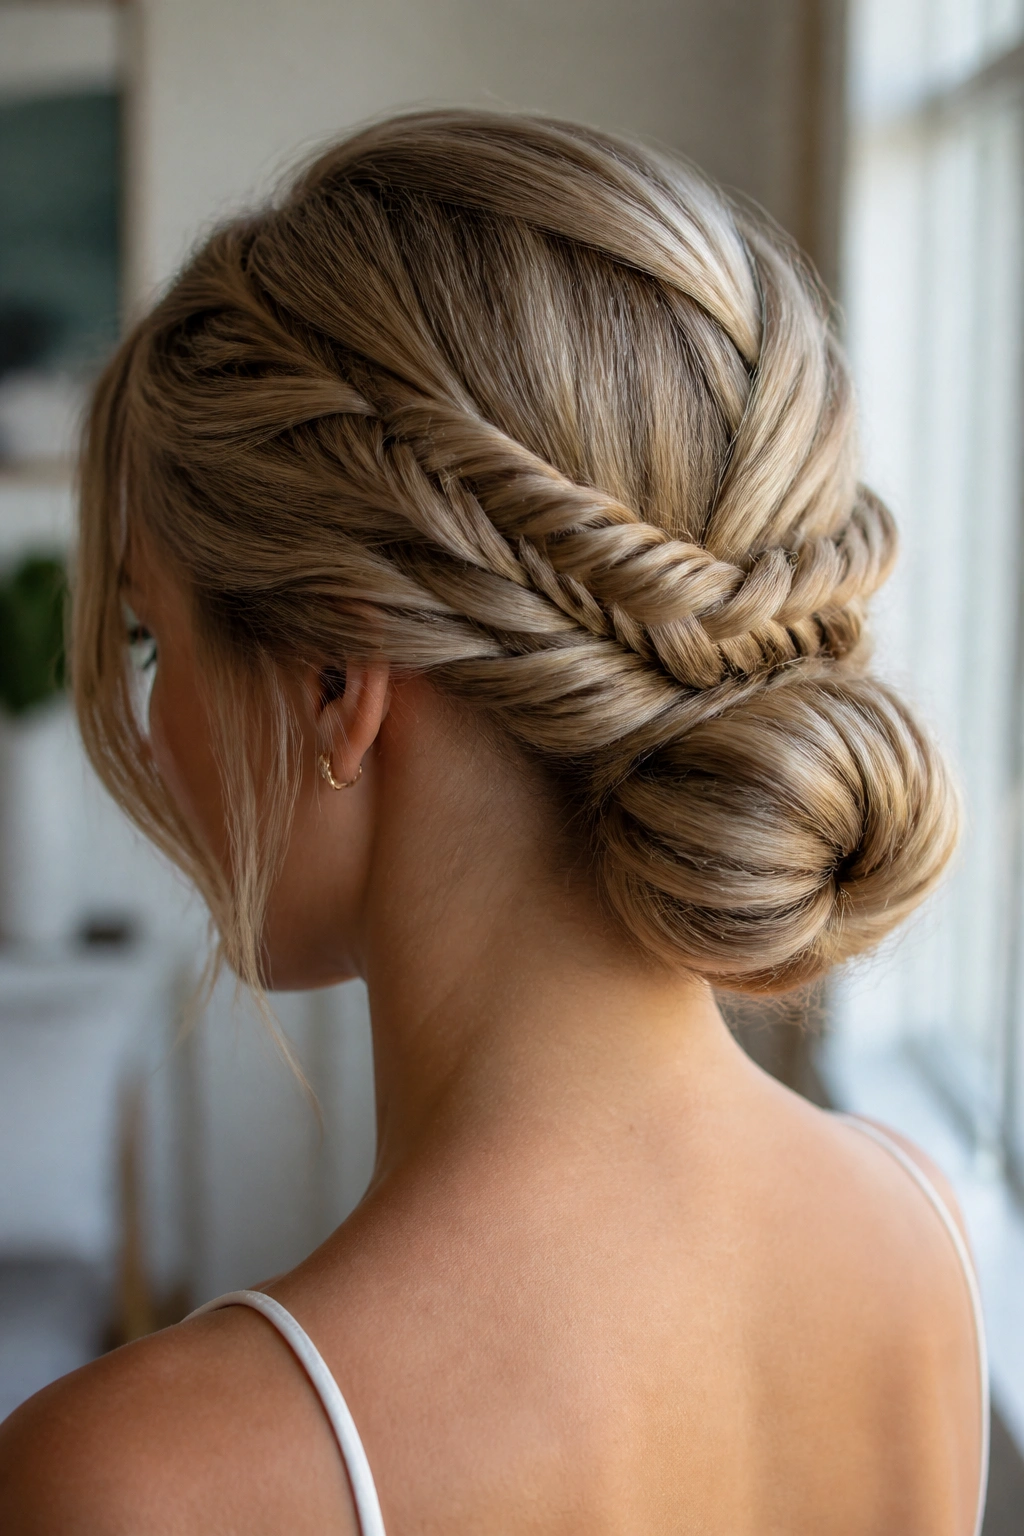
A fishtail braid has a finer, woven look than a regular three-strand braid, and that texture changes the whole mood of the updo. Wrapped into a bun, it looks intricate even when the shape is basically simple. The braid itself does half the visual work, so the bun can stay low and tidy.
This style is especially nice on long hair because the braid has enough length to show off its pattern. Shorter hair can do it, but the texture is easier to read when there’s more surface to work with. If your hair tends to puff at the crown, smooth that area before you start braiding. A fishtail shows every bump.
Where It Shines
Think bridal hair, rehearsal dinners, gallery openings, or any setting where you want the style to look deliberate without screaming for attention. It also works well with a middle part, though I prefer a slight off-center part because it softens the line a bit.
You can keep the bun sleek or pinch the braid loose after it’s wrapped. Sleek feels modern. Looser feels softer. I’d skip the super-loose version if your hair is layered heavily; the ends can start escaping, and then the whole thing loses shape at the back.
One small detail matters here: use clear pins or pins that match your hair color. A fishtail shows enough texture already. You do not need hardware stealing the scene.
7. Braided Space Buns

This one is playful, but it is not flimsy. Braided space buns use two braids — usually from a middle part — that feed into high buns on each side of the head. On long hair, the style has real volume, which keeps it from reading like a costume unless you push it that way on purpose.
The braid sections give the buns more structure than a simple twisted puff. That helps if your hair is thick, because thick lengths can make high buns feel too heavy or too flat. Split into two, the weight becomes more manageable. The style is also practical for movement. It stays off the neck, and the buns do not flop around when you walk.
I like this one for casual events, concerts, festival days, and any situation where you want your hair to feel part of the outfit. It can be neat or messy. Both work. A sleek version looks sharper; a slightly undone version feels younger and more relaxed.
If your ends are long enough to poke out, tuck them under each bun instead of wrapping them loosely. Loose ends make the style look unfinished fast. A snug tuck keeps the buns round and clean.
8. Side Braid Wrapped Bun
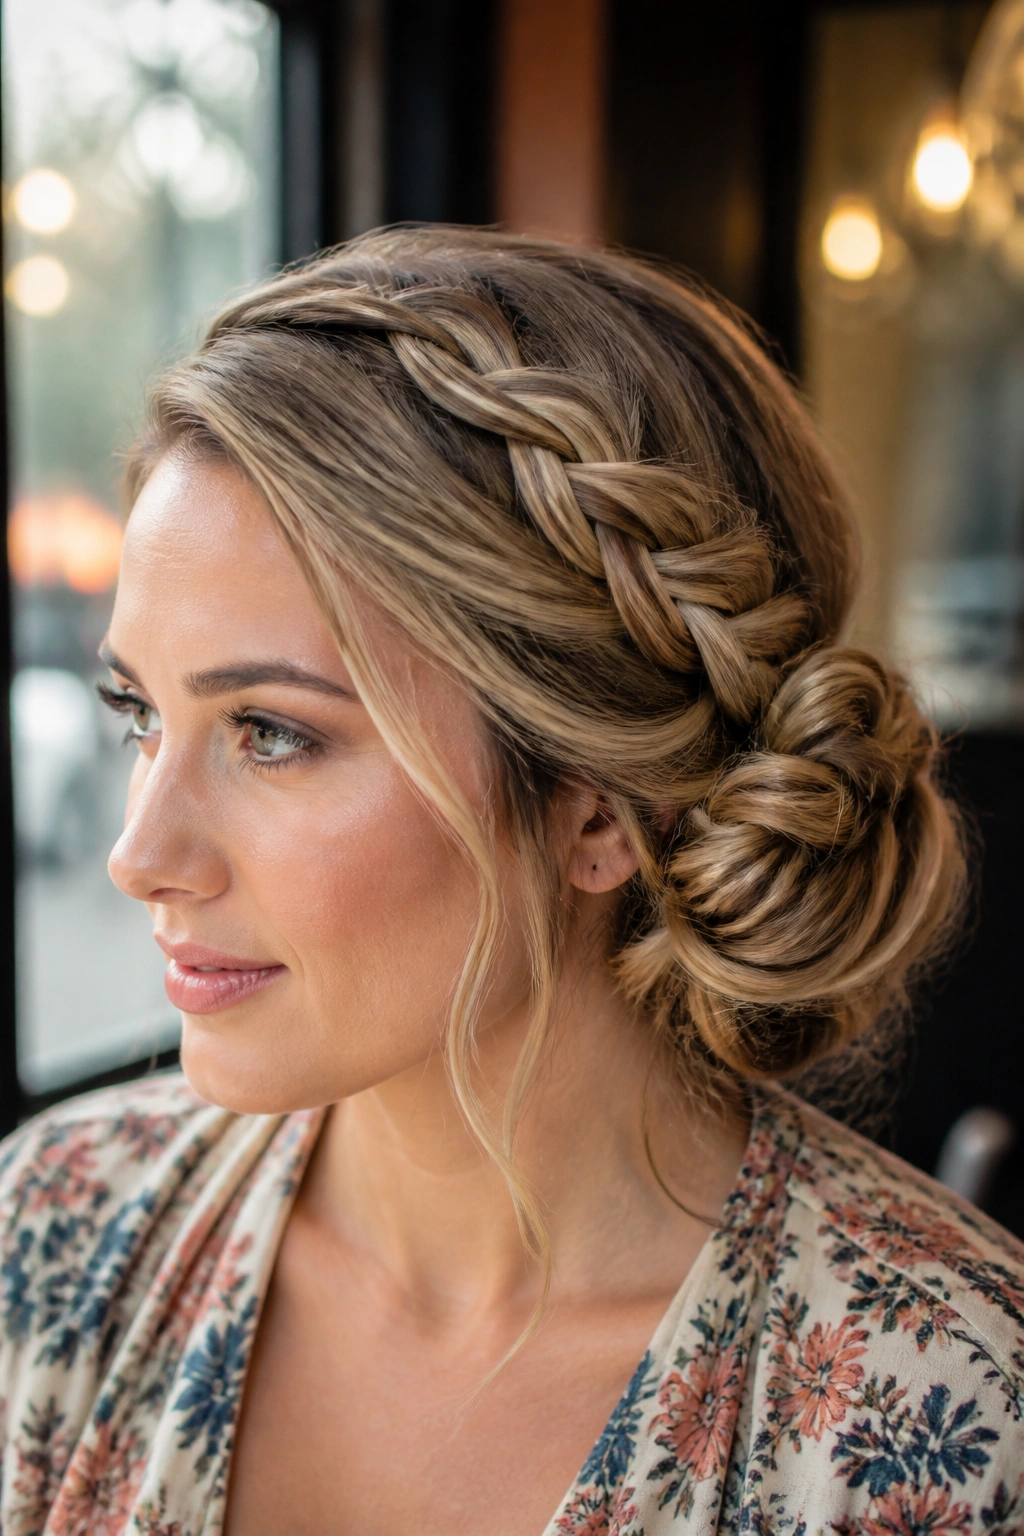
A side braid wrapped bun gives you asymmetry, which is a nice break from the usual center-parted look. One braid starts from a deep side part or one temple, follows the head diagonally, then wraps into a low bun at the opposite side. That diagonal line is the whole point. It makes long hair look controlled without flattening it.
The style works especially well if your hair has layers around the front. Those shorter pieces can blend into the braid instead of fighting it, and the diagonal path helps disguise any uneven thickness. If one side of your hair is a little fuller than the other, this is the style to use. It hides imbalance instead of highlighting it.
I’d keep the bun slightly off-center rather than sitting dead in the middle of the nape. Off-center looks more relaxed. Dead center can feel strict, especially if the braid is tight. A few pins placed under the bun, not just around it, make the wrap feel secure from underneath.
This is also one of the more flattering styles for earrings. Big hoops, small drops, even a plain stud. The braid draws the eye across the face, so the neckline and jewelry get room to breathe.
9. Twisted Rope Braid Updo

A rope braid is technically a twist, not a classic braid, but long hair loves it. Two strands are twisted in opposite directions, then wound together, and the result is smooth, glossy, and a little more refined than a three-strand plait. It has a clean line that can feel almost architectural when you pin it into an updo.
What I like most is how tidy it looks on heavy hair. Rope braids hold their shape without getting bulky, so the finished updo can sit close to the head. That matters if you hate a big mound of hair at the back. The style is also forgiving on straight hair, which can sometimes look messy in a regular braid when the strands keep slipping.
How to Keep It From Unraveling
The twist needs tension from the start. Not tight enough to hurt, but firm enough that each strand keeps its direction. If you let one side go slack, the whole rope starts to spin open.
- Start with: slightly dirty or textured hair
- Seal the ends with: a small elastic before pinning
- Finish with: a mist of flexible-hold spray, not stiff lacquer
I reach for this one when I want something sleek that still has movement. It never feels frozen in place.
10. Infinity Braid Bun
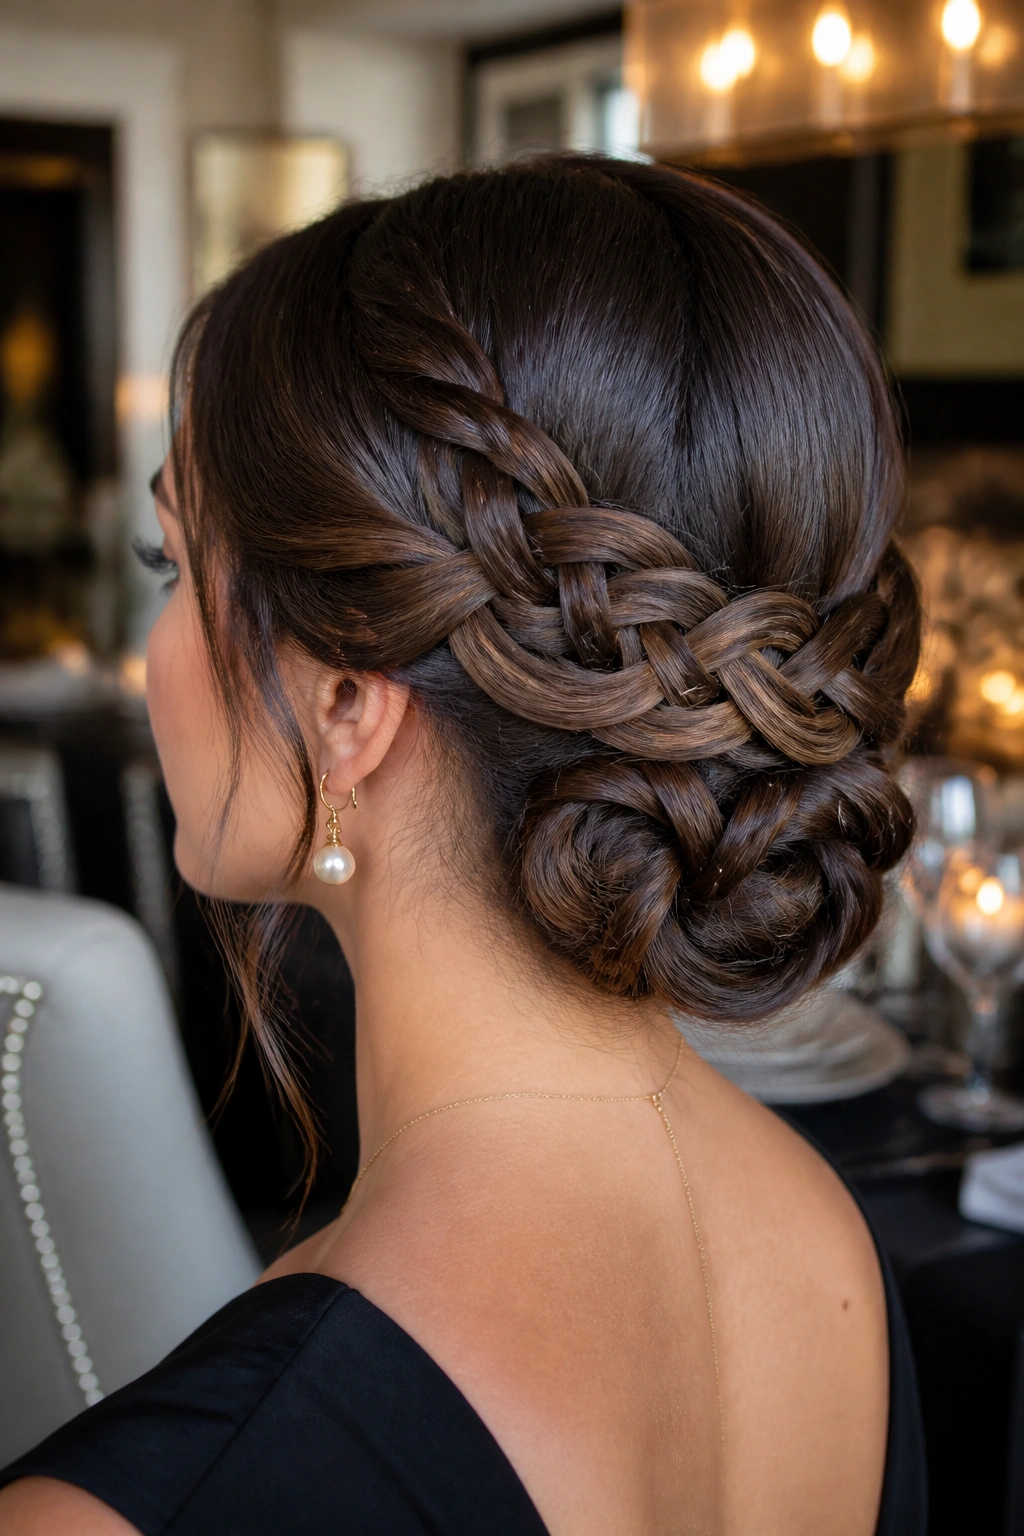
The infinity braid bun has a built-in wow factor, mostly because the braid pattern looks more complex than it really is. The weaving creates that looping, figure-eight feel, and once it’s pinned into a bun, the whole style looks like it took a lot more work than it did. I have a soft spot for styles like that.
On long hair, the loops can stay visible longer, which is the whole appeal. Shorter lengths sometimes lose the pattern once they’re pinned, but extra length keeps the braid readable even in the bun. If your hair is thick, keep the tension even as you weave. One loose loop can make the whole thing sag.
The Part That Matters
The infinity braid needs a clear path. Don’t let the sections wander. Keep the weave tight near the scalp and a touch softer as you move toward the bun so the shape doesn’t turn rigid. Once the braid is complete, coil it low or mid-height and pin from the inside of the bun outward.
Good for: dinners, formal nights, and any event where you want one detail that people notice up close.
Bad for: the morning you’re running late and already annoyed.
A small detail that helps a lot: smooth the crown before you start. The braid pattern looks best when the base is flat.
11. Milkmaid Braided Updo
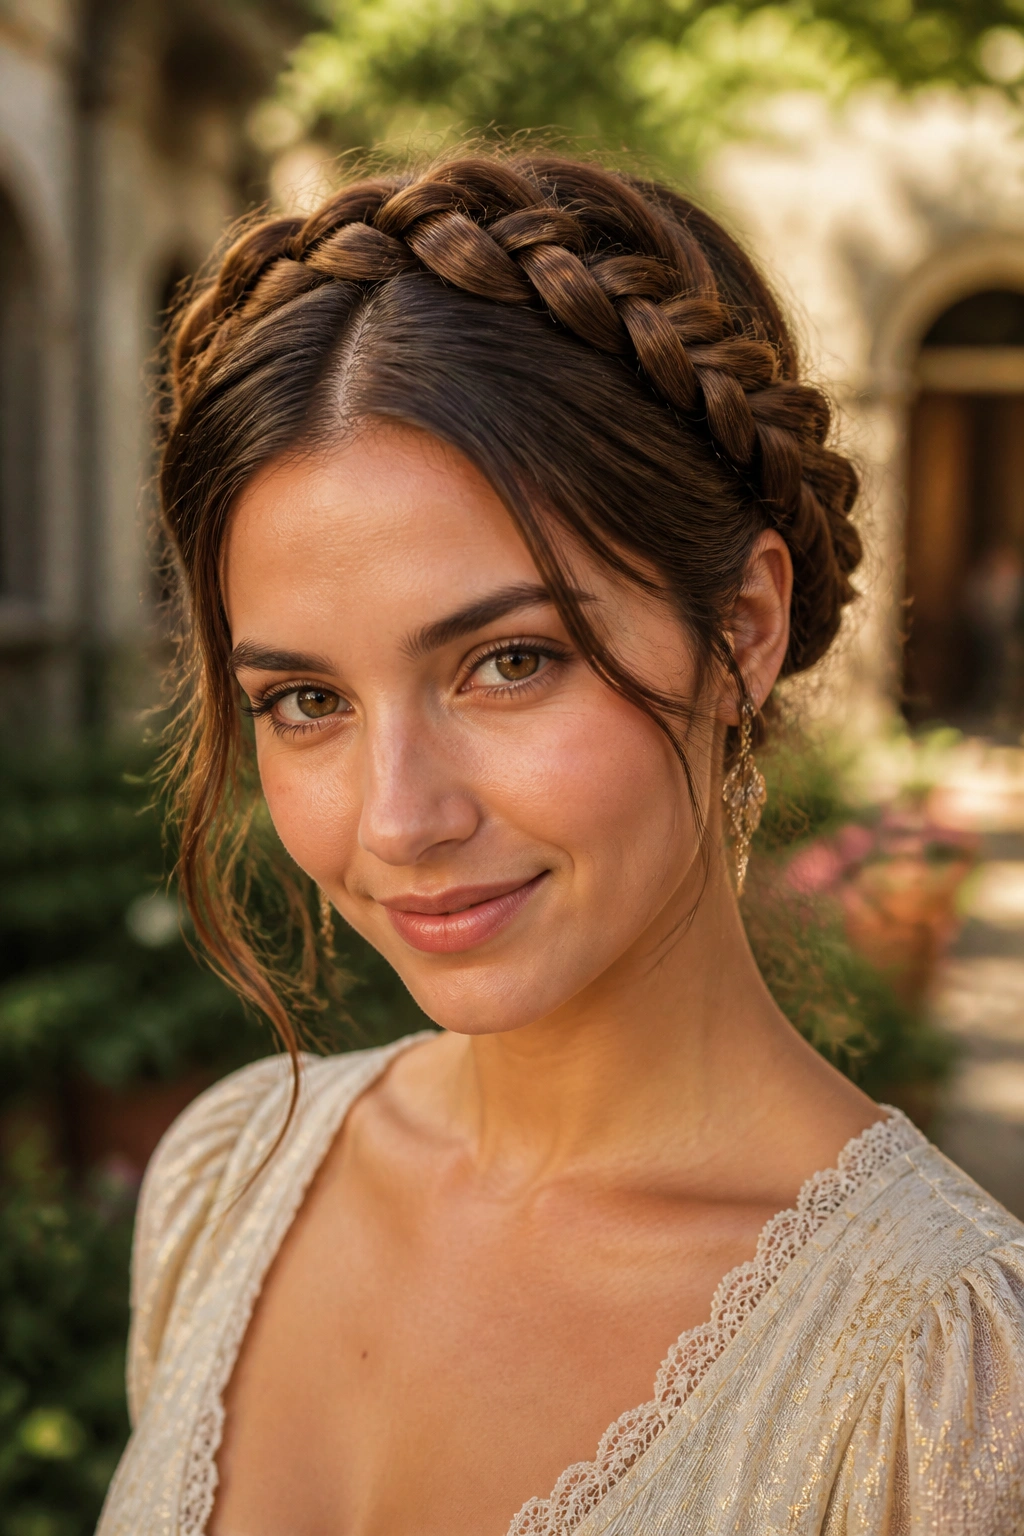
A milkmaid braided updo has that classic wrapped-over-the-head look, but on long hair it gains a little more grace because the braids are long enough to curve cleanly and tuck neatly. Two braids cross over the top of the head, then get pinned in place, usually with the ends hidden under the braid line or tucked behind the ears.
The style sits somewhere between romantic and practical. It keeps the hair up and off the shoulders, but it also leaves a soft frame around the face. I think that balance is why it stays so popular. It does not feel severe, and it doesn’t collapse into a messy knot either.
If your hair is very long, braid the tails all the way down and fold the lengths inward before pinning. That keeps the ends from hanging loose at the back. If your hair is layered, a little edge control or a touch of styling cream around the hairline can keep the smaller pieces from drifting out of place.
This one pairs well with soft makeup, but it also works with a very plain face and a strong neckline. The braid does enough on its own. No need to pile on extra drama.
12. Pull-Through Braided Pony Updo
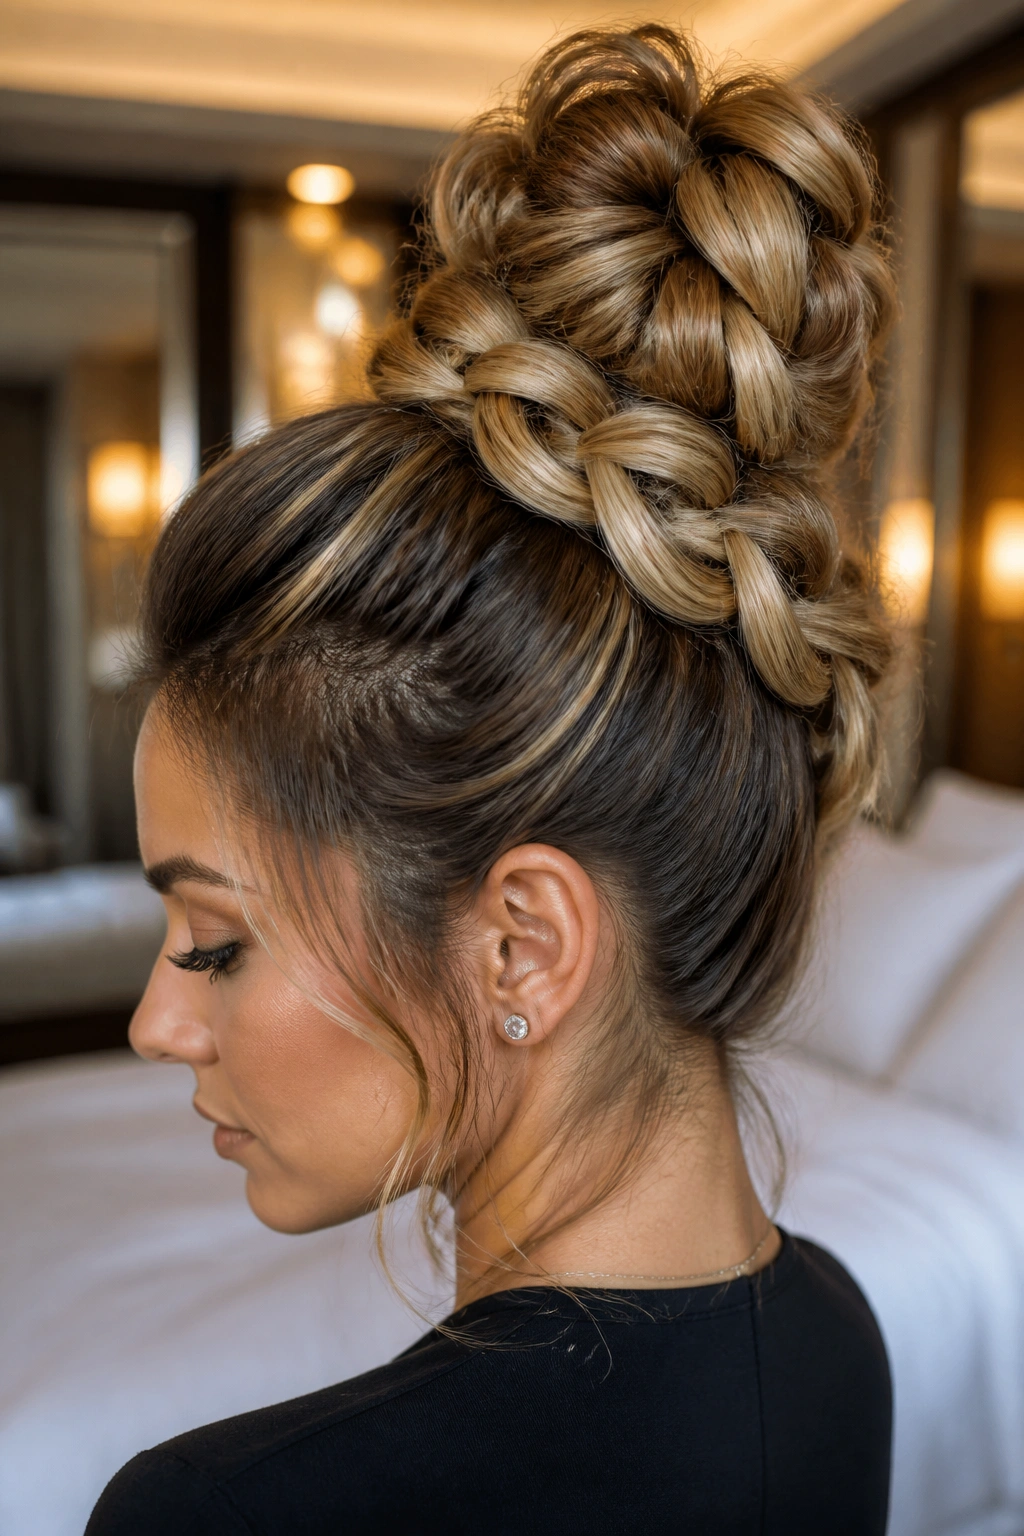
Unlike a classic braid, the pull-through braid builds volume by stacking little ponytail sections one over the other. That means the finished look can be big, plush, and sharply defined, which is exactly why it works so well for long hair. You get the drama of a thick braid without needing every single strand to cooperate in the same direction.
Once the pull-through is finished, it can be looped into a ponytail bun or folded upward and pinned into an updo shape. The structure stays visible, which is useful if your hair is very dense and you want people to see the pattern from across the room. It also creates a nice lift at the crown without needing heavy teasing.
Who It Suits
This style is a gift for thick hair. Thin hair can wear it too, but it usually needs a few hidden elastics and a bit of teasing at each section to keep the braid looking full. Clear elastics help a lot here. Black elastics on dark hair can still peek out if you’re not careful.
I’d use this for events where you want height and shape, not softness. It has more edge than a low bun and more presence than a plain ponytail. If you want the braid to look wider, tug each loop gently after it’s secured, then stop. Too much pulling makes it sloppy fast.
13. Cornrow-to-Bun Protective Style
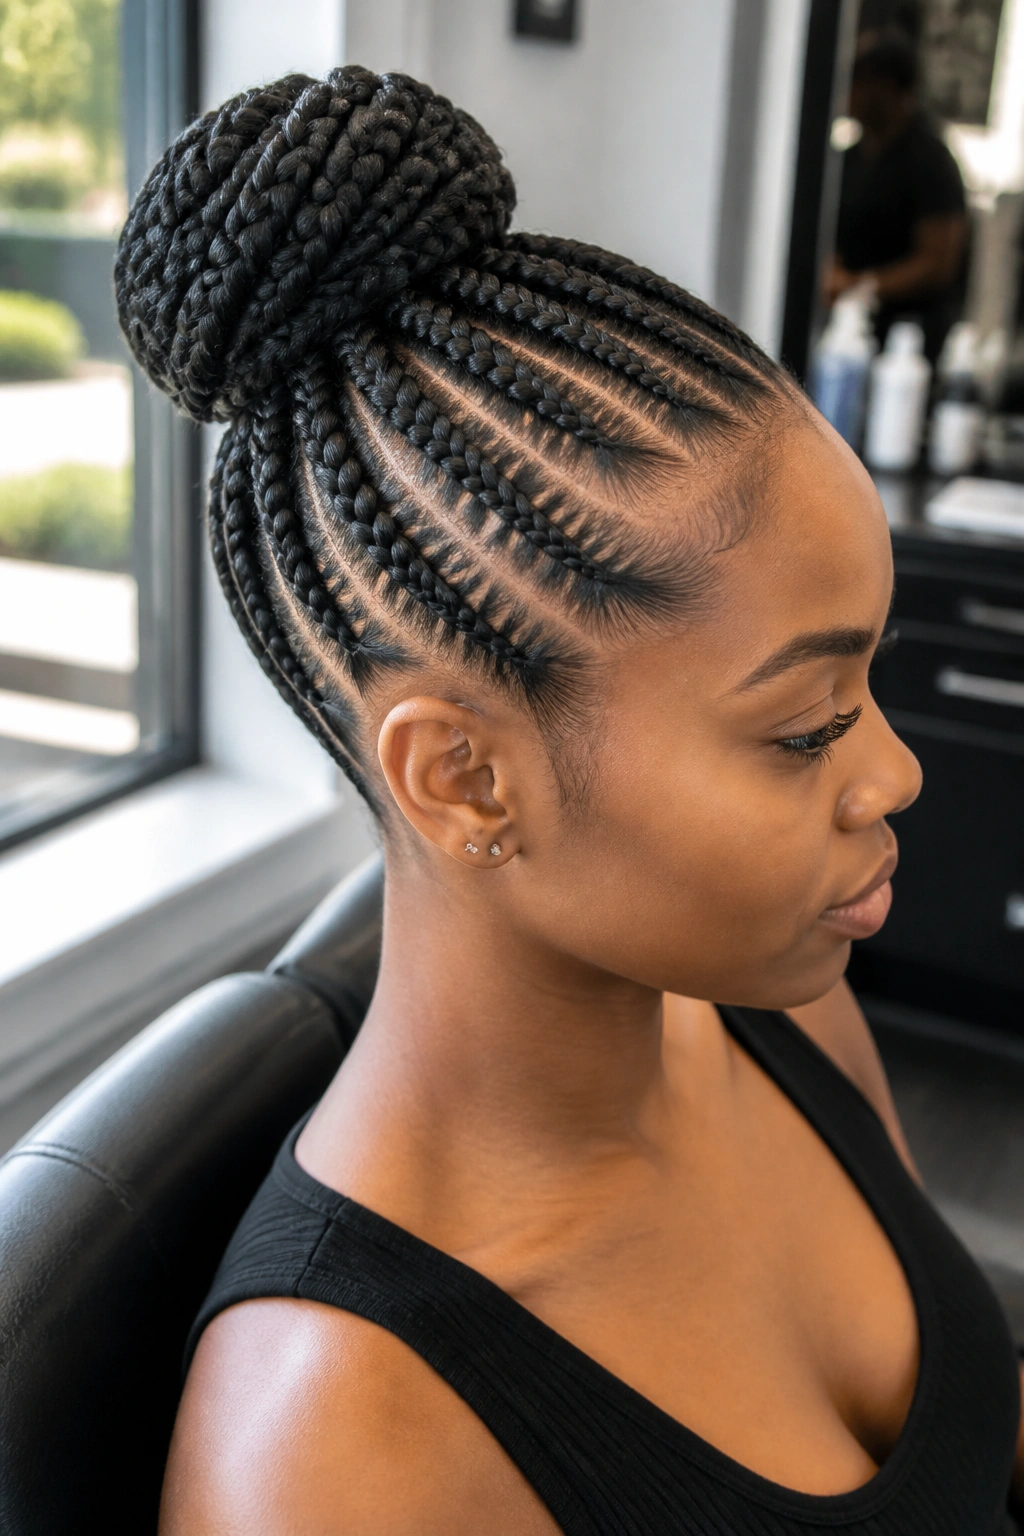
If your goal is protection first and decoration second, this is one of the smartest braided updo styles for long hair. Cornrows or feed-in braids start at the scalp, keep the roots neat, and lead into a bun or coiled finish that hides the length safely. The whole point is to keep manipulation low and the ends tucked away.
The style works because the scalp braid creates a firm base. Once that base is secure, the bun does not have to carry all the weight on its own. That matters a lot with long natural hair, especially when you want to keep ends protected from rubbing, snagging, and dry air. A bun with no real foundation can get loose and pull unevenly. This one avoids that problem.
What to Watch For
- Parting: clean, even parts help the style look neat from every angle
- Tension: firm, not painful; a sore scalp is not a badge of honor
- Finish: tuck the ends fully into the bun so they don’t fray
A little scalp oil on the part lines can keep the style looking fresh, but don’t overdo it. Too much product at the roots makes the braids slip. This is one of those styles that rewards patience and punishes rushing.
14. Accent Braid Low Twist

An accent braid low twist is the quiet one in the group, and I mean that as a compliment. A single braid — usually along one temple, the part line, or one side of the crown — feeds into a low twist or bun. The braid adds detail without taking over the whole style, which makes it useful when you want your hair to look finished but not heavily styled.
I love this on long hair because the length gives the twist enough substance. Shorter hair can look a little thin in this shape, but long hair lets the twist sit full and smooth. It is especially nice for fine hair that needs a small visual lift. The braid creates the illusion of more work and more texture than there really is.
This style also behaves well with accessories. One pin, one comb, one small barrette. That’s enough. If you put too much on it, the whole thing gets busy and loses the clean line that makes it work in the first place.
You can wear it to work, a dinner, or anywhere that calls for restraint with a small twist of detail. Not flashy. Better than flashy, honestly.
15. Waterfall Braid Rolled Updo
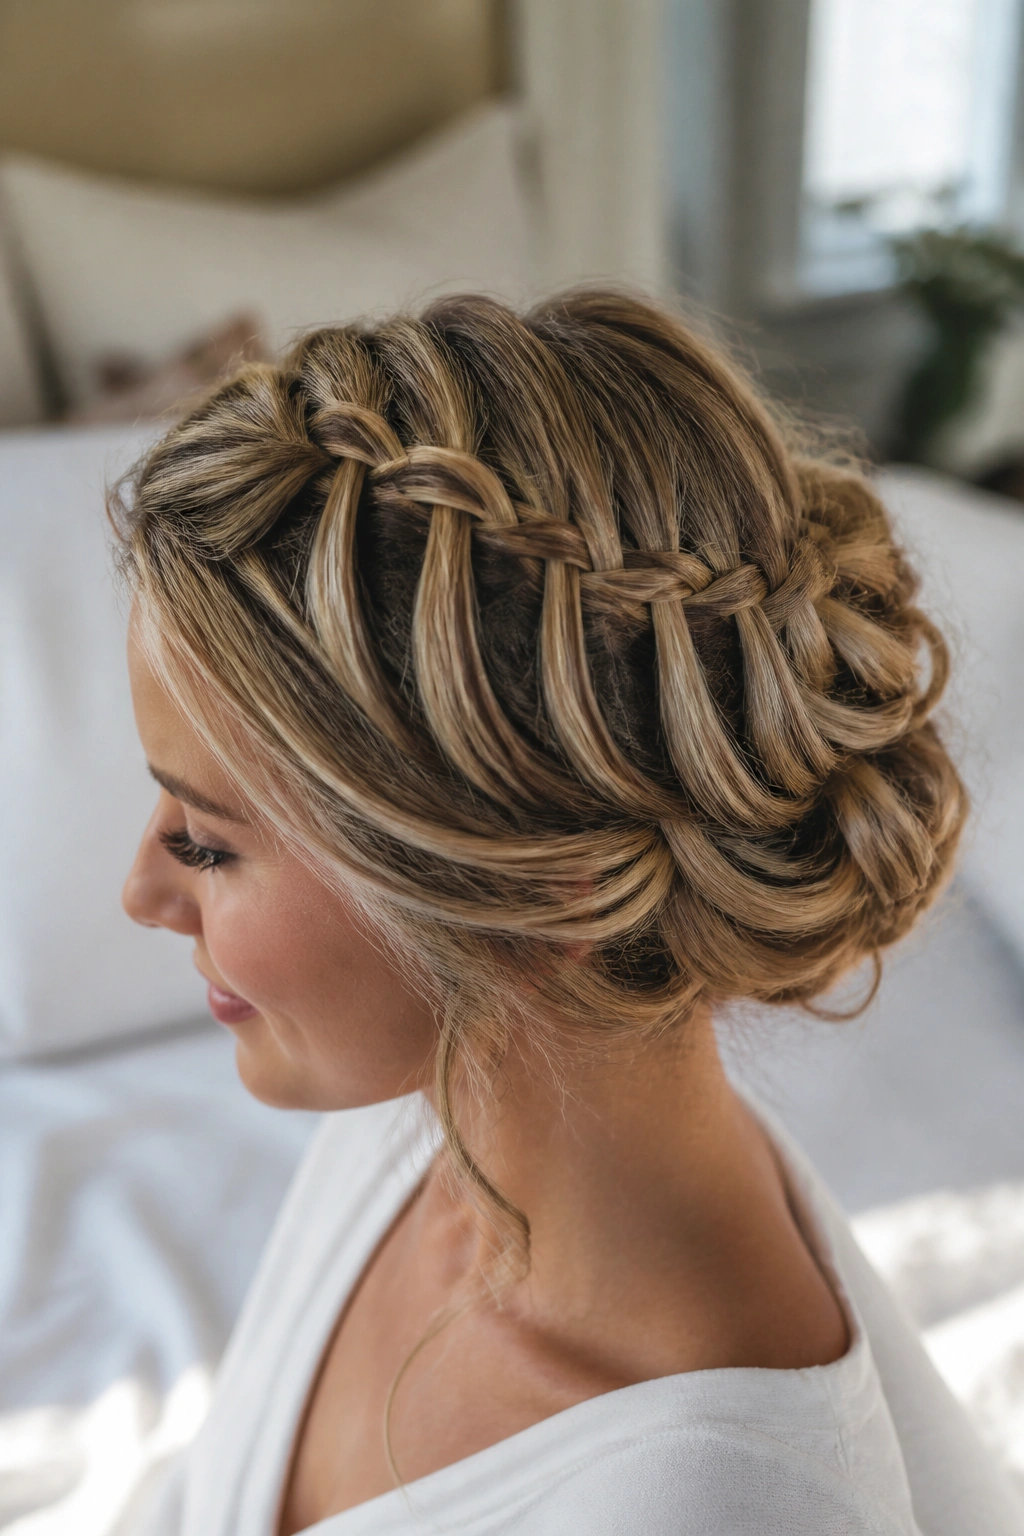
Why does the waterfall braid hold so much charm? Because it lets pieces of hair drop through the braid in a way that feels soft, then collects the rest into a rolled updo. On long hair, the trailing sections make the style look layered and airy before you ever pin anything into place.
The braid itself is the part that usually wins people over. It creates that cascading effect near the crown or along one side, and the roll underneath keeps the length under control. If your hair is thick, this style can handle it well. If your hair is fine, it needs a little more texture so the braid doesn’t flatten out.
How to Make It Read Clearly
Keep the waterfall sections even. Uneven drops make the braid look accidental, not decorative. The rolled portion underneath should be neat enough to support the visible braid, but not so tight that the top pieces lose their softness.
A few notes:
- Best on: wavy hair or hair with a little hold product
- Needs: careful pin placement under the roll
- Avoid: overly slick roots, which make the braid slide
The whole thing feels light, which is nice when long hair usually feels like a lot of hair. That alone makes it worth knowing.
16. Knotted Braid Bun
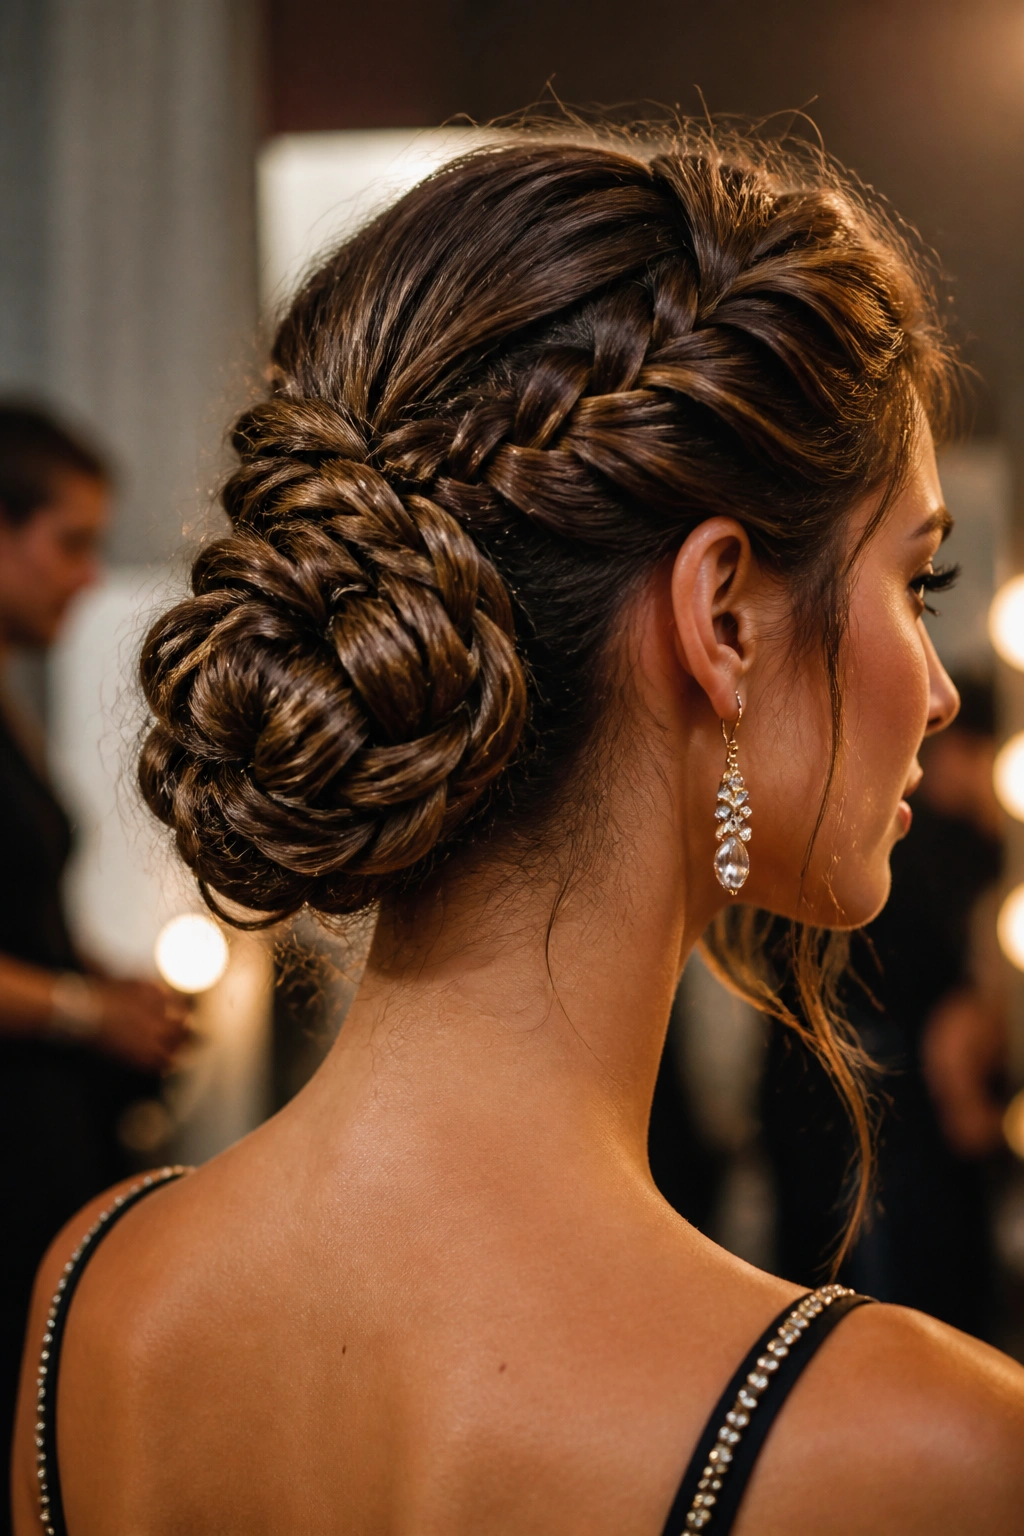
A knotted braid bun is one of those styles that looks like you had a clever friend help you, even when you did it yourself in a mirror. The braid sections are tied or looped into little knots before they’re wrapped into a bun, so the final shape has more texture than a standard twist. On long hair, the knotting gives the style a bit of body without making it bulky.
This one is especially useful when the ends of your hair are a little rough. Instead of trying to hide them in a flat twist, the knots fold the length into the shape itself. That gives the bun a more organic finish. It also holds well on hair that has some grip but isn’t heavily styled.
What Makes It Different
The knots create tension points, and tension points help the bun stay put. Simple. If you’ve ever had a twist slip out after an hour, you’ll understand why this matters. The style works best when each knot is snug and the bun is anchored with pins at the base, not just the surface.
A little texture spray before styling helps the knots stay visible. Without it, the strands can slide into each other and the whole point of the style gets lost. I’d wear this one for evenings, photo-heavy events, or any time you want a braid that feels a touch less expected.
17. Braided Gibson Tuck

The Gibson tuck already has a soft, vintage shape, and adding a braid turns it into something more interesting. Long hair is useful here because the braid can run from the crown or side and then fold neatly under itself, creating that tucked roll at the nape. It feels old-school in the best way, with enough structure to stay elegant and enough softness to keep it from looking severe.
I like this style on hair that has a little movement. Pin-straight hair can do it, but slightly wavy hair tends to hold the tuck with less fuss. If your hair is extra long, braid the length first and then tuck the braid under so the roll has more volume. That gives the style a fuller back view, which is where a lot of tucked styles either win or lose.
The Gibson tuck is also easy to dress up with a comb, a ribbon, or a small decorative pin. Keep the accessory modest. The tuck already has a strong shape, and too much embellishment can make it feel like a costume piece.
This is one of those styles that looks calm from the front and quietly smart from the back. I appreciate that.
18. Basket Weave Braided Updo

If you want the most intricate-looking style on the list, this is the one that earns it. A basket weave updo uses sections braided or crossed over and under each other so the surface looks layered, almost like fabric. On long hair, the pattern can be dramatic because there’s enough length to keep the weave readable instead of collapsing into a knot.
The style takes patience, no way around that. But the payoff is real. The weave holds shape well, and the finished updo has depth that a single braid can’t quite give you. It’s especially good when you want a style that photographs from the side and the back, because the pattern stays visible from multiple angles.
What to Expect
This is not the style I’d choose when I’m in a rush. It asks for clean sections, steady hands, and pins placed with some thought. Once it’s in place, though, it tends to stay put better than it looks like it should. That’s the funny part.
- Best for: formal occasions, thick hair, long uniform lengths
- Needs: sectioning clips and a tail comb
- Tip: smooth each section before crossing it, or the weave starts to look fuzzy fast
Basket weave styles can feel a little elaborate, but that’s the point. Sometimes hair should look like you spent time on it.
Final Thoughts
The strongest braided updo styles for long hair do two things at once: they manage the length and they make the shape look intentional. That is why some styles feel fussy while others feel smart. The difference usually comes down to how well the braid supports the bun, tuck, or twist underneath.
If your hair is heavy, start with a style that has a firm base near the scalp. If your hair is slippery, build in texture first. And if you want the style to last through a full day, pin from the inside out so the hold comes from the structure, not from a pile of surface pins that can shift the second you move.
I’d keep one practical rule in mind: the more movement you want in the front, the cleaner the back needs to be. That tradeoff is worth making. A good braided updo should feel secure, a little wearable, and not like your head is being negotiated with.
